
Introduction
Product Feed for Magento 2 by Magenest is a powerful tool to promote your products.
Feature
Flexible Product Feed configurations.
Easily generate product feeds.
Customizable feed templates.
System Requirements
Your store should be running on Magento 2 CE & EE version 2.2.x and 2.3.x
Configuration
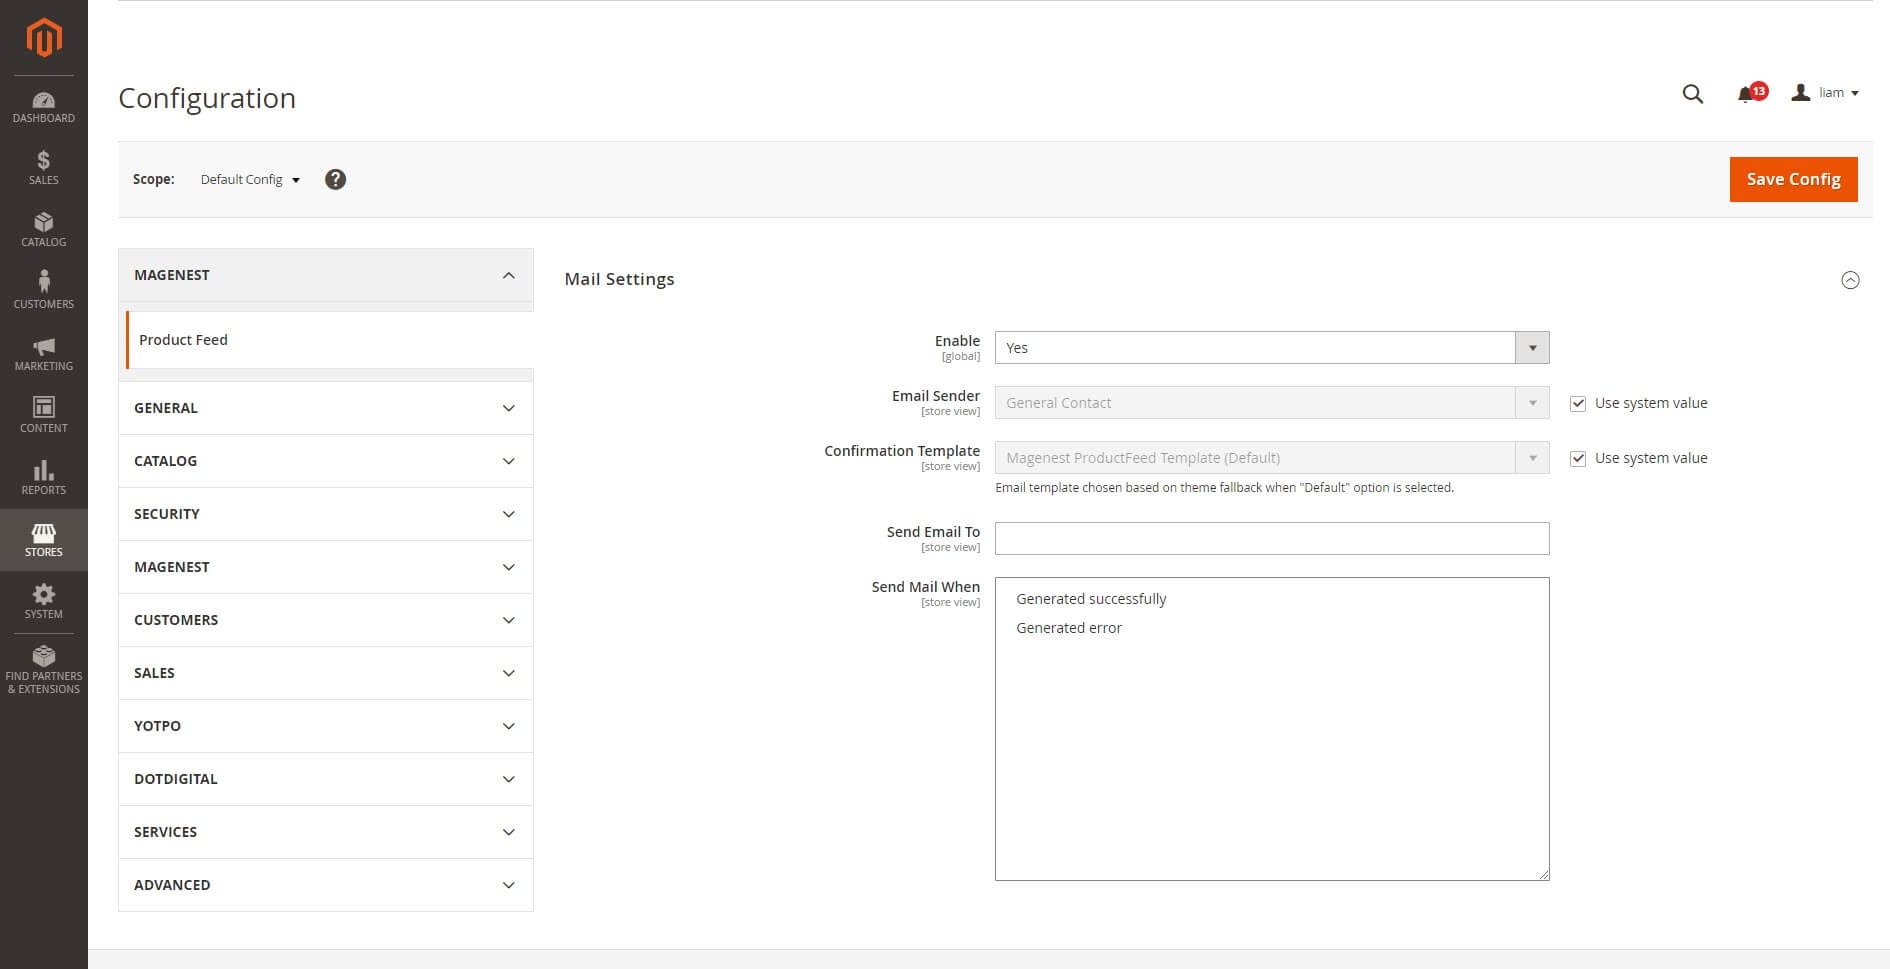
From the Admin sidebar, choose Marketing > Product Feed > Configuration, go to the Configuration page.
Under the Mail Settings section:
Enable: Choose “Yes” to enable the email notification for store owners.
Confirmation Template: select a template for the email on the drop-down list.
- Send Email To: Enter the receiver email.
Send Mail When: select a stage to send the email.
Manage feed
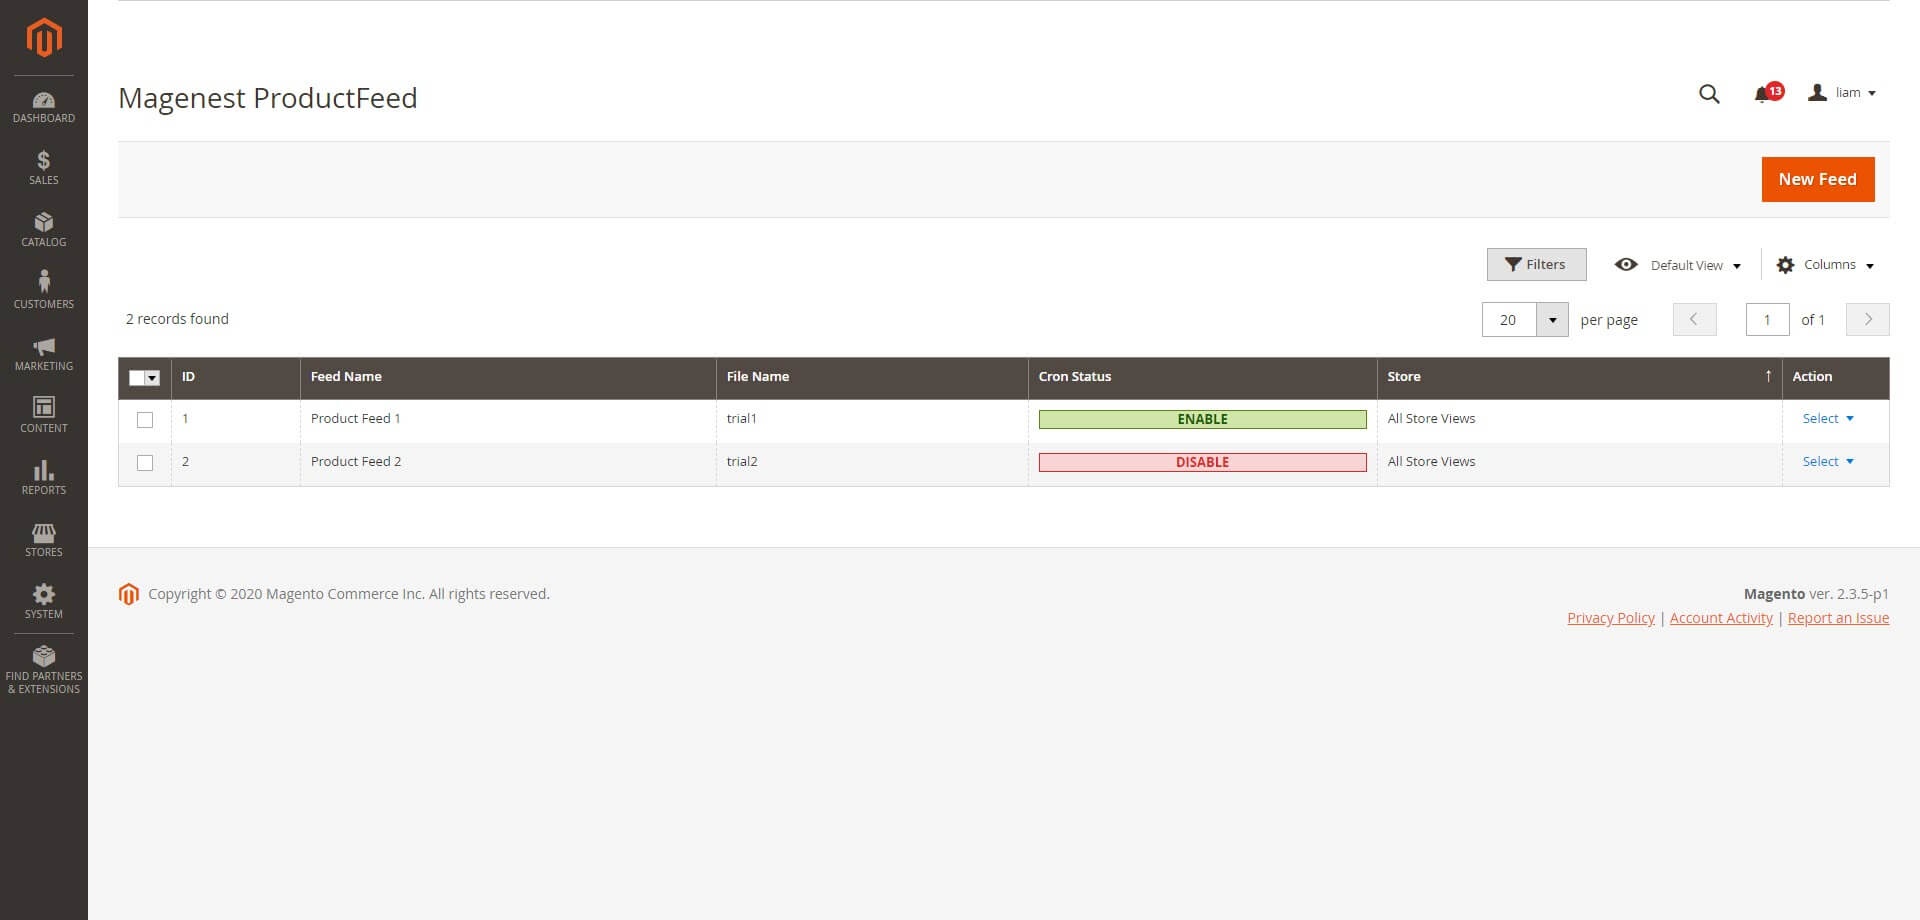
![]() Go to Marketing > Manage Feed.
Go to Marketing > Manage Feed.
![]() On Maganest ProductFeed, you can edit or delete the available feed by clicking on Select in the Action column.
On Maganest ProductFeed, you can edit or delete the available feed by clicking on Select in the Action column.
![]() To create a new feed, click on the New Feed button.
To create a new feed, click on the New Feed button.
Create a new feed
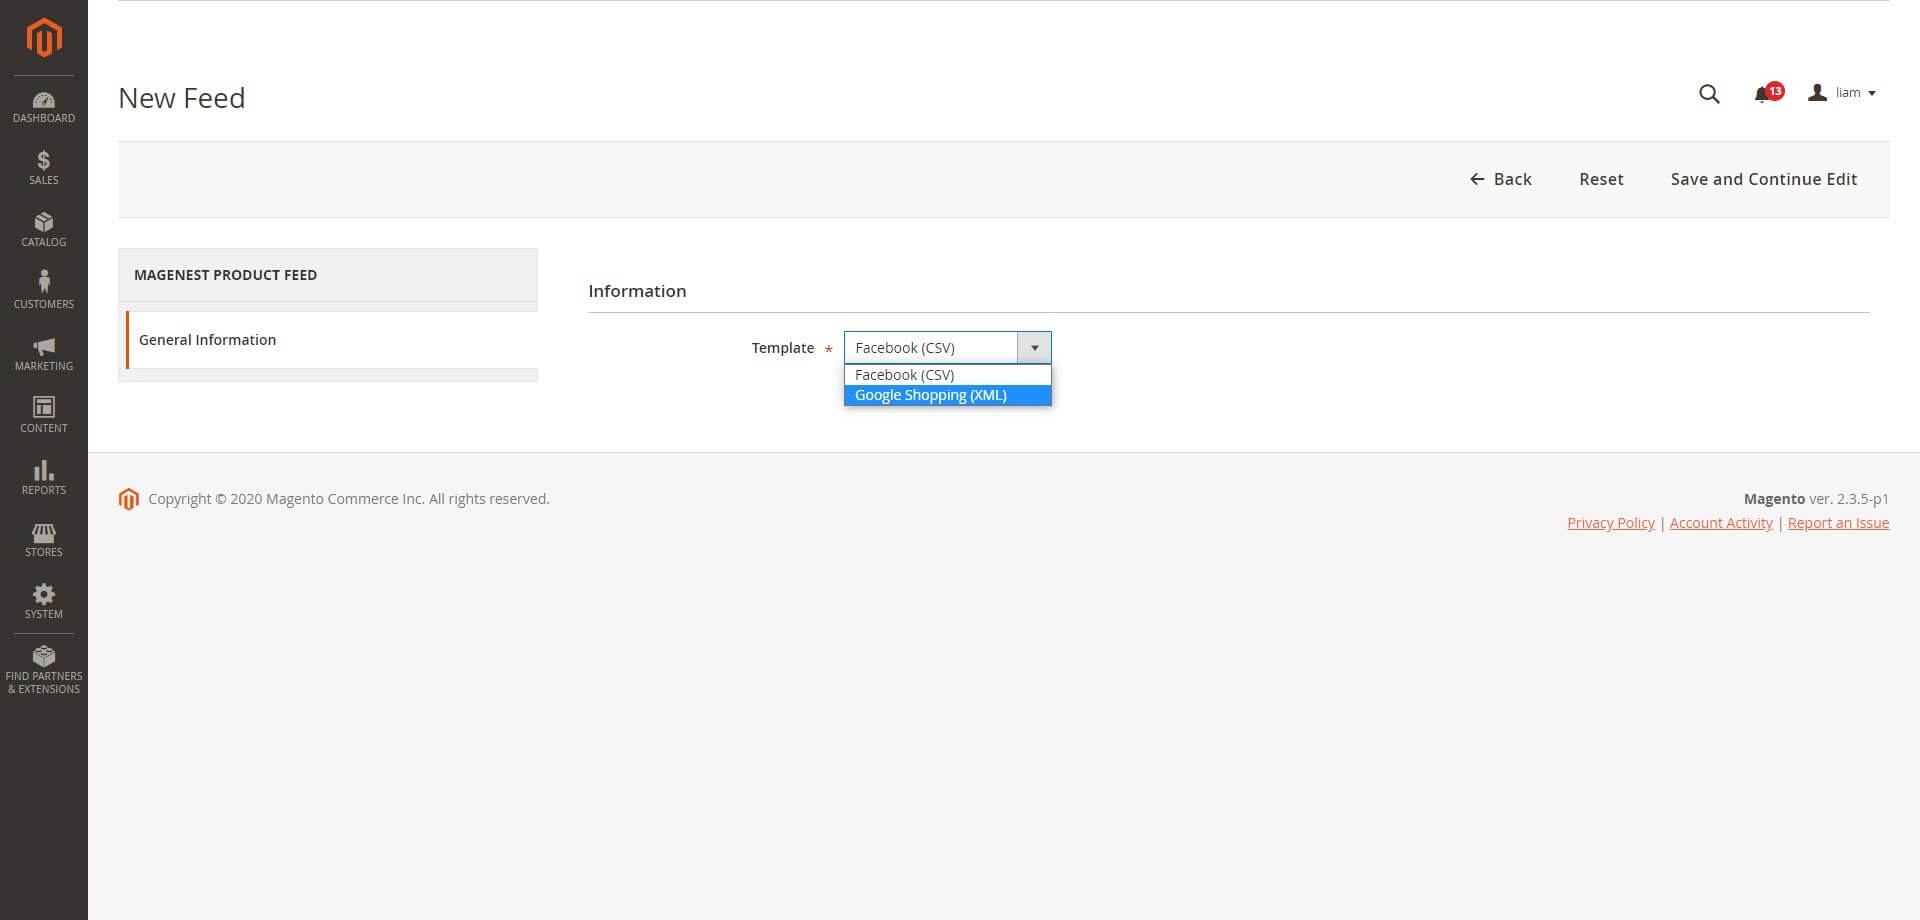
Step 1: Choose a template for the feed
Select the file format on the Template field. There are 2 file formats: CSV, and XML.
Step 2: Fill in the General Information field
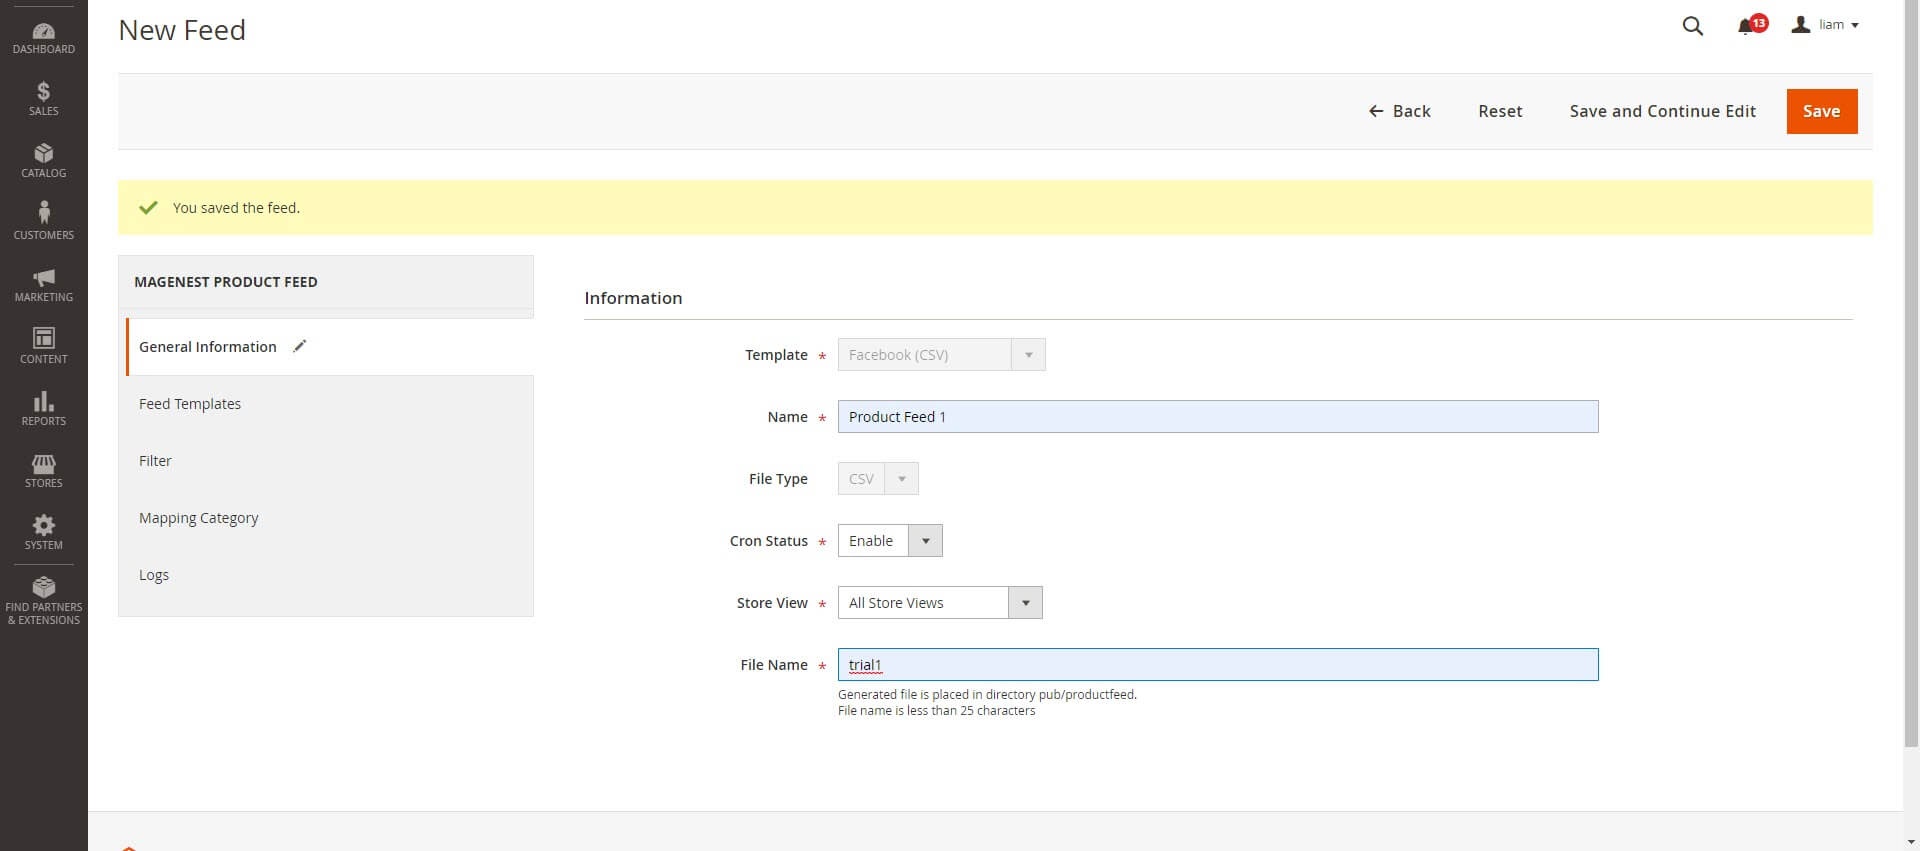
![]() Name: enter a name for the feed.
Name: enter a name for the feed.
![]() Cron Status: Choose “Enable” send the email automatically.
Cron Status: Choose “Enable” send the email automatically.
![]() Store View: Choose a store to get the products and generate the file.
Store View: Choose a store to get the products and generate the file.
![]() File Name: enter the name of the file after being generated.
File Name: enter the name of the file after being generated.
Step 3: Choose Template Type
![]() For the template format is XML:
For the template format is XML:
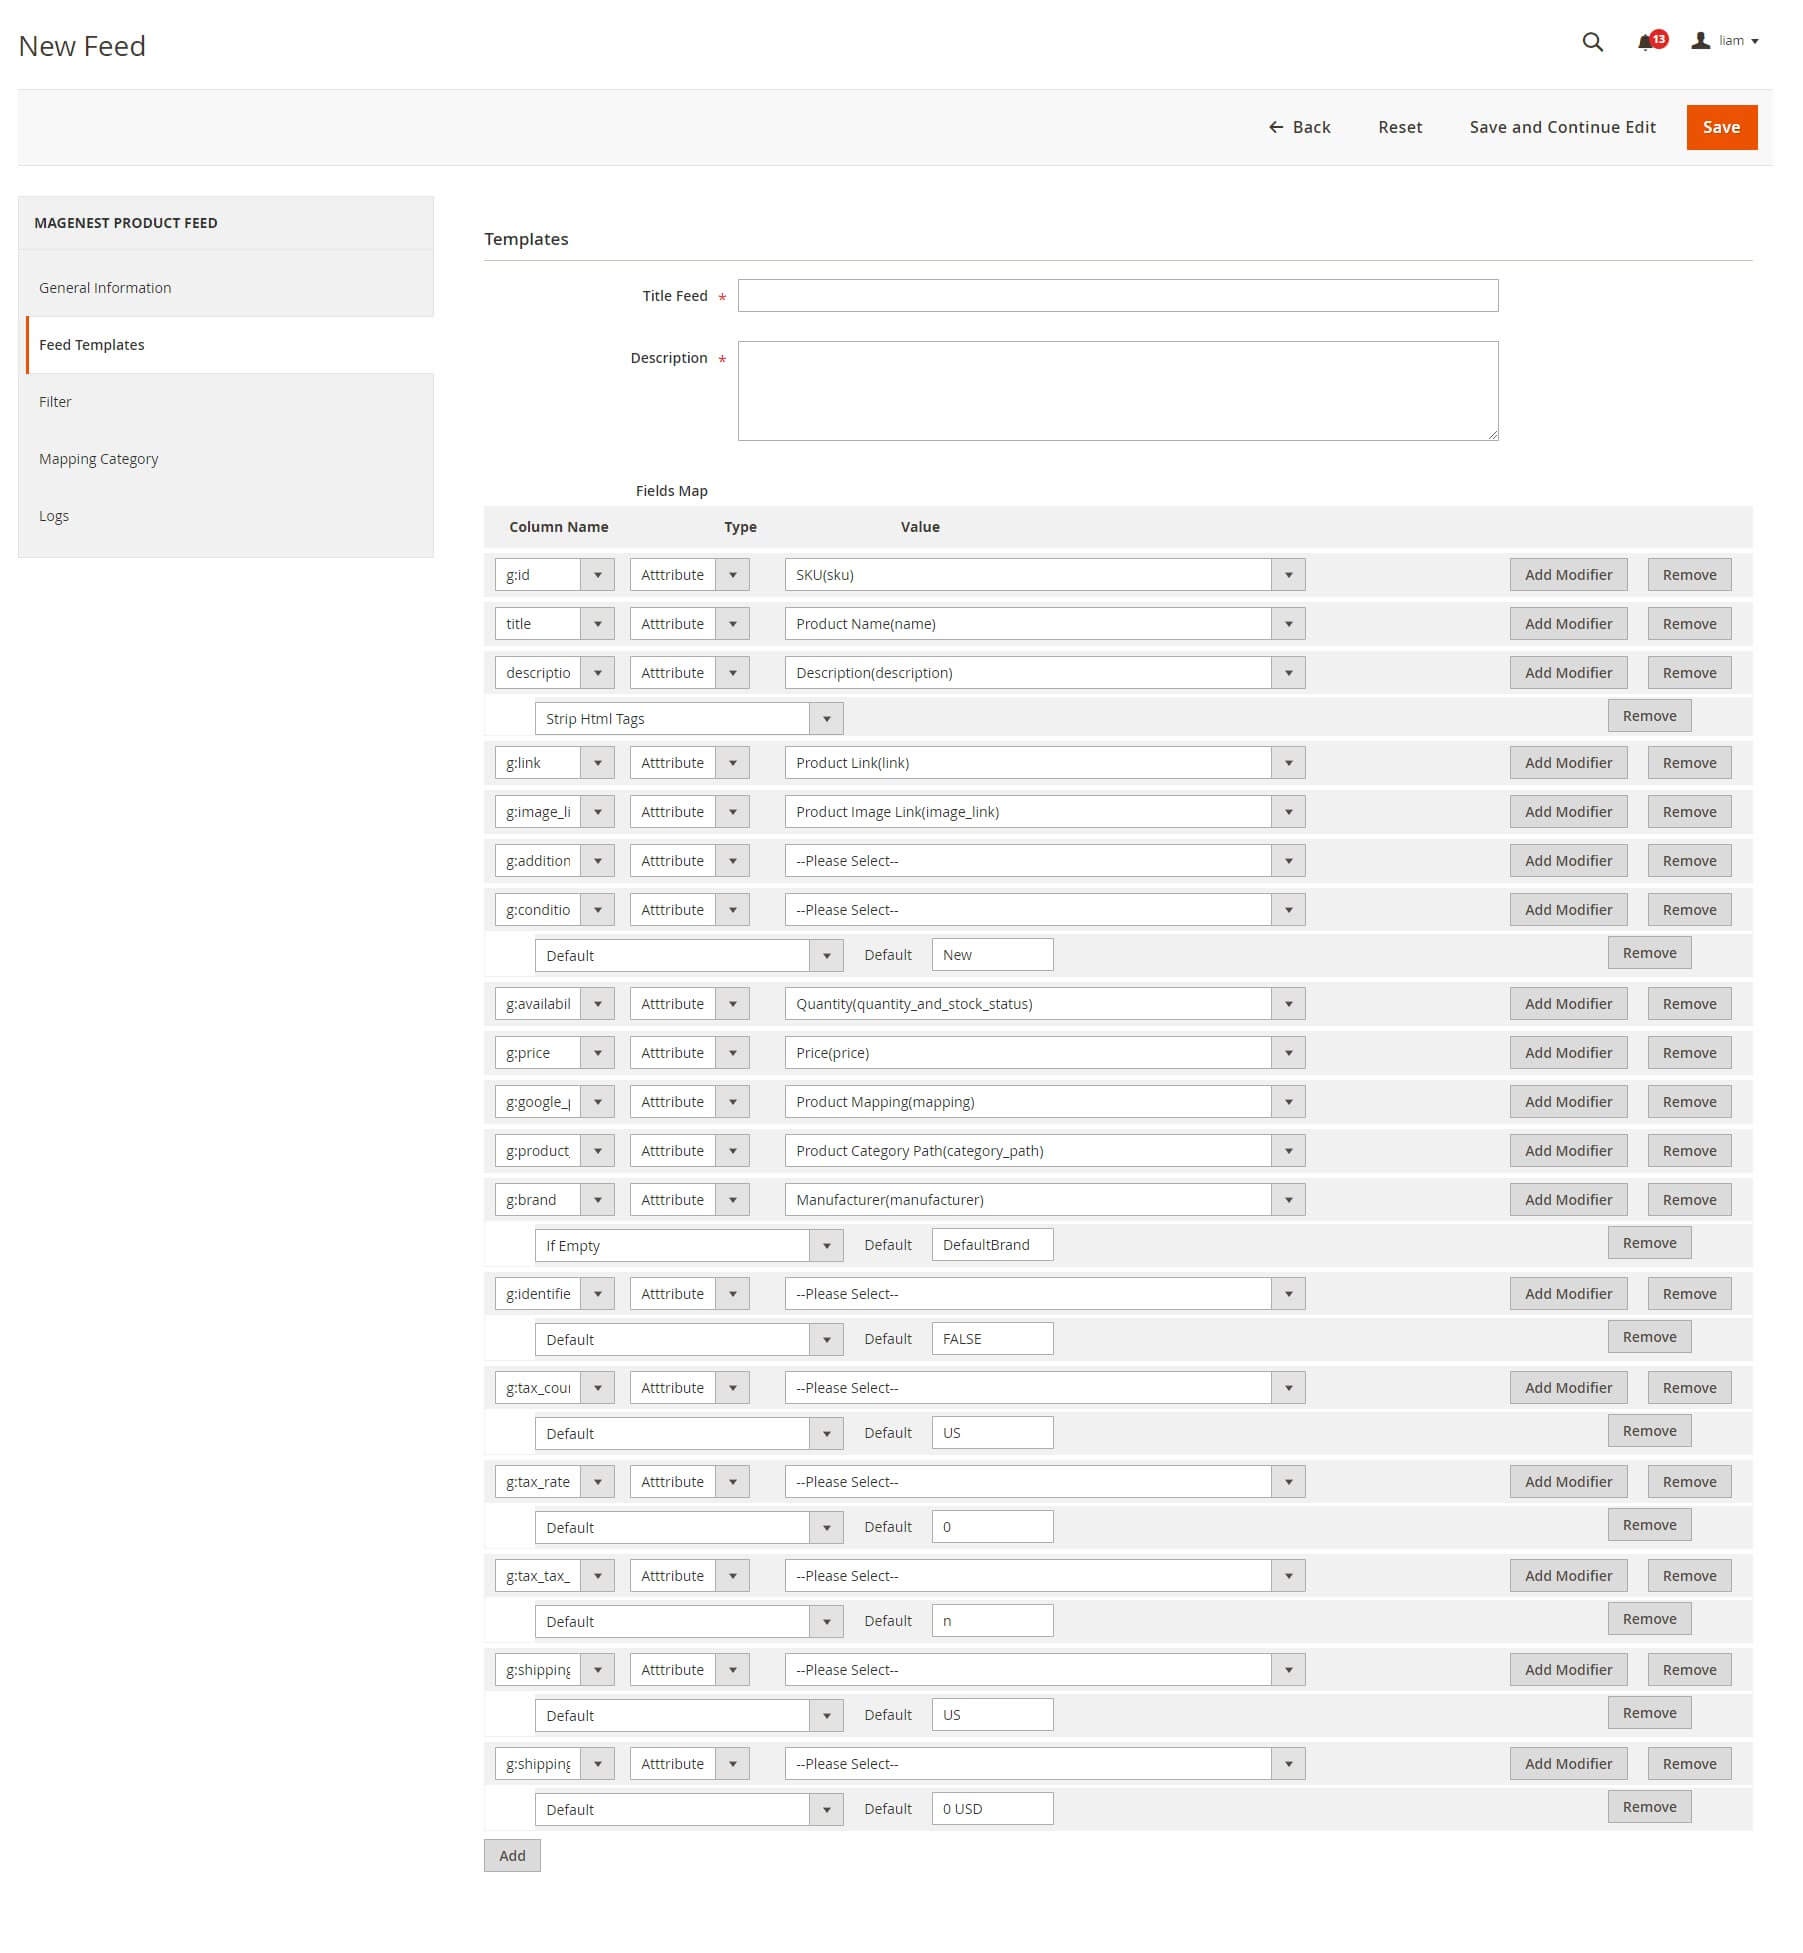
Title Feed: Title of the feed.
Description: Description of the feed.
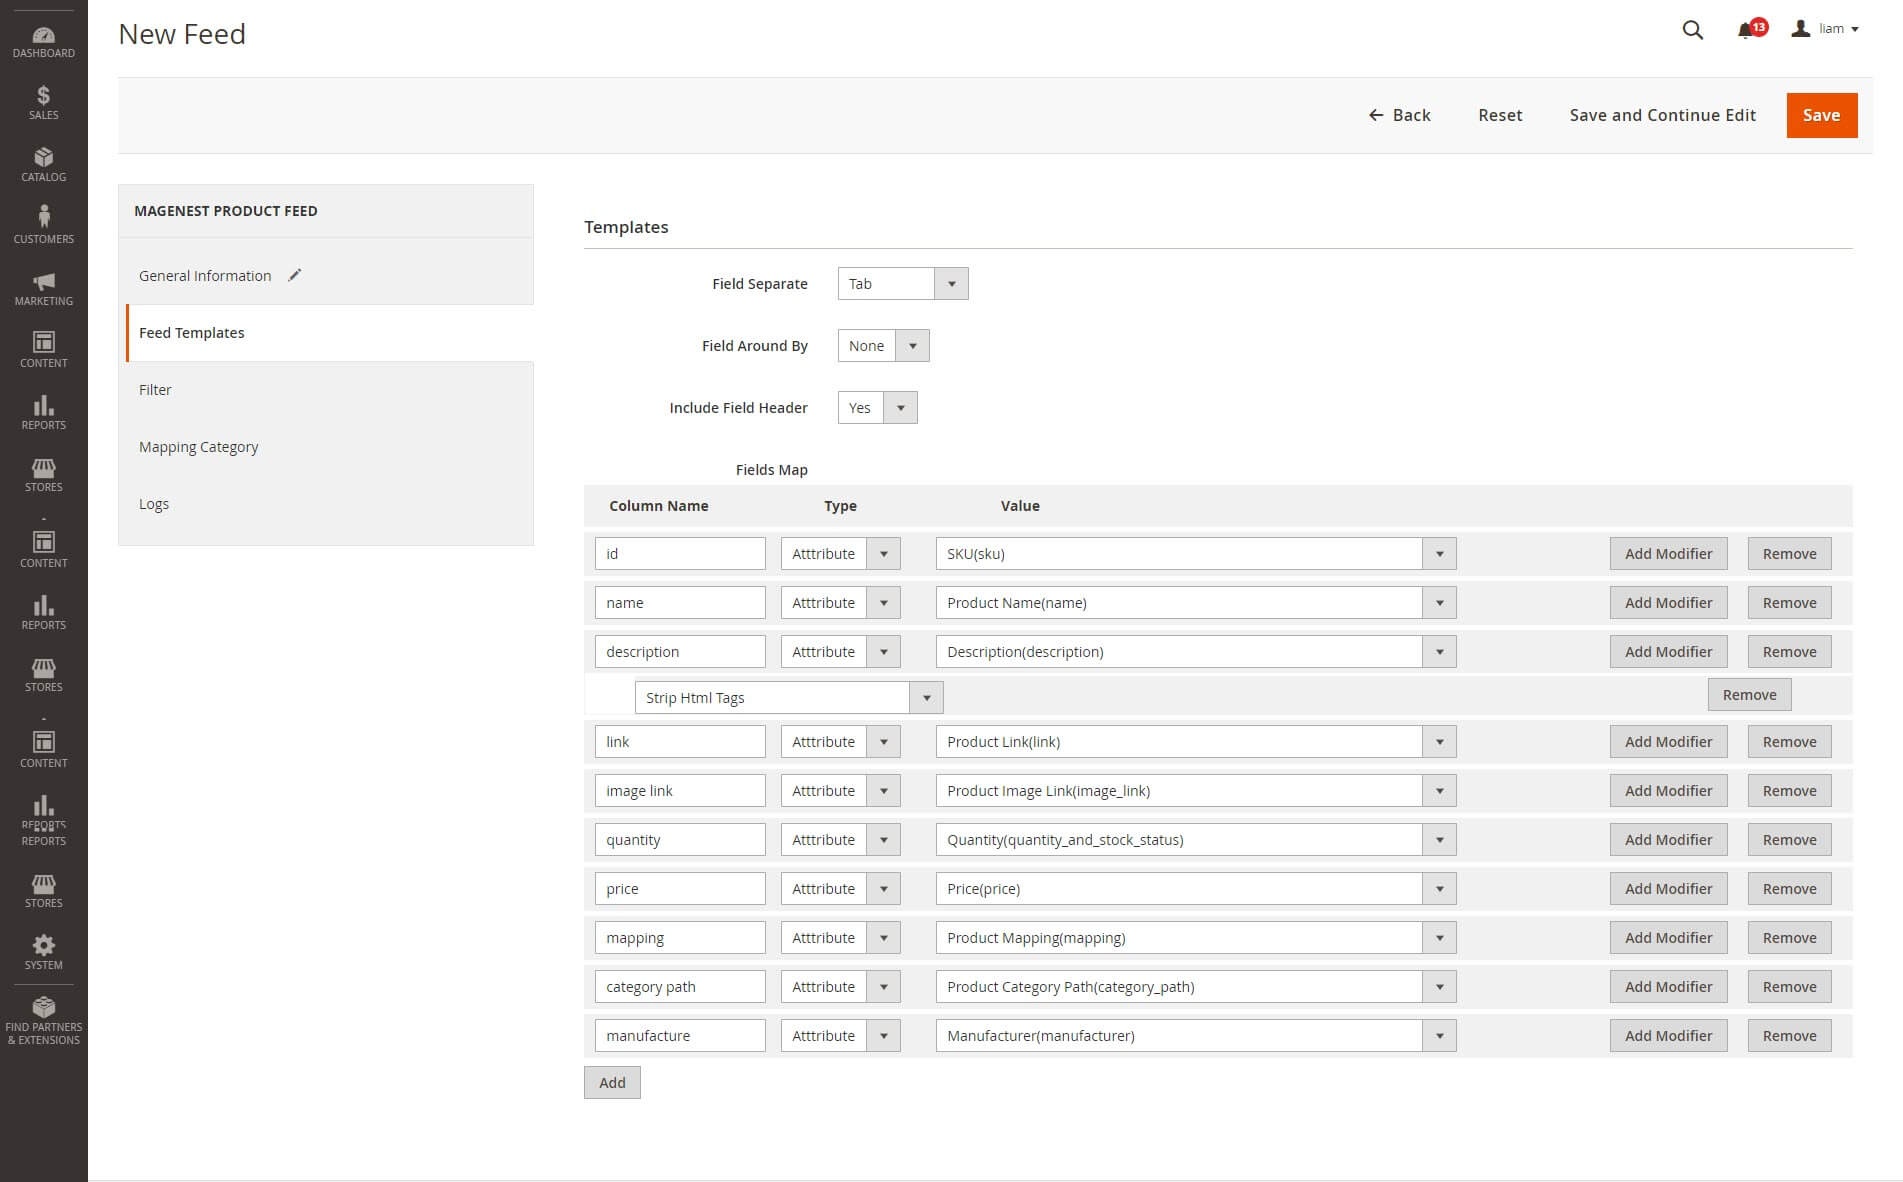
![]() For the template format is CSV:
For the template format is CSV:
- Choose the character separating the fields when exporting the file in the “Field Separate” field.
- Select the character surrounding the fields when exporting the file in the “Field Around” field.
- To get the header field when exporting the file, choose “Yes” in the Include Field Header field.
![]() Fields Map: Allow adding any value you want into the Fields Map field. The added values must be the standard of Google or Facebook.
Fields Map: Allow adding any value you want into the Fields Map field. The added values must be the standard of Google or Facebook.
![]() Template for Google XML file
Template for Google XML file
![]() Template for Facebook CSV file
Template for Facebook CSV file
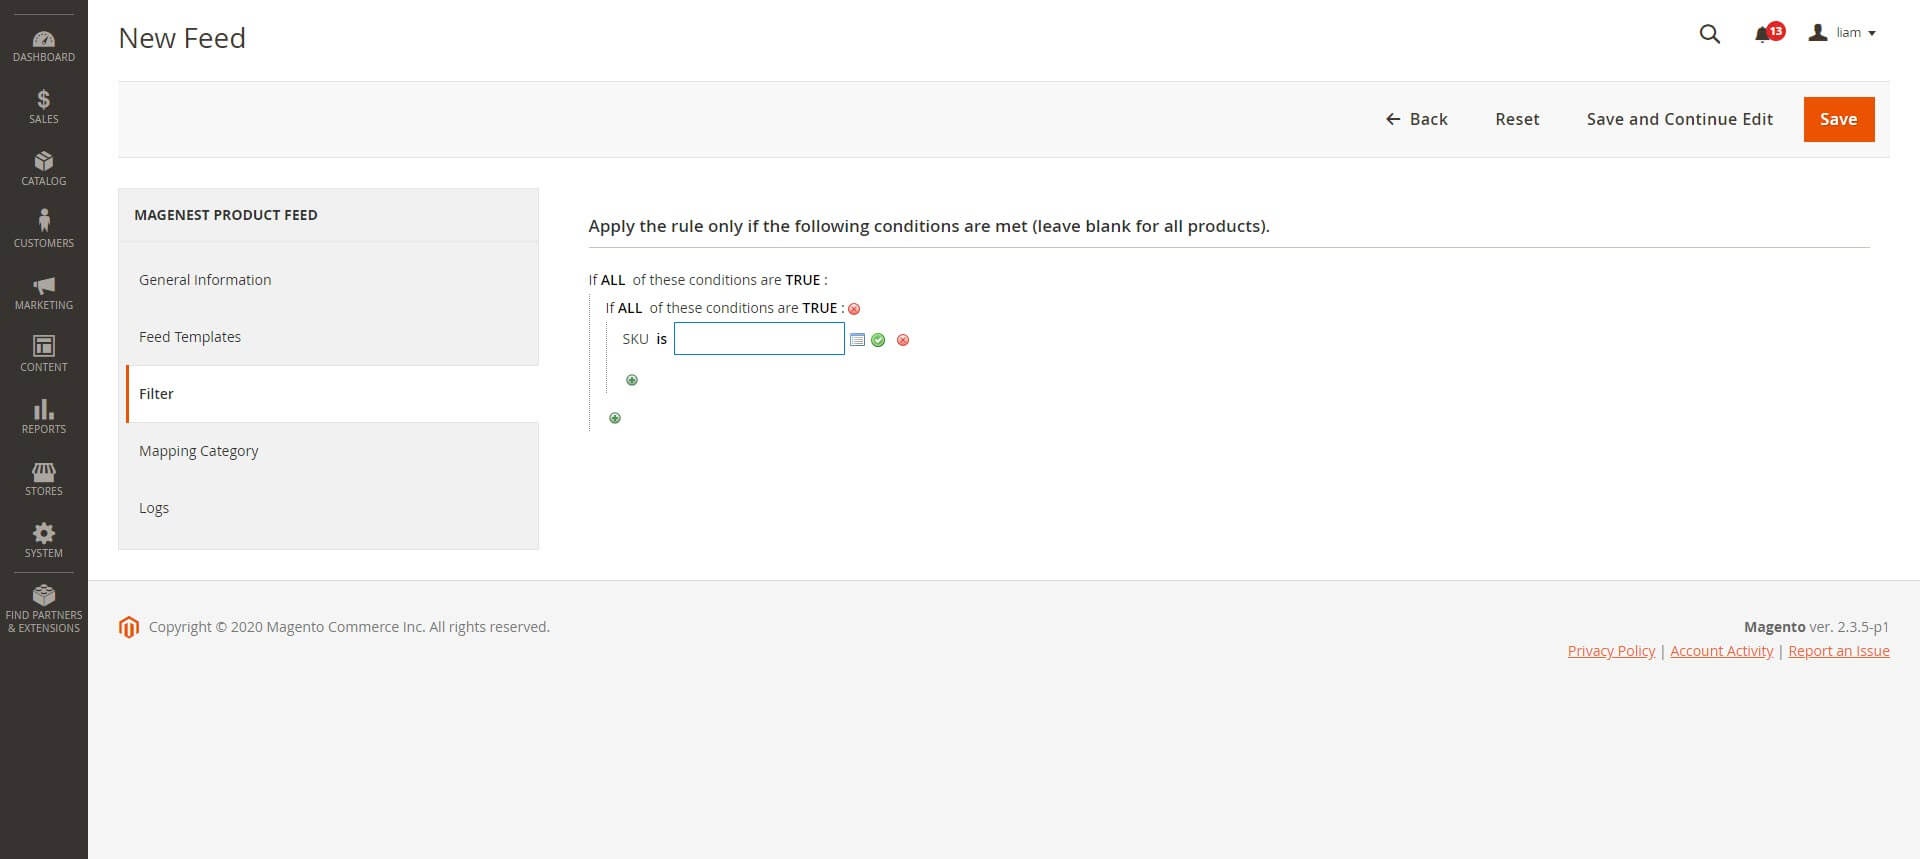
Step 4: Choose the condition filter to export the file
Click on the Add icon.
Choose condition to add > Choose value of condition > Click Apply.
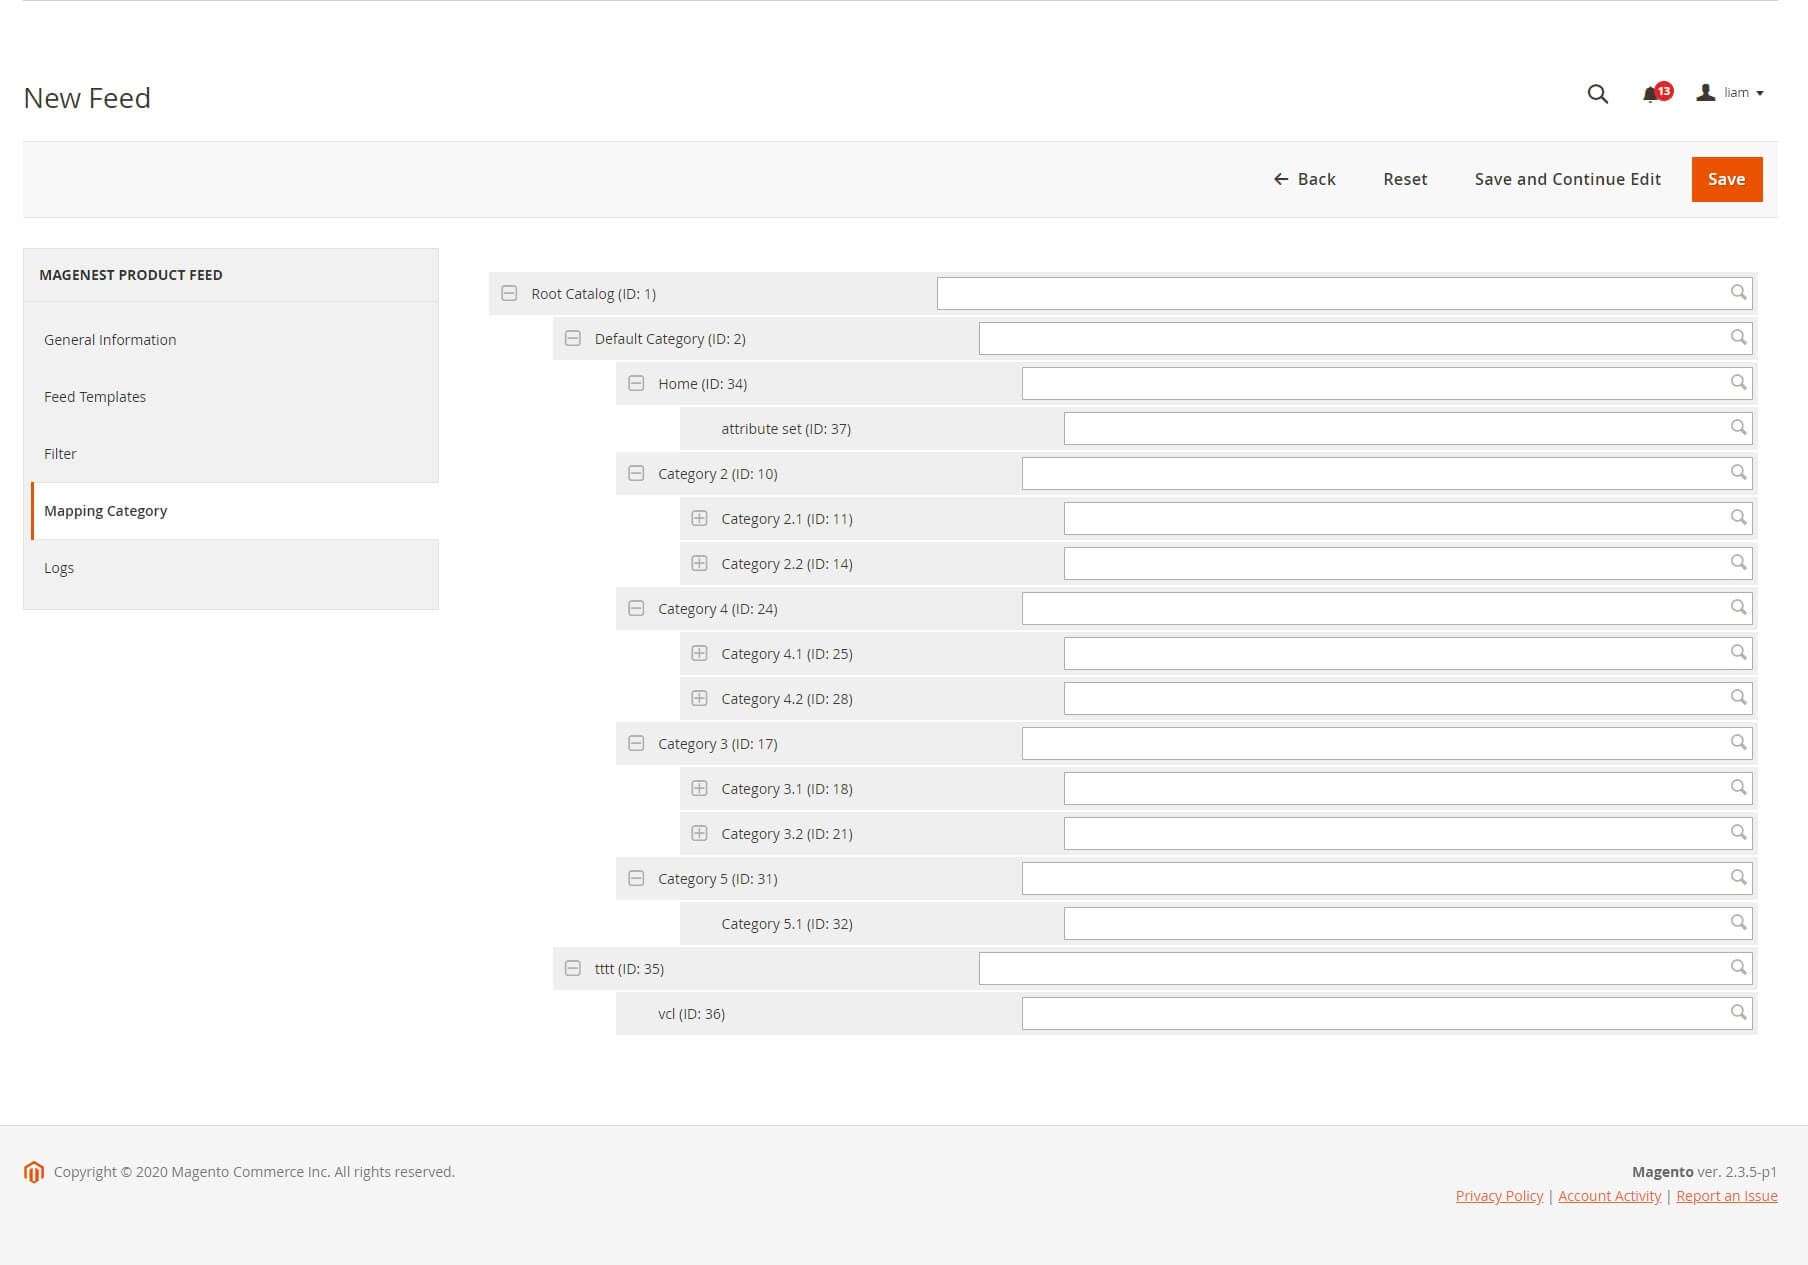
Step 5: Enter the Category Map for products
![]() For the XML file: Admins can choose and classified according to the available suggestions. For the categories with the same level, it will get the classification type of the top-level category.
For the XML file: Admins can choose and classified according to the available suggestions. For the categories with the same level, it will get the classification type of the top-level category.
![]() For the CSV file: Admins can type the category name in mapping category fields by yourself. If the value of the field is empty, the value will be the default category name of the store.
For the CSV file: Admins can type the category name in mapping category fields by yourself. If the value of the field is empty, the value will be the default category name of the store.
Step 6: Save and generate files.
After entering full information about feed (from step 1 to step 5), click on the Save button to save the feed.
Click on the Generate button to generate a feed file.
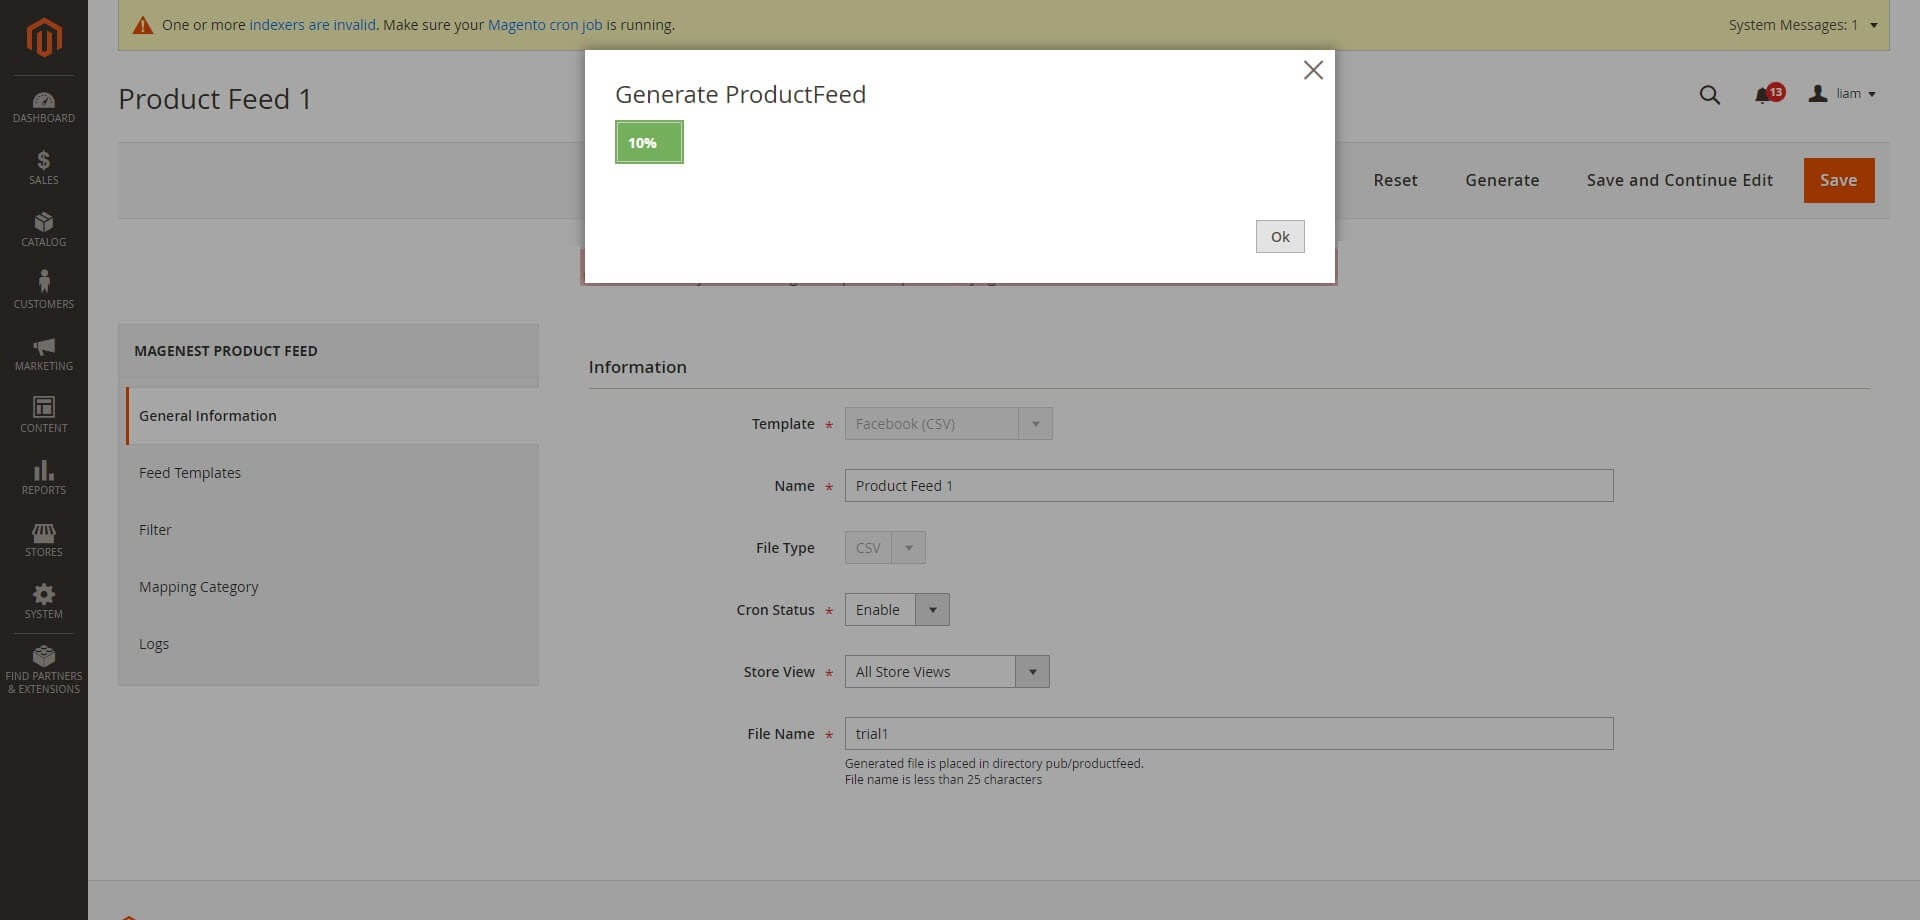
Feed file generated successfully
Logs
On the Admin sidebar, go to Marketing > Manage Feed > Edit > Logs, you can view the file history of feed.
