Thank you for purchasing our extension. If you have any questions that are beyond the scope of this document, do not hesitate to leave us an email via [email protected] or submit a ticket on our support portal.
By: Magenest | Support Portal: http://servicedesk.izysync.com/servicedesk/customer/portal/92
| Table of Contents |
|---|
Introduction
WooCommerce Ticket from Magenest allows merchants to create event products and sell tickets on WooCommerce platform.
Features for admin
![]()
- Support Simple products and Variable products
- Create ticket products with ease
- Able to customize the PDF ticket
- Able to customize email template
- Generate QR code for tickets
- Display Google Map on product page to show event location
- Manage event tickets in backend
- Export data of event attendees to CSV file
- Set reminder email to customers X days before event date
- Redeem tickets from backend (for single ticket or mass/bulk actions)
- Resend tickets from backend (for single ticket or mass/bulk actions)
- Scan QR and redeem tickets with browsers on Android mobiles or webcam
- Upload QR code image and redeem tickets from backend
Features for customers
- Purchase one or multiple tickets for events
- Choose between E-ticket and physical ticket (with shipping option)
- Receive pdf ticket(s) via emails
- Send emails to all attendees
System Requirements
Your store should be running on WooCommerce 3.0, 3.4.7; Wordpress 4.8., 4.9.8
Configuration
General Settings
In Ticket Manager > Settings
![]() General settings
General settings
- The order status when payment is completed: You can set the status of the order when customers make the payment for the tickets. The default status is Completed
- Google Map API: In order to show the google map on the product page, you have to fill in the Google Map API. Learn more

![]() Email: You can set the default email template in this setting. You can also add specific email template in each product setting. If the email template in product setting is empty, this default one will be used.
Email: You can set the default email template in this setting. You can also add specific email template in each product setting. If the email template in product setting is empty, this default one will be used.
Create event product
In the back end, go to Products > All Products > Click on Add New button to create new event ticket product.
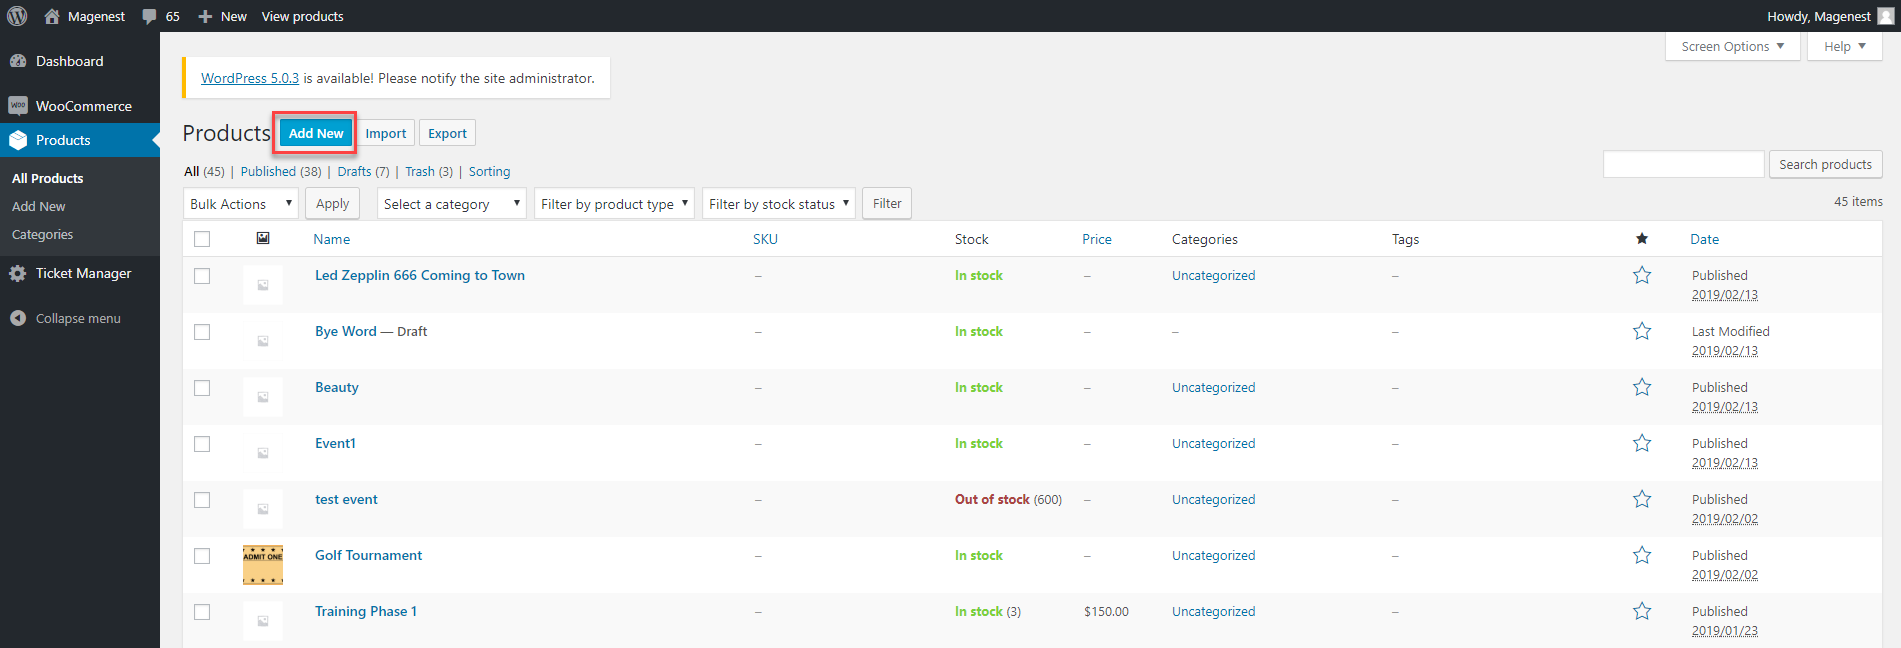
First, you must tick in the Ticket checkbox.
In the General settings, you can set the price for the tickets. The extension supports Simple product and Variable product so you can set the prices for either one of these two.
You can refer to this document on how to setup WooCommerce variable product
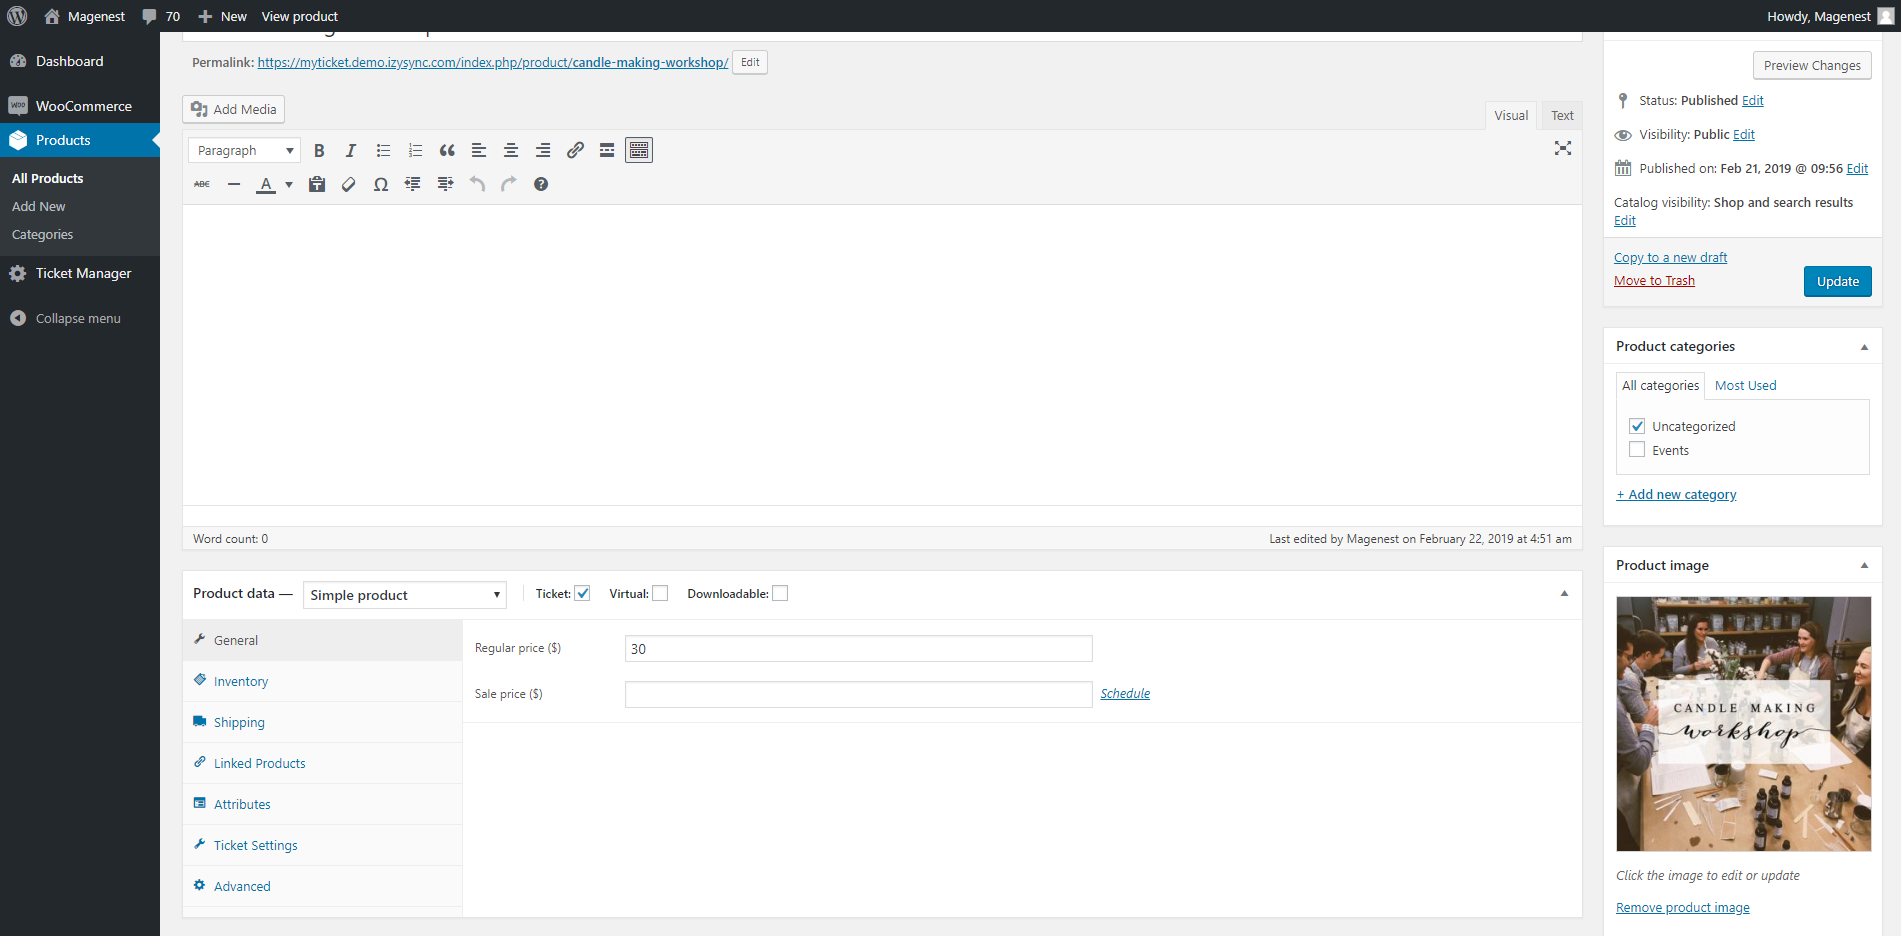
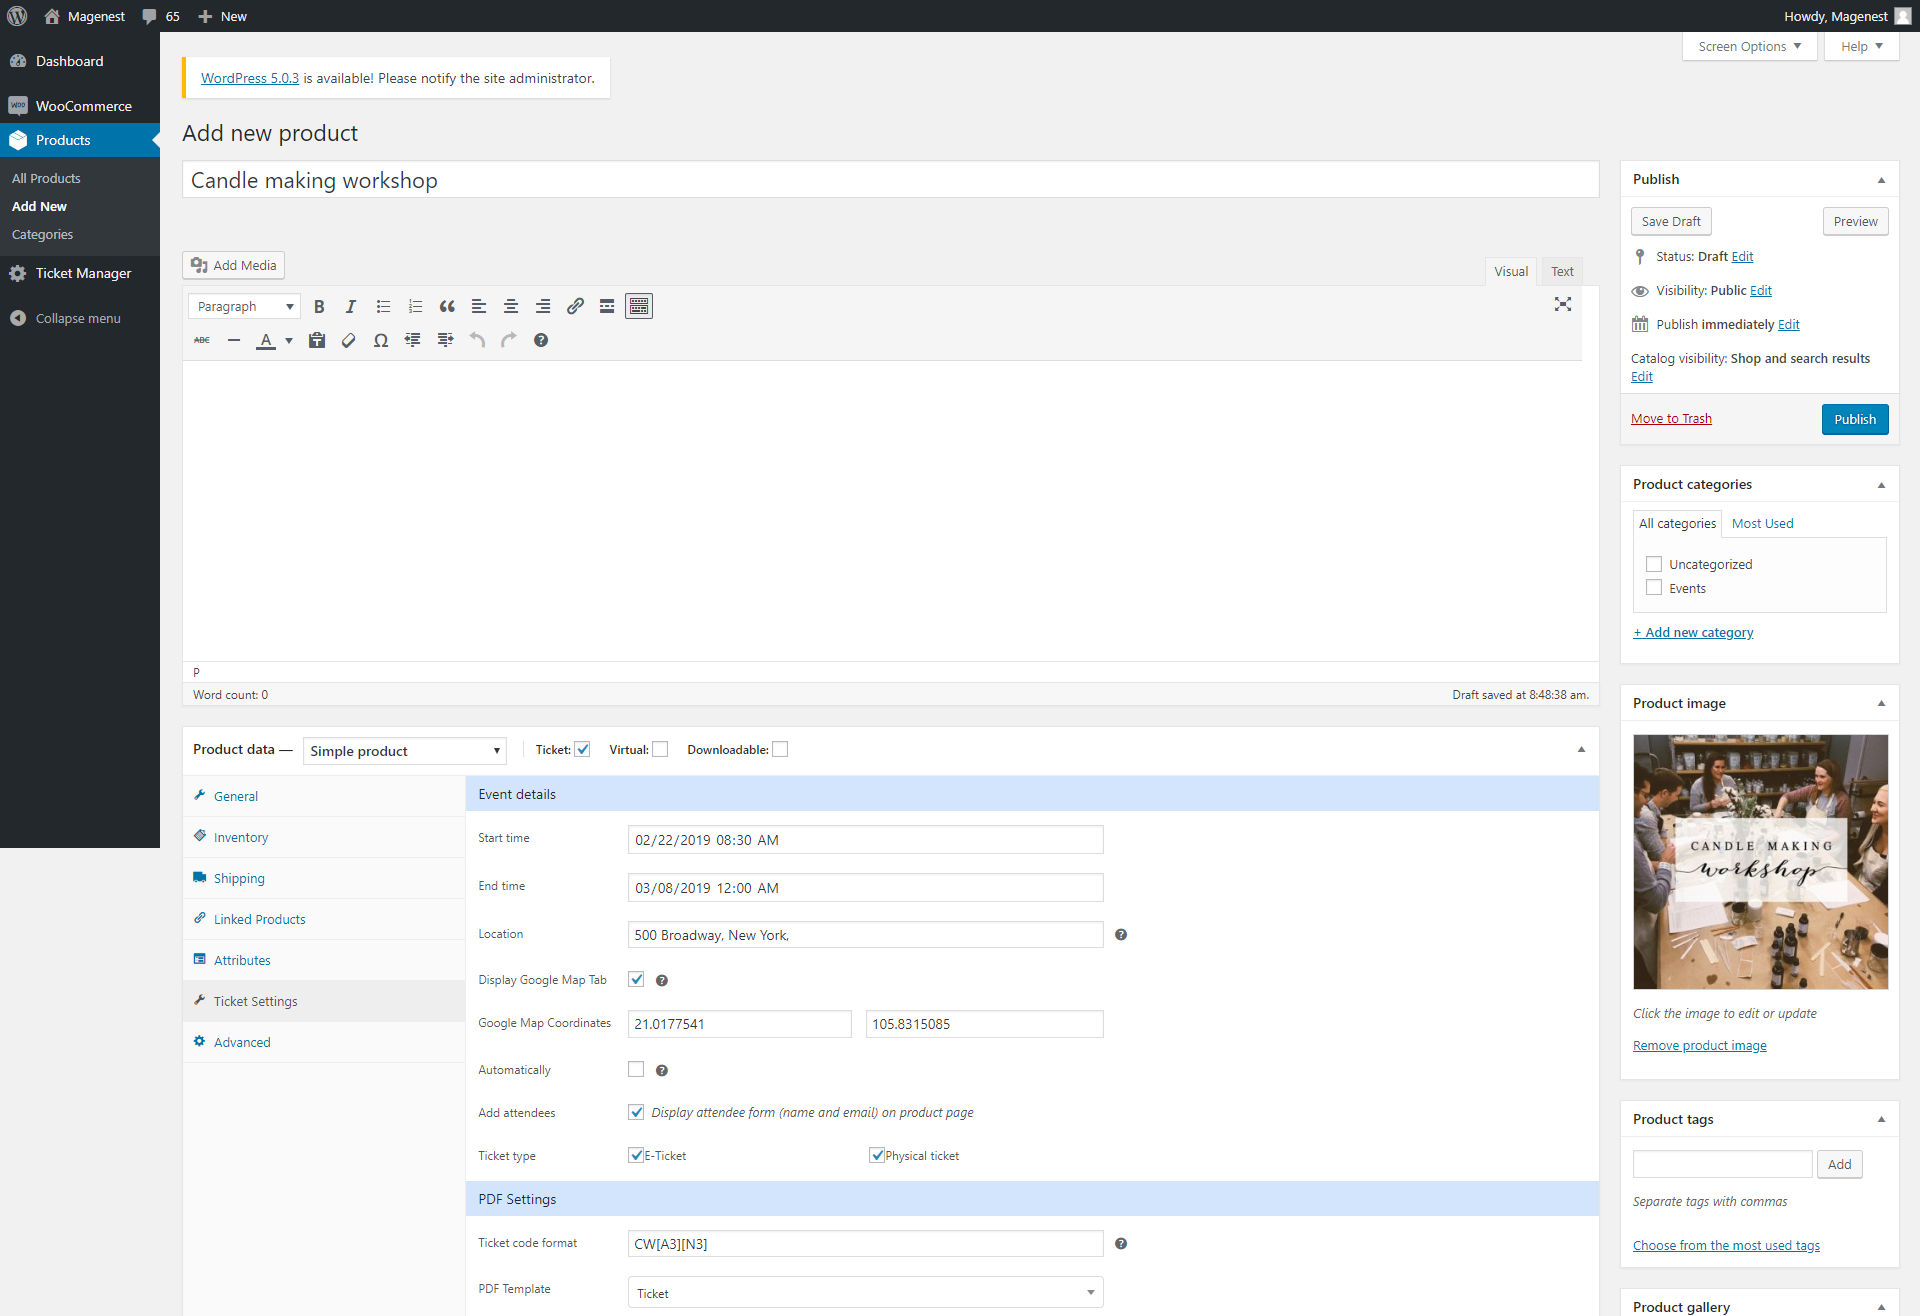
Simple product
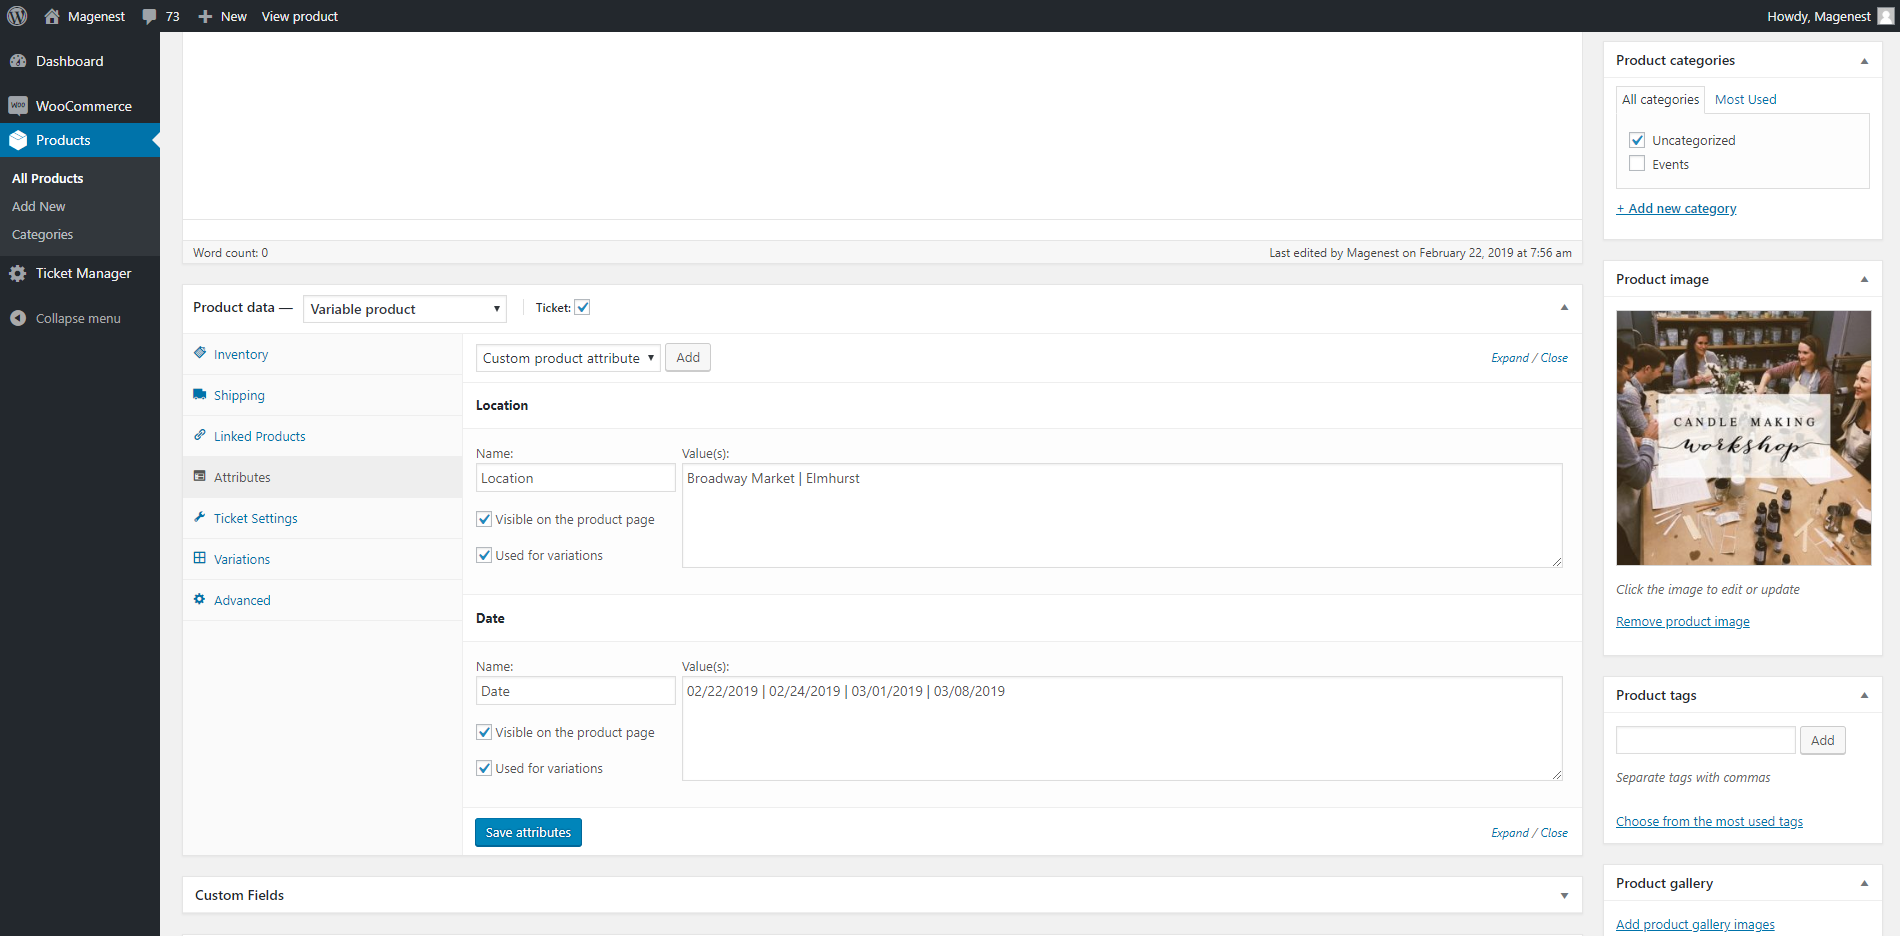
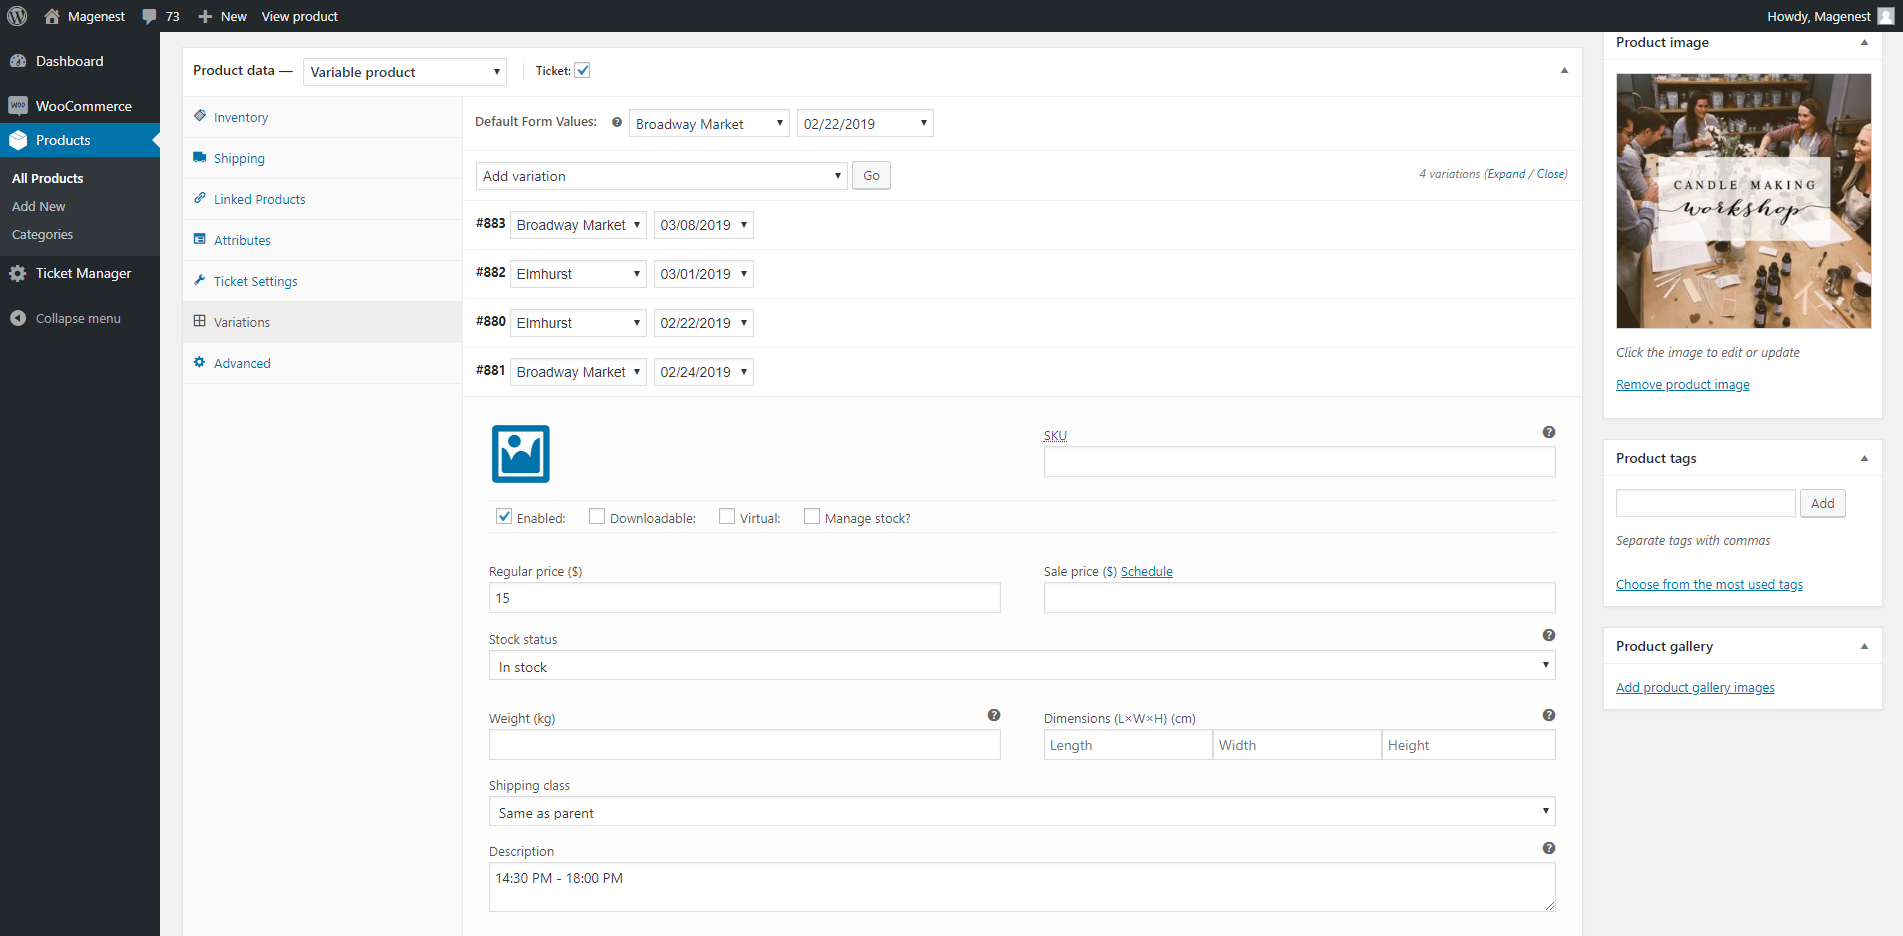
Variable Product
![]() Event details:
Event details:
- Start time, end time: The event date and time, which could be for multiple days or for the same day
- Location: The event address
- Display Google Map Tab: Show the Google Map on product page with the event location. You must fill in the latitude and longitude of the location,
- Automatically disable the product: The product will be disabled automatically when the event time is over. Customers cannot purchase the tickets anymore.
- Add attendees: Display the attendee form with name and email fields on product page.
- Ticket type: You can set it as the E-ticket or Physical Ticket (with shipping option) or both.
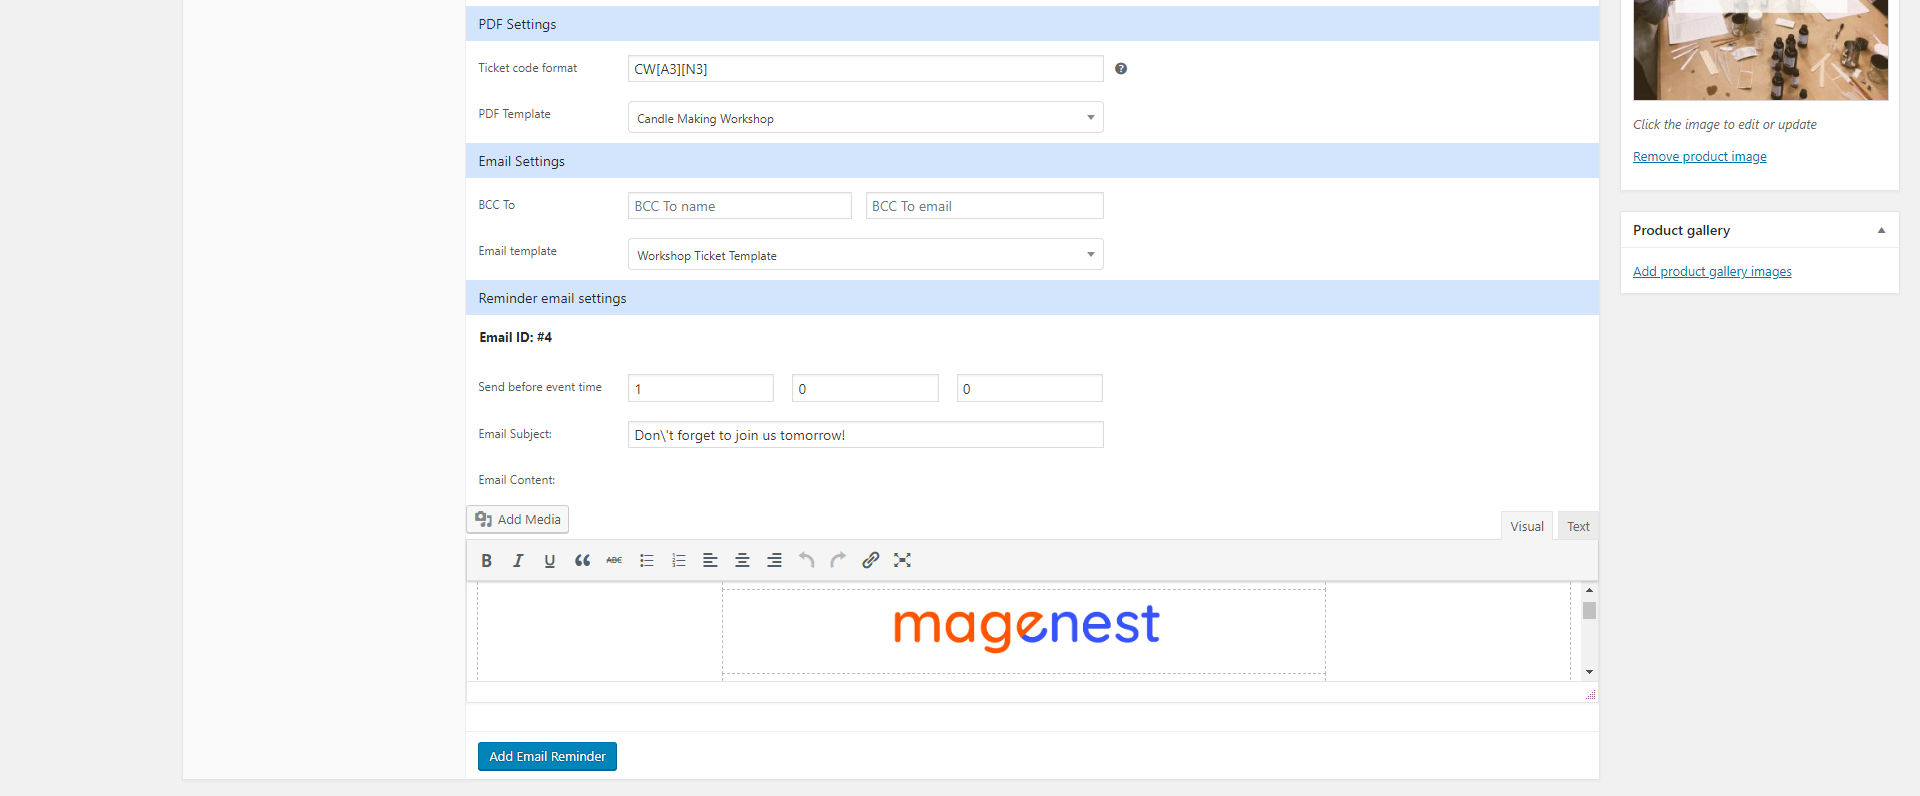
![]() PDF Settings:
PDF Settings:
- Ticket code pattern: The ticket code format. [A3] means to generate 3 random alphabetical characters, [N3 ] will generate 3 random numbers. "CW" is the hard code
Example: Magenest-[A3][N2] will generate a code like Magenest-afl23 or Magenest-afo09 ...
PDF Template: Assign the PDF ticket design to this product.
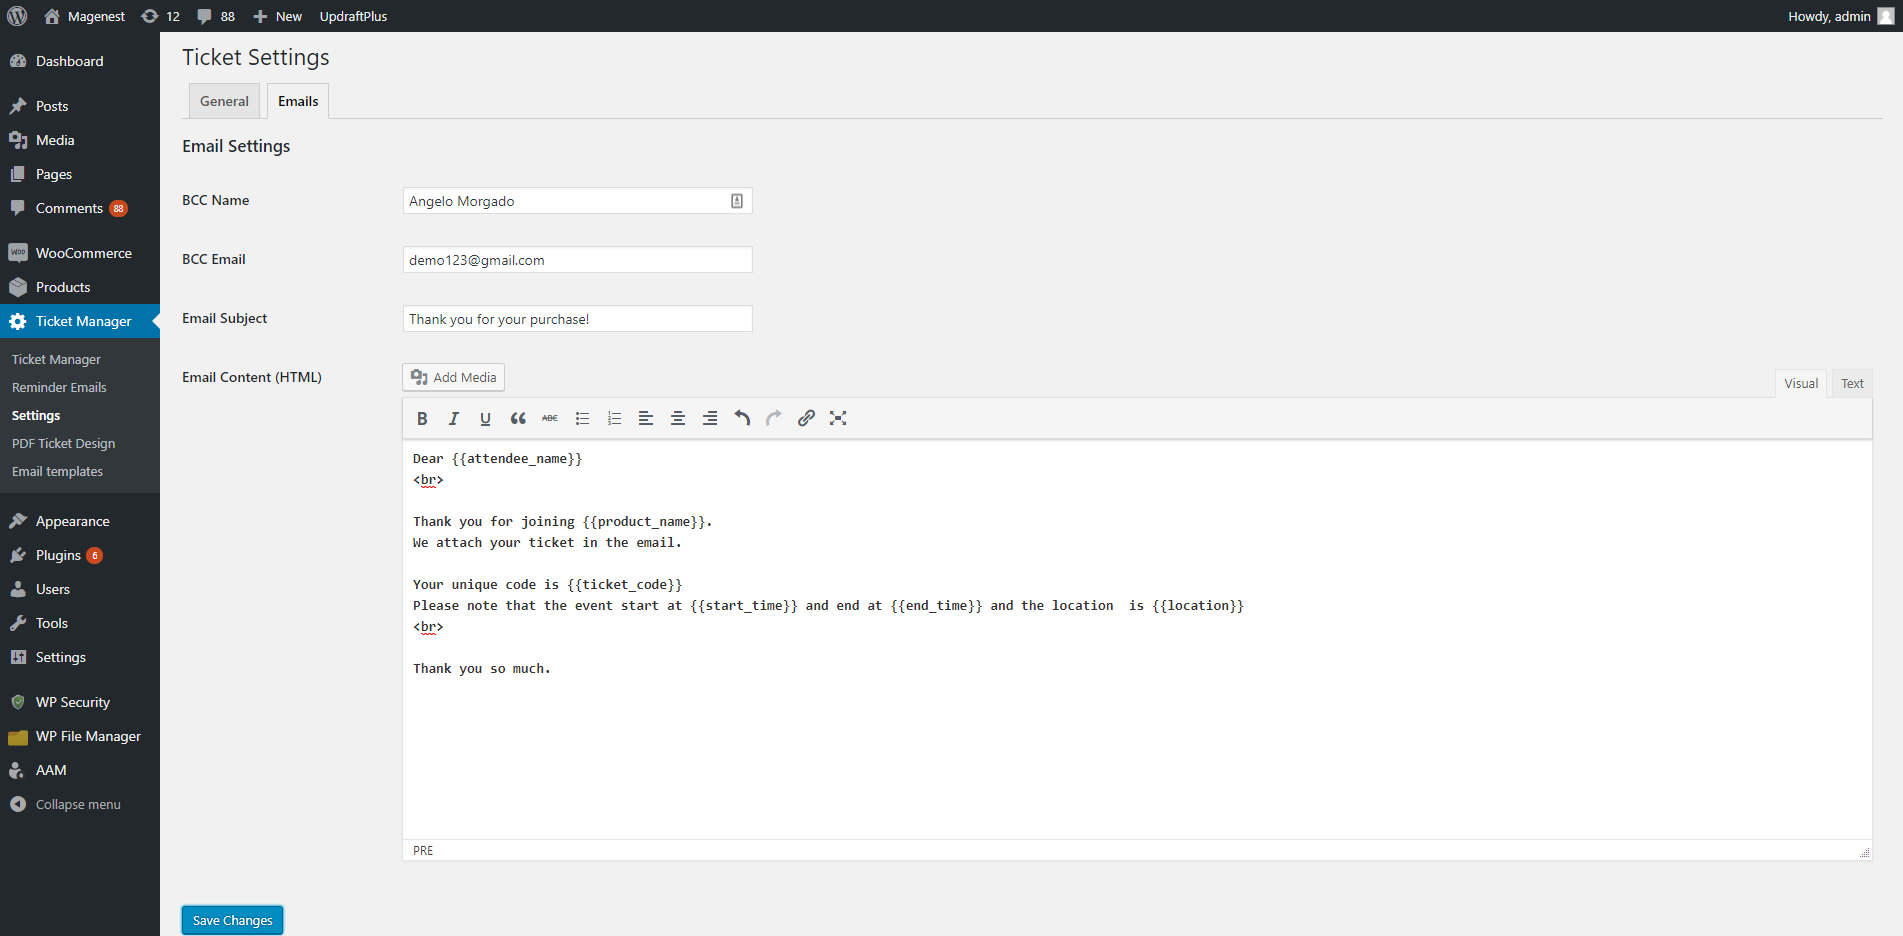
![]() Email Settings
Email Settings
- BCC to: Fill in the name and email of you/admin if you want to send the ticket confirmation email to admin email for management
- Email subject: The subject of the ticket email sent to customers
- Email content: You can add the email template using HTML
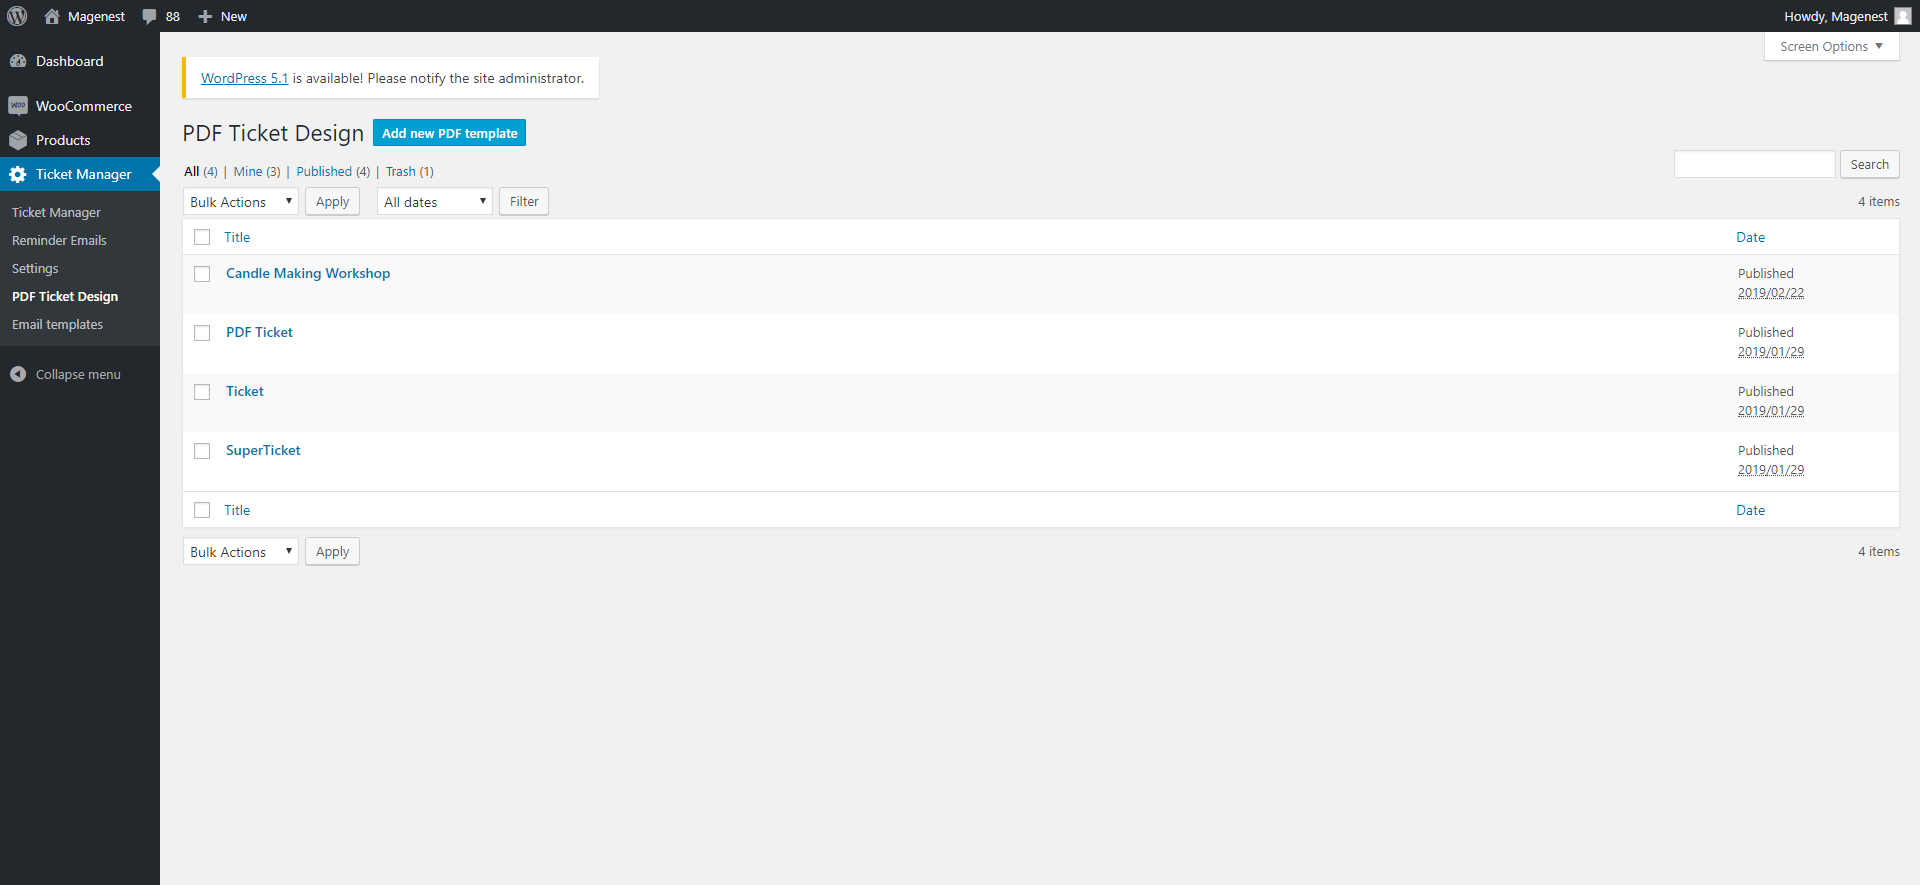
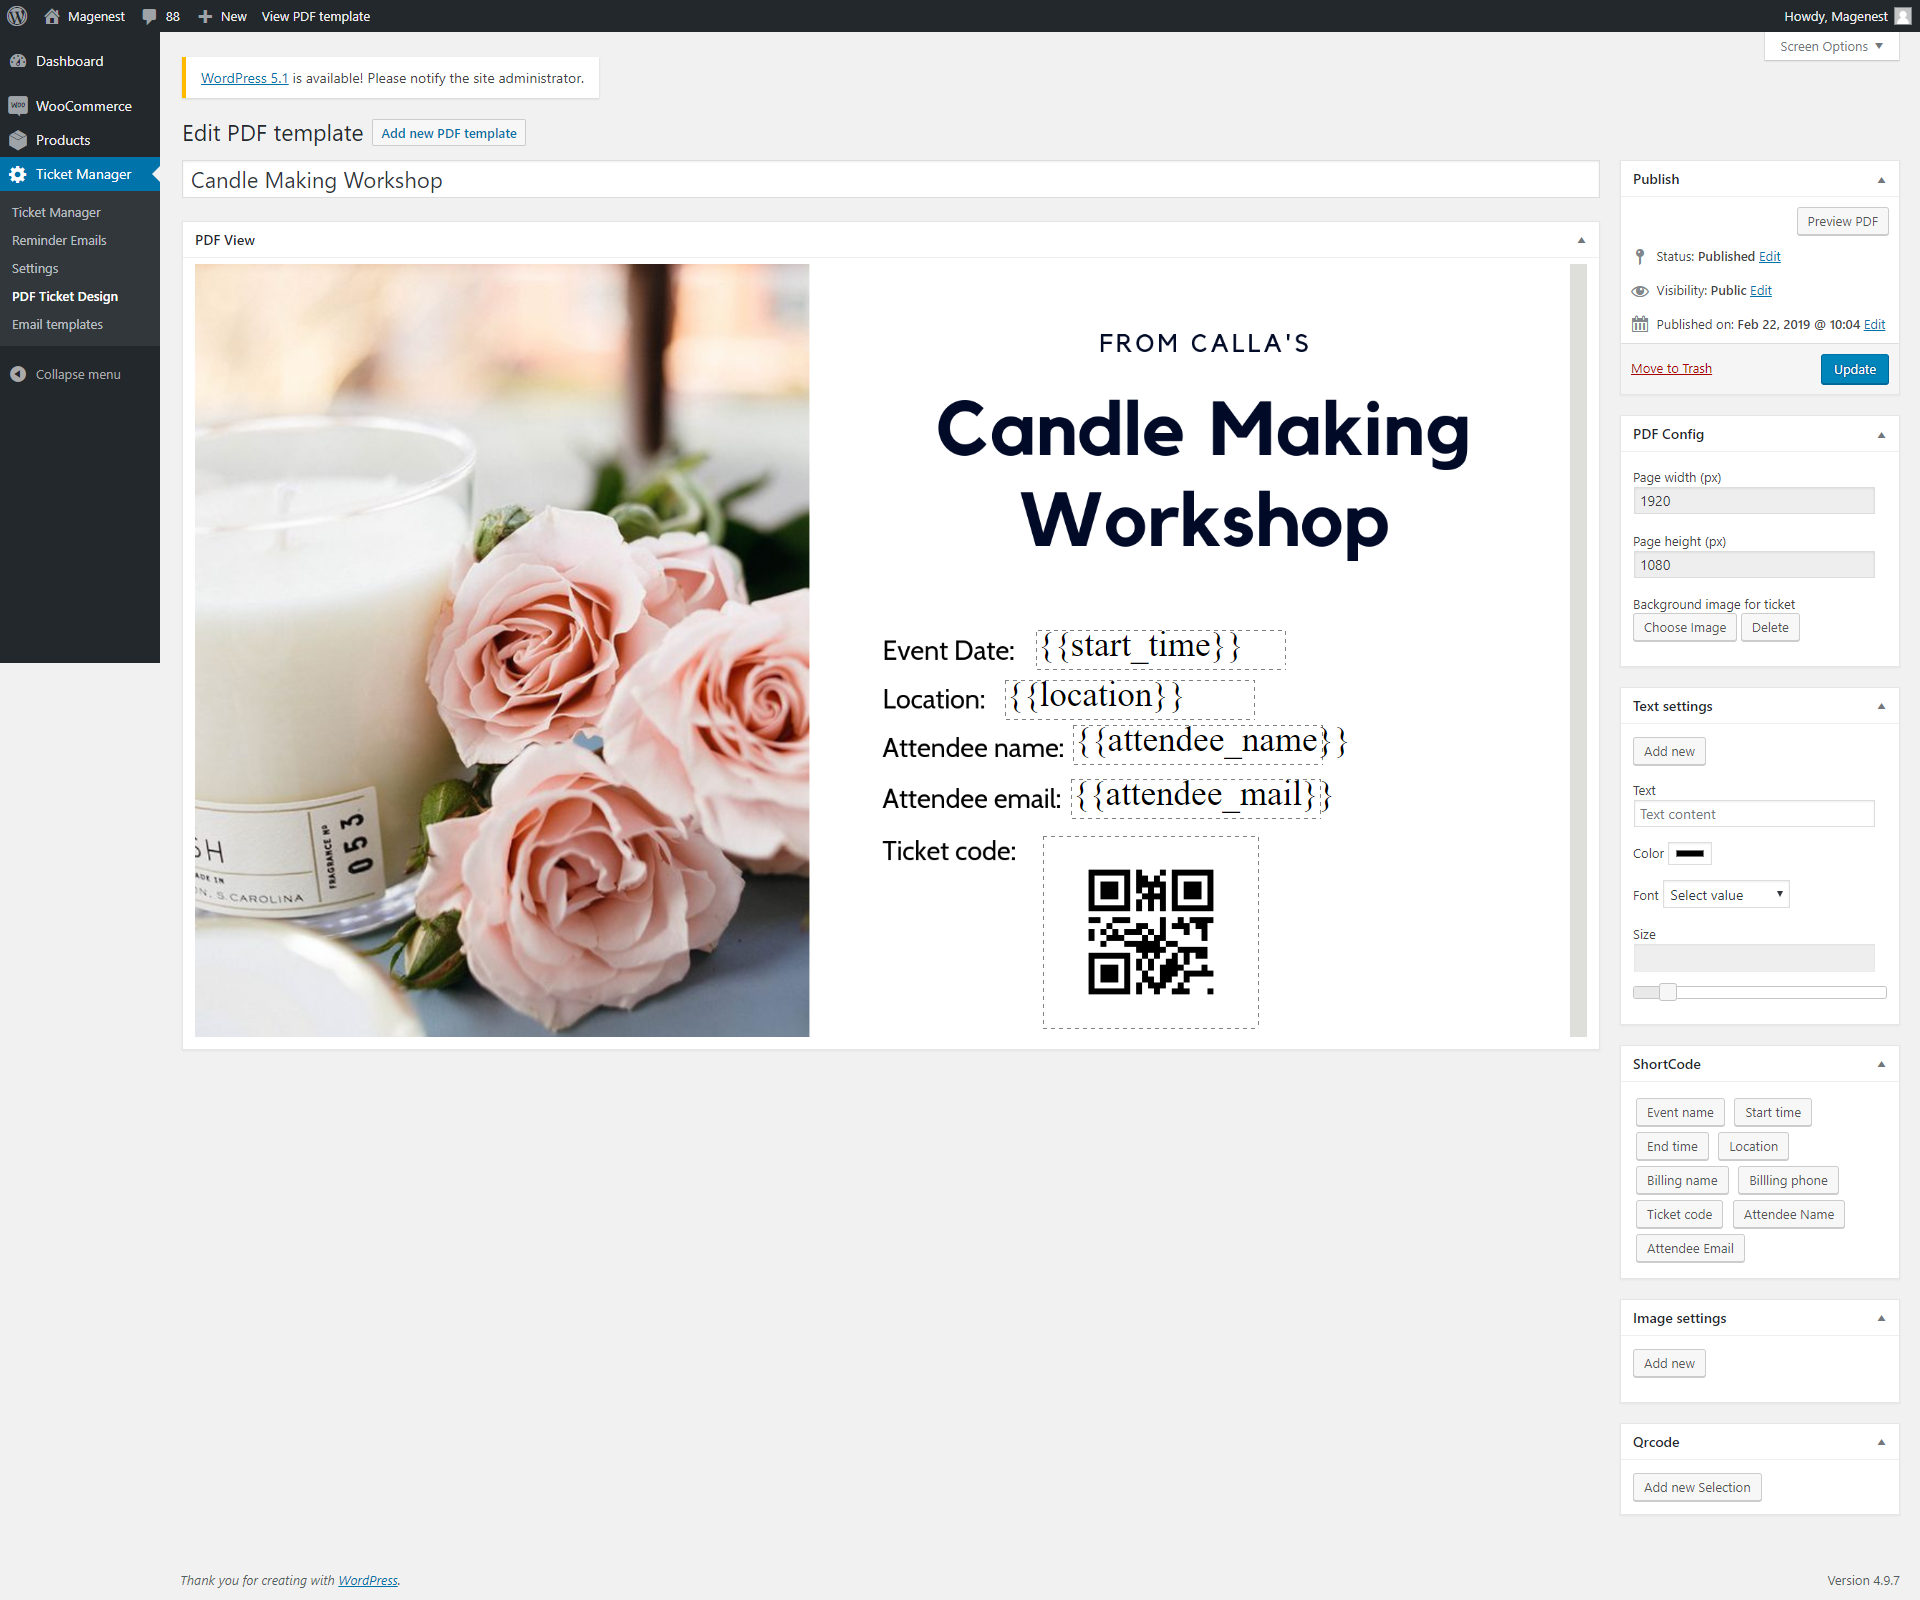
Design your PDF ticket
In the back end, go to Ticket Manager > PDF Ticket Design > Add new PDF Template
The changes you make for the PDF configuration can be previewed in the PDF View field.
![]() PDF Config: You can adjust the page width and height and upload the background image for the ticket.
PDF Config: You can adjust the page width and height and upload the background image for the ticket.
![]() Text settings:
Text settings:
To add the text field, to you have to fill in the text content first, then click on Add new button.
You can then change the text font, color, and size.
You can delete the text field by pressing the Recycle bin icon on the top right of the field.
![]() Shortcode: There are 9 shortcodes available for your choice.
Shortcode: There are 9 shortcodes available for your choice.
{{product_name}} : Event name
{{start_time}} : Start time of the event
{{end_time}} : End time of the event
{{location}} : Event Location
{{attendee_name}} : Attendee's name
{{attendee_mail}} : Attendee's email
{{billing_name}} : Billing name
{{billing_phone}} : Billing phone number
{{ticket_code}}: The numeric ticket code
![]() Image settings: Apart from background image, you can add more images to the ticket design.
Image settings: Apart from background image, you can add more images to the ticket design.
![]() QR Code: Add the QR code to the design.
QR Code: Add the QR code to the design.
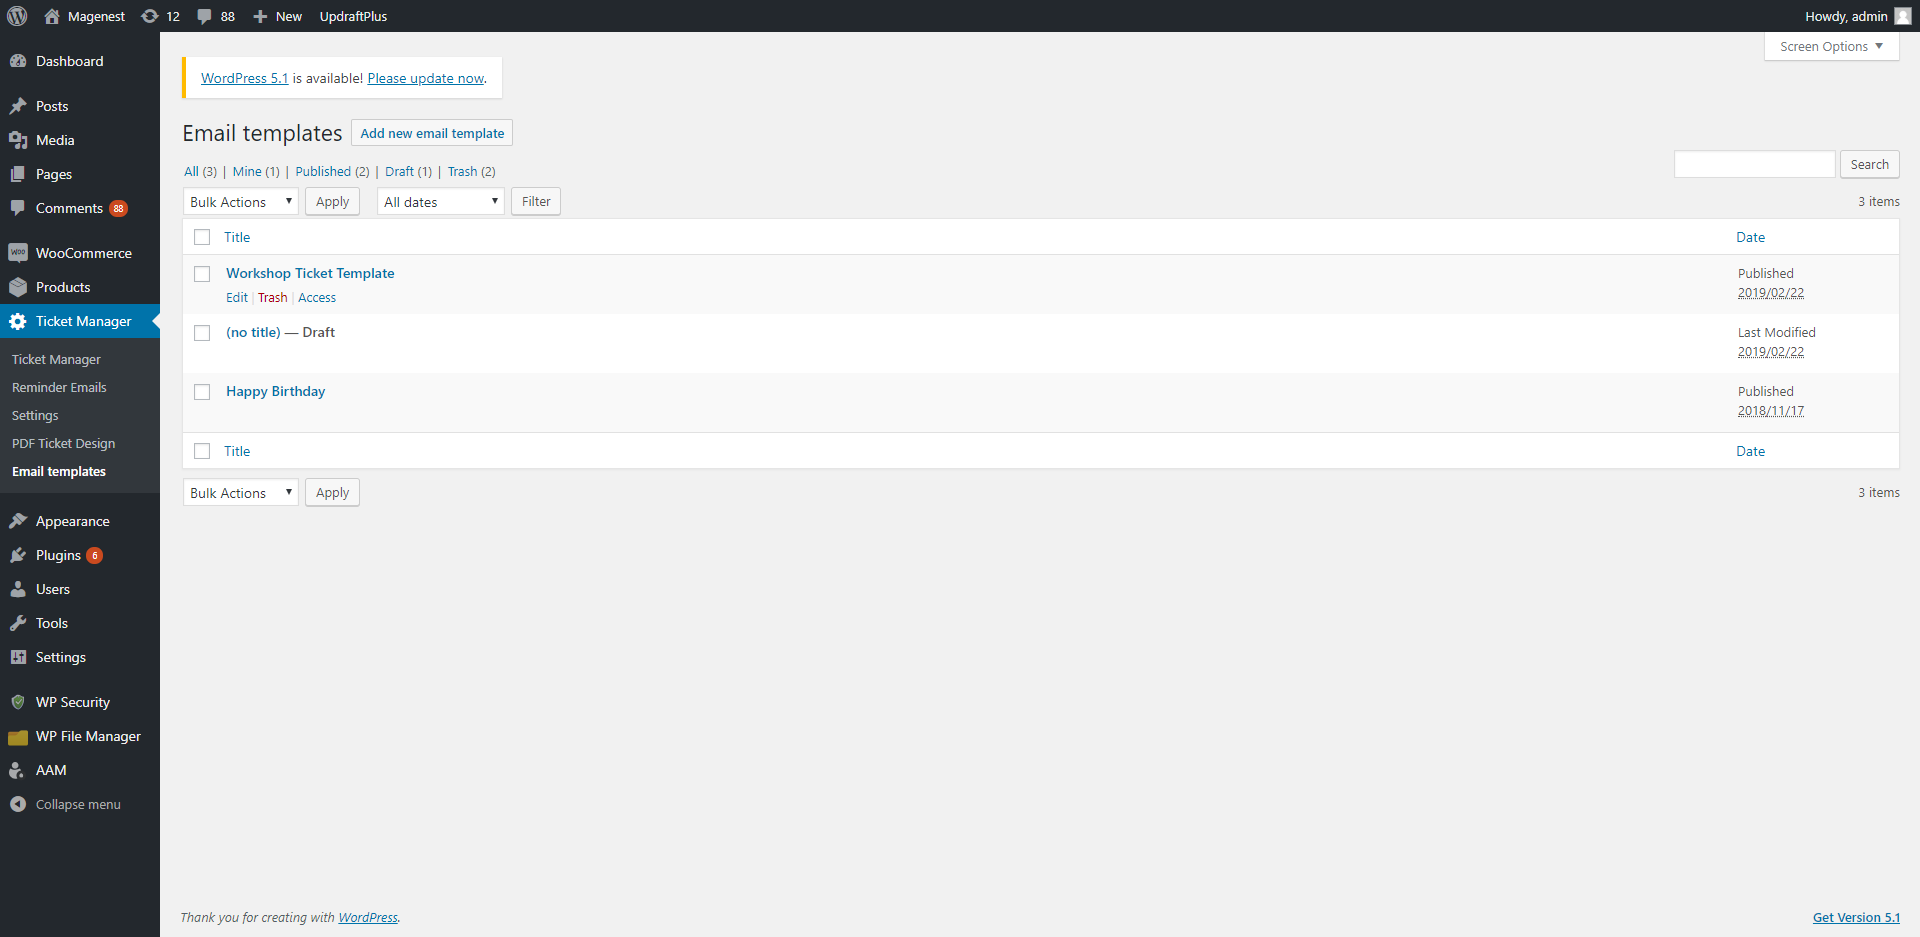
Create email templates
In the Ticket Manager > Email Templates, you can manage all available templates in the table, or creating new template by clicking on Add new email template button.
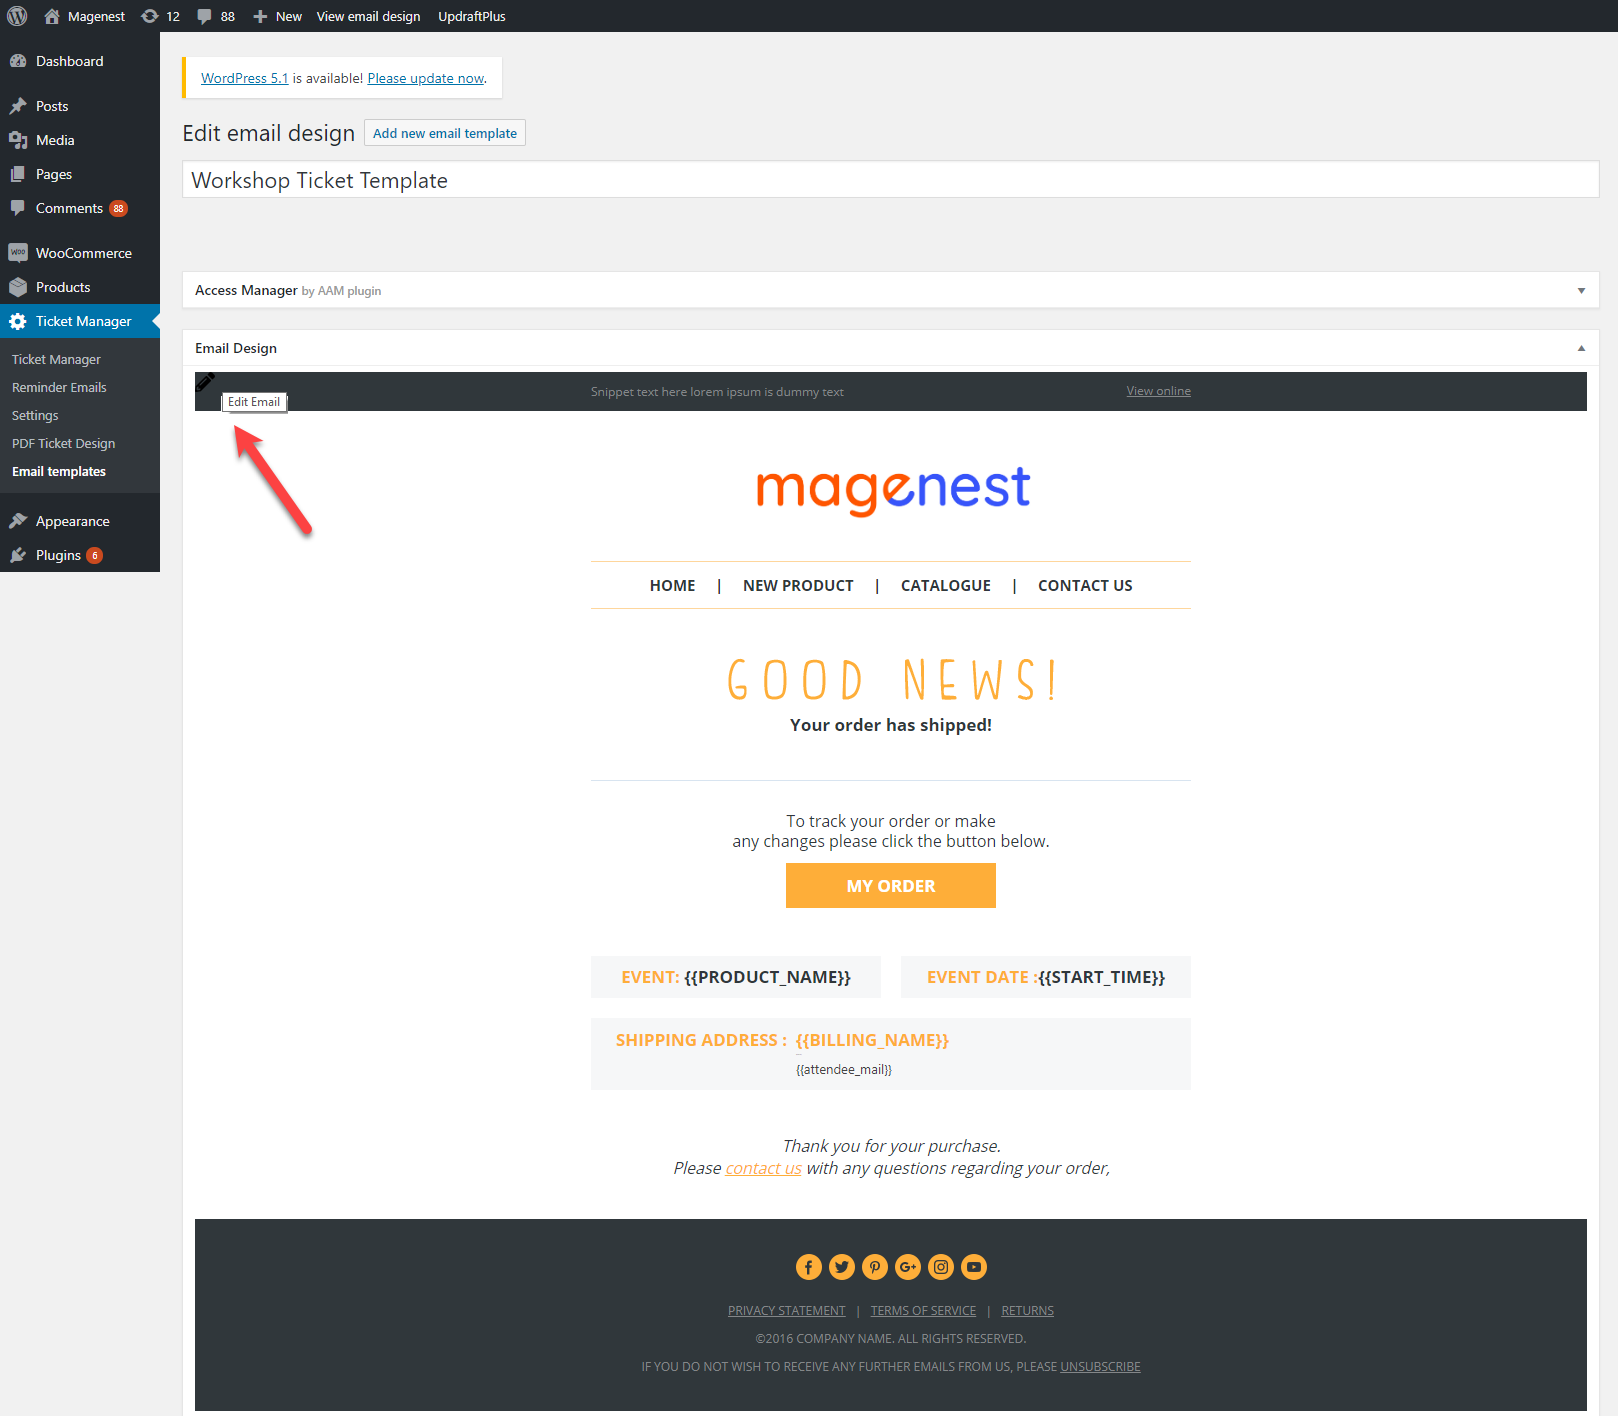
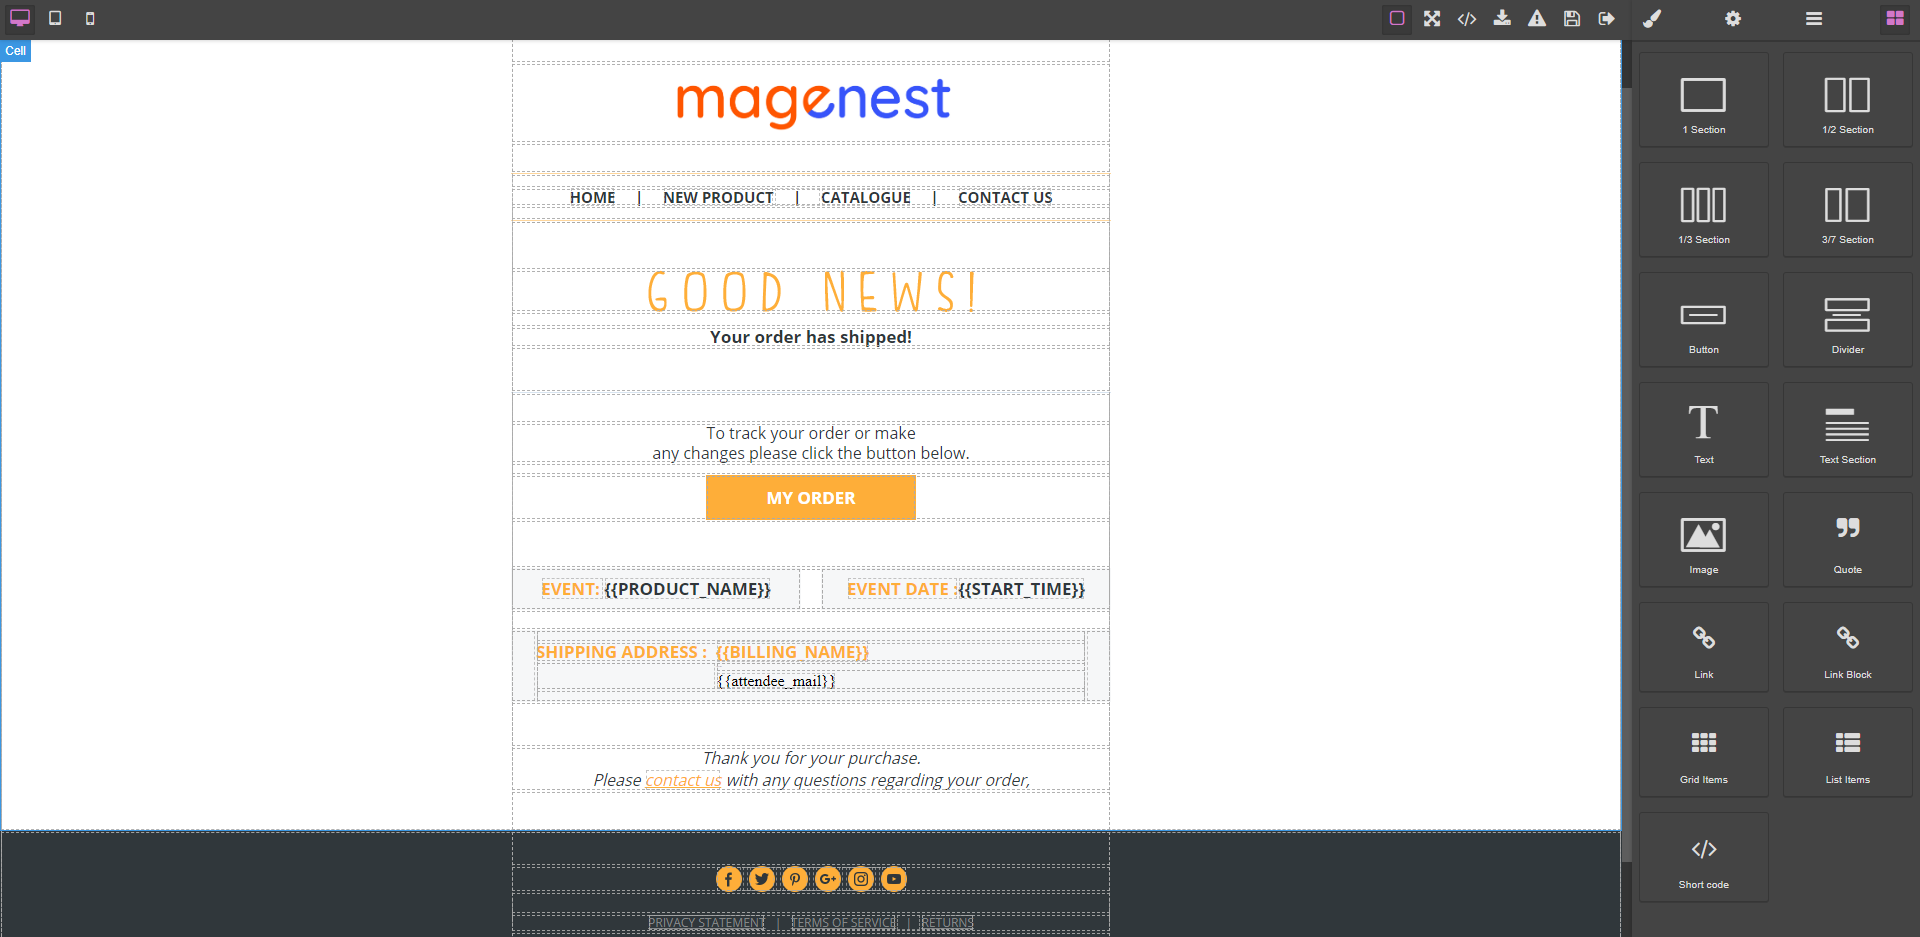
You can use the Web Builder Framework to design the email template. Click on the Pen icon on the top left of the Email Design field.
Manage ticket/attendee list
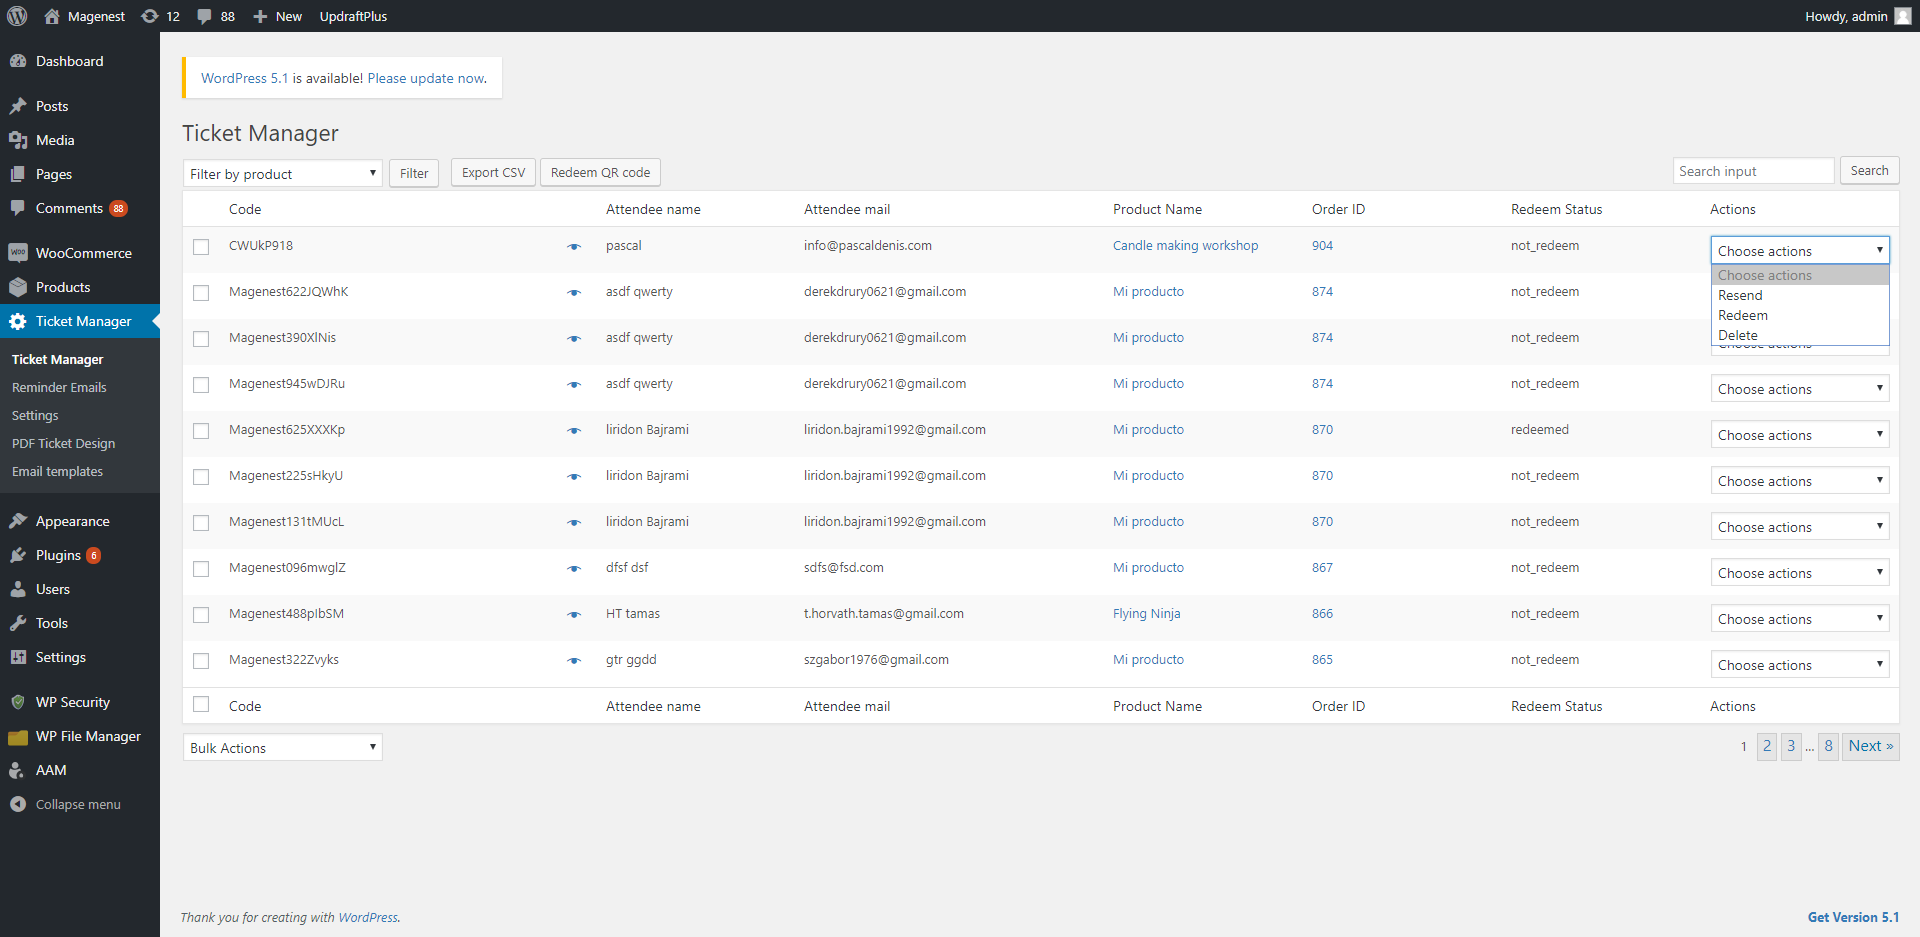
You can manage the tickets on Ticket Manager page.
With the filter by product, you can select a specific event and view all the tickets sold for that event. You can also resend, redeem or delete the ticket in the action column or select multiple tickets and use bulk actions.
Scan and redeem tickets
You can redeem the QR code from the back end. On Ticket Manager page, click on Redeem QR Code button.
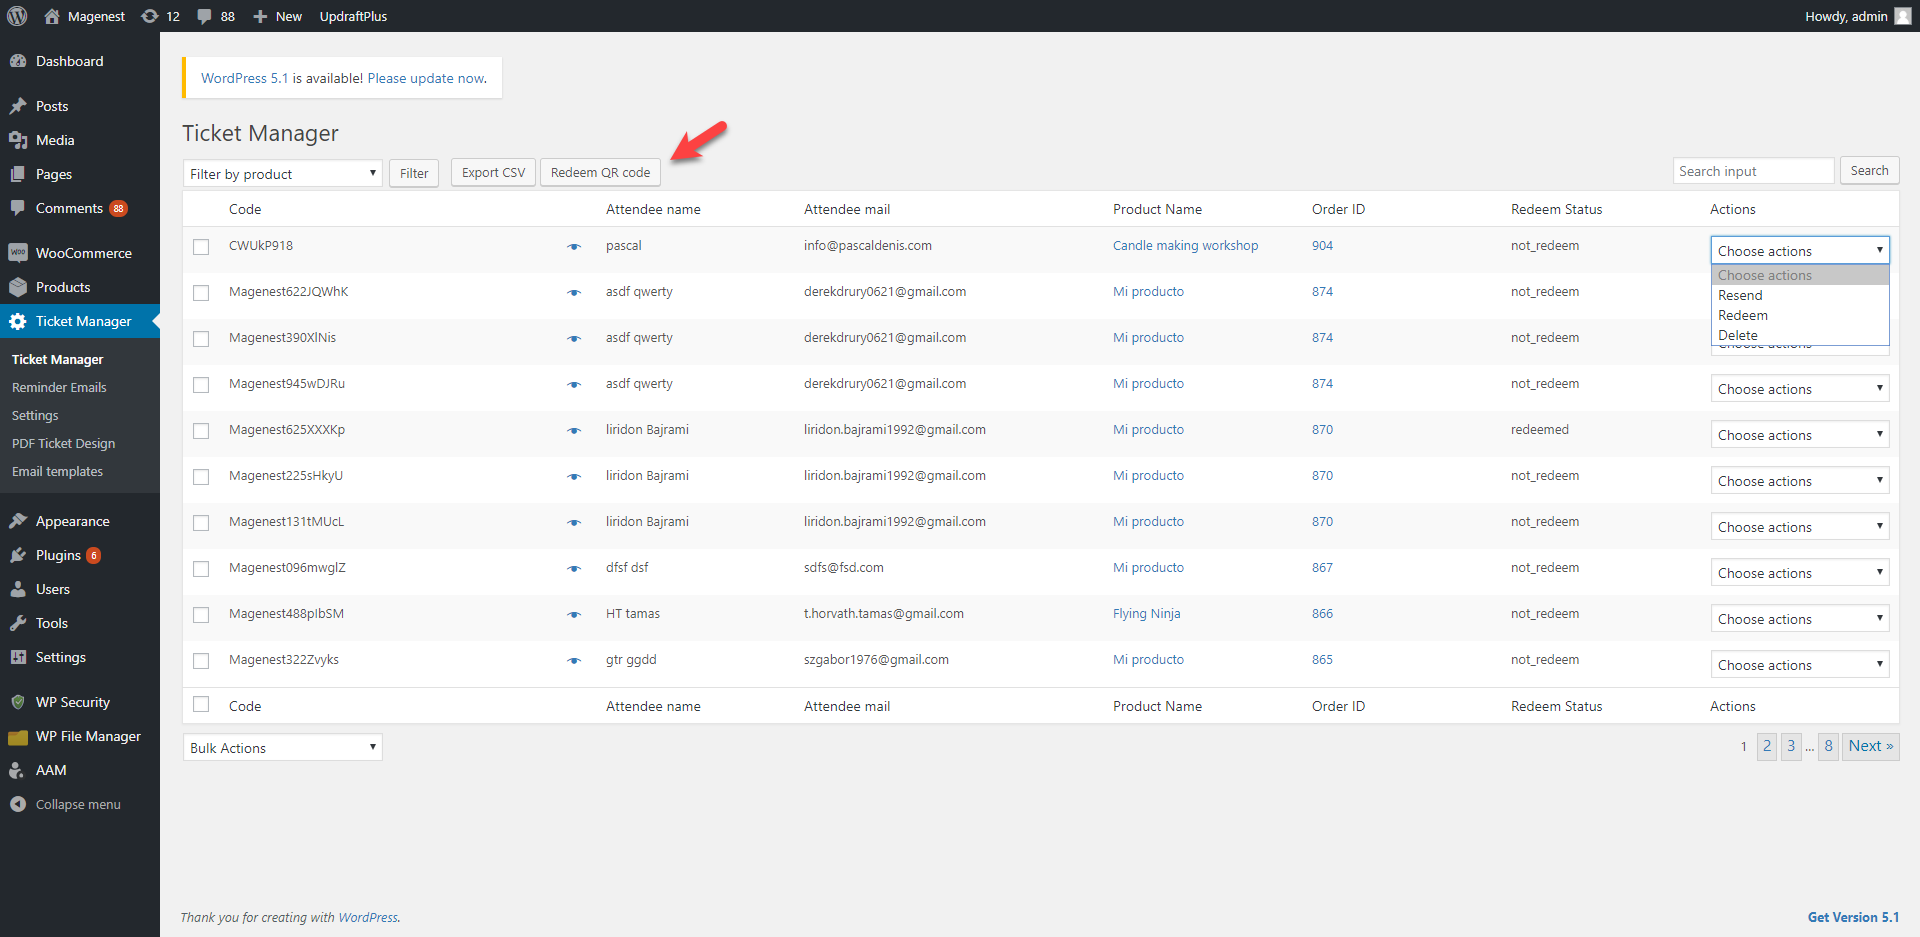
You can use Android phone camera, webcam to scan the ticket, or upload the image of the QR code onto the site.
When the code is scanned successfully, you can redeem the ticket with the Redeem button under the ticket information.

![]() You can also choose Redeem in the action column to redeem each ticket manually without scanning.
You can also choose Redeem in the action column to redeem each ticket manually without scanning.

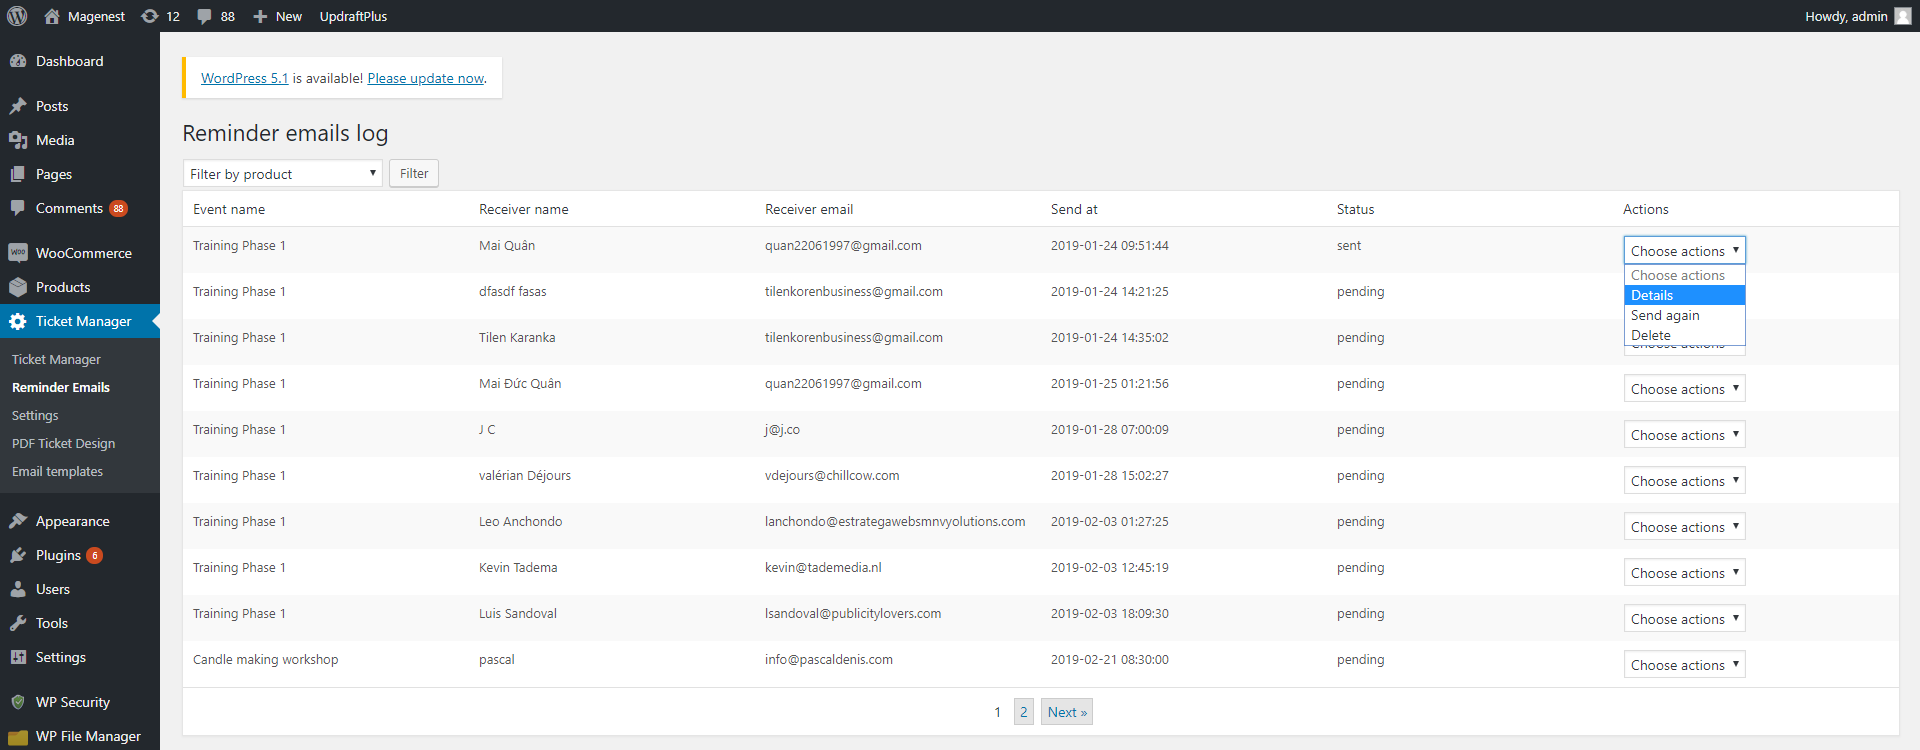
Manage reminder emails
You can track the reminder email list in Ticket Manager > Reminder emails.
With the filter by product, you can select a specific event and view all the tickets sold for that event. You can view the ticket details, resend the reminder email or delete the record.
Update
- When a bug fix or new feature is released, we will provide you with the module's new package.
- All you need to do is repeating the above installing steps and uploading the package onto your store. The code will automatically override.
- Flush the configure cache. Your store and newly installed module should be working as expected.
Support
- We will reply to support requests within 2 business days.
- We will offer lifetime free update and 6-month free support for all of our paid products. Support includes answering questions related to our products, bug/error fixing to make sure our products fit well in your site exactly like our demo.
- Support DOES NOT include other services such as customizing our products, installation and uninstallation service.
Once again, thank you for purchasing our extension. If you have any questions relating to this extension, please do not hesitate to contact us for support.
Woocommerce Ticket from Magenest is the plugin that allows you to creat and manage ticket products easily.
Introduction
Features: For admins:
- Support Simple product and Variable product
- Creat ticket products with ease
- Export data of event attendees to CSV file
- Enable QR code/Bar code for tickets
- Add event location on Google map
- Customize the PDF ticket by configuration
- Specify the email template for sending pdf ticket to customer after payment made
- Specify the email template for reminder customer of event
- Set the reminder date to customers X days before an event happens
- Allow print PDF tickets
- Easy install and set up
For customers:
- Buy tickets easily more than anything
- Manage and re-download tickets purchased
- Add multiple attendess in one time
- Have 2 selection ticket types : E-tickets and Hard-copy
- Manage and re-download tickets purchased
Configuration
Go to Woocommerce → Setting → Event ticket tab
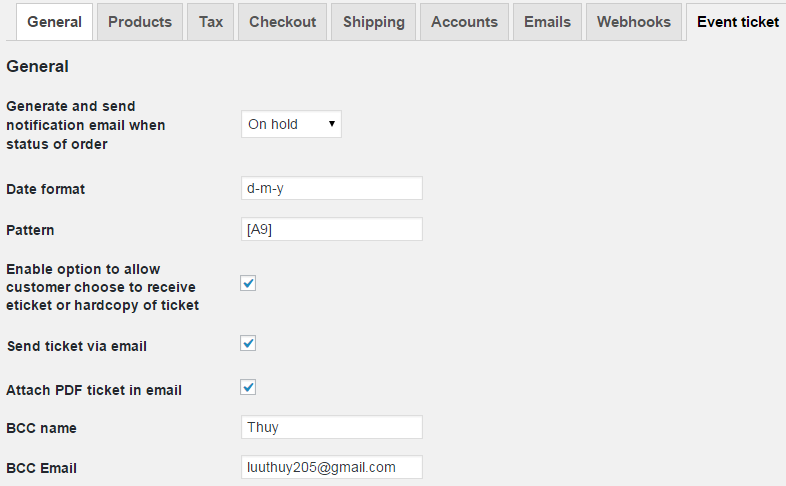
- Generate and send notification email when status of order: we suggest you to select On hold status in Live demo. In fact, you should choose Completed status if use plugin in your site.
- Date format: choose date format for your tikets.
- Pattern: This setting affect automatic generated ticket code. [A3]com[N1] will generate refcom8 or axy90 and so on. You can set it to [A4][N3] or [AN4] ….
- Enable option to allow customer choose to receive eticket or hardcopy of ticket: If you check this box, when customers make a purchase, they can be able to select e-ticket or hard copy ticket
- Send ticket via email: check this box if you want tickets are sent to email
- Attach PDF ticket in email: check this box if you want attach PDF ticket in email
- BCC name: fill the name you want BBC to
- BCC Email: fill the email you want BBC to
- Google map api: Fill your Google map api
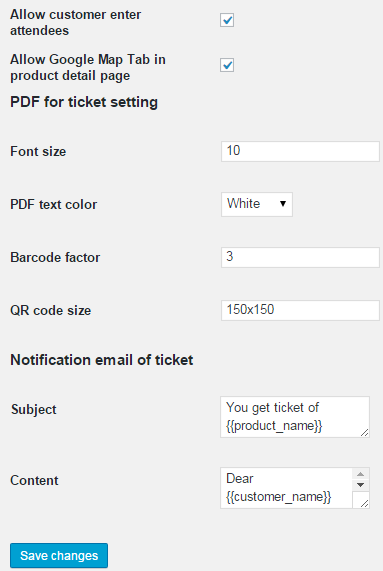
- Allow customer enter attendees: check this box to allow customers enter their attendees
- Allow Google Map Tab in product detail page: If you check this box, an Google map will be displayed in product detail showing your event location.
- PDF for ticket setting: Customize PDF file
- Font size: fill the PDF font size
- PDF text color: choose the PDF text color
- Barcode factor: fill the Barcode size
- QR code size: fill the QR code size
- Notification email of ticket: Customize notification email
- Subject: fill the subject email
- Content: fill the content email. You can consult this example:
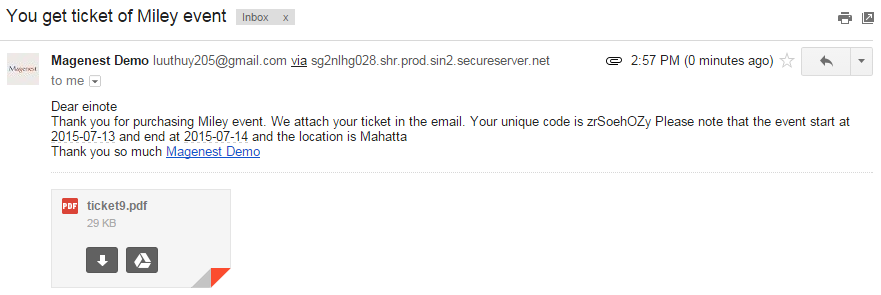
The email content
Dear {{customer_name}}
<br>

Thank you for purchasing {{product_name}}.
We attach your ticket in the email.

Your unique code is {{code}}
Please note that the event start at {{start_time}} and end at {{end_time}} and the location  is {{location}}
<br>

Thank you so much
<a href="{{store_url}}"> {{store_name}}</a> |
|---|
Installation
- Unzip and upload the plugin’s folder to your /wp-content/plugins/ directory
- Activate the extension through the ‘Plugins’ menu in WordPress
- Set write permission for folder temp and upload
After you install and active the plugin you will see the menu of module
Create ticket product
Go to Products → Products → Add products
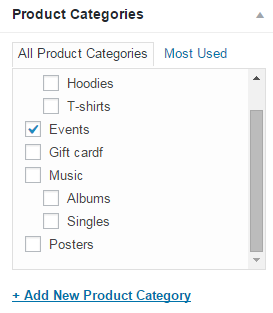
- Product categories: Add and select Event product category
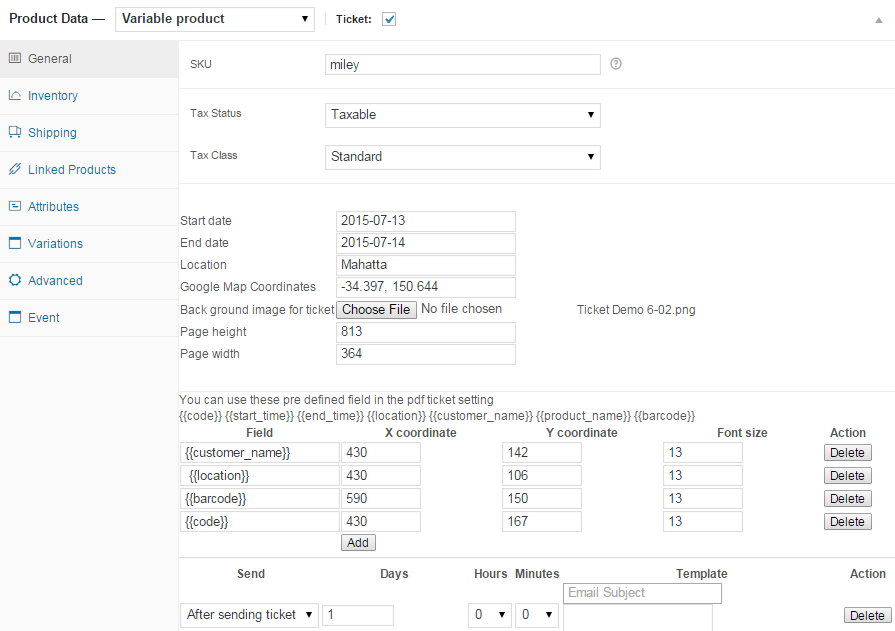
- Product Data: Choose Simple Product if your ticket don't have variation or Variable product if your ticket have variation. Tick the Ticket box
- Tax Status: Select Taxable
- Tax Class: Select Standard
- Start date, End date, Location: fill the start date, end date, location for your ticket
- Google Map Coordinates: fill your event location coordinate
- Back ground image for ticket: Upload image for ticket
- Page Width: set it to the desired width of ticket
- Page Height set it to the desired width of ticket
You can also add the defined field in the pdf ticket setting, set the font size and coordinates for that fields.
If your ticket have variatons, you need to creat atribute for your ticket
Go to Products → Atributes → Add new atribute
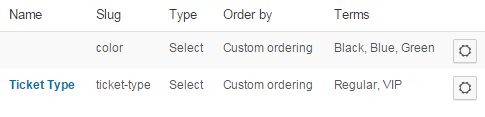
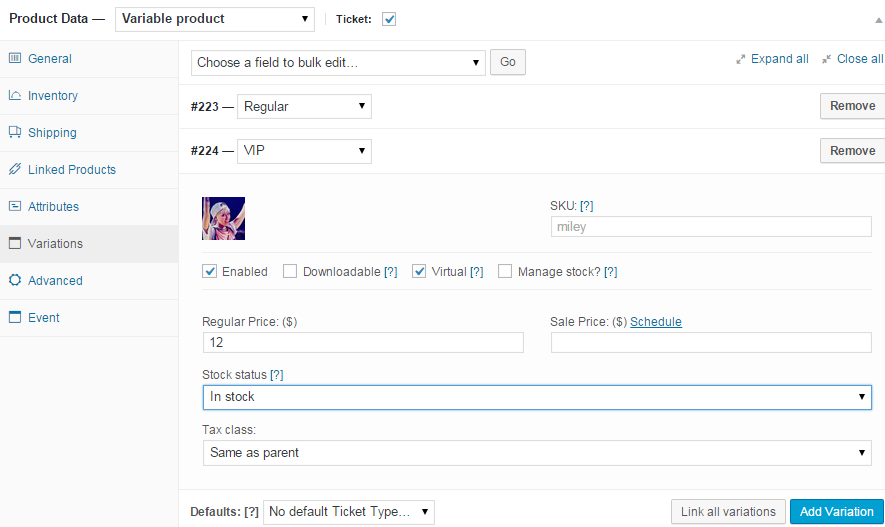
Then add variations to ticket, set up all needed information.
When complete, click Publish button
Customers buy ticket product
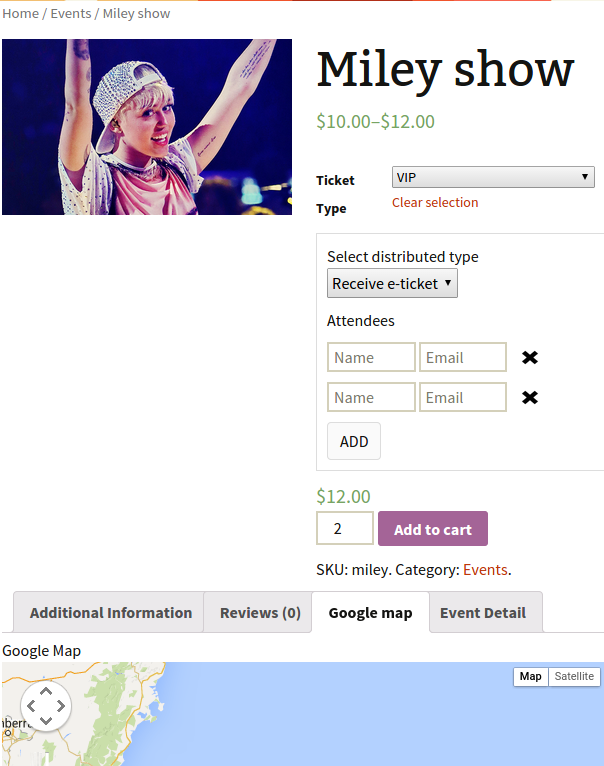
Customers can choose distributed type and select the ticket type add unlimited attendees to event.
Manage tickets
Admin can access manage ticket by click on menu Event Ticket Manager Manage tickets in back end:
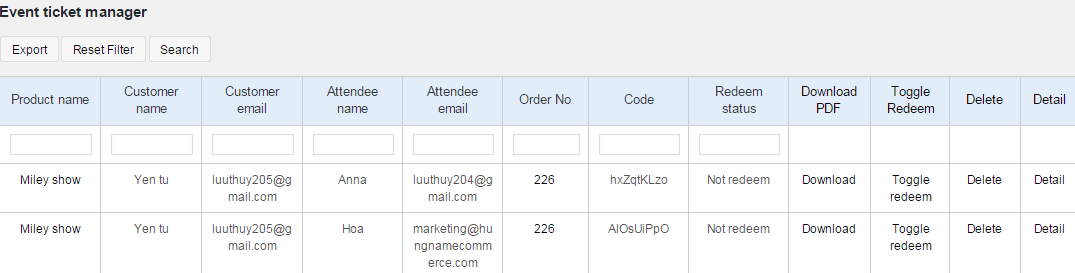
You will see a grid view of tickets.
The module have powerful filter.
For example you want to filter only tickets that belong to product Miley show , you can fulfill the Product name with Miley and click Search.
You can even combine multiple filter criteria. For example you want to filter for ticket that is purchased by customer has email [email protected] and product name is Miley show , you can fulfill both product name and customer email and click Search button
You can export the ticket to csv and using Excel to manage it . click on Export Button
Manage tickets in front end:
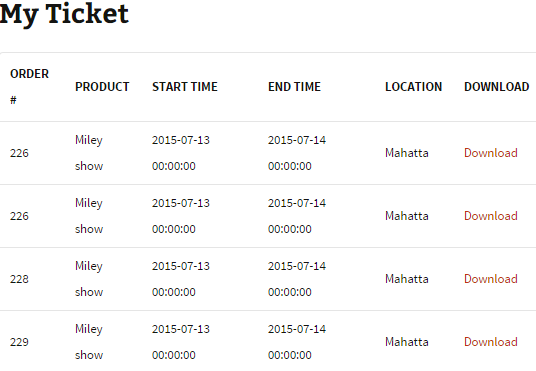
Customers can see tickets they purchased by click on My account, they will see a grid view of My ticket, customers only see this grid when they sign in, nobody can't see this grid anyway.
In that grid, you can see order number, product name, start time, end time, location. You also can download purchased ticket again.
Notification Emails
When finish a purchase, an email is sent to customer:
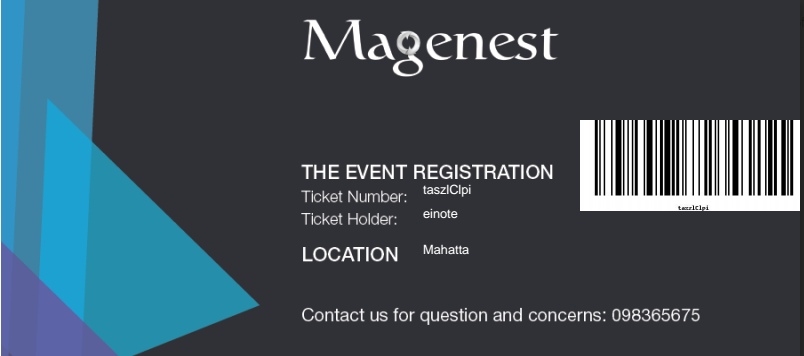
Ticket with Bar code:
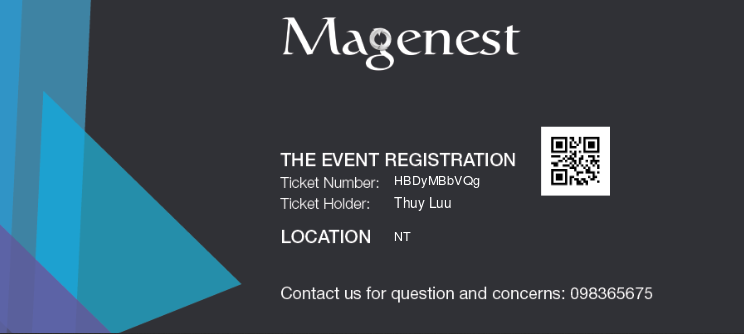
Ticket with QR code:
You also can set the time and template sending reminder email before the event start or after sending ticket.
 You can manage all reminder mail in Mail log. Click on Event ticket manager → Mail log.
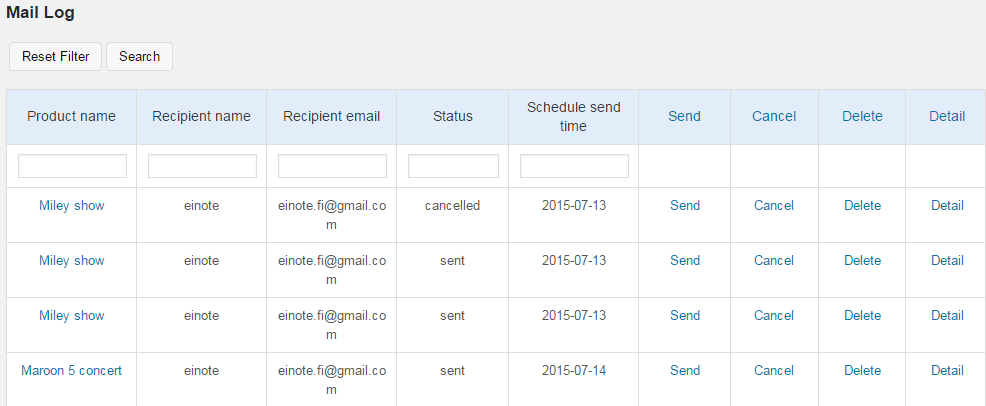
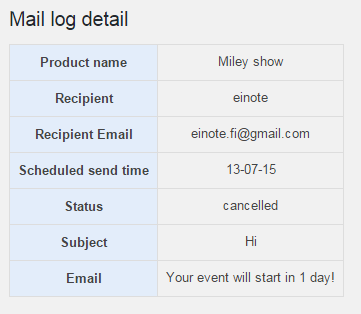
You can resend email to customers by click Send, Cancel email ( with pending email), delete and view detail, this grid also includes powerful filter can filter one or multiple criteria.
Trouble Shooting
You need to grand 777 permission to the upload folder of woocommerce ticket
If you have want the further features that is not supported in current version, do not hesitate to contact us.
Magenest