Thank you for purchasing our extension. If you have any questions that are beyond the scope of this document, do not hesitate to leave us an email via our email address below.
By: Magenest | Support Portal: https://servicedesk.izysync.com/servicedesk/customer/portal/161
Introduction
Notification box for Magento 2 is a useful tool that informs your customers about important news such as order status updates, new products, available promotions & discounts, etc. in real-time in a quick and effective manner.
Features
Features for admin
- Push unlimited notifications for customers
- Create a notification box in the header section
- Set up 2 notification modes: Send immediately or schedule time
- Set up conditions to send notifications based on customer behaviors/customer attributes
- Create various types of notifications including 3 default types: Abandoned cart reminders, Order status update, Review reminders
- Customize content, images, and URLs for each notification
- Design notification box
- Support notifications for guests
- Report performance of notifications
- Display subscription popup for unsubscribed customer
Features for customers
- Receive 2 types of notification: Magento Popup Noti and Web Push.
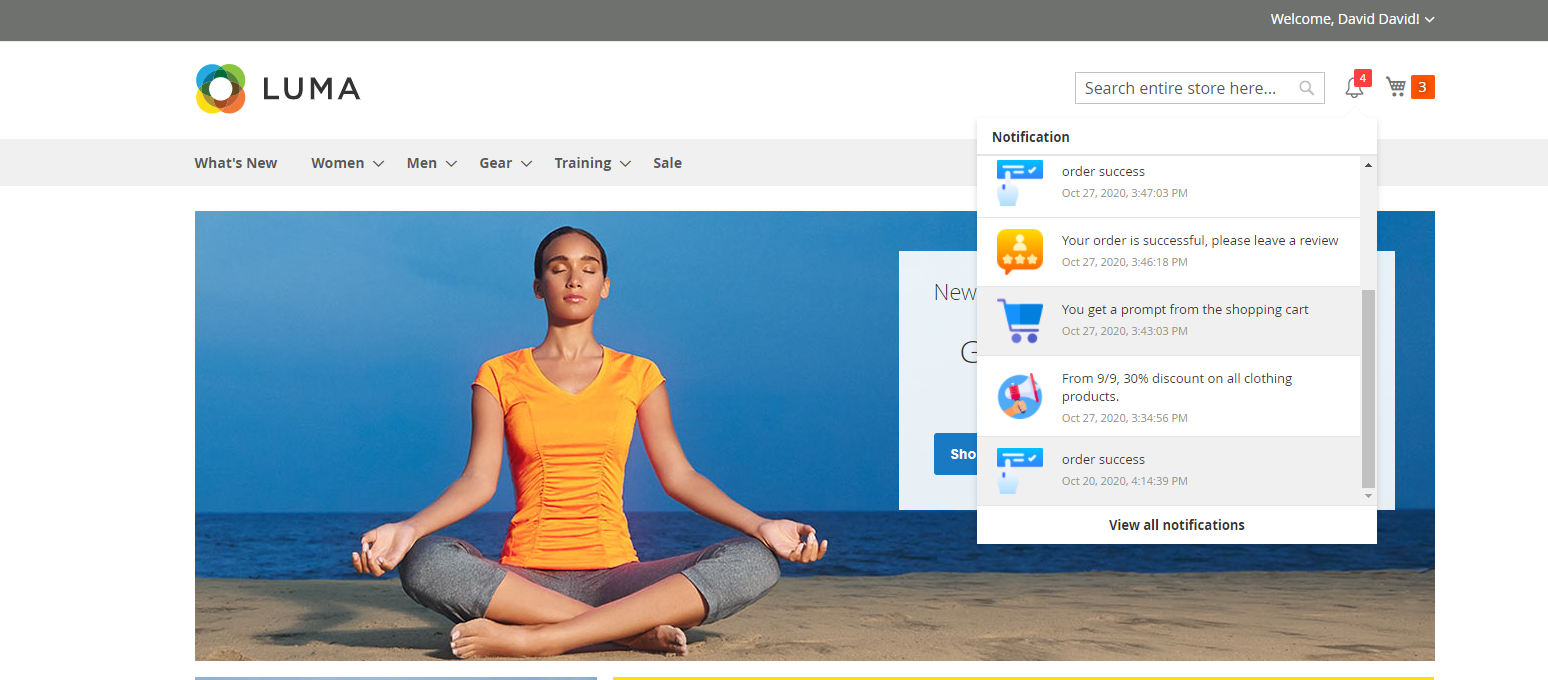
- View all new important notifications in the notification box.
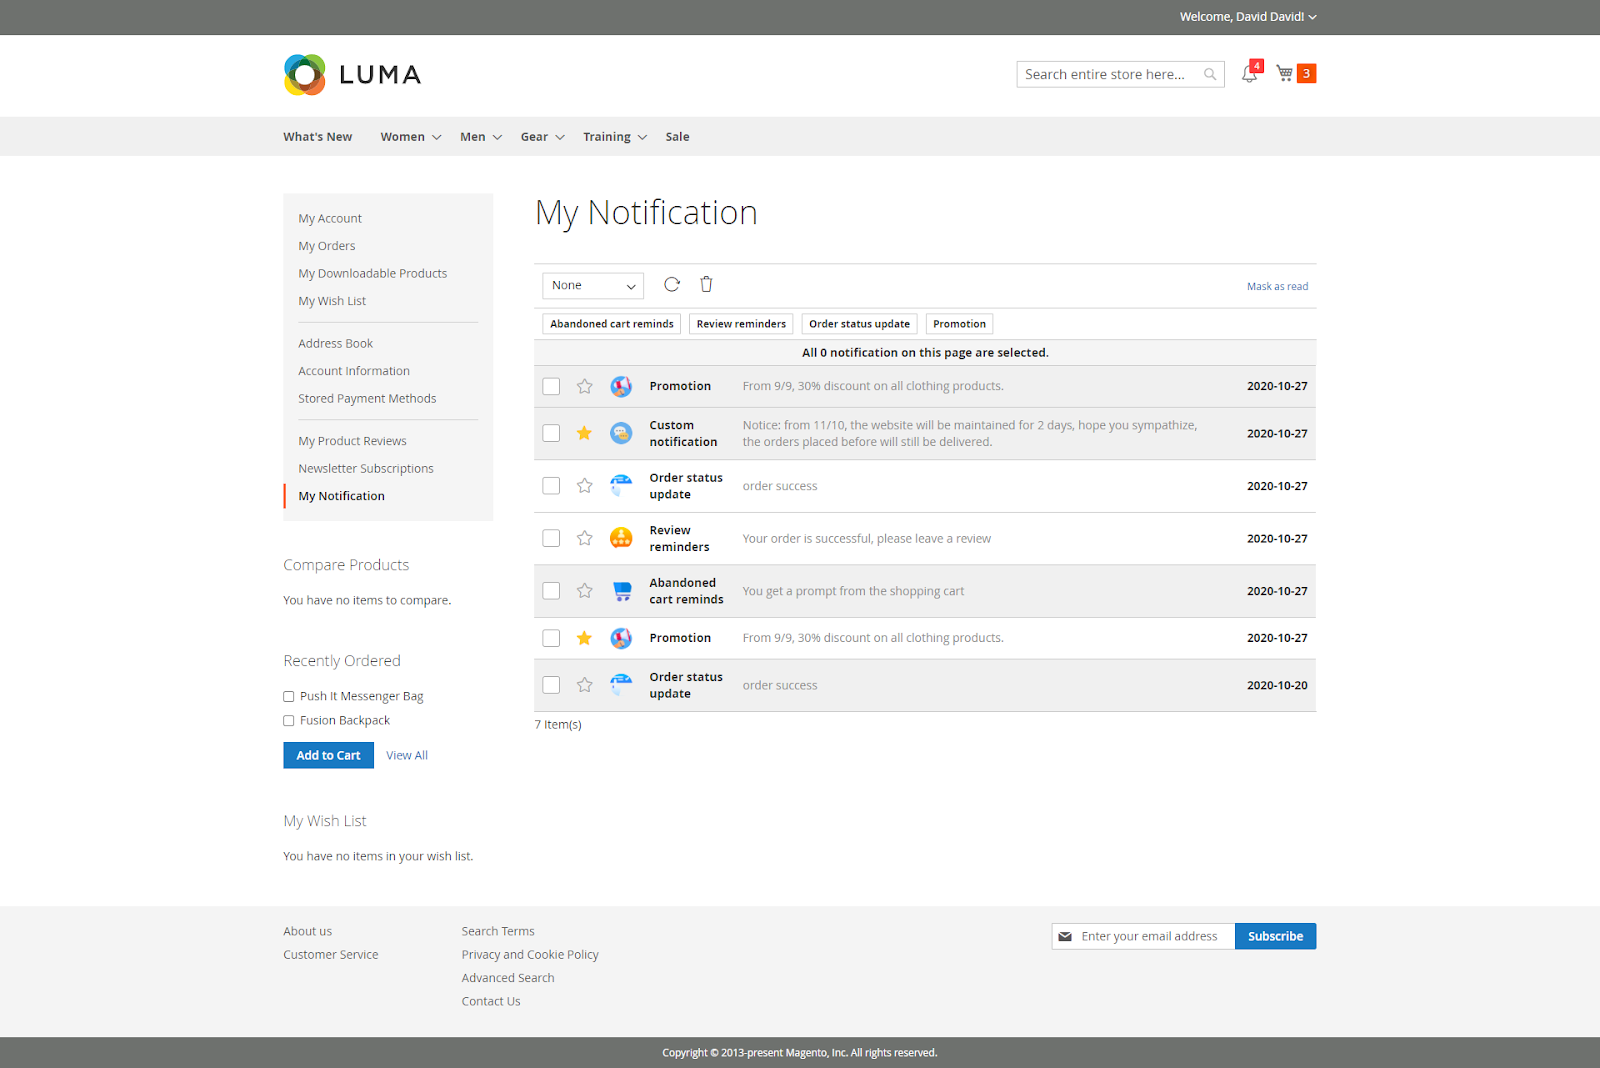
- View notifications on My Notification page.
- Mark important notifications, delete notifications, filter notifications by type.
System Requirements
Your store should be running on Magento CE EE 2.3.x, 2.4
Configuration
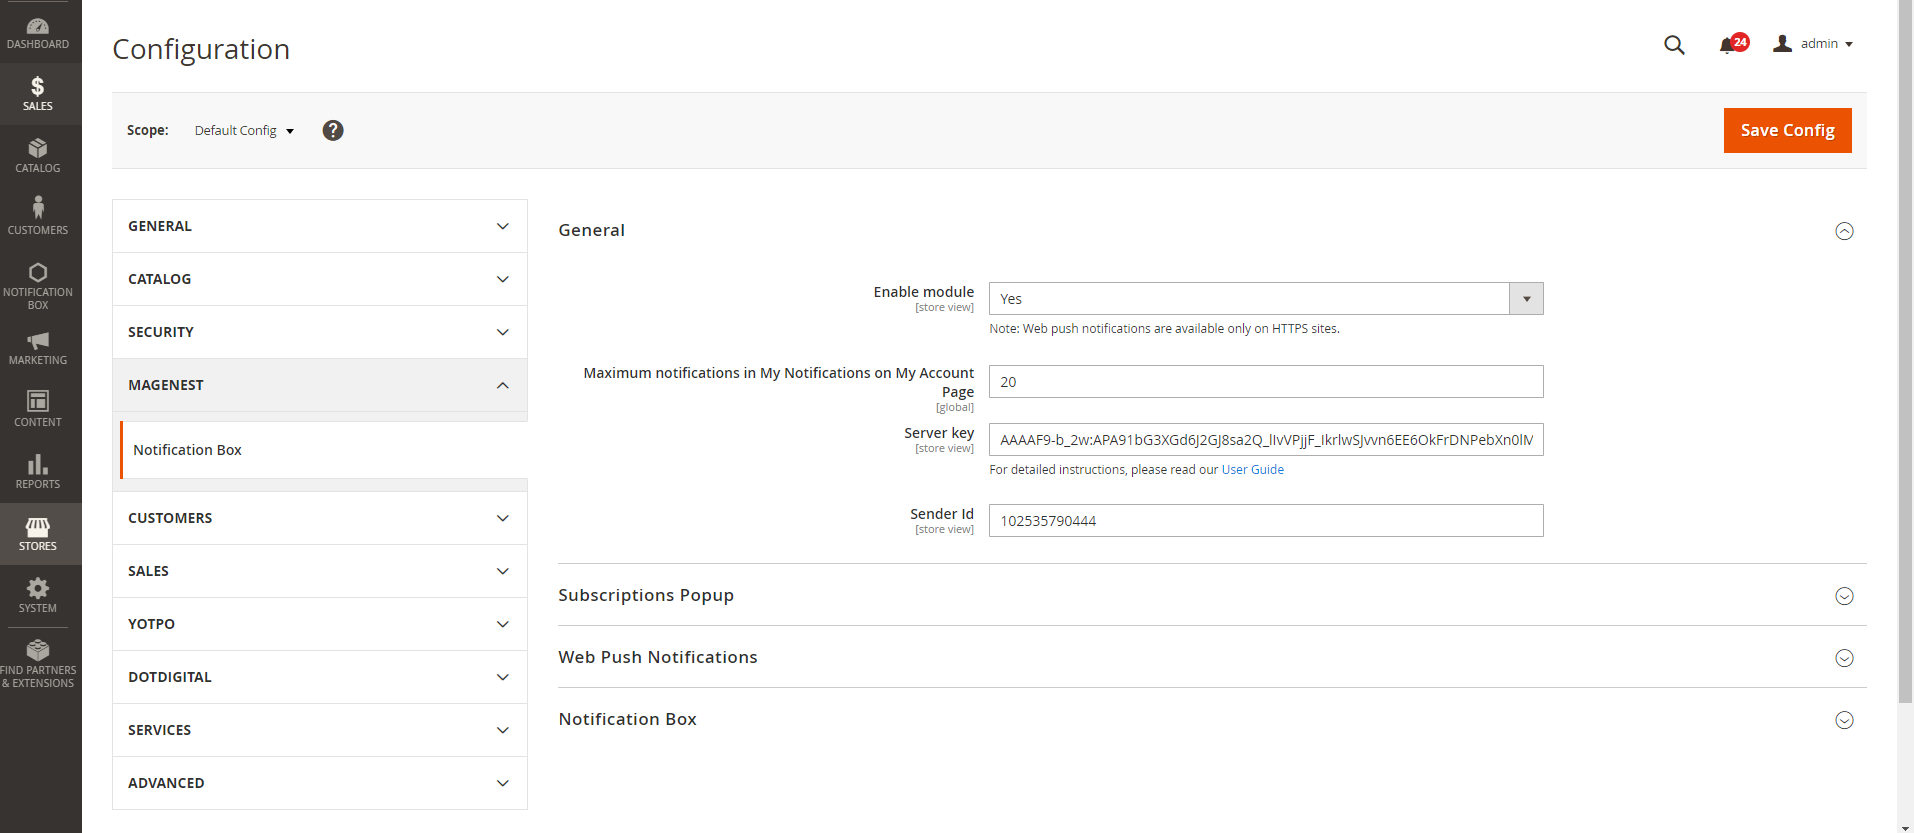
On the admin sidebar, go to Stores > Configuration > Magenest > Notification Box
General Settings
 General:
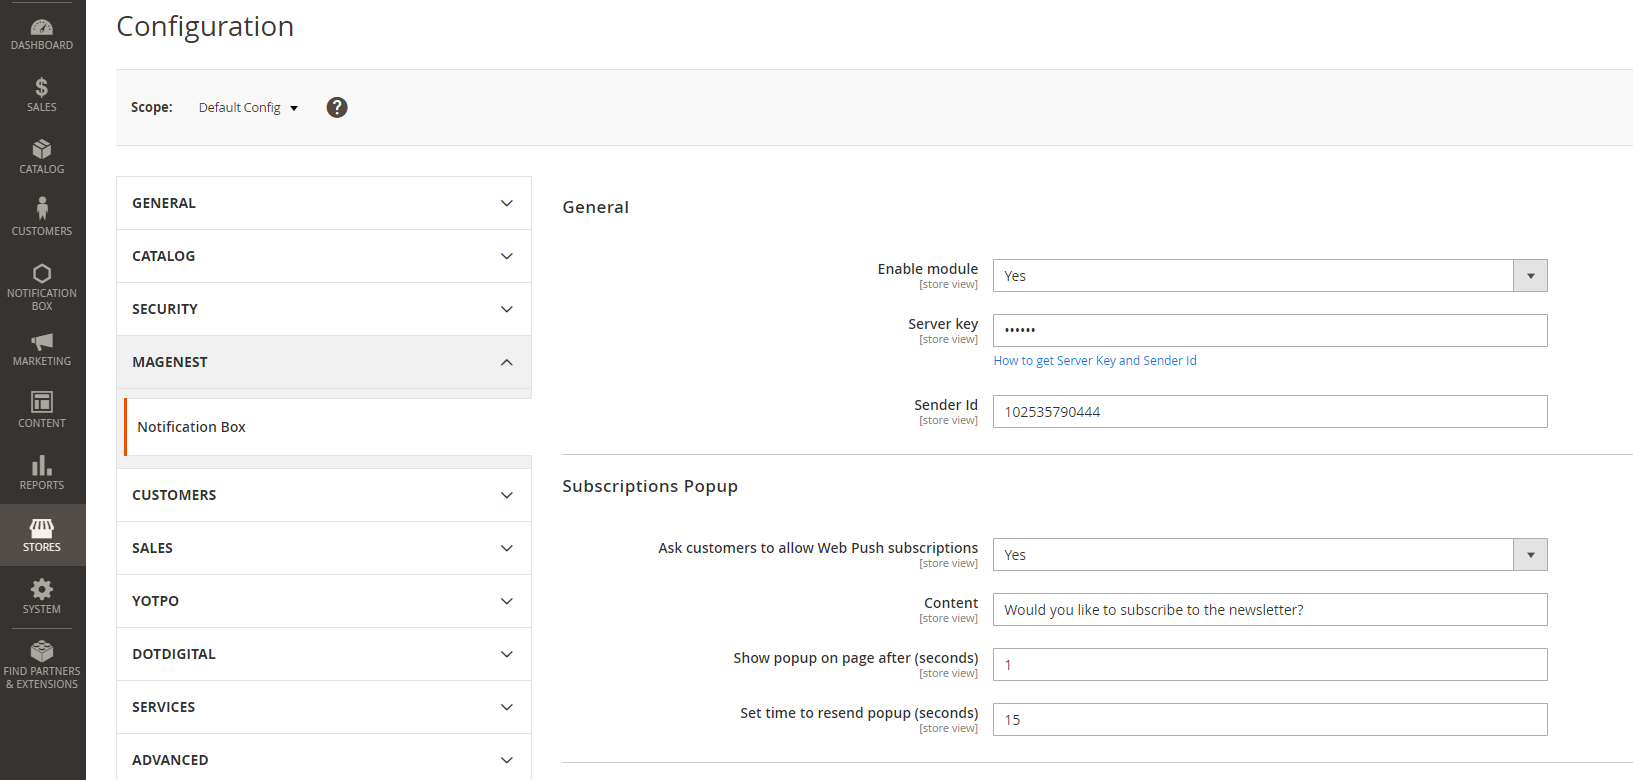
- Enable module: Choose Yes to enable the Notification box extension.
Note: Your site has to have SSL to enable the Notification box extension.
- Maximum notifications in My Notifications on My Account Page: Set the maximum numbers of notification could be displayed in My Account > My Notification tab
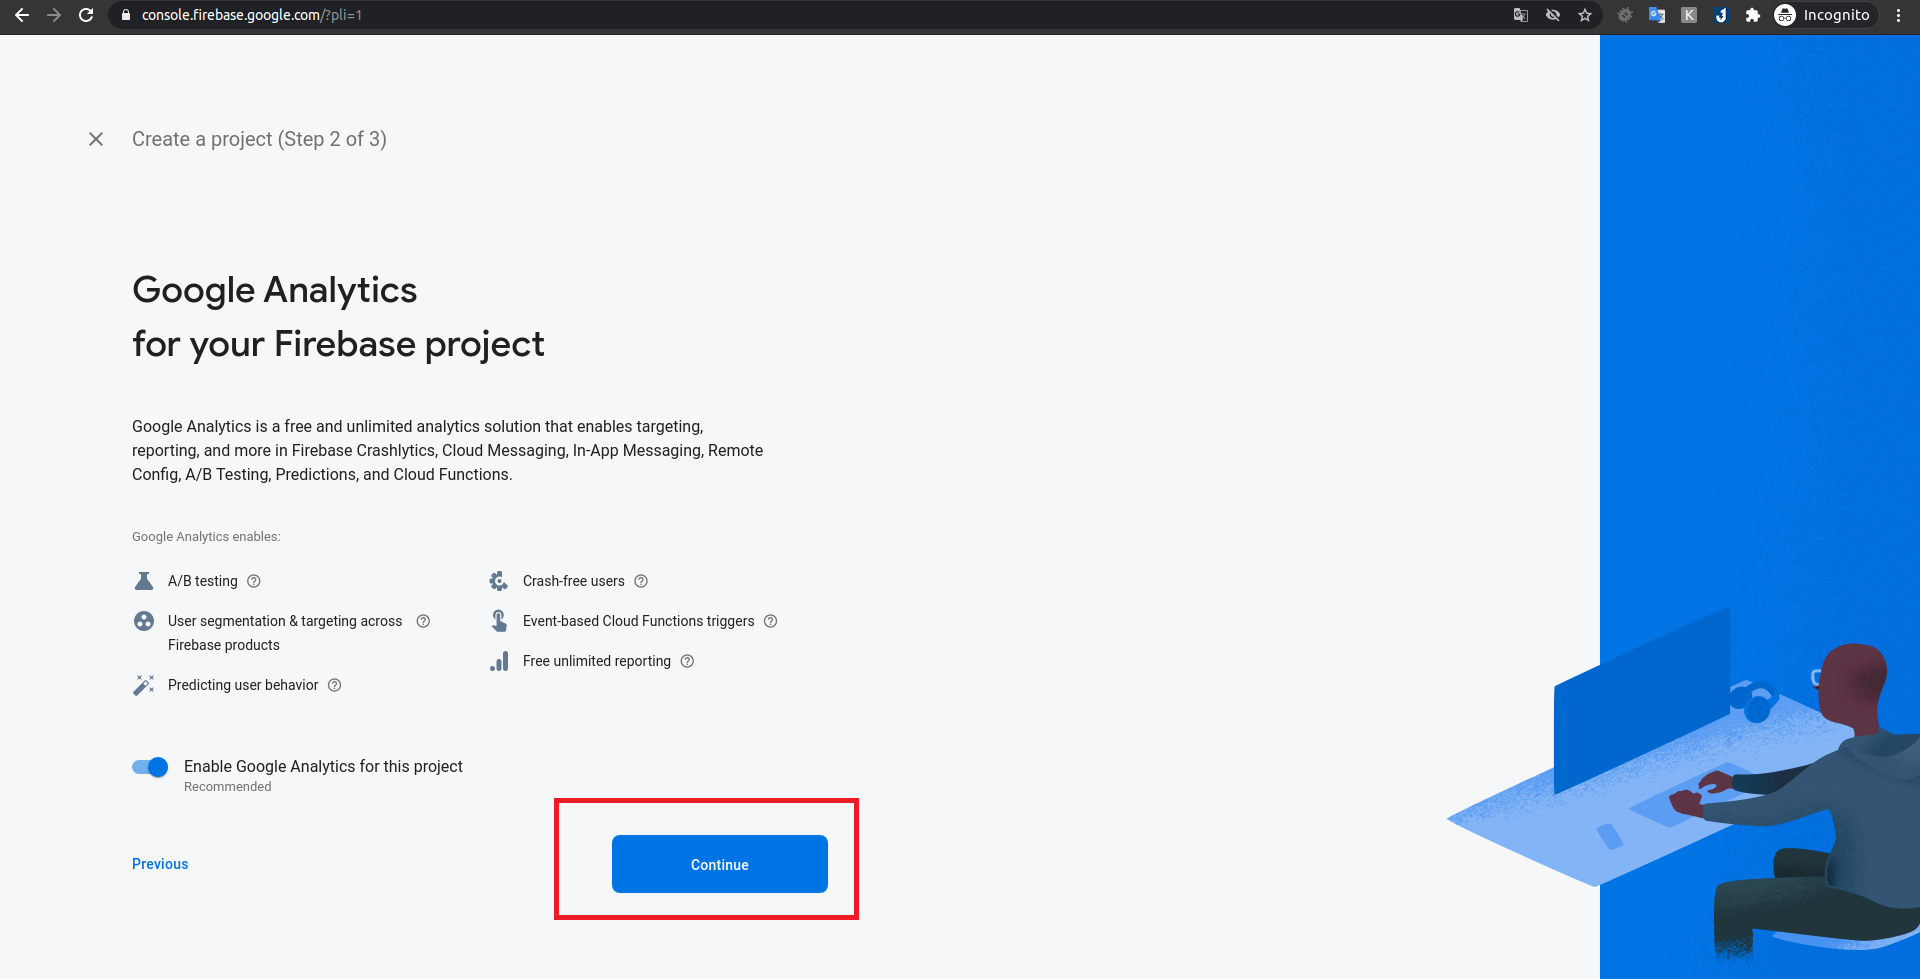
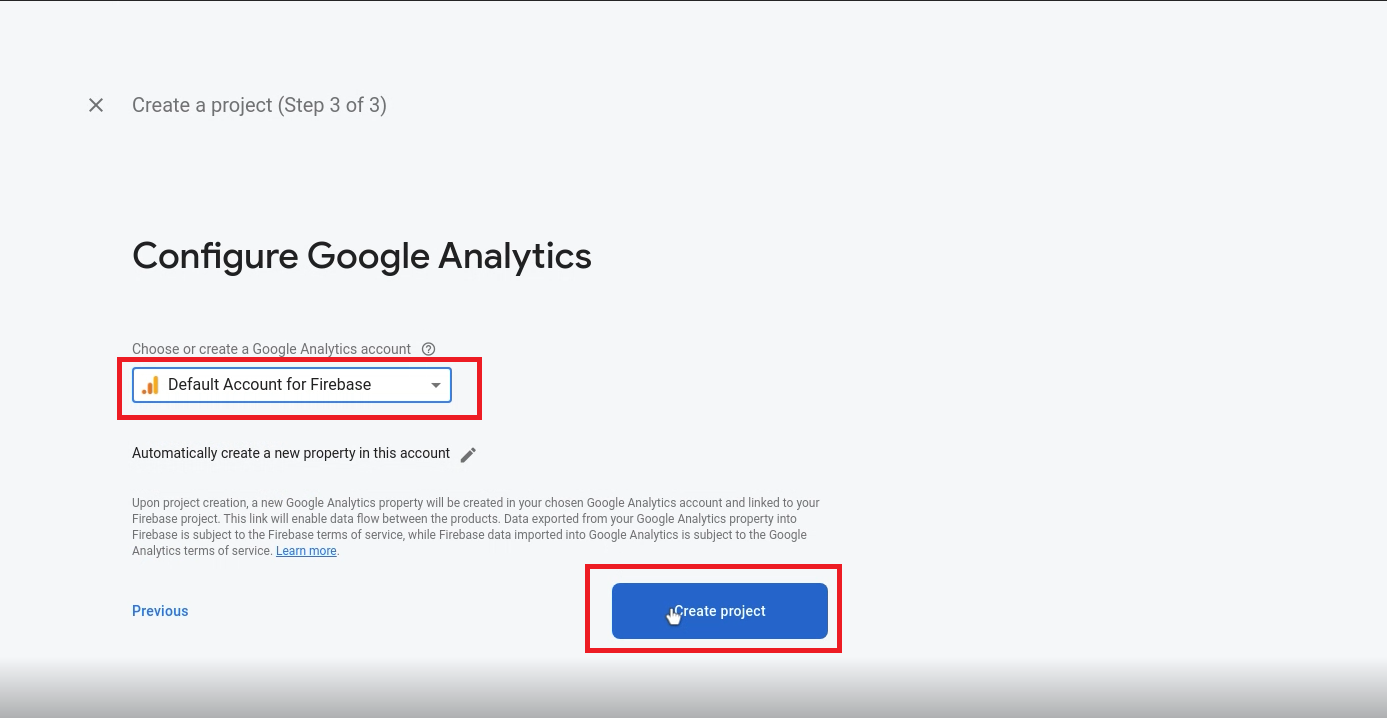
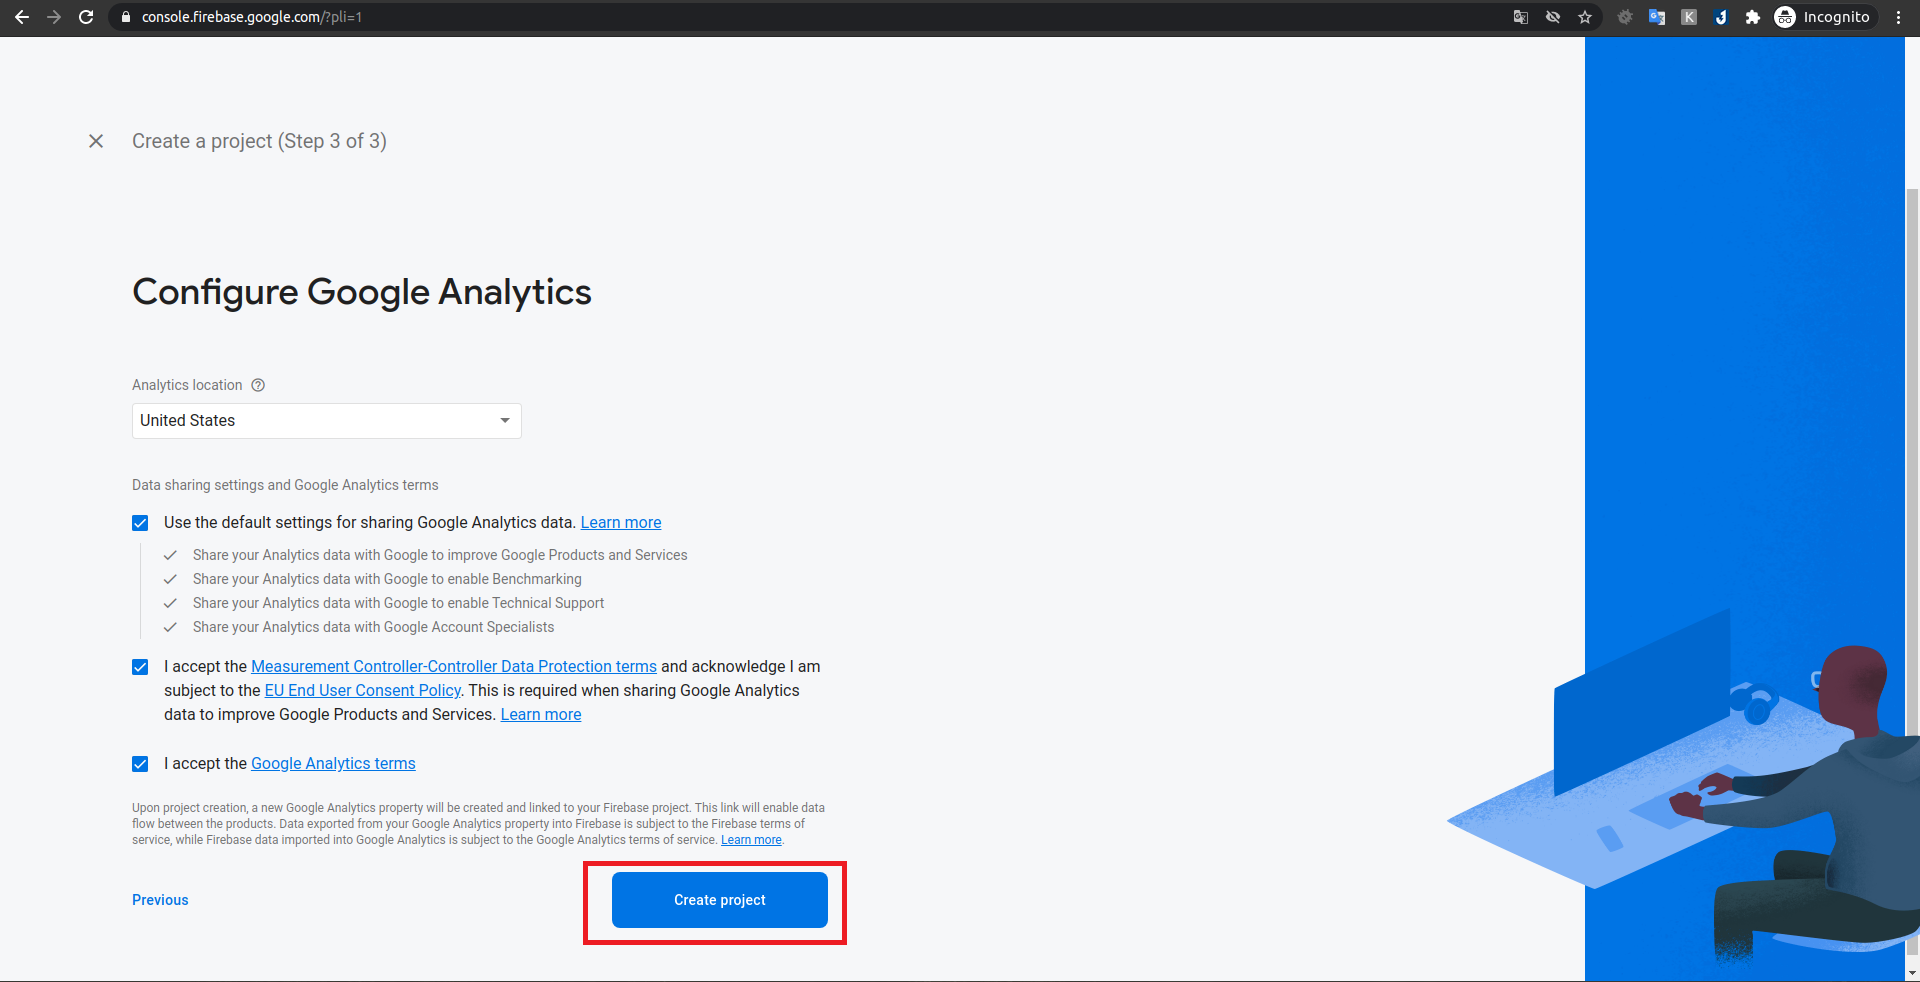
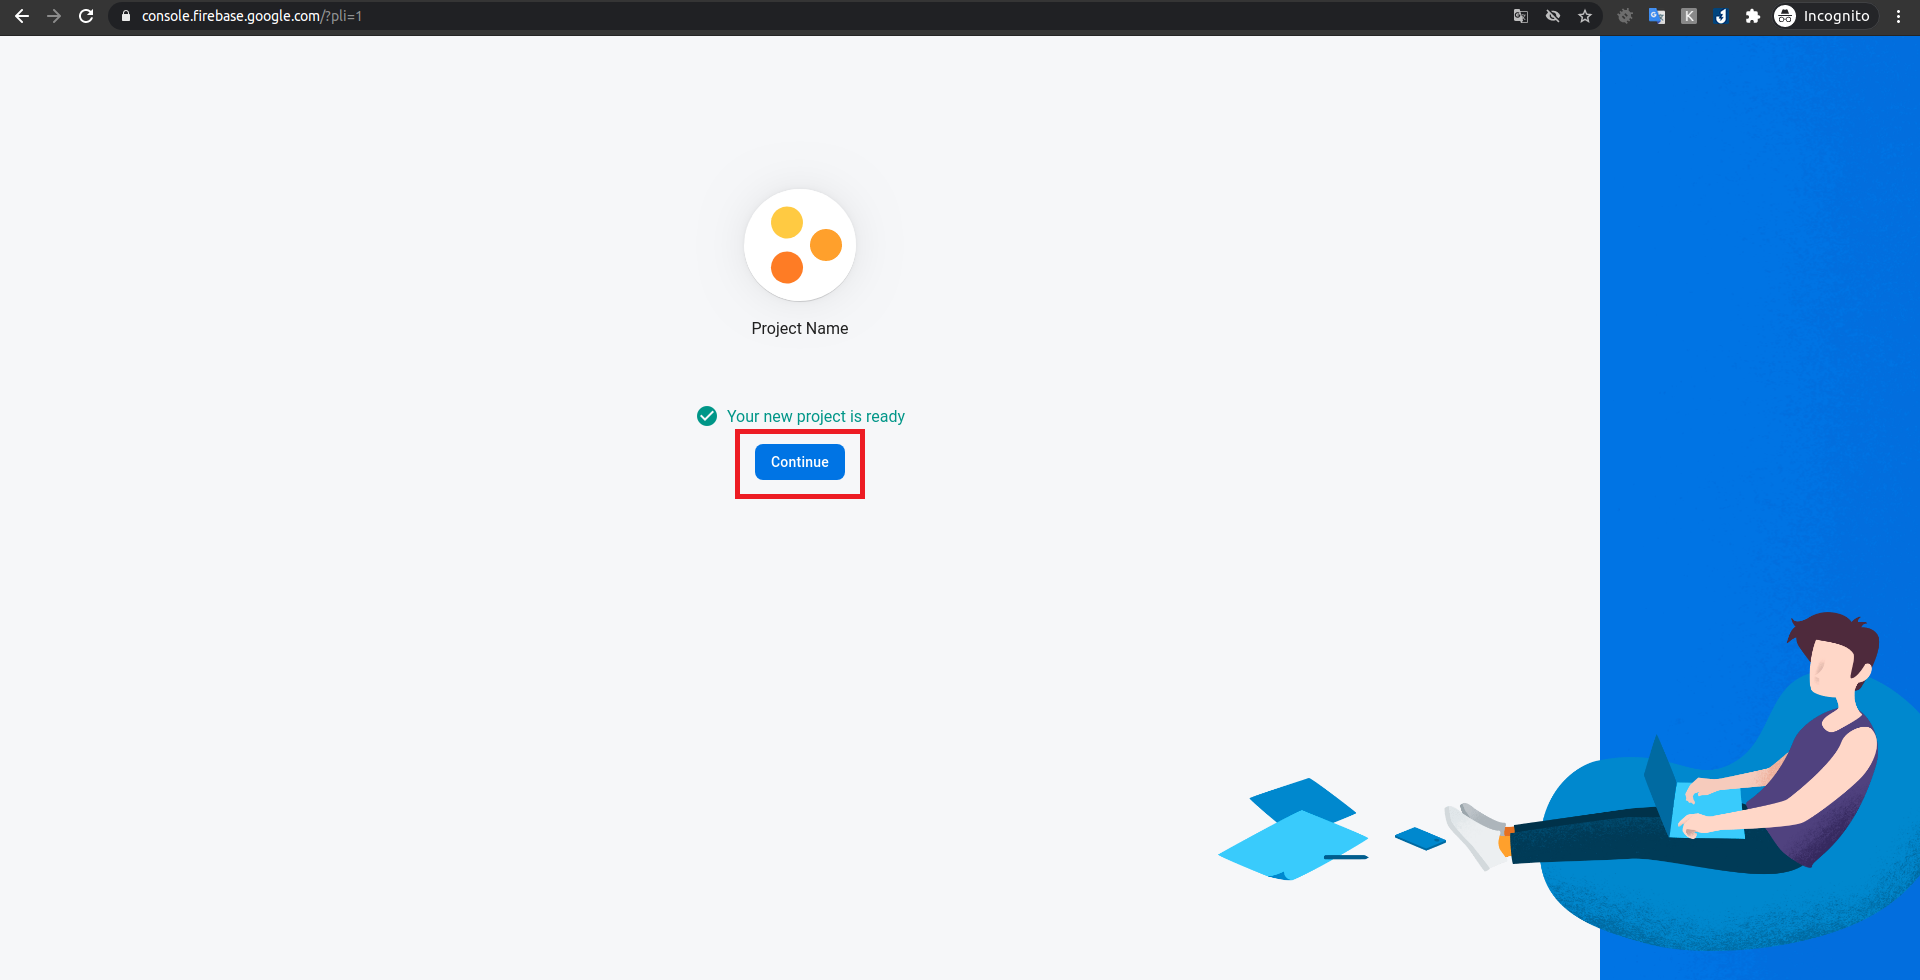
- Server key and Sender ID: You need the server key and sender ID to enable the sending notification box features via Firebase. Click “How to get Server Key and Sender ID” to see the detailed guideline.
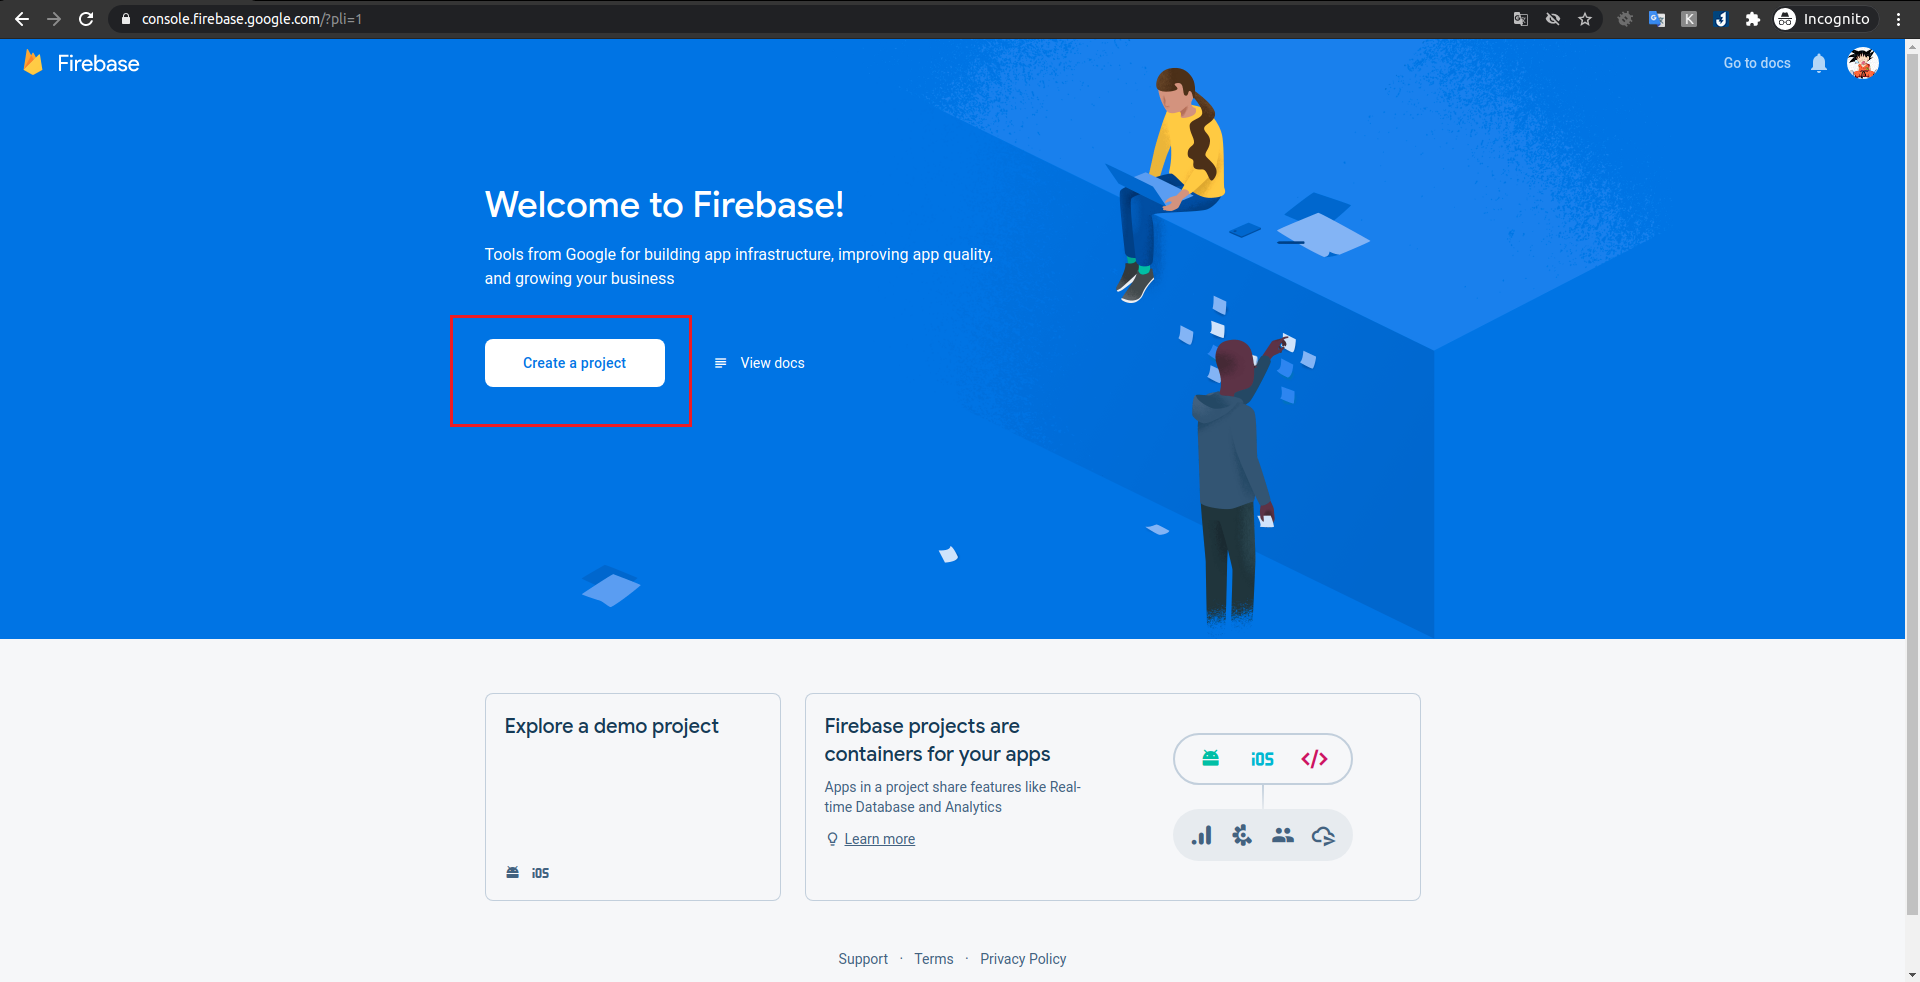
- Create a new Project https://console.firebase.google.com/u/0/
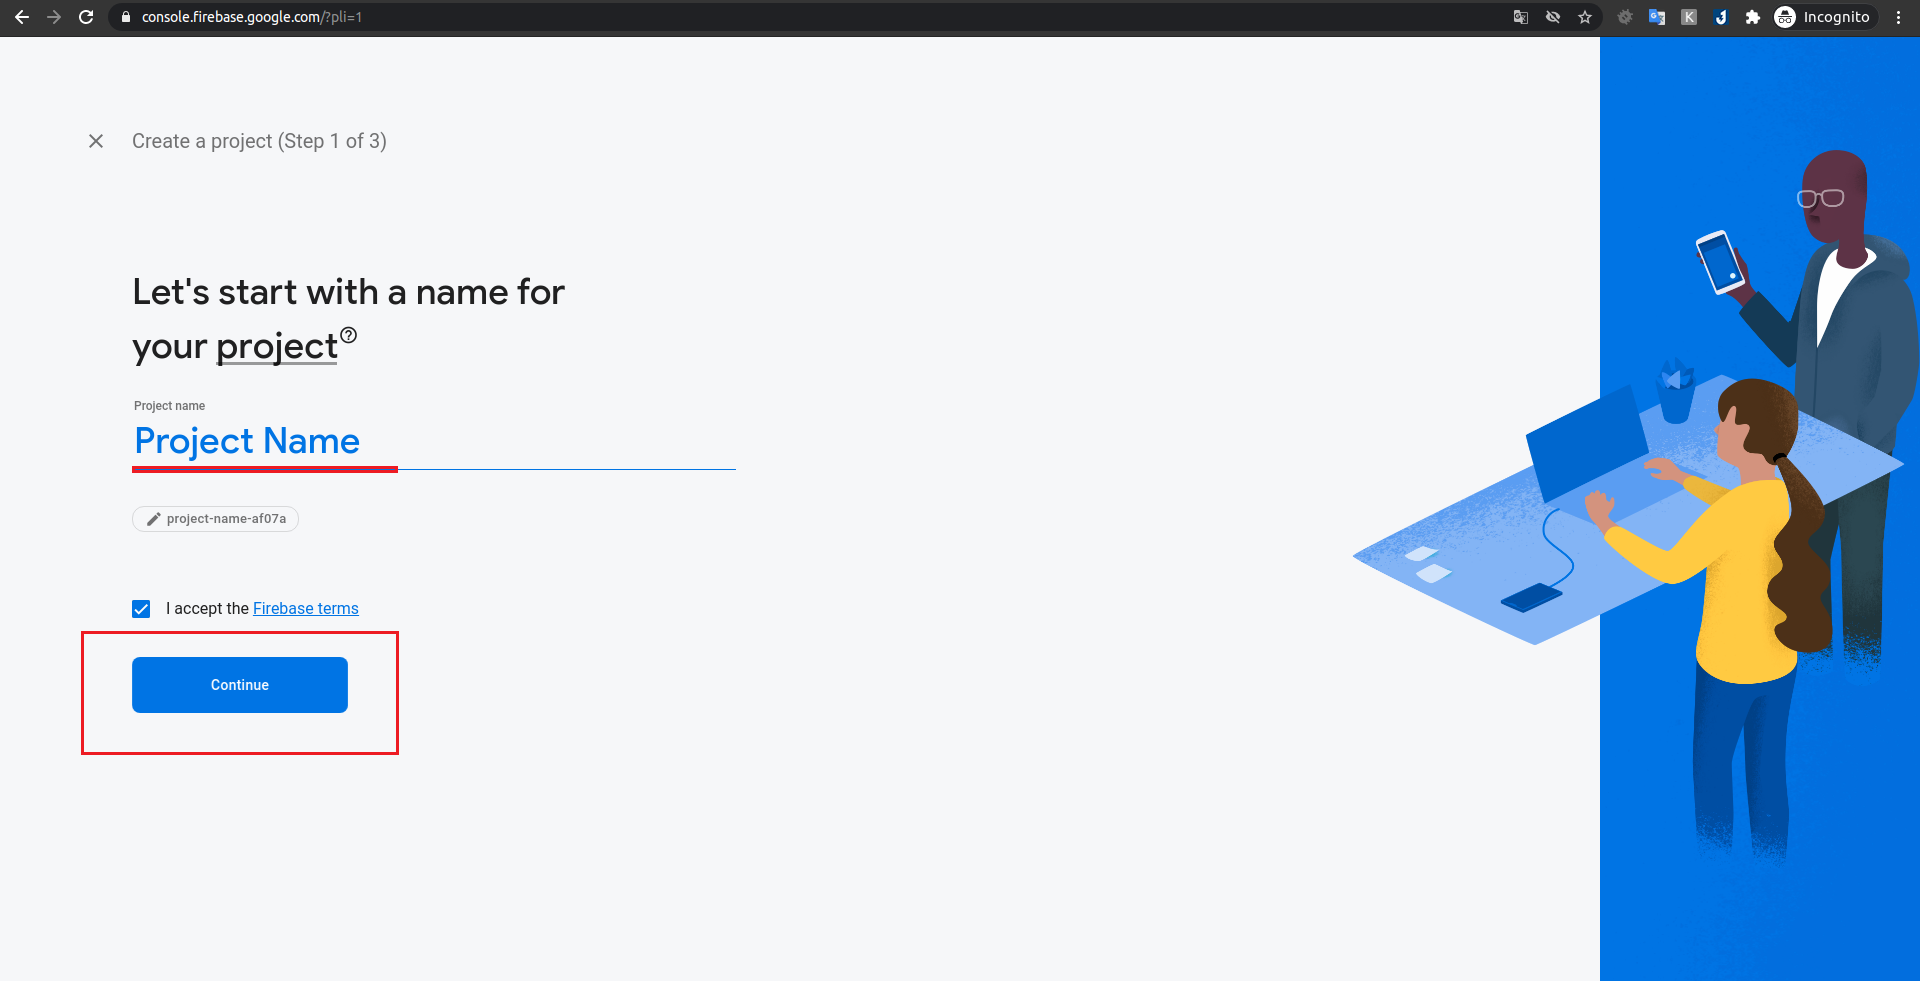
- Fill in your project name
- Choose Default Account for Firebase, then click Create project
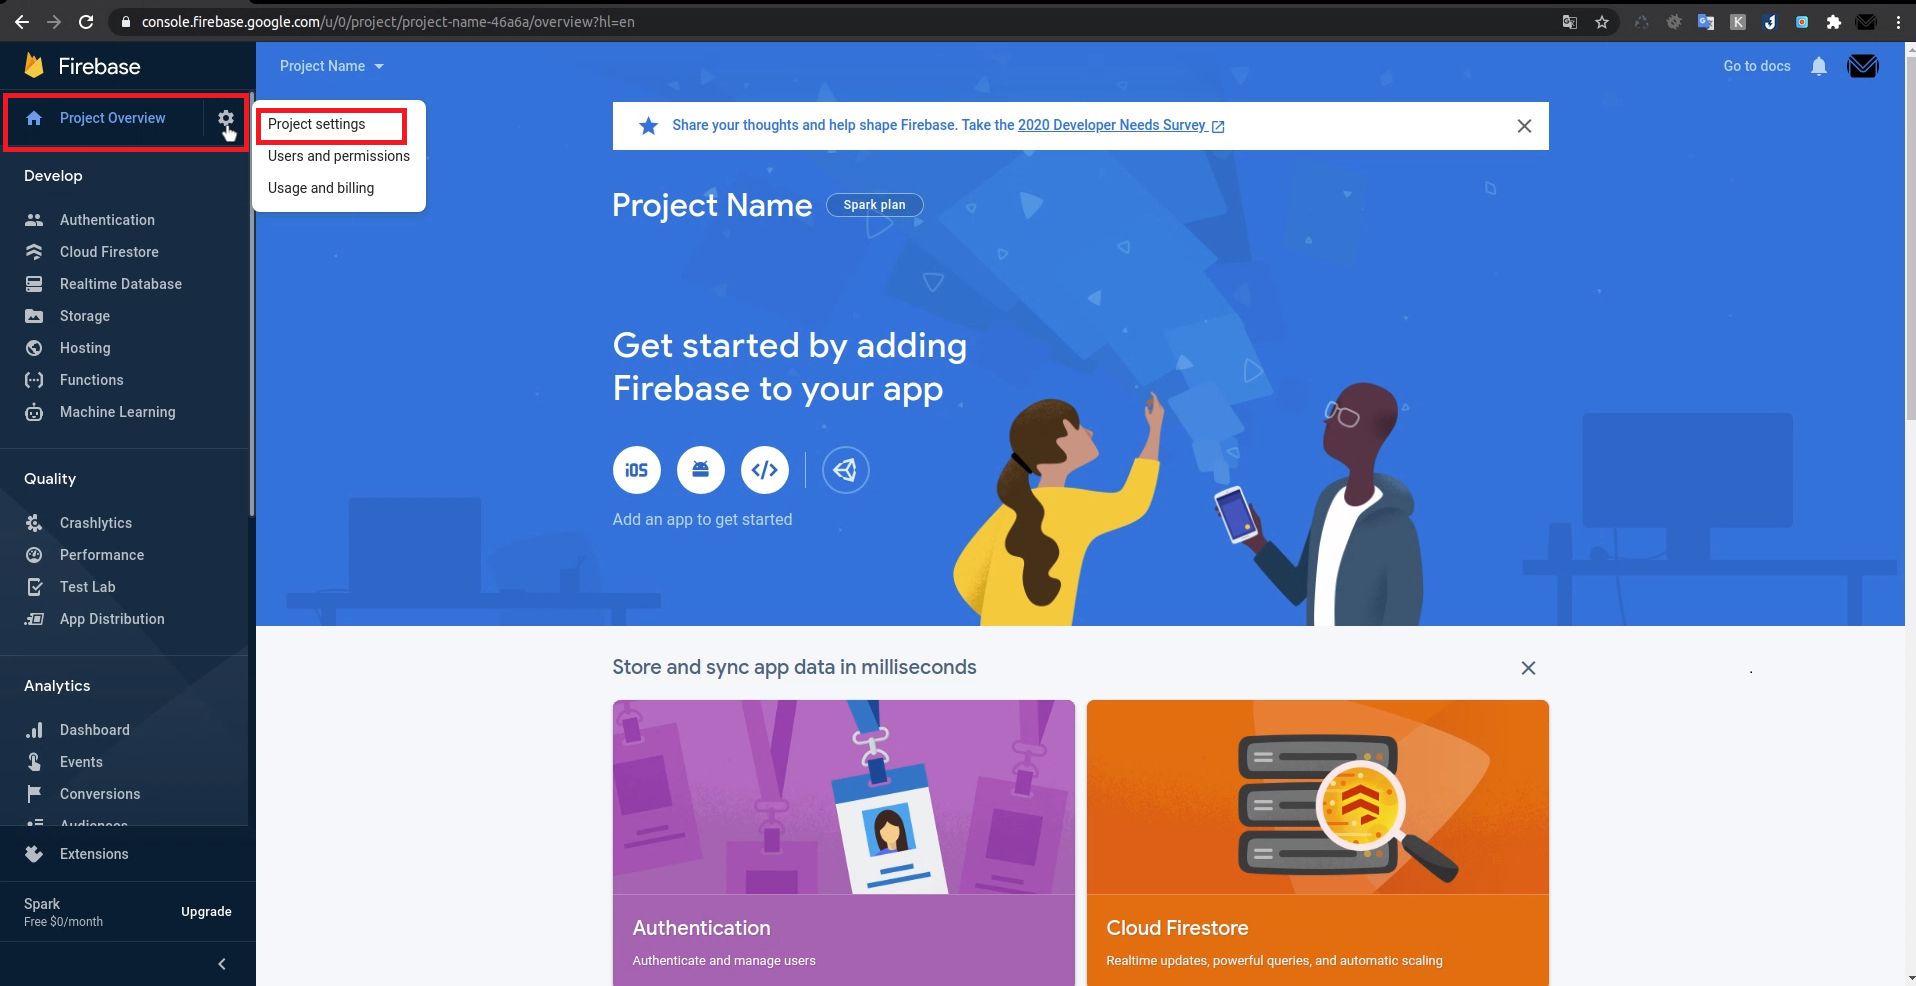
- Choose Project Overview and Project setting
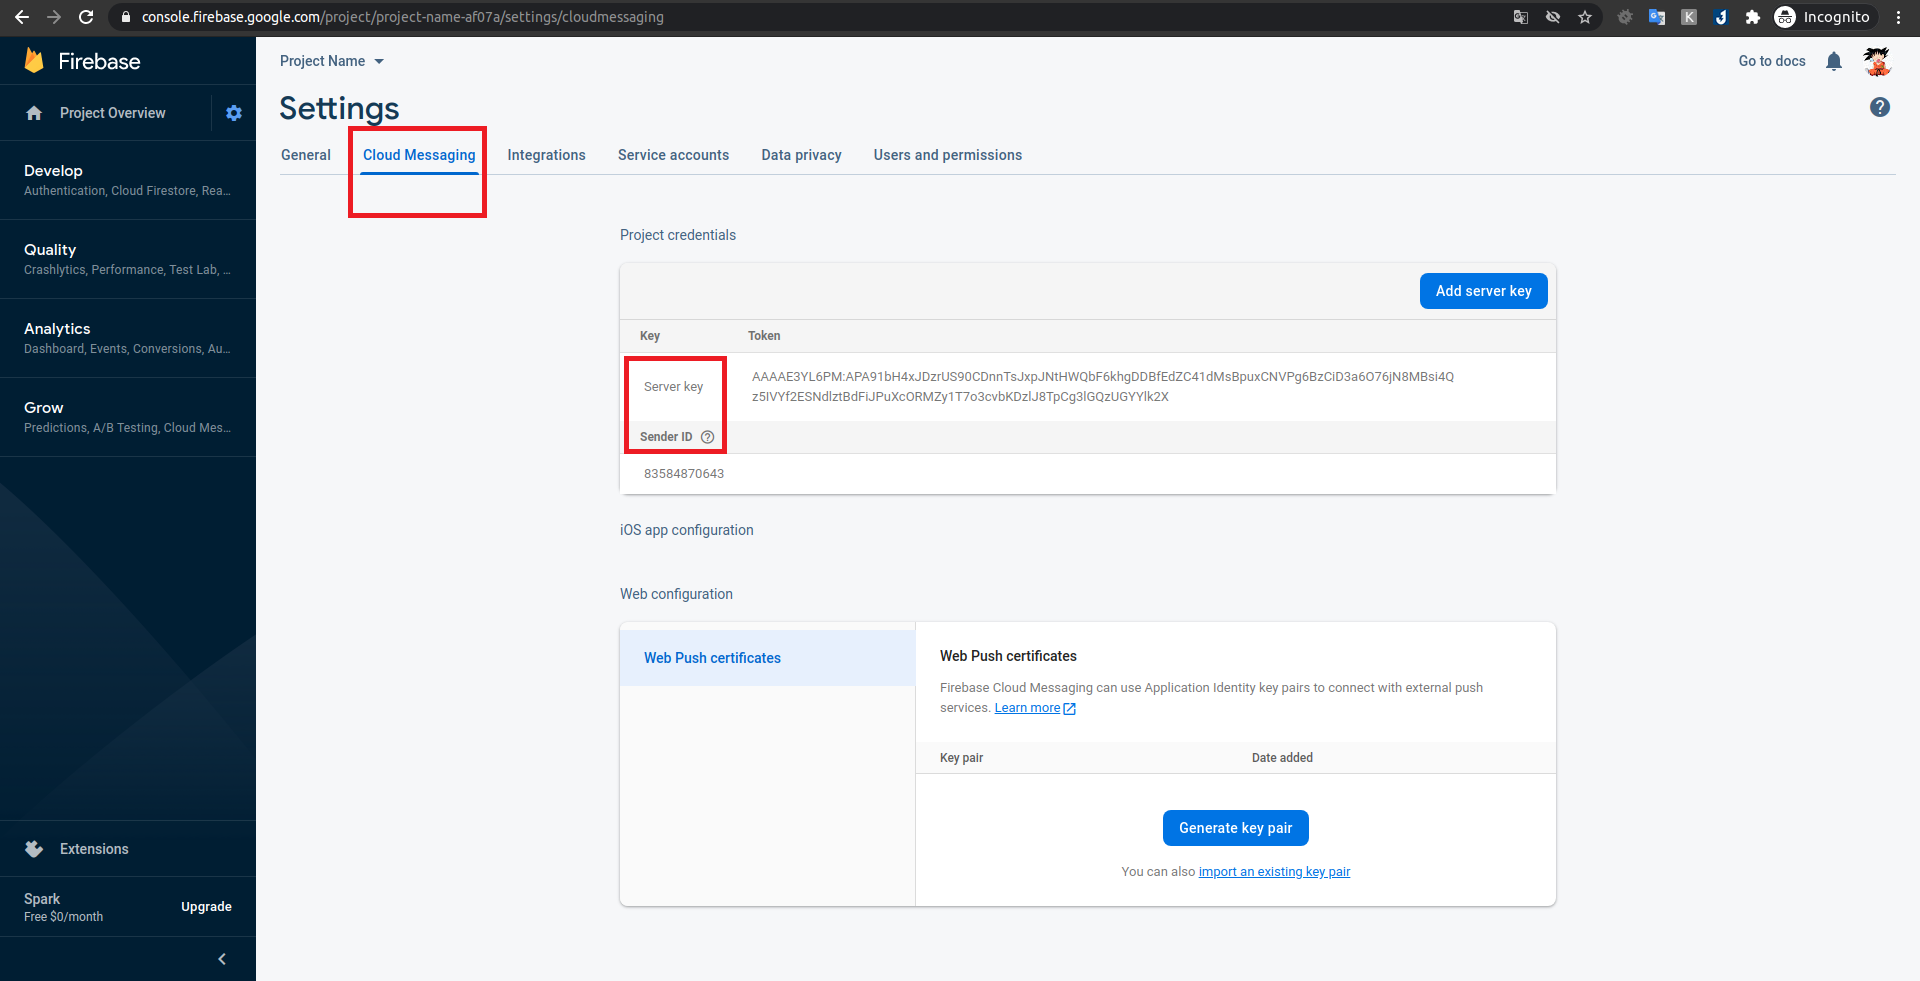
- Choose Cloud Messaging and copy the Server Key and Sender ID
 Subscriptions Popup:
Apart from the default permission popup from the browser, the admin could also encourage customers to sign up for the newsletter via browser web push through Subscription Popup
- Ask customers to allow Web Push subscriptions: Enable this feature to display a popup asking to subscribe notification.
- Content: Content of the popup
- Show popup on page after (seconds): Period of time (by seconds) that popup will be displayed after customer visit the website
- Set time to resend popup (seconds): Period of time (by seconds) that popup will be redisplayed if the customer click “Remind me later”
 Web push notifications:
- Maximum numbers of web push for customer per day: Set the maximum numbers of web push for a customer per day so customers will not be bothered.
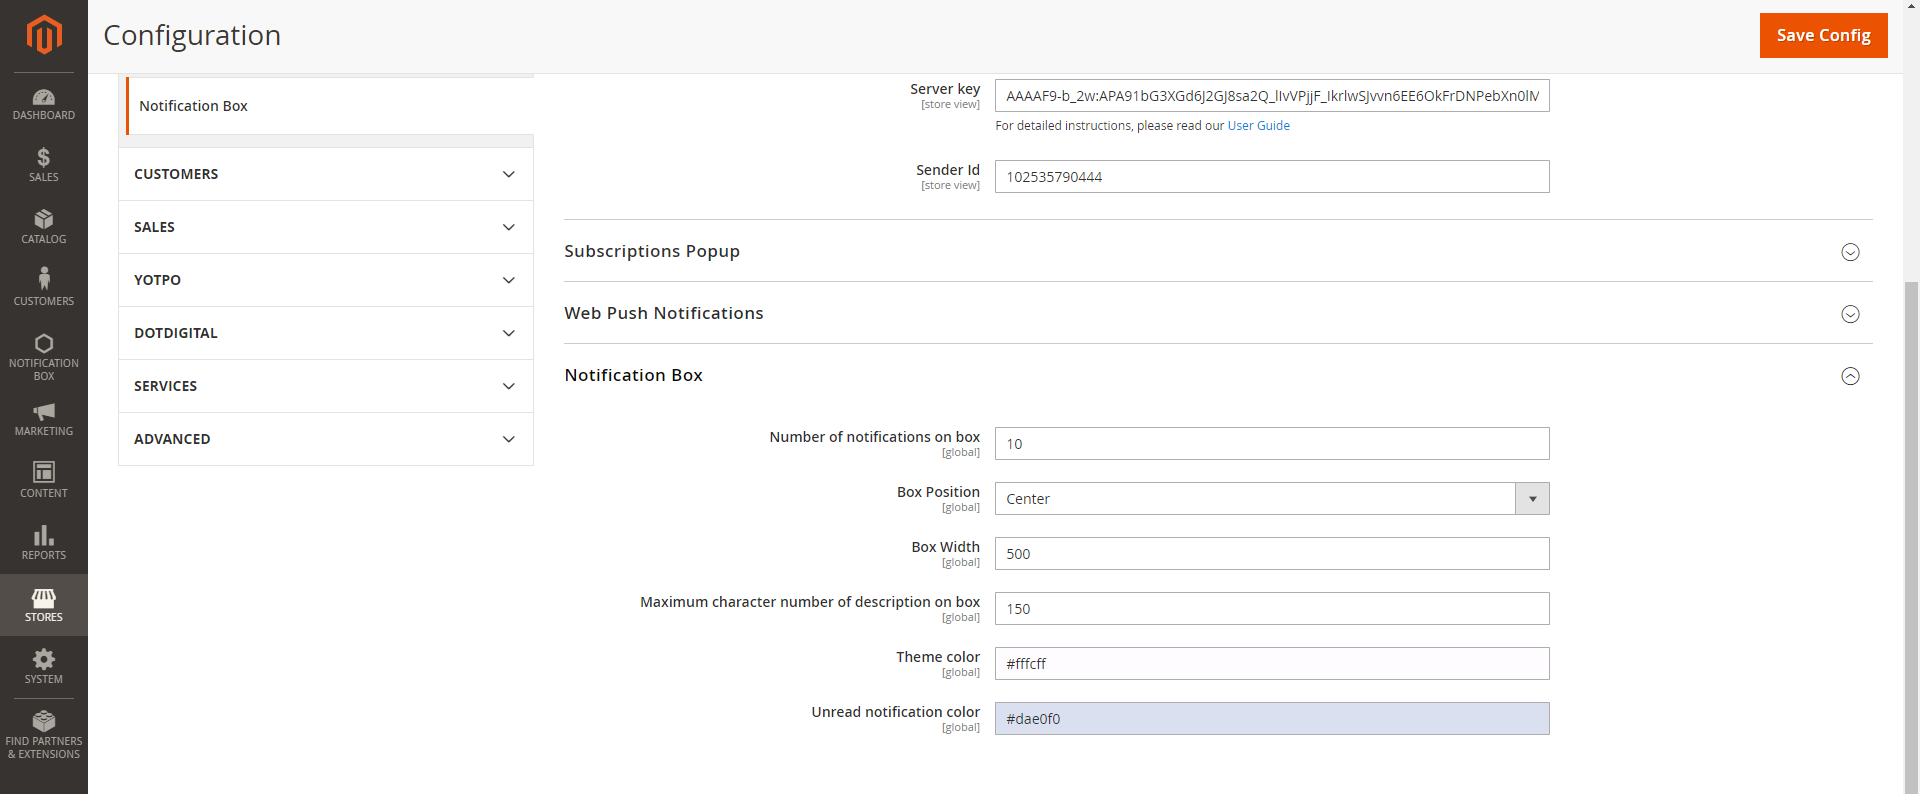
 Notification Box:
- Number of notifications on box: Set the maximum number of notifications that could be displayed in the notification box.
- Box Position: Position of the notification box
- Box Width: Notification box’s width
- Maximum character number of description on box: Set the maximum number of characters in the notification’s description
- Theme color: The theme color of the notification box
- Unread notification color: Theme color of the unread notification box
Notification Types
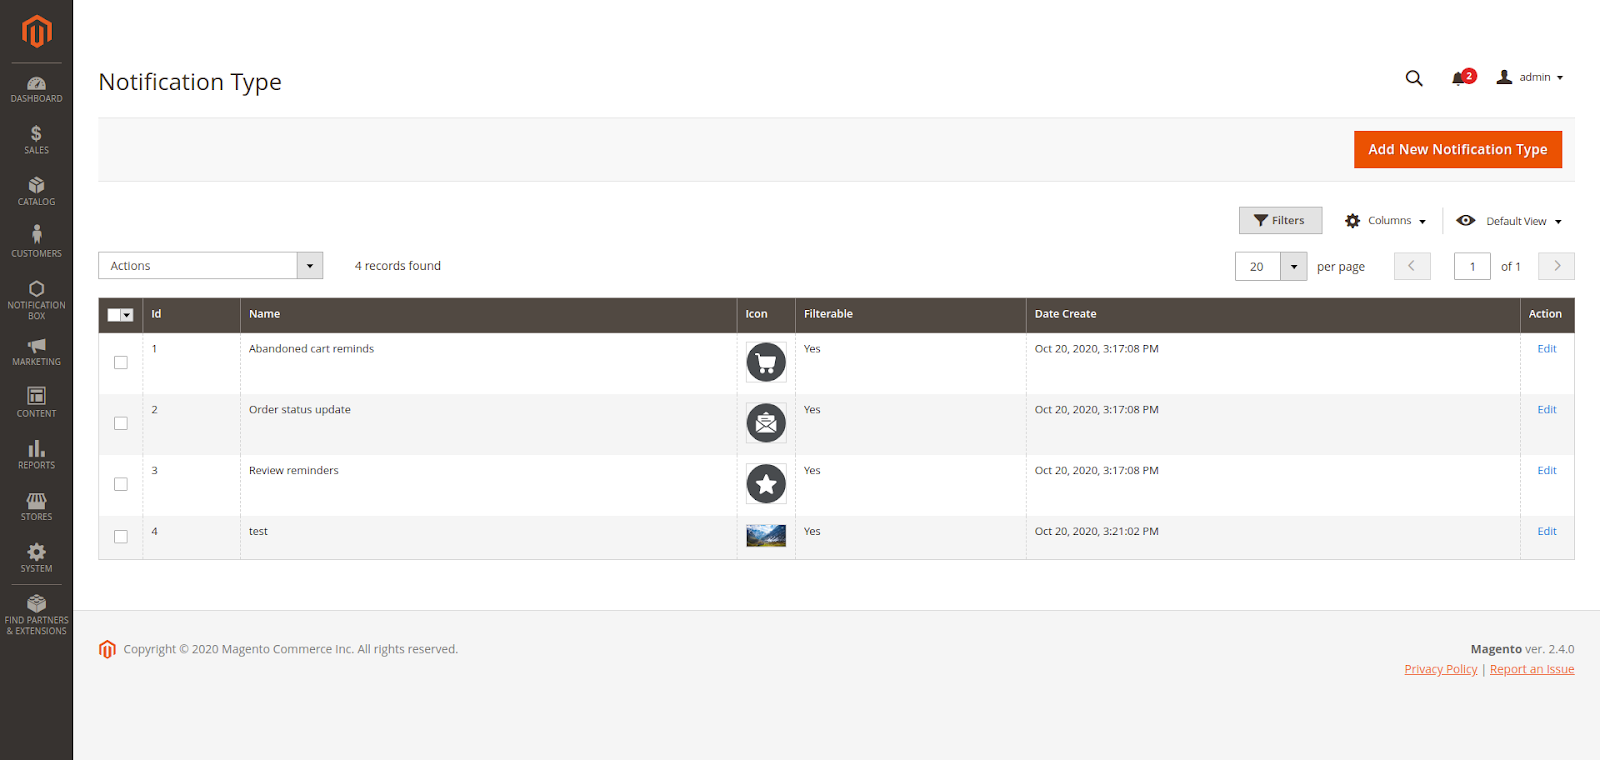
All generated types of notification will be saved here
Admin can add new notifications type or edit available notification types.
On the admin sidebar, go to Notification Box > Notification Types
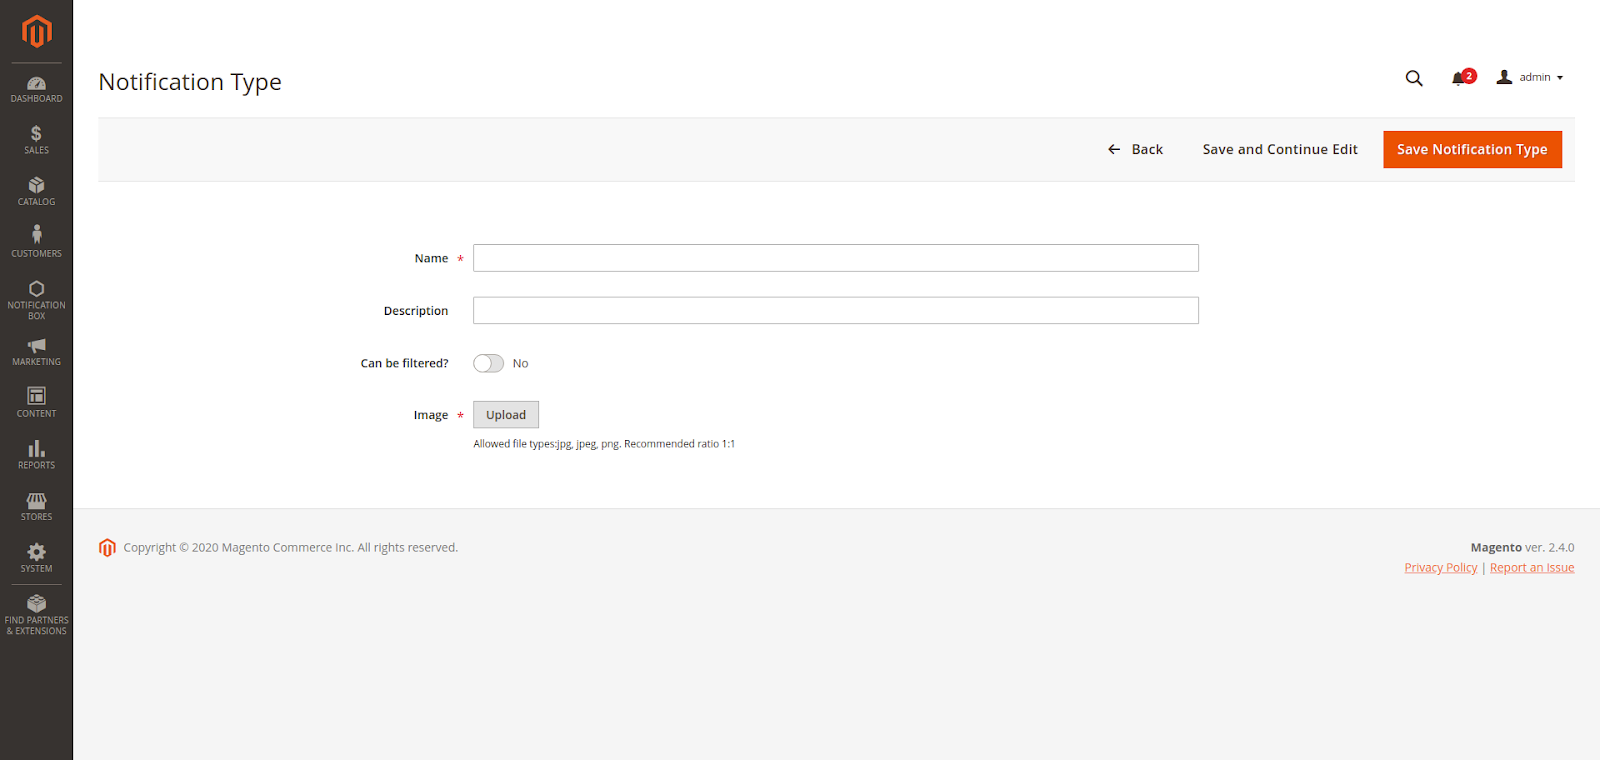
 Add new notification type
- Name: notification type’s name
- Description: Description of notification type
- Can be filtered?: This notification type could be filtered on My Notification page or not.
- Image: notification type’s image
 Three default notification types
- Abandoned cart reminds: Select this to set abandoned cart time (hours). When the customer has not finished their payment, after a period of time their cart will be considered as abandoned.
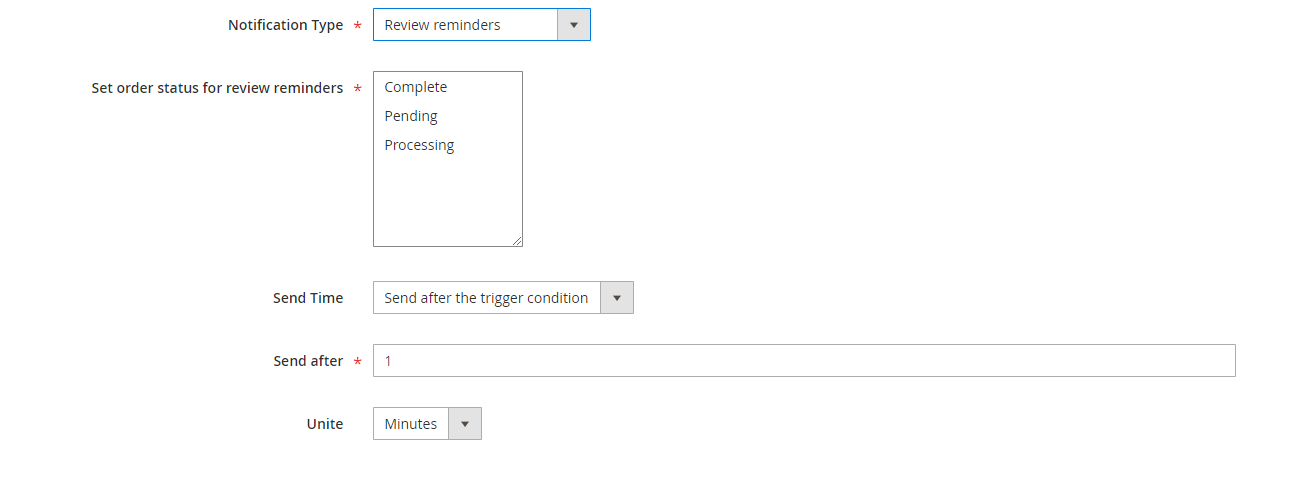
- Review Reminder: Remind customers to write reviews with specific order status
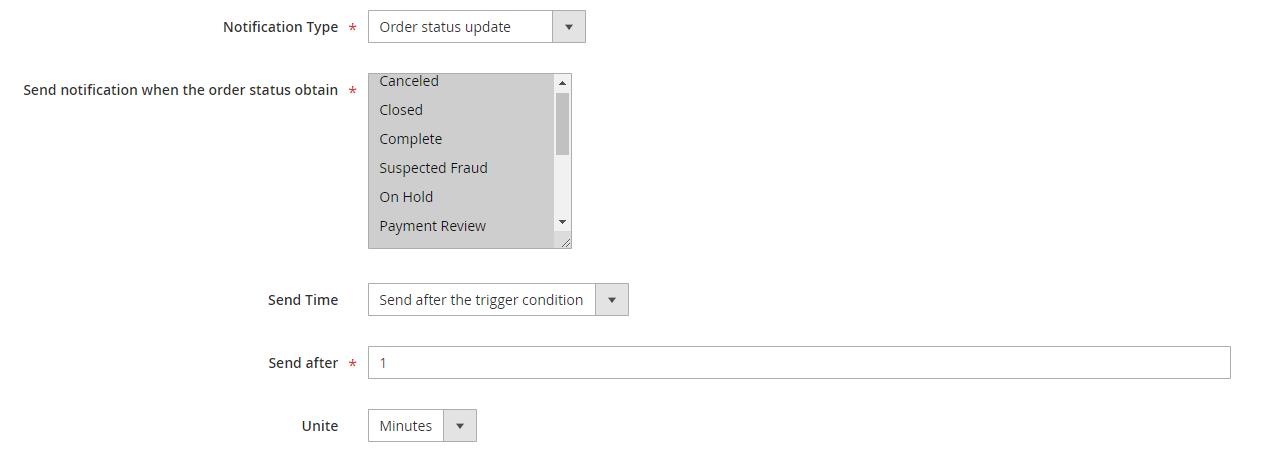
- Order Status Update: Customer will receive notification after one of 12 order status
Notification Information
On the Admin sidebar, go to Notification Box > Notification
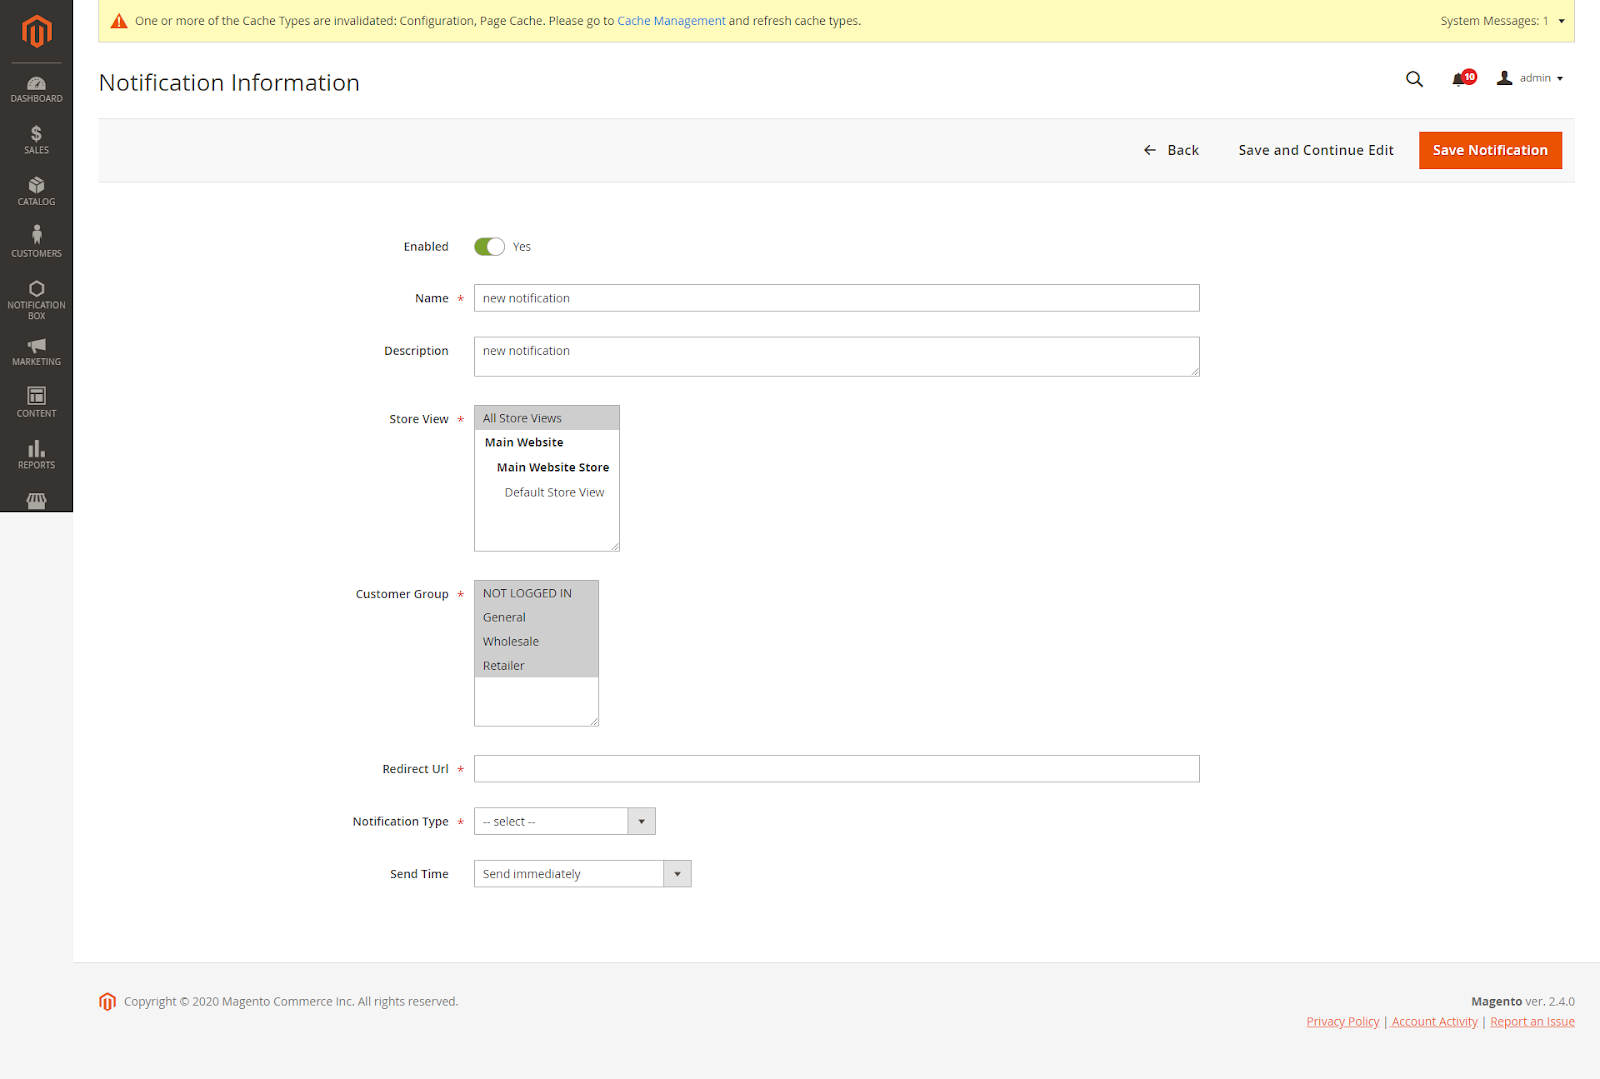
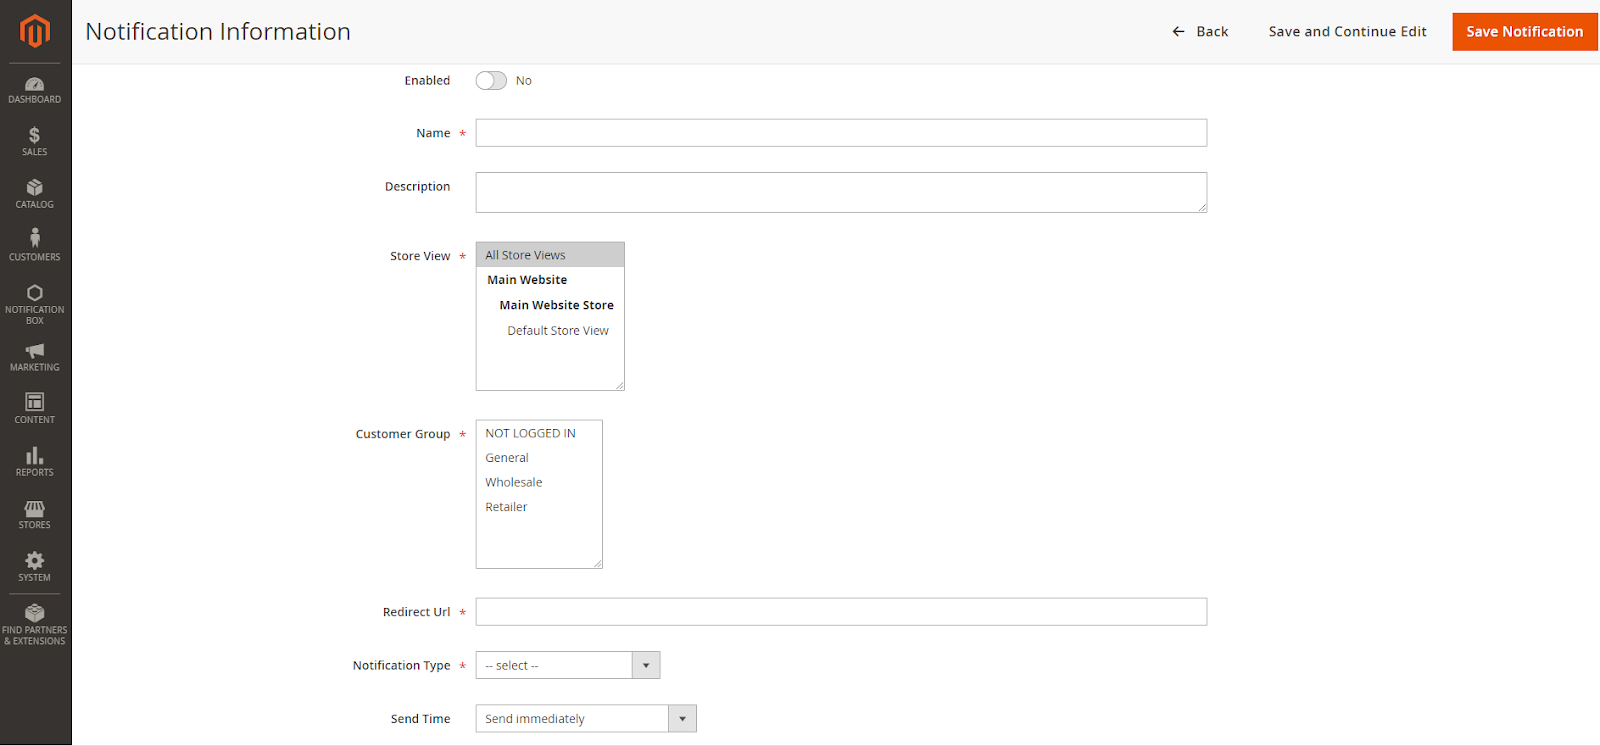
Admin can add new notifications or edit available notifications.
Note: Guest will not receive the default notification type.
- Enable: Enable to send notification
- Name: Notification’s name
- Description: Notification’s content
- Store View: Only registered customers of this store view could receive notifications.
- Customer Group: Customer groups receive notifications.
- Redirect Url: Redirect link when the customer clicks on the notification
- Notification Type: check the notification type
- Send Time: Schedule time to send notification
 Edit notifications
 Add new notifications
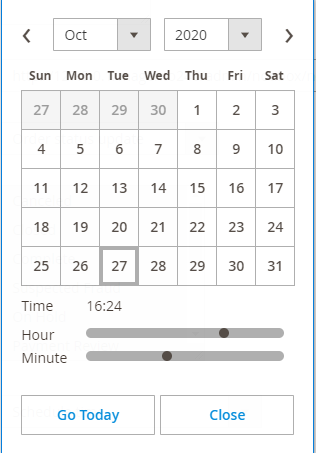
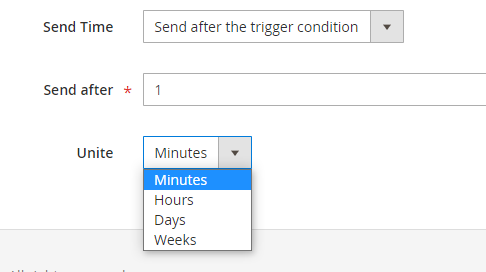
 Set a time to send notifications
- Send immediately: Once the conditions are met, the notification will be sent immediately
- Schedule Time: Schedule specific time to send notification (will not be set for default notification type)
- Send after the trigger condition: Notification will be sent after this period of time.
Report
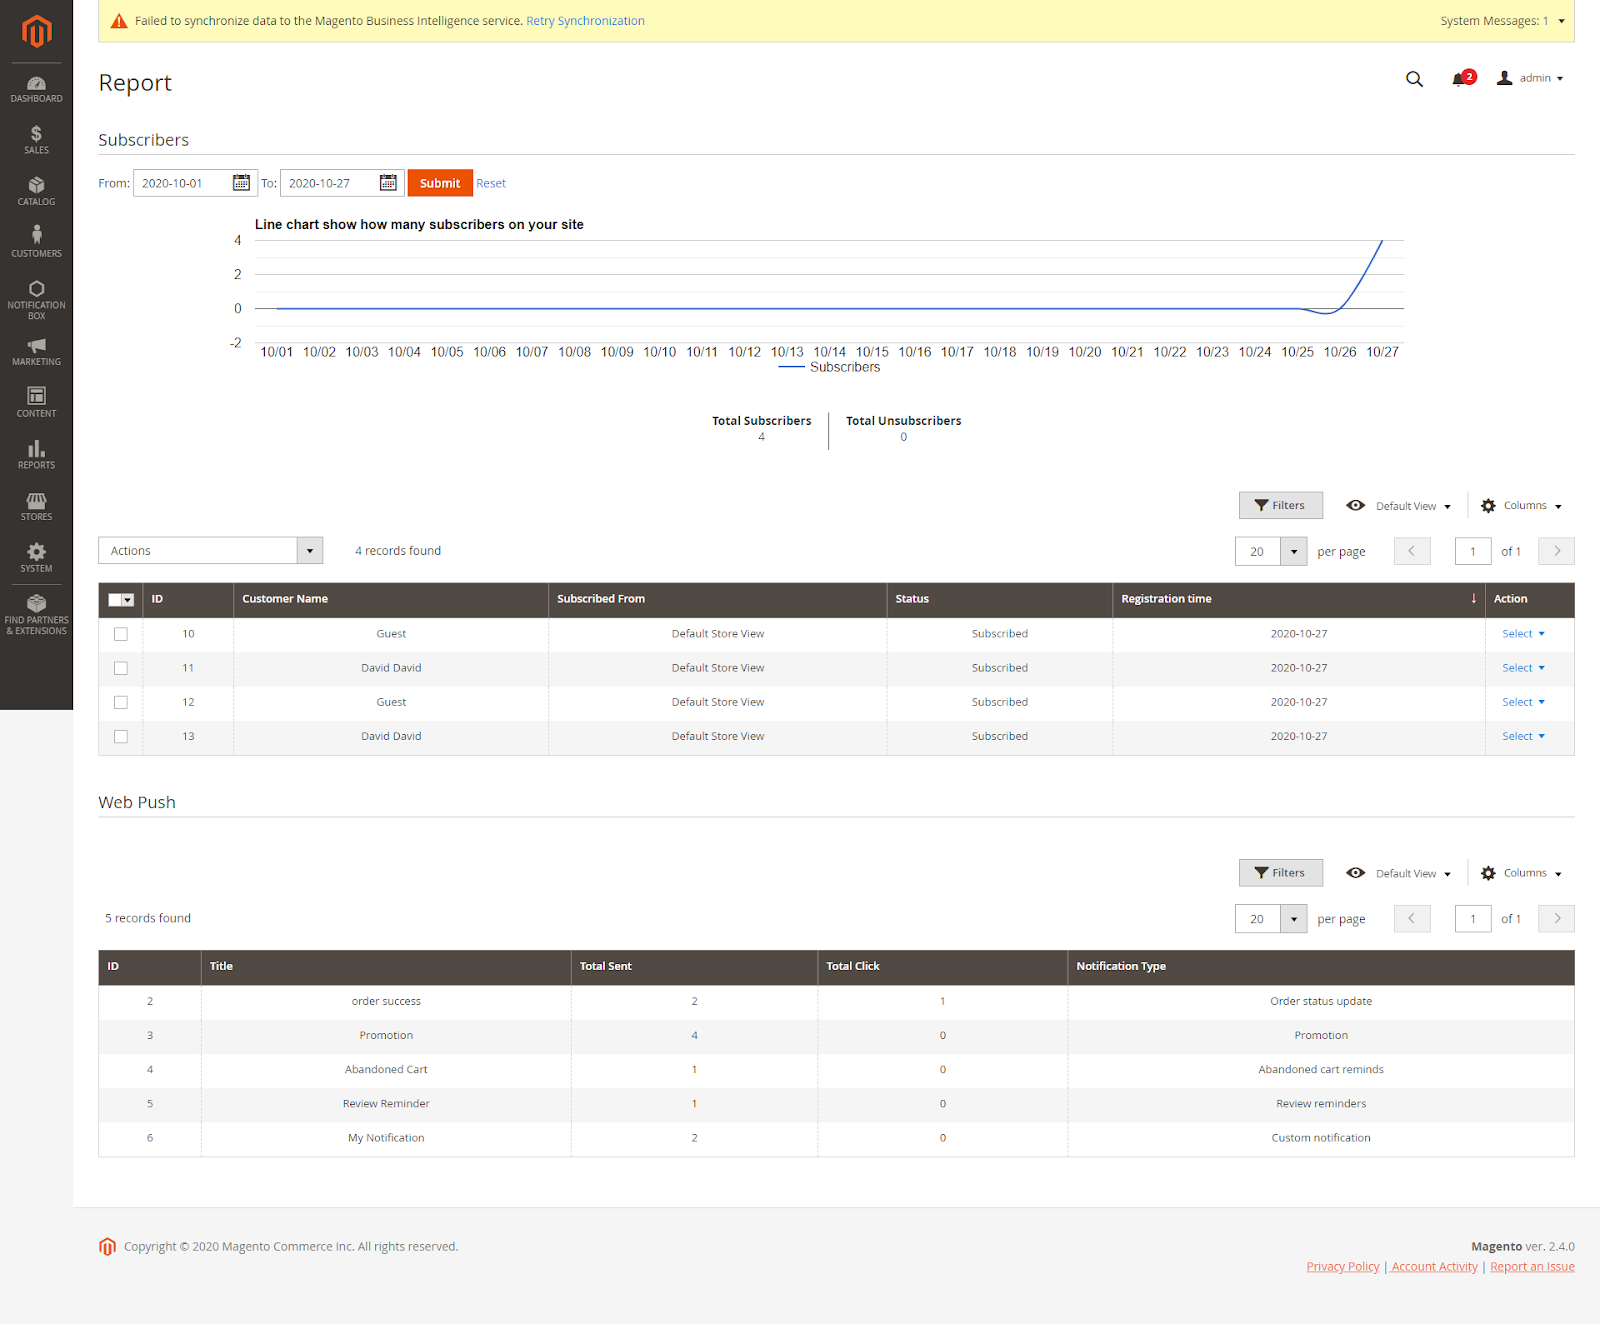
View report in a specific time, about number of Total Subscribers, Total Unsubscribers and customers’ actions.
On the admin sidebar, go to Notification Box > Report
Subscribers:
- The line chart shows the number of people who subscribe to notifications by day.
- The table displays details of customers who register to receive notifications.
Web Push: Statistics of types of notifications, the number of notification was sent through Firebase, the total number of clicks on Firebase notifications.
APIs for the Notification Box module
 Register token API
Get token for Guest
- Method: POST
- API: /rest/V1/notificationbox/guest/register
- Body: {
“Token”:”your token get from firebase”,
“deviceId”:”device id”
}
Get token for Customer
- Method: POST
- API: /rest/V1/notificationbox/guest/register
- Body: {
“Token”:”your token get from firebase”,
“deviceId”:”device id”
}
- Authentication:
+Type: Bearer token
+Token: customer token
 Get customer notification
- Method: GET
- API: /rest/V1/notificationbox/getCustomerNotification/:customerId/list
- Authentication:
Type: Bearer token
Token: customer token
 Mark notification as important/unimportant
- Method: POST
- API: /rest/V1/notificationbox/mark-important
- Body: {
“customerId”:”customer id”,
“notificationId”:”notification id”,
“status”: 1
}
- Authentication:
Type: Bearer token
Token: customer token
Note: To mark notification as important please set the status in body with 1, and mark notification as unimportant please set status with 0
 Delete Notifications
- Method: POST
- API: /V1/notificationbox/delete
- Body: {
“customerId”:”customer id”,
“notificationId”:”NOTIFICATION-ID”
}
- Authentication:
Type: Bearer token
Token: customer token
Note: For the NOTIFICATION-ID in the body
To delete one or multiple notifications, pass a string of notification ids separated by commas.
To delete all notification please set NOTIFICATION-ID with "all"
Example:
Delete all notification:
Body: {
“customerId”:”16”,
“notificationId”:”all”
}
Delete multiple notification:
Body:{
"customerId":"16",
"notificationId":"1,2,3,10,22,37"
}
Storefront
See popup when visiting the website.
View the notification box.
View customer’s Notification Page
- Customers can view their full notifications on this page
- Customers can mark (star) important notifications, delete notifications, filter notifications by type
Update
- When a bug fix or new feature is released, we will provide you with the module's new package.
- All you need to do is repeating the above installing steps and uploading the package onto your store. The code will automatically override.
- Flush the configure cache. Your store and newly installed module should be working as expected.
Support
- We will reply to support requests within 2 business days.
- We offer lifetime free updates and 6 months of free support for all of our paid products. Support includes answering questions related to our products, bug/error fixing to make sure our products fit well in your site exactly like our demo.
- Support DOES NOT include other services such as customizing our products, installation, and uninstallation service.
