Thank you for purchasing our extension. If you have any questions that are beyond the scope of this document, do not hesitate to leave us an email via our email address below.
Created: 06/06/2016 | By: Magenest | Email: [email protected]
Introduction
![]()
Ultimate Follow Up Emails extension is a powerful extension which allows you to to keep a healthy interaction with your customers. You will be able to create flexible rules for follow up emails and specifically link them up with your store.
Extension page: Ultimate Follow Up Emails.
Features
- Customizable multiple email template for each rule.
- Ability to specify a delay of sending mails in days, hours, minutes.
- Automatic integration of discount coupon in promotion rule. Auto complete for the "Coupon Name" field in the coupon page.
- View the log of follow up emails which are sent to customers.
- Ability to manage rules in the order view.
- Can create and preview customized template email to be sent.
- Flexible rules and conditions.
- View abandoned cart list.
- View customer birthday list.
- Supports Daily and Hourly Cron job.
- Allow to attach files in email.
- Ensuring that customers will be received emails through Mandrill integration.
System Requirements
Your store should be running on Magento Community Edition version 2.0.0 and more.
Installation
Here we will guide you through the installation process of our extension. First off, open FileZilla, log in to your host as follows:

In the above example we switched the local site to the extension directory, and the remote site to the code directory. Now on the remote site window, inside app/code directory, create a folder named Magenest and go inside it. Now on your local site window, right click on Wrapper extension and click Upload. The extension will be uploaded onto your host in a few minutes.
The second method will require you to compress the extension into .zip or .tar.gz format, then execute the following command in your Command Line/Terminal:
scp <path to your extension> <ssh server>:<path to Magenest directory>
Then log into your ssh server, go to Magenest directory and execute the following command to decompress the module:
unzip <.zip compressed extension>
Or
tar -xzvf <.tar.gz compressed extension>
Now go to your Magento root directory, say it's named magento2, and execute the following commands:
sudo chmod -R 755 .
php bin/magento setup:upgrade
php bin/magento setup:static-content:deploy
sudo chmod -R 777 var pub
After running all these, your Command line/Terminal window might look like this:
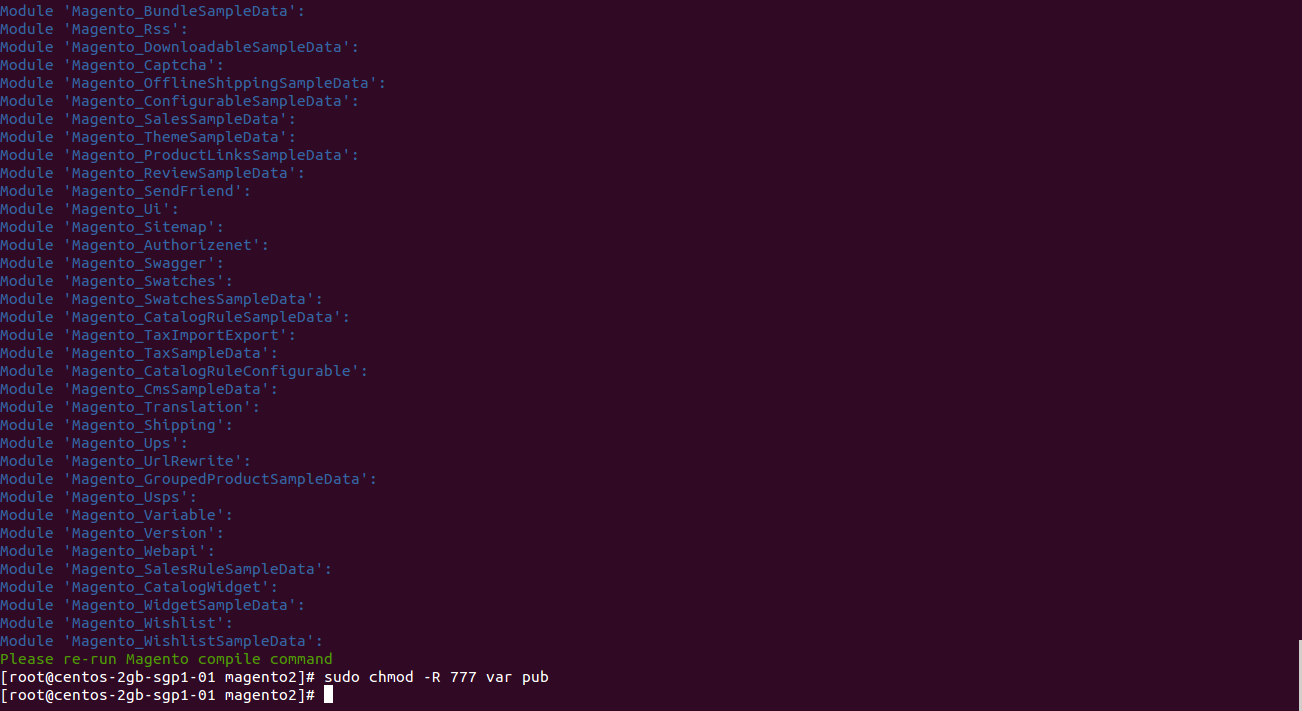
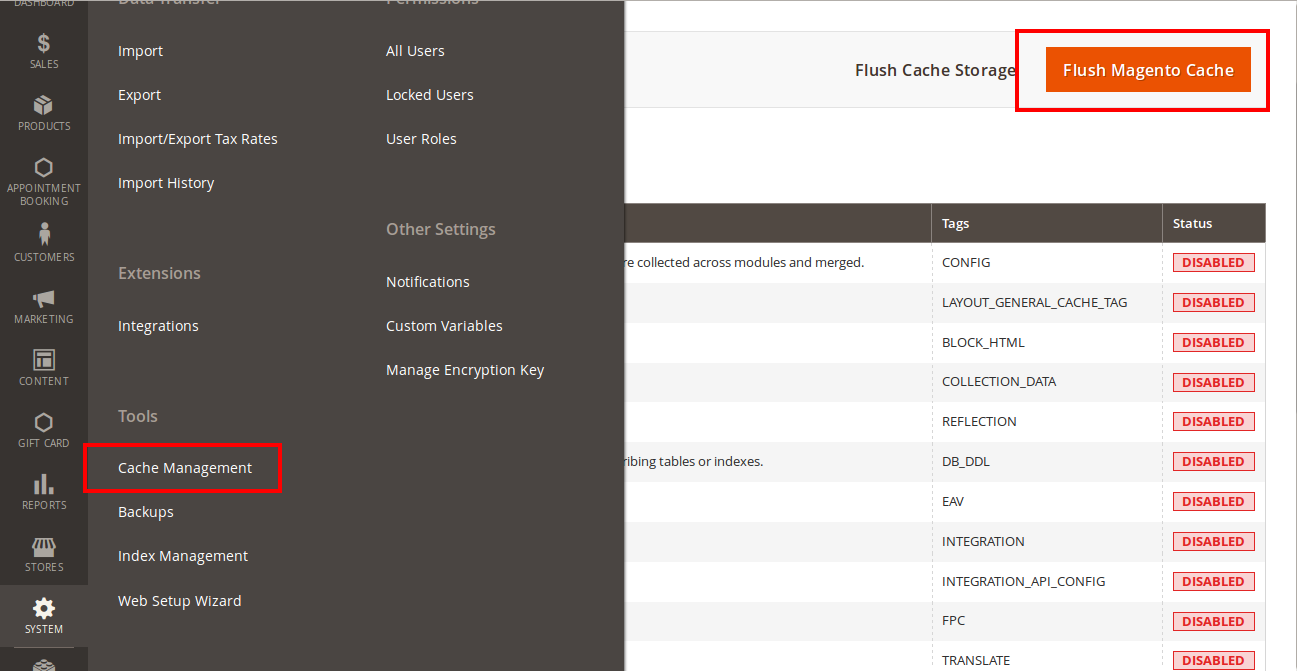
Finally, you need to flush the cache by either type this into the Command Line/Terminal:
php bin/magento cache:flush
Or go to System > Cache Management and click Flush Magento Cache
Now you can go to your store and check if the extension is working as expected.
Configuration
General Configuration
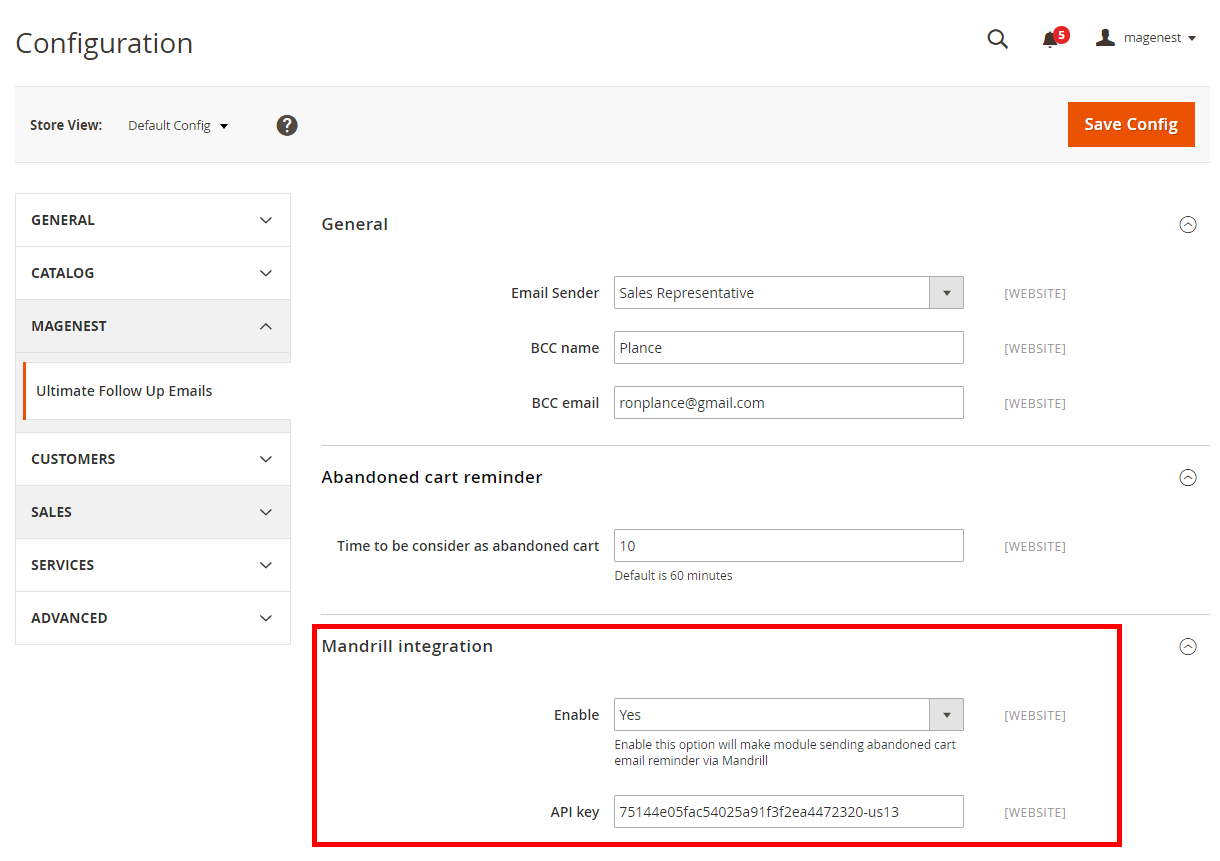
You can configure the extension's general settings in Store > Configuration > Magenest > Ultimate Follow Up Emails Configuration.
Admin need to set the following fields, consist of:
- Email Sender.
- BBC name.
- BBC email.
- Time to be consider as abandoned cart.
- Status of Mandrill Integration.
- API key.
Main Functions
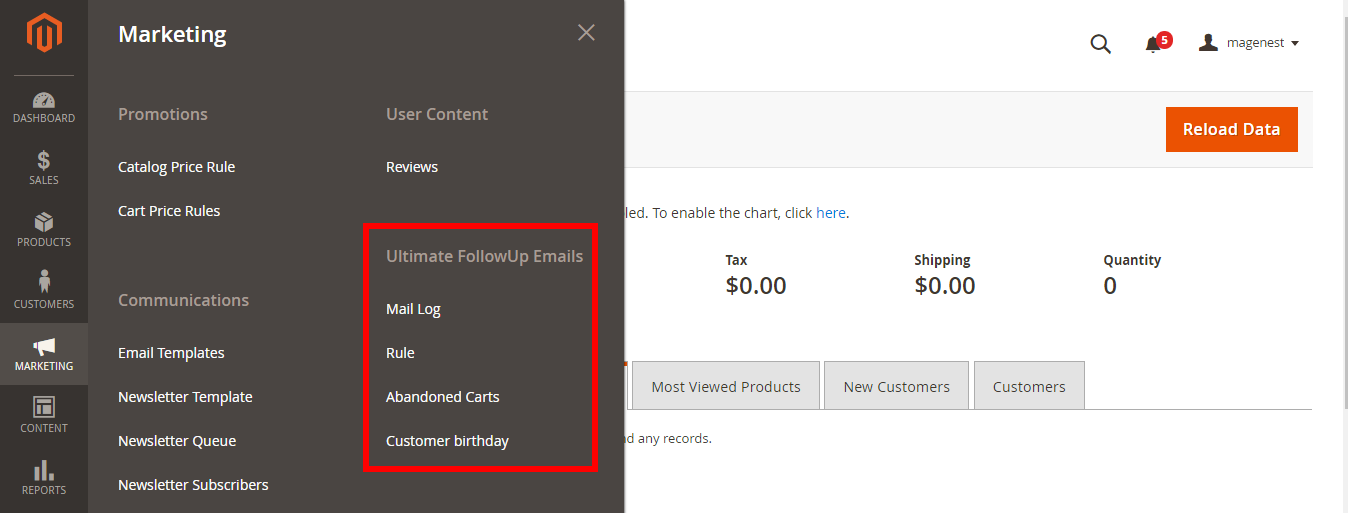
We created a Ultimate Follow Up Emails tab which allows admin can easily set and manage, regarding to this extension.
The following is the great features that Ultimate Follow Up Emails extension brings the owner stores.
Setting Up Rules
Firstly, admin need to set rules related the email type which suit their business strategy such as abandoned cart, customer birthday and so on by clicking on Marketing > Rule.
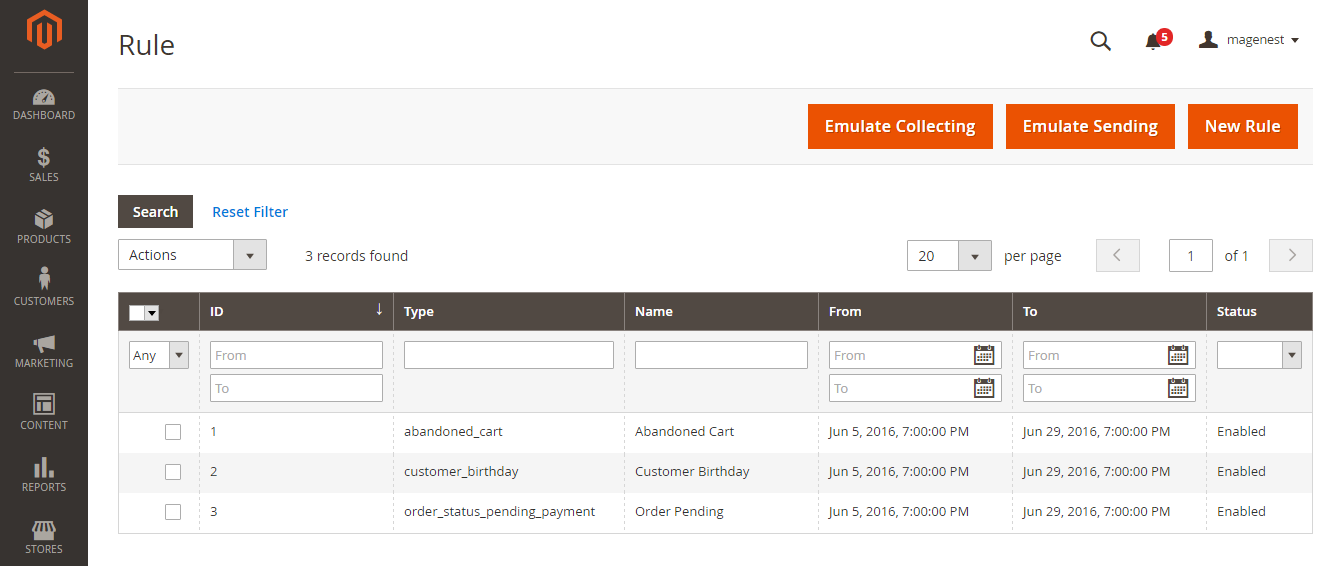
At Rule screen, admin can manage the entire existing rules.
To create a new rule, admin only click on New Rule button.

Then, admin need to select a event that they want.

Events
The extension supports these events:
| Event Title | Event Description |
| Abandoned Cart | |
|---|---|
| Abandoned Cart | This event allows sending email reminders to the customers who added any amount of products to their shopping cart and for some reason left the store without a purchase. |
| Customer | |
| Customer Registration | Send emails to customers when they created an account at the store |
Customer Registration No Purchase In Period | This event allows sending emails to the registered customers who didn't purchase anything in a period time |
| Customer Birthday | This event allows sending birthday greetings to the store customers |
| Order | |
| This event allows sending emails to the customers upon any change in the order status like: | |
| Order placed | When an order is placed |
| Order Obtained Status Pending Payment | When an order captures updates of pending payment status |
| Order Obtained Status Processing | When an order obtained Processing status |
| Order Obtained Status Closed | When an order obtained Closed status |
| Order Obtained Status Completed | When an order obtained Completed status |
| Order Obtained Status Holded | When an order obtained Holded status |
| Order Obtained Status Cancelled | When an order obtained Cancelled status |
| Order Obtained Status Payment Review | When an order obtained Payment Review status |
| Newsletter Subcribe | |
| Customer Subcribe | Send emails to customers when they subcribed to the Newsletter |
| Customer Unsubcribe | This event cancels the subsequent notifications in case a customer clicks the unsubscribe link |
| Wishlist | |
| Wishlist is shared | Send emails to customers when they shared their wishlist |
| Wishlist is abandoned in period | Send emails to customers when their wishlist was abandoned in a period time |
Click Save button to continue the next step. Admin will need to set some information here.
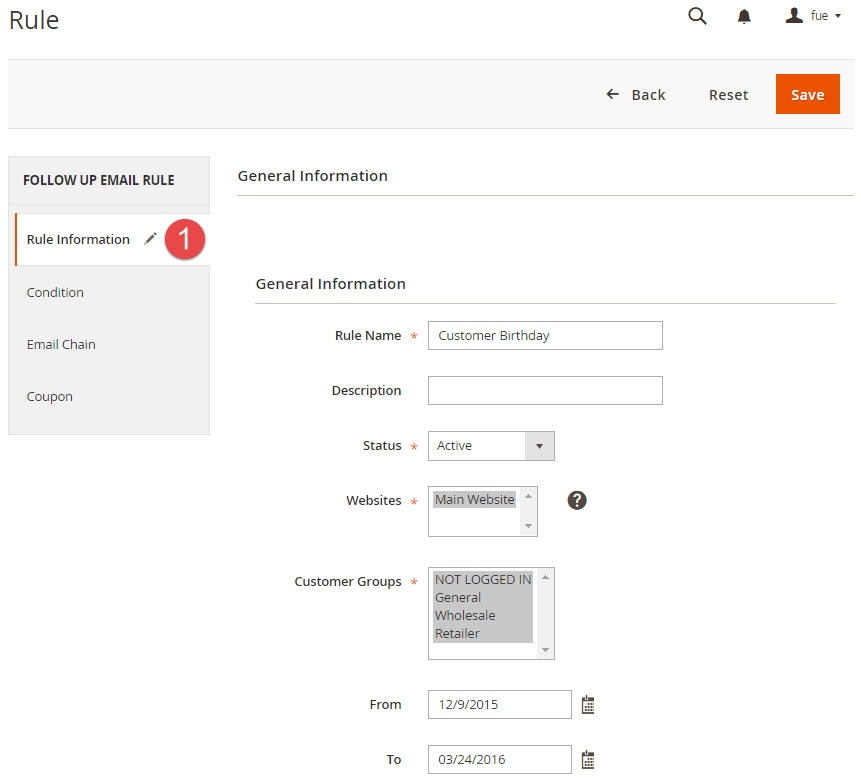
Rule Information
General information include Rule Name, Status, Active From-To, Websites and Customer Groups.
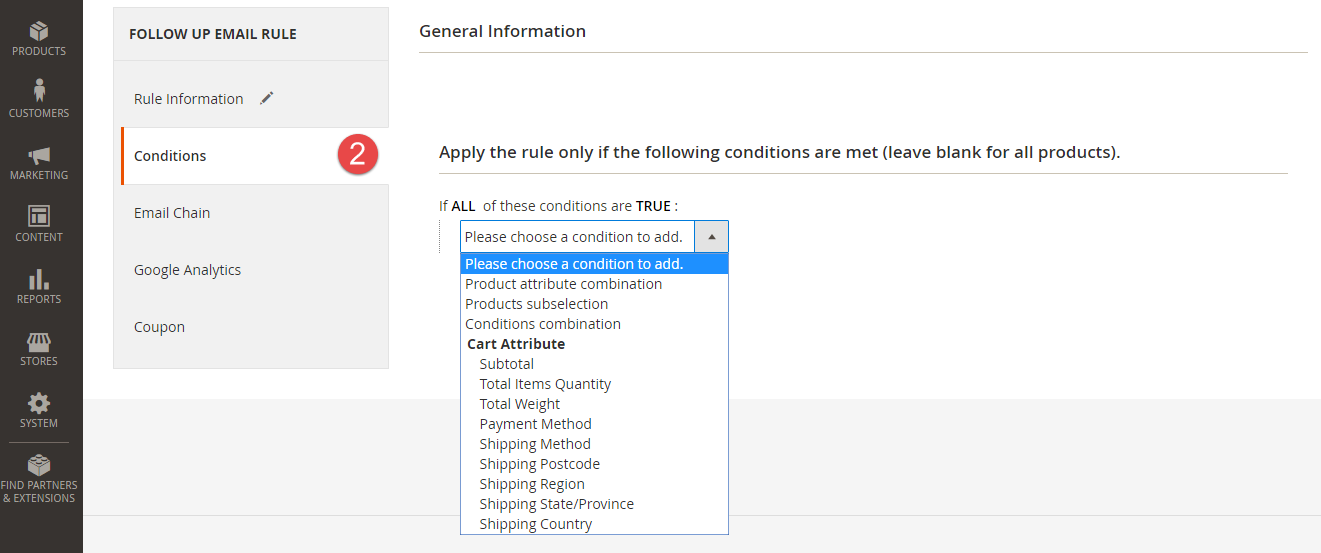
Condition
Go to Marketing > Ultimate Follow Up Emails > Rule and open a rule and click the Conditions tab.
Setting up rules allows you to set additional conditions based on customer details, who will receive certain emails.
You can use Customer, Shopping Cart, Order, Shipping Address, Wishlist conditions.
Email Chain
In this section you can add email instances that would be sent to a customer when the rule gets triggered. Remember you must add at least 1 email when creating a rule.
To add new email to mail chain, follow these steps:
*Case 1:
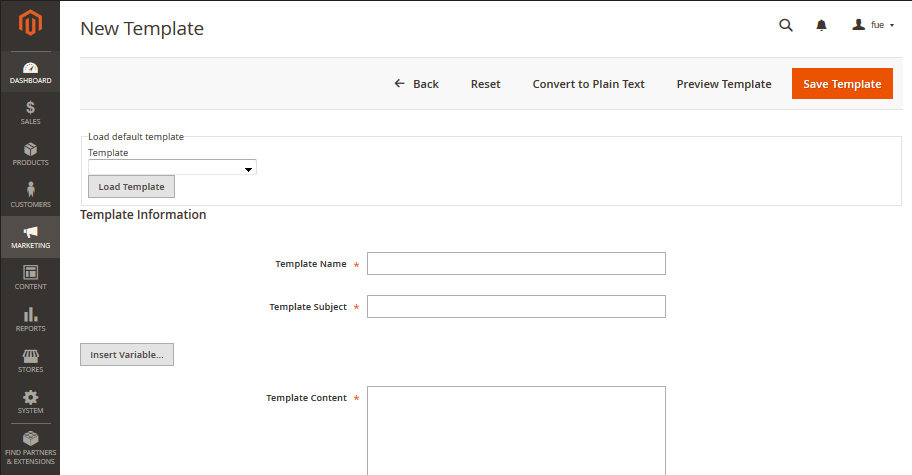
- Go to Marketing > Communications > Email Template and open the rule.
Press Add New Template
Template Name, Template Subject and Template Content fields will be taken from the template and processed with the filter. The Sender Name and Sender Email fields are ignored by the extension, it uses the values specified in the Configuration (Gmail Account).
You can insert variables in email template and preview email after editing.
Then go to Marketing > Ultimate Follow Up Emails > Rule, follow Email Chain Tab.
Select when the triggered message will be sent.
By default, it will send immediately after a triggering event (0 days 0 hours 0 minutes). You can choose set times from as short as one minute to as long as few years after the trigger’s criteria is met.
Select Email Template, which will be sent.
*Case 2:
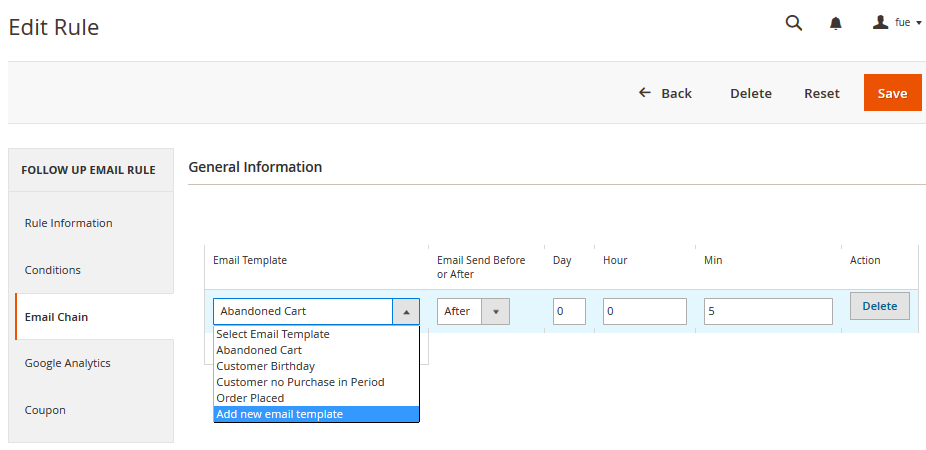
Navigate to Marketing > Ultimate Follow Up Emails > Rule, follow Email Chain Tab.
- Select when the triggered message will be sent.
- Select Add new email Template in dropdown email template menu. You be led to a popup screen that allow you to write your template.
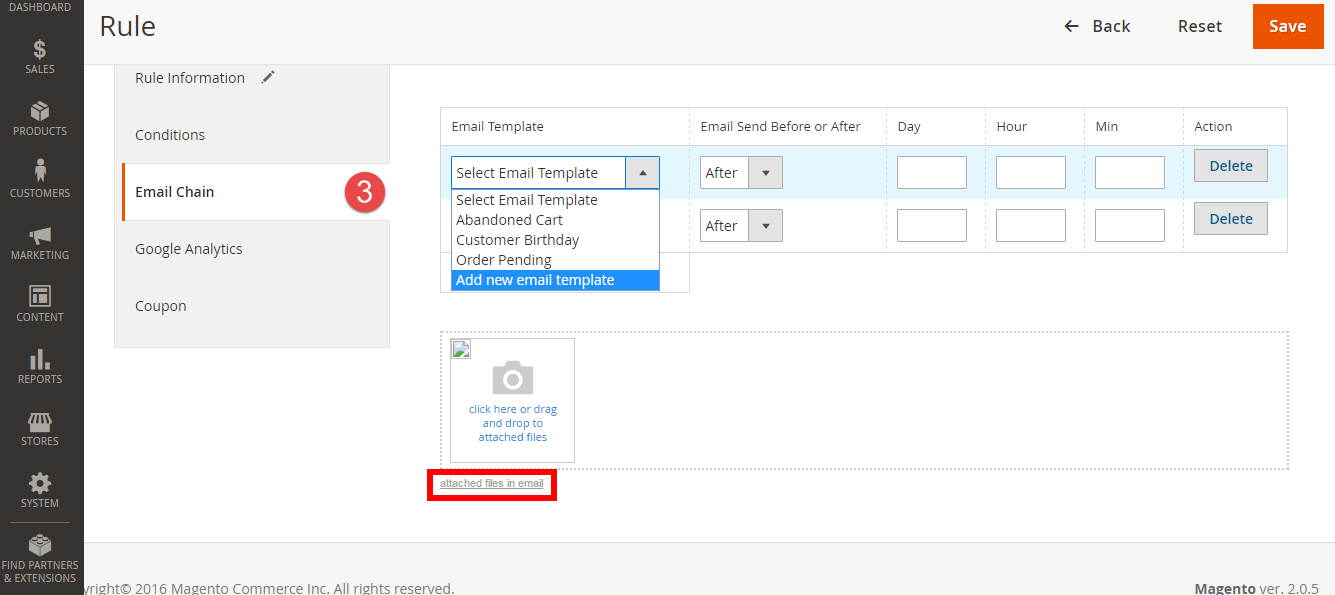
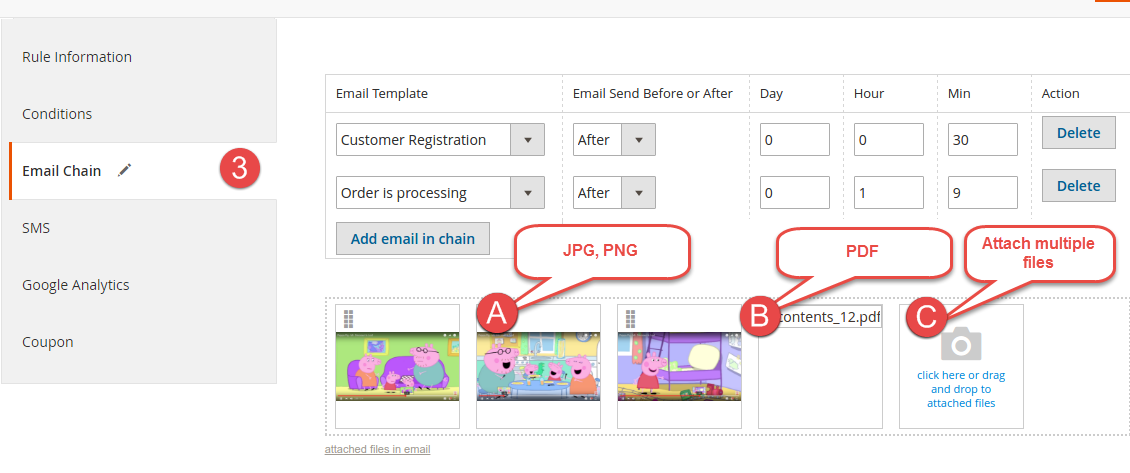
Especially, admin can attach one or more files into email in order to send customers.
Google Analytics
To configure Google Analytics Campaign, follow these steps:
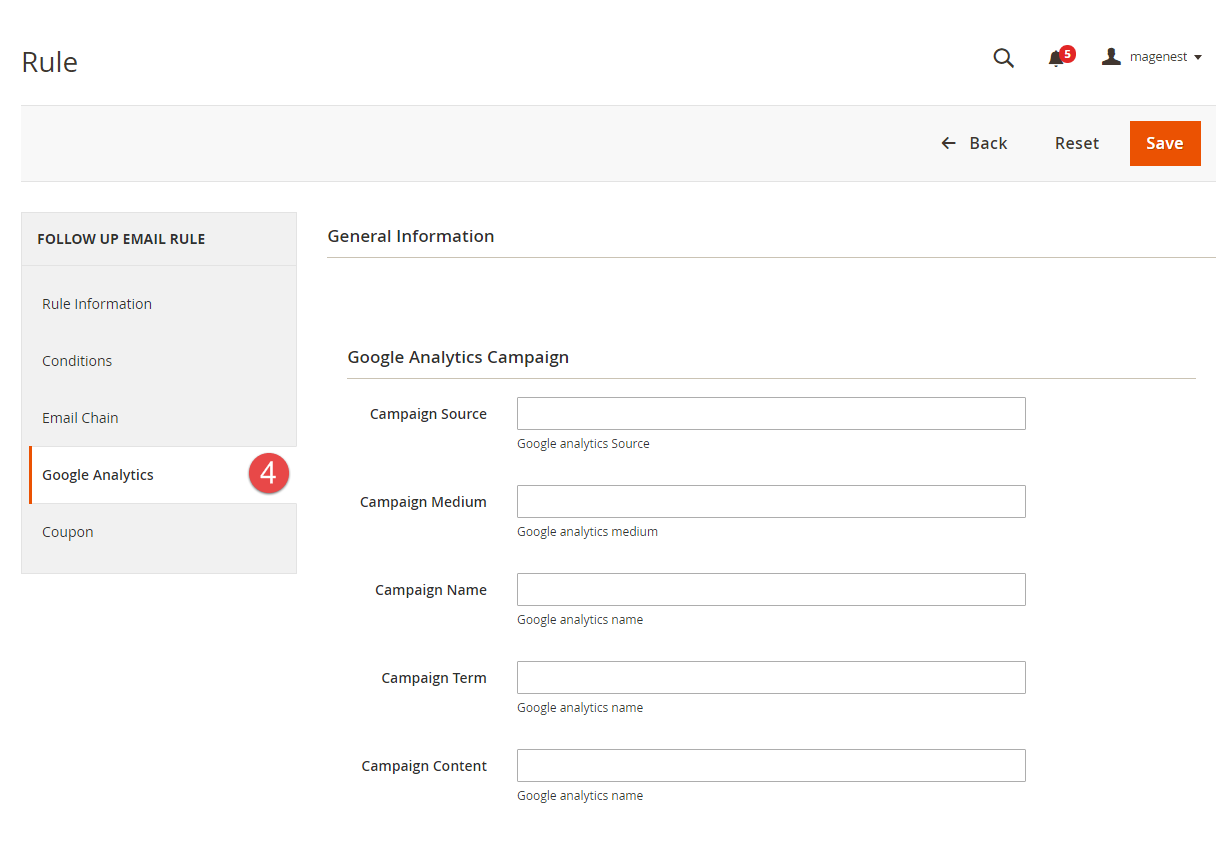
- Go to Marketing > Ultimate Follow Up Emails > Rule, open rule and follow tab Google Analytics.
- Fill in 3 required fields:
- Campaign Source - Identifies a search engine, newsletter name, or other source.(i.e. email, follow-up-email, newsletter)
- Campaign Medium - Identifies a medium such as email or cost-per-click. (i.e. cpc, banner, email)
- Campaign Name - Identifies a specific product promotion or strategic campaign. (i.e product, promo code, or slogan)
Also, you can optionally fill in other fields: - Campaign Term - Identifies paid keywords.
- Campaign Content - Differentiates ads or links that point to the same URL.
- Save the trigger
After configuring Google Analytics Campaign, extension will automatically add special get params to all links in email. Thus, you don't need to do additional configuration adjustments. (i.e. url http://example.com/about-us/ will be converted to http://example.com/about-us/?utm-source=email&utm-medium=trigger-email&utm-name=review-request).
To track Google Analytics Campaign log in into your Google account and go to Traffic Sources > Campaigns. Select campaign source from the list.
Coupon
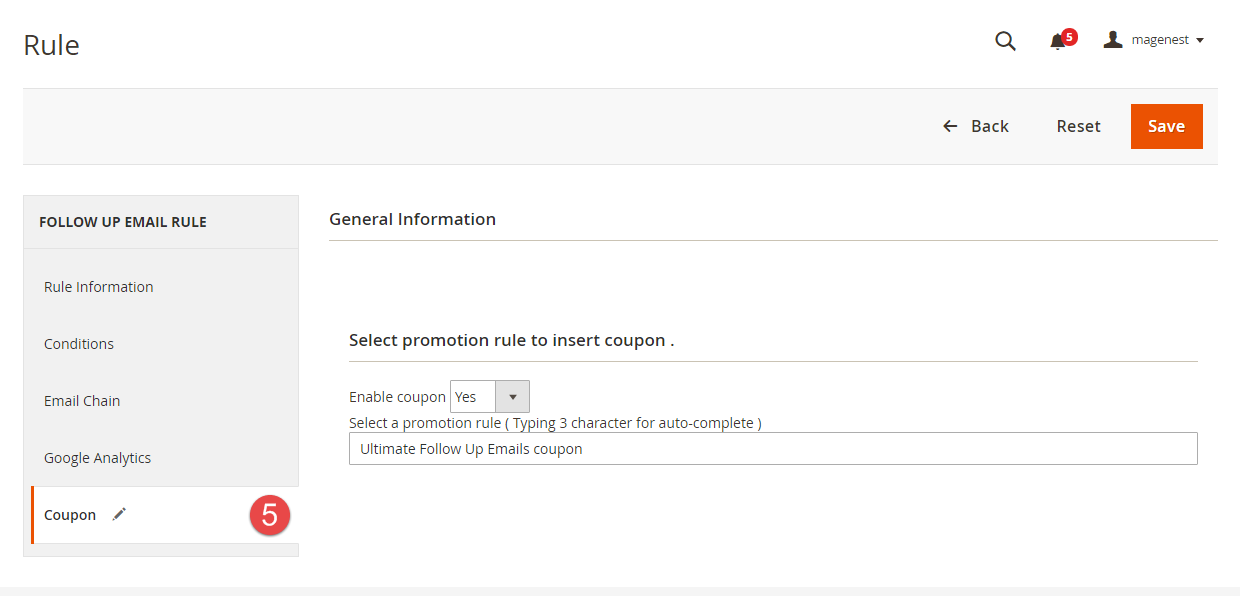
Navigate to Marketing > Ultimate Follow Up Emails > Rule, follow Coupons Tab.
At first, you need to create some Cart Price Rules then select the Specific Coupons value in the Coupon field and check the Use Auto Generation box.
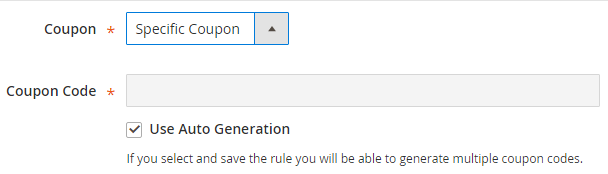
In the Coupon section of extension you can search your cart price rule by type 3 characters for search auto complete. The extension will show 3 nearest results for you. Enter the promotion coupon you want for rule.
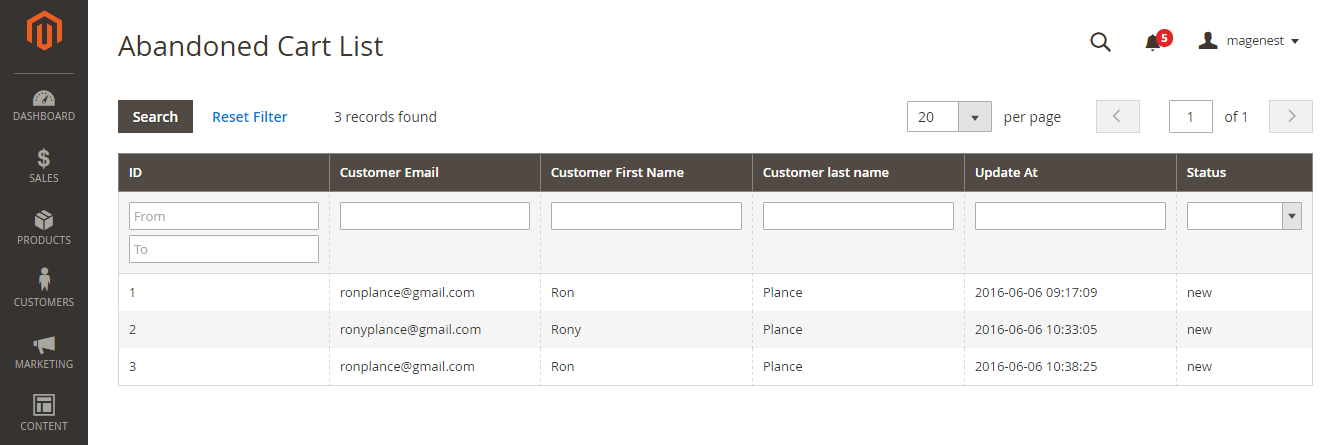
- Abandoned Cart List
Go to Marketing > Ultimate Follow Up Email > Abandoned Cart List.
Manage your customers' abandoned carts in this section.
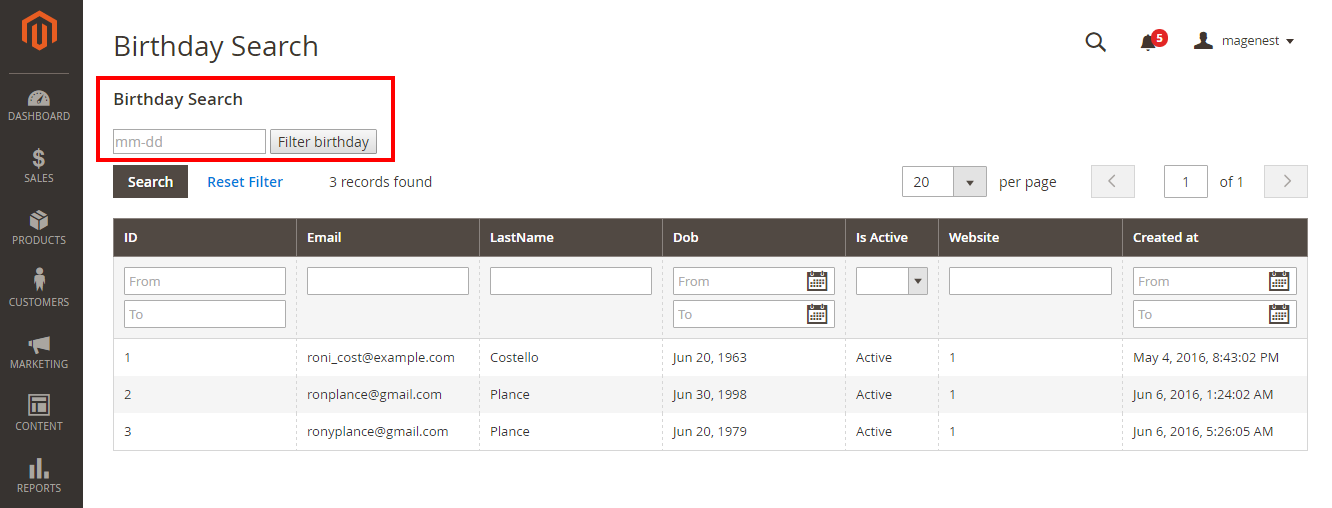
Customer Birthday Collect
Go to Marketing > Ultimate Follow Up Email > Customer Birthday.
Collect your customers' date of birth in this section.
Mail Log
Go to Marketing > Ultimate Follow Up Email > Mail Log.
In the mail log grid, you can view any of the currently scheduled, already sent, failed and cancelled emails. The grid shows the status, created at/ sent at timestamps, rule details (rule ID, rule name) and recipient details email address).
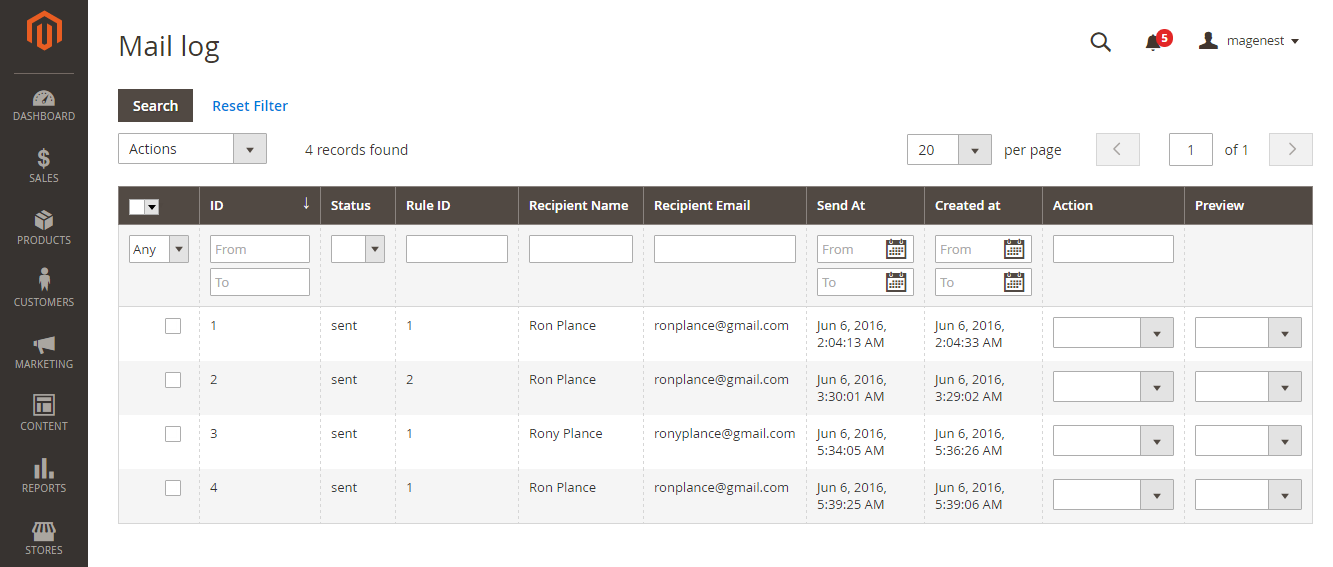
You can also apply certain actions to any of the queue items - Preview, Cancel and Send Now (the latter sends the selected email(s) instantly, disregarding their schedule or status)
- Testing Rule
Note
Please note this testing only apply for abandoned cart and customer birthday rule!
To test abandoned cart rule, follow these steps:
- Go to Marketing > Follow Up Emails > Rule.
- At top right corner press Emulate Hourly Cron..
- Extension will send all email (chains) associated with the abandoned card rule for each selected store.
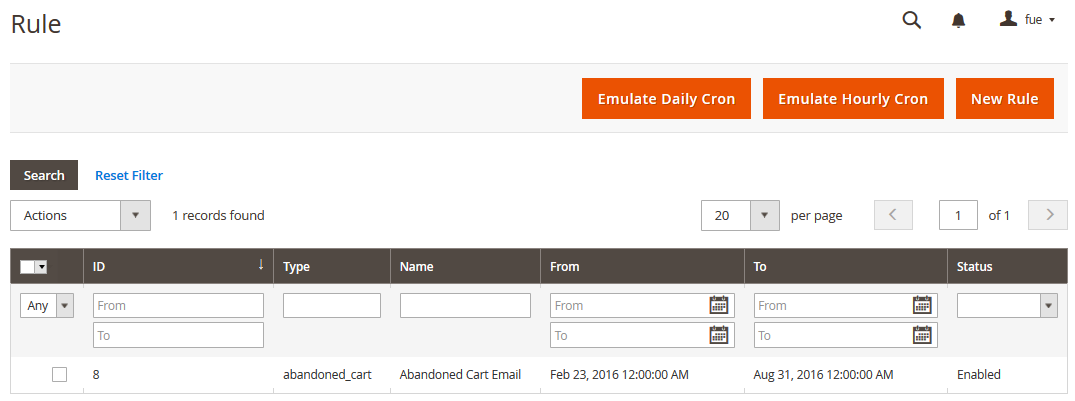
To test customer birthday rule, follow these steps:
- Go to Marketing > Ultimate FollowUp Emails > Rule.
- At top right corner press Emulate Daily Cron.
- Extension will send all email (chains) associated with the customer birthday rule for each selected store.
Sample Email Template
Abandoned carts reminder
Dear {{var customerName}}
<br>
We notice you have abandoned cart
 <br>
{{var cart}}

<br>

Please click <a href="{{var resumeLink}}" > Resume Cart </a> to complete the order.

<br>
We gift you a coupon with code {{var coupon.code}}
<br>
Happy birthday email template
Dear {{var customerName}}


Happy birthday .
We gift a coupon $50 {{var coupon.code}}

Thank  you
Update
- When a bug fix or new feature is released, we will provide you with the module's new package.
- All you need to do is repeating the above installing steps and uploading the package onto your store. The code will automatically override.
- Flush the config cache. Your store and newly installed module should be working as expected.
Support
- Magenest offers the response time can be up to 3-5 days.
- We offers lifetime support free for all of our paid products. Support includes answering questions related to our products, bug/error fixing to make sure our products work well in your site exactly like our demo.
- Support DOES NOT include other services as customize our product to fit your own needs, installation service, uninstallation service. We ONLYsupport you with exist features of module.
Once again, thank you for purchasing our extension. If you have any questions relating to this extension, please do not hesitate to contact us for support.