Thank you for purchasing our extension. If you have any questions that are beyond the scope of this document, please feel free to contact us, we will be happy to assist
Updated: 19th February 2021 | By: Magenest | Email: [email protected] | Support Portal: http://servicedesk.izysync.com/servicedesk/customer/portal/21
Introduction
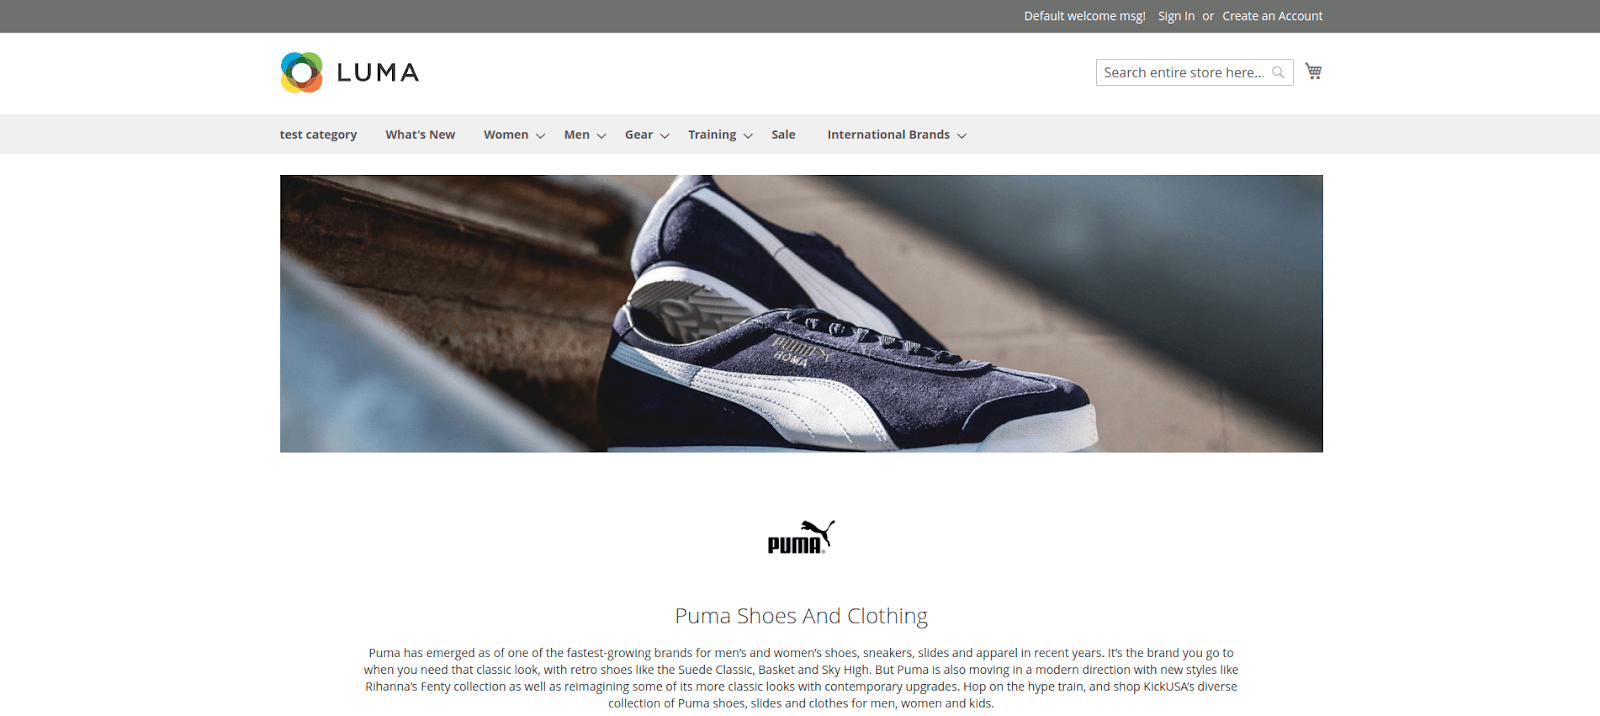
Shop by Brand for Magento 2 helps merchants to showcase products by brand, taking advantage of familiar brand names to customers to create more sales. Also, the extension shortens the buying journey by letting customers find out products of their favorite brands easily.
Key Features
For admin
- Show brands on brands page, brand detail page, product list and product detail page
- Create multiple brand groups to classify and manage
- Easily create new brands, including: brand name, logo, banner, description and more
- Add products to a brand
- Show brand with multiple display mode: icon, brand name or both
- Show featured brand list and featured product list
- Edit the title for featured list
- Add short description and detail description for brand
- Show number of products on each brand
- Set image for brand logo and banner on brand page
- SEO setting for brands page
For Customers
- View brands on brands page, brand detail page, product list and product detail page
- Hover to the brand icon to view brand short description
- View detail information of a brand on the brand detail page
- Search for brands by the search box or brand group
- View featured brands and featured product list
- View the number of product on each brand
System Requirements
Your store should be running on Magento 2 Community Edition version 2.2.x, 2.3.x, 2.4.0, 2.4.1 or Magento 2 Enterprise Edition version 2.2.x, 2.3.x, 2.4.0, 2.4.1.
Configuration
![]() On the admin sidebar, go to Shop By Brand > Settings to set the general configuration for the extension. On the Configuration page:
On the admin sidebar, go to Shop By Brand > Settings to set the general configuration for the extension. On the Configuration page:
General
This section contains the setting for the brands on the main menu and product pages.
- Add all brands page link to menu: Choose Yes to add Brands tab on the main menu.
- Menu Title: Enter the name of the brands tab on the main menu. The default title "Brands" will be shown if this field is left blank.
- Display brand icons in product listing: Choose Yes to display the brand icon on each product on product listing page.
- Show brands in product page: Select a layout for the brand information on product detail page. There are four options: No, Brand name only, Icon only, Brand name and icon.

- Front-end layout
![]() International Brands tab could be renamed from the back-end
International Brands tab could be renamed from the back-end


All Brand Page Setup
In this section, admin can set the layout for the brands list page.
- Search Brand Page Title: Title for brand list page.
- Display Featured Brands: Choose Yes to display the most-popular-brand list on Brands page.
- Title of Featured Brands: Enter the title for the featured brands list.
- Title Of Brand List: Title for all-brand list.
- Show brands list in product page: Select a layout for the brand information on brand list page.
There are two options: Brand name only and Brand name and icon.
- Show Product Quantity Of Each Brand: Choose Yes to display the items quantity on each brand icon on the all-brand list.
- Sort order brands list in product page: Sort order brands by alphabetically.
There are two options: Number first and Character first.
- Front-end layout


Brand Detail Page Setup
This section contains the settings for the brand detail page.
- Display Features Products: Choose Yes to enable the featured products list on the brand detail page.
- Title Of Featured Product: Enter the title for the featured products list.
- Front-end layout

SEO Settings
This section contains the Search Engine Optimization settings for the brands page.
After finishing, click on Save button to save the configuration.

Manage Groups
Before creating new brands, admin need to create groups to classify the brands.
![]() On the admin sidebar, go to Shop By Brand > Manage Groups.
On the admin sidebar, go to Shop By Brand > Manage Groups.
![]() On Brand Groups page, admin can delete or change status of the available groups.
On Brand Groups page, admin can delete or change status of the available groups.
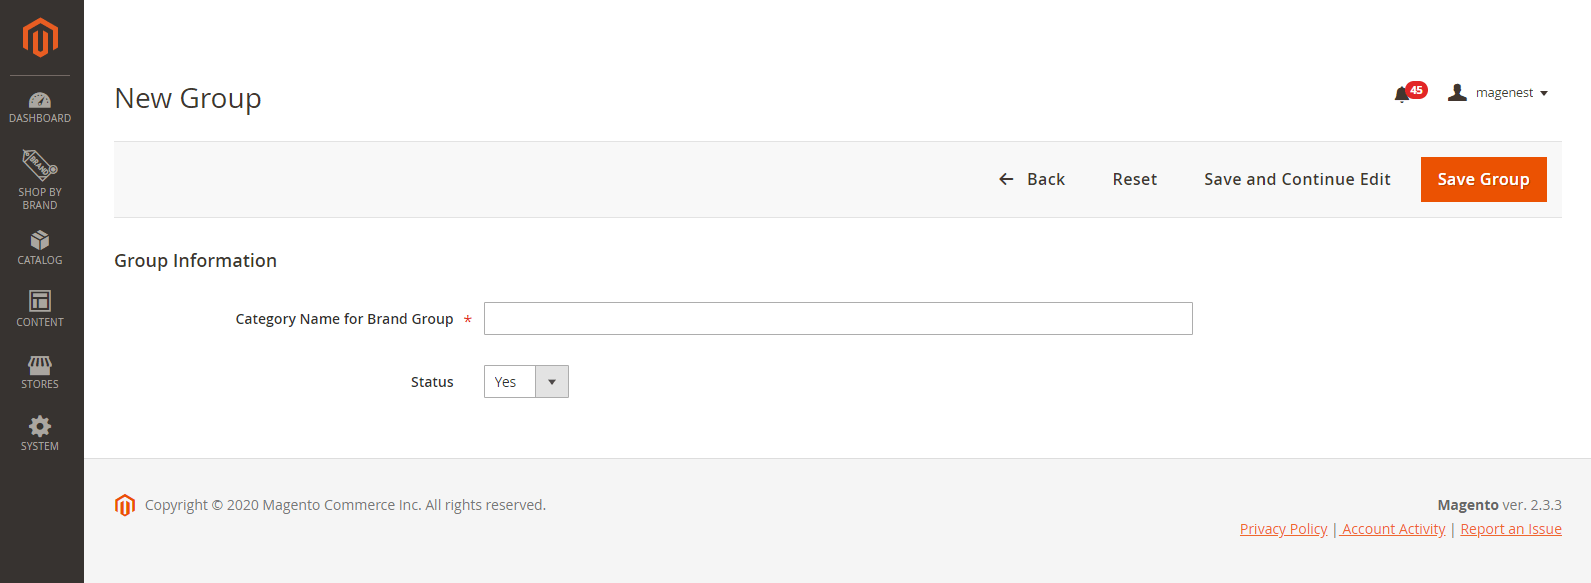
![]() To create a new group, click on Add New Group button.
To create a new group, click on Add New Group button.

![]() On New Group page, set name and status for the new group. Then click on Save Group button to save.
On New Group page, set name and status for the new group. Then click on Save Group button to save.

Manage Brands
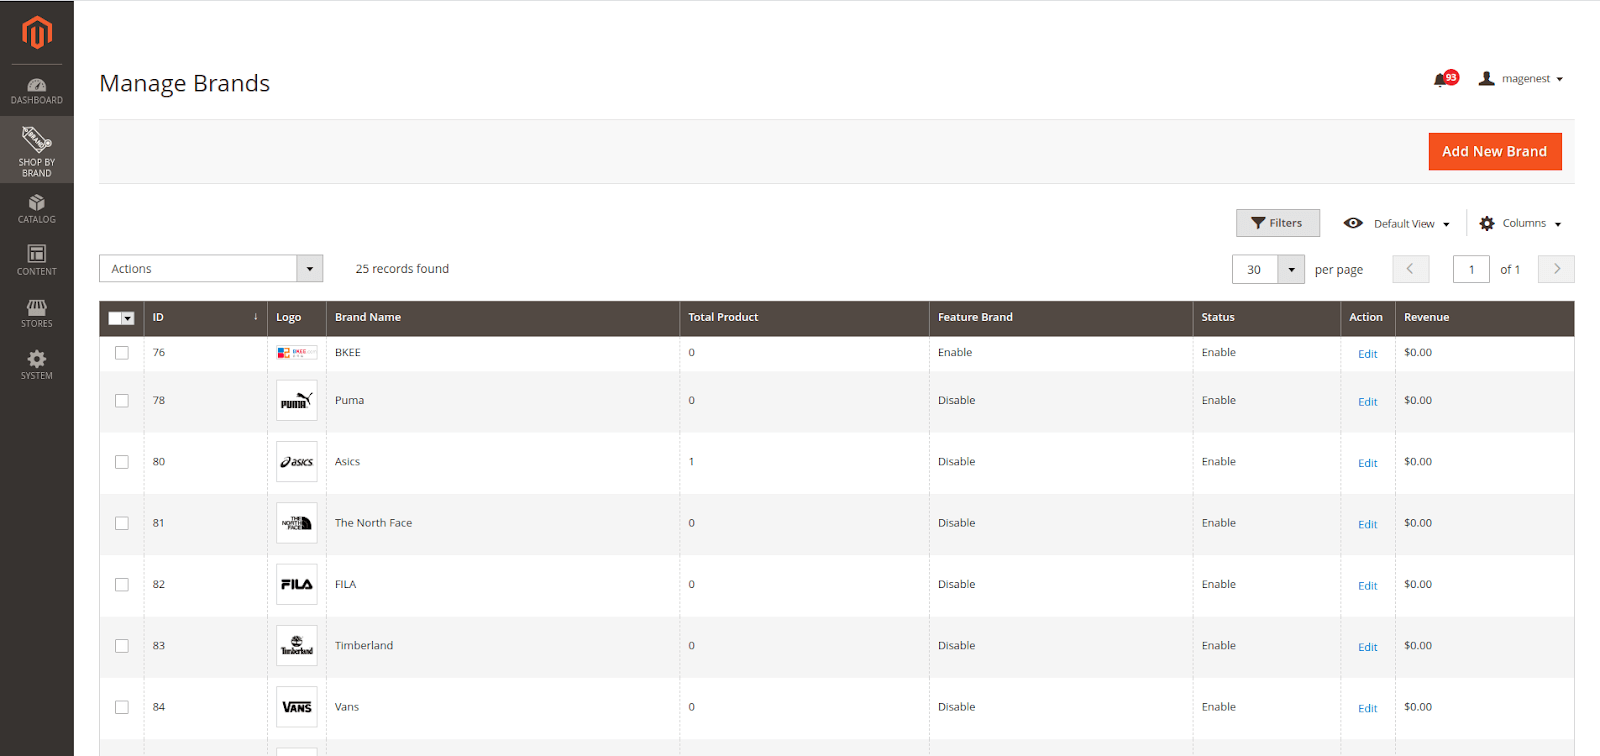
![]() On the admin site bar, go to Shop By Brand > Manage Brands.
On the admin site bar, go to Shop By Brand > Manage Brands.
![]() On the Shop By Brands page, admin can edit or delete the available brands on the list grid.
On the Shop By Brands page, admin can edit or delete the available brands on the list grid.
Create a new brand
To create a new brand, click on Add New Brand button. On the New Brand page:
 General
- Title: Set a name for the new brand.
- Status: Choose Yes to activate the brand.
- Add to Featured Brands: If choose Yes, the brand will be added to the featured brands list.
- Store Views: Select a store view for the brand.
- Group: Assign the brand to one or several groups.
Images
- Logo in Brand Page: Set the brand logo on brands page.
- Logo in Brand Detail: Set the brand logo on brand detail page.
- Banner: Set the banner on brand detail page.
- Front-end layout


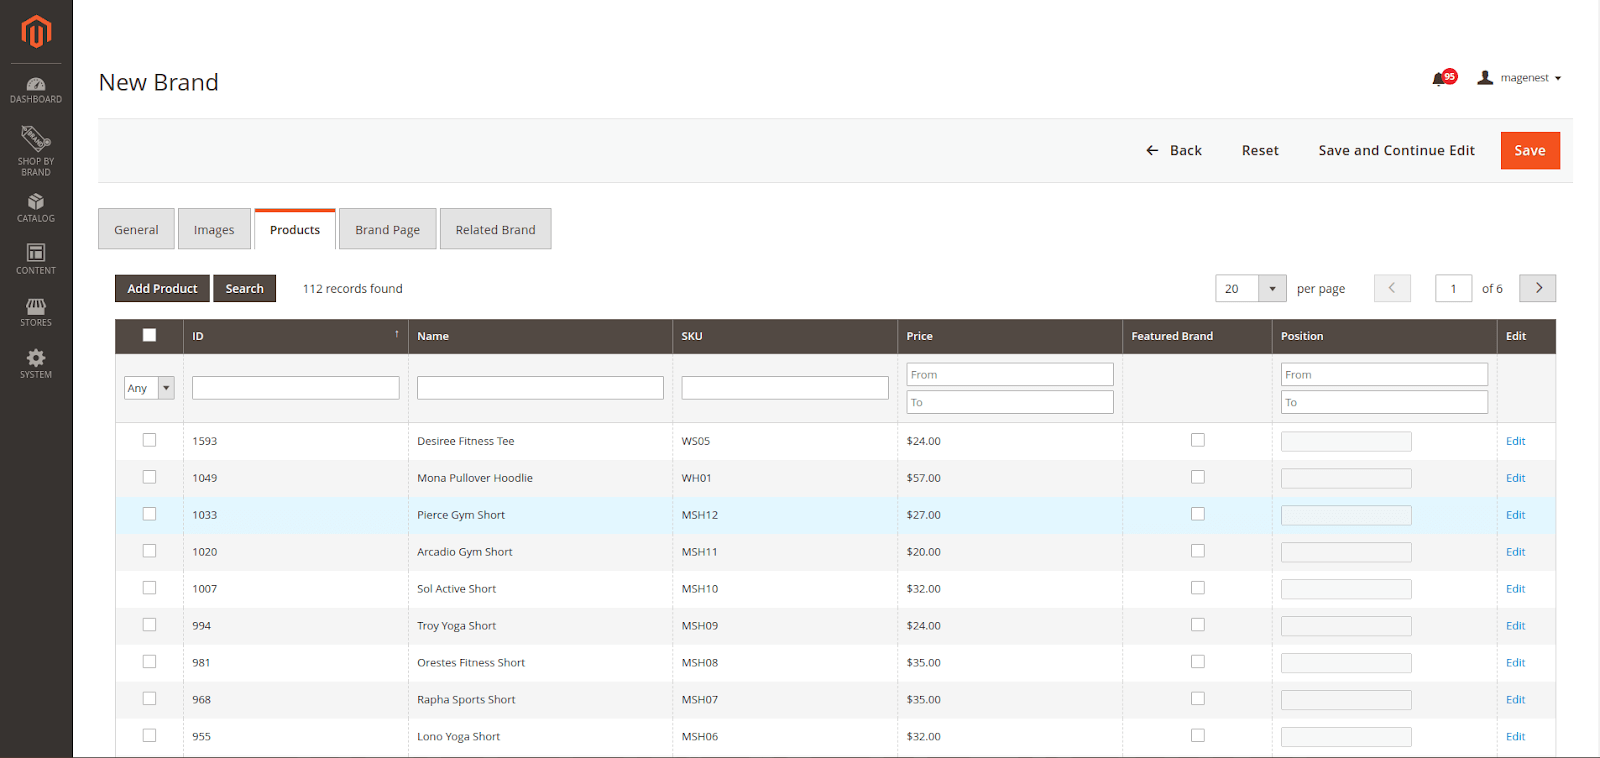
Products
Select products to add to the new brand.
When editing a brand, in case admin want to add more products to the available list, click on Add Product button then select products to add.

Brand Page
Setup the detail page for the brand.
- Page Title: Title in the header html.
- URL Key: The URL Key for marketing purposes.
- Short Description: A short description for the brand. This description will display when users hover on the brand icon.
- Brand Description: A detailed description for the brand using the.
- Meta keywords, Meta description: Search Engine Optimization for the brands page.
![]() Click Save to save the brand.
Click Save to save the brand.
Related Brand
- Select brands to add to the new brand. These brands will be displayed in the "Related Brand" section on the frontend.
- When editing a brand, in case the admin wants to add more brands to the available list, click on the Add Brand button then select brands to add.
- Click Save to save the brand.
Import Brand
On the admin site bar, go to Shop By Brand > Import Brand
![]() Import Settings
Import Settings
Entity Type: Select Magenest Shop By Brand Import. Then press Download Sample File and modify the content accordingly.

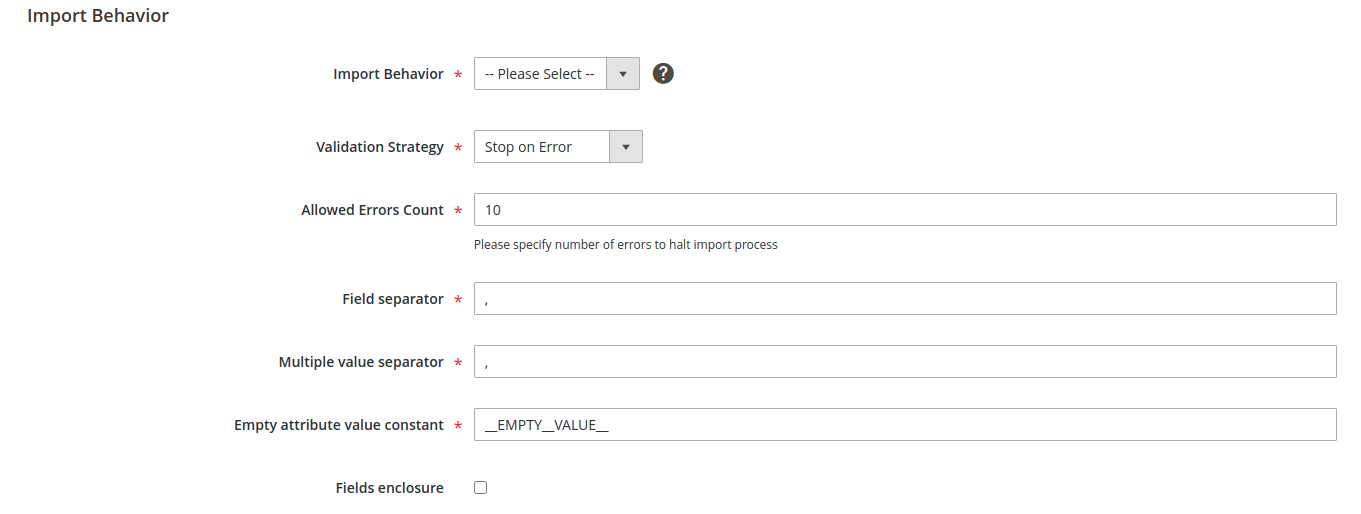
![]() Import Behavior
Import Behavior
- Import Behavior: Set Import Behavior to one of the following: Add/Update Replace Delete
- Validation Strategy: To determine what happens when an error is encountered when importing data, choose one of the following: Stop on Error or Skip error entries
- Allowed Errors Count: Enter the number of errors that can occur before the import is canceled.
- Field separator: Accept the default value of a comma (,).
- Multiple value separator: Accept the default value of a comma (,).
- Fields enclosure: If you want to enclose any special characters that might be found in the data as an escape sequence, select the Fields Enclosure checkbox.

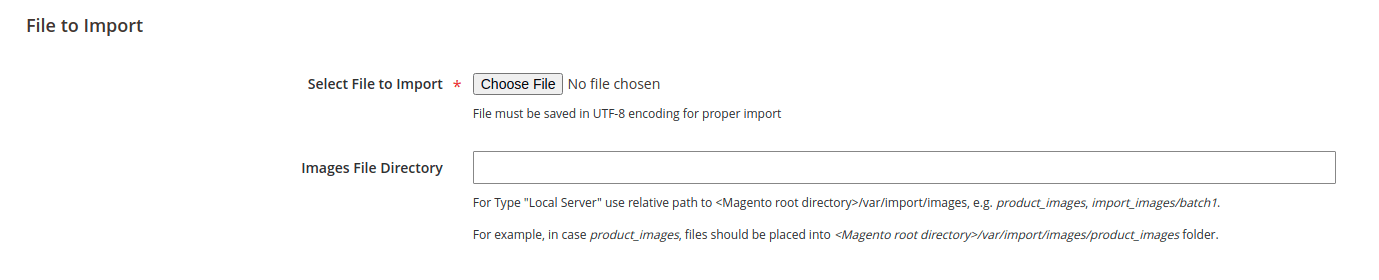
![]() File to Import
File to Import
- Select File to Import: Find the CSV file that you prepared to import and click Open.
- Images File Directory: Enter the relative path to the location on the Magento server where uploaded images are stored.

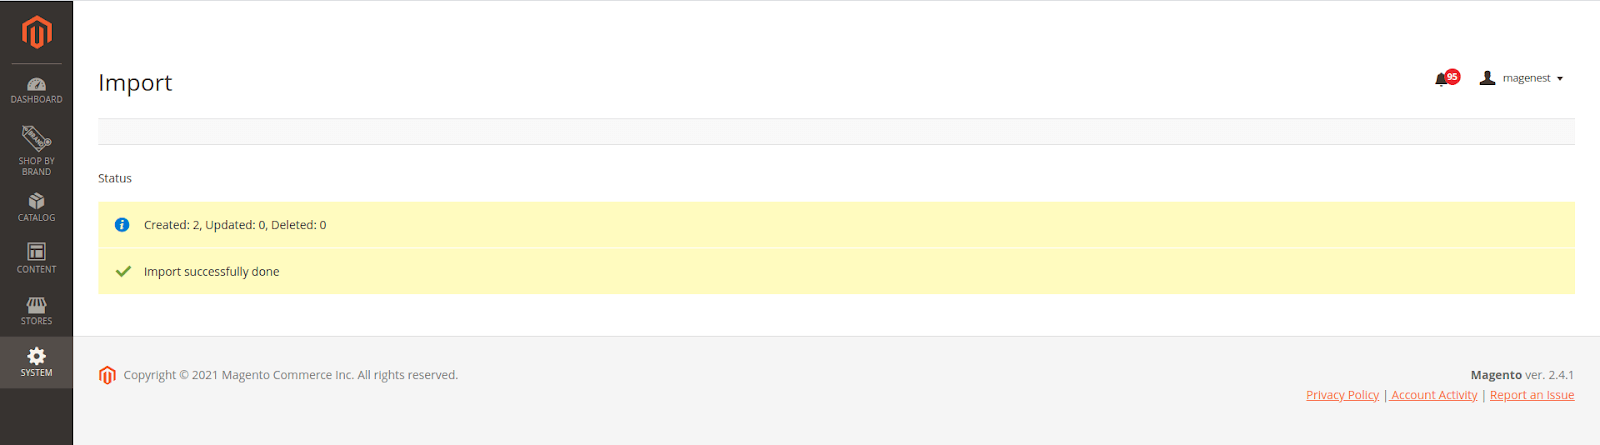
Then click the Check Data button and wait a few moments for the validation process to complete. If the import data is valid, the following message appears:
If the file is valid, click Import.
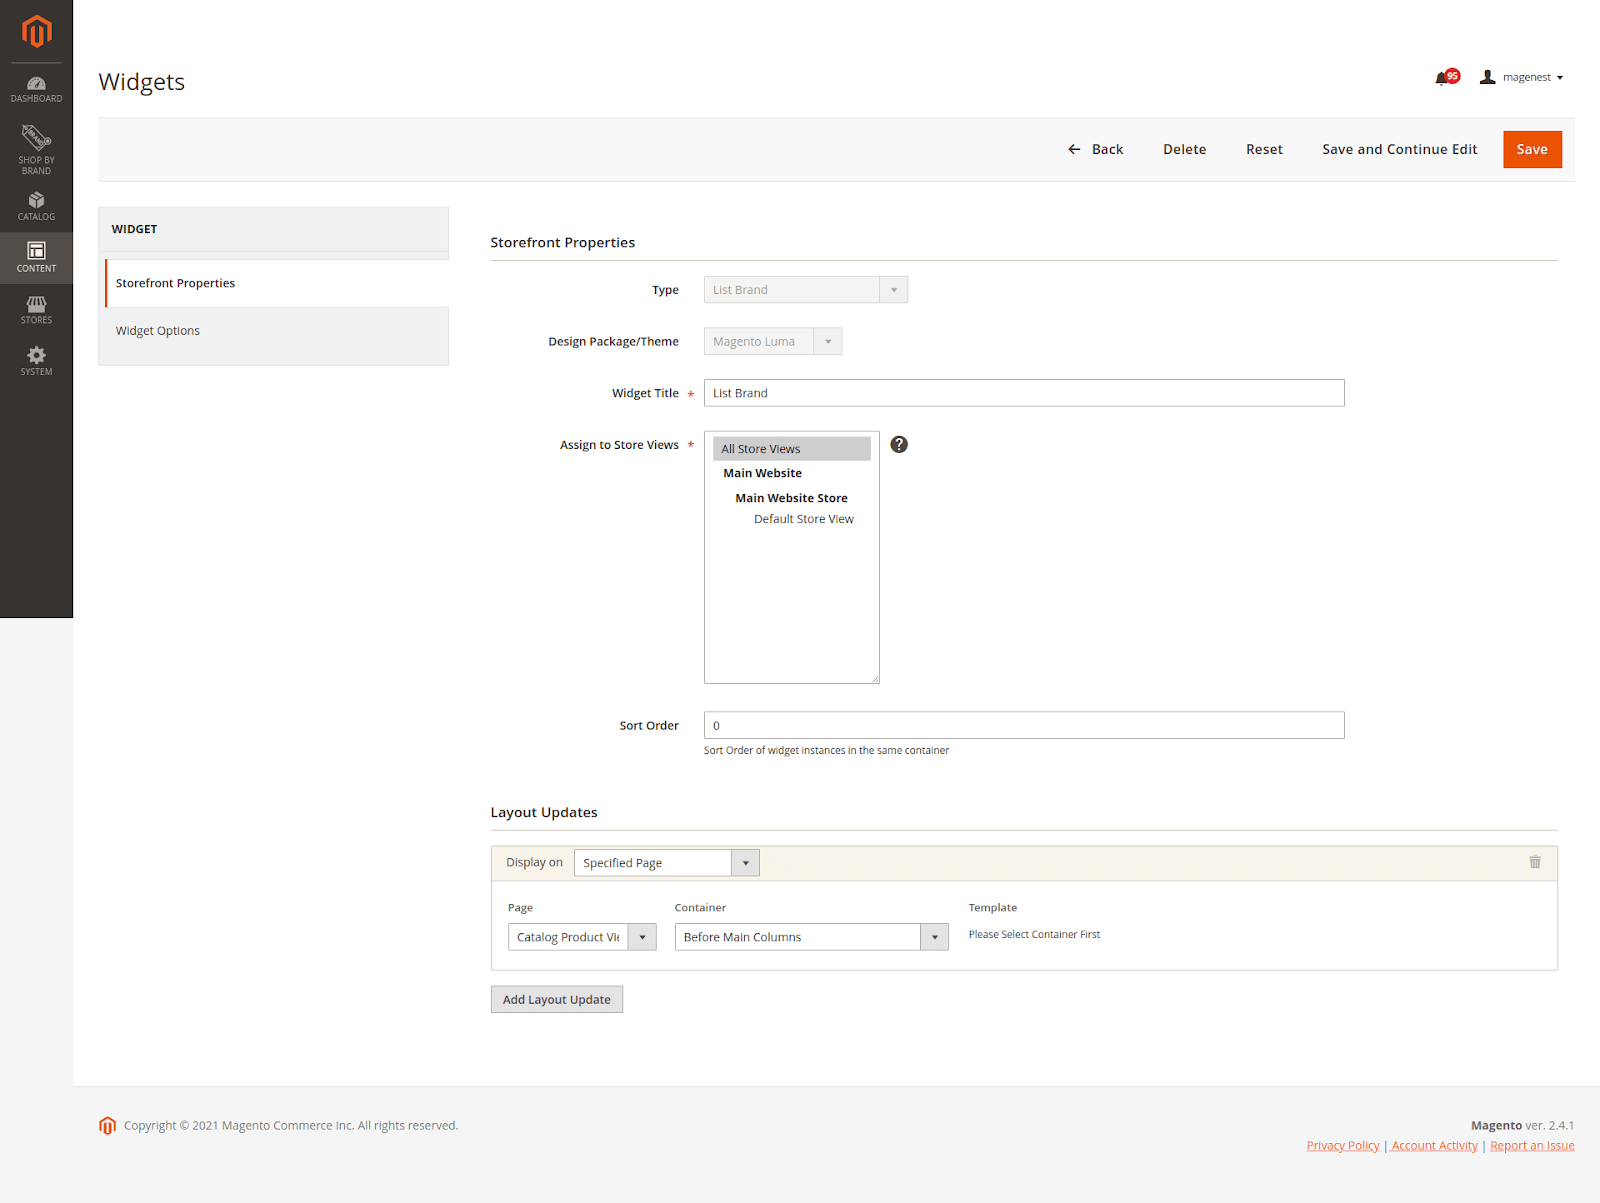
Add brands list widget
- On the admin site bar, go to Content > Widget.
- Click Add Widget button
- Type: Select List Brand
- Design Theme: Select the theme to which the widget will be applied.
Then press the Continue button.
- Storefront Properties: Config widget name and where the widget will show up.

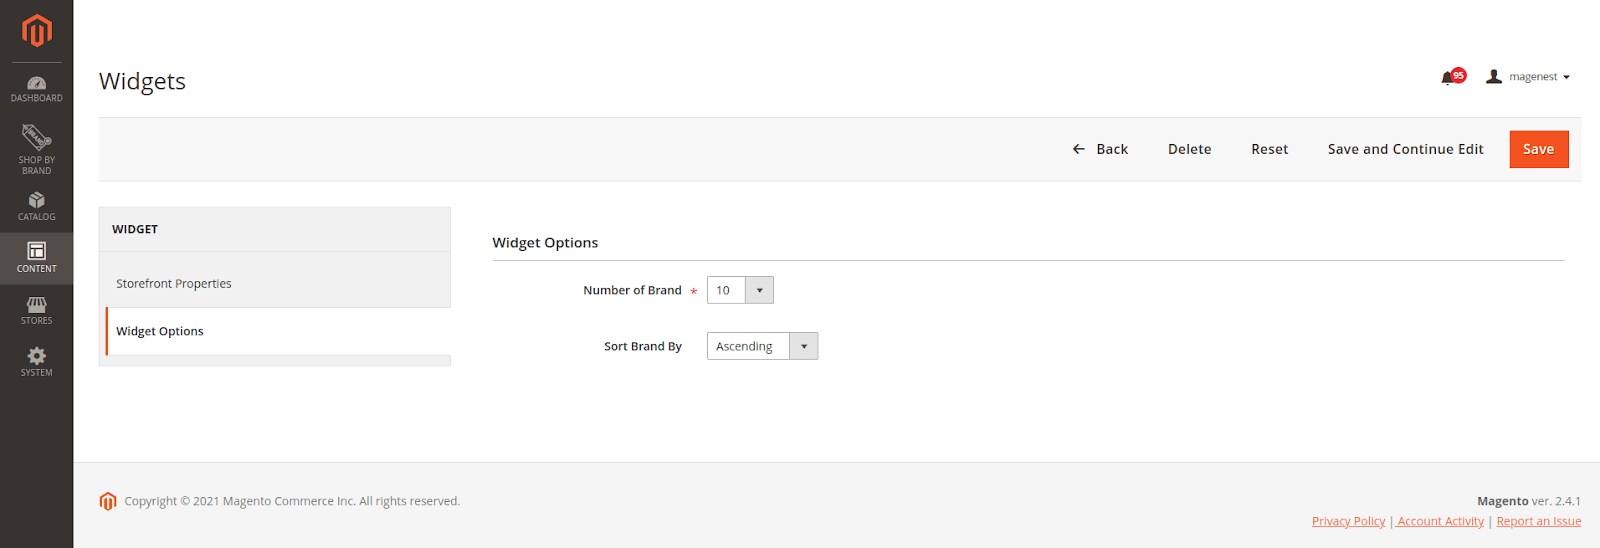
![]() Widget Options:
Widget Options:
Number of Brand: Brand number will show up on widget.
Sort Brand By: Choose sort order brands. There are 2 options: Ascending and Descending.

On frontend layout:

Main functions on the front-end
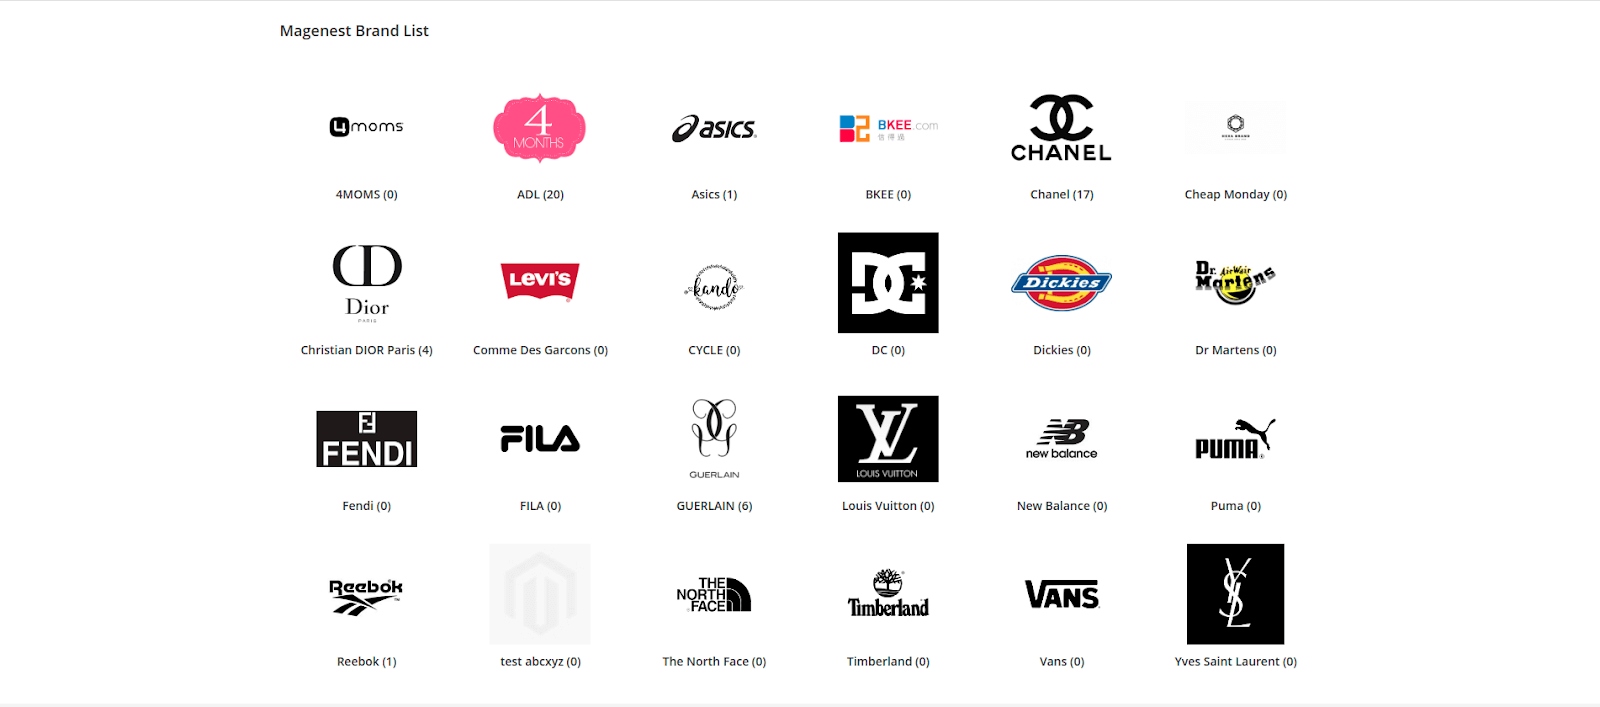
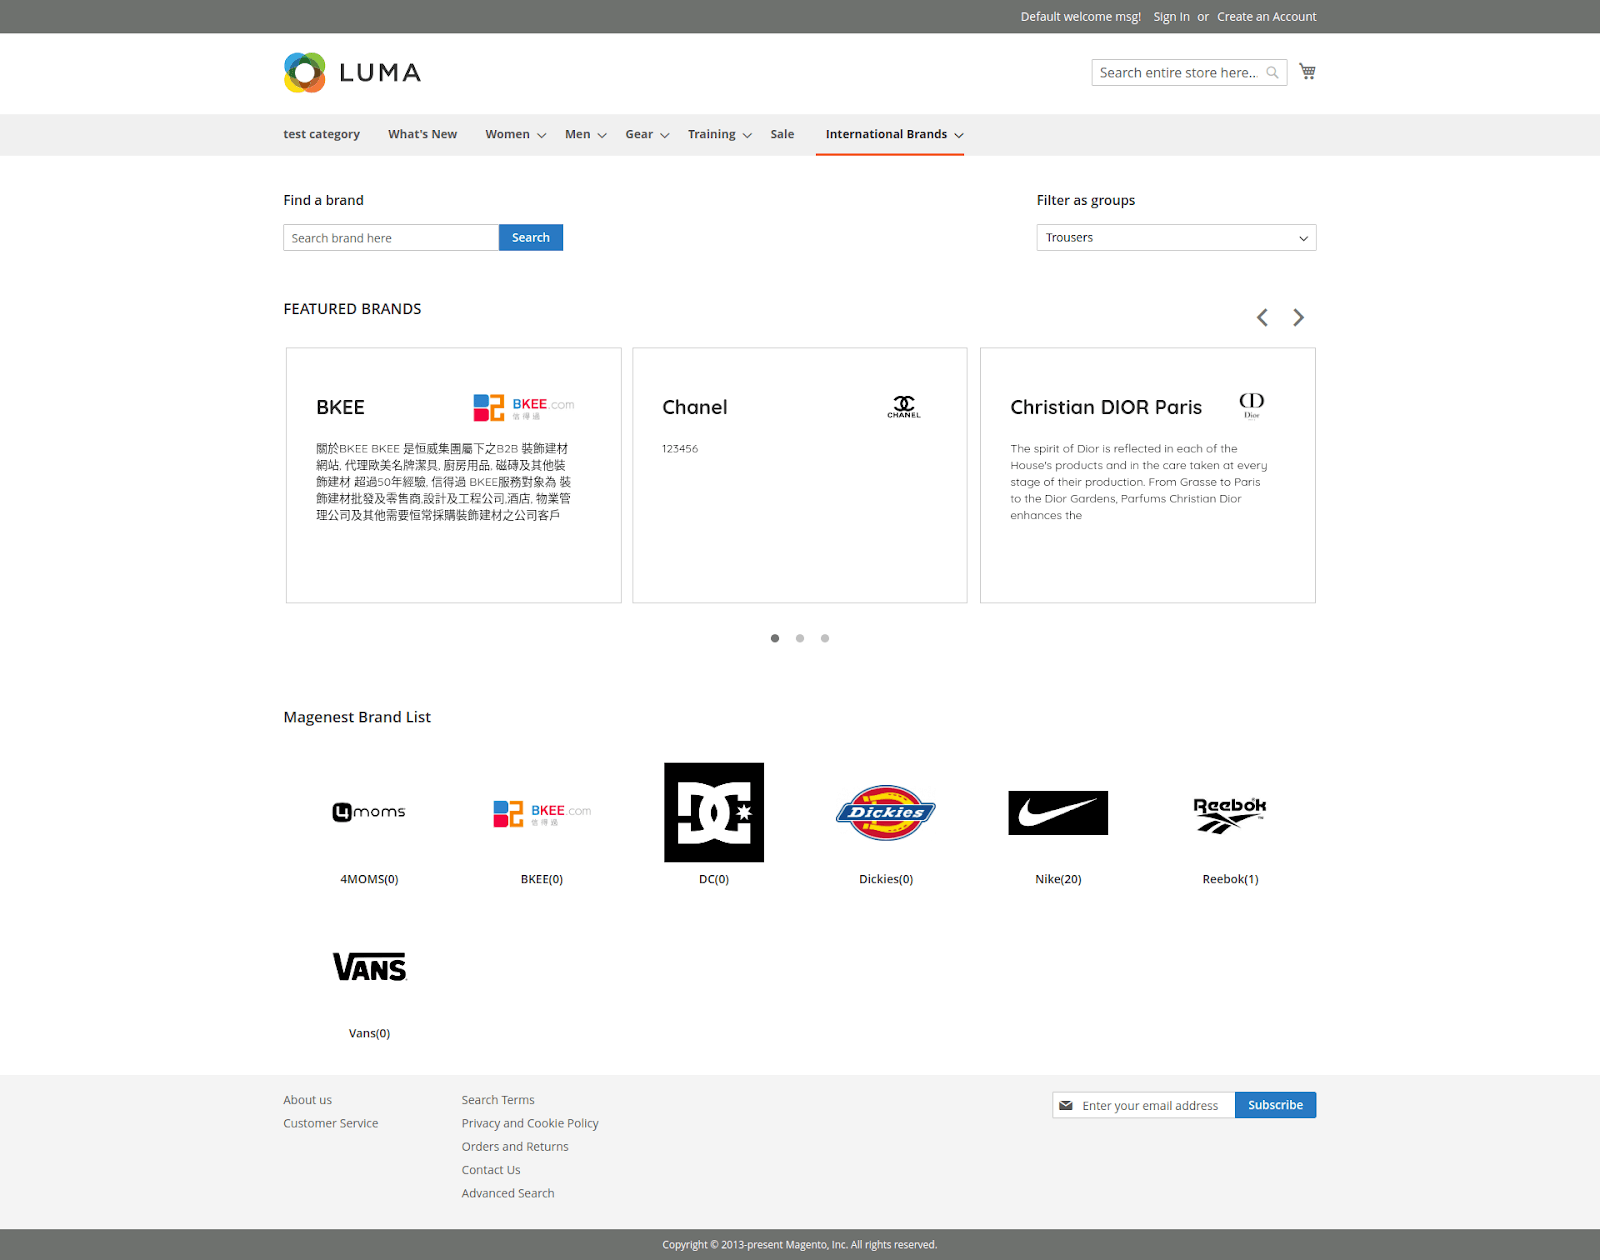
View brands page
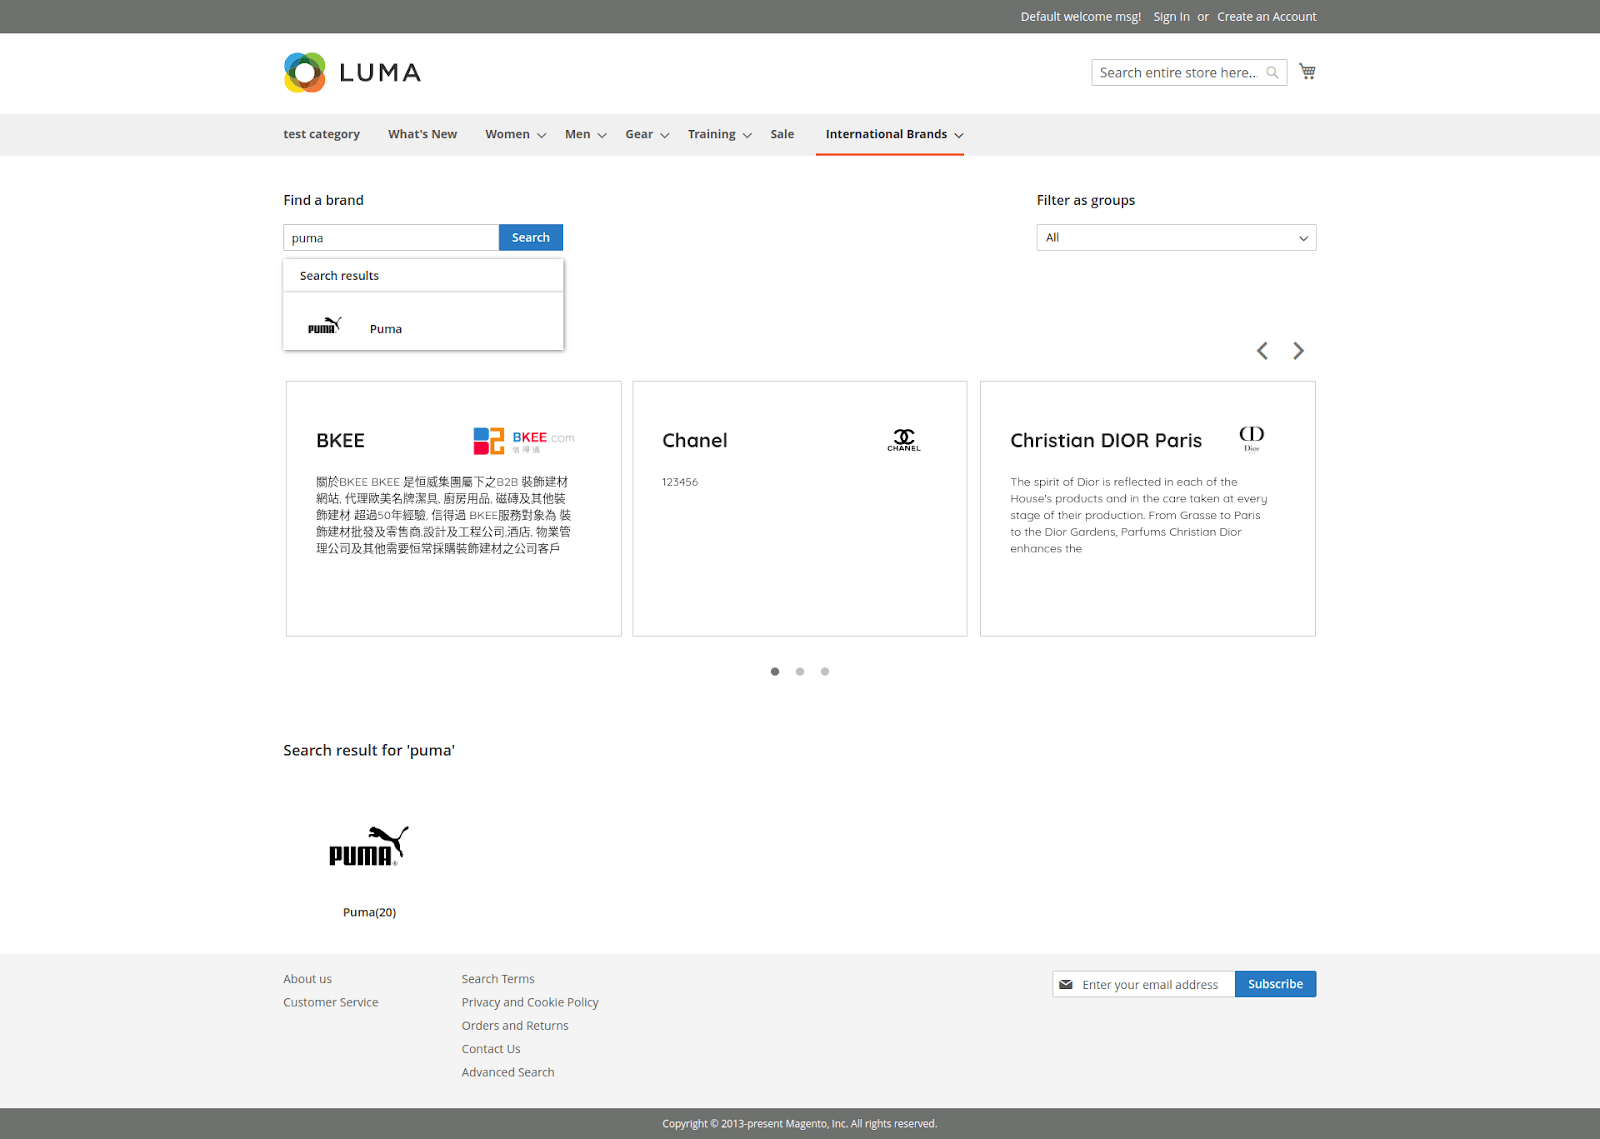
On the store, customer can view a separate page for all available brands.
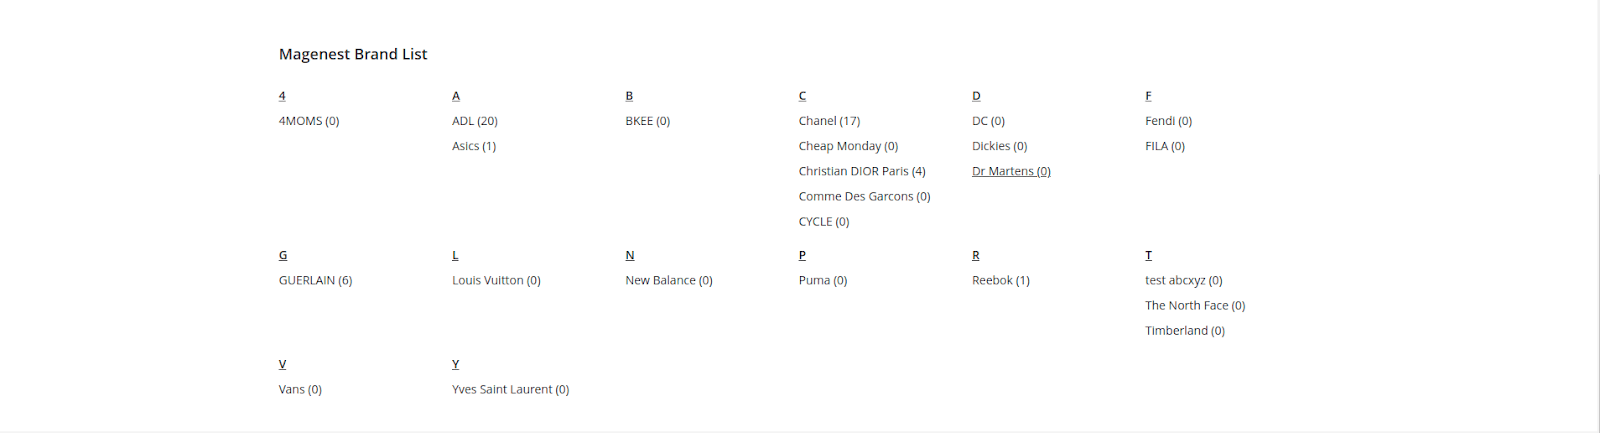
Search for a brand
![]() Search by brand name: Customers enter a brand name on the search bar to find the brand.
Search by brand name: Customers enter a brand name on the search bar to find the brand.
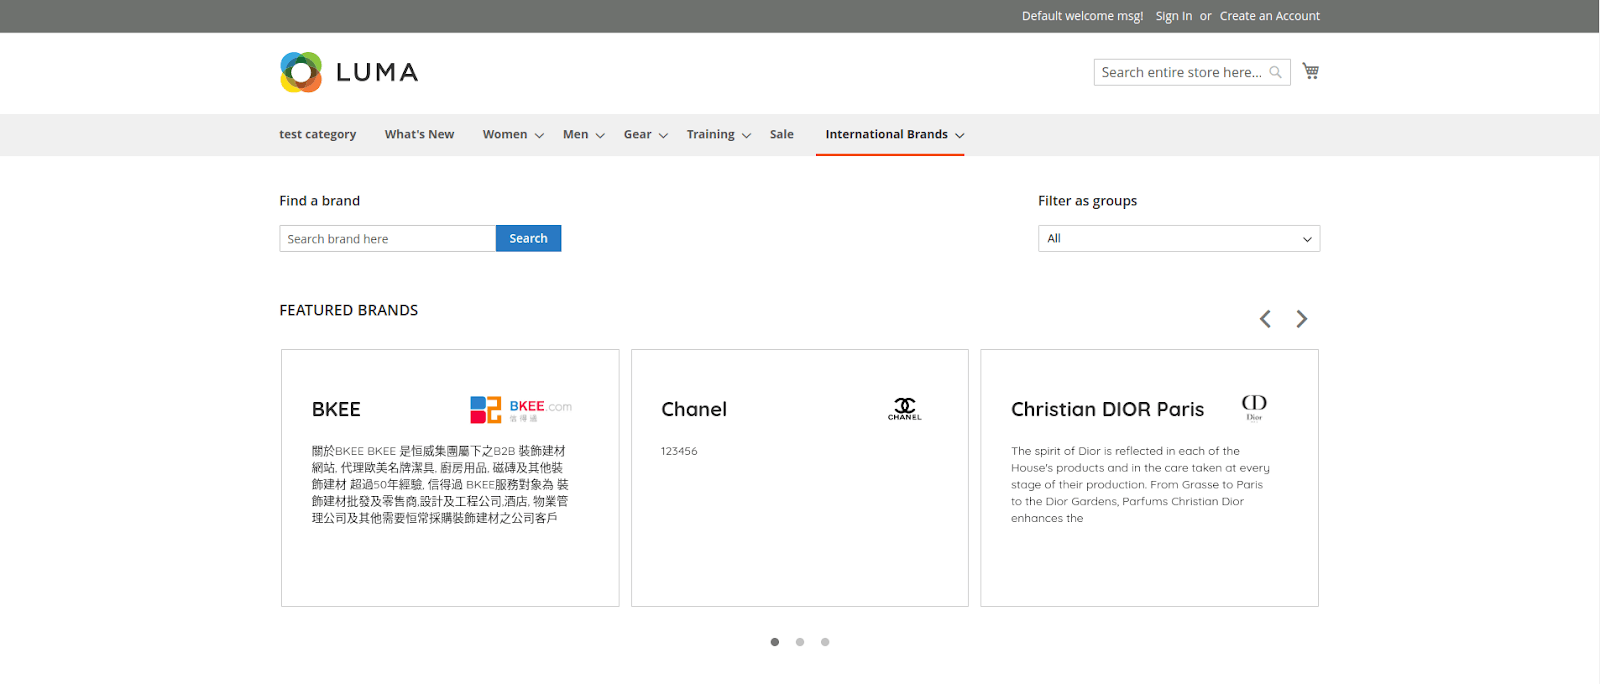
![]() Search by group: Select a group and all the brands on the group will display on the list below.
Search by group: Select a group and all the brands on the group will display on the list below.

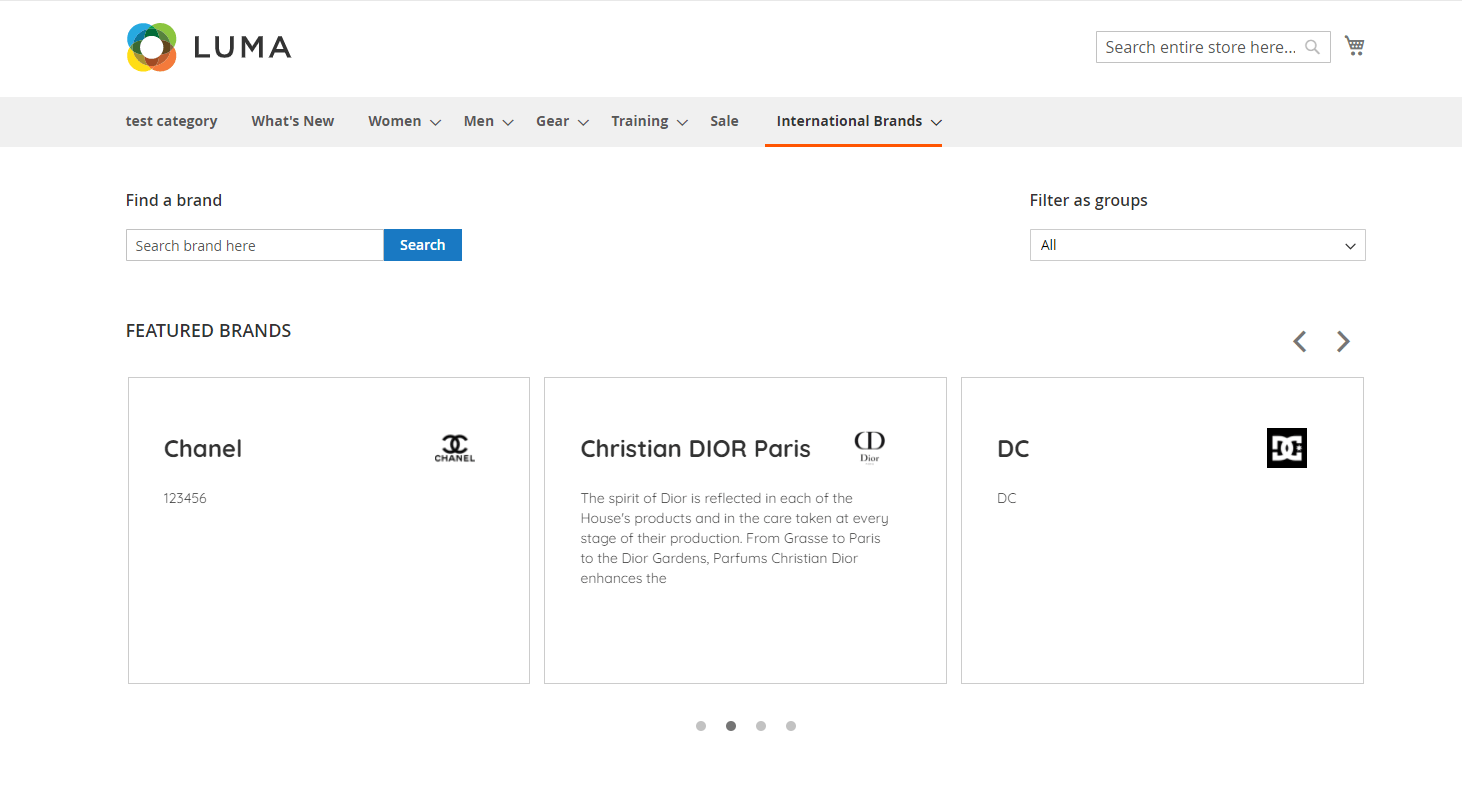
View featured brand list
The featured brands list is displayed on a slider.
View product quantity on each brand
Customers can view the number of products on each brand.
View brand detail page
Customers can click on a brand to view the detail page of it.
View featured product list
Customers can view a list of featured product on the brand page. This list is set by admin from the back-end.

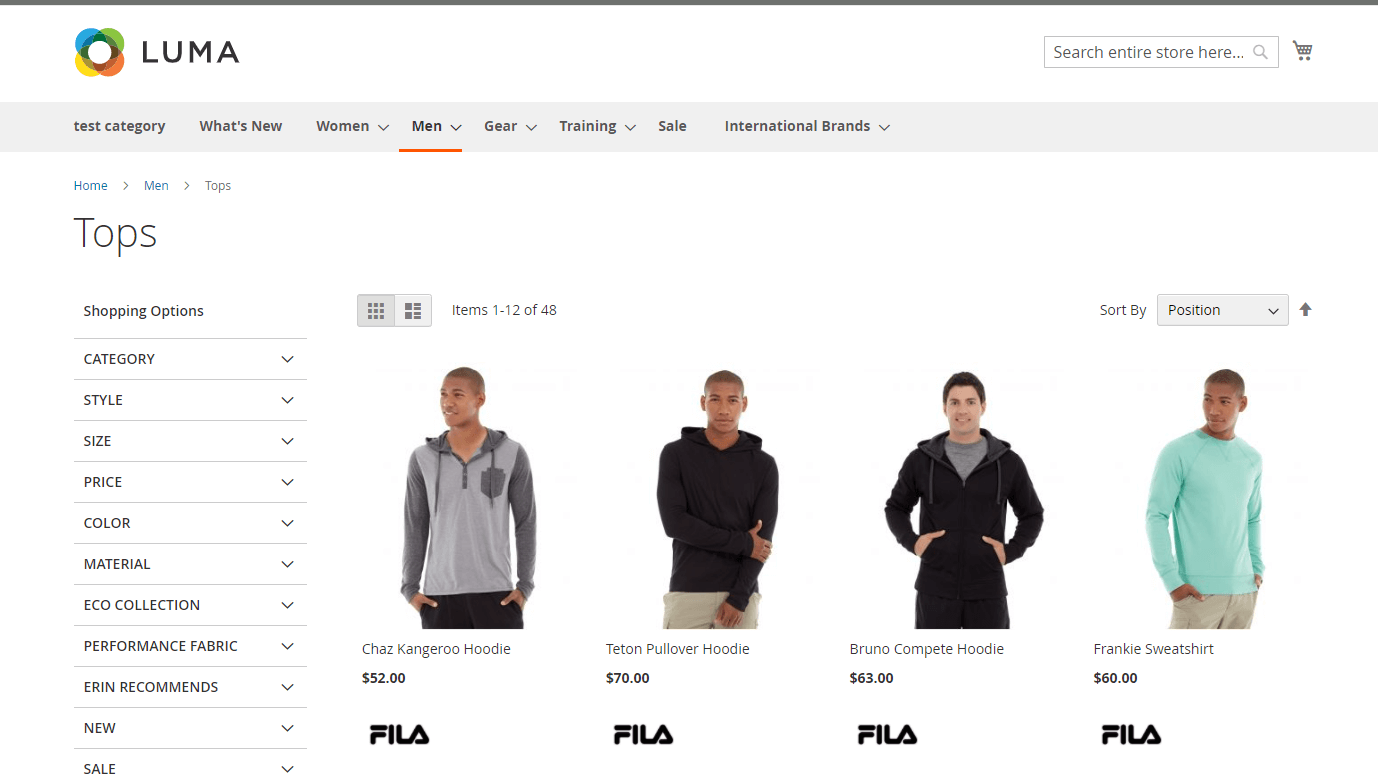
View brand icon and short description on products list
On the product list, the short description will display when customers hover on the brand icon of a product.
View related brand
Customers can view a list of related brands on the brand page.

View brand icon and short description on product detail page
On the product detail page, the short description will display when customers hover on the brand icon.
Update
When a bug fix or new feature is released, we will provide you with the updated package.
- All you need to do is repeating the above installing steps and uploading the package onto your store. The code will automatically override.
- Flush the configure cache. Your store and newly installed module should be working as expected.
Support
- We will reply to support request within 2 business days.
- We will offer lifetime free update and 6 months free support for all of our paid products. Support includes answering questions related to our products, bug/error fixing to make sure our products fit well in your site exactly like our demo.
- Support DOES NOT include other series such as customizing our products, installation and uninstallation service.