Thank you for purchasing our extension. If you have any questions that are beyond the scope of this document, do not hesitate to leave us an email via [email protected]
Created: 04/12/2018 | By: Magenest | Support Portal: http://servicedesk.izysync.com/servicedesk/customer/portal/147
Highlight Features
- Create/Edit one or multiple promo bars.
- Set the promo bar for the mobile view.
- Create/Edit Call-to-Action button for promo bars.
- Display promo bars on any page.
- Design promo bars easily with many options.
- Design button for promo bar.
- Put button to 1 of 3 positions on promo bar.
- Put promo bar to 1 of 4 possible positions on the web page.
- Use the WYSIWYG editor to edit the content of the bar.
- Set up sticky promo bars.
- Duplicate promo bars with ease.
System Requirements
Your store should be running on Magento 2 version 2.1.x.; 2.2.x; 2.3.x
Configuration
Promo Bar extension allows the customer to create the promo bar on the frontend with the call-to-action button, therefore, there are two main parts in the configuration: create a call-to-action button and set up a promo bar.
Create Call-to-Action Buttons
![]() In Magento 2 back end, you will see the Magenest Promo Bars icon on the left menu bar. Go to Magenest Promo Bars > Manage Buttons.
In Magento 2 back end, you will see the Magenest Promo Bars icon on the left menu bar. Go to Magenest Promo Bars > Manage Buttons.
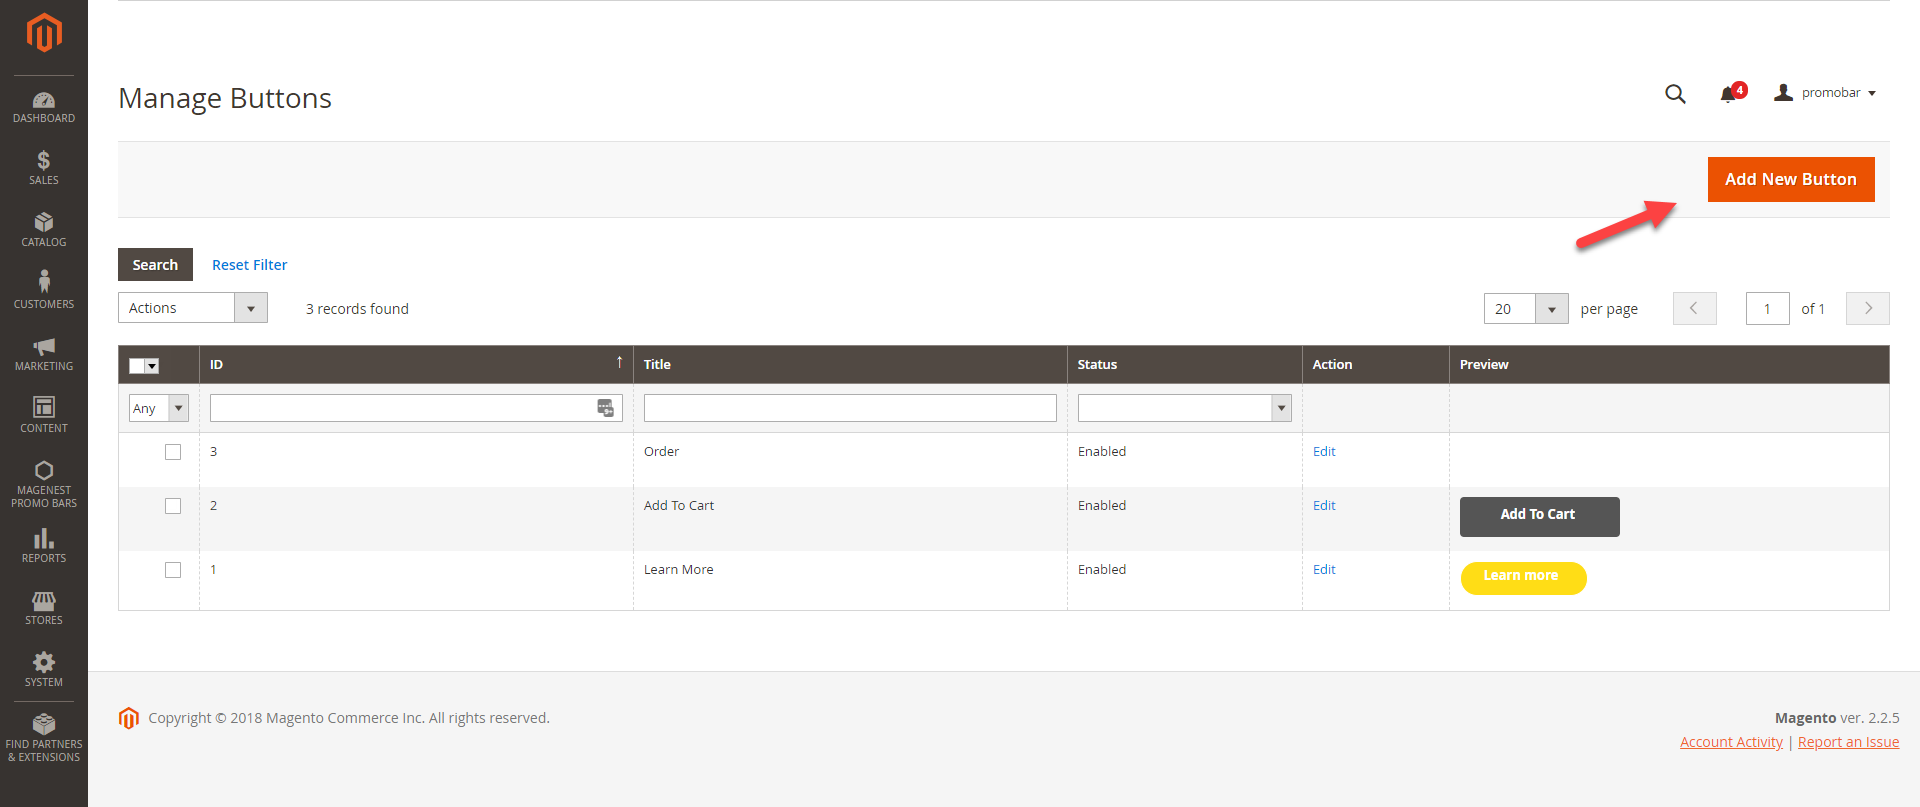
![]() In order to create a Call-to-Action button, click on Add New Button on the top right.
In order to create a Call-to-Action button, click on Add New Button on the top right.
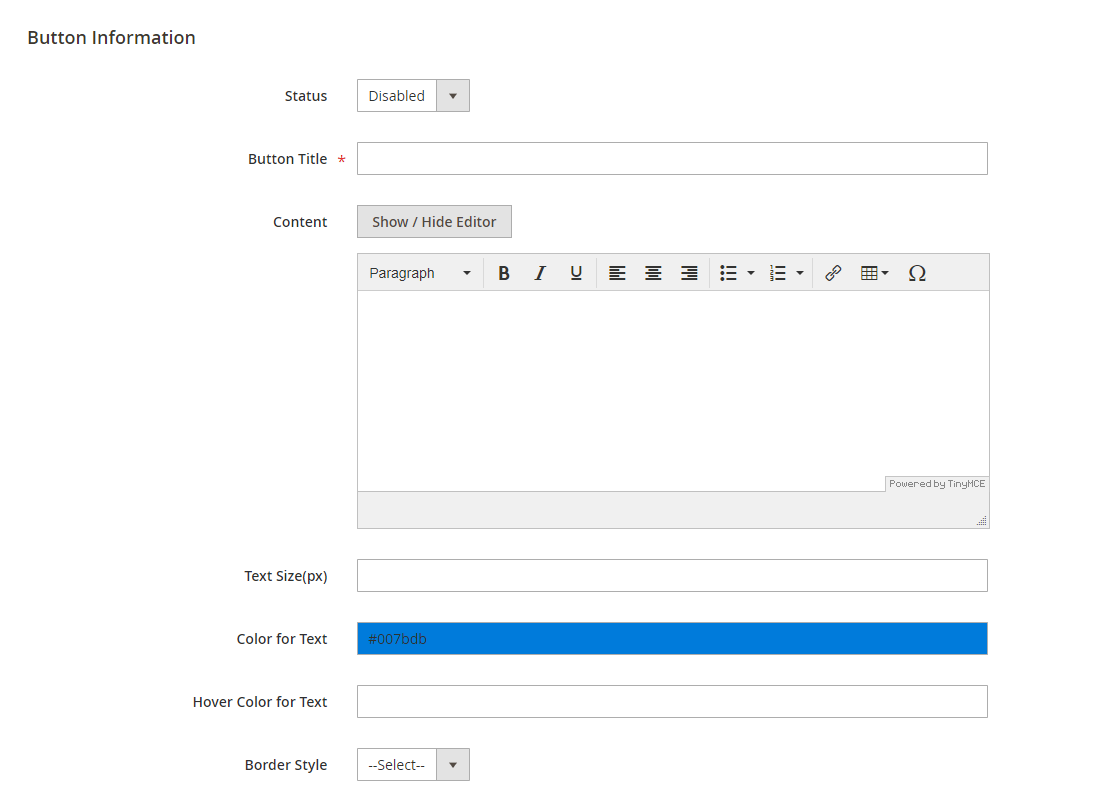
- Status: Select the status for the new button between Enable and Disable.
- Button Title: Enter the title for the button which is shown in the back-end for management.
- Content: Enter the call-to-action phrase for the button which is shown on the frontend. Then use the edit tool style the button title (color, font, size, etc).
- Text Size (px): Set the size for the text. Since the size in the Content field is limited to 36pt, this Text Size field is added for the unlimited font size (px).
In case both font size settings are set up, the value in the Text Size (px) will be taken. - Color for Text: Select the text color in the palette.
- Hover Color for Text: set the color of the text when the button is hovered.
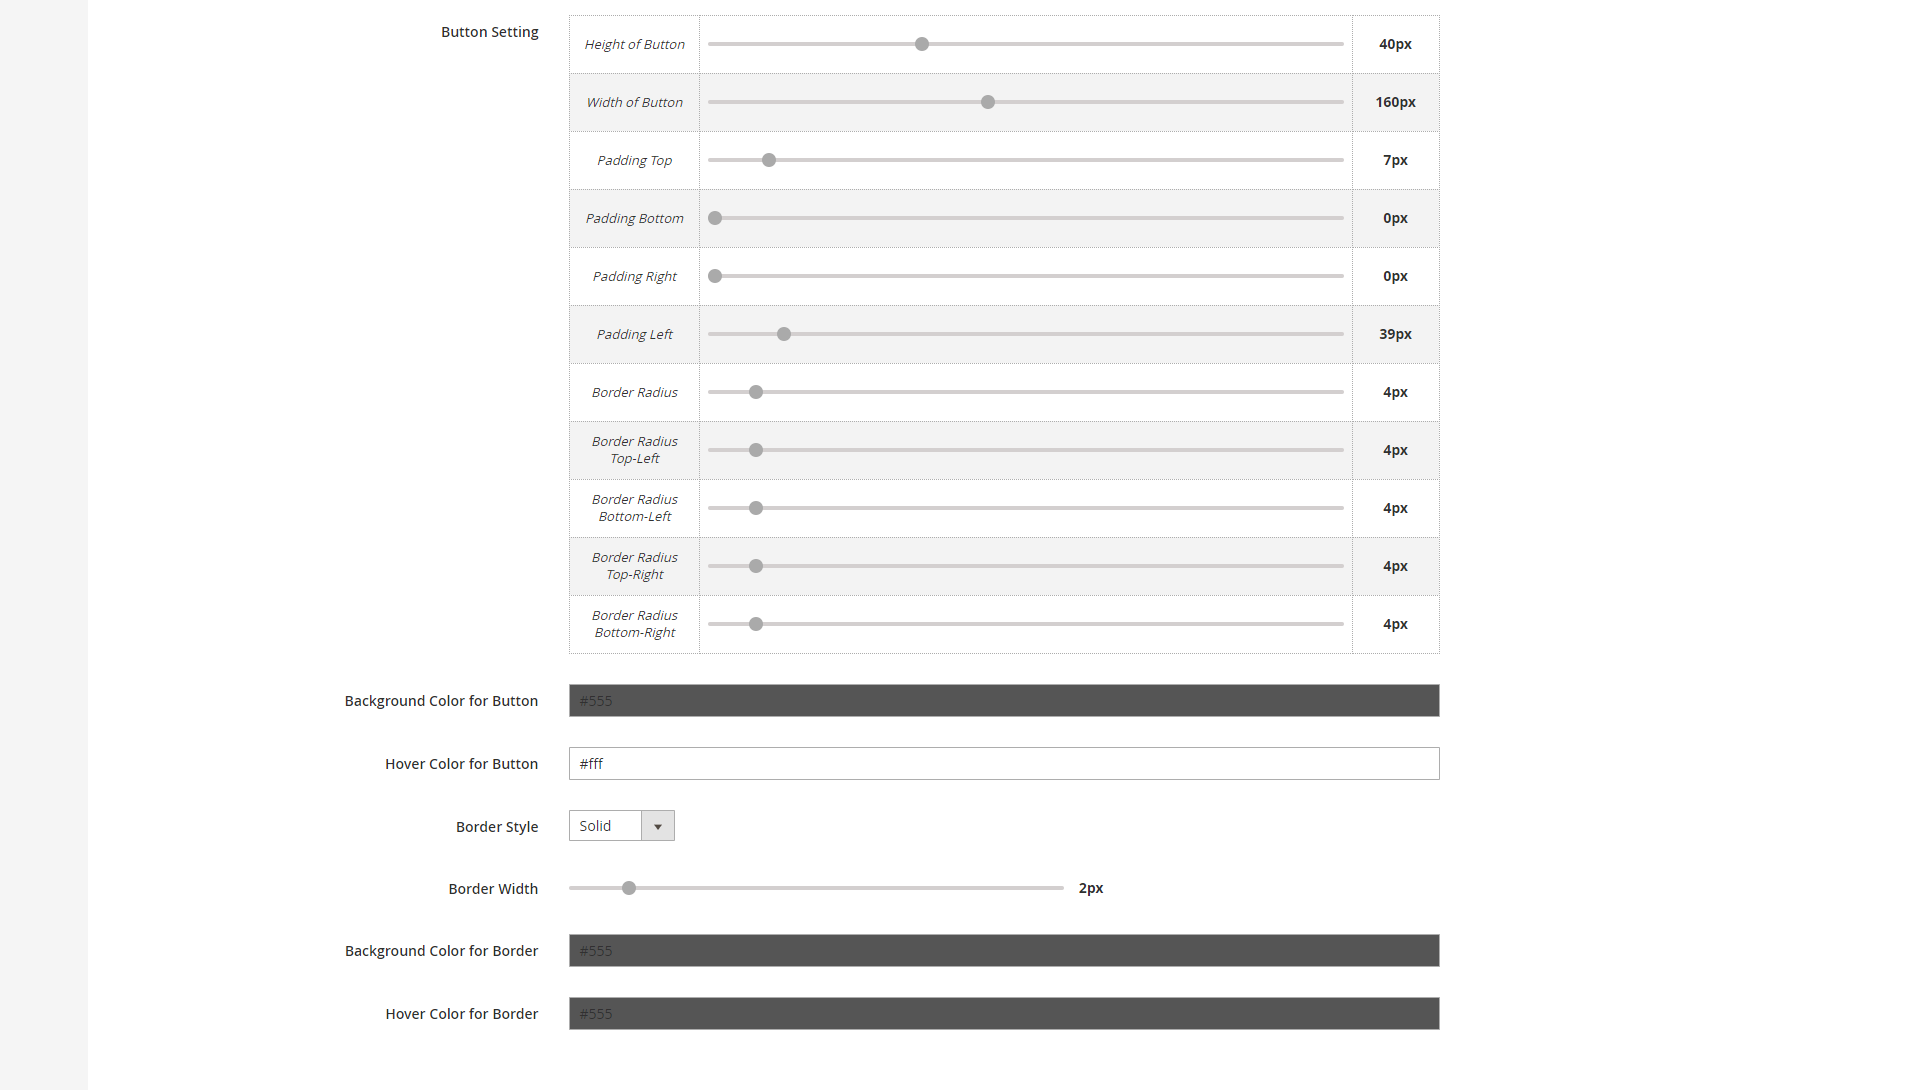
- Button Settings: Adjust each field on the adjustment tool to set the button shape and text alignment.
- Background color for button: Select the background color for the button.
- Hover Color for Button: Set the background color for the button when being hovered.
- Then set for the button border on Border Style, Border Width, Background Color for Border and Hover Color for Border.
- View the layout of the new button after each change on the live preview section then click Save when complete.
Setup a new Promo Bar
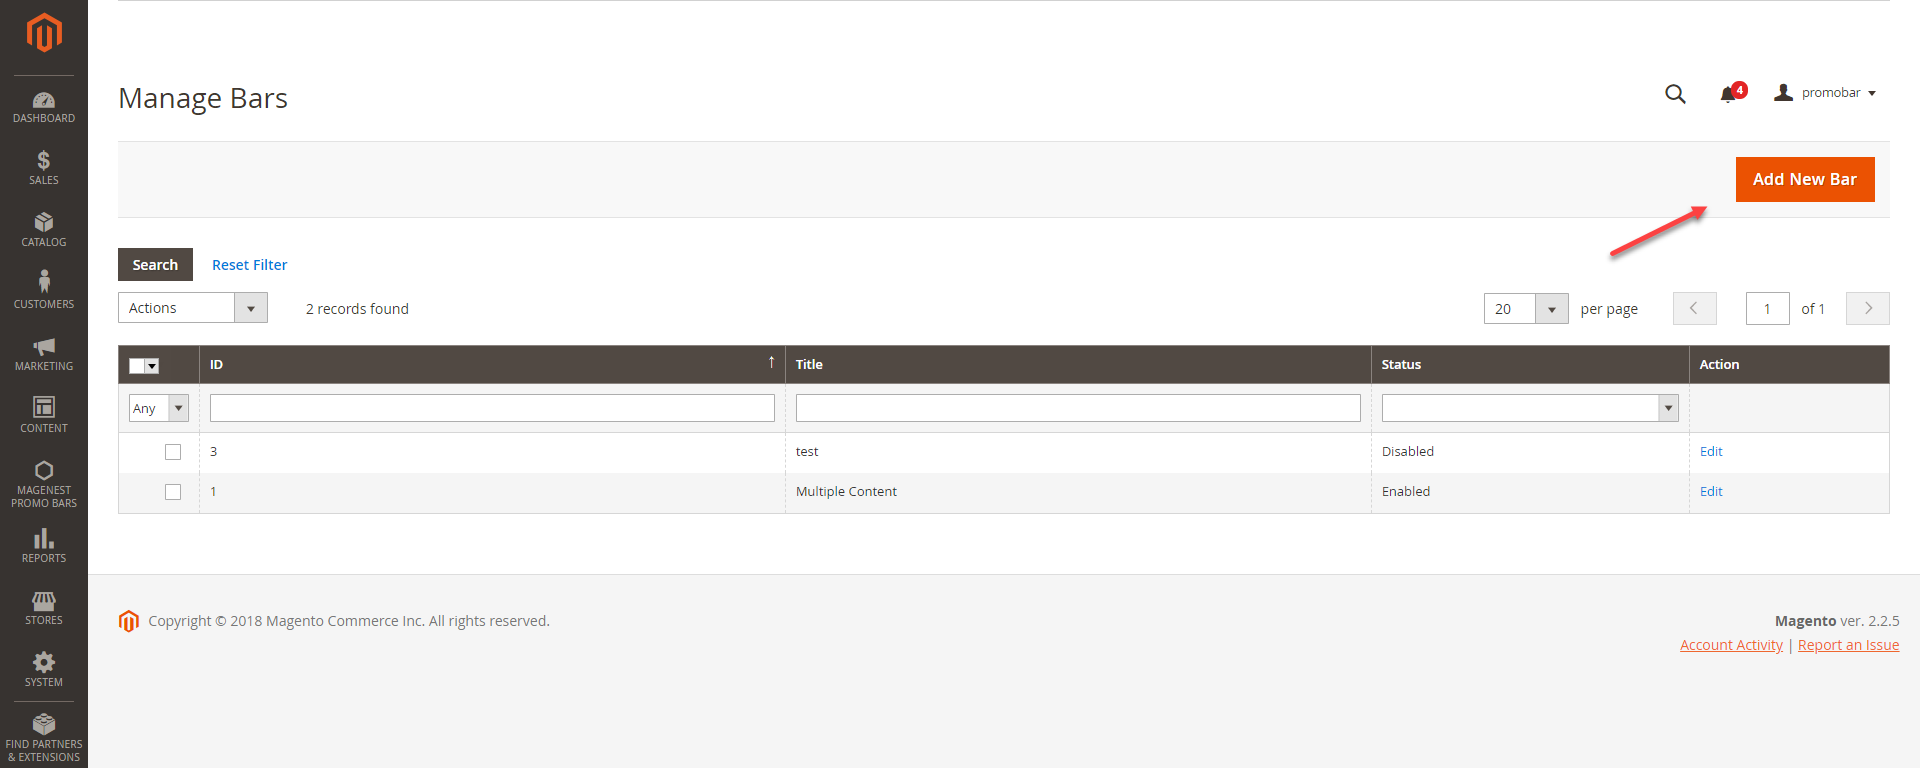
![]() Go to Magenest Promo Bars > Manage Bars. To create a promo bar, click on Add New Bar button. There are three configuration sections.
Go to Magenest Promo Bars > Manage Bars. To create a promo bar, click on Add New Bar button. There are three configuration sections.
- Desktop Bar Setting: set the display for the bar on desktop view.
- Mobile Bar Setting: set the display for the bar on the mobile view.
- Generate Widget: create a widget contains the new bar.
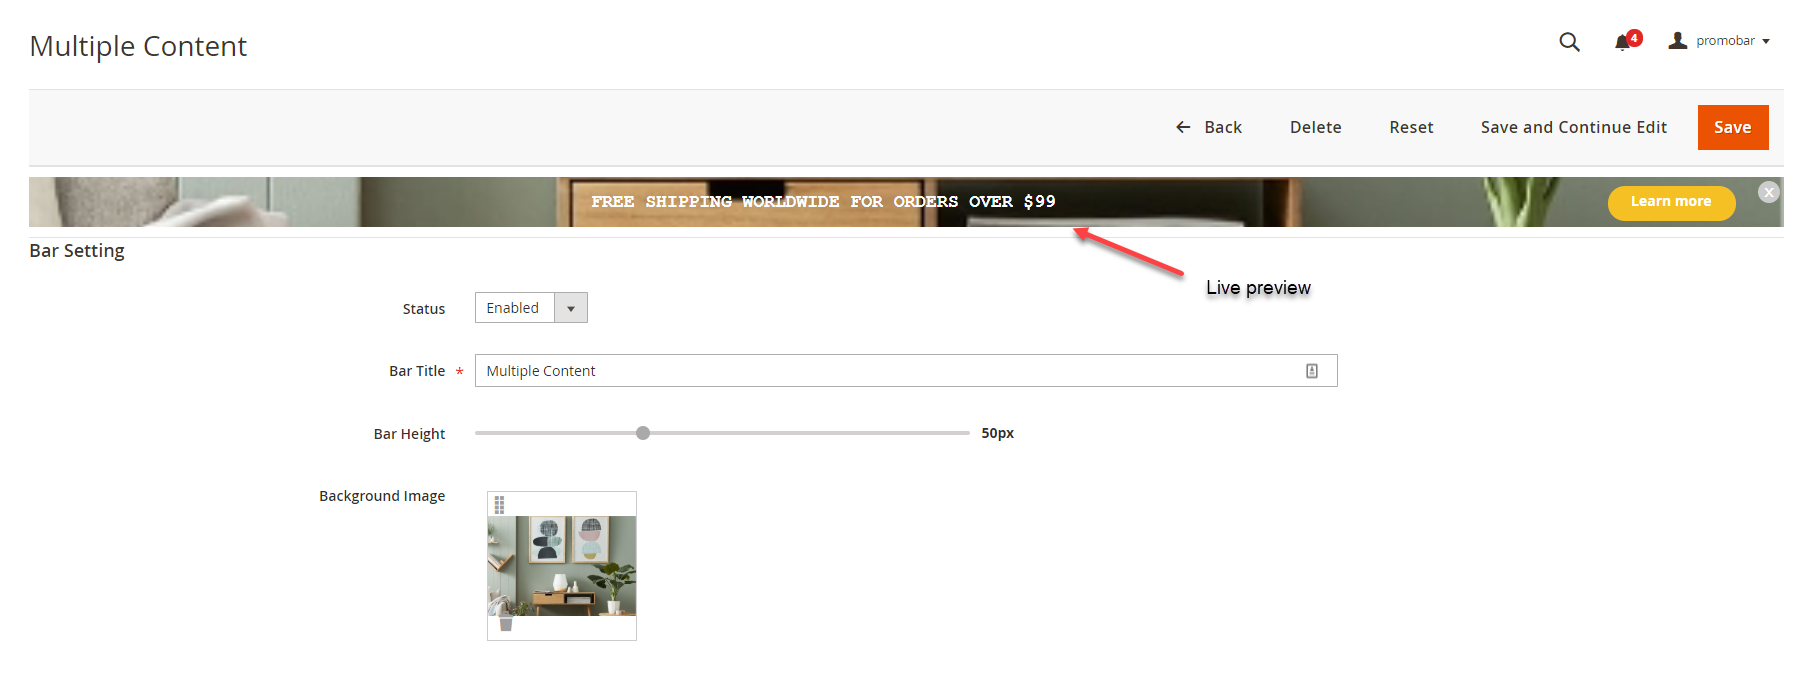
 Desktop Bar Setting
Bar Title: enter the bar name which displays in Magento backend for management purposes.
- Bar Height: Adjust the tool to set the promo bar height (0px - 150px).
- Background Image: Upload the background image for the promo bar. Then use the adjust tool on Background ImageSetting field to set for the background image.
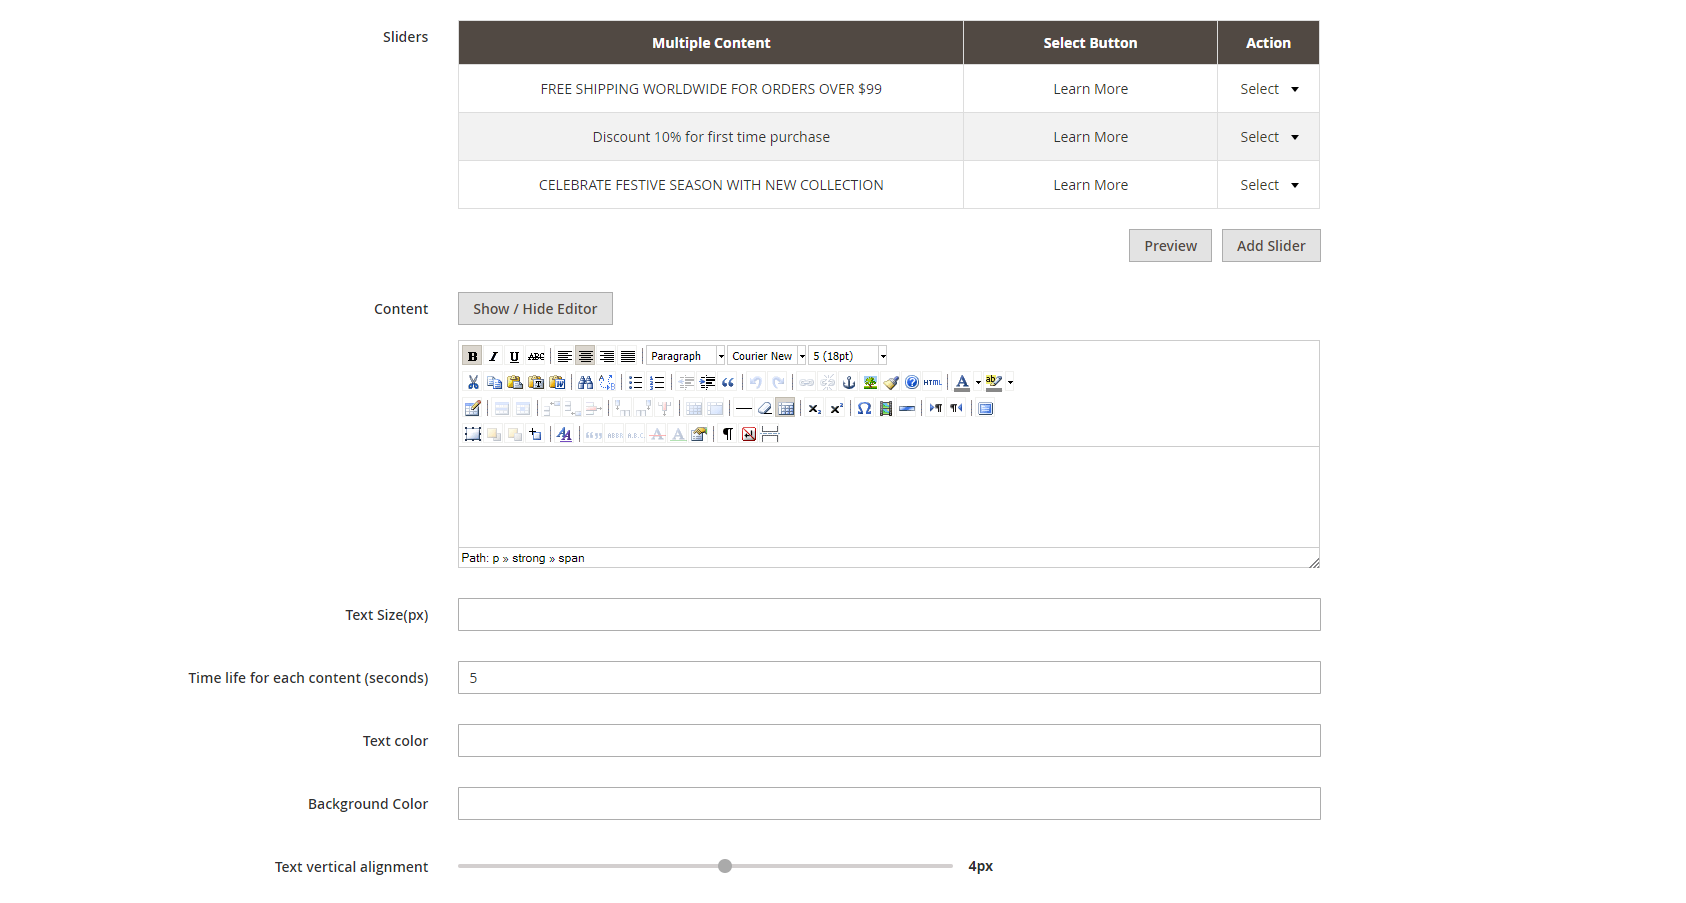
- Sliders: Create the slider for the promo bar. Click on Add Slider button to add more slider.
- Select one slider then click on Edit button under the Action column. Enter and modify the content for the slider on the Content field.
- Text size (px): Enter the size of the slider text.
Since the size in the Content filed is limited to 36pt, the Text Size field is added which allows unlimited font size (px). In case both font size settings are set up, the value in the text size (px) will be taken. - Time life for Each Content (seconds): Set the time to switch the sliders.
- Text Color: Set the text color by choosing in the palette.
- Background Color: The background color of the promo bar. In case you use the background image, this field is unnecessary and vice versa.
- Text Vertical Alignment: The slider content alignment on the promo bar (0px - 50px).
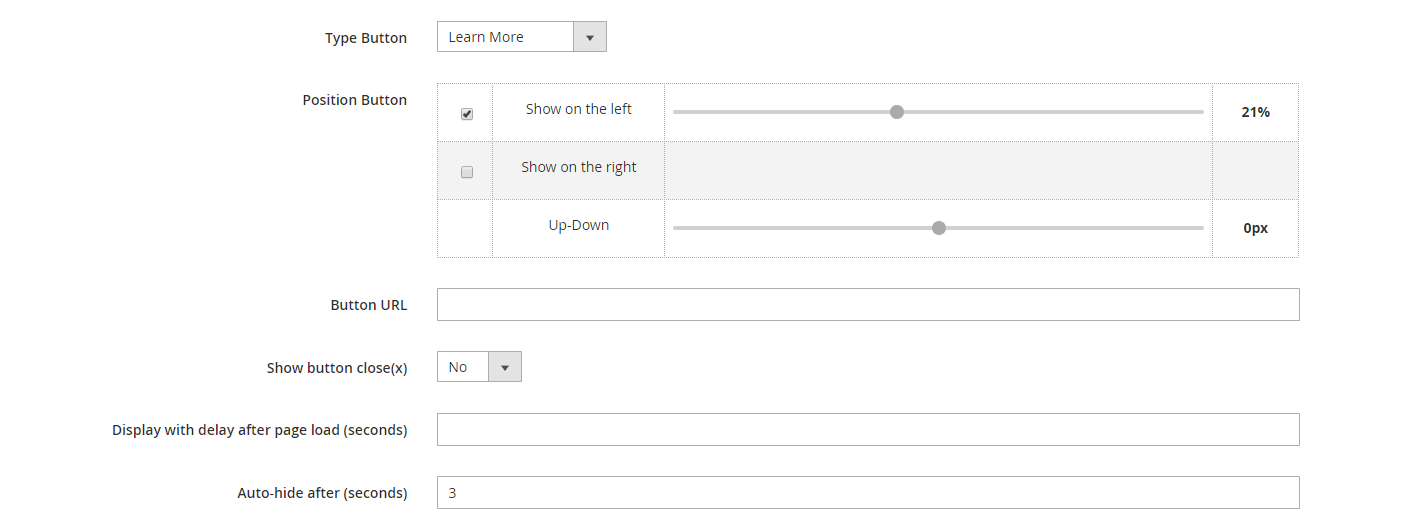
- Type Button: Assign a button on the drop-down list to the promo bar.
- Position Button: Change the button alignment on the bar.
- Button URL: Insert the redirect URL when customers click on the CTA button.
- Show button close: choose Yes to display the icon
 to close the bar.
 - Display with delay after page load (seconds): Set the time to display the promo bar since the page is opened on the browser.
- Auto-hide after (seconds): Set the time to close the bar since the page is opened on the browser.
- Sticky: If choose Yes, the bar will stay at the top of the screen when users scroll down.
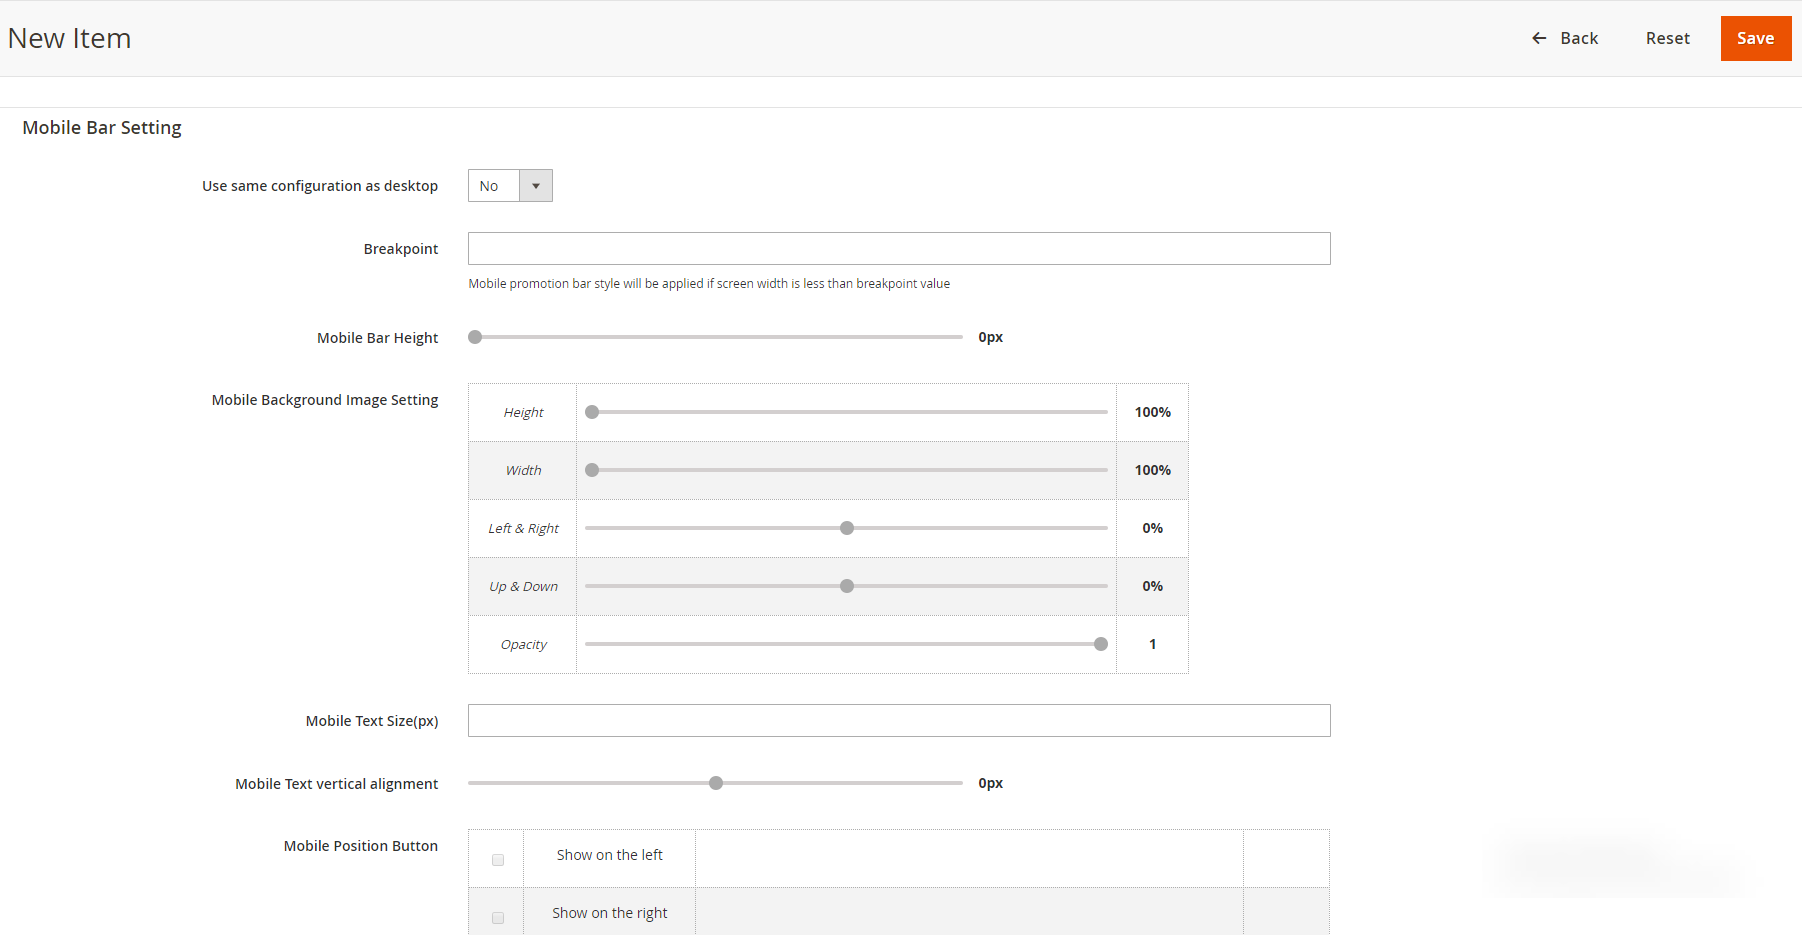
Mobile Bar Setting
This section is the configuration for the promo bar on the mobile view.
- Use same configuration as desktop: Choose Yes if the configuration for mobile is similar to the desktop configuration.
- If choose No, set the configuration for the mobile bar setting with some fields below.
- Breakpoint: set the breakpoint. Mobile promo bar style will be applied if the screen width is less than breakpoint value
Generate Widget
- Design Theme: The current website's theme.
- Assign to Store Views: Choose the store you want to display the promo bar.
- Sort Order: The order of the promo bar with other widget in the same container.
- Page: Choose the specific page you want to display the promo bar or All pages.
- Container: Choose the position on the page where you want to put the promo bar.
- Click on Generate Widget button to create a widget that contains the new promo bar.
![]() Note: We recommended that you should not set 2 promo bars sticky on the same site. It might cause errors.
Note: We recommended that you should not set 2 promo bars sticky on the same site. It might cause errors.

![]() Save the configuration then clear cache in System > Cache Management.
Save the configuration then clear cache in System > Cache Management.
Manage promo bars
Delete bars
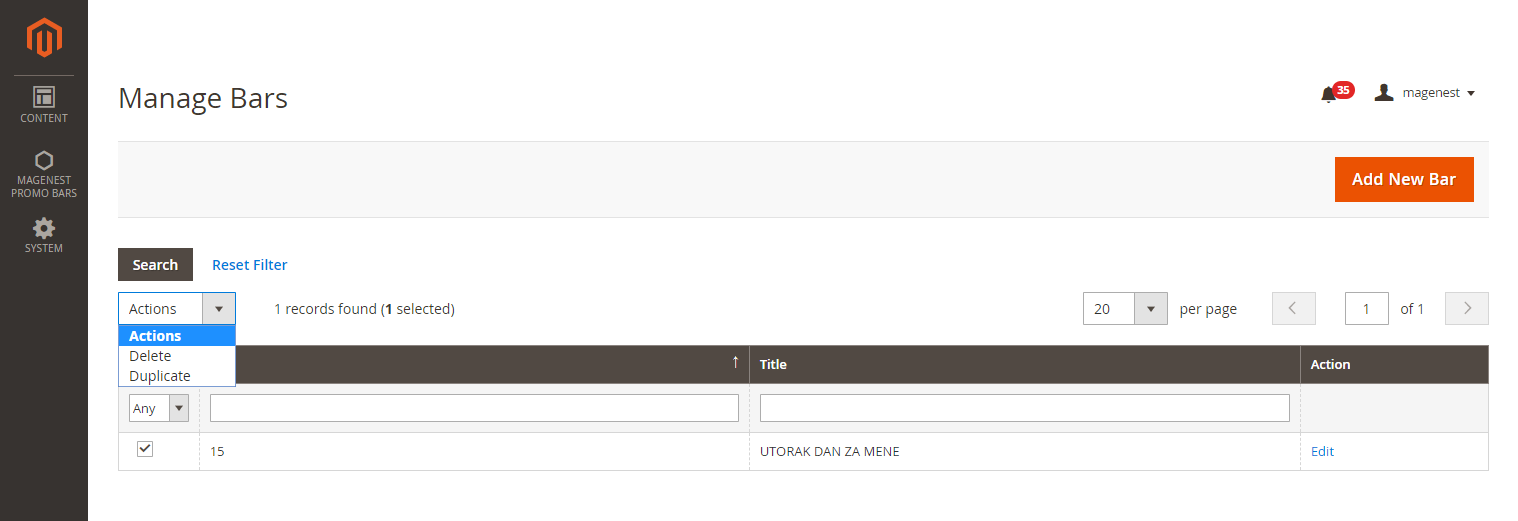
![]() To delete bars, go to Magenest Promo Bars > Manage Bars. On Manage Bars page, select bars to delete on the grid, then select Delete on the mass actions drop-down list.
To delete bars, go to Magenest Promo Bars > Manage Bars. On Manage Bars page, select bars to delete on the grid, then select Delete on the mass actions drop-down list.
Duplicate a bar
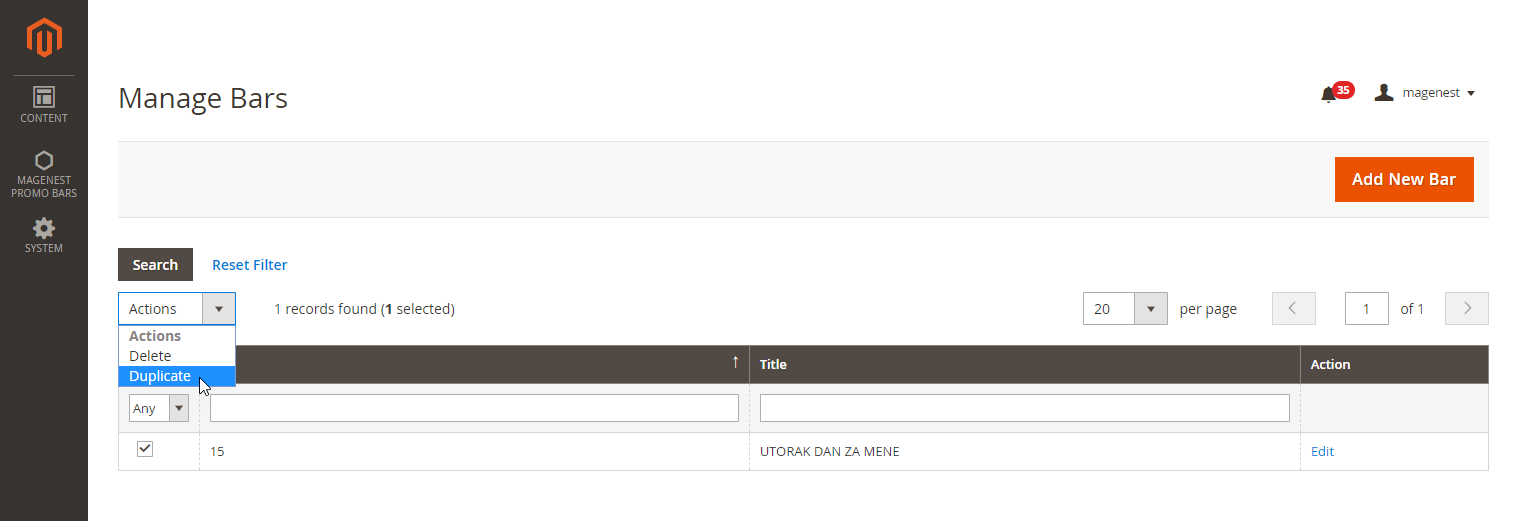
![]() To duplicate a bar, go to Magenest Promo Bars > Manage Bars. On Manage Bars page, select the bar to duplicate on the grid, then select Duplicate on the mass actions drop-down list.
To duplicate a bar, go to Magenest Promo Bars > Manage Bars. On Manage Bars page, select the bar to duplicate on the grid, then select Duplicate on the mass actions drop-down list.
Disable a bar
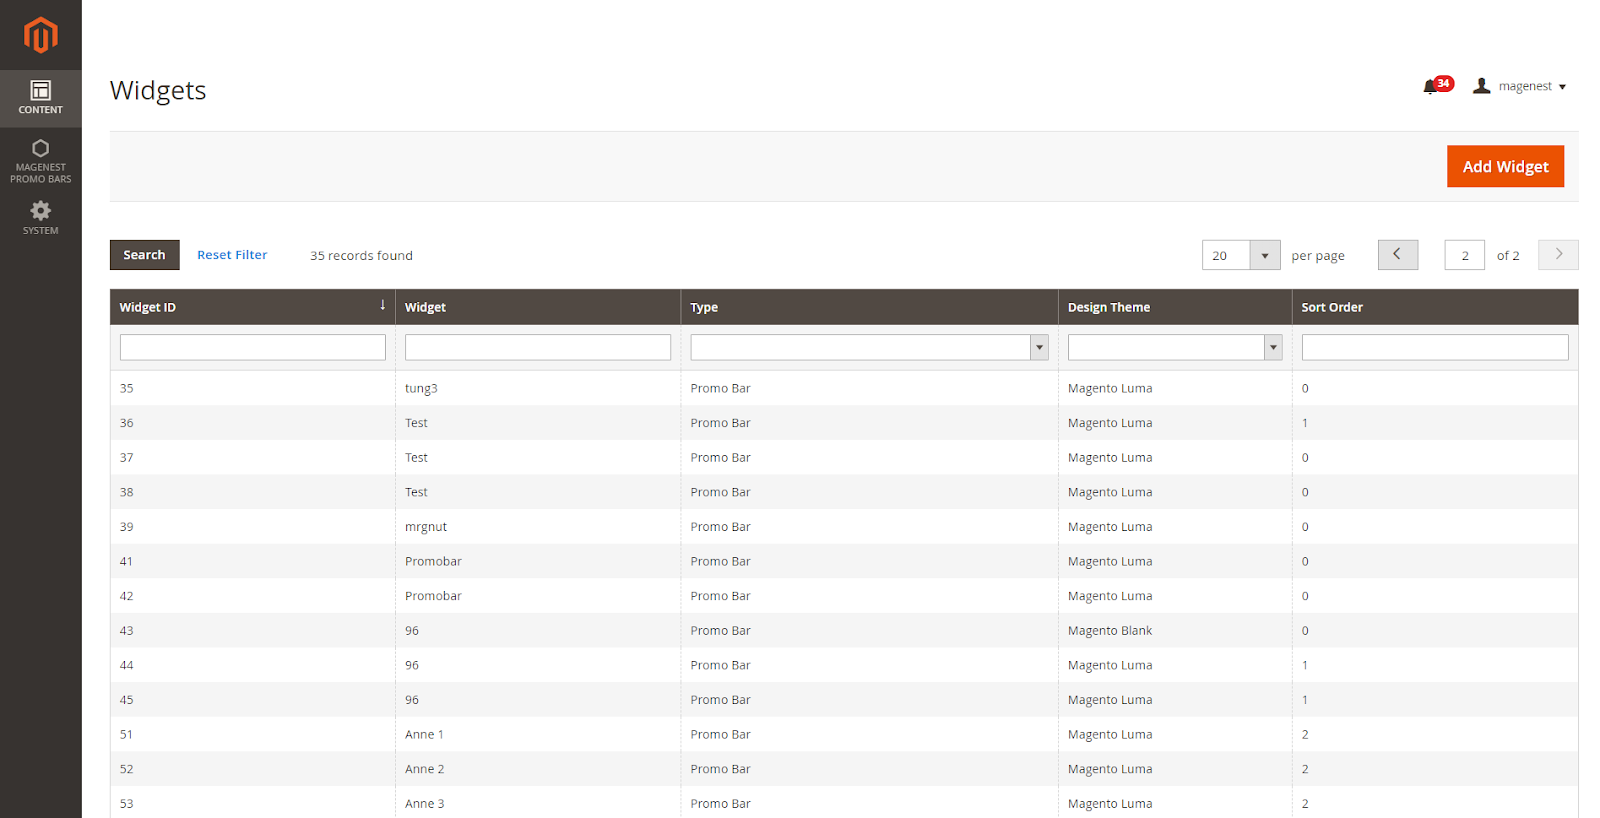
![]() On the admin sidebar, go to Content > Widgets. On the Widgets page, select the widget that contains the promo bar need disabling.
On the admin sidebar, go to Content > Widgets. On the Widgets page, select the widget that contains the promo bar need disabling.

Change promo bar position
![]() On the admin sidebar, go to Content > Widgets. On the Widgets page, select the widget that contains the promo bar need editing.
On the admin sidebar, go to Content > Widgets. On the Widgets page, select the widget that contains the promo bar need editing.
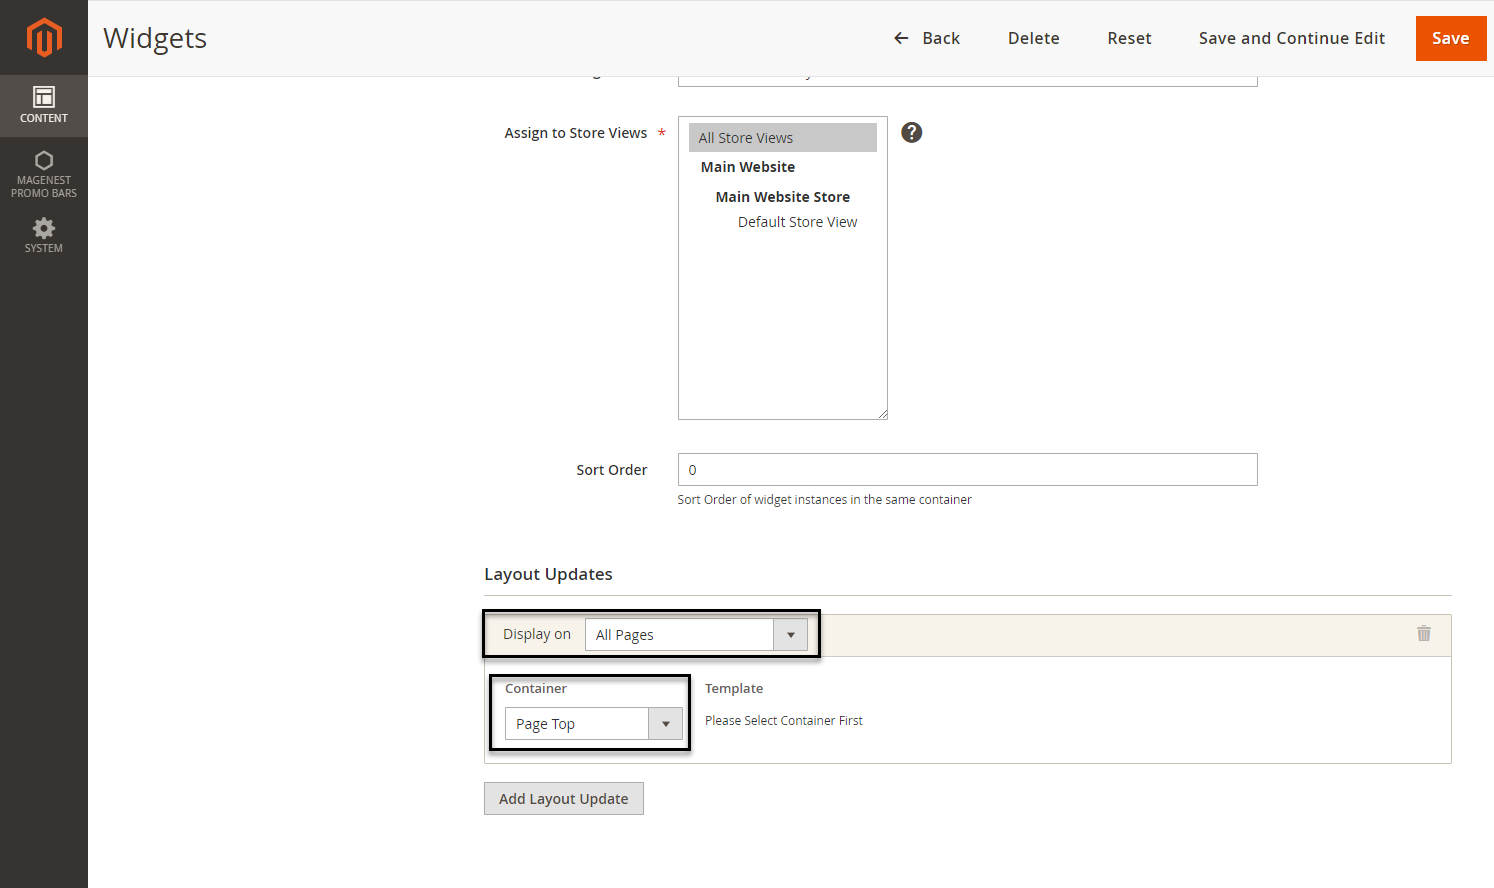
In order to change a promo bar position, on the Widgets Management Page, scroll down to see the Layout Updates section.
- Display On: on the drop-down list, select All pages or a specific page to display the promo bar.
- Container: Select the position of the promo bar on the drop-down list.
Update
- When a new update is available, we will provide you with a new package containing our updated extension.
- You will have to delete the module directory and repeat the installing steps above.
- Flush the config cache. Your store and newly installed module should be working as expected.
Support
- We will reply to support requests within 2 business days.
- We will offer lifetime free update and 6 months free support for all of our paid products. Support includes answering questions related to our products, bug/error fixing to make sure our products fit well in your site exactly like our demo.
- Support DOES NOT include other series such as customizing our products, installation and uninstallation service.
Once again, thank you for purchasing our extension. If you have any questions relating to this extension, please do not hesitate to contact us for support.