Thank you for purchasing our extension. If you have any questions that are beyond the scope of this document, do not hesitate to leave us an email via [email protected].
Updated: February 15th, 2020 | By: Magenest | Support Portal: http://servicedesk.izysync.com/servicedesk/customer/portal/41
Introduction
![]()
Store Locator for Magento 2 helps merchants guide online customers to physical stores easily via Google Maps integration. In this way, customers are allowed to find the right direction to the nearest store with multiple options (distance, payment methods, parking availability, etc.)
Highlight Features
1. For admin
Set locations by directly clicking on the Map in the setting.
Manually specify locations using Latitude/Longitude and apply them to the Map.
Set the default zoom level on the map.
Enable/disable the store(s).
Set to display stores list tab on menu bar.
Add description images for the stores.
Set opening and closing time for all or each store by each day of the week.
Set day-off for the stores.
Set available products for store in store setting.
Set stores list for each product in product configuration.
Set color for the stores list on the front-end.
Add special dates for a store with promotion information.
Configure the SEO for each store.
Add new attribute to a store: parking, ATM, new arrivals, payment methods, brands.
Create holidays and brands, assign them to the stores.
Import / Export the stores list.
2. For customers
Customers can search for a store by location or filters.
Auto zoom to show all locations in the region.
Advanced direction from customer's spot to the store.
Google Street view 360.
Search locations by distance.
Search locations by area (country, city and zip code).
Distance can be shown by radius (Km or Miles).
Show store list in product detail pages.
User friendly interface.
Display image slider on store detail page.
Show pin point on the map when clicking on store name in store list.
Store pin point will show store info when clicked.
System Requirements
Your store should be running on Magento 2 CE version 2.2.x, 2.3.x or Magento 2 EE version 2.2.x, 2.3.x.
General Configuration
On the admin sidebar, go to Magenest Map List > Settings > Configuration.
On the Configuration page
![]() General
General
- Show "Store" in Menu: Choose Yes to display Store tab on the main menu bar.
- Display a list of stores having the products in Product Detail page: choose Yes to show list of stores on the product detail page. In the list, online customer can view the store that the product is available.
- Background Color: set the background for the store list section on the front-end.
![]() Map configuration
Map configuration
- Google Maps API: Enter your Google API.
 Note: Google has the API limit, learn more here.
 - Unit System: The radius unit - kilometers or miles.
- Default Country: Select the default country of the store range.
- Default Zoom: Select the default zoom level.
- Preferred Travel: The direction will be shown based on this default travelling mode (driving, walking, bicycling, transit).
- Google Maps API: Enter your Google API.

![]() Default Opening Hours for All Stores
Default Opening Hours for All Stores
Set the opening time for each day in a week. Leave blank on a day to set day off.

![]() After finishing the configuration, click on Save Configure button.
After finishing the configuration, click on Save Configure button.
Create Store Attribute
Add holidays
![]() On the admin sidebar, go to Magenest Map List > Attributes > Holiday. On Manage Holiday page, admin can edit/delete the available holidays in the grid. To create a new one, click on Add New Holiday button. On the New Holiday page:
On the admin sidebar, go to Magenest Map List > Attributes > Holiday. On Manage Holiday page, admin can edit/delete the available holidays in the grid. To create a new one, click on Add New Holiday button. On the New Holiday page:
Holiday Settings
- Name: Enter the holiday name.
- Status: Enable the holiday.
- Set the first and last day of the holiday on Date and Holiday Date To fields.

Add Store
On the stores list grid, select the stores that the holiday is applied to.

![]() After finishing the configuration for the holiday, click Save button.
After finishing the configuration for the holiday, click Save button.
Add brands
![]() On the admin sidebar, go to Magenest Map List > Attributes > Brands. On Manage Brand page, admin can edit/delete the available brands in the grid. To create a new one, click on Add New Brand button. On the New Brand page:
On the admin sidebar, go to Magenest Map List > Attributes > Brands. On Manage Brand page, admin can edit/delete the available brands in the grid. To create a new one, click on Add New Brand button. On the New Brand page:
- Name: Set the brand name.
- Status: Enable the brand.
- Brand Logo: Upload logo image for the brand.
- Brand Description: Enter the brand description.

Add New Store
On the admin sidebar, go to Magenest Map List > Stores > All Stores, on the Stores page, admin can manage the available stores or add a new one. To add a new store, click on Add New Store, go to New Store page.
Store Settings
![]() Status: Enable/Disable the new store.
Status: Enable/Disable the new store.
![]() Store Name: Enter a name for the new store.
Store Name: Enter a name for the new store.
![]() Short Description: Fill with a short description, which will be shown after customers click on the pin point on the map.
Short Description: Fill with a short description, which will be shown after customers click on the pin point on the map.
![]() Description: Enter a detail description on the store-view page.
Description: Enter a detail description on the store-view page.
![]() Enter the store address on State/Province, City, Zip, Address fields.
Enter the store address on State/Province, City, Zip, Address fields.
![]() Add further information for the store on Website, Email, Phone Number fields.
Add further information for the store on Website, Email, Phone Number fields.
![]() Map: Use Ctrl + scroll and mark the store address on the map, then the Latitude and Longitude fields will be auto filled.
Map: Use Ctrl + scroll and mark the store address on the map, then the Latitude and Longitude fields will be auto filled.
![]() Store Icon: Upload store icon to identify the store on stores list.
Store Icon: Upload store icon to identify the store on stores list.
![]() Assign to Store Views: Select store views to show the store information.
Assign to Store Views: Select store views to show the store information.

Add Product
On the product list grid, select products that are available in the new store.

Opening Hours
![]() Set the working hours for the store. To set a day as day-off, leave the field blank.
Set the working hours for the store. To set a day as day-off, leave the field blank.
![]() Follow the hour format instruction in the configure to set the hour.
Follow the hour format instruction in the configure to set the hour.
![]() Clicking on Use Default Hours to set the hour as in Default Opening Hours for all Stores field in general configuration.
Clicking on Use Default Hours to set the hour as in Default Opening Hours for all Stores field in general configuration.

Special Date
You can add the special dates and promotions to the store information.
- Date: Choose a date from the date picker.
- Description: enter the promotion name.

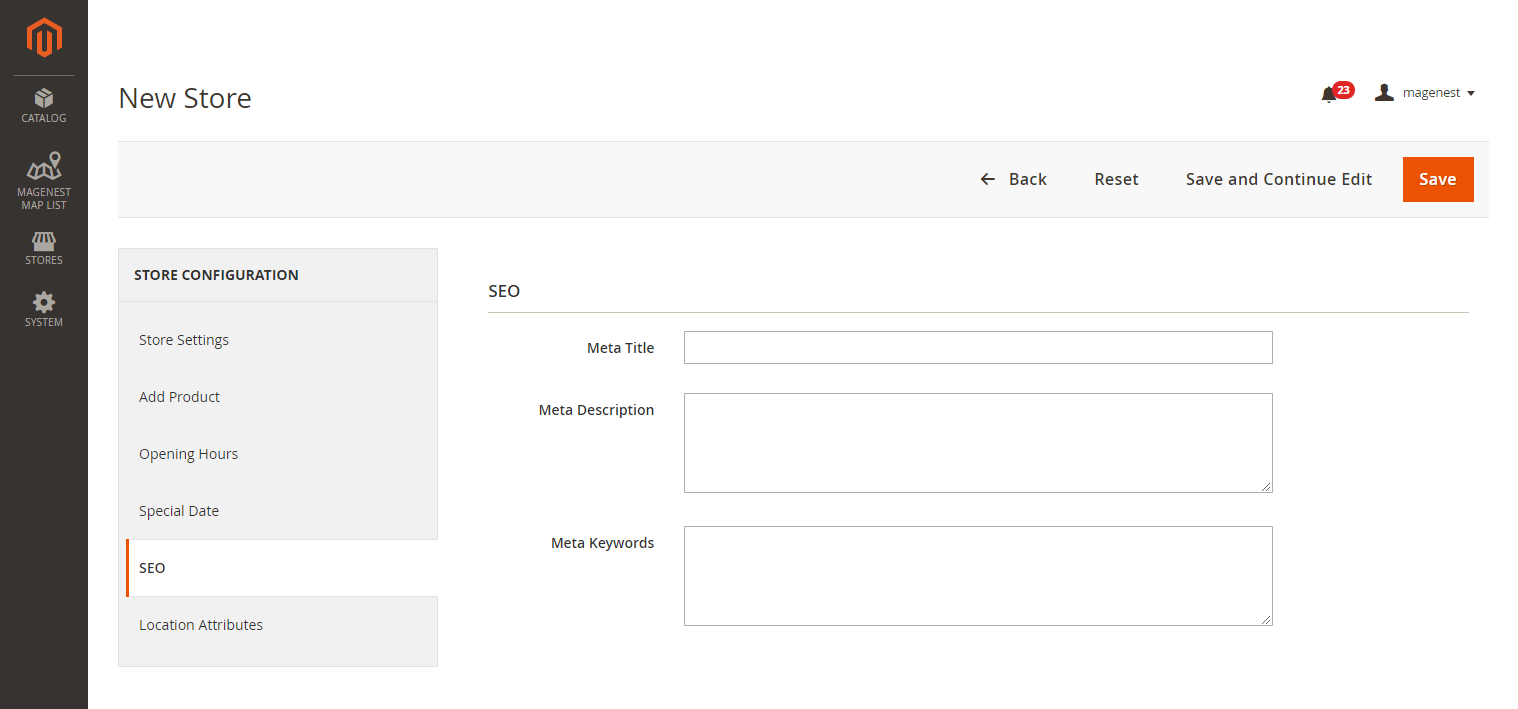
SEO
Set SEO configure for marketing purposes. Enter Meta Title, Meta Description and Meta Keywords.
Location Attributes
Configure attributes for the new store so that customers can check if the store's facilities meet their needs.
- Parking: Choose Yes or No.
- ATM: Choose Yes or No.
- New Arrivals: Select a date that the new items are available at the store.
- Payment Methods: Select the payment methods which are served on the store.
- Brands: Select the brands of the items in store.

After finish all the above configuration, click Save button.
Add stores in product settings
When creating or editing a product, admin can assign the product to some stores on the product configuration page.

Store-front Functions
Find a store
On the store front, customers can find a store and view it on the map.
![]() Click on Stores tab on the main menu.
Click on Stores tab on the main menu.
![]() On the stores page, click on the necessary attribute (Parking, ATM), select radius, payment method, brands then click on Filter button. A list of expected stores will display below the search box.
On the stores page, click on the necessary attribute (Parking, ATM), select radius, payment method, brands then click on Filter button. A list of expected stores will display below the search box.
![]() The color of stores list section can be changes by admin.
The color of stores list section can be changes by admin.

Quick view of the store on the map
![]() To have a quick view to a store on the list, click on the store name, then the quick-view section will display above the pin point. Customer can view the store address, short description and working hours.
To have a quick view to a store on the list, click on the store name, then the quick-view section will display above the pin point. Customer can view the store address, short description and working hours.

Get direction to a store
Customers can get direction from their location to the store they want to visit. There are three vehicle options for the direction: car, motorbike and bus. In case there is no road map for the bus on the direction, it will convert to the direction for walking.

Direction with street view

Store detail page
On the store detail page, customers can view all information about the store such as store name, address, website, email, telephone, opening hours, special dates, images and available attributes (parking, ATM, new arrivals, brands, payment method).

View list of stores on product page
On the product detail page, customer can view a list of stores that the product is available in.

Update
- When a new update is available, we will provide you with a new package containing our updated extension.
- You will have to delete the module directory and repeat the installing steps above.
- Flush the config cache. Your store and newly installed module should be working as expected.
Support
- We will reply to support requests within 2 business days.
- We will offer lifetime free update and 6-month free support for all of our paid products. Support includes answering questions related to our products, bug/error fixing to make sure our products fit well in your site exactly like our demo.
- Support DOES NOT include other services such as customizing our products, installation and uninstallation service.
Once again, thank you for purchasing our extension. If you have any questions relating to this extension, please do not hesitate to contact us for support.