Introduction
Customer Attributes extension allows you and your customers to manage everything related to customer accounts as account password and their information.
![]()
Features
- Create unlimited customer attributes.
- Manage all attributes: edit or delete attributes.
- Change password and login customers account from backend.
- Multiple attribute types: text, textarea, date, dropdown, multiselect, yes/no, image.
- Add new attributes to registration form page and account information page.
- Set default value for the attribute.
- Enable / disable attributes on the registration page
- Display attributes according to location.
- Sort order to display attribute on the frontend.
- Input validation for attributes.
System Requirements
Your store should be running on Magento Community Edition version 2.1.x., 2.2.x, 2.3.x
Configuration
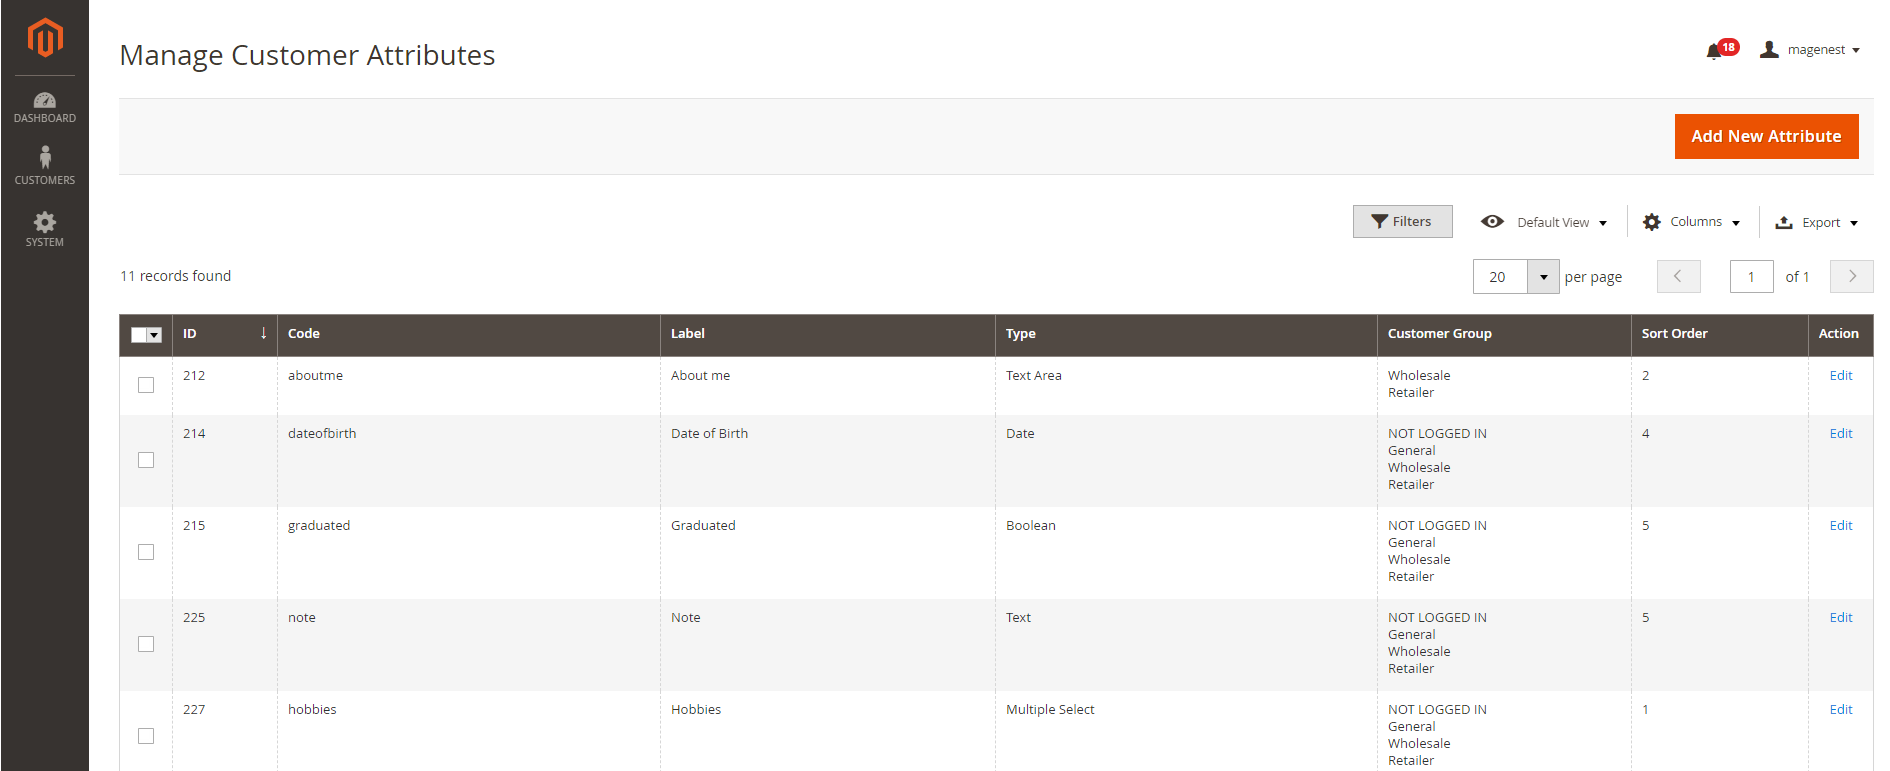
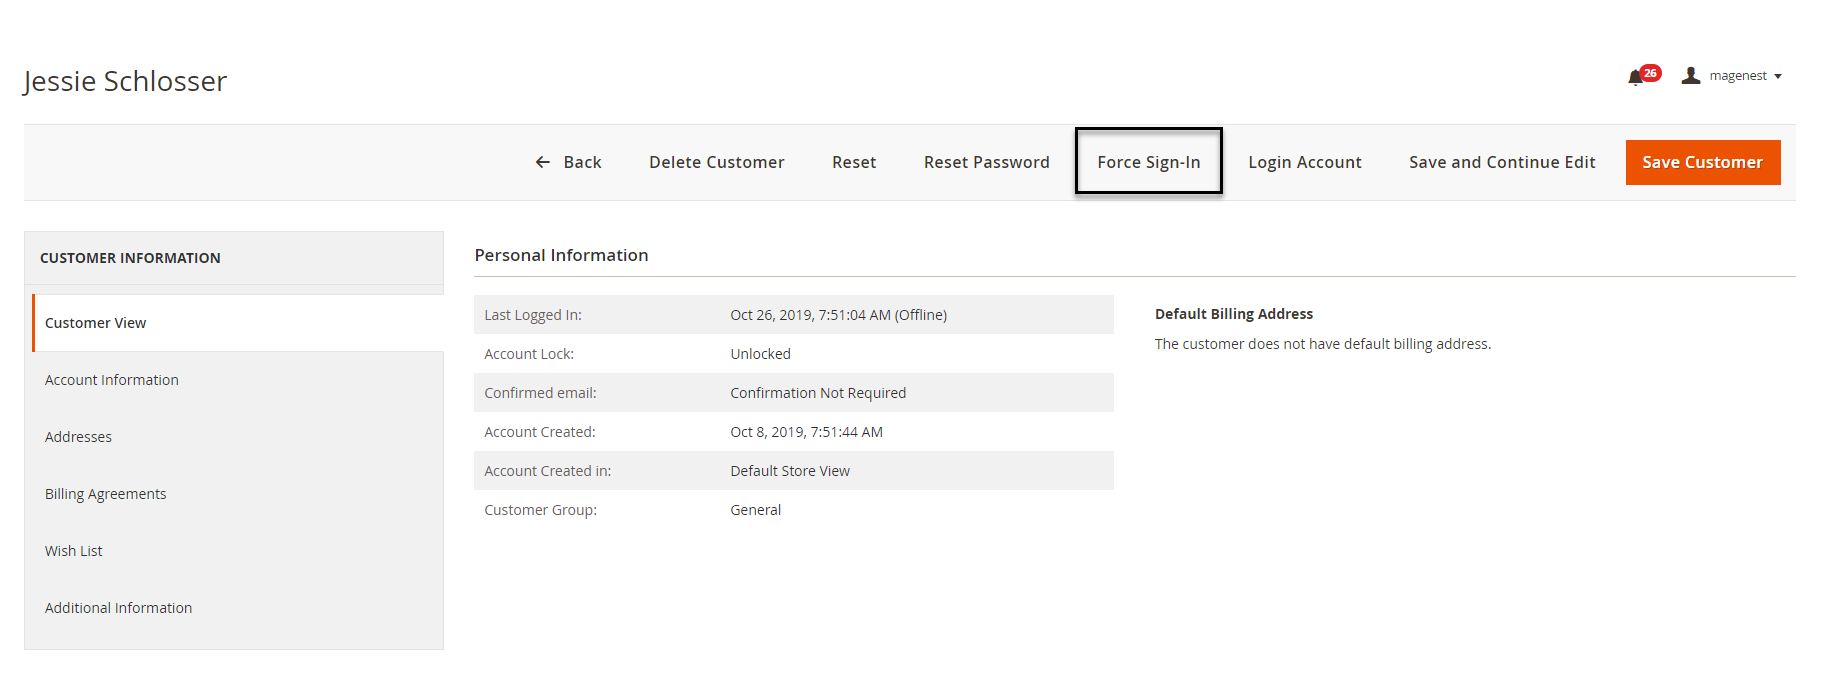
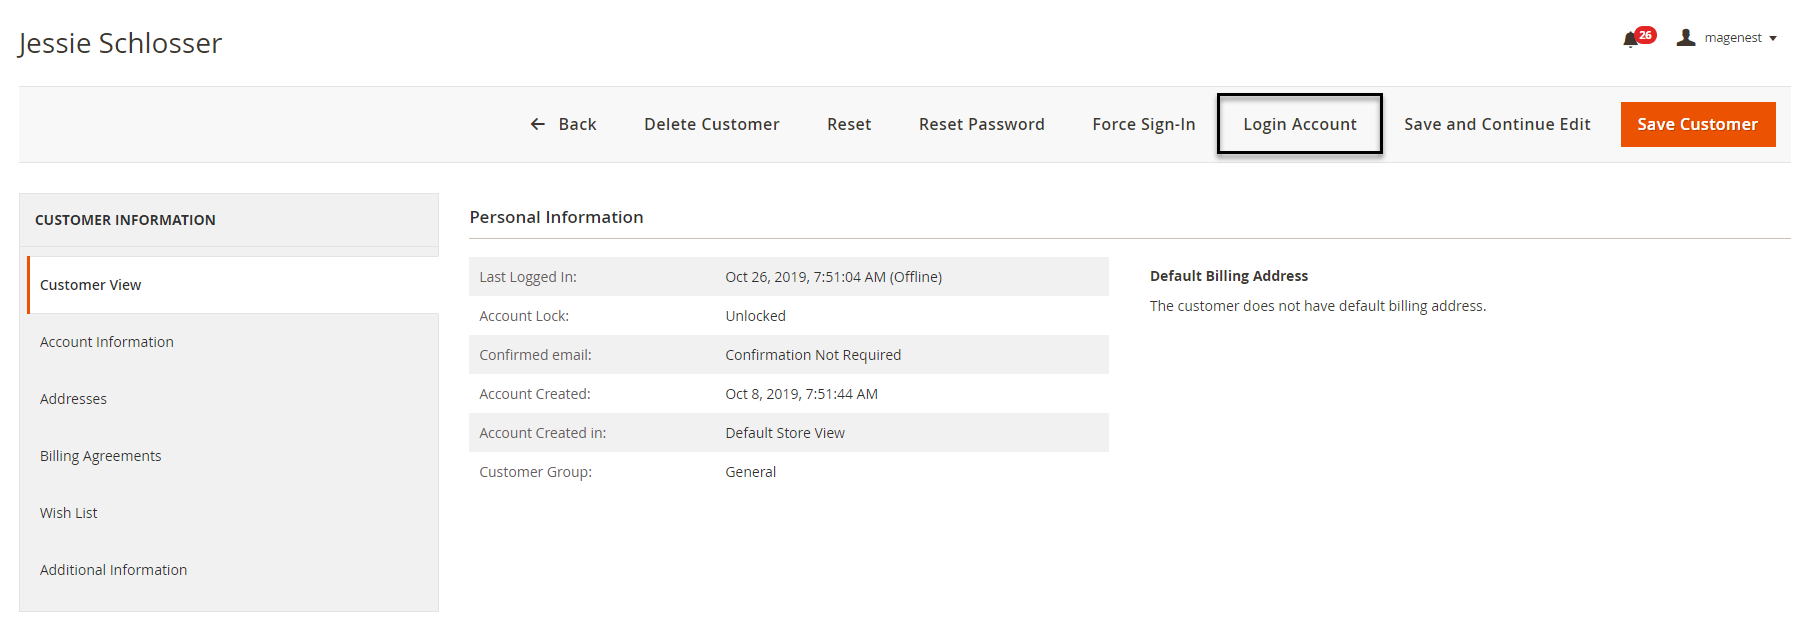
On the Admin Sidebar, tap Customer, then choose Manage Attributes.
On Manage Customer Attributes page, Admin can view and manage the available attributes or create a new attribute by clicking on Add New Attribute button.
On New Customer Attribute page
Properties
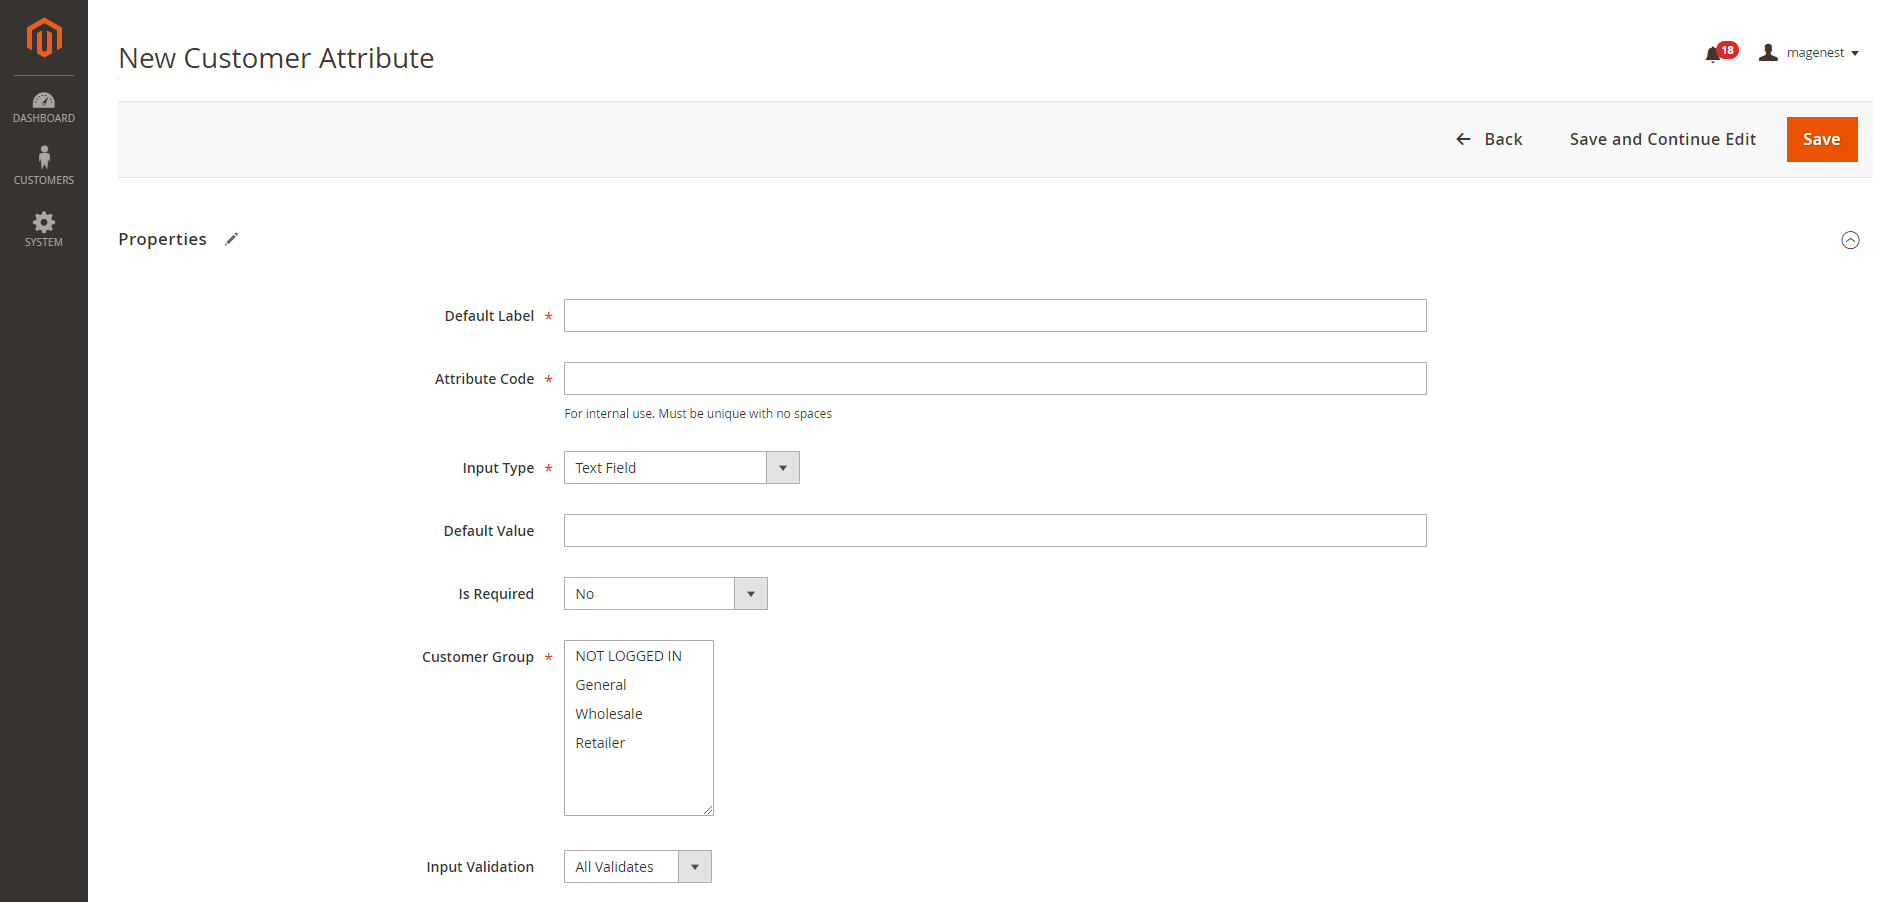
![]() Default Label: enter the name of the attribute which will display as the attribute title on the frontend.
Default Label: enter the name of the attribute which will display as the attribute title on the frontend.
![]() Attribute Code: enter the identified code for the attribute.
Attribute Code: enter the identified code for the attribute.
![]() Input Type: there are 9 options for the input type of customer attribute.
Input Type: there are 9 options for the input type of customer attribute.
1 Text Field
- This is a single line input field for text.
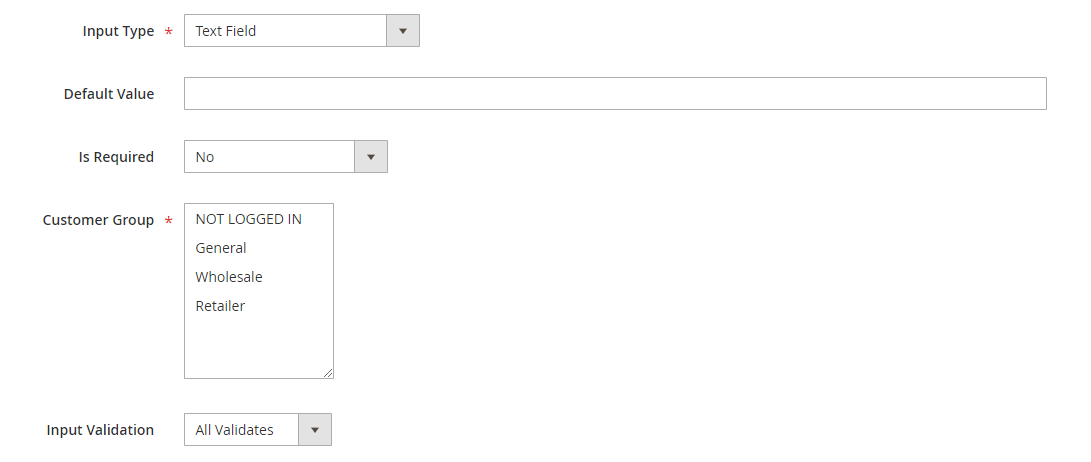
- Default Value: enter the default text which appears in the field as a suggestion. Customer can edit the text.
- Input Validation: select among 6 options: Alphanumeric, Numeric Only, Alpha Only, URL, Email, Date and All Validates.
- Text Field display:

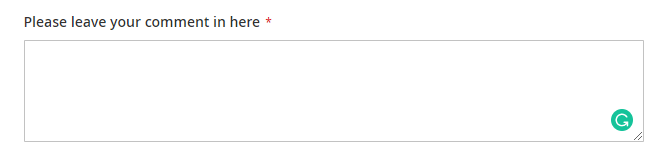
2 Text Area
This is a multiple-line input field for entering paragraphs of text.

- Default Value: enter the default text which appears in the field as a suggestion. Customer can edit the text.
- Text Area display:
3 Date
The date can be entered by making a selection from the popup calendar.
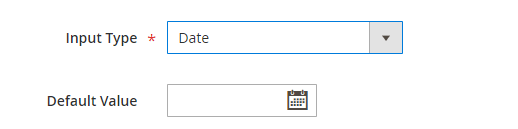
- Default Value: choose the default value which appears in the field as a suggestion. Customer can choose another date.
- Date display:
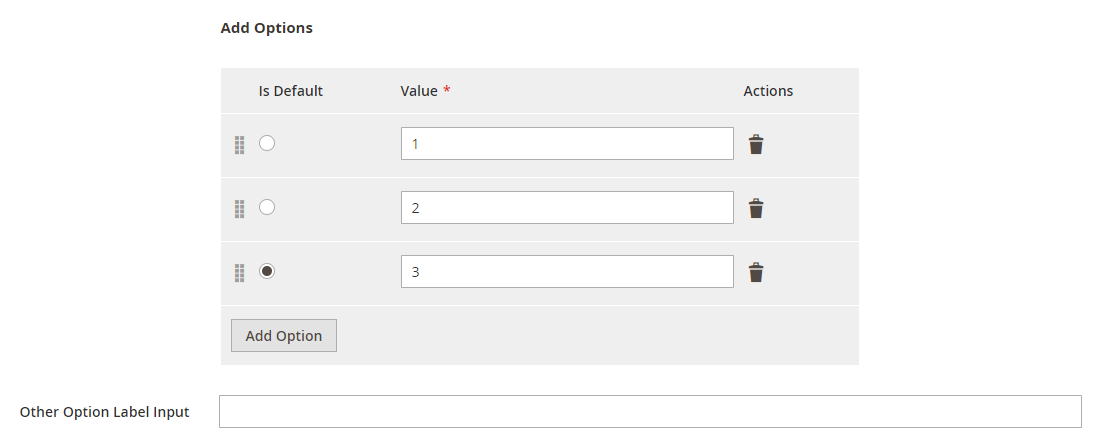
4 Multiple Select
This type allows displaying a drop-down list of values. To select more than one option, the customer can hold the Ctrl key down and click each item.

- Click on Add Option button to add more option to the drop-down list for the attribute.
- Tick on the tickbox under Is Default column to set the option as default.
- Show option in admin: enter the title of the option which displays on the backend.
- Show option in storefront: enter the title of the option which displays on the customer side.
- Multiple Select display:
5 Multiple Select With Images
There will be a list of options with images for customer's selection.
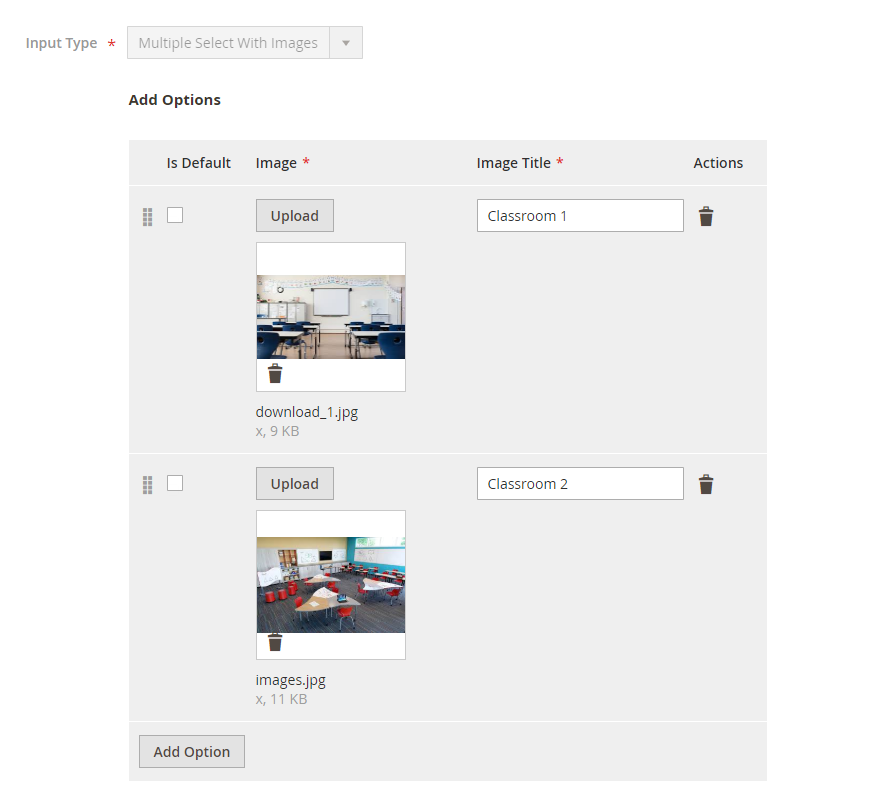
- Click on Add Option button to add more option.
- Choose the image and fill the title for each option.
- Multiple Select With Images display:
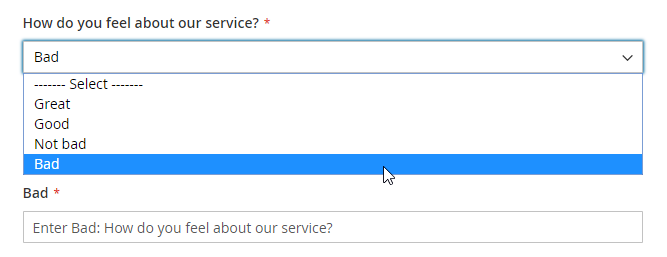
6 Dropdown
This type displays a drop-down list of values for customer selection.
- Click on Add Option button to add more option.
- Value: Enter the title for each option in the dropdown list.
- Other Option Label Input: enter the text for the last option in the drop-down list, which is the option for the customer who has the question beyond the listed answers in the default list.
- Dropdown display:
7 Yes/No
This type allows displaying a drop-down list with pre-defined options of “Yes” and “No”.
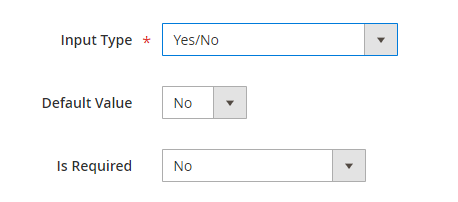
- Default Value: choose the value that will be marked by default. Customer can choose another option.
- Yes/No display
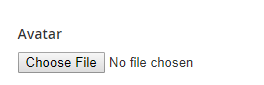
8 Image File
This type allows the customer to upload their image.
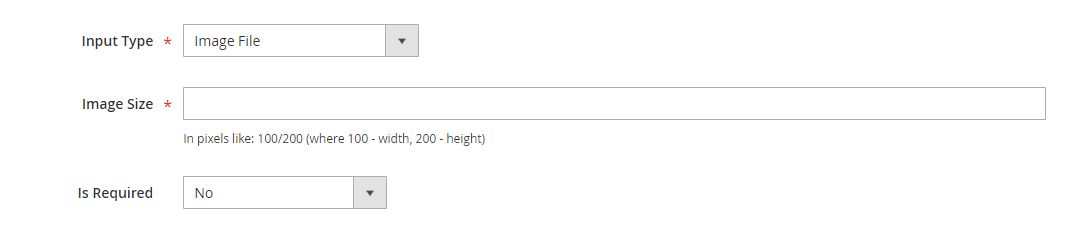
- Image Size: set the layout size for the uploaded image. The size unit in this field is "pixels". Follow the note under this field to set the proper size.
- Image File display
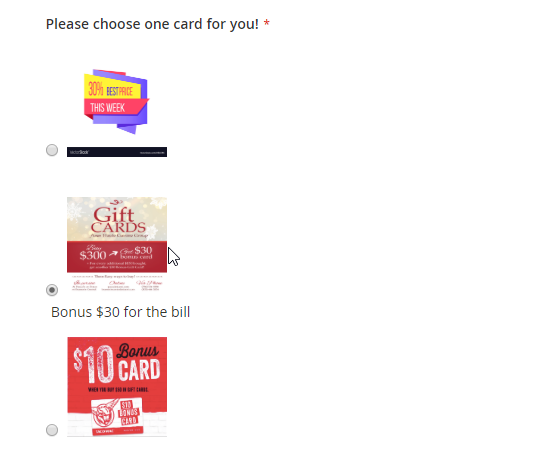
9 Single radio Image
There will be a list of options with images that allows the customer to select only one option.
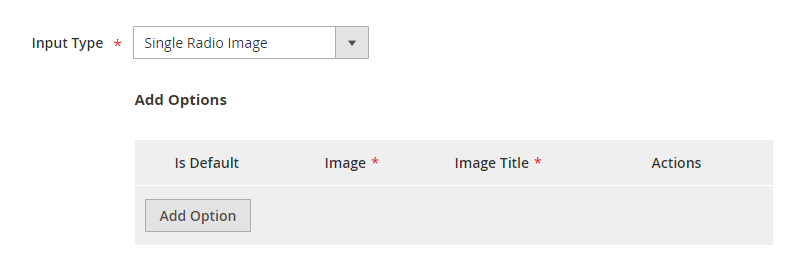
- Click on Add Option button to add more option.
- Choose the image and fill the title for each option, which will display with the image.
- Single radio Image display:
![]() Is Required: decide whether the attribute is required to be filled by the customer among 3 options: Frontend and Backend, No, Only Frontend.
Is Required: decide whether the attribute is required to be filled by the customer among 3 options: Frontend and Backend, No, Only Frontend.
![]() Customer Group: select the customer group to display the attribute.
Customer Group: select the customer group to display the attribute.
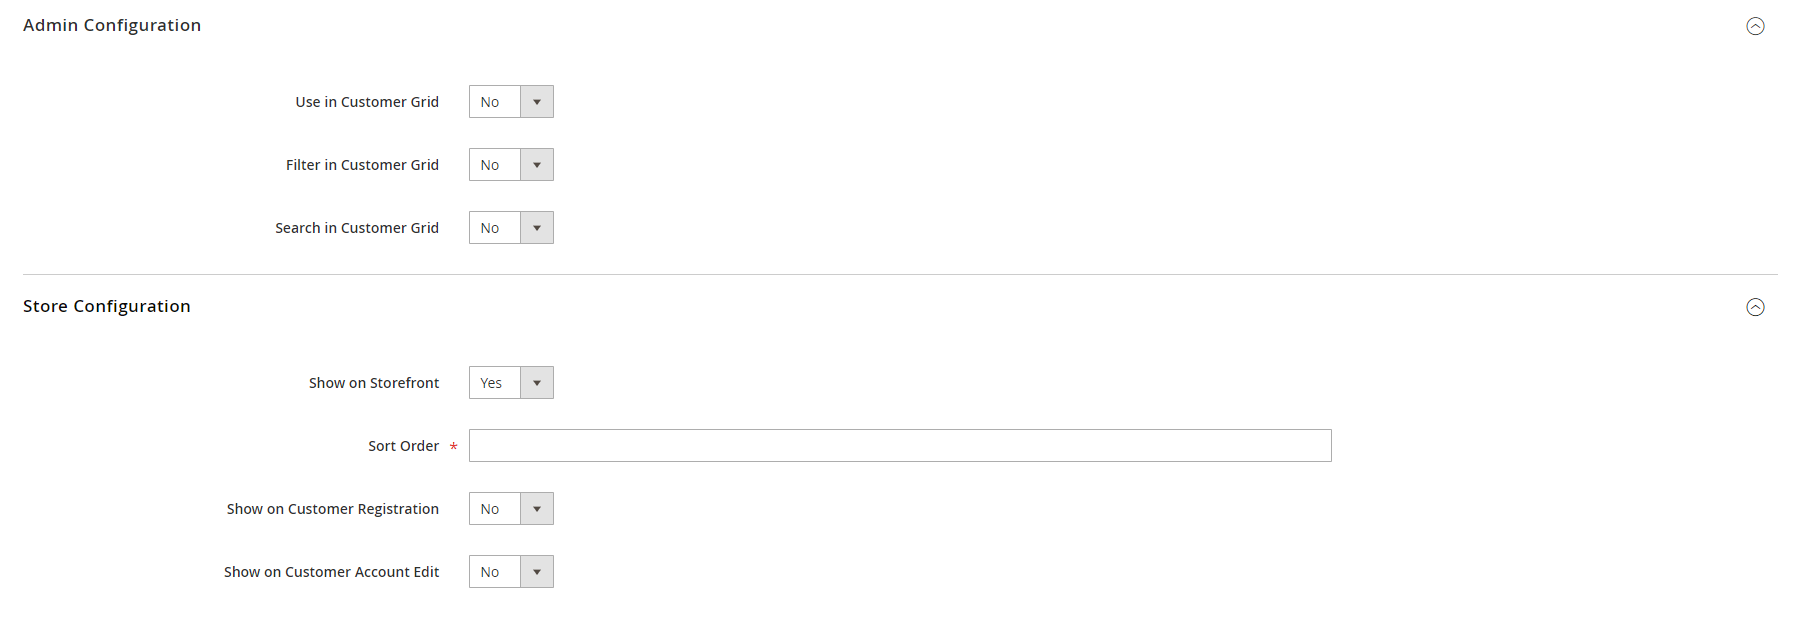
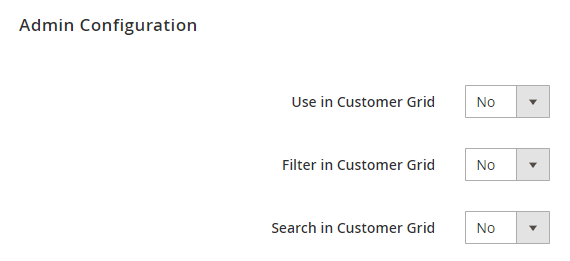
Admin Configuration
This section allows setting for the display of the attribute in backend by choosing Yes or No in each field: Use in Customer Grid, Filter in Customer Grid and Search in Customer Grid.
Store Configuration
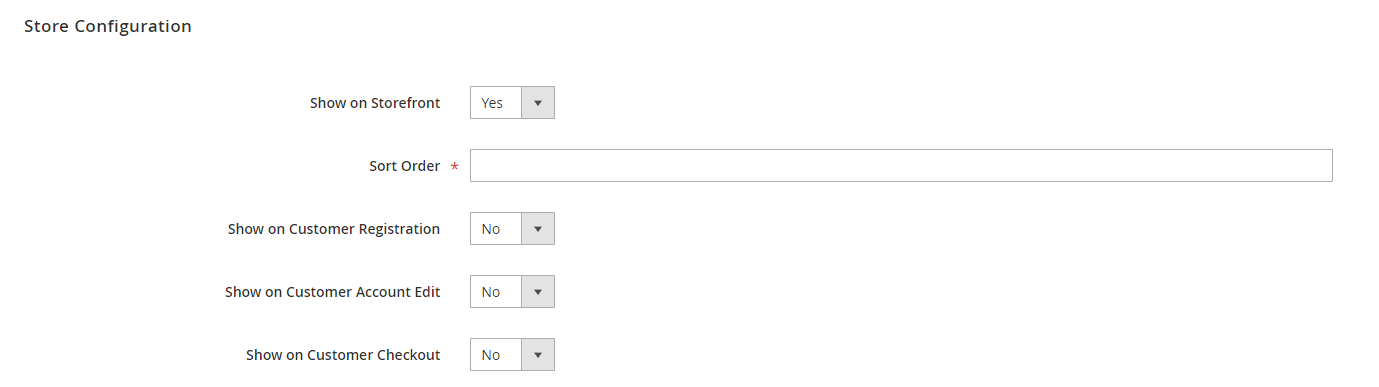
This section allows setting display for the attribute on the storefront.
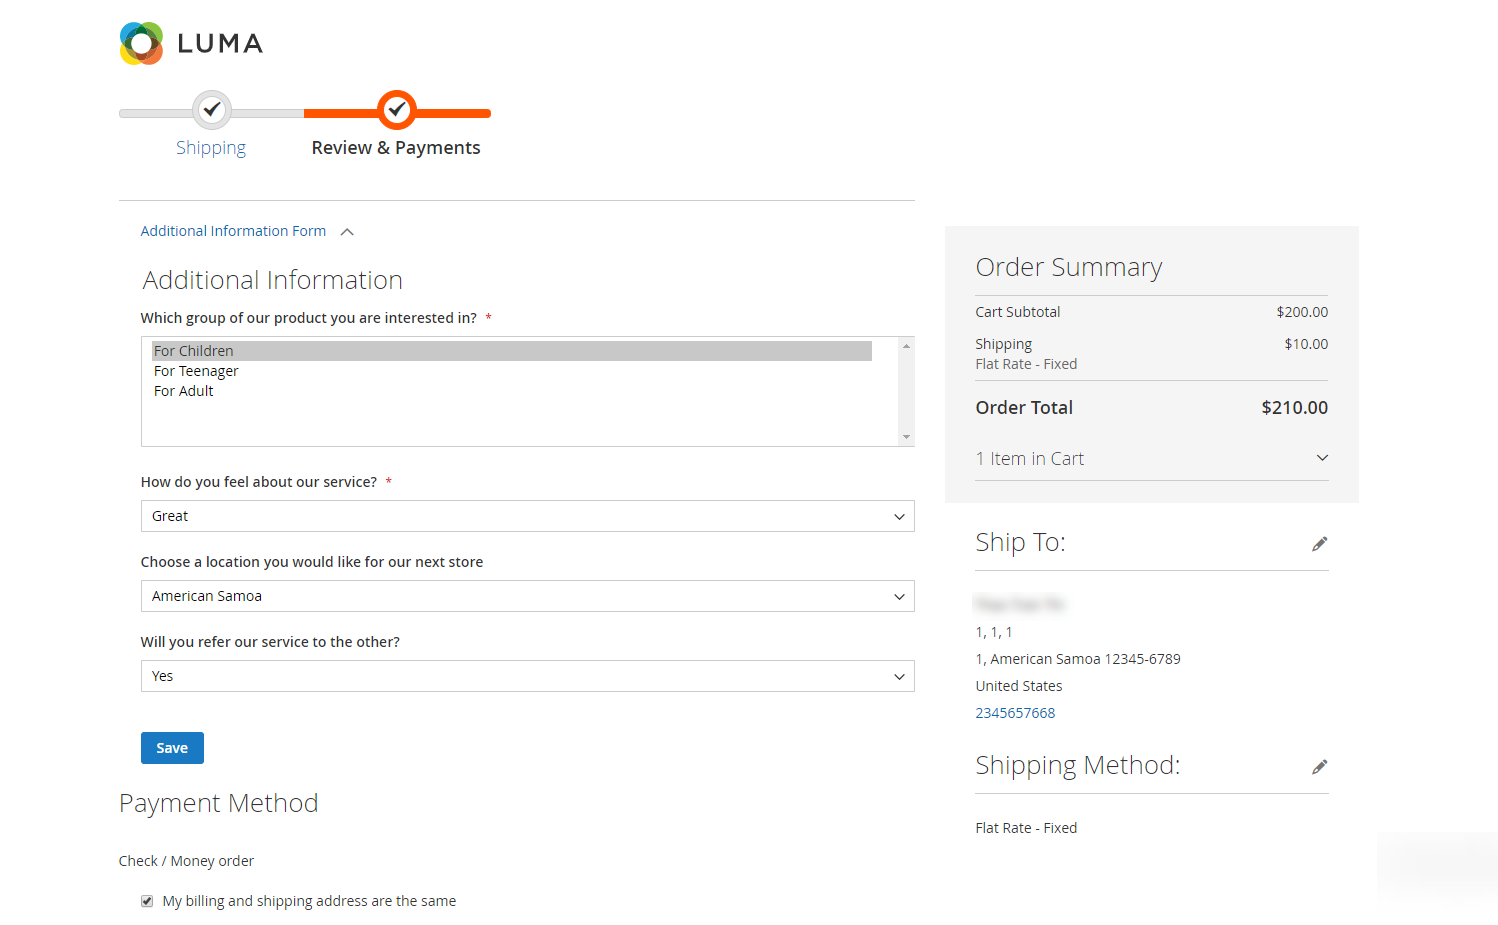
Enable the attribute on the store, then set the sort order and assign the attribute to some pages such as Customer Registration, Customer Account Edit and Customer checkout page.
![]() After finishing the setup, click Save to save the attribute and view on the frontend.
After finishing the setup, click Save to save the attribute and view on the frontend.
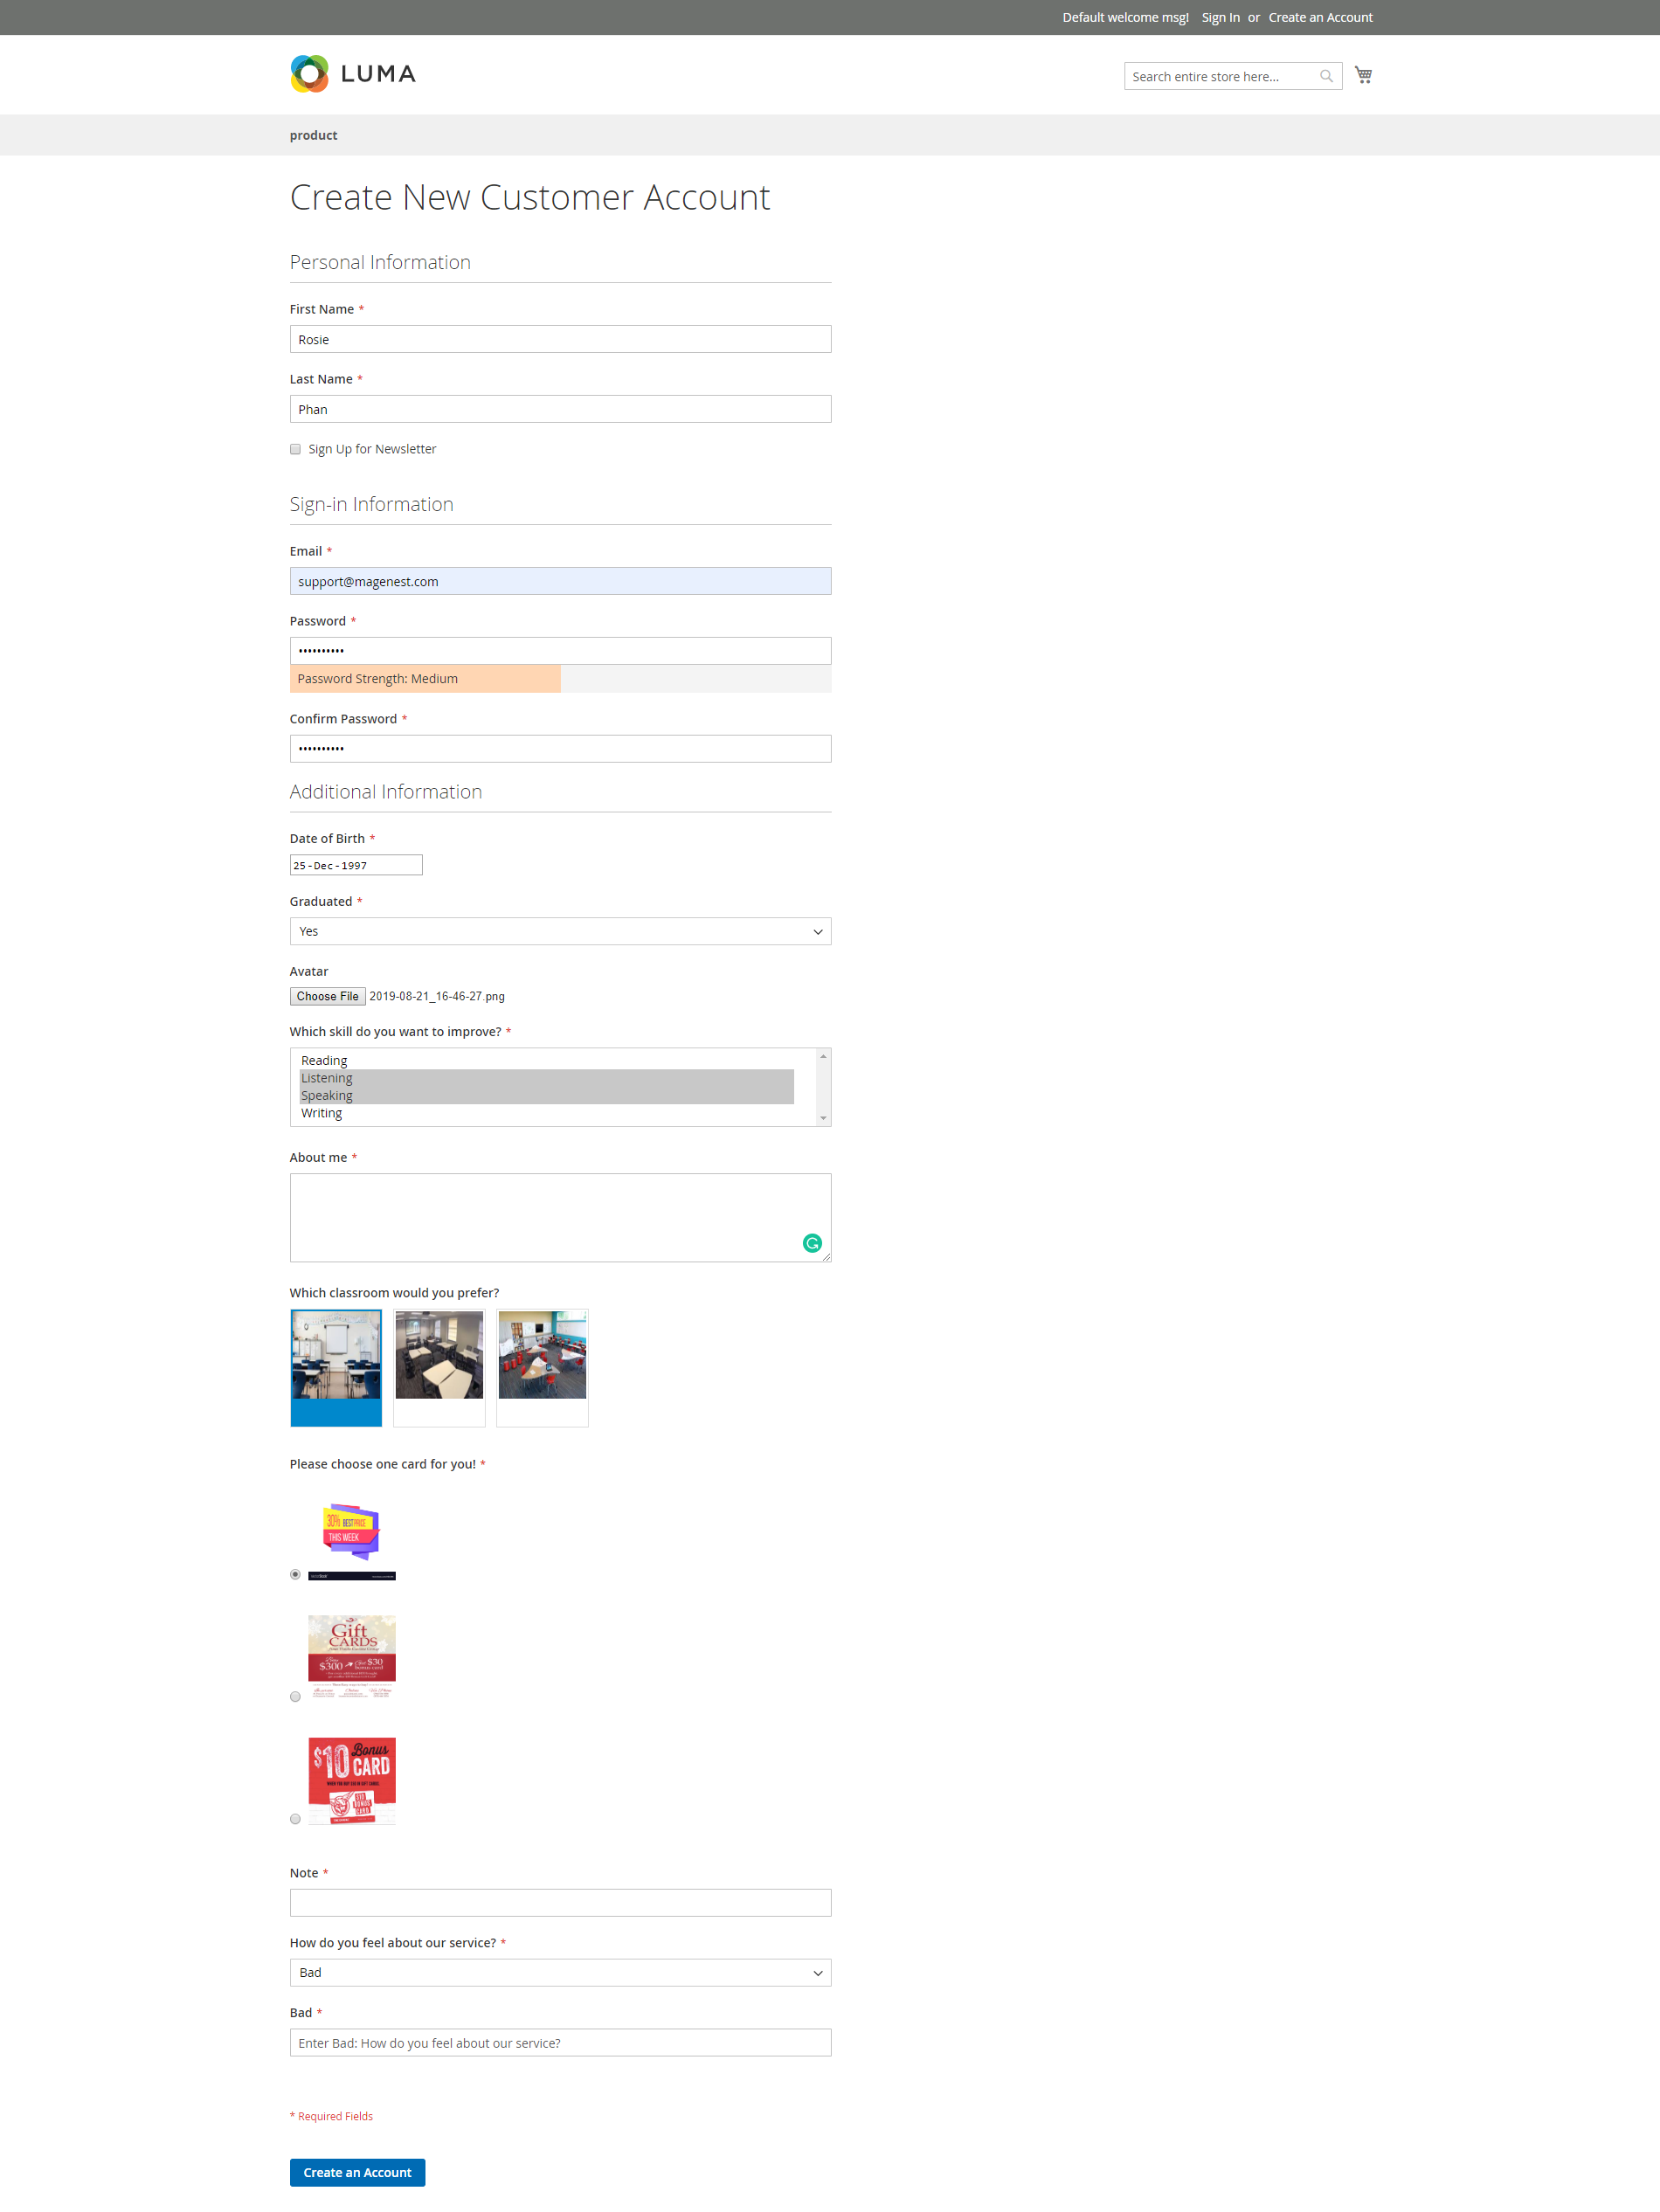
On Storefront
Additional attribute on Customer Registrant page
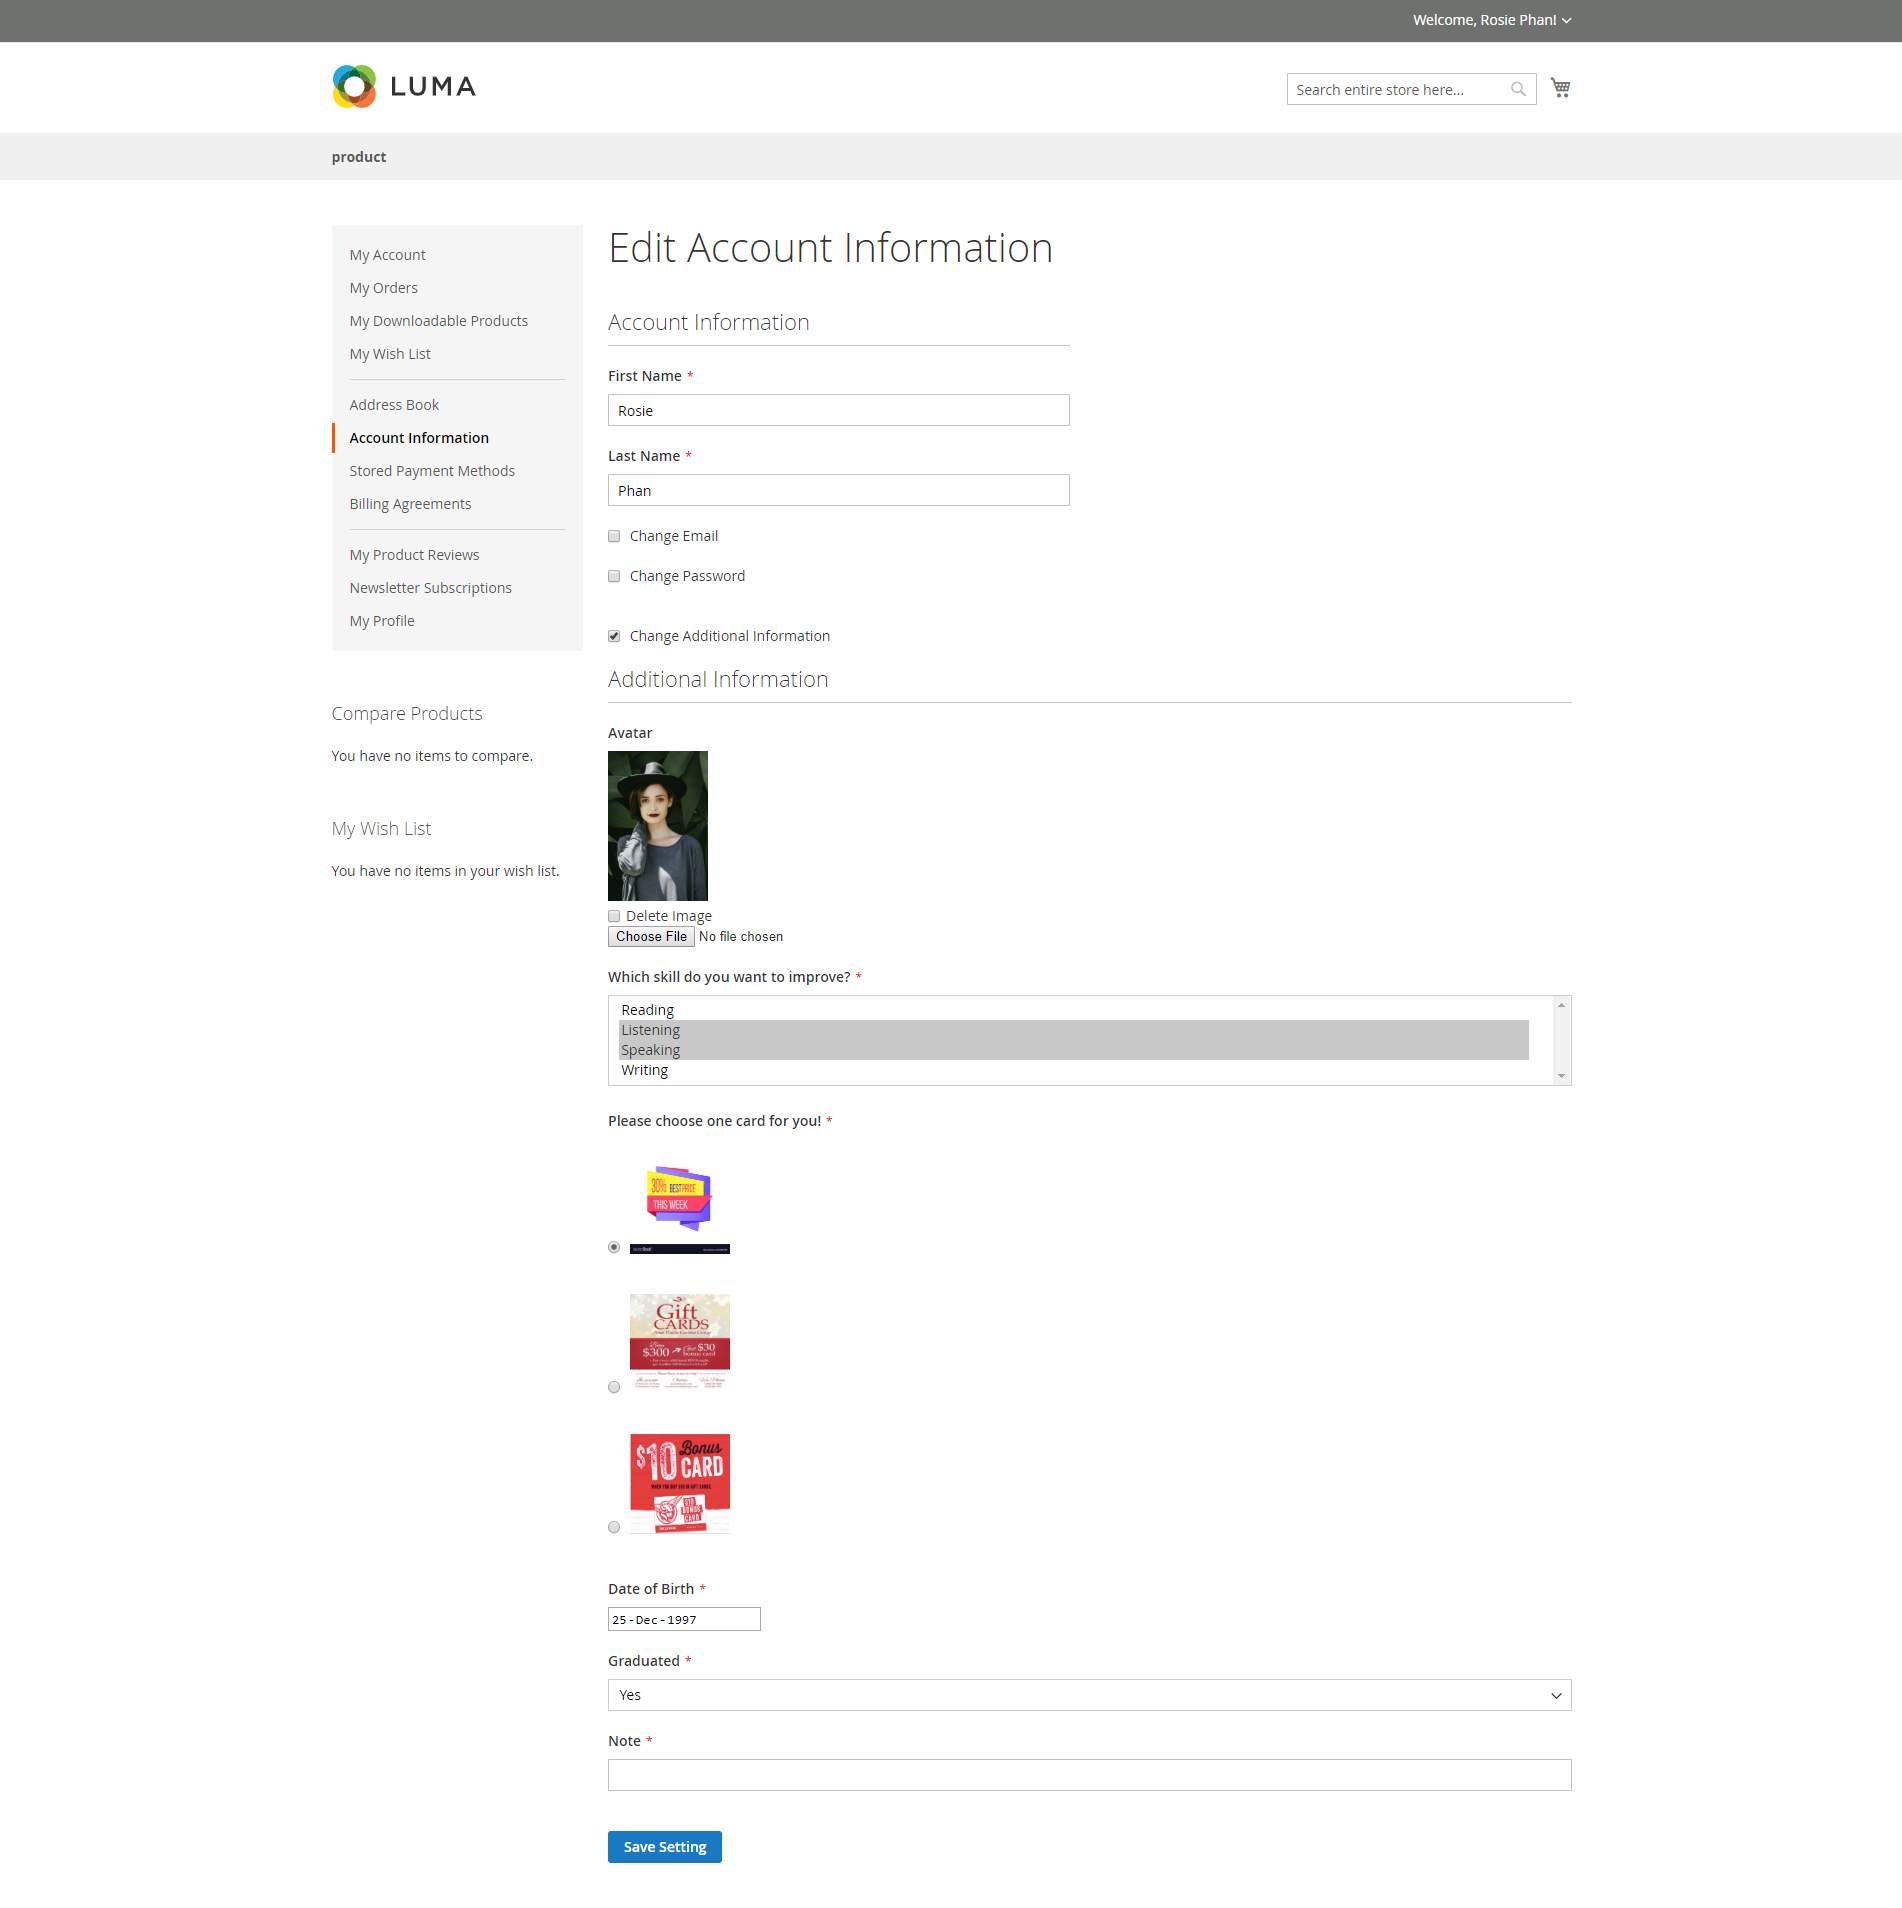
Additional attribute on Edit Account Information page
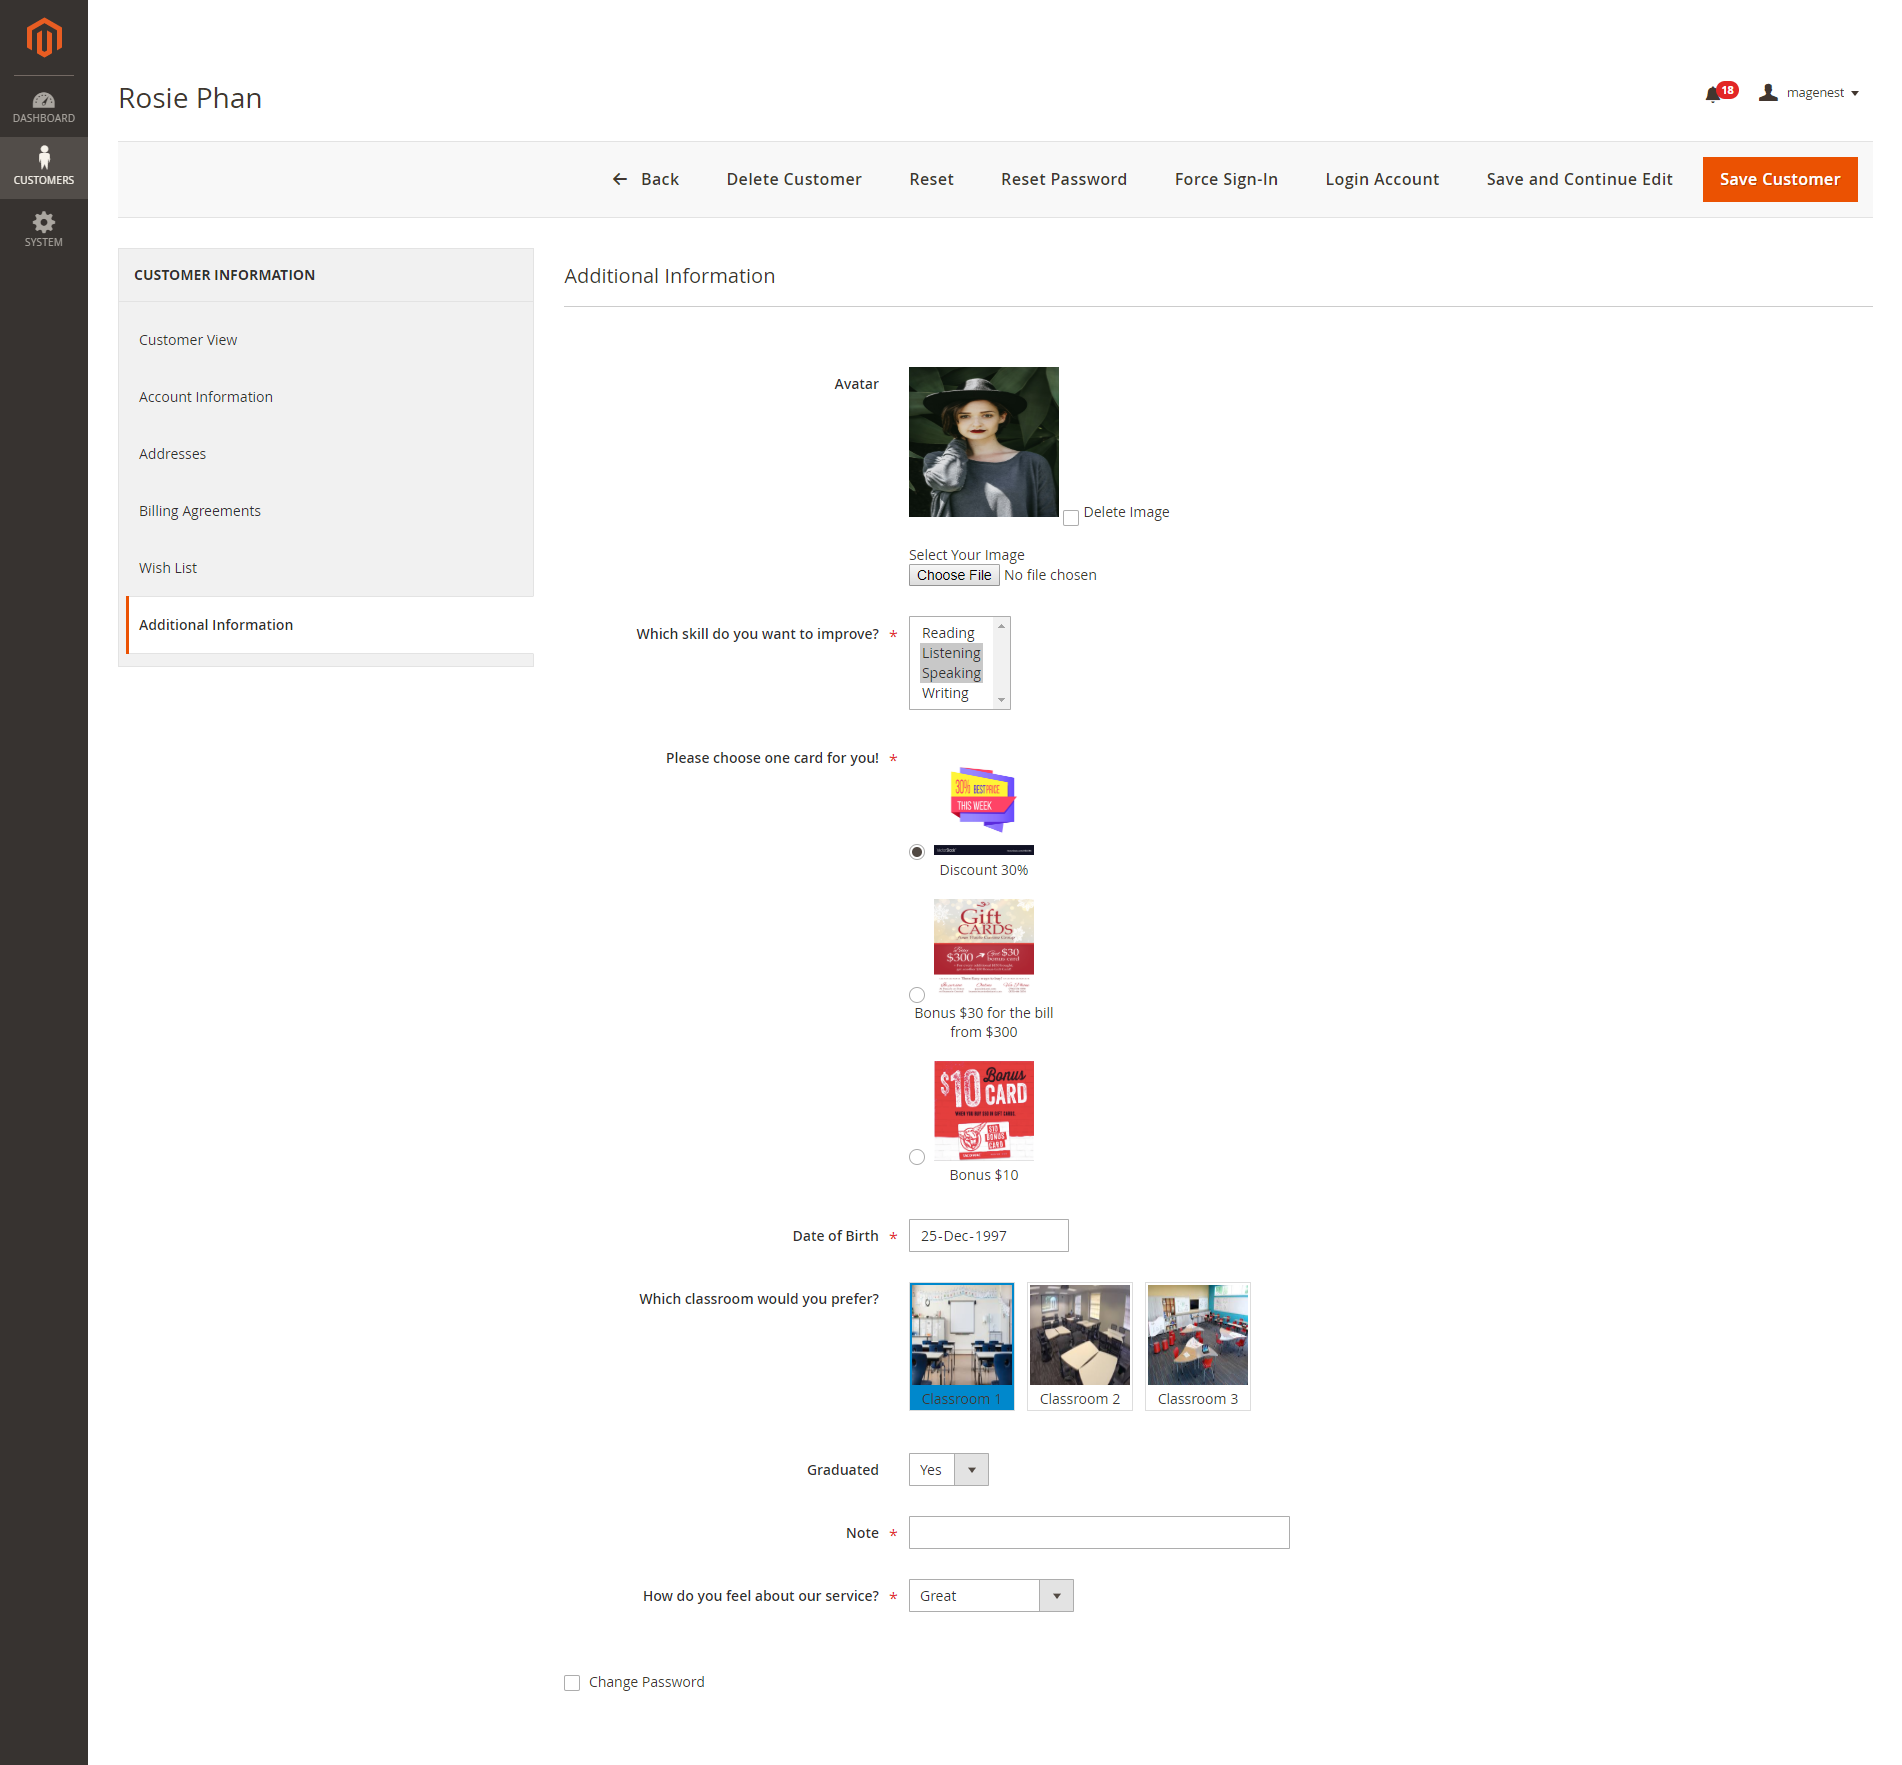
Additional attribute on Customer Information page from backend
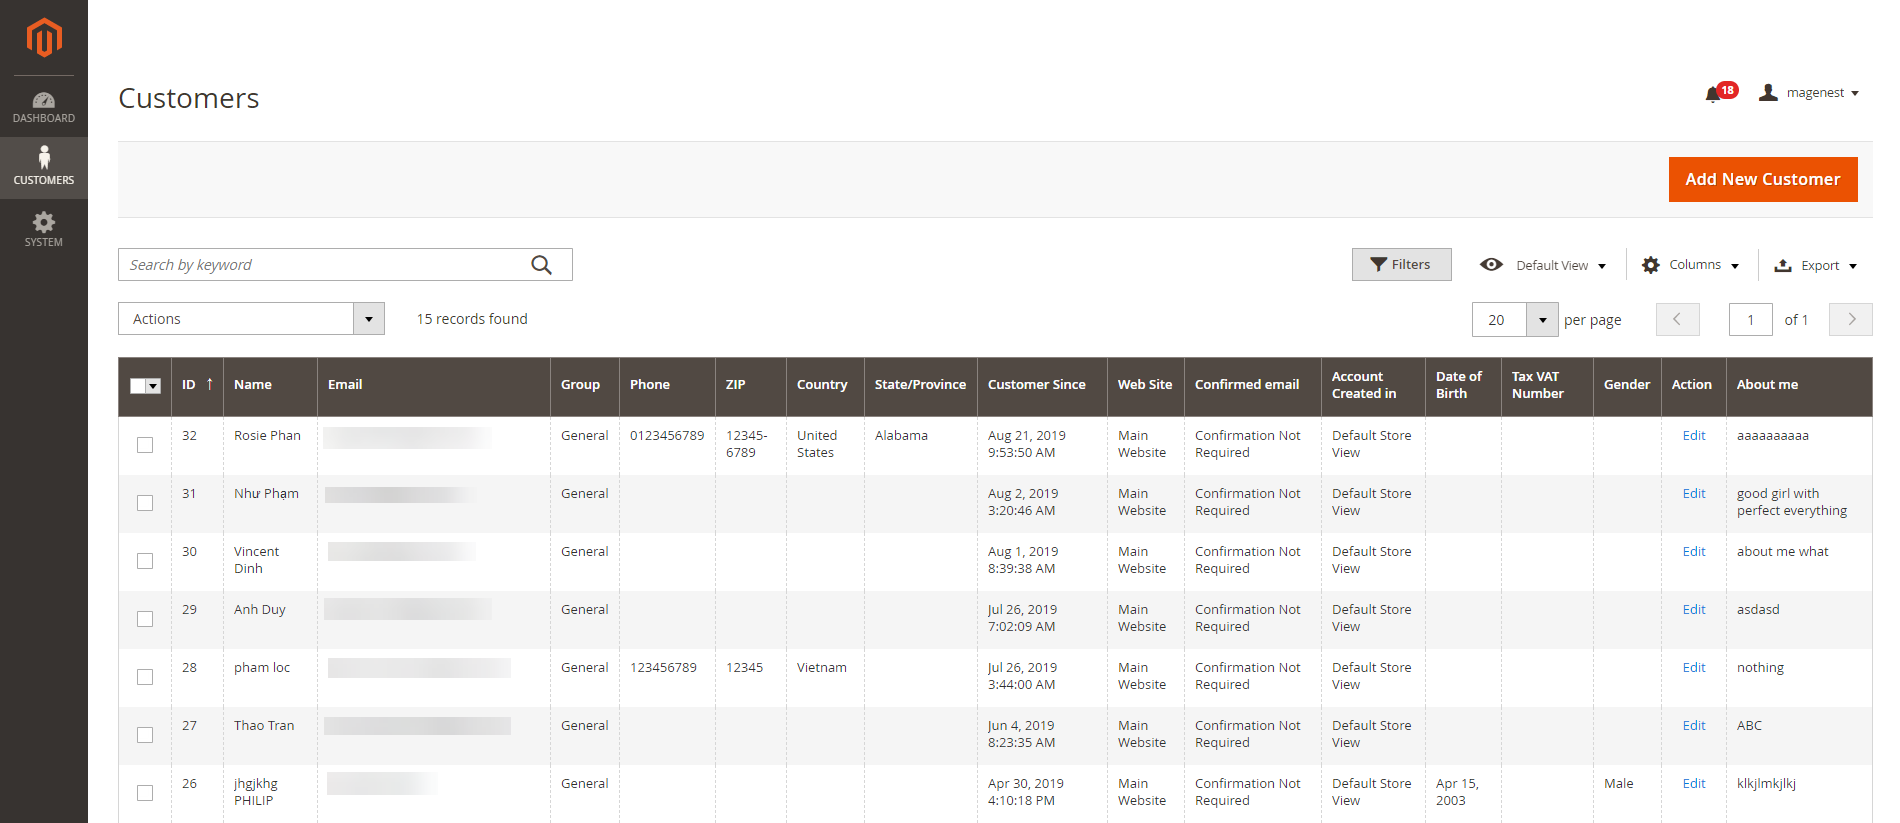
Additional attribute on customer grid from backend
Update
- When a new update is available, we will provide you with a new package containing our updated extension.
- You will have to delete the module directory and repeat the installing steps above.
- Flush the config cache. Your store and newly installed module should be working as expected.
Support
- We will reply to support requests within 2 business days.
- We will offer lifetime free update and 6-month free support for all of our paid products. Support includes answering questions related to our products, bug/error fixing to make sure our products fit well in your site exactly like our demo.
- Support DOES NOT include other services such as customizing our products, installation and uninstallation service.
Once again, thank you for purchasing our extension. If you have any questions relating to this extension, please do not hesitate to contact us for support.