Configuration
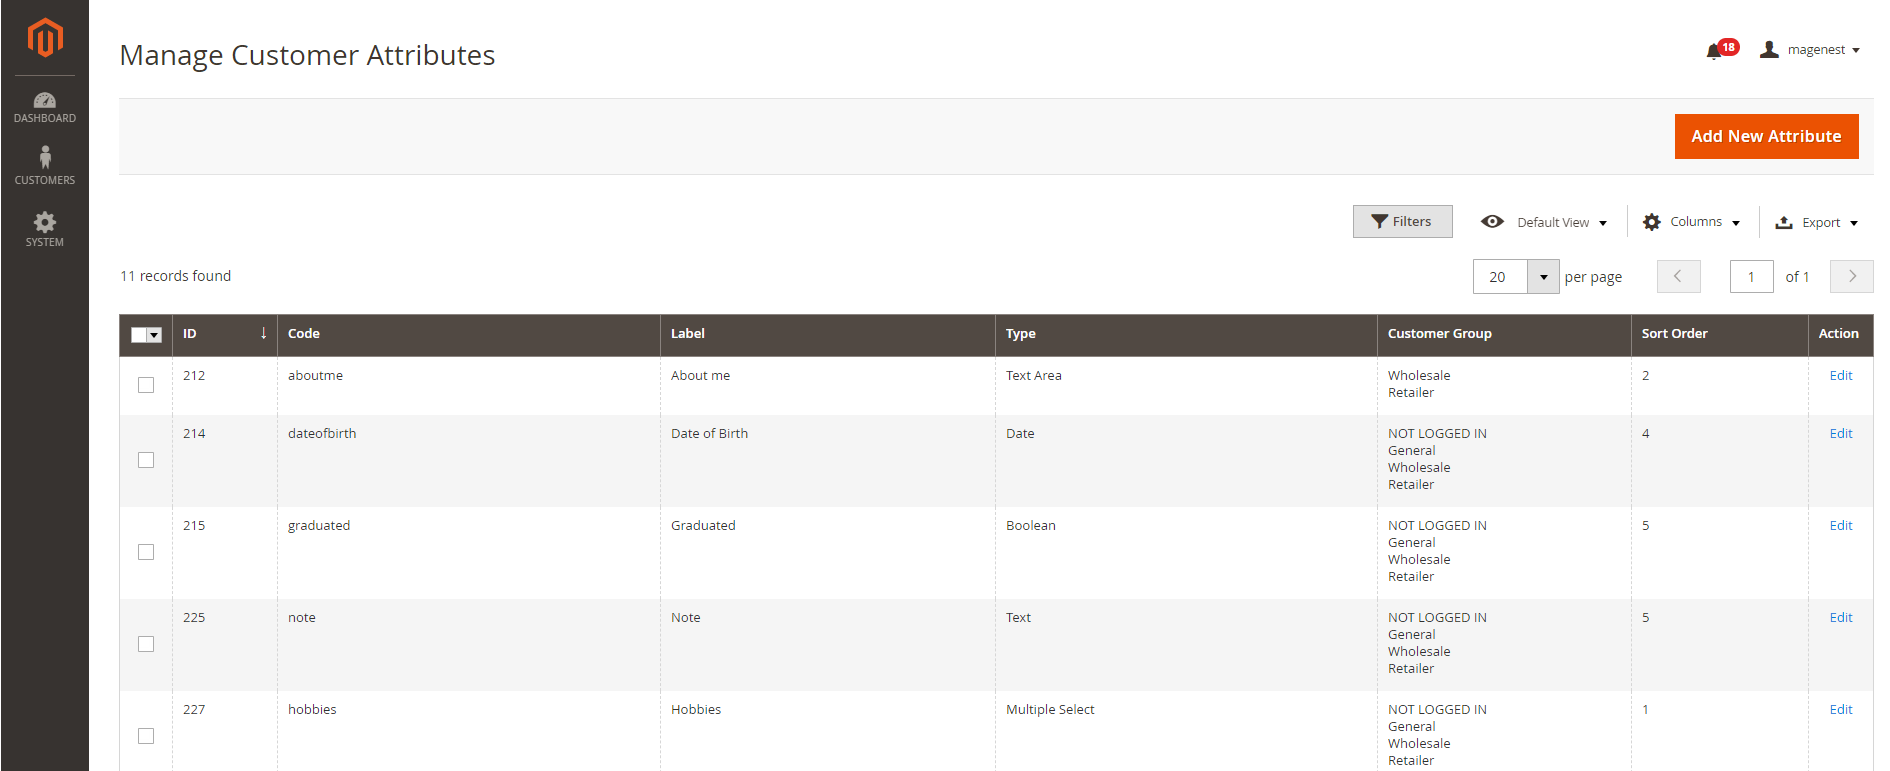
On the Admin Sidebar, tap Customer, then choose Manage Attributes.
On Manage Customer Attributes page, Admin can view and manage the available attributes or create a new attribute by clicking on Add New Attribute button.
On New Customer Attribute page
PROPERTIES
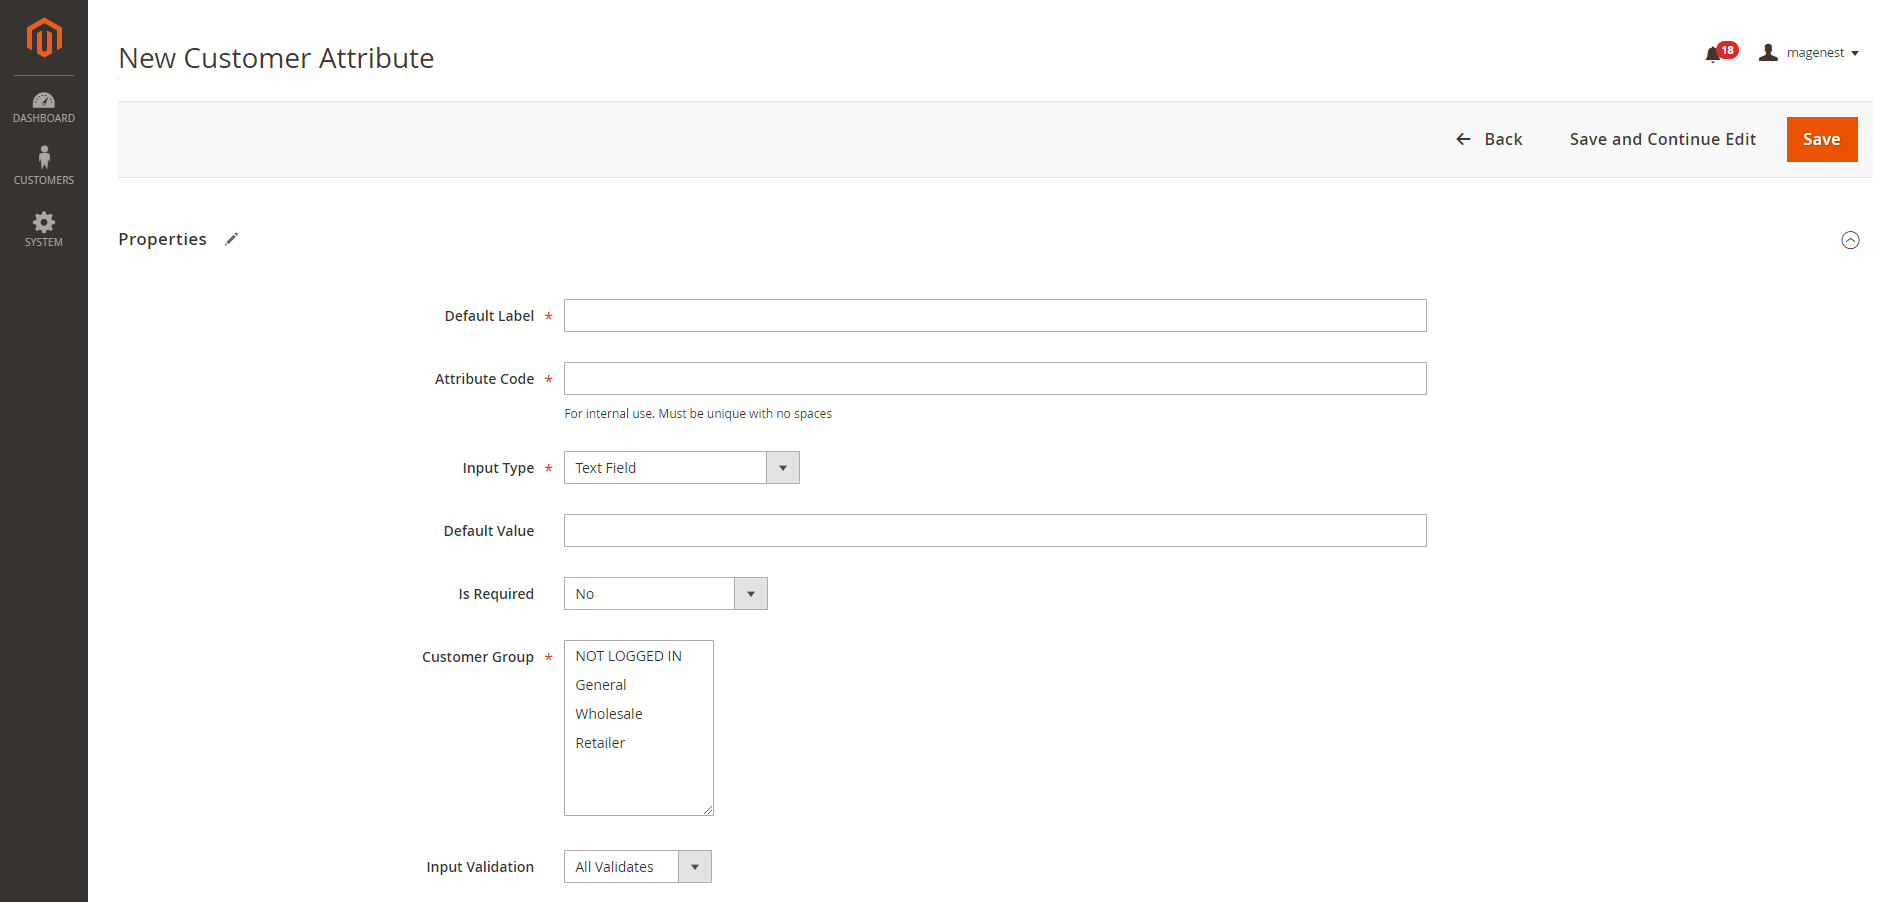
![]() Default Label: enter the name of the attribute which will display as the attribute title on the frontend.
Default Label: enter the name of the attribute which will display as the attribute title on the frontend.
![]() Attribute Code: enter the identified code for the attribute.
Attribute Code: enter the identified code for the attribute.
![]() Input Type: there are 9 options for the input type of customer attribute.
Input Type: there are 9 options for the input type of customer attribute.
Text Field
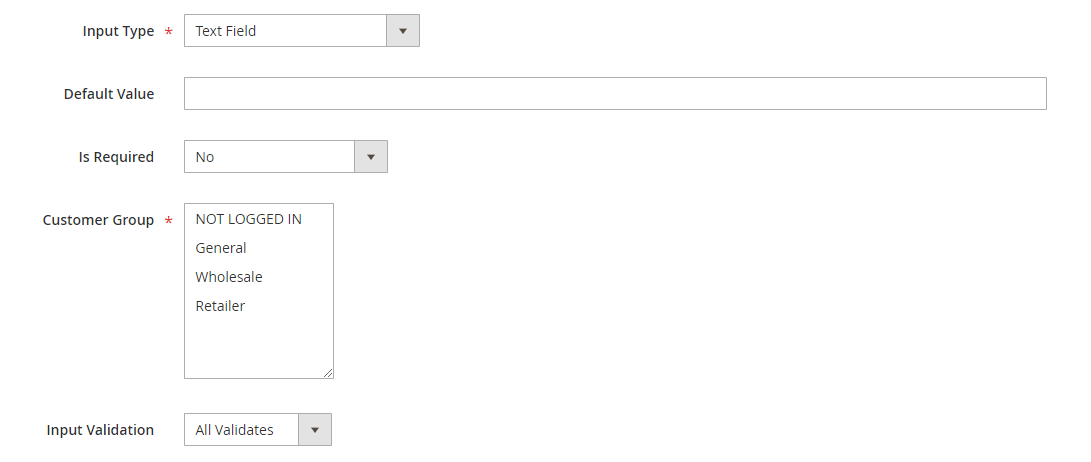
- Default Value: enter the default text which appears in the field as a suggestion. Customer can edit the text.
- Input Validation: select among 6 options: Alphanumeric, Numeric Only, Alpha Only, URL, Email, Date and All Validates.
Text Area

- Default Value: enter the default text which appears in the field as a suggestion. Customer can edit the text.
Date
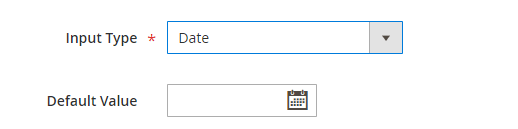
- Default Value: choose the default value which appears in the field as a suggestion. Customer can choose another date.
Multiple Select

- Click on Add Option button to add more option to the drop-down list for the attribute.
- Tick on the tickbox under Is Default column to set the option as default.
- Show option in admin: enter the title of the option which displays on the backend.
- Show option in storefront: enter the title of the option which displays on the customer side.
Multiple Select With Images