Thank you for purchasing our extension. If you have any questions that are beyond the scope of this document, do not hesitate to leave us an email via our email address below.
Created: 22/08/2016 | By: Magenest | Support Portal: http://servicedesk.izysync.com/servicedesk/customer/portal/6
Introduction
![]()
Advanced Product Options extension for Magento 2 is powerful tool to create unlimited custom option templates and assgin them to any products. Advanced Product Options extension for Magento 2 by Magenest is what the store owners need to easily and quickly deal with custom options. It allows store owners to configure custom options for any products, control products with complex configuration and assign them to a selection of products in one click. This will help to save your time on manually generating a huge number of custom options for your products as well as create more revenue for your business.
Extension's page: Advanced Product Options
Highlight Features
- Allows admin to effortlessly create an unlimited number of custom option templates and assign them to a selection of products with just a mouse click.
- Easily edits custom option templates if admin need to create any changes for the existing templates.
- Conveniently controls all product custom options in the Magento back end.
- Allows admin to set flexible product option dependence and specify individual prices for each product.
- Allows admin set custom options per customer groups.
- Allows admin to upload images for each value of a customer option and display them next to the basic images.
- Provides friendly interfaces for customers.
System Requirements
Your store should be running on Magento 2 Community Edition version 2.1.x.
Main Functions
Magento Back End
Firstly, admin need to create templates by clicking on Advanced Product Option > Template.

Then, Edit page will be shown. Here admin can see and manage the list of all the created templates.
To create a new template, admin need to click on Add New Template button.
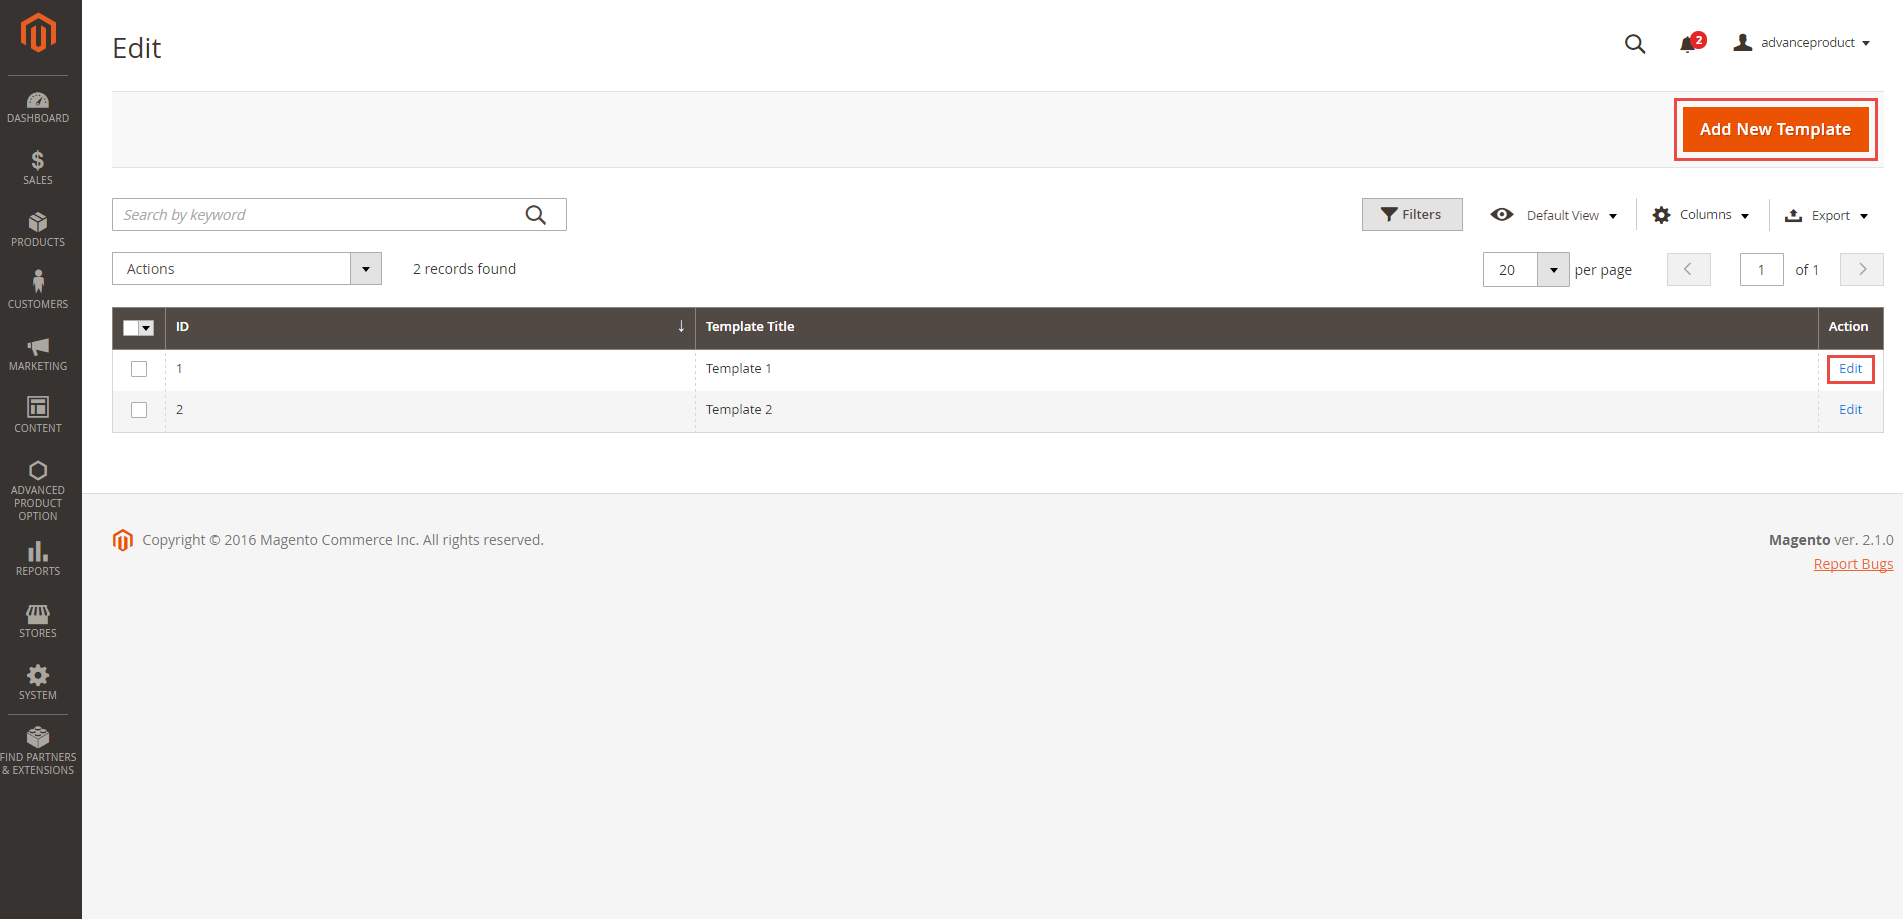
There are some fields that admin need to set, including:
- Template Name: Type a name for your template. Used for reference later when you have multiple templates.
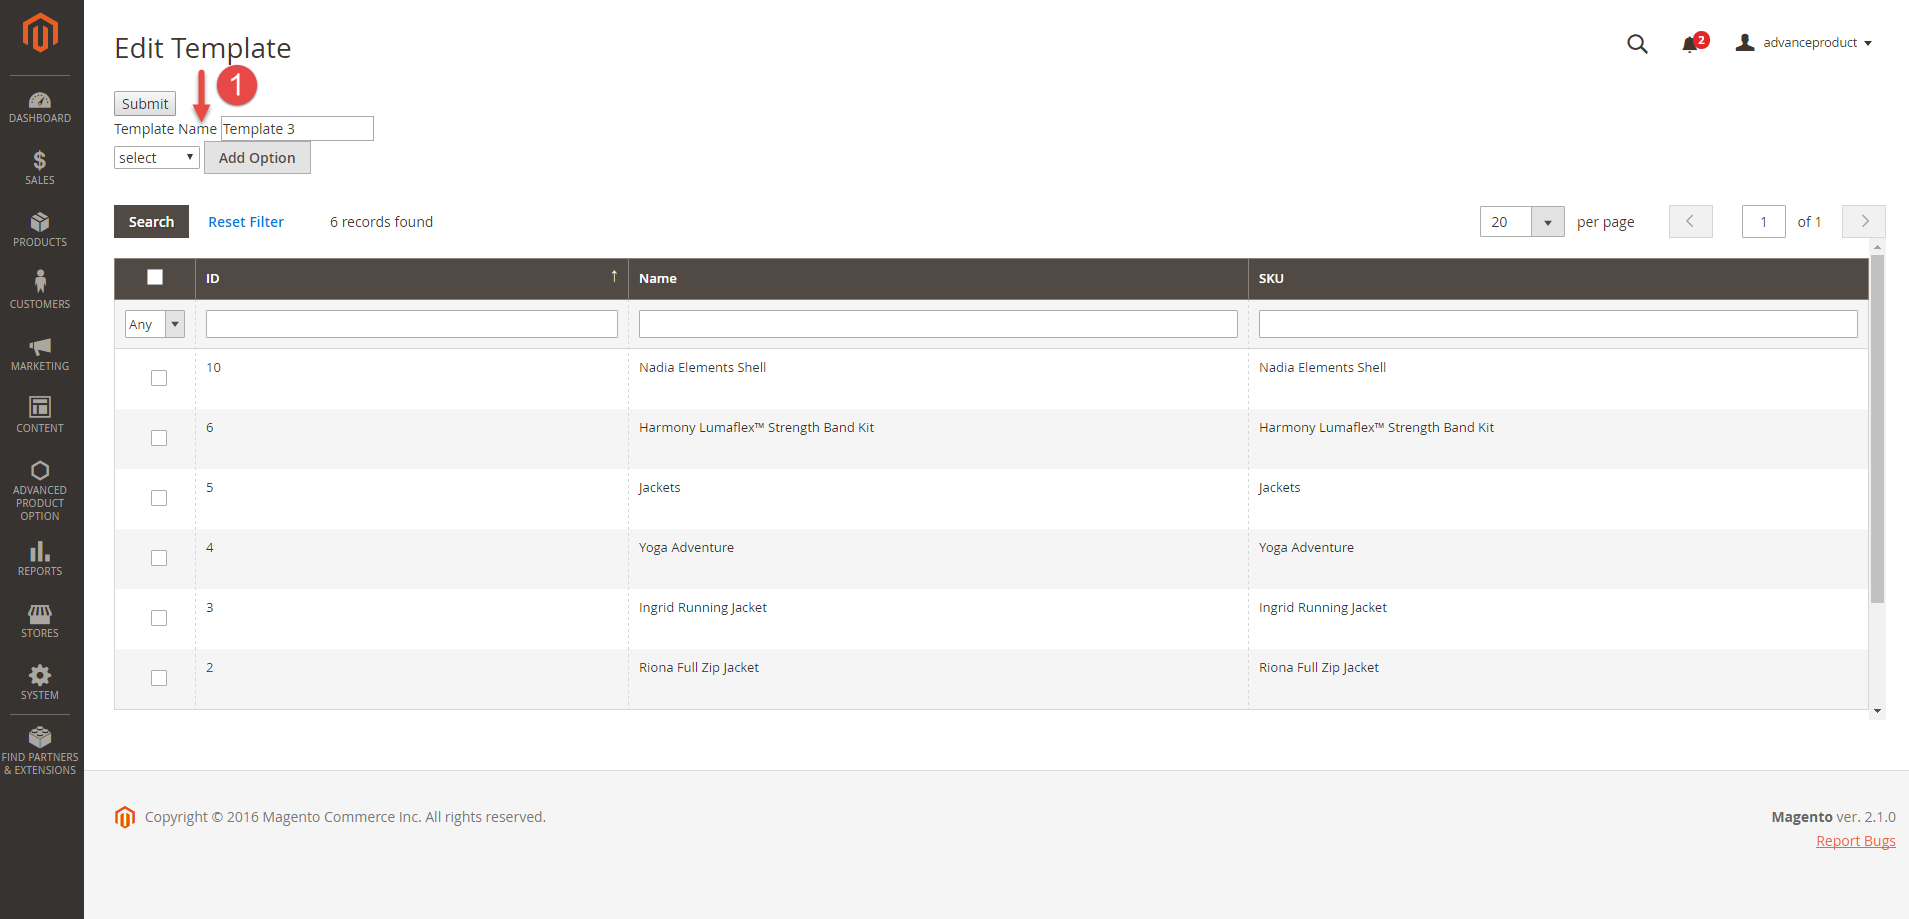
Then, click on the Add Option button. Admin will get to the default settings that are available for custom options.
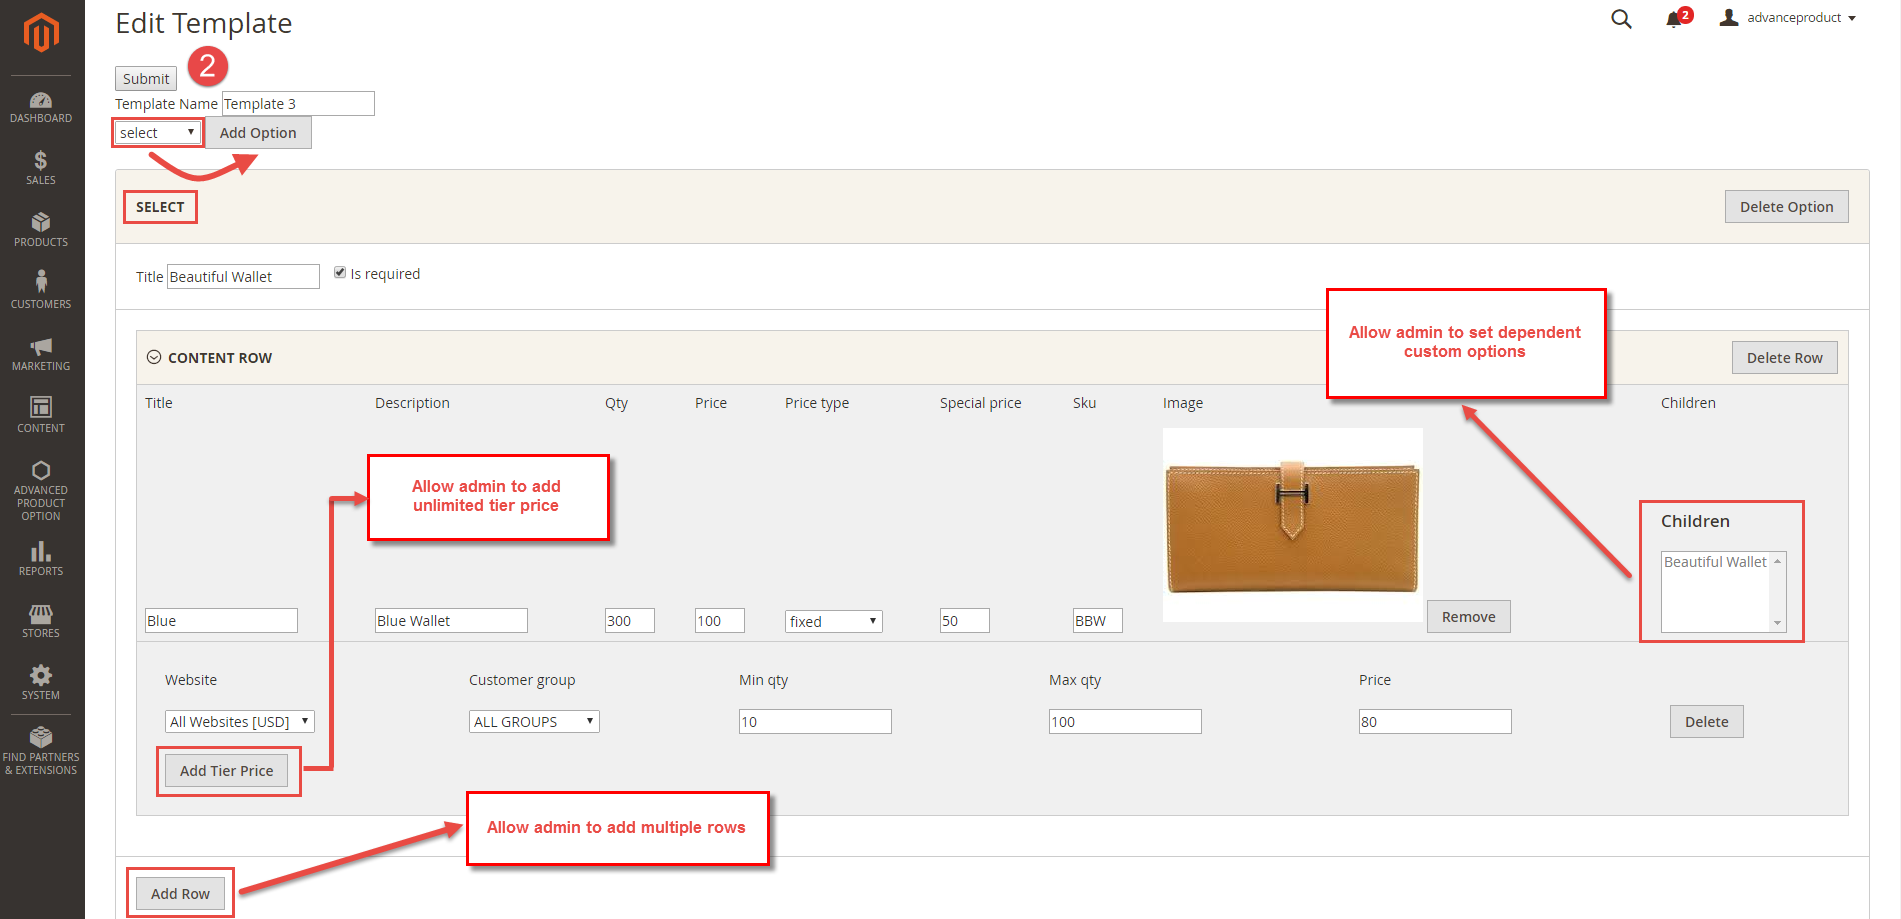
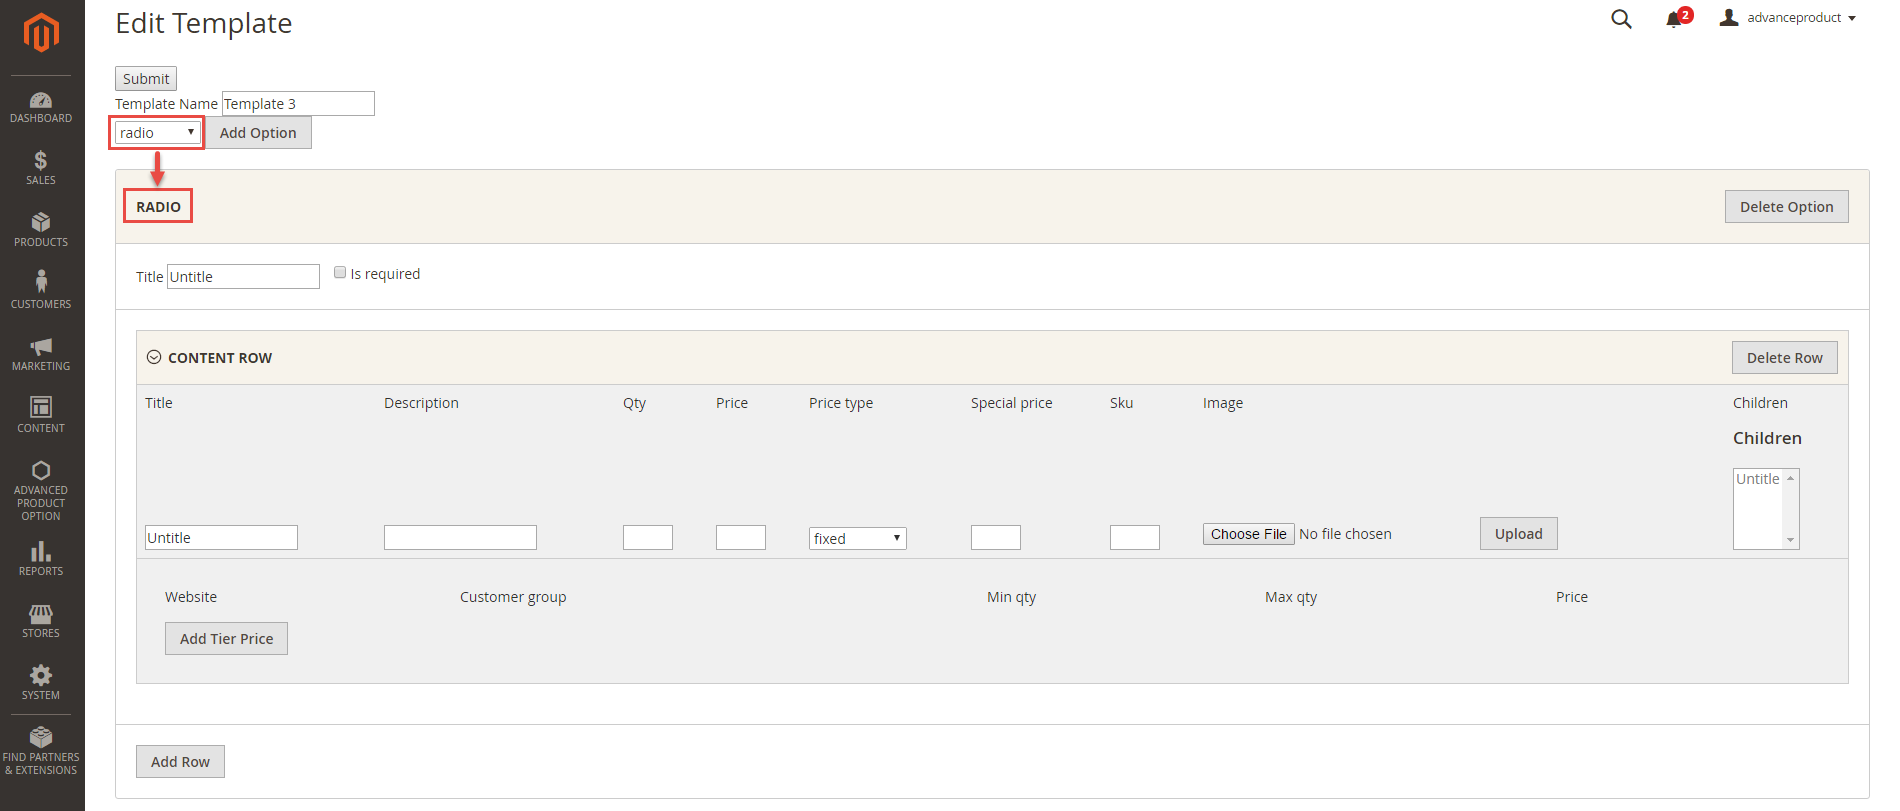
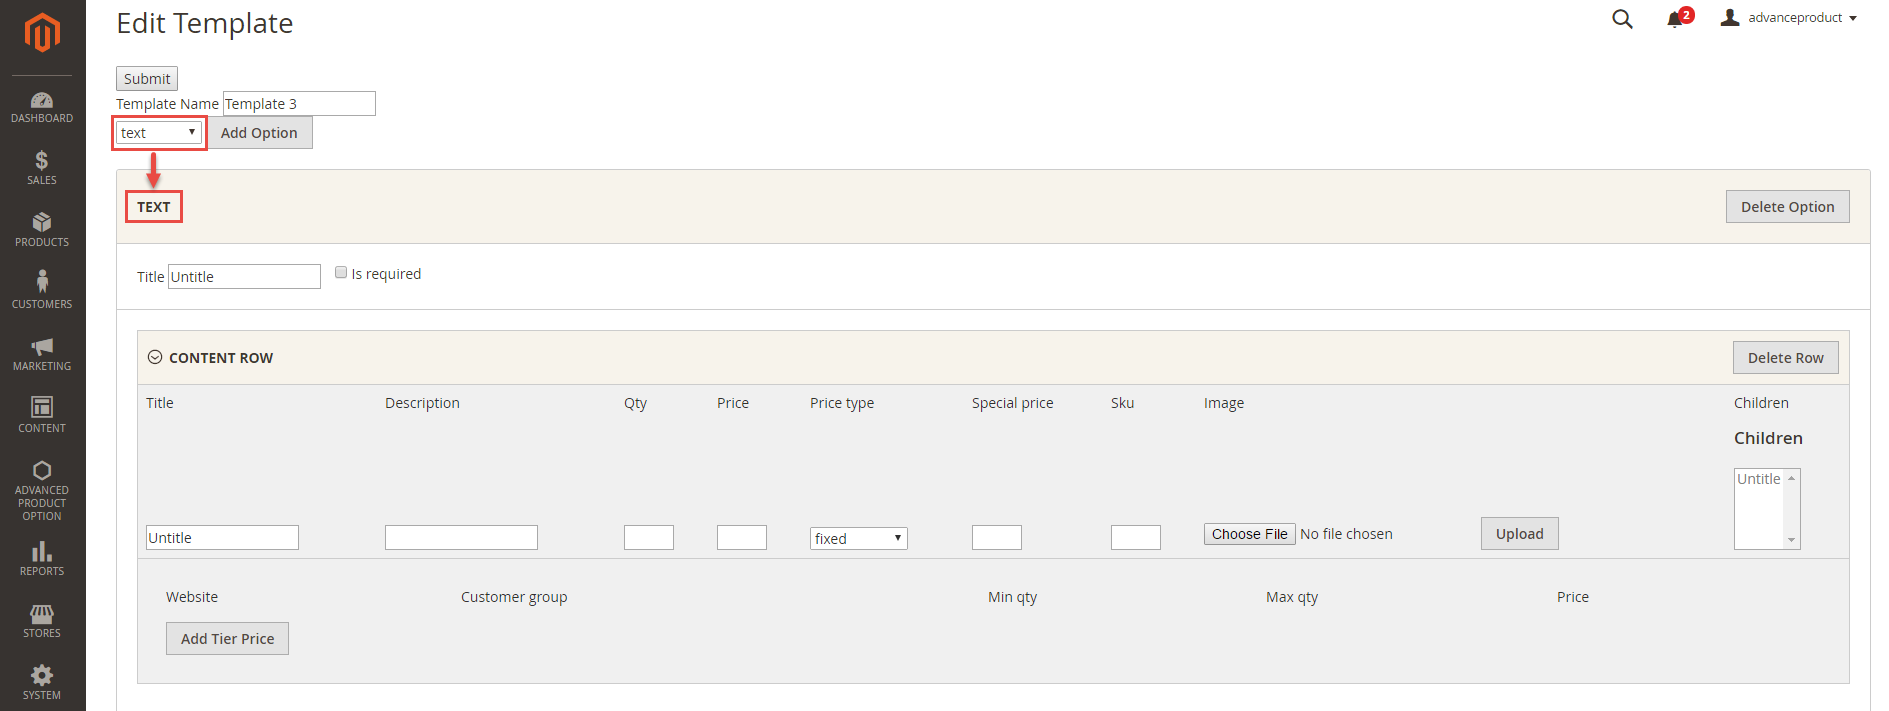
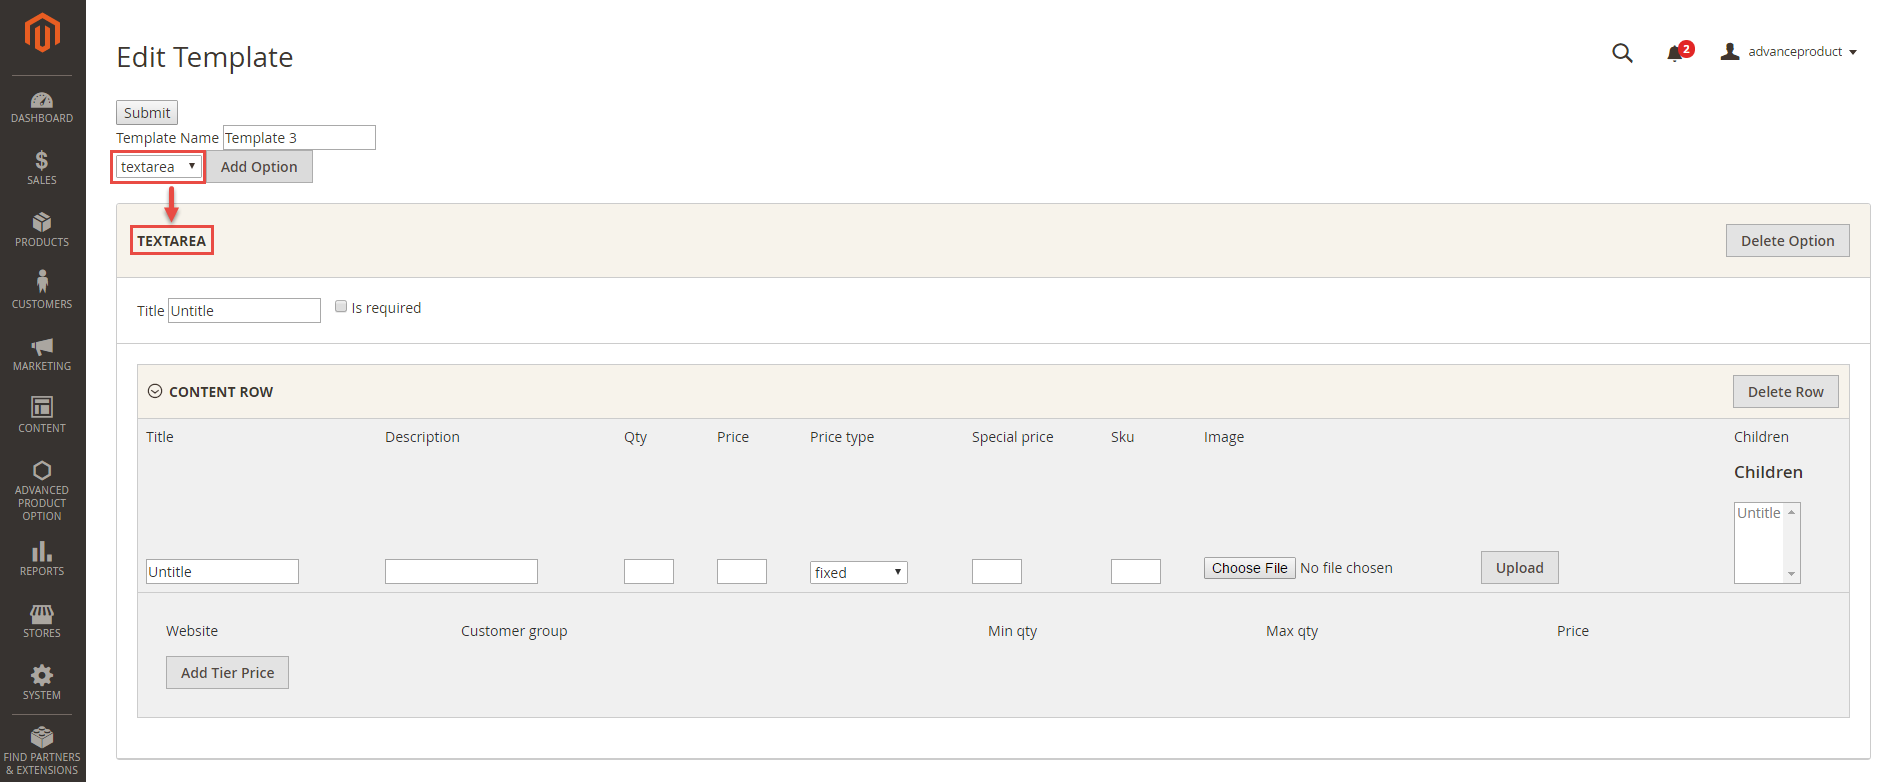
- Option type: There are 5 type options to select, including: Select, Radio, Checkbox, Text, Textarea.
Select: This is equivalent to drop down options. Your option group will contain different options that you can choose by click on the drop-down menu and pick one option.
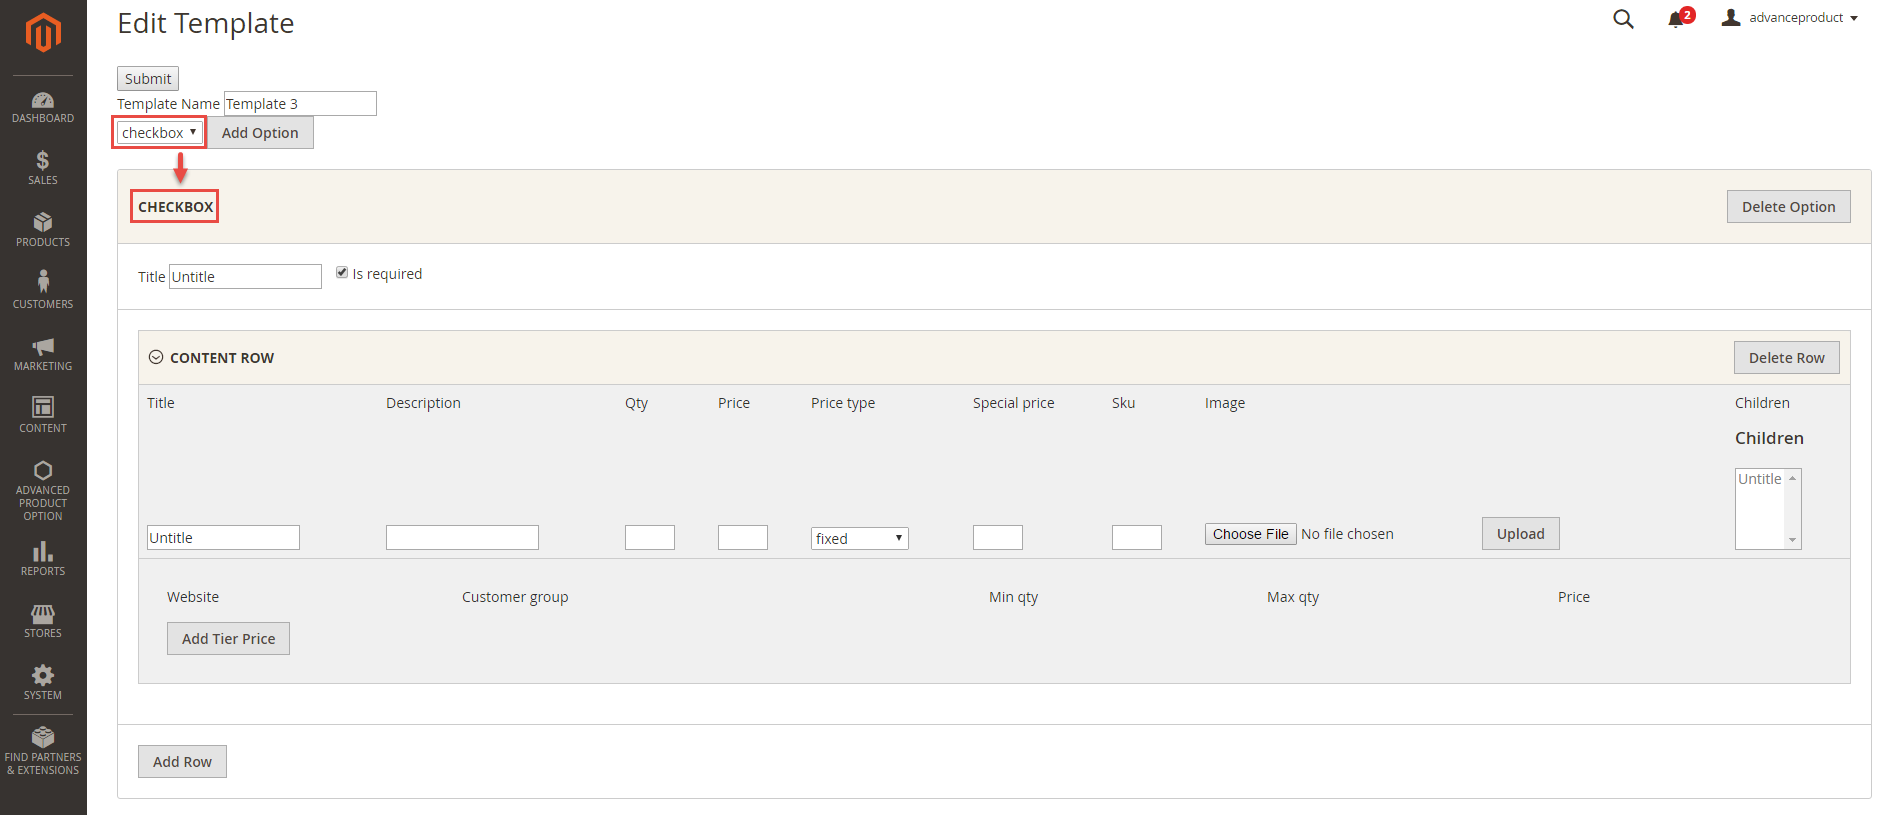
Checkbox: This option type allows you to choose multiple options at the same time.
Radiobutton: This option
Text: This option type allows you to type text in one line.
Text Area: This option type allows you to type text in a paragraph.
- Title: This is the display name of the option group, which will appears on the store front.
- Is required: Select it you want to require customers to choose an option in this group (or fill in the text area) before they are allowed to add a product to cart.
- Children field: Allows admin to create dependent sub-options that appear only when the parent option is chosen. Within an option, you can select another pre-existing option to assign it as a sub-option of the option.
- Tiered Pricing: This section define the quantity discount policy for different customers groups and websites for your business.
- Customer Group:
- Website: Choose which website will this tier pricing scheme be shown.
- Min Quantity:the minimum order quantity for the price discount level. Below this quantity, the price discount will be reduced to a lower level.
- Max Quantity: the maximum order quantity for the price discount level. Beyond this quantity, the price discount will be raised to a higher level.
- Price:
- Add Row: Each row is equivalent to a new option (or sub-option if it is selected as a children)
- Special Prices: Admin can set a special price for each option.
- Upload Image: Merchants can upload multiple images to a custom option’s value next to the basic images. This will really bring convenience to customers because they can see the product with actual options before deciding to buy them.
Checkbox
Radio
Text
Textarea
After setting all of options, admin will assign to them a selection of products at once.
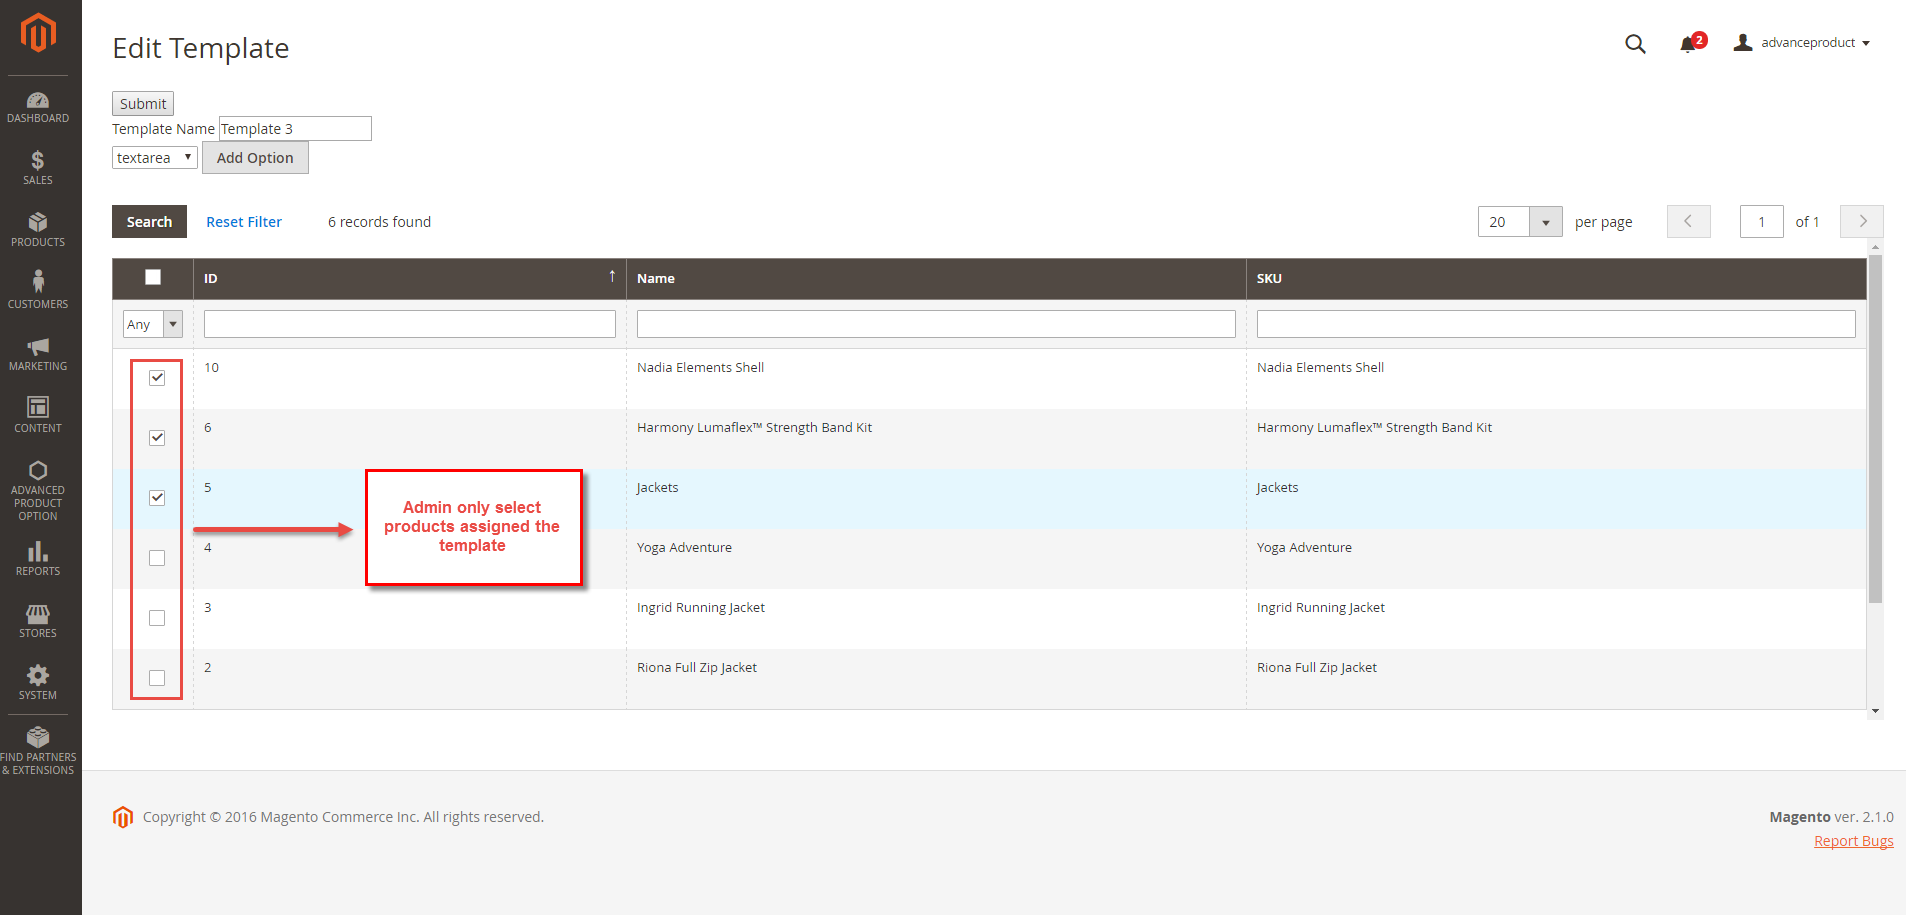
Click the "Save" button to complete.
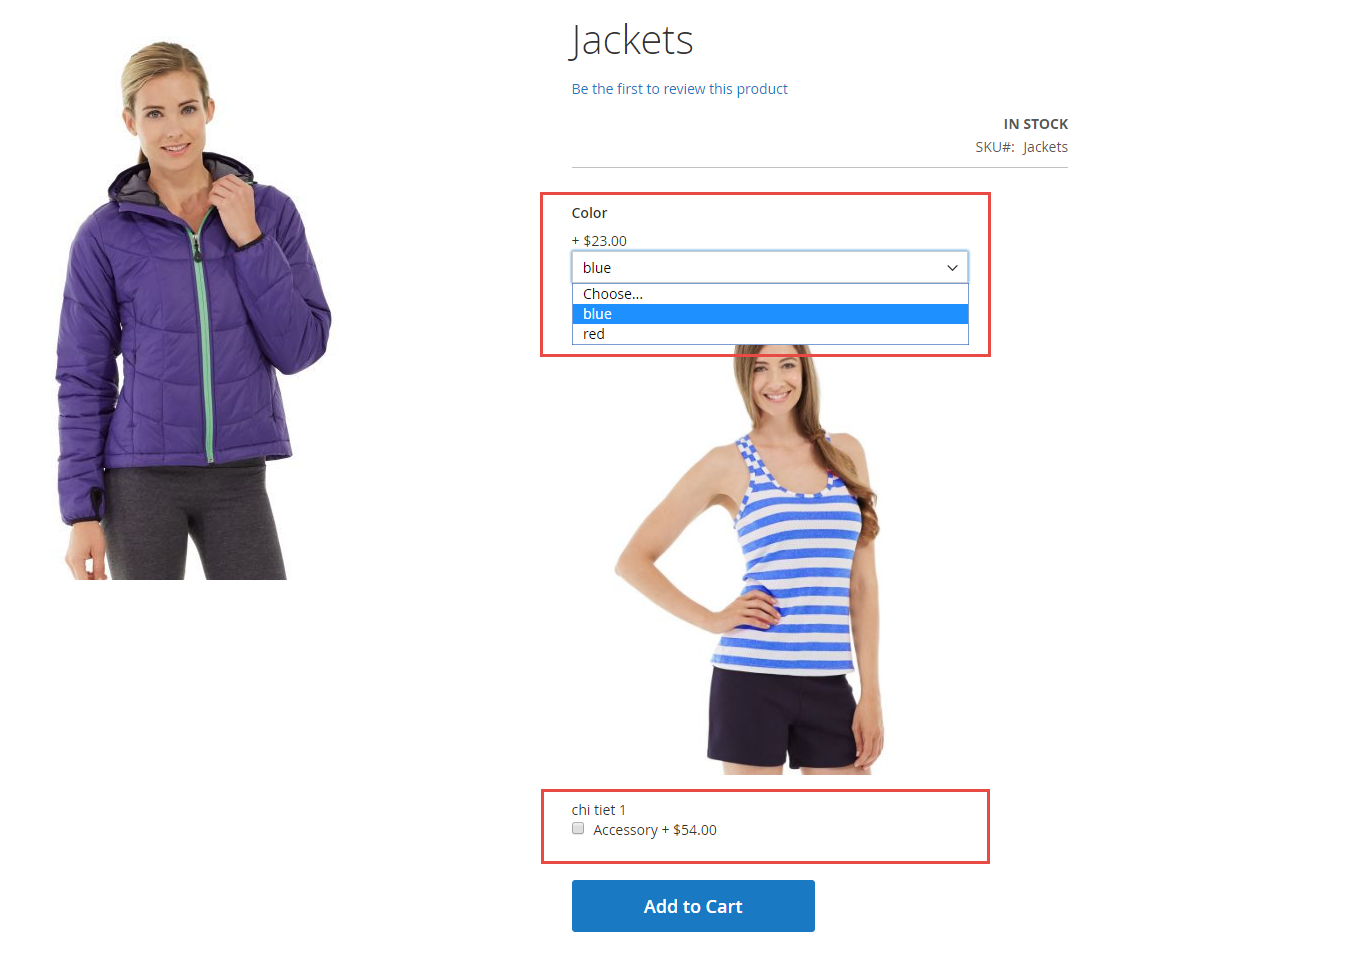
Magento Front End
At front end, customer can view many options for each product with images the different price level.
This will really bring convenience to customers because they can see the product with actual options before deciding to buy them.
Update
- When a new update is available, we will provide you with a new package containing our updated extension.
- You will have to delete the module directory and repeat the installing steps above.
- Flush the config cache. Your store and newly installed module should be working as expected.
Support
- We will reply to support requests after 2 business days.
- We will offer lifetime free update and 6 months free support for all of our paid products. Support includes answering questions related to our products, bug/error fixing to make sure our products fit well in your site exactly like our demo.
- Support DOES NOT include other series such as customizing our products, installation and uninstallation service.
Once again, thank you for purchasing our extension. If you have any questions relating to this extension, please do not hesitate to contact us for support.