Thank you for purchasing our extension. If you have any questions that are beyond the scope of this document, do not hesitate to leave us an email via our email address below.
Created: 08/02/2017 | By: Magenest | Support Portal:http://servicedesk.izysync.com/servicedesk/customer/portal/62
Introduction
PSiGate Payment Gateway extension by Magenest is the great payment tool synchronizing from your Magento 2 store to the PSiGate Payment Gateway..
Extension's page: psigate-payment
Features For Admins
A lot of features is included in the extension that you can tweak to make it best suit your business, including:
- Choose between Authorize Only or Authorize and Capture.
- Payment method
View new order status.
Features For Customers
The primary aim of the extension is to deliver the most fluent and effortless payment experience to the customers:
Easily checkout using credit card.
System Requirements
Your store should be running on Magento 2 Community Edition version 2.0.x or 2.1.x.
Configuration
At backend, admin need to configure some fields to connect between your magento site and the account.
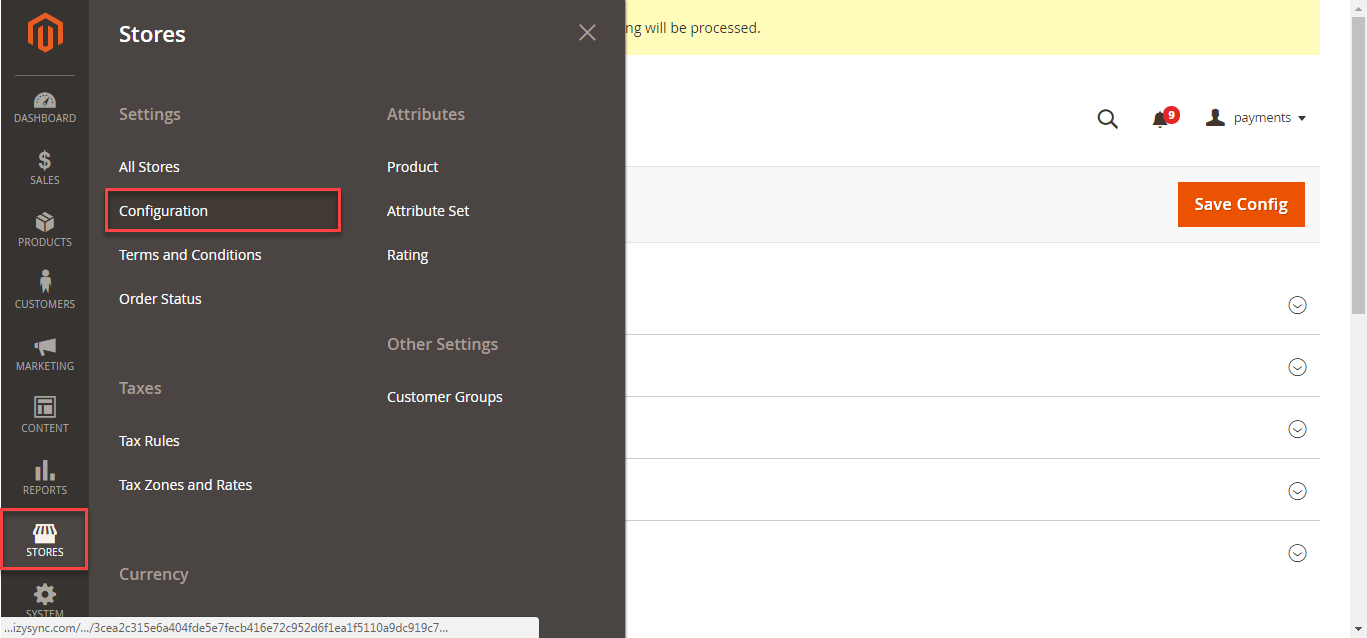
Firstly, admin click on Stores > Configuration > Sales > Payment Methods.
In addition, admin can set information for: Title, Payment Action, Payment Methods, Sandbox Mode Enabled, PSiGate store key test, New Order Status.
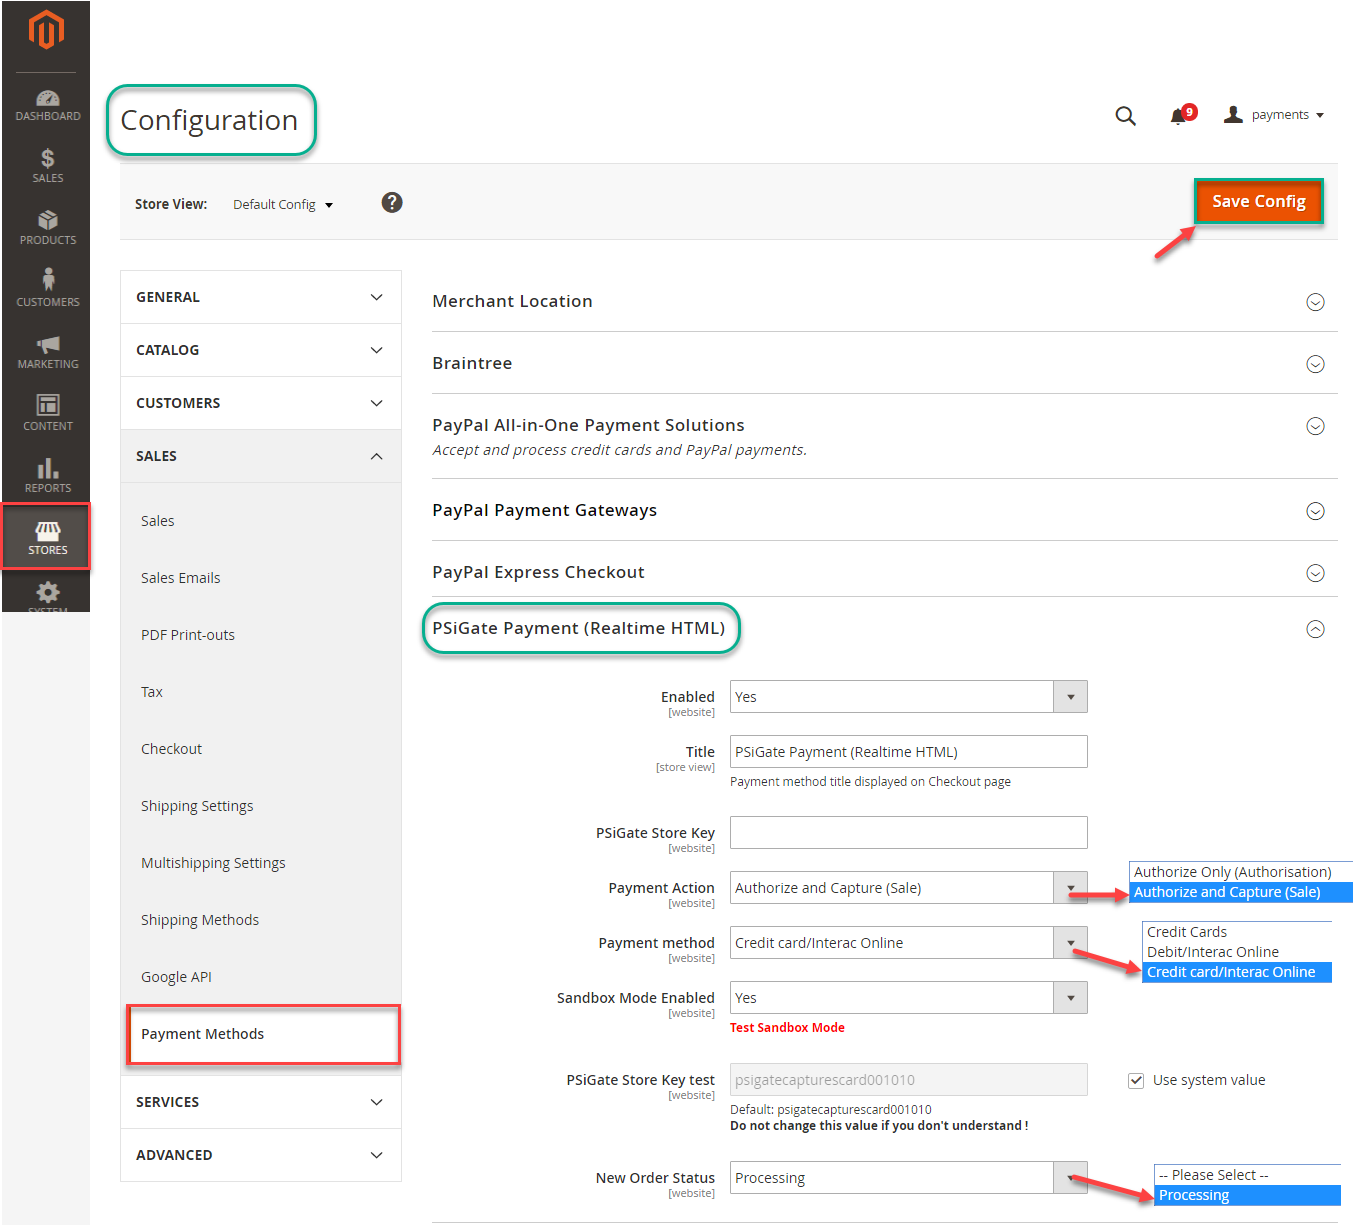
After set information,click on Save Config button, your configuration is ready to use.
- NOTE:
* Setup PSiGate control panel
- Login to your PSiGate control panel at https://secure.psigate.com
- Click the HTML Capture Settings link
- Set Enabled to Yes
- Input your Store Account Name (StoreID) given within your PSiGate Welcome Email within the StoreKey field. This setting informs PSiGate of the store account
that is to receive the transaction request. Write this number down as you will need it later. - If you are using the Client side secure form POST connection method, set DBA Display Name to your company name.
- Leave the Approved URL and Declined URL fields blank
- If you are using the Client side secure form POST connection method, set the Capture Setting field to Card Data is Passed to PSiGate. If you are using the Client side non-secure form POST connection method, set it to PSiGate Captures Card Data.
- Set the Restrict Referring Hosts field to No
- Set the Results field to 1.2
- Click the Save button
- Open the payment gateway record labeled PSiGate in the control panel of Squirrelcart
- Enter your PSiGate StoreKey in the Account Name field
- Leave the Account Password field blank. It is only used for the XML Messenger Interface
- Set the Transaction Type field.
- Set Connection Method to Gateway Hosted or Store Hosted / Browser to Gateway (Relay)
- Check the Enabled field
- Click

Main Functions
- Easily Checkout Using Credit Card
At frontend, customer will need to choose an item and click on Add to Cart button.

Then, go to checkout and select PSiGate Payment instead of Check/Money Order .

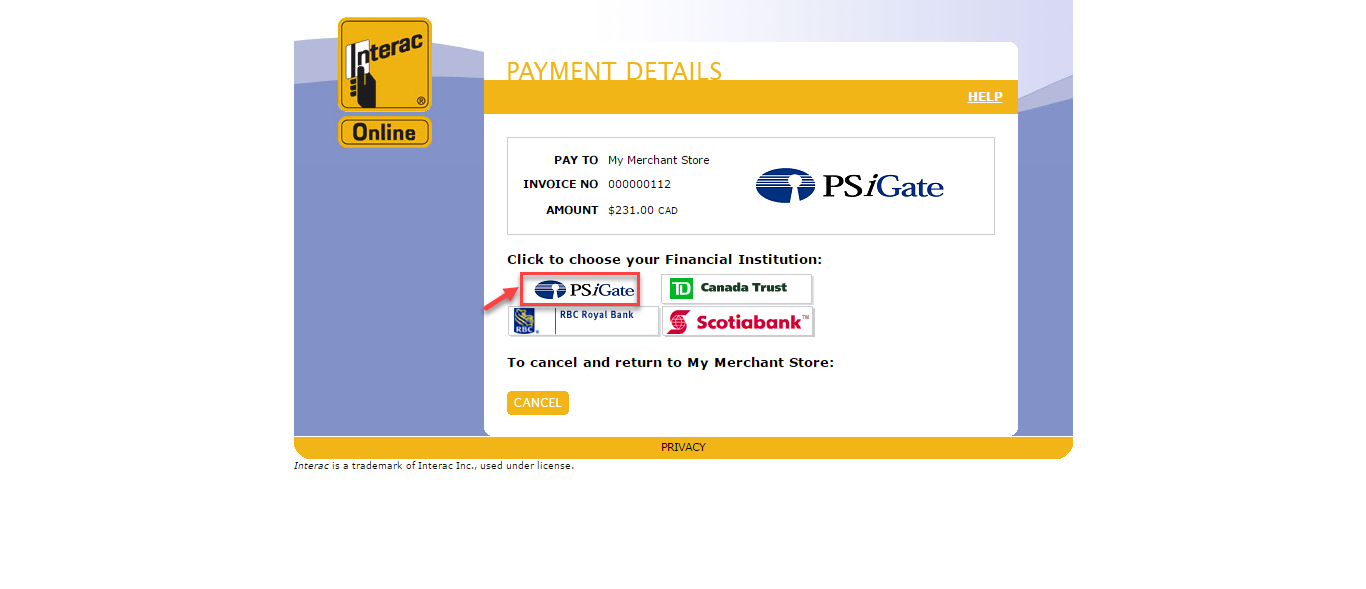
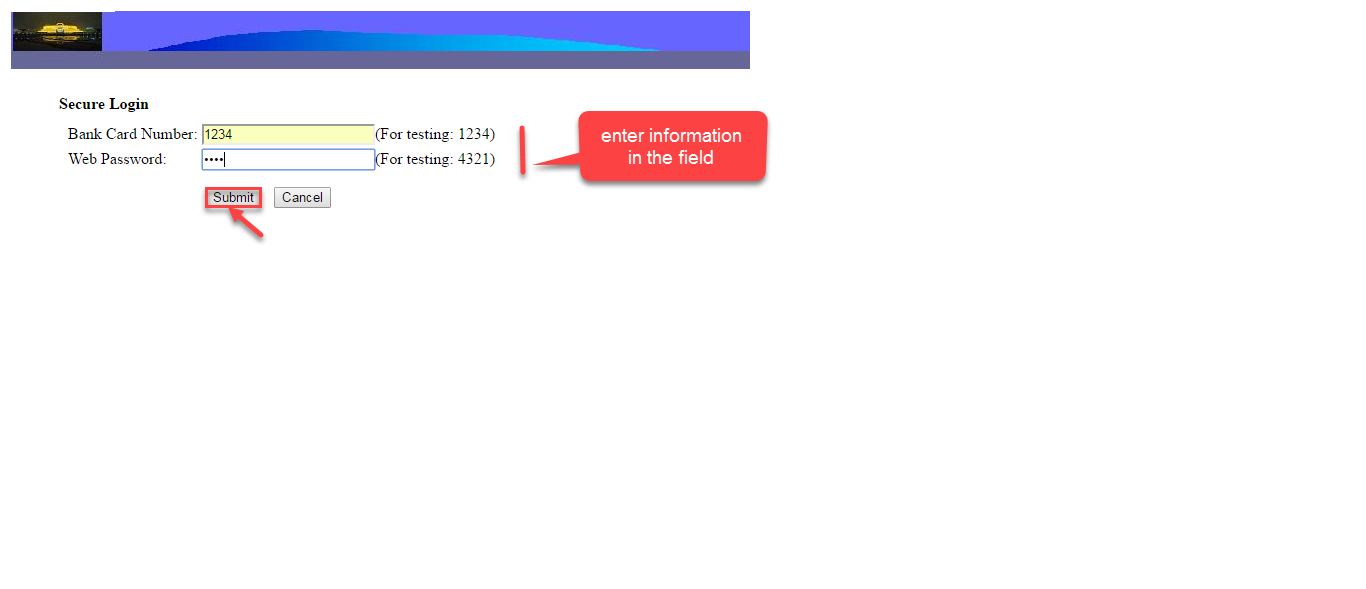
After clicking Continue to PSiGate button, you will be transmitted to PSiGate payment page. Some steps are continued to complete transaction
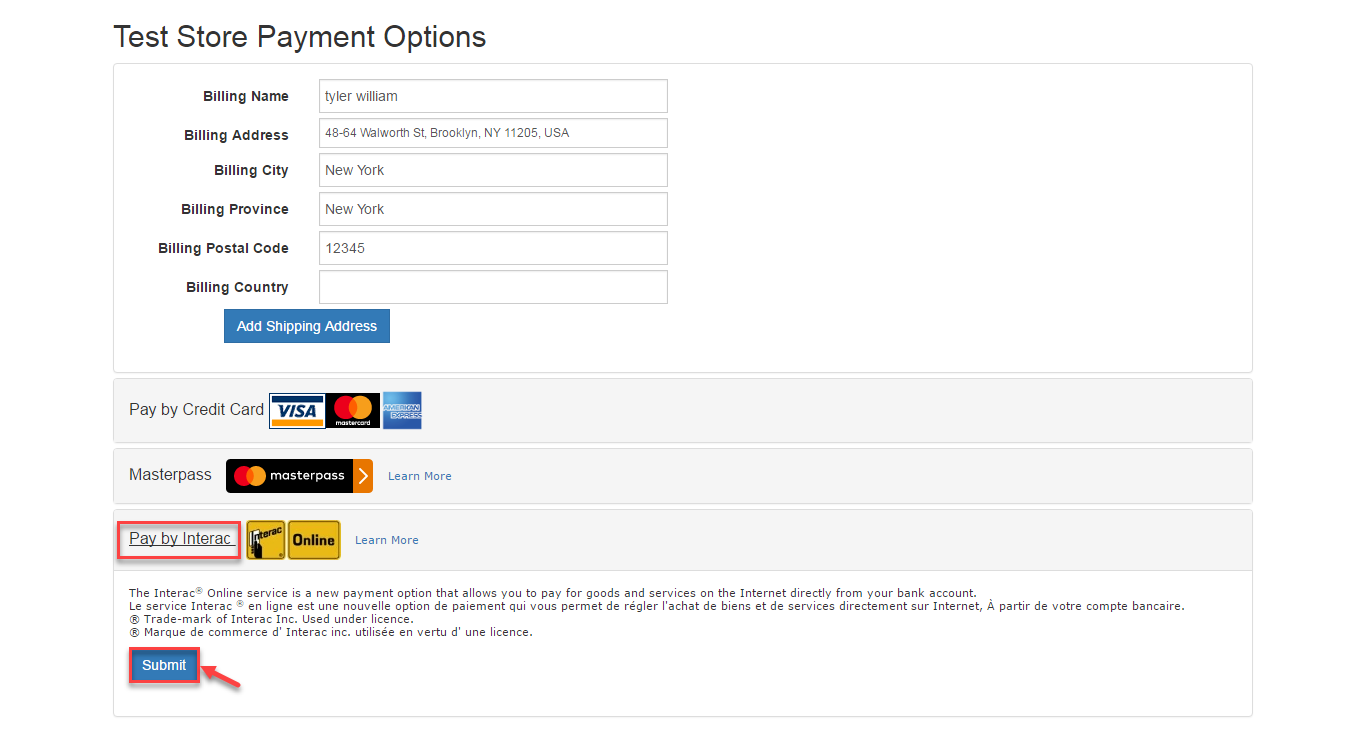
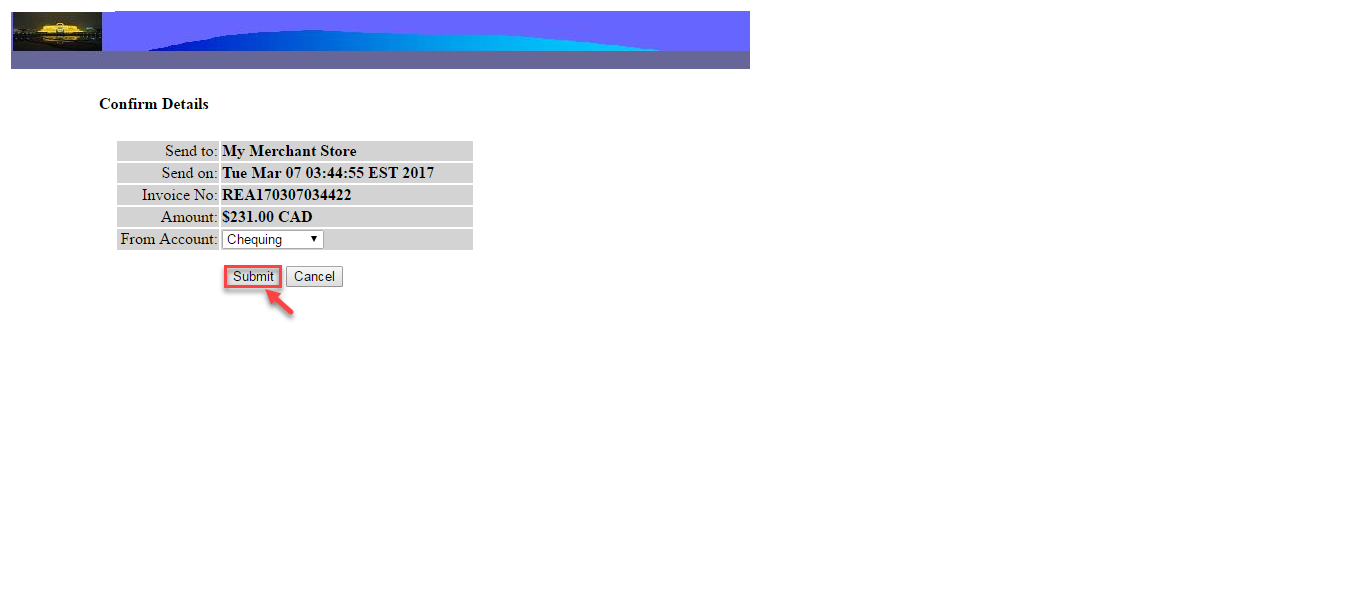
After having done transaction, Procducts that you are bought successfully.

Update
- When a new update is available, we will provide you with a new package containing our updated extension.
- You will have to delete the module directory and repeat the installing steps above.
- Flush the config cache. Your store and newly installed module should be working as expected.
Support
- We will reply to support requests after 2 business days.
- We will offer lifetime free update and 6 months free support for all of our paid products. Support includes answering questions related to our products, bug/error fixing to make sure our products fit well in your site exactly like our demo.
- Support DOES NOT include other series such as customizing our products, installation and uninstallation service.
Once again, thank you for purchasing our extension. If you have any questions relating to this extension, please do not hesitate to contact us for support.