Thank you for purchasing our extension. If you have any questions that are beyond the scope of this document, please feel free to contact us via [email protected]
By: Magenest | Support Portal: http://servicedesk.izysync.com/servicedesk/customer/portal/7
Introduction
Highlight Keys:
AI Virtual Try-On is a feature that allows online shoppers to preview how a product may look on a person before purchasing. The feature can be enabled or disabled for selected products from the admin panel.
On the storefront, customers can upload their own photo or choose a sample image from the gallery, validate the image, and generate an AI-powered try-on result directly on the product detail page.
For Admin:
- Enable or disable Virtual Try-On for each product based on product suitability.
- Control the experience at product level, including parent products such as configurable products.
- Upload and organize gallery images in the Magento media gallery for shoppers to use as sample images.
- Improve product visualization and support a more interactive product detail page experience.
For Customer:
- Try products visually using their own uploaded photo or a preloaded gallery image.
- Preview the uploaded image before continuing to the validation and generation step.
- Receive AI validation to help ensure the uploaded image is suitable for try-on generation.
- Reduce uncertainty during online shopping and make product evaluation more convenient.
System Requirements:
Your store should be running on Magento 2.4.x
Admin Configuration
Virtual Try-On Settings:
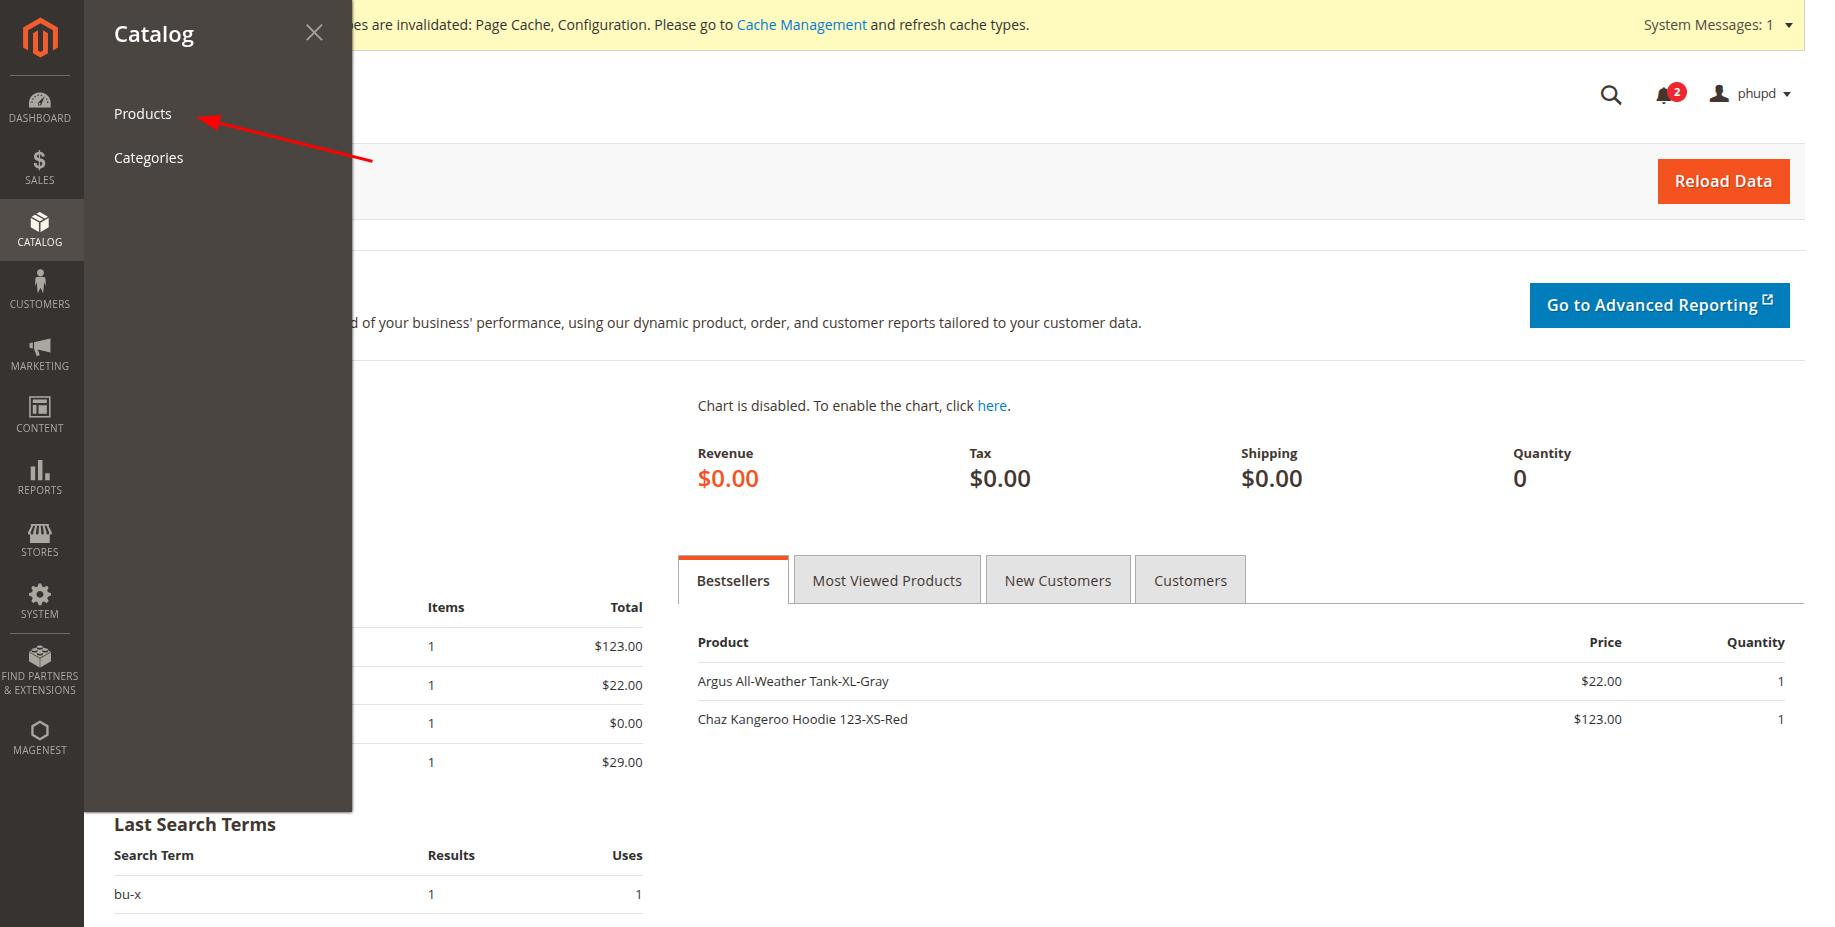
Step 1: After logging in to the admin panel, go to Catalog > Products.
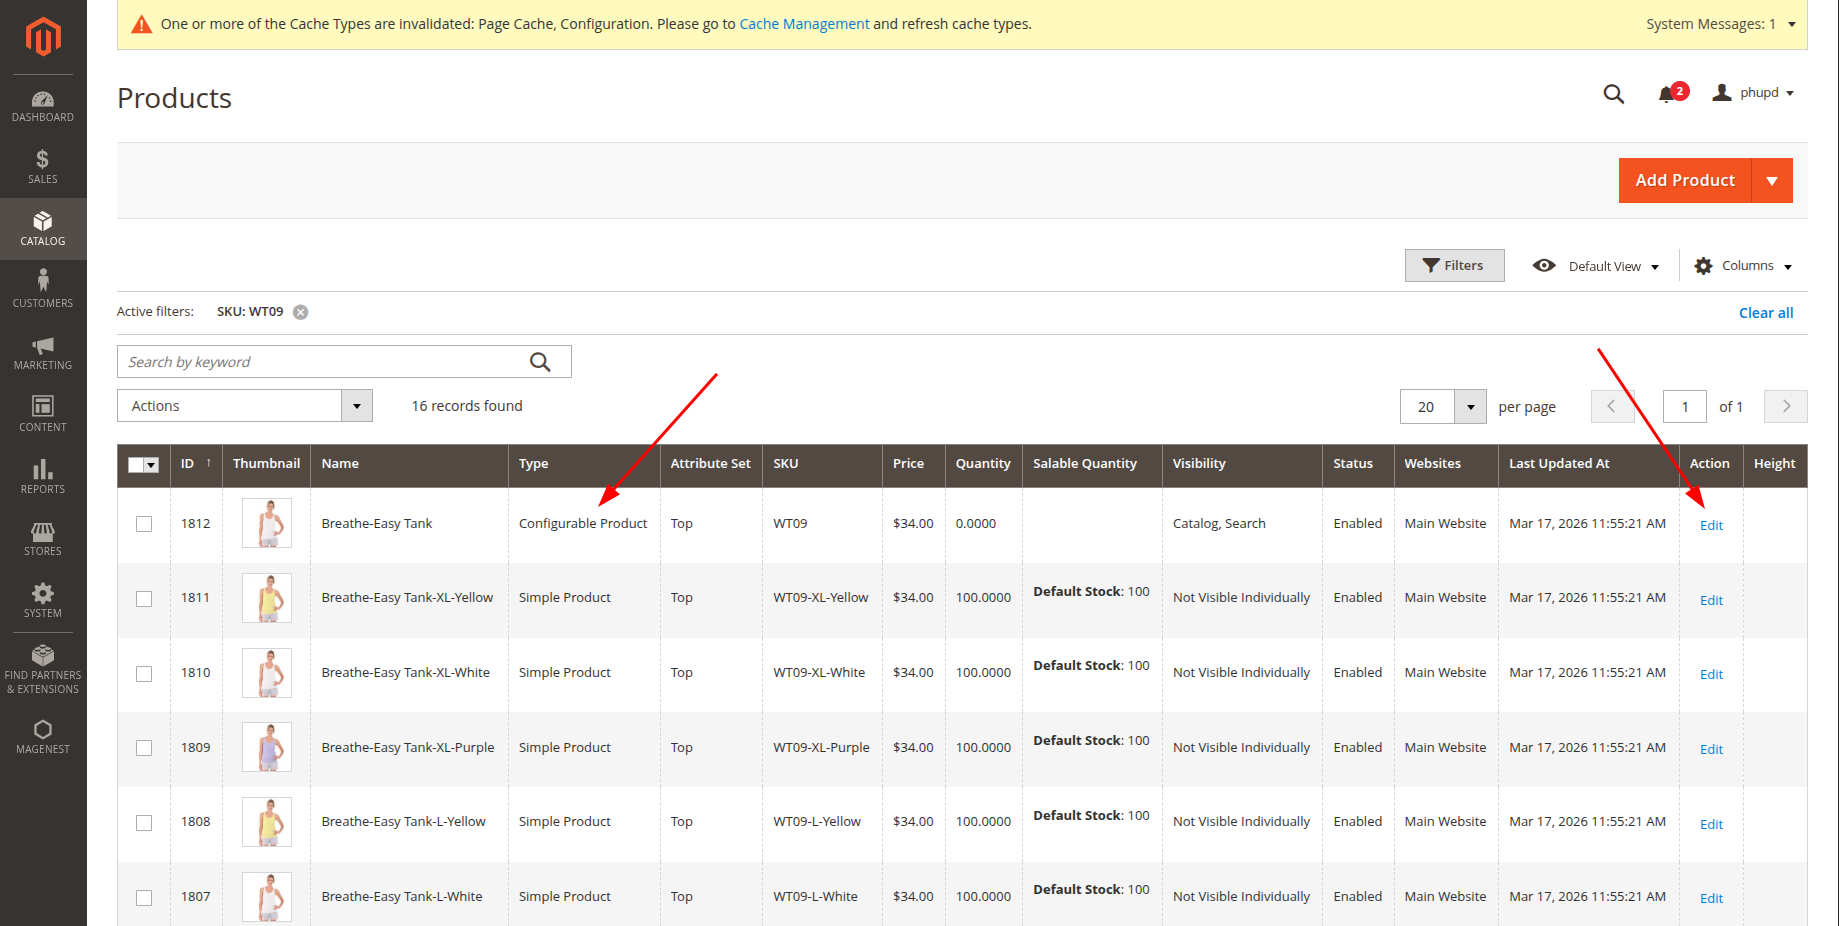
Step 2: Select the product you want to enable Virtual Try-On for, then click Edit.
Note: For product types that contain child products, such as Configurable Product, enable Virtual Try-On only on the parent product.
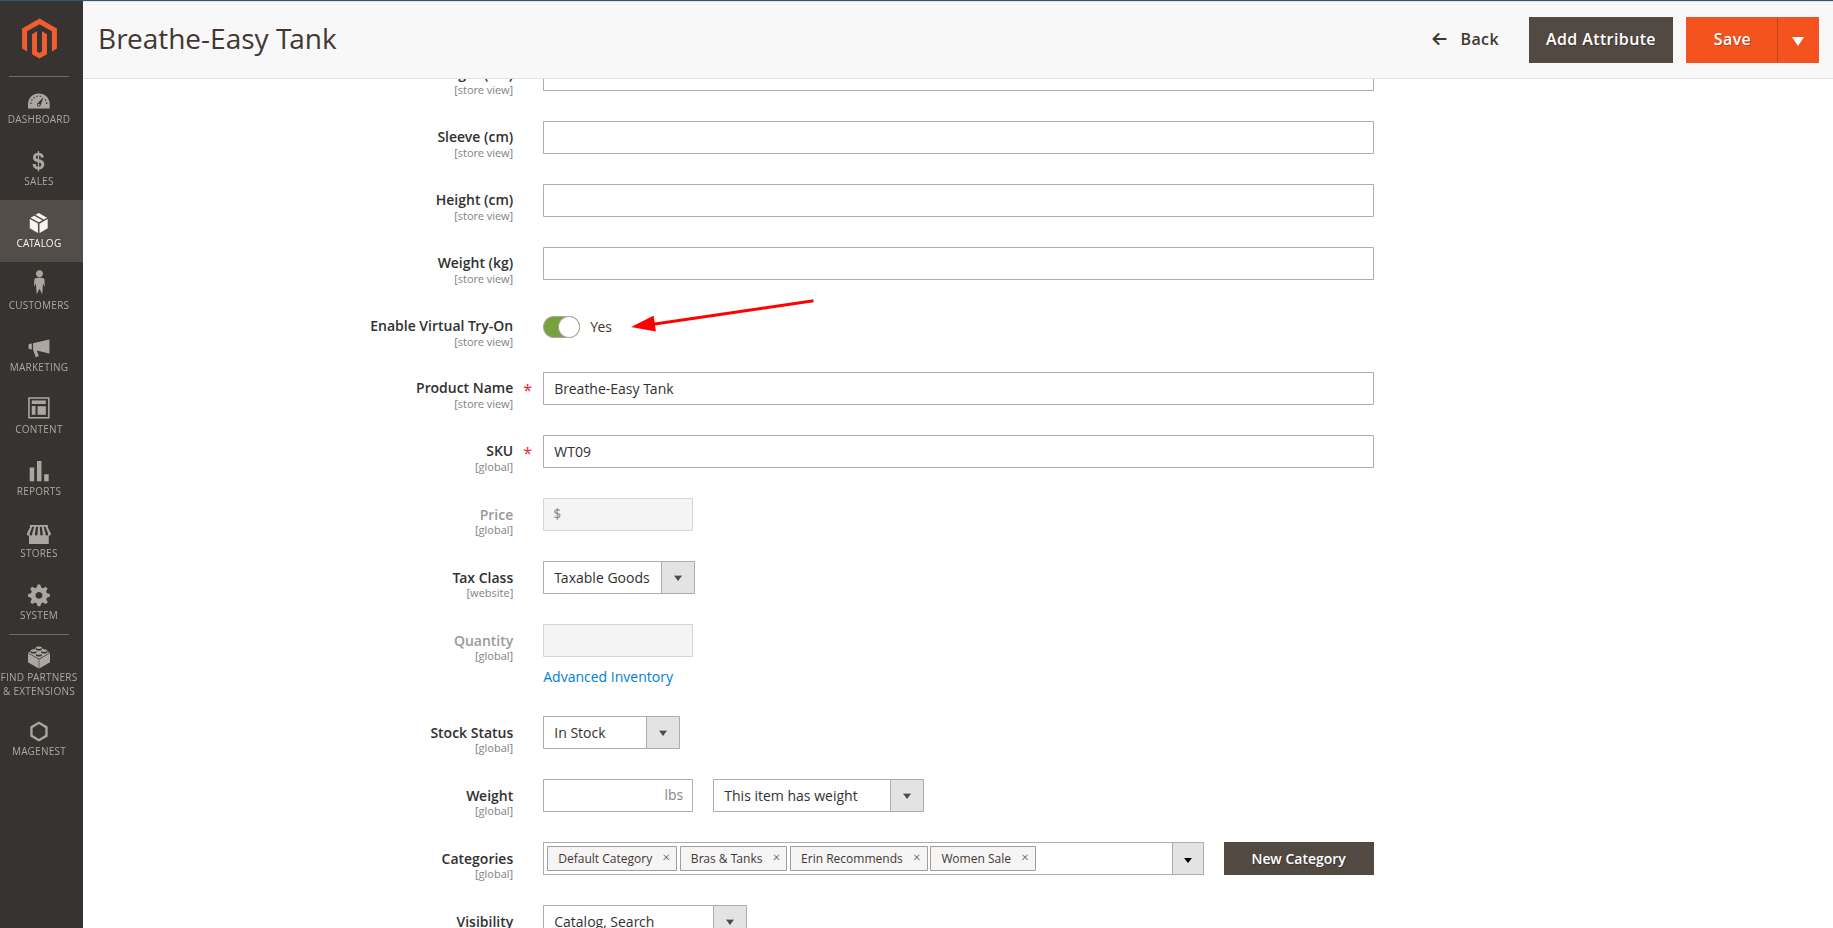
Step 3: On the product edit page, change the Virtual Try-On status using the Enable Virtual Try-On field. Click Save to apply the change.
Upload Gallery Images:
Admins can build and manage image libraries based on gender, age group, body type, style, or product category, helping shoppers choose a model image that better matches their preferences and customer segment.
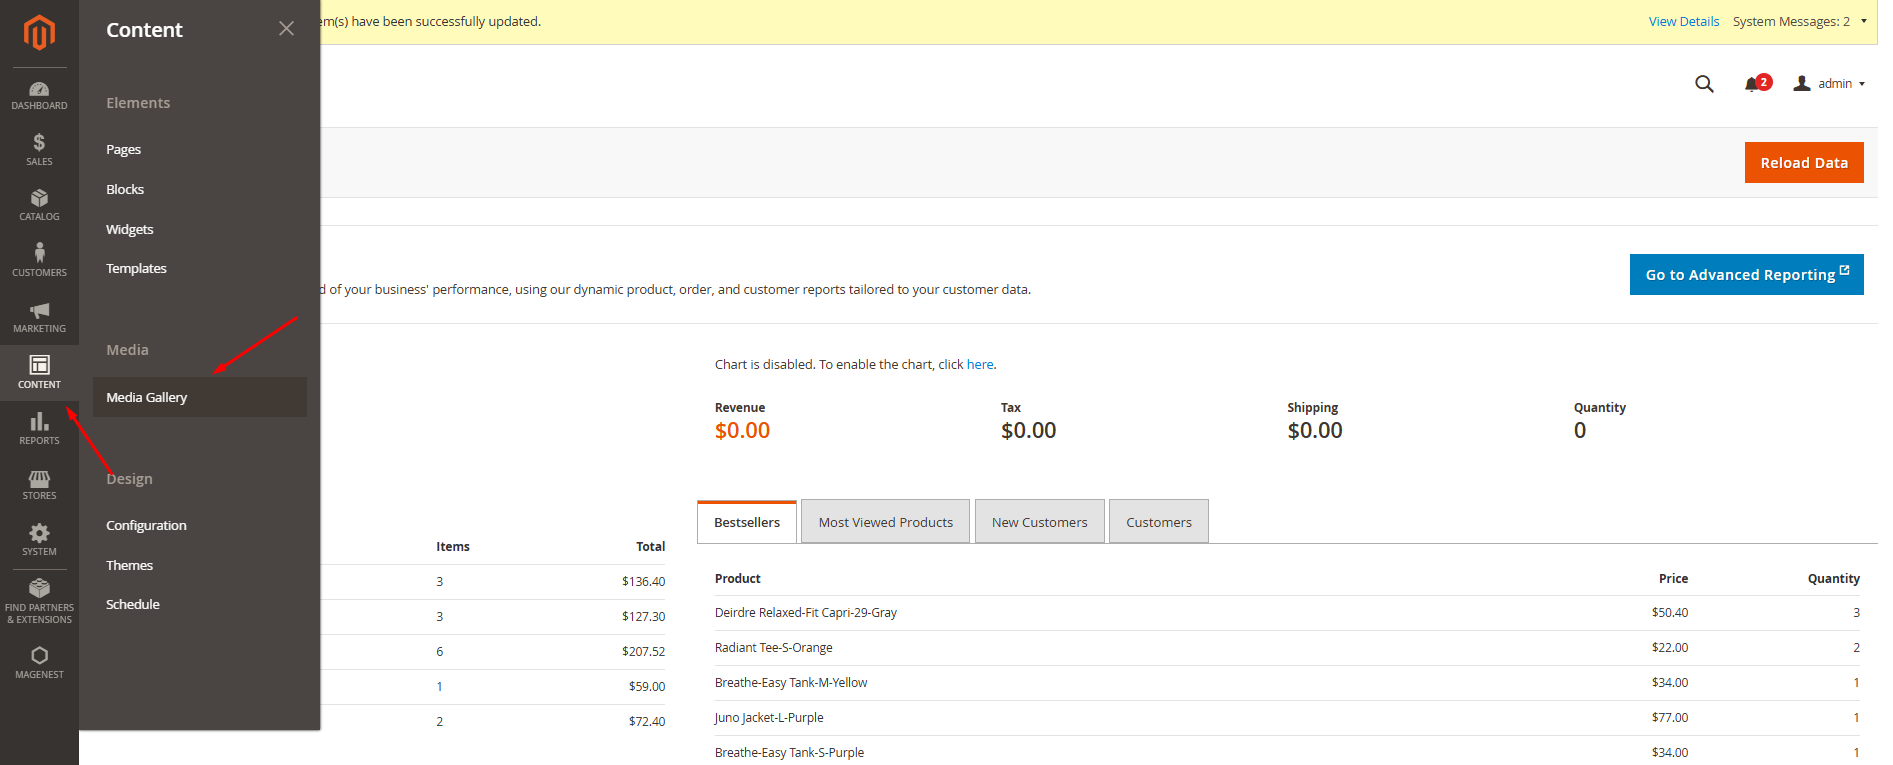
Step 1: Go to Content > Media > Manage Gallery.
Step 2: In the folder tree panel on the left, expand wysiwyg > virtualtryon.
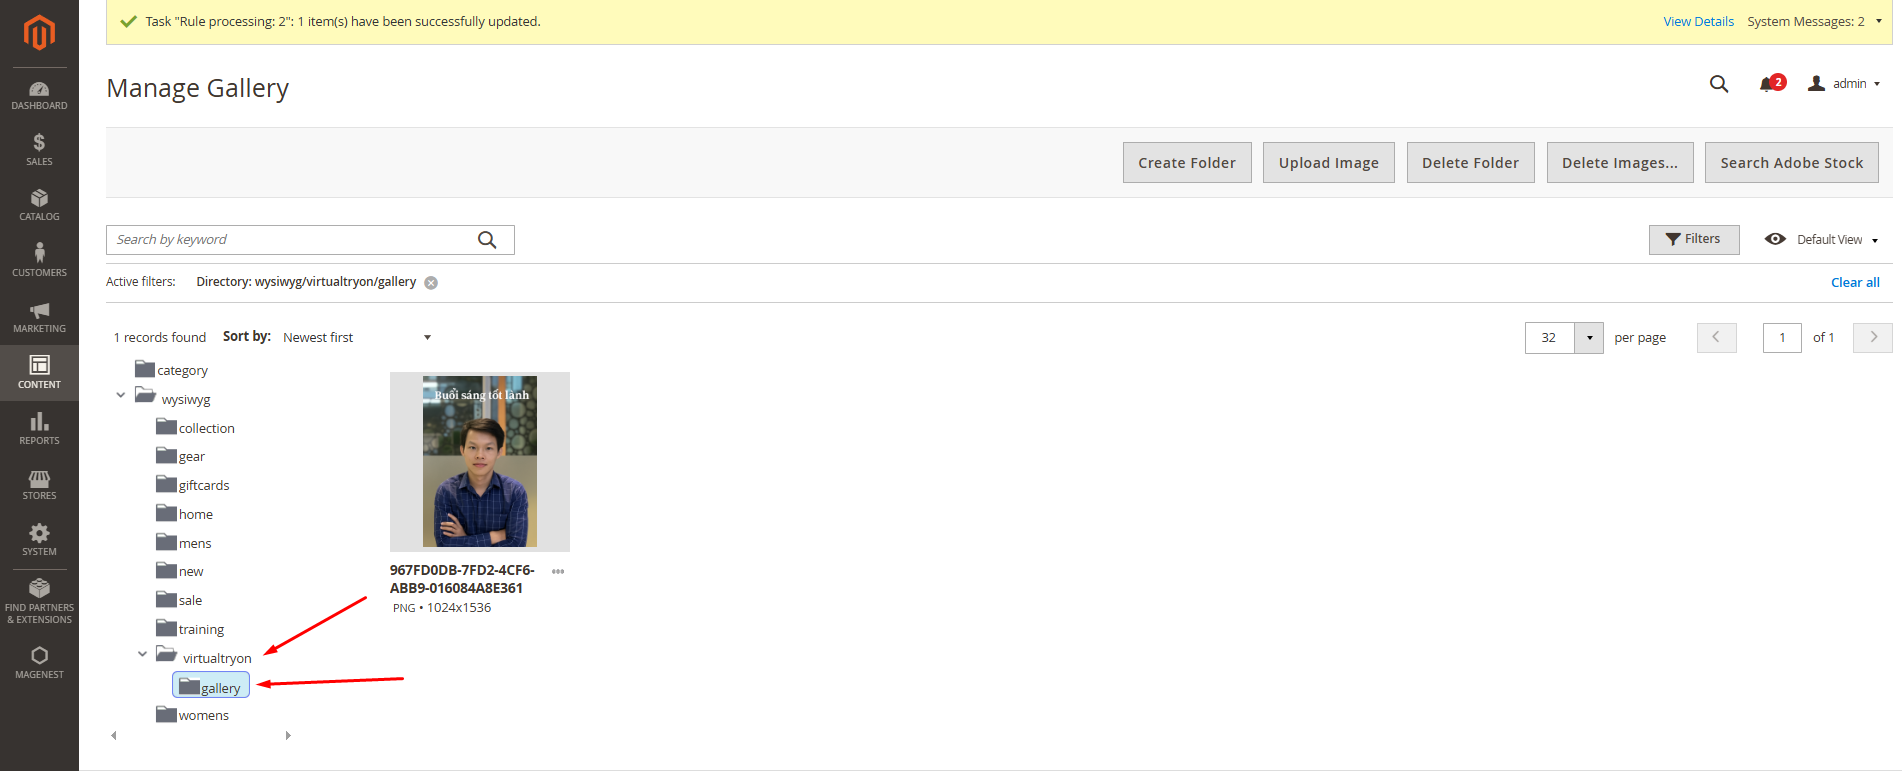
Step 3: Click Create Folder to create classification subfolders as needed. For example: gallery, male, female, kids, or athletic_wear.
Note: Use only letters (a-z or A-Z), numbers (0-9), underscore (_) or hyphen (-) in this field. No spaces or other characters are allowed.
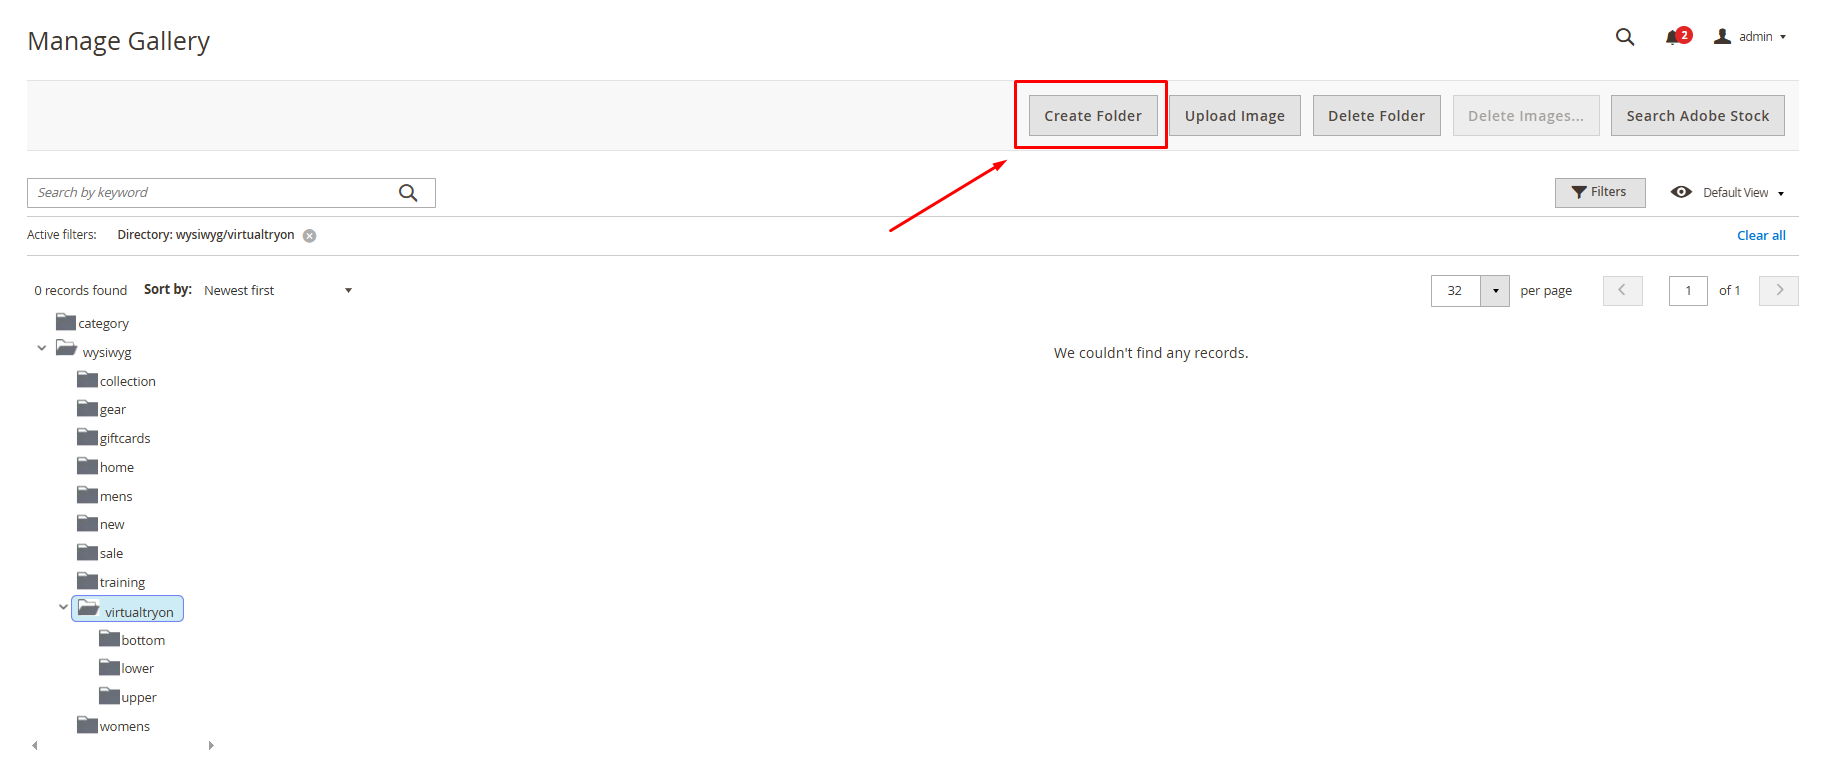
Step 4: Click the target folder, click Upload Image, then select a JPG, PNG, or WebP file.
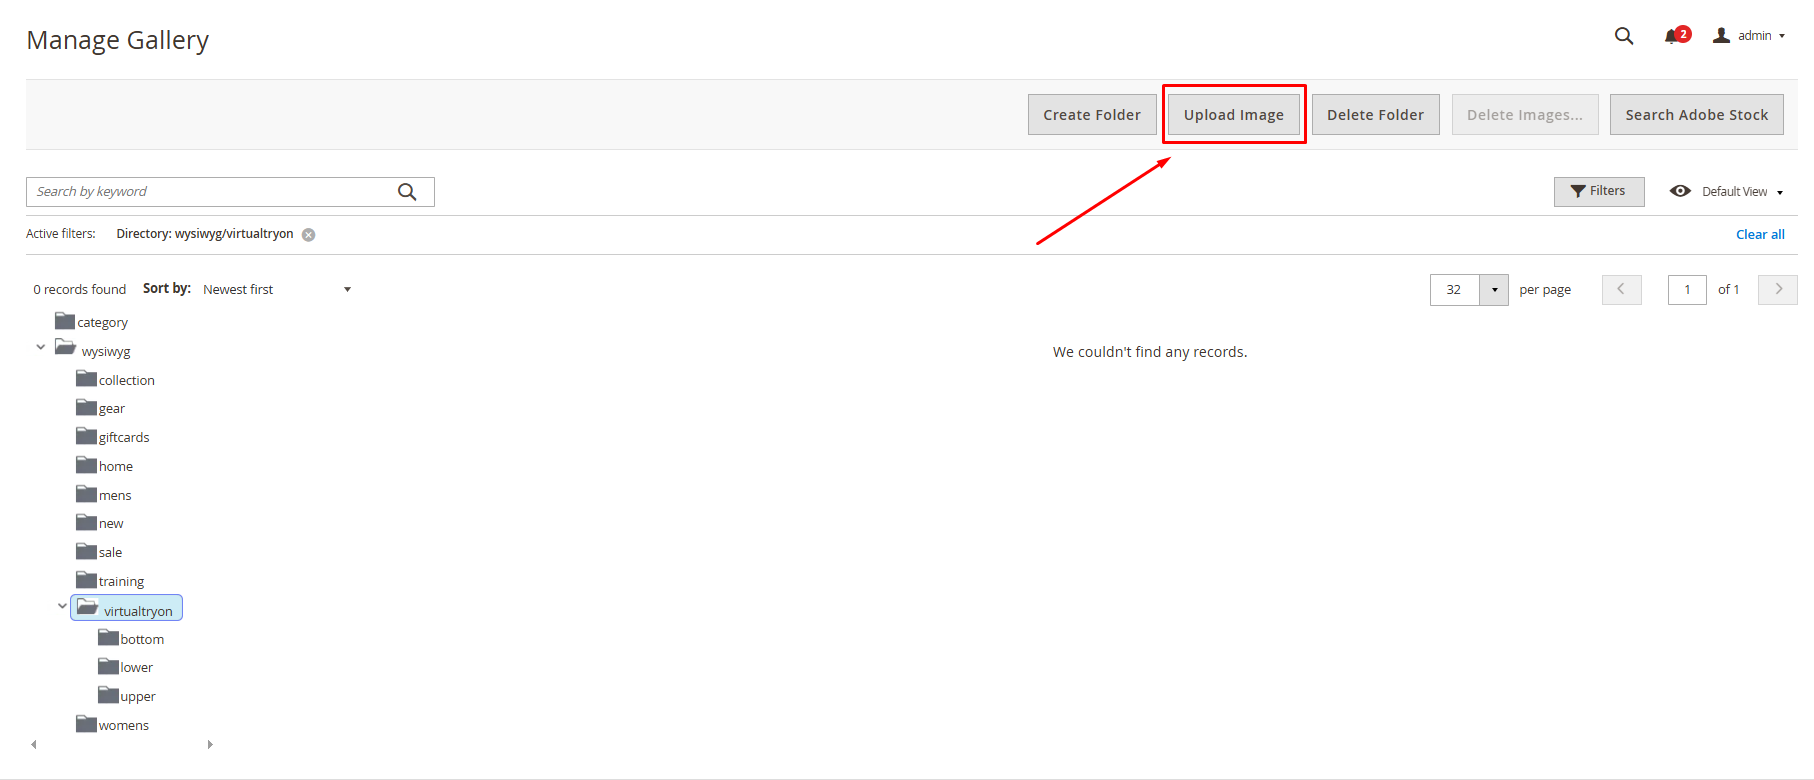
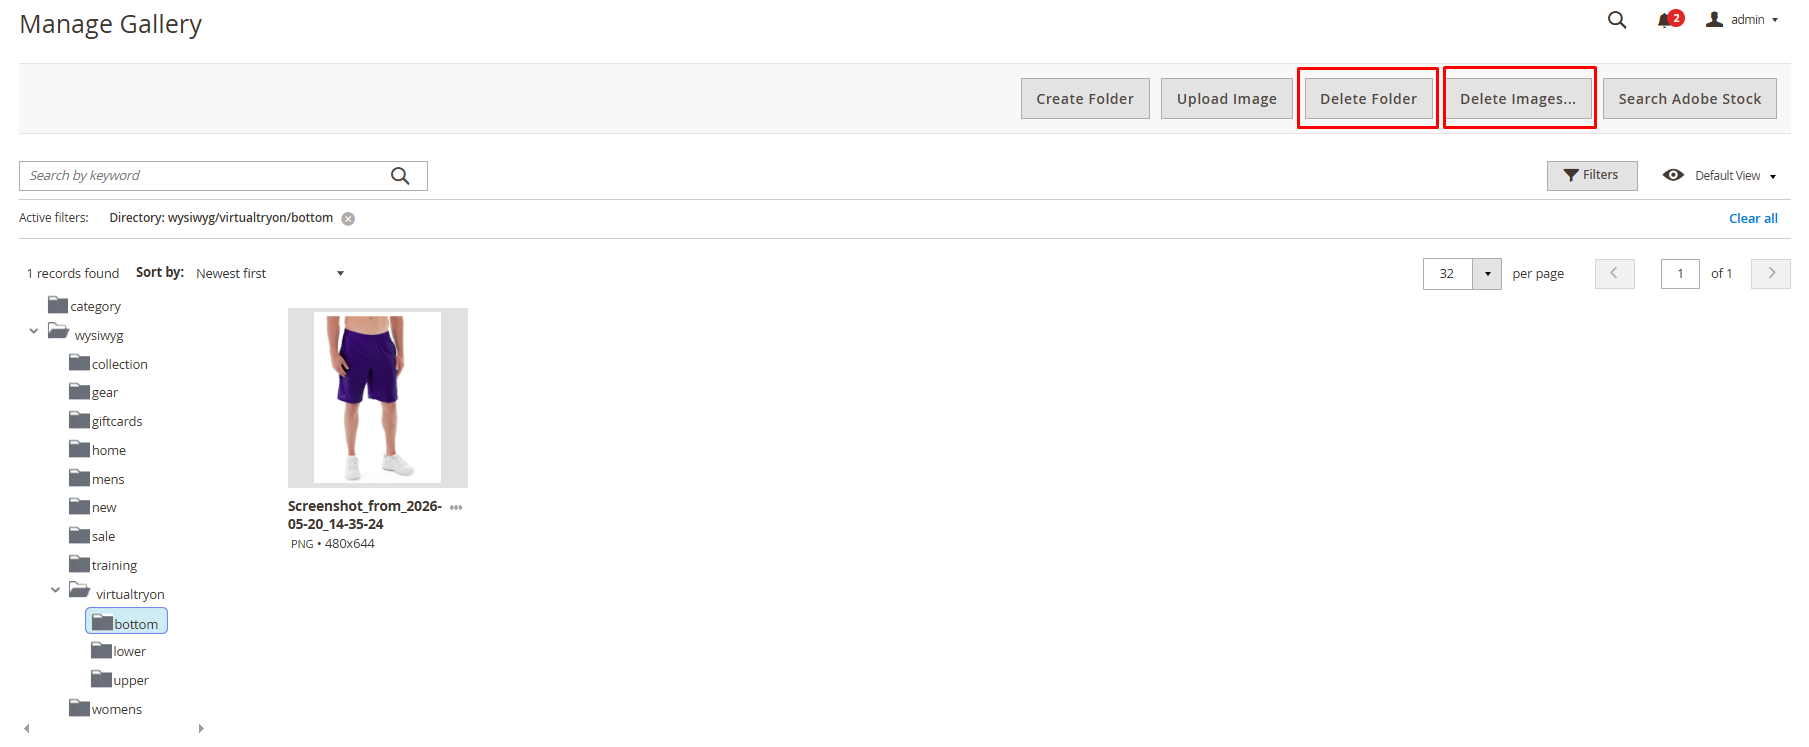
If you want to delete any folder or image, pick the folder or image then click Delete Folder/Delete Images.
Step 5: Refresh the product page on the storefront. The uploaded images will appear in the Choose from Gallery tab.
Note: There must be at least one image in the subfolder for the subfolder to be displayed on the frontend.
Frontend Experience
1. On the storefront, the customer clicks a product to open the product detail page.
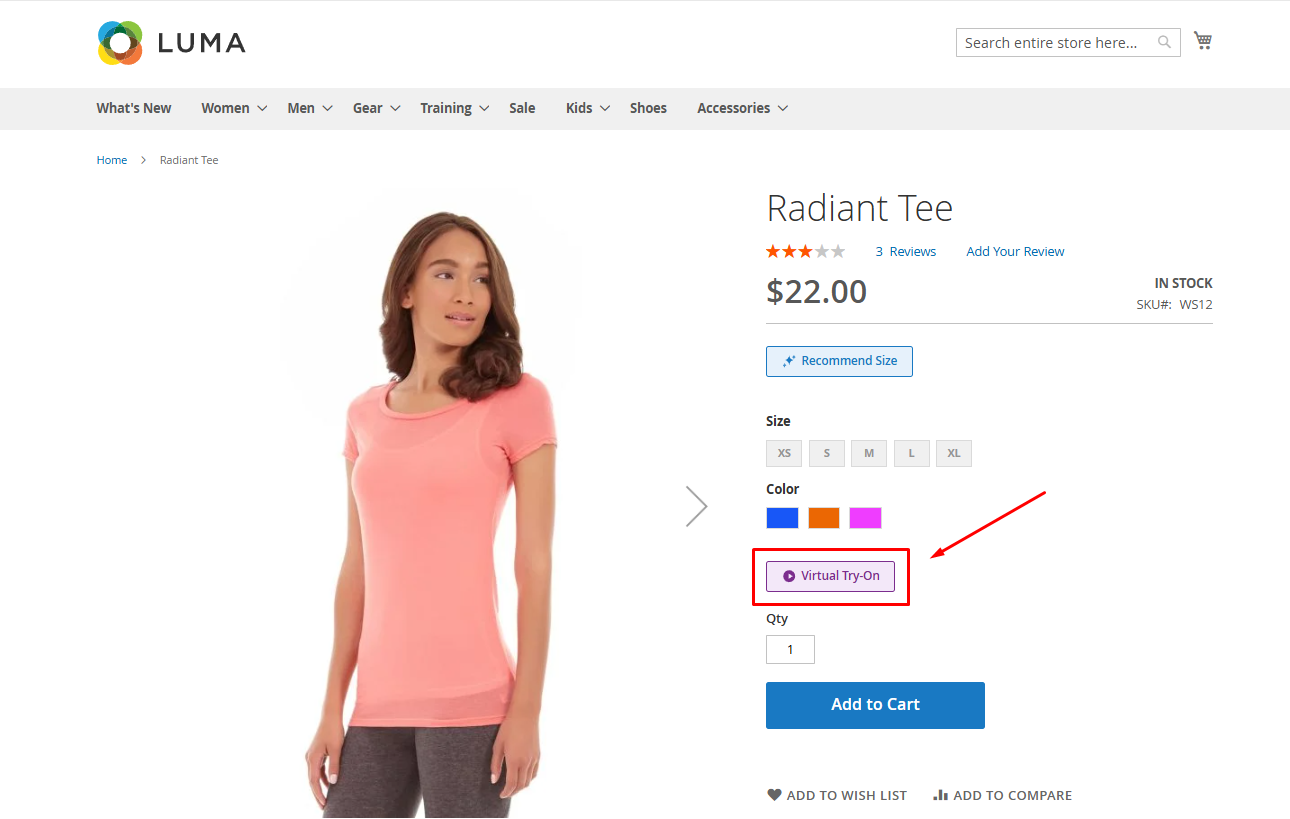
2. On the product detail page, the customer clicks the Virtual Try-On button to use the feature.
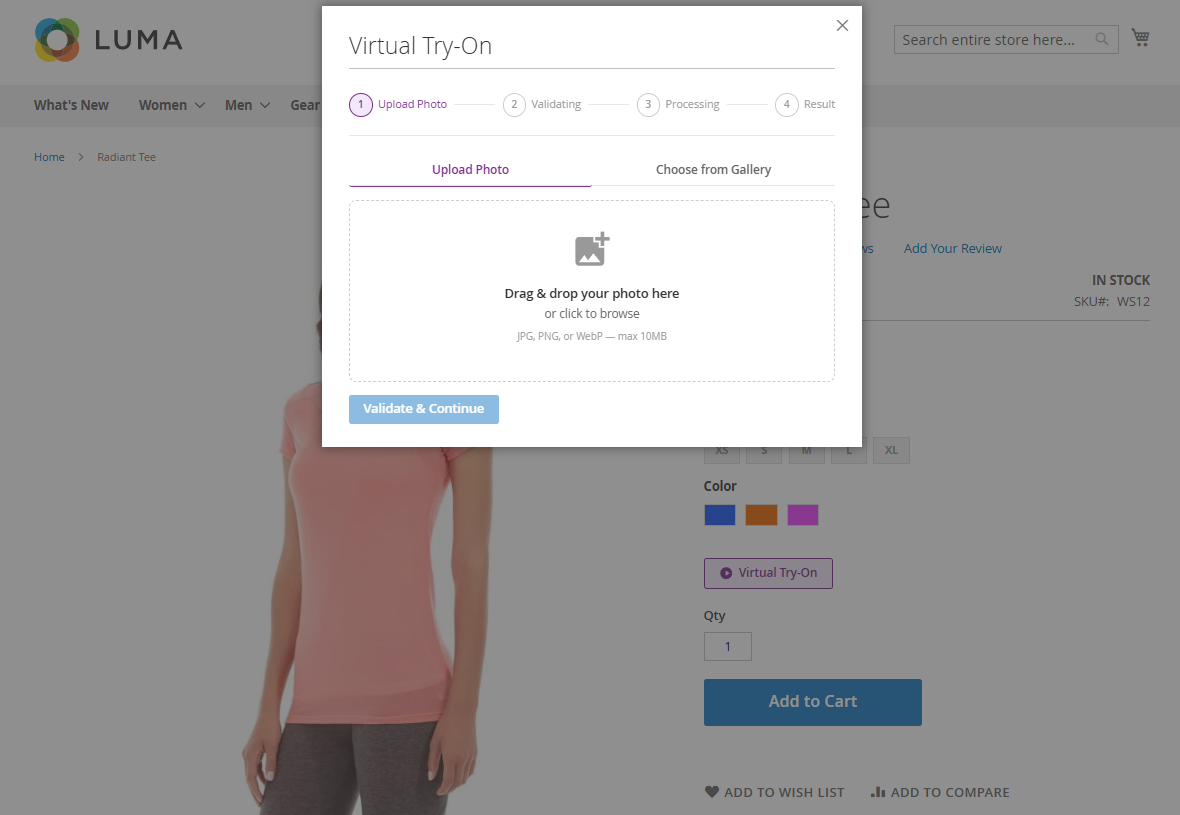
3. The image upload modal appears. The customer can click the upload area, drag and drop an image, or choose an image from the gallery.
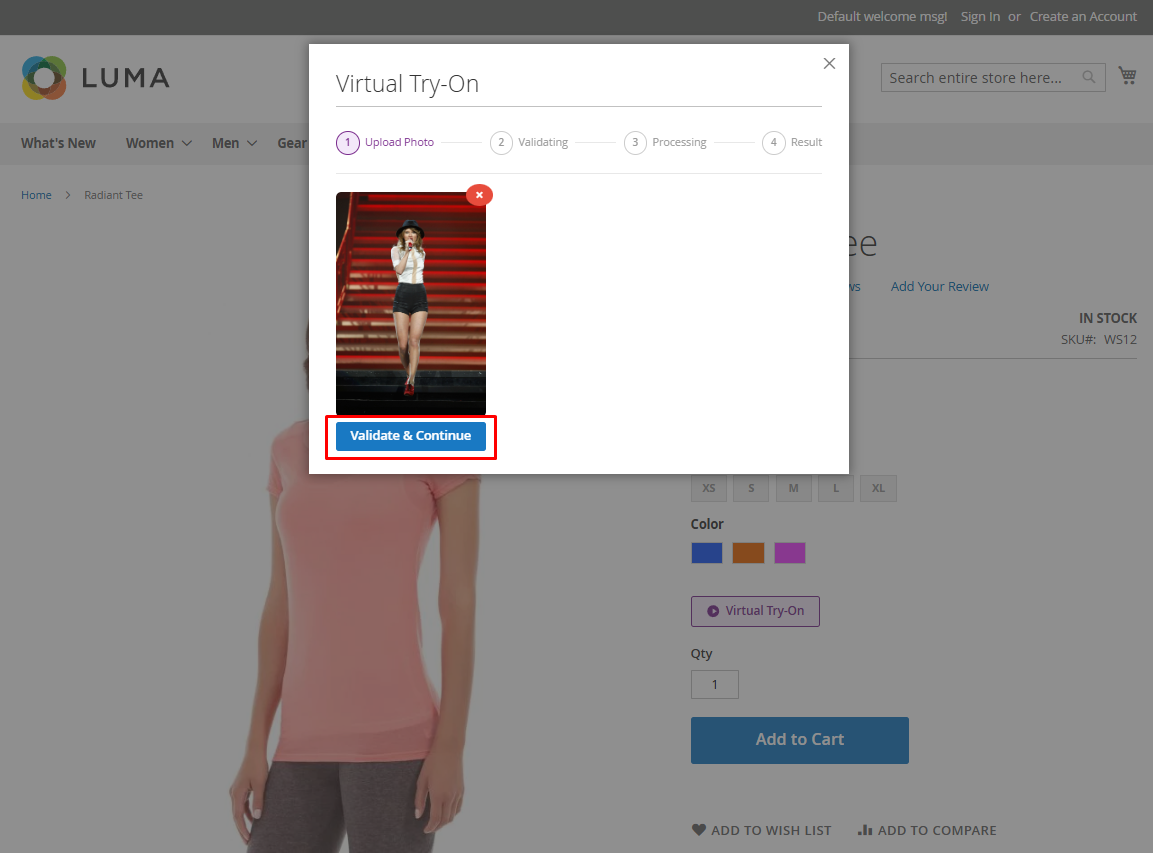
4. After the image is uploaded successfully, the customer can preview it before moving to the next step. To continue, click Validate & Continue.
5. AI validates whether the uploaded image is suitable for try-on generation. If the image meets the requirements, the system automatically applies the product image to the corresponding body area in the uploaded photo. The final result is the generated try-on image.
- Before/After Comparison: Customers can compare the original photo and the virtual try-on result by moving the before/after slider across the image. Dragging the slider to the left or right allows them to clearly see how the selected product looks on their uploaded photo.
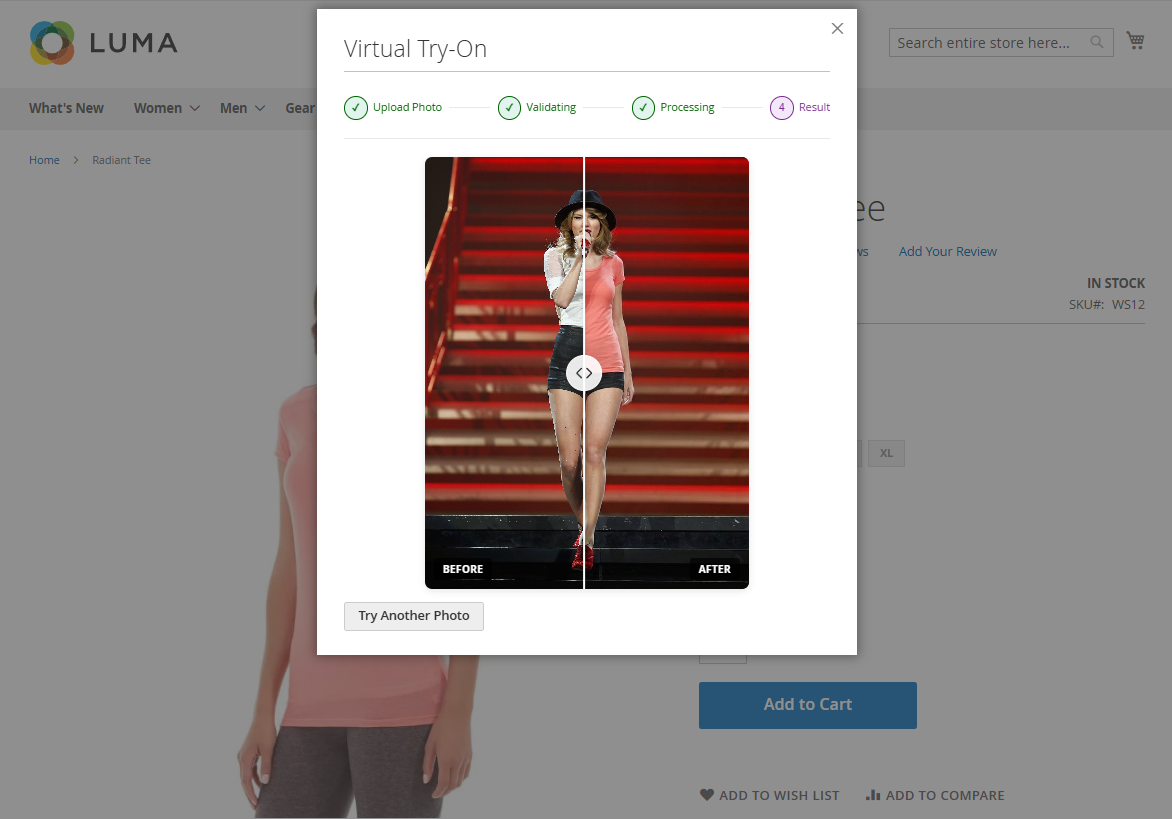
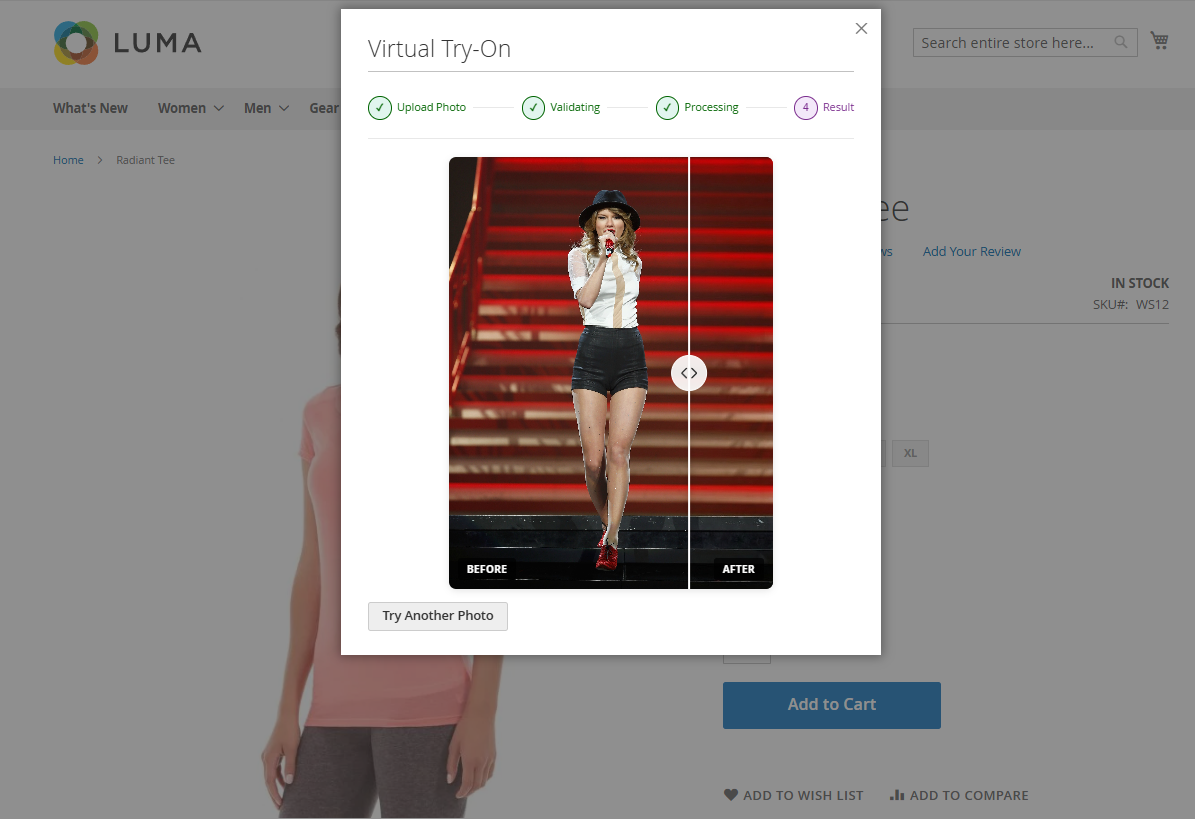
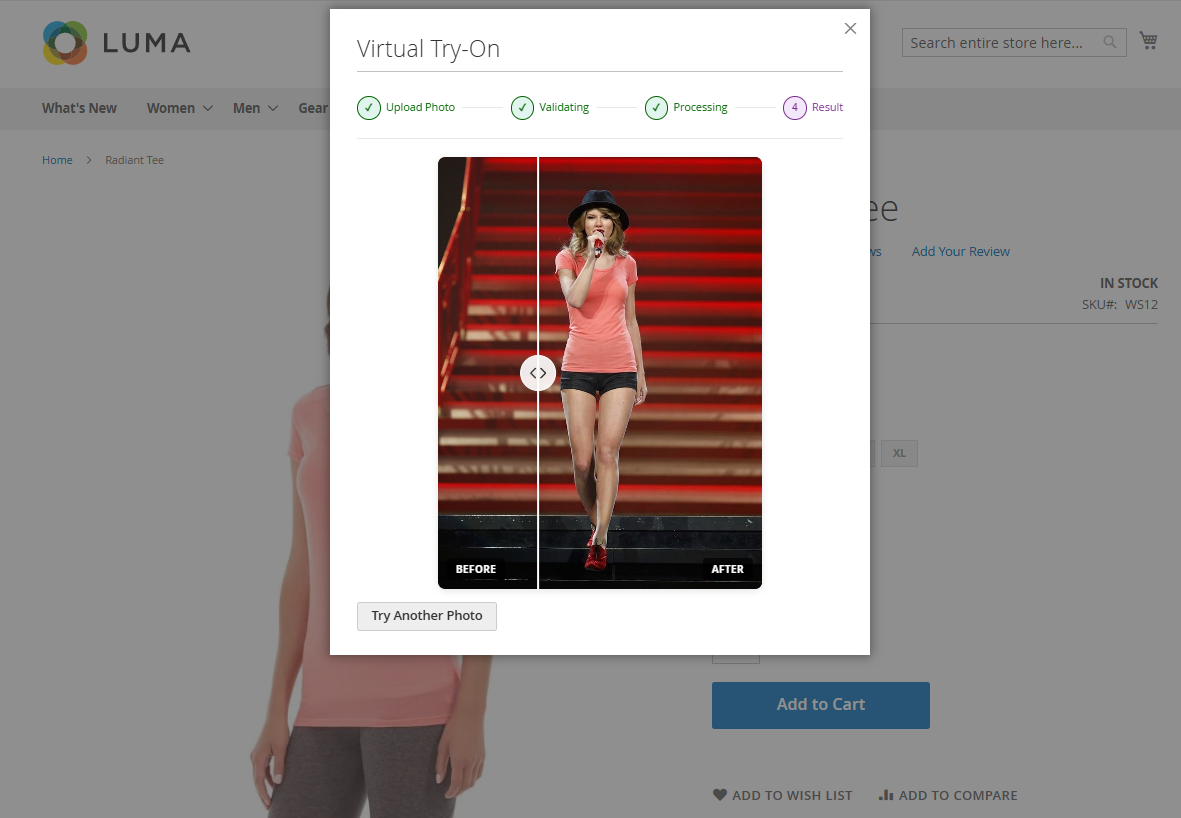
- If the image does not meet the requirements, the system will not continue with the try-on step. Instead, it displays a clear notification to help users understand the issue and upload a better image or choose another one from the gallery.
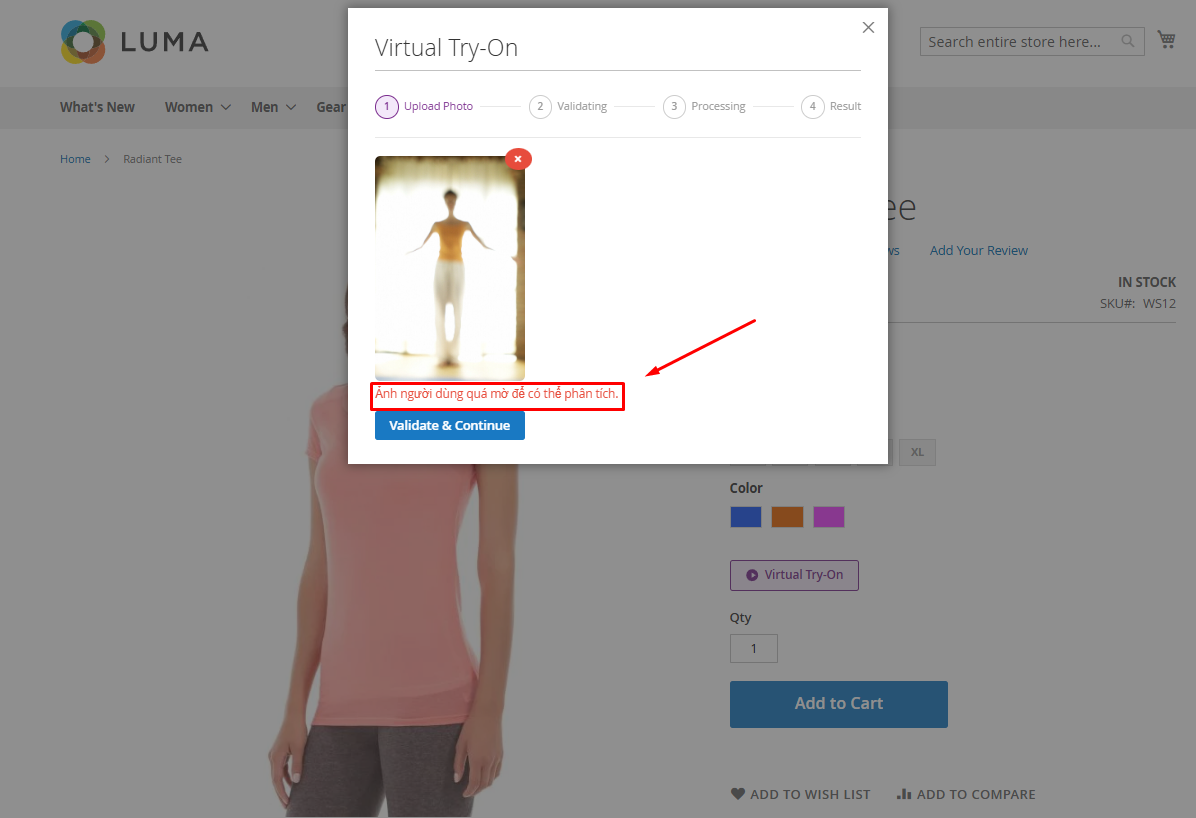
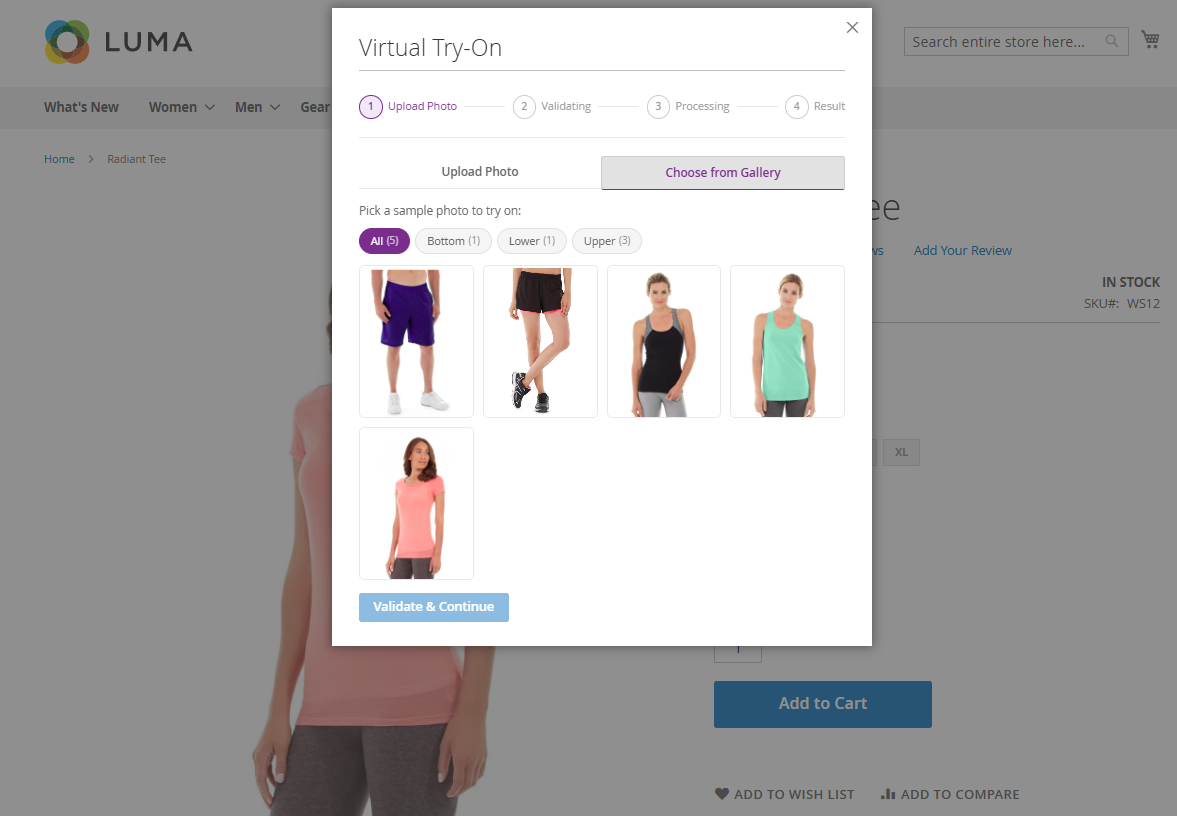
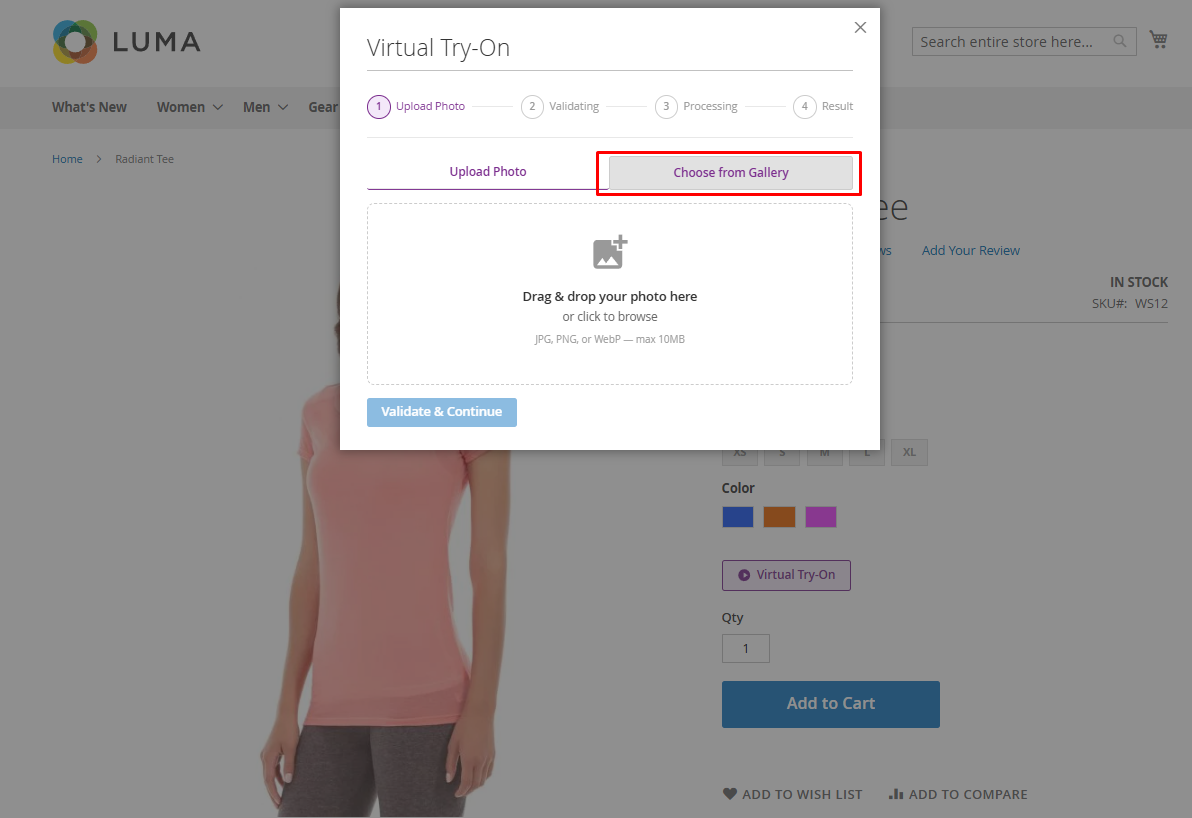
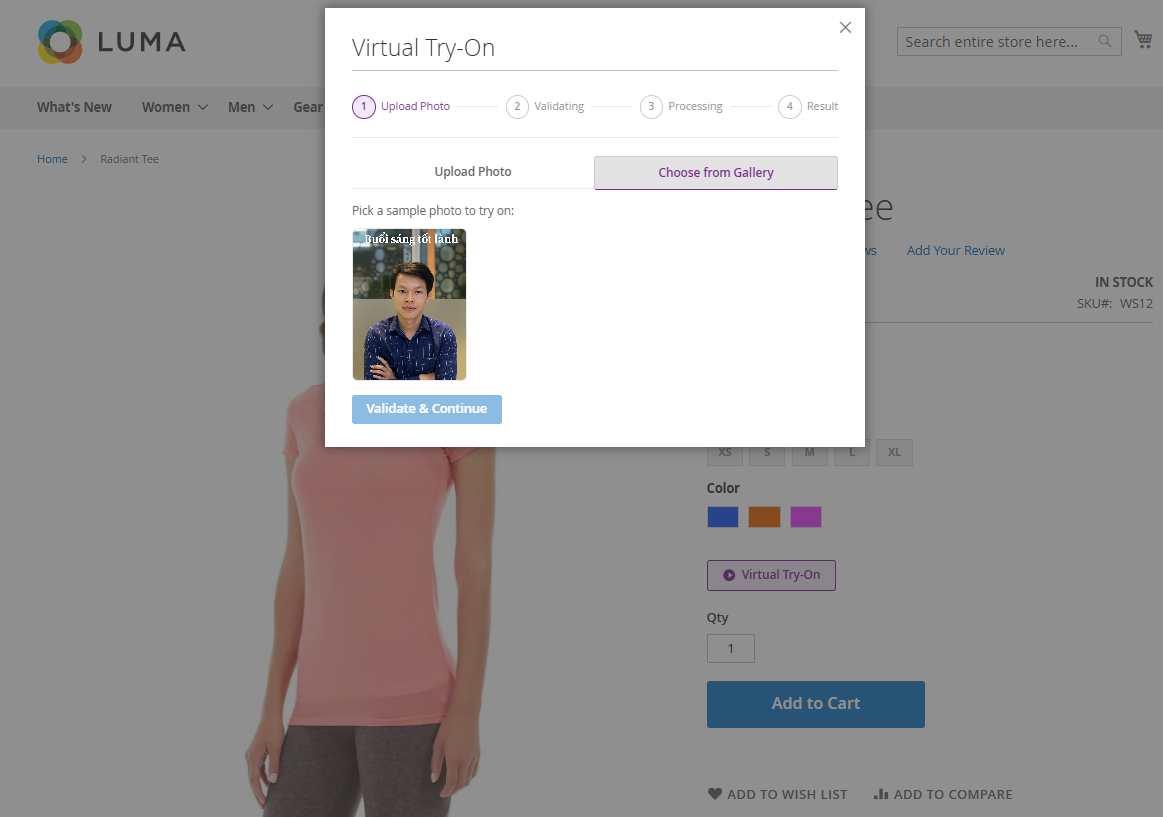
6. Shoppers can use the Virtual Try-On feature in two flexible ways: uploading their own photo or selecting a ready-to-use image from the gallery. This helps reduce friction for users who may not want to upload personal photos, while still allowing them to experience how the selected product looks in a realistic visual preview.
- Step 1: Click Choose from Gallery
- Step 2: Pick the model picture you want for the Try-On feature
- Step 3: Click Validate & Continue to process the feature
Update
When a bug fix or new feature is released, we will provide you with the module's new package.
All you need to do is repeating the above installing steps and uploading the package onto your store. The code will automatically override.
Flush the config cache. Your store and newly installed module should be working as expected.
Support
- We will reply to support requests within 2 business days.
- We will offer lifetime free update and 6 months of free support for all of our paid products. Support includes answering questions related to our products, bug/error fixing to make sure our products fit well in your site exactly like our demo.
- Support DOES NOT include other services such as customizing our products, installation, and uninstallation service.
Once again, thank you for purchasing our extension. If you have any questions relating to this extension, please do not hesitate to contact us for support.