Thank you for purchasing our extension. If you have any questions that are beyond the scope of this guide, please send us an email via the user page contact form here. Thank you.
Created: 30/07/2017 | By: Magenest | Email: [email protected].
Introduction
 QuickBooks Desktop Integration extension for Magento 2 is a powerful tool that allows merchants to automatically synchronize and update accounting data from their Magento 2 store to the QuickBooks Desktop software.
Please view more detail here: QuickBooks Desktop Integration
Main Features
- Allows synchronizing and updating Customers from Magento 2 store to QuickBooks Desktop Items.
- Allows synchronizing and updating Products from Magento 2 store to QuickBooks Desktop Customer.
- Allows synchronizing Orders from Magento 2 store to QuickBooks Desktop Sales Orders.
- Allows synchronizing Unpaid Invoices Magento 2 store to QuickBooks Desktop Open Invoices.
- Allows synchronizing Paid Invoices Magento 2 store to QuickBooks Desktop Payments.
Note: Only Full Invoices are implemented
- Allows synchronizing Credit Memos Magento 2 store to QuickBooks Desktop Credit Memos.
- Allows synchronizing Guest Order
System Requirements
Your store needs to be running on Magento version 2.0.0 and more.
Prerequisites
- An eligible copy of QuickBooks Desktop installed (Note: This QuickBooks Desktop Integration is compatible with all QuickBooks versions.)
- QuickBooks Web Connector: You need to choose the QuickBooks Web Connector that is compatible with your QuickBooks version and download them here.
How to use
Step 1: Set up QuickBooks Web Connector
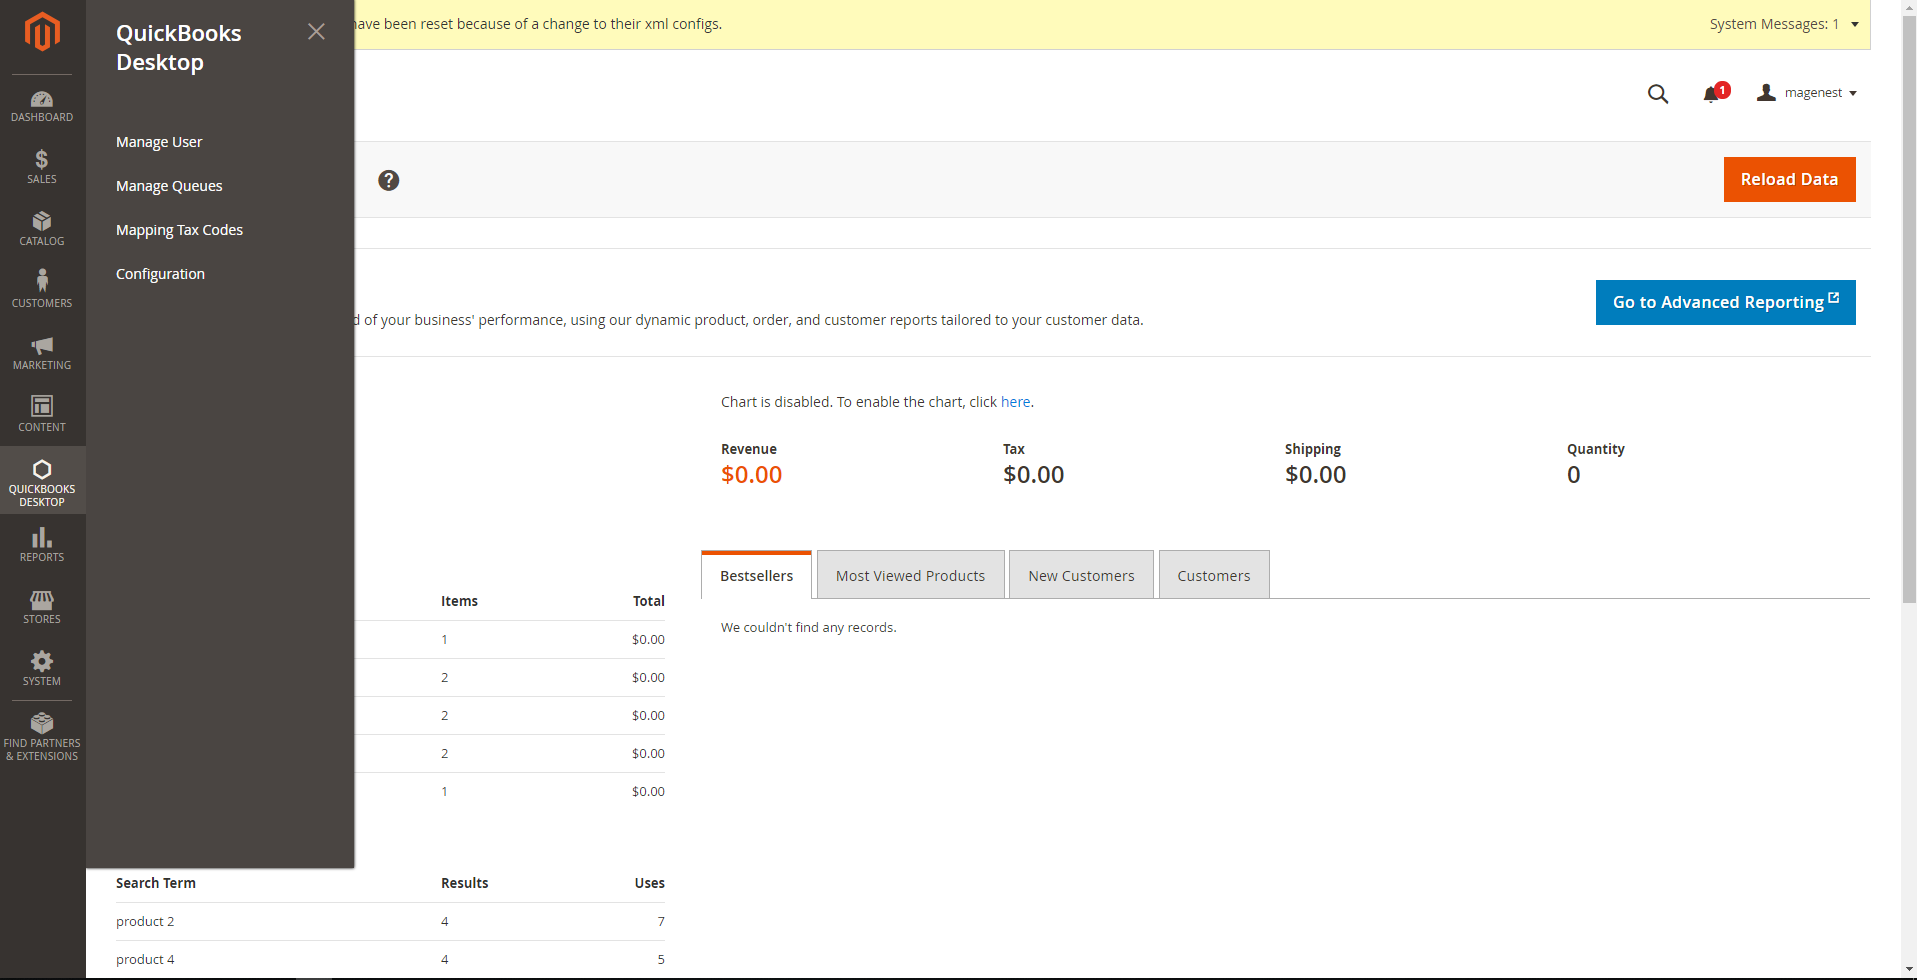
First, admins need to create user credentials to be used with QuickBooks Web Connector, this user account allows it to verify the ownership of your website. You can create one by going to QuickBooks Desktop > Manage Users, and click on Add New User.

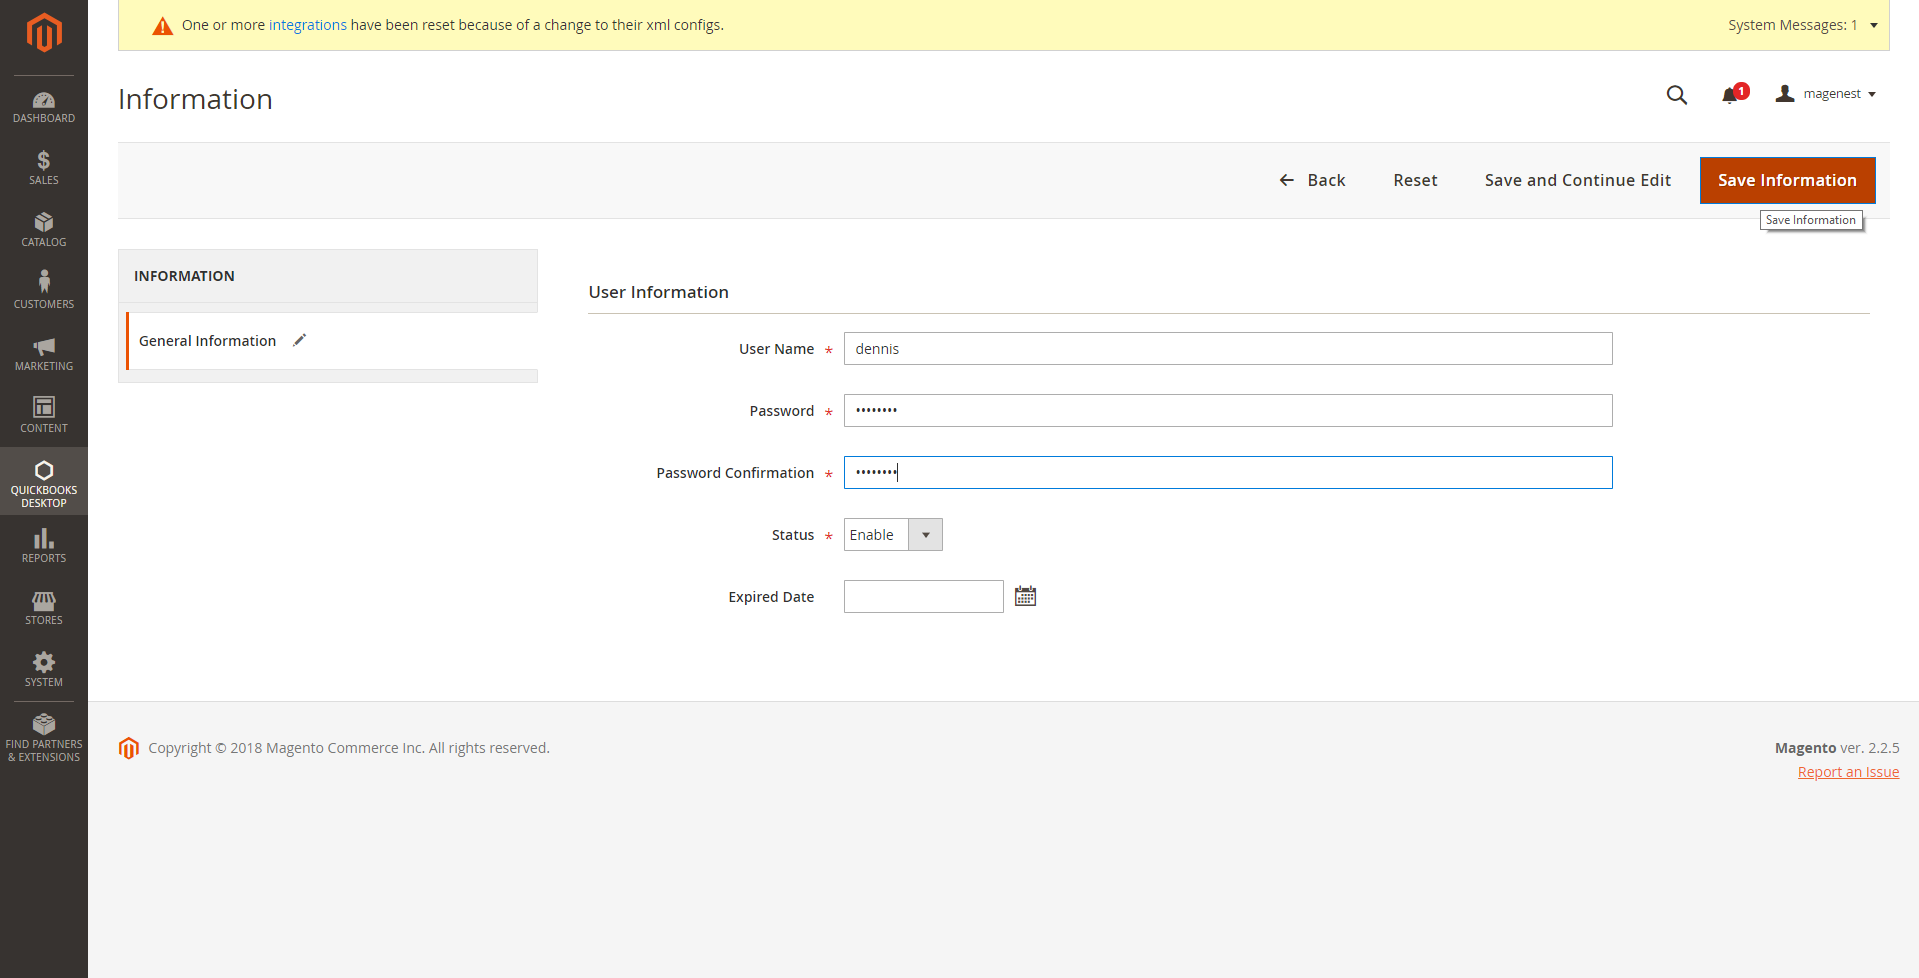
Fill all the fields then click Save Information to save the entered information. The username and password will be used with QuickBooks Web Connector later on.
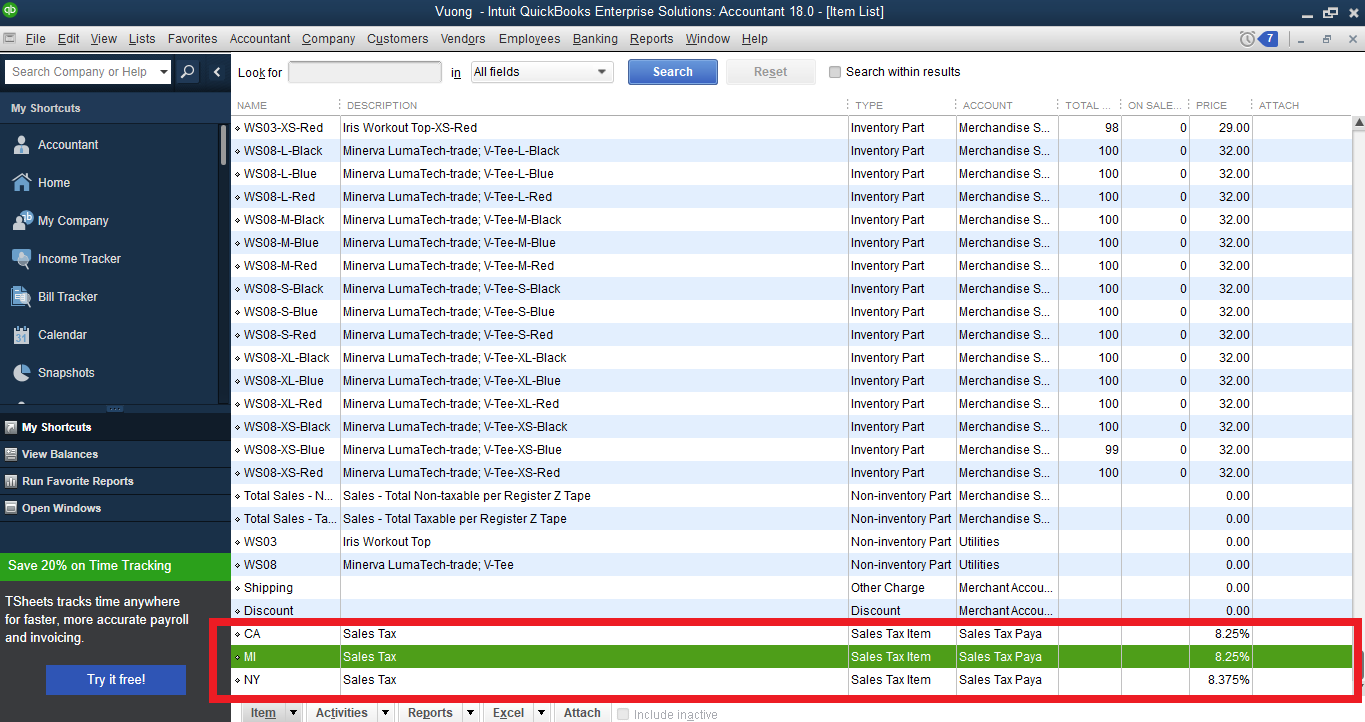
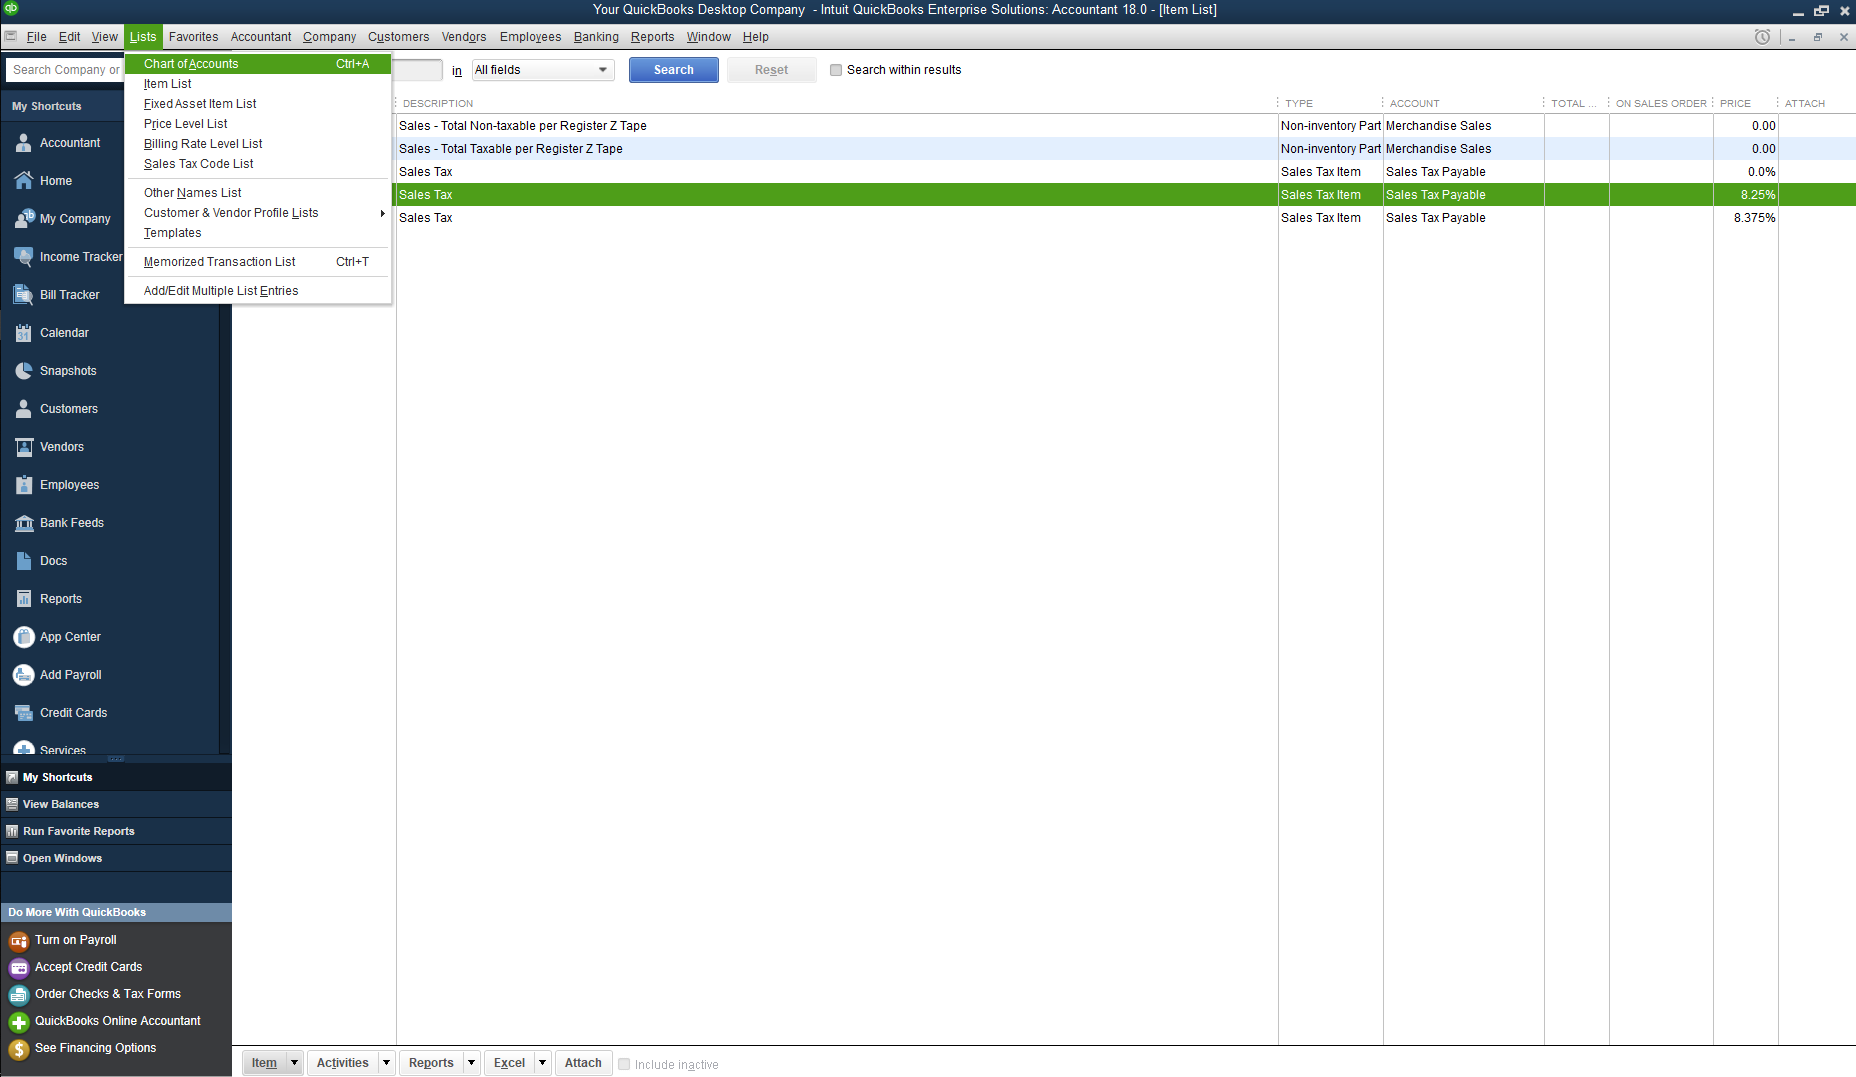
Step 2: Setup Sales Taxes in QuickBooks
Go to your QuickBooks Desktop and set up all the sales taxes, including Item Sales Tax and Sales Tax Codes (Canada version). These Taxes will be used to map with each tax rate in your Magento Site with our table Mapping Tax Rates.
Step 3: Set up configuration
After completing a new user and setting up Taxes in QuickBooks, admins need to set up a few to integrate with QuickBooks.
Go to QuickBooks Desktop > Configuration > QuickBooks Desktop, there are two sections that are required to set before using the extension.
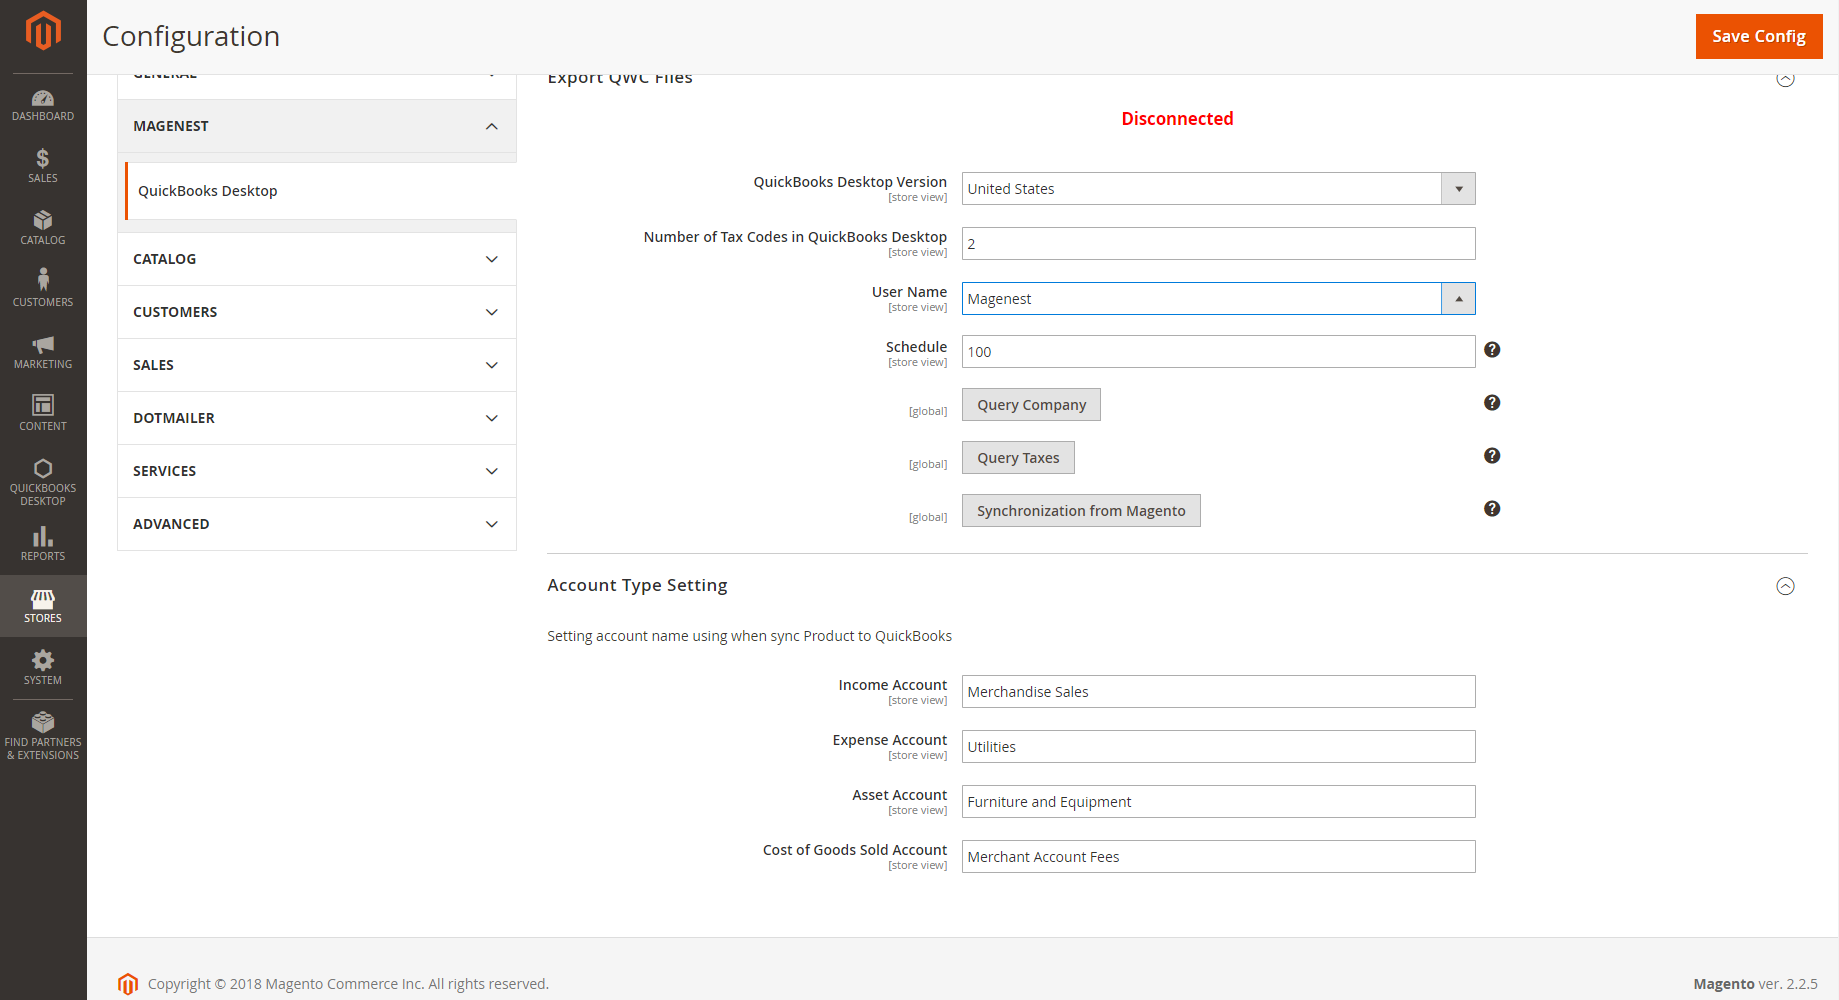
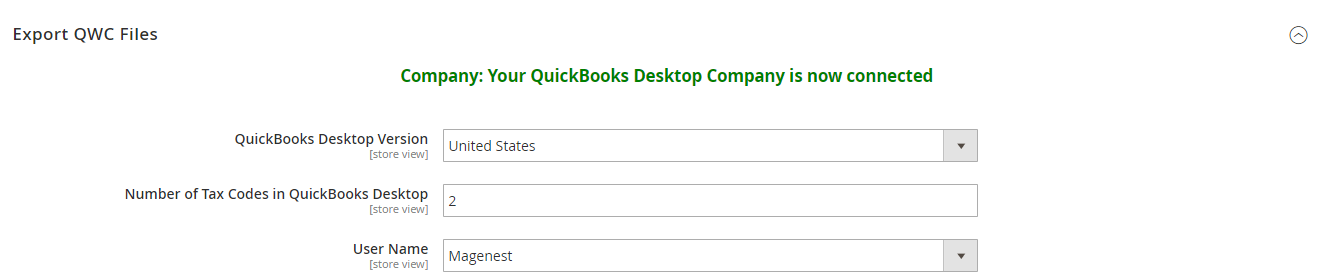
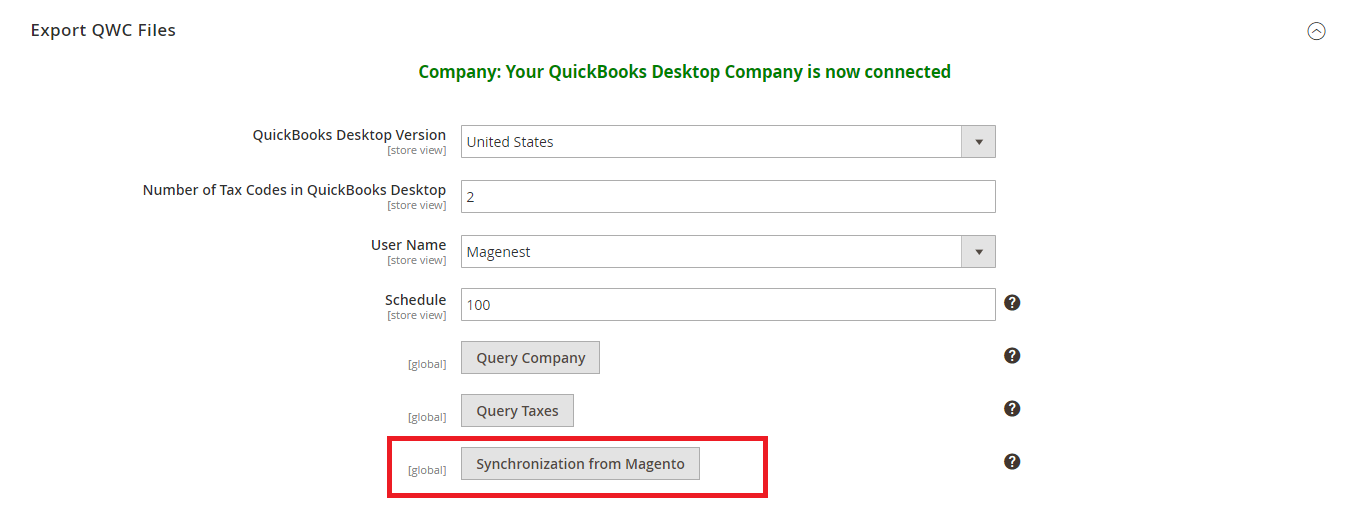
![]() Export QWC Files:
Export QWC Files:
- QuickBooks Desktop Version: Select the Country of your QuickBooks Desktop version
- The Number of Tax Codes in QuickBooks Desktop:
Input the total number of all:
Sales Tax Items if yours is US version
Sales Tax Codes if yours is CA version
- Select User: the user will be used to connect with Web Connector, which was created in the previous step: Create and manage user for QuickBooks Web Connector
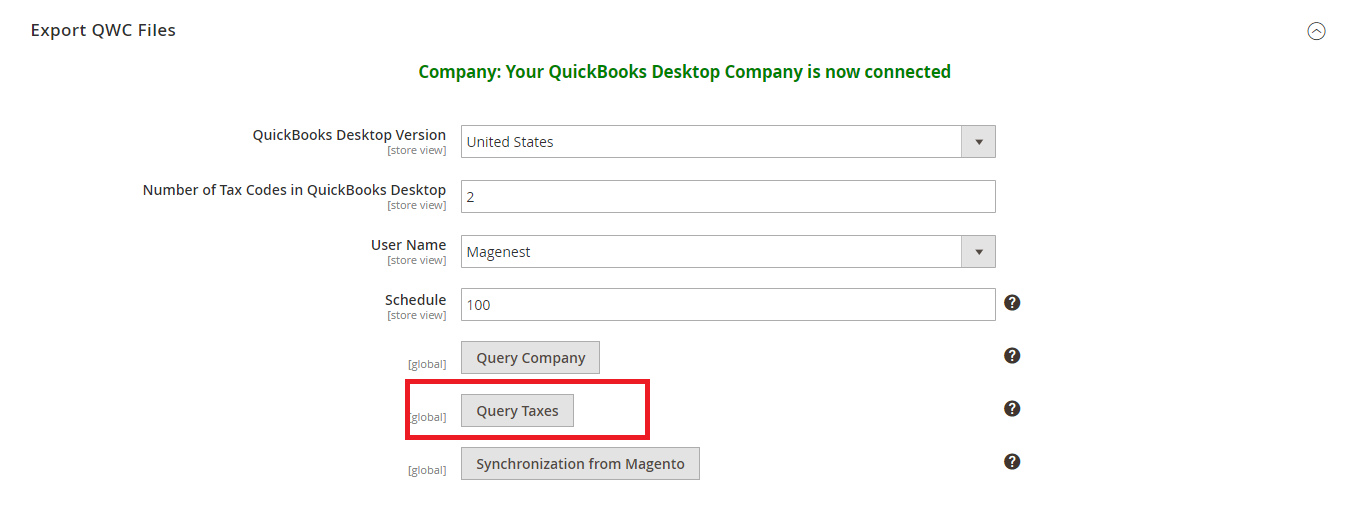
- Scheduler: Time for Web Connector to automatically run the Update (in minutes)
![]() Account Type Settings:
Account Type Settings:
In order to know how to enter exactly 4 fields, include:
![]() Income Account
Income Account
![]() Expense Account
Expense Account
![]() Assert Account
Assert Account
![]() Cost of Goods Sold Account
Cost of Goods Sold Account
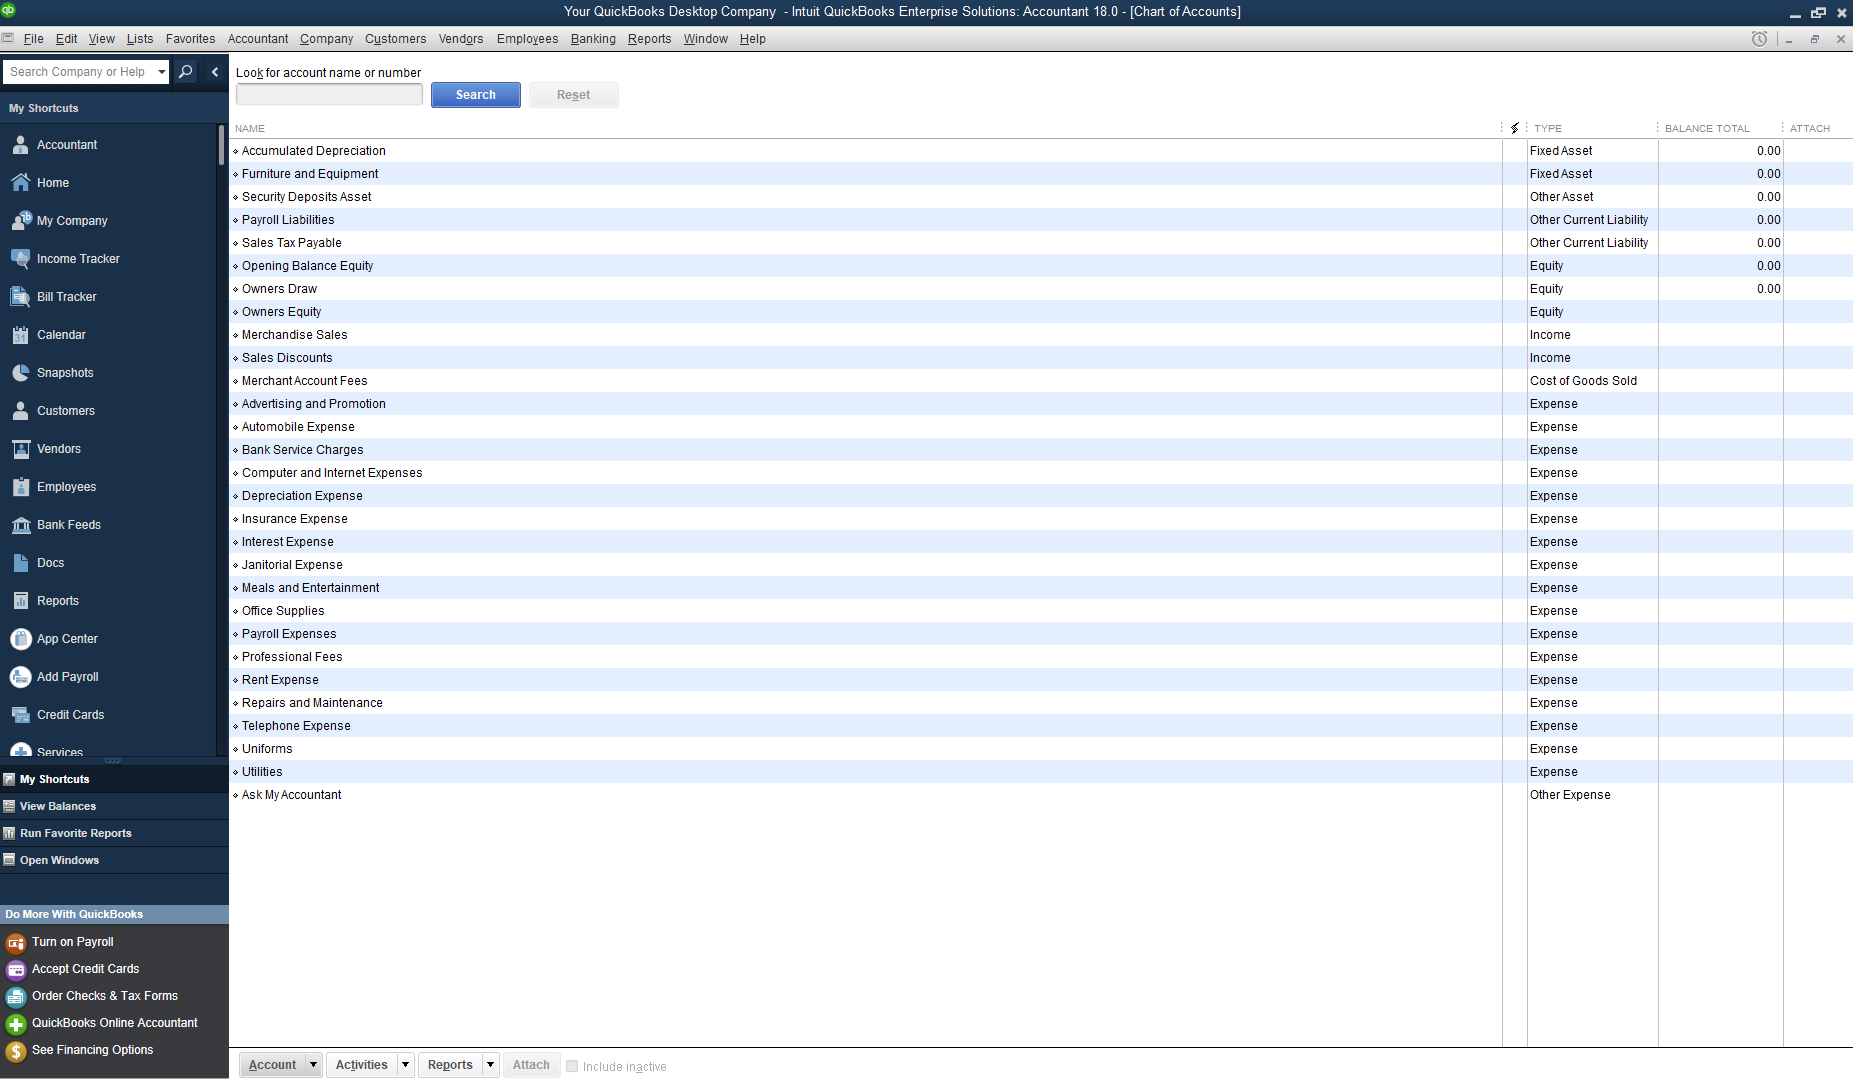
> Please open the QuickBooks Desktop software and go to Lists > Chart of Accounts, find the exact name of the account and input it into each field.
Finishing the Configuration by clicking Save Config
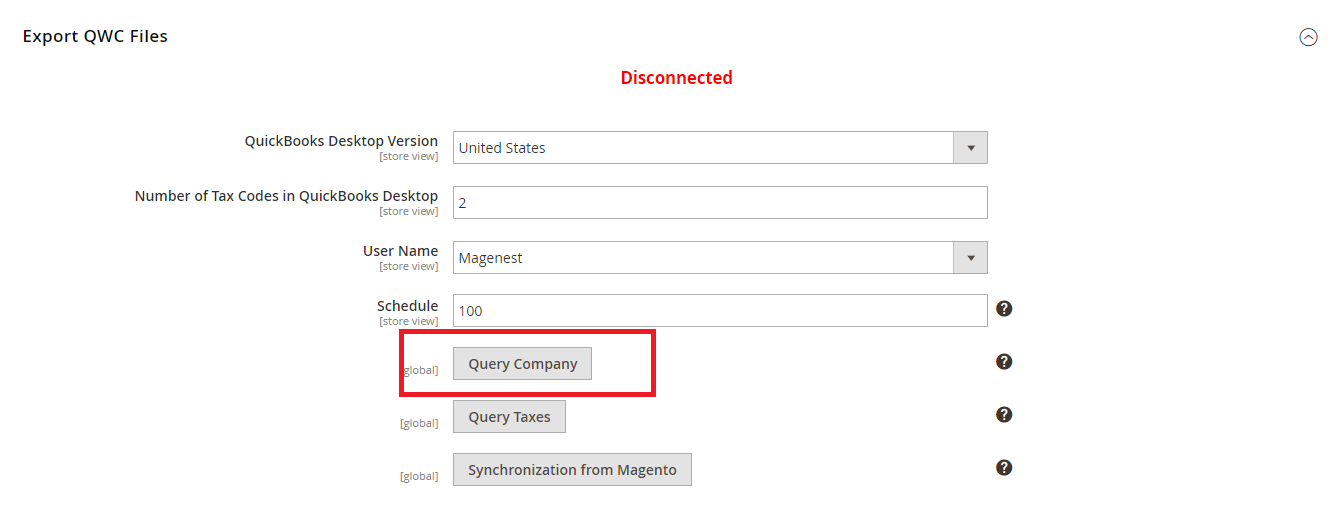
Step 4: Query the Company admin are using in QuickBooks to Magento 2
- Click on the Query Company button to export the company.qwc file

- Run QuickBooks Web Connector.

- Click Add an application and choose the company.qwc file above.
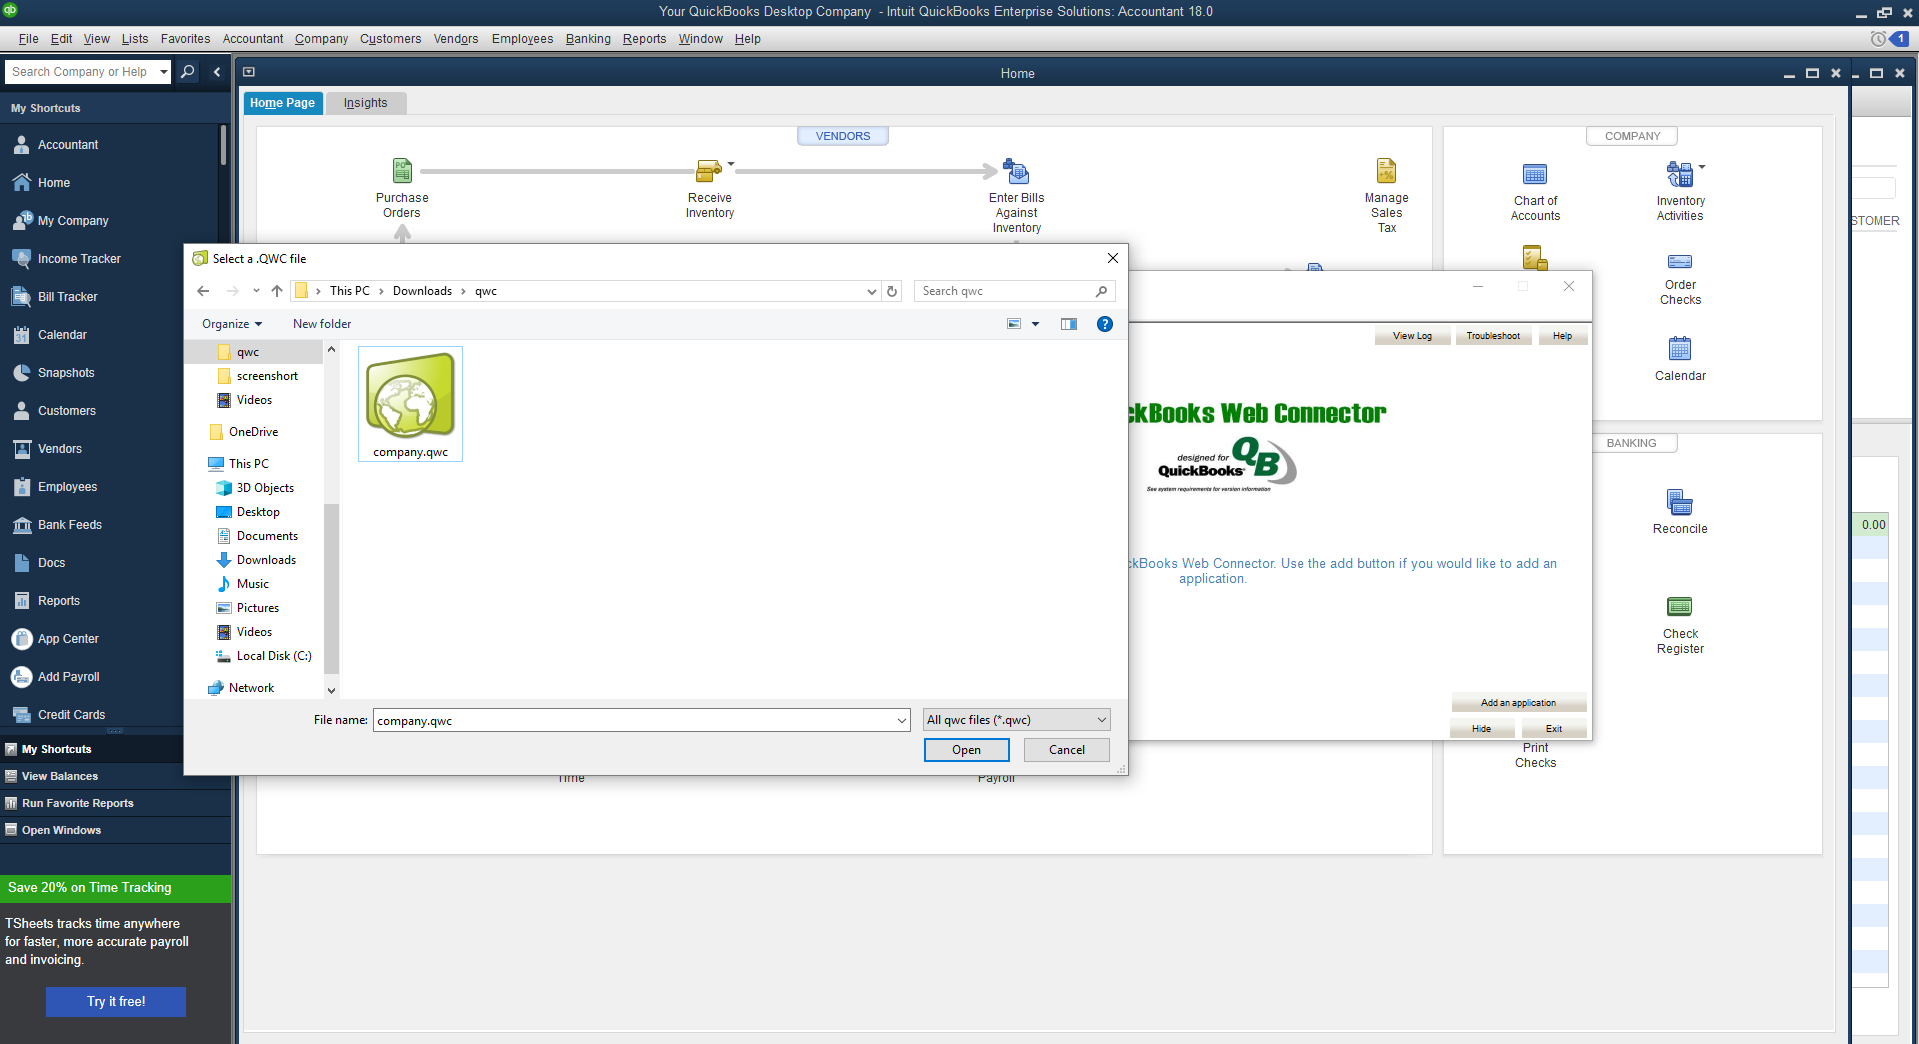

- Enter the password of the User you select in Configuration.
- Tick the checkbox
- Click on Update Selected button to complete.
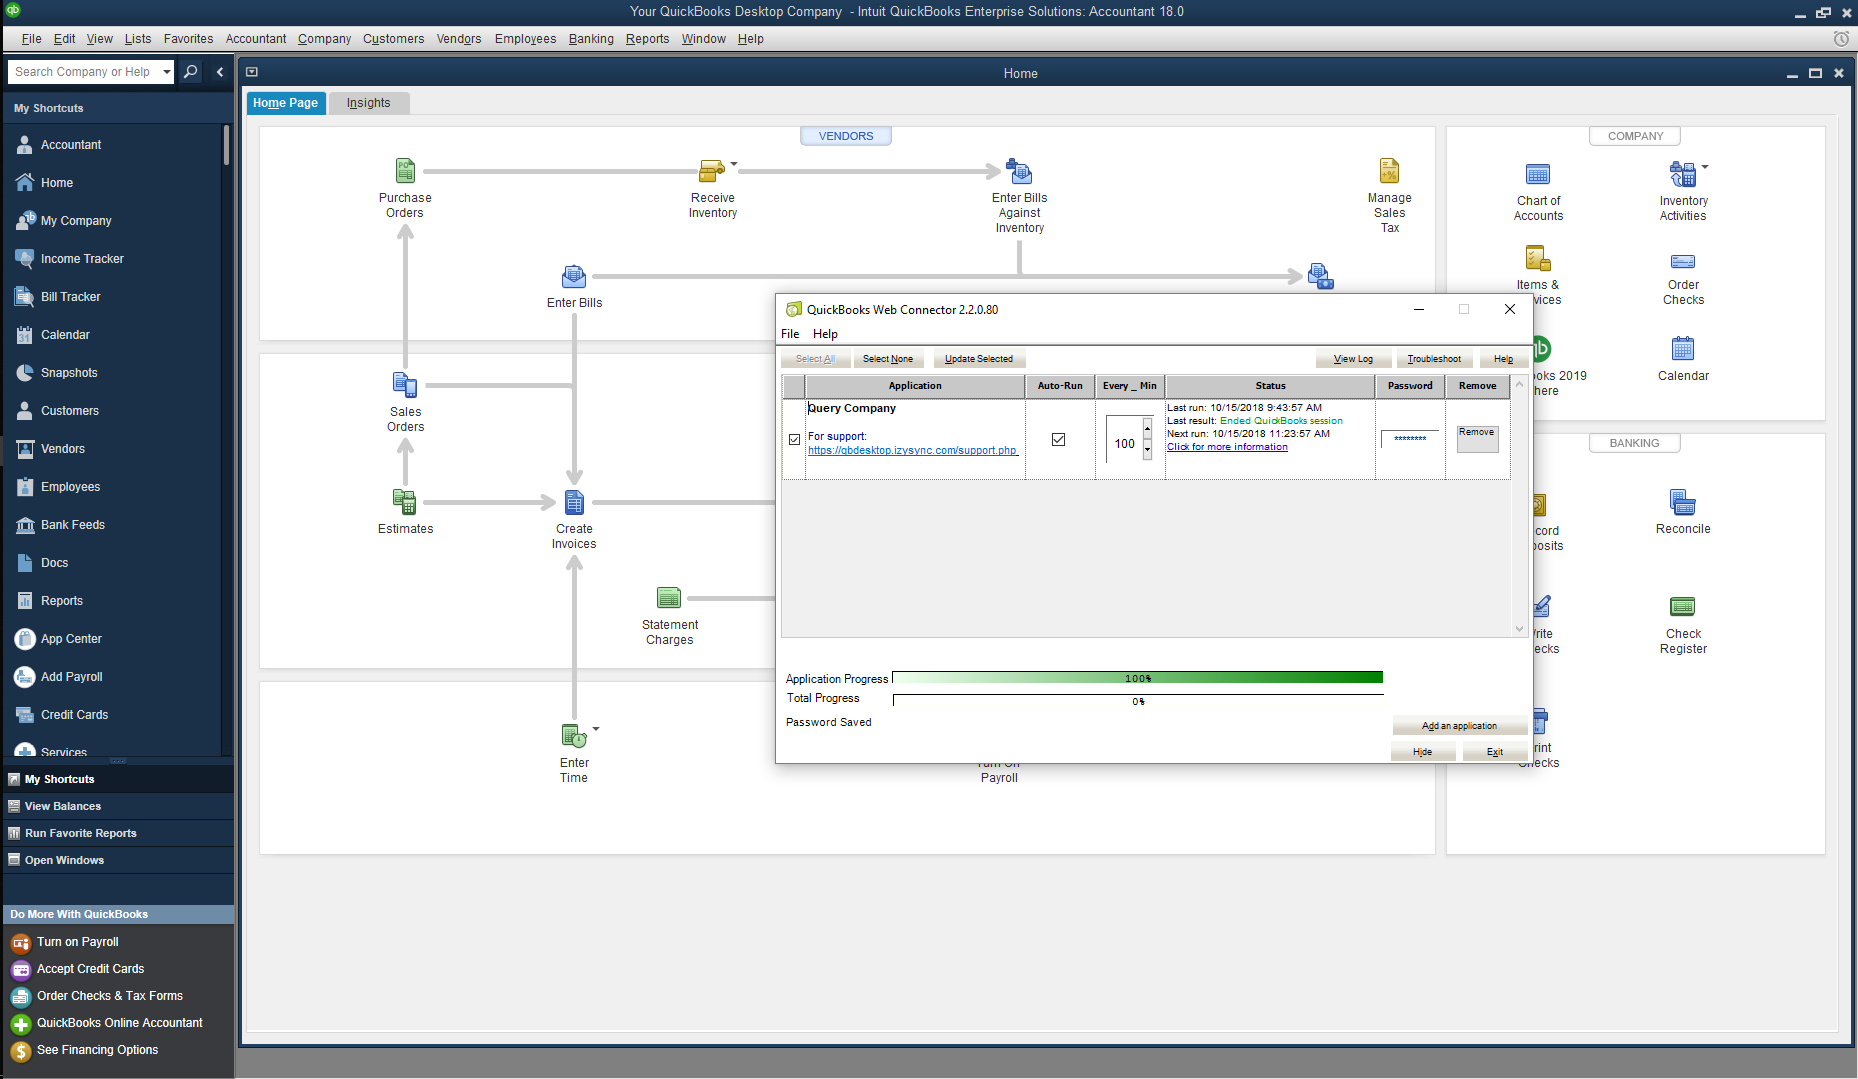
After the process is complete, go to QuickBooks Desktop > Configuration > QuickBooks Desktop again, you will see the company is now connected.
Finally, you can remove this Query Company application in Web connector by clicking Remove button there
Note: If admin wants to use other Company in QuickBooks Desktop application, create a company with a different name first then query the company again with QuickBooks Web Connector.
Step 5: Mapping Taxes
- Click the button Query Taxes to export the tax.qwc file

- Open the QuickBooks Web Connector software application.
- Click on Add an application button and choose the tax.qwc file above.
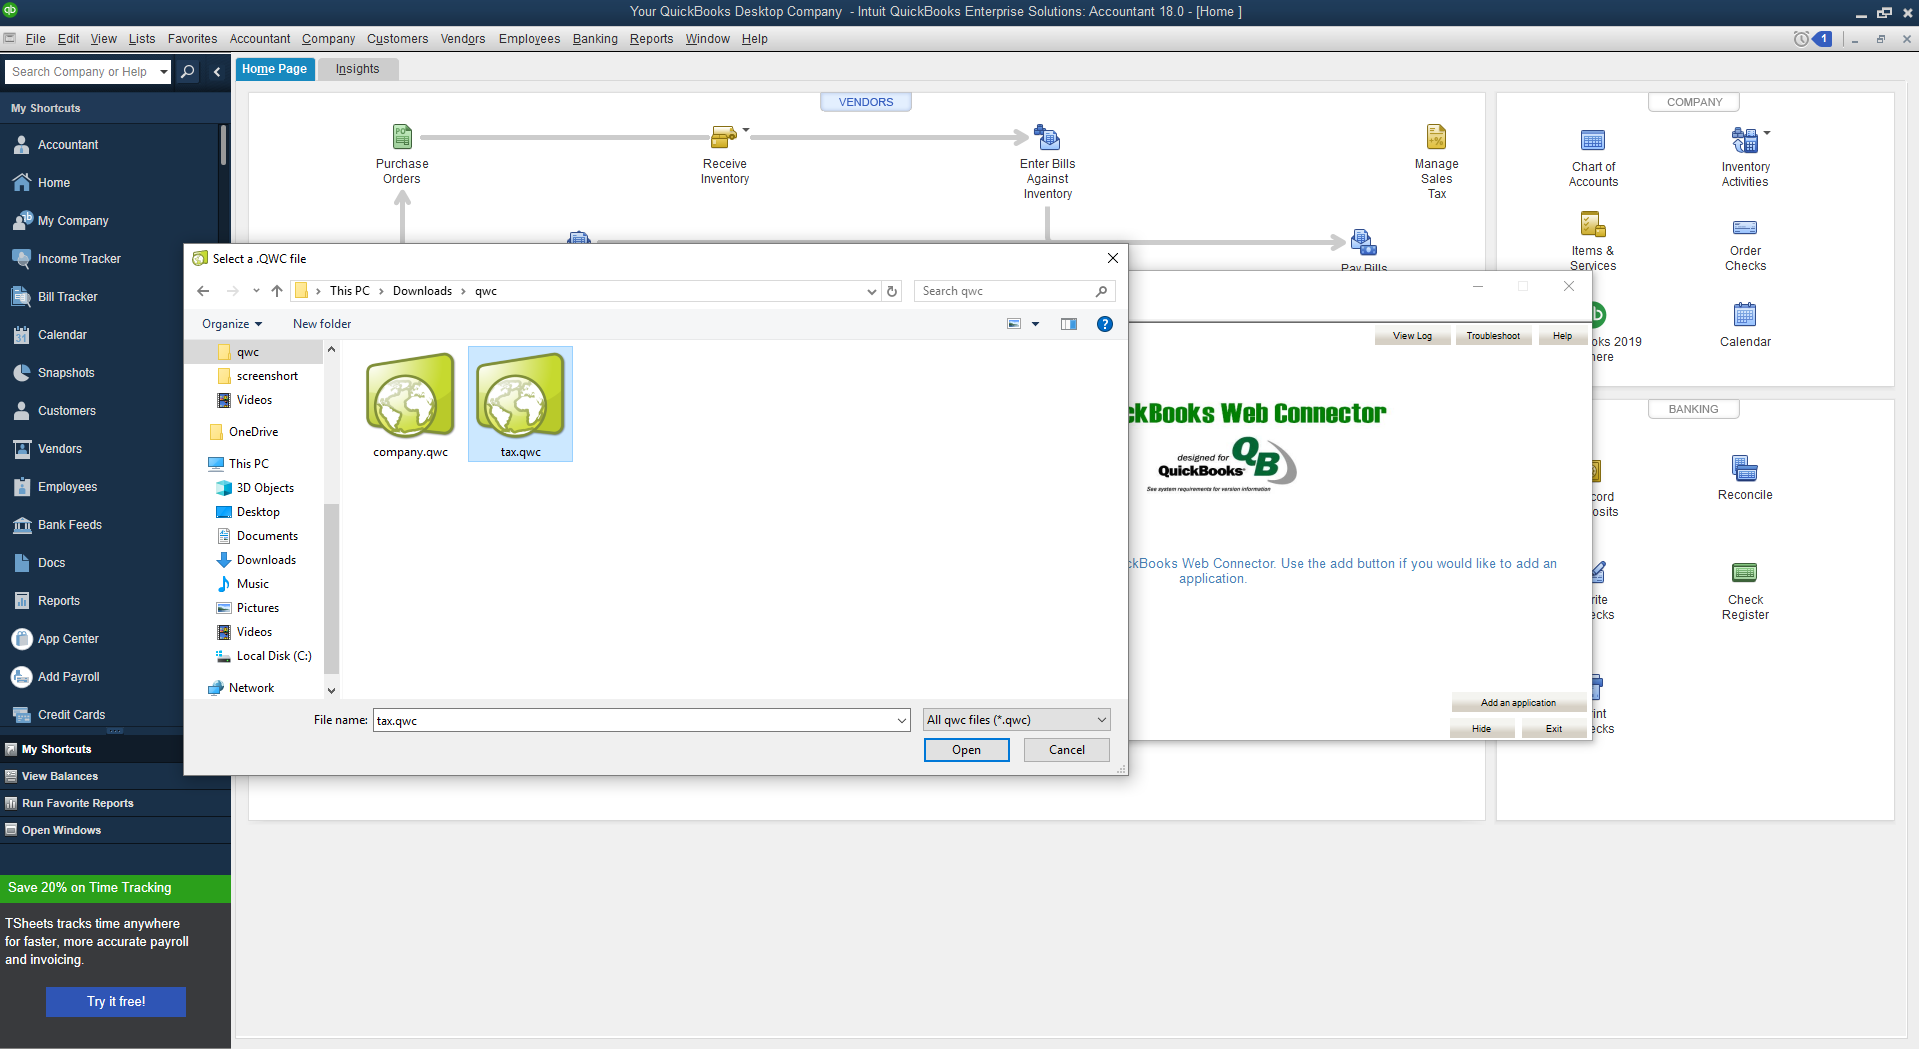
- Enter the password of the User you select in Configuration.
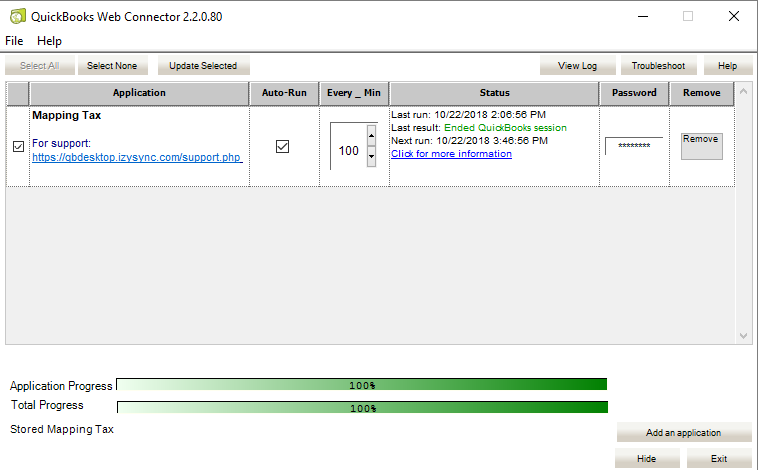
- Tick the checkbox
- Click on Update Selected button to complete.
After the process is complete, go to QuickBooks Desktop > Mapping Tax Codes
There will be a list of tax rates in your Magento Site, select the tax code that you just queried from QuickBooks Desktop in the dropdown for each tax rates.
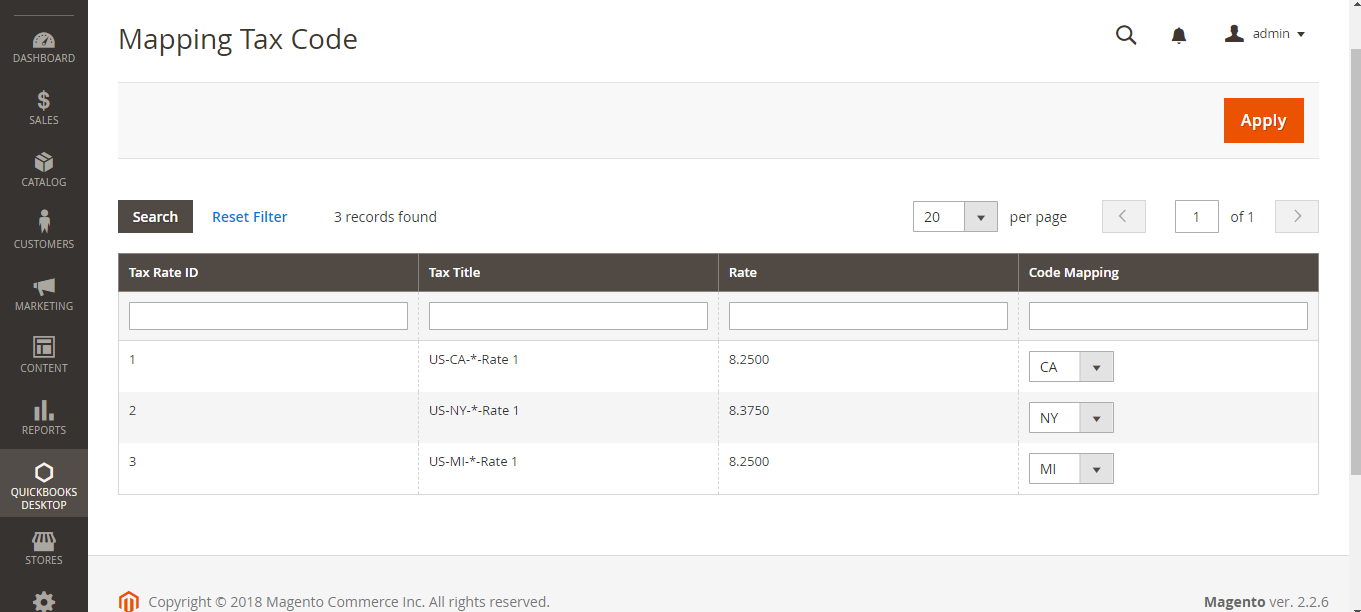
Click Apply to save the mapping.
Finally, you can remove this Query Taxes application in Web connector by clicking Remove button there
Step 6: Sync Magento Data to QuickBooks Desktop
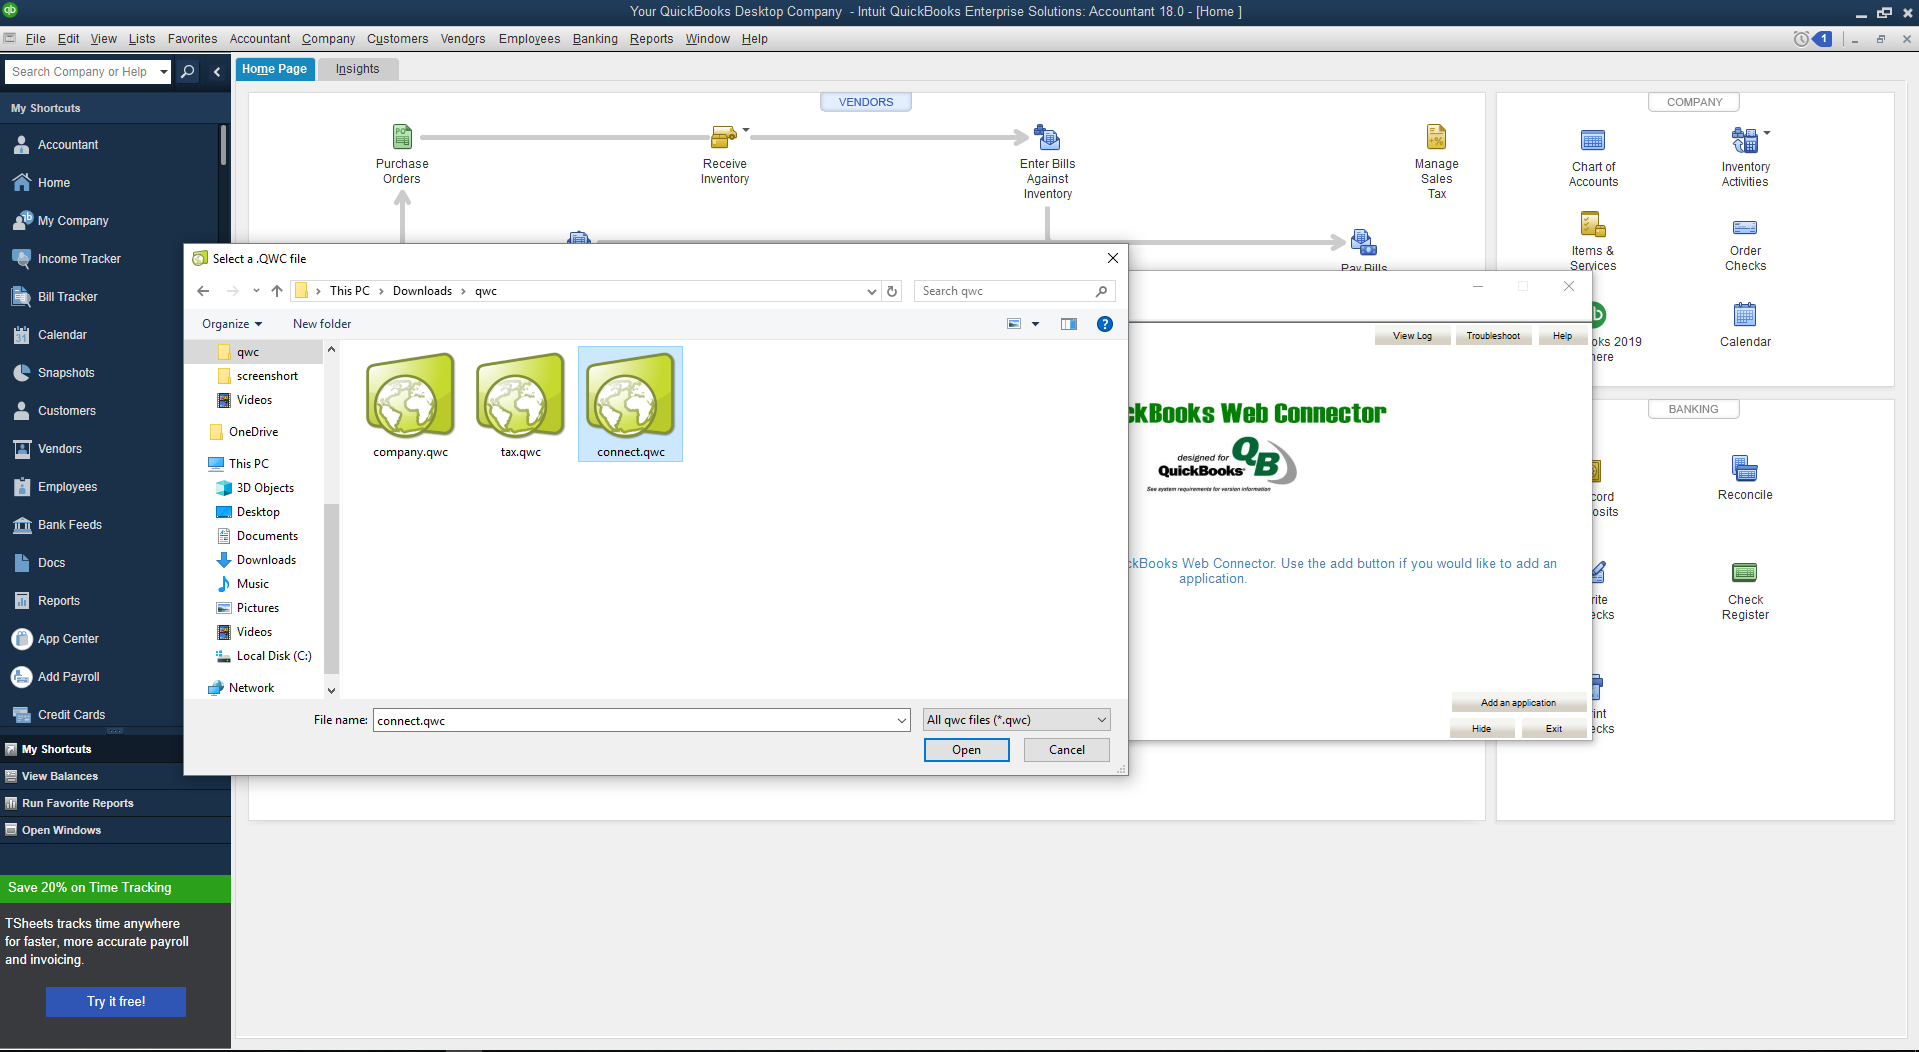
- Click the button Synchronization from Magento to export the connect.qwc file

- Open the QuickBooks Web Connector software application.
- Click on Add an application button and choose the connect.qwc file above.
For the first sync, you must sync the existing data from Magento to QuickBooks Desktop, including the below feeds:
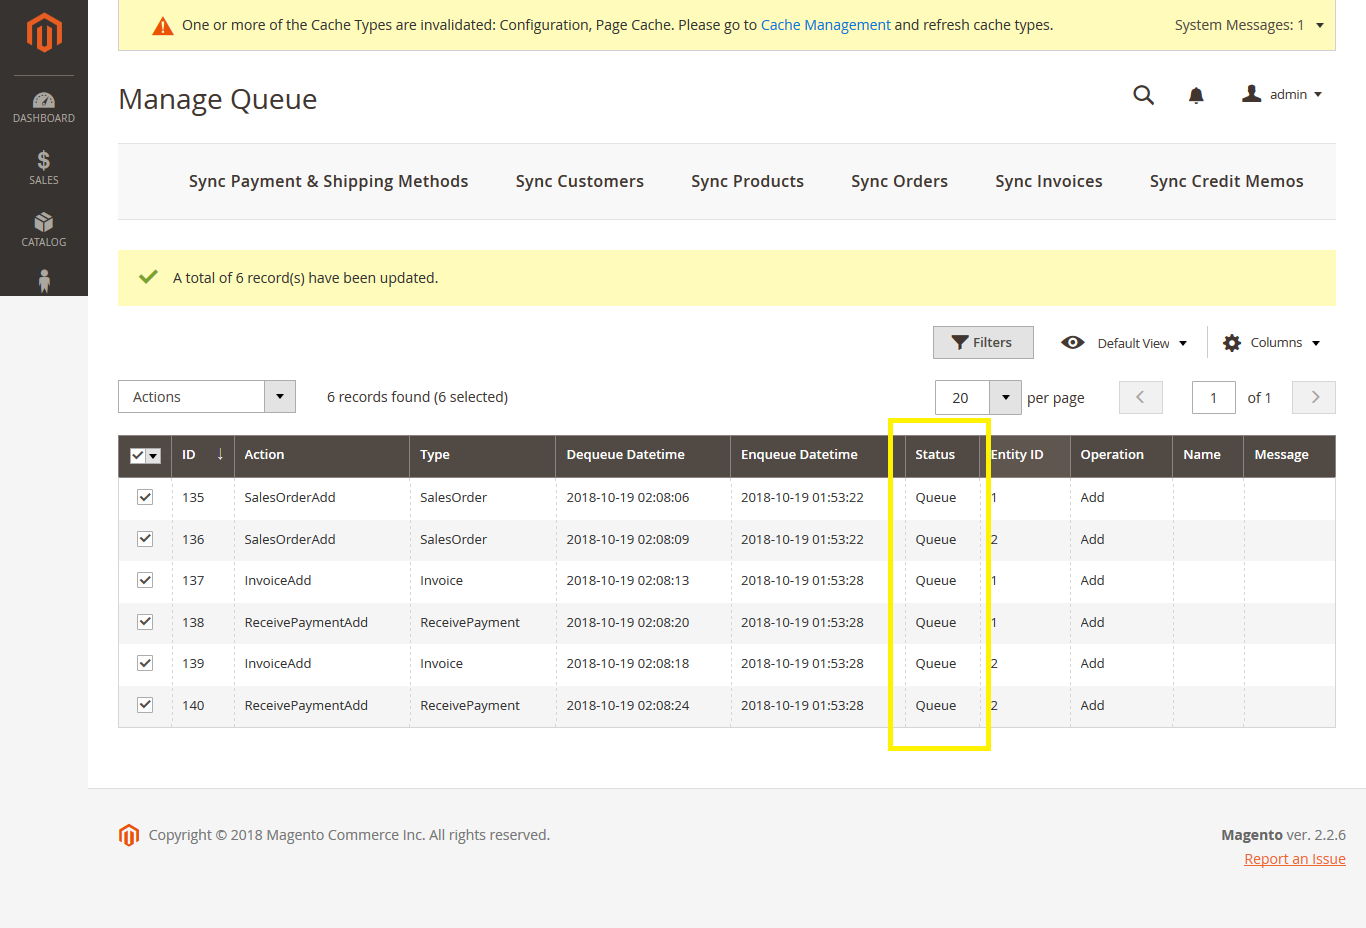
Go to QuickBooks Desktop > Manage Queue
There are 6 buttons for the feeds that admins need to be synced, include:
- Sync Payment & Shipping Methods
- Sync Customers
- Sync Products
- Sync Orders
- Sync Invoice
- Sync Credit Memos
Click these buttons with the order above to create the queues in the Manage Queue table.
Note: Only click these buttons for the first sync to sync the existing data from Magento to QuickBooks Desktop. The queue for new customers, products or transactions will be created automatically when these feeds are created in Magento
The status for each record will be Queue when it is created
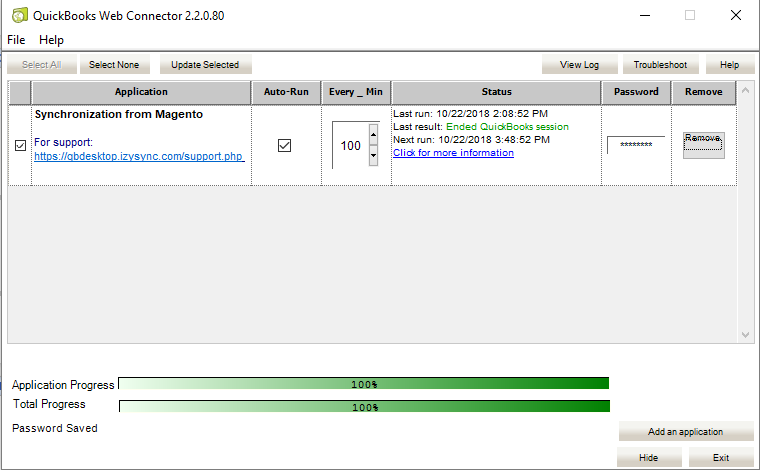
After all the queues are created, open Web Connector again:
- Enter the password of the User you select in Configuration.
- Tick the checkbox for Synchronization from Magento application
- Click on Update Selected button to sync.
After the process is complete, you can go back to Manage Queue table to check the result, for each record:
- If success, status will be Success
- If fail, status will be Failed and there will be an error message in Message column

Result
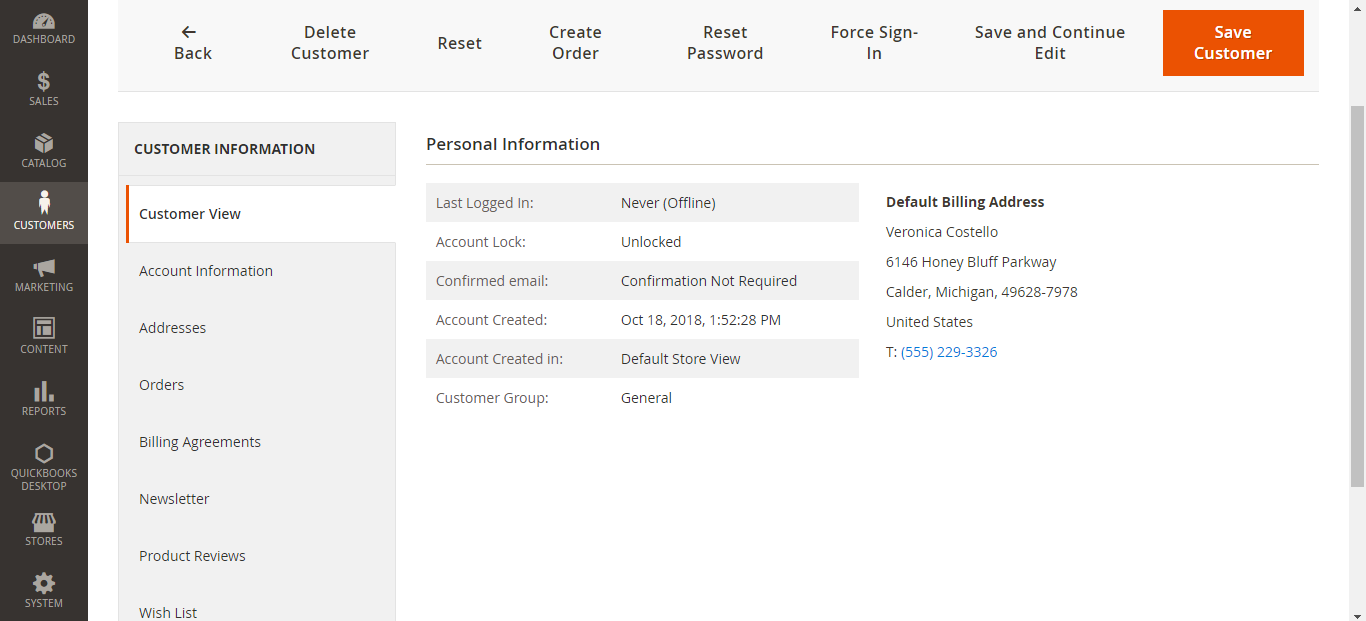
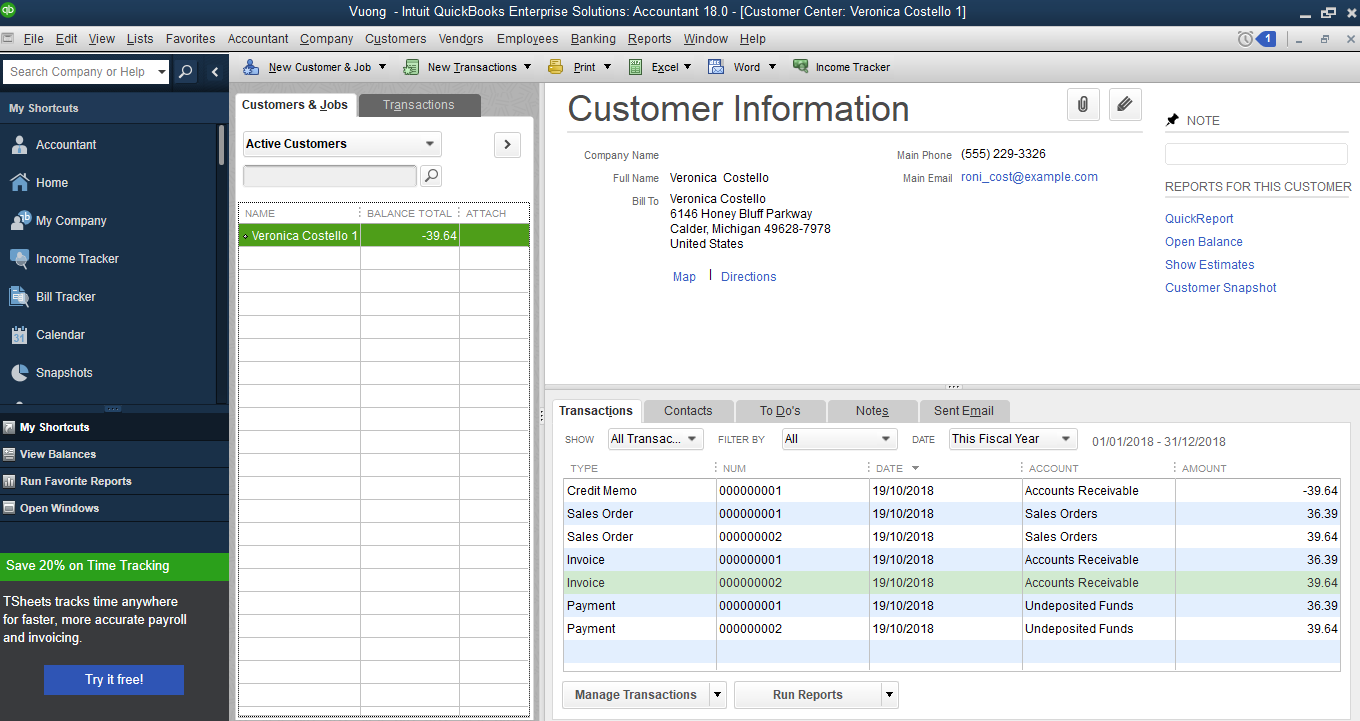
Sync customers from Magento 2 to QuickBooks
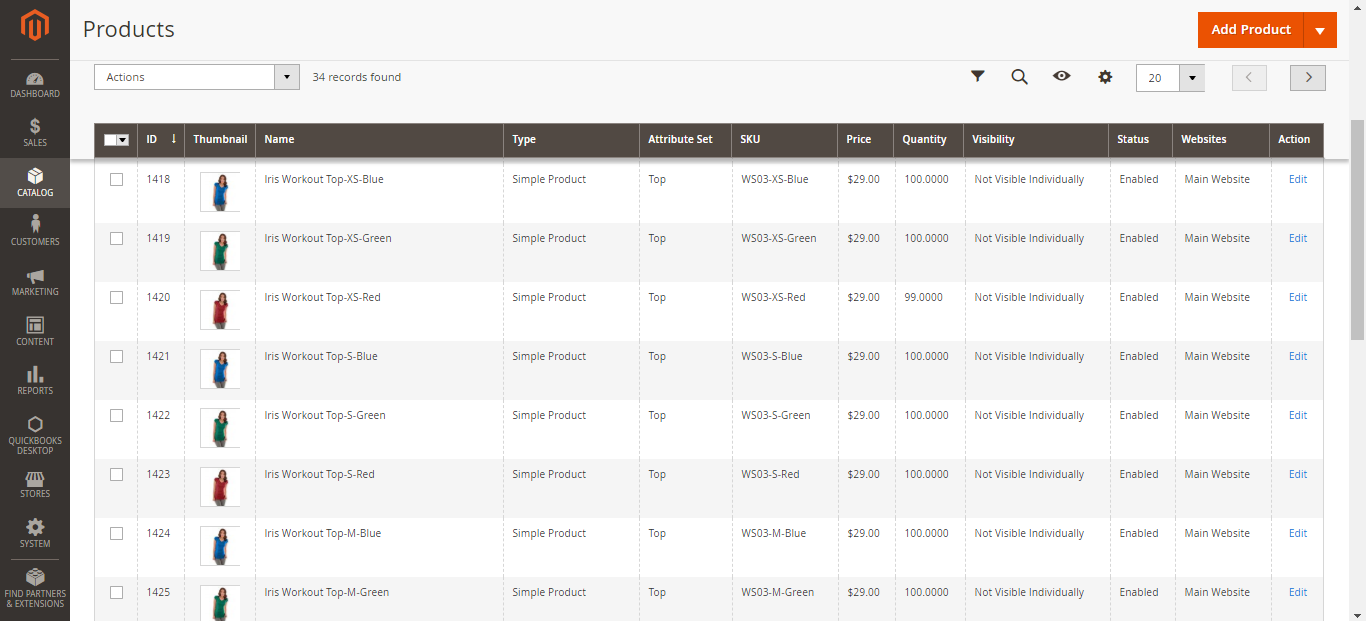
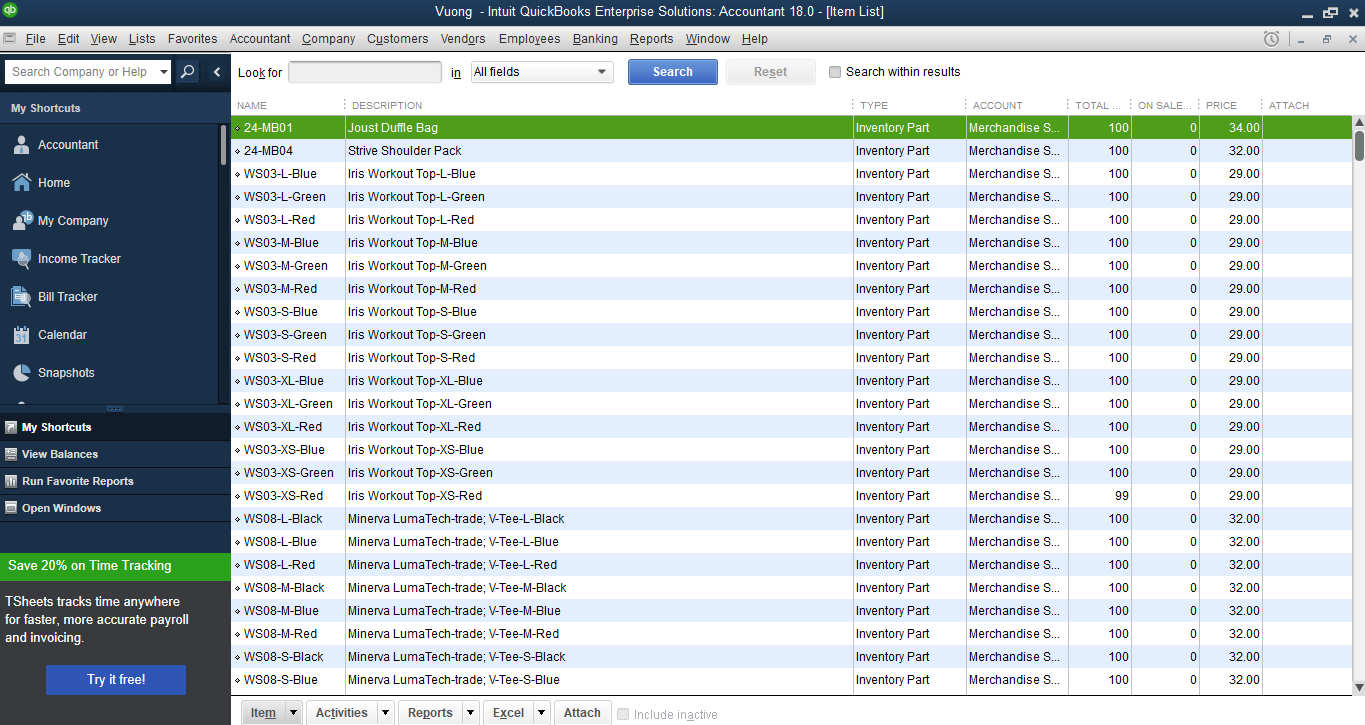
Sync products from Magento 2 to QuickBooks
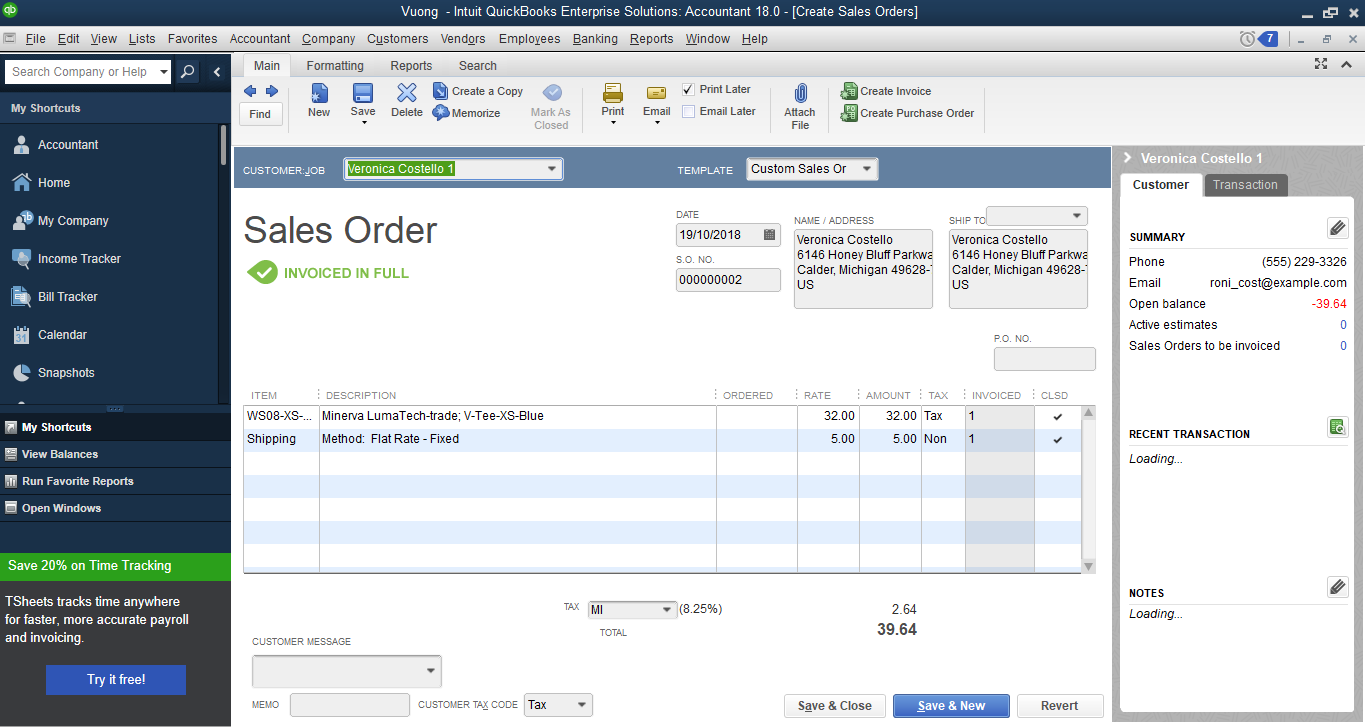
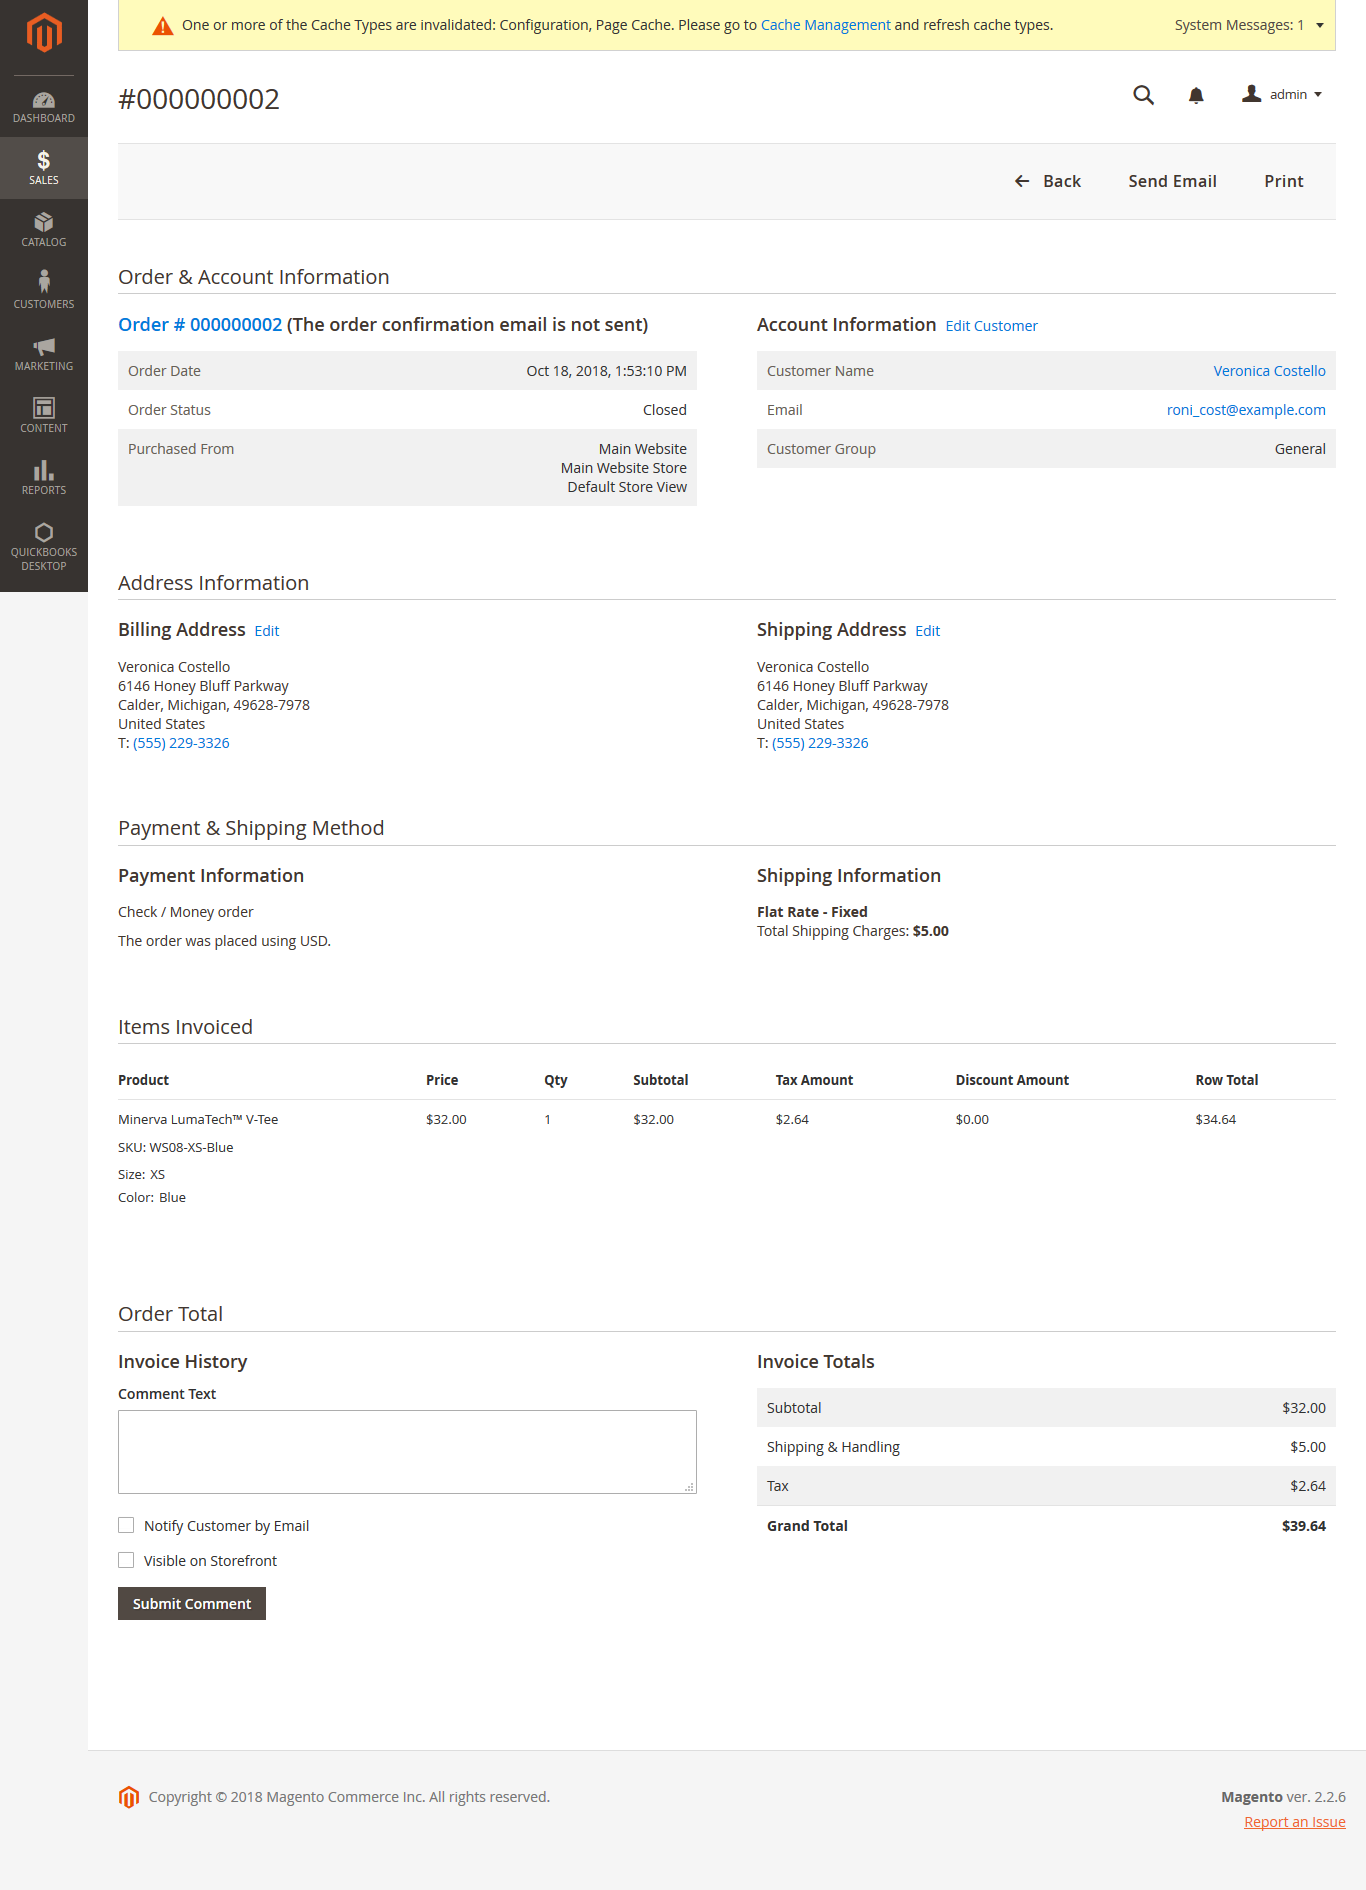
Sync Orders from Magento 2 store into QuickBooks Desktop Sales Order
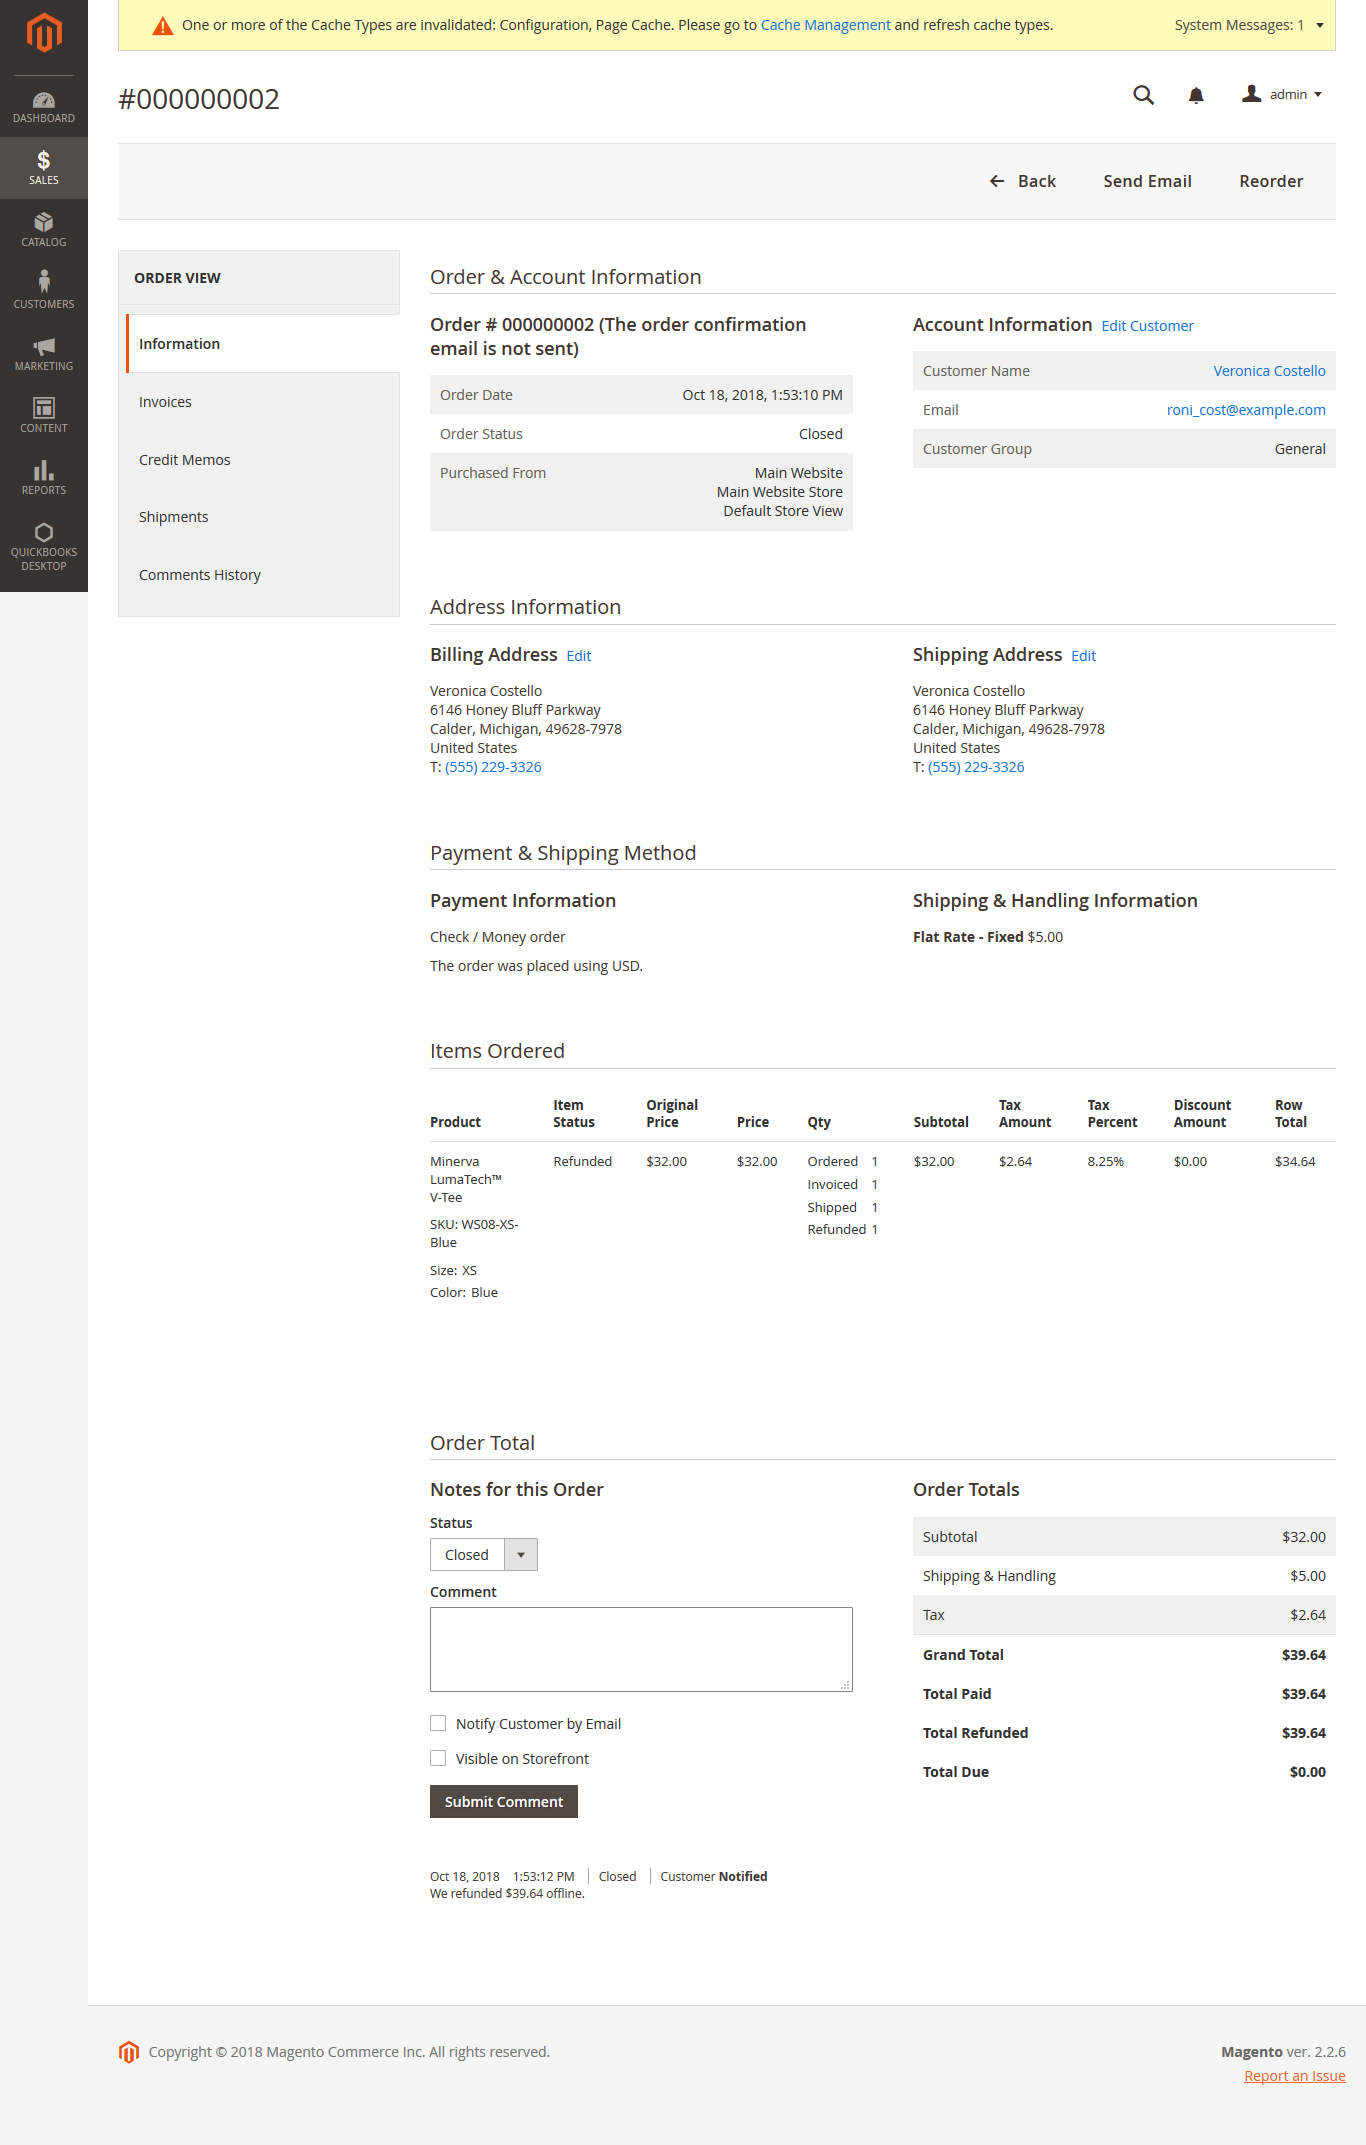
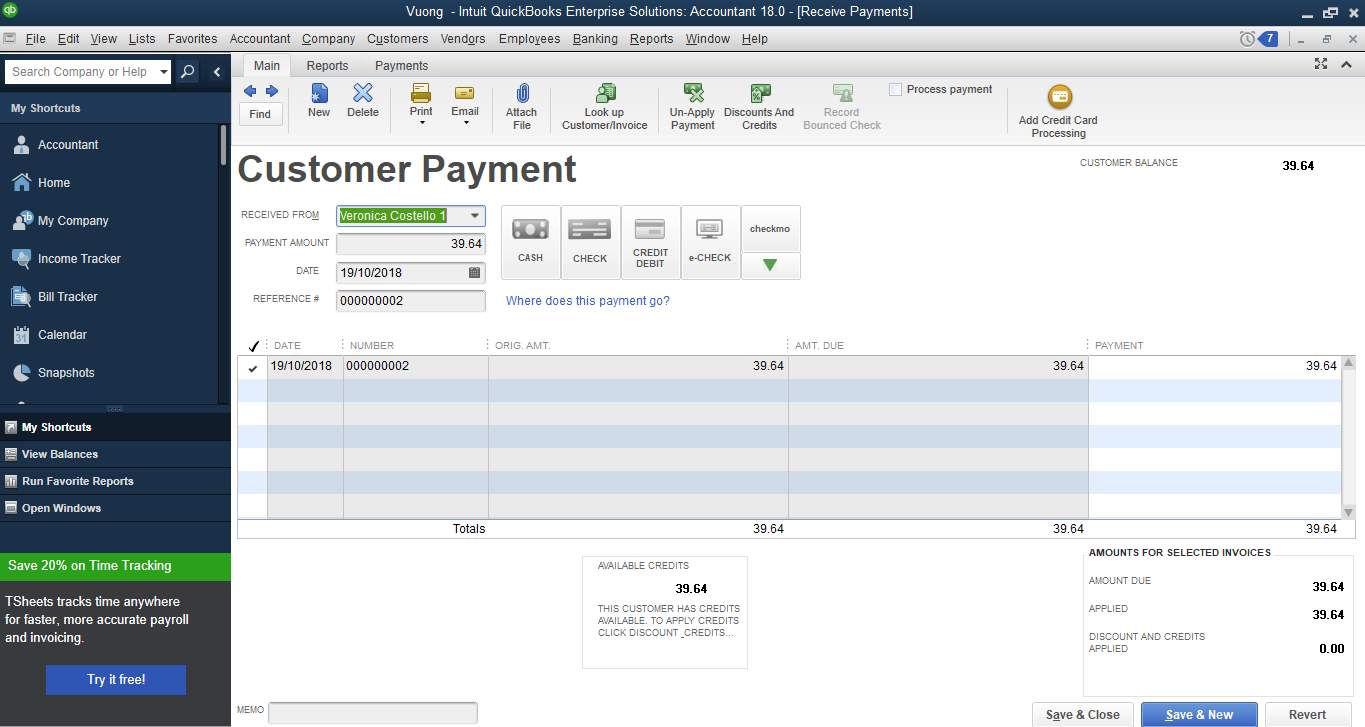
Sync Invoices Magento 2 store into QuickBooks Desktop Open Invoices and Receive Payment.

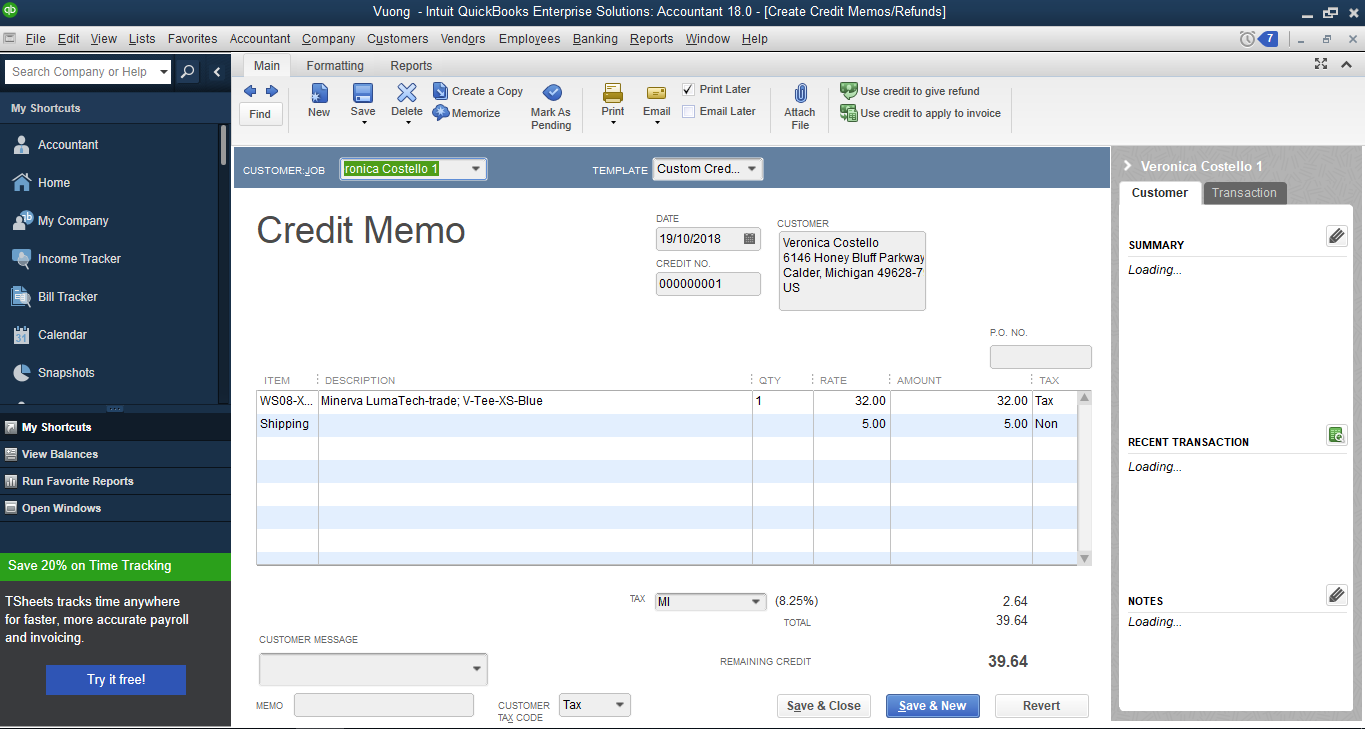
Sync Credit Memos Magento 2 store into QuickBooks Desktop Credit Memos

QuickBooks Desktop Synchronization Feeds and Field
Customer
Magento Customer | QBD Customer |
First name | FirstName |
Last name | LastName |
ID | Suffix |
Phone Number | Main Phone |
Default Billing Address | Bill Address |
Default Shipping Address | Shipping Address |
First name + Last name | Customer Name |
Product
Magento Product | QBD Item |
Name | Name, PurchaseDesc, FullyQualifiedName |
Short Description | Description |
Price | Unit Price |
Tax Enable | Taxable |
Sku | Sku |
Qty | Qty On Hand |
Created At | Inventory Start Date |
Order
Magento Product | QBD Item |
Increment ID | Document Number |
Customer | CustomerRef |
Items | Line Items |
Grand Total | Total Amount |
Customer Email | Billing Address |
Tax | TnxTaxDetail -> Total Tax |
Created At | TnxDate |
Product Qty | Quantity each product in order |
Price Each Product | Rate |
Total amount each Product | Amount |
Discount Amount | Discount |
Shipping Fee | Shipping |
Billing address | Billing address |
Shipping Address | Shipping Address |
Invoice
Magento InvoiceCredit Memo | QBD Invoice |
Method QBO ID | Payment Method Ref |
Created At | TxnDate |
Tax Amount | TxnTaxDetail -> Total Tax |
CustomerRef | Customer Reference |
Items | Line Items |
Grand Total | Total Amount |
Customer Email | Billing Email Address |
Credit Memo
Magento Credit Memo | QBD Credit Memo |
Increment ID | Document Number |
Created At | TxnDate |
Tax Amount | TxnTaxDetail -> Total Tax |
CustomerRef | Customer Reference |
Items | Line Items |
Item qty | Qty |
Product price | Amount |
Amount product | Total |
Shipping Fee | Shipping |
Discount Amount | Discount |
Grand Total | Total Amount |
Customer Email | Billing Email Address |
Update
- When a bug fix or new feature is released, we will provide you with the module's new package.
- All you need to do is repeating the above installing steps and uploading the package to your store. The code will automatically override.
- Flush the configure cache. Your store and newly installed module should be working as expected.
Support
- We will reply to support requests after 2 business days.
- We will offer lifetime free update and 6 months free support for all of our paid products. Support includes answering questions related to our products, bug/error fixing to make sure our products fit well on your site exactly like our demo.
- Support DOES NOT include other series such as customizing our products, installation and uninstallation service.