...
Your store needs to be running on Magento version 2.x2.x10
Prerequisites
- You have to use SSL for your website
- Web connector application is required on the computer that installs QuickBooks with version 2.1.0.30 and older versions
- Support QuickBooks version:
- QuickBooks Enterprise Solutions
- QuickBooks Premier (2002 or later)
- QuickBooks Pro (2002 or later)
- QuickBooks Simple Start (2006 or later)
- Canadian editions of QuickBooks Pro, Premier, or Enterprise (2003 or later)
- UK editions of QuickBooks Pro or Accountant Edition (2003 or later)
...
First of all, you have to set up the connection between the Magento website and QuickBooks software through the Web connector application. Please follow the below steps:
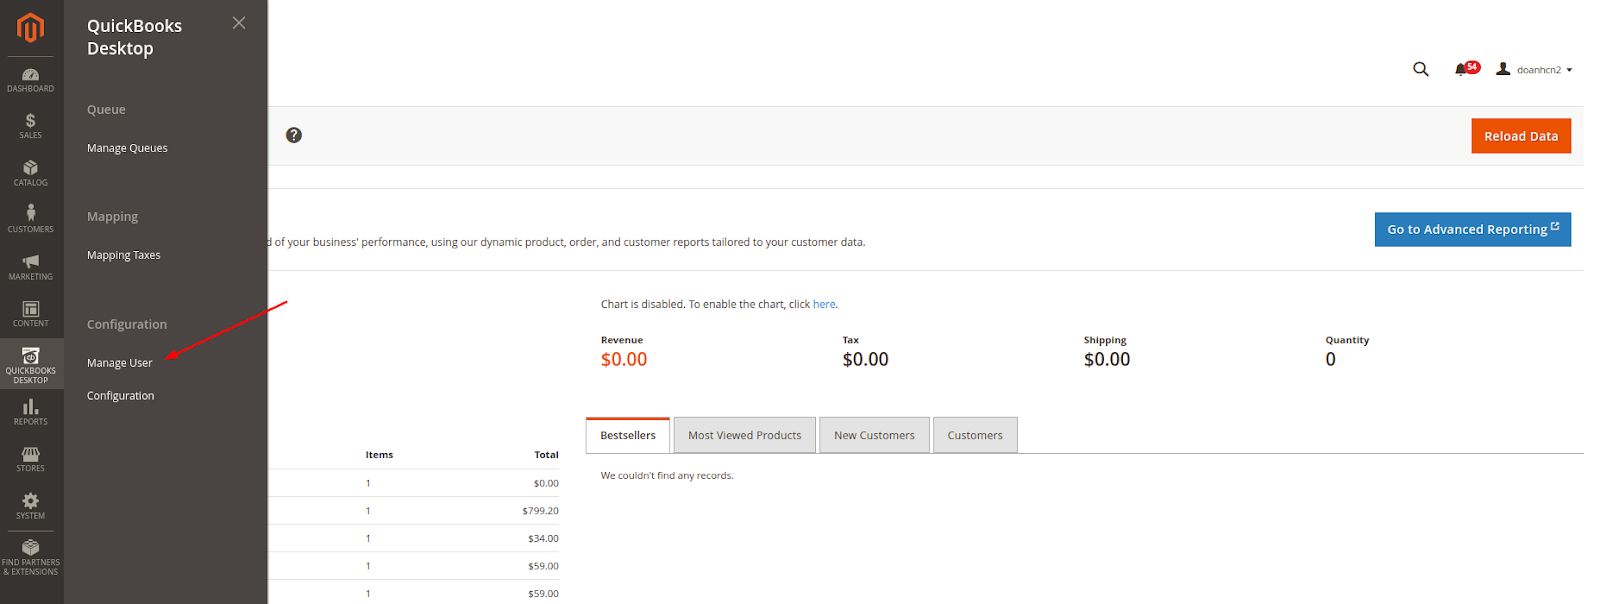
Step 1: Create a user for QuickBooks Web Connector
In this step, you have to create a user account that will be used to establish a connection between Magento 2 and Web connector. You can create one by going to QuickBooks Desktop > Manage User, and click on Add New User.
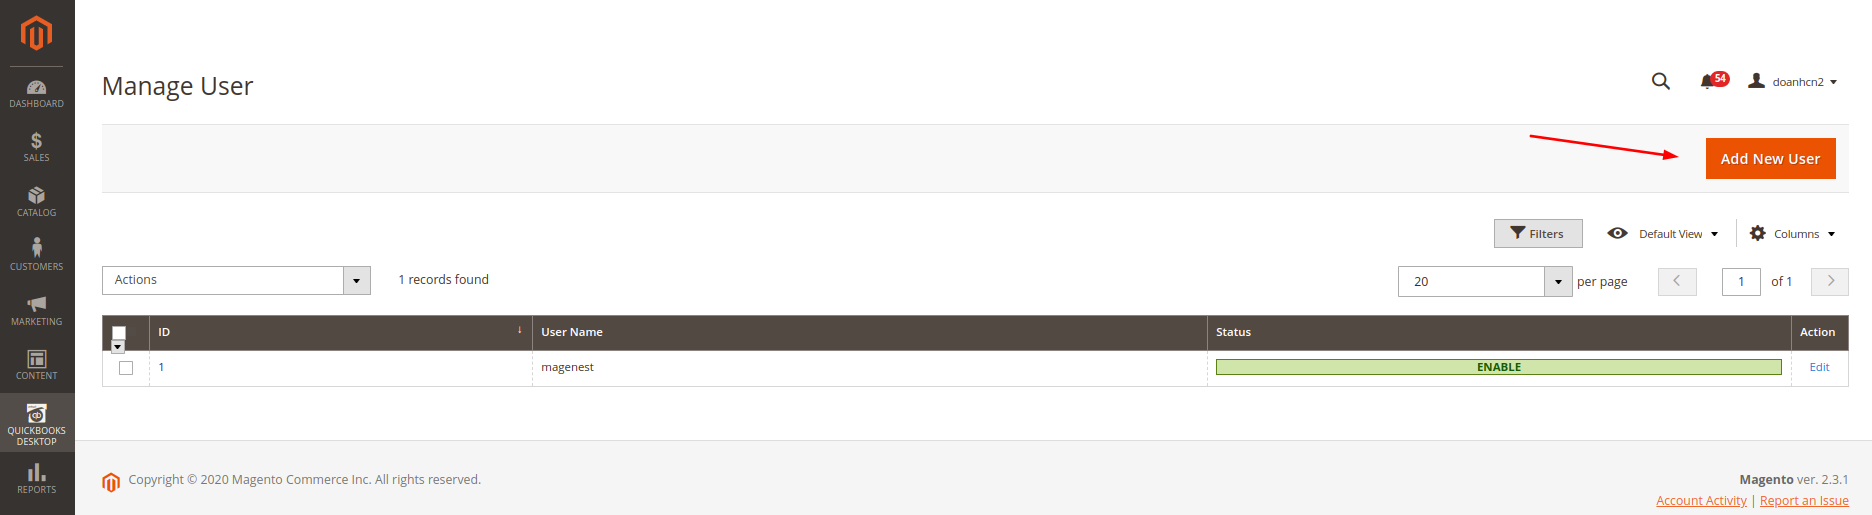
Fill all the fields then click Save Information to save the entered information. The username and password will be used with QuickBooks Web Connector later on.
...
At the end of this step, you have to set up the account for the connection by going to QuickBooks Desktop > Configuration > Connection Settings
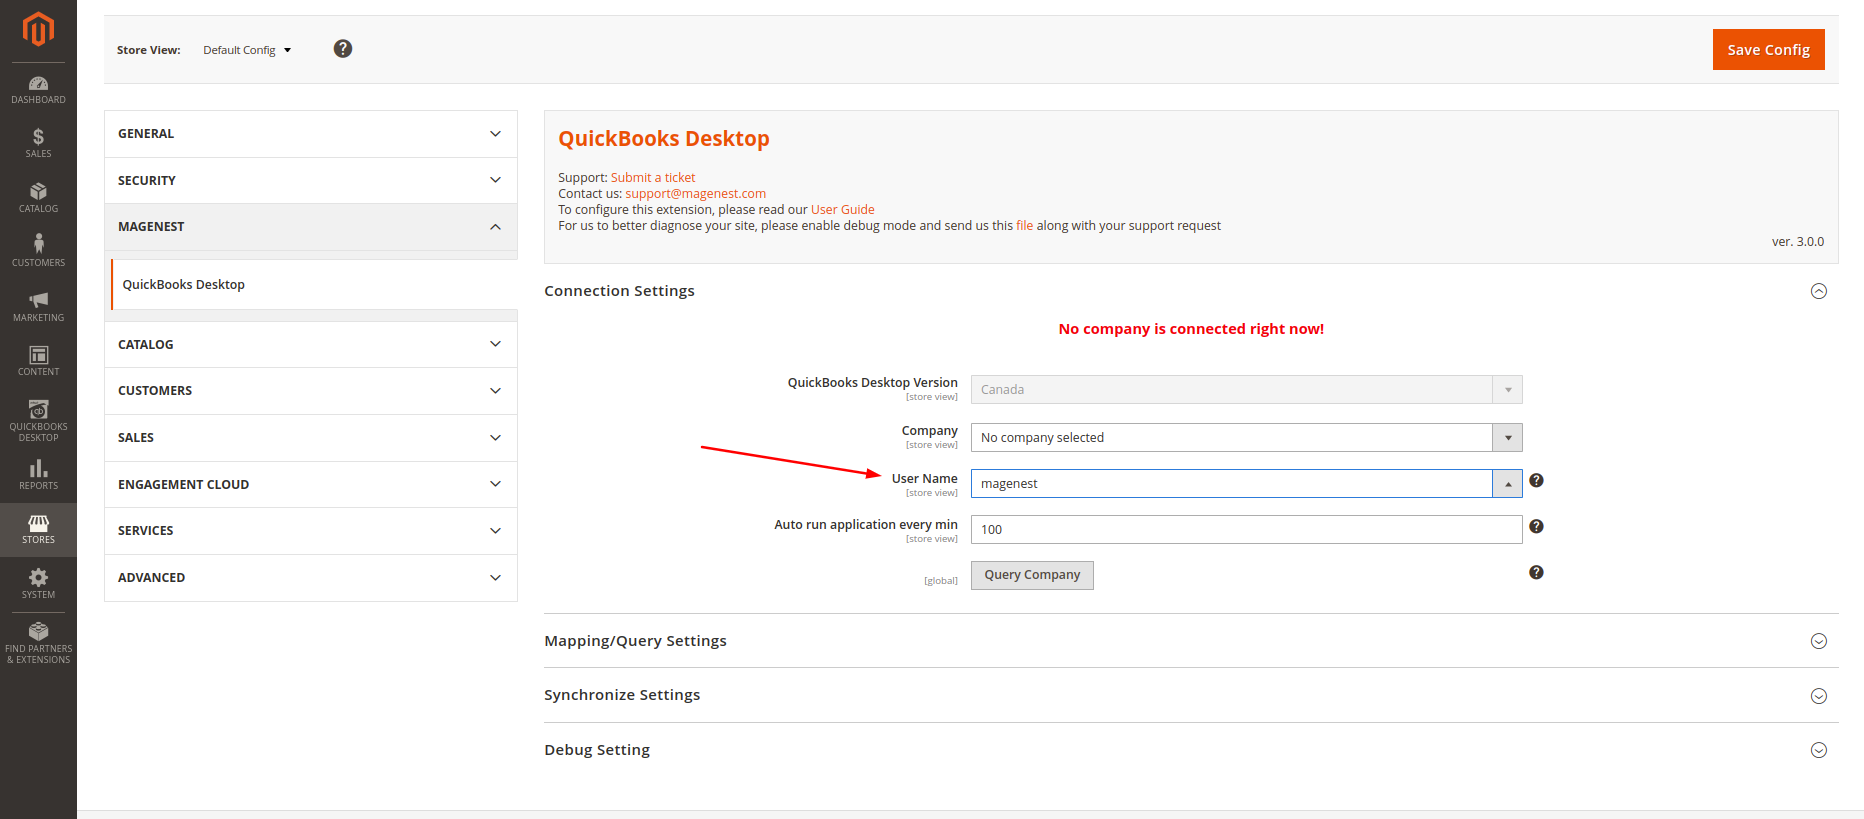
Step 2: Establish the connection
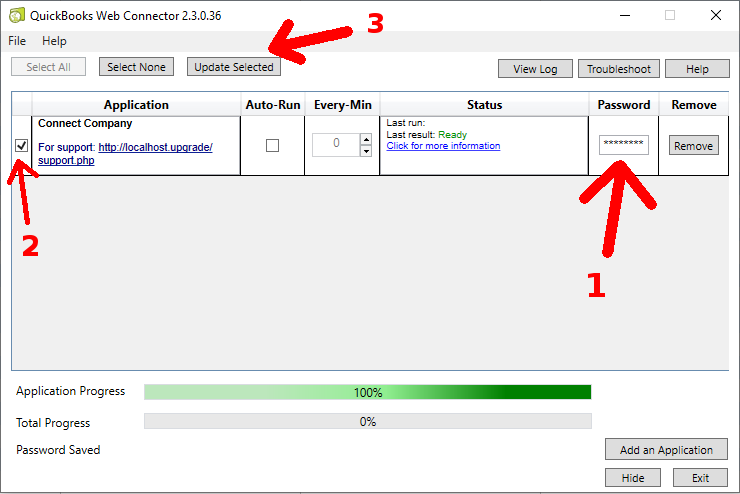
Please click on the “Query company” button to download the connection file to add to the Web connector application:
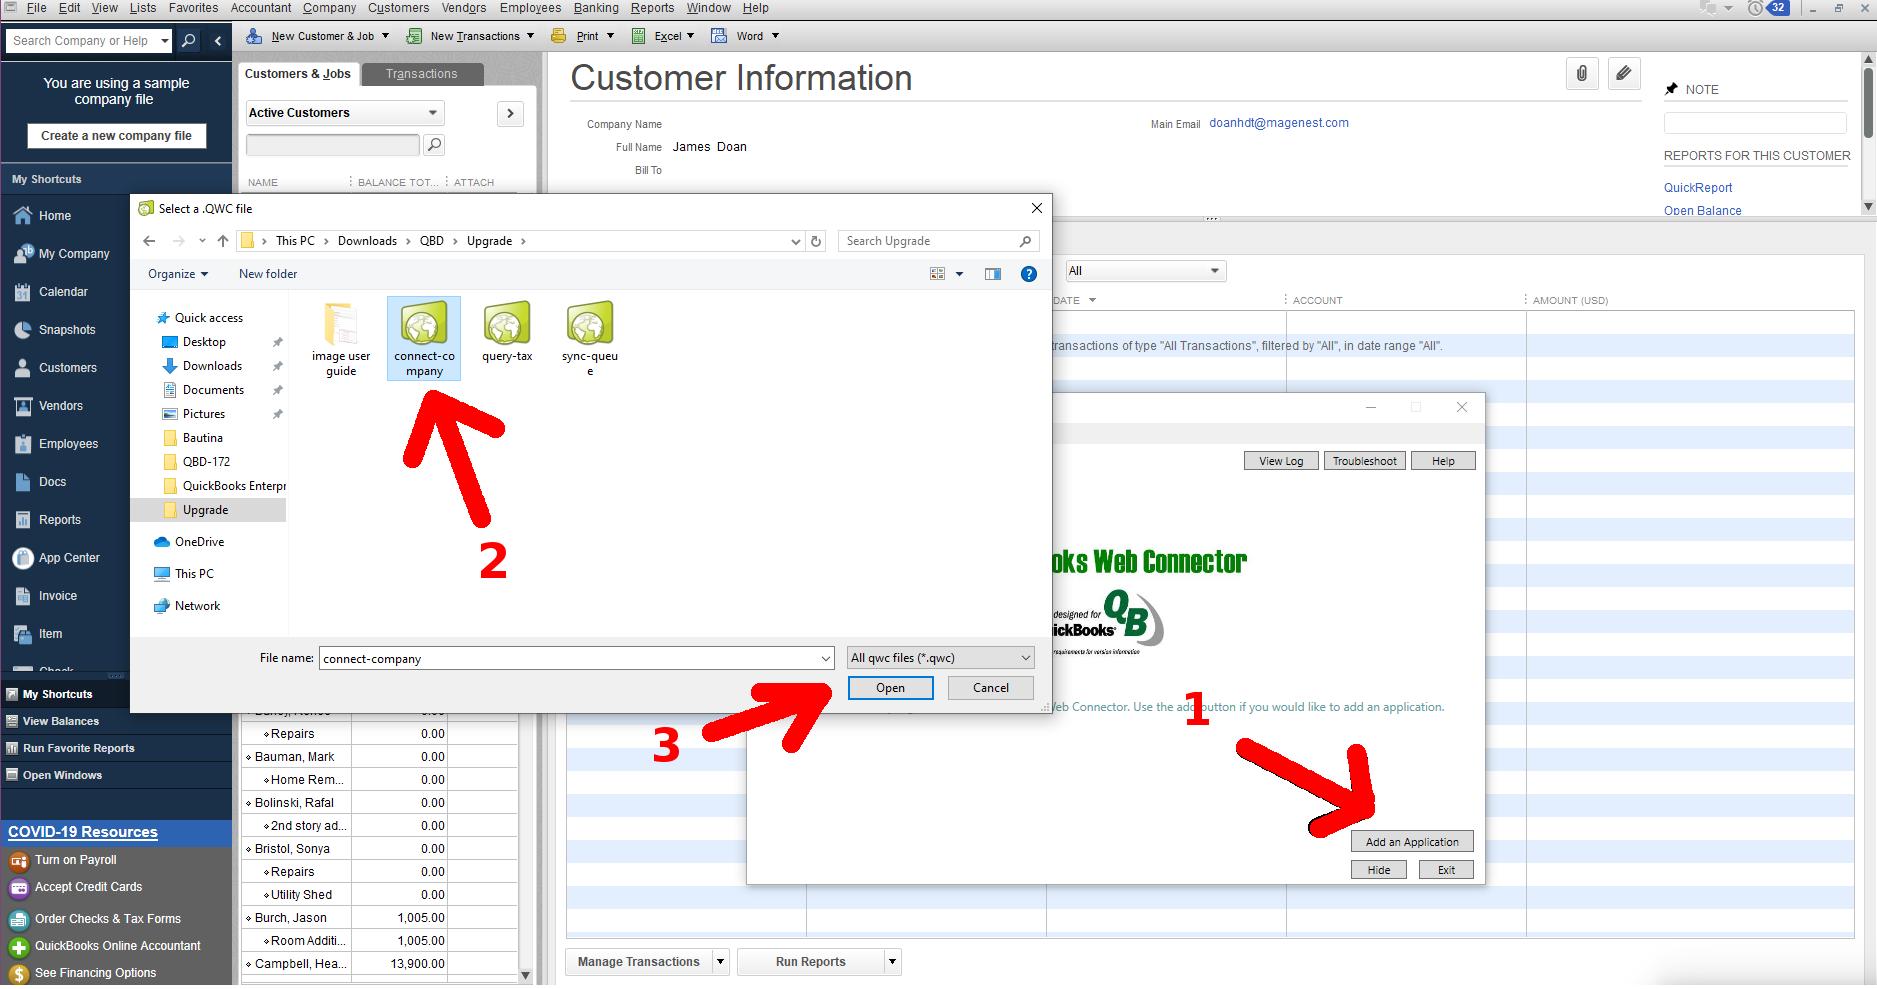
After adding the connection file to the Web connector application, run the application that has been added:
...
Once the connection setup is done, you should see the following image:

...
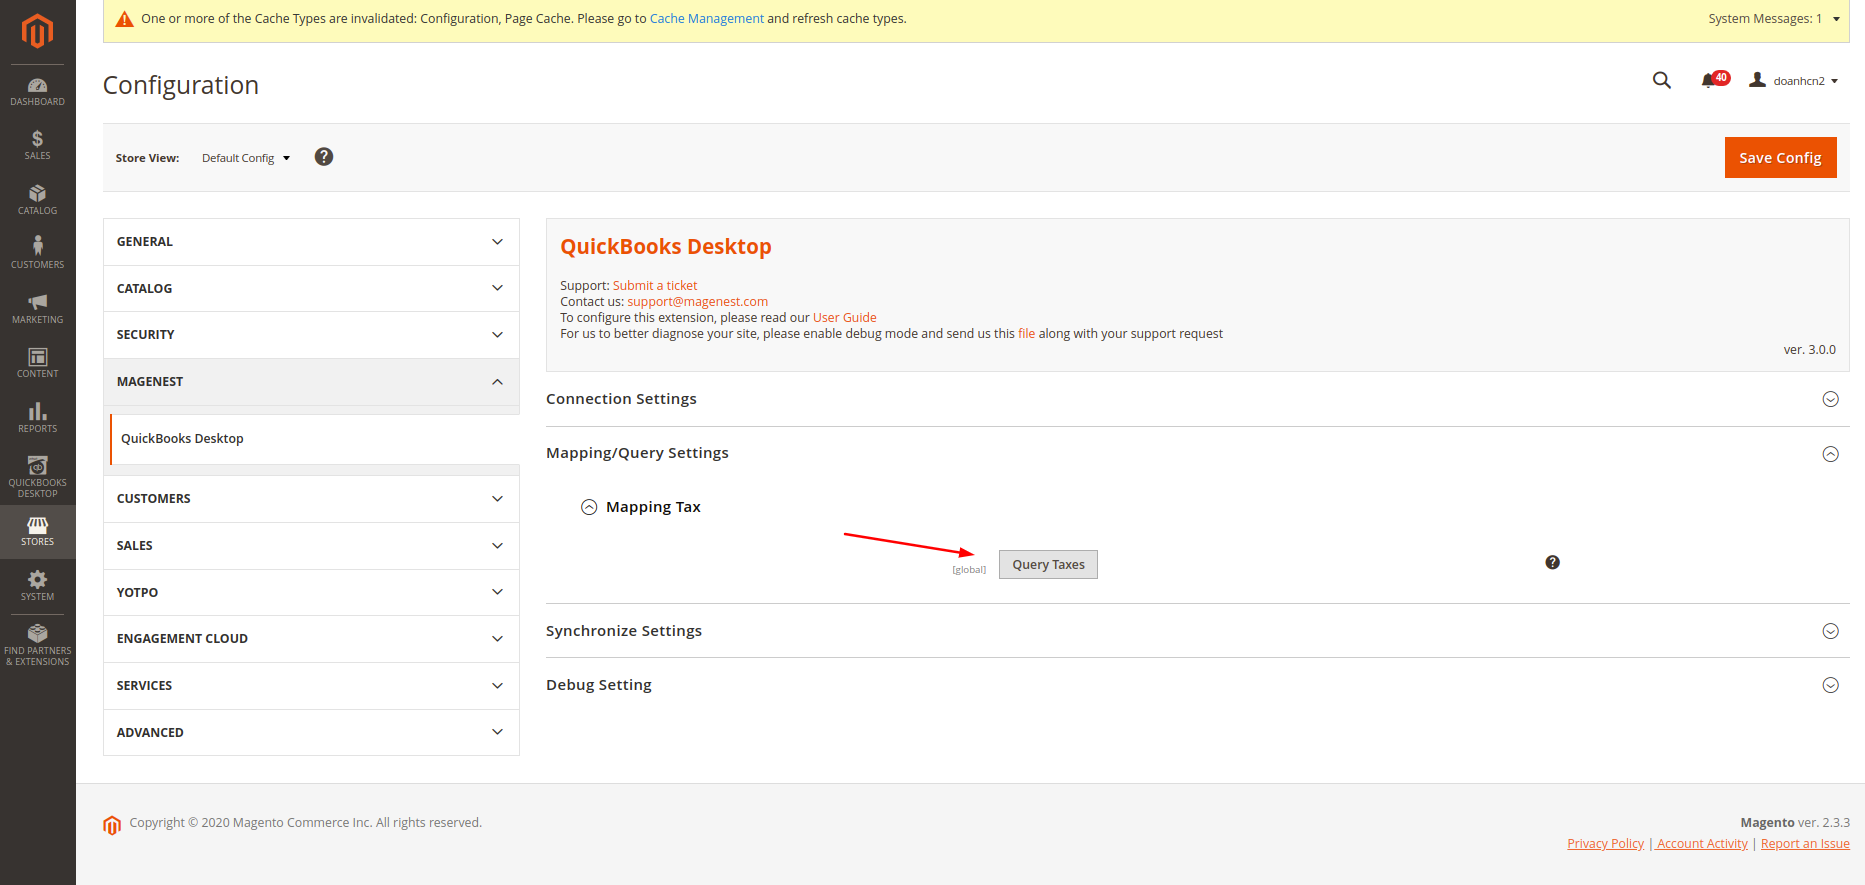
First of all, get query-tax.qwc file to add to Web connector:
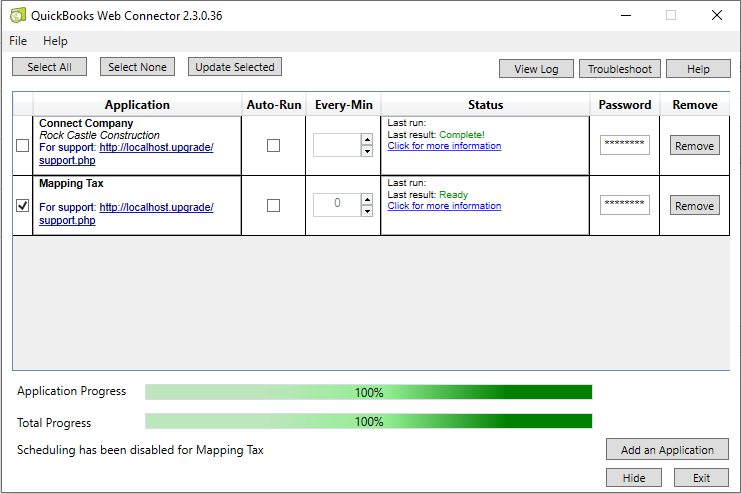
After Update Selected, you will see all of the taxes that exist in QuickBooks in the Mapping Tax Mapping table table.
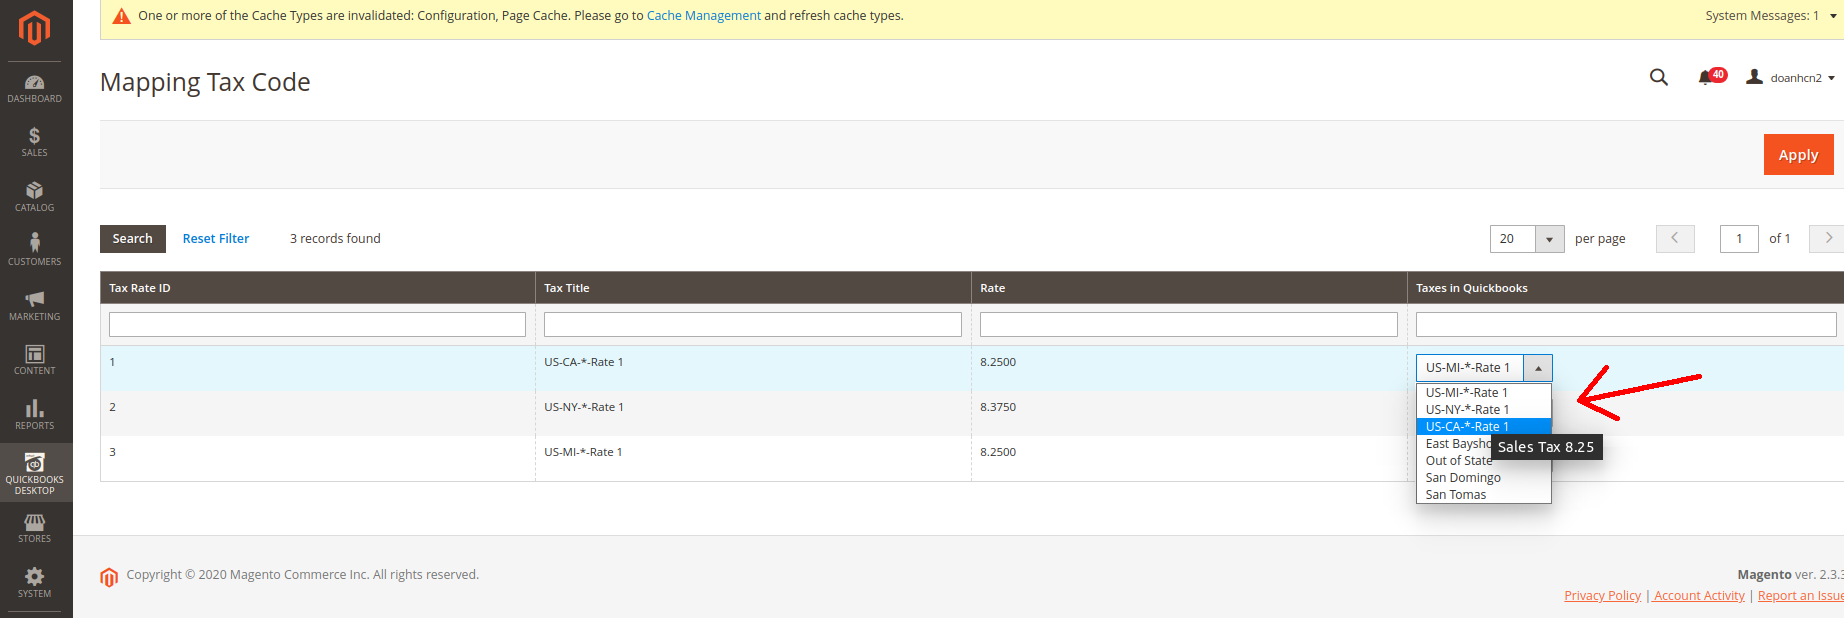
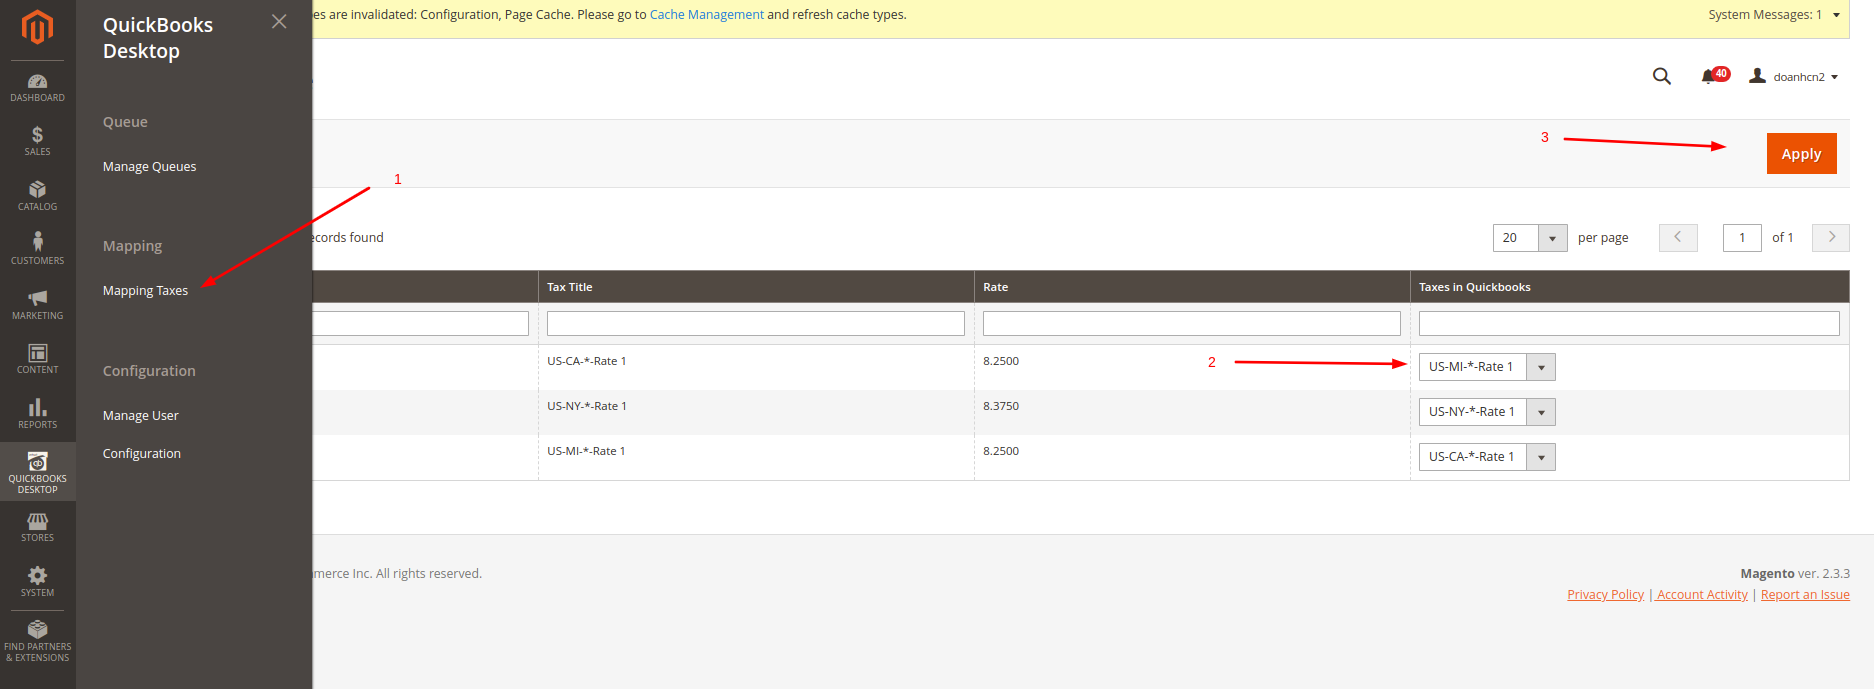
Step 2: Mapping Taxes
QuickBooks Desktop -> Mapping -> Mapping Taxes, you will see a table which shows all of the taxes in both Magento and QuickBooks
...
Finally, click the Apply button to save the Mapping.
Synchronize Magento Data
Magento data will be synchronized into QuickBooks when all of them exist in the Queue table with Queue status.
...
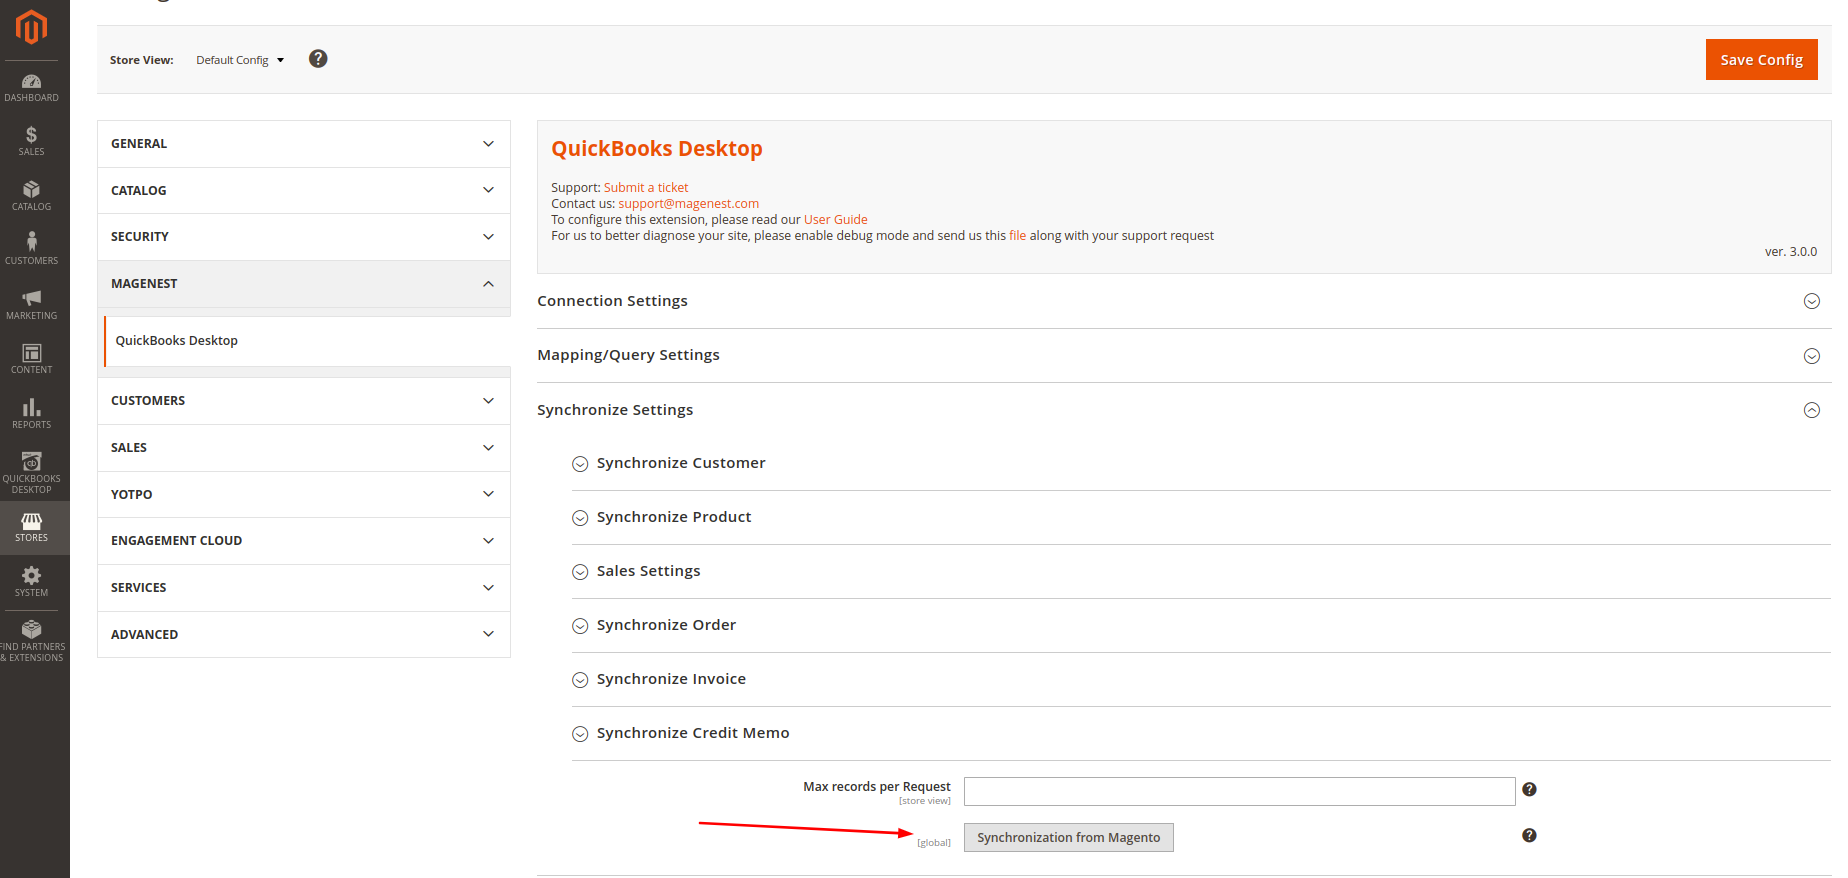
You have to set up some configuration before synchronizing Magento data into QuickBooks. Go to QuickBooks Desktop -> Configuration -> Synchronize Settings
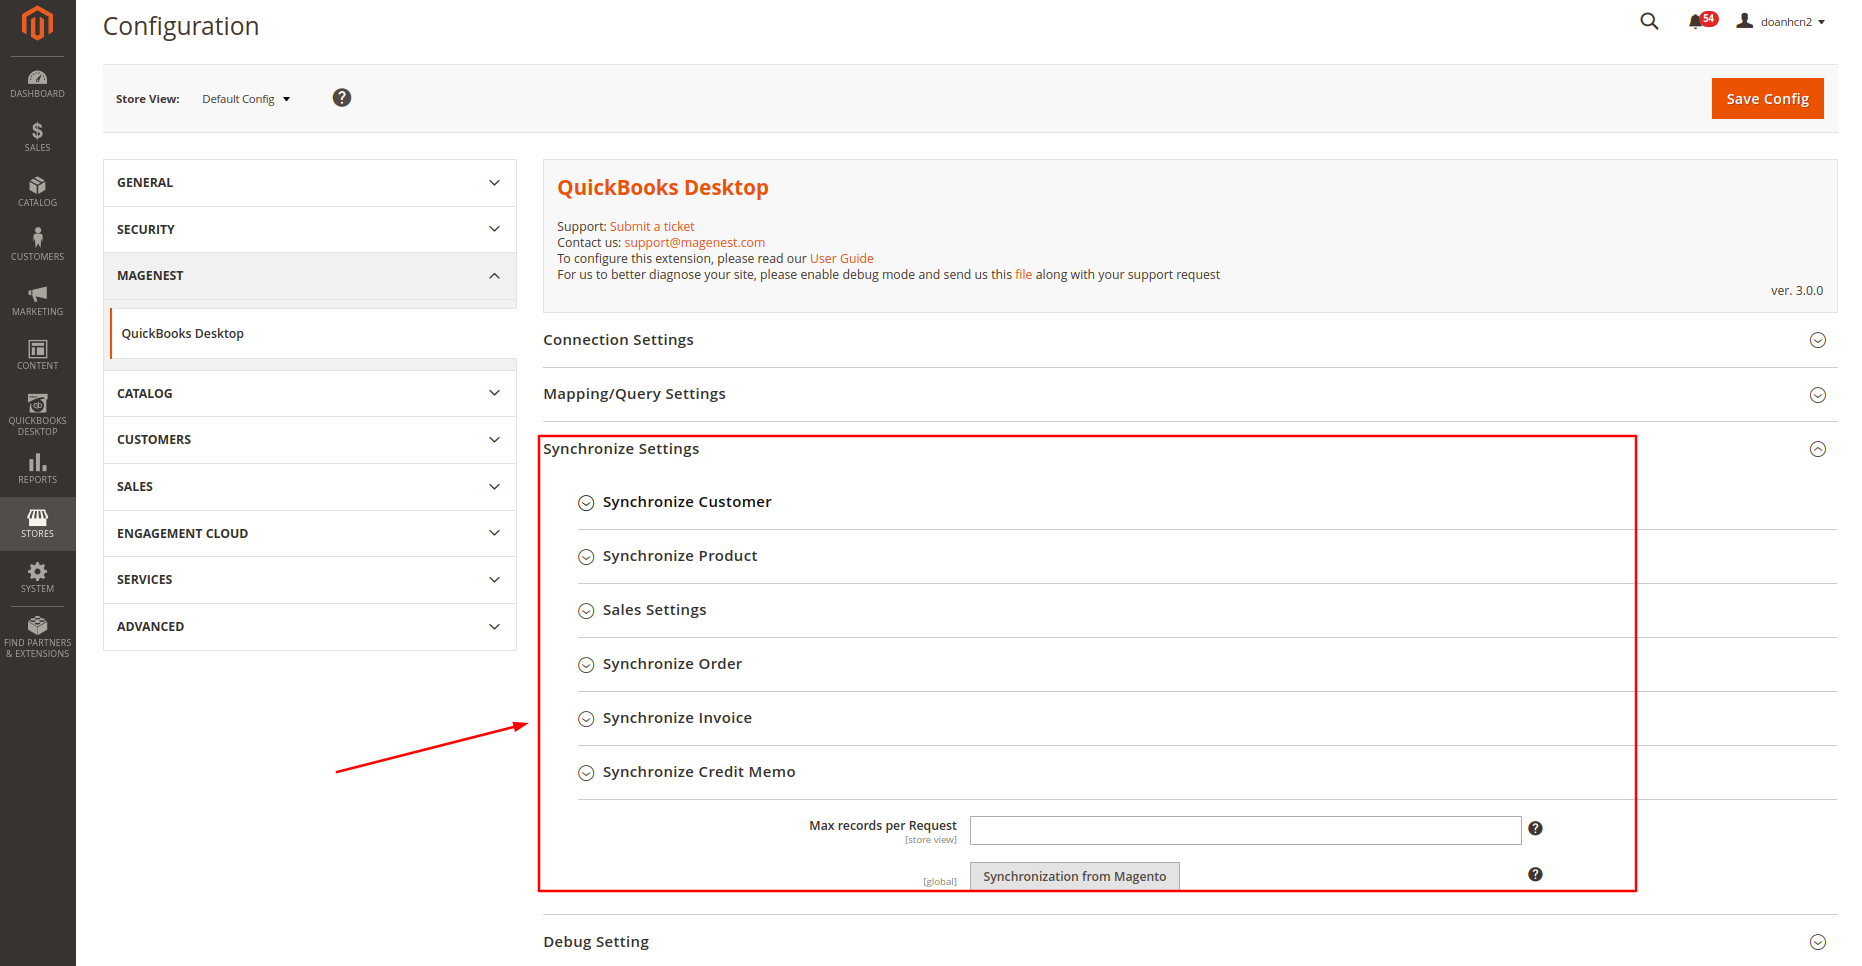
When you open each section, you may see the following settings:
...
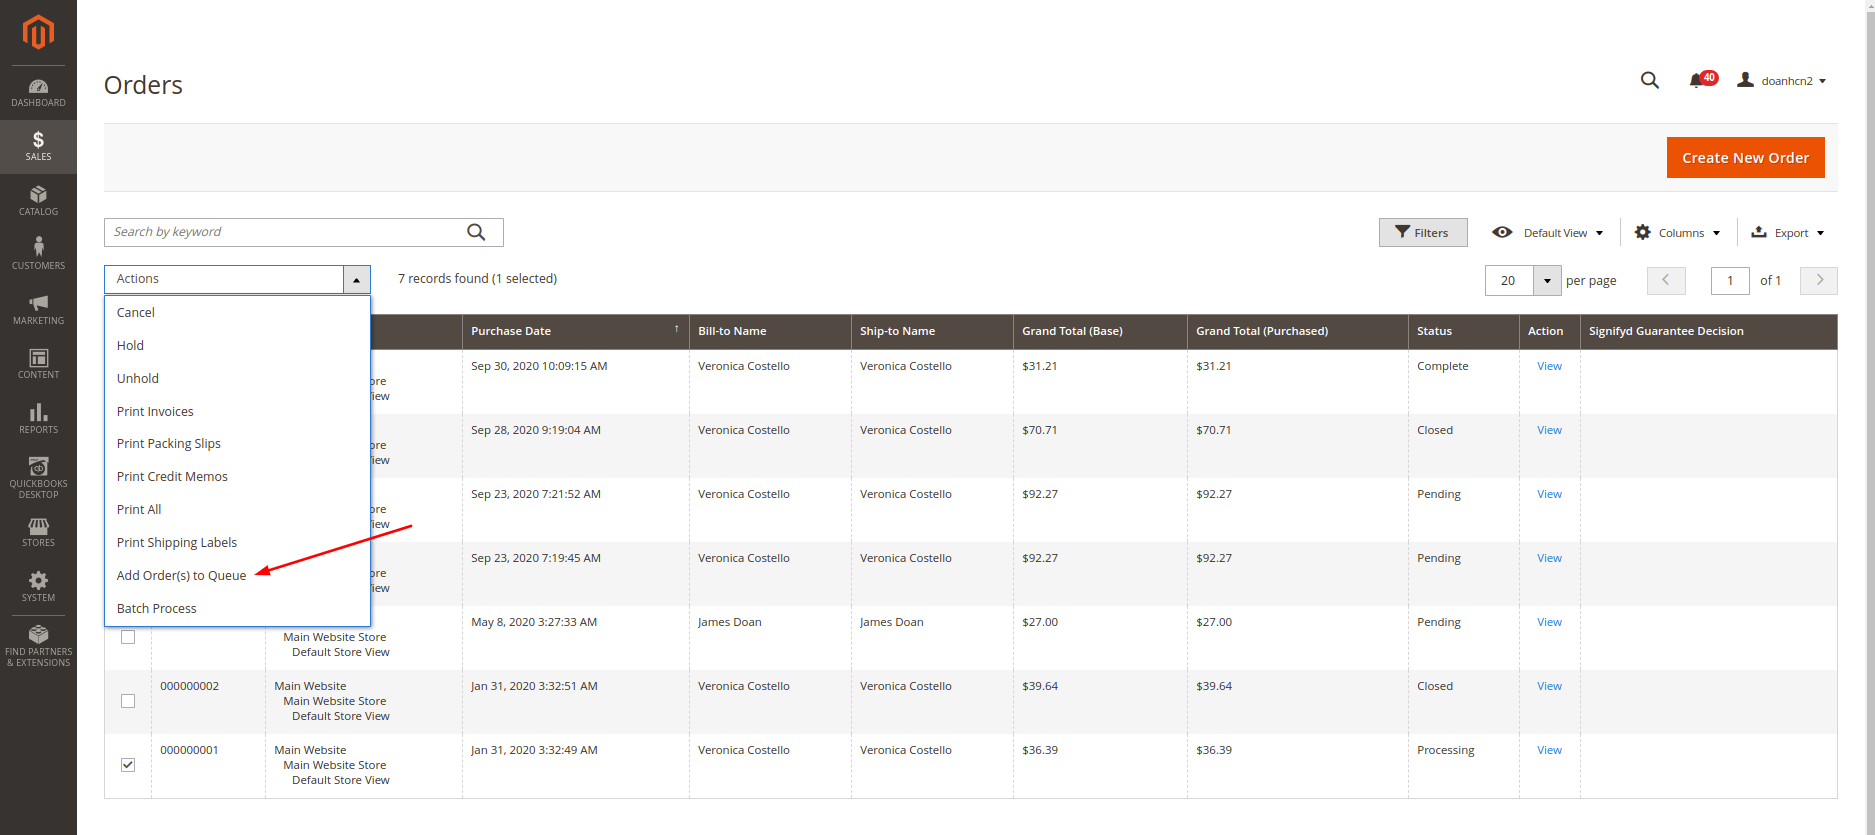
- Add a set of object data with date filter by clicking the button in the header of the Queue table
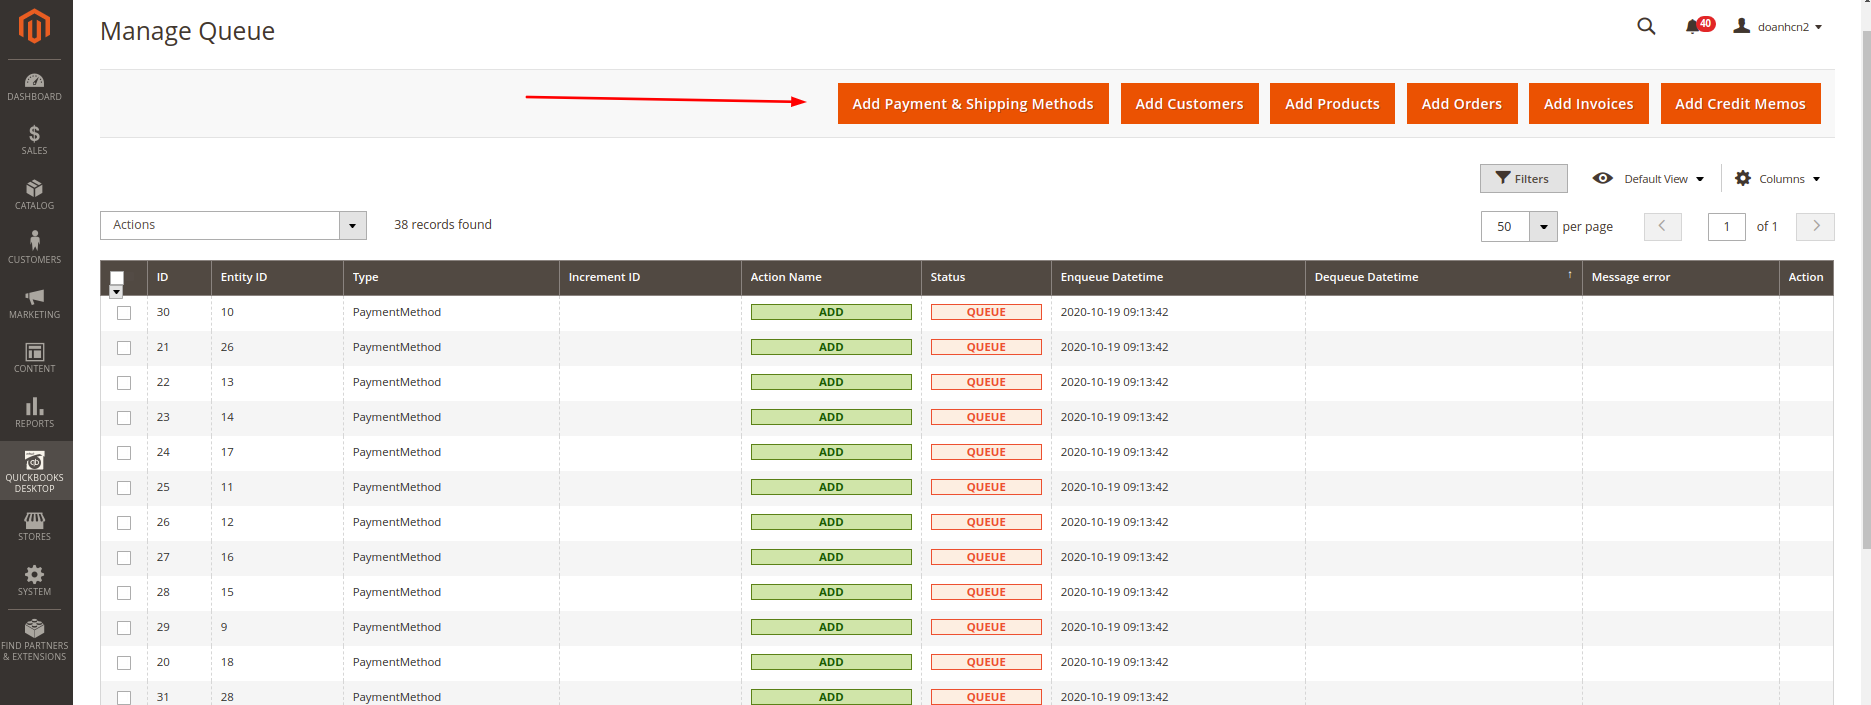
- Add specific object data by using Mass action:
Synchronize Data to QuickBooks
...
Go to QuickBooks Desktop -> Configuration -> Synchronize Settings, click the Synchronize from Magento button to download the sync-queue.qwc file
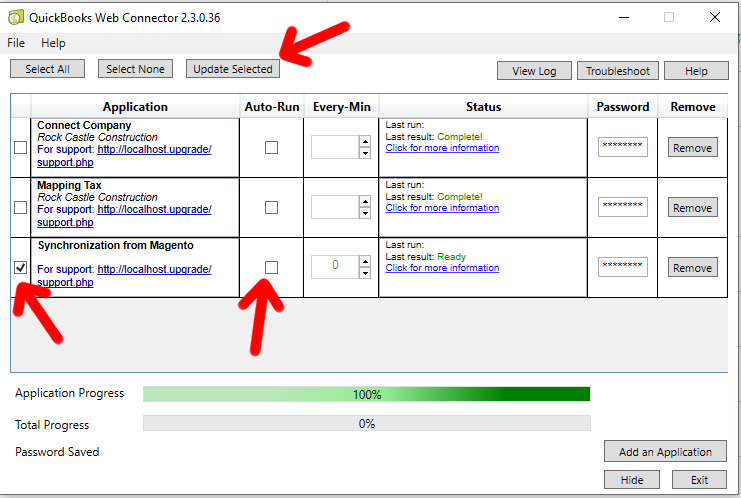
Step 2: Run the file in the Web connector
Add the file that you downloaded in step 1 to the Web connector. Then you can update manually by Update Selected or use the Autorun function to get data from Magento to QuickBooks.
![]() Note:
Note:
- Simple, Virtual, Giftcard, Downloadable products in Magento will create an inventory item in Quickbooks.
- Other products such as Bundle products, Configurable products, Group products will create a non-inventory item without a list of child items. Only SKU, price, and description will be imported.
- Only Support Inventory item and Non-inventory item when synchronizing Sales Order.
- The order of the items that are processed while importing to Quickbooks are Shipping method, Payment method -> Customer/Guest -> Product -> Order -> Invoice -> Receive payment -> Credit memo.
...