Thank you for purchasing our extension. If you have any questions that are beyond the scope of this help file, please feel free contact us via [email protected]
Updated: February 25thOctober 2nd, 2020 | By: Magenest | Support Portal: http://servicedesk.izysync.com/servicedesk/customer/portal/9
| Table of Contents |
|---|
Introduction

As you know, It's a general fact that one of the best ways to improve and increase your profit in business is giving customers what they really want. Catching this needs, Magenest developed a Gift Registry extension for Magento 2 to help you completely tackle tackle you from this problem.
With our extension, consumers can easily create a list of items that they wish to receive in on special days such as their wedding, birthday and so forth.
Features
For Admin
- Add a separate page for gift registry on the store
- Set background image for the registry page
- Configure emails for registry program
- Allow guests to buy gift items with more or less than the desired quantity
- Create multiple events
- Enable / Disable the events
- Set the necessary information sections for each event
- Set images for the events
- View and manage the registry lists from the back-end
- Manage registry orders
For customers
For registry owner
- Create, edit and delete personal registry.
- Set event date, name, description, location, add image for the registry.
- Review expired event information.
- Share gift registry via multiple social media (Facebook, Twitter and Email) or sending registry URL.
- Track gift item's status and quantity.
- Receive the notification email when an item in the registry item list is purchased.
- Active multiple registries at once. Noted Note that the activated registry are not in the same event type.
For gift purchaser
- Search for gift registries by registrant name and event title.
- View the public registries.
- Add the gift list to card from the gift list page.
- Purchase several gifts in a registry at once.
System Requirements
Your store should be running on:
- Magento Community Edition version version 2.23.x., 2.3.x.4
- Magento Enterprise Edition version 2.2.x, 2.3.x., 2.4
Configuration
General Settings
On the admin sidebar, go to Gift Registry > Settings.
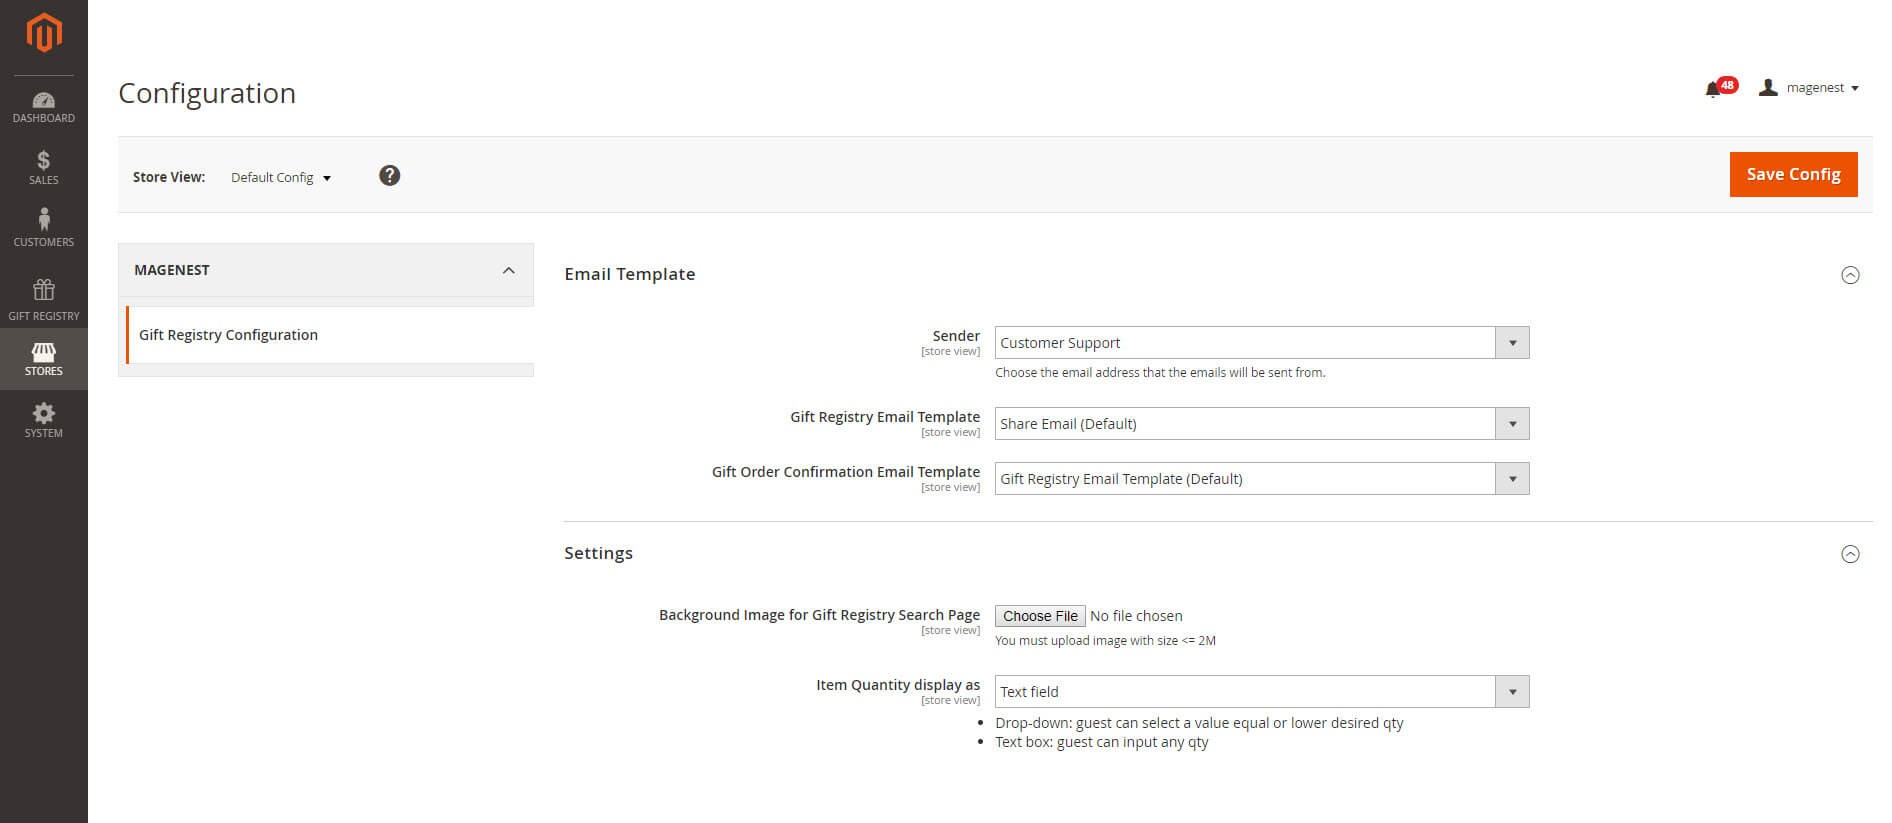
On the Configuration page, there are you could find the settings for the email template and registry page on the front-end.details of the extension.
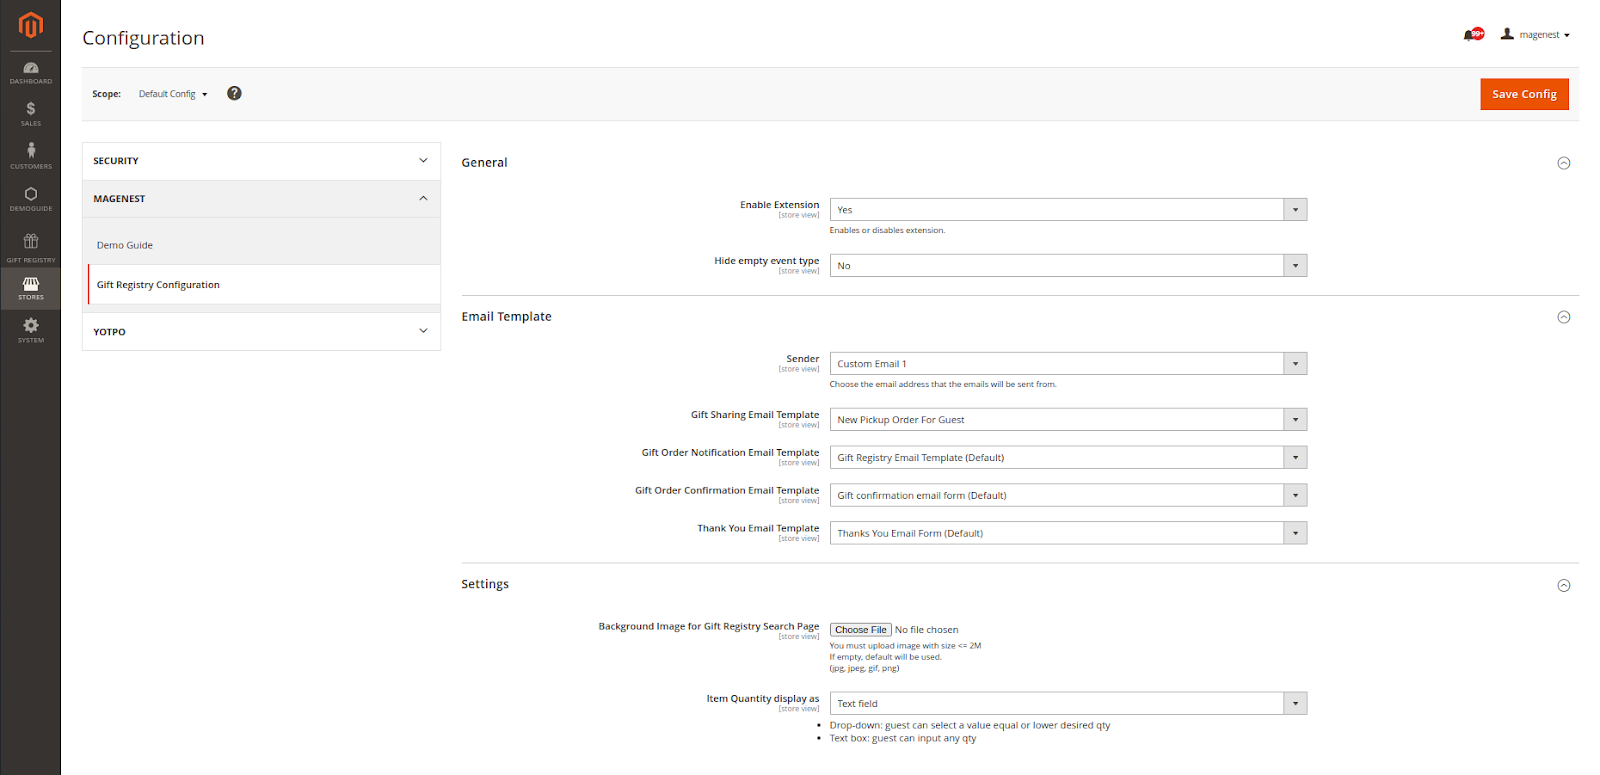
 Email Template
Sender: Select a default sender address for the emails set below.
Gift Registry Sharing Email Template: Select a an email template for the email that will be sent when the to the registrant shares a their registry to their friends via email.
- Gift Order Confirmation Notification Email Template: Select an email template that will be sent template to the registrant registry owner when an item in their gift list is purchased.
Gift Order Confirmation Email Template: Select an email template to the registry buyer when their order is successful.
- Thank You Email Form: Select an email template sent from the registry owner to the buyers on demands.
Settings
- Background Image for Gift Registry Search Page: Set the image background for the gift registry search page.
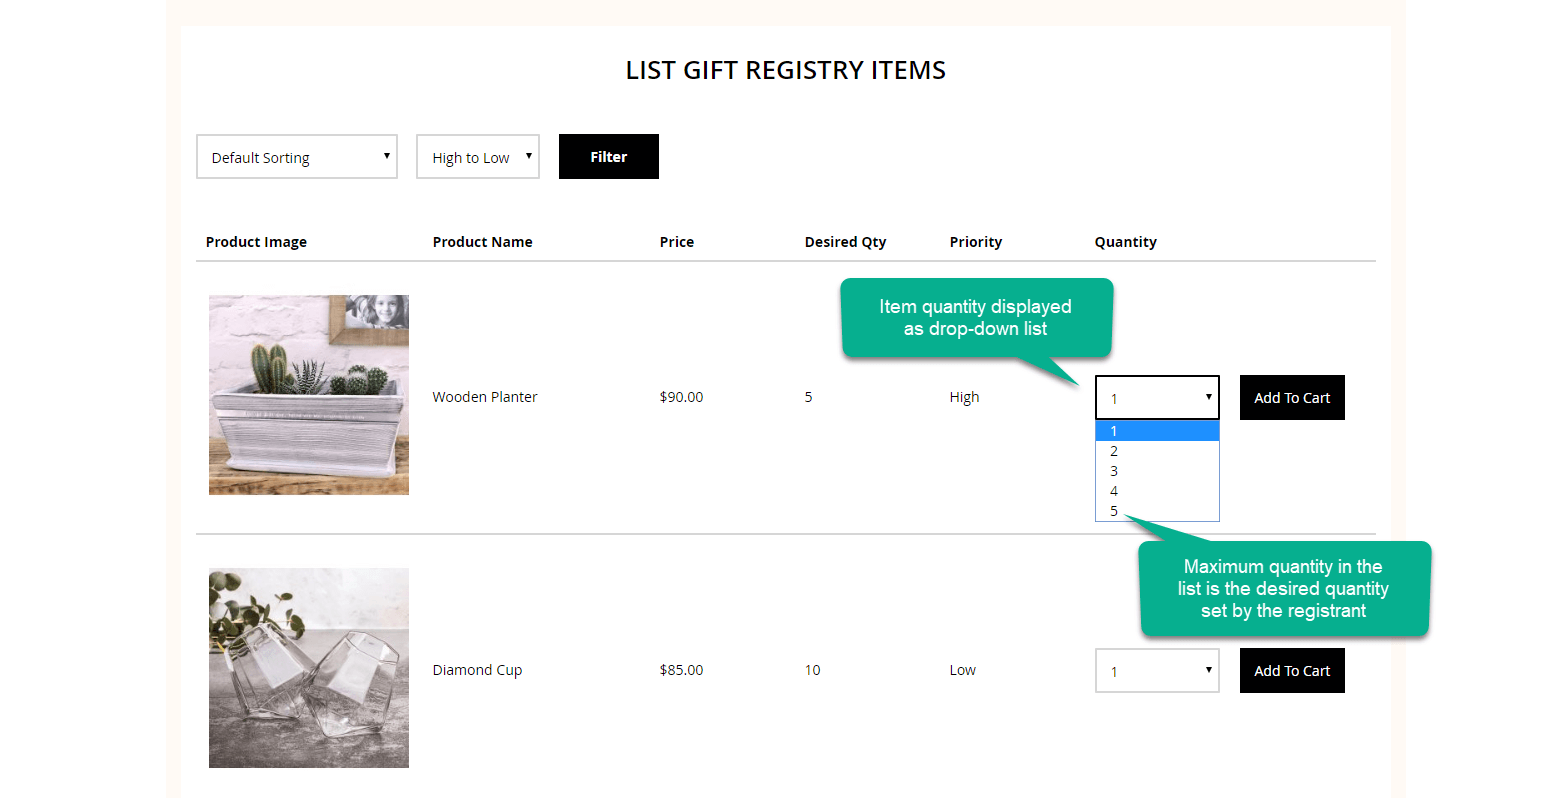
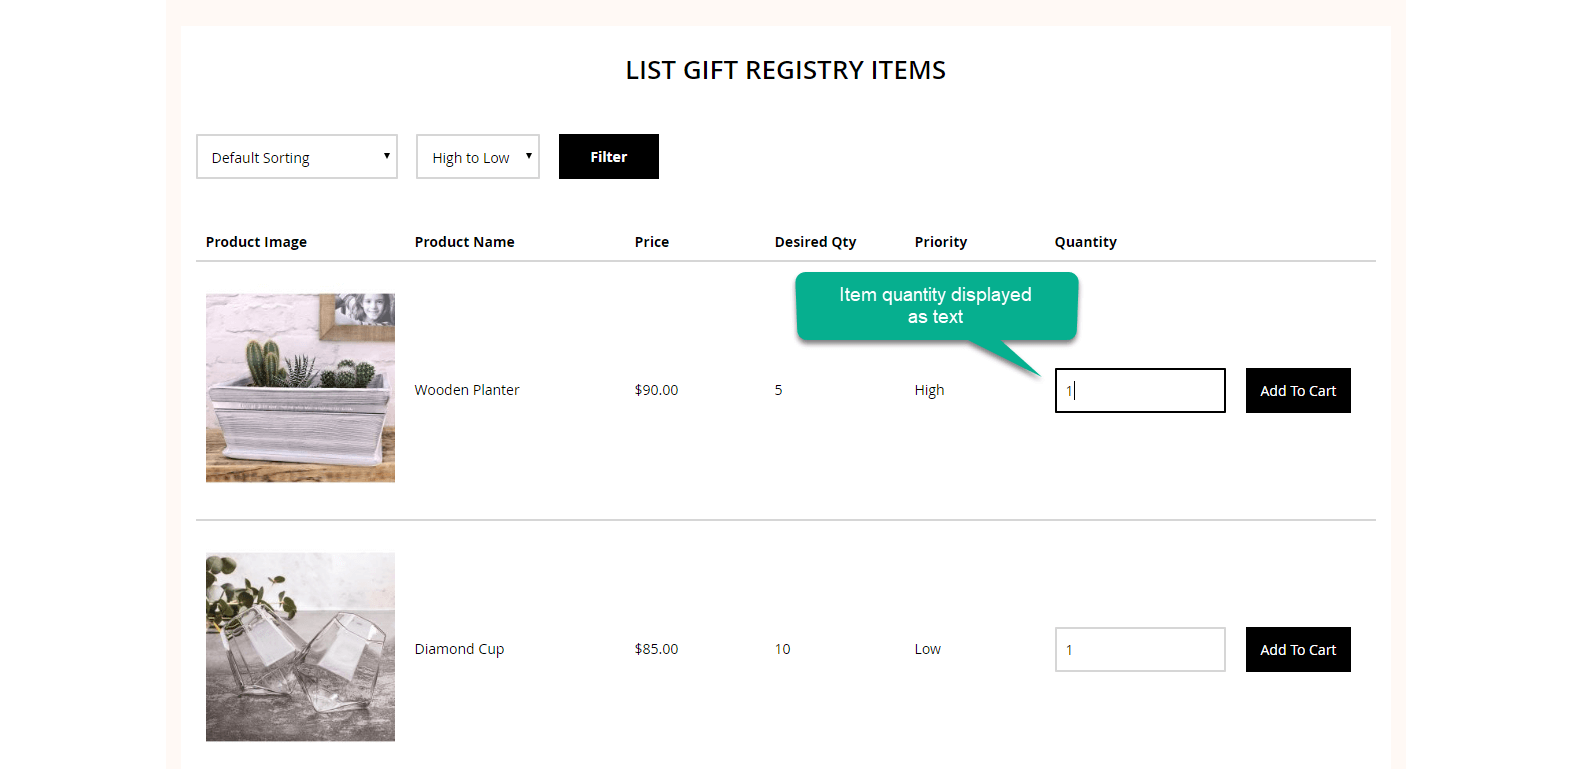
- Item Quantity displayed as: Set the display for item quantity on the registry page. This setting will affect the item quantity that a guest can purchase.
- Drop-down List: The guest can purchase a gift item with the quantity listed on the drop-down list. The quantity in the list is no more than the registrant's desired quantity.
- Text Fields: The guest can enter the quantity of gift item to purchase.
- Display of the settings
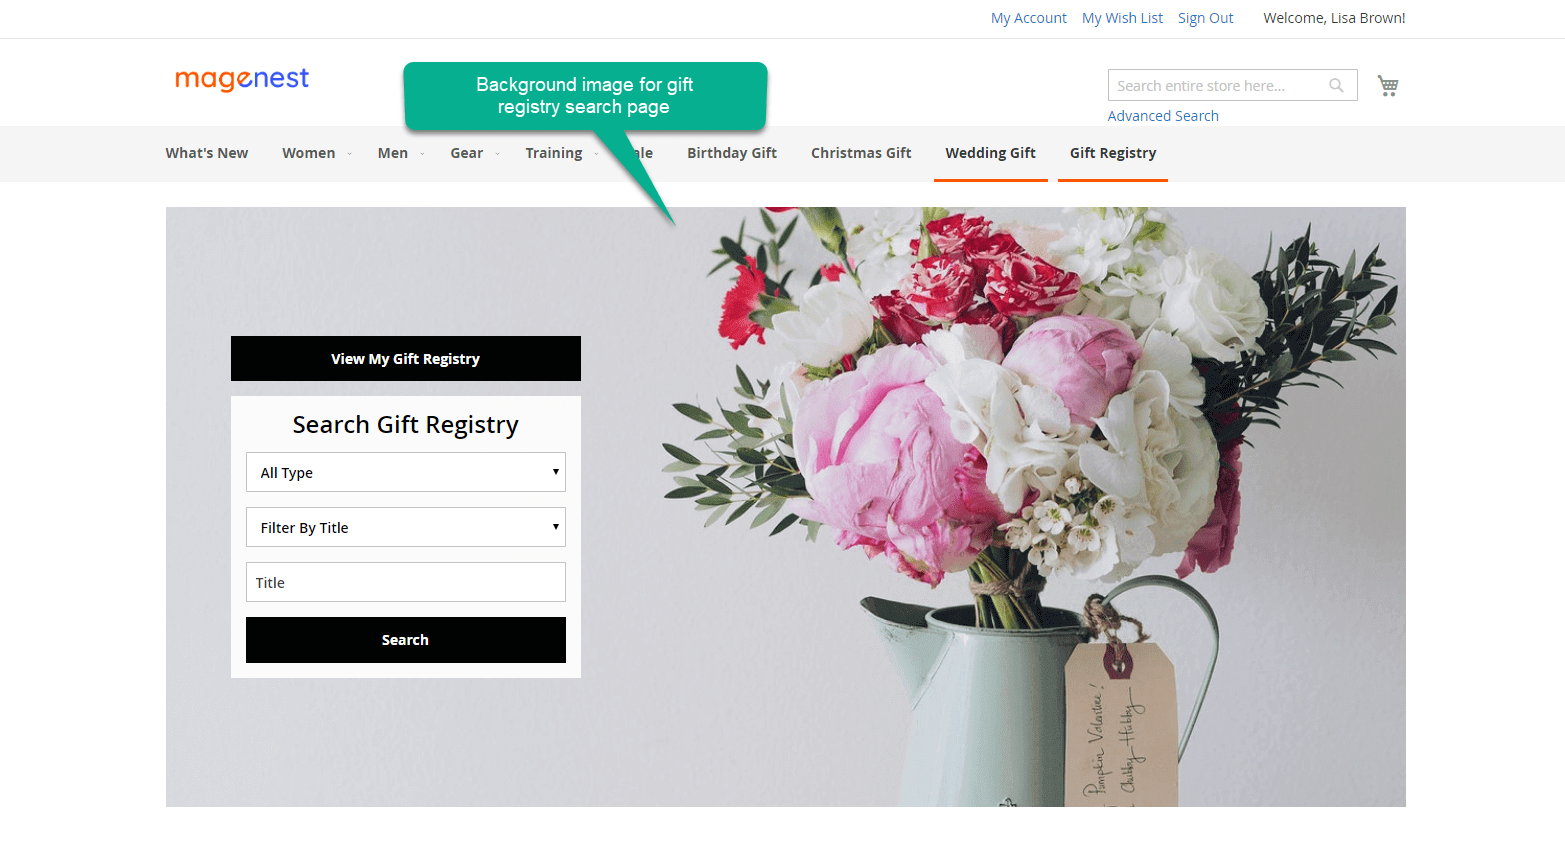
On the Storefront
Create a new event type
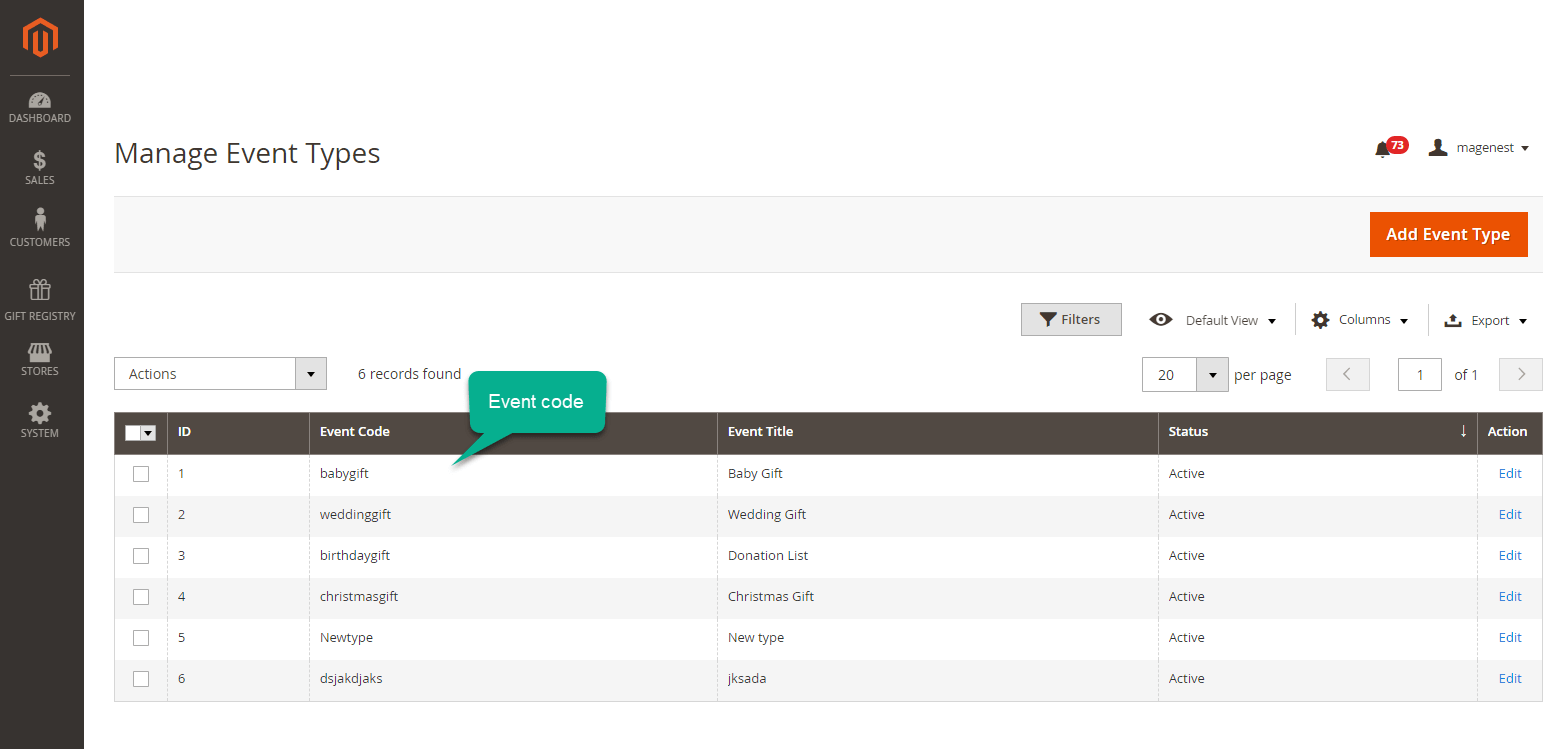
Admin will need to add create event types so that for the customers can to create related gift registry list in.
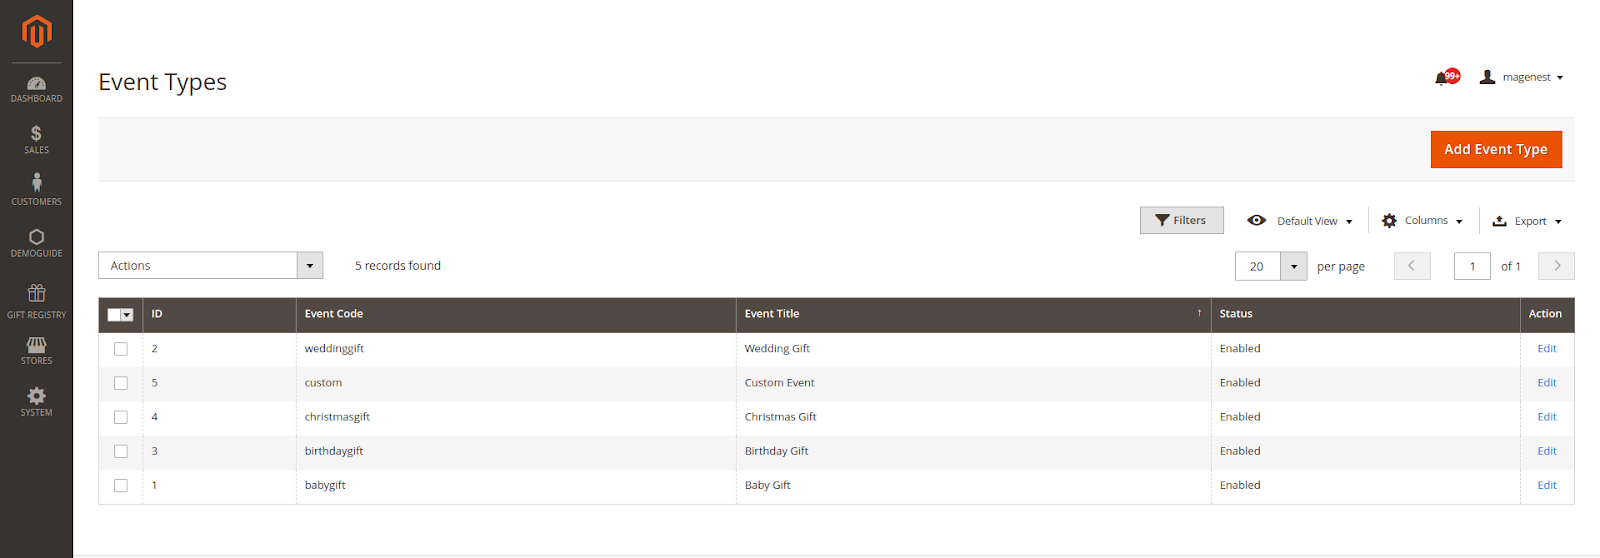
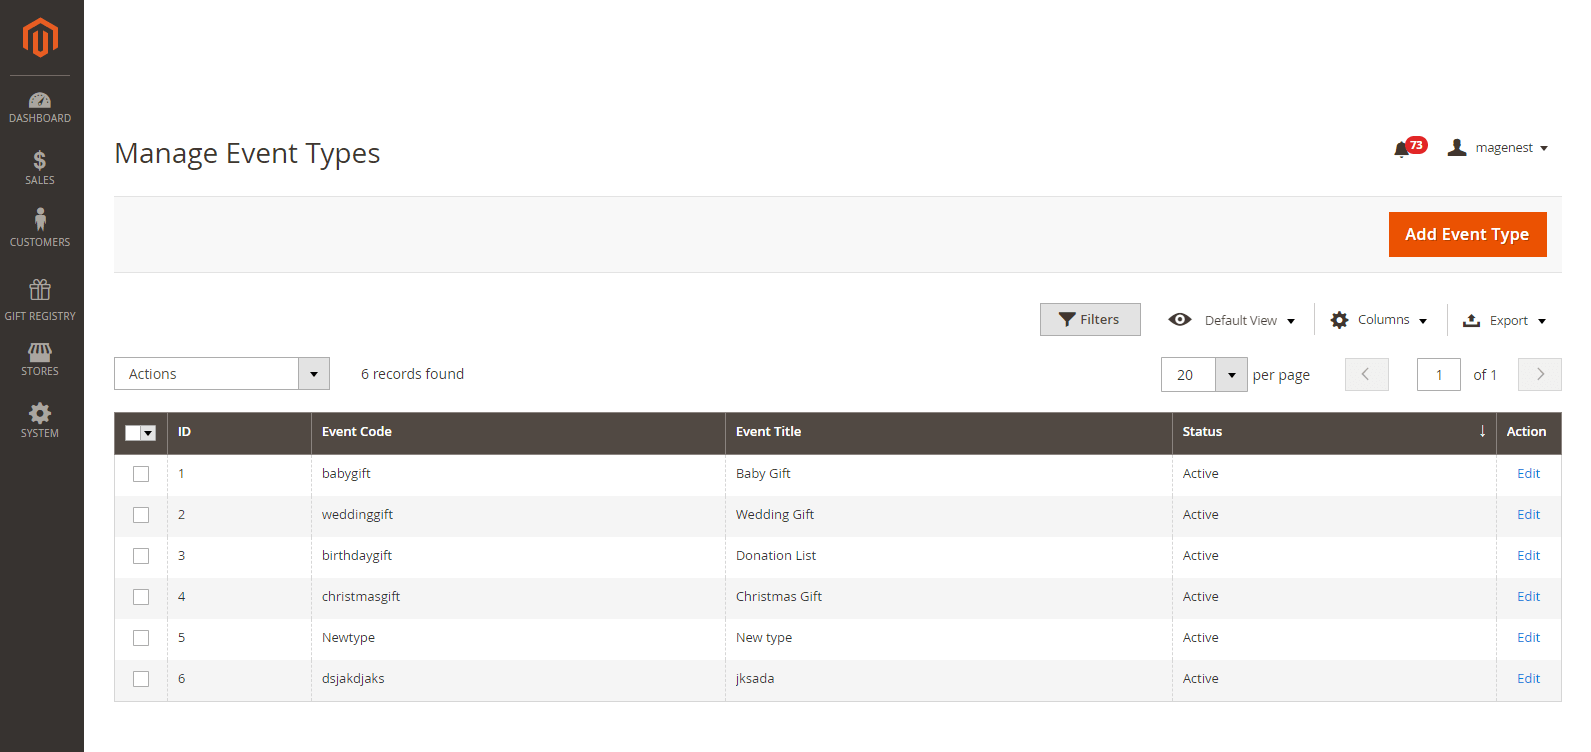
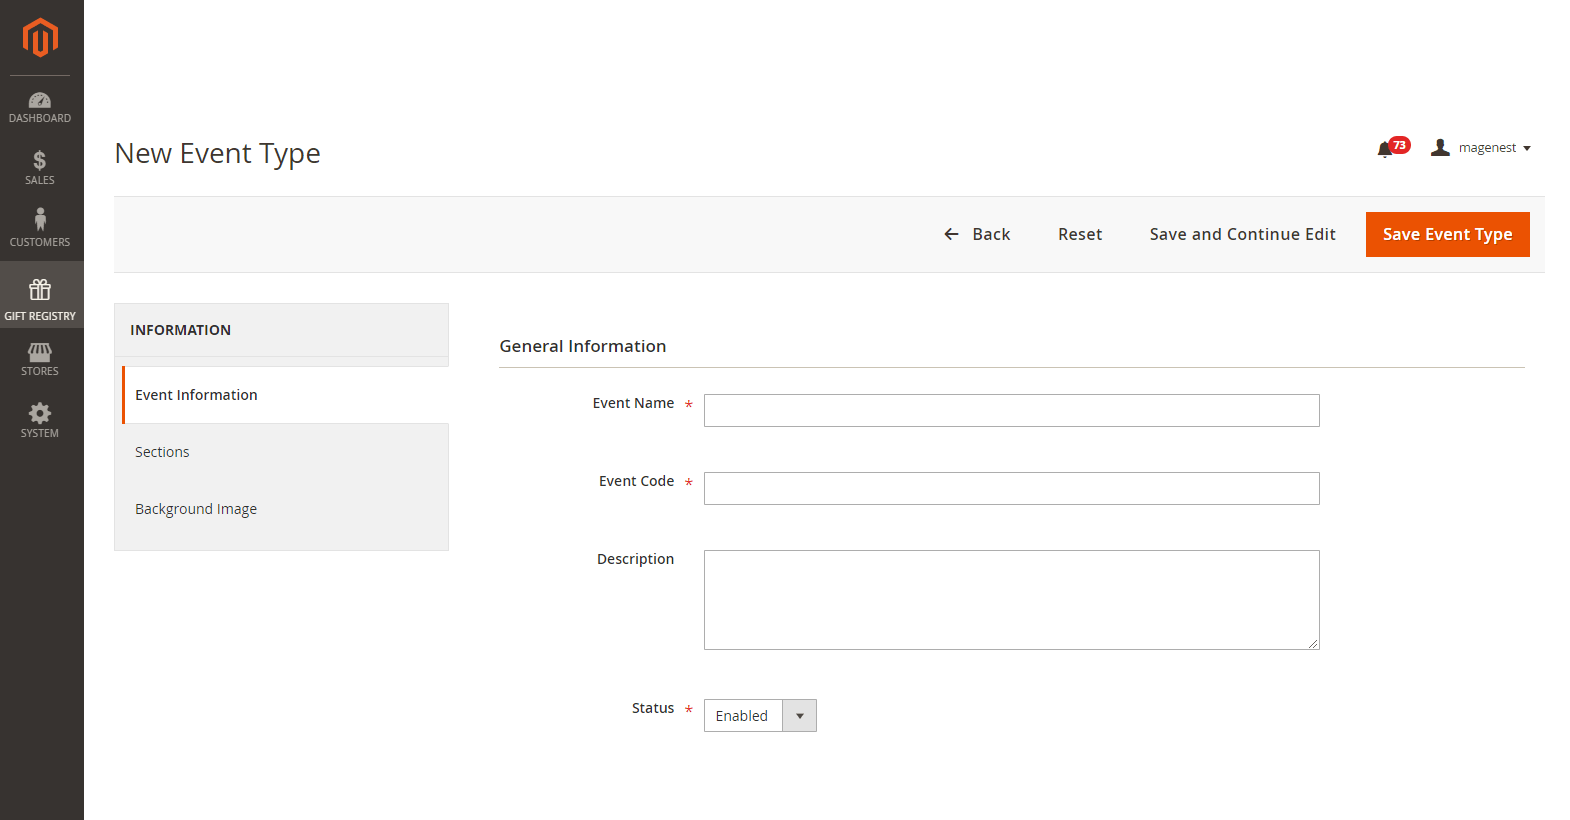
On the admin sidebar, go to Gift Registry > Event Types. On Manage Event Types page, click on Add Event Type button, go to New Event Type page.
Event Information
Open Event Information tab to set the general information for the new event.After clicking on the Add Event Type, you'll be able to configure a new event type

- Event Name: Enter the name for new event.
- Event Code: Enter a code to identify the event on the event manage page.
- Description: Enter a description for the event.
- Status: Enable/Disable the event.
- Display on the front-end
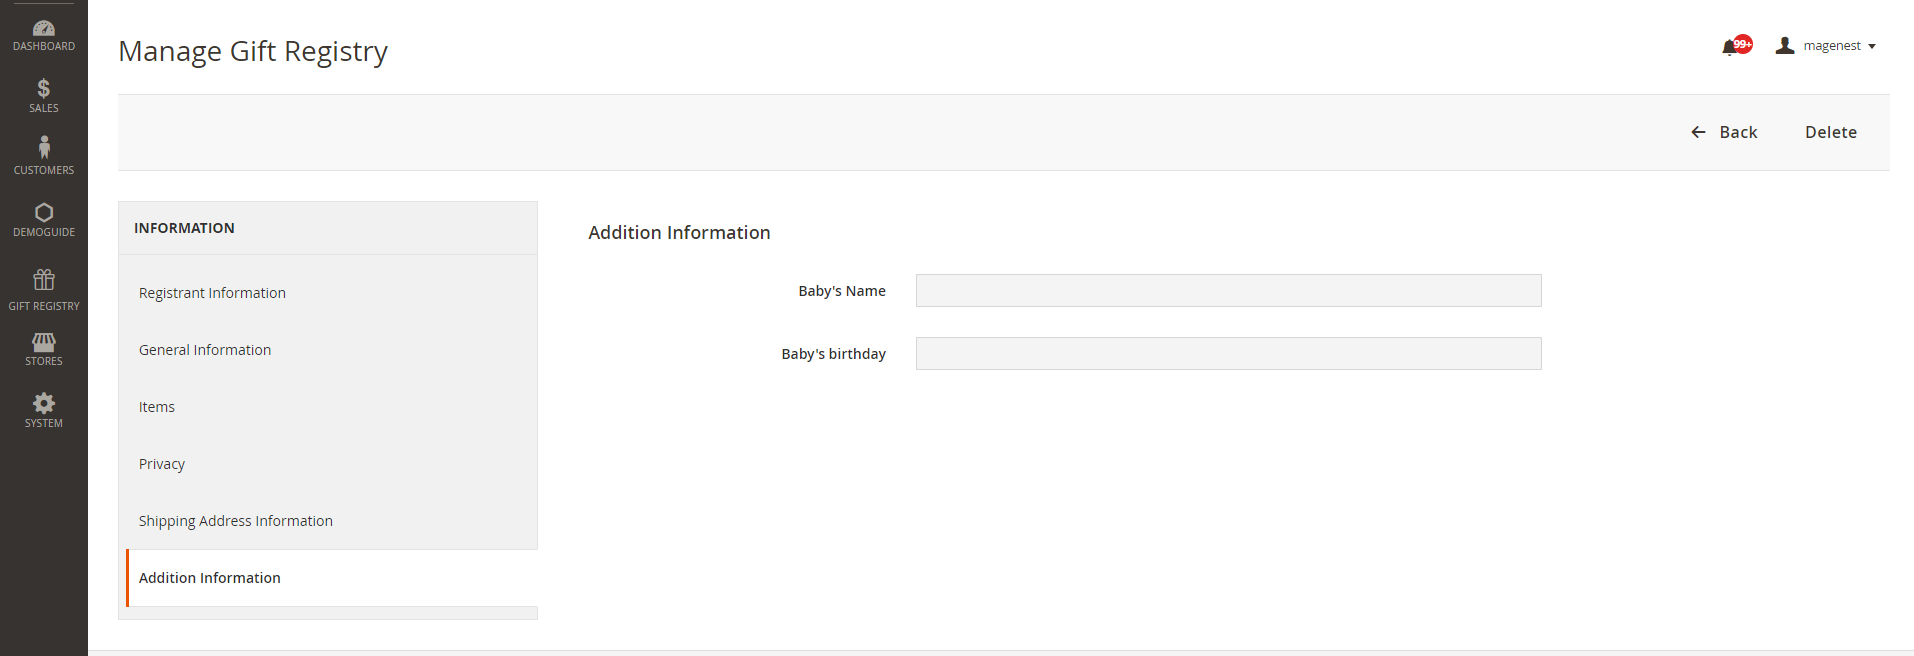
Sections
On the Sections setting, admin can set the fields display on registry creation page when customers add a new registry.
- Select the fields to display when customers add a new registry.
- Beside the default fields, admin can set the custom filed to require customers fill in. Select Enable then add the new fields on the Additional Sections table.
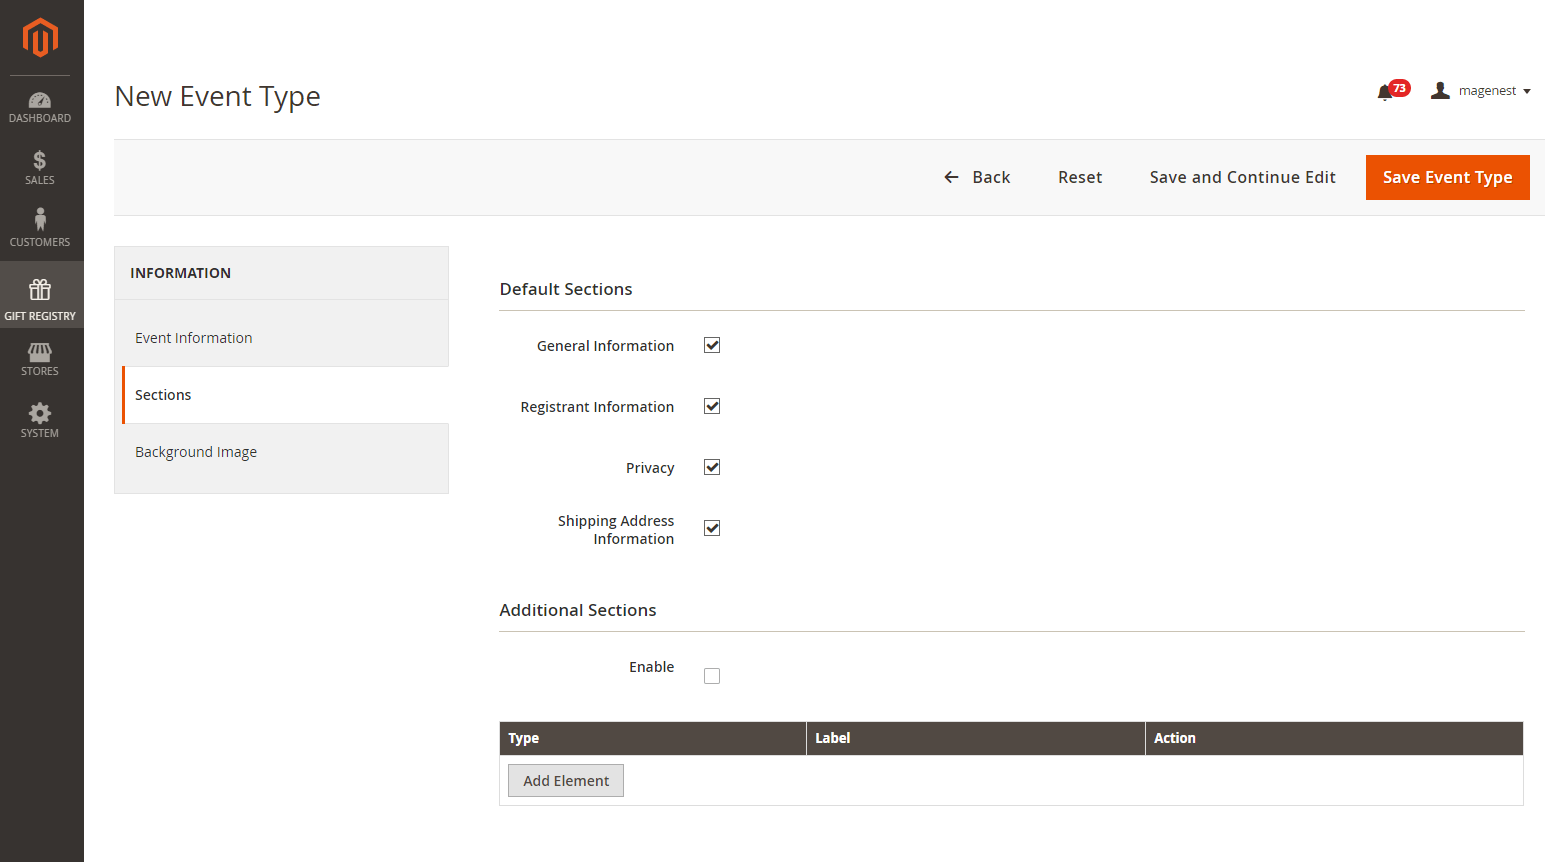
- Display on the front-end

Background Image
- Banner Default: Set the banner background for the banner on the gift registry page.
- Thumbnail Default: Set an image for the event on the events list page.
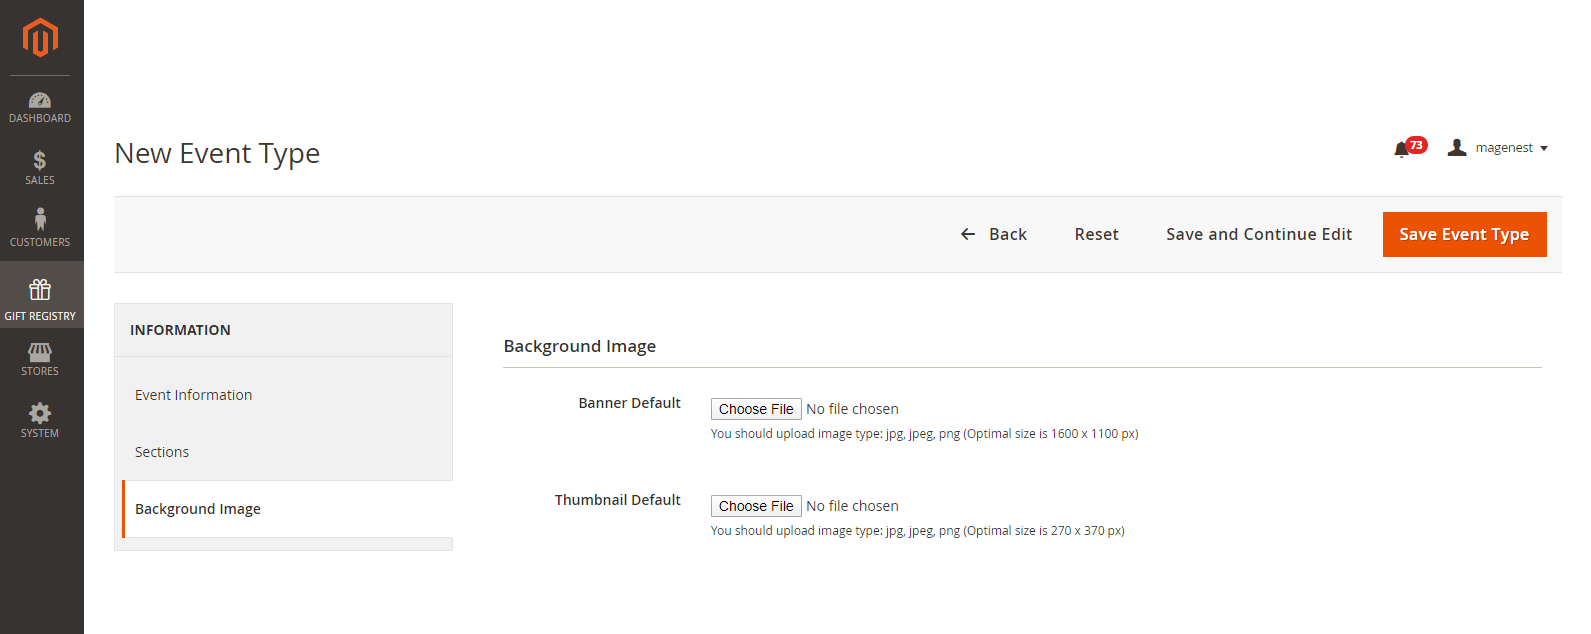
- Display on the front-end
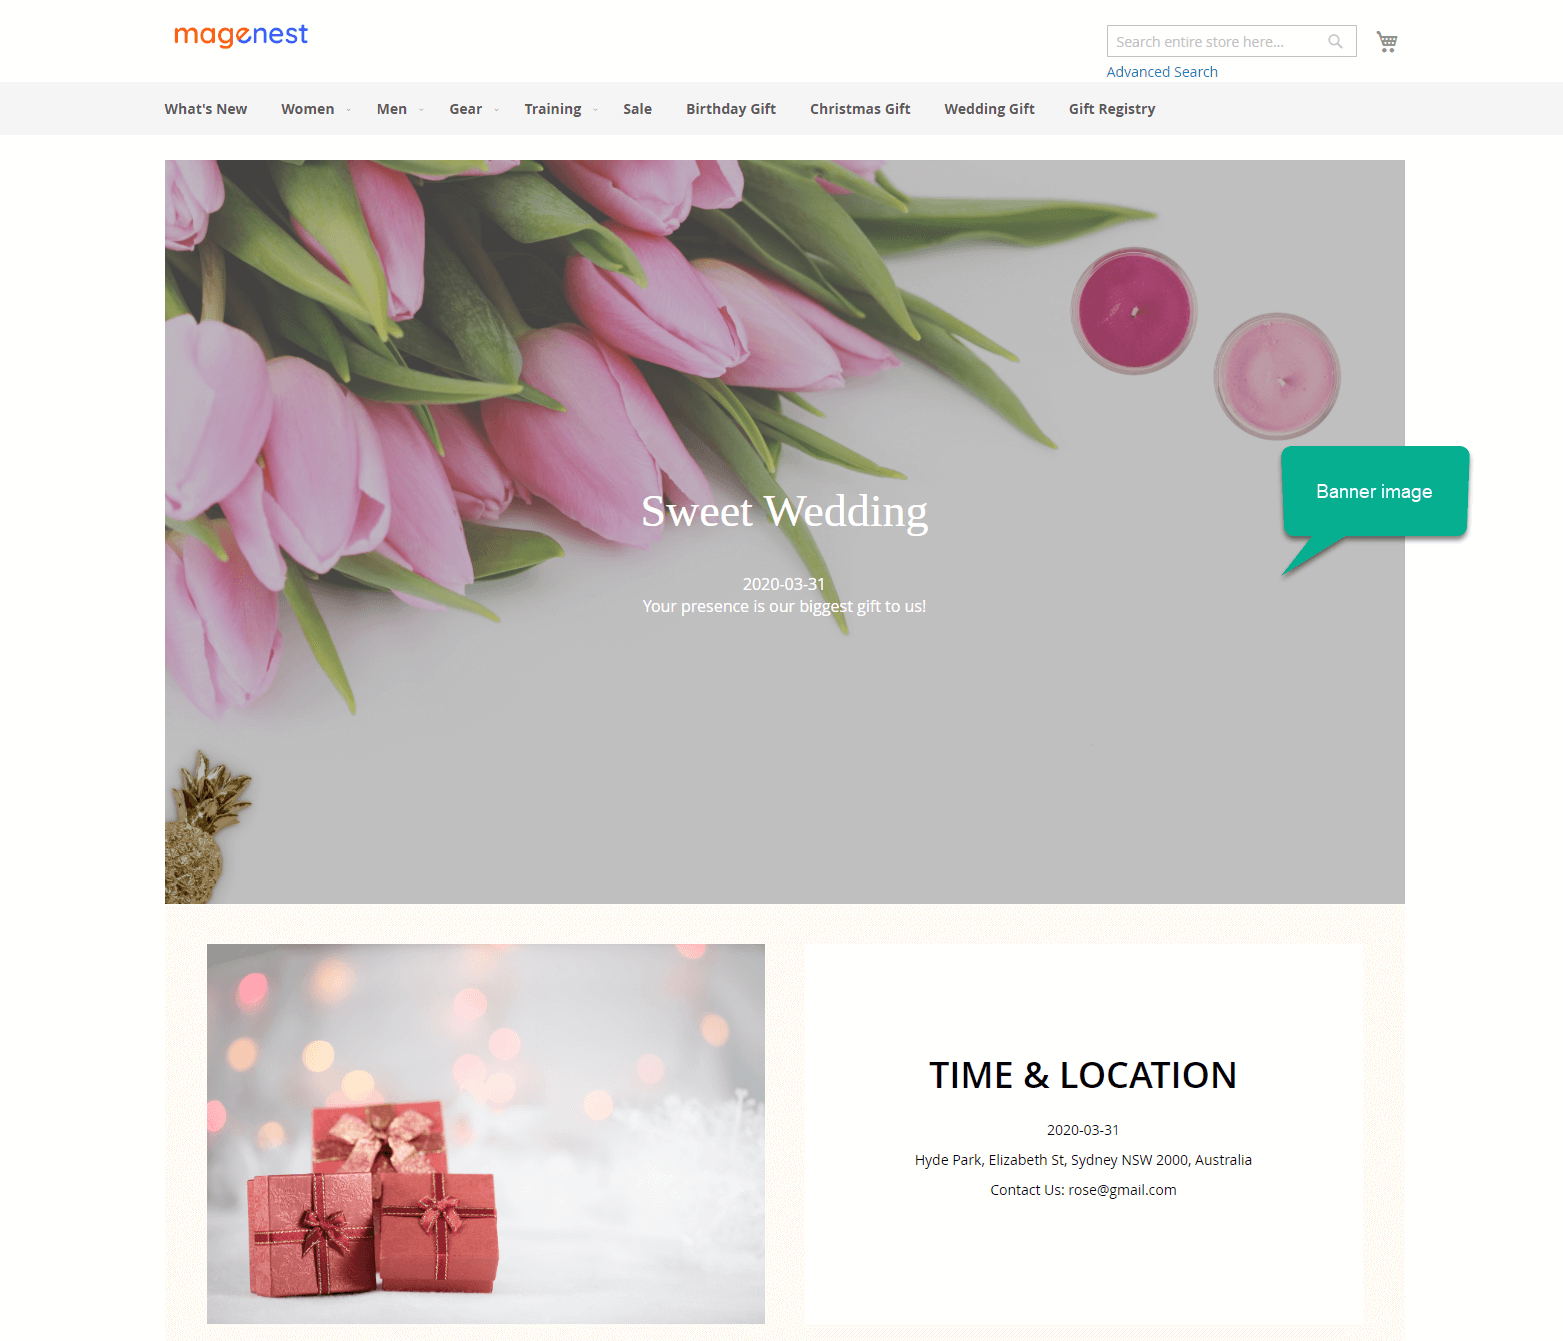
Background banner
Main functions for admin
Thumbnail image
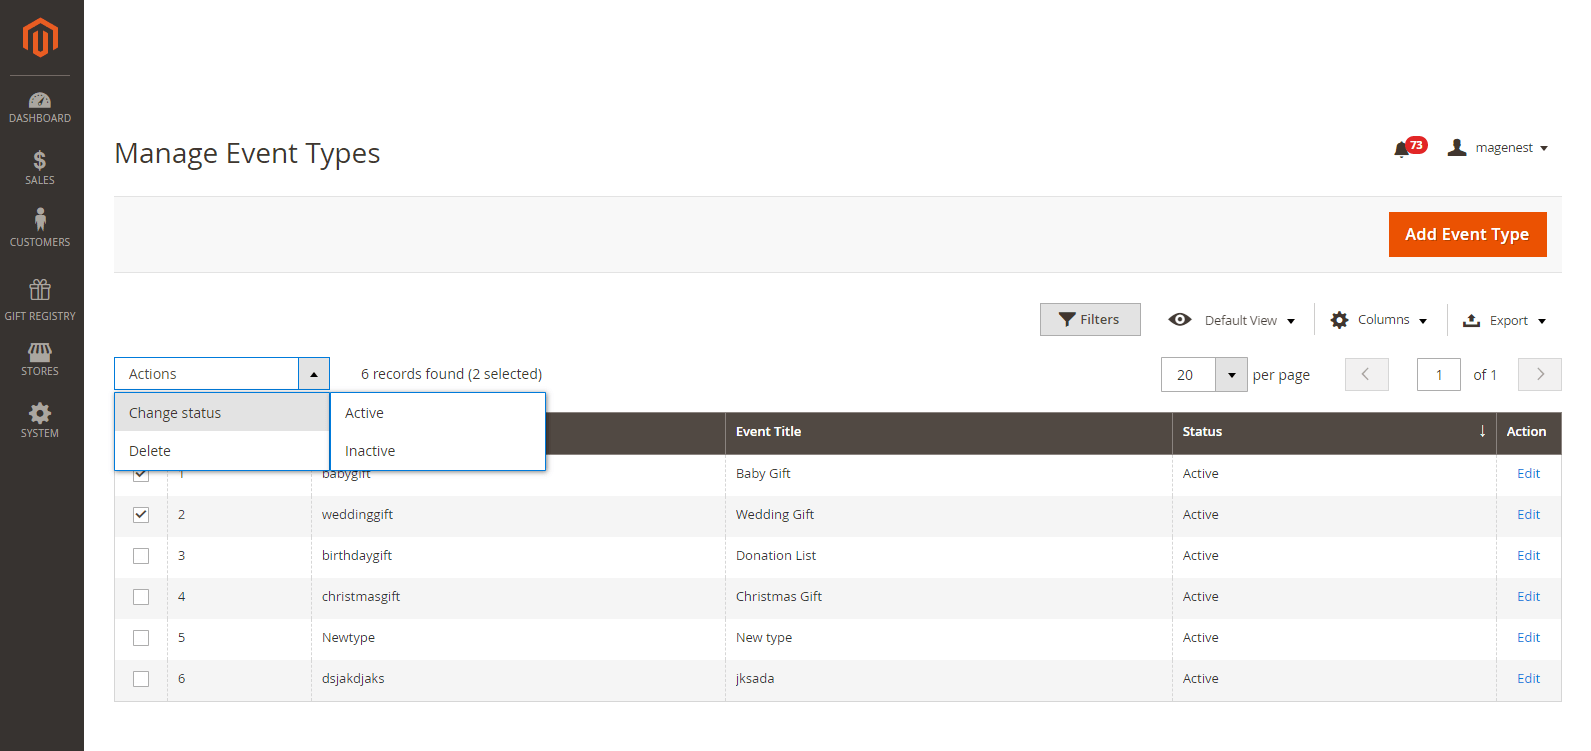
Manage event types
![]() Go to Gift Registry > Event Types > Manage Event Types page.
Go to Gift Registry > Event Types > Manage Event Types page.
![]() On Manage Event Types page, admin can edit an available events or and change status of off the existing events with using mass action..
On Manage Event Types page, admin can edit an available events or and change status of off the existing events with using mass action..
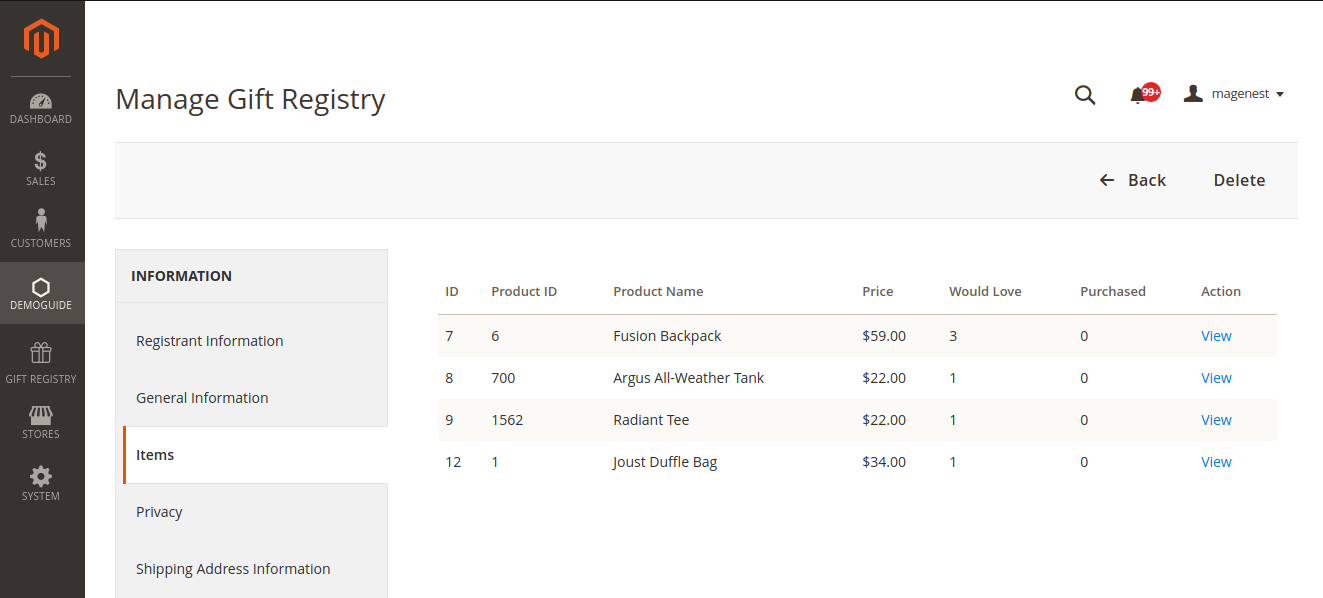
Manage gift registries
Admin can view, edit or delete the available existing registries from the back-end . Navigate by going to Gift Registry > Gift Registries > Manage Gift Registries page.
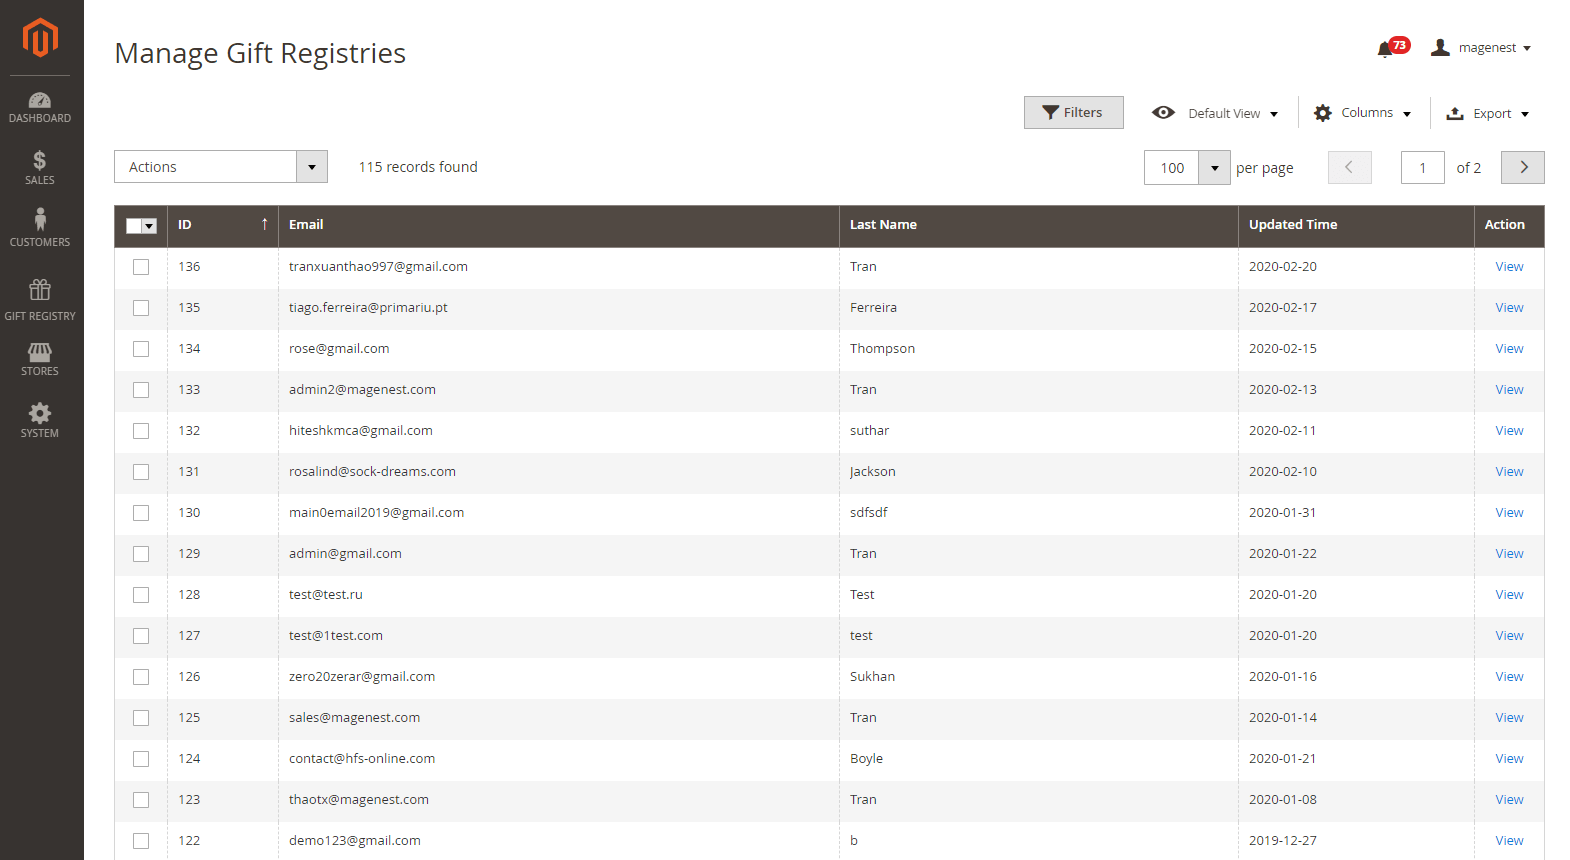
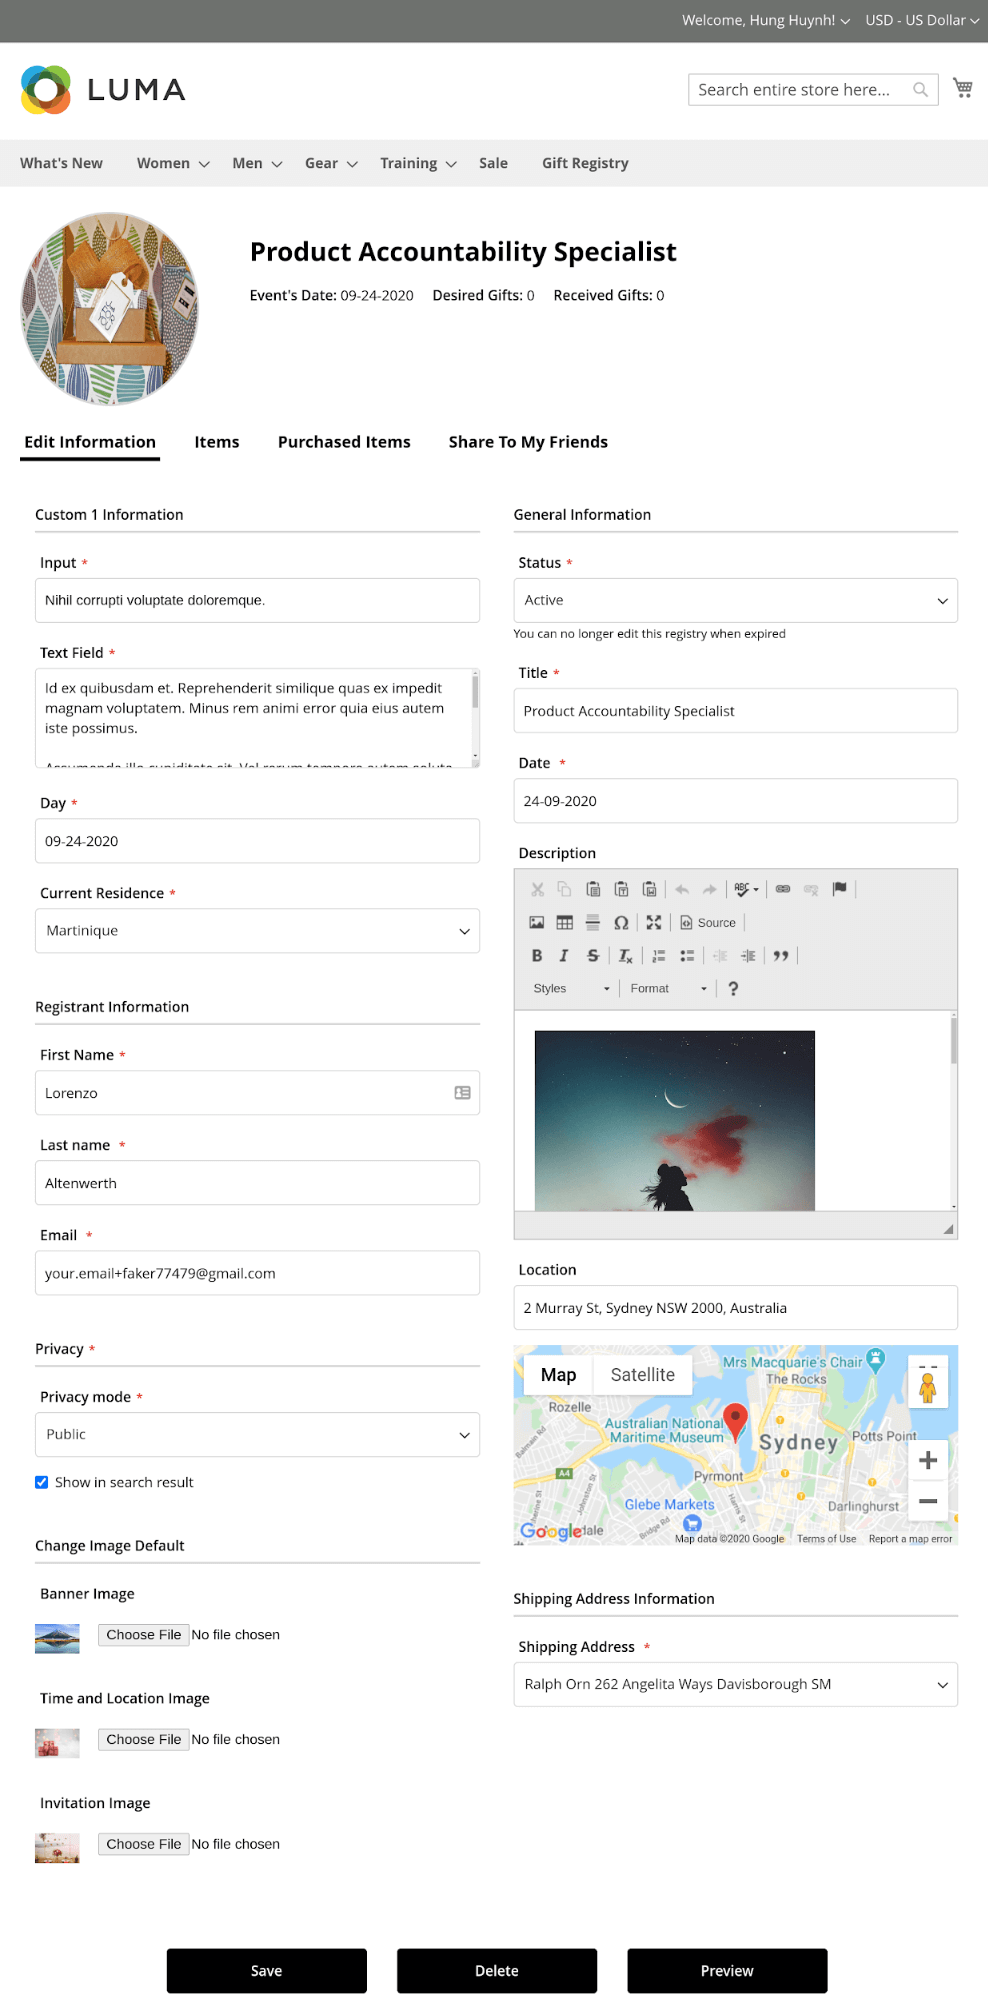
![]() To view a registry details, click on View under the Action column.
To view a registry details, click on View under the Action column.
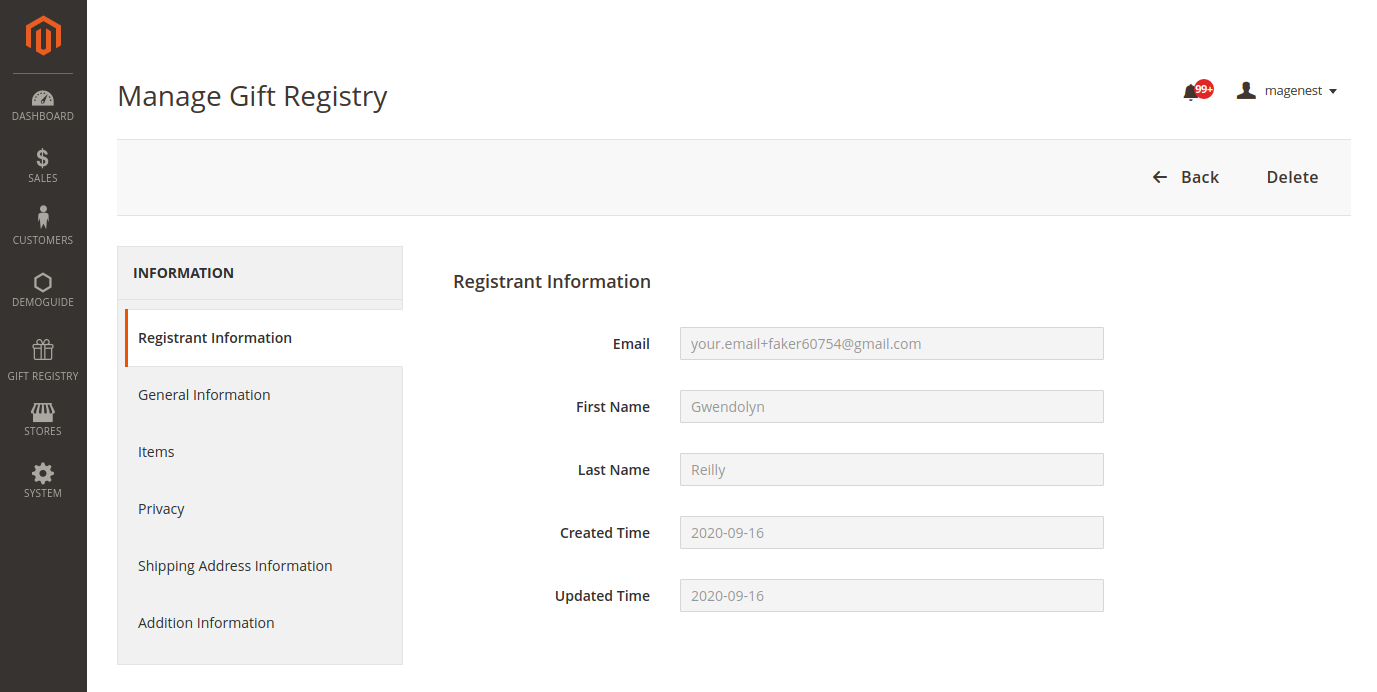
![]() On gift registry detail page
On gift registry detail page
- Admin can view the registrant registry owner details.
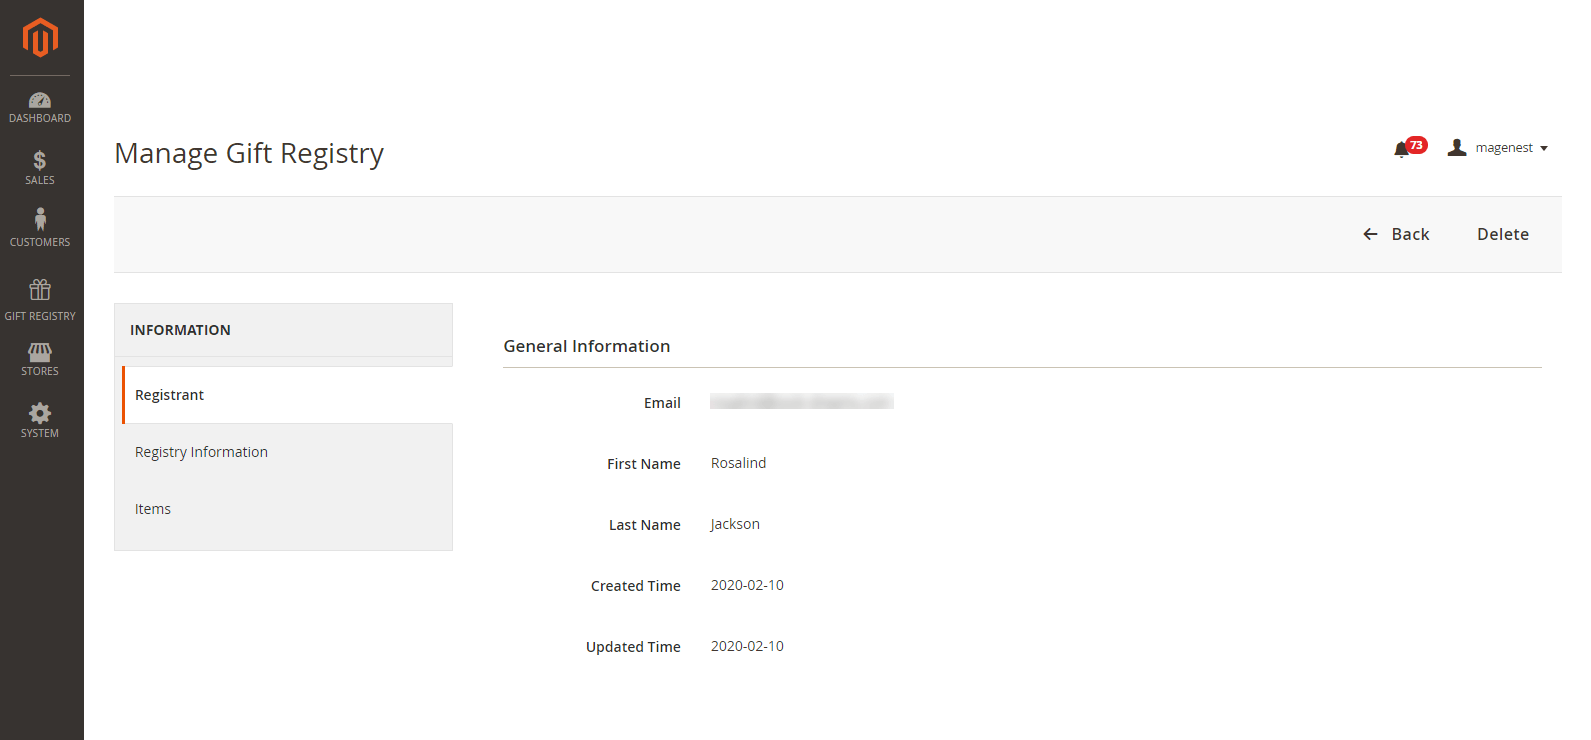
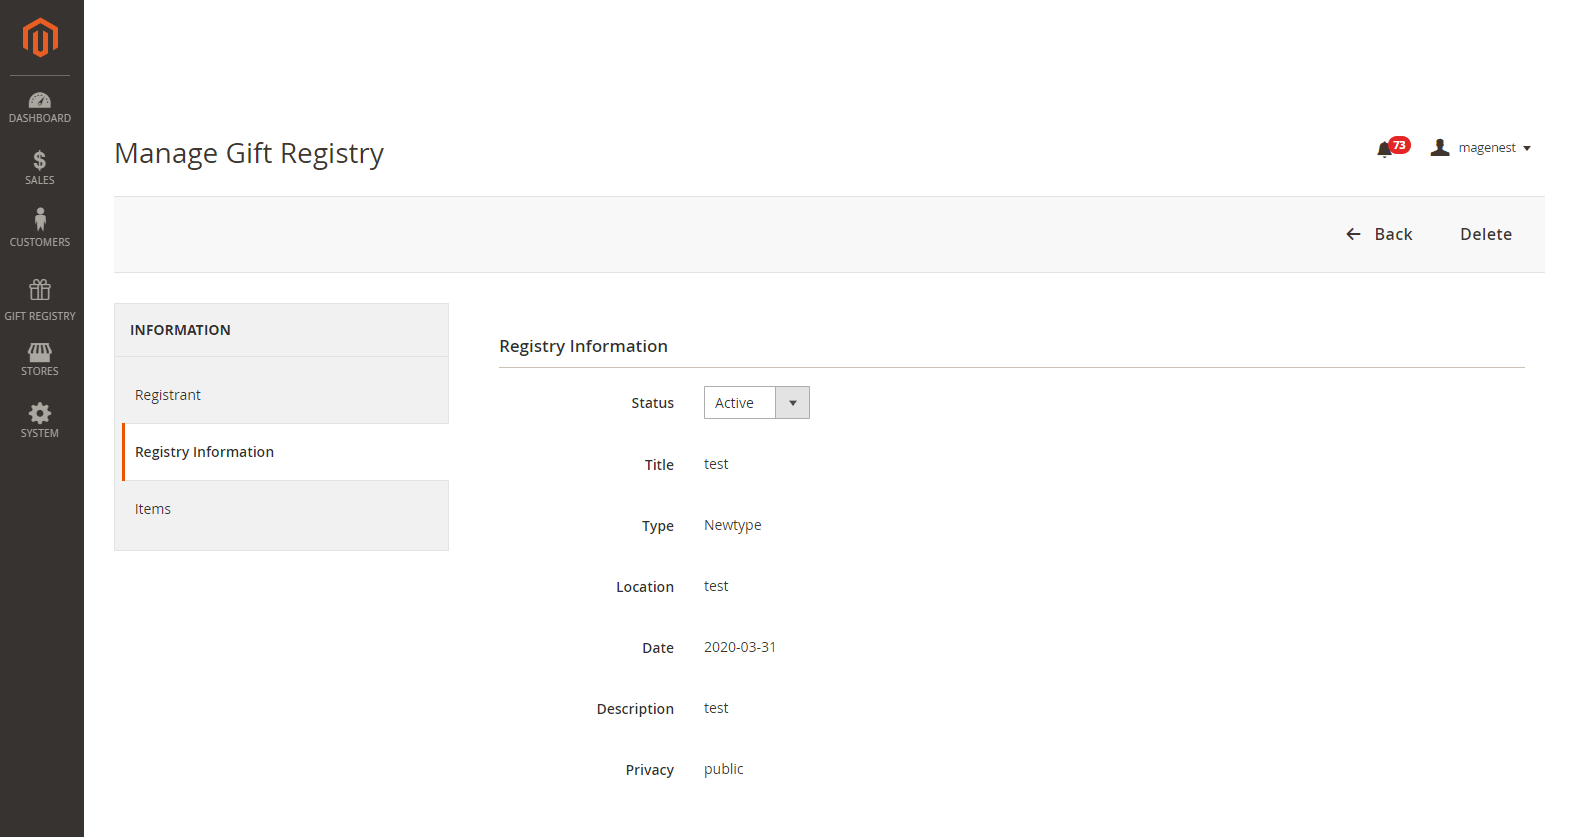
- Admin can view the registry details and change status of the registry.
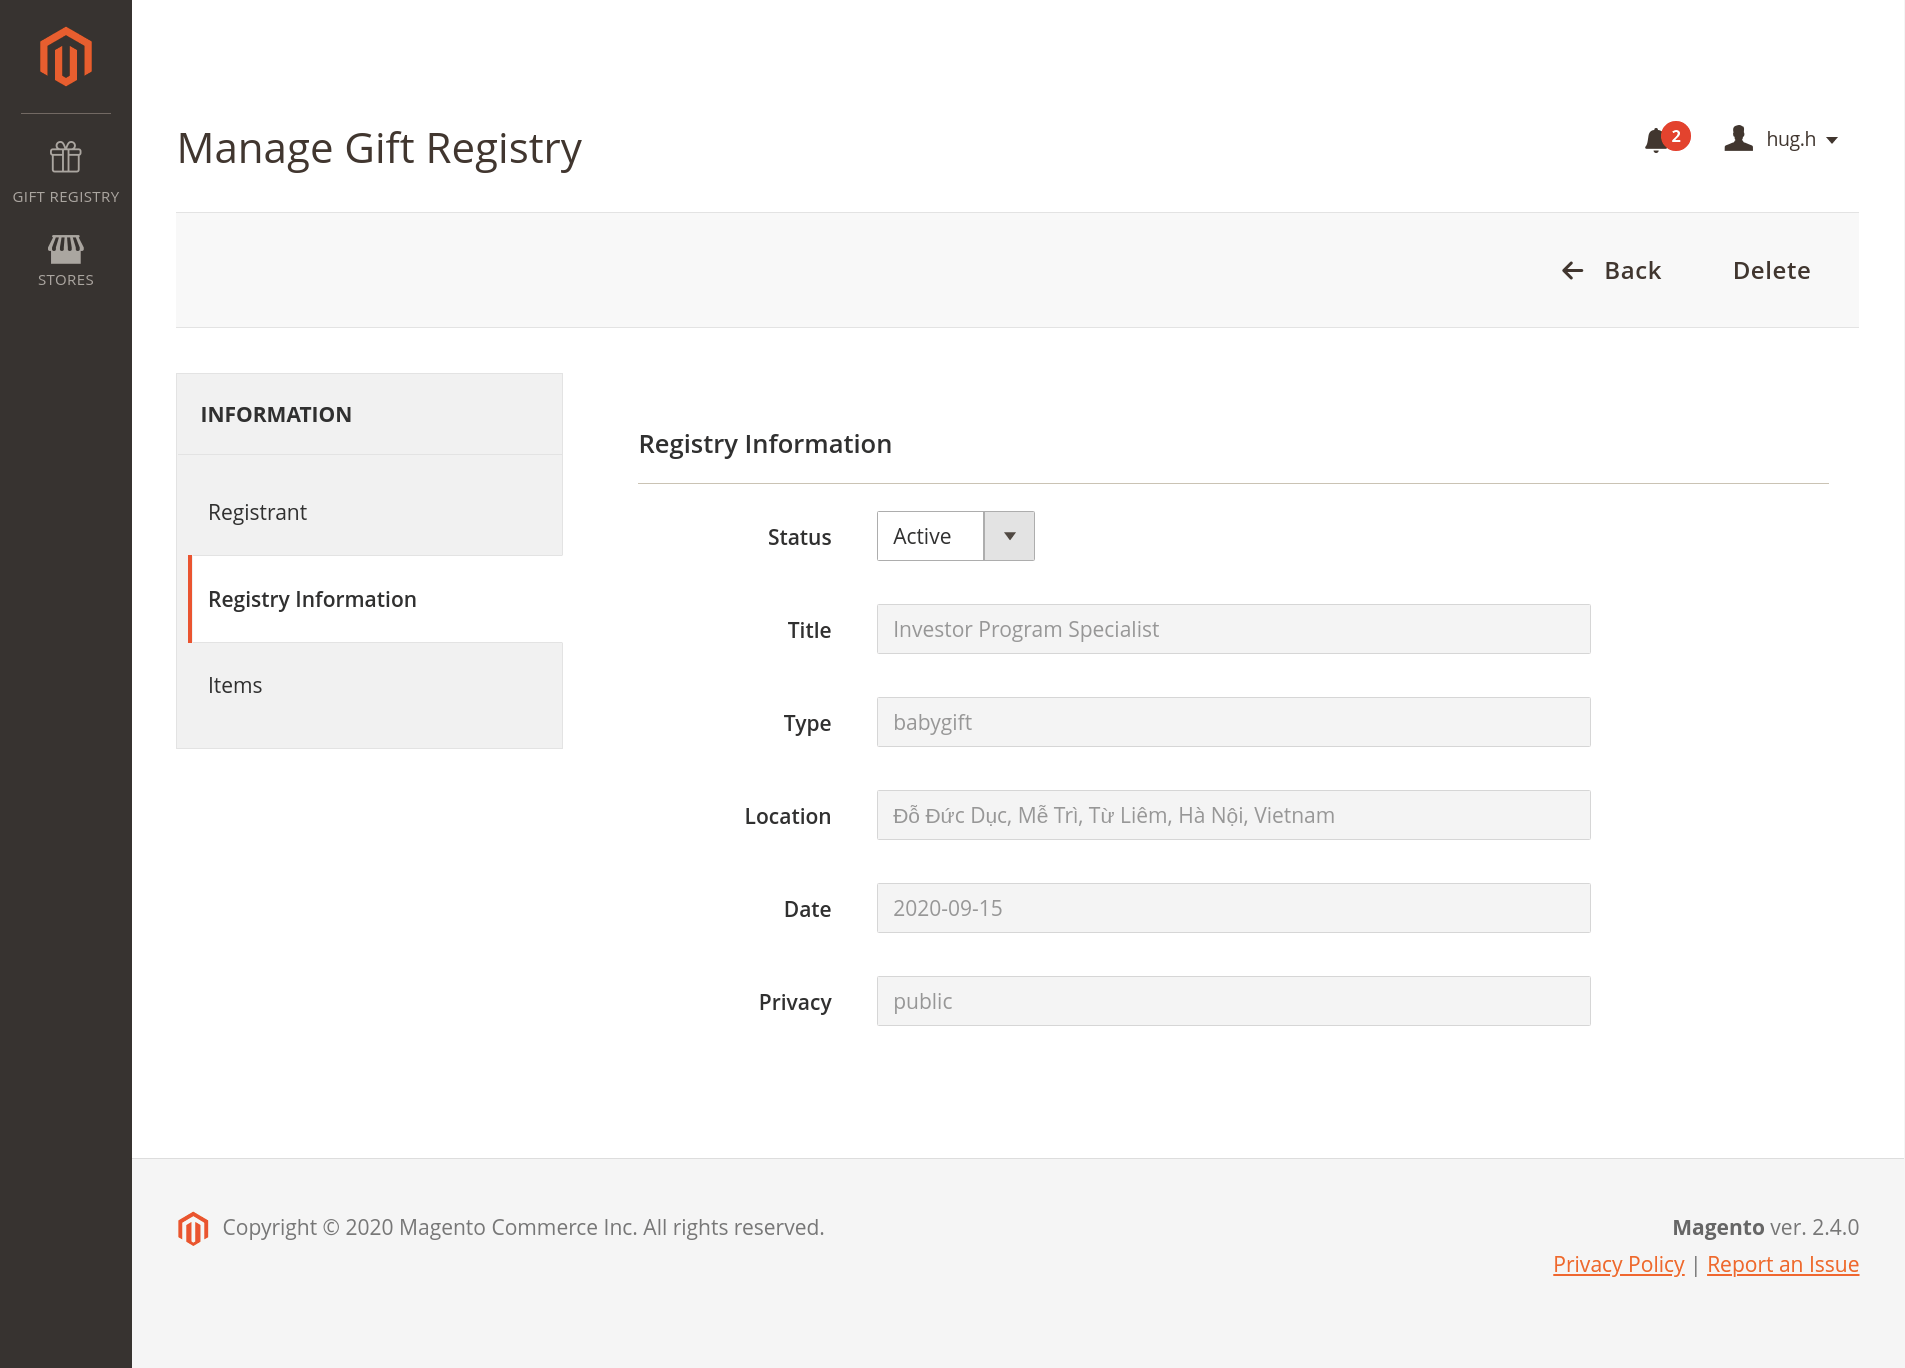
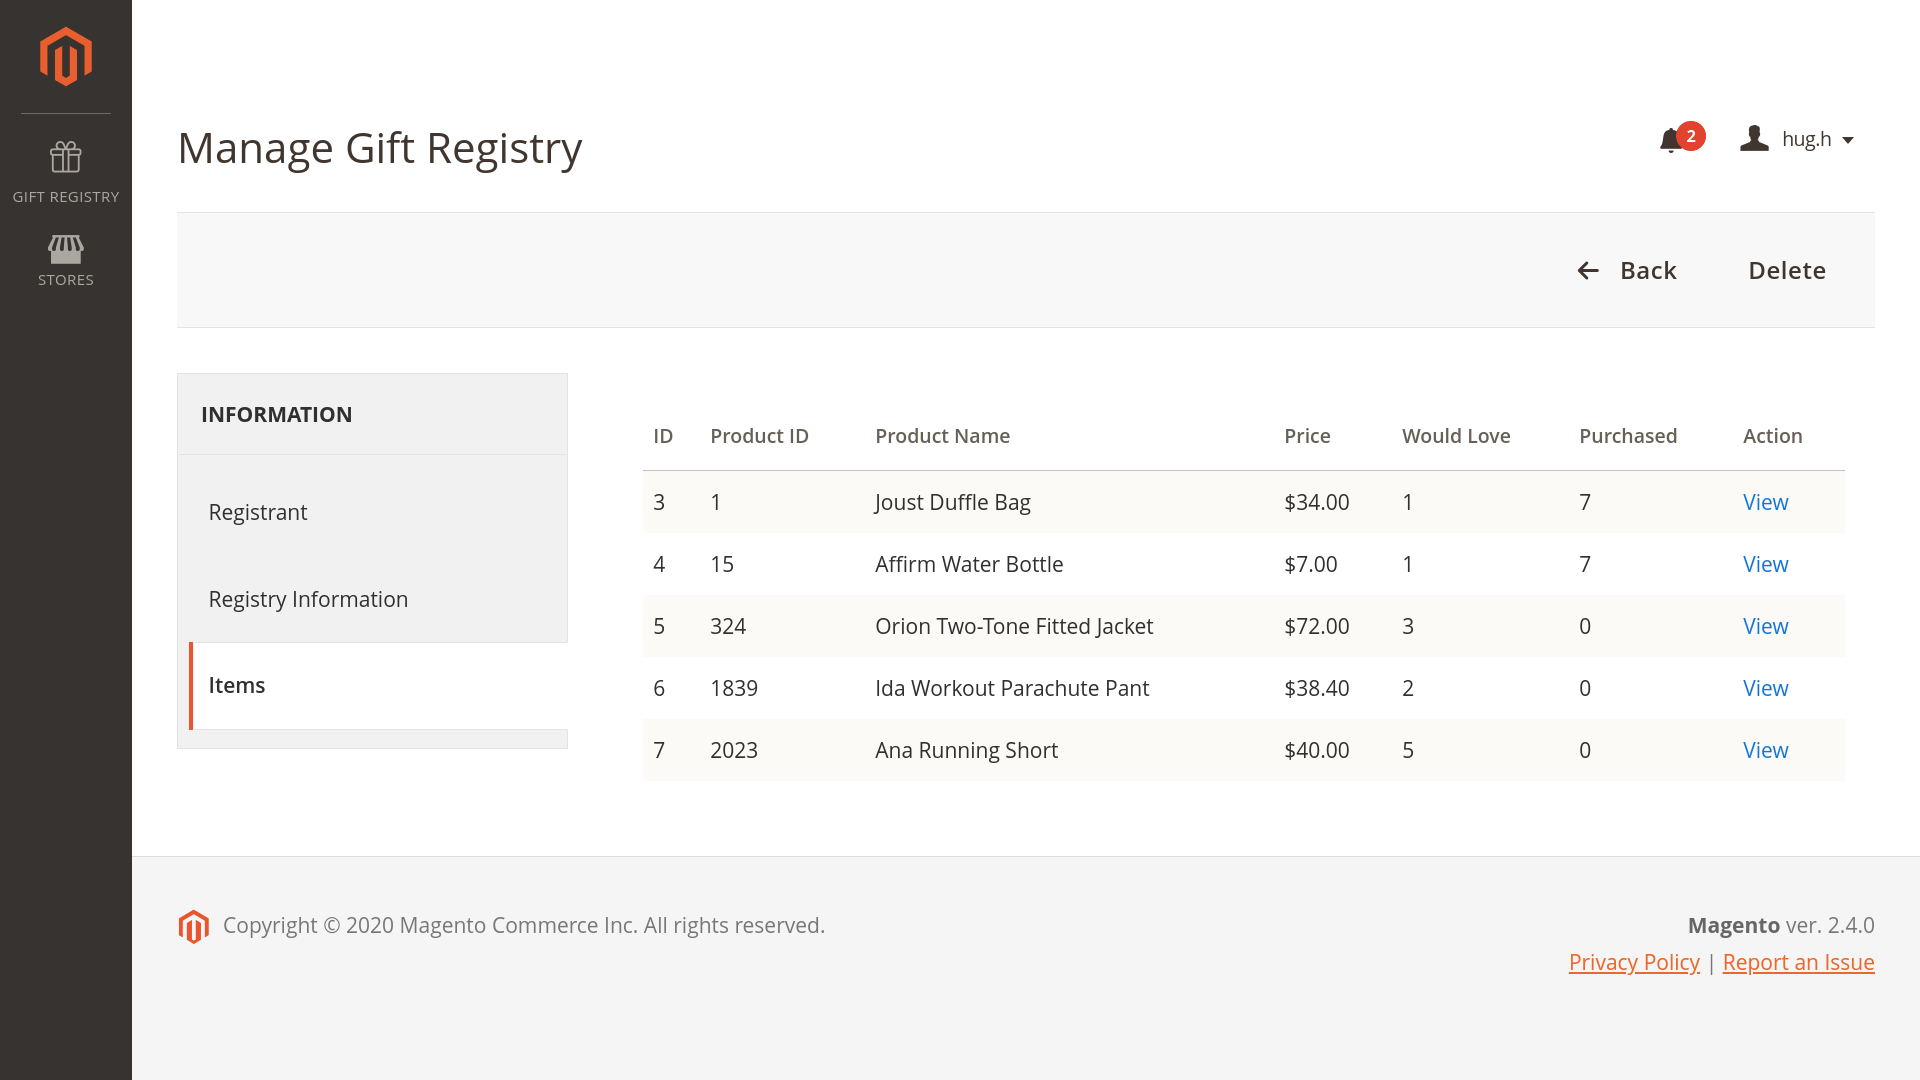
- Admin can view the gift registry items and the purchases of those.
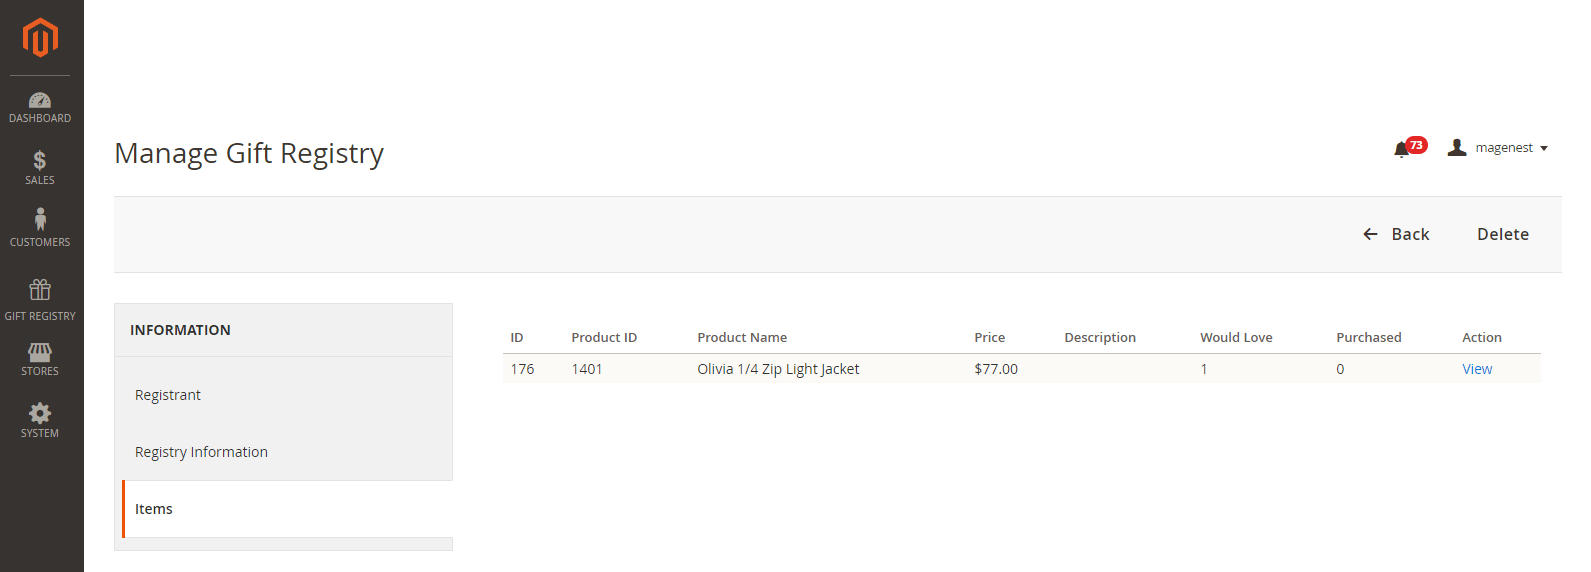
- item list and know their purchasing status.
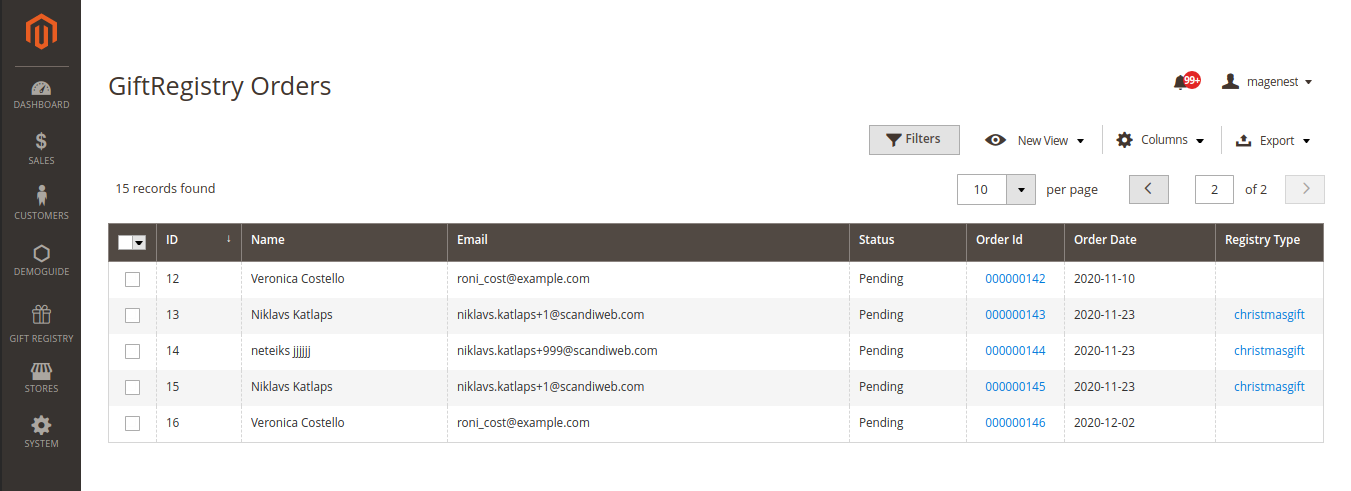
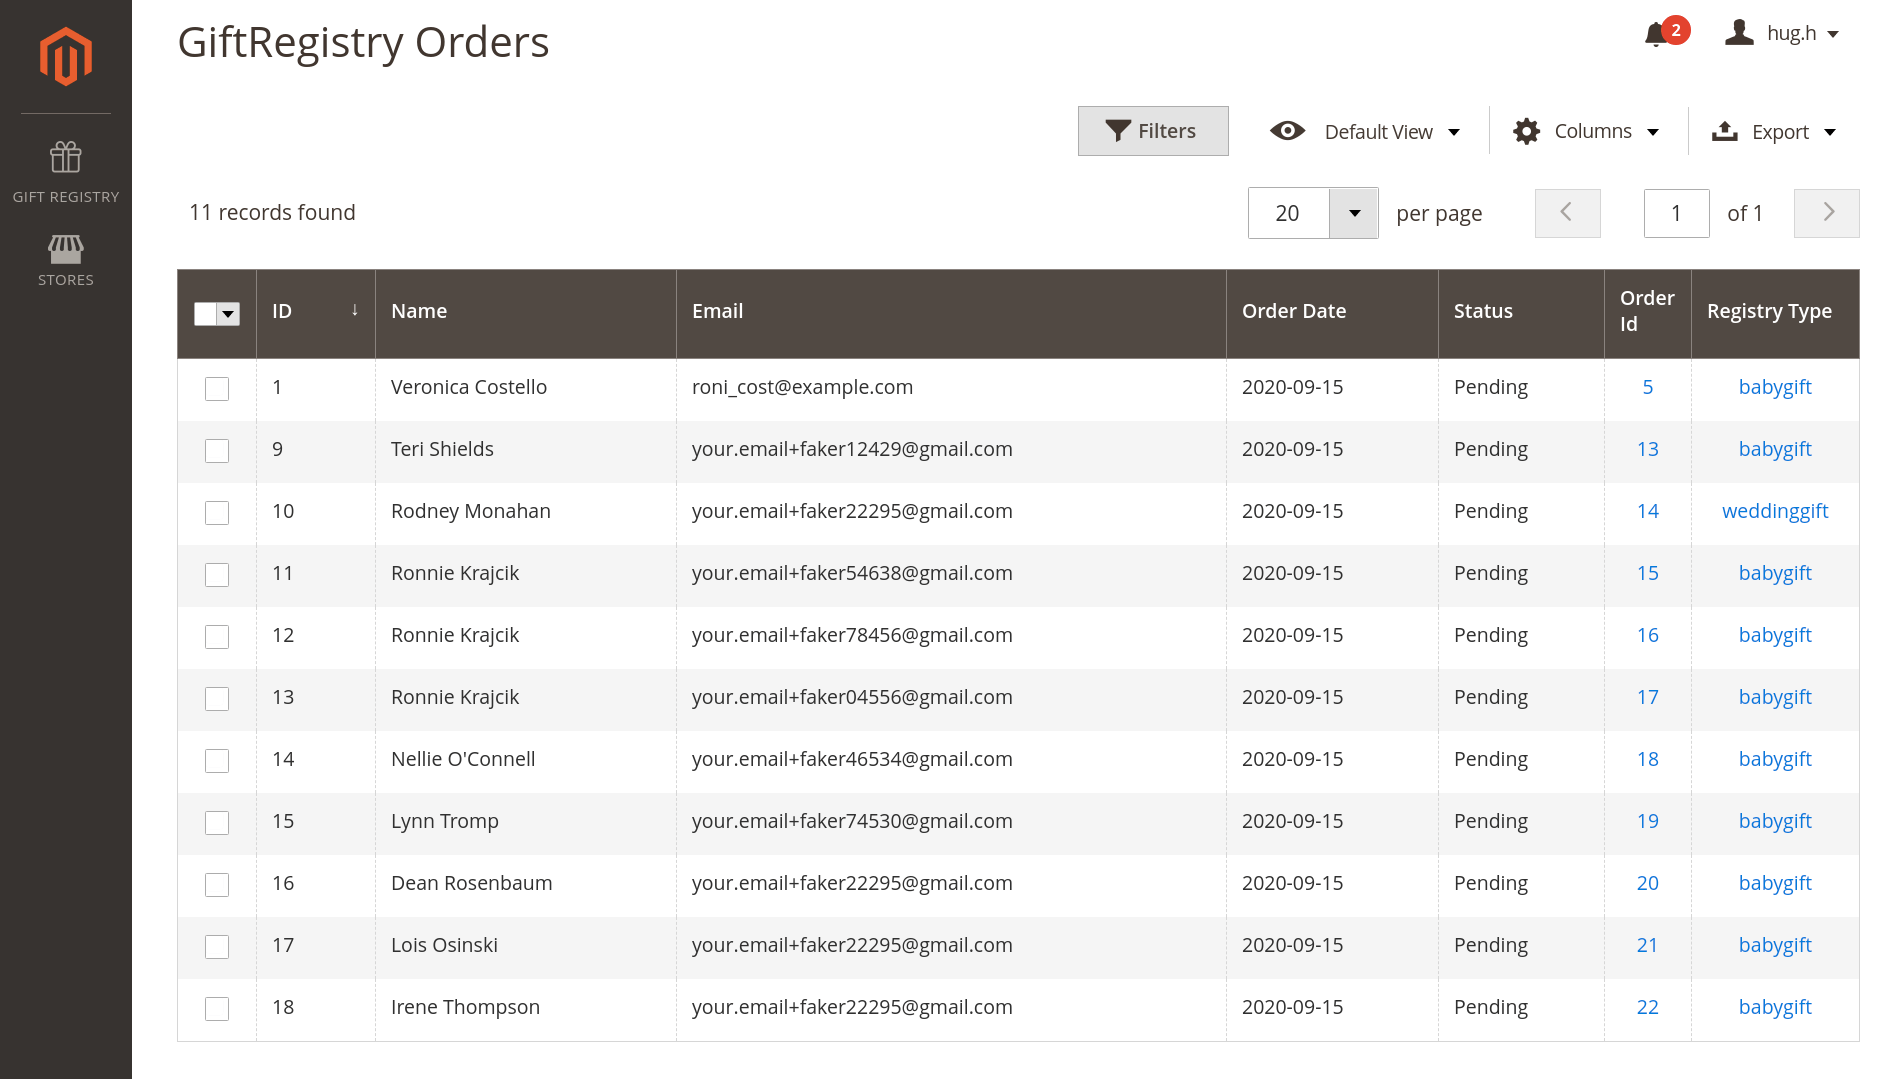
Manage gift registry orders
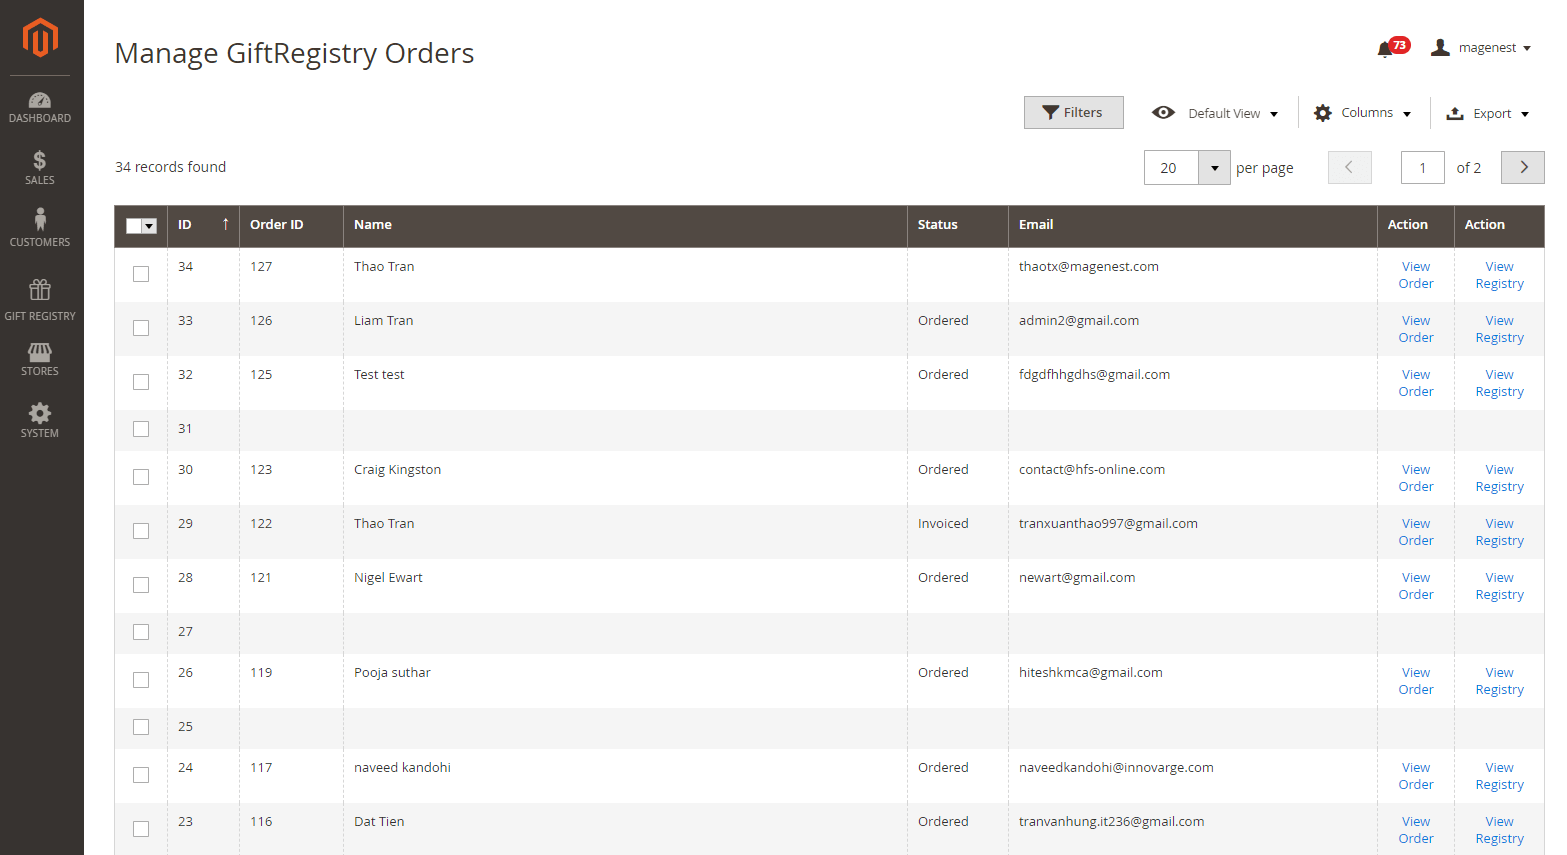
Go to Gift Registry > Gift Registry Orders > Manage Gift Registry Orders page, admin can view all the purchased orders with registry items. From here, admin can go to gift registry details page or order information page.
Functions on the front-end
Store front
For the
registrantregistry owner
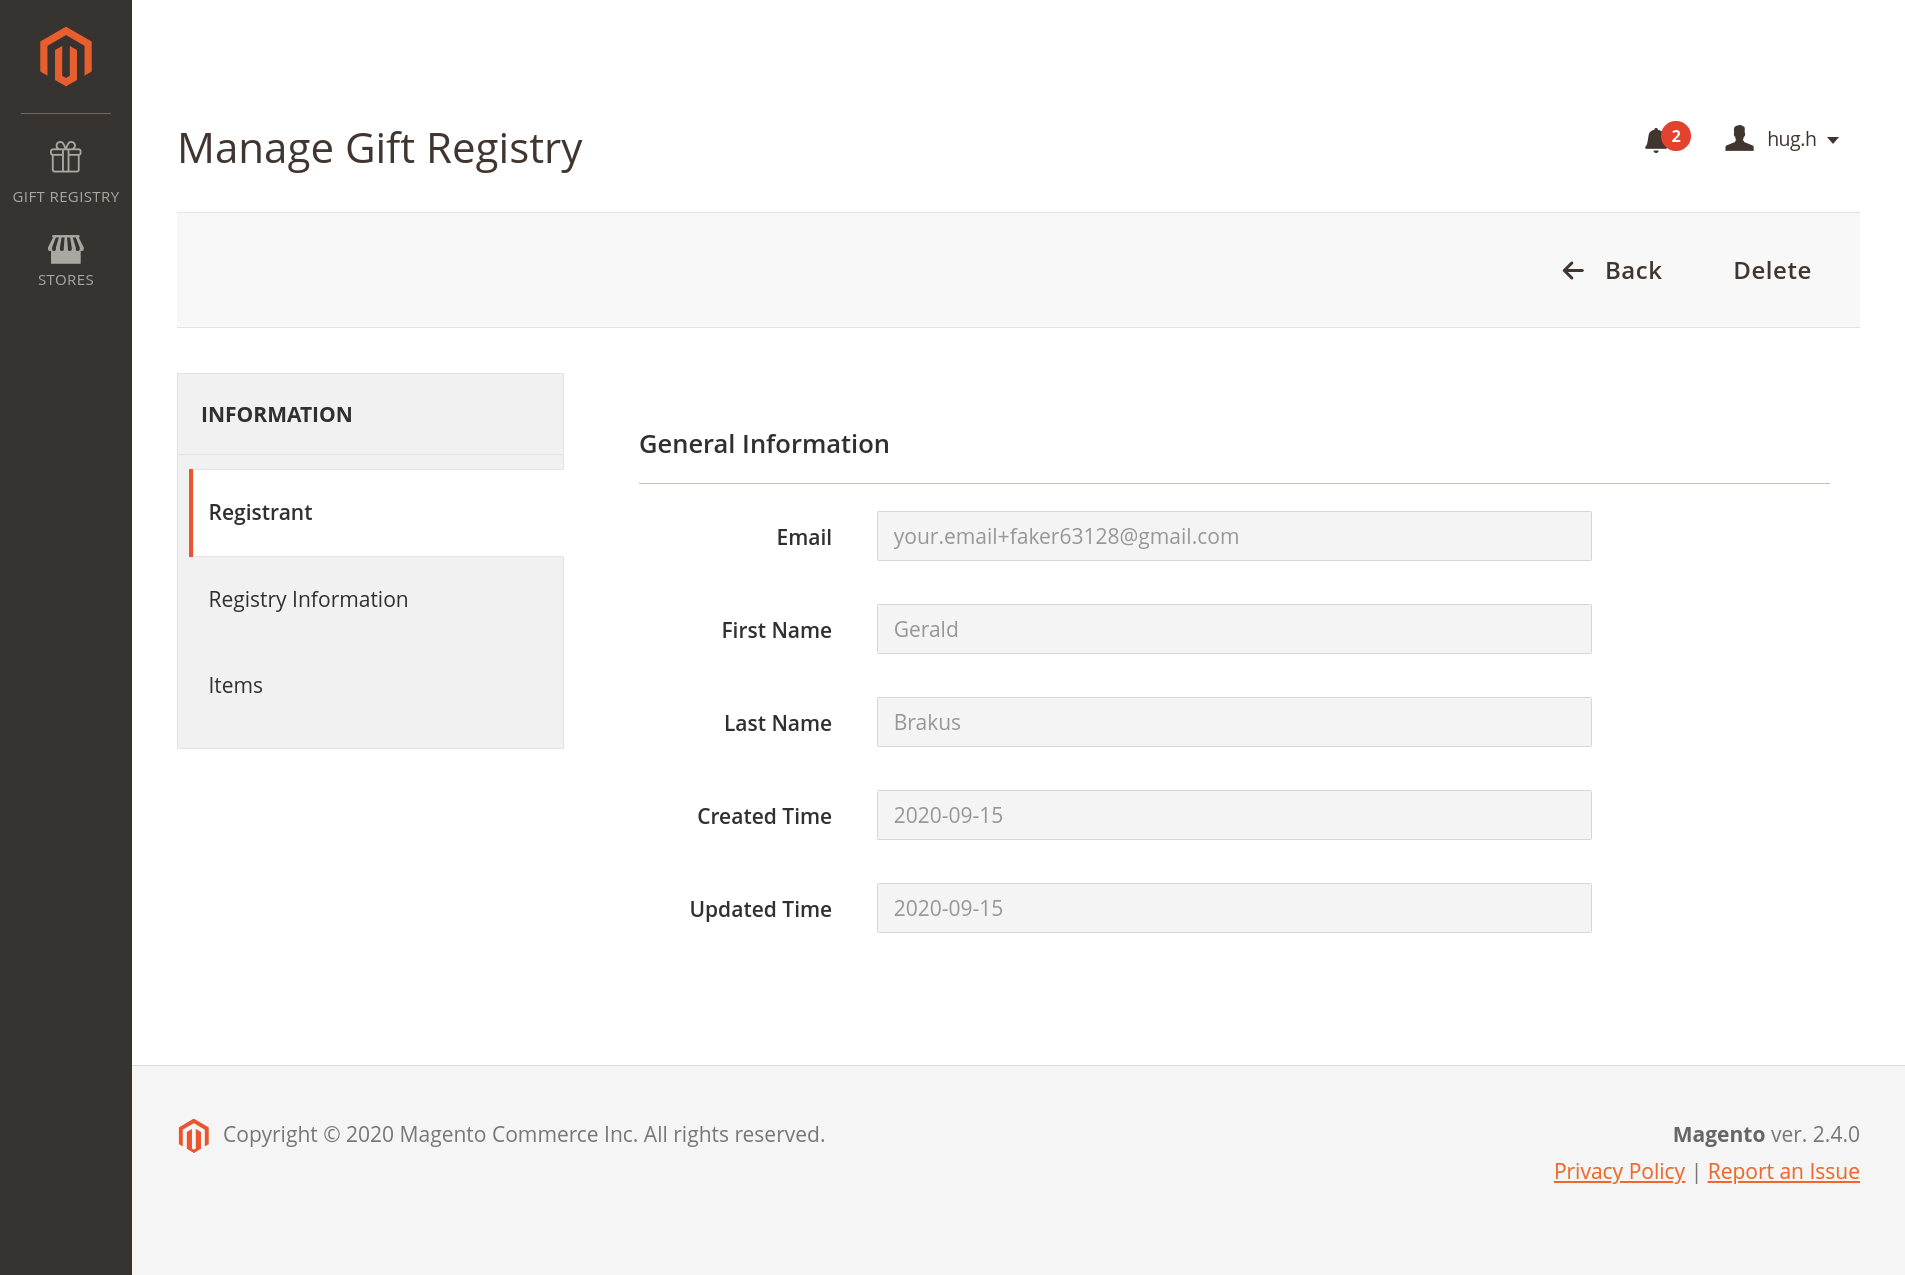
Create a new registry
Customers need to sign in
the store.to their account on the site to create a gift registry
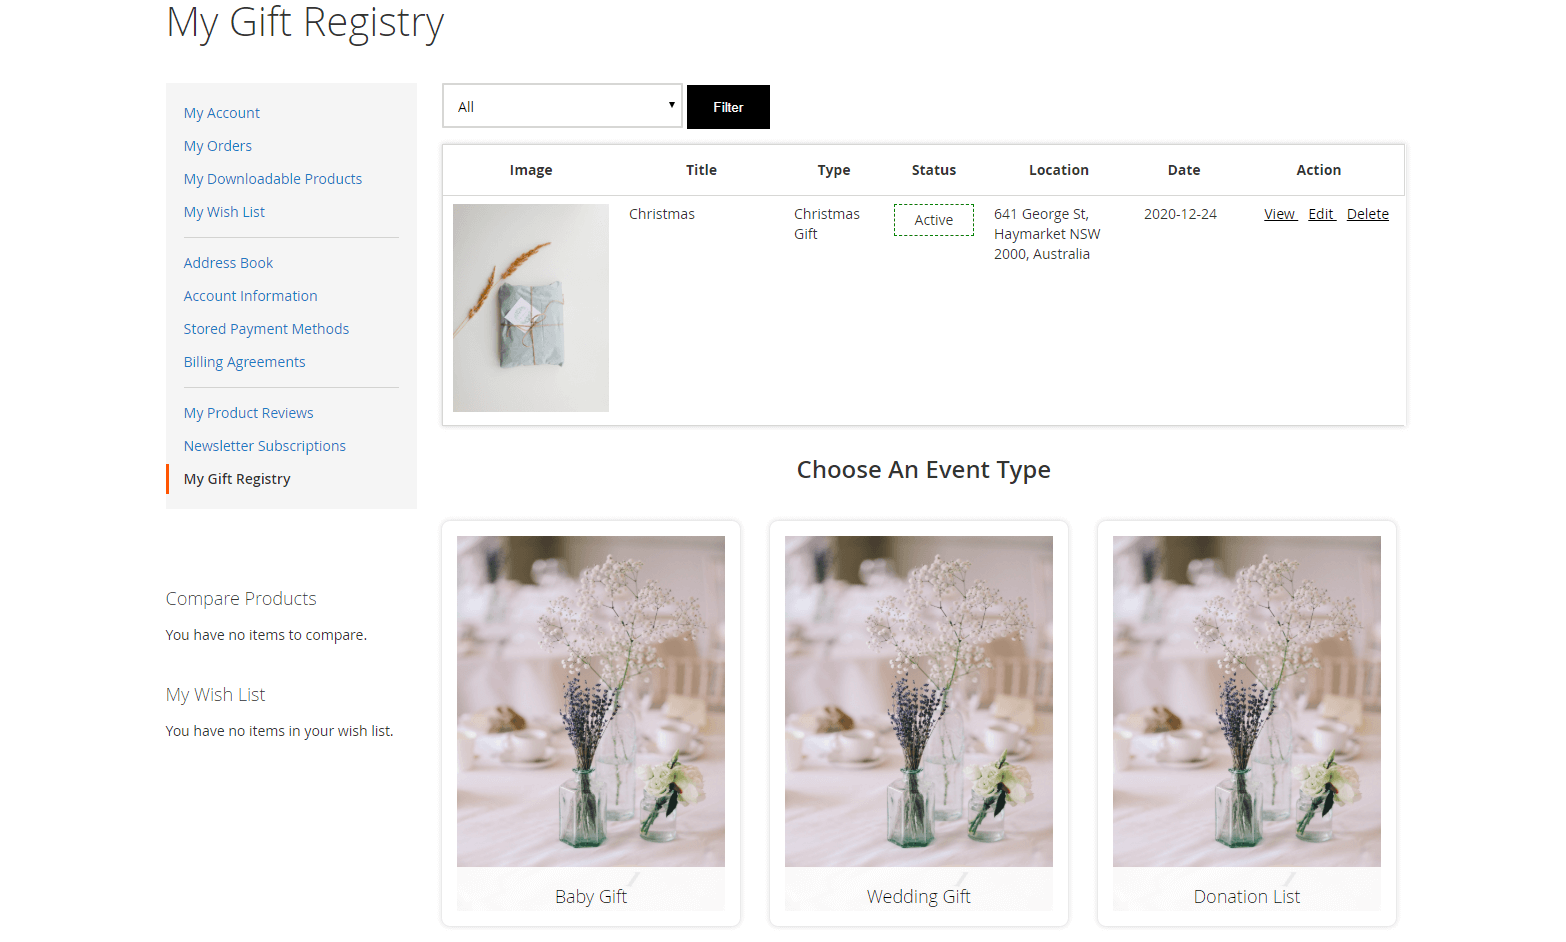
- Go to My Account > My Gift Registry, customers can view the
- registries they've already created or start a new one.
- Select an event
- for the new registry
- .
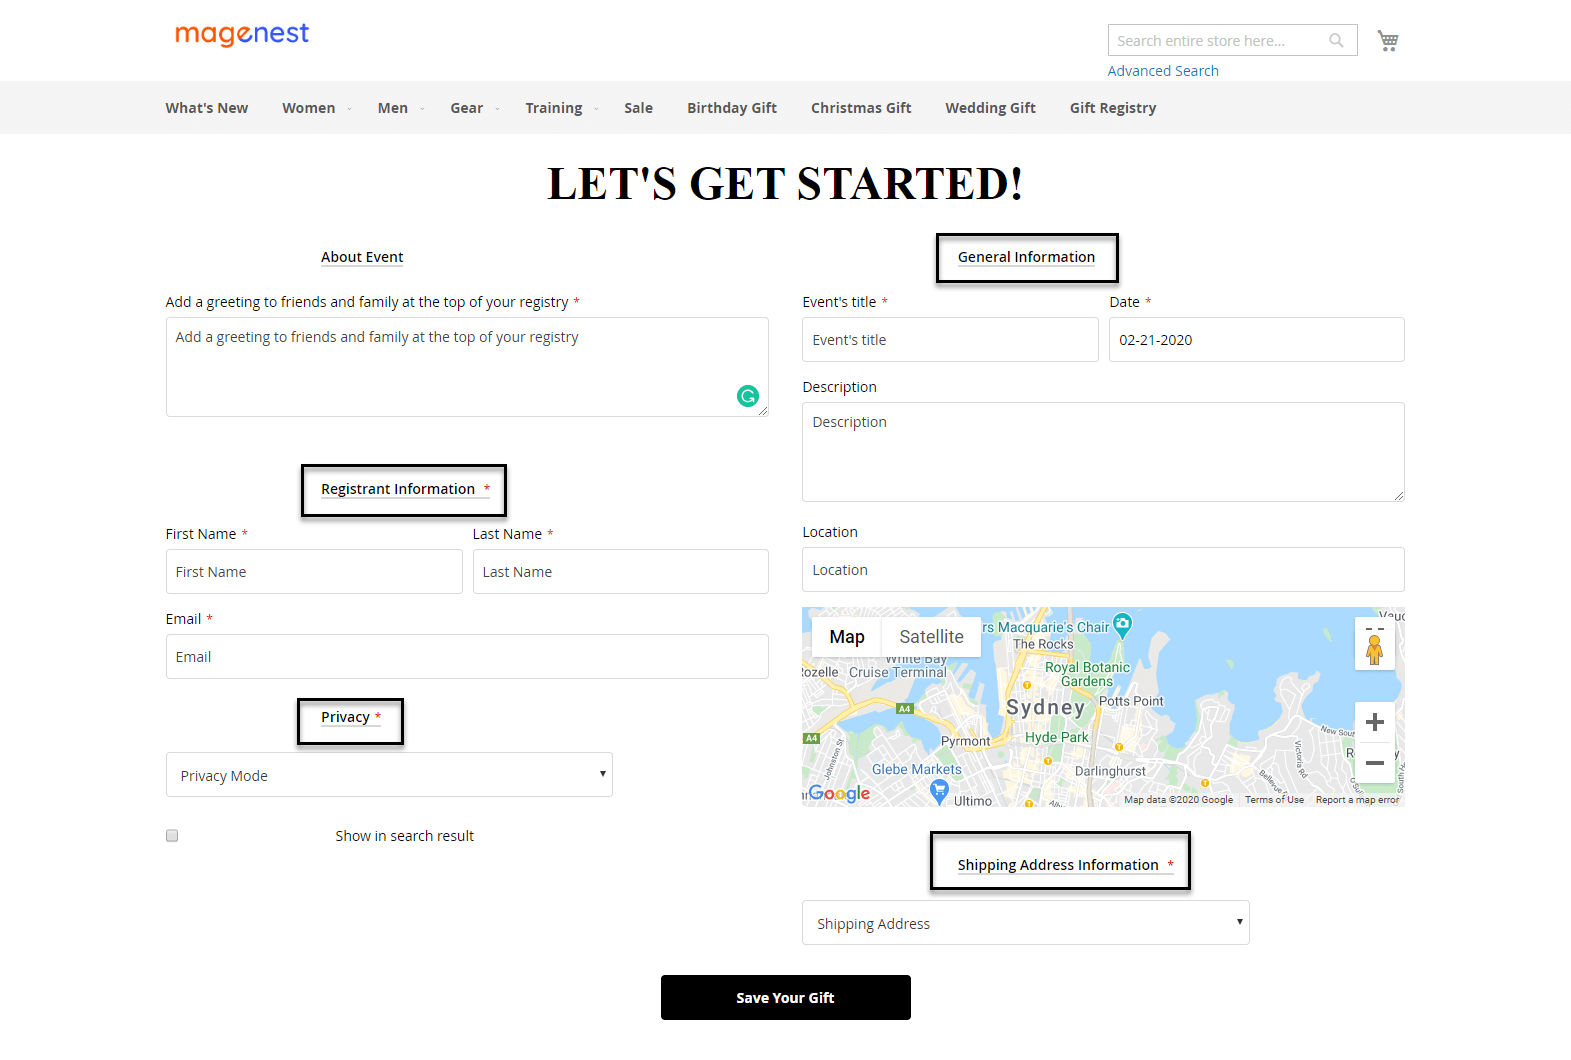
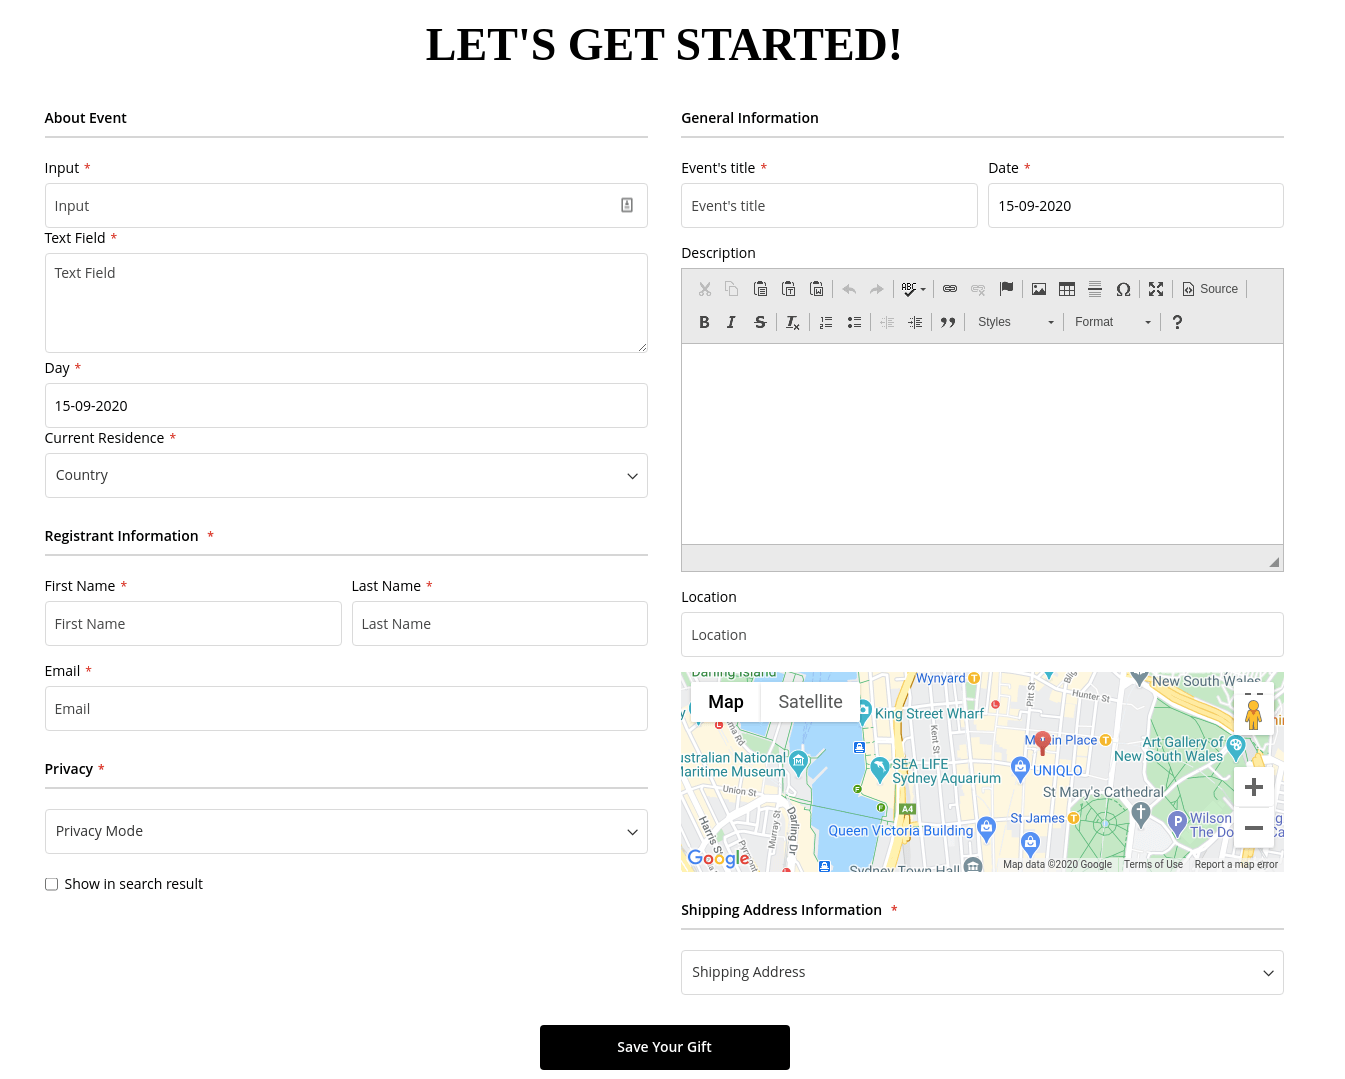
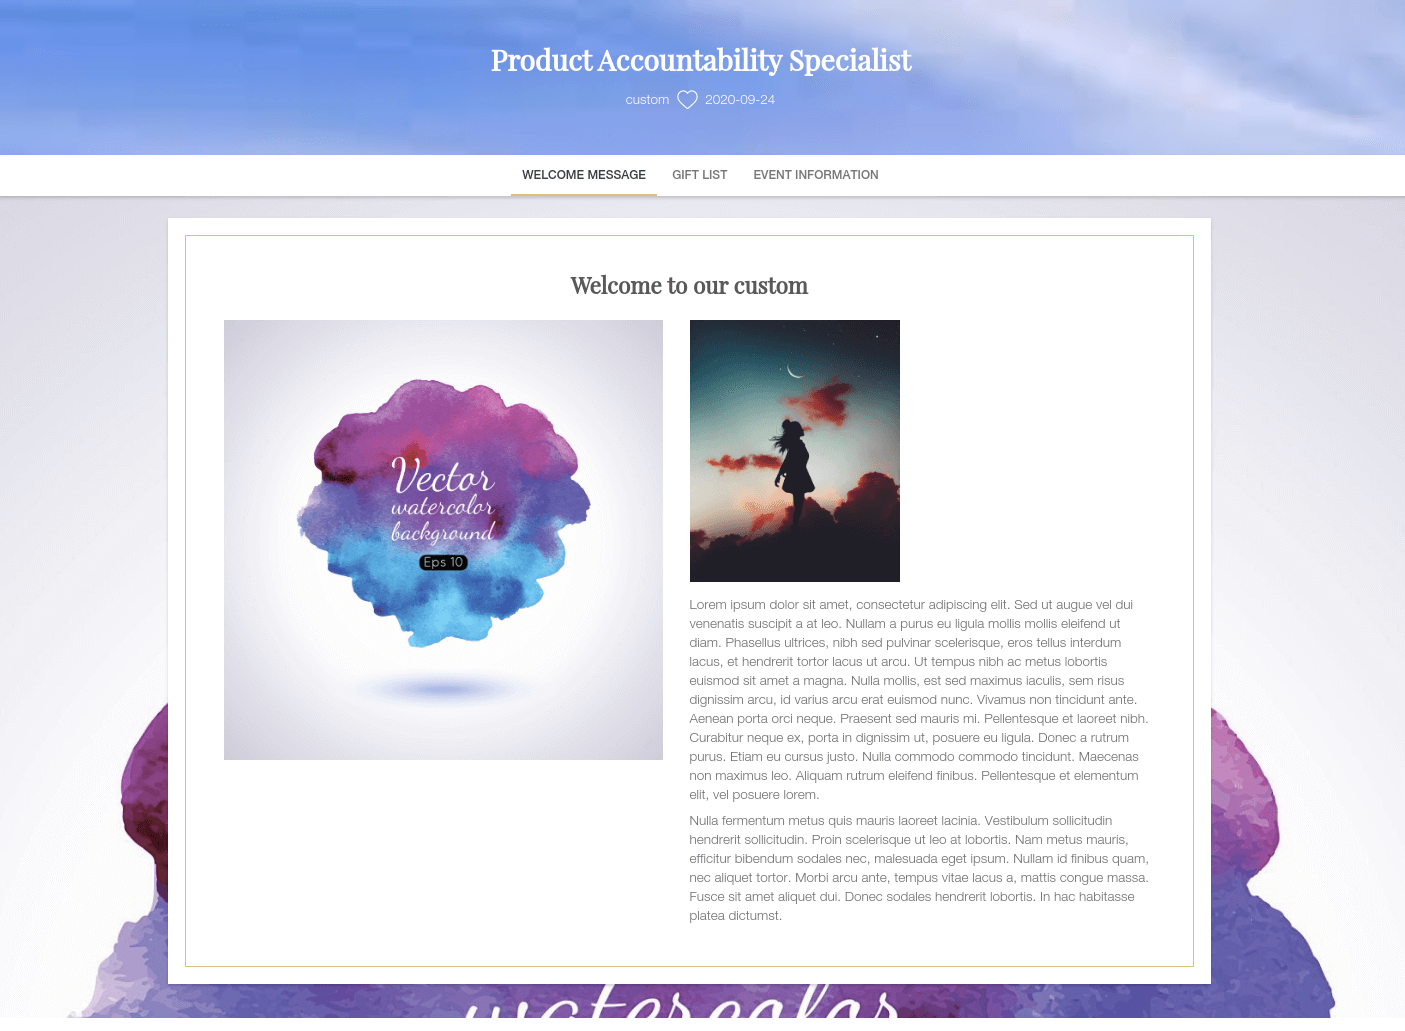
![]() On the new registry page
On the new registry page
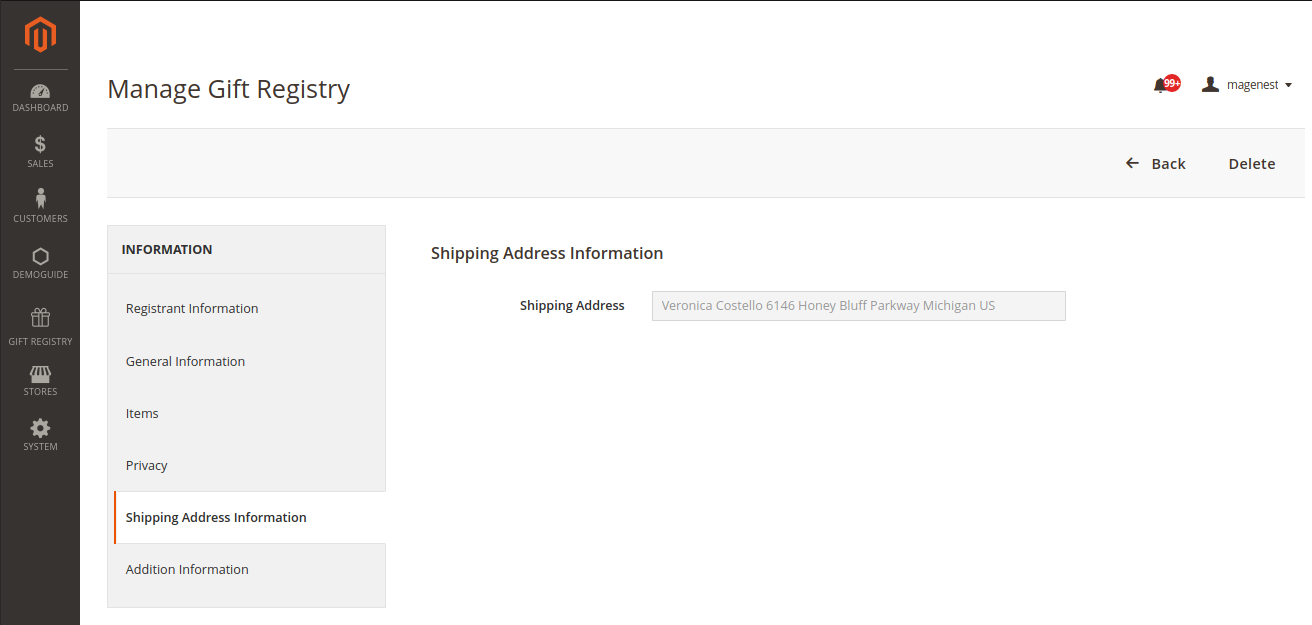
- Fill the necessary information on in the About Event, General Information, Registrant Information and Shipping Address Information sections fields.
- Under the Privacy section, set the privacy status for the registry with 2 options:
- Private: Other people customers need to enter a password to access the your gift registry.
- Public: Other people customers can view the registry publicly by searching on the store. If the Show in search result option is disable, they can access the registry list by a link shared by the registrantregistry owner.
- Tick on the Show in search result field to allow other people to search for the registry.
Additional settings for the registry list
Customers can set the registry page image and add gift items to the list after creating the registry.
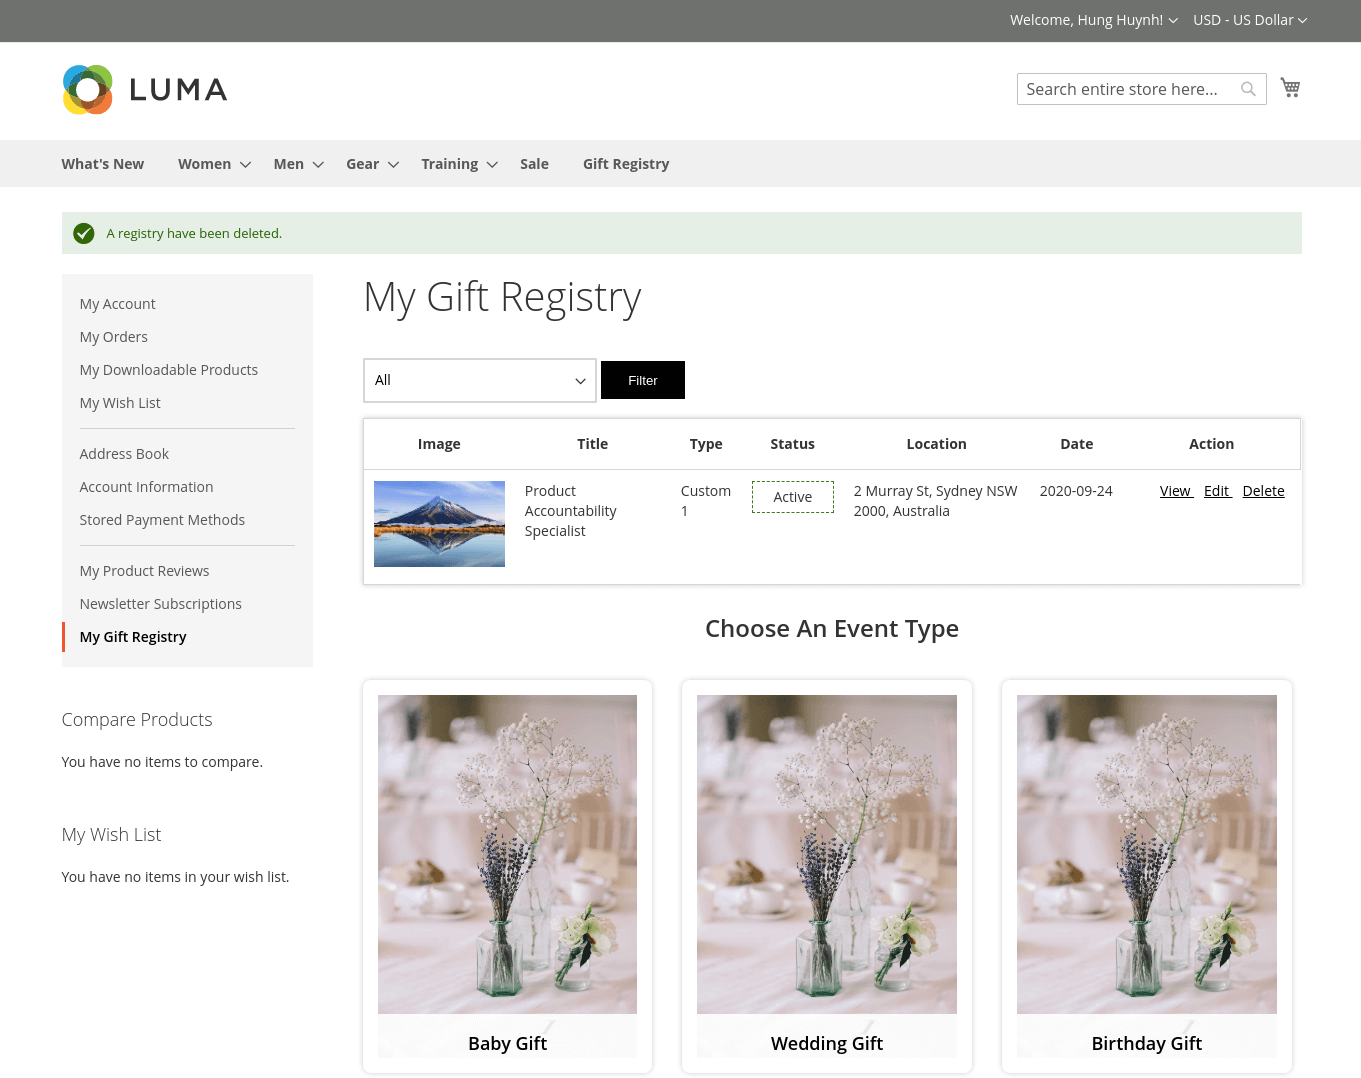
![]() Go to My Account > My Gift Registry, click Edit on the registry.
Go to My Account > My Gift Registry, click Edit on the registry.
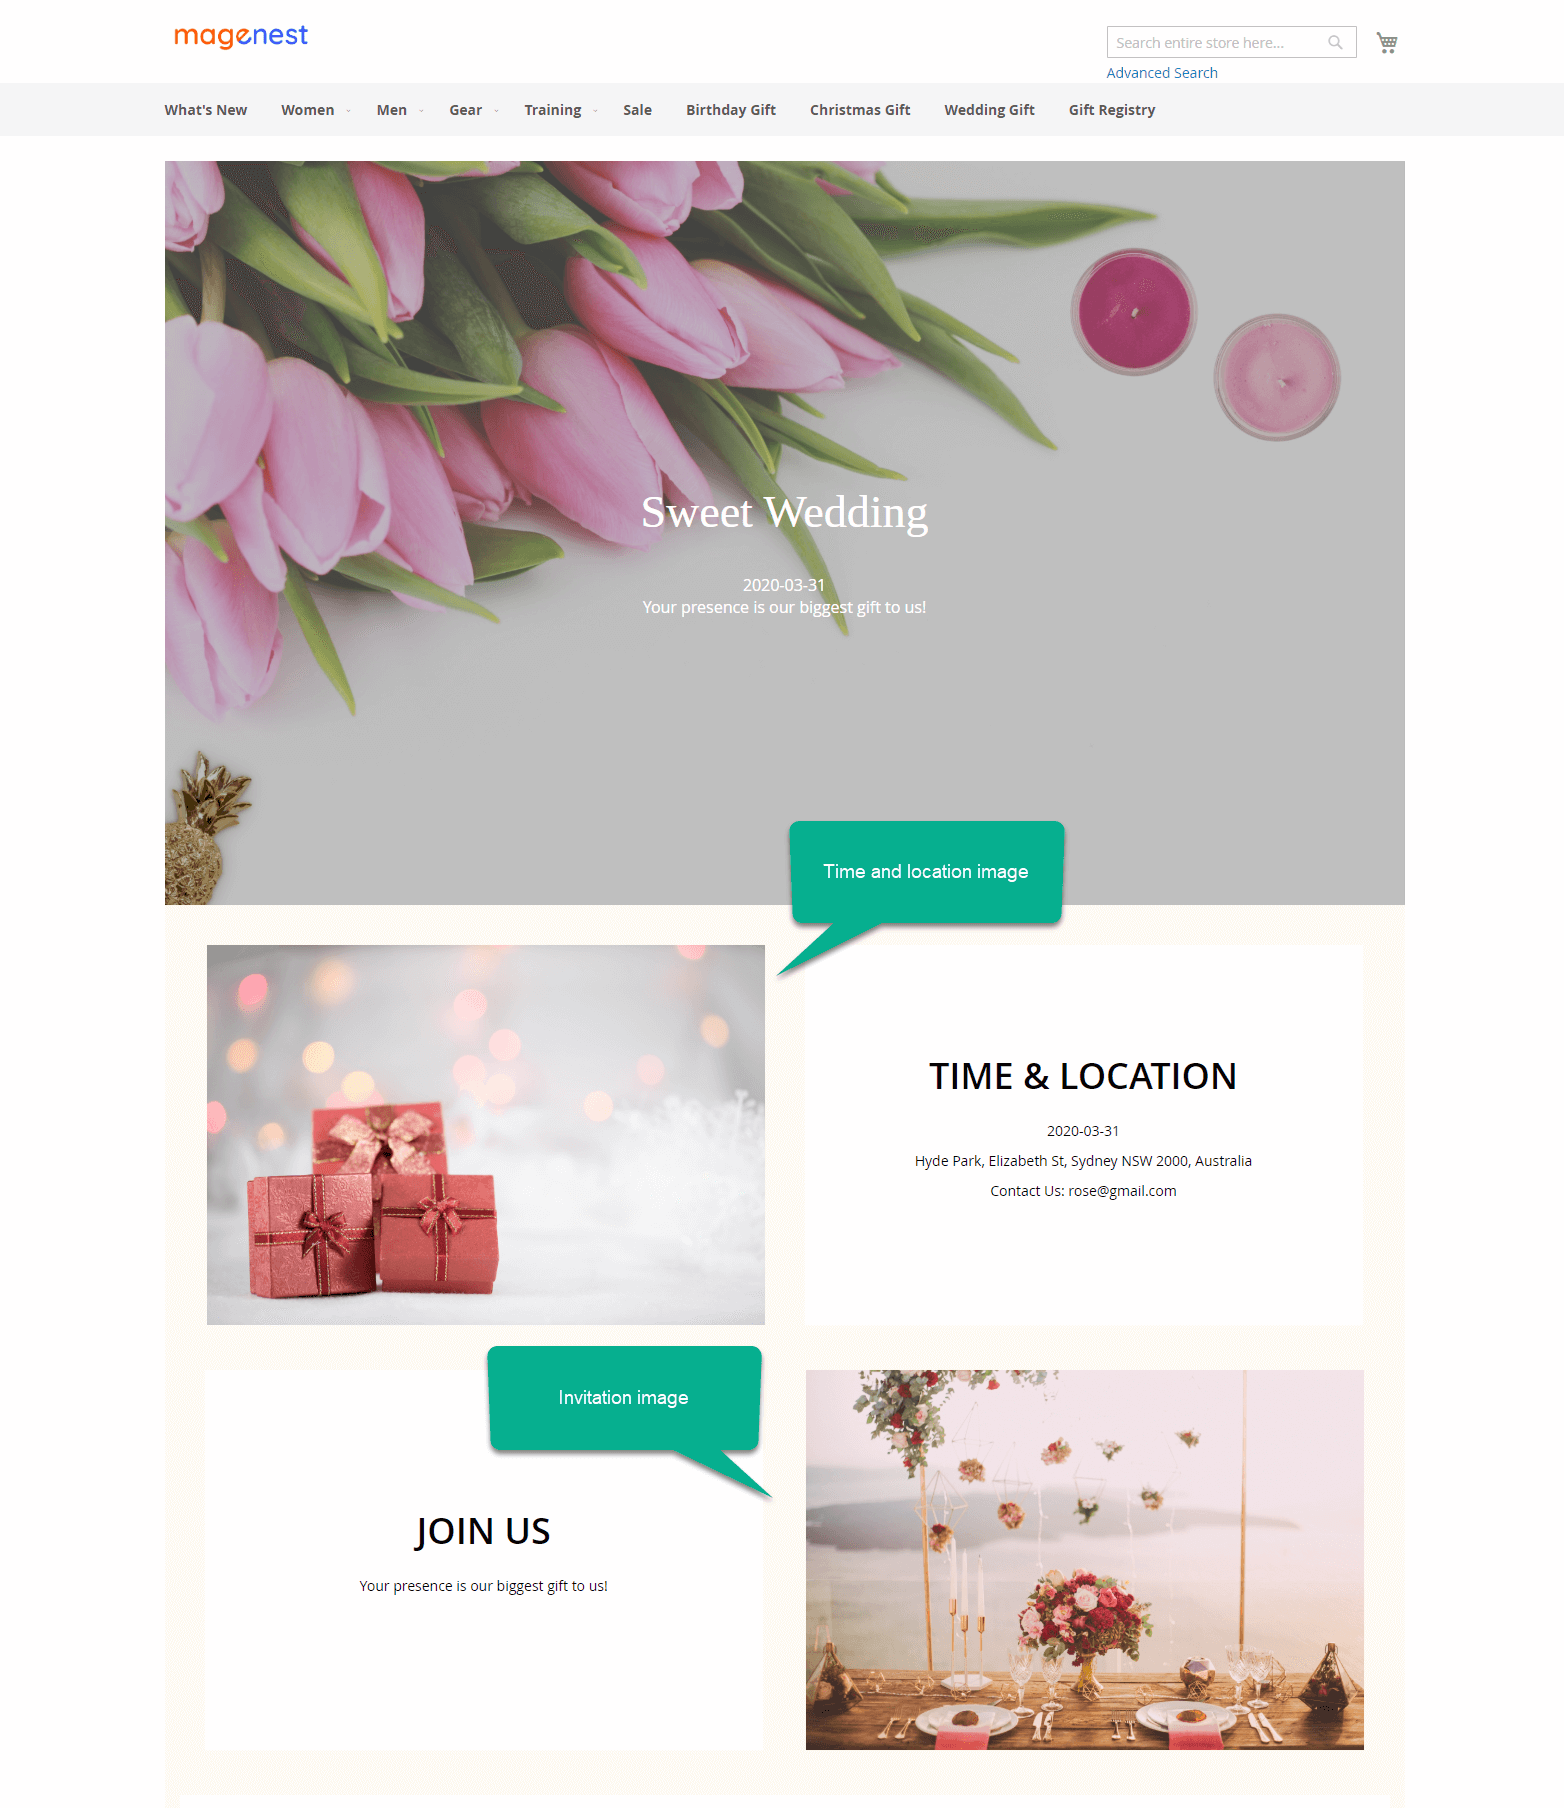
Set images on registry page
- Under Edit Information tab, set the images on customer can Change Default Image section for (including Banner image, Time & Location Image and Invitation Image).
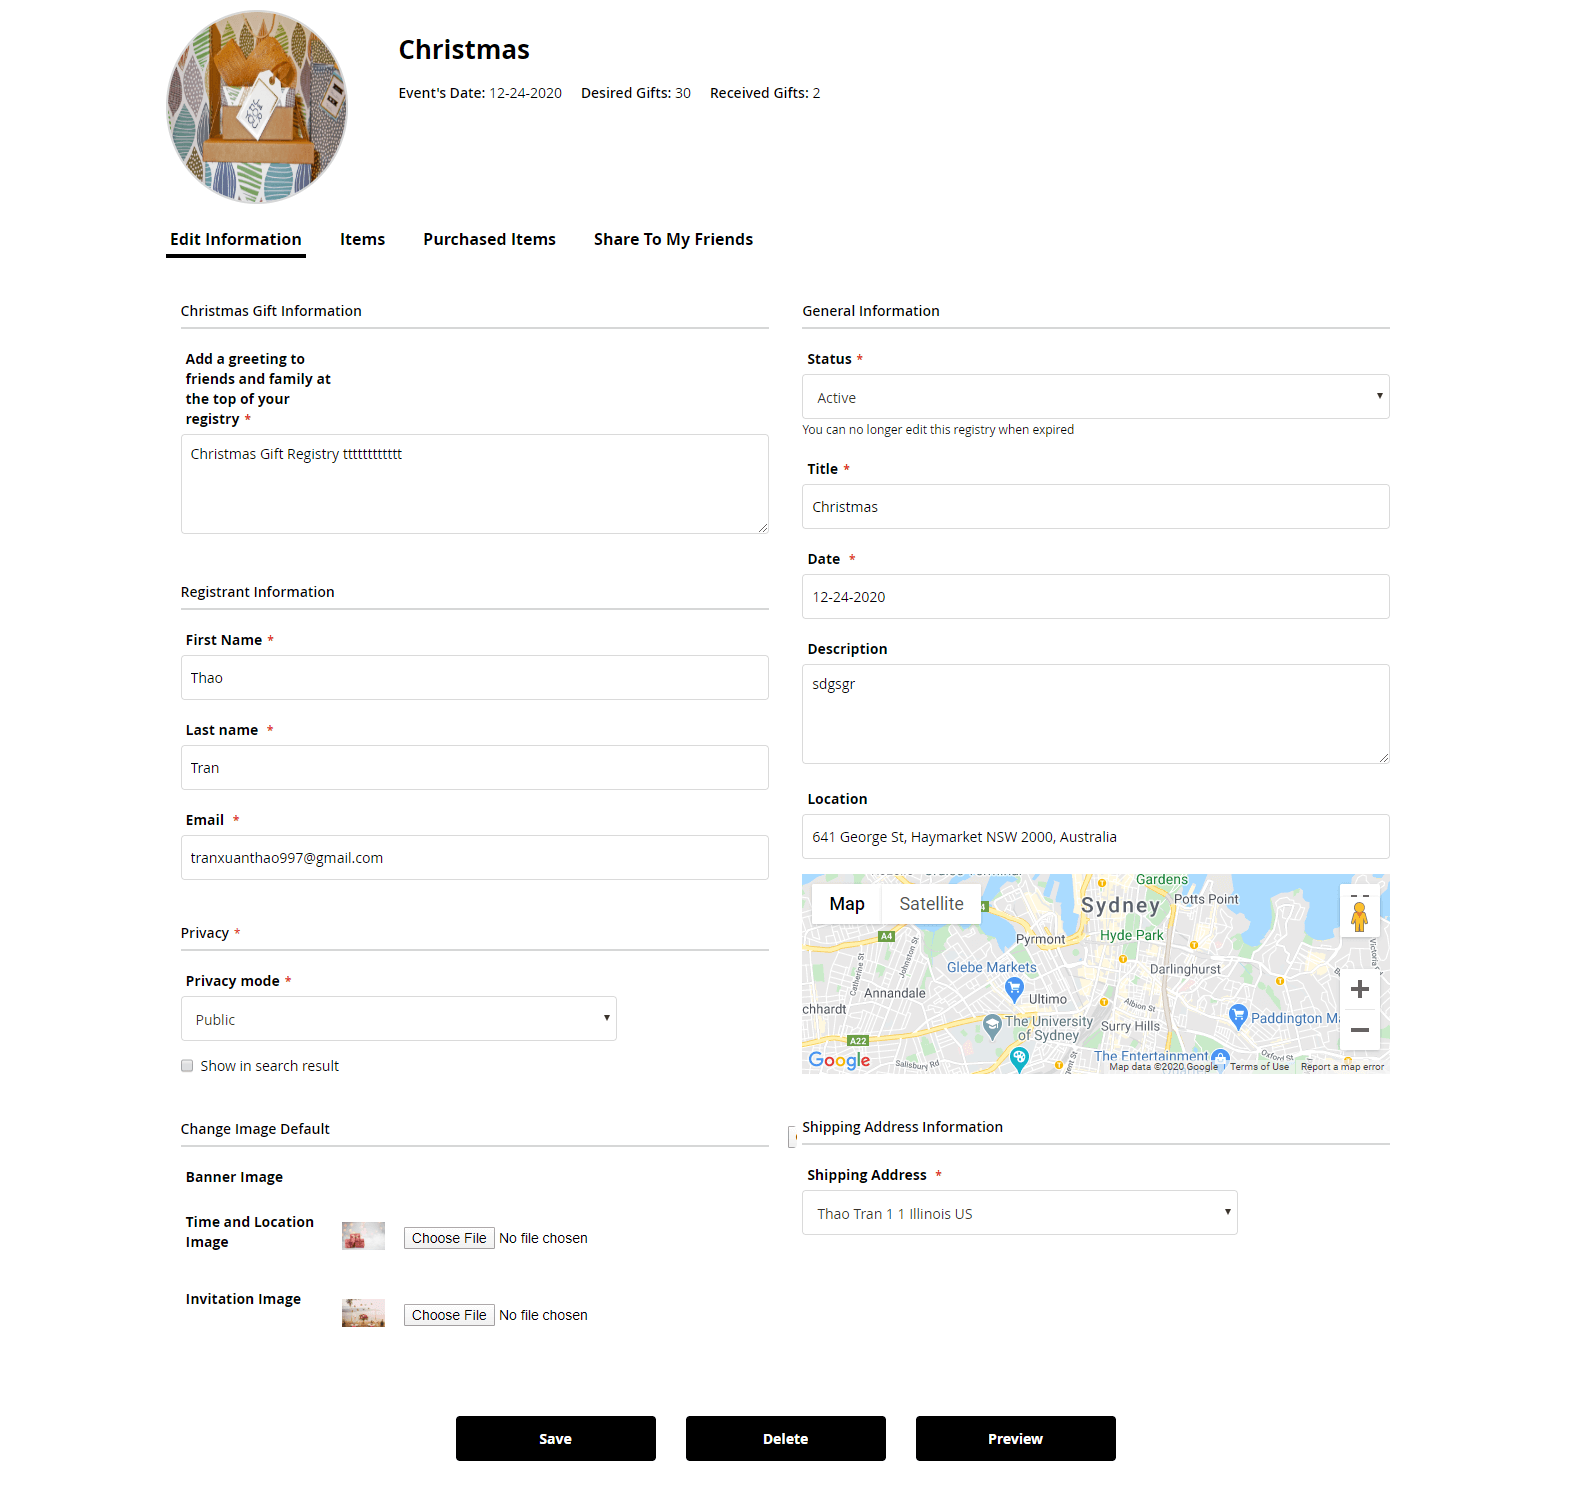
- Display of the settings
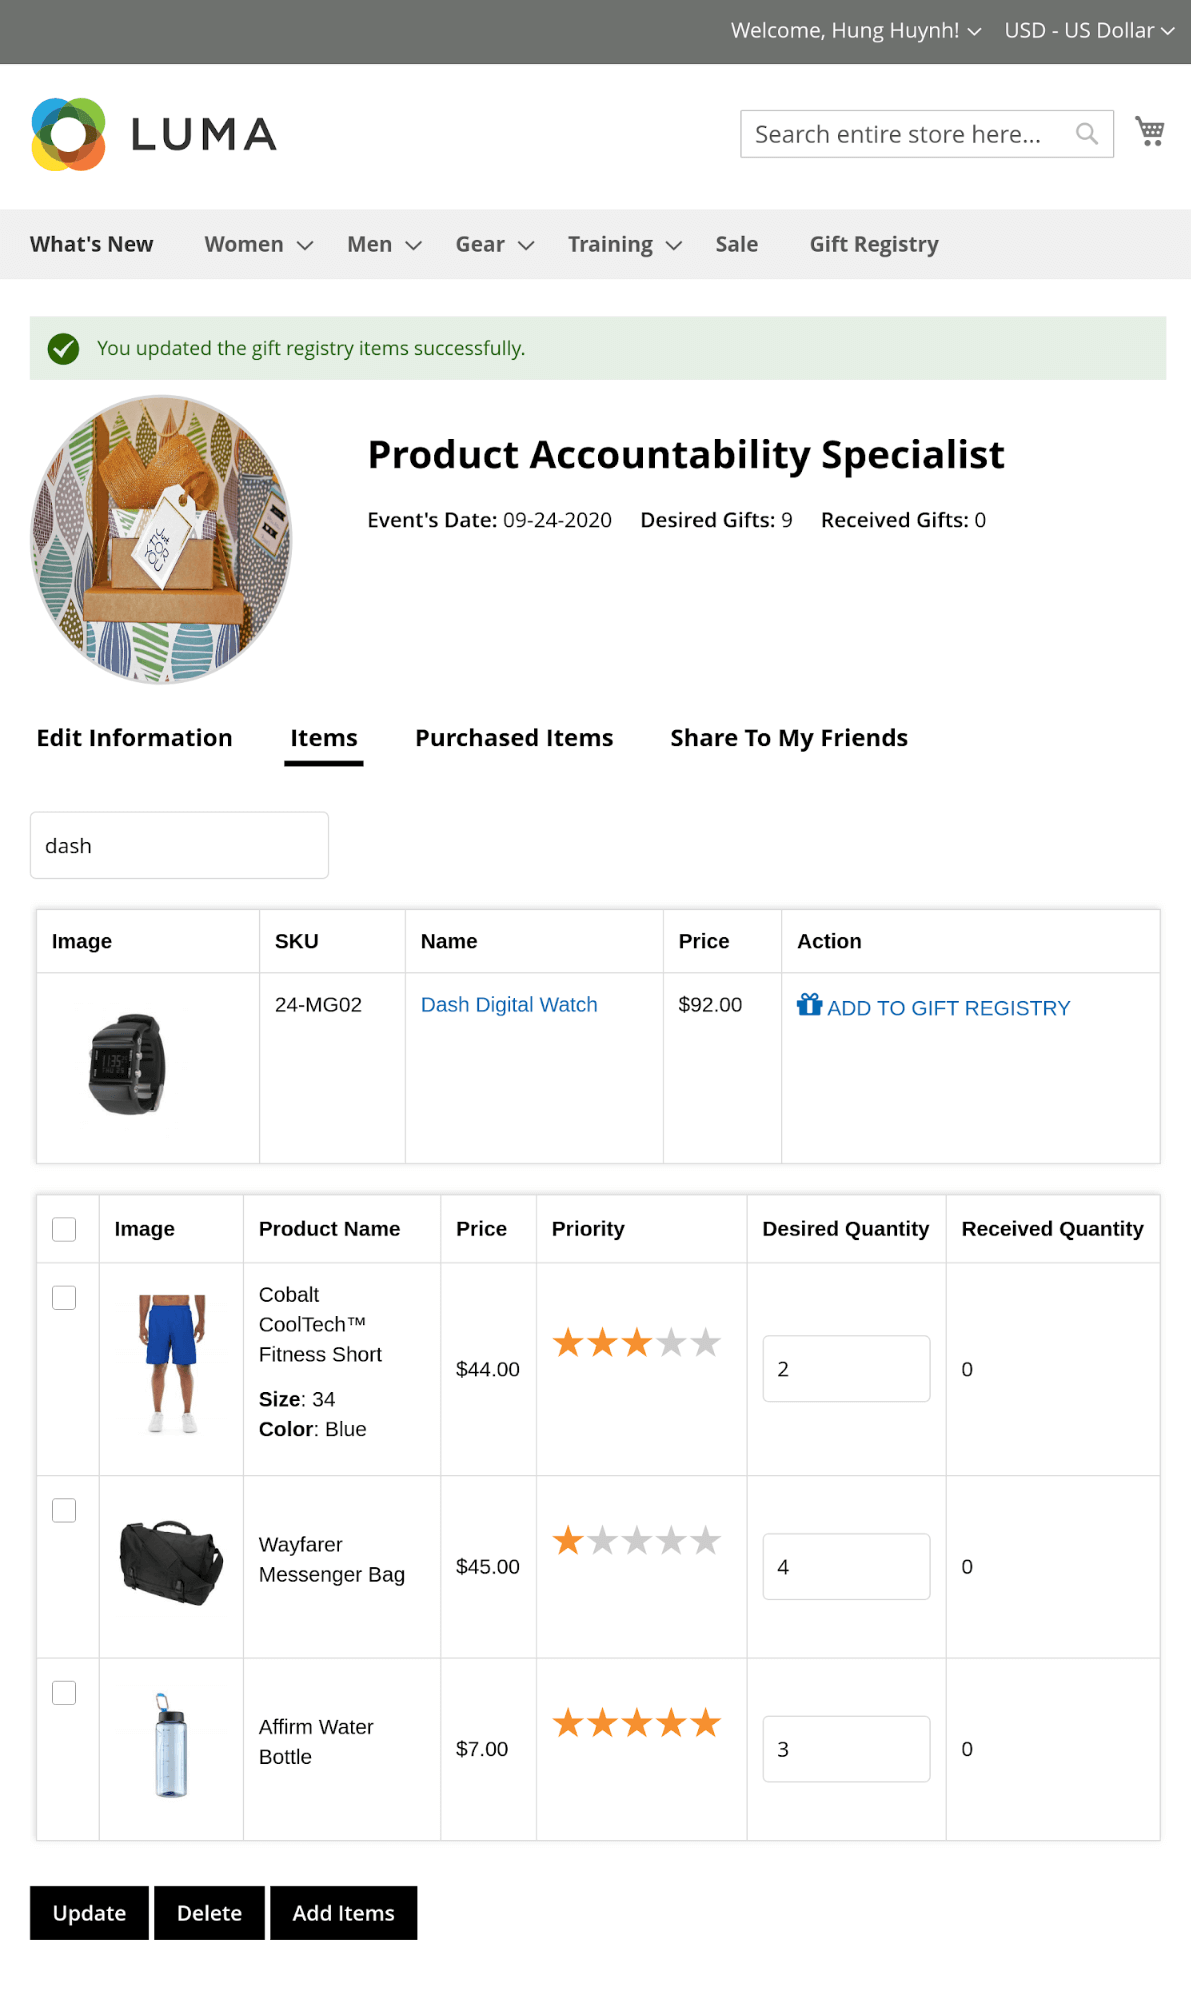
Add items to the registry list
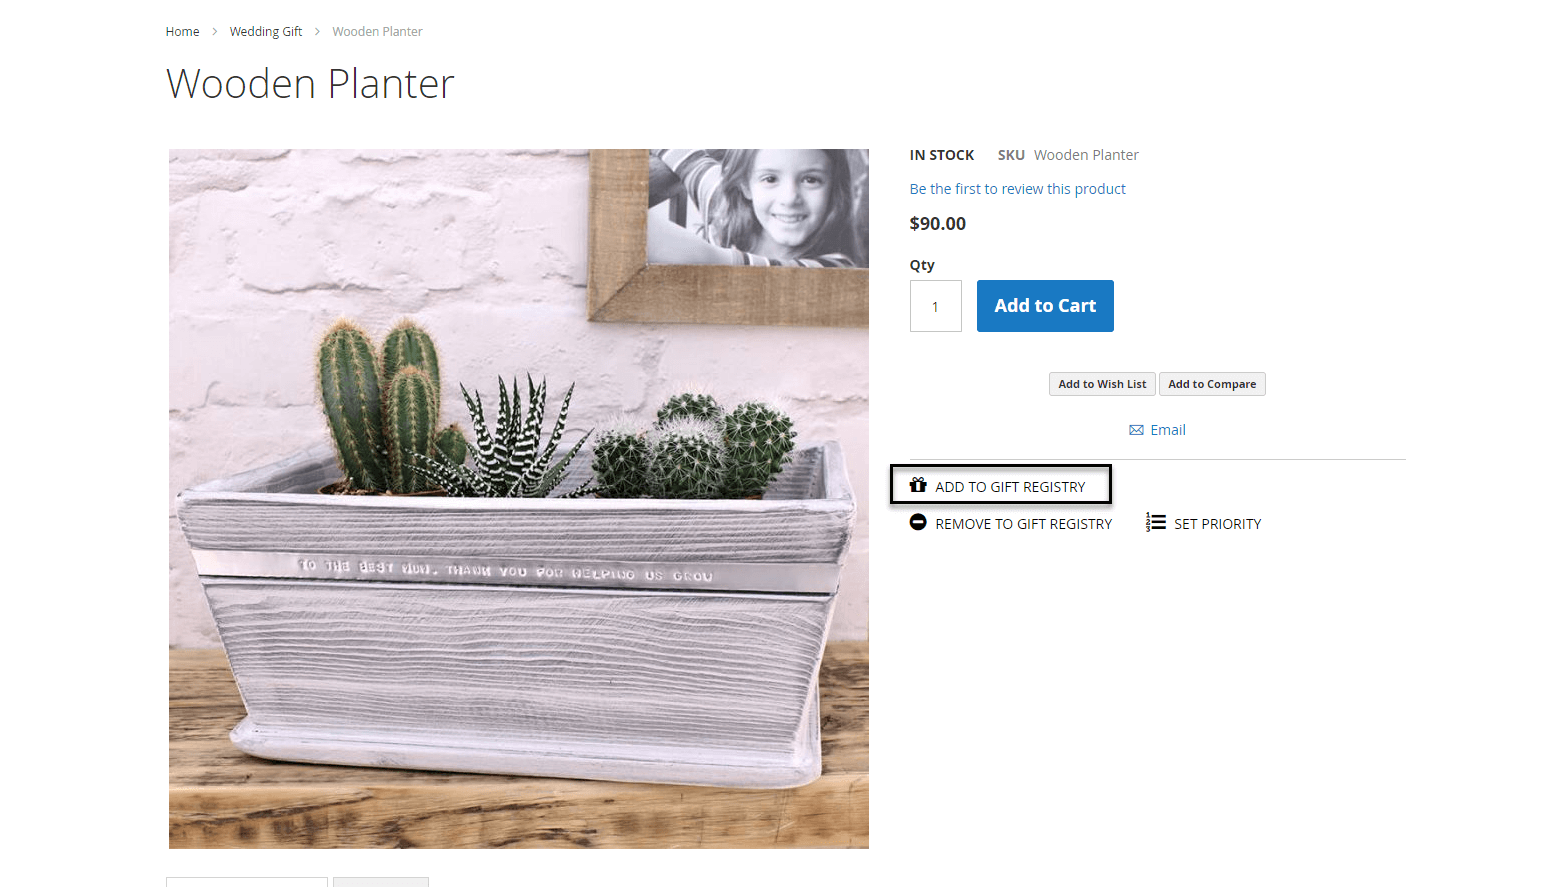
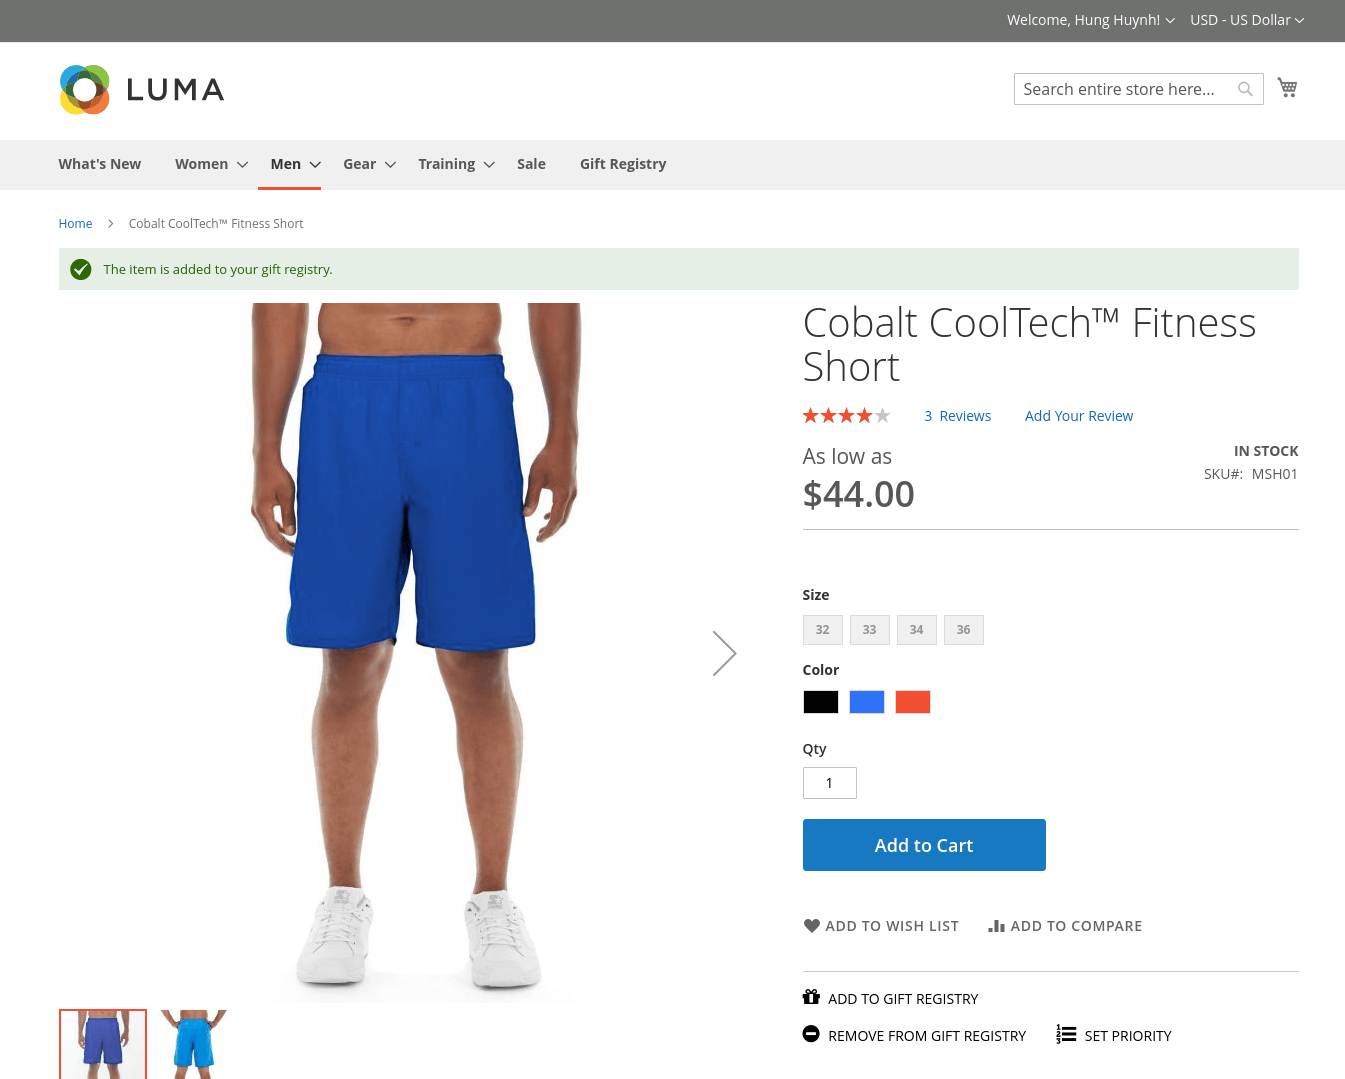
- Go to any product page on the store, click on Add To Registry button to add the product to registry list.
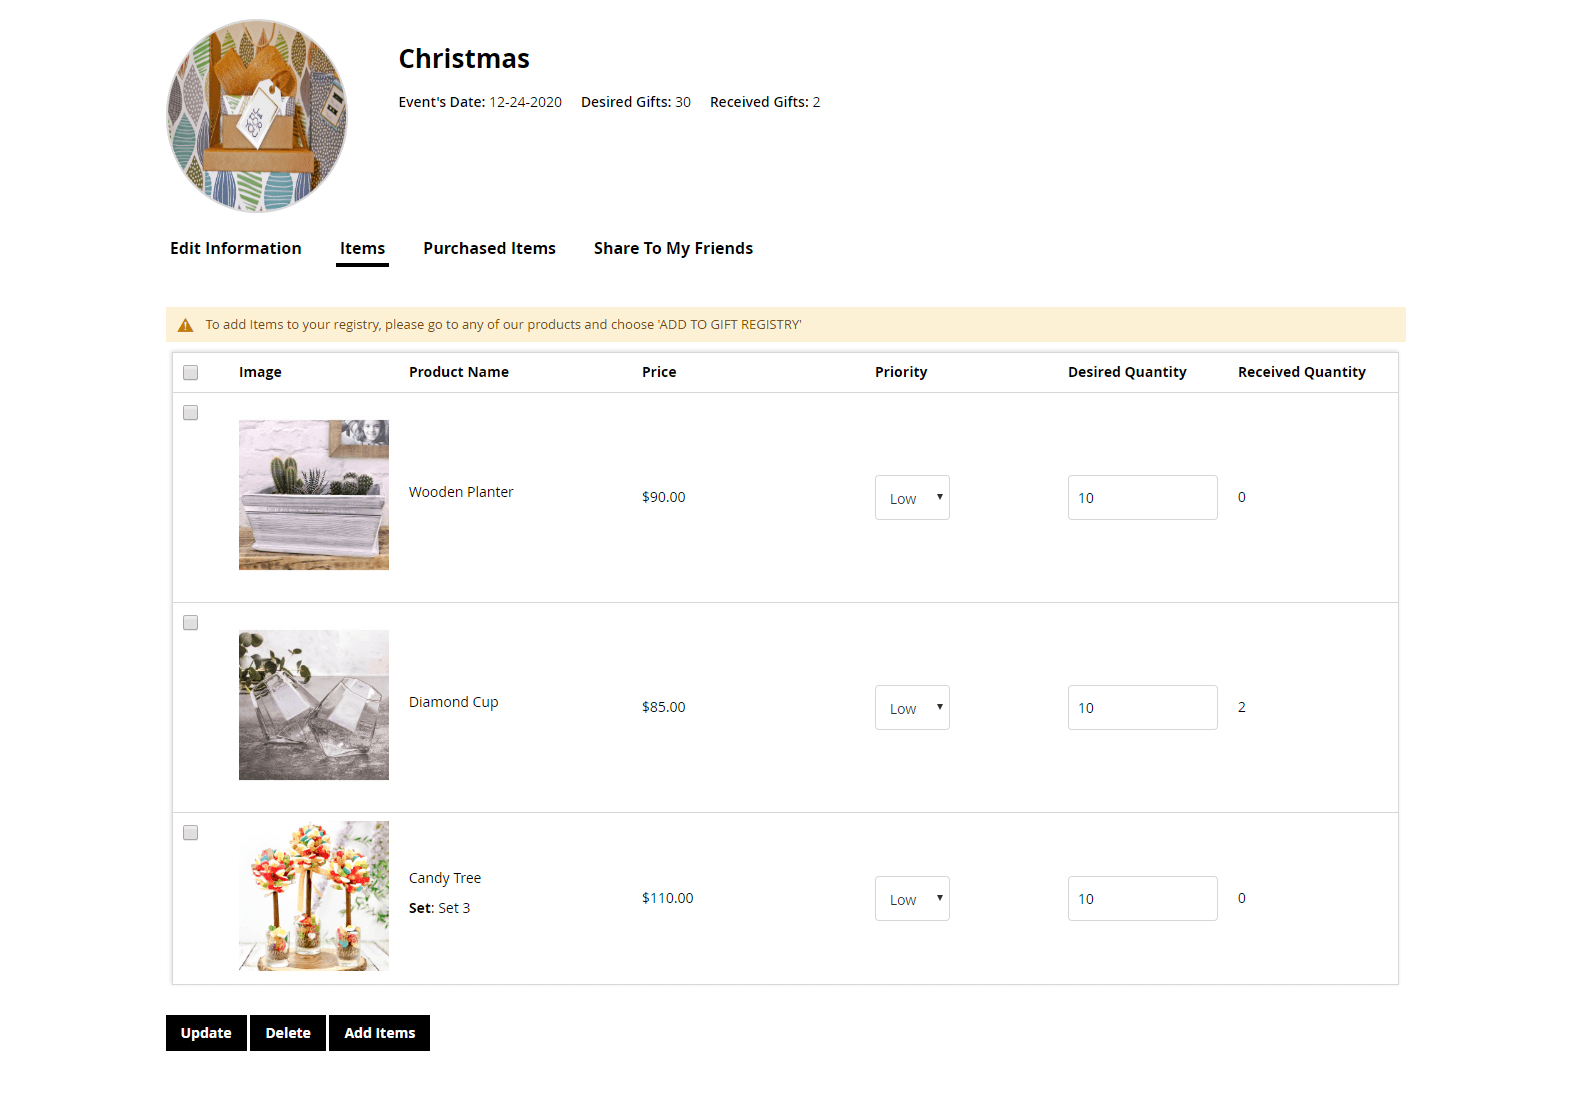
- After collecting adding products to the gift list, go to My Gift Registry page and view the added products product list under the Items tab.

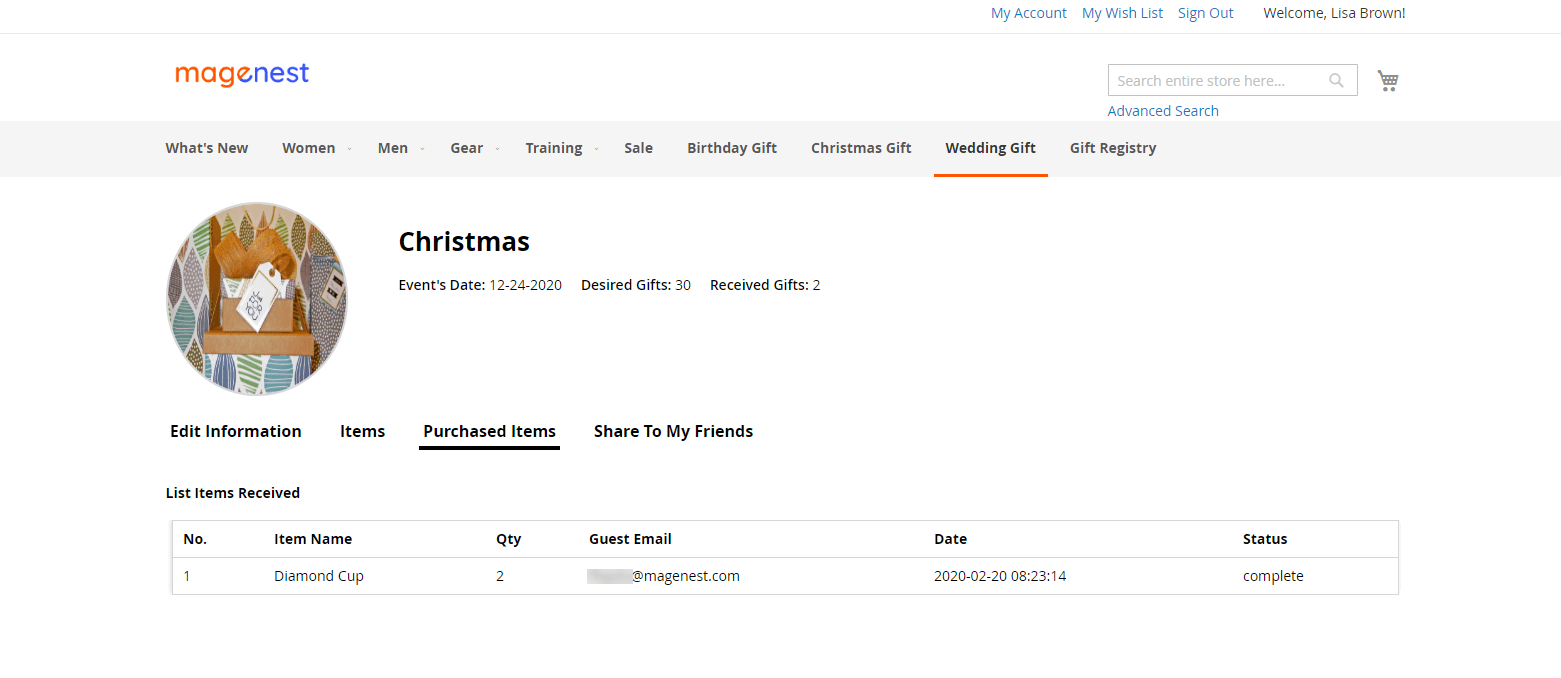
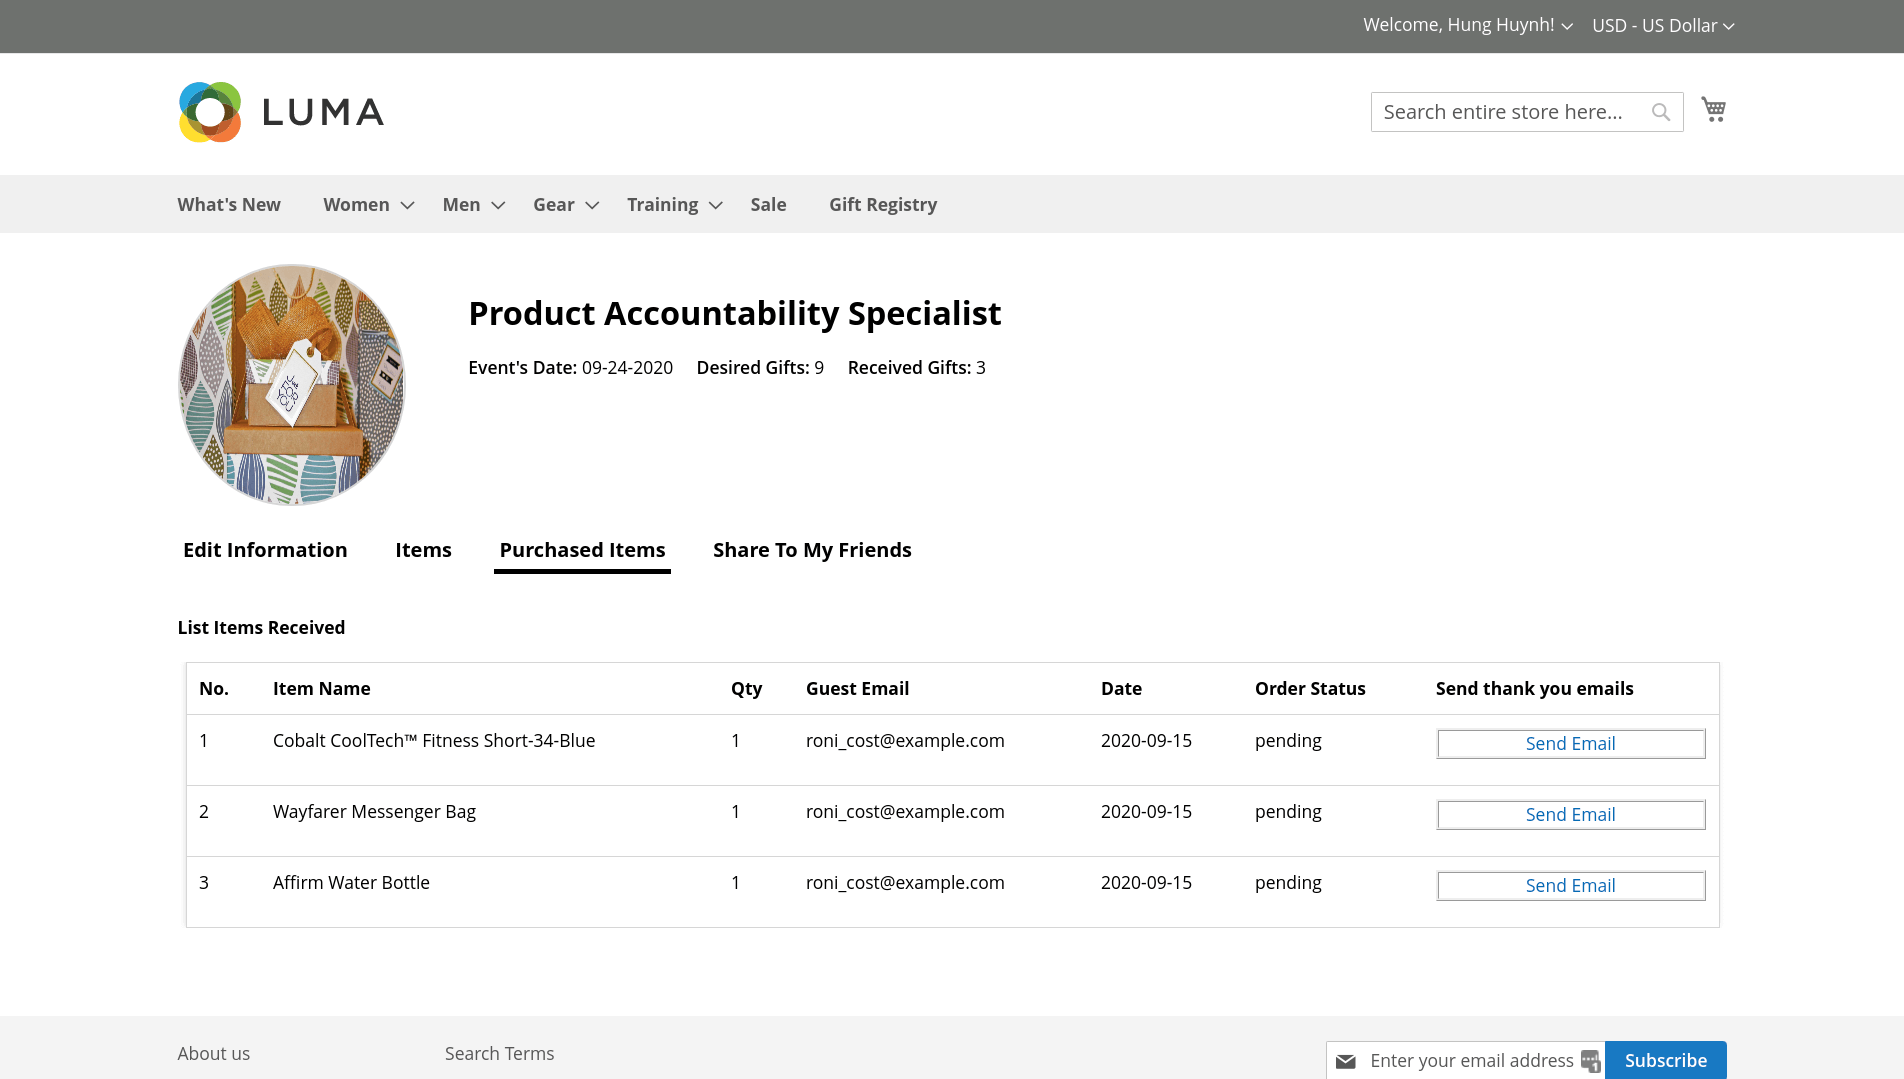
Manage personal registry list
Customers can view, edit registry information, share registry list to
the friendtheir friends and view the purchased
gift itemsitem list.
Go to My Account > My Gift Registry >
clickEdit
on a registry> Gift Registry page.
- Edit the registry information under Edit Information tab.
- View ordered items list under Purchased Items tab.
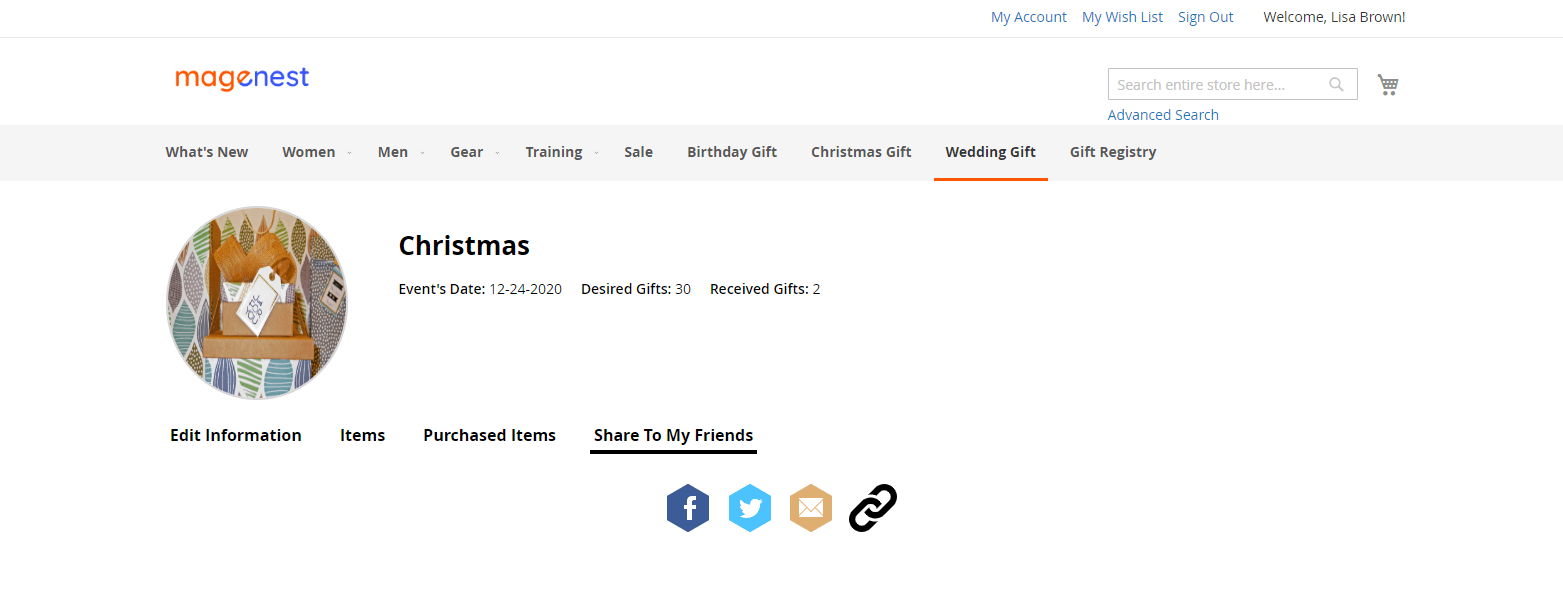
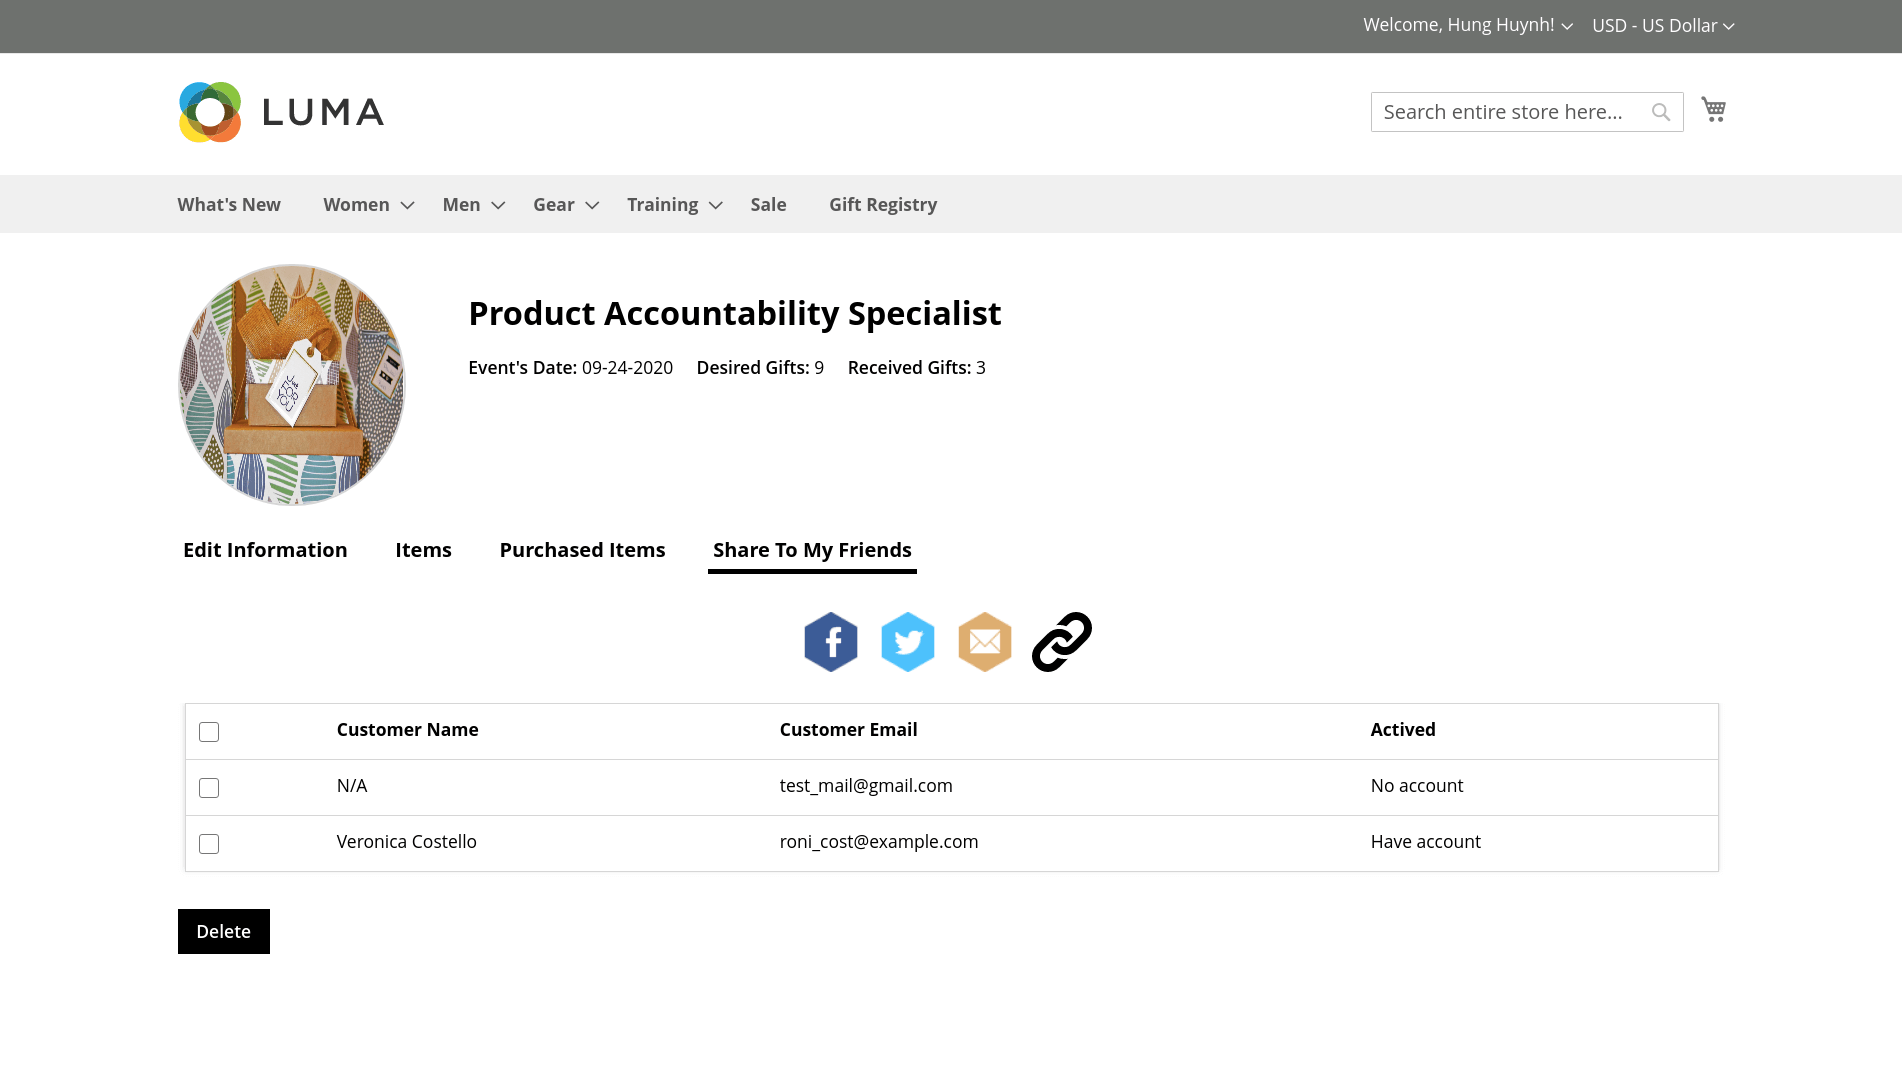
![]() Select a social media channel to share your gift registry
Select a social media channel to share your gift registry
to friends. There are 4 options for social sharing: Facebook, Twitter, Gmail and link sharing.
For
the guestnon logged-in customers
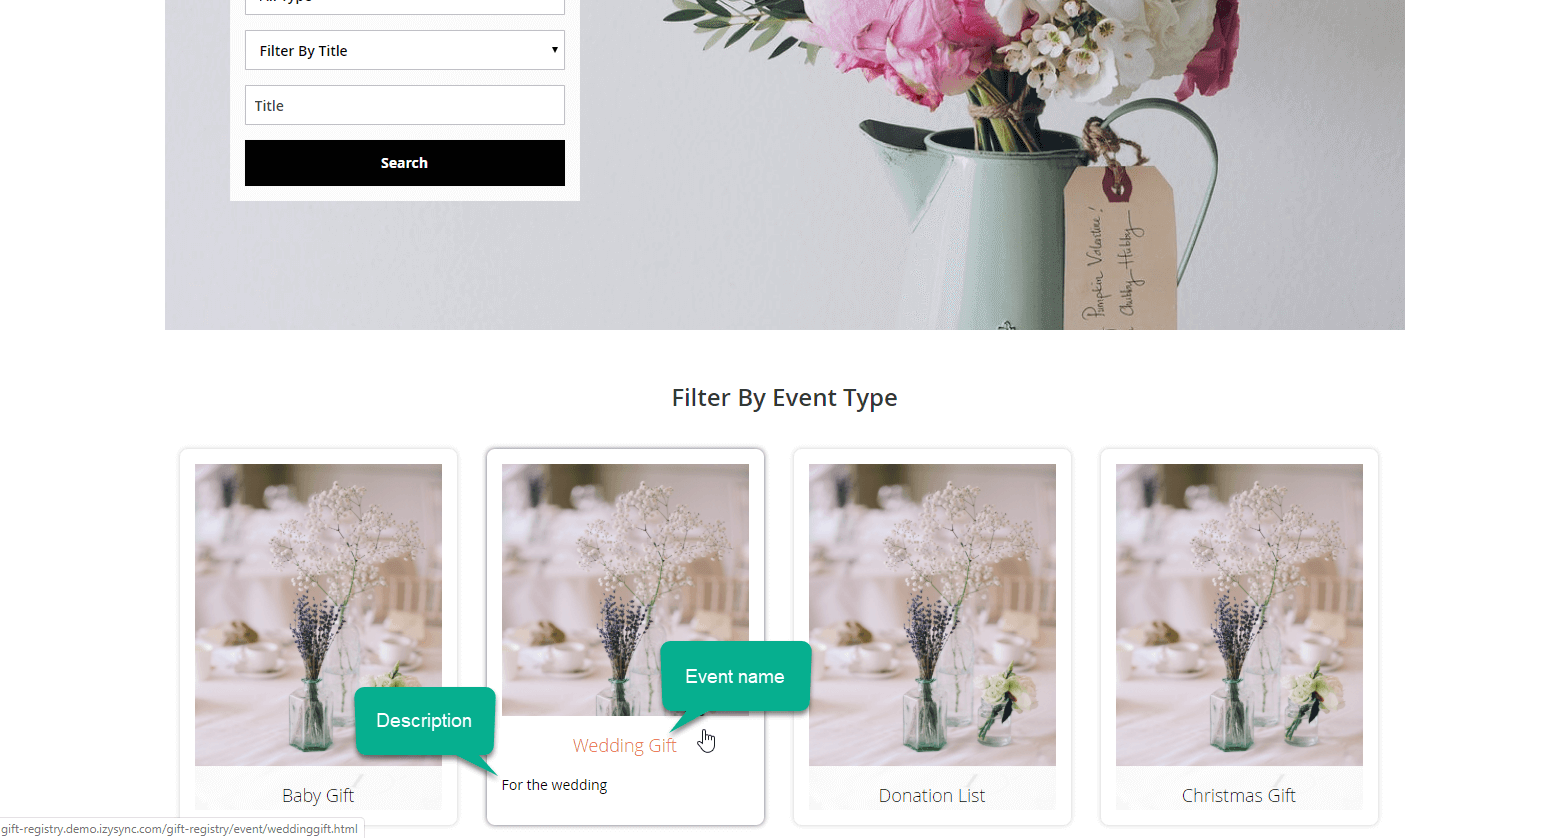
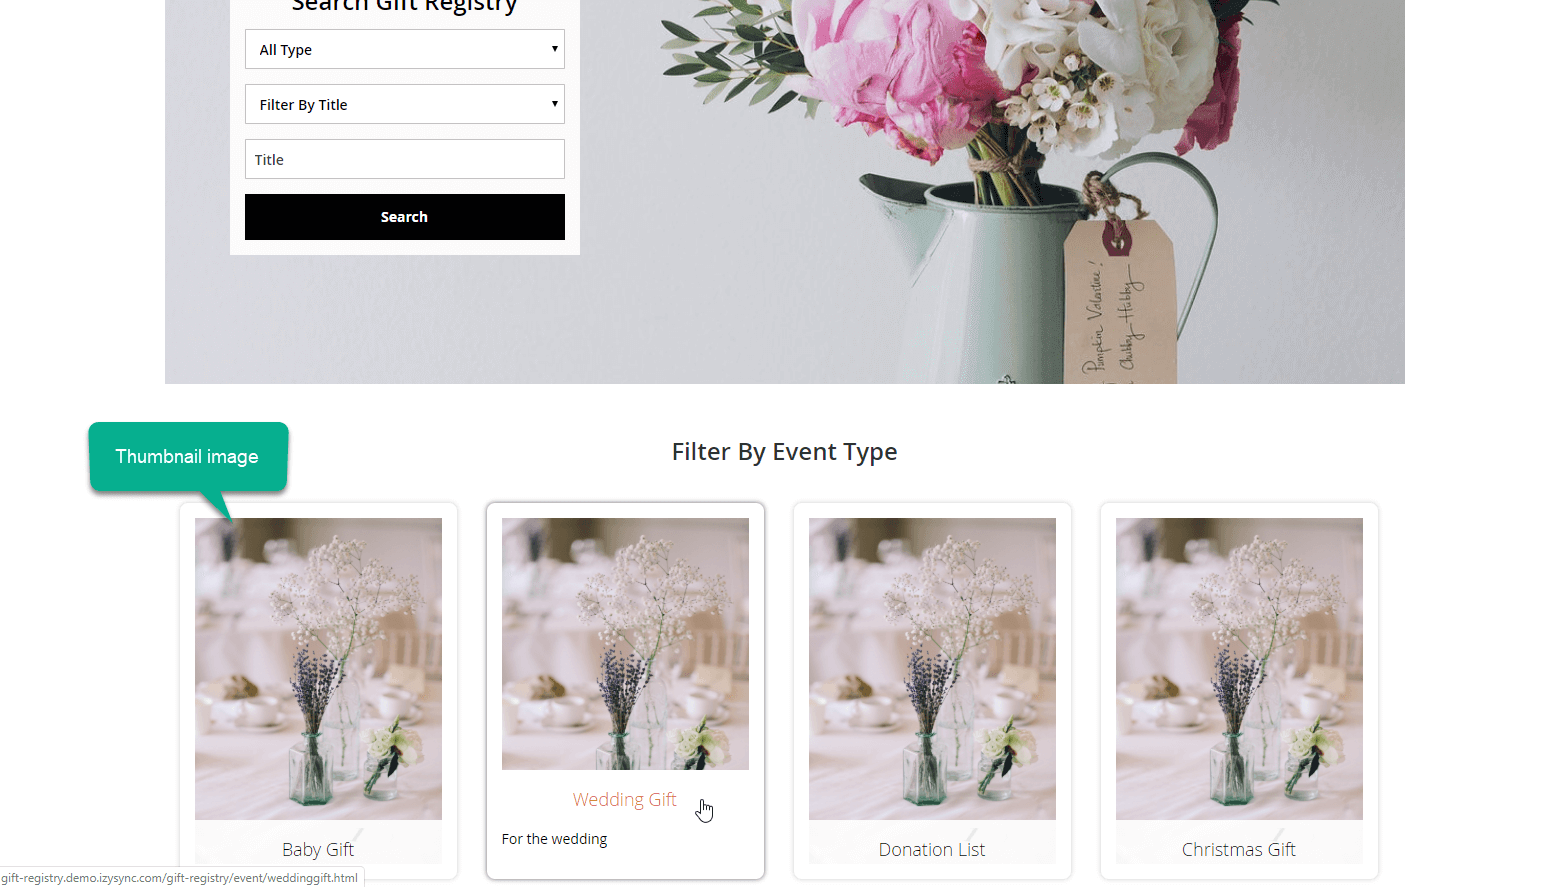
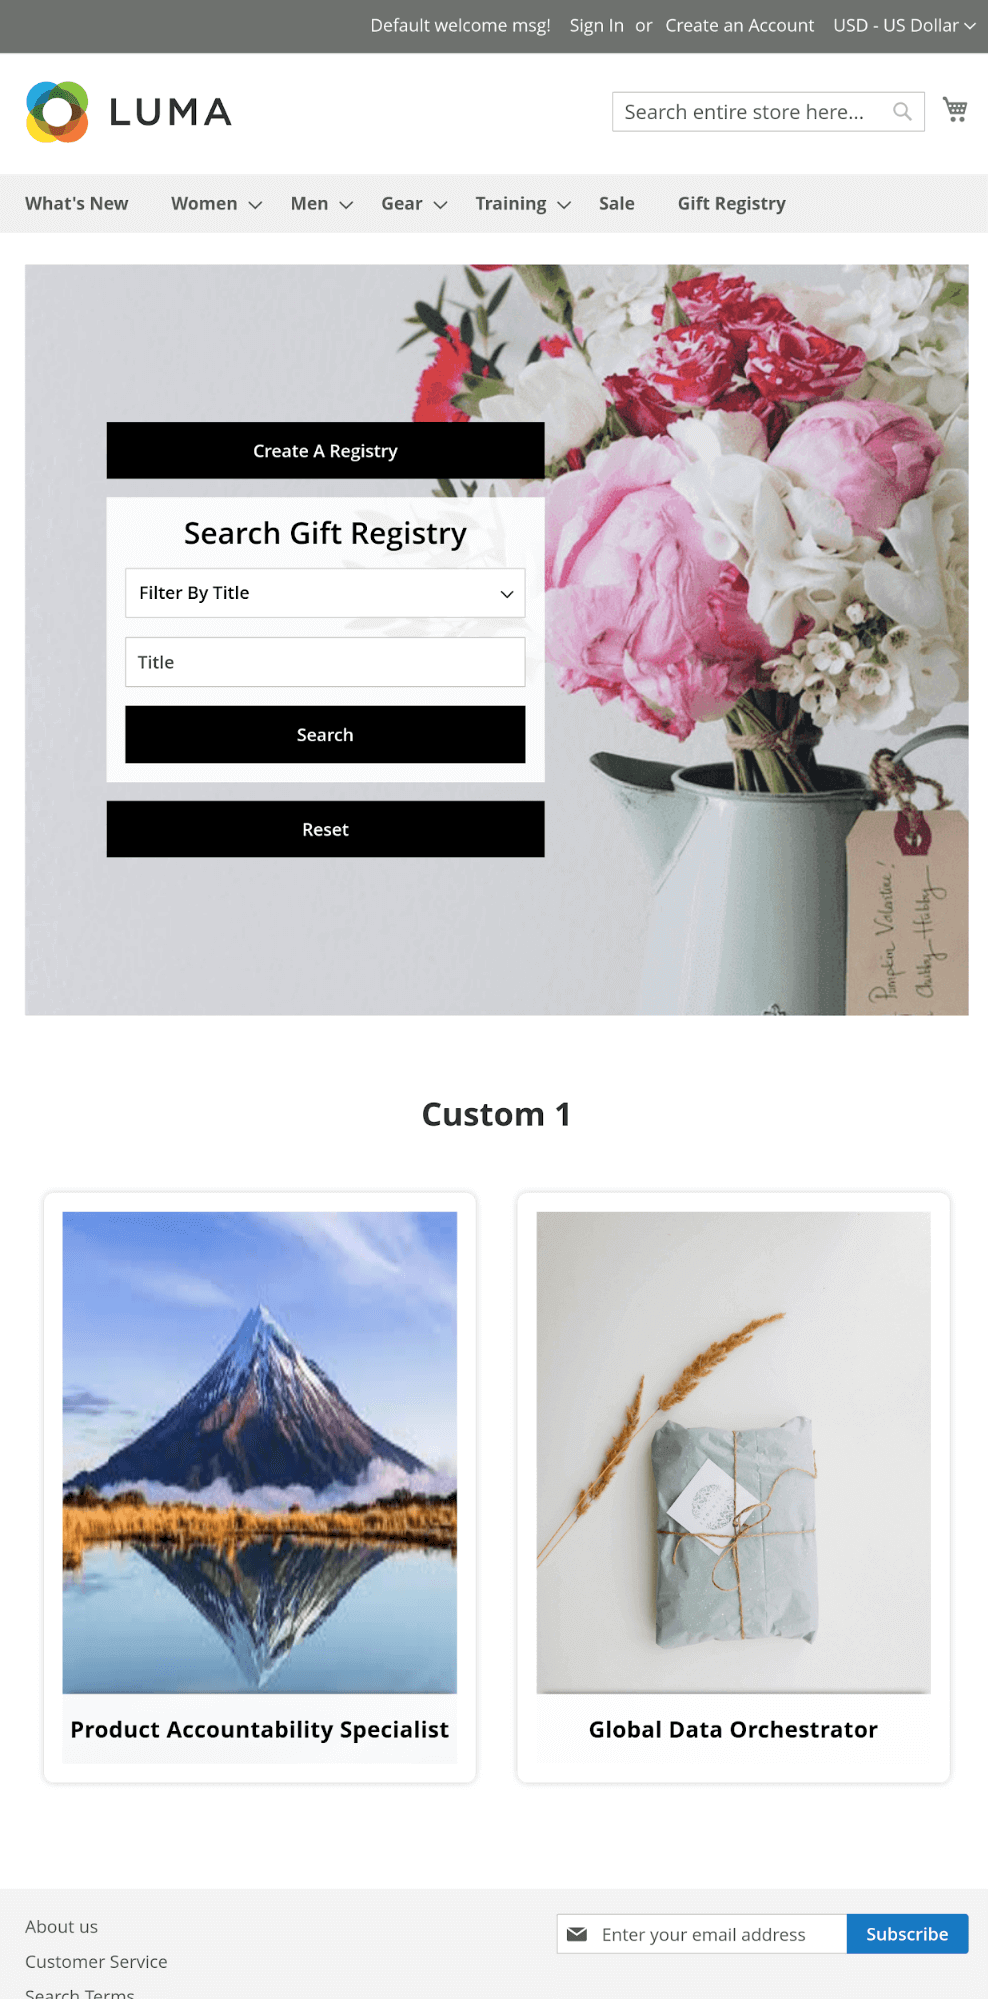
Searching for a registry
- Non logged-in customers (Guests) can access a registry directly by the shared link from the registry owner.
- Guests can search for a registry list using filters by event, registry title or
- registry owner's name.
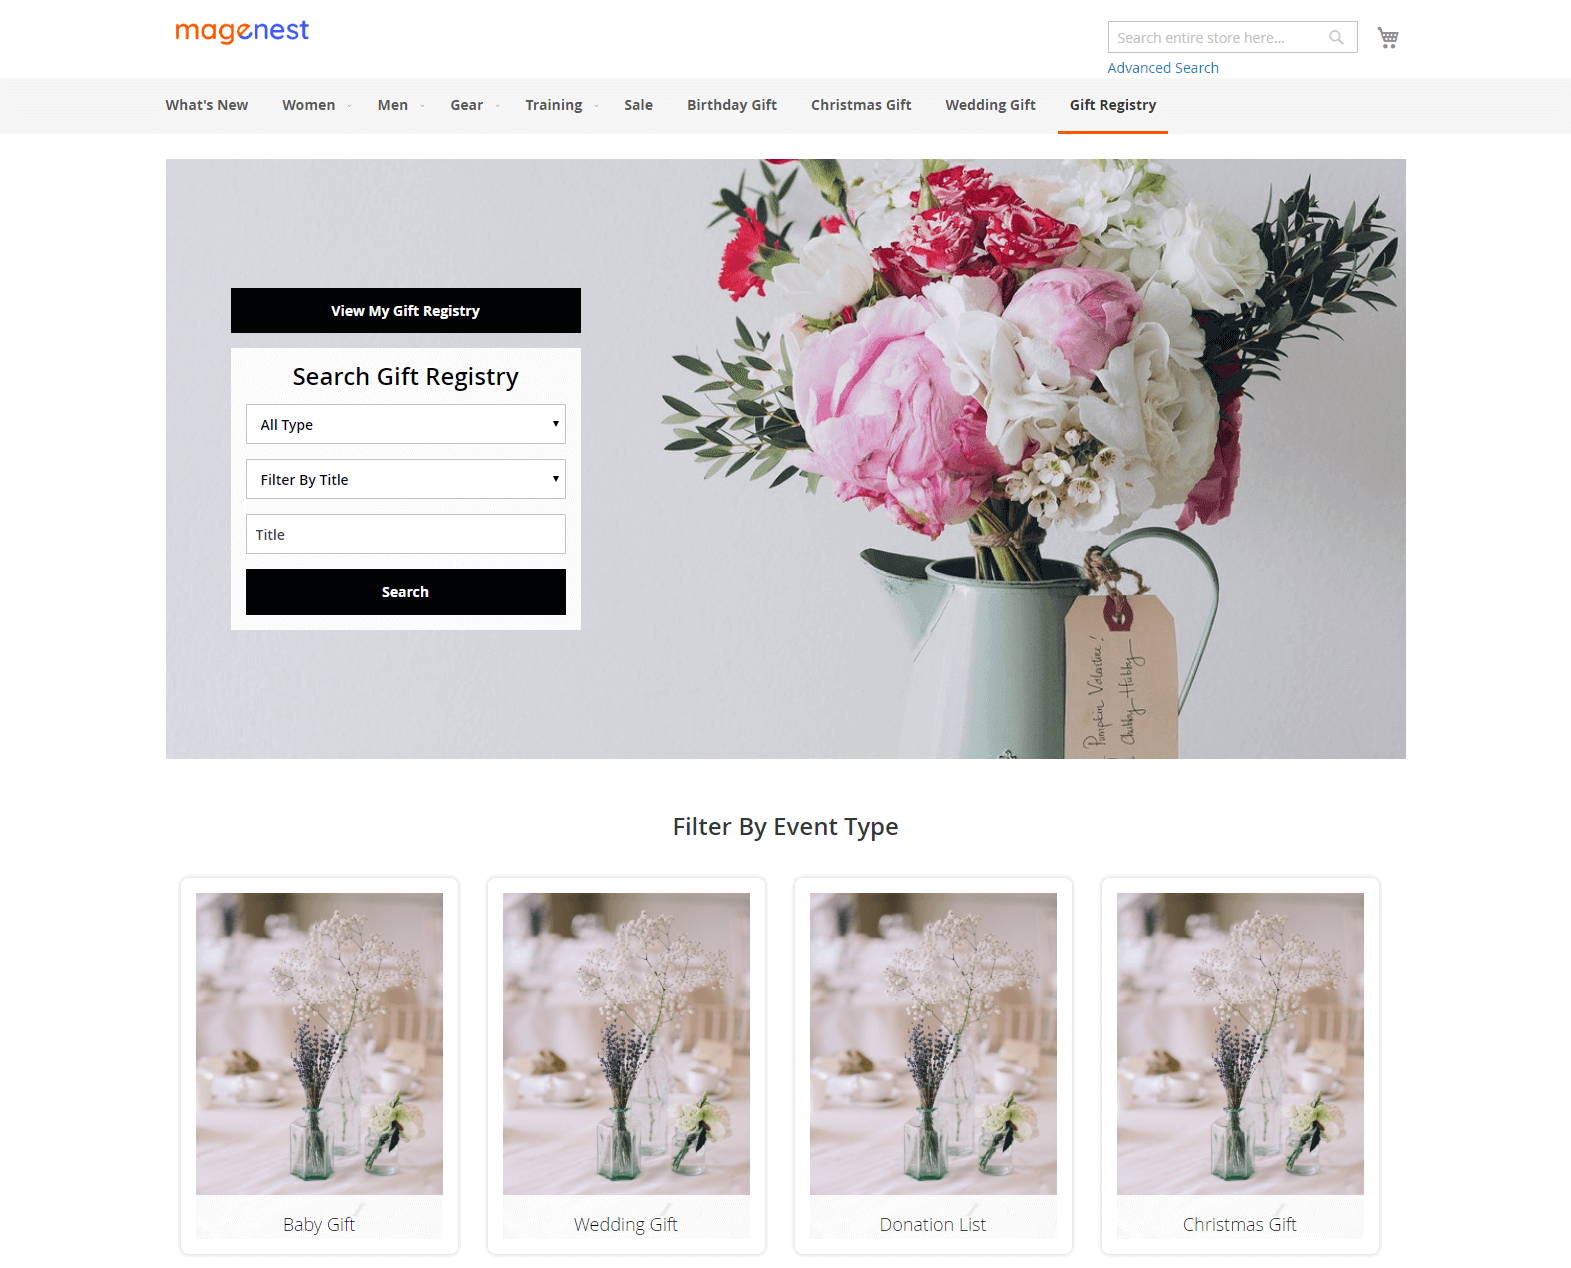
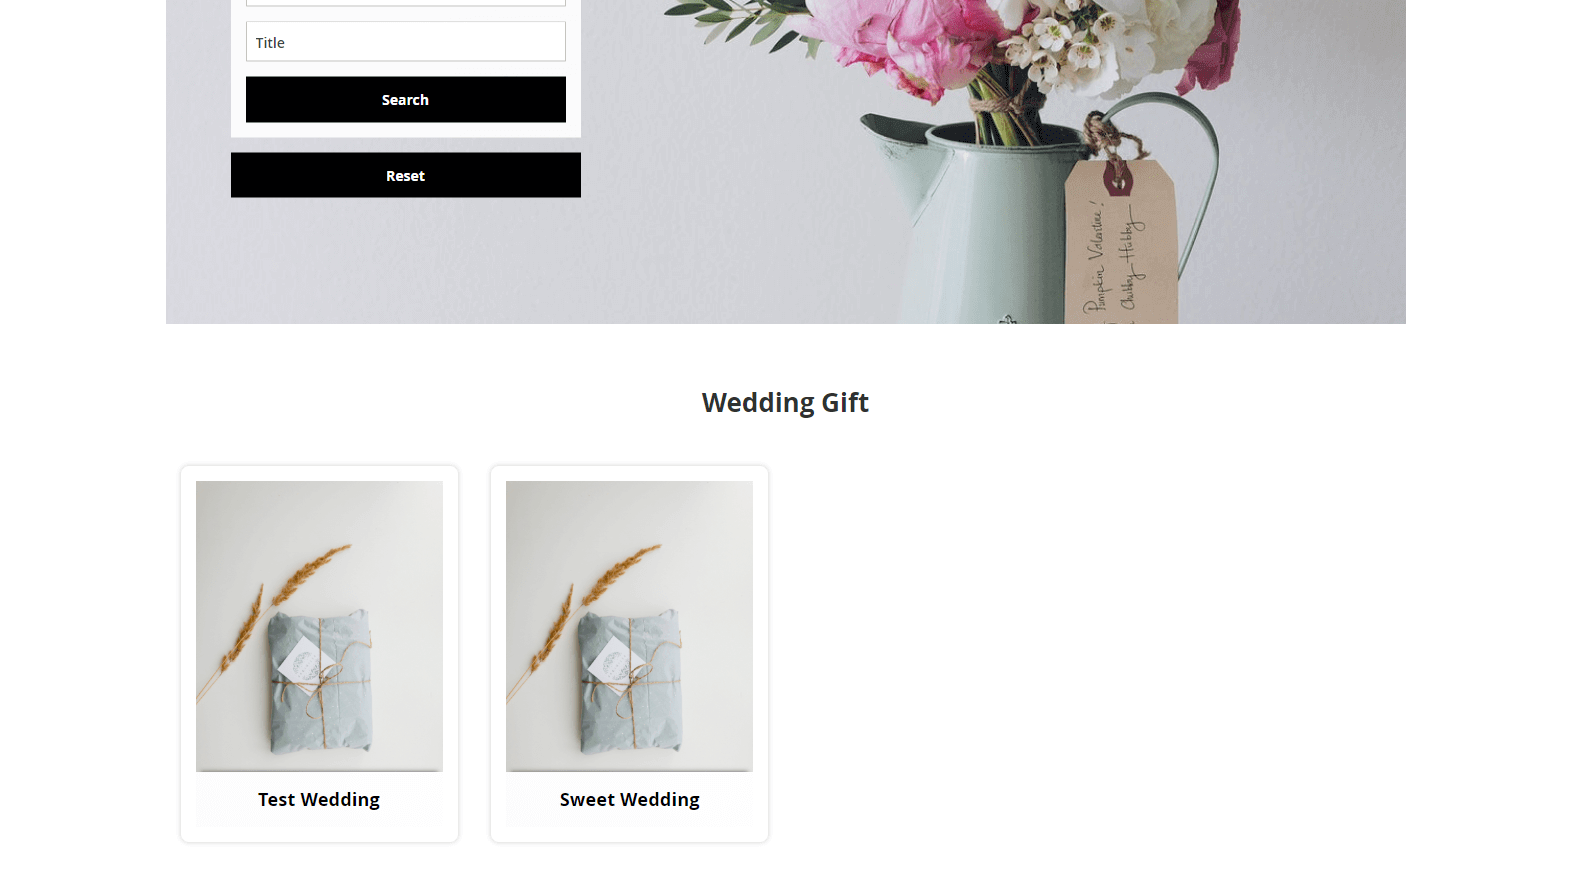
- Non logged-in customers can view the public registries of each event without searching.
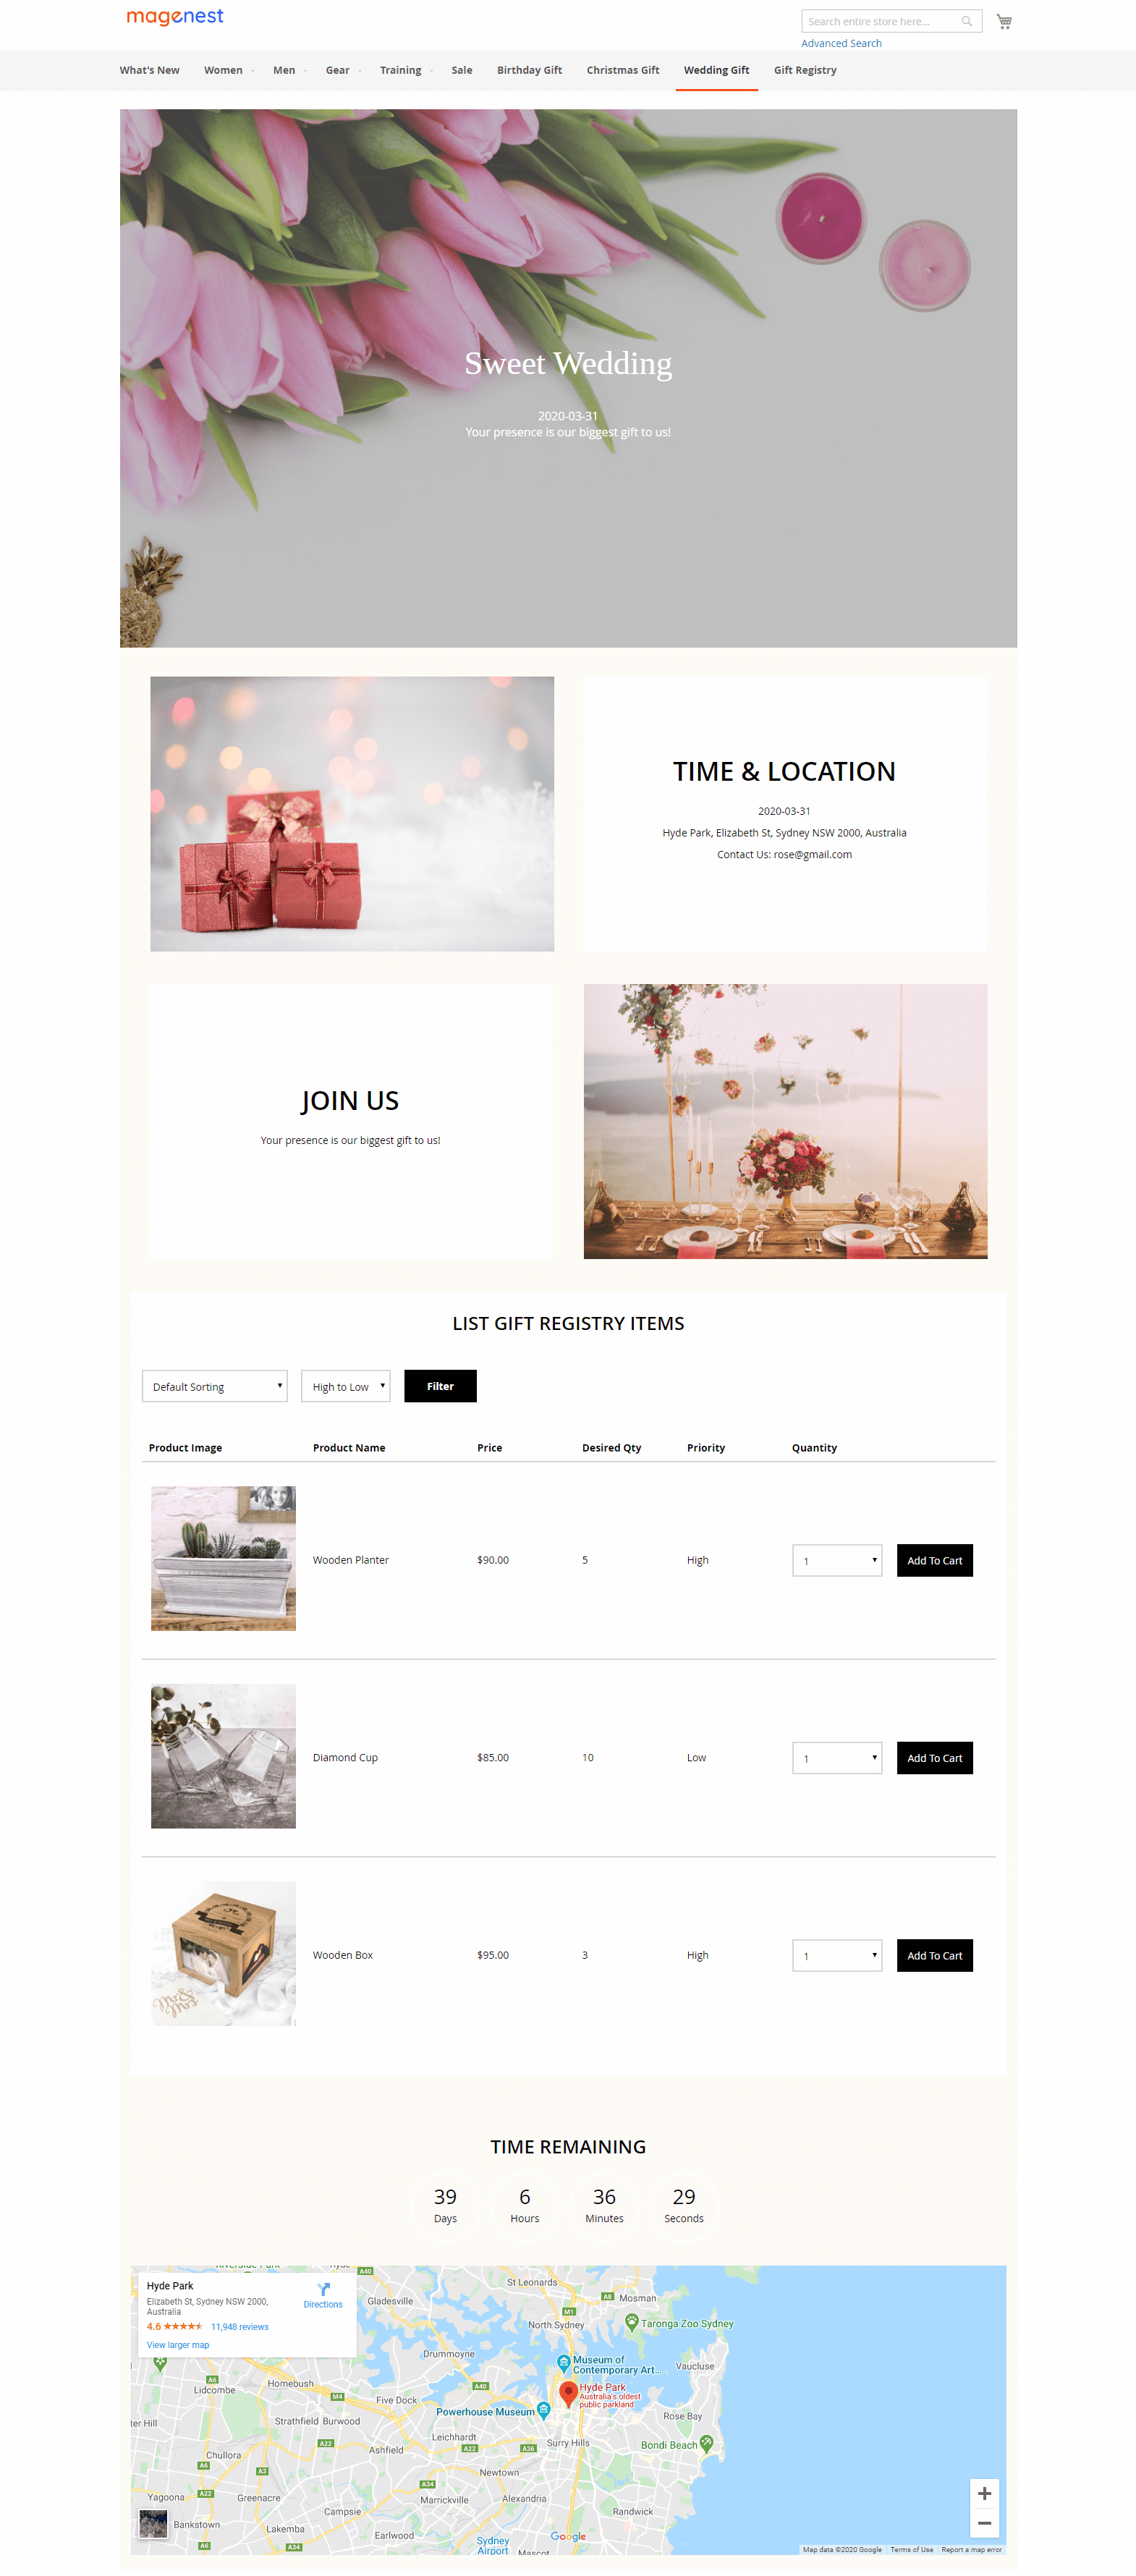
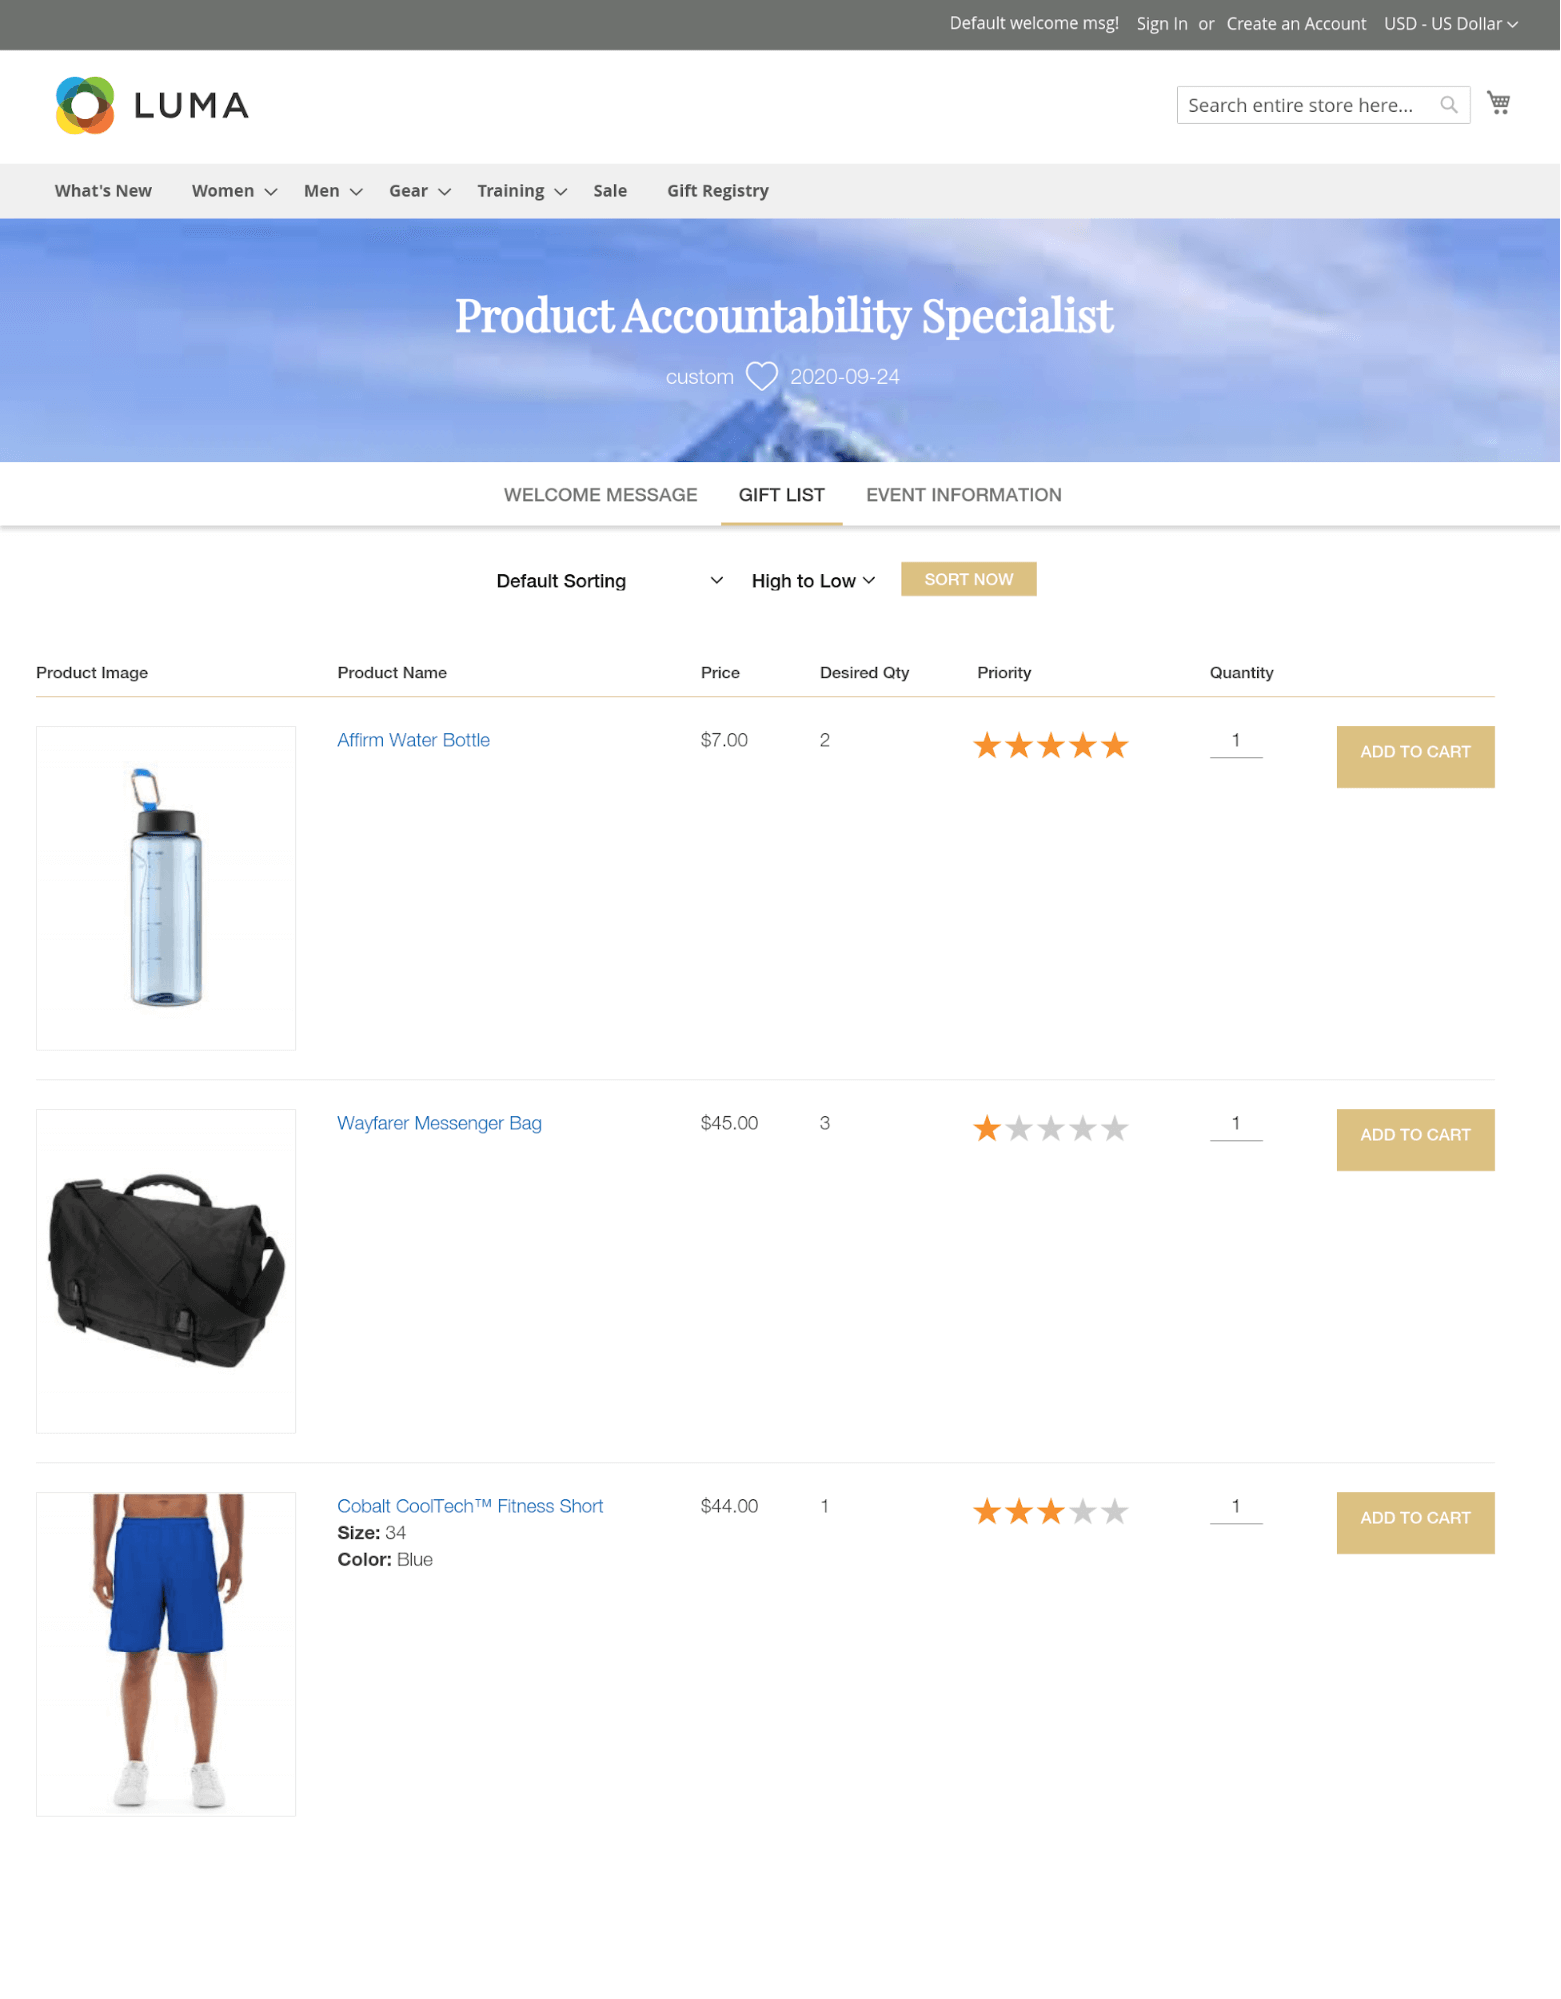
View registry information
- Guests can view the registry details including event date, location, gift items list.
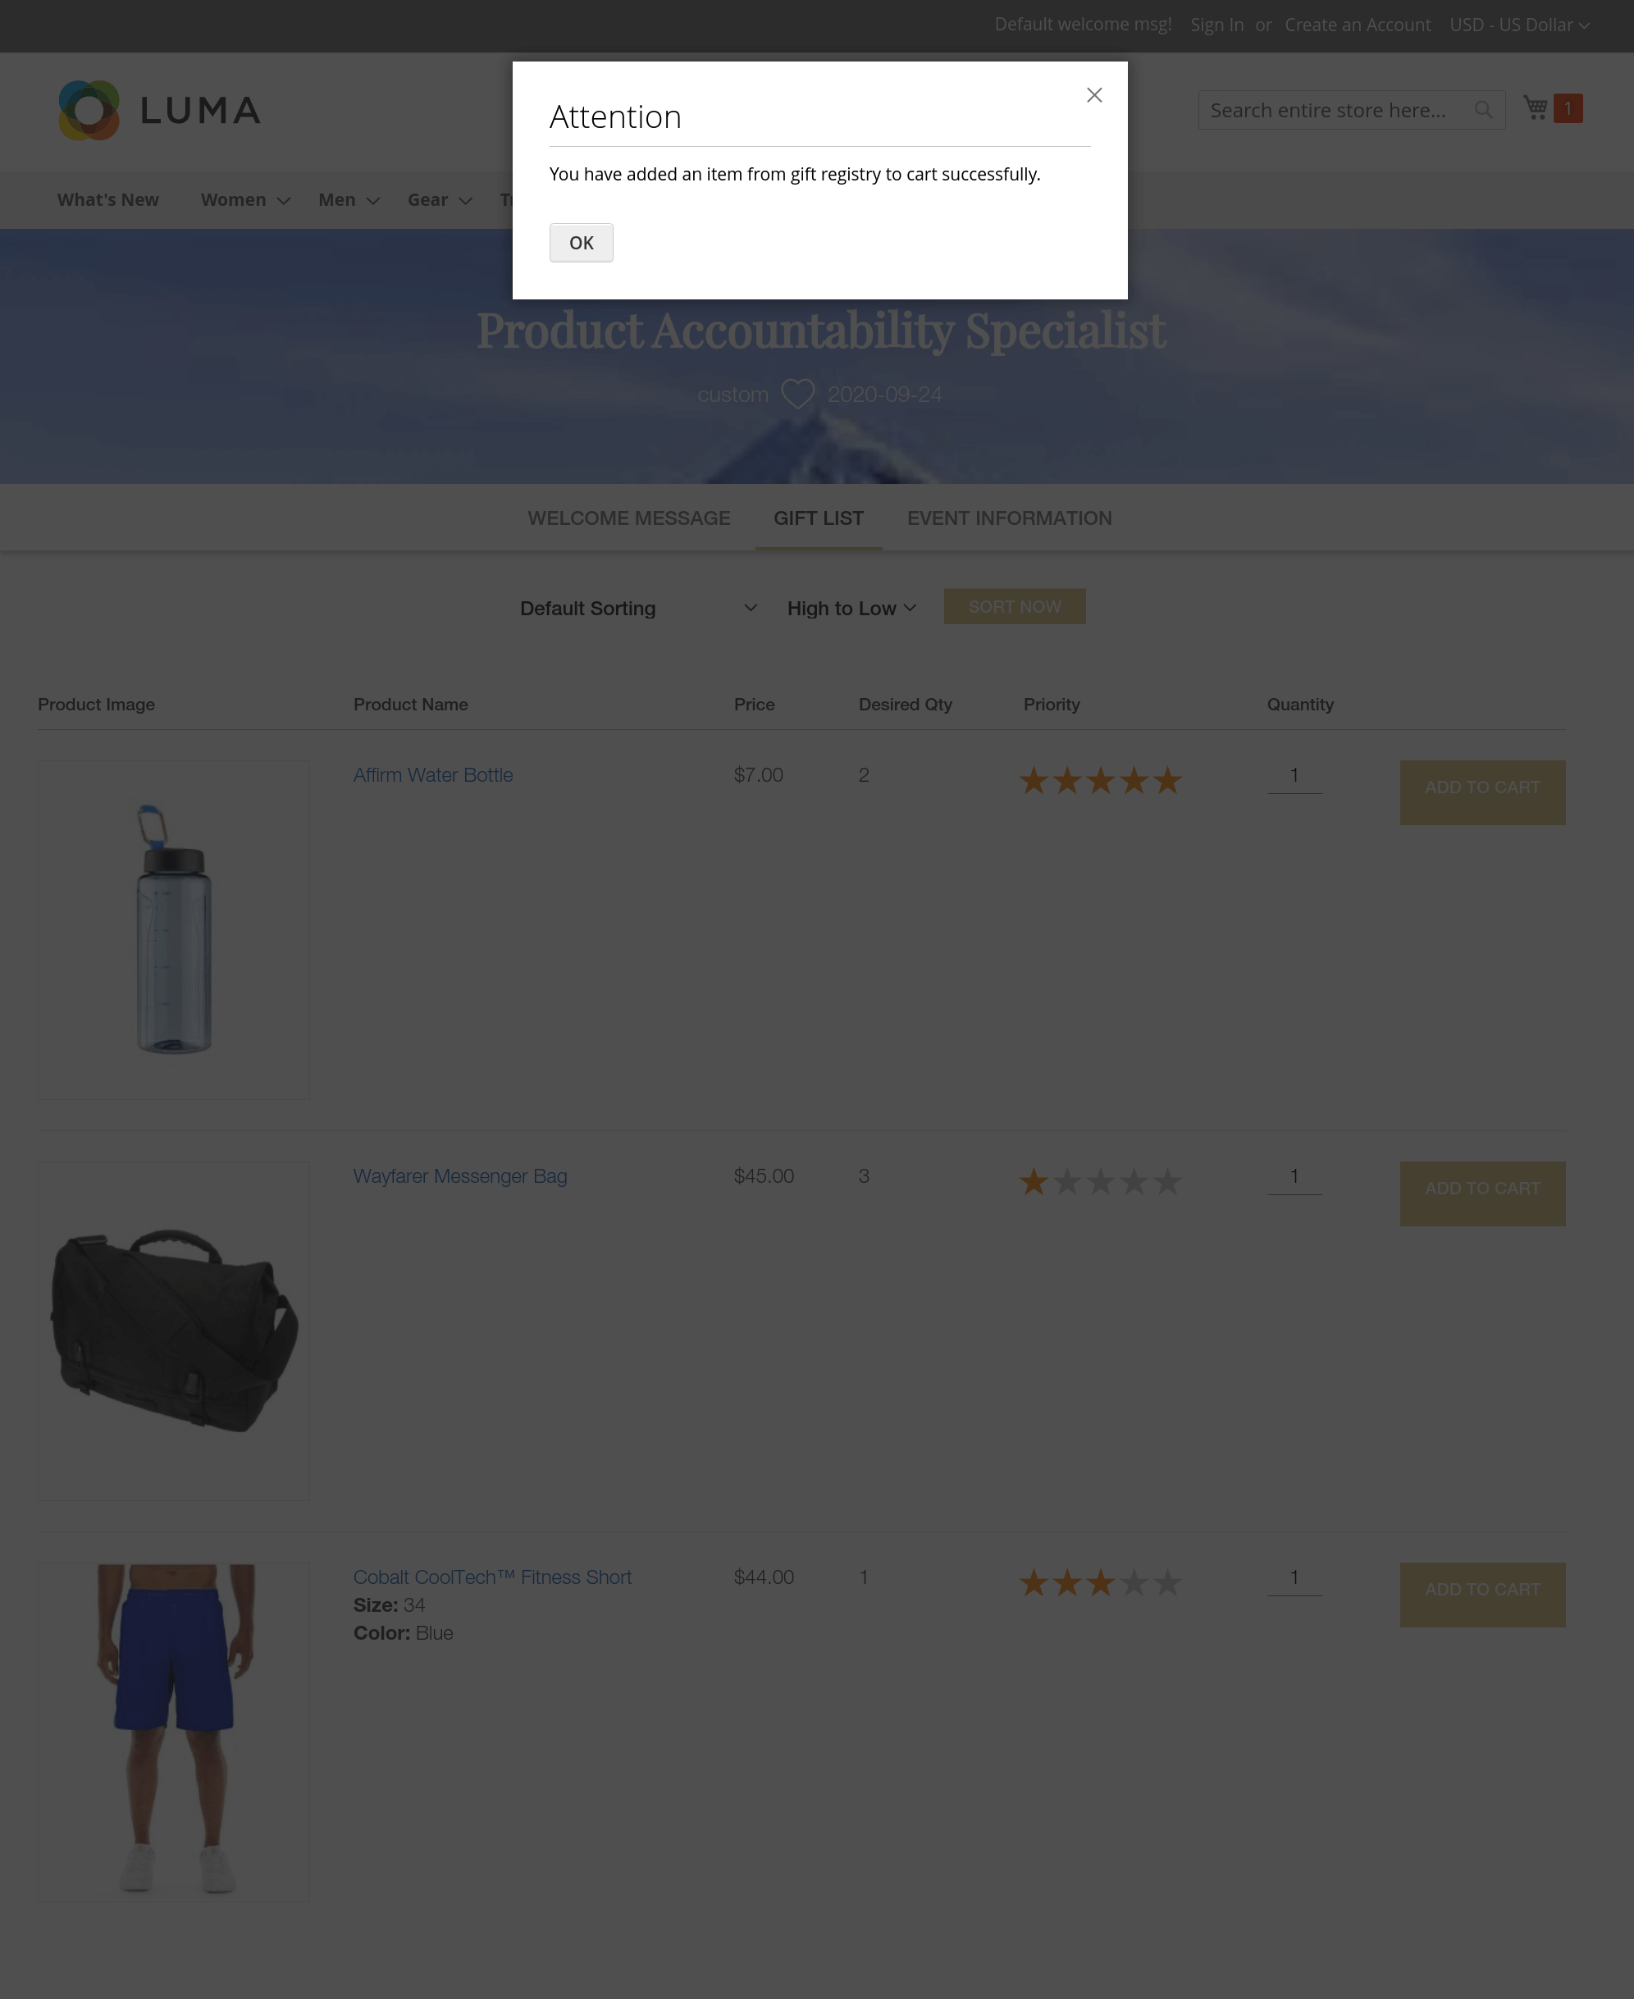
- Guests can add a gist item to cart directly from the gift list.
![]() Note: Buyers can add gift items of a registry list to cart only.
Note: Buyers can add gift items of a registry list to cart only.
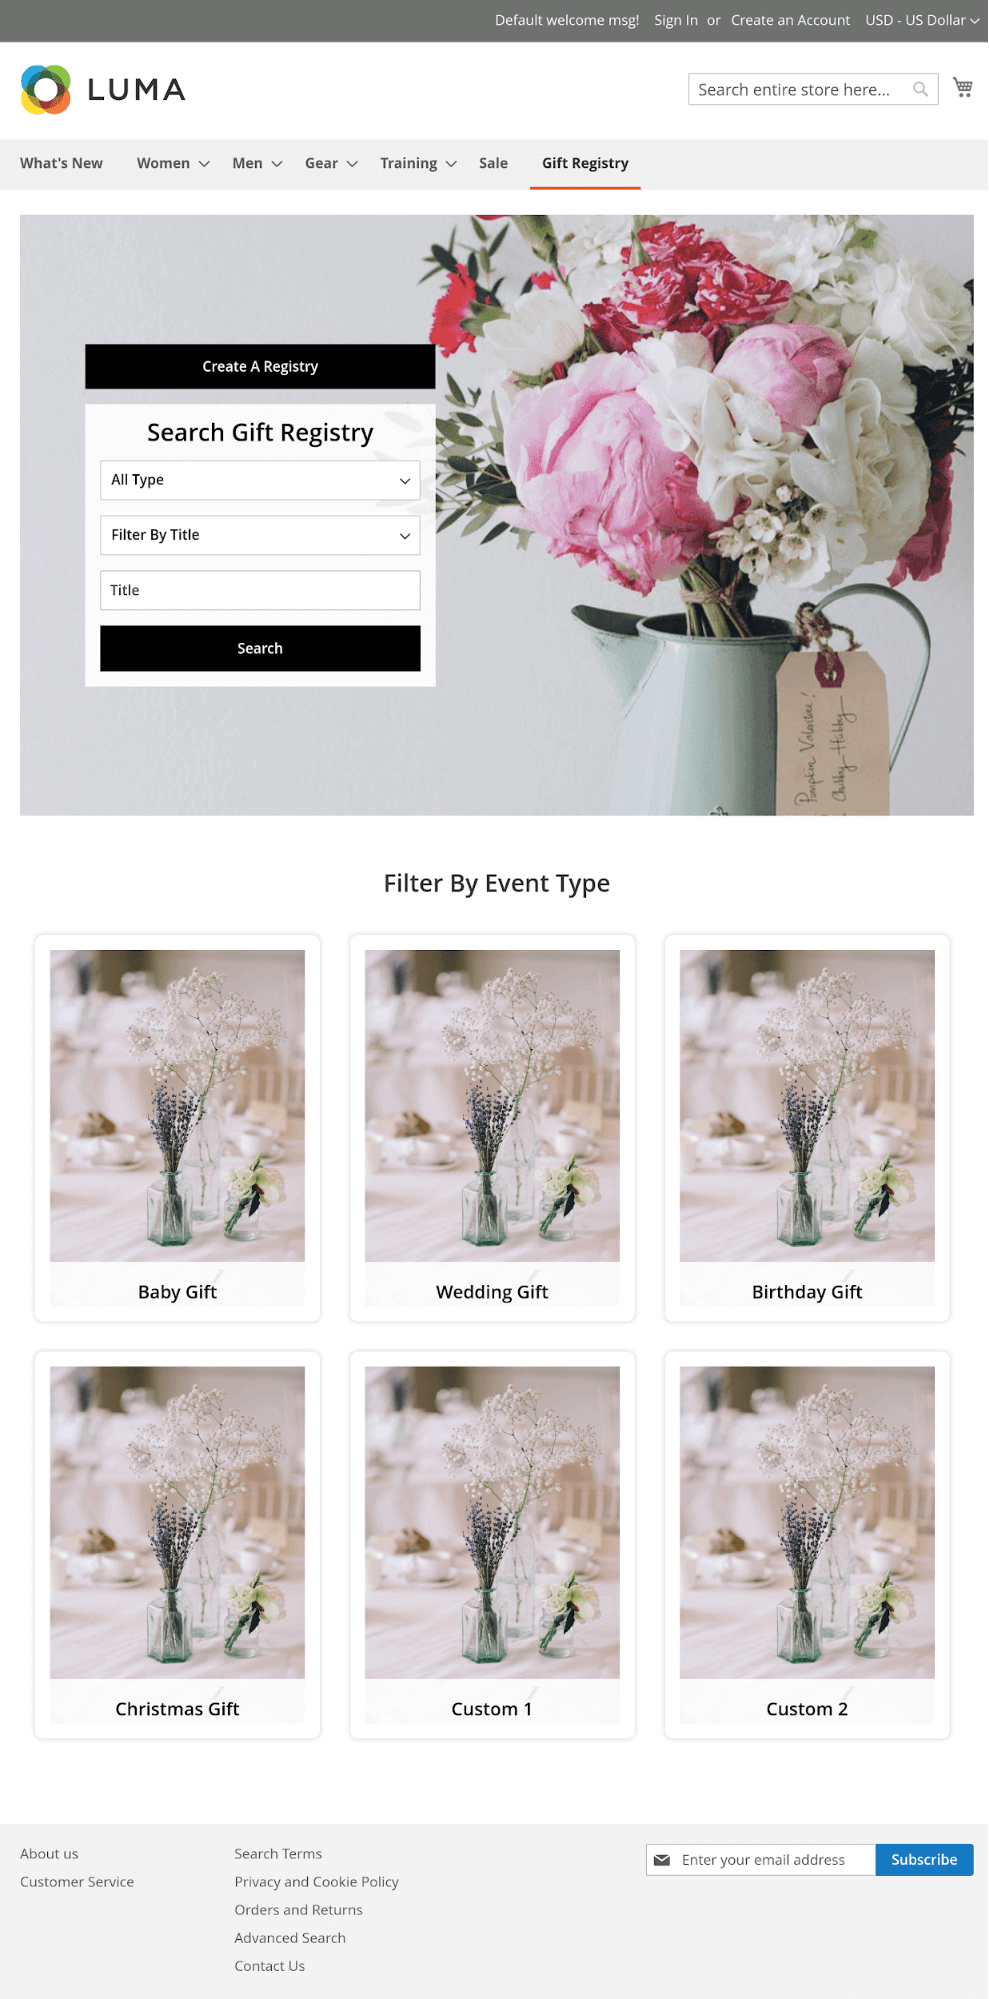
- Guests can view the public registries of each event without searching.
View registry information
- Guests can view the registry details including event date, location, gift items list.
- Guests can add a gift item to cart directly from the gift list.
 Note: Purchasers can add gift items of a registry list to cart only.
Update
- When a bug fix or new feature is released, we will provide you with the module's new package.
- All you need to do is repeating the above installing steps and uploading the package onto your store. The code will automatically override.
- Flush the configure cache. Your store and newly installed module should be working as expected.
Support
- We will reply to support requests within 2 business days.
- We will offer lifetime free update and 6 months free support for all of our paid products. Support includes answering questions related to our products, bug/error fixing to make sure our products fit well in your site exactly like our demo.
- Support DOES NOT include other services such as customizing our products, installation and uninstallation service.