...
After completing a new user, admins need to set configuration to integrate with Quickbooks.
In the first use, if admin want to sync all data existing from Magento 2 to QuickBooks Desktop, admins must do the following steps:
Step 1: Do this step when admins use this extension for the first time or when admins want to change the company in the Quickbooks Desktop application
At Set QWC file, admin choose Query Company.
Then, at Manage Configuration, admin will be fill the fields, including: Base URL, User name and Scheduler.
Finally, admin click on Export QWC Config button and save the company file created.
Step 2:
At Set QWC file, admin choose Sync Customer.
Then, at Manage Configuration, admin will be fill the fields, including: Base URL, User name and Scheduler.
Finally, admin click on Export QWC Config button and save the customer file created.
Step 3:
At Set QWC file, admin choose Sync Product.
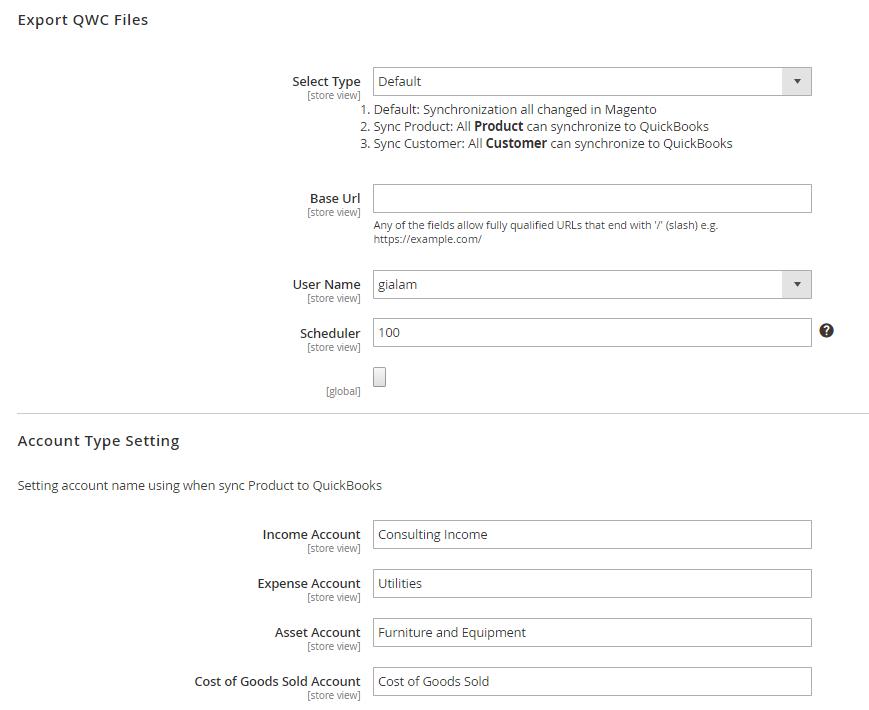
Go to Stores > Configuration, there are two sections which are needed to set before using the extension.
![]() Export QWC Files:
Export QWC Files:
In Mode section:
- Default: sync orders to real customers.
- Customize: enable sync all orders to only one customer (except for the orders of wholesale customer).
In Customer Receive, type the CUSTOMER NAME of the customer above as in QuickBooks Desktop
Note: You have to create this customer in QuickBooks Desktop first.
In Vendor Tax Agency Name, name of the vendor you want to create, this field is required in order to sync Tax.
Fill all the other Then, at Manage Configuration, admin will be fill the fields, including: Base URL, User name and Scheduler.
Finally, admin click on Export QWC Config button and save the product file created.
Step 4:
At Set QWC file, admin choose Sync Default.
Then, at Manage Configuration, admin will be fill the fields, including: Base URL, User name and Scheduler.
Finally, admin click on Export QWC Config button and save the default file created.
, Scheduler and the 4 Account fields.
Then click Save Config to store all information.
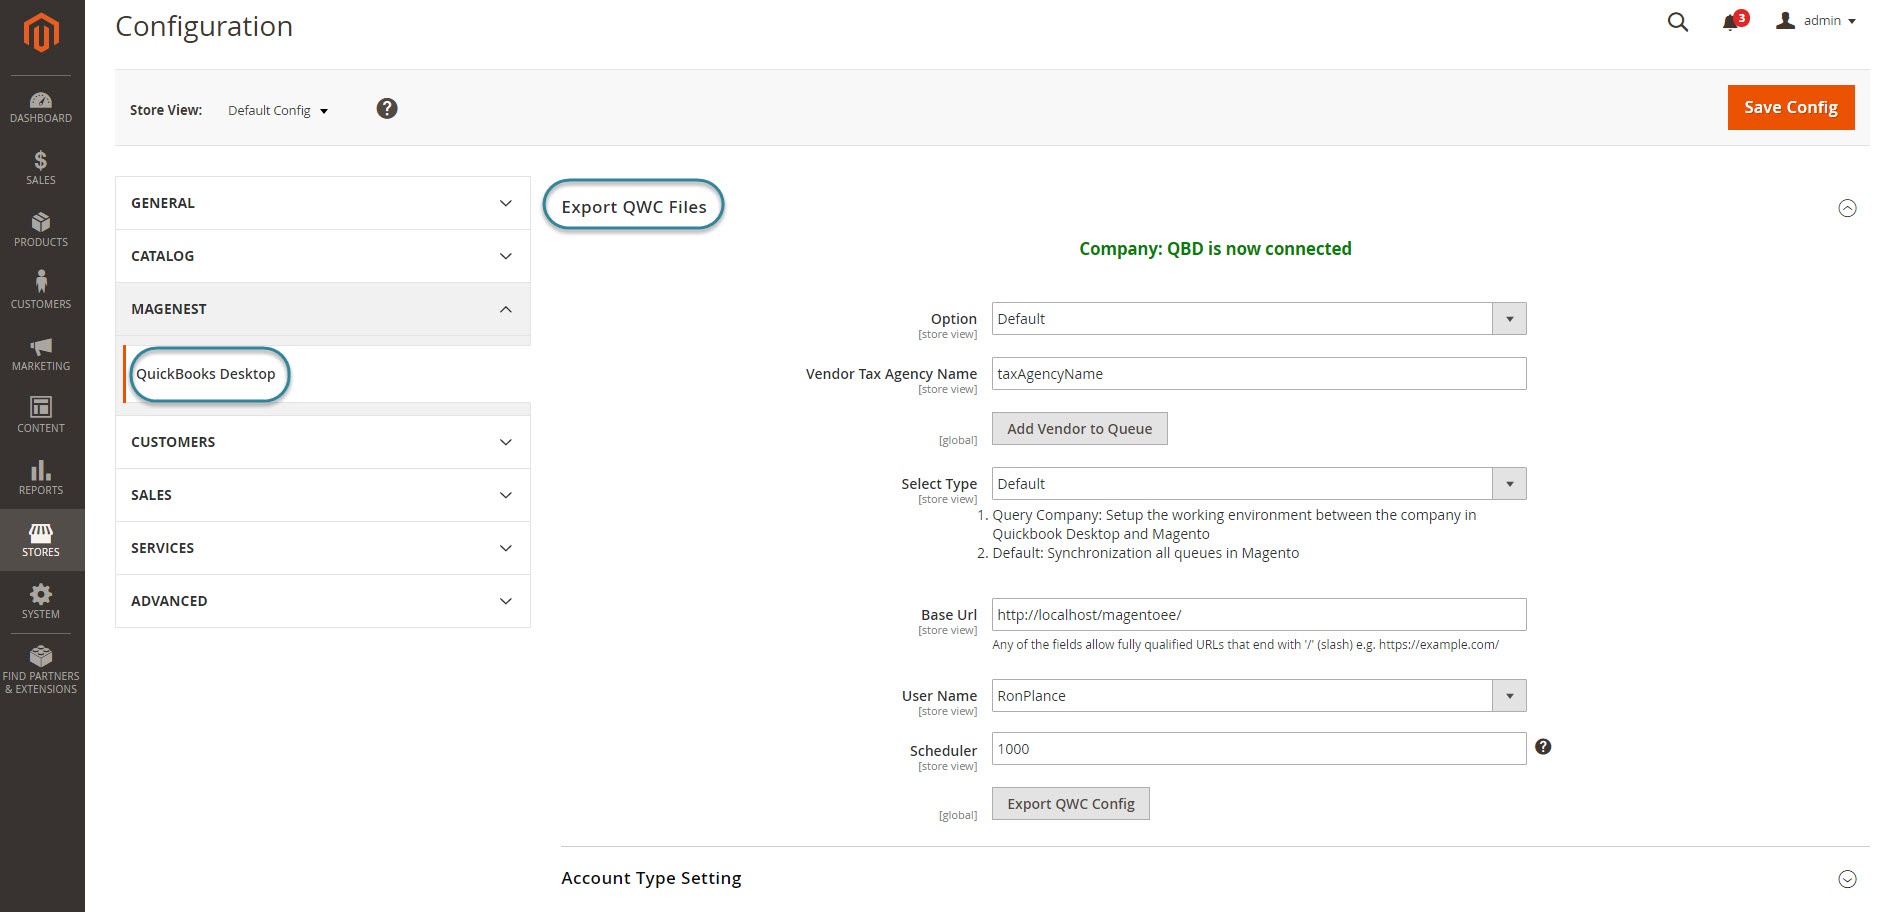
Query the Company admin are using in Quickbooks to Magento 2
...