...
At backend of Magento 2, go to Store menu > Magenest > Event Ticket backend page to set up for Event Ticket extension.
...
- Pattern to generate code: Fill the code format.
- Google API Keys: Fill your Google API key to show map of event in frontend.
Creating an event
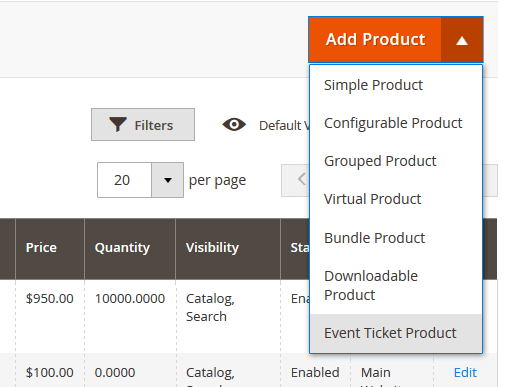
The extension added a new product type called Event Ticket Product into the system, so you need to add a new product of type Event Ticket Product to get started.
Enter information into each of the form's fields:
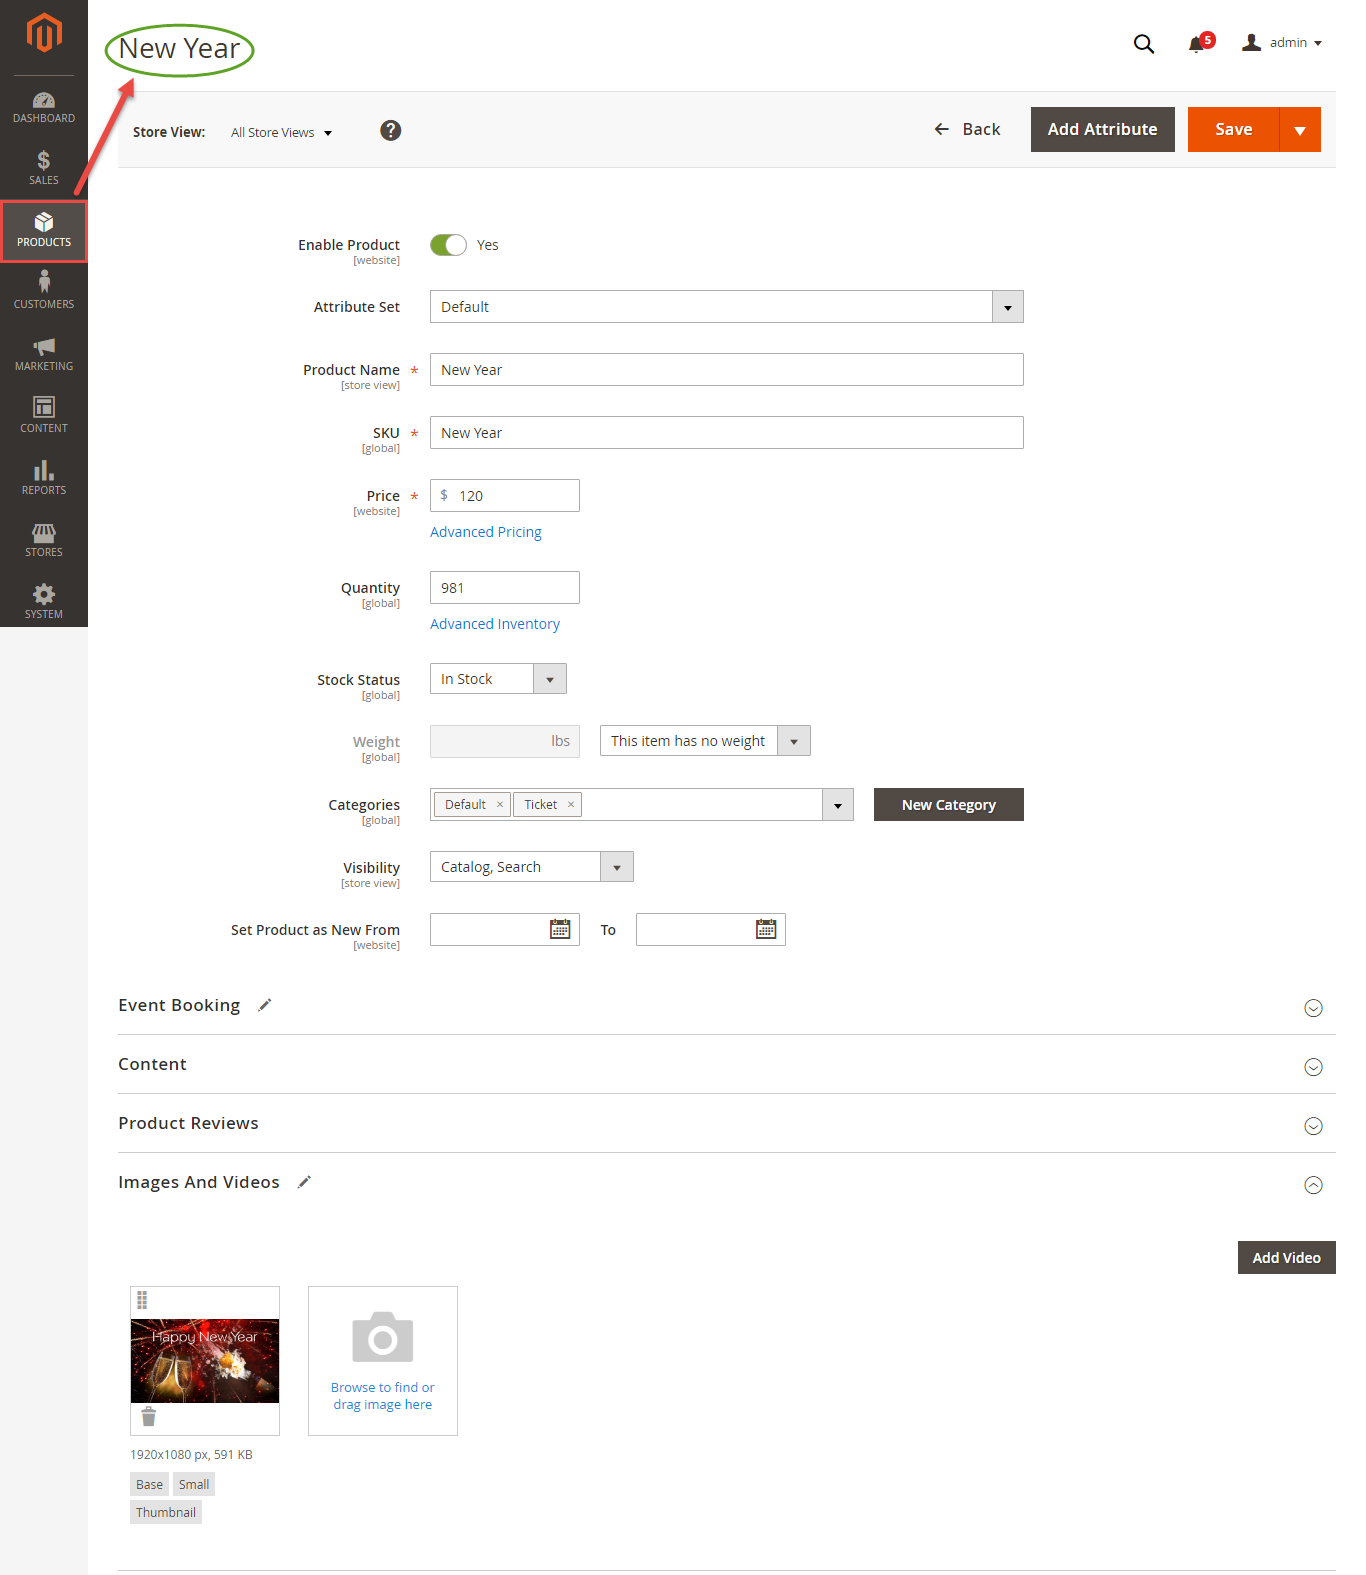
Information
At Event Booking Tab > Click on Schedule to set schedule for the event. Admins can set up multiple locations, multiple days, and multiple sections for each event. Especially, you can set up the event enable or disable for each location.
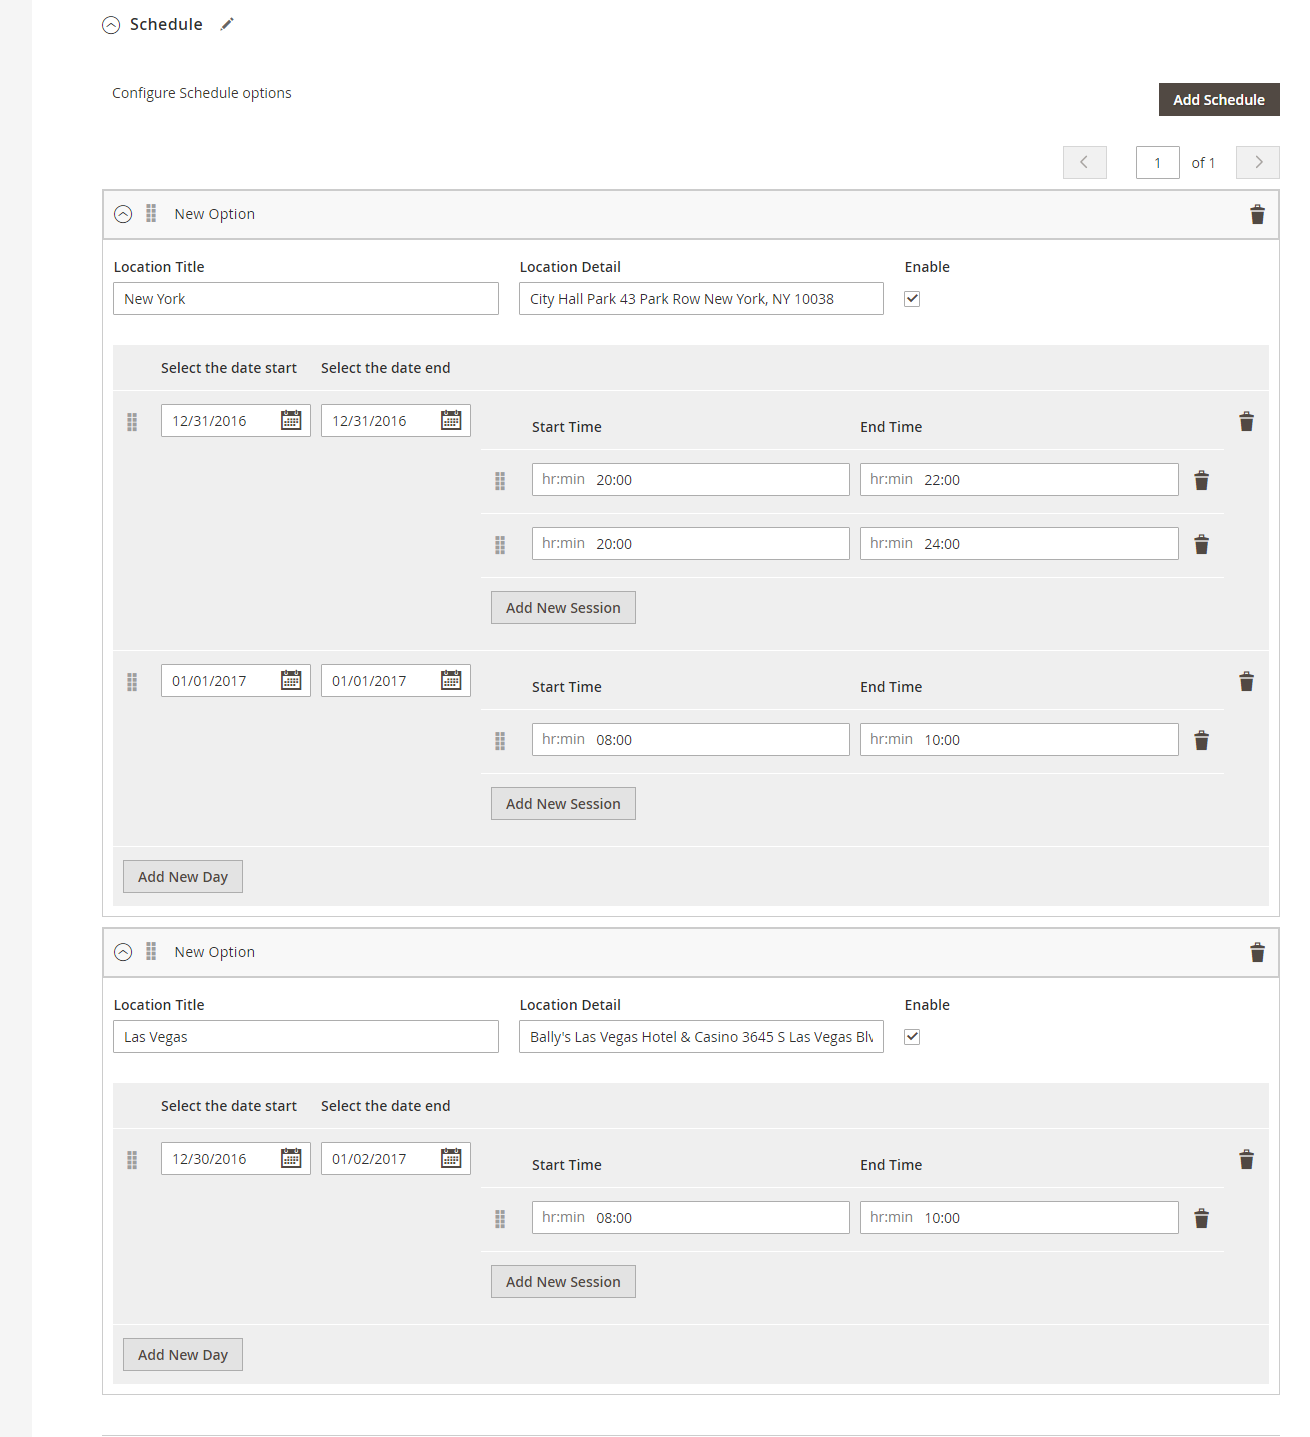
- Location: Specify the location details
- Date & Time of Event: specify the event date.
...
- Background PDF: Upload your image background
- Page width: width of PDF template
- Page height: height of PDF template
After that you can click on Preview: click the Preview button to preview your ticket.
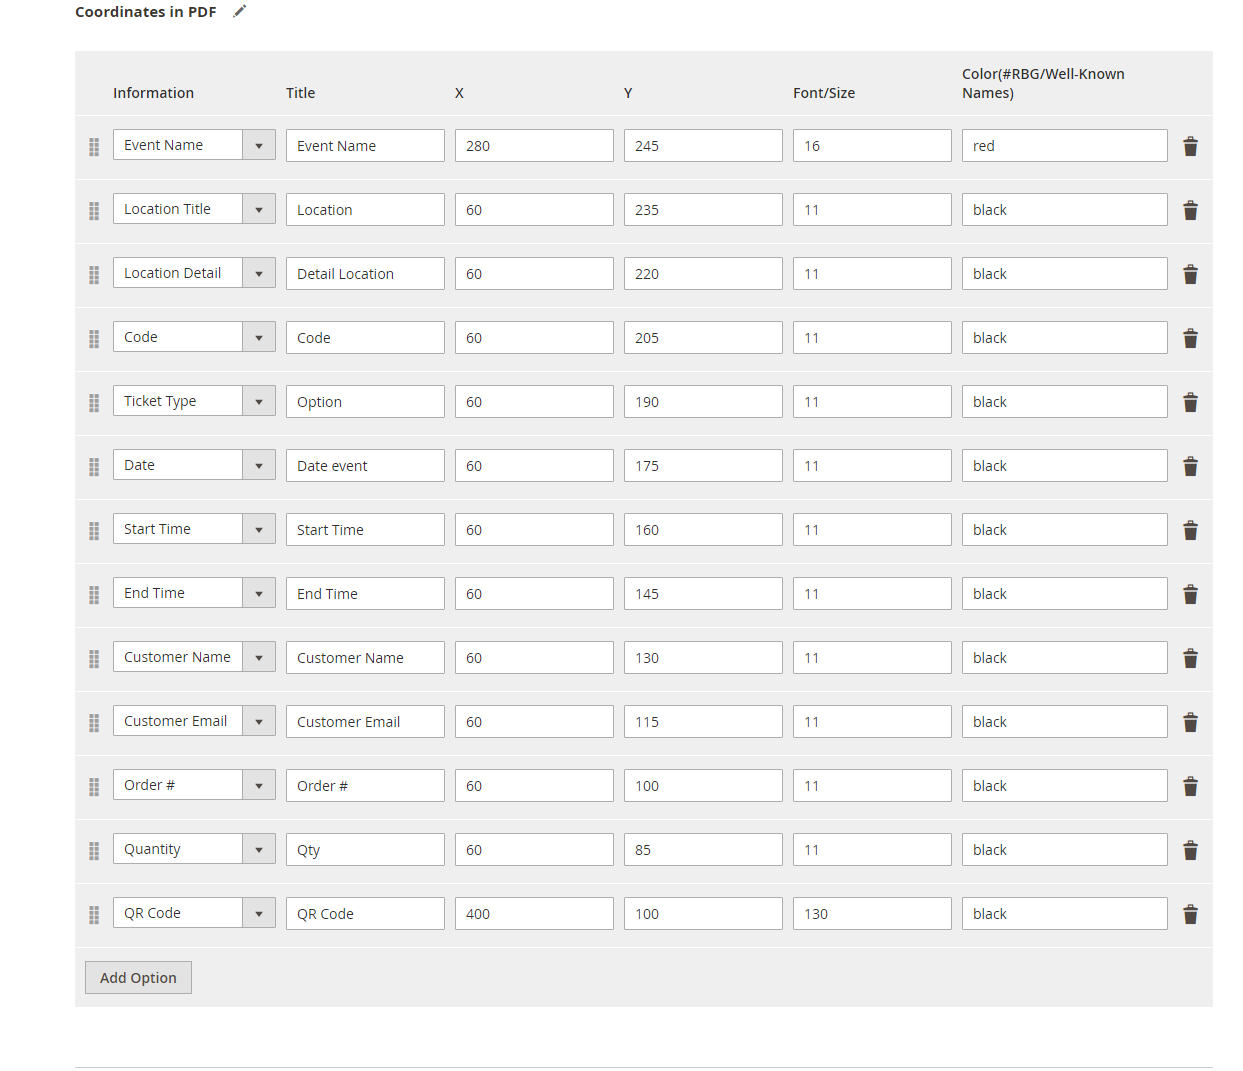
- Coordinates allow you to set information to display on the PDF Ticket. You can name title for each information that appears on the ticket.
3. Email Template:
Admin can choose Default Email Template or you can customize the email that is sent to their customers.

Below is the email template:
| Code Block | ||||||||
|---|---|---|---|---|---|---|---|---|
| ||||||||
{{template config_path="design/email/header_template"}}
<p>{{trans "Welcome to %store_name." store_name=$store.getFrontendName()}}</p>
<ul>
 <li><strong>{{trans "Event Name: "}}</strong> <em> {{var title}}</em></li>
 <li><strong>{{trans "Customer Name: "}}</strong> {{var customer_name}}</li>
 <li><strong>{{trans "My Code: "}}</strong> {{var ticket_code}}</li>
 <li><strong>{{trans "Location Title: "}}</strong> {{var location_title}}</li>
 <li><strong>{{trans "Location Detail: "}}</strong> {{var location_detail}}</li>
 <li><strong>{{trans "Date: "}}</strong> {{var date}}</li>
 <li><strong>{{trans "Time: "}}</strong> {{var time}}</li>
 <li><strong>{{trans "Quantity: "}}</strong> {{var qty}}</li>
 <li><strong>{{trans "Option: "}}</strong> {{var option_type}}</li>
</ul>
{{template config_path="design/email/footer_template"}} |
...