...
Your store should be running on Magento Community Edition version 2.0.0 and more.
Video Tutorial Playlist
(Go to the playlist to view more: https://www.youtube.com/playlist?list=PLOgckfH7zlZvxHoQ13oN-Baqk_iXfa4wY )
| Widget Connector | ||||||
|---|---|---|---|---|---|---|
|
Installation
Here we will guide you through the installation process of our extension. First off, open FileZilla, log in to your host as follows:

In the above example we switched the local site to the extension directory, and the remote site to the code directory. Now on the remote site window, inside app/code directory, create a folder named Magenest and go inside it. Now on your local site window, right click on Wrapper extension and click Upload. The extension will be uploaded onto your host in a few minutes.
The second method will require you to compress the extension into .zip or .tar.gz format, then execute the following command in your Command Line/Terminal:
scp <path to your extension> <ssh server>:<path to Magenest directory>Then log into your ssh server, go to Magenest directory and execute the following command to decompress the module:
unzip <.zip compressed extension> Or
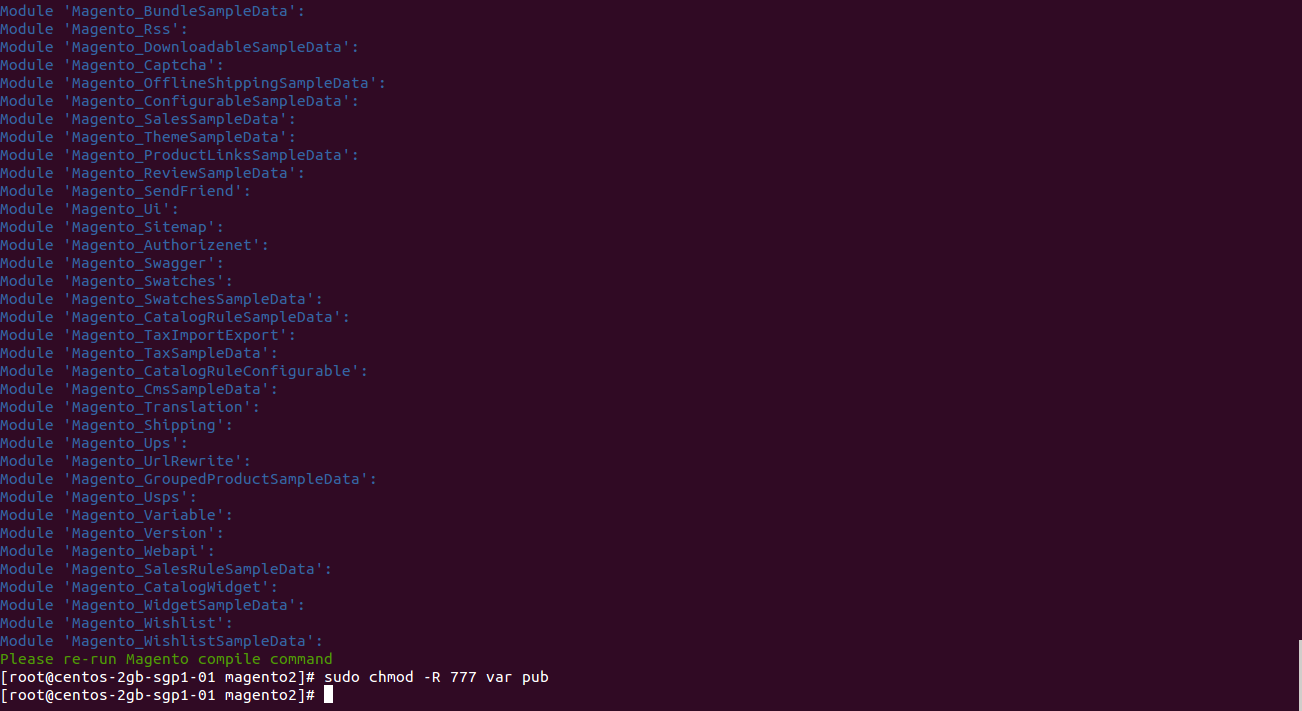
tar -xzvf <.tar.gz compressed extension> Now go to your Magento root directory, say it's named magento2, and execute the following commands:
sudo chmod -R 755 . php bin/magento setup:upgrade php bin/magento setup:static-content:deploy sudo chmod -R 777 var pub
After running all these, your Command line/Terminal window might look like this:
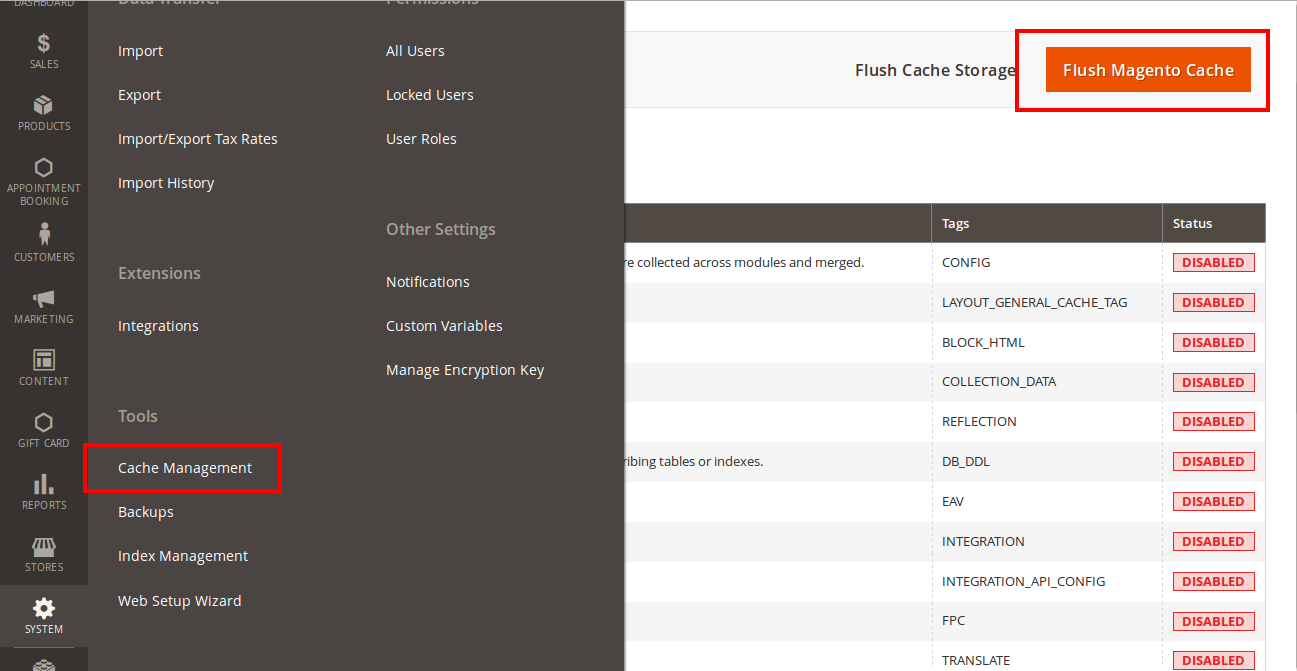
Finally, you need to flush the cache by either type this into the Command Line/Terminal:
php bin/magento cache:flushOr go to System > Cache Management and click Flush Magento Cache
Now you can go to your store and check if the extension is working as expected.
Configuration
Set up the Zoho account
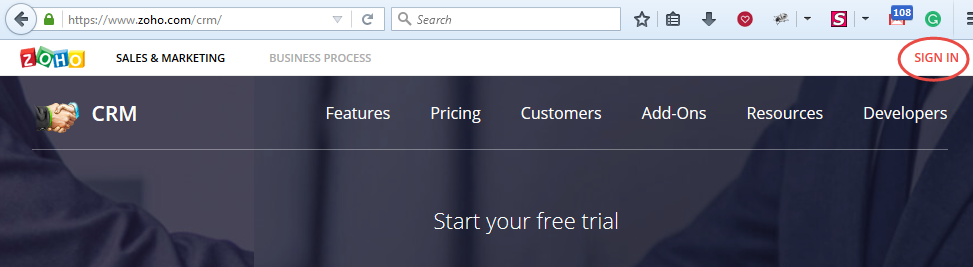
You must to have an existing Zoho account to use this extension. If you don't have a Zoho account, you can create one by go to: https://www.zoho.com/crm/ and click Sign in.
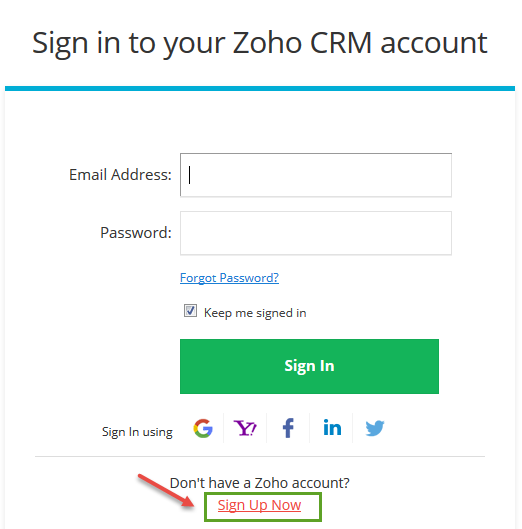
Click Sign Up Now button to register a new account.
Give your details and you will get the Zoho account
After verify your account via email, access your account in Zoho CRM to get the Auth token.
You need to log in backend Magento 2: Store/ Magenest / ZohoCRM Config/ Setup
2. Zoho CRM Integration User Guides | 2. Zoho CRM Integration User Guides
Generating Zoho Auth token
Method 1:
- Using the URL format: https://accounts.zoho.com/apiauthtoken/nb/create?SCOPE=ZohoCRM/crmapi&EMAIL_ID=Zoho CRM Username or Email ID&PASSWORD=Your Zoho CRM Password
The generated output looks like this:

Method 2:
- Just leave the Auth token field blank, it will be automatically generated after you hit Save Config
However, it is important for you to clear active auth token after a while. If the number of active auth token goes above 10, the extension cannot function properly.
Click on your Profile picture at the top right corner, click on My Account > Preferences > Sessions > Active Authtokens
Delete active authtokens

...