Thank you for purchasing our extension. If you have any questions that are beyond the scope of this help file, please feel free to email to [email protected], we will be happy to assist.
Support Portal: http://servicedesk.izysync.com/servicedesk/customer/portal/27
Introduction
Magento 2 Zoho CRM Integration synchronizes data automatically from your Magento 2 store to Zoho CRM.
Features
- Allows synchronizing and updating Customers from Magento store into Zoho CRM Leads, Contacts, Accounts both manually and automatically.
- Allows synchronizing and updating Products from Magento store into Zoho CRM Products both manually and automatically.
- Allows synchronizing Orders from Magento store into Zoho CRM Sales Orders both manually and automatically.
- Allows synchronizing Invoices from Magento store into Zoho CRM Invoices both manually and automatically.
- Admin can manage the field mappings in Magento 2 backend with ease
- It is very easy to use and set up
- Supports multiple languages
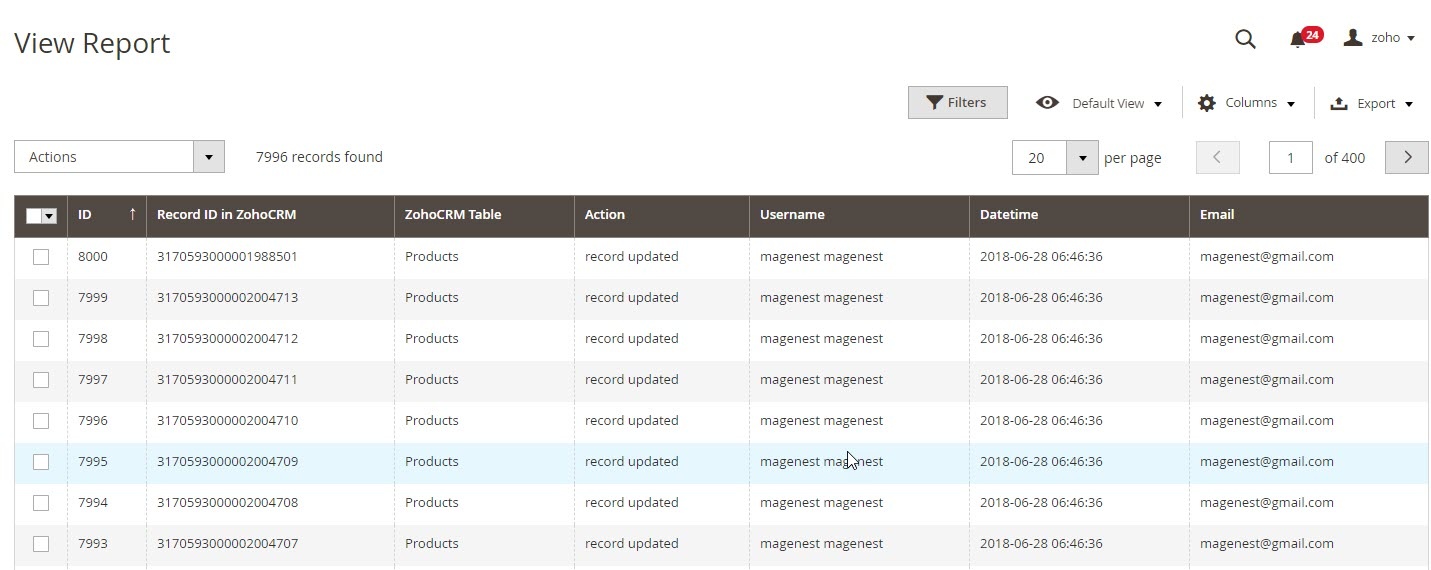
- View synchronization history from synchronization report
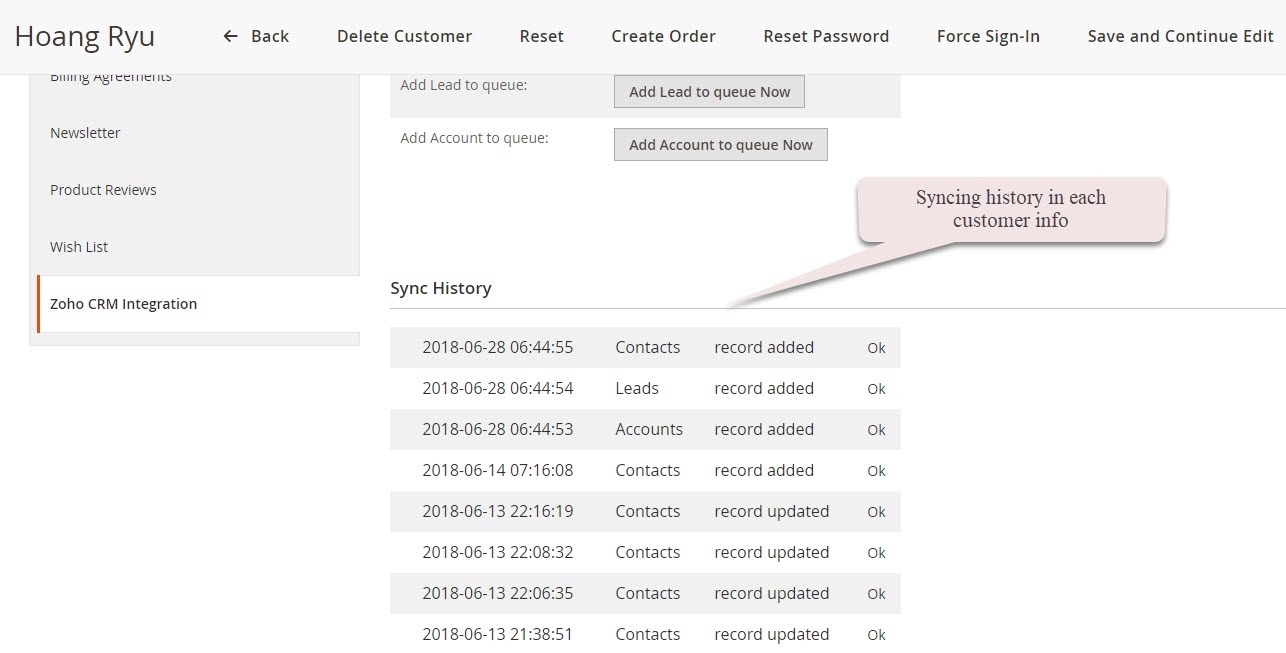
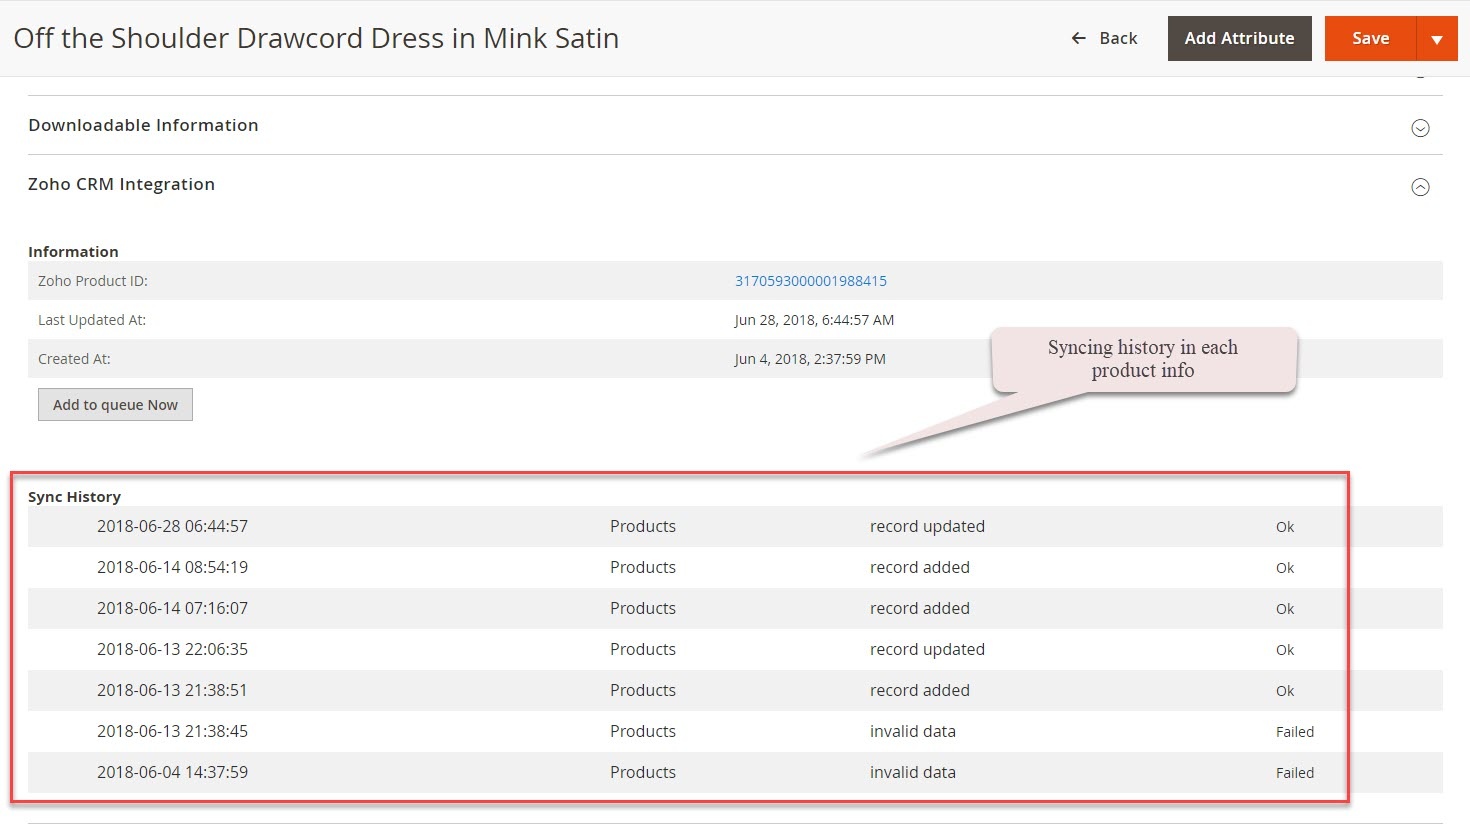
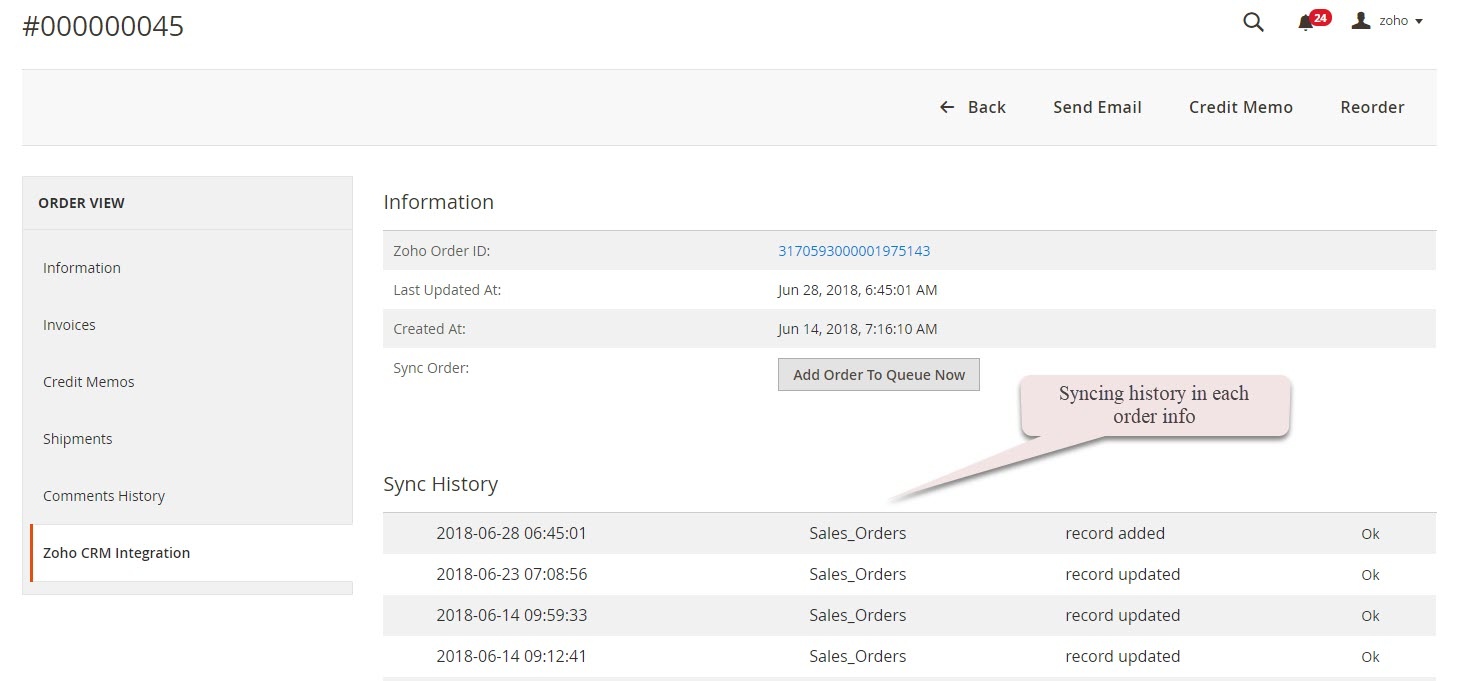
- View synchronization history in each item for Customers, Orders, and Products
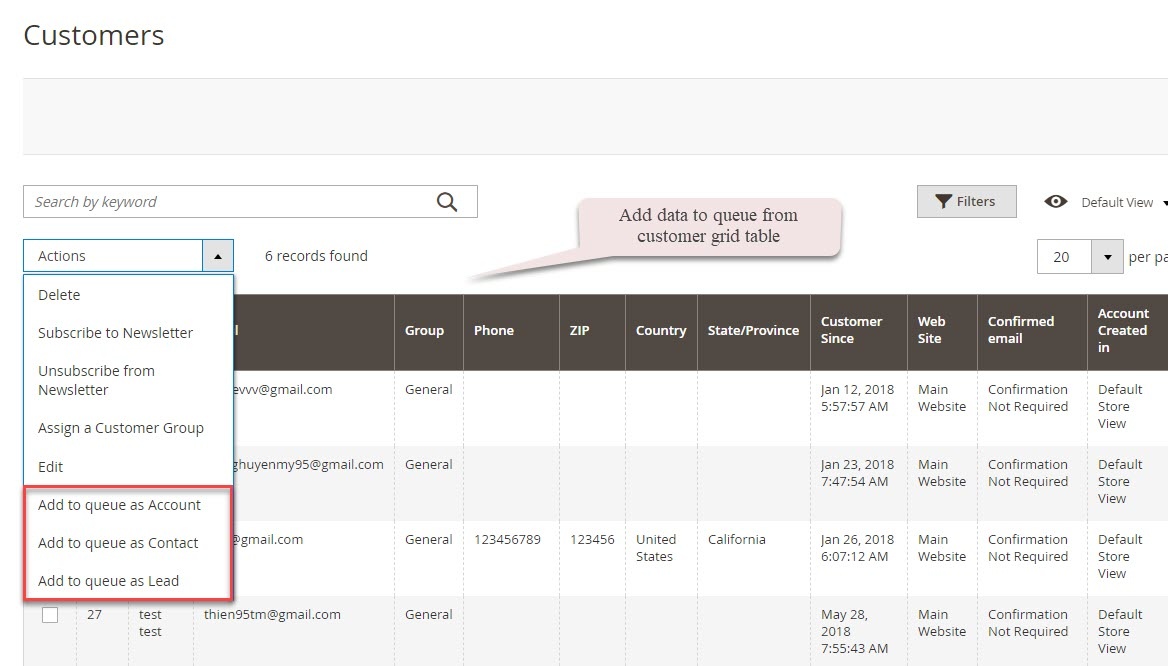
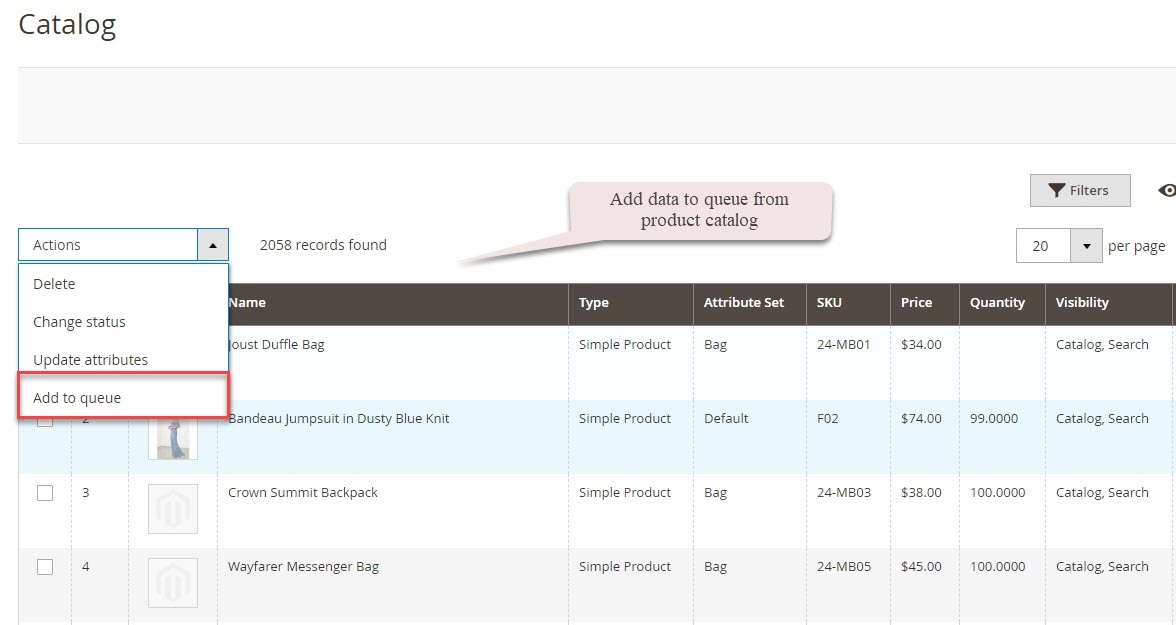
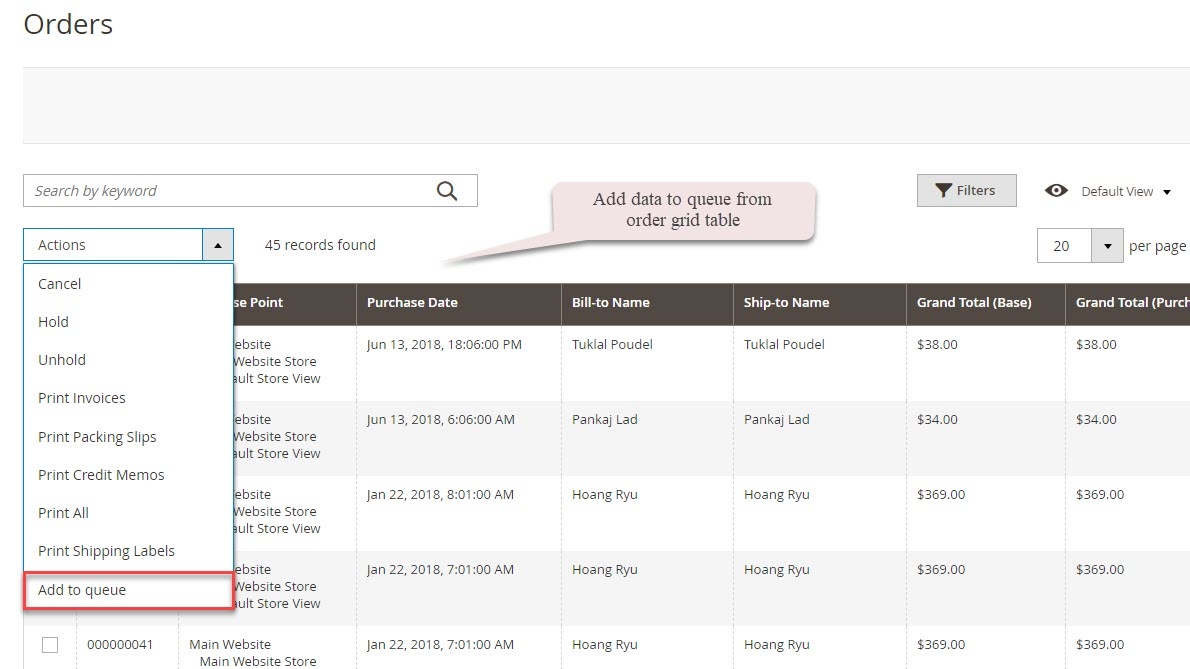
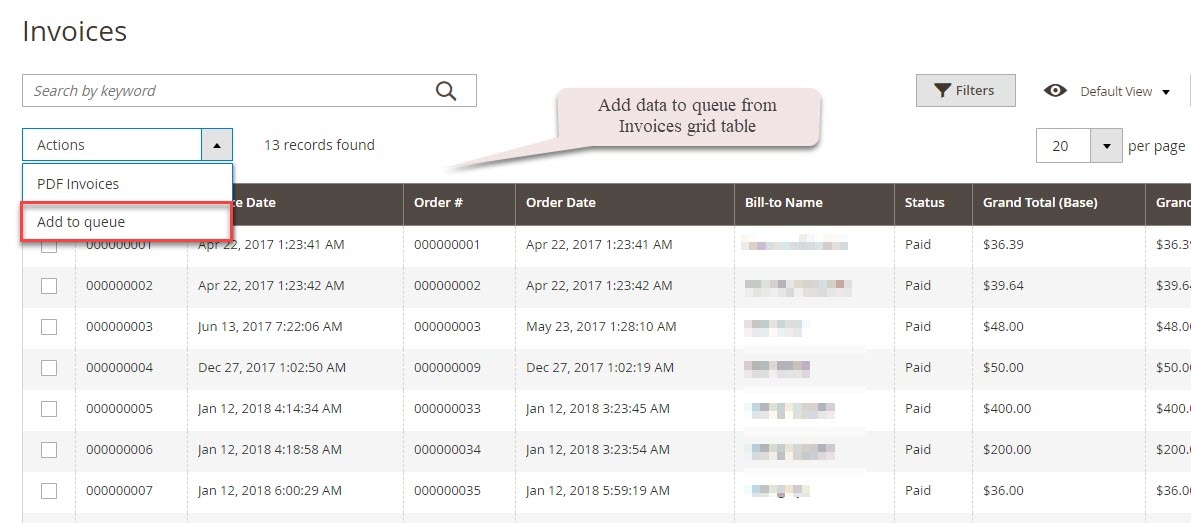
- "Add to queue" mass action for Customers, Orders, Products and Invoices grid tables
System Requirements
Your store should be running on Magento Community Edition version 2.0.x, 2.1.x, 2.2.x, 2.3.x
Magenest Zoho CRM Version 2.1.5 - Updated: April 7, 2023
Compatibility: Magento 2.3.x, 2.4.x
Compatible with Magento 2.4.6
Video Tutorial
Configuration
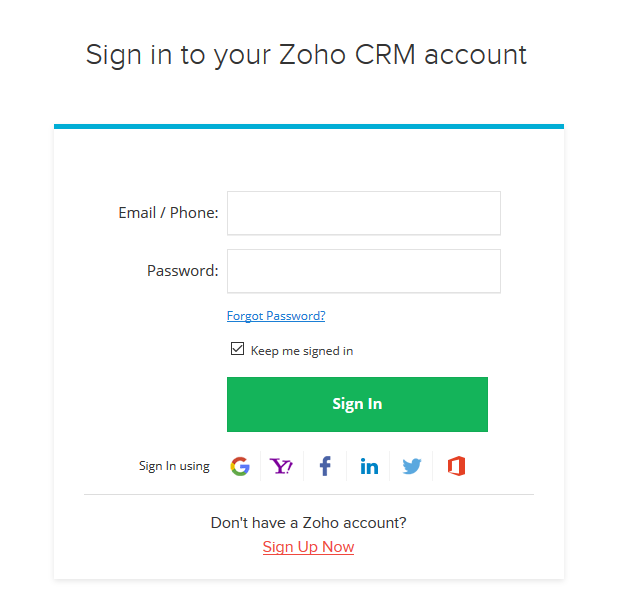
Login to the Zoho account
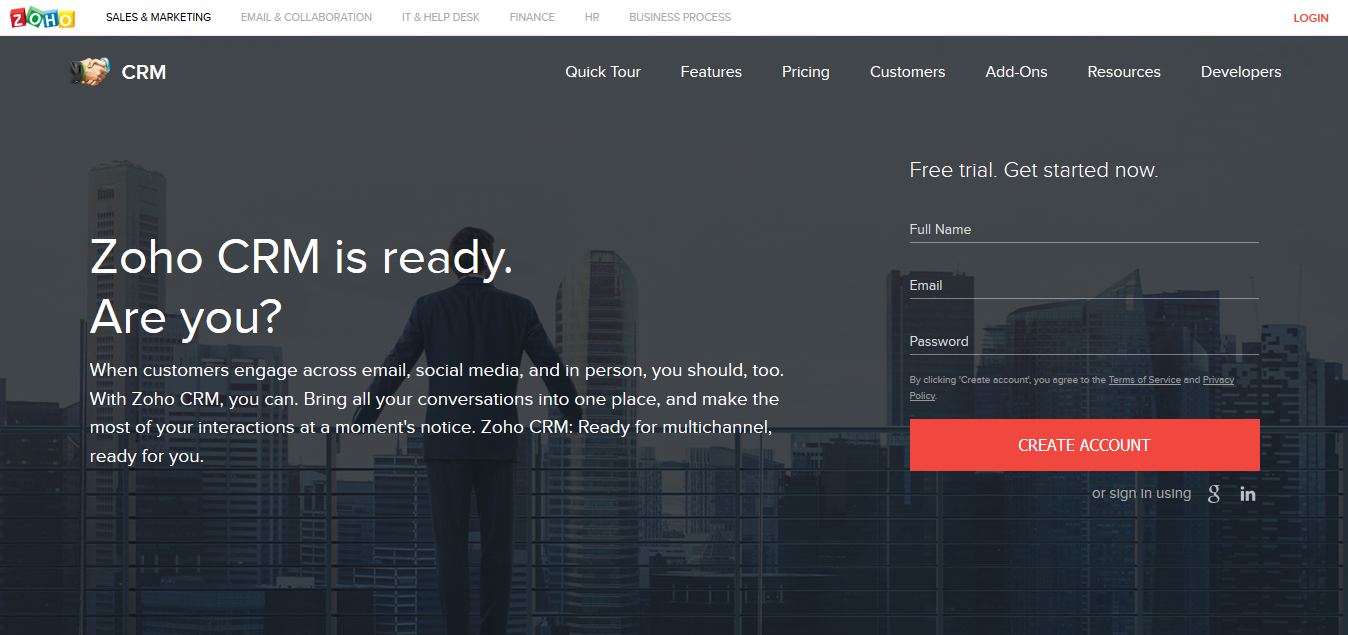
First, you have to create a Zoho account by going to https://www.zoho.com/crm/
Click on the Create Account button to register a new account.
Configuration
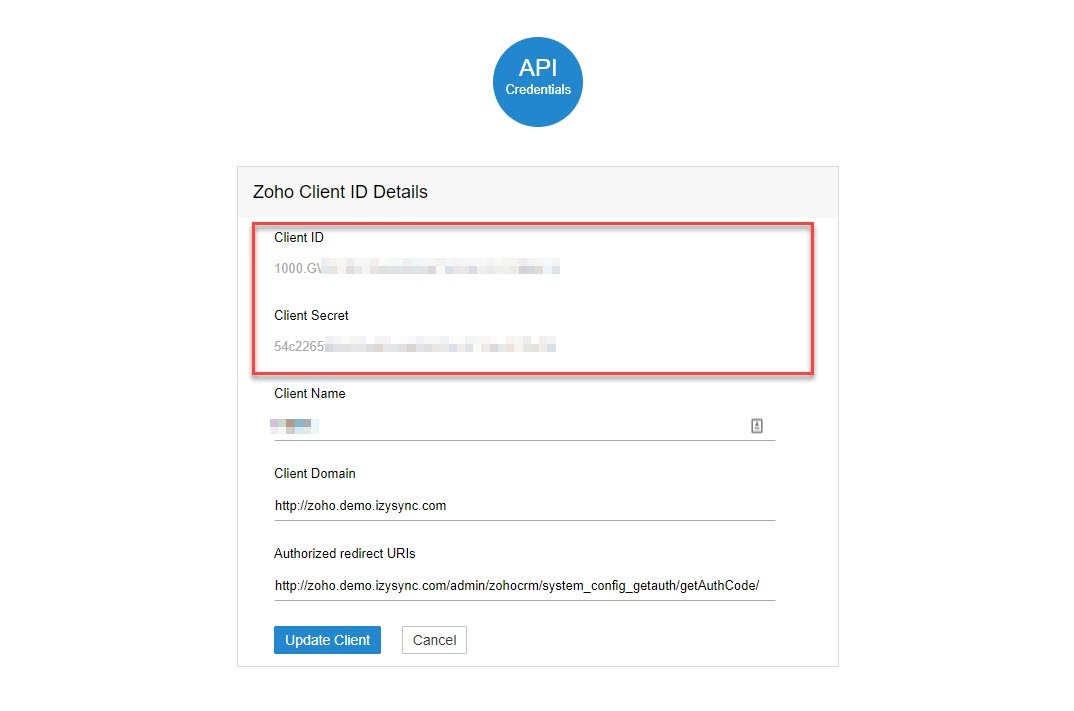
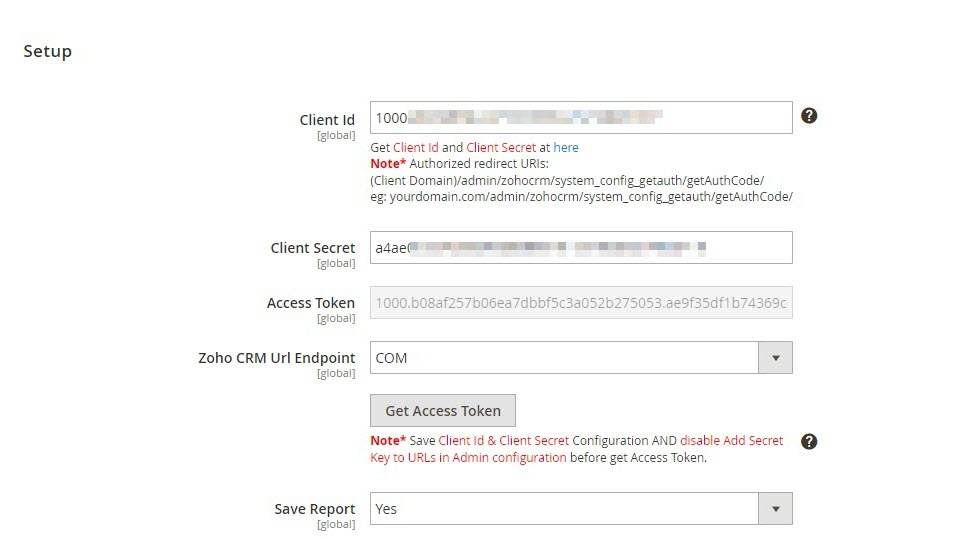
Go to https://accounts.zoho.com/developerconsole to get your Zoho API credentials. (Client ID and Client Secret)
In Magento 2 backend, go to Zoho CRM Integration > Configuration > Setup.
Fill in the Client ID and Client Secret obtained from Zoho.
Choose your Zoho CRM URL Endpoint: .com or .eu
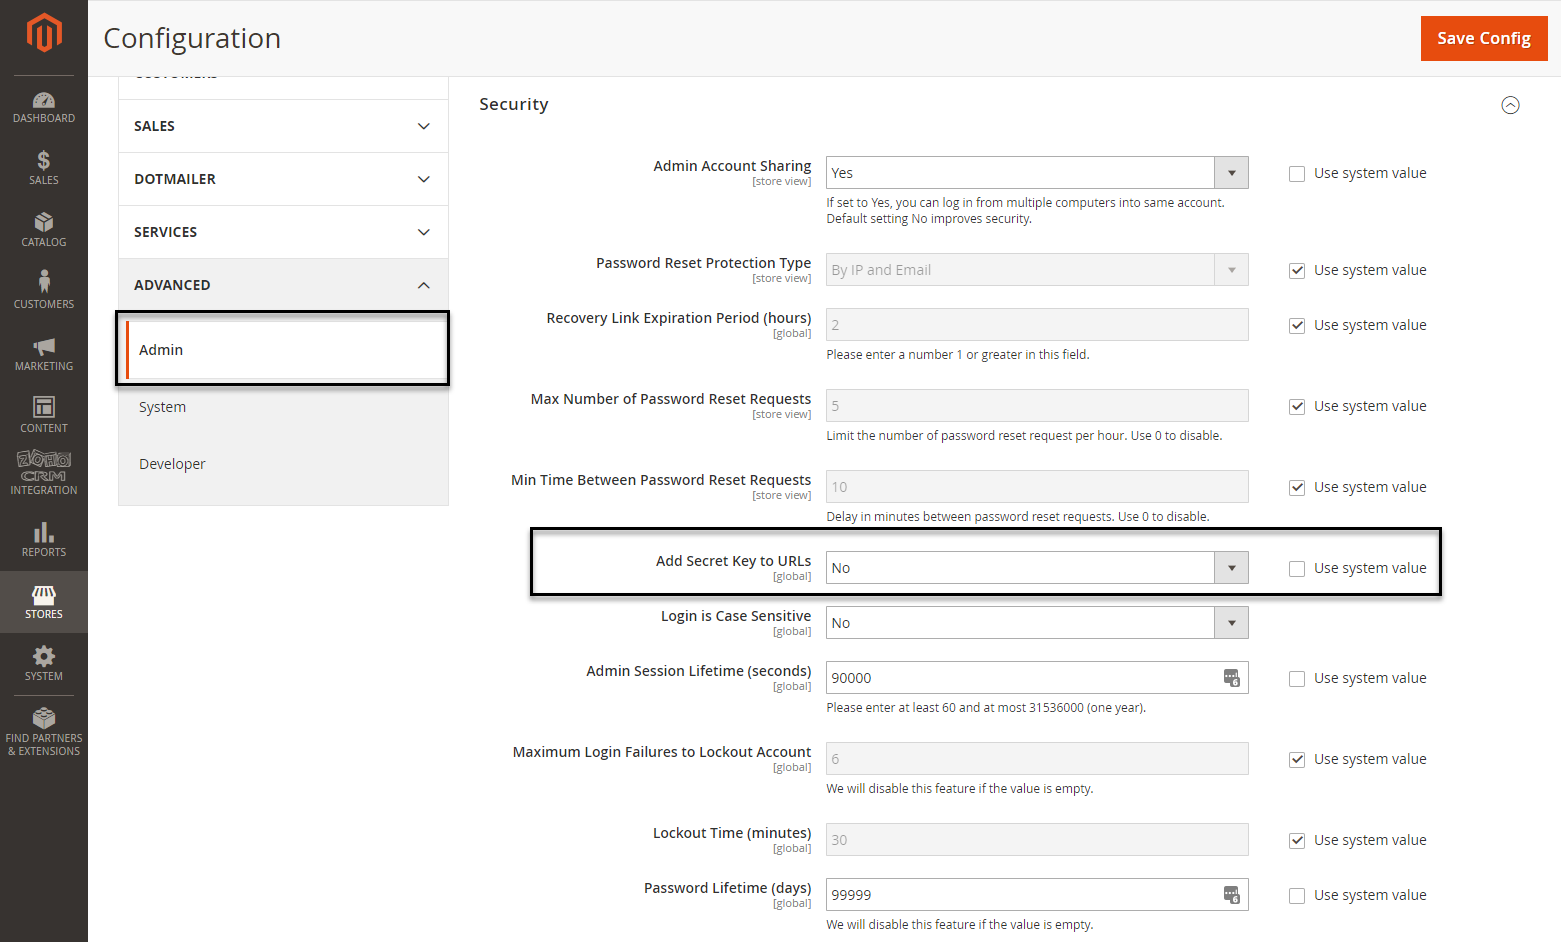
Remember to turn off your Admin Key before getting an access token. You can turn on this Admin Key later after connecting Magento 2 to Zoho CRM successfully.
Go to Stores > Configuration > Advanced > Admin, choose No in Add Secret Key to URLs.
Click Save Configuration then Get Access Token in Zoho CRM Configuration.
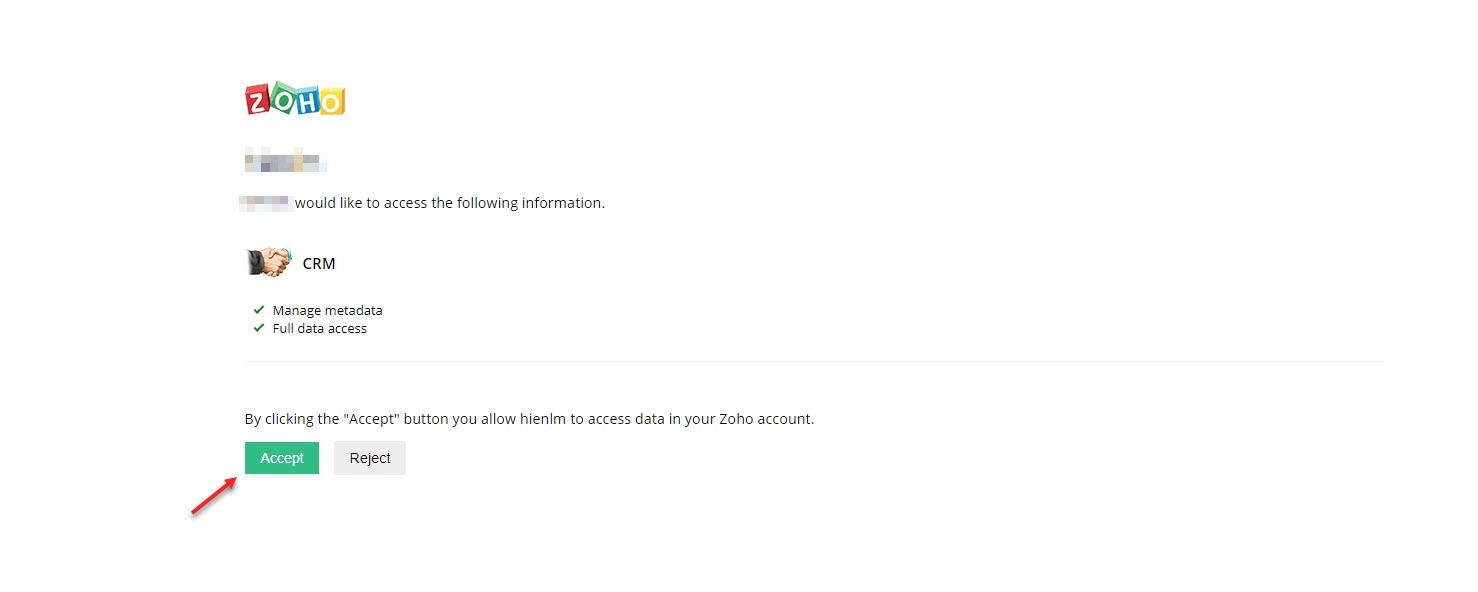
You will be redirected to Zoho, in here Zoho will require to access your information. Click Accept
Synchronization Settings
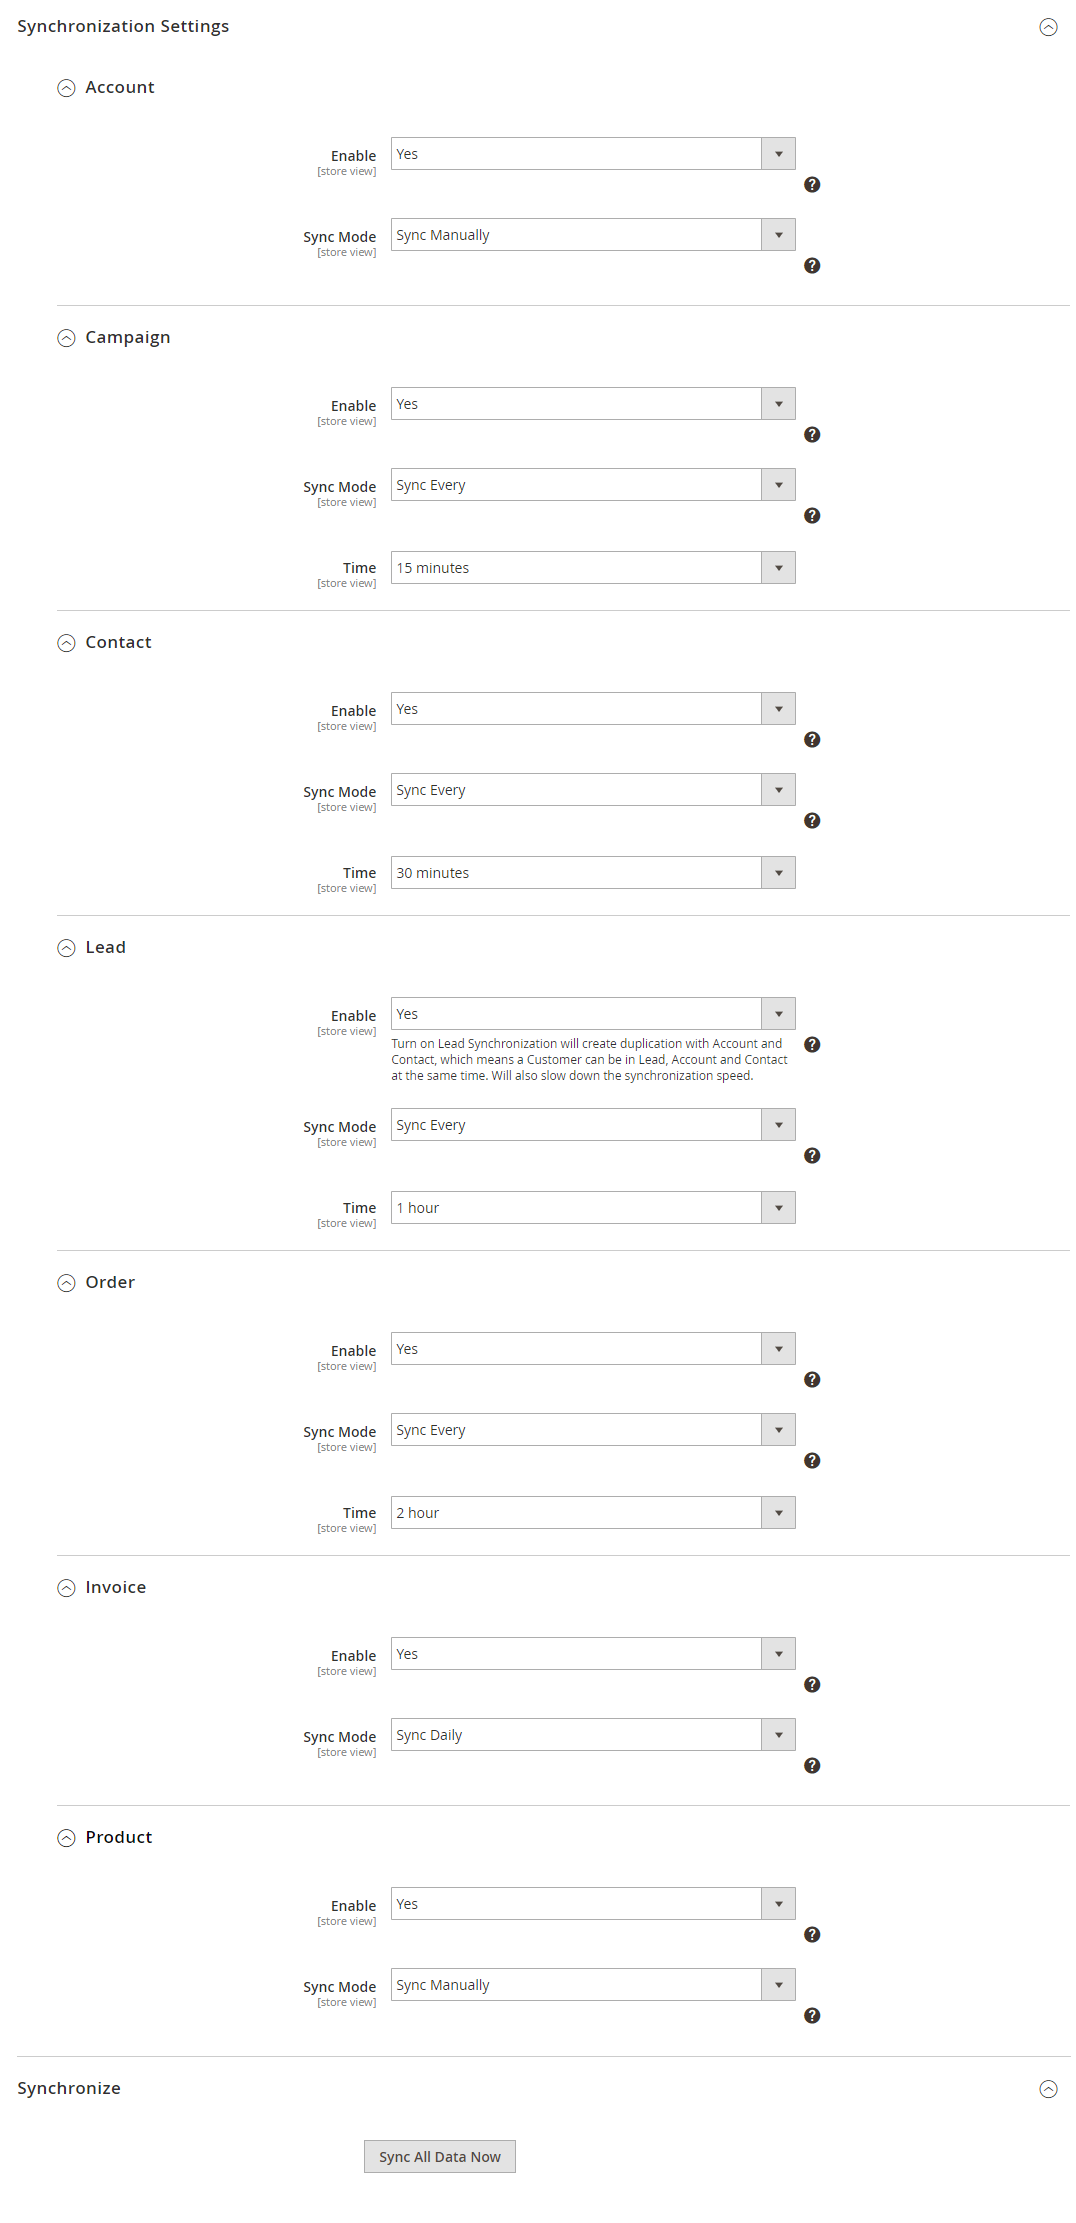
This extension allows you to synchronize the existing data as well as a new one from Magento 2 store to your Zoho CRM, including Account, Campaign, Contact, Lead, Order, Invoice, Product.
We highly recommend that you should synchronize the existing data from Magento 2 store to Zoho CRM account only one time.
You can enable synchronization for each data, as well as synchronization mode (Manual mode and Cron Job mode).
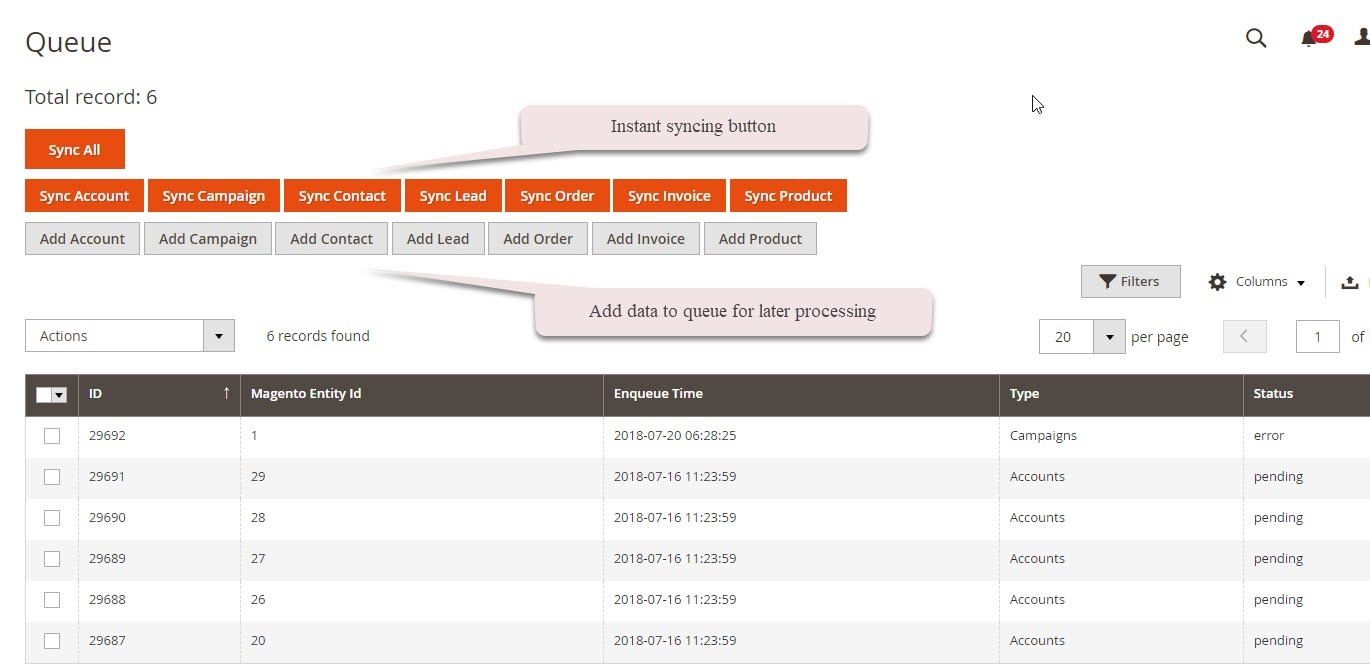
For manual mode, you have to go to Queue Page to sync data.
For cron job mode, data will be synced automatically every 15 minutes, 30 minutes, 1 hour, 2 hours, or at 3 a.m daily.
You can add all data to queue for later processing by clicking on Sync All Data Now button.
Field Mapping
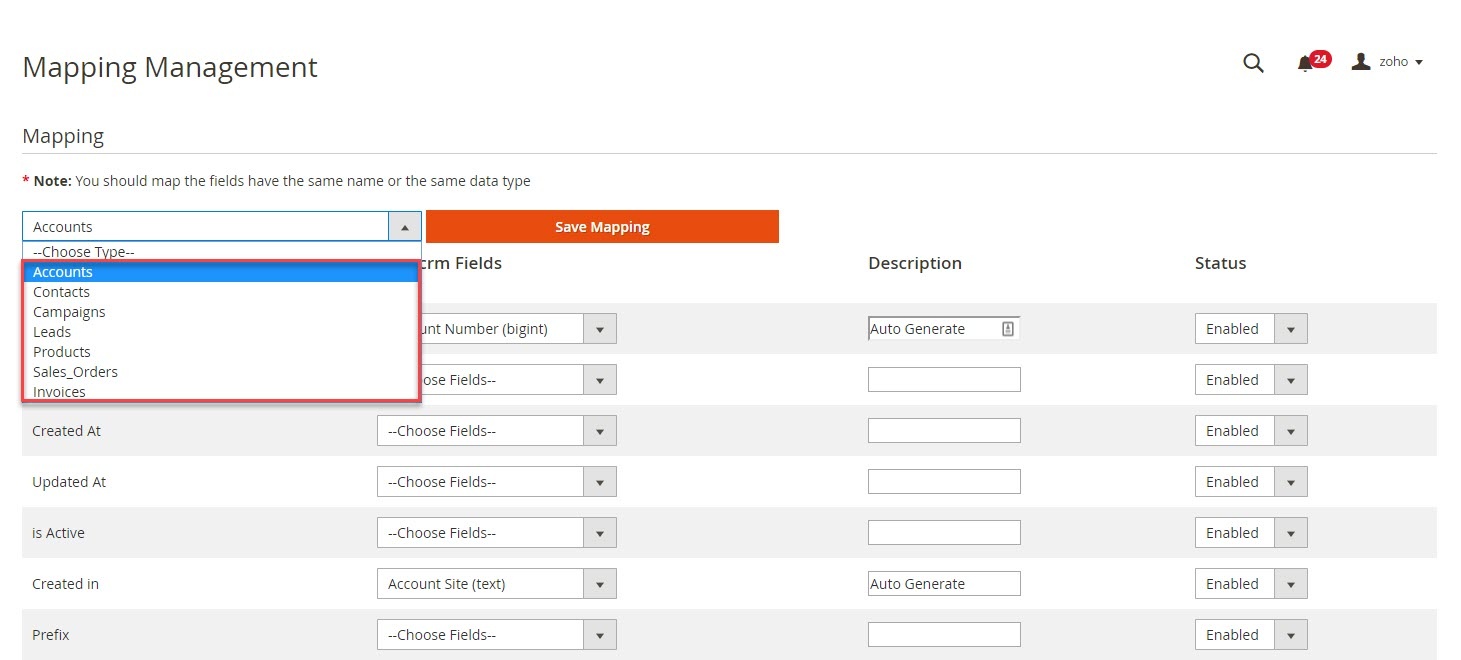
In order to synchronize data fields from the Magento 2 store to your Zoho CRM account correctly, you need to create the mapping for these fields first.
Go to Zoho CRM Integration > Field Mapping
You can choose the type of data to set the field mapping (Accounts, Contacts, Campaigns, Leads, Products, Sales Orders, Invoices)
The Magento fields and Zoho CRM fields will display in a drop-down list. Choose the status Enabled to enable the field, then Save Mapping
Manual Queue Adding
You can add data to the queue manually in the Customer, Product, Order, and Invoice grid table.
You can also add data in the Queue grid table using Add [data type] button.
Synchronization Process
Data will be added to the queue for processing. In the data queue, click on the Sync All button to synchronize all data in the queue to Zoho CRM, or use the Sync [data type] button to synchronize each data.
*NOTE: Synchronizing will take time, the length of time depends on the size of the database.
Synchronization History/Report
When the process is done, you can go to Zoho CRM Integration > View Report to track the synchronized data.
You can also view the synchronization history in Customer, Product, Order info
Main Features
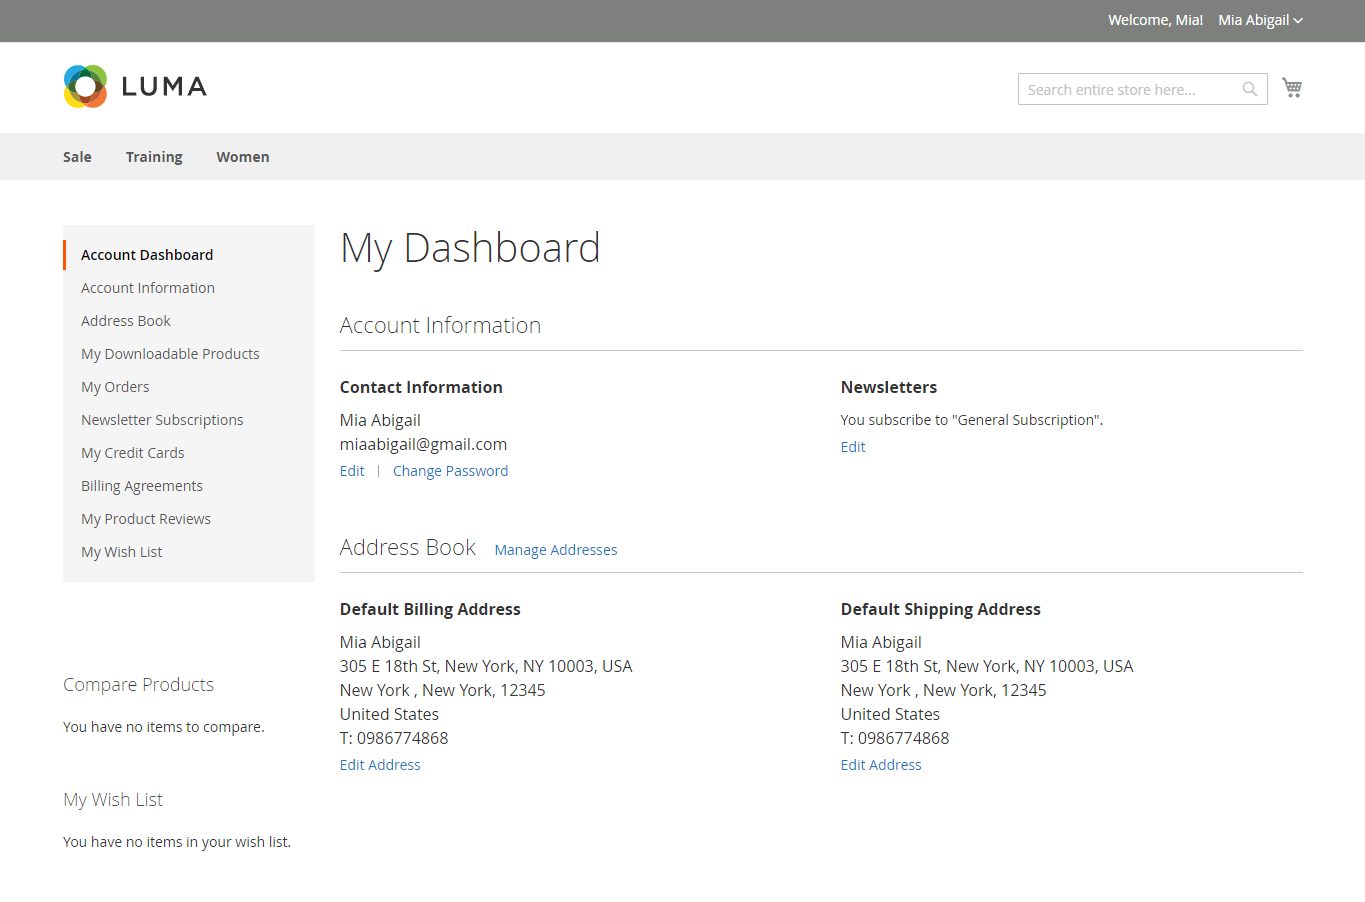
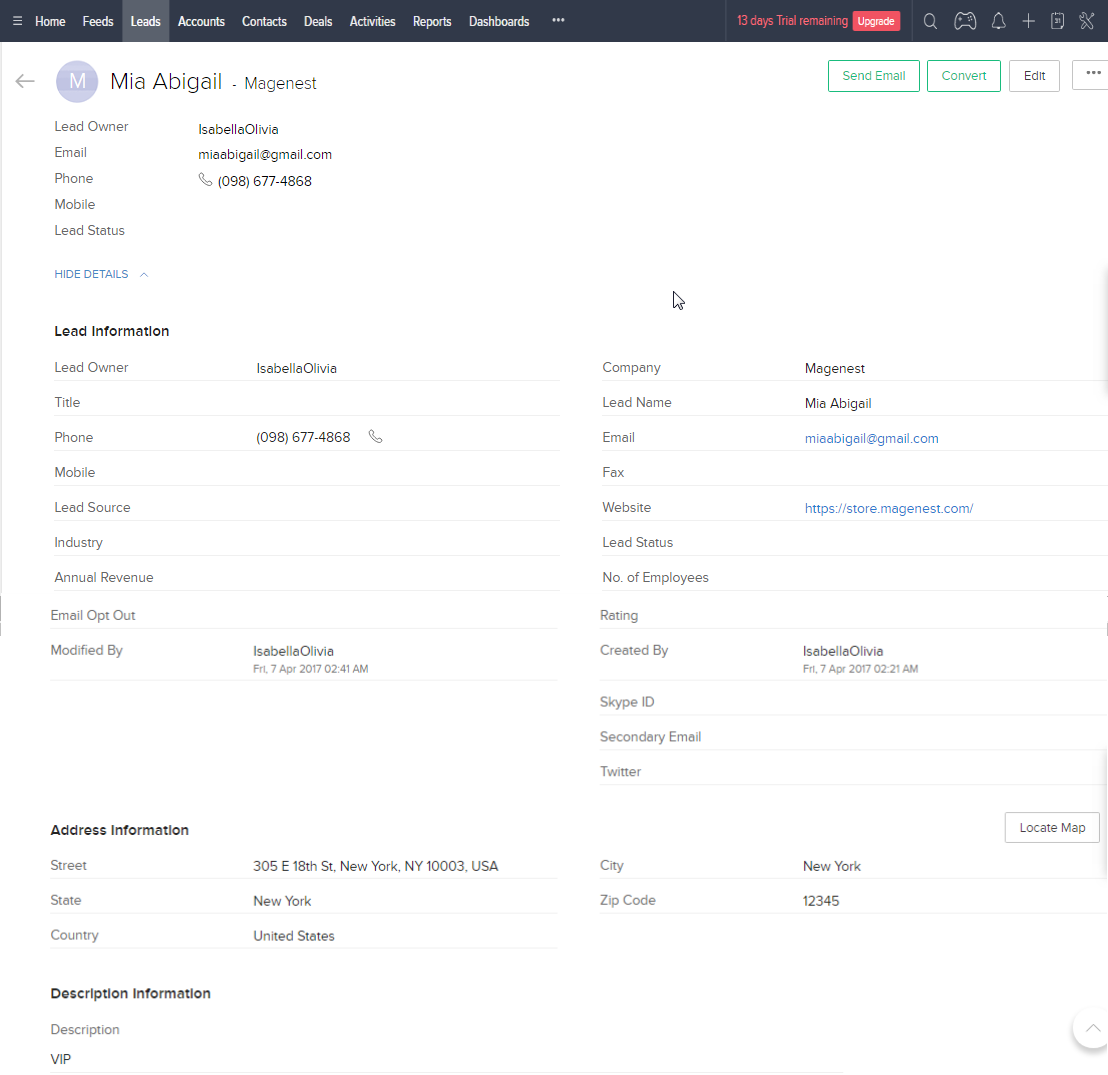
- When a new account is registered in Magento 2, Zoho will automatically add a new record of this account in Leads
In Magento 2 Register Page
In Zoho's Leads
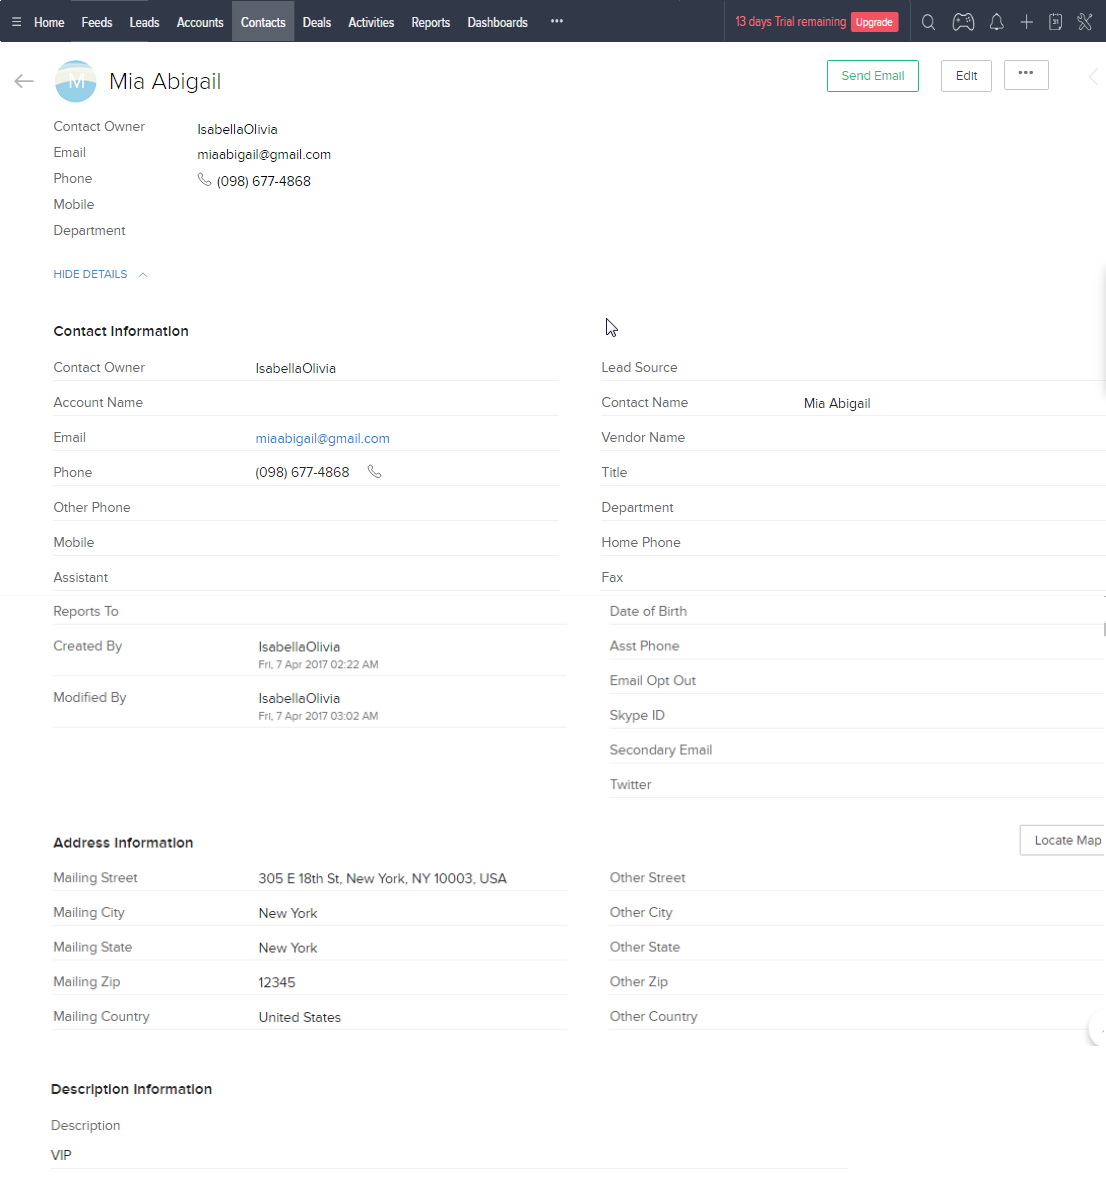
When a customer updates his information, data in Leads and Contacts will also be updated automatically
In Zoho's Contacts
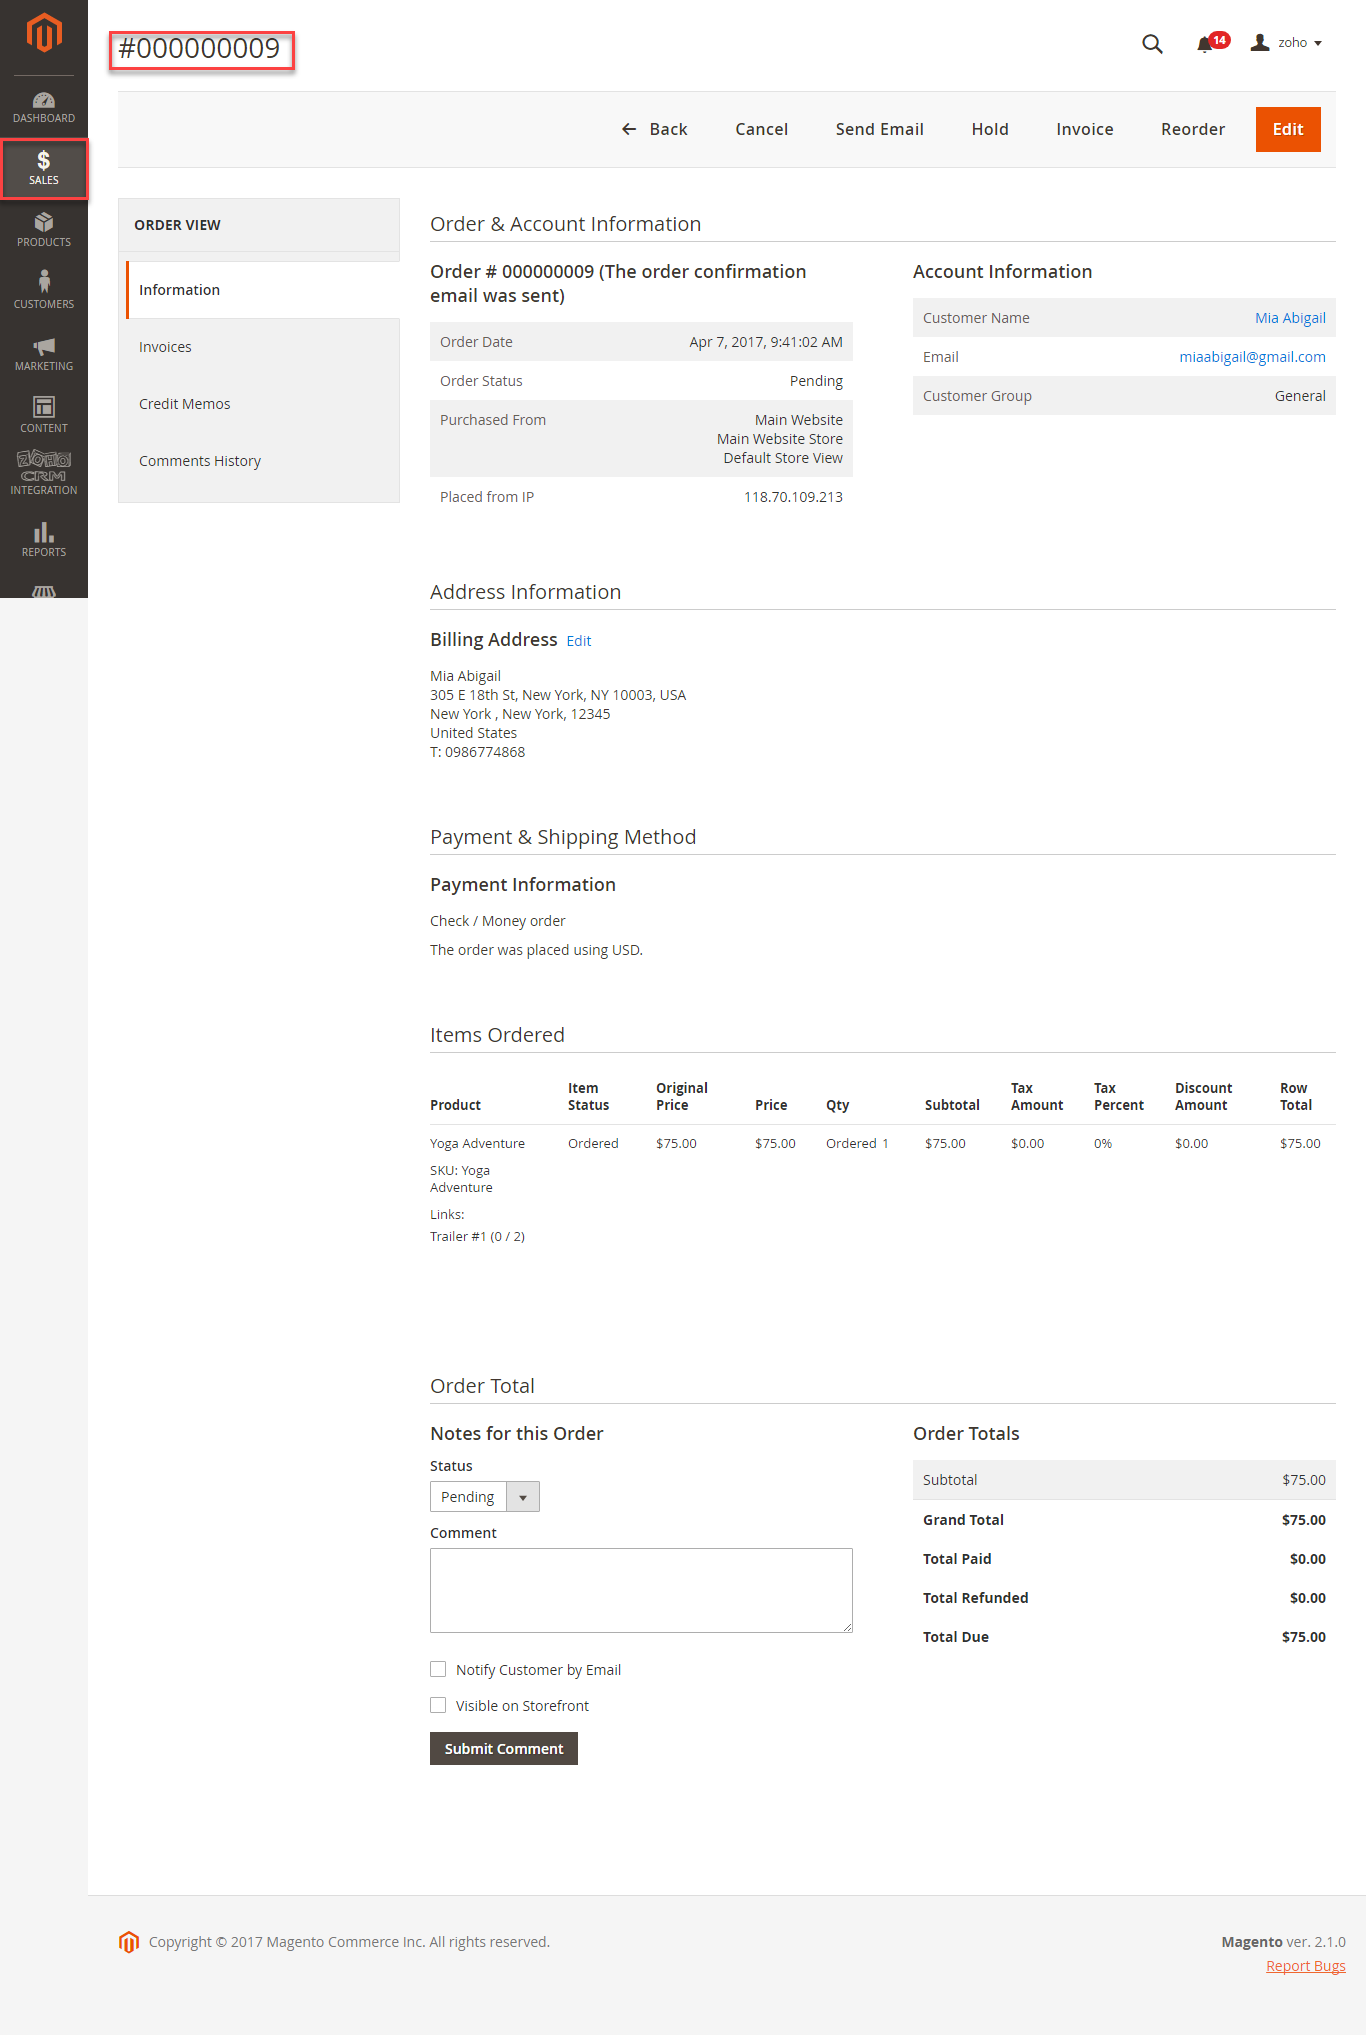
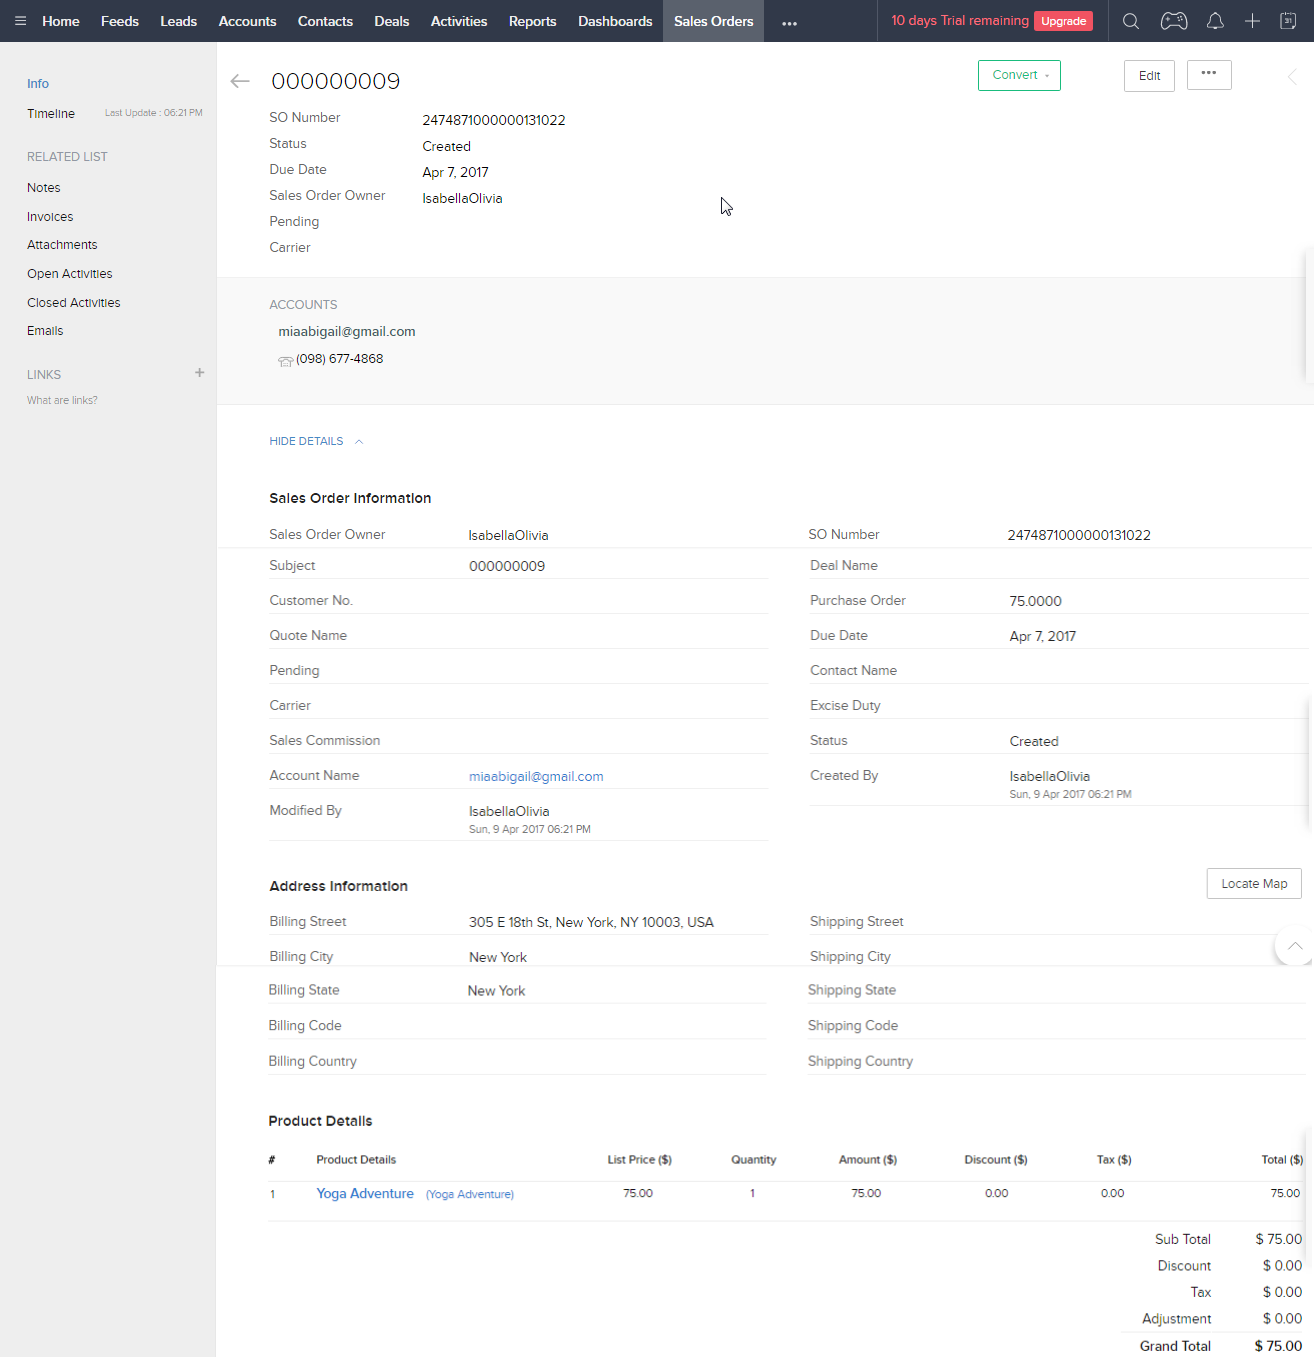
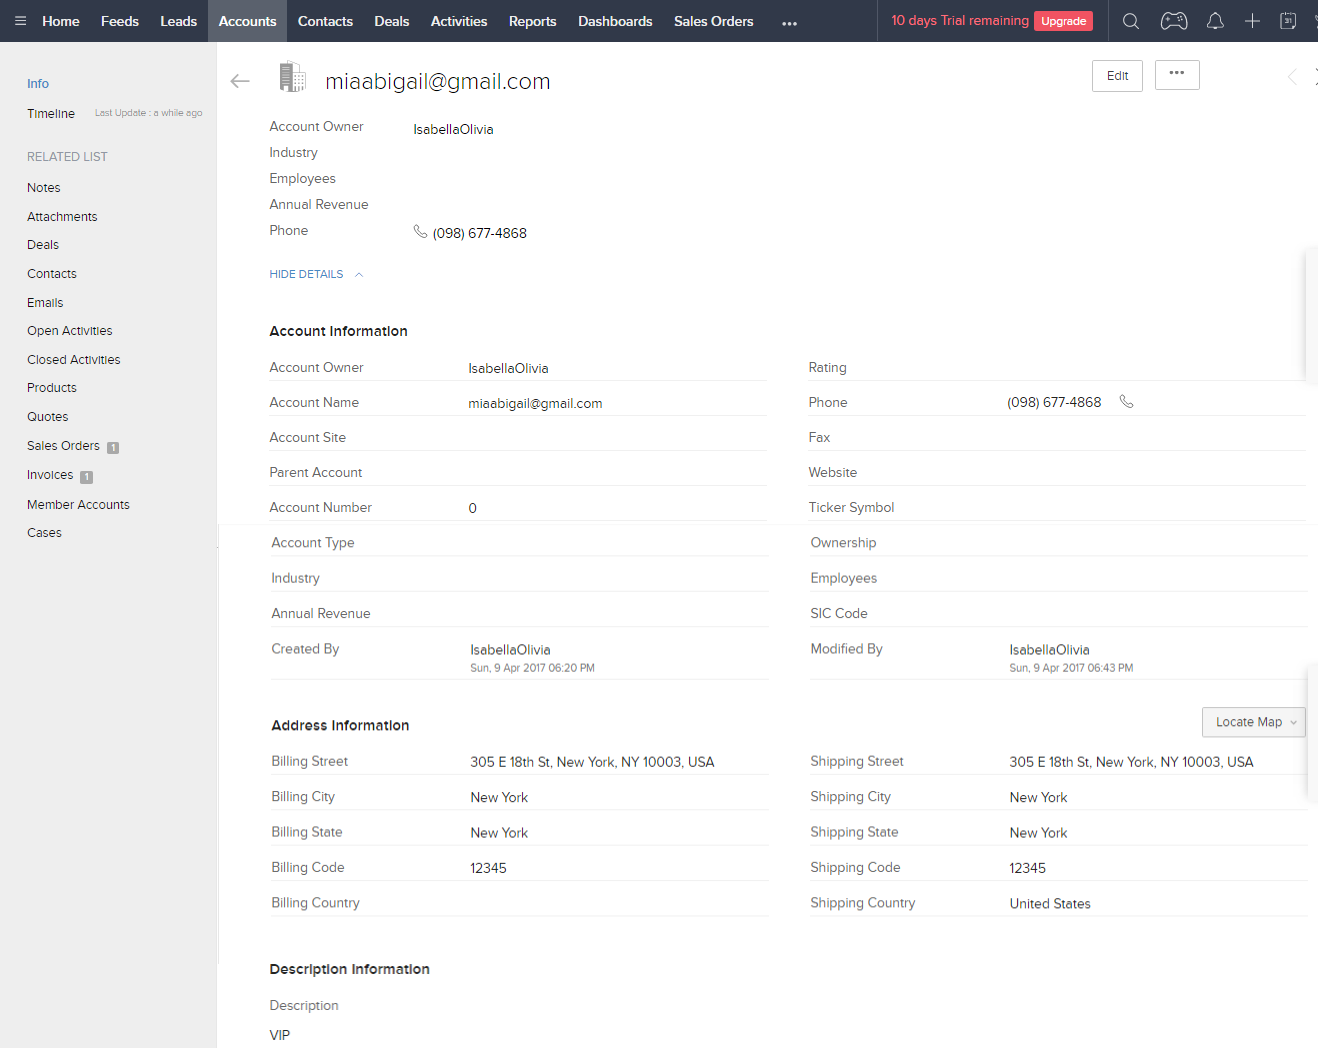
When a customer adds items to the cart then checks out, Sales Orders in Zoho will be auto-synced. Also, a record in Accounts of that customer will also be added if not exist
After successfully placed an order
In Zoho's Sales Orders
In Zoho's Accounts:
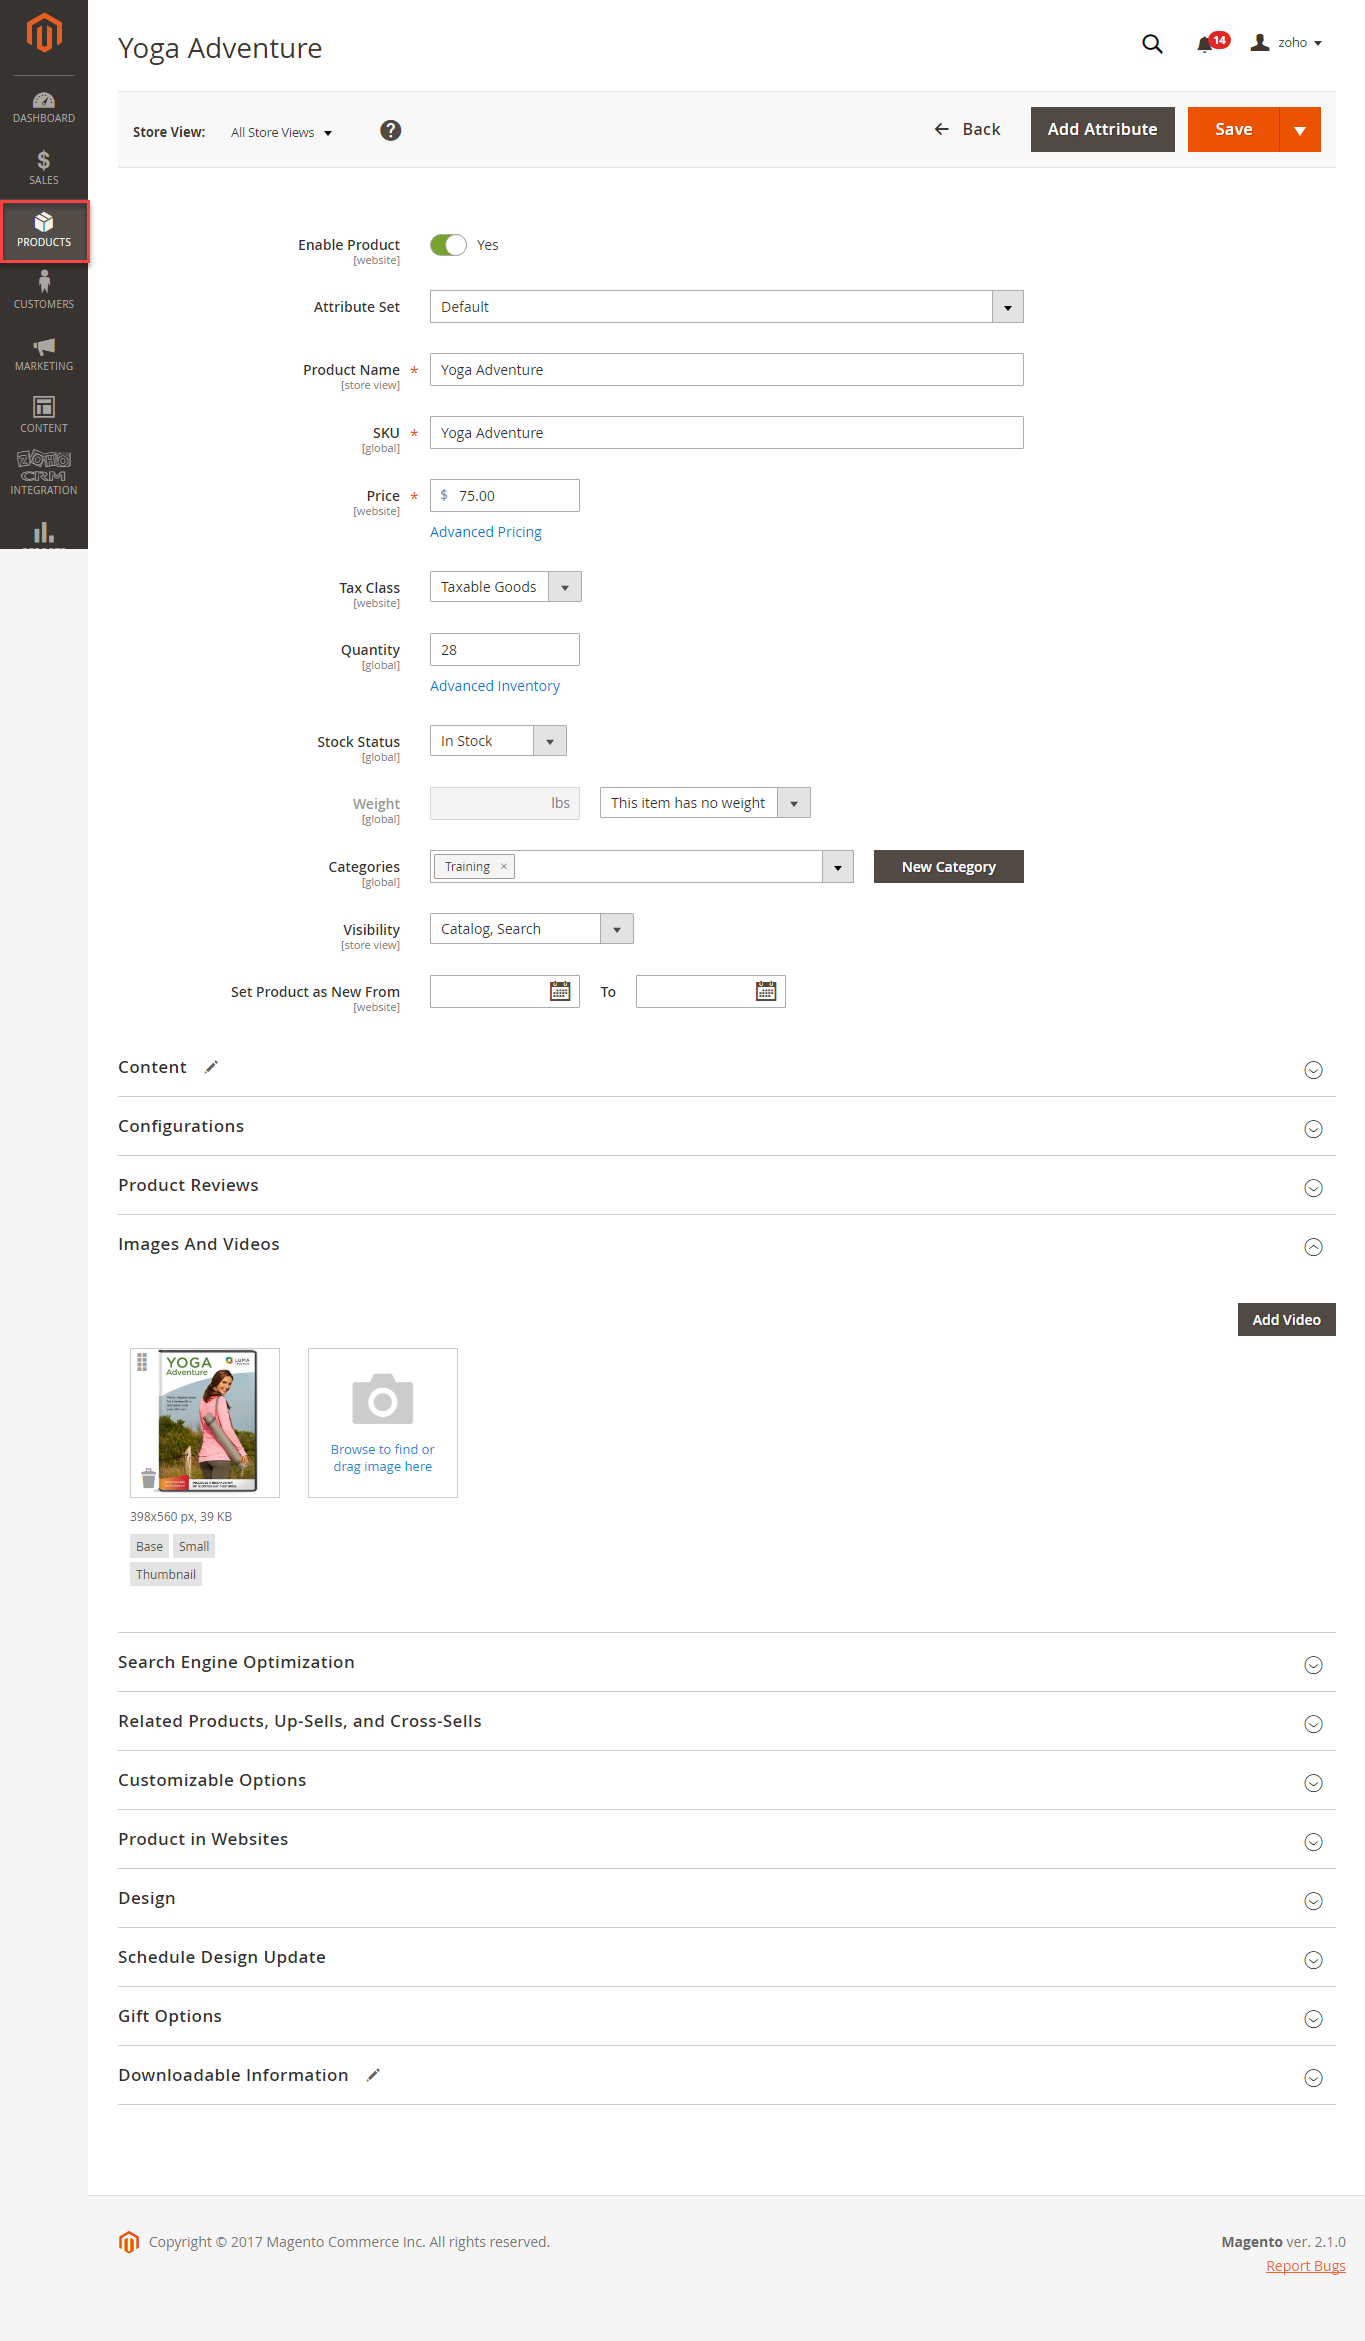
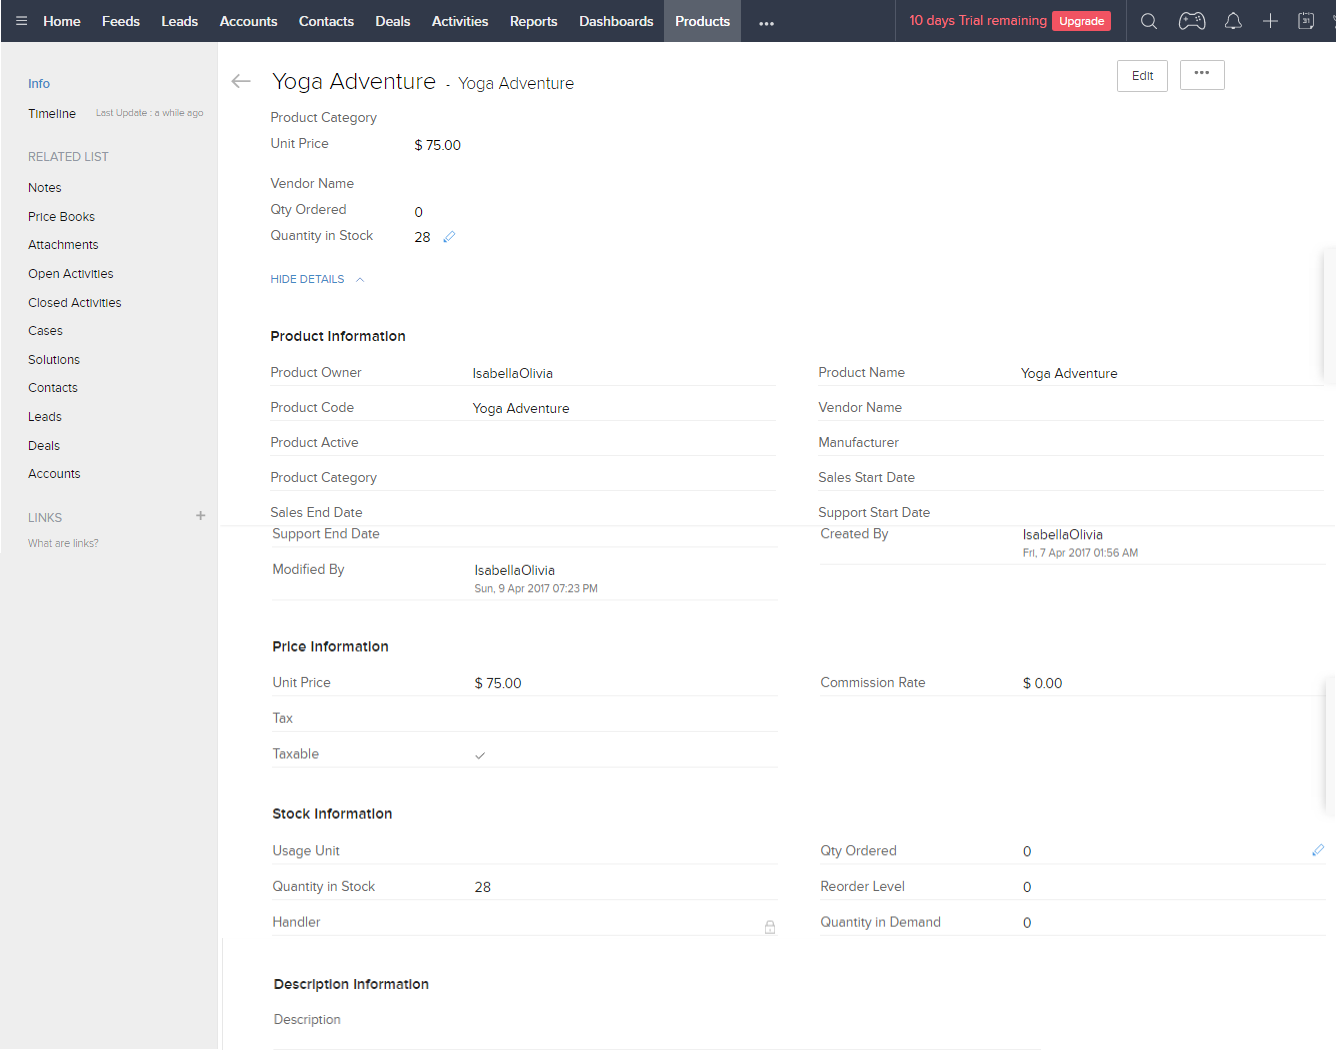
When admin add a new product in Magento 2, Zoho will auto sync data about that product
After successfully Added Ball Pup
In Zoho's Products
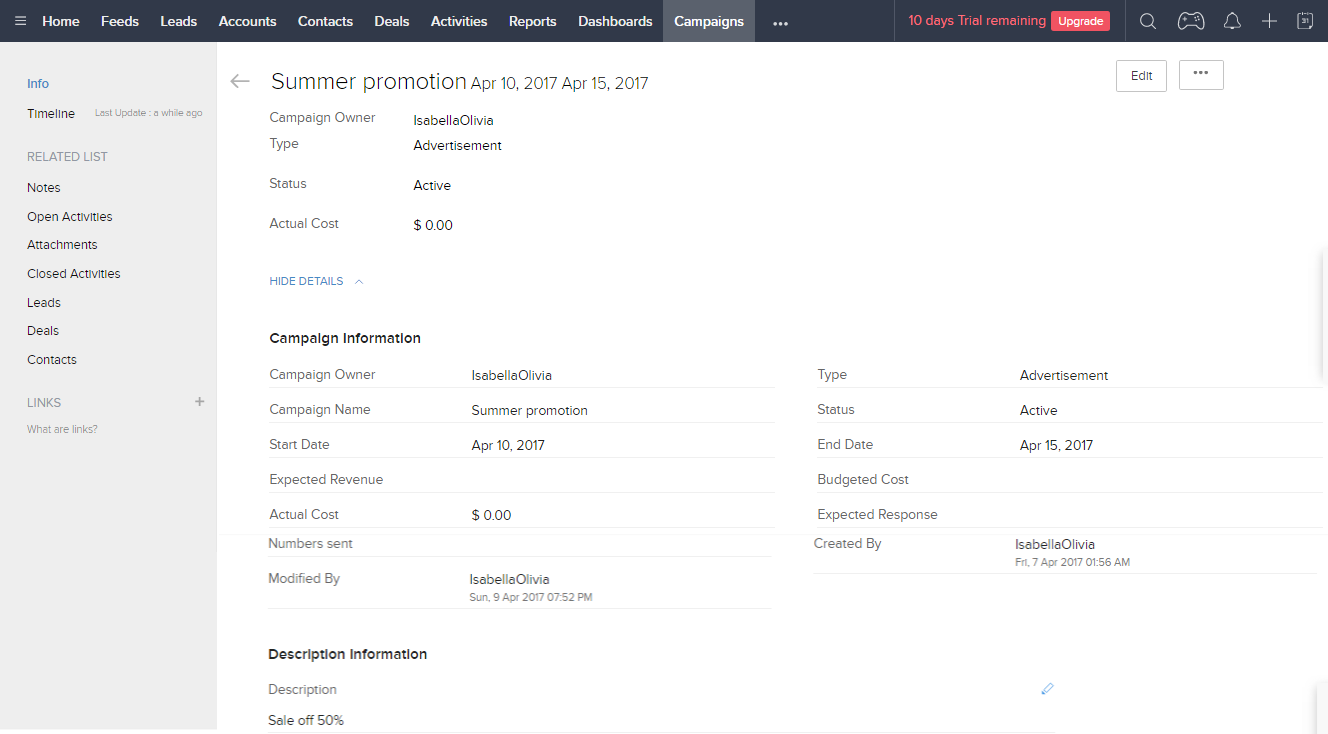
- When the admin adds a new Promotion in Magento 2, Zoho will auto sync data about it as a Campaign. All editing will also be synced
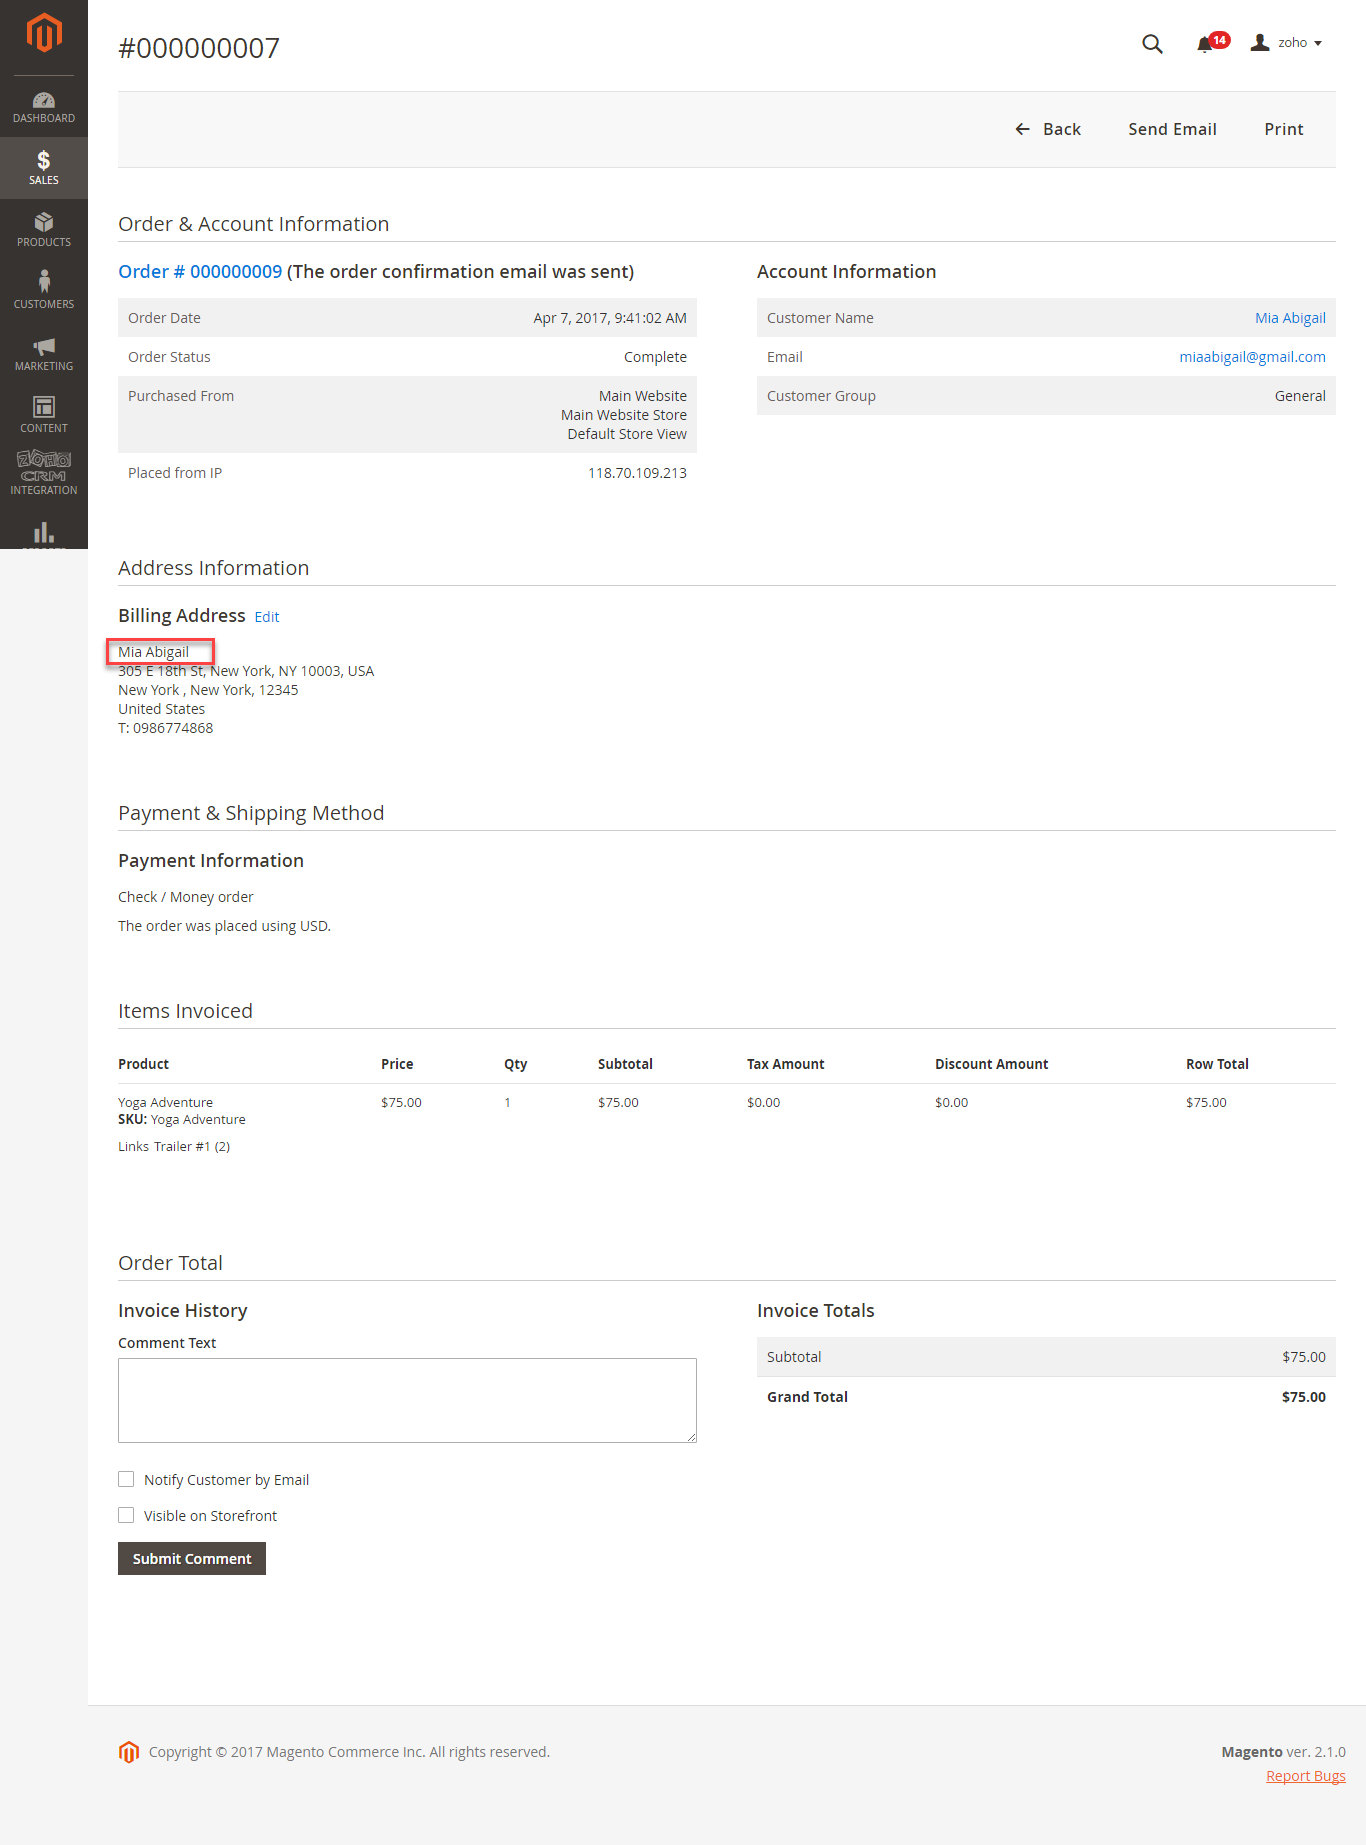
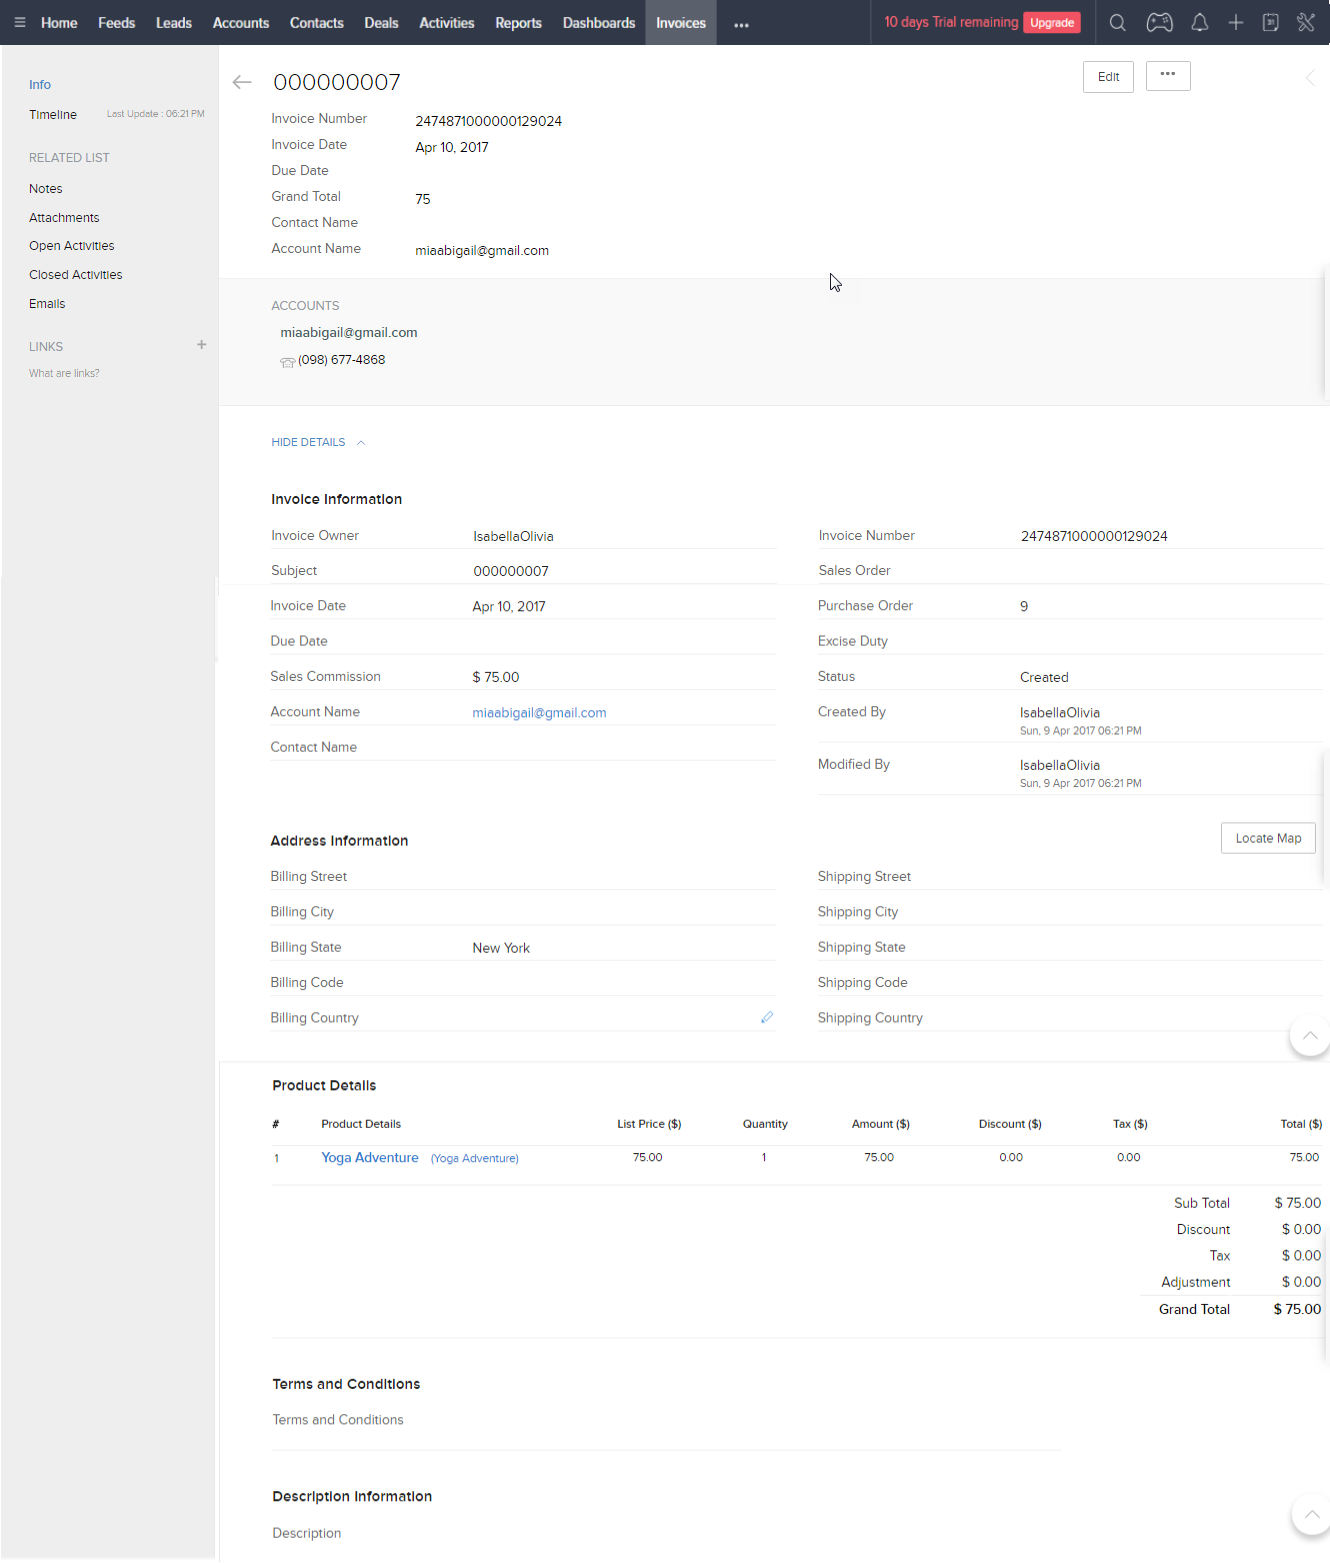
When an invoice is made by admin in Magento 2, the Invoice in Zoho will be synced.
When an invoice is successfully sent
When admin deletes a customer account in Magento, that customer will also be wiped from Leads, Accounts, and Contacts in Zoho.
Zoho CRM Default Synchronization Fields
The fields in Red are hard-code
Contact
Magento Customer | Zoho CRM Contact |
First name | First name |
Last name | Last name |
Customer Name | Account Name |
Date of Birth | Date of Birth |
Billing Street | Mail Street |
Billing City | Mail City |
Billing State/Province | Mail State |
Billing Country | Mail Country |
Billing Telephone | Phone |
Billing Fax | Fax |
Shipping Street | Other Street |
Shipping City | Other City |
Shipping State/Province | Other State |
Shipping Country | Other Country |
Account
Magento Customer | Zoho CRM Account |
ID | Account Number |
Customer Name | Account Name |
Billing Street | Billing Street |
Billing City | Billing City |
Billing State/Province | Billing State |
Billing Country | Billing Country |
Billing Telephone | Phone |
Billing Fax | Fax |
Shipping Street | Shipping Street |
Shipping City | Shipping City |
Shipping State/Province | Shipping State |
Shipping Country | Shipping Country |
Lead
Magento Customer | Zoho CRM Lead |
First Name | First Name |
Last Name | Last Name |
Billing Street | Street |
Billing City | City |
Billing State/Province | State |
Billing Country | Country |
Billing Telephone | Phone |
Billing Fax | Fax |
Product
Magento Customer | Zoho CRM Product |
Name | Product Name |
SKU | Product Code |
Status | Product Active |
Price | Unit Price |
Quantity | Quantity in Stock |
Description | Description |
Sales Order
Magento | Zoho CRM Sales Order |
Increment ID | Subject |
Created At | Due At |
Status | Status |
Customer Id | Customer_No |
Customer Name | Account Name |
Billing Street | Billing Street |
Billing City | Billing City |
Billing State/Province | Billing State/Province |
Billing Zip/Postal Code | Billing Zip/Postal Code |
Billing Country | Billing Country |
Shipping Street | Shipping Street |
Shipping City | Shipping City |
Shipping State/Province | Shipping State |
Shipping Zip/Postal Code | Shipping Code |
Shipping Country | Shipping Country |
Shipping Amount | Adjustment |
Tax Amount | Tax |
Discount | Discount |
Invoice
Magento | Zoho CRM Invoice |
Increment ID | Subject |
Created At | Invoice Date |
State | Status |
Order ID | Sales Order |
Customer Name | Account Name |
Billing Street | Billing Street |
Billing City | Billing City |
Billing State/Province | Billing State/Province |
Billing Zip/Postal Code | Billing Zip/Postal Code |
Billing Country | Billing Country |
Shipping Street | Shipping Street |
Shipping City | Shipping City |
Shipping State/Province | Shipping State |
Shipping Zip/Postal Code | Shipping Zip |
Shipping Country | Shipping Country |
Shipping Amount | Adjustment |
Tax Amount | Tax |
Discount | Discount |
Update
- When a bug fix or new feature is released, we will provide you with the module's new package.
- All you need to do is repeating the above installing steps and uploading the package onto your store. The code will automatically override.
- Flush the config cache. Your store and newly installed module should be working as expected.
Support
- We will reply to support requests within 2 business days.
- We will offer lifetime free update and 6 months free support for all of our paid products. Support includes answering questions related to our products, bug/error fixing to make sure our products fit well in your site exactly like our demo.
- Support DOES NOT include other series such as customizing our products, installation and uninstallation service.
Once again, thank you for purchasing our extension. If you have any questions relating to this extension, please do not hesitate to contact us for support.
Magenest

