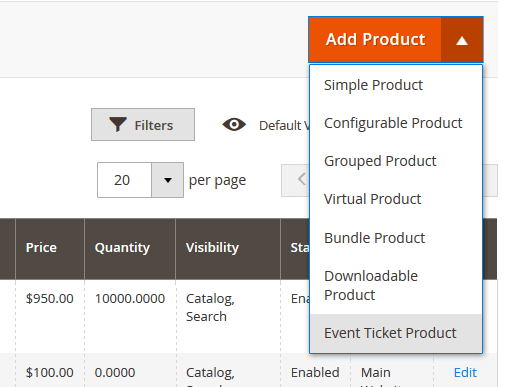
...
Then add switch to Event Booking Tab . > Click on Schedule
Information
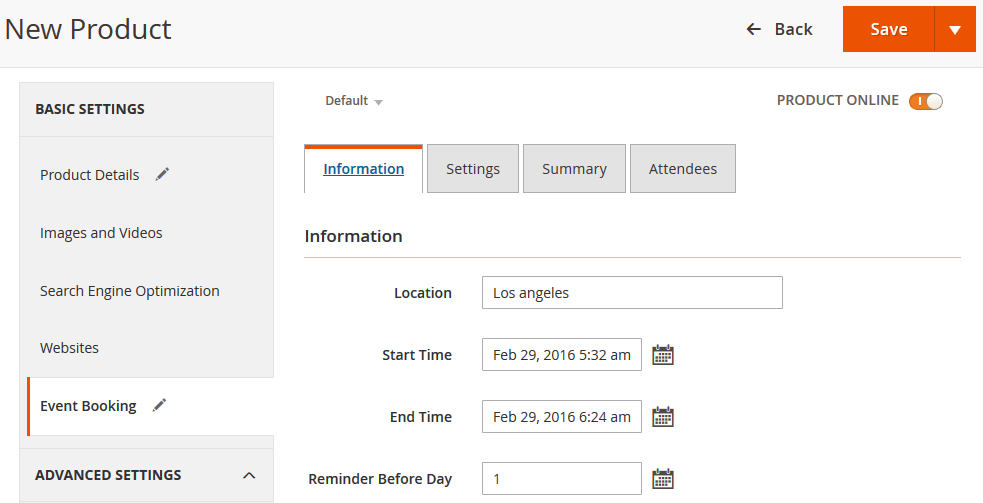

- Location: Specify the location details
- Date & Time of Event: specify the event date.
...
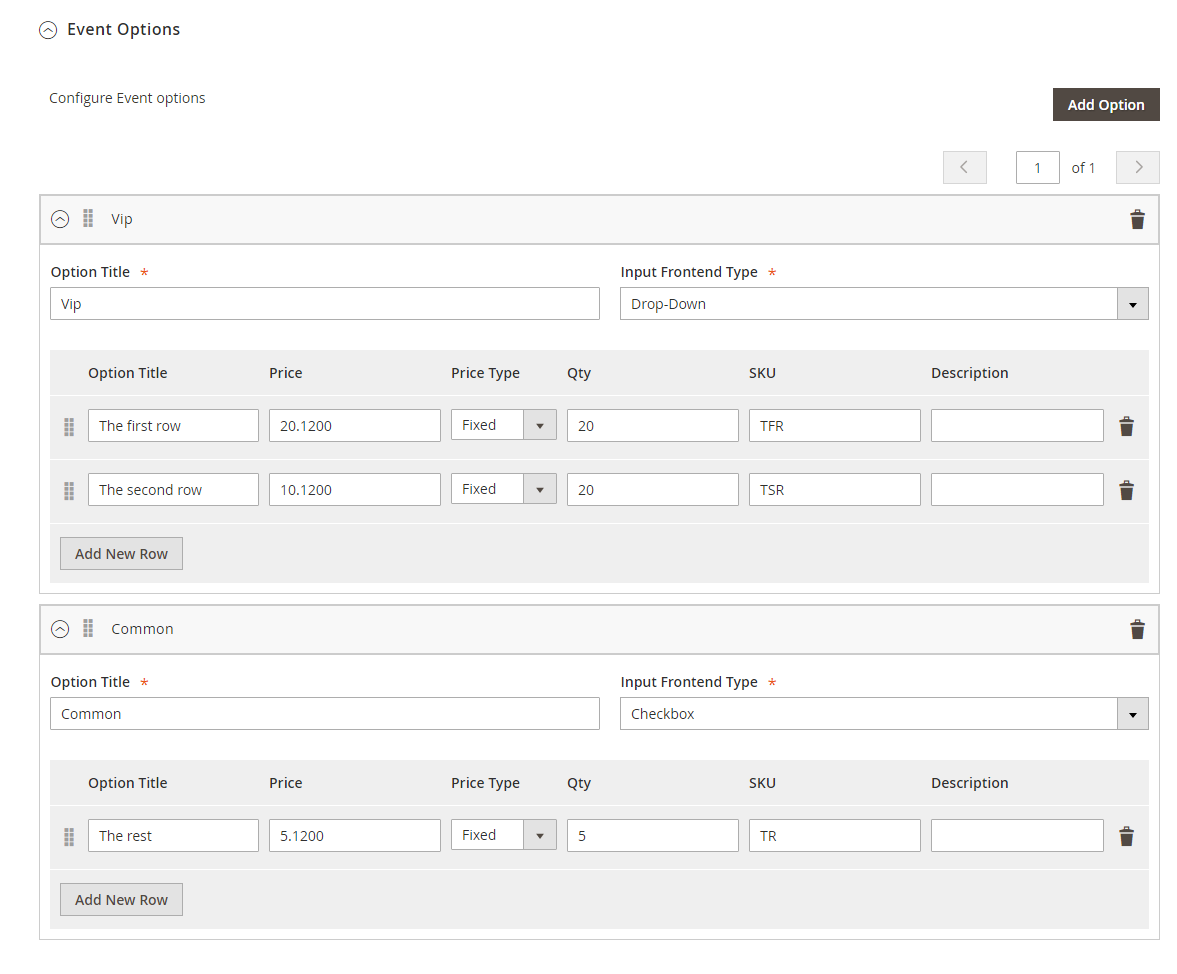
- Event Options
Through this section, you can set up various ticket types and options.
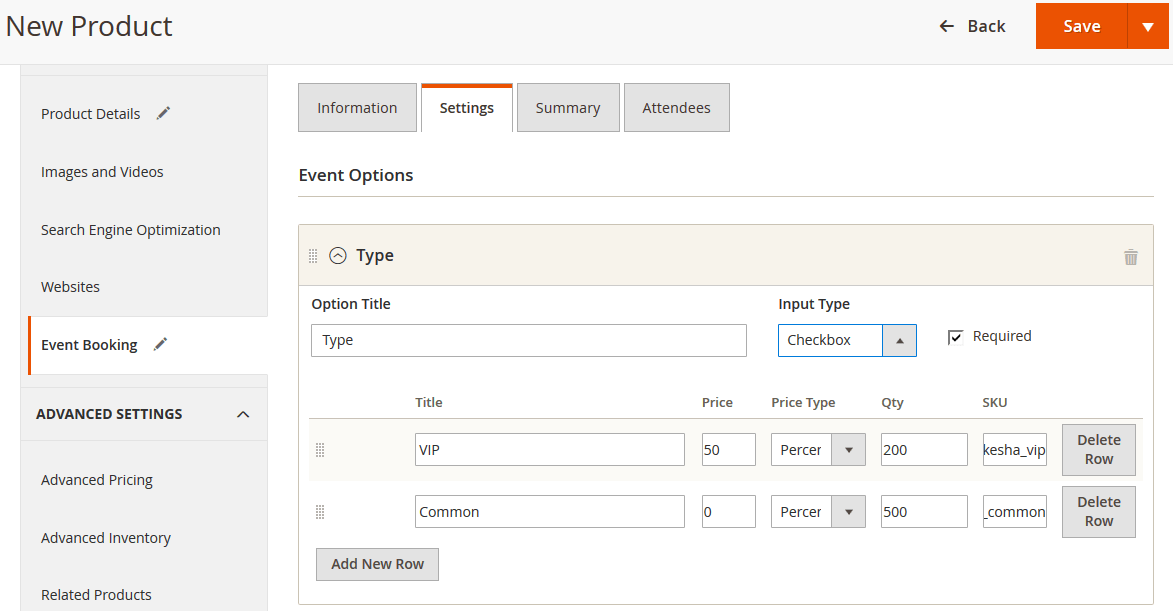
- Title - specify the title text for the ticket type selection section in the frontend product view
- Input Type: You can choose drop down/radio button/check box/multiple select.
- Required: check this box if you want your customer at least choose one ticket type before check out.
- Ticket Types - you can create a number of different ticket types for the same event. The available tickets may differ in price.
A given ticket type has the below options:
- Title - frontend ticket type title
- Price - the price modifier value
- Price Type - the price modifier type (fixed/ percent) NOTE: the price modifier is added to the basic product price
- SKU [optional] - allows to add the SKU postfix to the main product's SKU (this postfix will be displayed in the Order Details).
- Qty - the available quantity of tickets of a given type
2. PDF Template
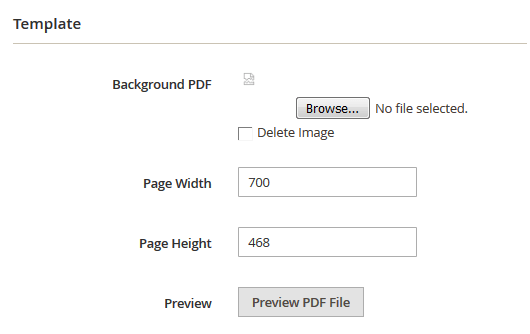
- Background PDF: Upload your image background
- Page width:
- Page height:
...
| Note | ||
|---|---|---|
| ||
*please note that you must to upload your image background first, then click Save button. After that, you can customize your page width, height, x, y coordinates and preview your PDF ticket without click Save again. 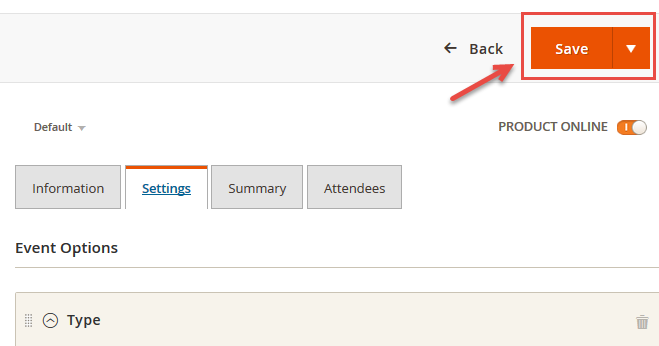 Example:
If you change your image background, you must save this setting by click Save button again before make any changes in PDF setting. |
3. Coordinates
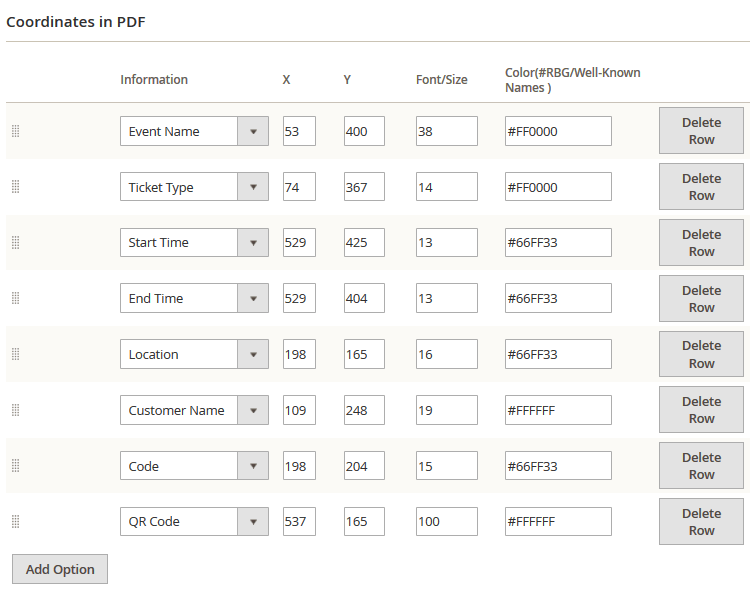
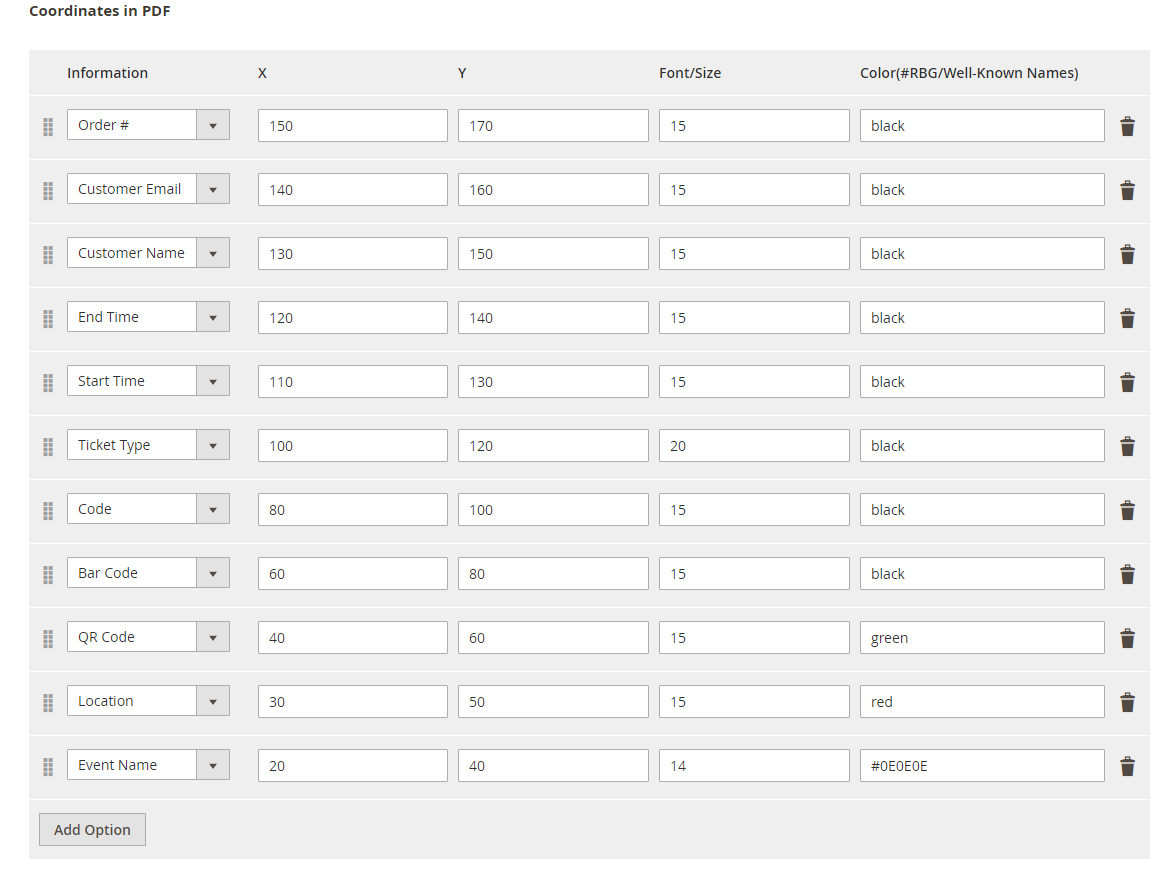
You can use MB-Ruler software to measure distances and angles on yout ticket. This application is free download.
...
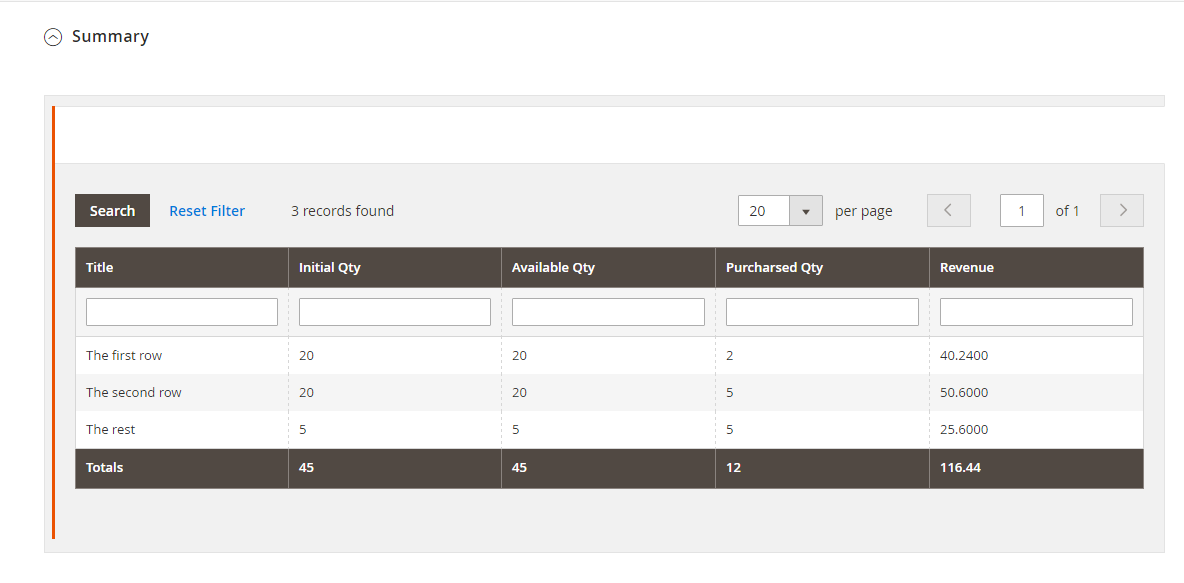
This is basically the Summary for ticket types, with Purchased quantity, Available quantity and revenue for each type, as shown.

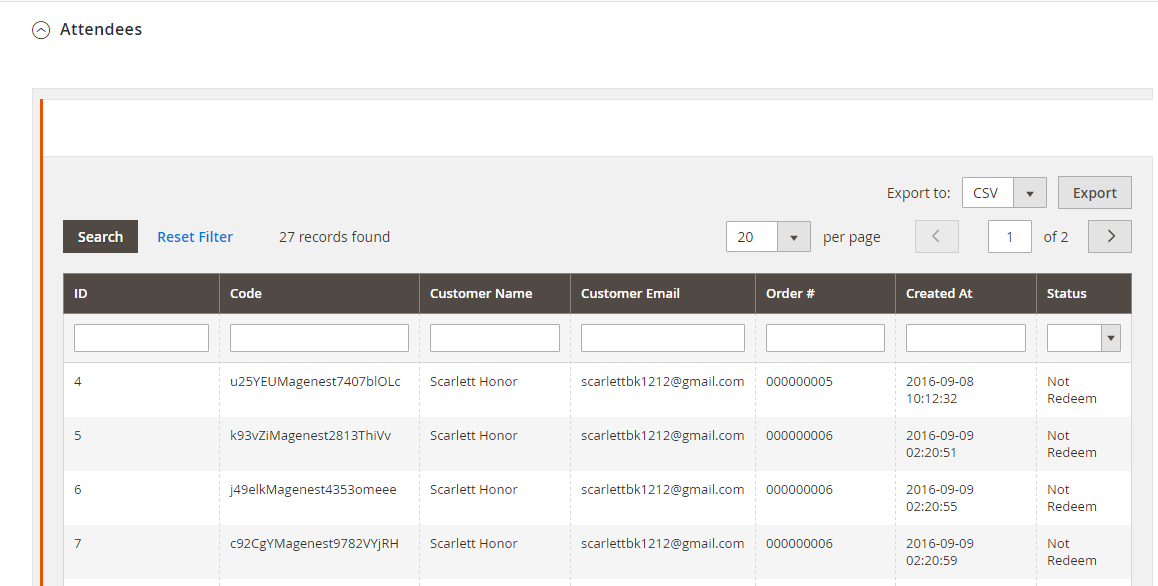
Attendees
In the Attendees tab, the admin can easily manage the attendees of the event. In this tab, all the event attendees will be listed. Please, note that a customer will appear in this section after their order gets processed.

...
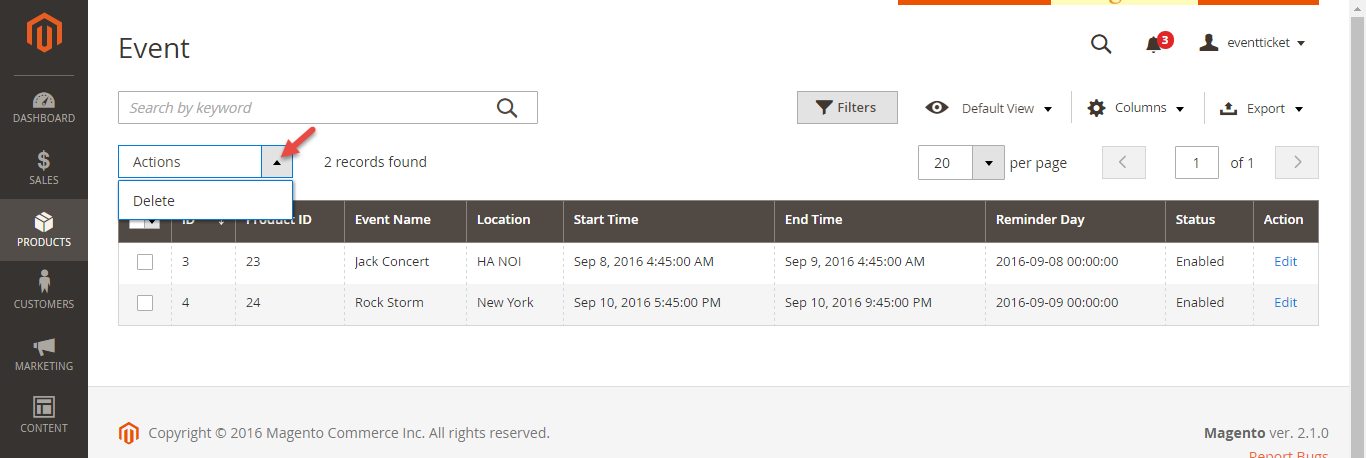
Management
The Product > Event Tickets > Manage Ticket or Manage Event grid displays the actual event & ticket sales.
...
This grid lists ALL the items which had ever had Event Ticket functionality enabled, include: product ID, event name, start time, end time, reminder day, status and location. You can and export to the CSV/XML file.

In the Manage Ticket tab:
...
You can see this grid displays the actual ticket sales and export to the CSV/XML file.


...
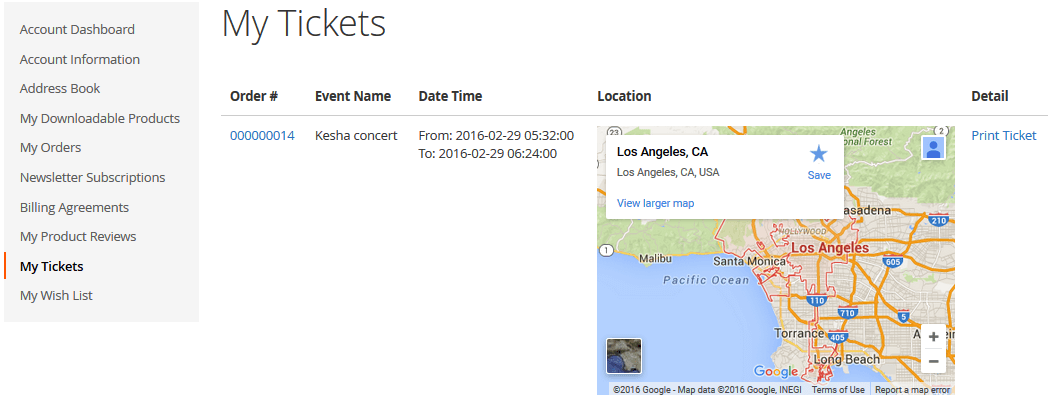
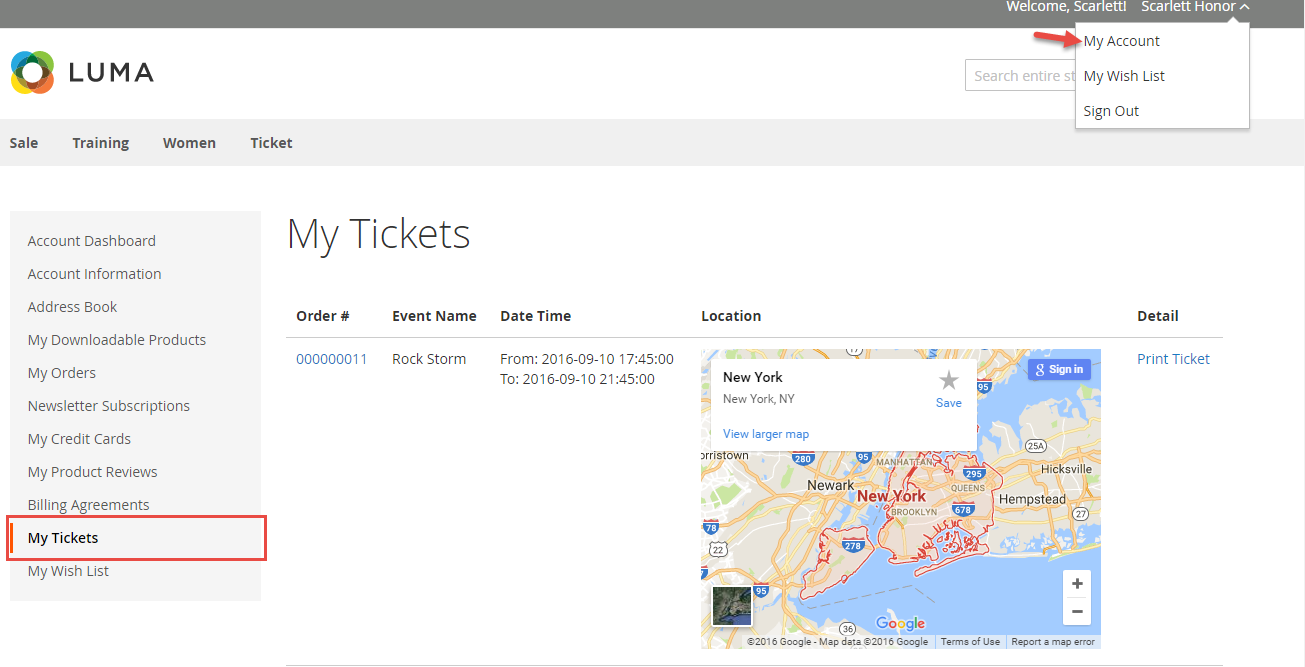
My Tickets
In My Account area, they can see a special tab into My Account area names My Ticket, where customers can view ticket price, status, duration, and location.
| Note | ||
|---|---|---|
| ||
Your customers must to register to buy tickets. if a guest buy a ticket so the Customer name field in PDF will be a blank. |
...