Thank you for purchasing our extension. If you have any questions that are beyond the scope of this guide, please send us an email via the user page contact form here. Thank you.
Created: 30/07/2017 | By: Magenest | Support portal: http://servicedesk.izysync.com/servicedesk/customer/portal/33
Table of Contents outline true style none
...
Introduction
Magento 2 Quickbooks Desktop Integration for Magento 2 is a powerful extension that helps merchants synchronize error-free data from your Magento 2 store to QuickBooks Desktop automatically in real-time. Merchants can transfer unlimited online transaction data at a glance.
Main Features
...
- You have to use SSL for your website
- Web connector application is required on the computer that installs QuickBooks with version 2.1.0.30 and older versions
- Support QuickBooks version:
- QuickBooks Enterprise Solutions
- QuickBooks Premier (2002 or later)
- QuickBooks Pro (2002 or later)
- QuickBooks Simple Start (2006 or later)
- Canadian editions of QuickBooks Pro, Premier, or Enterprise (2003 or later)
- UK editions of QuickBooks Pro or Accountant Edition (2003 or later)
...
How to setup connection
First of all, you have to set up the connection between the Magento website and QuickBooks software through the Web connector application. Please follow the below steps:
...
- Synchronization date from: set update which use to filter when you add object data to Queue by click the button in the Header of the Queue table (second way to add data to Queue table)
- Income Account: Enter Income account name which use to create Inventory Item in QuickBooks
- Other Income Account: Enter Income account name which use to create Other charge item in QuickBooks
- Discount Income Account: Enter Income account name which use to create Discount item in QuickBooks
- Account for Non-Inventory Item: Enter account name which use to create Non-Inventory item in QuickBooks
- Cost of Goods Sold Account: Enter COGS account name which use to create Inventory item in QuickBooks
- Auto insert id to customer name: Select Yes in case you want to add an ID to the customer name. To avoid customers synchronization failure because customers have the same name.
- Allow Sync Order: Select No if you don't want to sync orders.
- Allow Sync Invoice: Select No if you don't want to sync invoices and receive payments.
- Allow Sync Credit Memo: Select No if you don't want to sync credit memos.Asset Account: Enter Asset account name which use to create Inventory item in QuickBooks
- Max records per Request: When you click to click Update Selected or Autorun is triggered in the Web connector, there will be a lot of requests sent to Magento to get data and import to QuickBooks. This field will set the number of items that will be imported into Quickbooks in each of these requests. By default, if you don't set a value for this configuration, it will process all records of one type for each request.
| errors. |
|---|
Synchronize Product
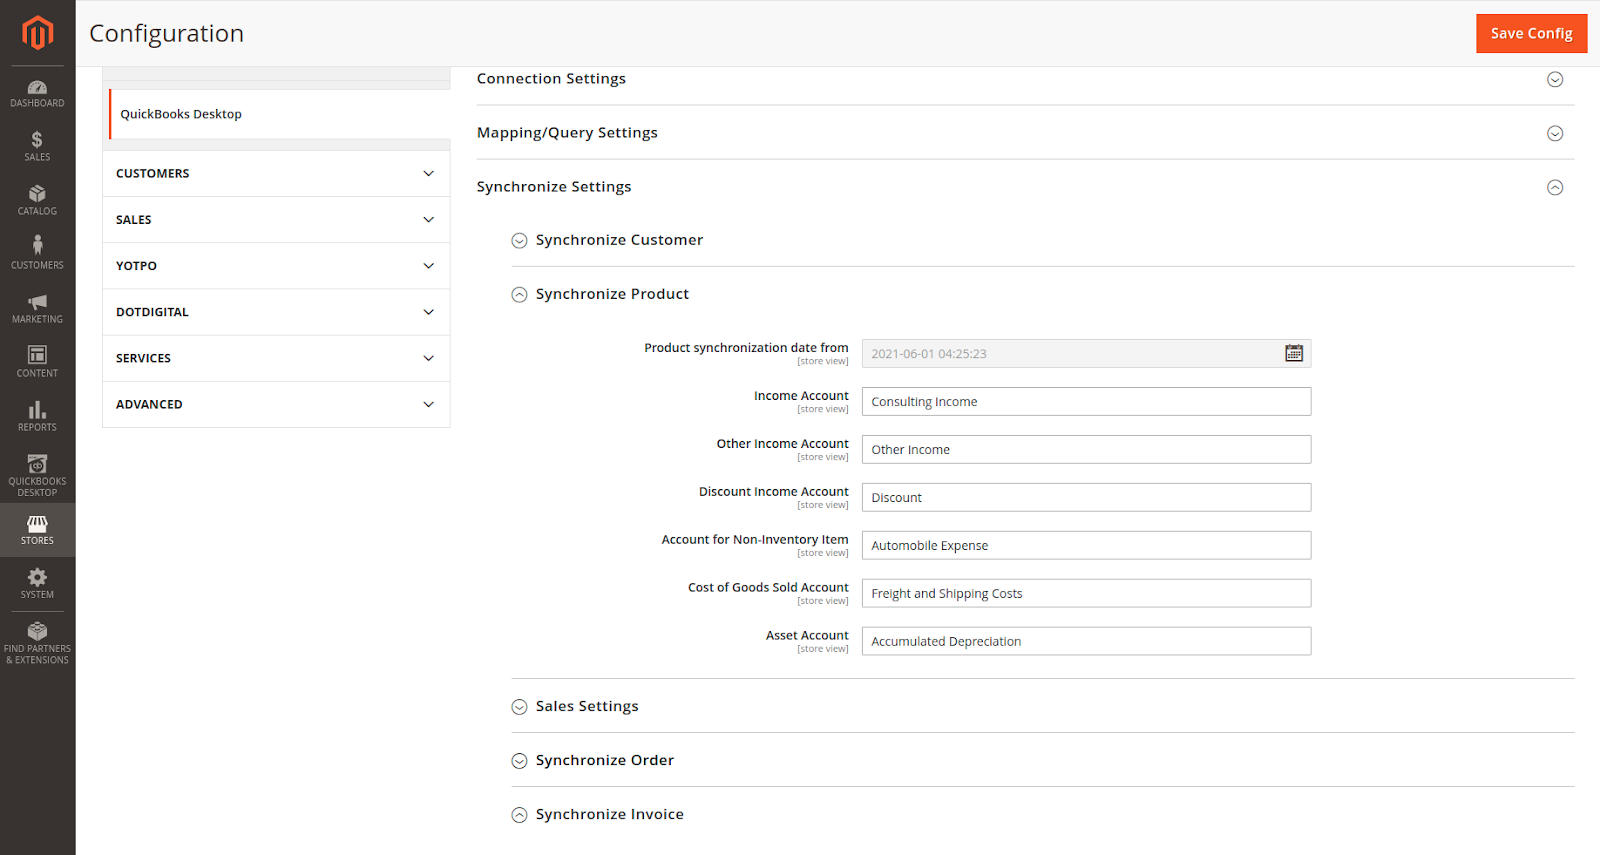
- Income Account: Enter Income account name which use to create Inventory Item in QuickBooks
- Other Income Account: Enter Income account name which use to create Other charge item in QuickBooks
- Discount Income Account: Enter Income account name which use to create Discount item in QuickBooks
- Account for Non-Inventory Item: Enter account name which use to create Non-Inventory item in QuickBooks
- Cost of Goods Sold Account: Enter COGS account name which use to create Inventory item in QuickBooks
- Asset Account: Enter Asset account name which use to create Inventory item in QuickBooks
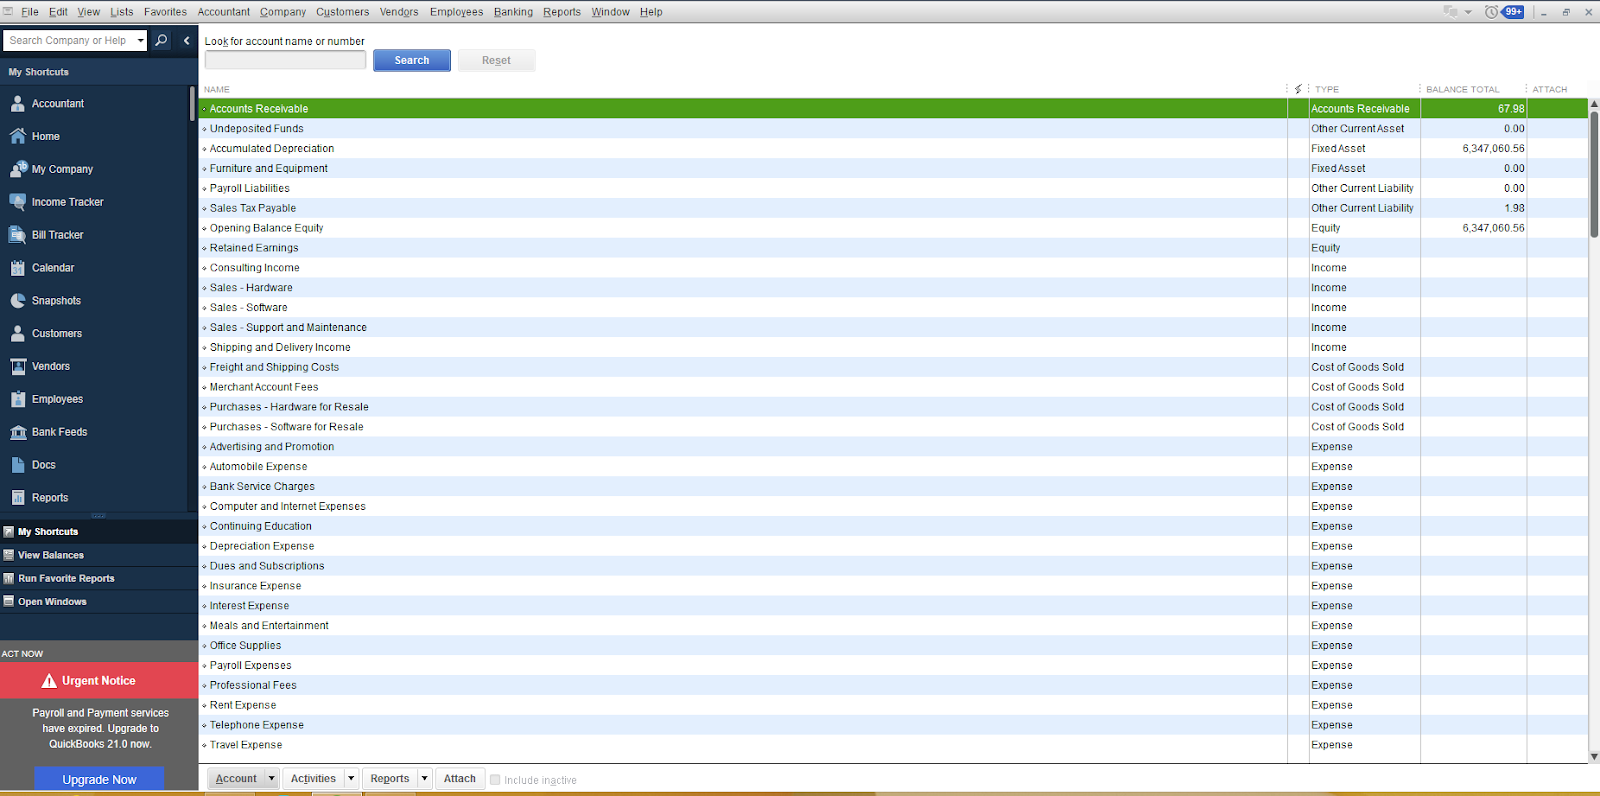
![]() You can get these accounts by going to your company file. Then go to Lists > Chart of Accounts and you'll see a list of your existing accounts. If not, create new ones.
You can get these accounts by going to your company file. Then go to Lists > Chart of Accounts and you'll see a list of your existing accounts. If not, create new ones.
Add data to Queue table
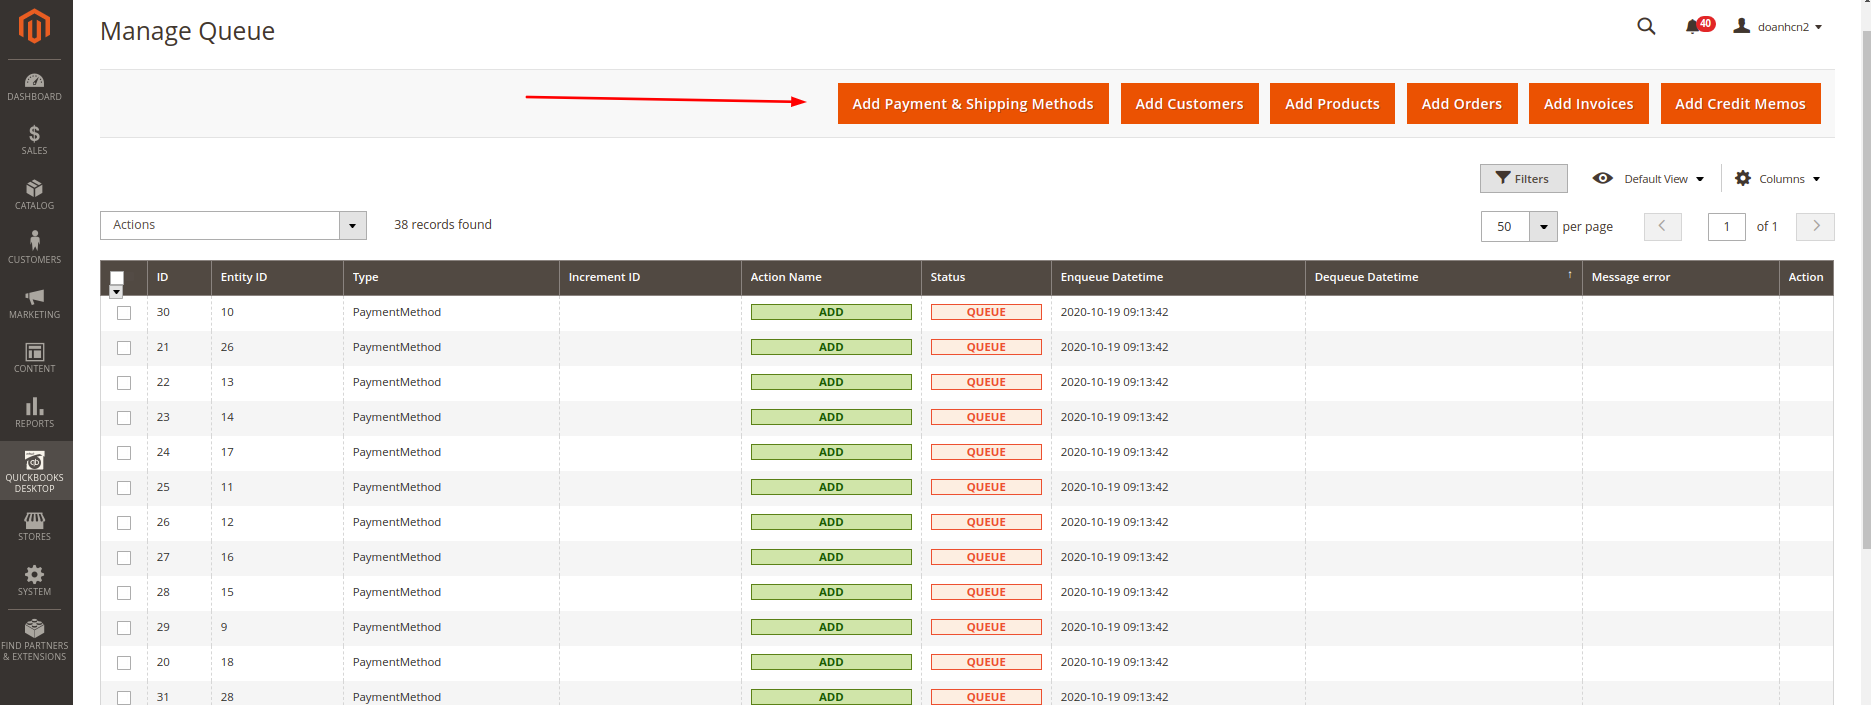
![]() You can add Magento data to the Queue table in the following way:
You can add Magento data to the Queue table in the following way:
- Auto-add by trigger add/edit object. It means when you create a new customer or new Order or same that, it is automatically added into the Queue table.
- Add a set of object data with date filter by clicking the button in the header of the Queue table
...
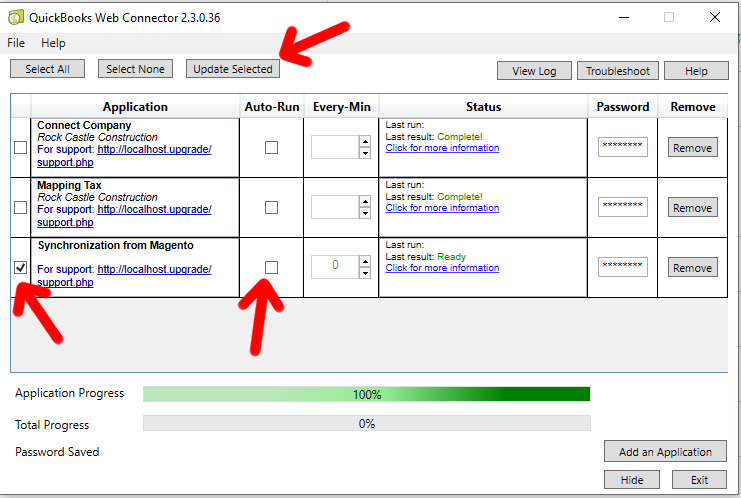
![]() Add the file that you downloaded in step 1 to the Web connector. Then you can update manually by Update Selected or use the Autorun function to get data from Magento to QuickBooks.
Add the file that you downloaded in step 1 to the Web connector. Then you can update manually by Update Selected or use the Autorun function to get data from Magento to QuickBooks.
- Simple, Virtual, Giftcard, Downloadable, and child item of configurable products in Magento will create an inventory item in Quickbooks.
- Other products such as Bundle products, Configurable products, Group products will create a non-inventory item without a list of child items. Only SKU, price, and description will be imported.
- Only Support Inventory item and Non-inventory item when synchronizing Sales Order.
- The order of the items that are processed while importing to Quickbooks are Shipping method, Payment method -> Customer/Guest -> Product -> Order -> Invoice -> Receive payment -> Credit memo.
You have to make sure that all the information needed to create an order/invoice/receive payment/credit memo must be imported successfully before importing them into Quickbooks to avoid not-found error.
Queue table information
...
- Synchronizing: the records are processed by being processed by Web connector.
|
|---|
...
| |
|---|
...
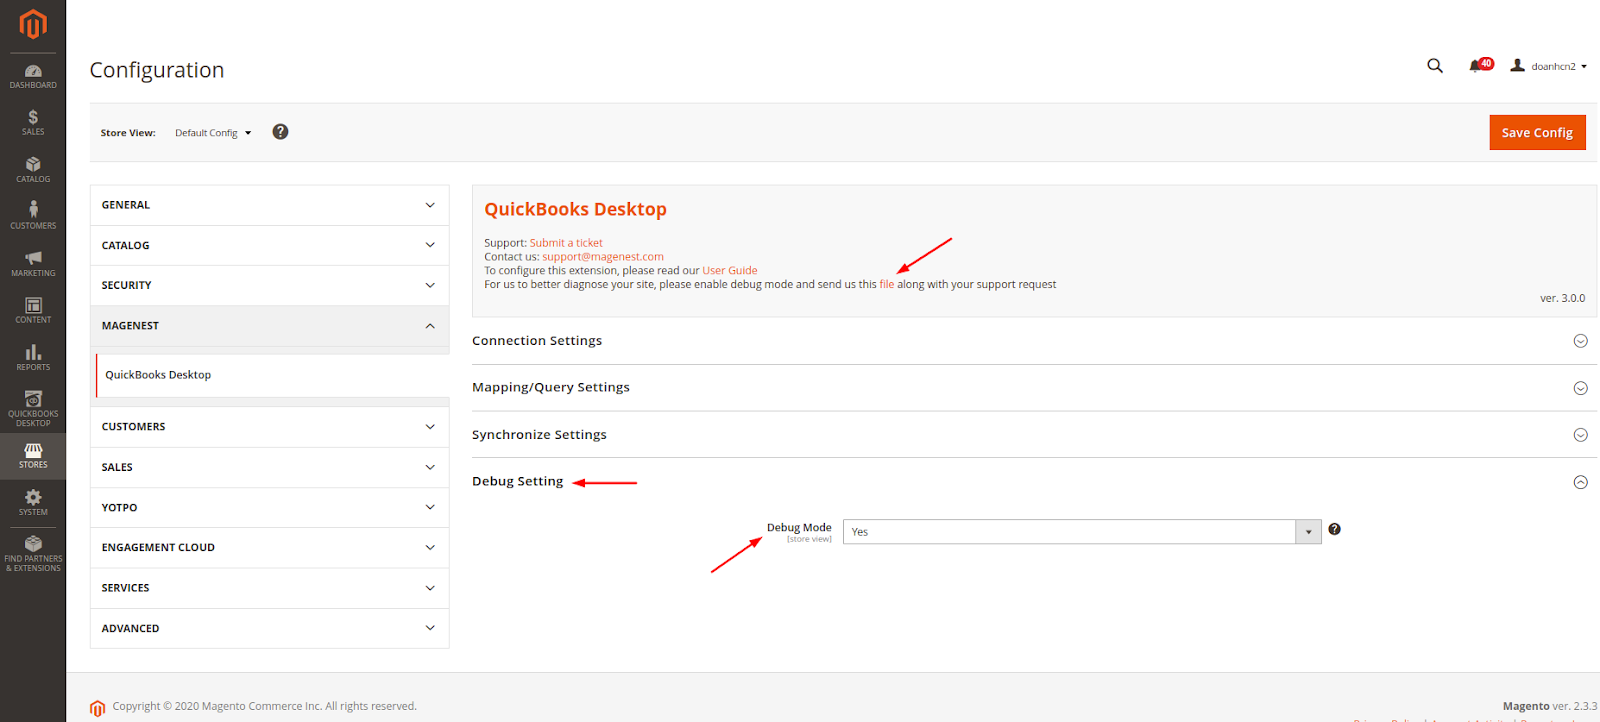
Debug Setting
If you enable Debug mode, the error will write to a file. You should attach the debug file when submitting a request to help us investigate the issue quickly.
...
Update
- When a bug fix or new feature is released, we will provide you with the module's new package.
- All you need to do is repeating the above installing steps and uploading the package to your store. The code will automatically override.
- Flush the configure cache. Your store and newly installed module should be working as expected.
Support
...