Thank you for purchasing our extension. If you have any questions that are beyond the scope of this document, do not hesitate to leave send us an email at [email protected]
Updated: 19/03/2019 | By: Magenest | Support Portal: http://servicedesk.izysync.com/servicedesk/customer/portal/12
| Table of Contents |
|---|
...
Introduction
...
Mega Menu for Magneto Magento 2 by Magenest is a powerful tool to create beautiful menu layouts.
Extension's page: Mega Menu
Features
Merchants will be able to customize their own mega menu with flexible options.
Features
- Flexible Mega Menu configurations
- Create a multi-level menu using drag & drop or hyperlink
- Add pages, categories, or custom item(s) to the menu
- Customize menu items with different colors, background images, labels, icons
- Generate menu according to existing categories automaticallyPre-setup a set of common labels
- Create labels for the menu
- Assign a label to each menu item
- Able to customize label and menu with HTML and CSS
- Live preview for label editing
- Add background image/change background color for menu
System Requirements
Your store should be running on Magento 2 CE & EE version 2version 2.13.x, 2.2.x 2.3.0
...
4.x
...
Configuration
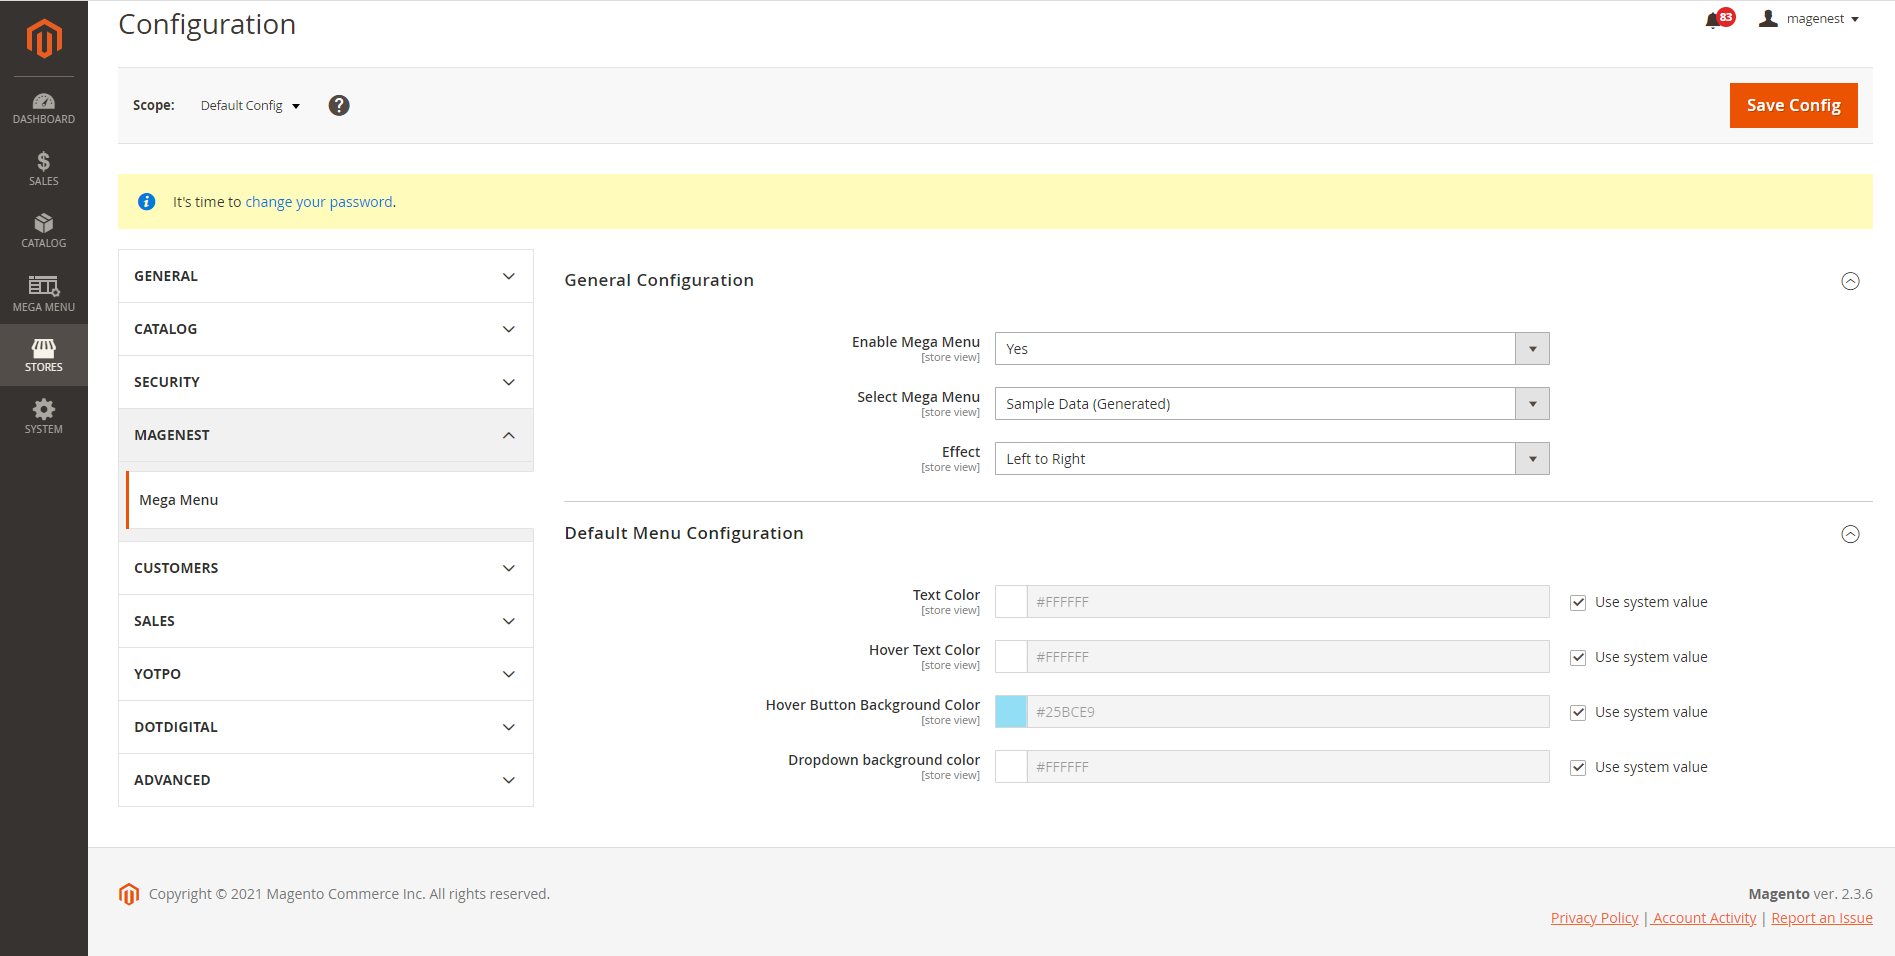
General configuration
Enable Mega Menu: to enable/disable the module
Select Mega Menu: Set up the menu to be used for the site here. You can create the menu in Mega Menu > Menus
Effect: The effect to show menu and submenu on the storefront
Default Menu Configuration
In these settings, you can customize the default menu text color, hover text color, hover button background color, and drop-down background color.
Note: The default menu will only be used if there is no mega menu selected.
...
Create a label
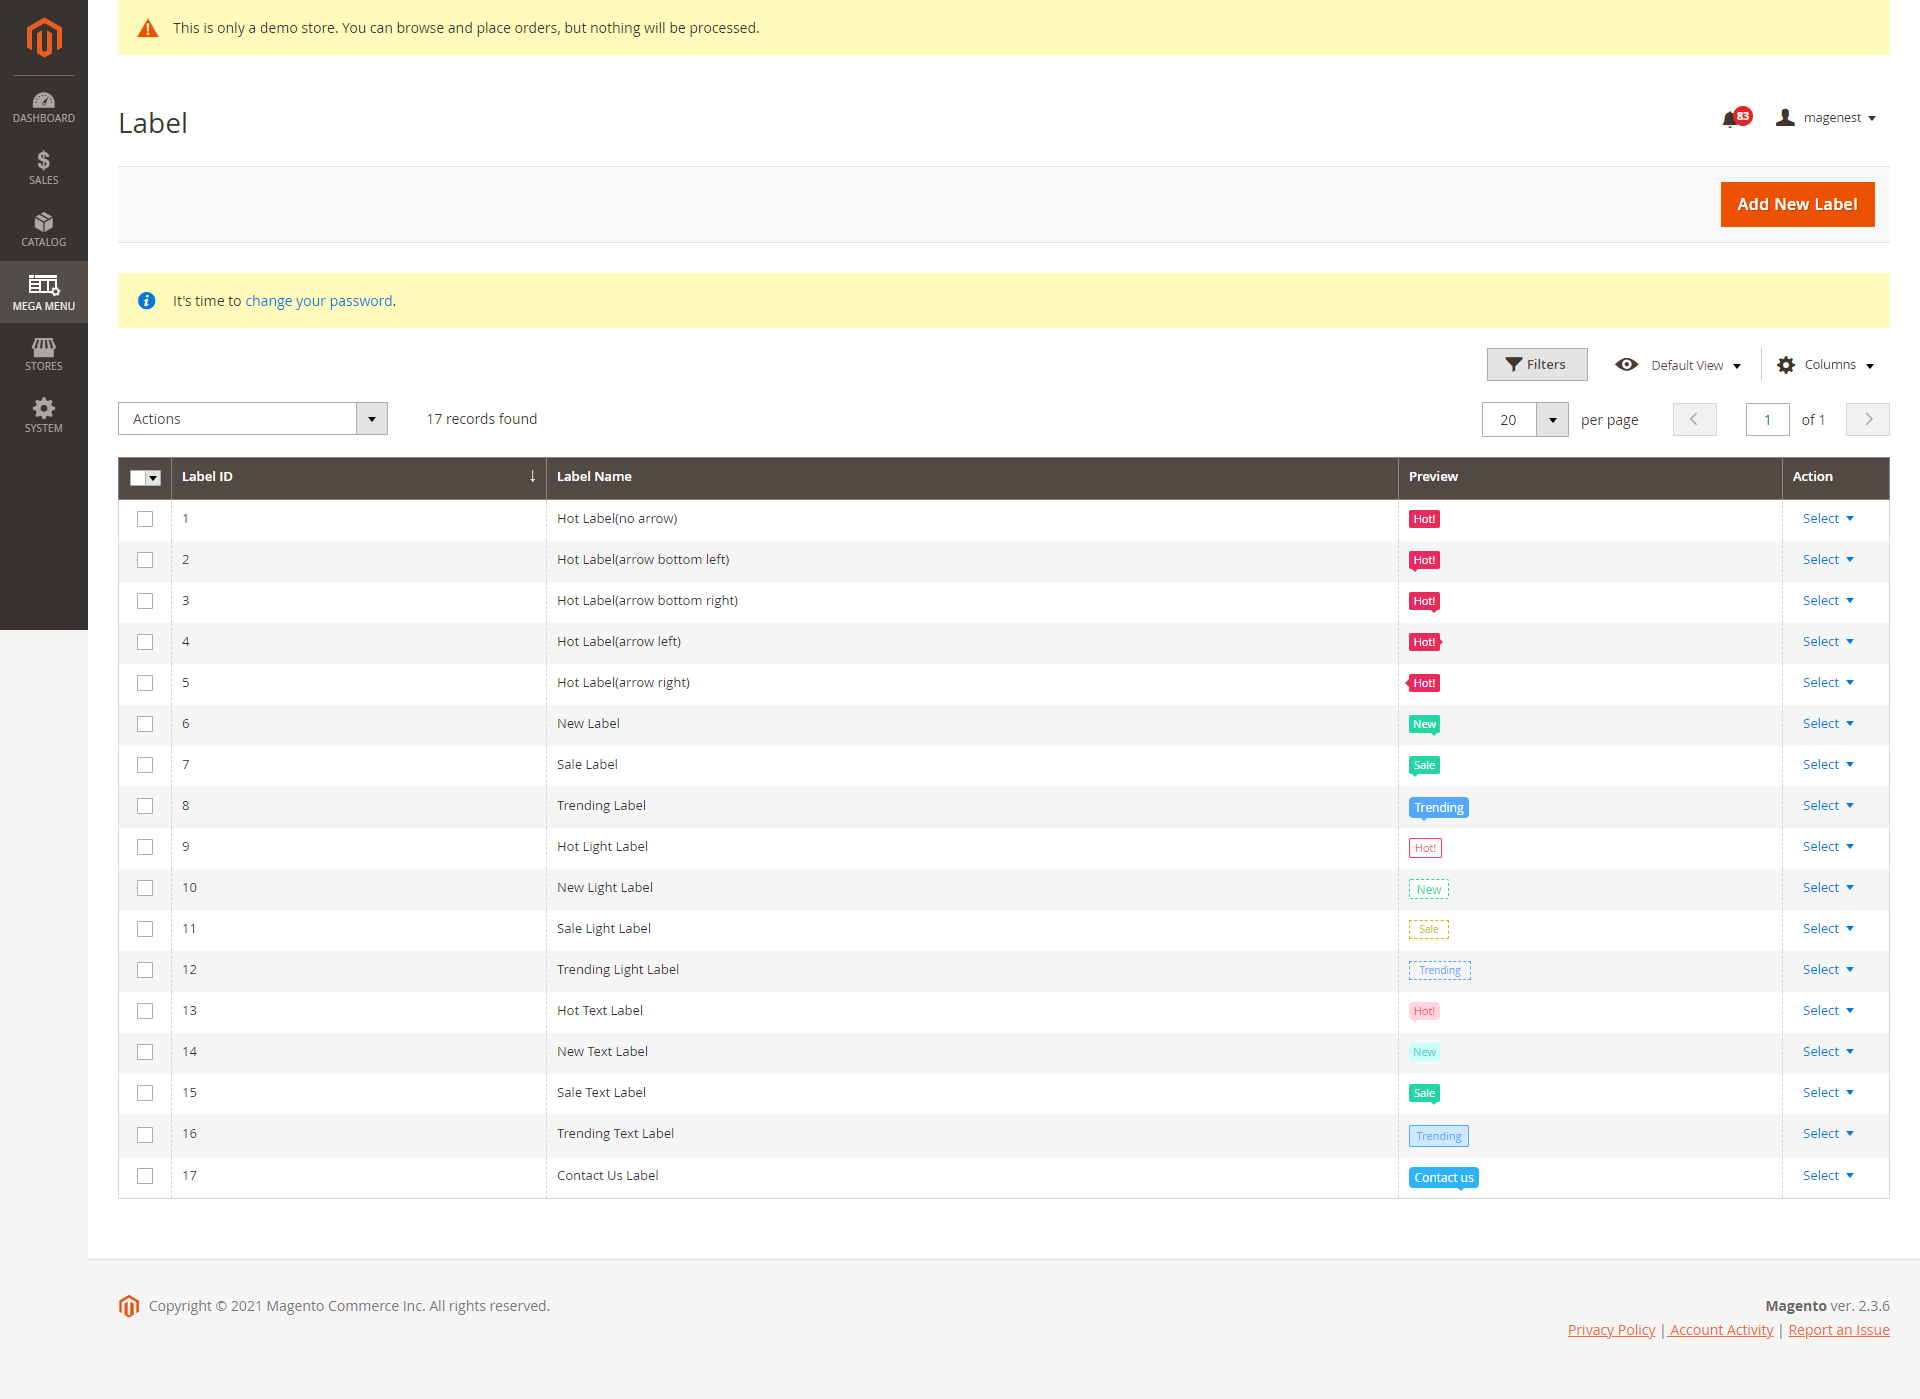
- Go to Mega Menu > Labels, you can manage all the available labels in the grid table.
- You can edit or delete the label by clicking on the Select in the Action column.
- Or you can create a label by clicking on Add New Label button.
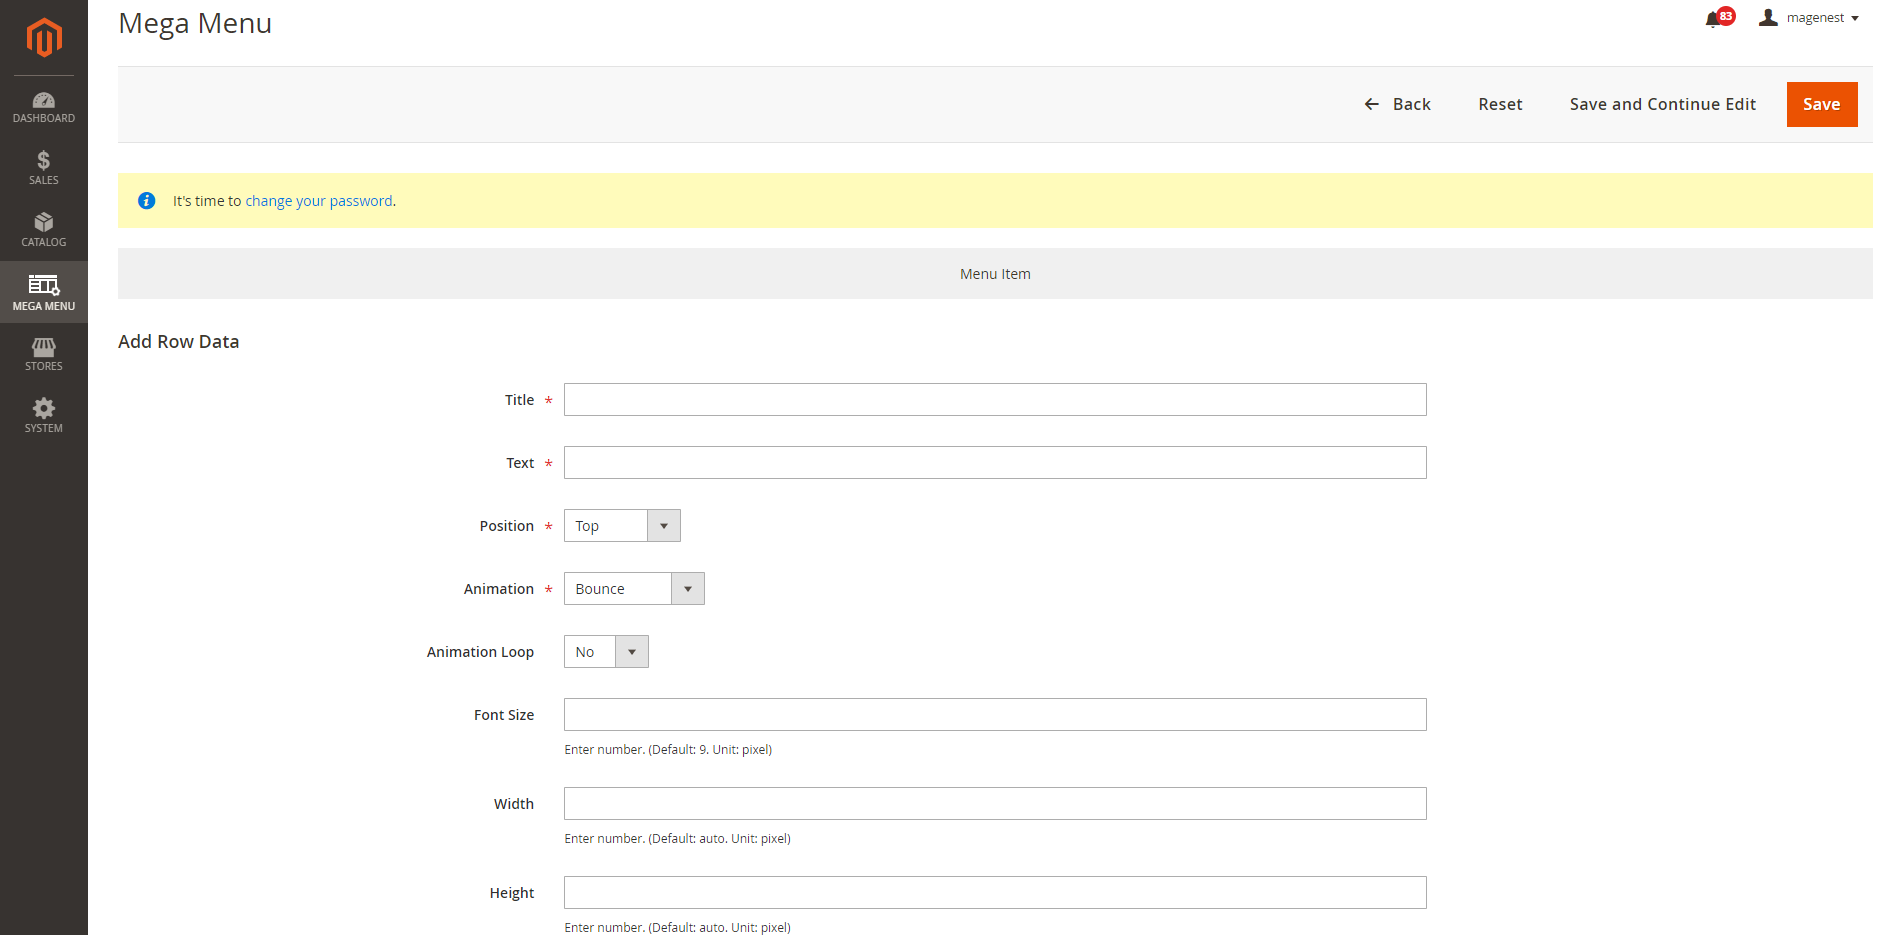
- Title: The label name displayed in the back end
- Text: The content of the label
- Position: Set the position of the label on the item name (Top, Left, Right, Top Left, Top Right)
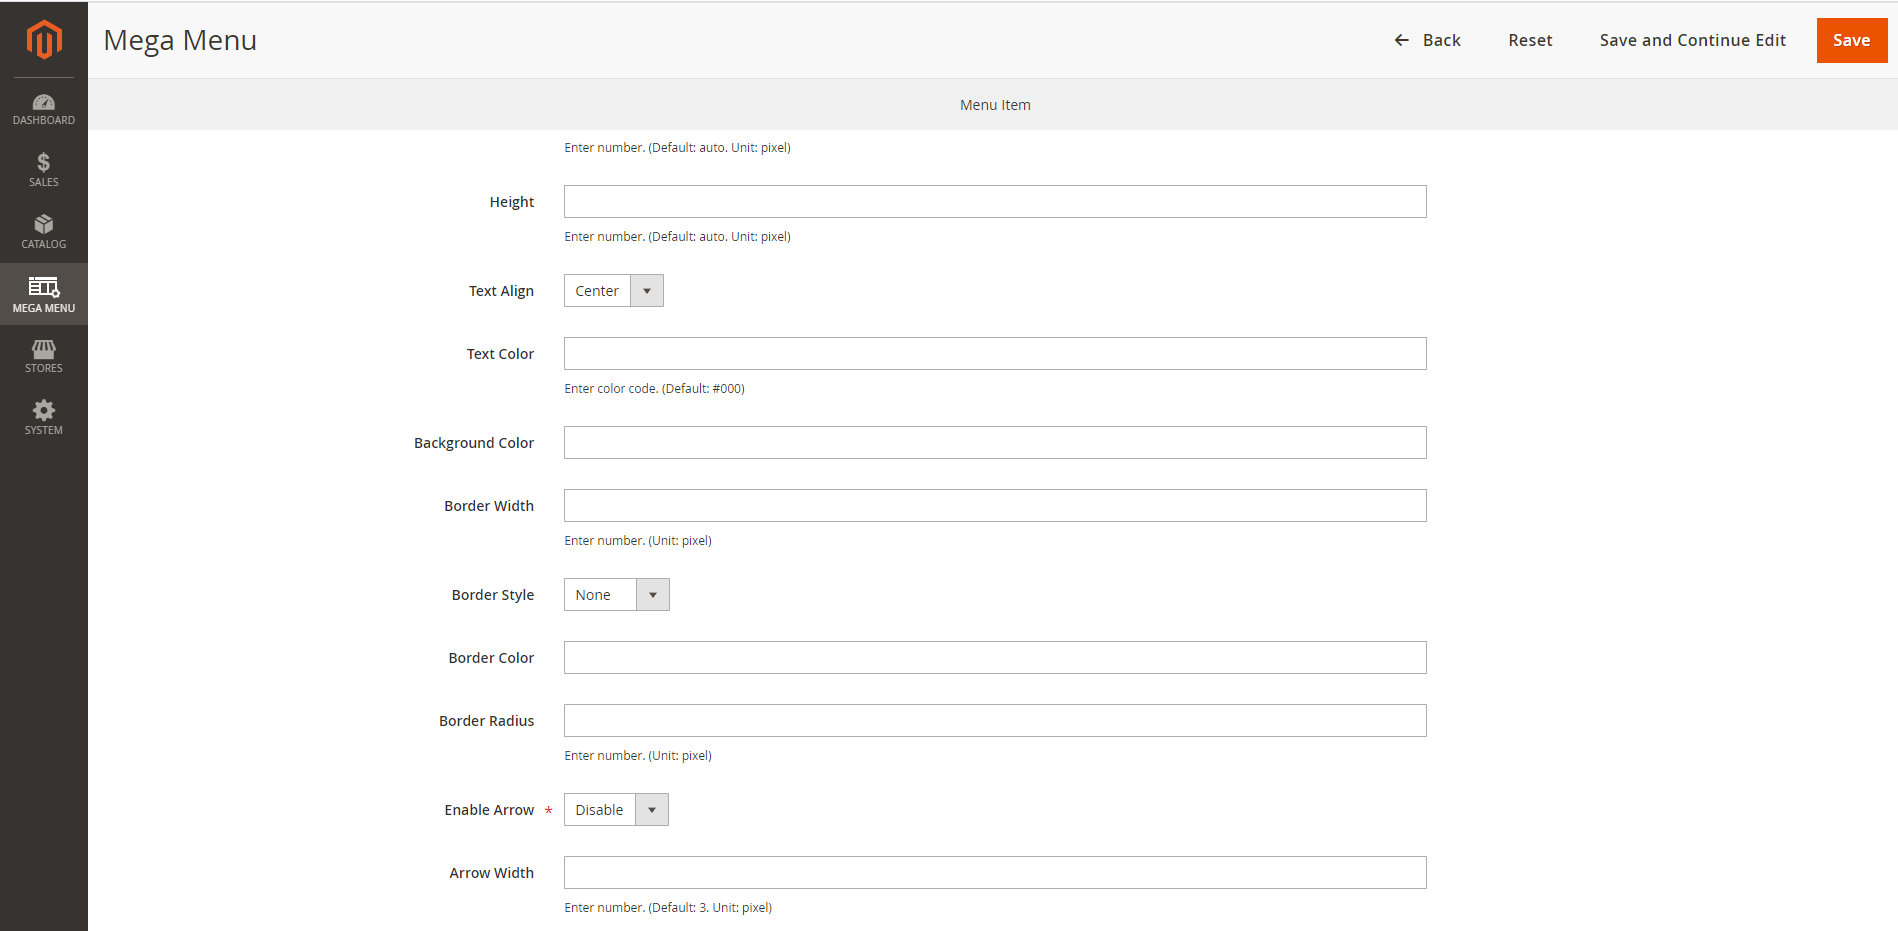
- You can change the font size of the text, the label width and height, the text alignment, and text color.
- You can also add a border to the label with 5 types of border styles: Dashed, Dotted, Double, Solid, or No style/None.
- Border radius: The rounded corners of the label
- You can add the arrow to point the label to the menu item. With the arrow, you can edit the width and color.
...
Create a new menu
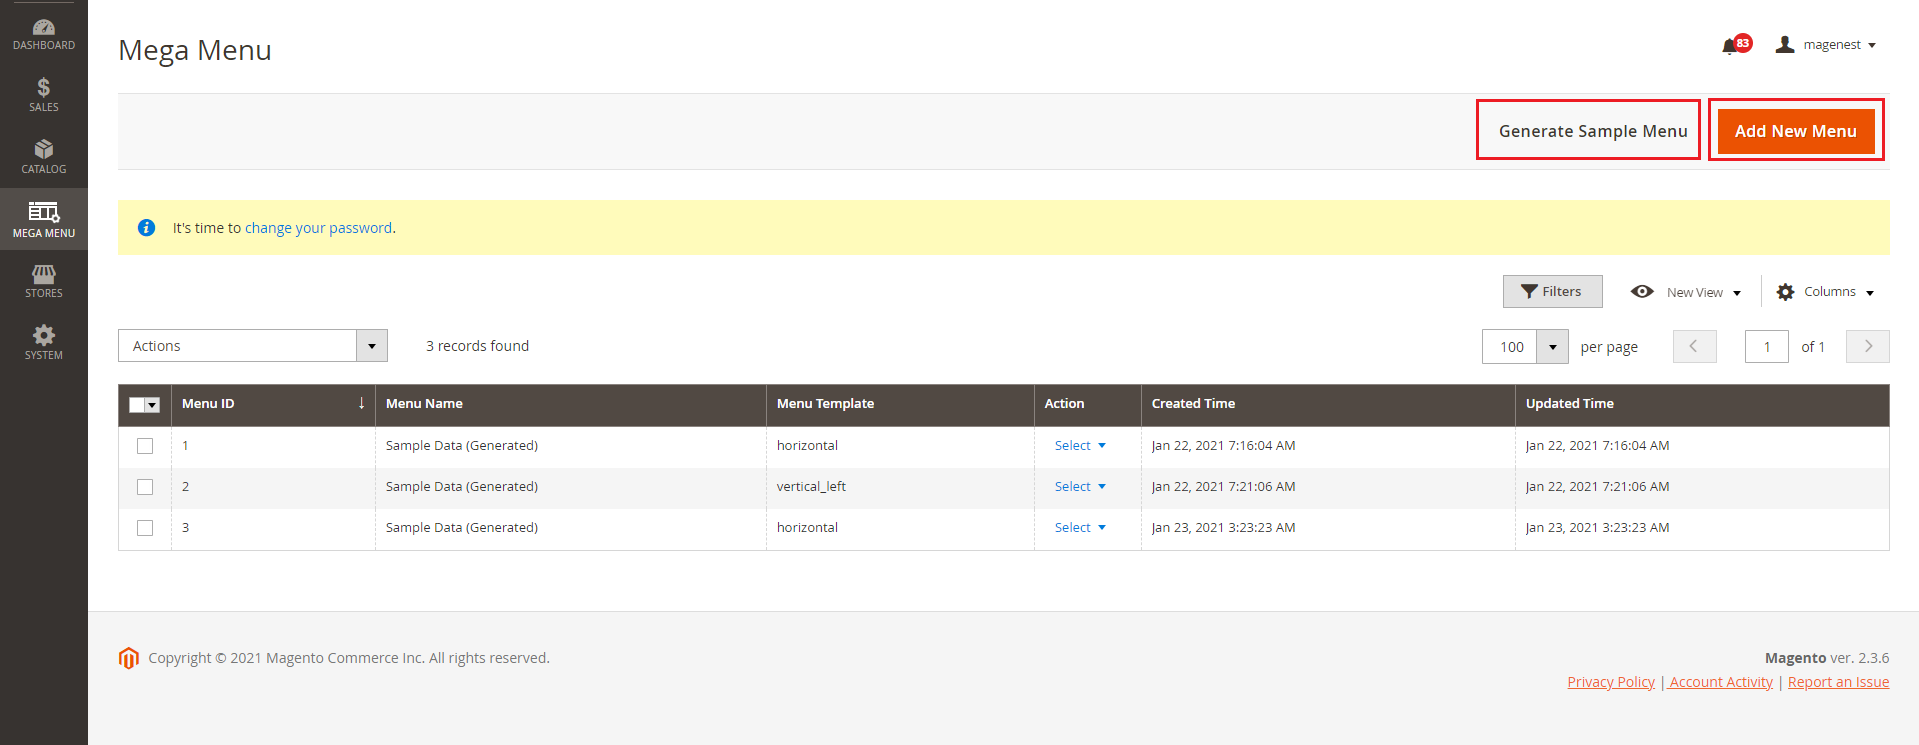
Go to In Magento 2 backend > Mega Menu > Manage Menus
You can click on Generate Sample Menu button to generate menus according to your categories with Grid type and default colors.
Or click on Add New Menu to create a custom menu.
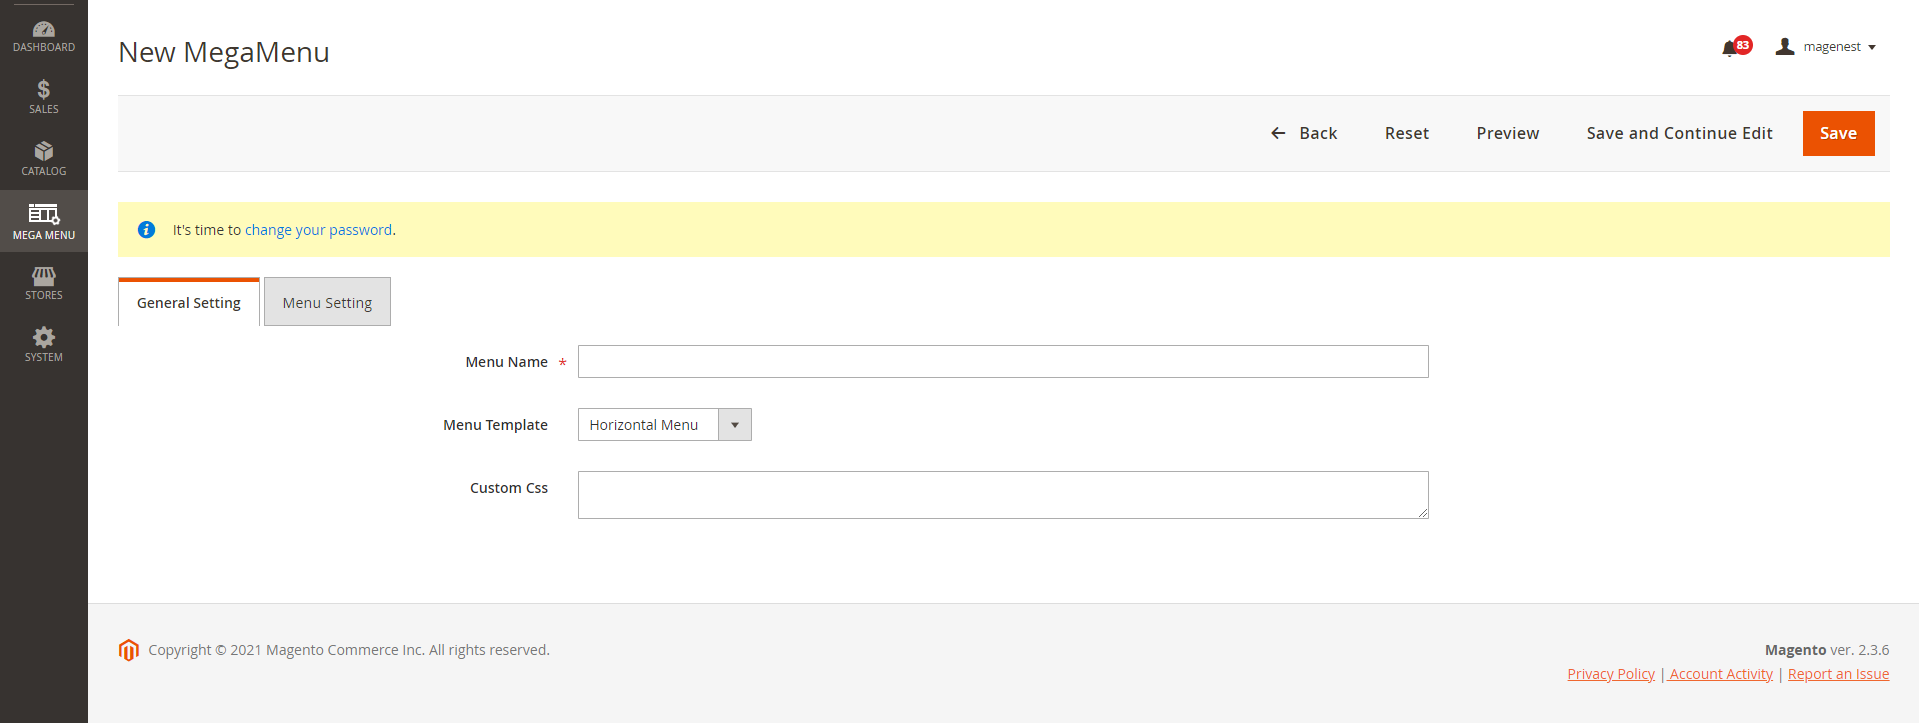
On the menu settings page,
General Settings
Menu Name: The menu name will be displayed in Magento 2 backend for management.
Menu Template: You can select the menu direction as horizontal or vertical left.
Custom CssCSS: You can customize/style the menu using CSS.
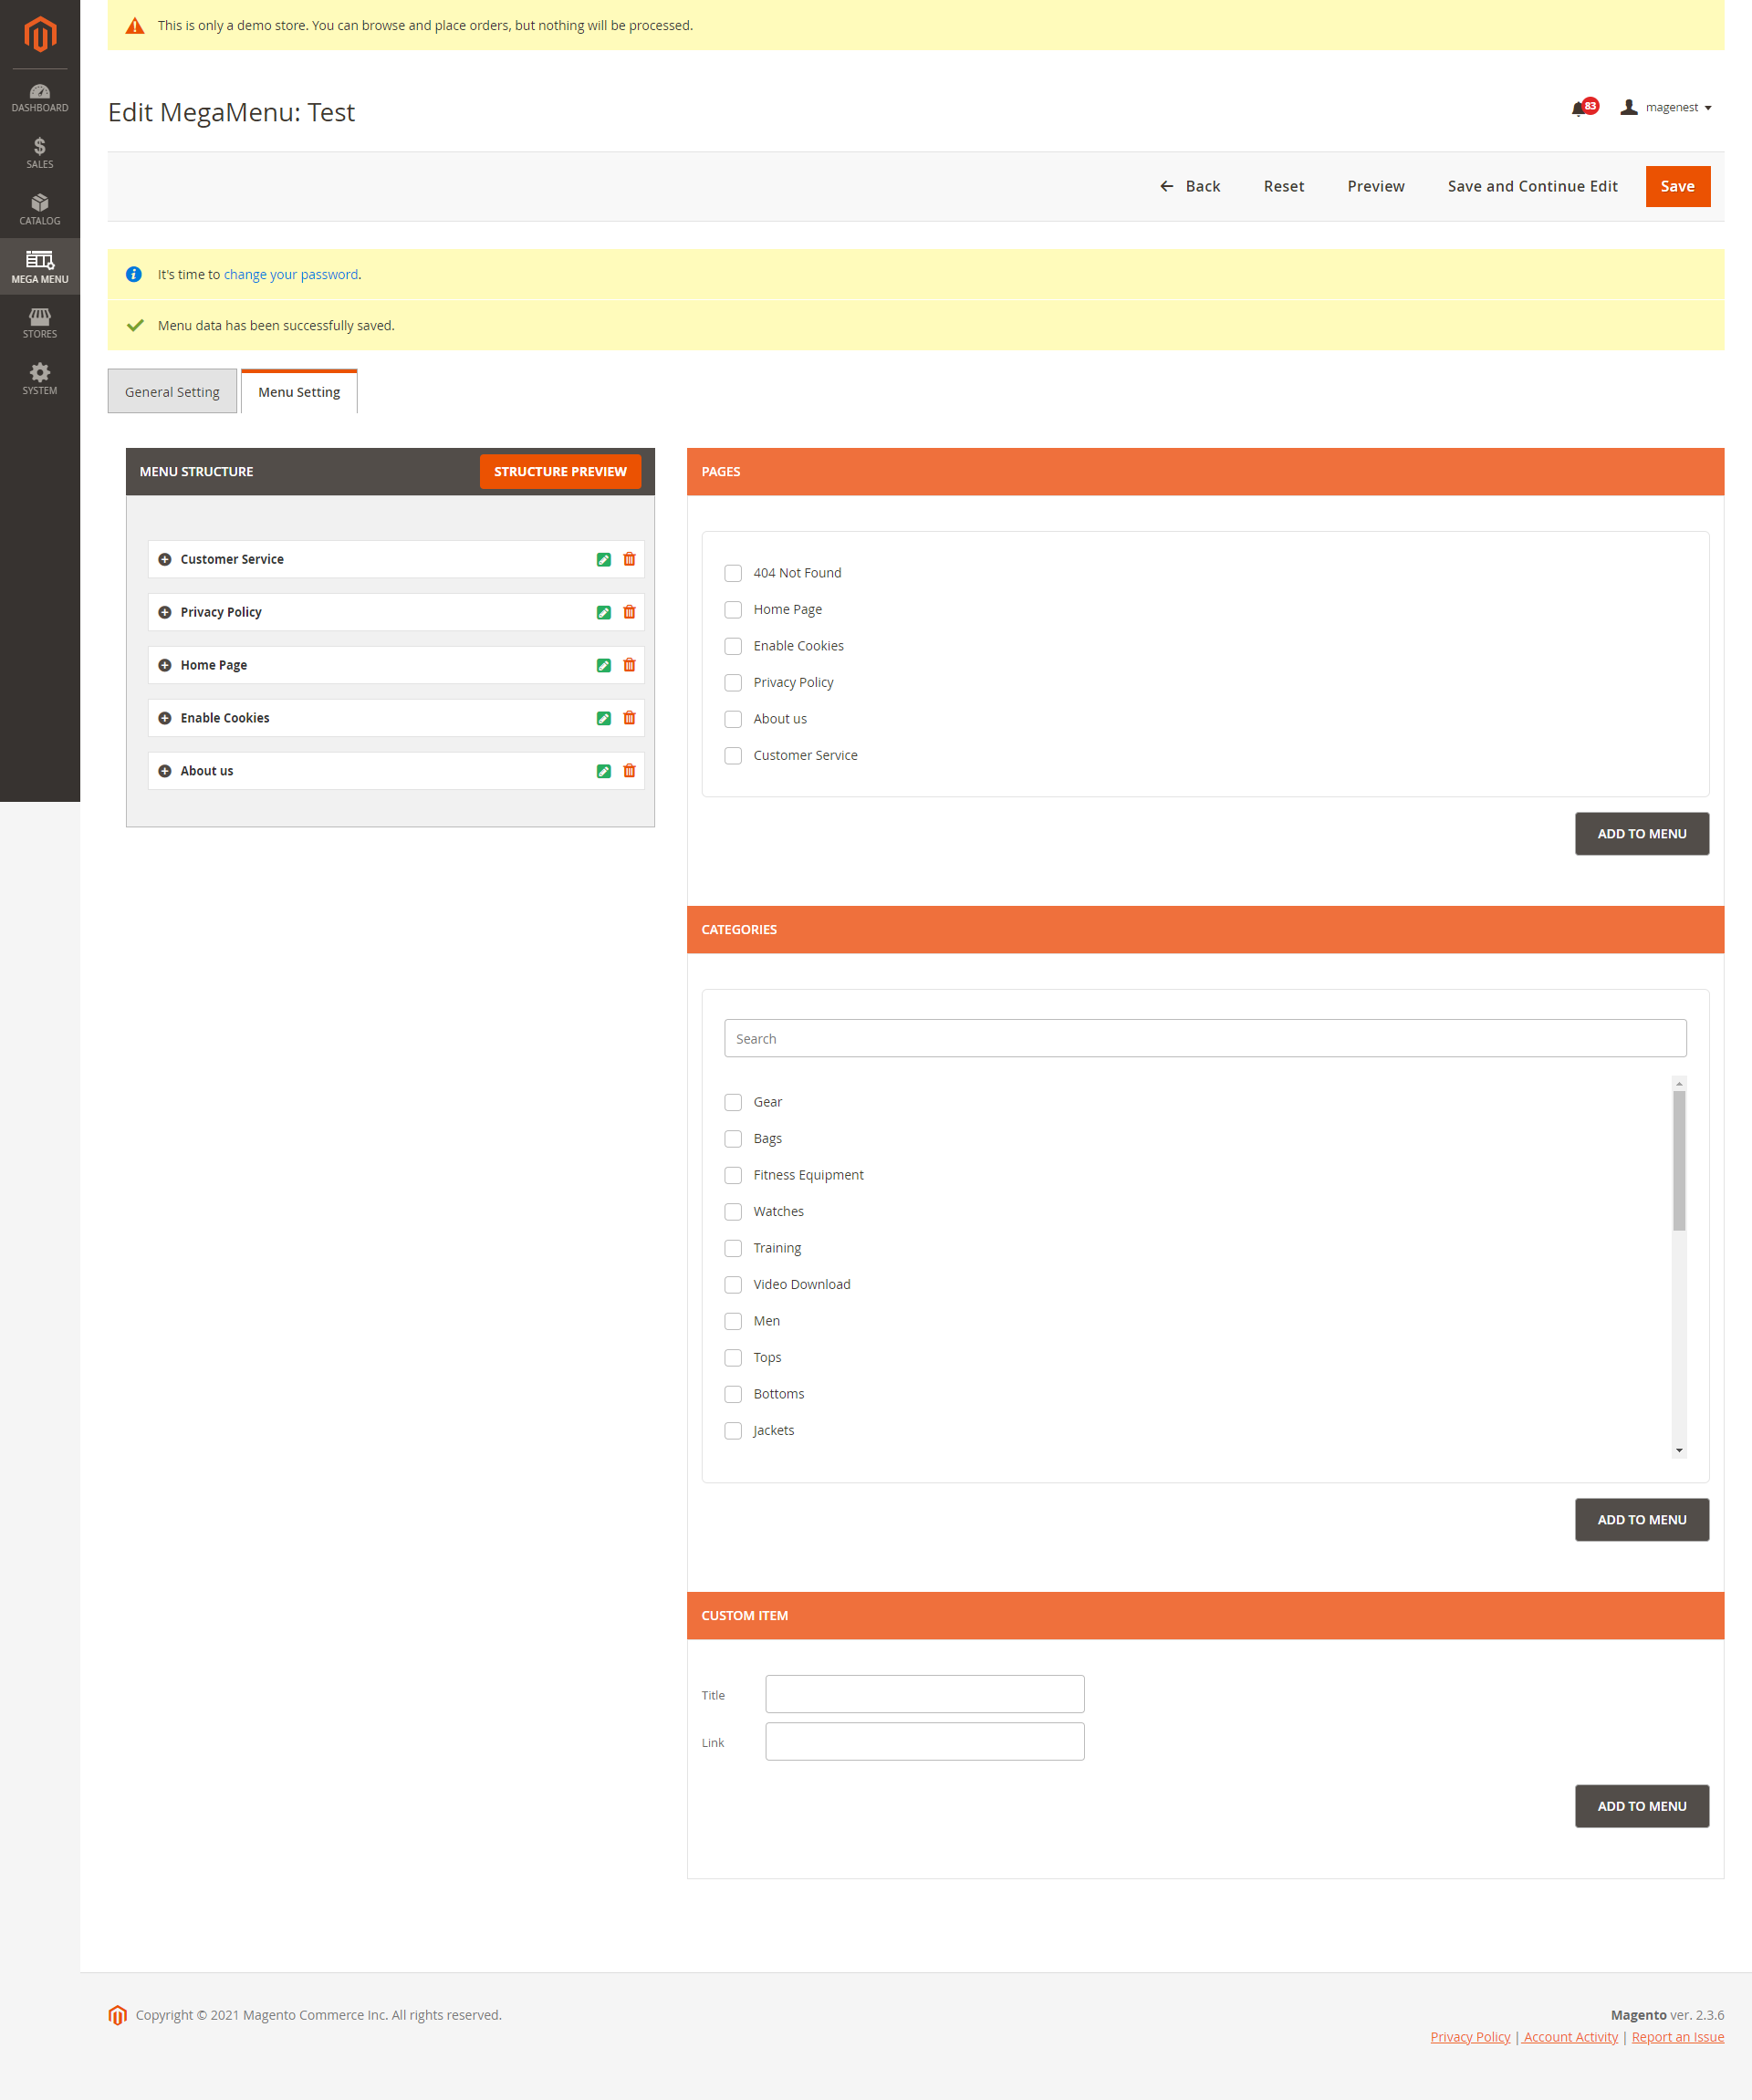
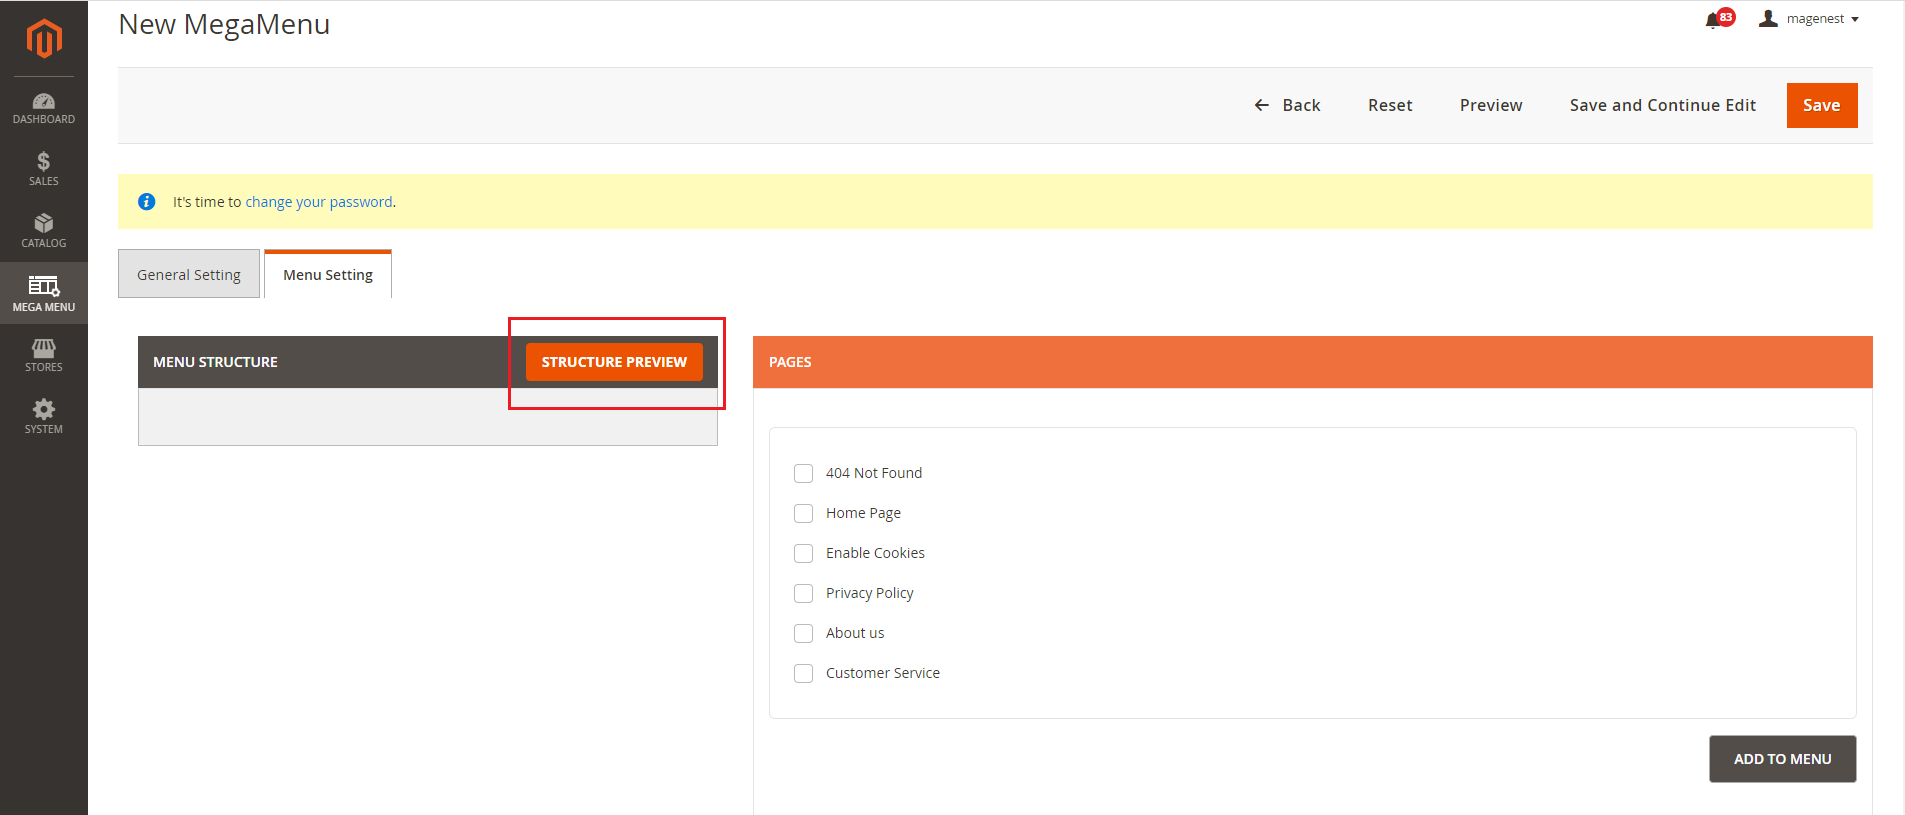
Menu Menu Settings:
In the Menu Structure, users can use drag & drop to configure the menu’s level.
On the right column, there are 3 tabs: Pages, Categories, Custom Item that allow you to add pages, categories, or custom page pages to the menu.
You can add one or more items to the menu by selecting the item(s) then click on Add to menu button.
Then you can drag and drop the item in the menu structure to create the submenu(s).
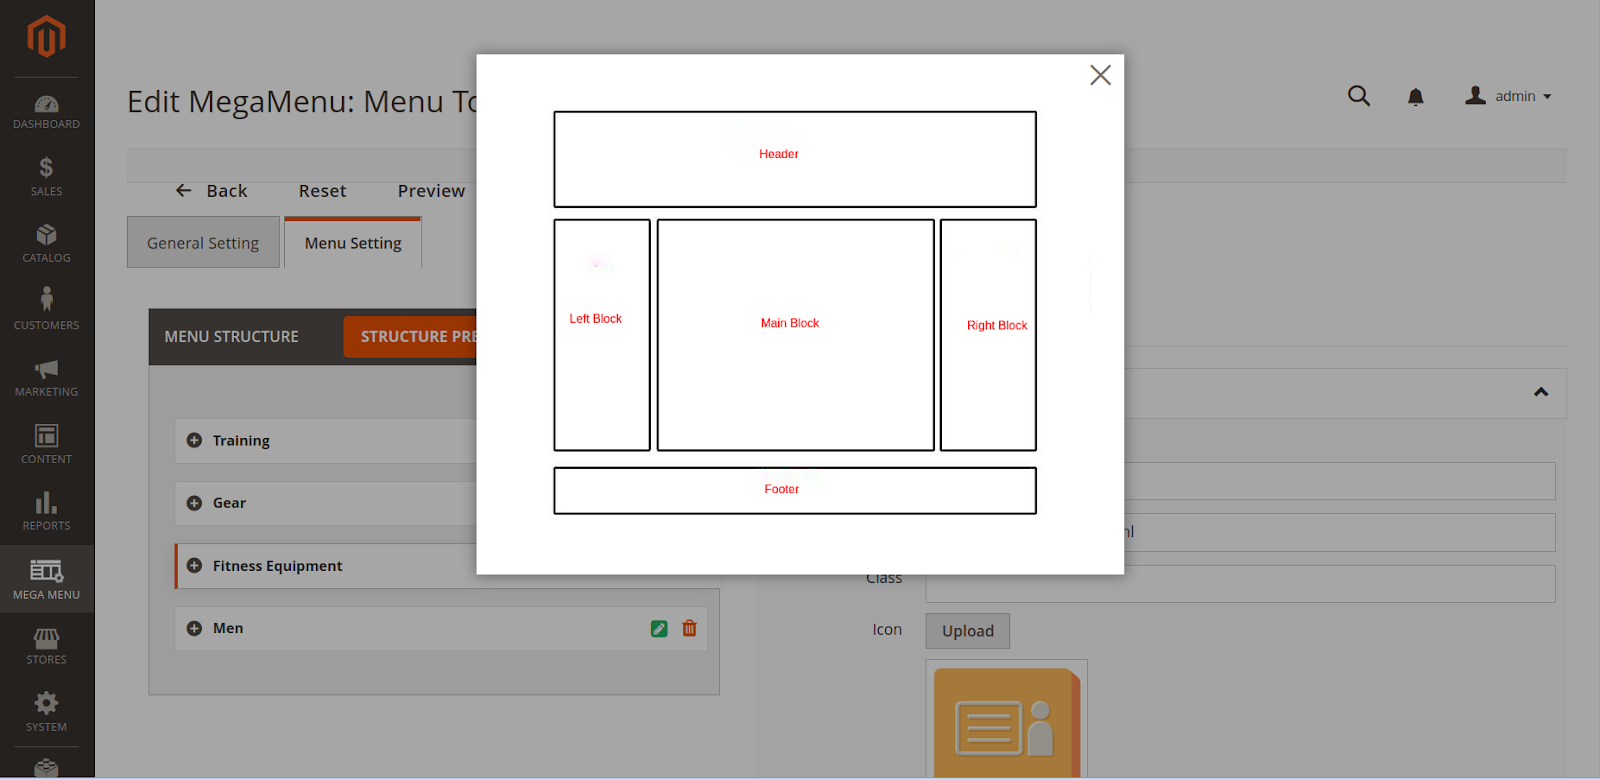
To preview the structure of the menu click Structure Preview
...
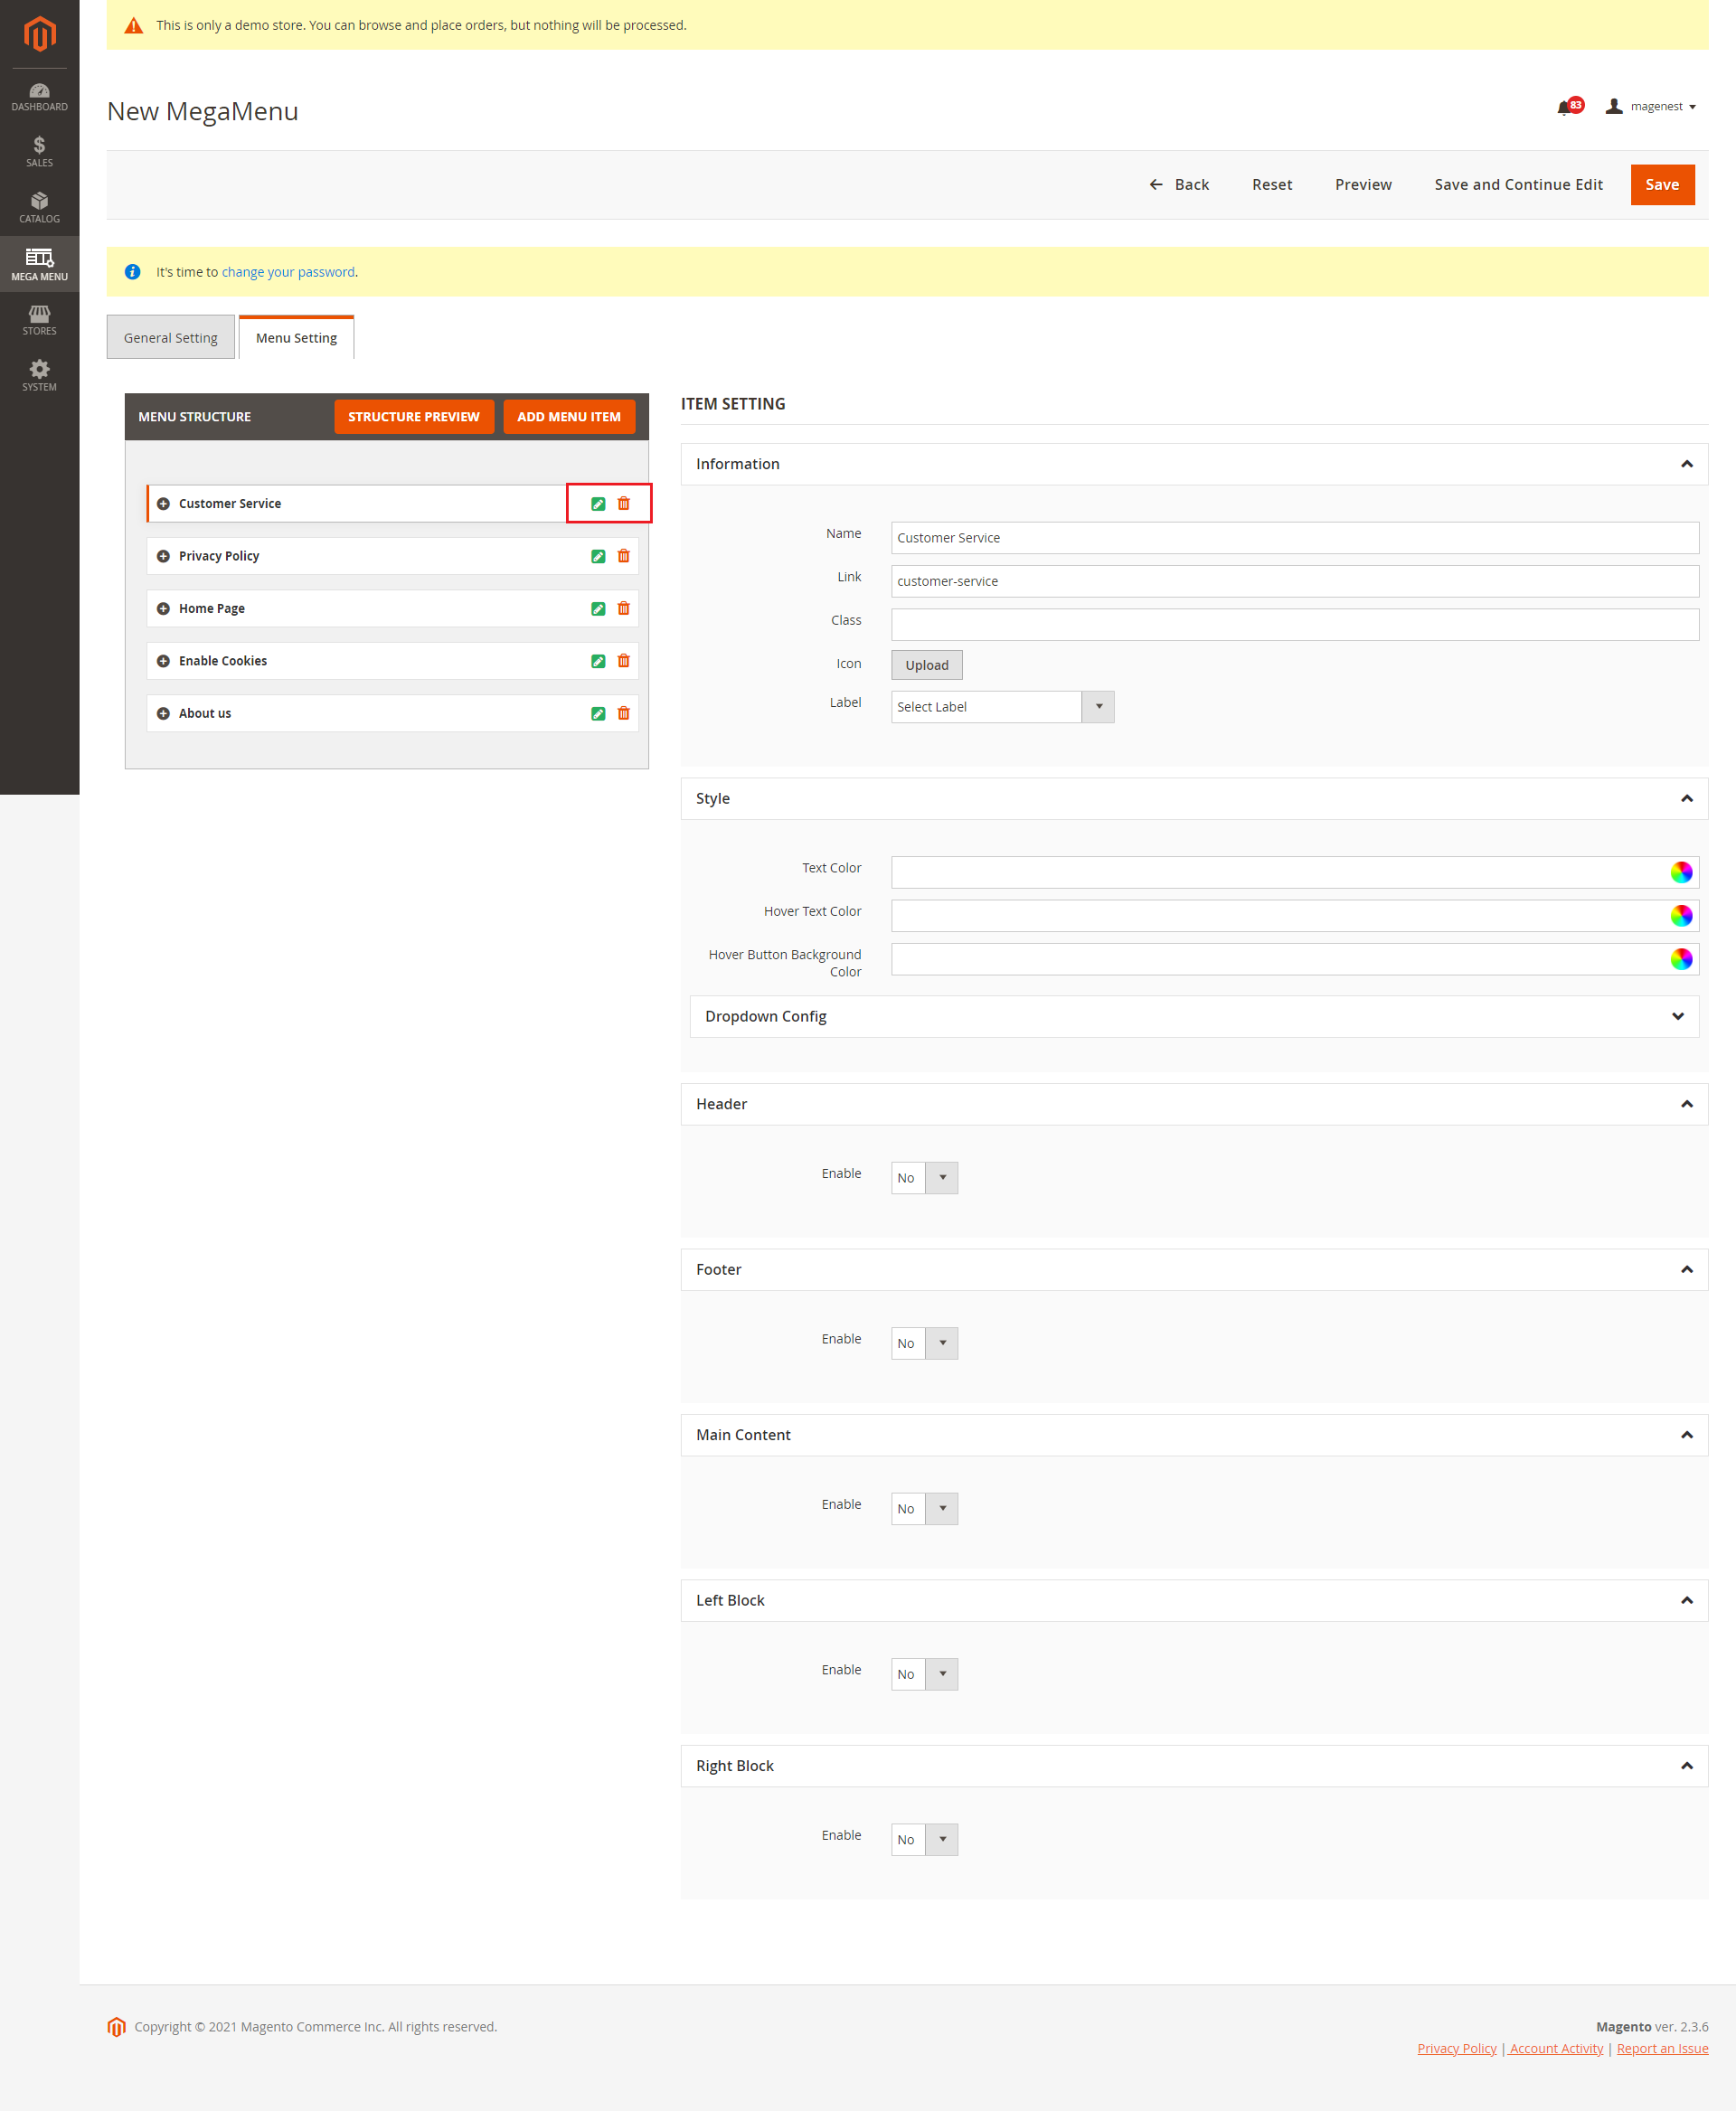
Customize menu item
You can edit each item with by clicking the green icon of each one or remove them from the menu list with the delete (red) icon.
Admins can create a new Menu using these two tabs.
Adding Page to a Menu
At Page tab > choose pages options which you would like to add into Menu Structure. Click on Add to Menu button to finish.
Adding Categories to a Menu
At Categories tab > choose categories options which you would like to add into Menu Structure. Click on Add to Menu button to finish.
*Note: Using subcategories instead of making menus at level 2 in Categories when creating multi-level Menus to avoid making an error.
In addition, admins have the ability of designing own page and category by click Edit button.
Left Block: display left block or not and create class, width or content HTML.
Main Content: set up layout for main content.
Style: text color and hover text color are two fields to style by HTML command.
Adding Custom Link to a Menu
At Custom Link tab > enter Title and add Link into textbox. Click on Add to Menu button to finish.
View custom link at the front-end:
Deleting a Menu Item:
Press Mega Menu tab and choose menu. Nextly, click Select drop down-> Delete.
How to add your Menu to your site
Click on Save button at the top right.
Congratulations! Your new custom menu has now been added to your site.
Information:
Name: The menu name that will be displayed on the front end.
Link: The menu URL or URL key.
Class: You can add a class to customize the item with CSS.
Icon: You can upload the icon for each item. It will be displayed on the left of the item on the main menu bar.
Label: You can create the label in Mega Menu > Labels.
Style:
You can choose the Text Color, Hover Text Color, Hover Button Background Color from the RGB color picker.
You can add the content in Header, Footer, Left Block, and/or Right Block. You can enable/disable each one and edit with HTML and CSS.
Main Content: You can use the WYSIWYG editor or use different types of content: default list, grid, or tab.
You can preview the mega menu before saving by clicking on the Preview button.
Remember to save the configuration
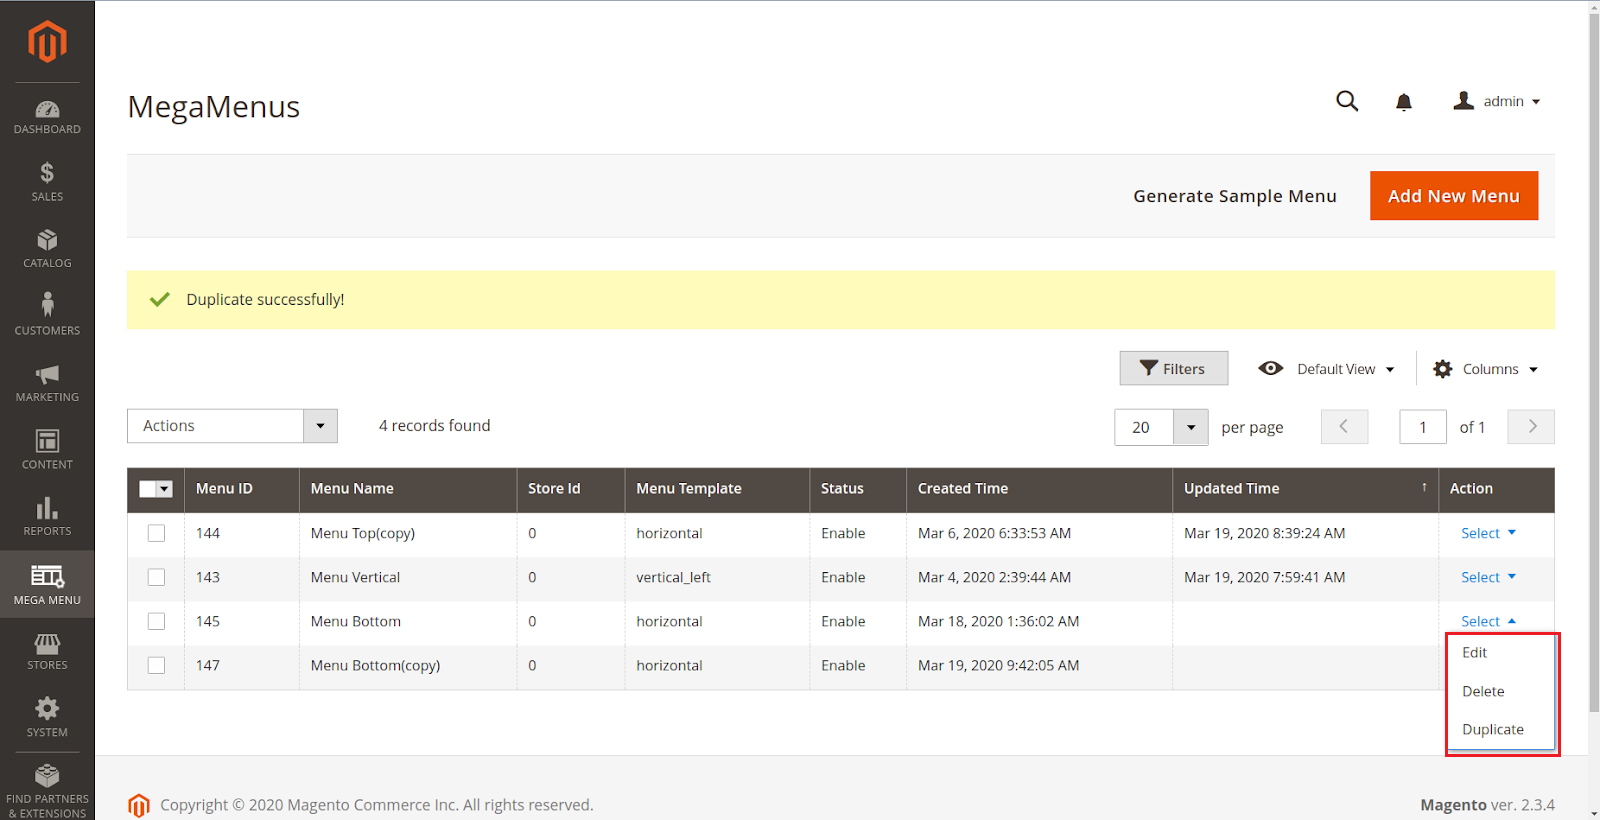
You can edit, delete and duplicate an available template
...
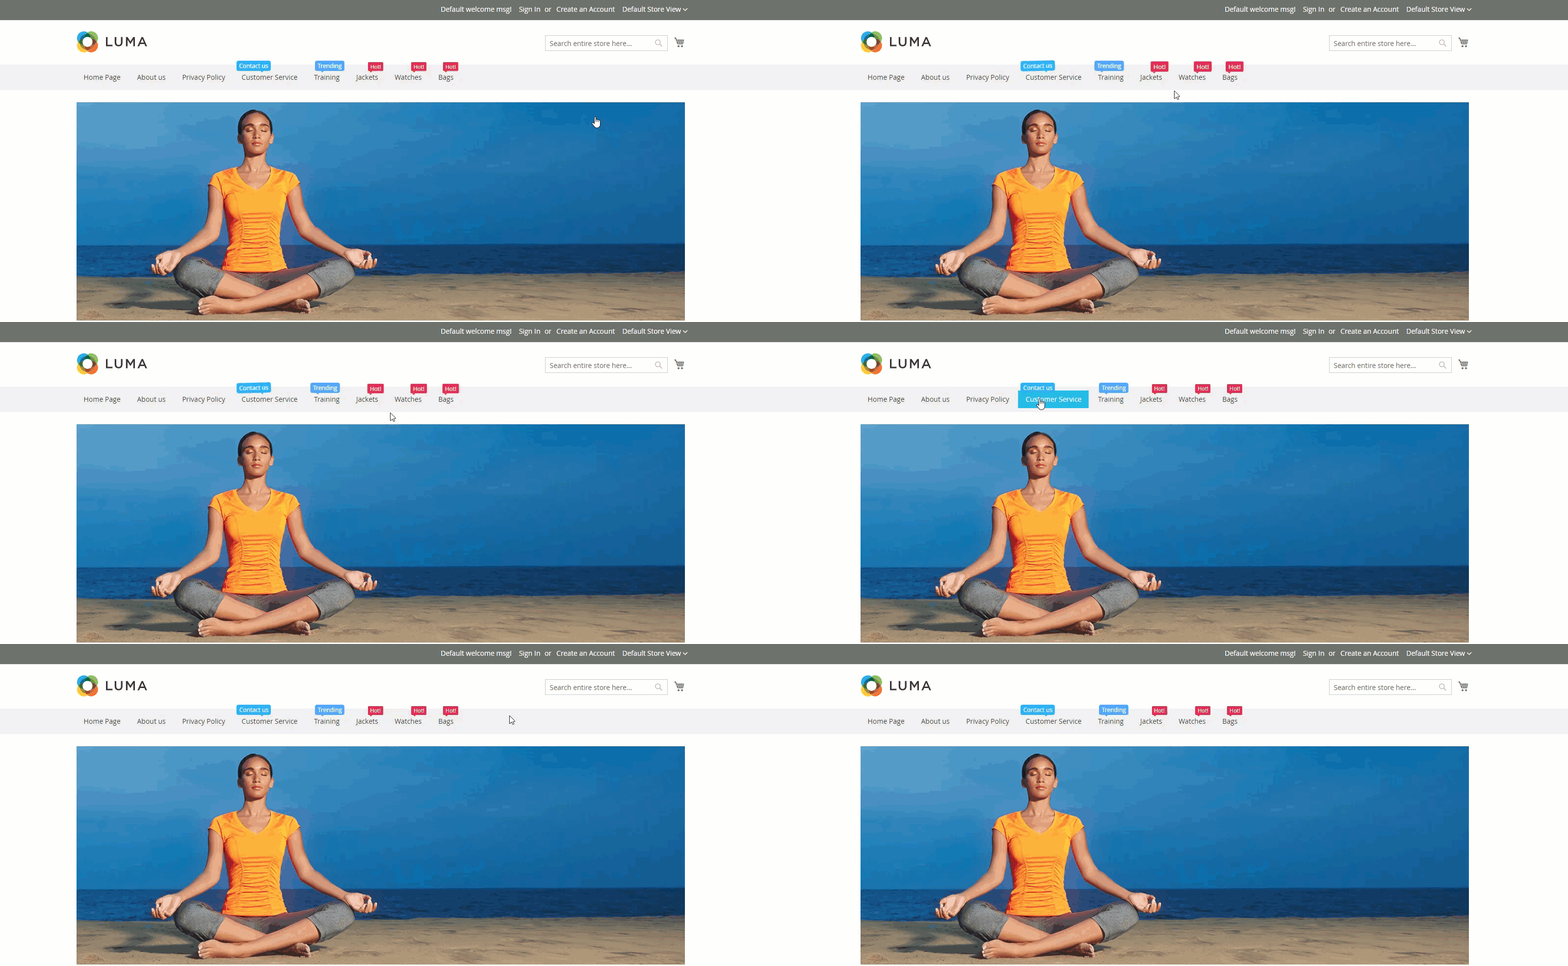
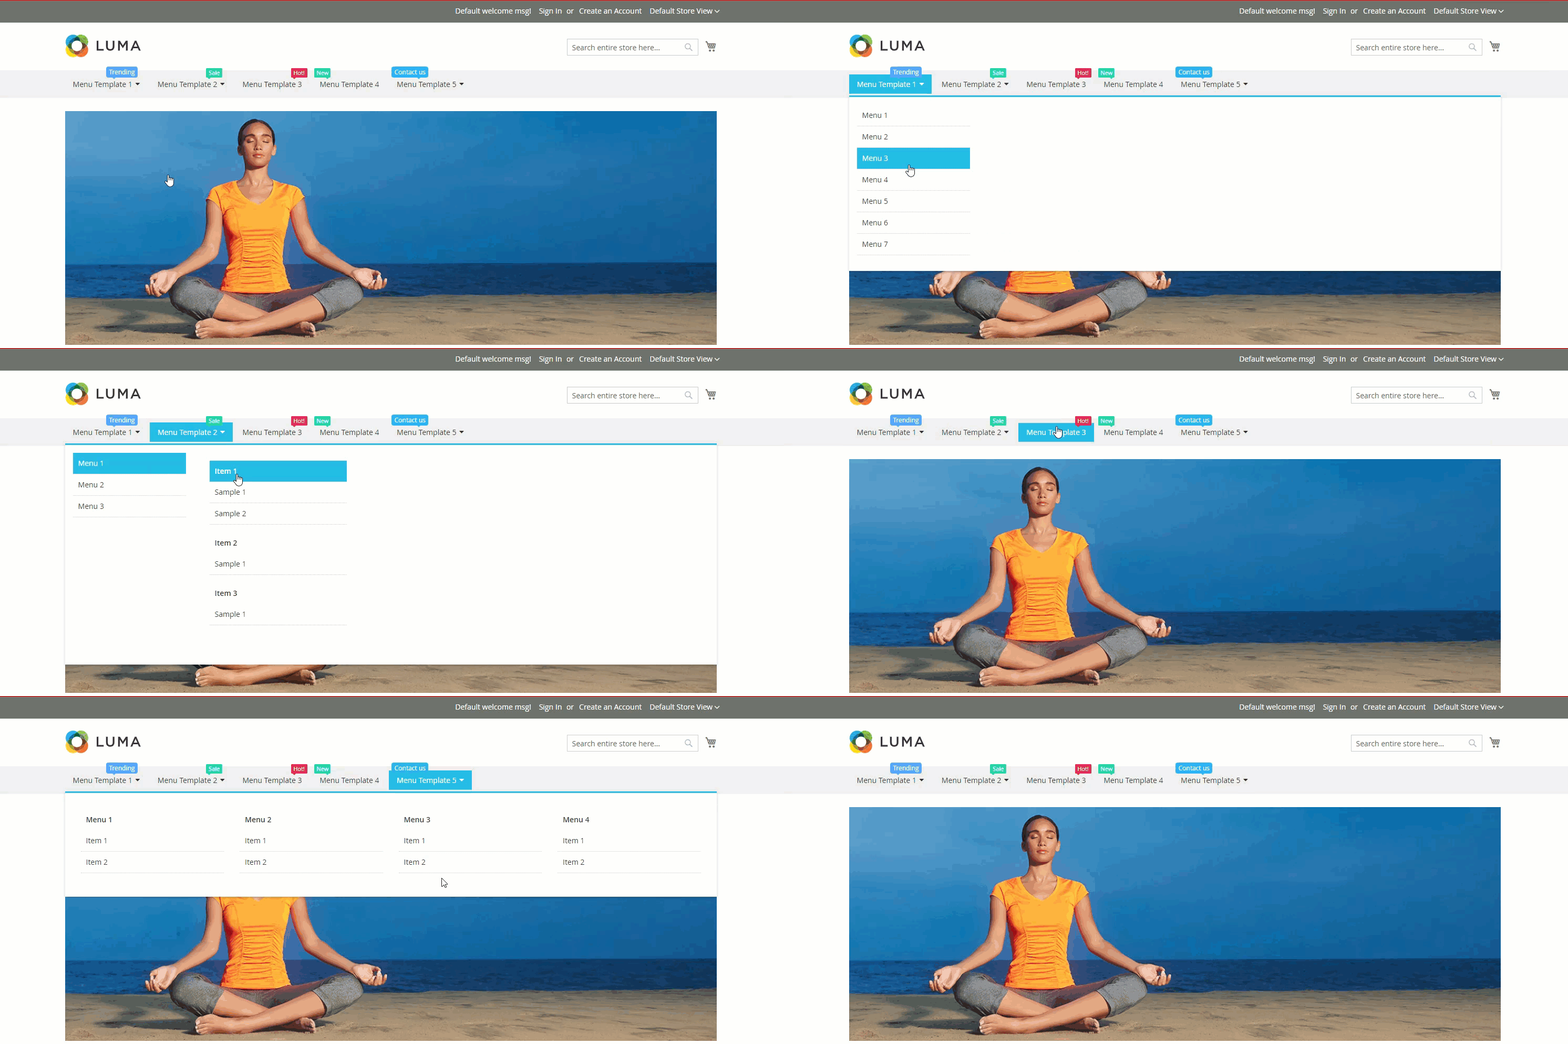
Front-end
...
Update
- When a new update is available, we will provide you with a new package containing our updated extension.
- You will have to delete the module directory and repeat the installing steps above.
- Flush the config cache. Your store and newly installed module should be working as expected.
...
Support
- We will reply to support requests after within 2 business days.
- We will offer lifetime free update and 6 months free support for all of our paid products. Support includes answering questions related to our products, bug/error fixing to make sure our products fit well in your site exactly like our demo.
- Support DOES NOT include other series services such as customizing our products, installation and uninstallation service.
...
Once again, thank you for purchasing our extension. If you have any questions relating to this extension, please do not hesitate to contact us for support.Magenest
