...
Created: 08/11/2016 | By: Magenest | Support Portal: http://servicedesk.izysync.com/servicedesk/customer/portal/22
| Table of Contents |
|---|
Introduction
...
|
...
Introduction
Magento 2 Stripe Payment Gateway And Subscription extension by Magenest is the ultimate tool that provides a seamless payment experience between your Magento 2 store and the Stripe Payment Gateway.

Features For Admins
A lot of features is included in the extension that you can tweak to make it best suit your business, including:
SCA is available on Stripe Checkout and Stripe Payment Intents
- SEPA Direct Debit
Choose between Authorize Only or Authorize and Capture.
- IFrame Checkout Form
- Alipay, Giropay, Apple Pay, Google Pay
- 3D Secure
Various credit card types
Enable CVC/AVS Verification
- Access to more than 25 countries
Restrict unwanted countries from payment
- Support Save Card function
Easily partial capture invoice.
Conveniently partial or total refund.
- Support 135 currencies
- Support MOTO (Making a payment from backend)
Support Giropay, Alipay, SOFORT, Bancontact, EPS, etc.
...
- Easily checkout using a credit card.
- Manage subscriptions
- Sign up for an account to save credit card information for future purchase
- Flexible payment choices
- Update Stripe Intents 2.0 (New)
System Requirements
Your Your store should be running on Magento 2 version version 2.2.x, 2.3.x, 2.4
Compatibility: Magento 2.3.5 and above, 2.4.x (Open Source, Commerce)
- Add Magento 2.4.6 support
- Update branding
- Bug fixes
...
Configuration
Set Up Stripe Online Account
...
Then, choose Create your Stripe account to set up a new account:
Once you have the Stripe account, sign in to your account.
...
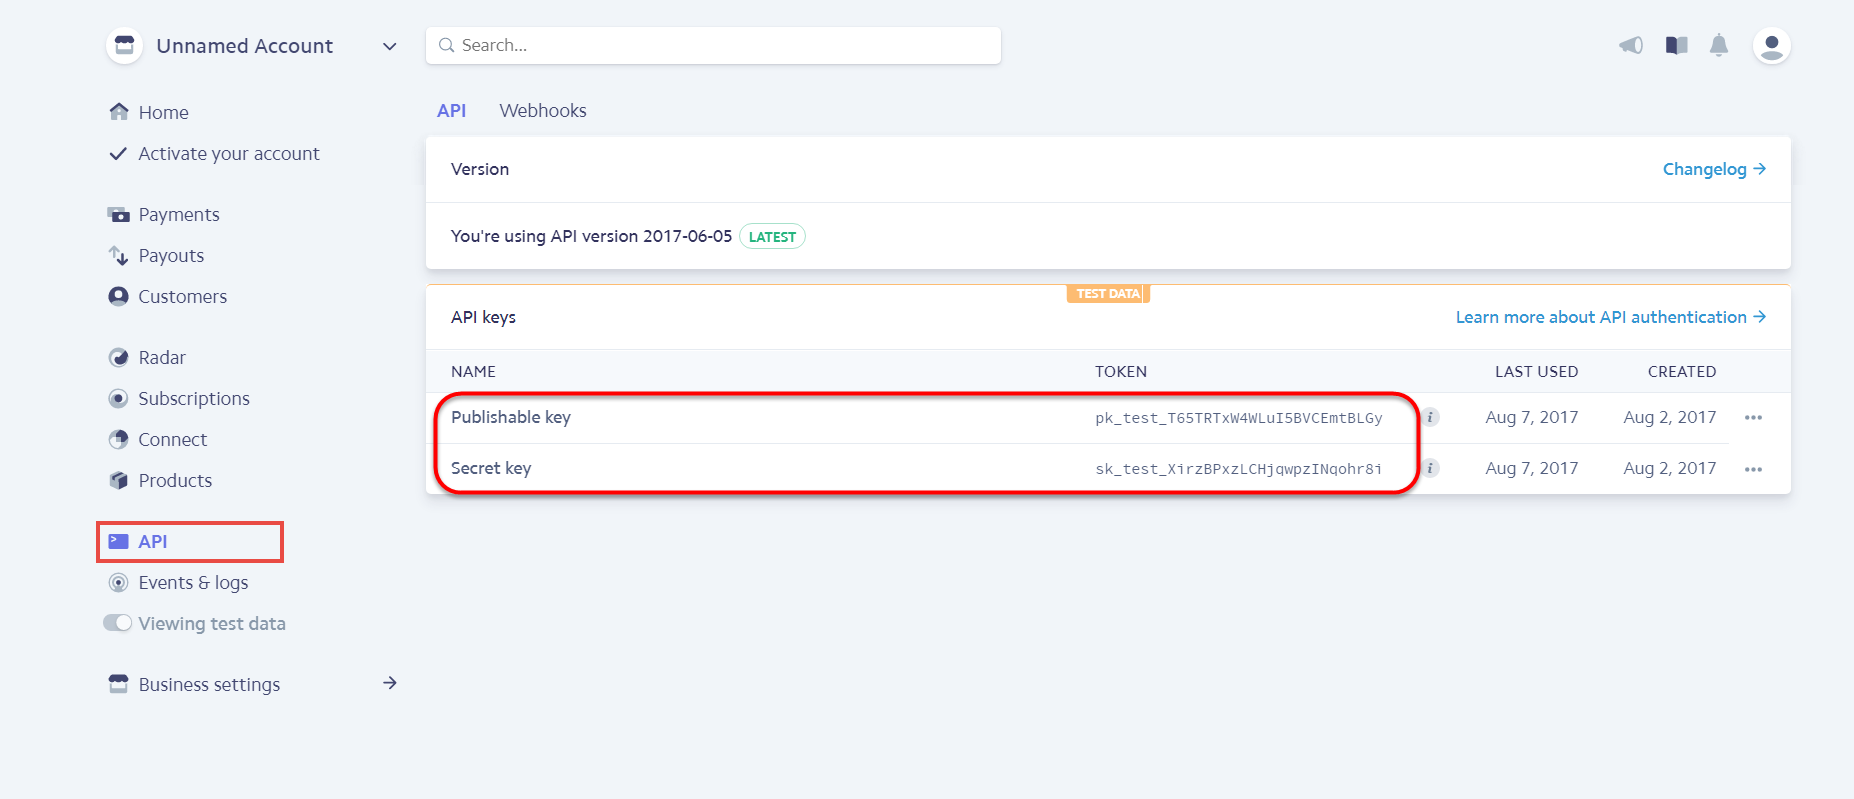
After that, click on API at the left corner > API Keys to take API Keys.
Set Up The Integration On Magento 2
...
- Checkout Title: enter the title for the payment on the checkout page.
- Checkout Description: enter the description on the checkout page so that the purchaser can have more details about the payment method.
- Checkout Image URL: fill in this field with the URL of the image on the checkout page.
- Submit Button Type: choose the text for the submit button on the checkout page. There are four options: Auto, Pay, Book, Donate.
Stripe Payment Intents (SCA Ready)
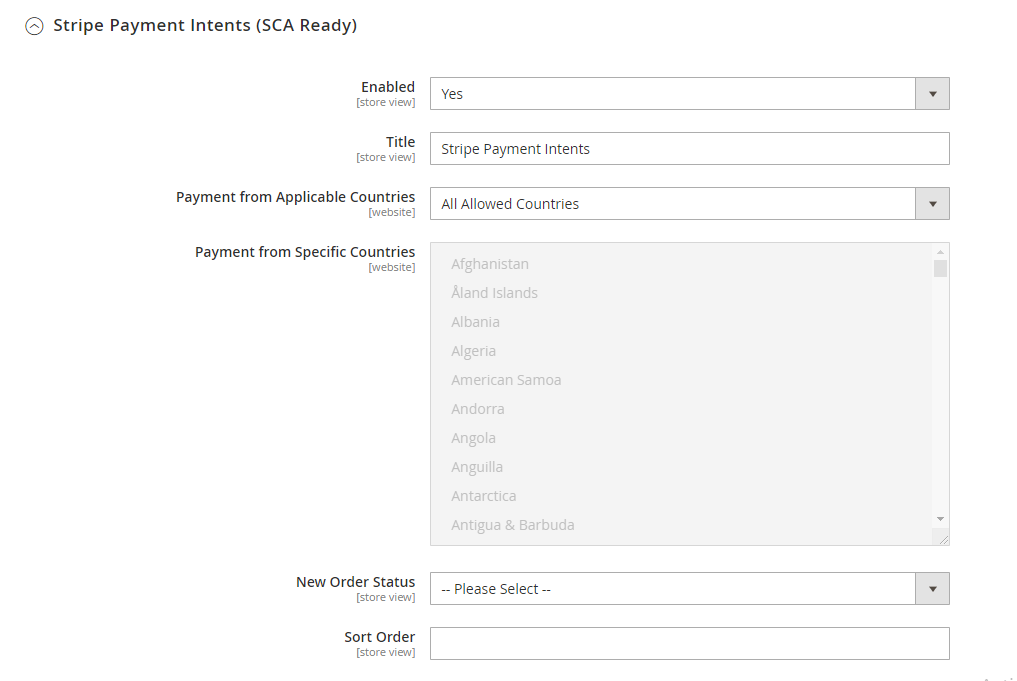
Enable: Choose Yes to active Stripe Payment Intents (SCA Ready) on the storefront.
Title: enter the title for the payment method on the payment list on the checkout page.
Payment from Applicable Countries:
All allowed countries: Enable all allowed countries to make payment.
Specific Countries: Restrict some countries by unselecting them from the Payment from Specific Countries.
New Order Status: set the status for the new order on the Order page at the backend.
Processing: The payment is made successfully and an order invoice is issued.
Suspected Fraud: No invoice is issued.
Sort Order: set the order of the payment on the payment method list.
...
![]() To use Google Pay (for PC), customers have to add their credit card to the browser.
To use Google Pay (for PC), customers have to add their credit card to the browser.
Button type: You have 3 options for the payment button type - Default, Donate or Buy
...
Main Functions
For Subscription Product
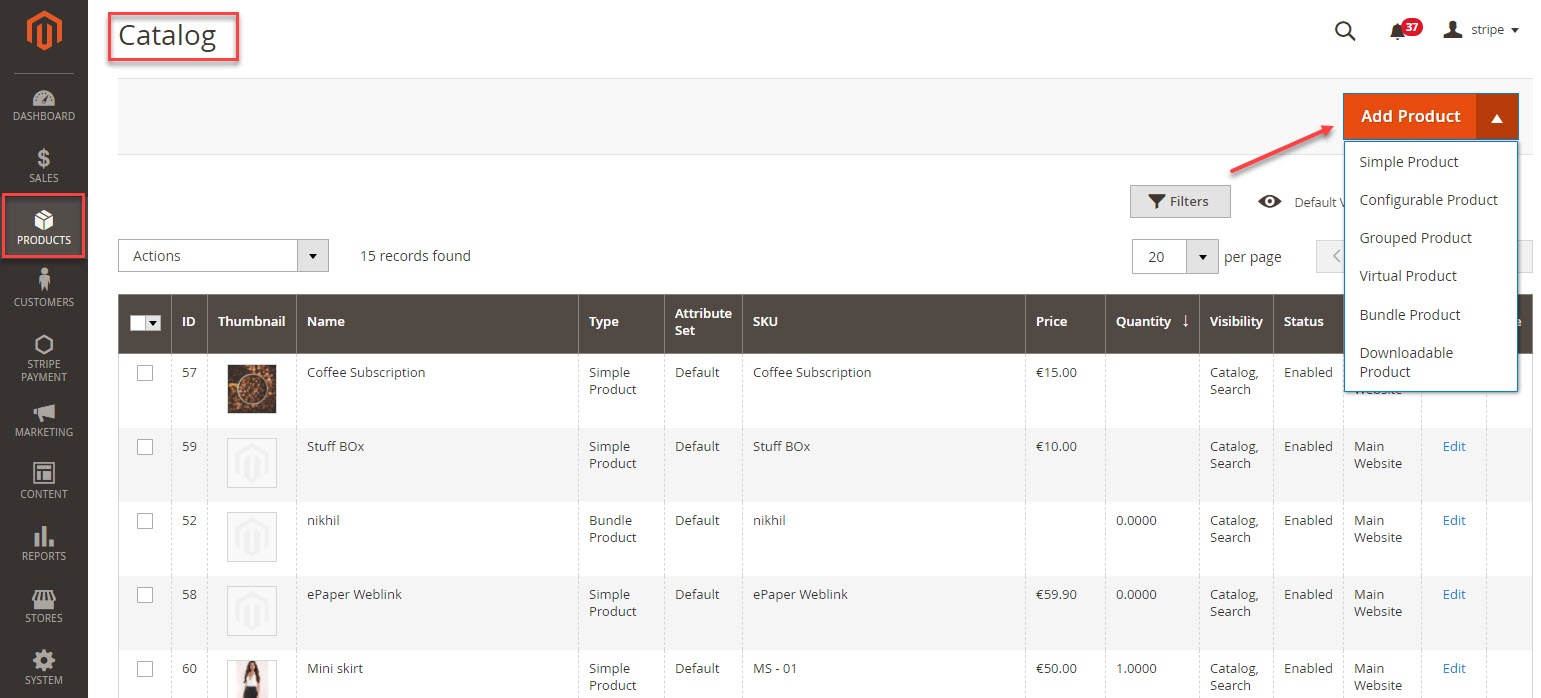
Create a subscription product
To create a subscription product, click on Products > Catalog. On the right side, click on Add Product and choose the desired product type among six types (Simple Product, Configurable Product, Grouped Product, Virtual Product, Bundle Product, Downloadable Product).
Then, the New Product page will be shown.
Regarding the Stripe Payment and Subscriptions extension, focus on two tabs named Stripe Subscription and Stripe Subscription Billing Options.
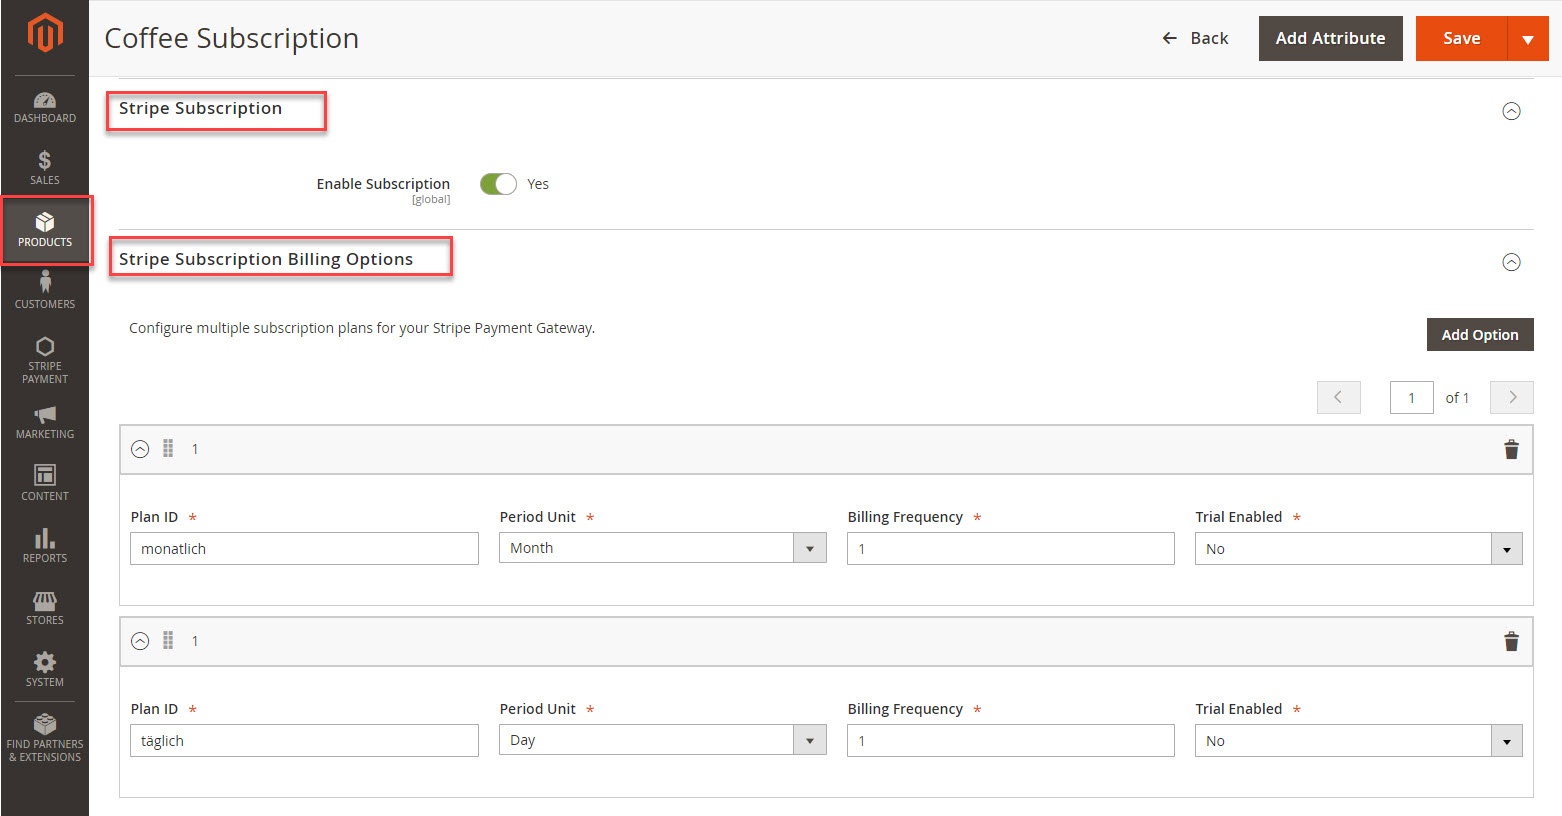
At the Stripe Subscription tab, you will set whether a product is a stripe subscription product or not.
- YES: This product will be shown as a stripe subscription product at the front end. This means this product plan in the Stripe Subscription Billing Options tab will be shown on the product detail page (e.g. Plan ID, Billing Frequency, etc).
- NO: This product will not be shown as a subscription product.
At the Stripe Subscription Billing Options tab, you will need to set plans for the subscription product. There are some fields to set, include:
- Plan ID: The ID of the plan
- Period Unit: Set subscription period in terms of the day, week, month, year
- Billing Frequency: How many times the customers want to repeat the subscription circle.
- Trail Enabled: Allow customers to try the product before deciding to subscribe or not. If you choose Yes, you can define the period time allowing customers to use the product for free. If you choose No, this means this product will not have a trial version.
Also, if you want to add more plans for a product, click on the Add Option button on the right side. Then, you can add the same as above.
Finally, click on the Save button to complete.
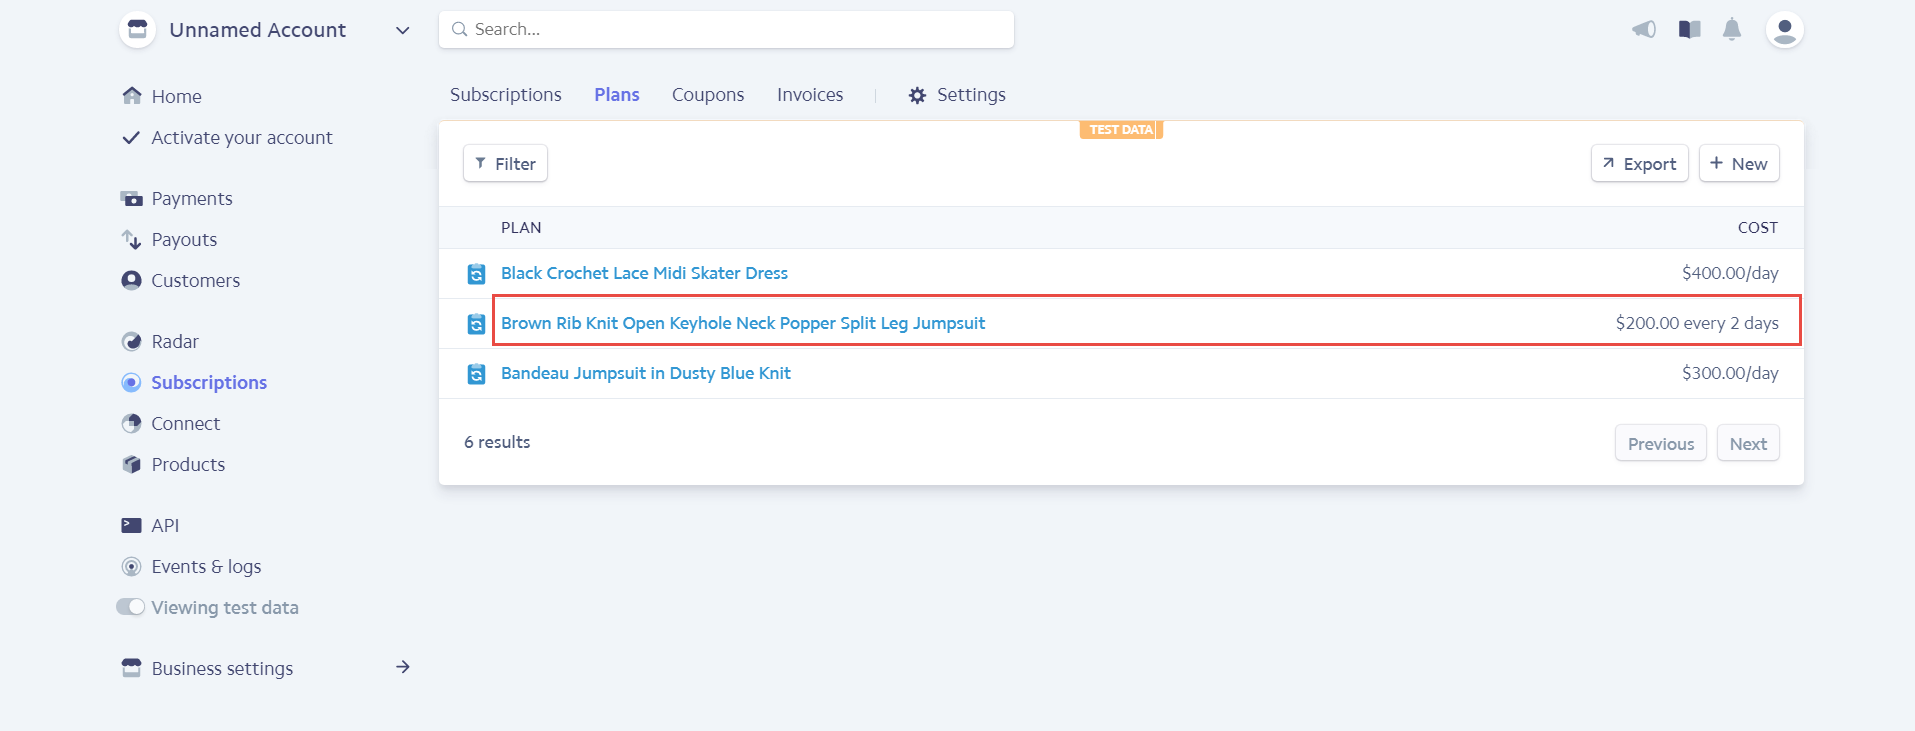
At the same time, your Stripe account will also automatically sync a product corresponding with the subscription product created at the Plans tab.
View And Manage Stripe Payment
We created a Stripe Payment tab that allows you to view and manage Stripe Order.
There are two tabs, includes:
- Settings
With the Settings tab, we provide you with the fastest way possible to access Stripe Payment Settings.
- Subscription Manager
Go to the Subscription Manager tab, you will see the list of orders regarding the subscription products.
You can view and manage some information such as Order ID, Subscription ID, Start Date, End Date, and Status an easy way.
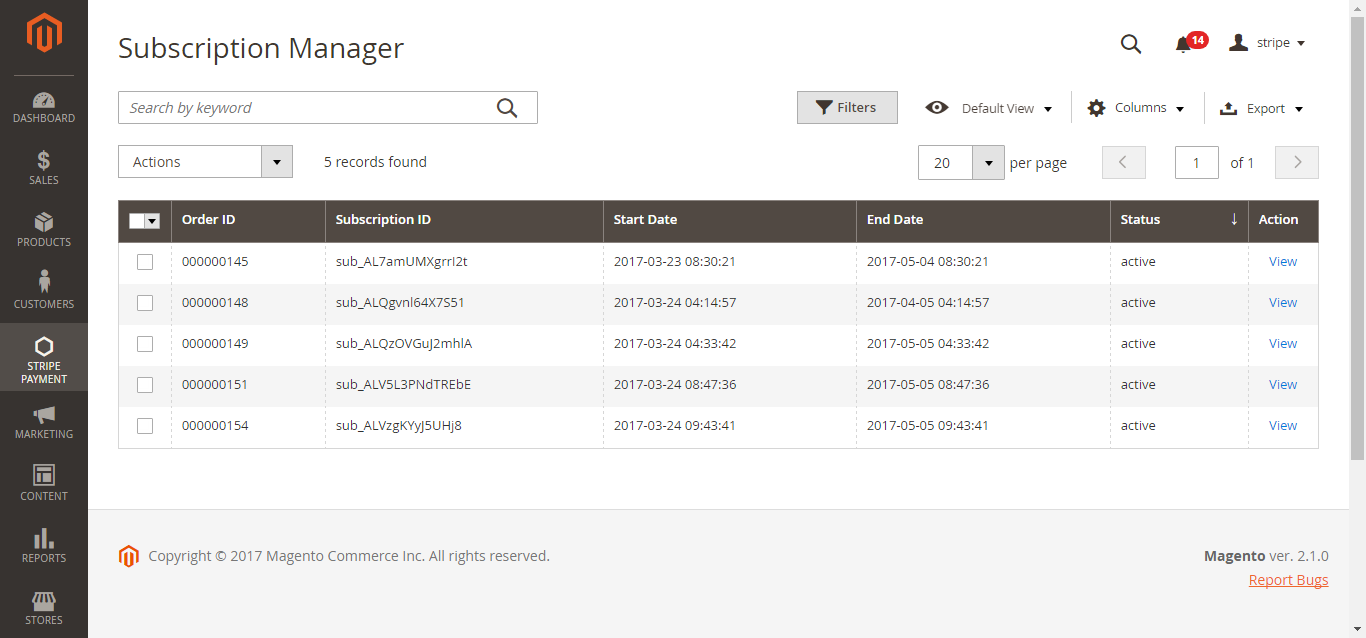
Click on the View button on the right to see the details of a subscription product.
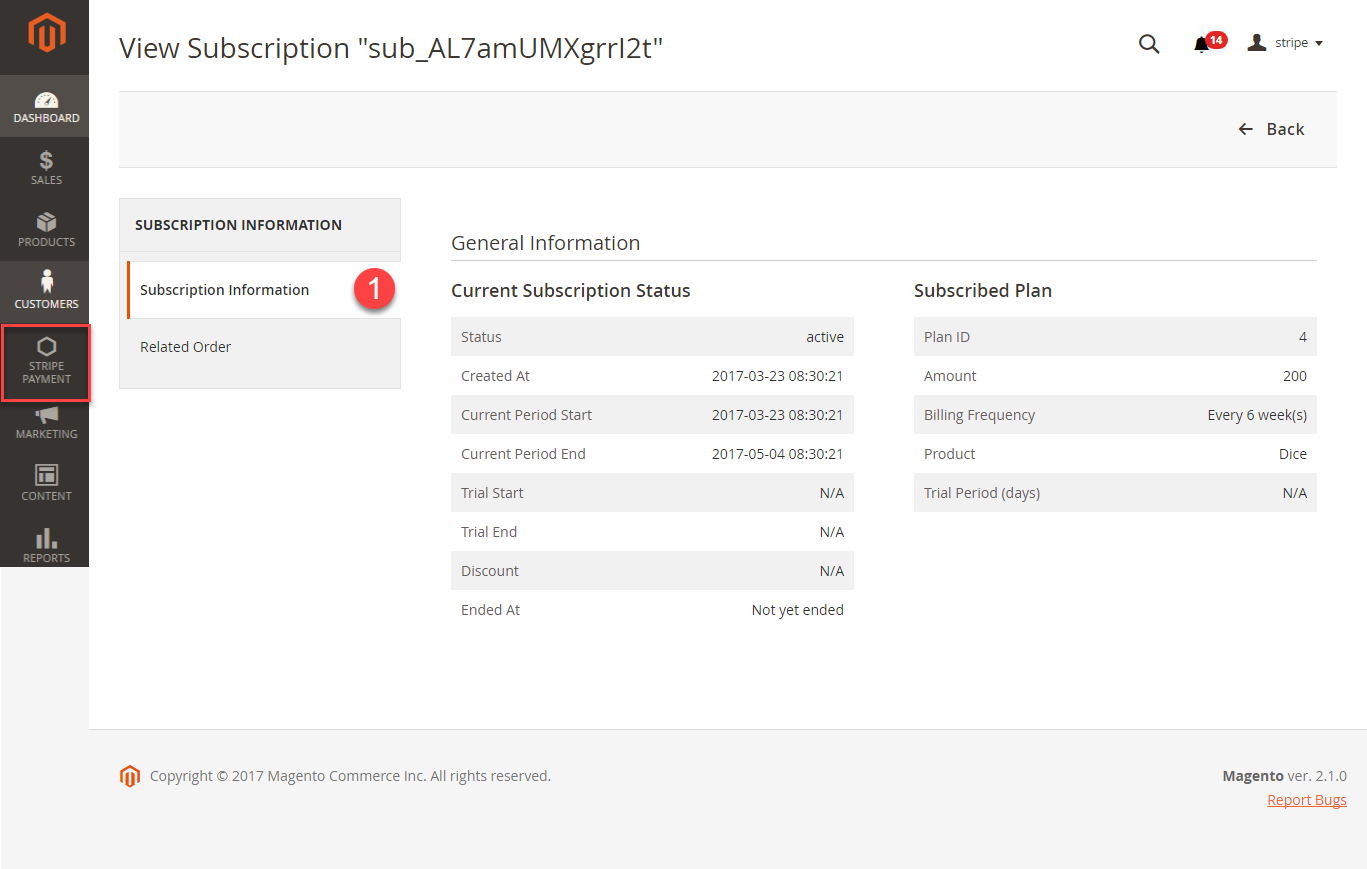
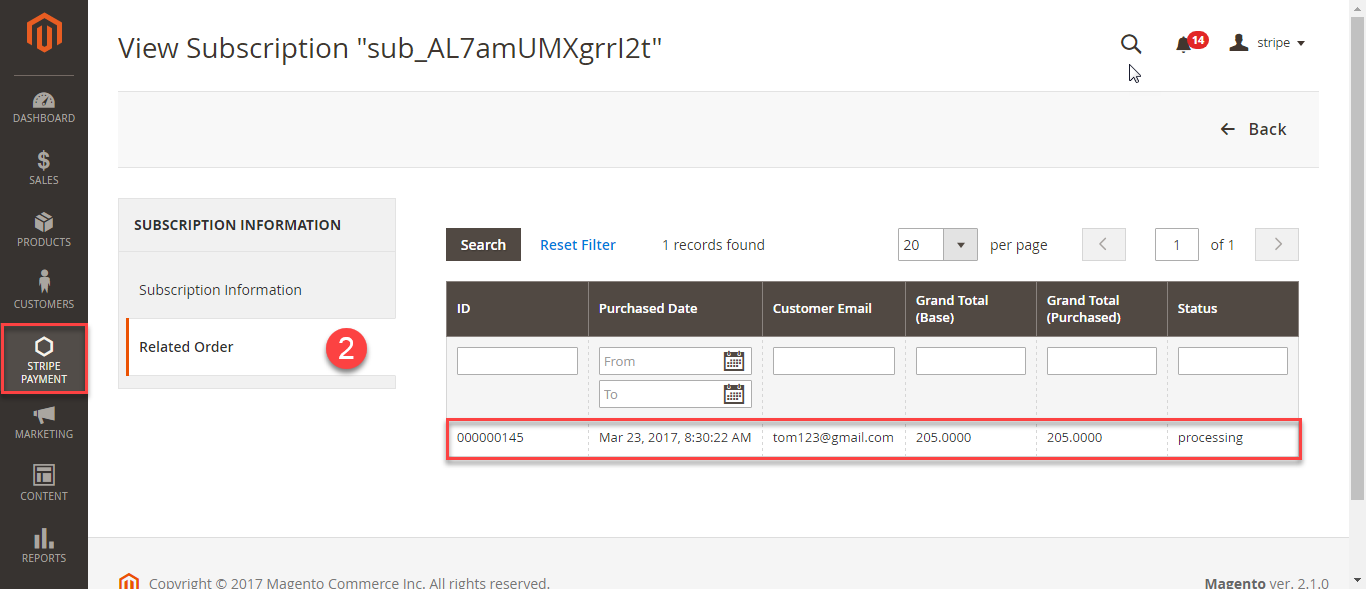
Click on the Subscription ID Number in the first column to see the details of a subscription order.
...
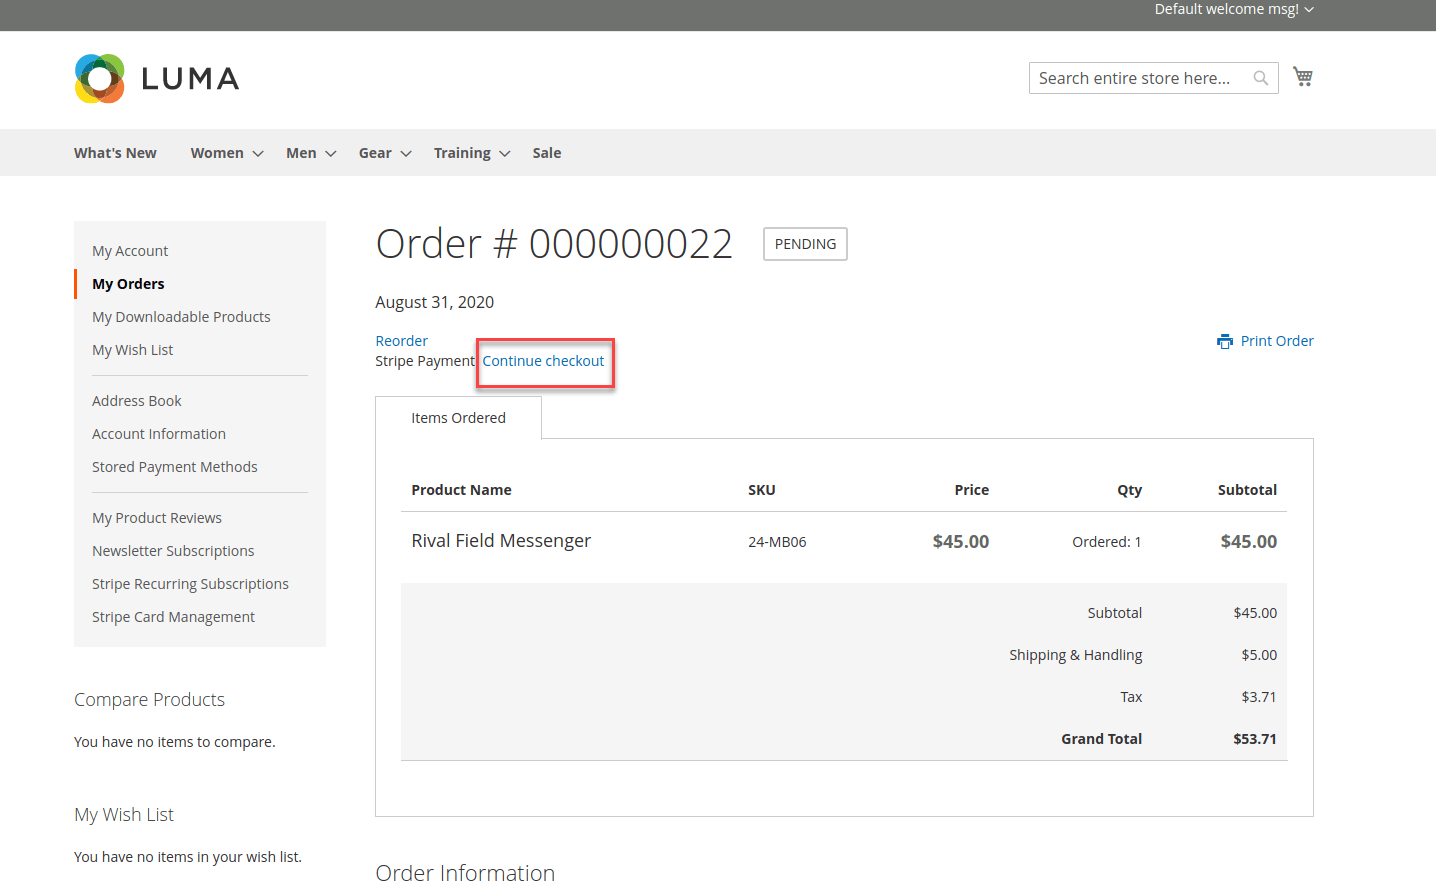
 Checkout with Stripe Payment Intents (SCA Ready)
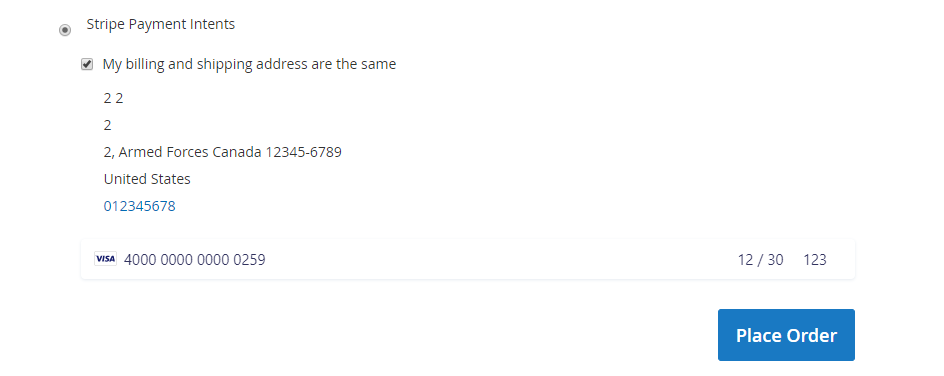
- After filling in the Shipping Address information, the customer chooses Stripe Payment Intents as the payment method.
- Enter the necessary information then click on Place Order when finishing.
Checkout with Apple Pay/Google Pay
...
- Mark the checkbox "My billing and shipping addresses are the same" if the shipping address and the billing address are not different.
- If they are different, fill in the billing address then click "Update".
After filling in all the necessary information, click Place Order
...
After filling in all the necessary information, click Place Order to finalize the payment.
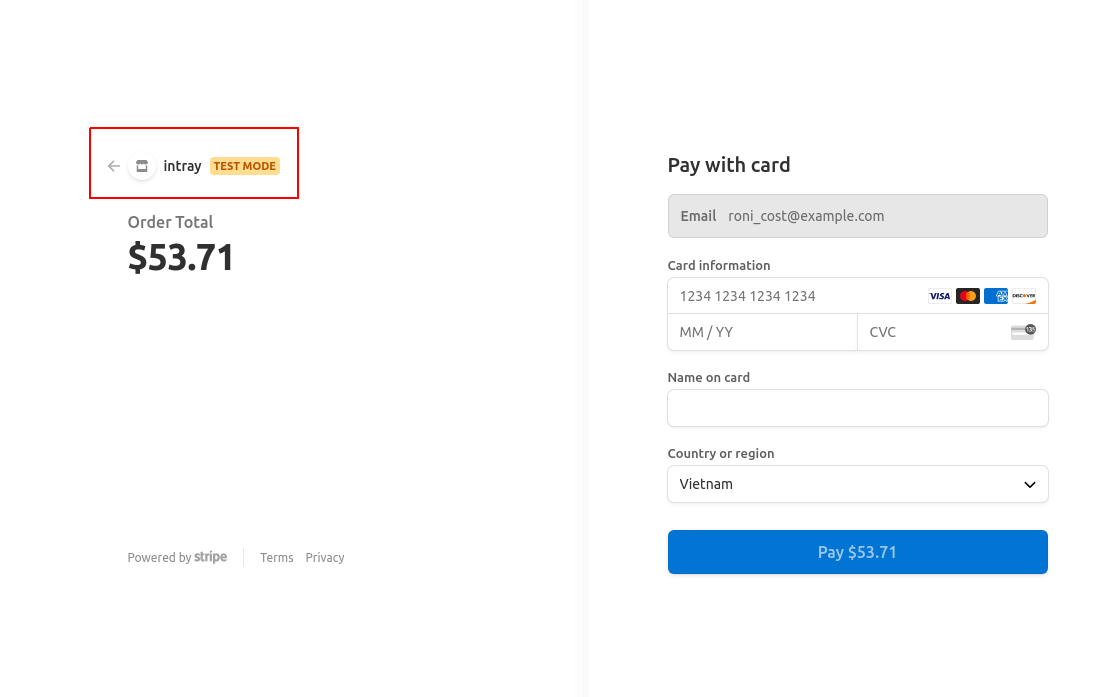
Checkout with Stripe IFrame Checkout (Redirect Checkout)
...
Credit card Iframe checkout form
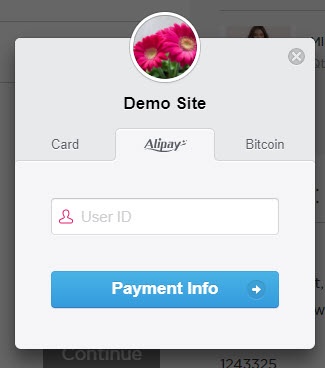
Alipay Iframe checkout form
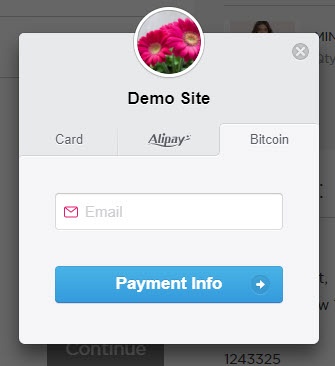
Bitcoin Iframe checkout form
If the customer enters his mobile phone number, Stripe will send a 6-number-verification code to confirm his payment info.
...