...
- Default Value: enter the default text which appears in the field as a suggestion. Customer can edit the text.
- Input Validation: select among 6 options: Alphanumeric, Numeric Only, Alpha Only, URL, Email, Date and All Validates.
- Text Field type display:

| Status | ||||||||
|---|---|---|---|---|---|---|---|---|
|
...
- Default Value: enter the default text which appears in the field as a suggestion. Customer can edit the text.
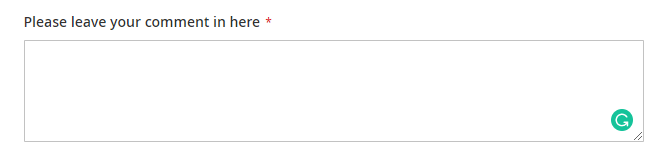
- Text Area type display:
| Status | ||||||
|---|---|---|---|---|---|---|
|
...
- Default Value: choose the default value which appears in the field as a suggestion. Customer can choose another date.
- Date type display:
| Status | ||||||||
|---|---|---|---|---|---|---|---|---|
|
...
- Click on Add Option button to add more option to the drop-down list for the attribute.
- Tick on the tickbox under Is Default column to set the option as default.
- Show option in admin: enter the title of the option which displays on the backend.
- Show option in storefront: enter the title of the option which displays on the customer side.
- Multiple Select type display:
| Status | ||||||
|---|---|---|---|---|---|---|
|
...
- Click on Add Option button to add more option.
- Choose the image and fill the title for each option.
- Multiple Select With Images type display:
| Status | ||||||||
|---|---|---|---|---|---|---|---|---|
|
...
- Click on Add Option button to add more option.
- Value: Enter the title for each option in the dropdown list.
- Other Option Label Input: enter the text for the last option in the drop-down list, which is the option for the customer who has the question beyond the listed answers in the default list.
- Dropdown type display:
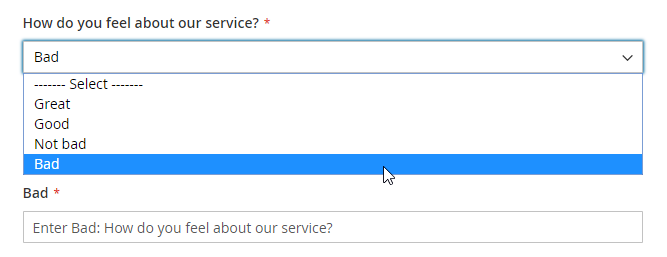
| Status | ||||||||
|---|---|---|---|---|---|---|---|---|
|
...
- Default Value: choose the value that will be marked by default. Customer can choose another option.
- Yes/No type display:
| Status | ||||||||
|---|---|---|---|---|---|---|---|---|
|
...
- Image Size: set the layout size for the uploaded image. The size unit in this field is "pixels". Follow the note under this field to set the proper size.
- Image File type display:
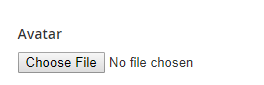
| Status | ||||||||
|---|---|---|---|---|---|---|---|---|
|
...
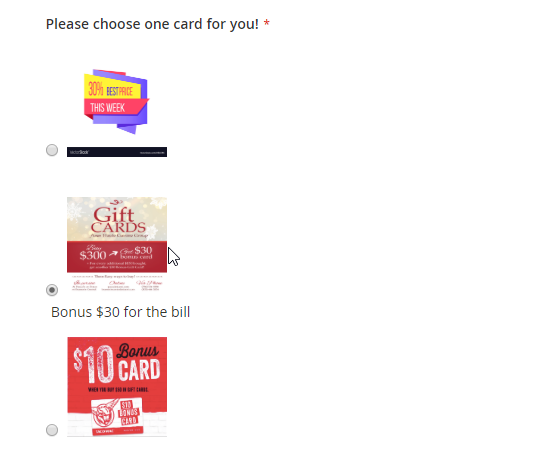
- Click on Add Option button to add more option.
- Choose the image and fill the title for each option, which will display with the image.
- Single radio Image type display:
![]() Is Required: decide whether the attribute is required to be filled by the customer among 3 options: Frontend and Backend, No, Only Frontend.
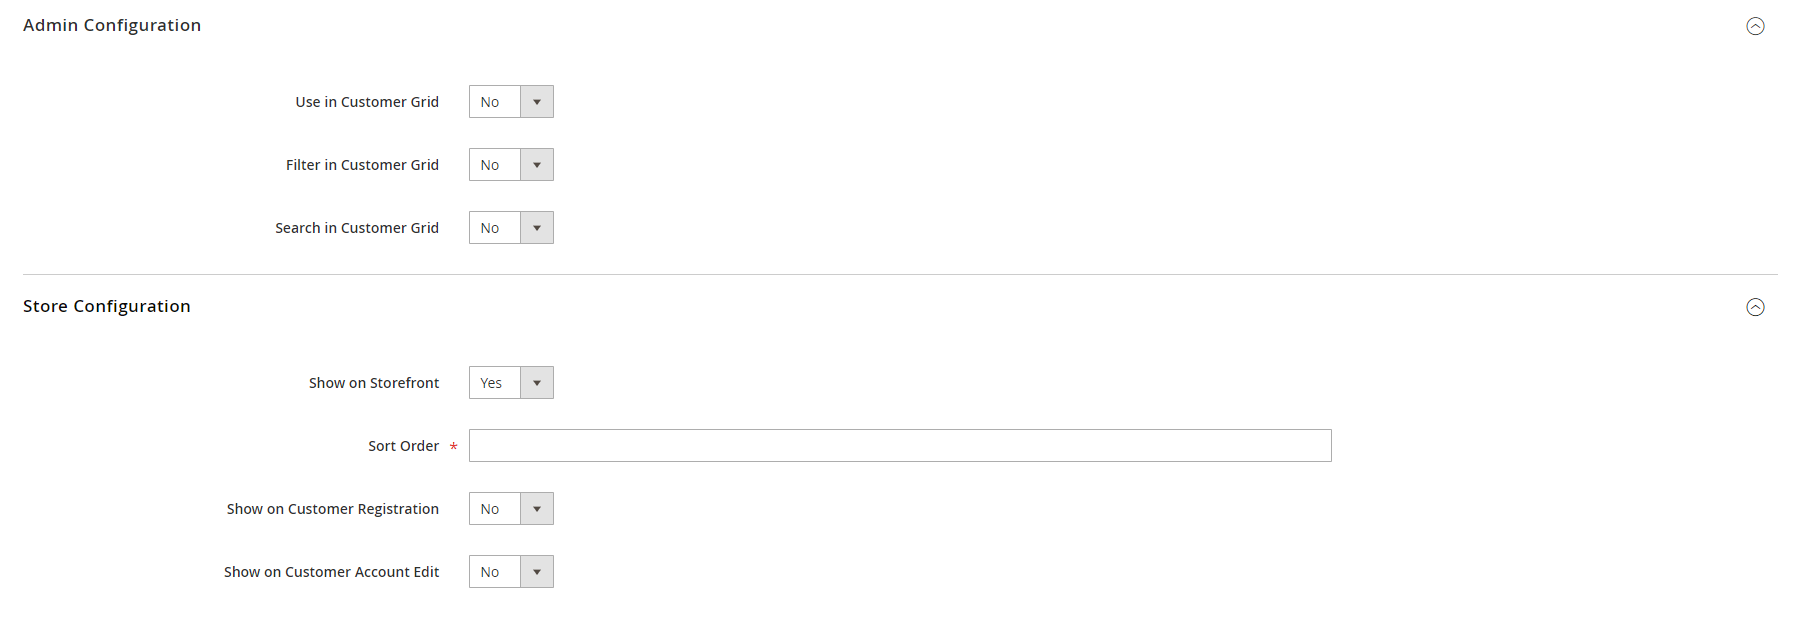
Is Required: decide whether the attribute is required to be filled by the customer among 3 options: Frontend and Backend, No, Only Frontend.
...
![]() After finishing the setup, click Save to save the attribute and view on the frontend.
After finishing the setup, click Save to save the attribute and view on the frontend.
...
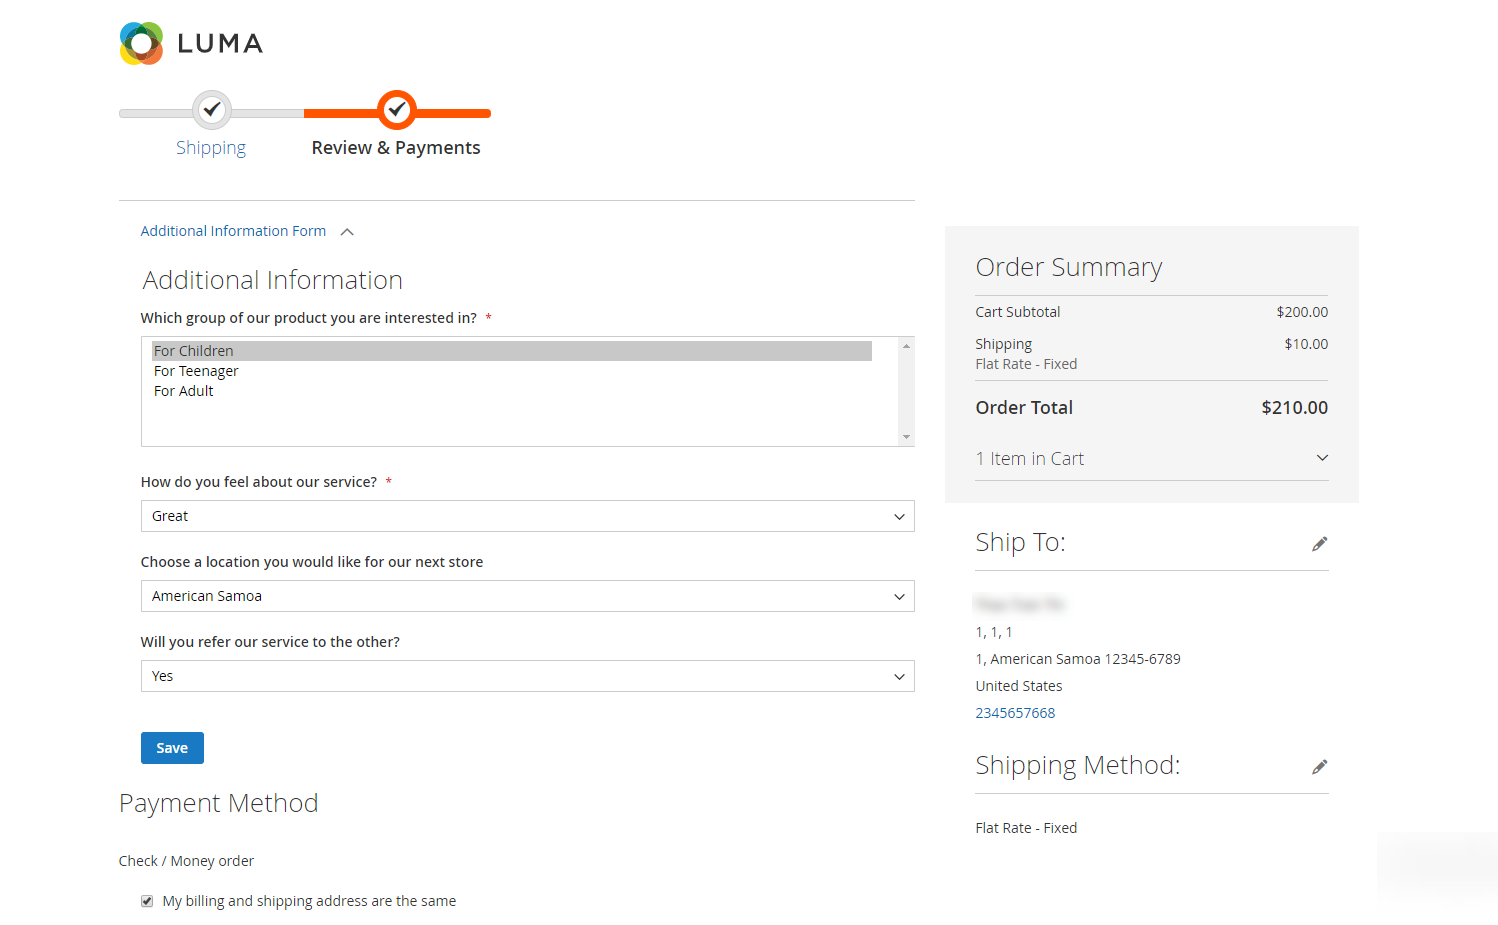
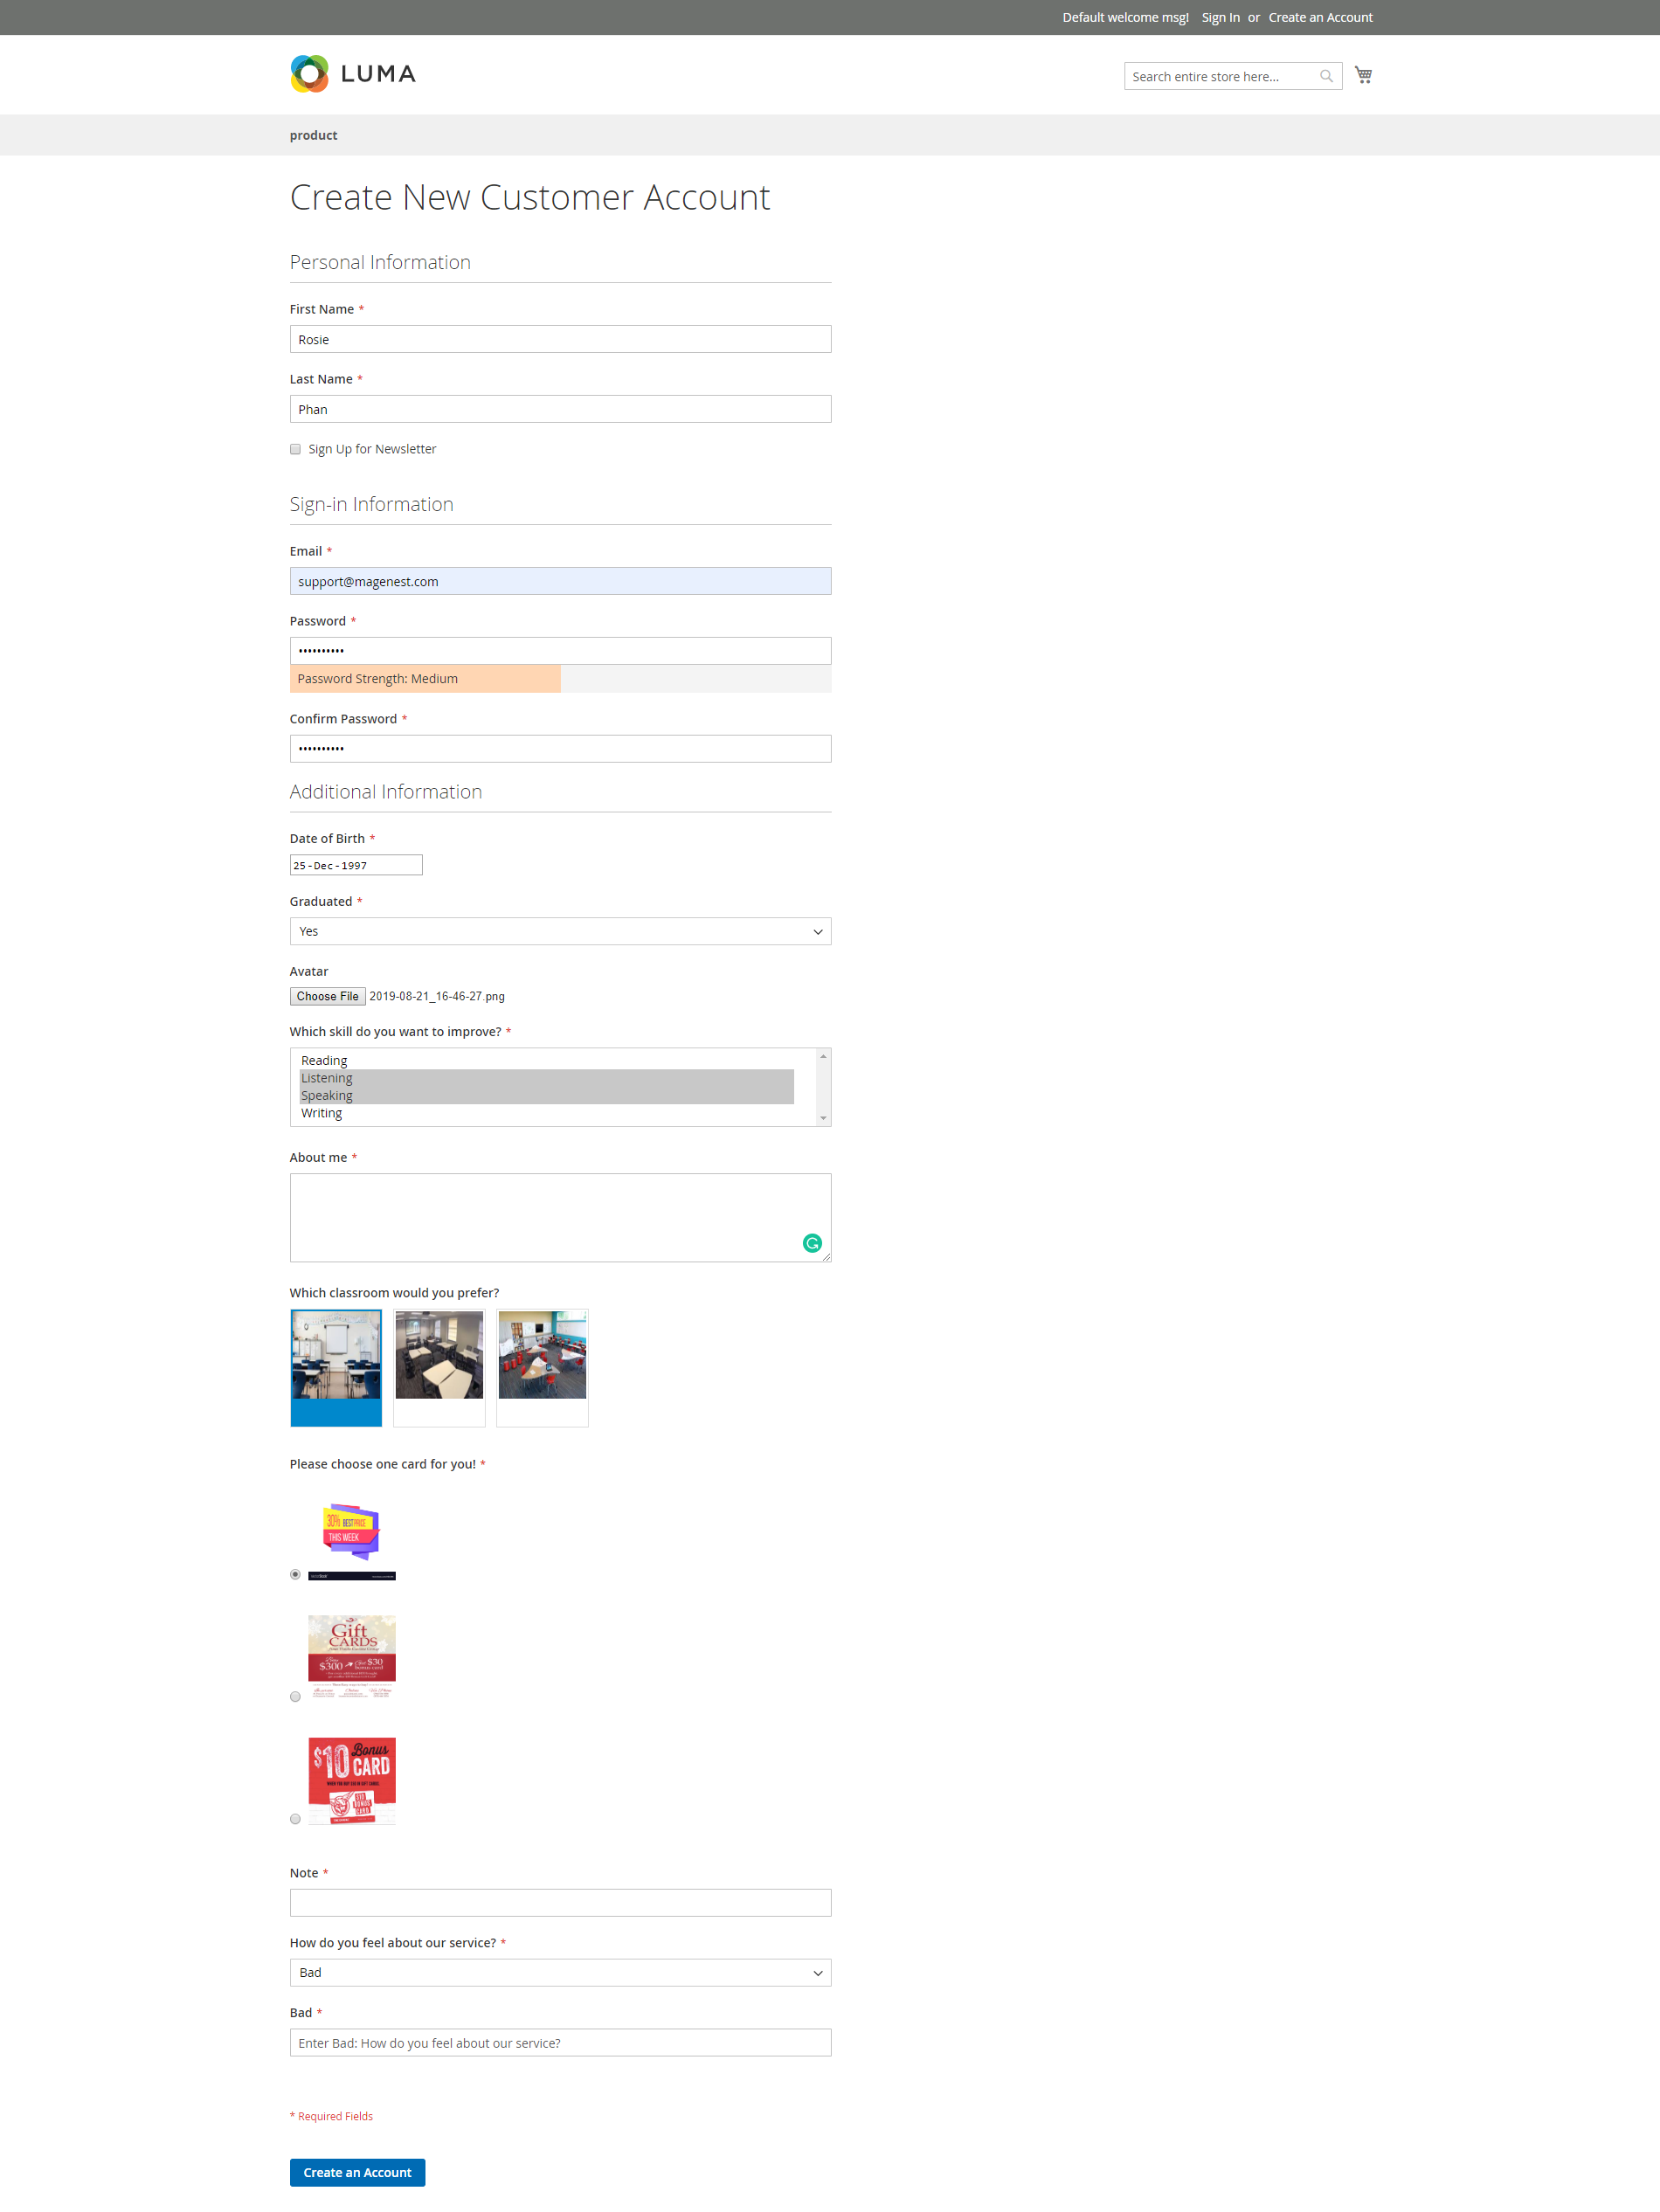
On Storefront
Additional attribute on Customer Registrant page
There will be additional fields beside the default attributes of Magento on the registrant form, which help merchant collect more necessary information from customer.
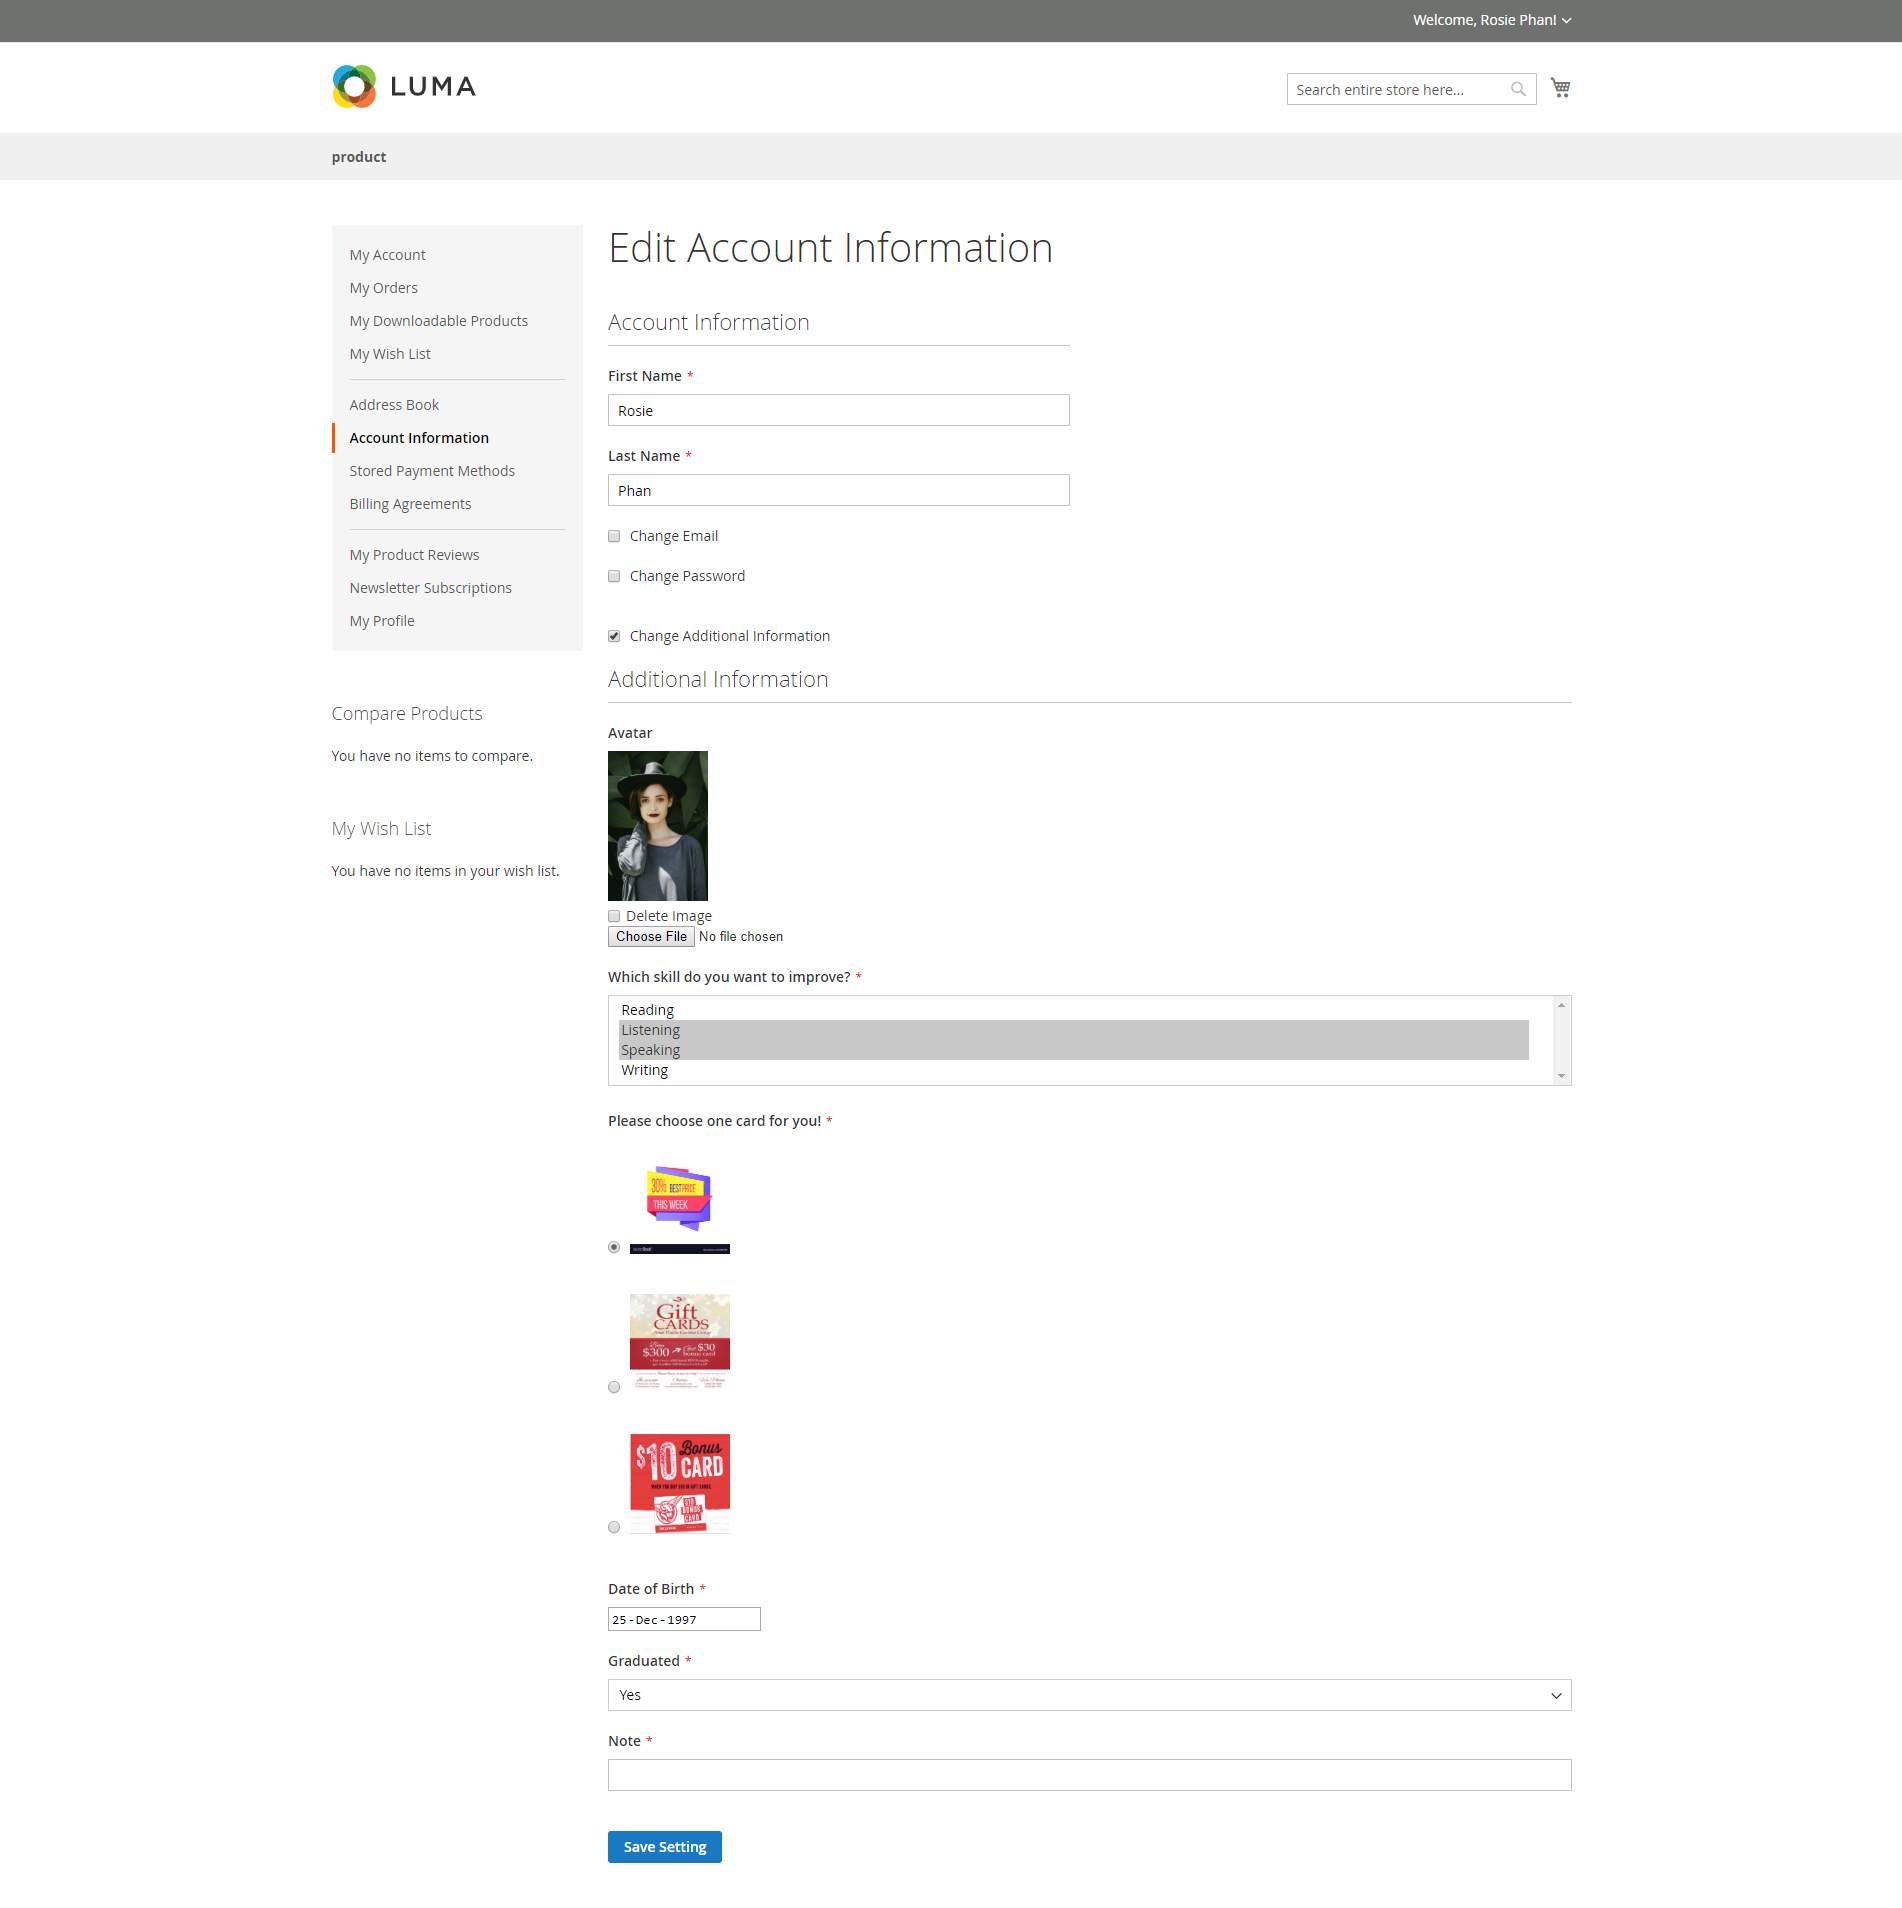
Additional attribute on Edit Account Information page
All the attributes set in the extension will display in the Additional Information section, which customer can edit on My Account page.
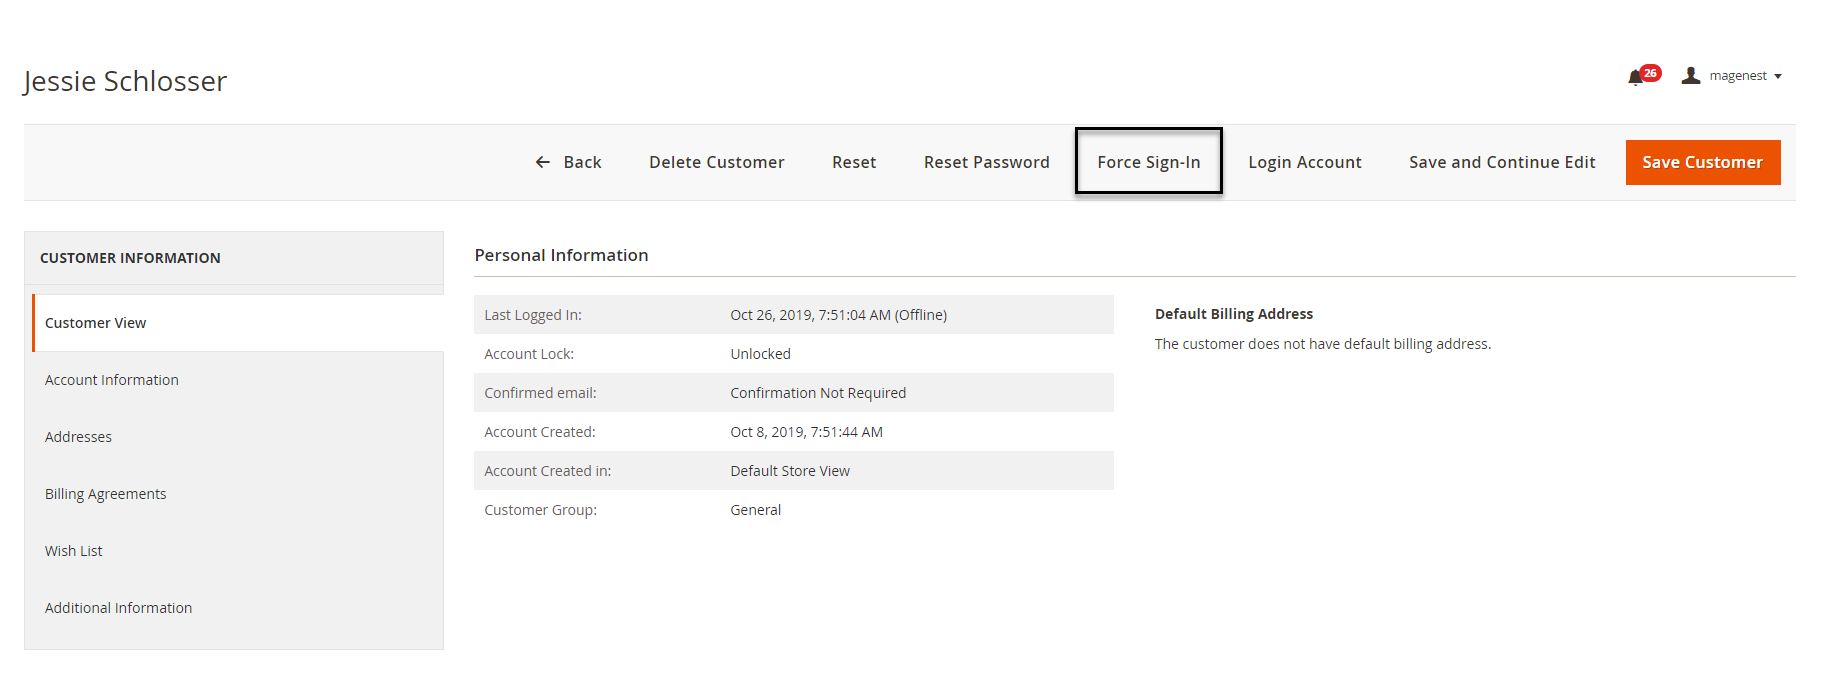
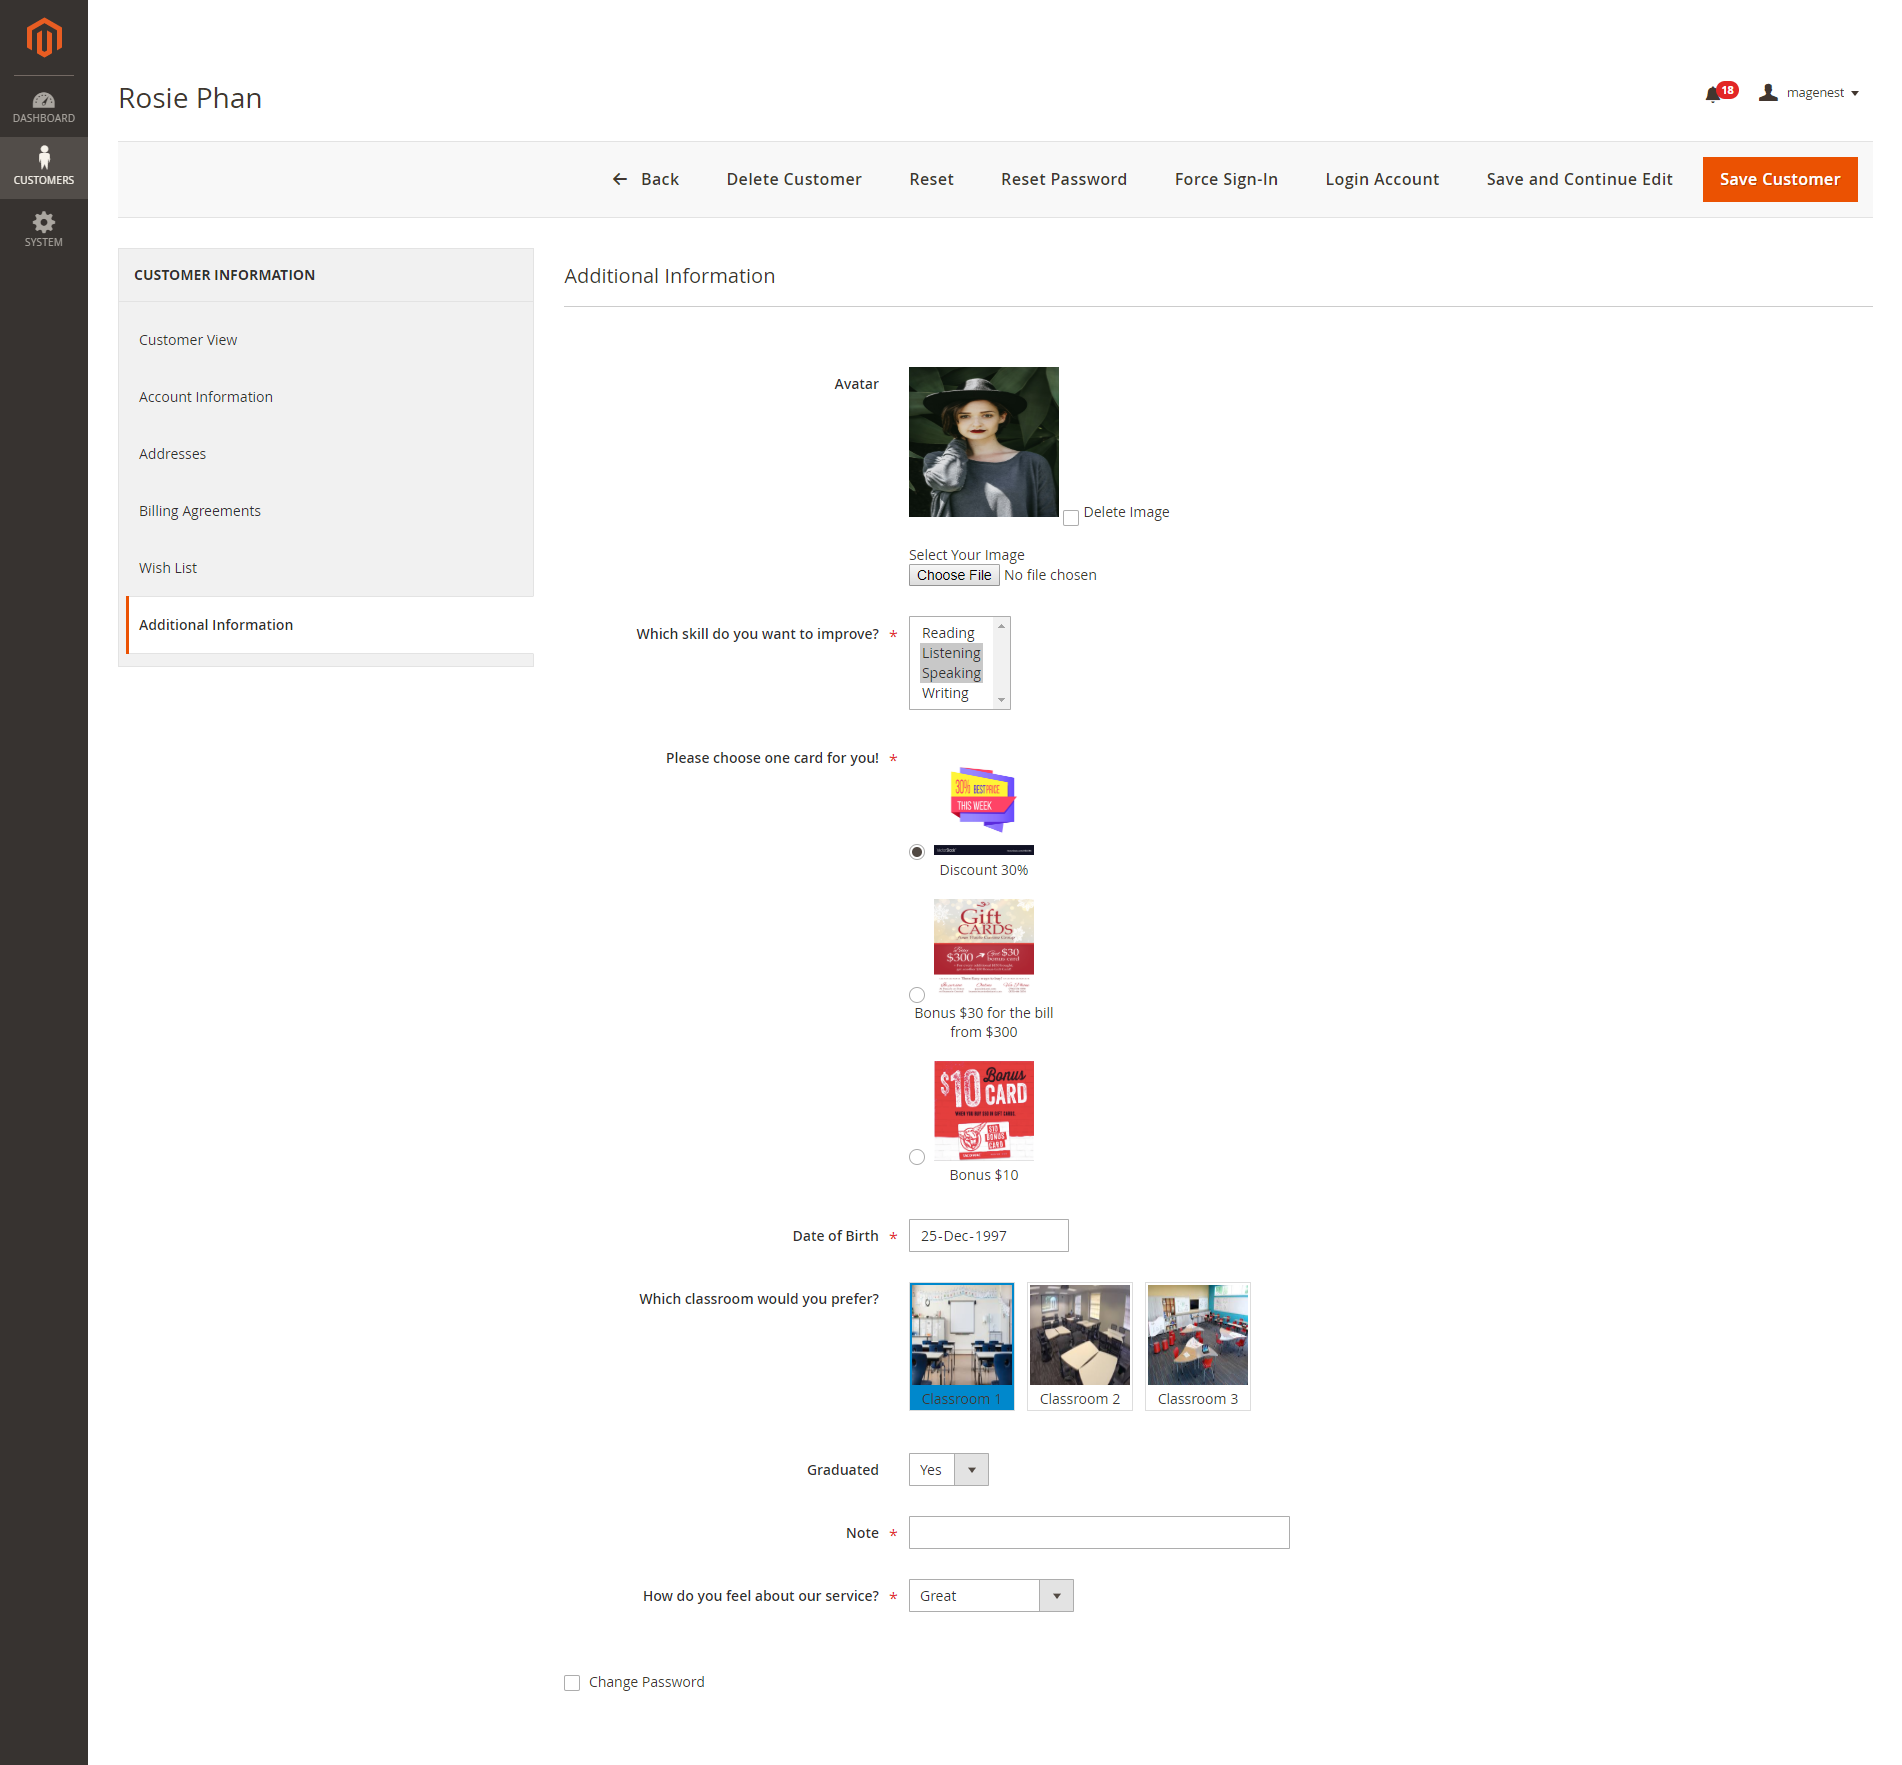
Additional attribute on Customer Information page from backend
Admin can view and edit customer information from backend, including the additional information.
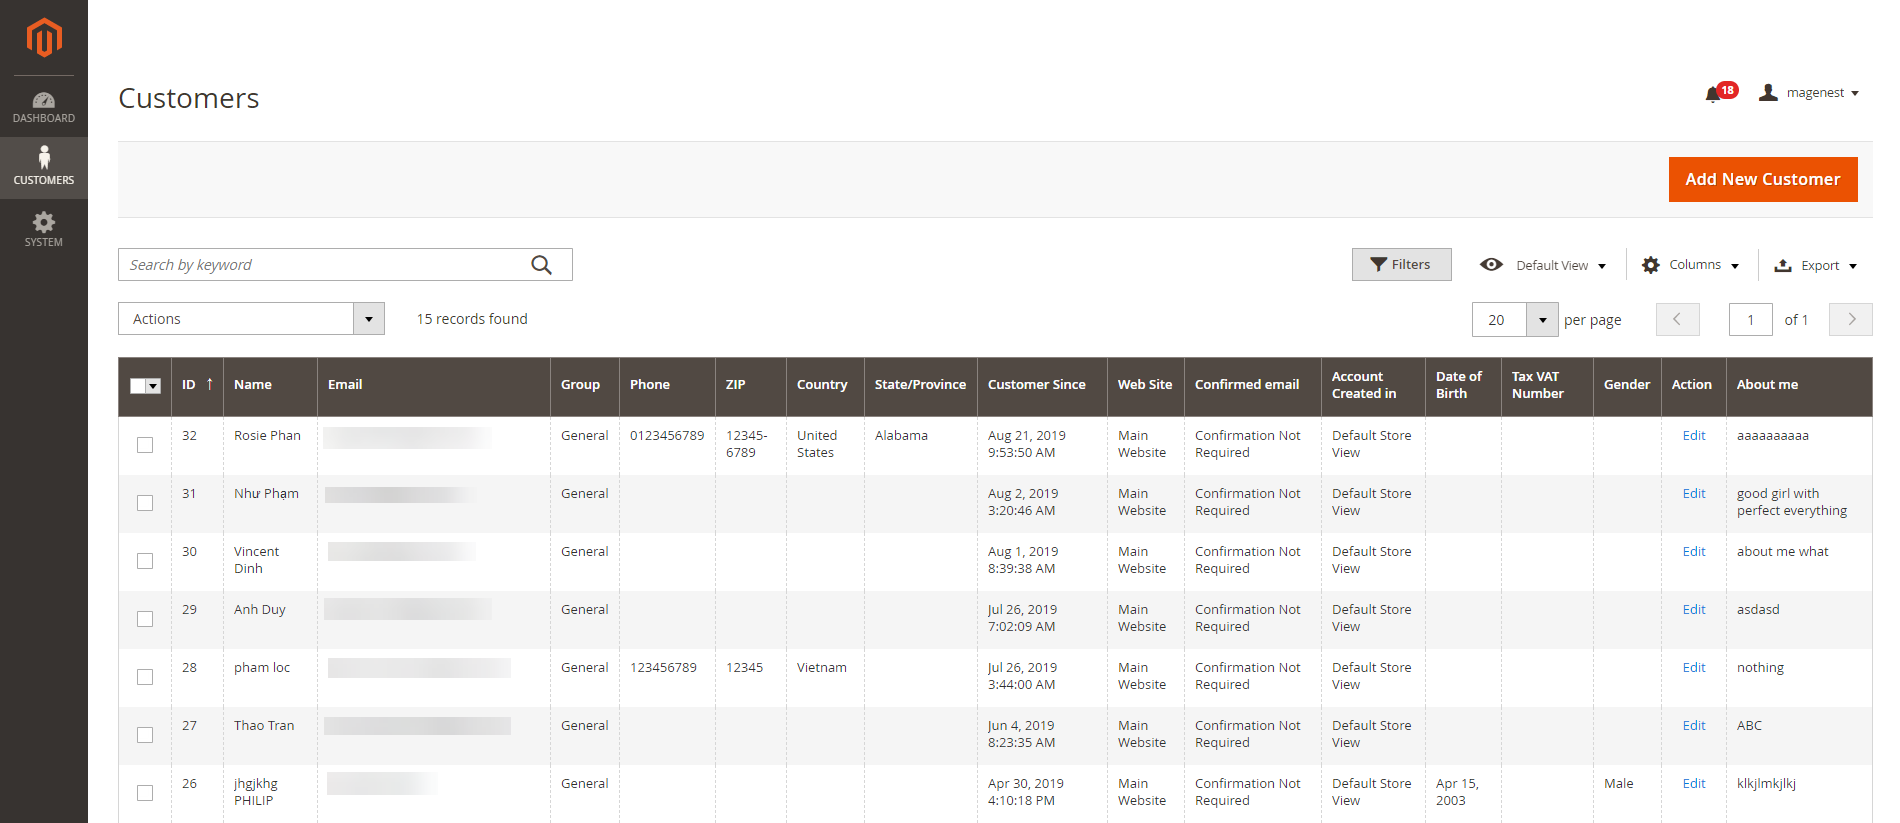
Additional attribute on customer grid from backend
...
Update
- When a new update is available, we will provide you with a new package containing our updated extension.
- You will have to delete the module directory and repeat the installing steps above.
- Flush the config cache. Your store and newly installed module should be working as expected.
...