Thank you for purchasing our extension. If you have any questions that are beyond the scope of this document, please contact us via [email protected]. Our team are always ready to answer all of your query.
Updated: 26/09/2020 | By: Magenest
Support portal: http://servicedesk.izysync.com/servicedesk/customer/portal/108
Key Features

The WooCommerce gift registry is designed for WooCommerce merchants who want to boost sales with gift registry.
For Admin
- Set up to send notification emails for new orders (to registry owner, registry creator, and admin)
- Set the shipping address as mandatory
- Set the social sharing for the gift registry
- Manage/Edit gift registry information
- Support simple and variable products
For Registry Owner
- Create/edit gift registry
- Add co-registrant information (name and contact)
- Add products on the store to his/her registry
- Set gift registry's privacy
- Set priority for items in gift registry item list
- Set quantity display
- Manage gift registry on My account page
- Share gift registry URL, share on social network (Facebook, Twitter, email)
- Get notification emails for new orders
For Registry Buyers
- Search gift registry
- Purchase gift for registrants
- Get notification emails for new orders
System Requirements
Your store should be running on WooCommerce 3.0, 3.4.7, 3.5.1; Wordpress 5.0, 5.1, 5.2, 5.3, 5.4, 5,5
Configuration
![]() In the back end, go to WooCommerce > Settings > Gift registry > Gift Registry Settings
In the back end, go to WooCommerce > Settings > Gift registry > Gift Registry Settings
 On the Gift Registry configuration page.
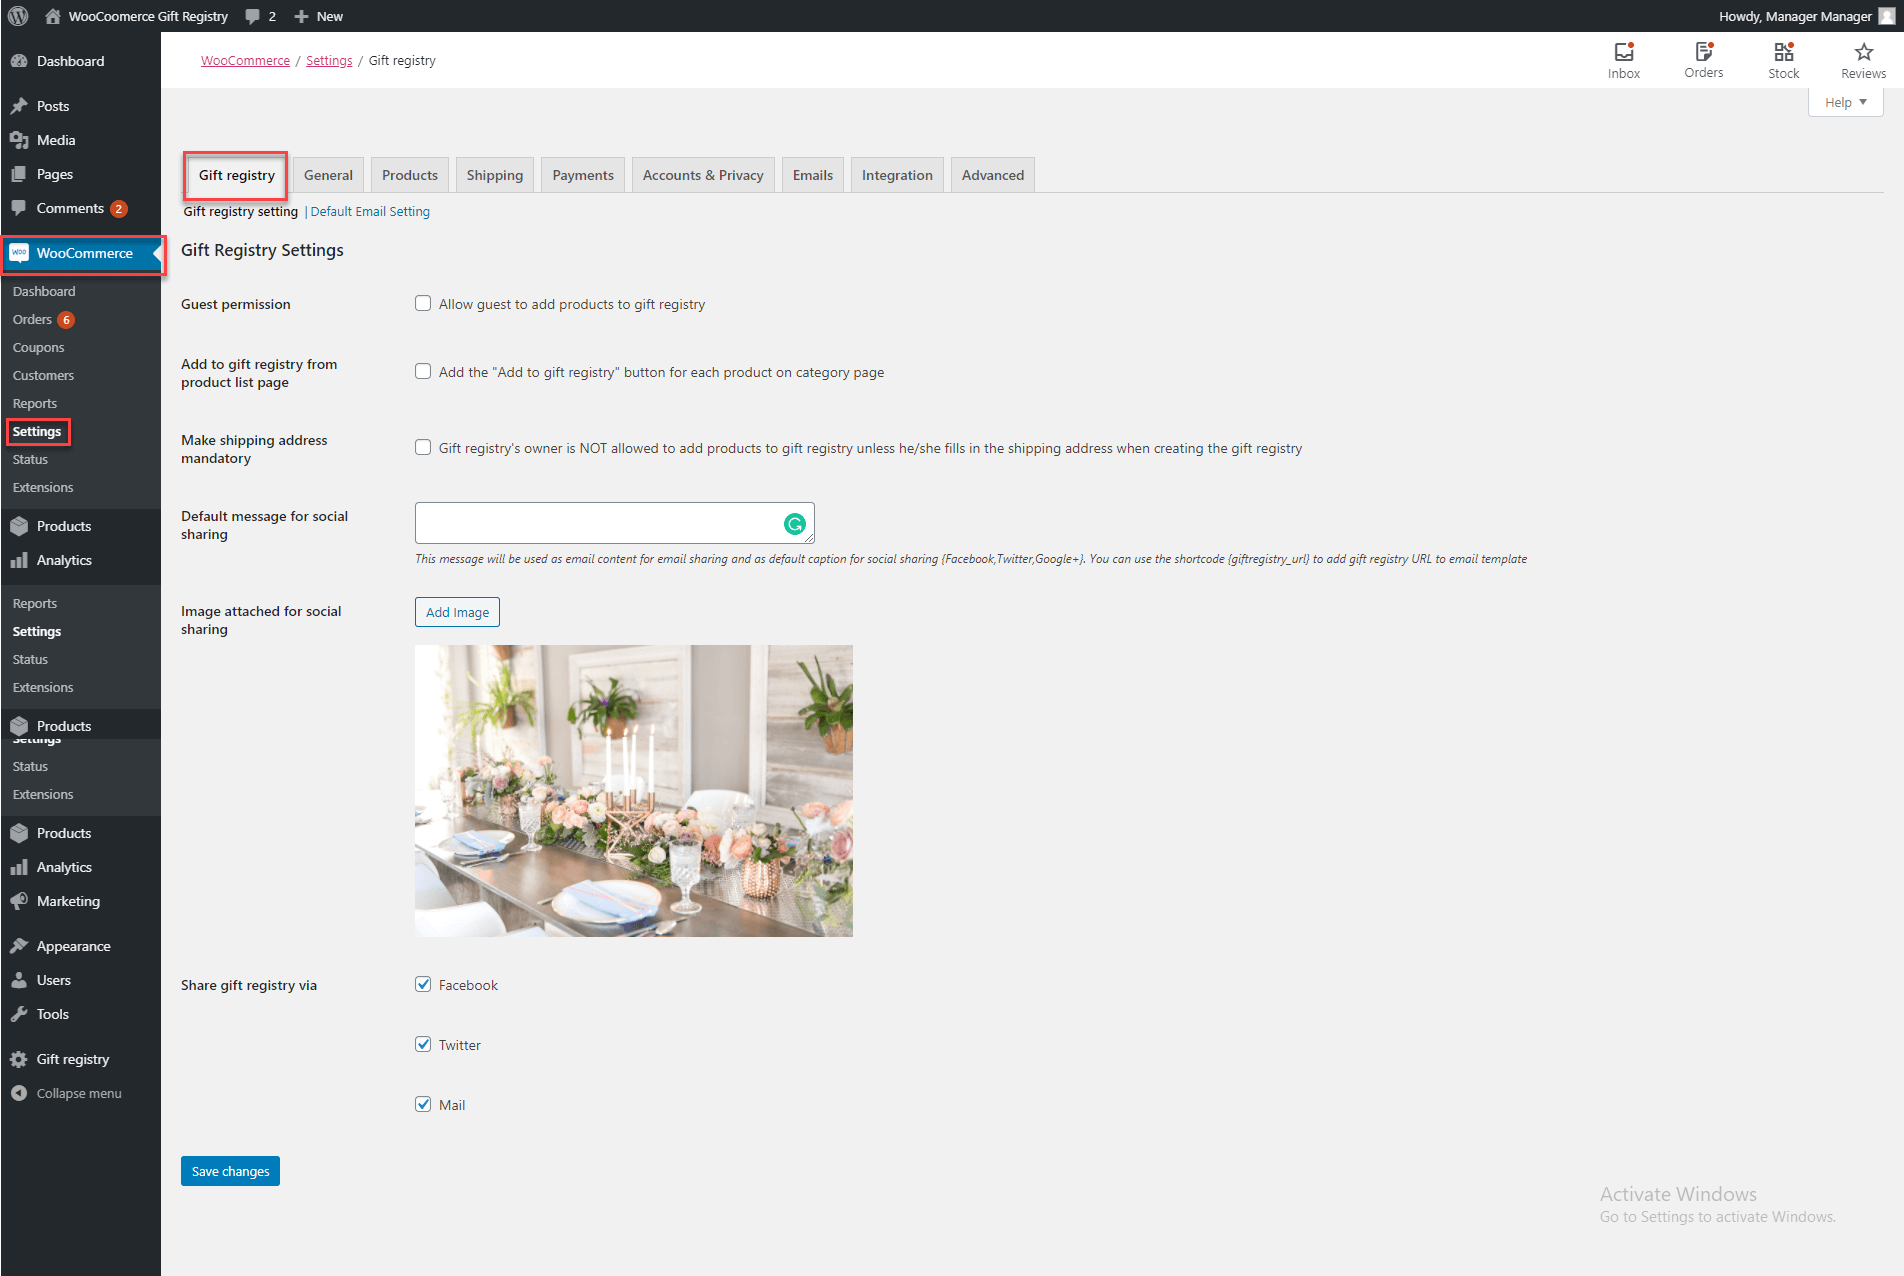
- Guest permission: Select this to allow guests to see the "Add to gift registry" button on the product page. When they click on the button, they'll be redirected to the Login To Your Account page.
- Add to gift registry from product list page: Show the "Add to gift registry" option for products on the category page
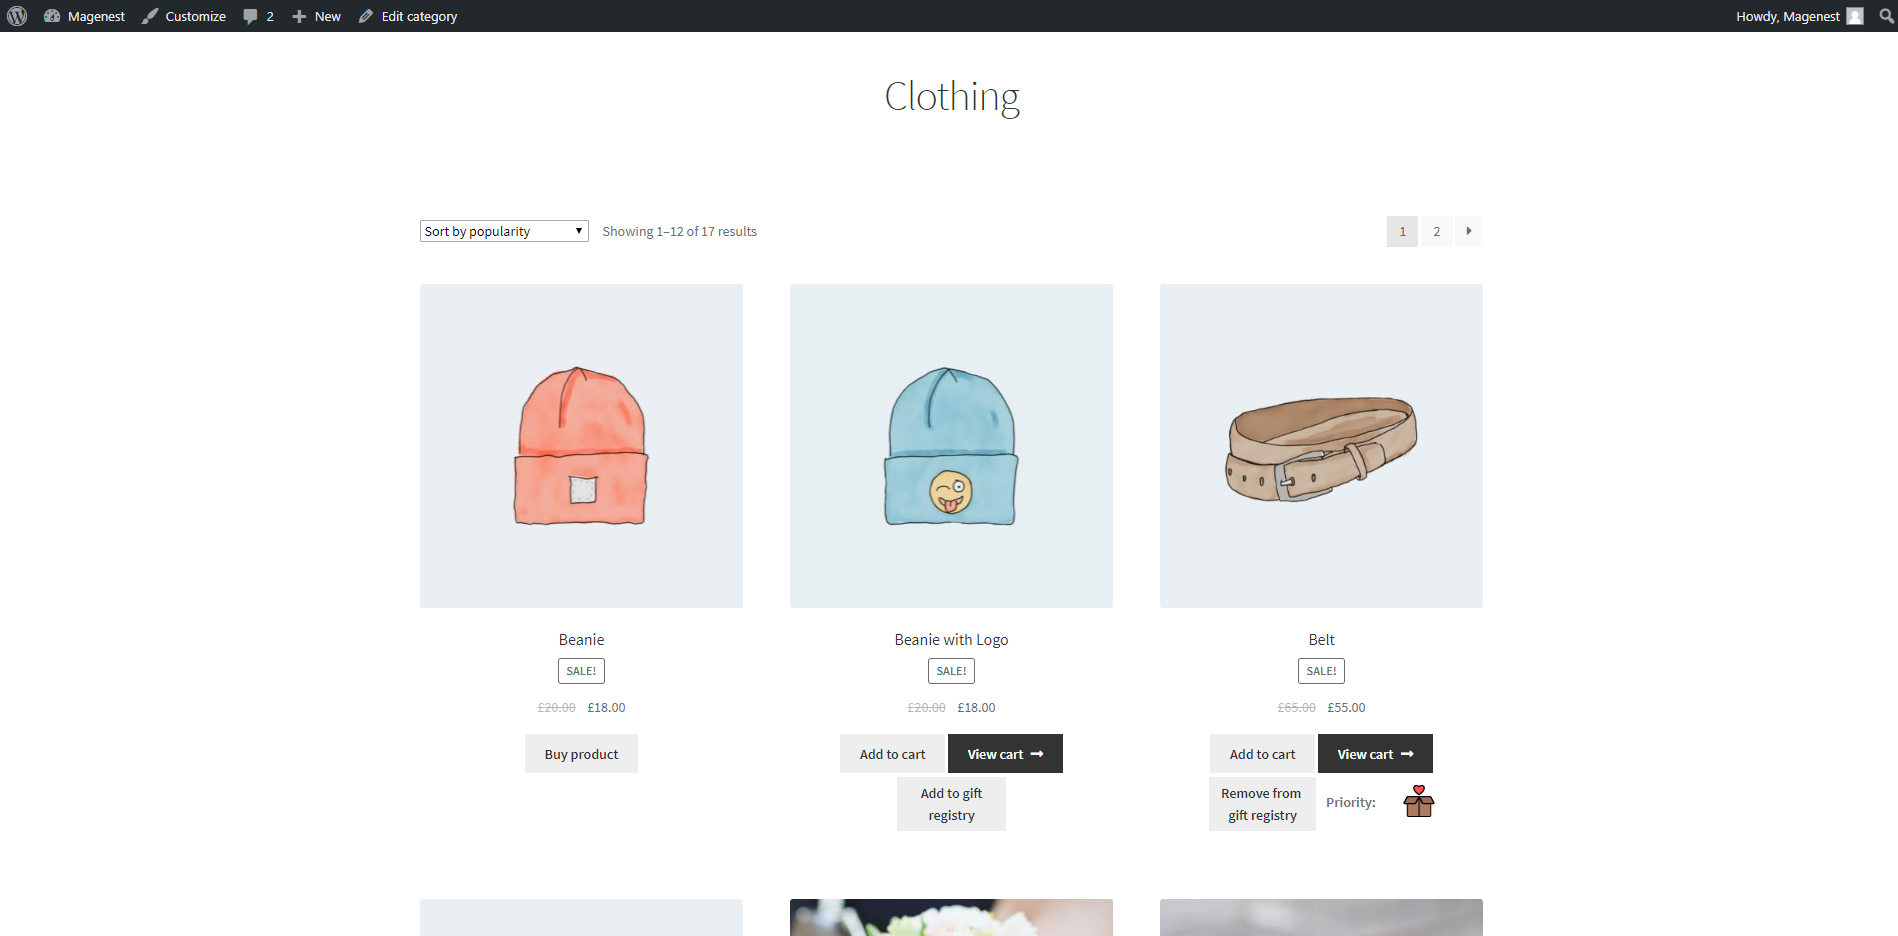
"Add to gift registry" button on the category page
- Make shipping address mandatory: Select this to prevent the Registry owner to add any products to his/her registry if he/she hasn't filled in the shipping address.
- Default message for social sharing: Enter the message added when sharing the gift registry to the social media.
- Image attached for social sharing: This image will be posted along with the gift registry URL on social network, or attached along with the email when sharing via email.
- Share gift registry via: Enable multiple channels to share the gift registry. You can allow the visitors to share the gift registry URL via Facebook, Twitter, or email.
![]() After finishing the general configuration, you could select the Default Email Setting tab to set the email templates
After finishing the general configuration, you could select the Default Email Setting tab to set the email templates
On the Default Email Setting page
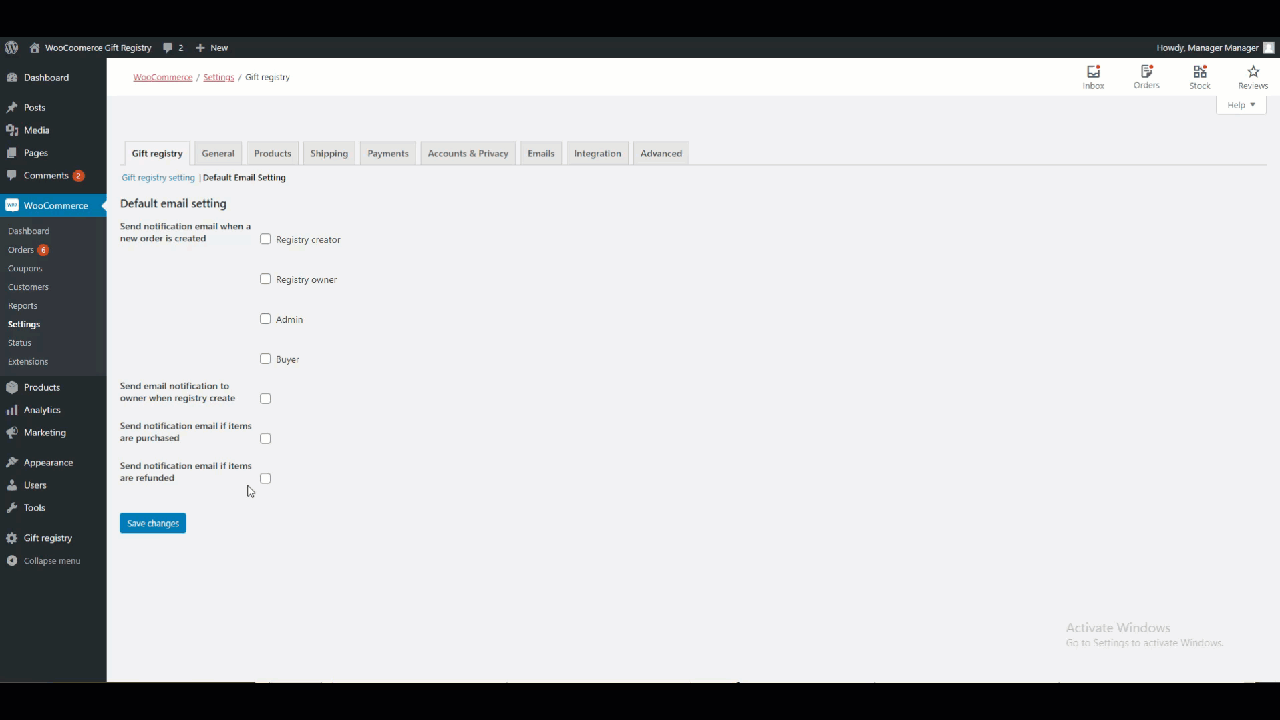
- You could send the notification emails when a new order is created ; a new registry is created ; an item from the registry is purchased ; an item from the registry is refunded.
 Note: Only some specific entities could receive these emails. please check the table below:
| Receiver | |
|---|---|
| Notification email when a new order is created | Registry creator |
| Registry owner | |
| Admin | |
| Buyer | |
| Notification email when a new registry is created | Registry owner |
| Notification email when an item from the registry is purchased | Registry Owner |
| Notification email when an item from the registry is refunded | Registry Owner |
- You could set the Subject and the Email template for each of this email following the below instruction
| Shortcodes | Content | |
|---|---|---|
| 1 | {{buyer_name}} | The gift purchaser's name |
| 2 | {{store_url}} | The link to your store |
| 3 | {{order_number}} | The order ID |
| 4 | {{store_name}} | Your store name |
| 5 | {{order_items}} | The name of the items in the order |
| 6 | {{break_line}} | To break the lines of the email |
- Press Save changes to save the configuration.
Gift Registry Management
![]() You can view, edit, or delete the gift registry in the back end on the Gift Registry Management page.
You can view, edit, or delete the gift registry in the back end on the Gift Registry Management page.
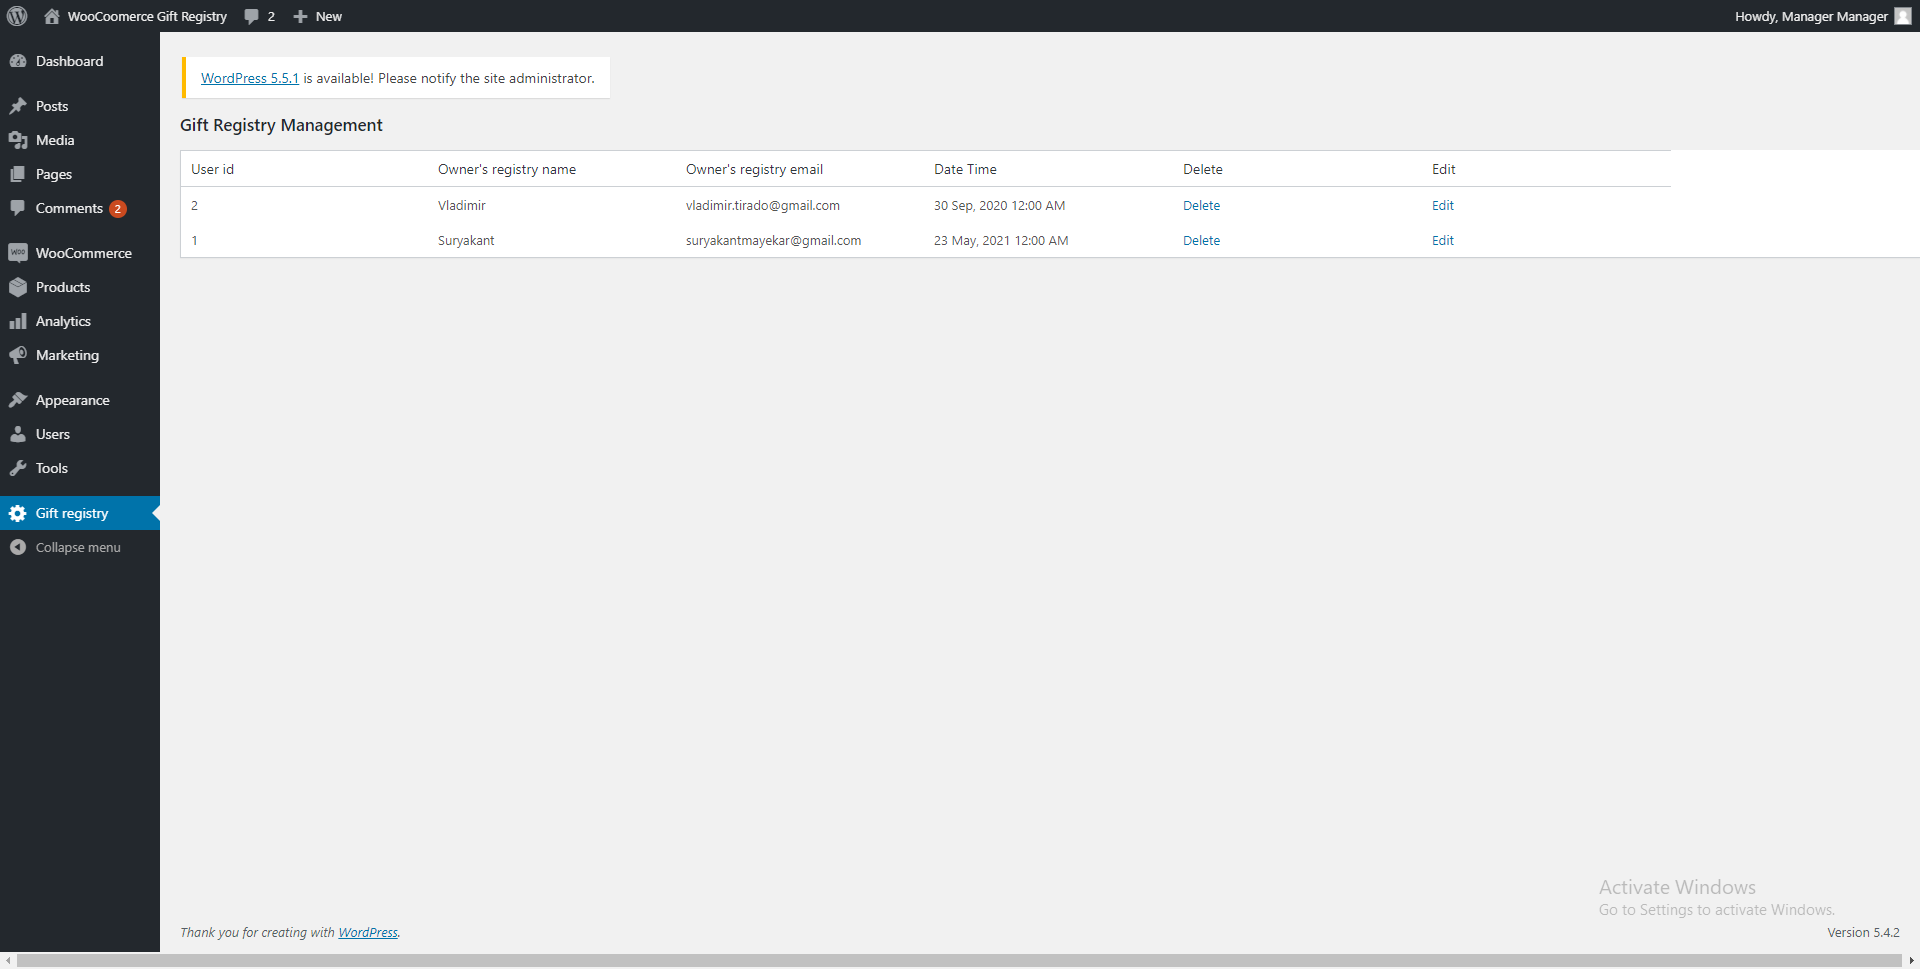
- Click on Edit in each gift registry, admin can view and edit the gift registry information.
- On the Item tab, admin can also view the item list of each registry. It's also possible to Delete, change the Quantity, change the Priority of each item.
Set Background Image
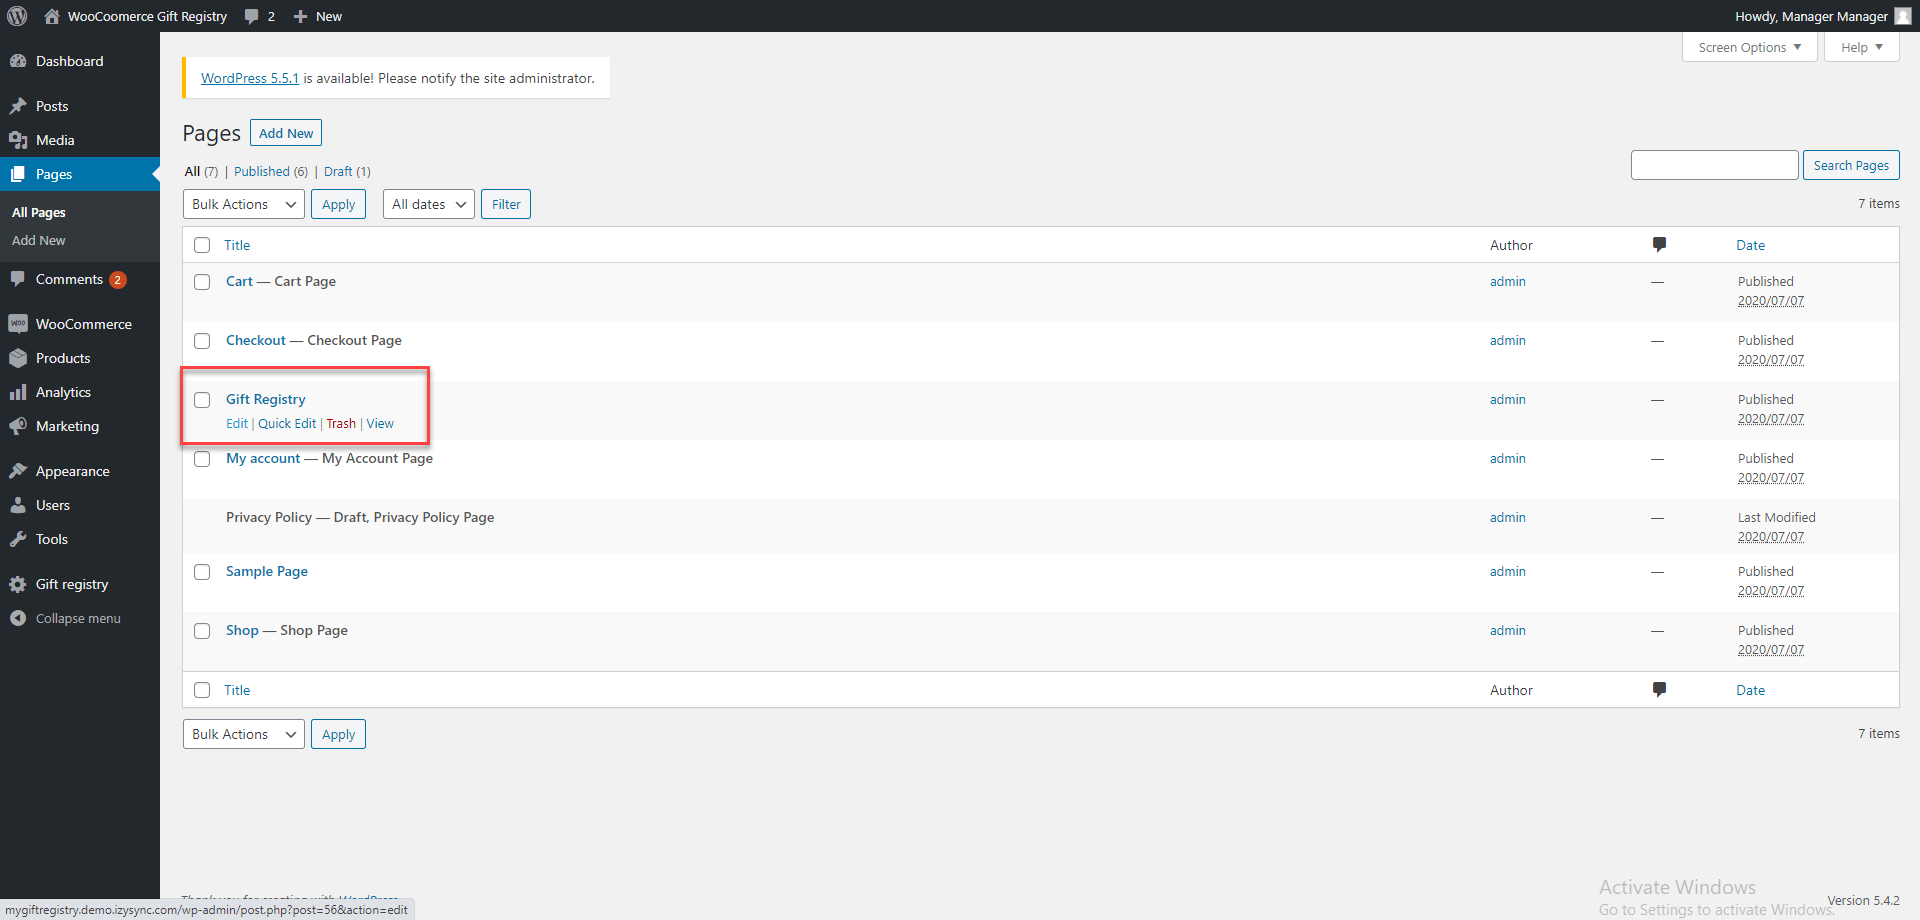
![]() On the Admin sidebar, go to Page > All Page > Gift Registry
On the Admin sidebar, go to Page > All Page > Gift Registry
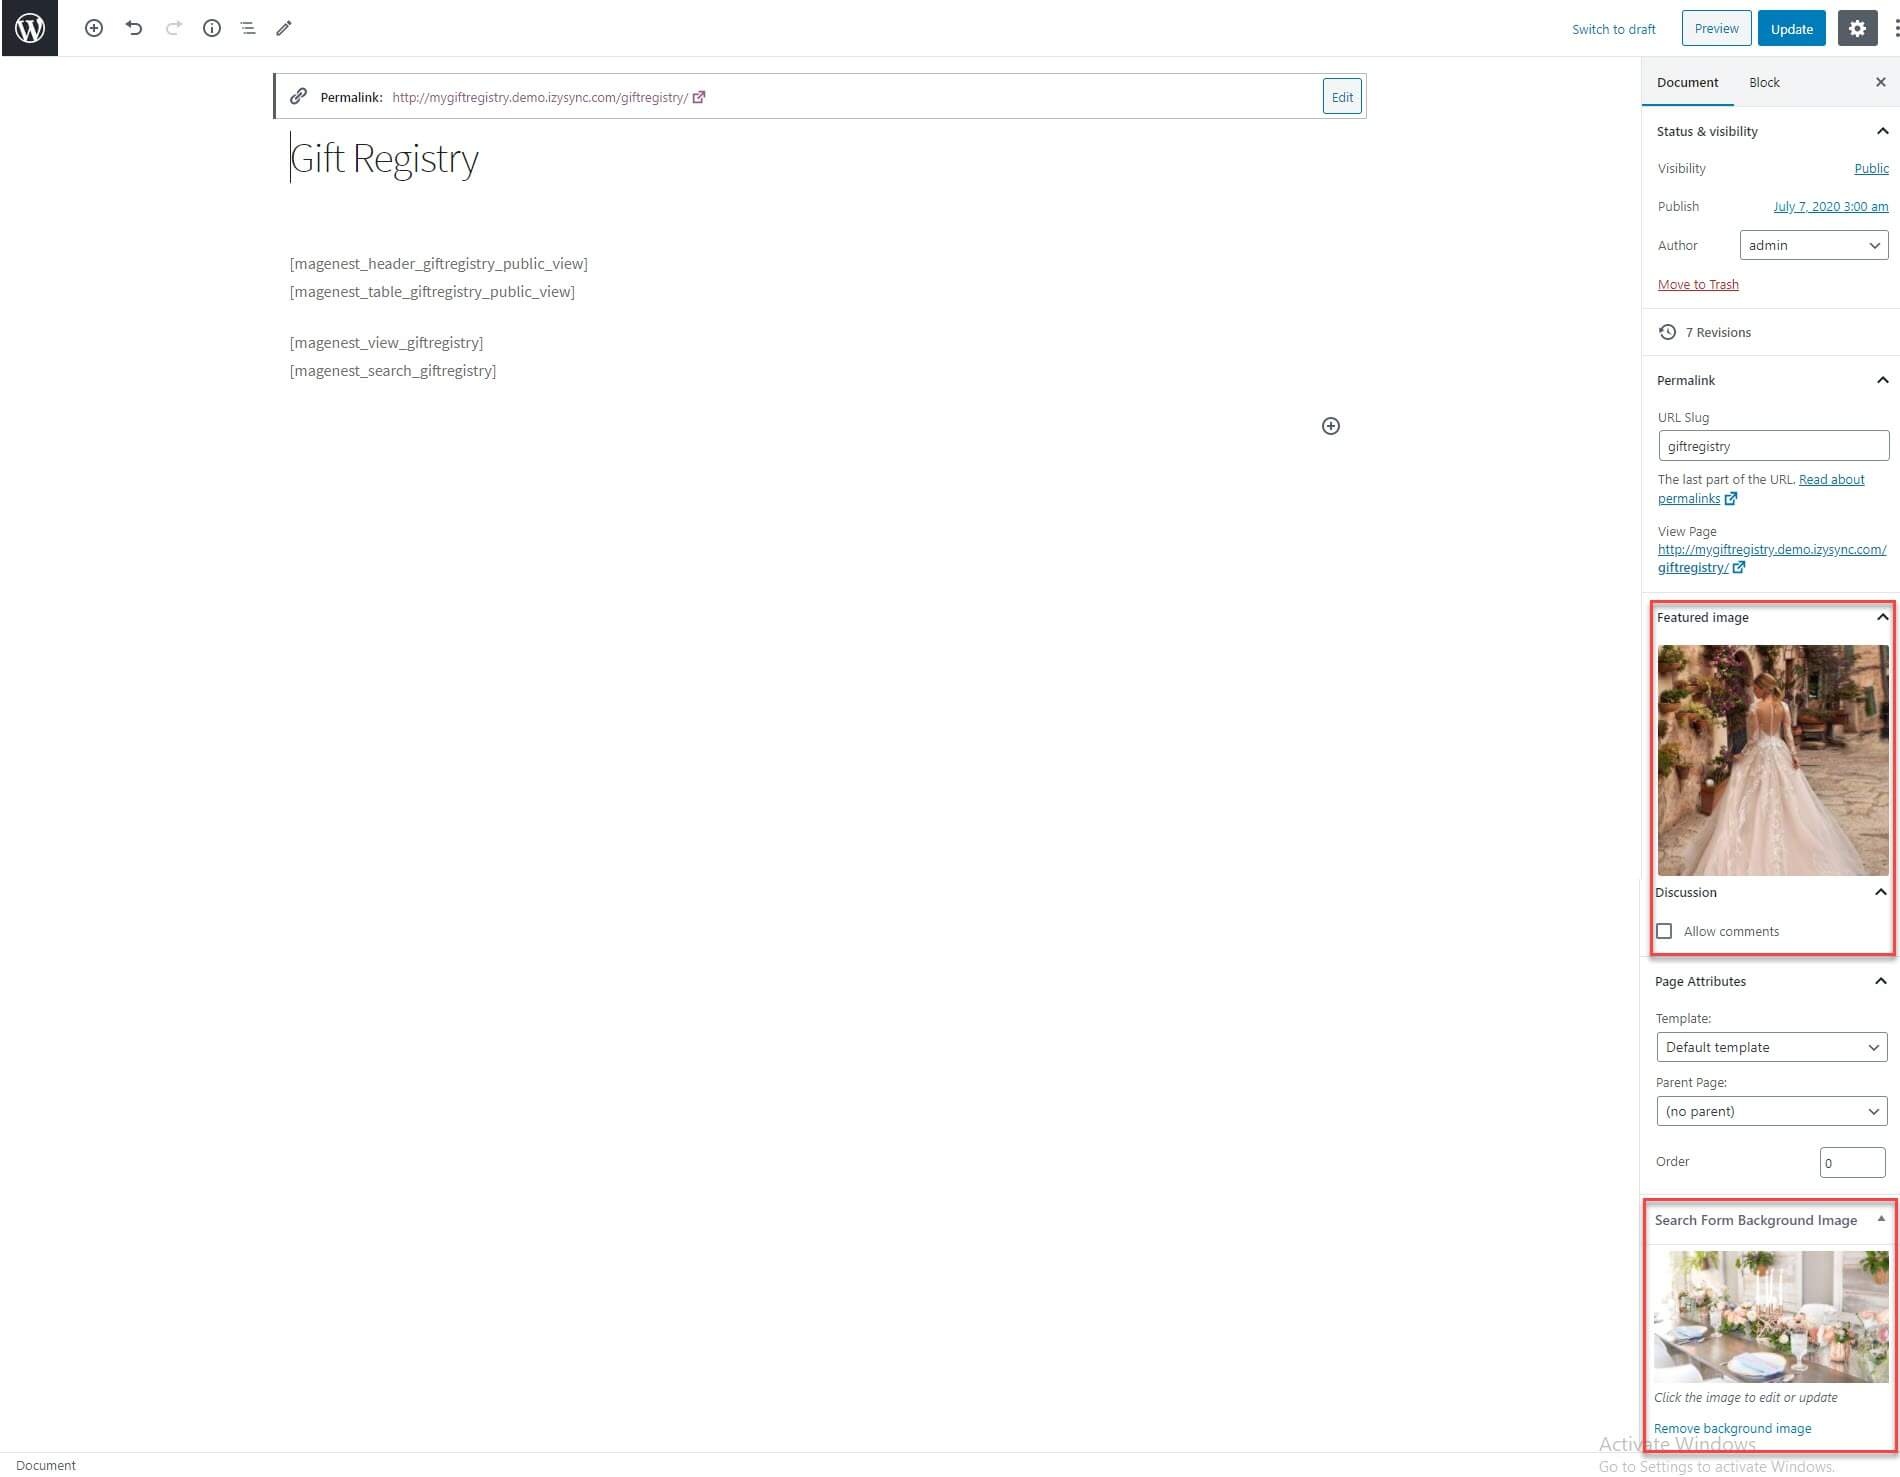
![]() On the Edit gift registry page, in the Document tab, you can change the gift registry's background image in Edit Page > Search Form Background Image > Set Back Ground Image. You could also set the Featured Image by clicking on the Add Featured Image button.
On the Edit gift registry page, in the Document tab, you can change the gift registry's background image in Edit Page > Search Form Background Image > Set Back Ground Image. You could also set the Featured Image by clicking on the Add Featured Image button.
Storefront
![]() On the storefront, customers must register an account on the store in order to create a gift registry. One user can only create one registry.
On the storefront, customers must register an account on the store in order to create a gift registry. One user can only create one registry.
![]() On My Account Page, customers will be able to create/edit their Gift Registry. There're 3 registry tabs, Information, Item, Share.
On My Account Page, customers will be able to create/edit their Gift Registry. There're 3 registry tabs, Information, Item, Share.
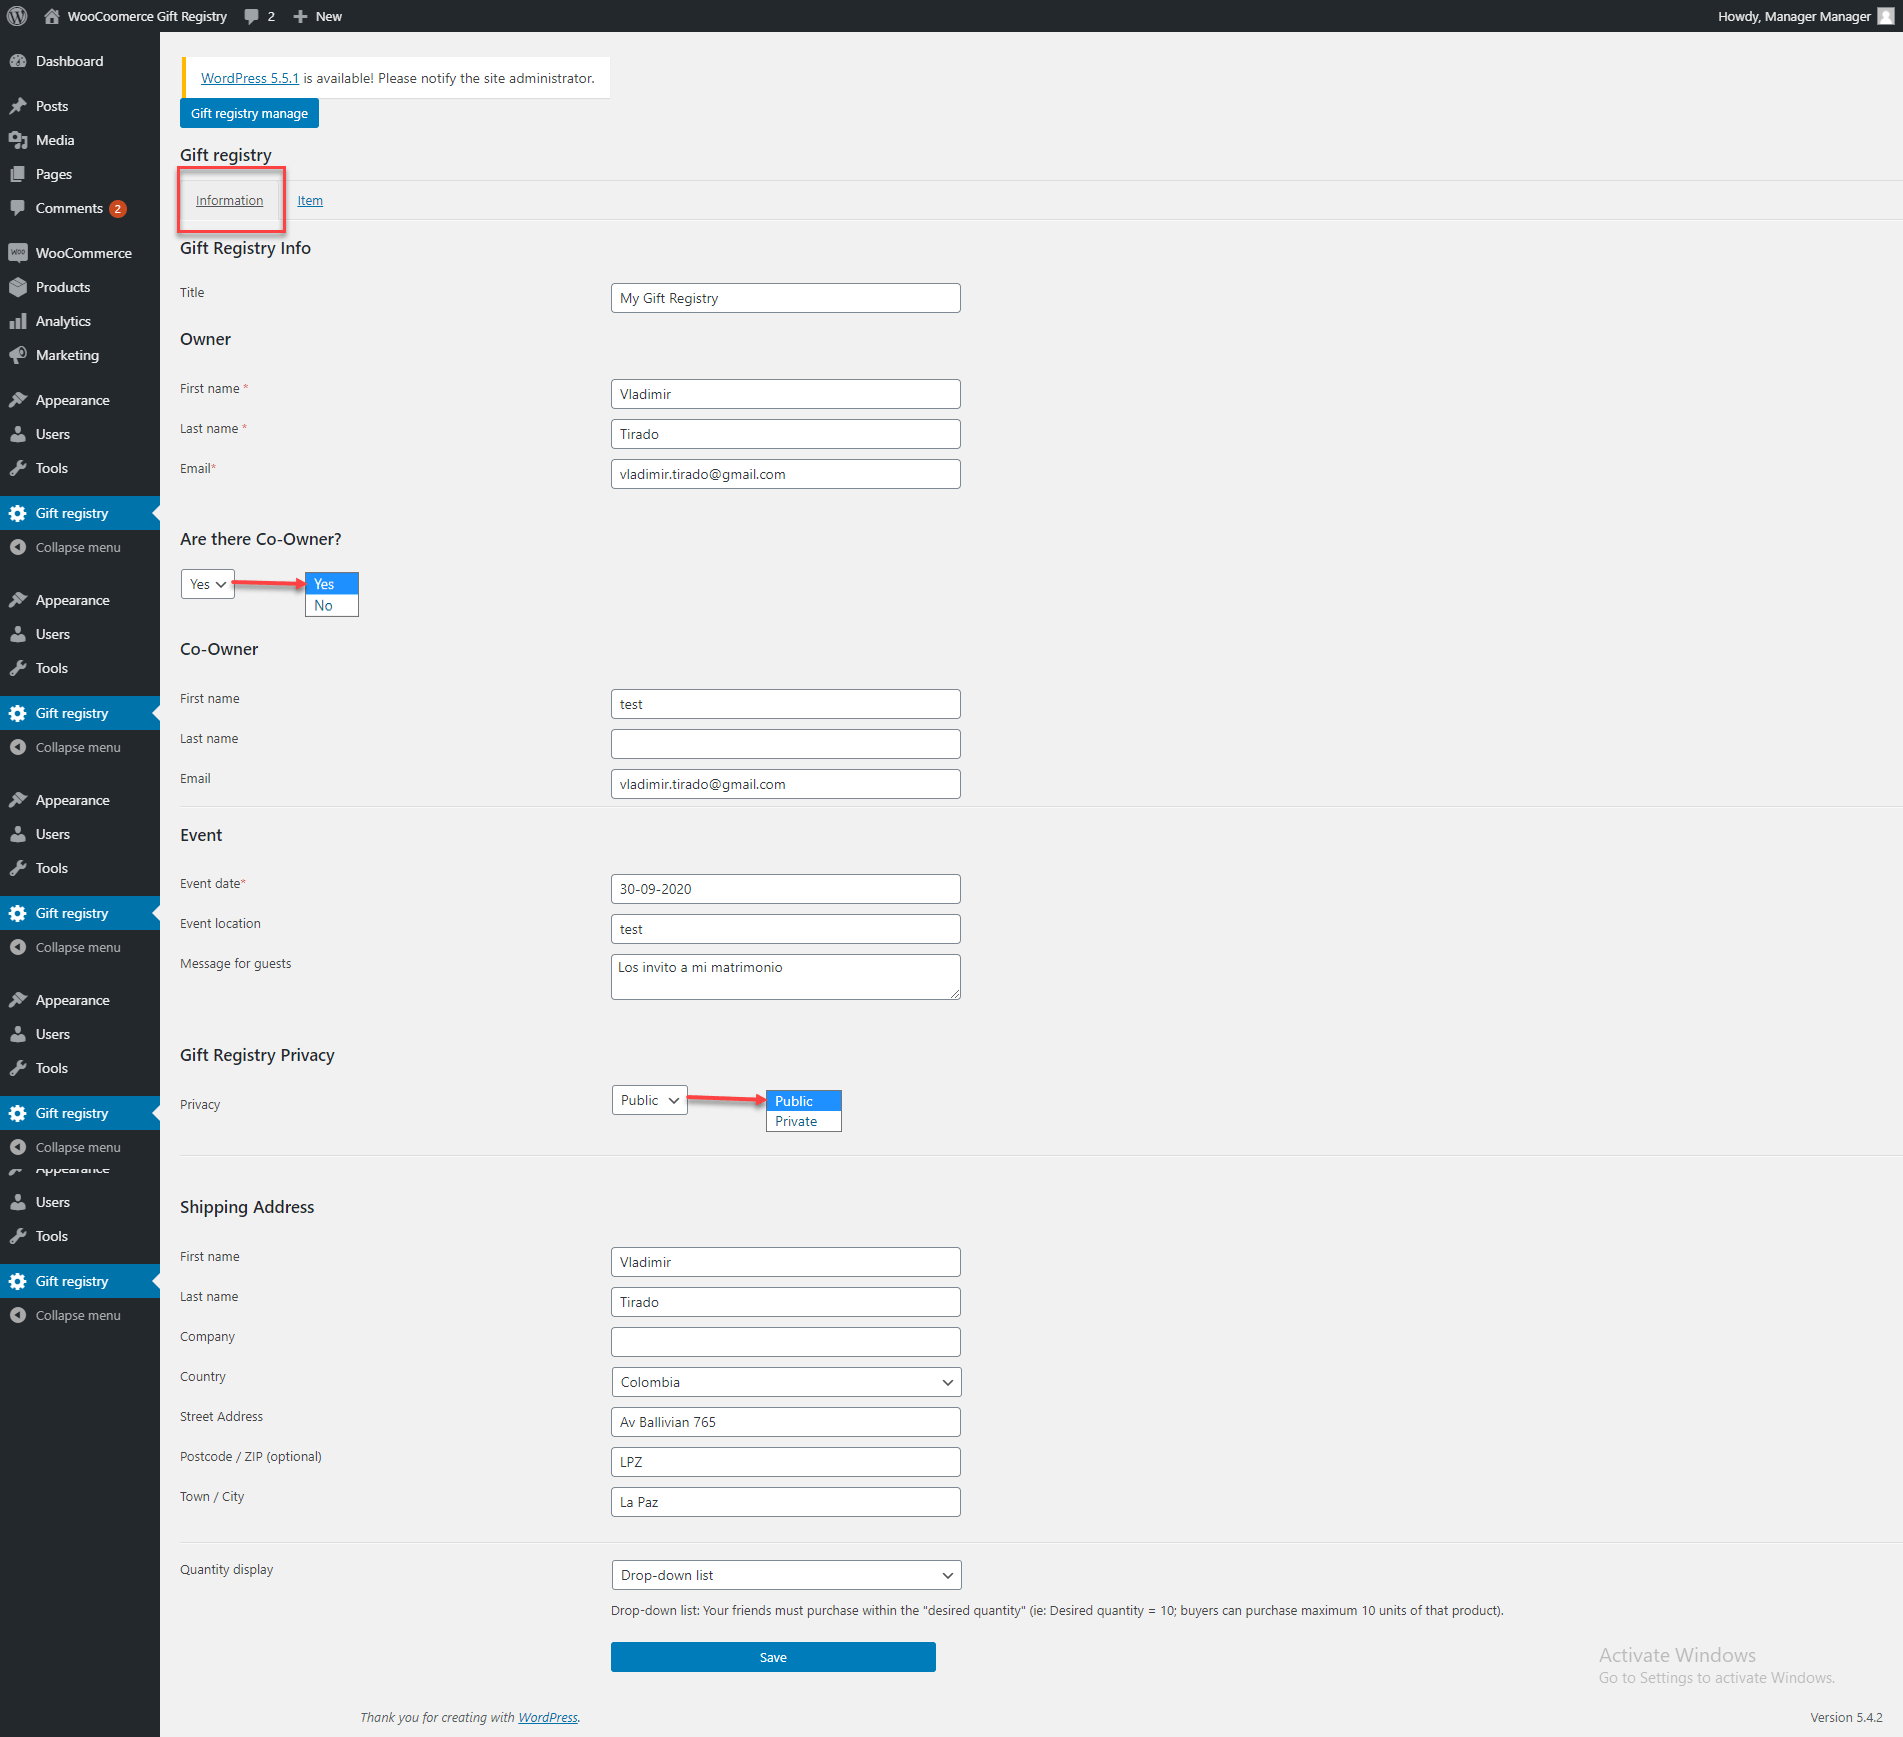
Information
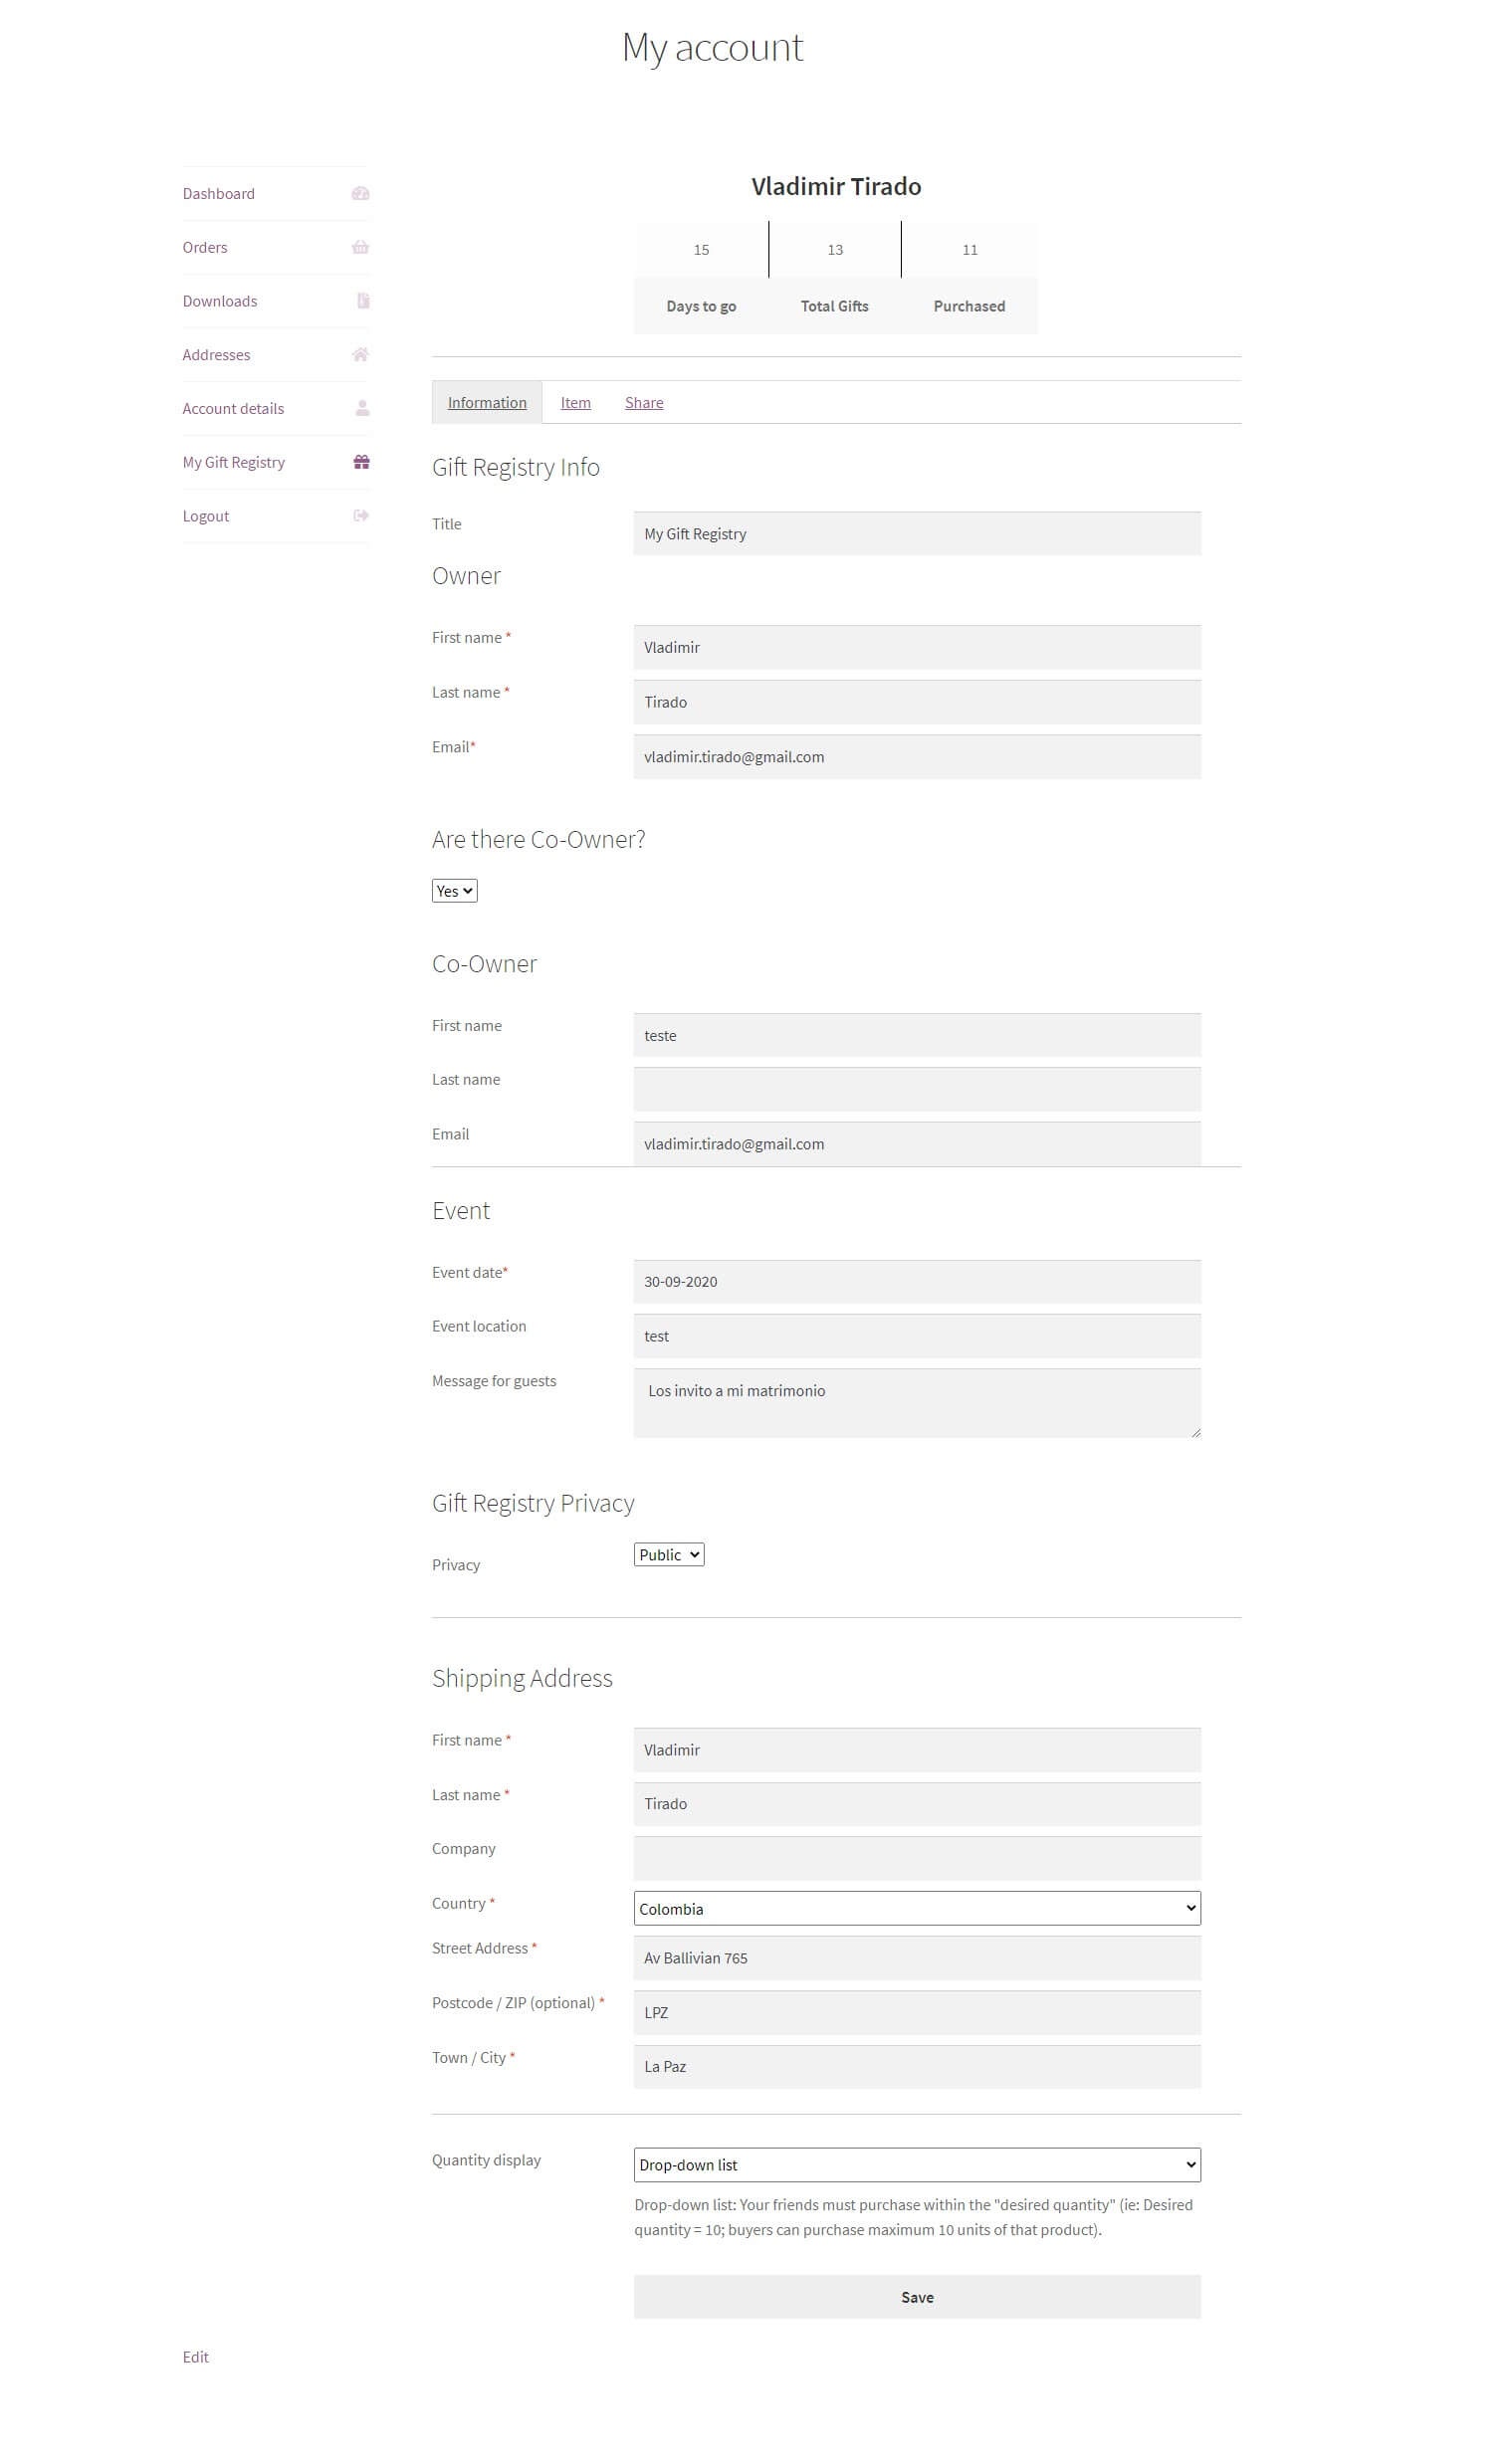
- The gift registry's owner will fill in the registry info. He/she can add co-registrant to the registry
The registry's owner can set the privacy mode for the gift registry.
Public: Everyone can see the gift registry
Private: A password is required to see the gift registry
The registry's owner can set the quantity display for the gift registry items
Drop-down list: Your friends must purchase within the "desired quantity" (ie: Desired quantity = 10; buyers can purchase a maximum of 10 units of that product).
Text field: Your friends can purchase more than the "desired quantity" (ie: Desired quantity = 10; buyers can purchase more than 10 units of that product).
After the event info is updated, there will be an overview summary on top of the page for registry's owner to track.
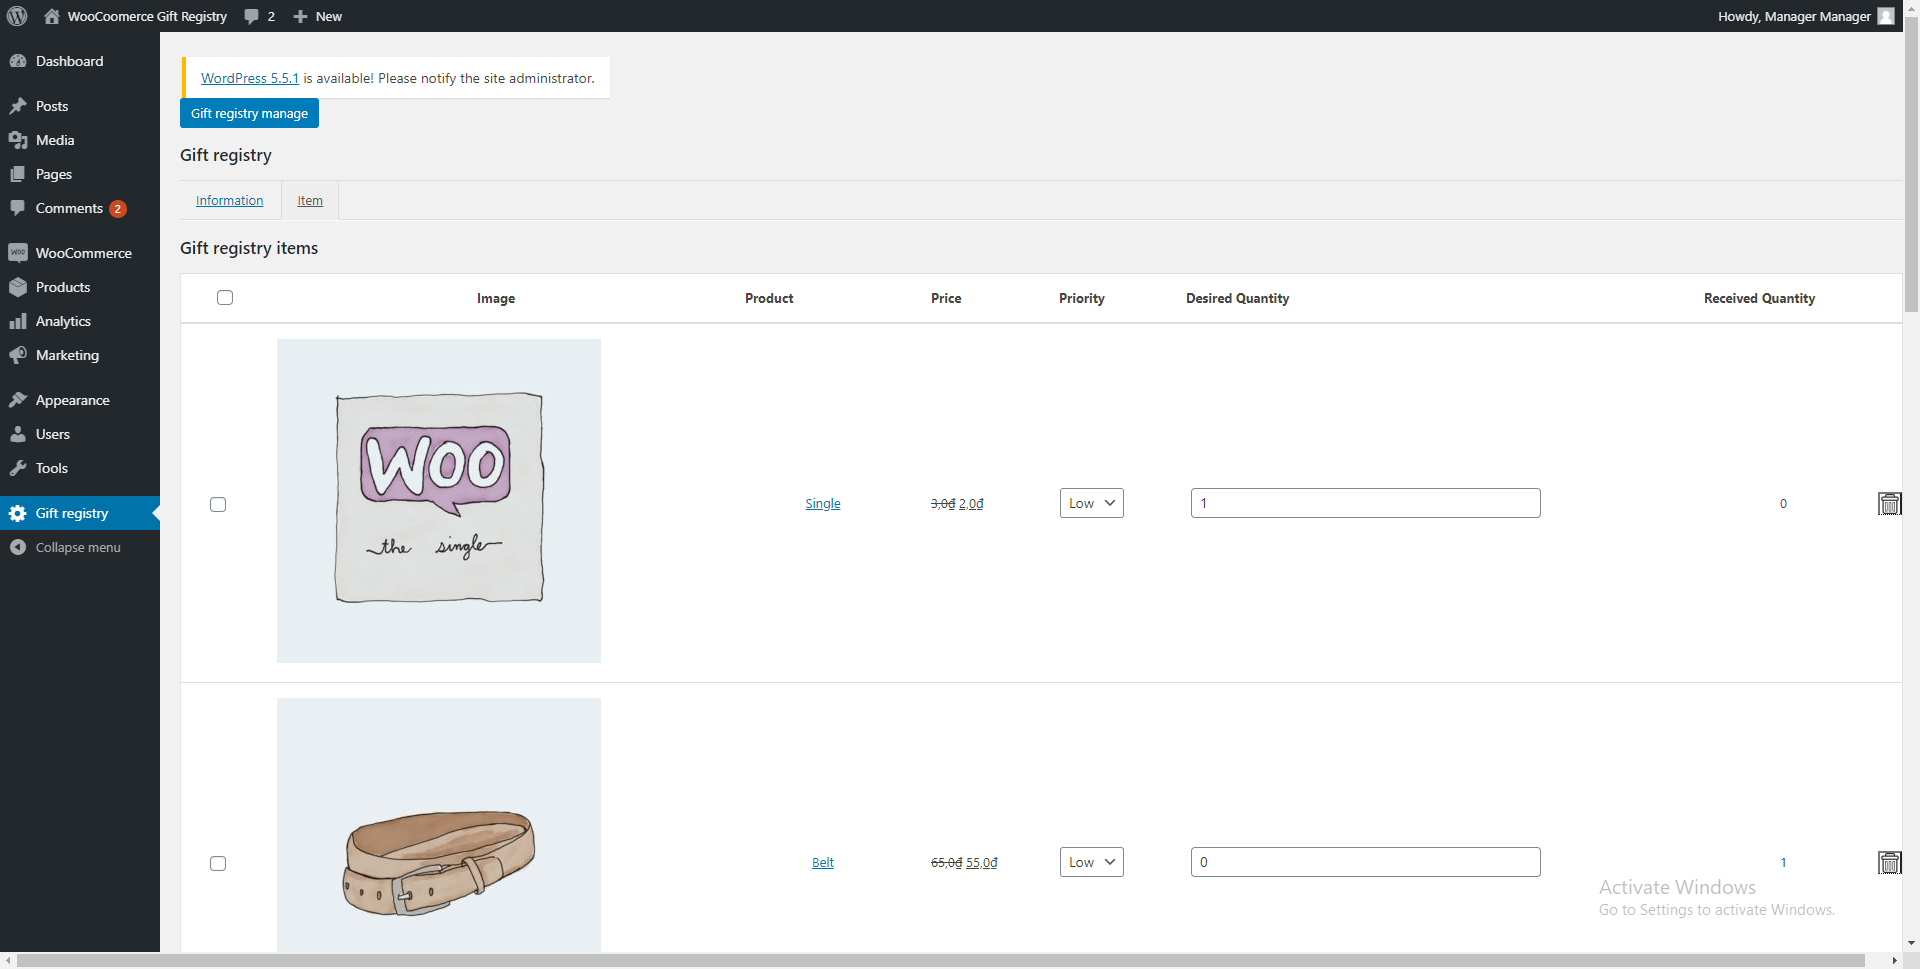
Item
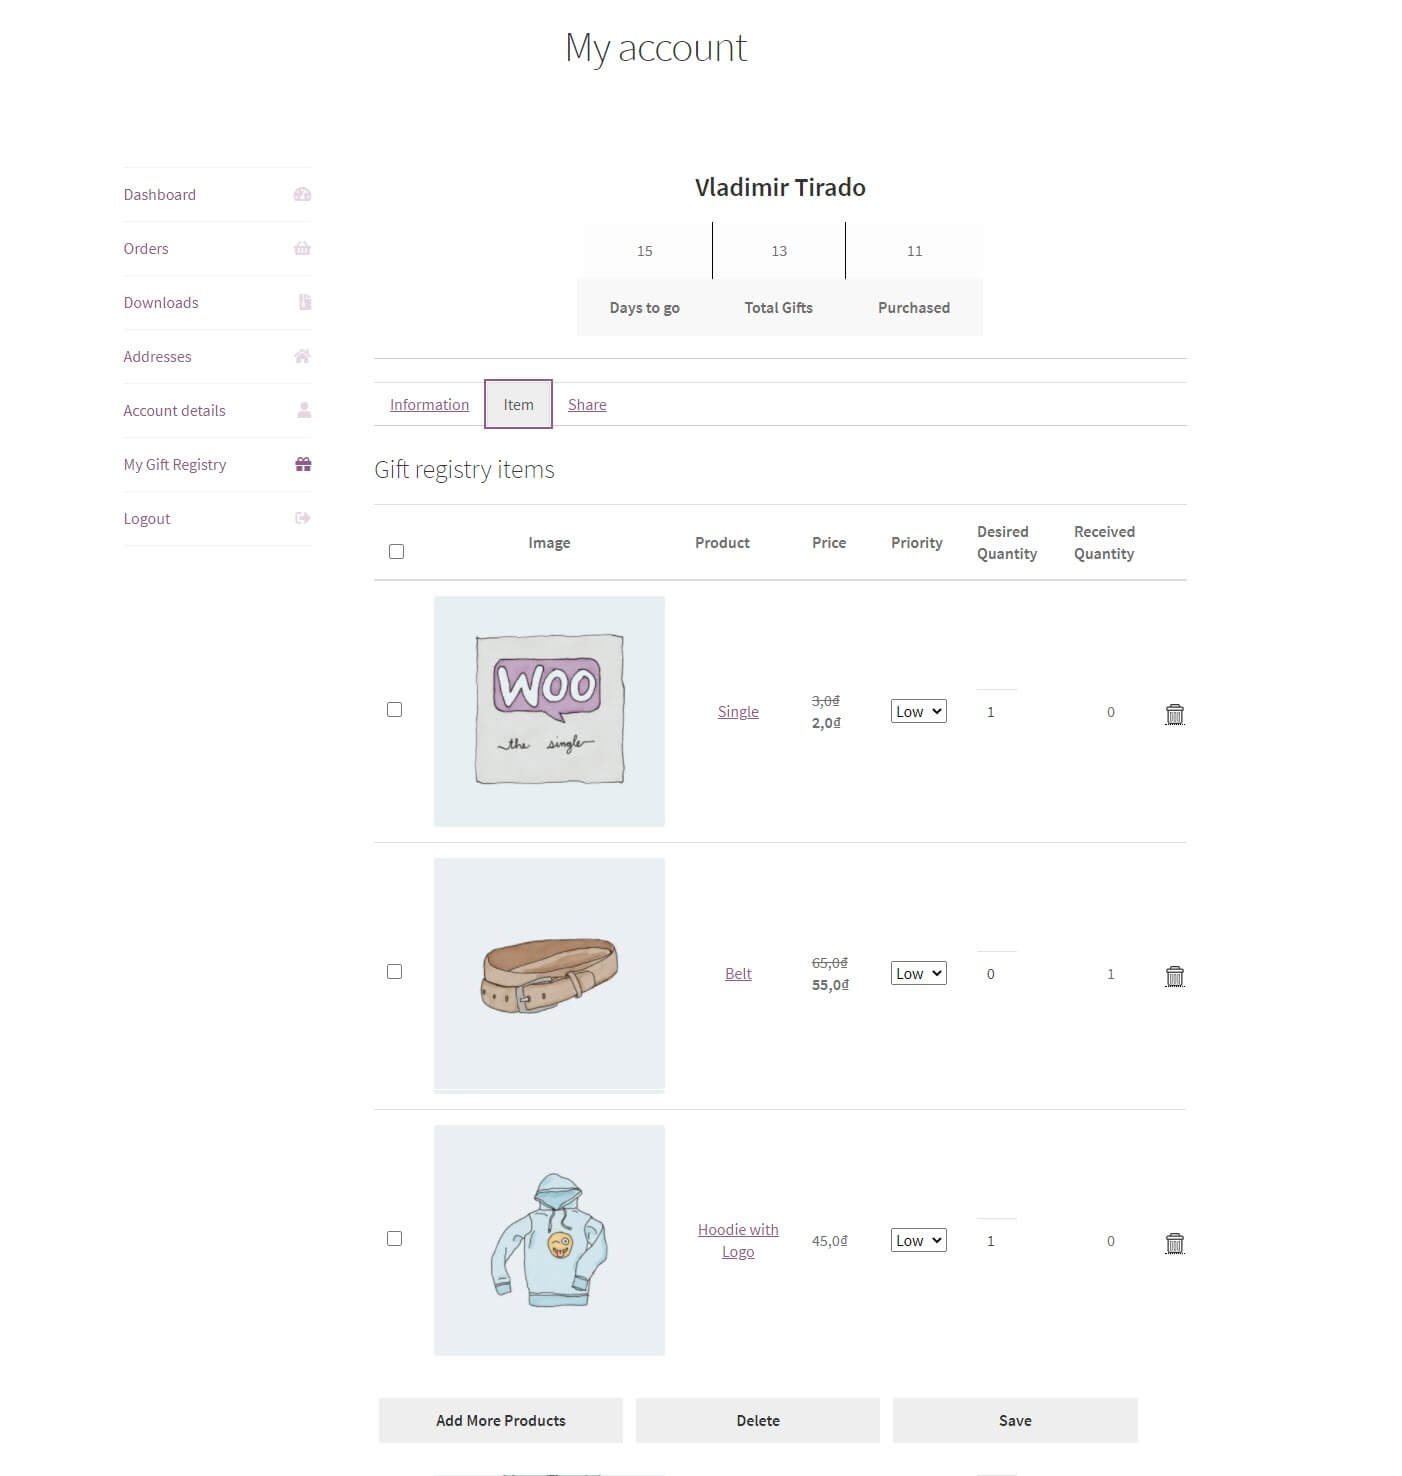
- Registry's owner can add, remove the item(s) from the list. He/she can also set the priority for each item as well as the desired quantity.
Share
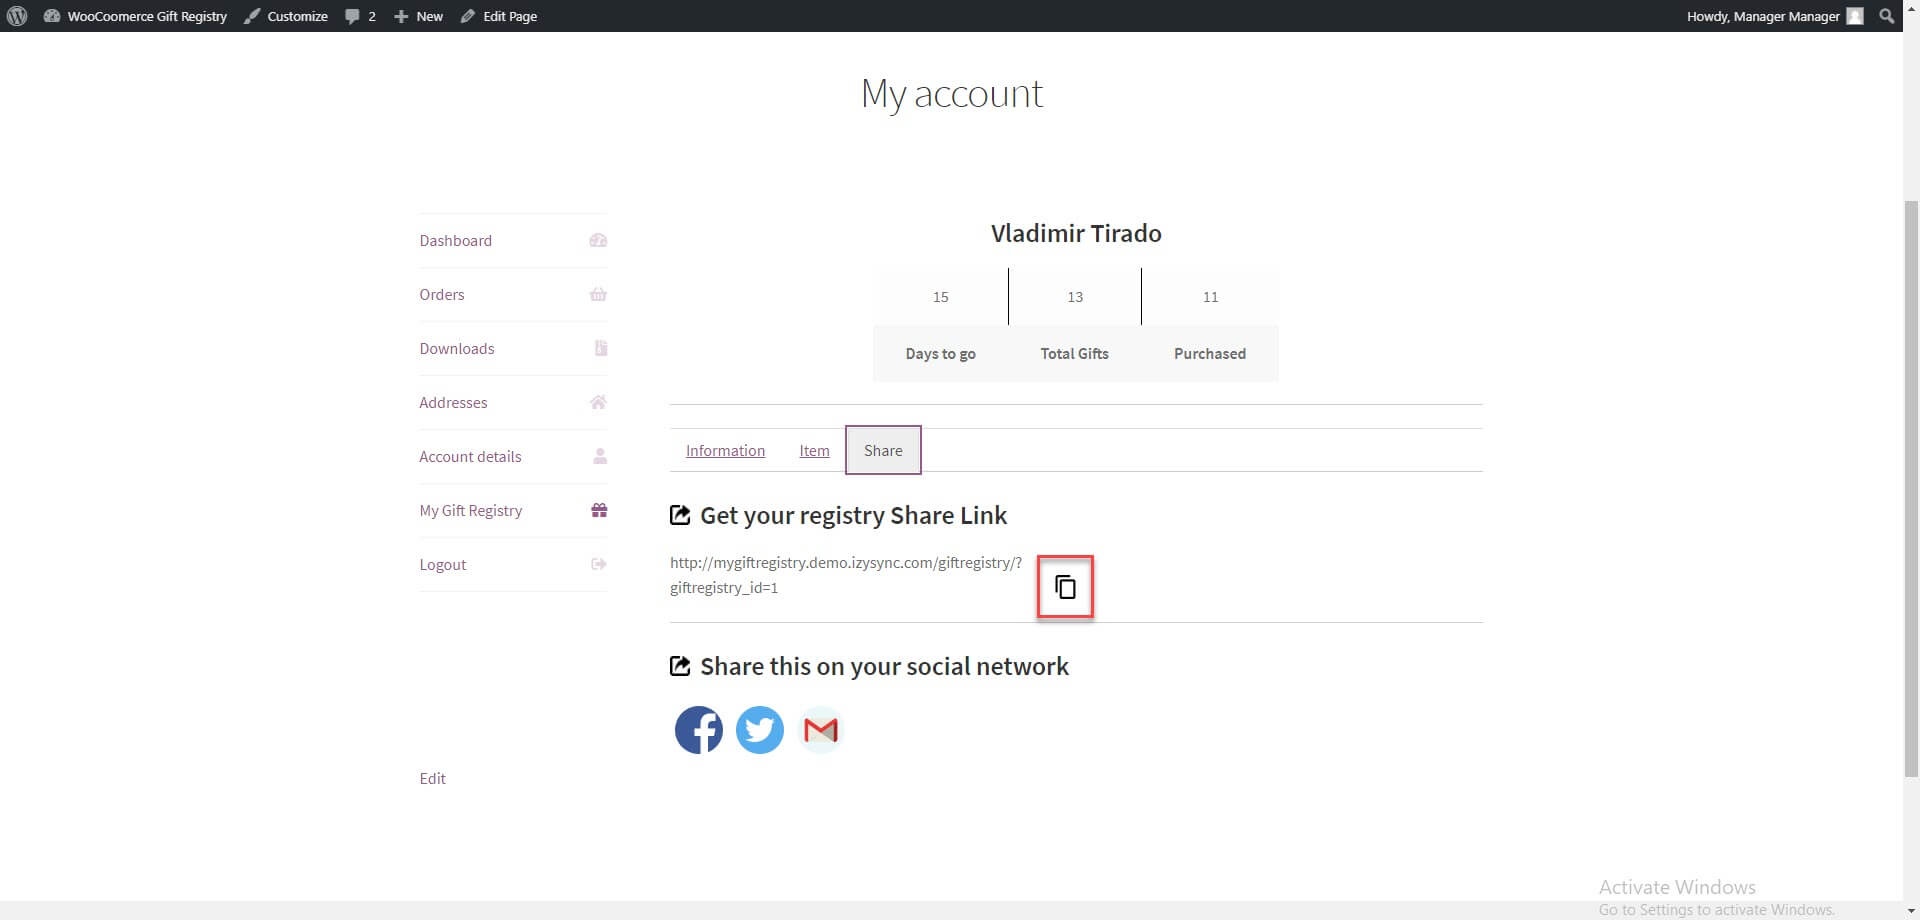
- The registry's owner can share the gift registry URL, or share via social network (based on admin's settings), including Facebook, Twitter, Email.
Gift Registry Page
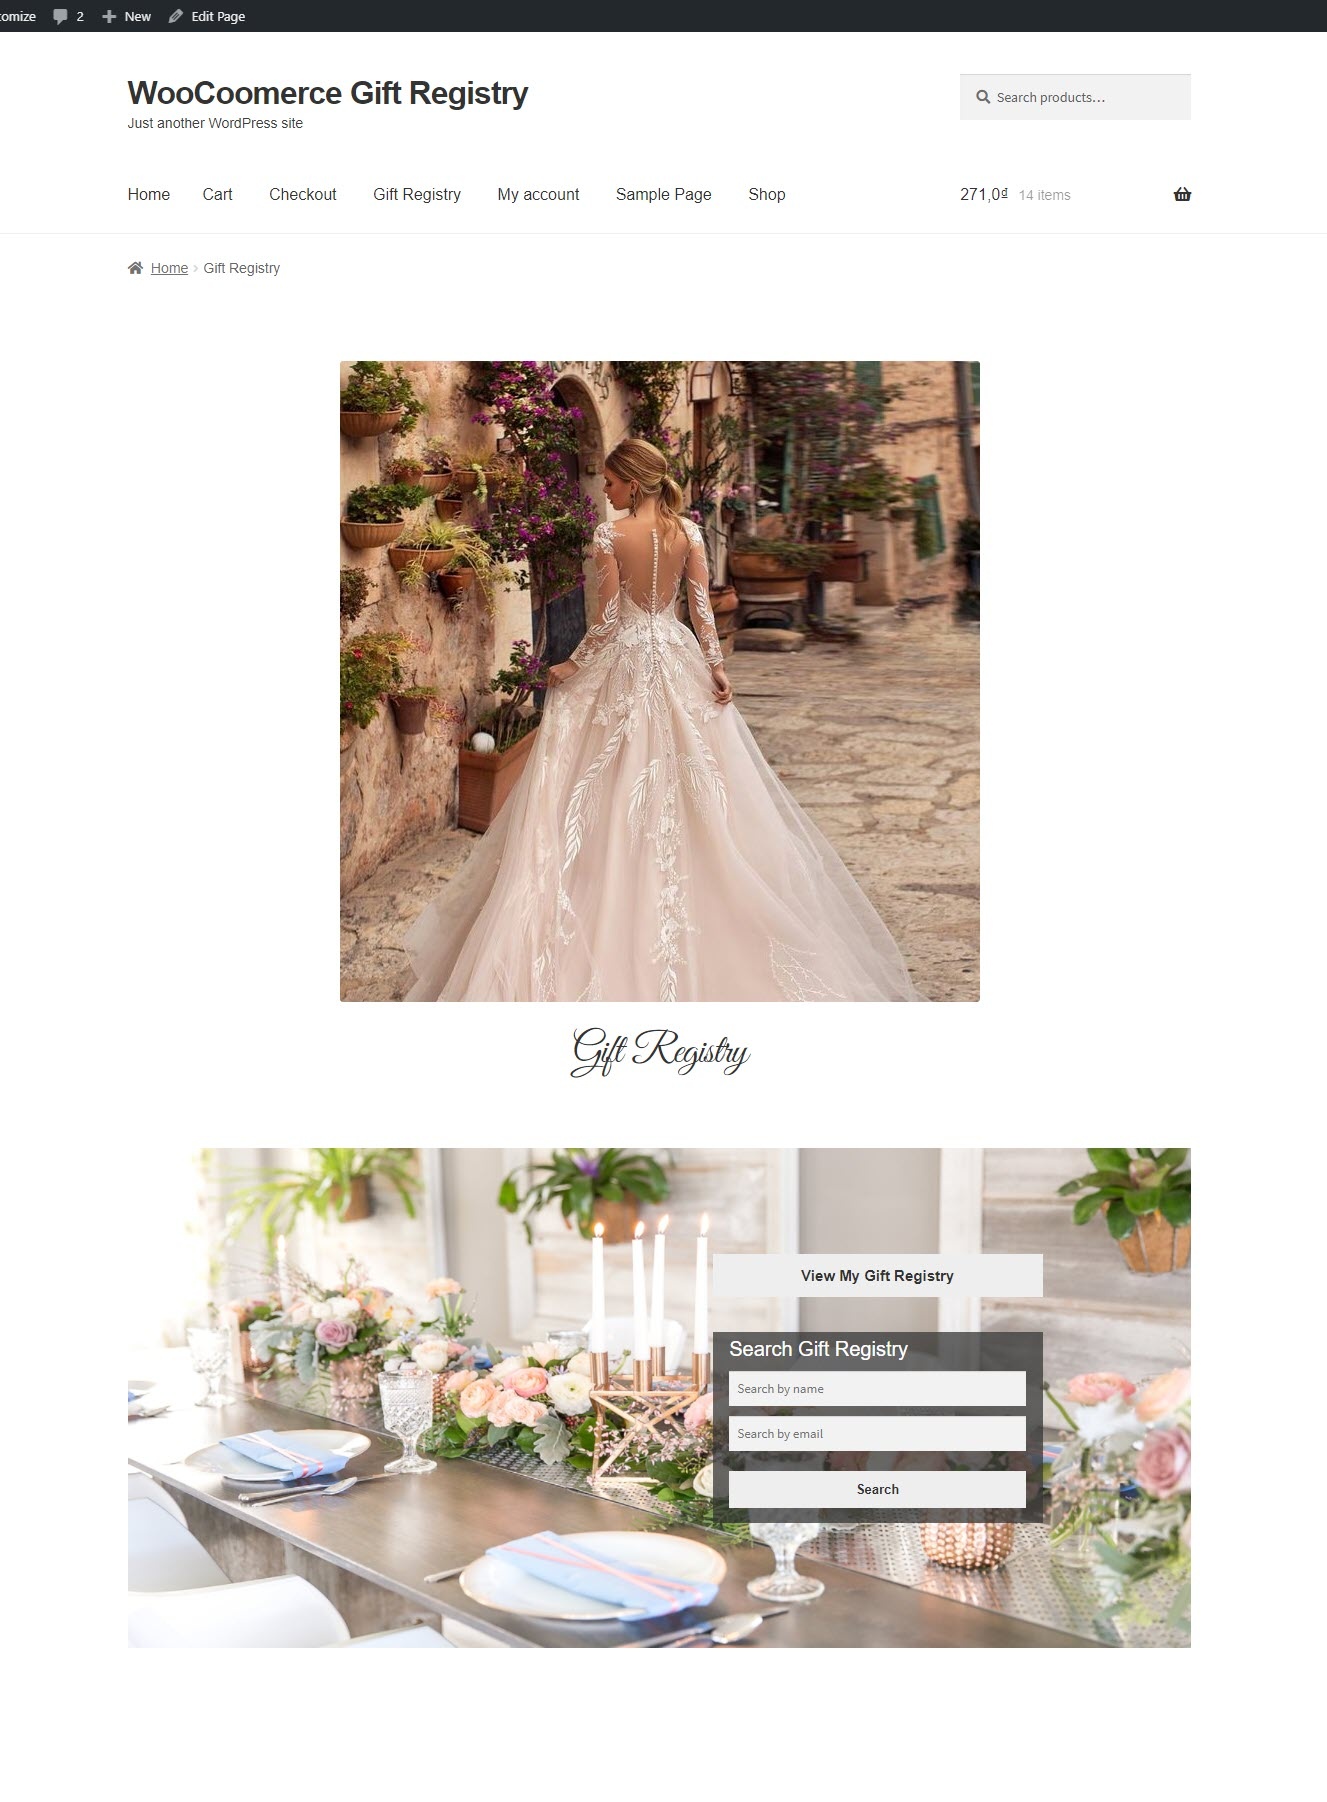
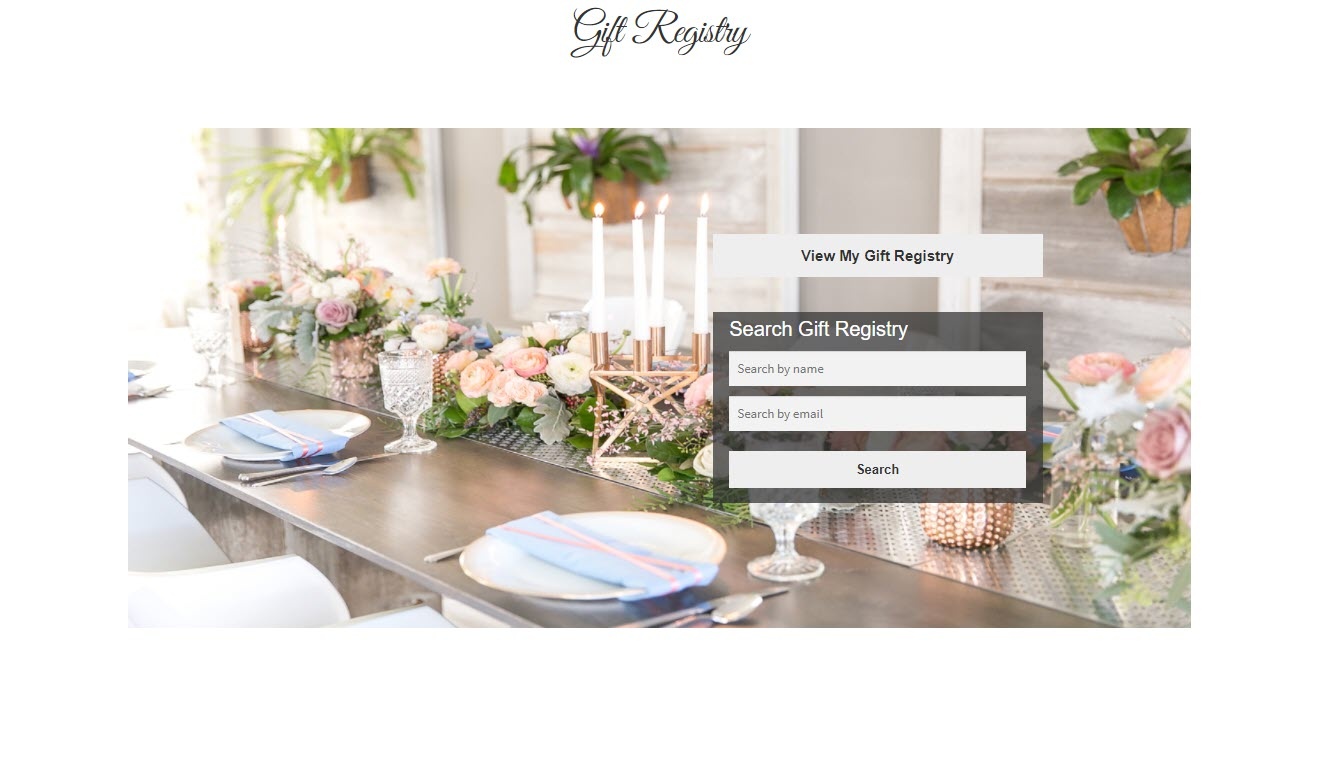
![]() On the Gift Registry Page, customers will be able to view their own gift registry or search for someone else's registry.
On the Gift Registry Page, customers will be able to view their own gift registry or search for someone else's registry.
User Story
- Click on View, they can see the event information and the gift registry's item list.
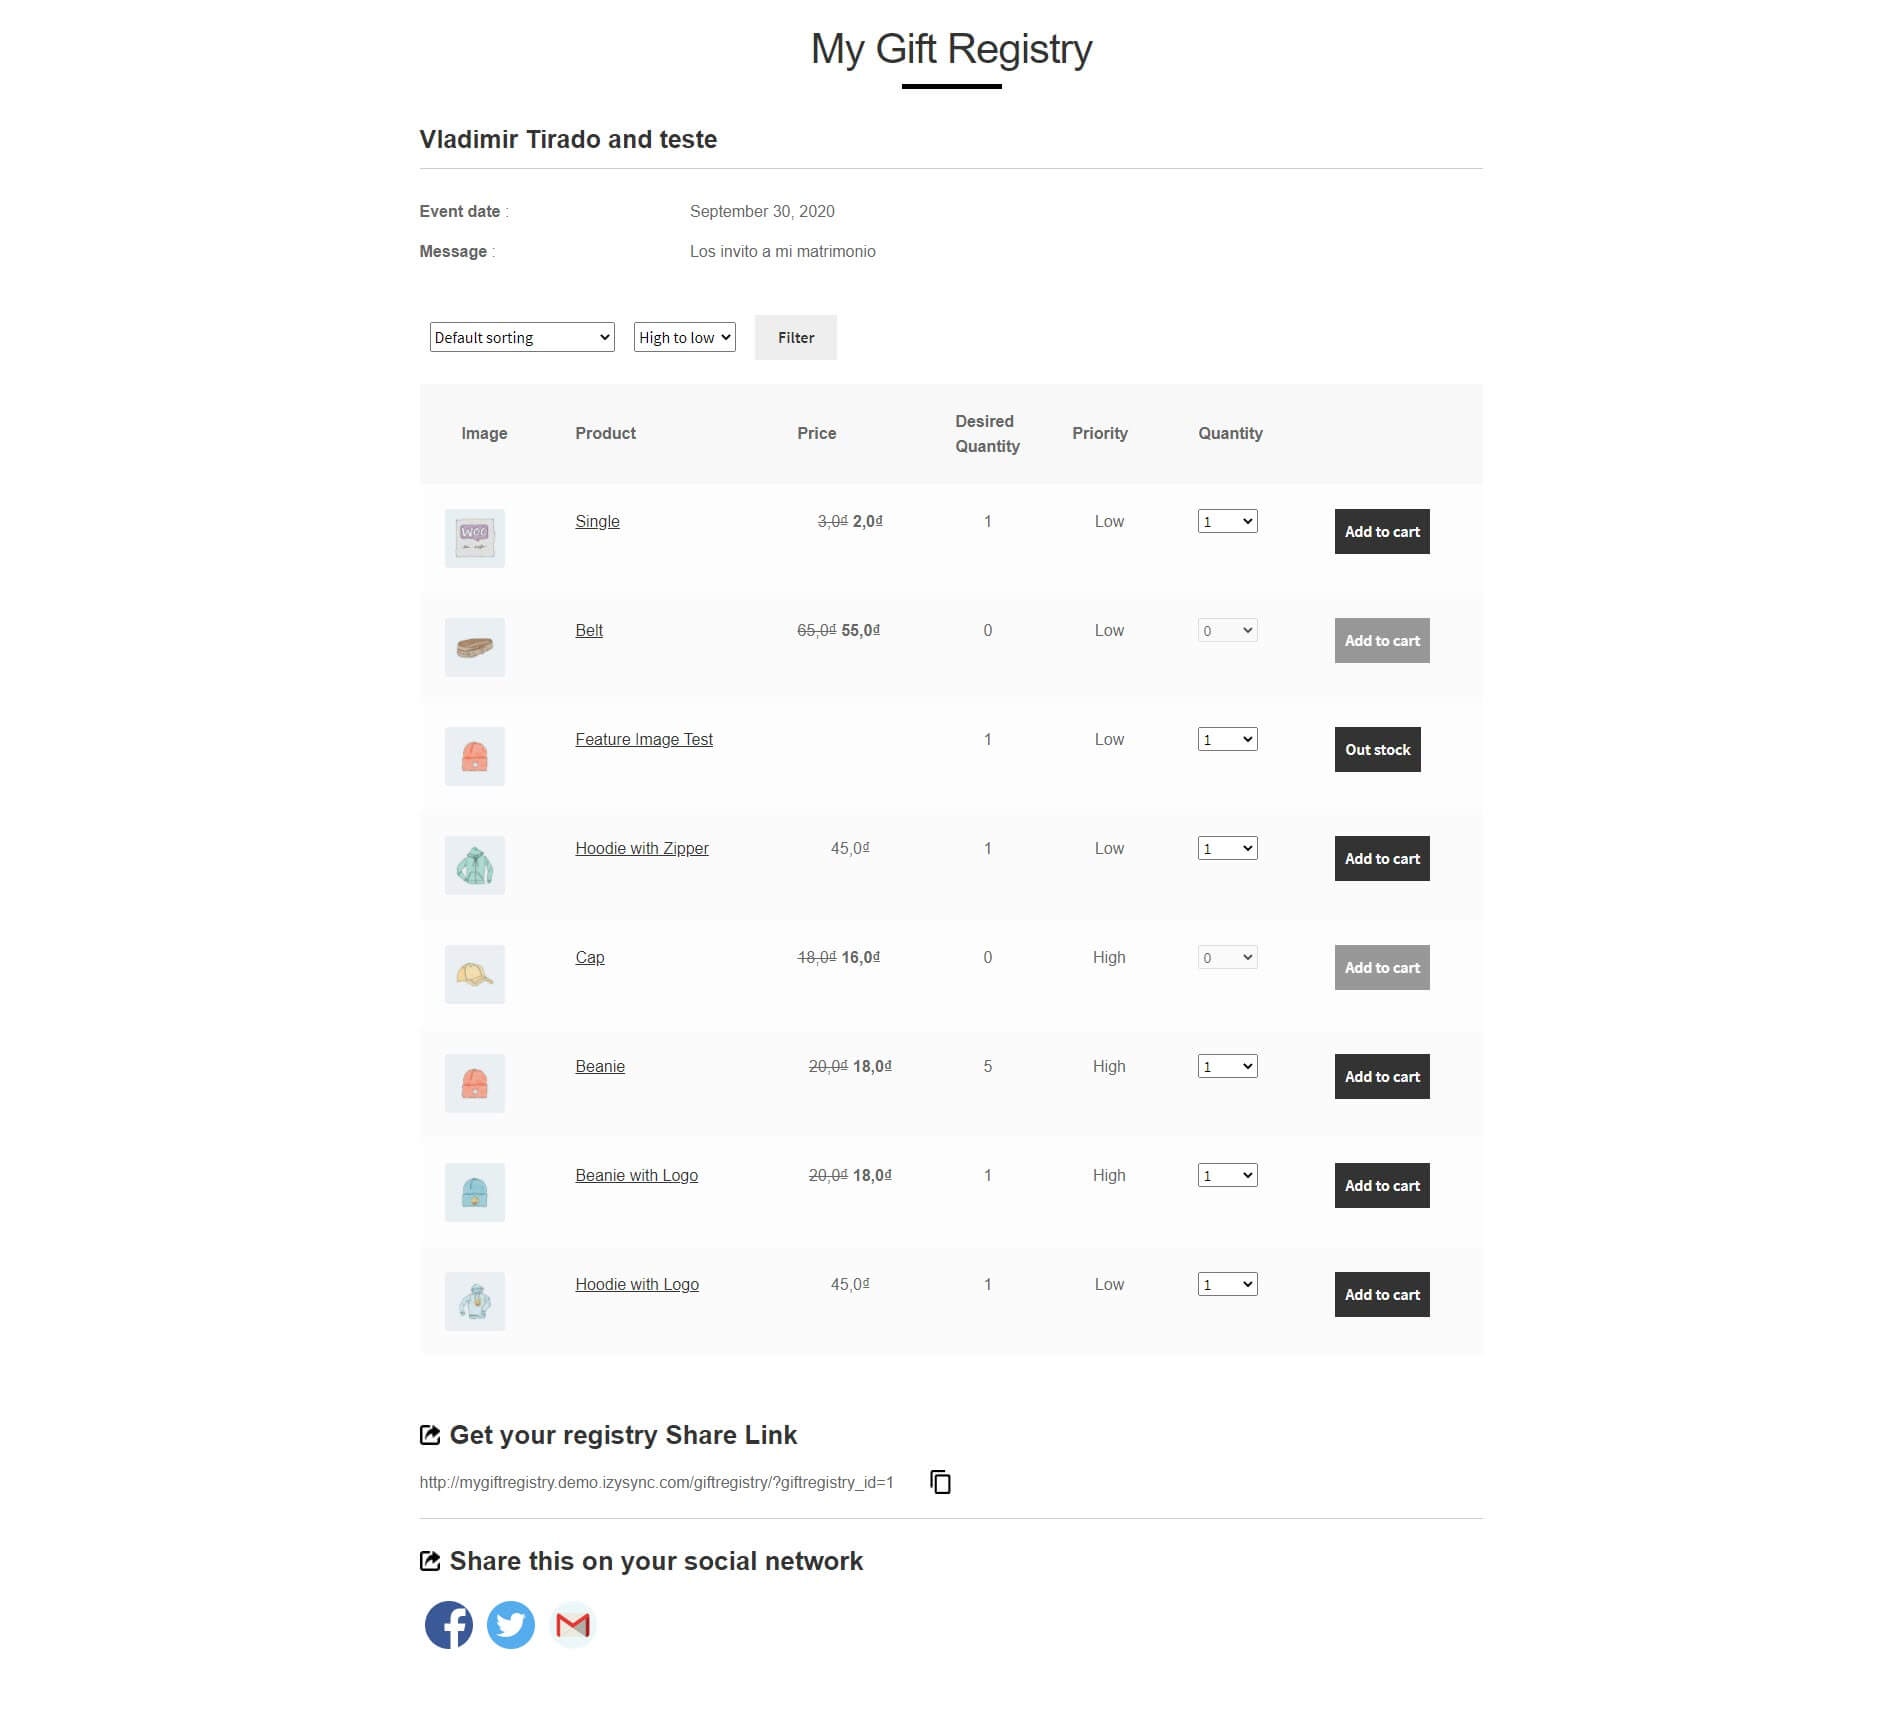
- Customers can use the filter to sort the gift list by desired quantity, priority, or price.
- For the drop-down list, when the quantity is out, the Add to cart button will be disabled so that customers cannot purchase that product for the gift registry anymore.
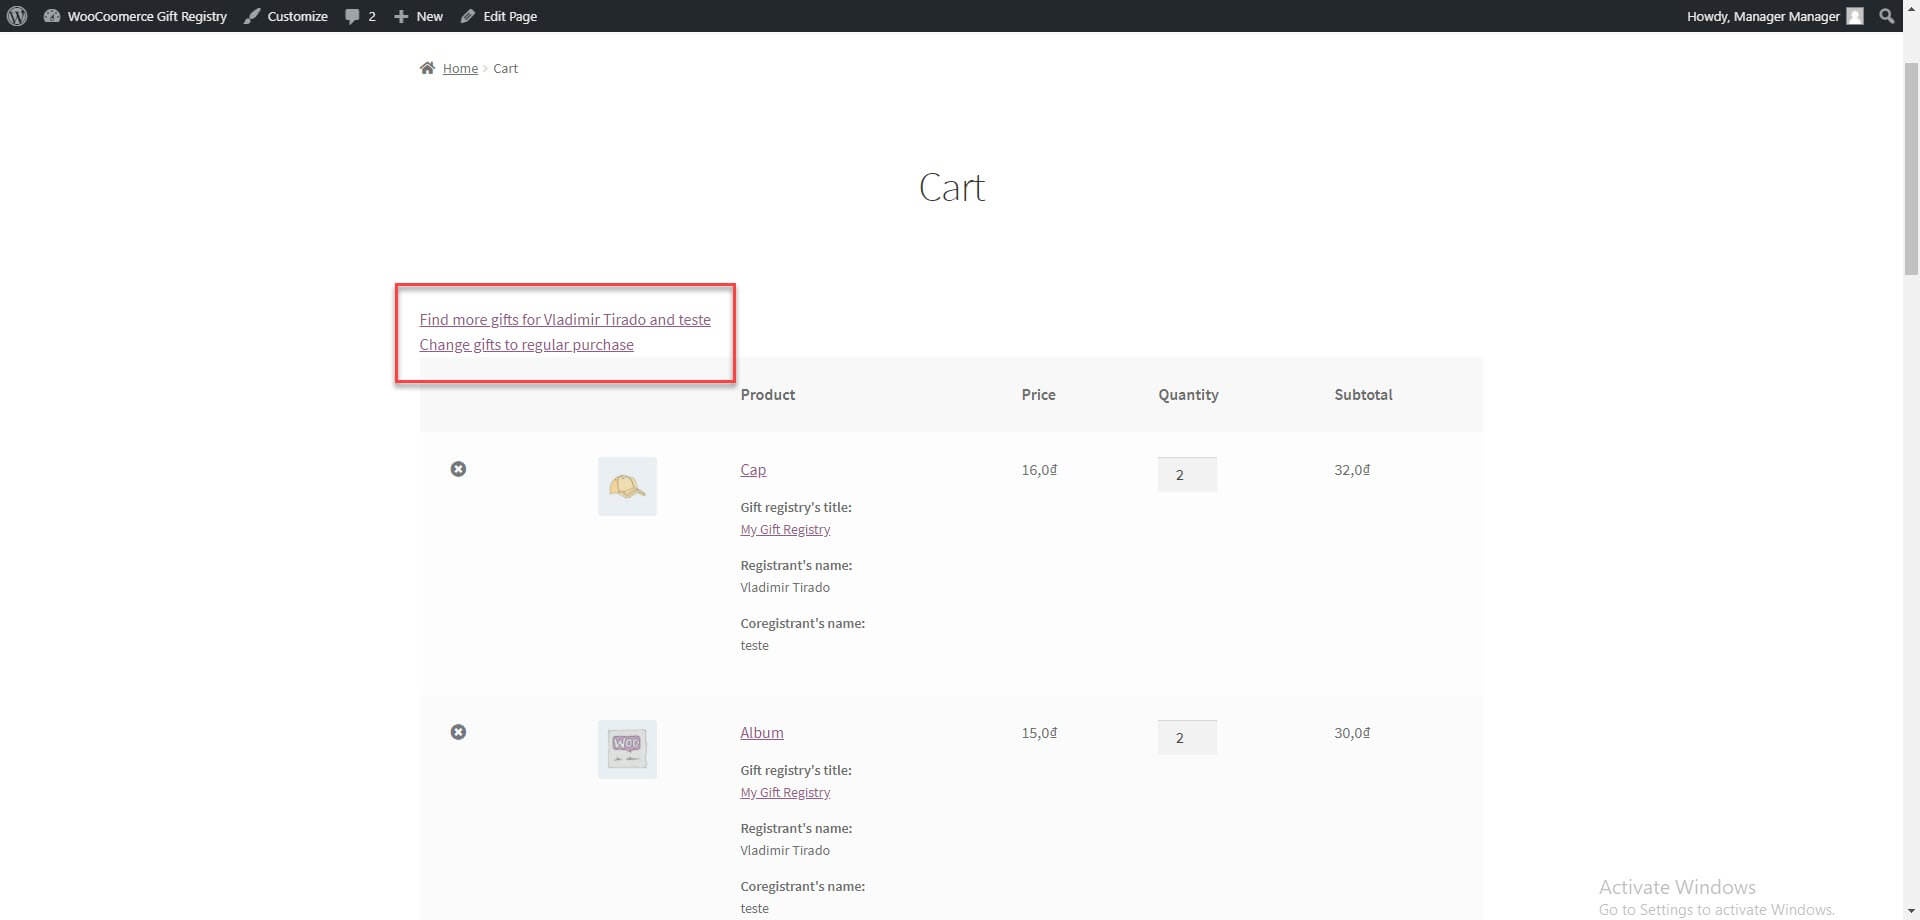
- Find more gifts for registrants: Going back to the gift registry item list to add the product to cart. The products are bought for registrants.
- Change gifts to regular purchase: The product(s) will be purchased for the visitors themselves, not for the registry.
- Note: Customers cannot purchase for more than one registry in one cart, i.e they cannot purchase for multiple gift registries at one time. Buyers have to complete the order which has added the product in a gift registry or change gifts to regular purchase to add another gift registry.
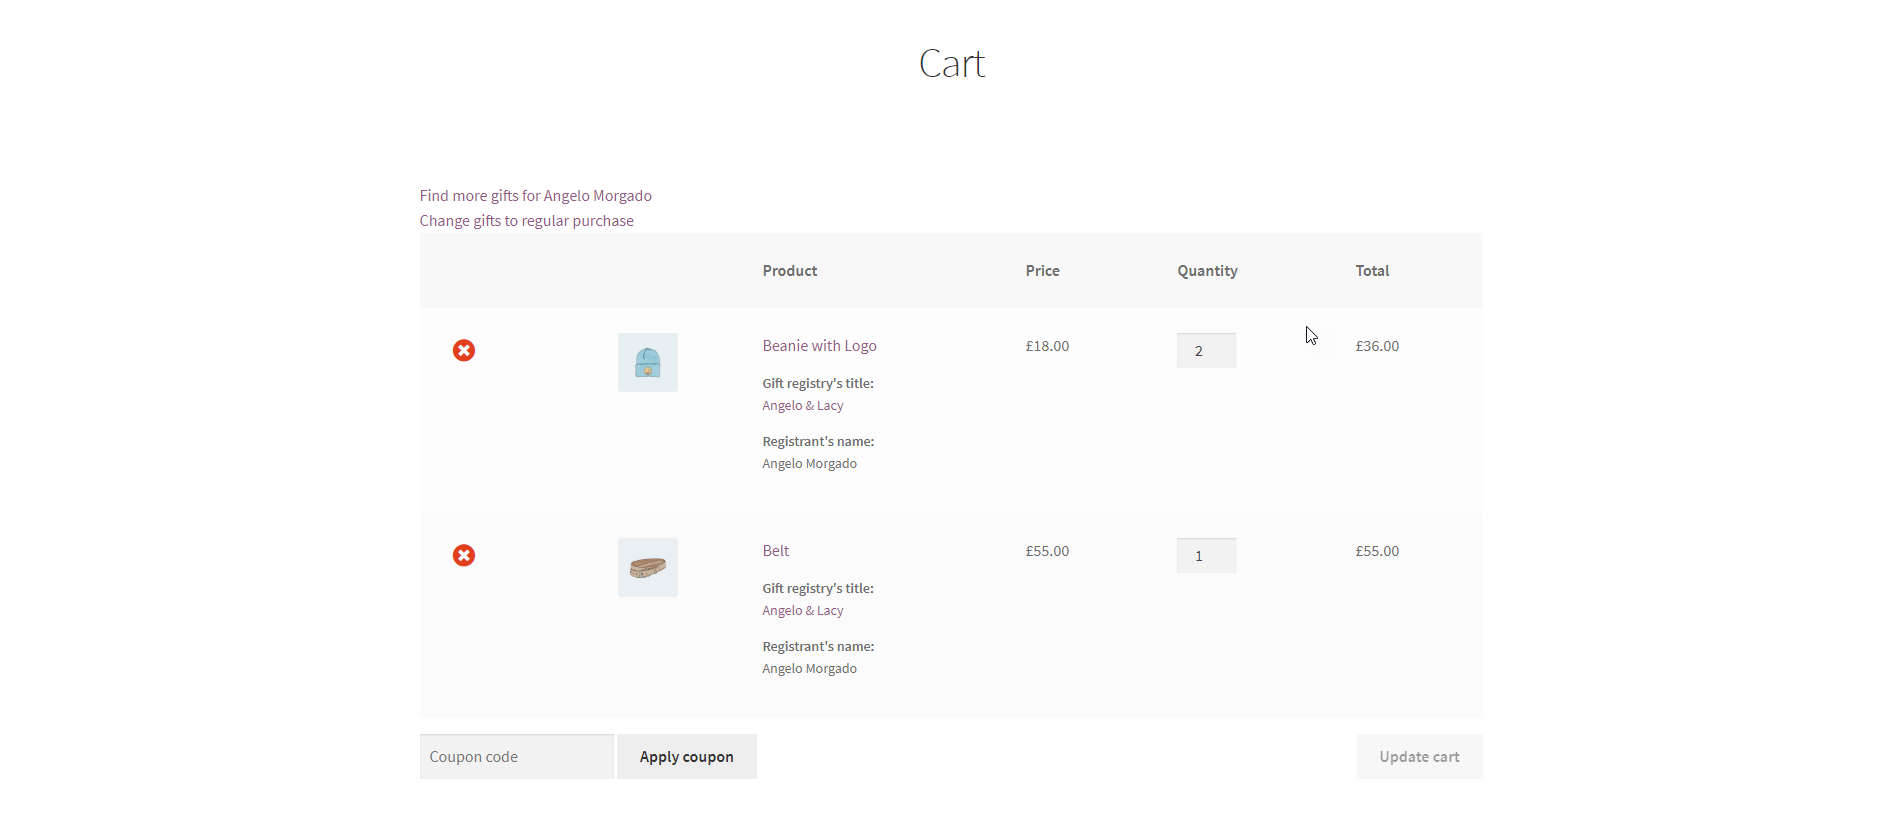
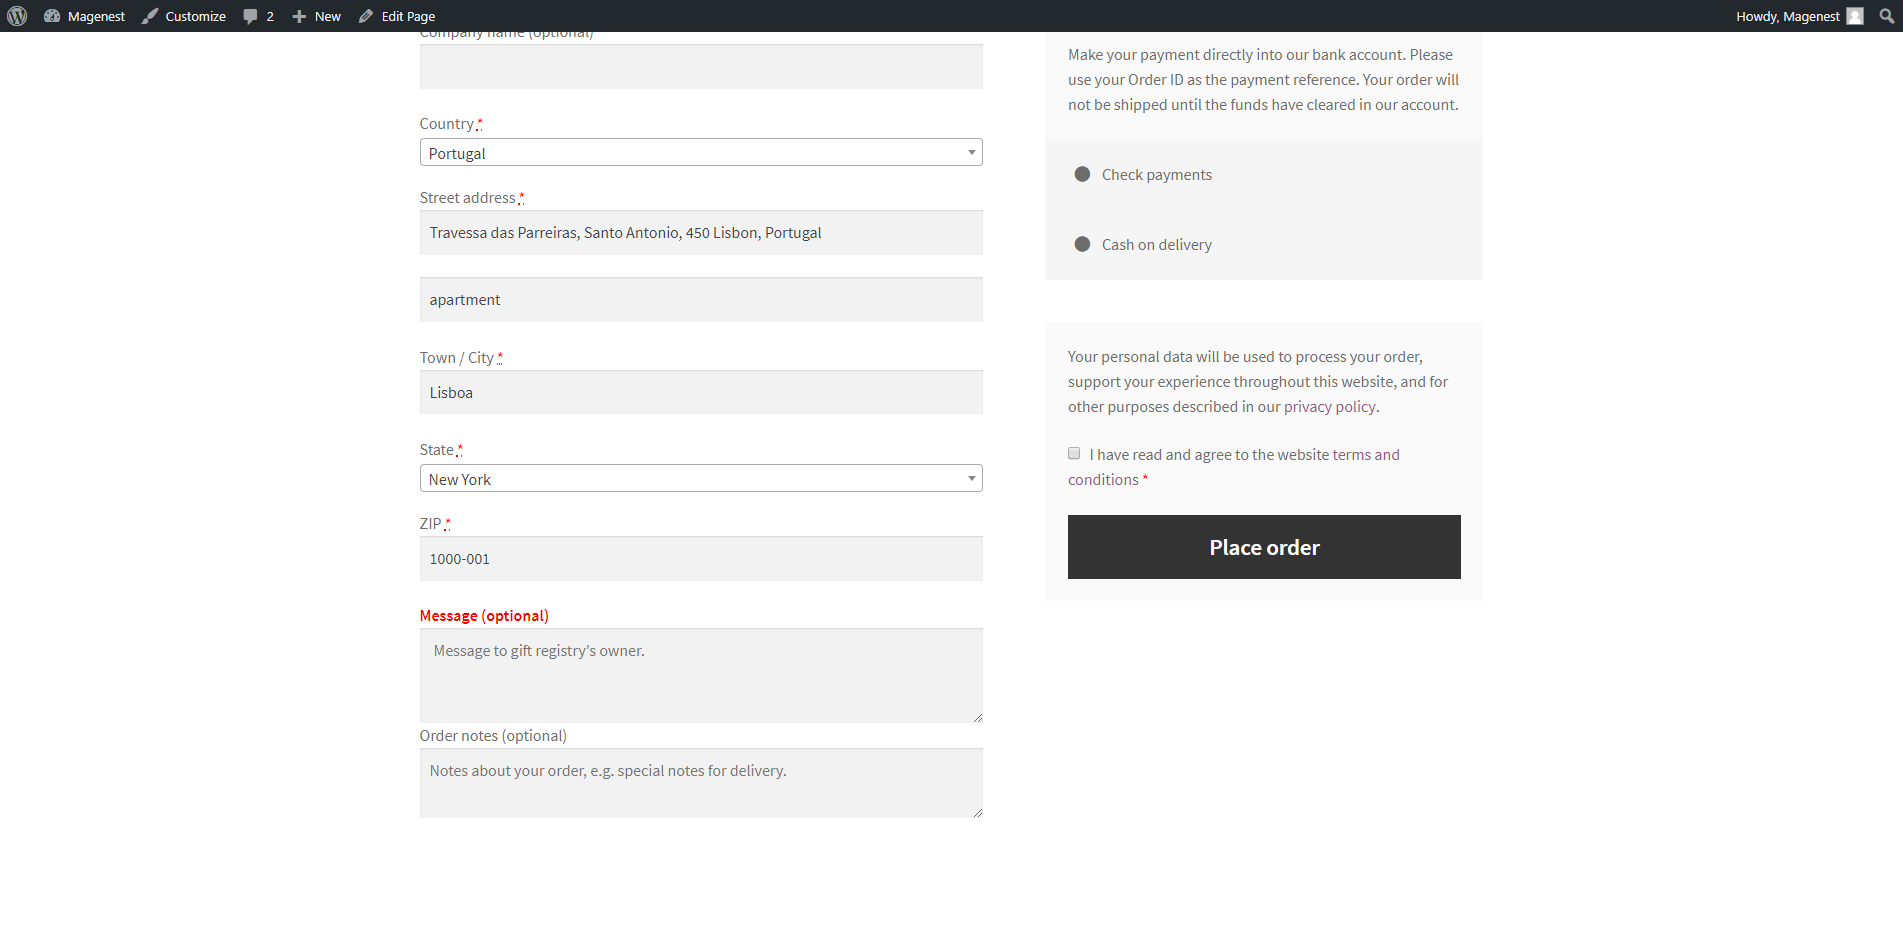
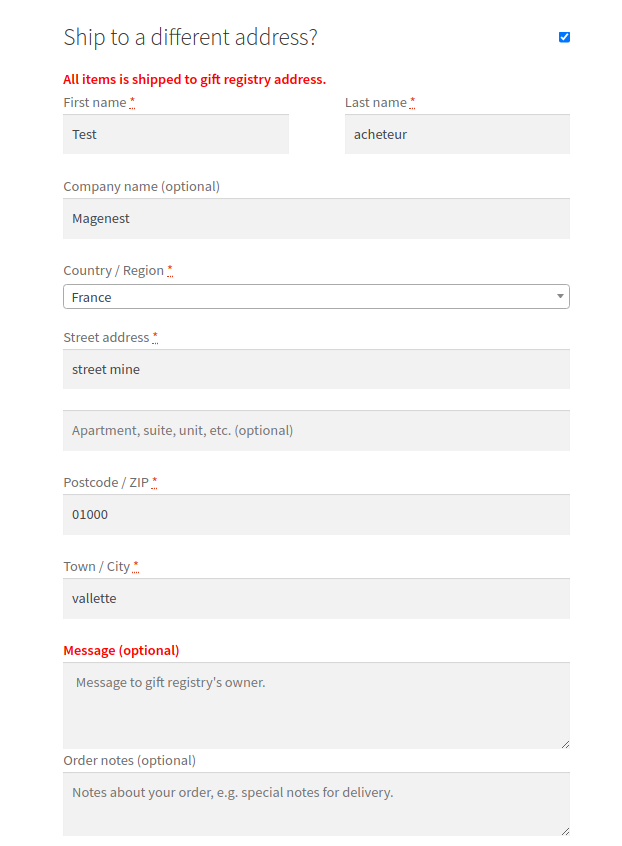
- Buyers can also choose the Shipping Address to be the account's shipping address or a different one (Note: This option will only appear if admin had set a Shipping Zone on the back end). Then, the buyer can see that the registry owner's shipping address has been auto-filled.
Update
- When a bug fix or new feature is released, we will provide you with the module's new package.
- All you need to do is repeating the above installing steps and uploading the package onto your store. The code will automatically override.
- Flush the configure cache. Your store and newly installed module should be working as expected.
Support
- We will reply to support requests within 2 business days.
- We will offer a lifetime free update and 6 months of free support for all of our paid products. Support includes answering questions related to our products, bug/error fixing to make sure our products fit well in your site exactly like our demo.
- Support DOES NOT include other services such as customizing our products, installation, and uninstallation service.
Once again, thank you for purchasing our extension. If you have any questions relating to this extension, please do not hesitate to contact us for support.