Thank you for purchasing our extension. If you have any questions that are beyond the scope of this document, do not hesitate to leave us an email via our email address below.
Created: 08/11/2016 | By: Magenest | Support Portal: http://servicedesk.izysync.com/servicedesk/customer/portal/22
Introduction
![]()
Stripe Payment Gateway And Subscription extension by Magenest is the ultimate tool that provides seamless payment experience between your Magento 2 store and the Stripe Payment Gateway.
Extension's page: Stripe Payment Gateway And Subscription.
Features For Admins
A lot of features is included in the extension that you can tweak to make it best suit your business, including:
Choose between Authorize Only or Authorize and Capture.
- IFrame Checkout Form
- Alipay, Giropay, Apple Pay, Google Pay
- 3D Secure
Various credit card types
Enable CVC/AVS Verification
- Access to more than 25 countries
Restrict unwanted countries from payment
- Support Save Card function
Easily partial capture invoice.
Conveniently partial or total refund.
- Support 135 currencies
Features For Customers
The primary aim of the extension is to deliver the most fluent and effortless payment experience to the customers:
- Easily checkout using credit card.
- Manage subscriptions
- Sign up for an account to save credit card information for future purchase
- Flexible payment choices
System Requirements
Your store should be running on Magento 2 version 2.0.x; 2.1.x, and 2.2.x
Configuration
Set Up Stripe Online Account
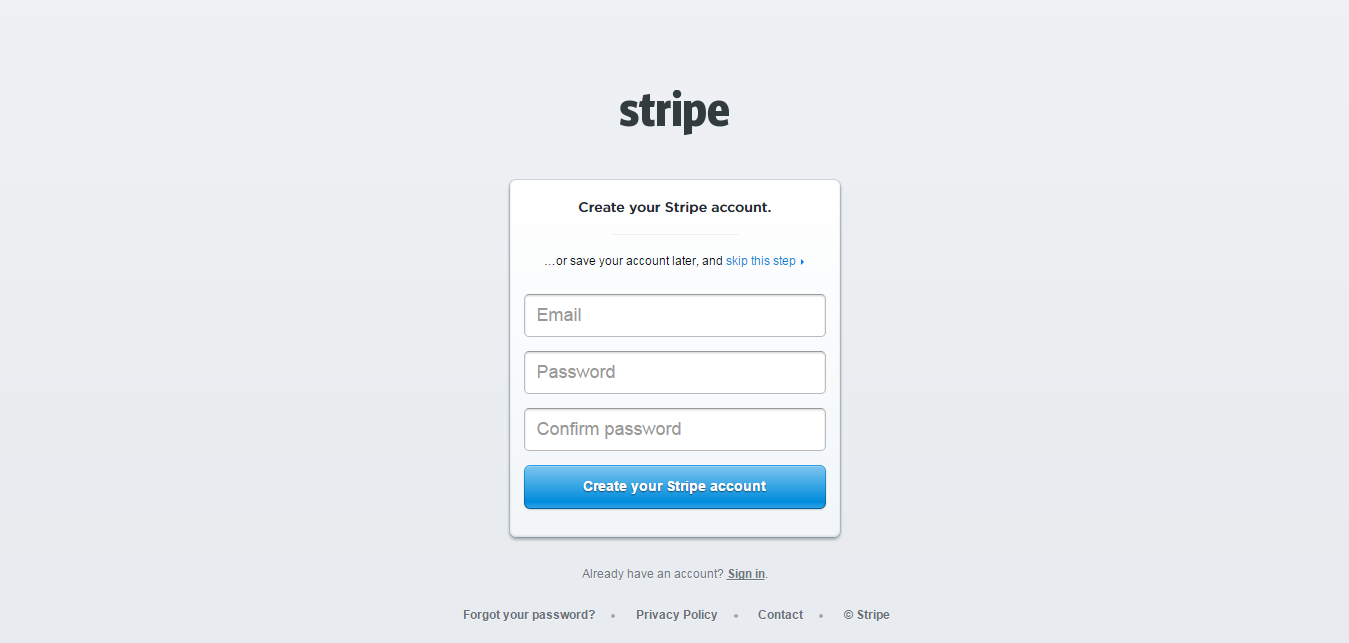
Merchant needs to have a Stripe account to use our extension. If you have not any Stripe accounts, you need to create a new account by clicking on the following link: https://dashboard.stripe.com/register.
Then, choose Create your Stripe account to set up a new account:
Once you have the Stripe account, sign into your account.
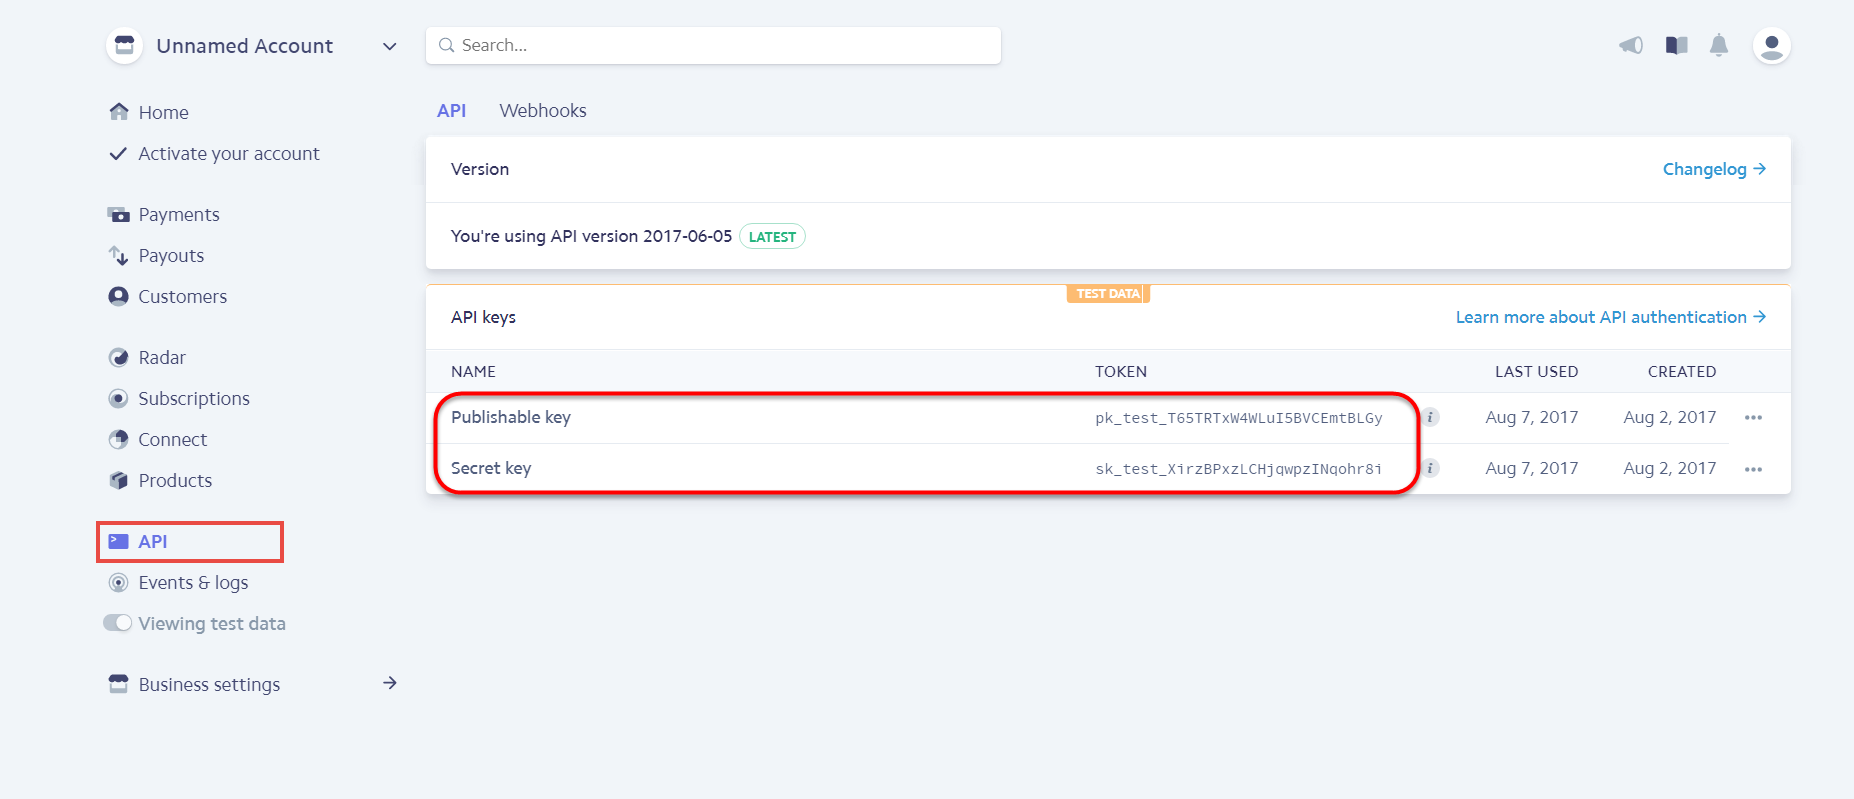
After that, click on API at the left corner > API Keys to take API Keys.
Set Up The Integration On Magento 2
At back end, you need to configure some fields to connect between your Magento site and the stripe account.
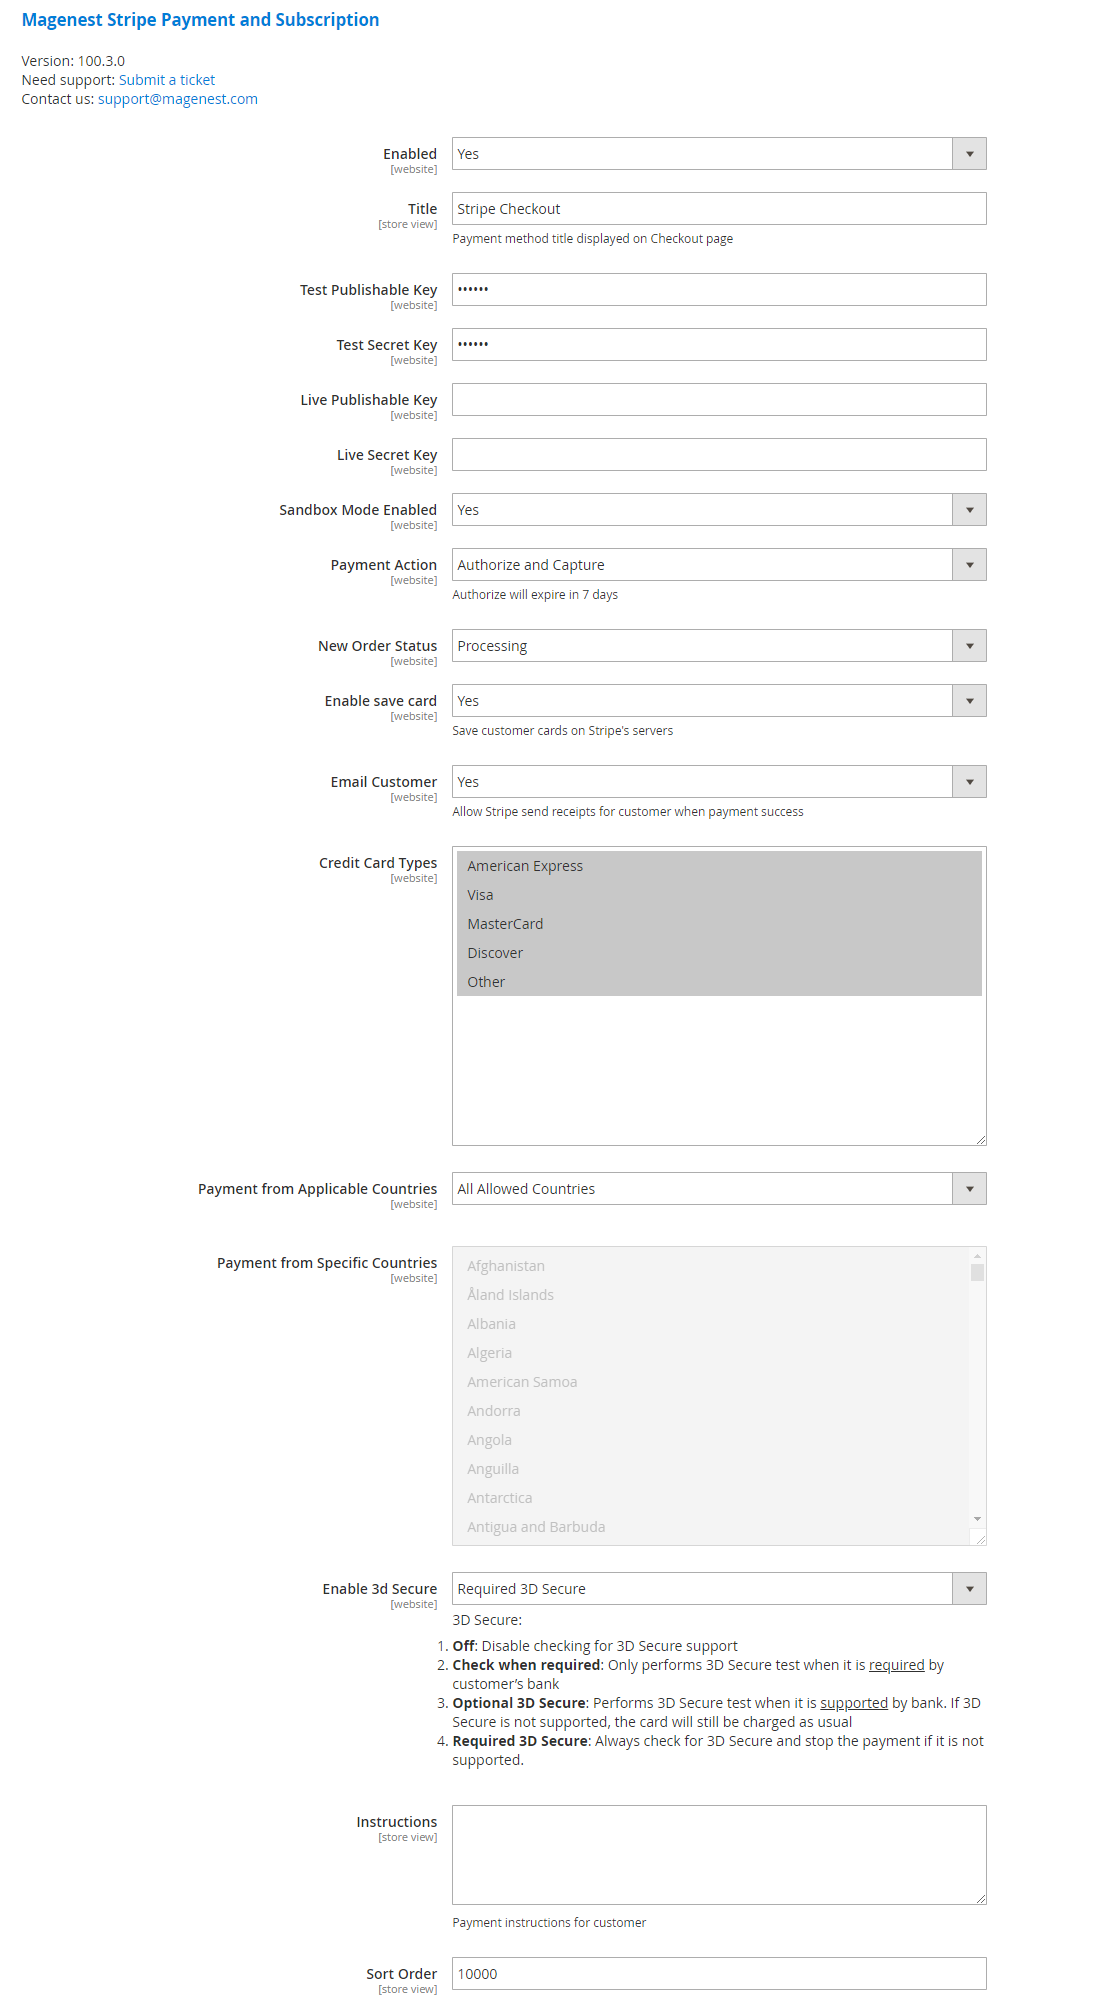
First, click on Stripe Payments > Settings > Stripe Payment Gateway
Title: the title of the payment method you want to be displayed on the Checkout Page.
![]() If you use the Test Key:
If you use the Test Key:
- You should fill in Stripe API Test Keys in Test Publishable Key, Test Secret Key to connect Magento and Stripe Payment Gateway.
- Turn on the Sandbox Mode Enabled by choosing Yes.
![]() If you use the Live Key:
If you use the Live Key:
- Fill in your Stripe API Keys in Live Publishable Key, Live Secret Key to connect Magento with Stripe Payment Gateway.
- Turn off the Sandbox Mode Enabled by choosing No.
![]() You can set the Payment Action to be Authorize and Capture or Authorize Only
You can set the Payment Action to be Authorize and Capture or Authorize Only
- Authorize Only (Authorization): will check the card for validity but not charge the account yet until the order is approved and invoiced.
- Authorize and Capture(Sale): will charge the debit/credit card at the time of the order submission.
![]() You can set the New Order Status: Processing, Suspected Fraud
You can set the New Order Status: Processing, Suspected Fraud
- Processing: The payment is made successfully and an order invoice is issued.
- Suspected Fraud: No invoice is issued.
![]() Enable Save Card: Allow customers to save credit card information once they sign in.
Enable Save Card: Allow customers to save credit card information once they sign in.
![]() Email Customer: Allow Stripe to send receipts to customers once the payment is successful.
Email Customer: Allow Stripe to send receipts to customers once the payment is successful.
![]() Credit Card Types: You can choose which credit card types you want by choosing one or more items.
Credit Card Types: You can choose which credit card types you want by choosing one or more items.
![]() Payment from Applicable Countries:
Payment from Applicable Countries:
- All allowed countries: Enable all allowed countries to make payment.
- Specific Countries: Restrict some countries by unselecting them from the Payment from Specific Countries.
![]() Enable 3D Secure: Enable the 3D Secure with 4 options (Off, Check when required, Optional 3D Secure, Required 3D Secure)
Enable 3D Secure: Enable the 3D Secure with 4 options (Off, Check when required, Optional 3D Secure, Required 3D Secure)
- Off: Disable checking for 3D Secure support
- Check when required: Only performs 3D Secure test when it is required by customer’s bank
- Optional 3D Secure: Performs 3D Secure test when it is supported by bank. If 3D Secure is not supported, the card will still be charged as usual
- Required 3D Secure: Always check for 3D Secure and stop the payment if it is not supported.
![]() In addition, you can add/edit the Instructions to instruct customers how to do payment.
In addition, you can add/edit the Instructions to instruct customers how to do payment.
![]() Sort Order: The order of the payment method that will be displayed on the checkout page.
Sort Order: The order of the payment method that will be displayed on the checkout page.
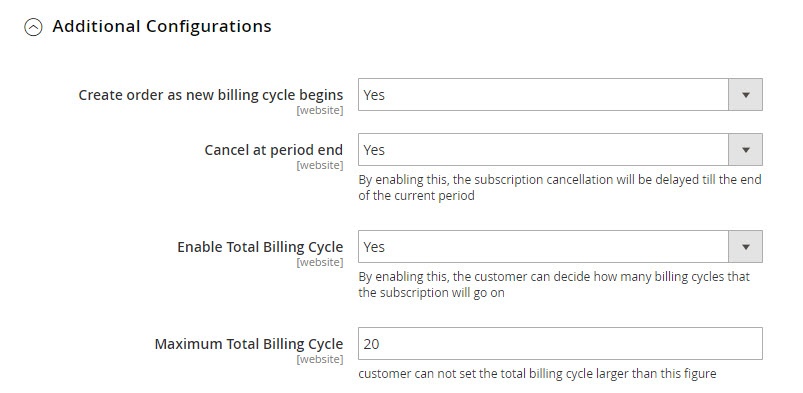
Additional Configuration, this is where you configure the subscription functions.
![]() Create order as new billing cycle begins
Create order as new billing cycle begins
![]() Cancel at period end:
Cancel at period end:
![]() Enable Total Billing Cycle:
Enable Total Billing Cycle:
![]() Maximum Total Billing Cycle:
Maximum Total Billing Cycle:
Stripe Checkout Form: IFrame checkout form settings
![]() Enable Stripe Checkout Form: Choose Yes to enable the IFrame checkout form.
Enable Stripe Checkout Form: Choose Yes to enable the IFrame checkout form.
![]() Title: Edit the title for the payment method. Here we recommend you to set it as "Stripe Checkout IFrame"
Title: Edit the title for the payment method. Here we recommend you to set it as "Stripe Checkout IFrame"
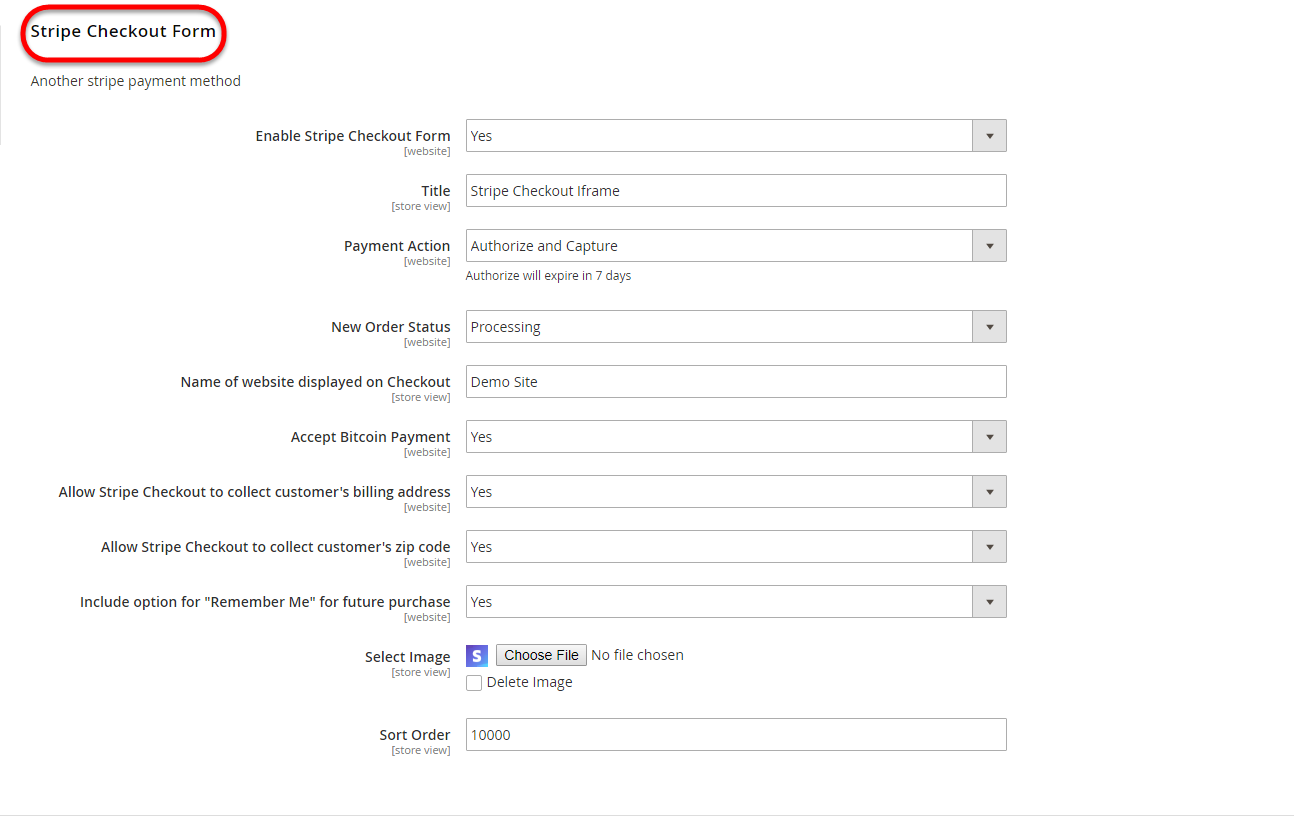
![]() You can set the Payment Action to be Authorize and Capture or Authorize Only
You can set the Payment Action to be Authorize and Capture or Authorize Only
- Authorize Only (Authorization): will check the card for validity but not charge the account yet until the order is approved and invoiced.
- Authorize and Capture(Sale): will charge the debit/credit card at the time of the order submission.
![]() You can set the New Order Status: Processing, Suspected Fraud
You can set the New Order Status: Processing, Suspected Fraud
- Processing: The payment is made successfully and an order invoice is issued.
- Suspected Fraud: No invoice is issued.
![]() You can allow customers to pay by Bitcoin and Alipay by choosing Yes/No in Accept Bitcoin Payment, Accept Alipay Payment.
You can allow customers to pay by Bitcoin and Alipay by choosing Yes/No in Accept Bitcoin Payment, Accept Alipay Payment.
![]() You can turn on Allow Stripe Checkout to collect customer's billing address, Allow Stripe Checkout to collect customer's zip code
You can turn on Allow Stripe Checkout to collect customer's billing address, Allow Stripe Checkout to collect customer's zip code
![]() Include Option for "Remember Me" for future purchase: If you set this option to Yes, Stripe will save the customer's information for later purchase in every website that use Stripe Payment Gateway.
Include Option for "Remember Me" for future purchase: If you set this option to Yes, Stripe will save the customer's information for later purchase in every website that use Stripe Payment Gateway.
![]() Select Image: Upload image for Iframe checkout form.
Select Image: Upload image for Iframe checkout form.
![]() Sort Order: The order of the payment method that will be displayed on the checkout page.
Sort Order: The order of the payment method that will be displayed on the checkout page.
![]() New: Three payment methods have been developed for Stripe: Apple/Google Pay, Giro Pay, Alipay.
New: Three payment methods have been developed for Stripe: Apple/Google Pay, Giro Pay, Alipay.
We have already connected fully in Stripe configuration. You only need to enable the methods by following these steps.
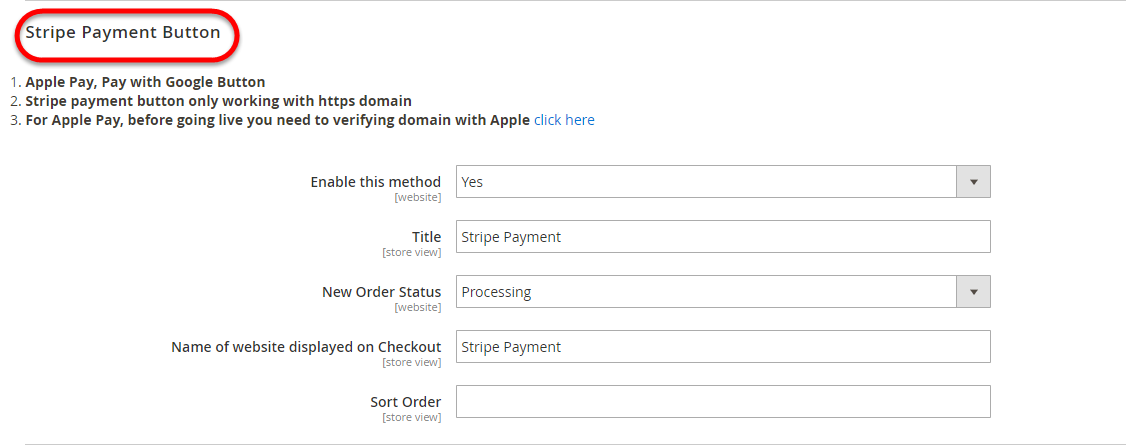
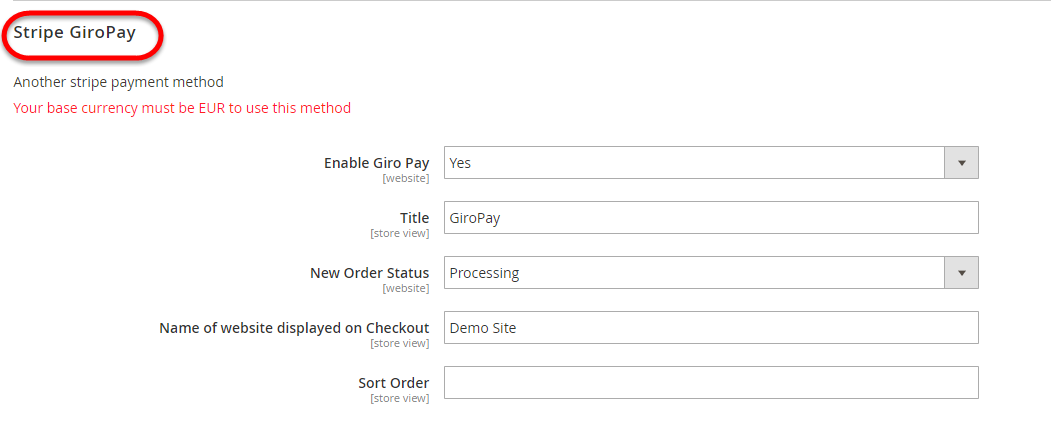
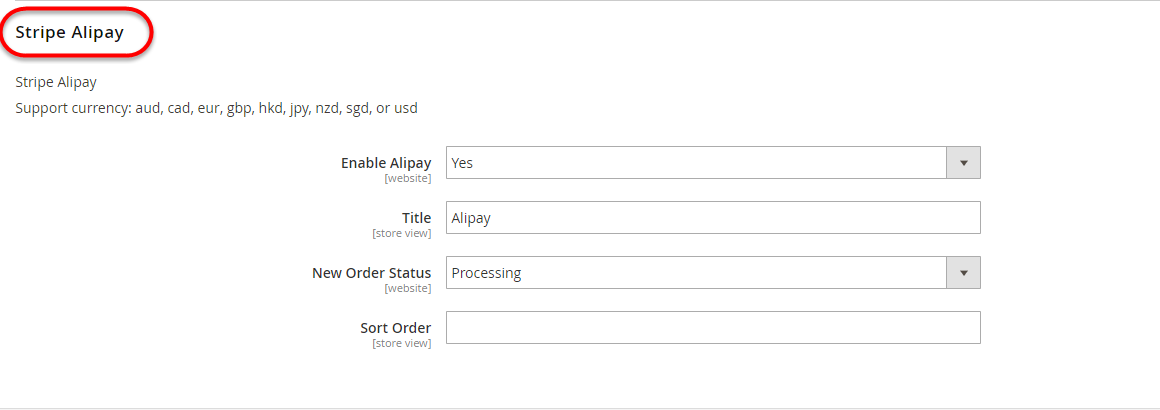
Stripe Apple Pay, Google Pay (Stripe Payment Button) and Stripe Giro Pay, Stripe Alipay
![]() Enable this method: Choose Yes to enable Apple Pay, Google Pay, Giro Pay
Enable this method: Choose Yes to enable Apple Pay, Google Pay, Giro Pay
![]() Title: Fill in the title for the payment method
Title: Fill in the title for the payment method
![]() You can set the New Order Status: Processing, Suspected Fraud
You can set the New Order Status: Processing, Suspected Fraud
- Processing: The payment is made successfully and an order invoice is issued.
- Suspected Fraud: No invoice is issued.
![]() Name of website displayed on Checkout: Your store name
Name of website displayed on Checkout: Your store name
![]() Sort Order: The order of the payment method that will be displayed on the checkout page.
Sort Order: The order of the payment method that will be displayed on the checkout page.
When done, please press Save Configuration > Cache Management, your configuration is ready to use.
![]() To use Google Pay (for PC), customers have to add their credit card to the browser.
To use Google Pay (for PC), customers have to add their credit card to the browser.
Main Functions
For Subscription Product
Create a subscription product
To create a subscription product, click on Products > Catalog. On the right side, click on Add Product and choose the desired product type among 6 types (Simple Product, Configurable Product, Grouped Product, Virtual Product, Bundle Product, Downloadable Product).
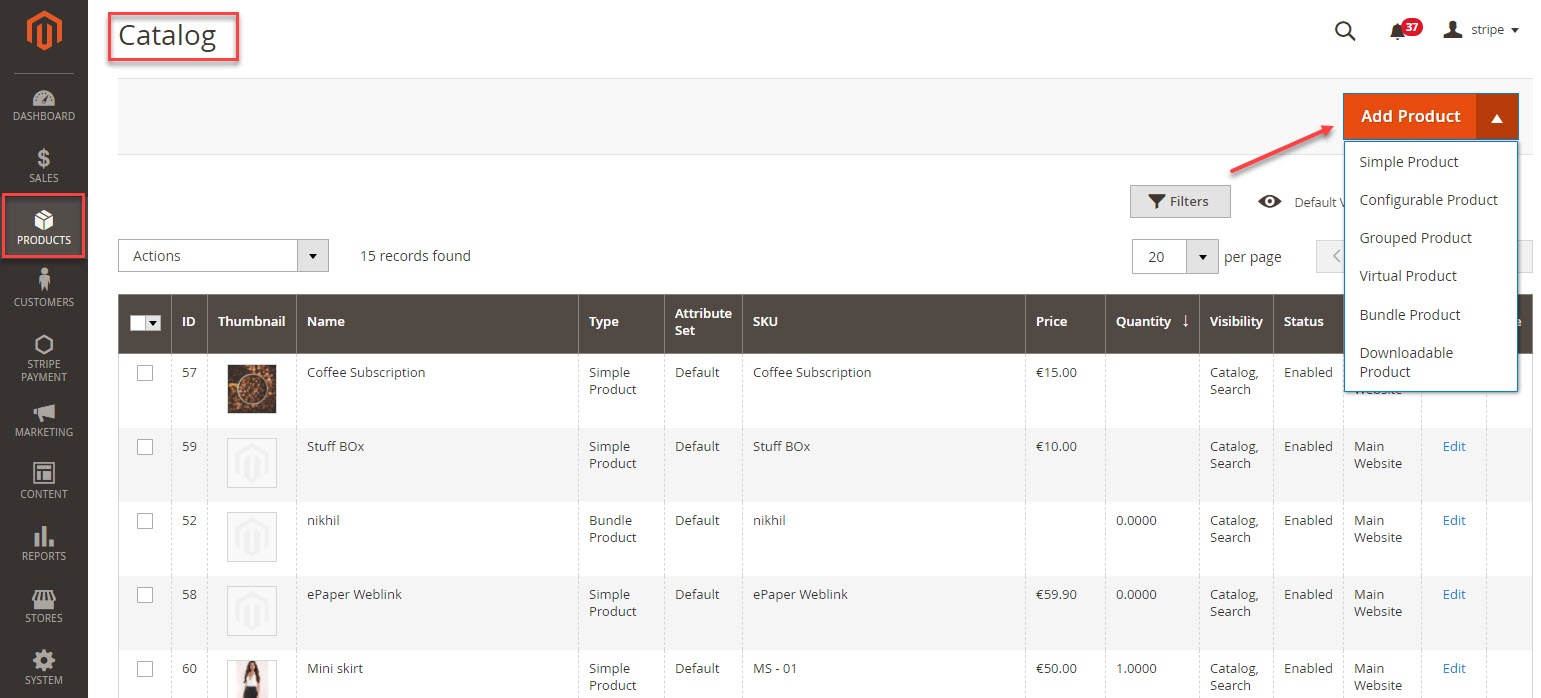
Then, the New Product page will be shown.
Regarding the Stripe Payment and Subscriptions extension, focus on two tabs named Stripe Subscription and Stripe Subscription Billing Options.
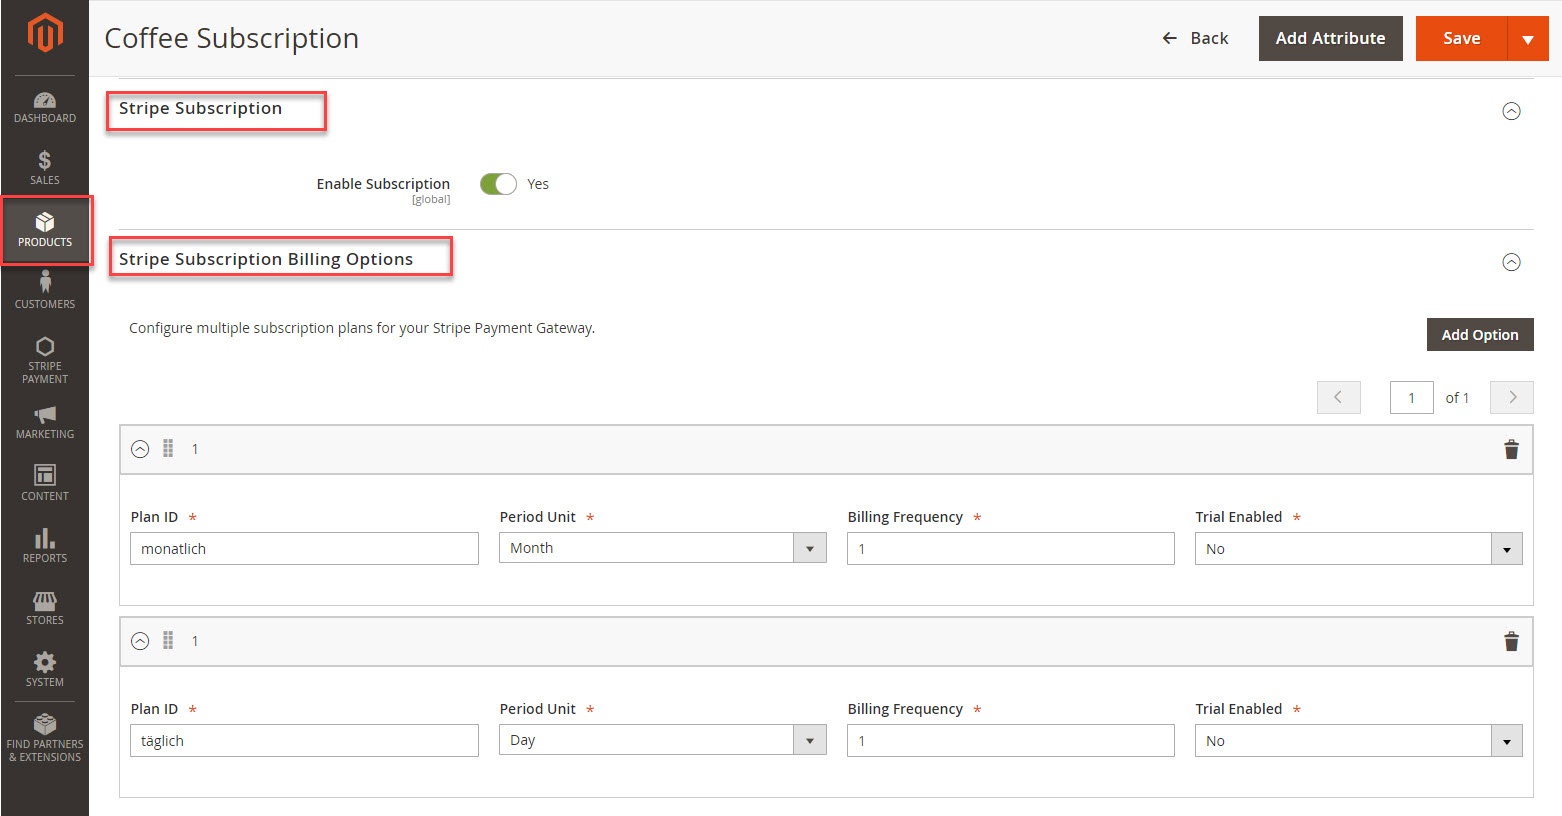
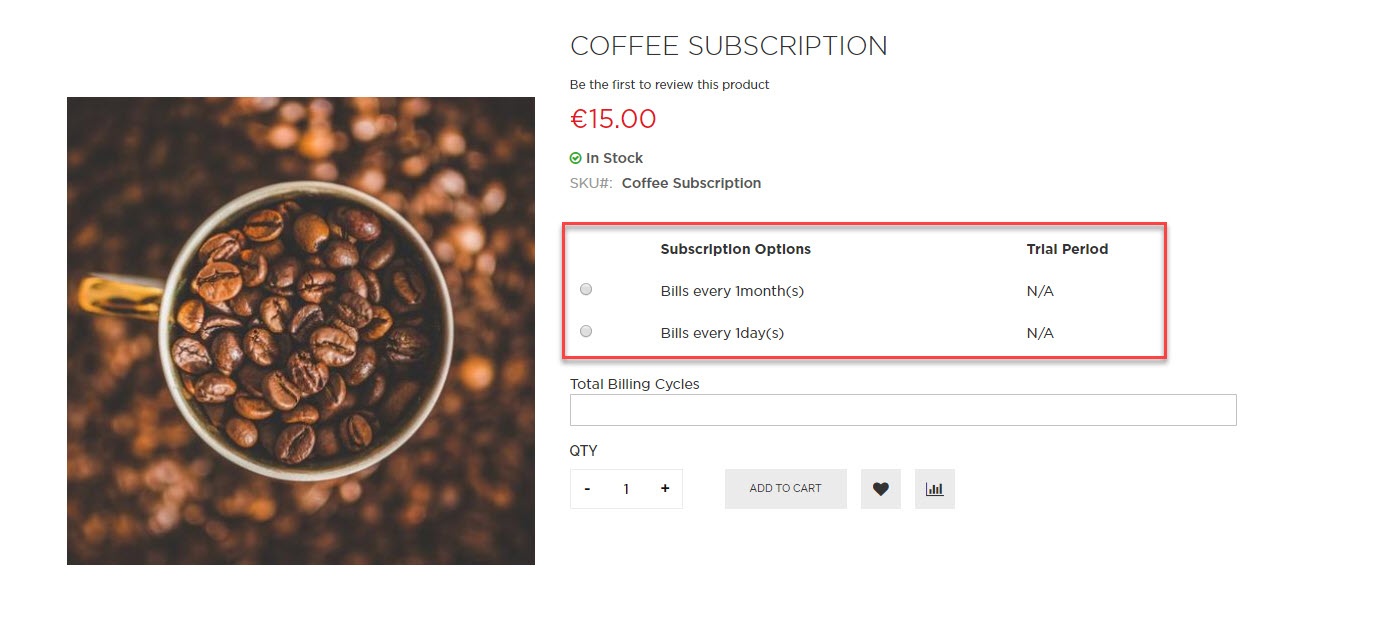
At Stripe Subscription tab, you will set whether a product is a stripe subscription product or not.
- YES: This product will be shown as a stripe subscription product at front end. This means this product plan in Stripe Subscription Billing Options tab will be shownat the product detail page (e.g. Plan ID, Billing Frequency, etc).
- NO: This product will not be shown as a subscription product.
At Stripe Subscription Billing Options tab, you will need to set plans for the subscription product. There are some fields to set, include:
- Plan ID: The ID of the plan
- Period Unit: Set subscription period in terms of day, week, month, year
- Billing Frequency: How many times the customers want to repeat the subscription circle.
- Trail Enabled: Allow customers to try the product before deciding to subscribe or not. If you choose Yes, you can define the period time allowing customer to use the product for free. If you choose No, this means this product will not have a trail version.
Also, if you want to add more plans for a product, click on Add Option button on the right side. Then, you can add the same as above.
Finally, click on Save button to complete.
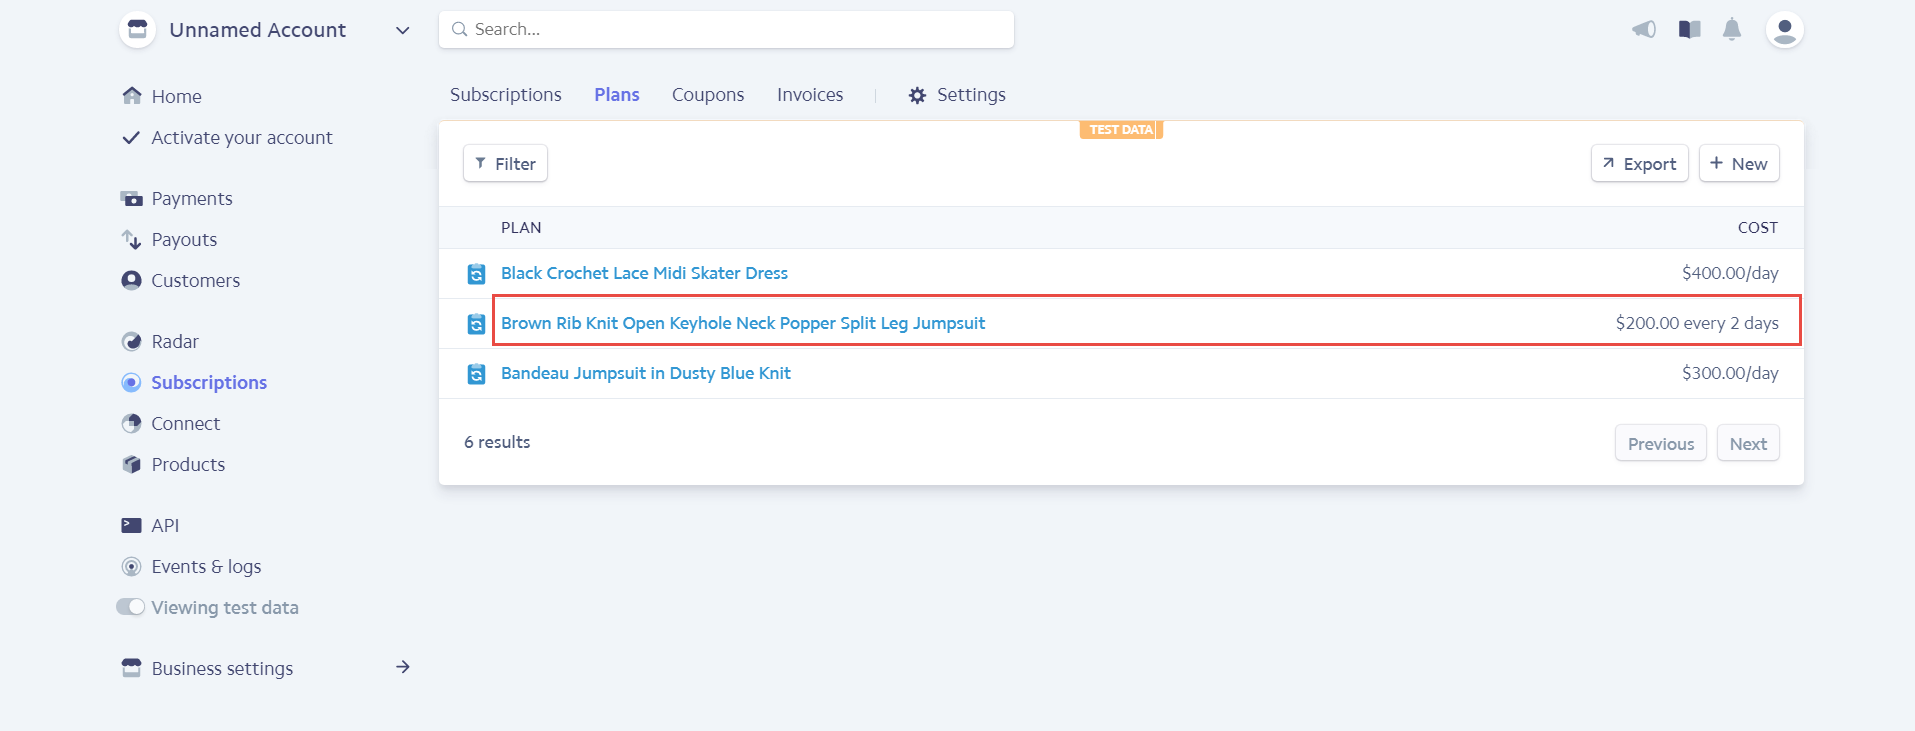
At the same time, your Stripe account will also automatically sync a product corresponding with the subscription product created at Plans tab.
View And Manage Stripe Payment
We created a Stripe Payment tab which allows you to view and manage Stripe Order.
There are two tabs, includes:
- Settings
With the Settings tab, we provide you with the fastest way possible to access to Stripe Payment Settings.
- Subscription Manager
Go to Subscription Manager tab, you will see the list of orders regarding the subscription products.
You can view and manage some information such as: Order ID, Subscription ID, Start Date, End Date and Status an easy way.
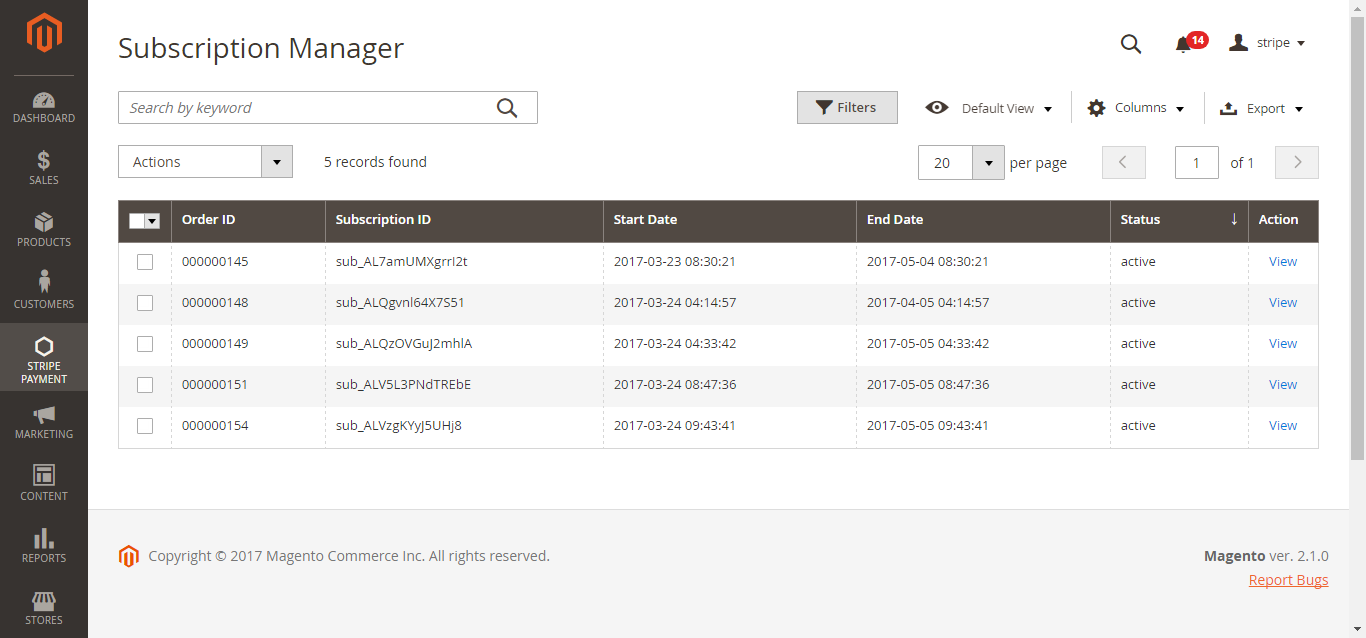
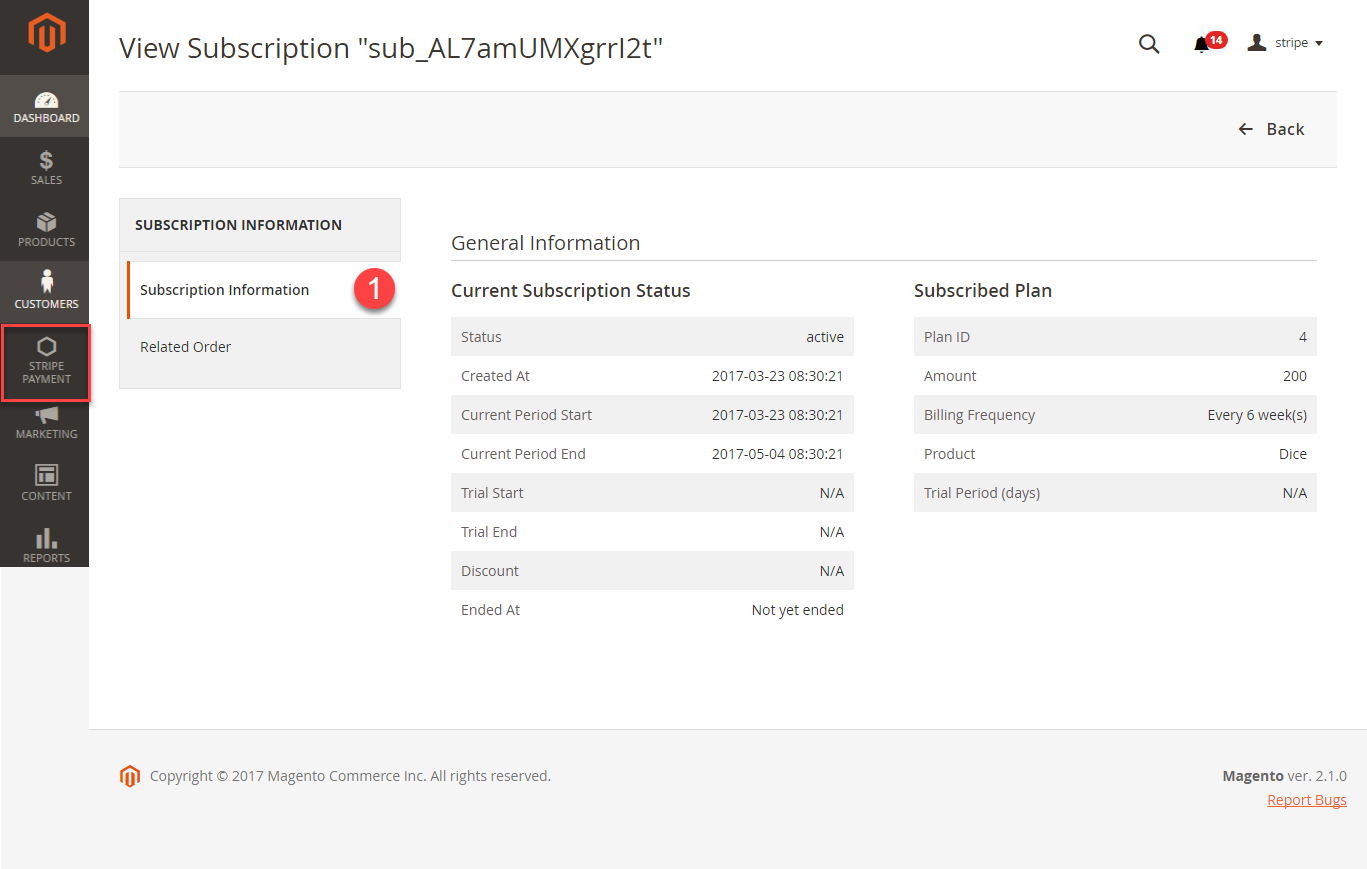
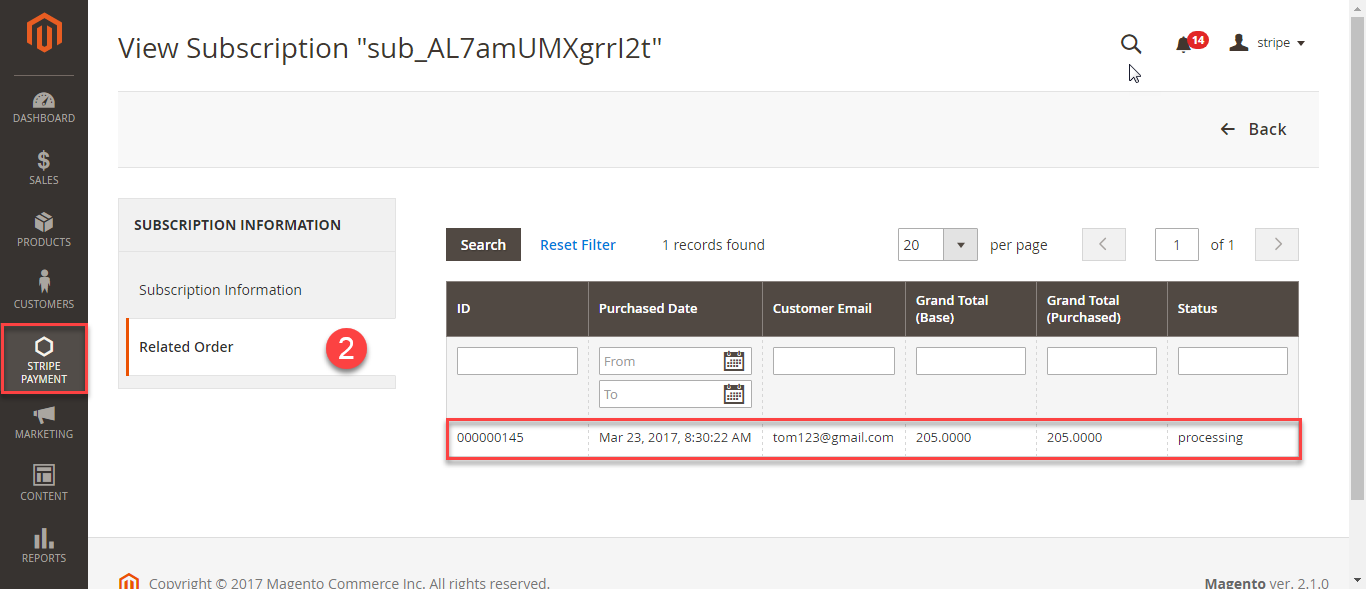
Click on the View button on the right to see the details of a subscription product.
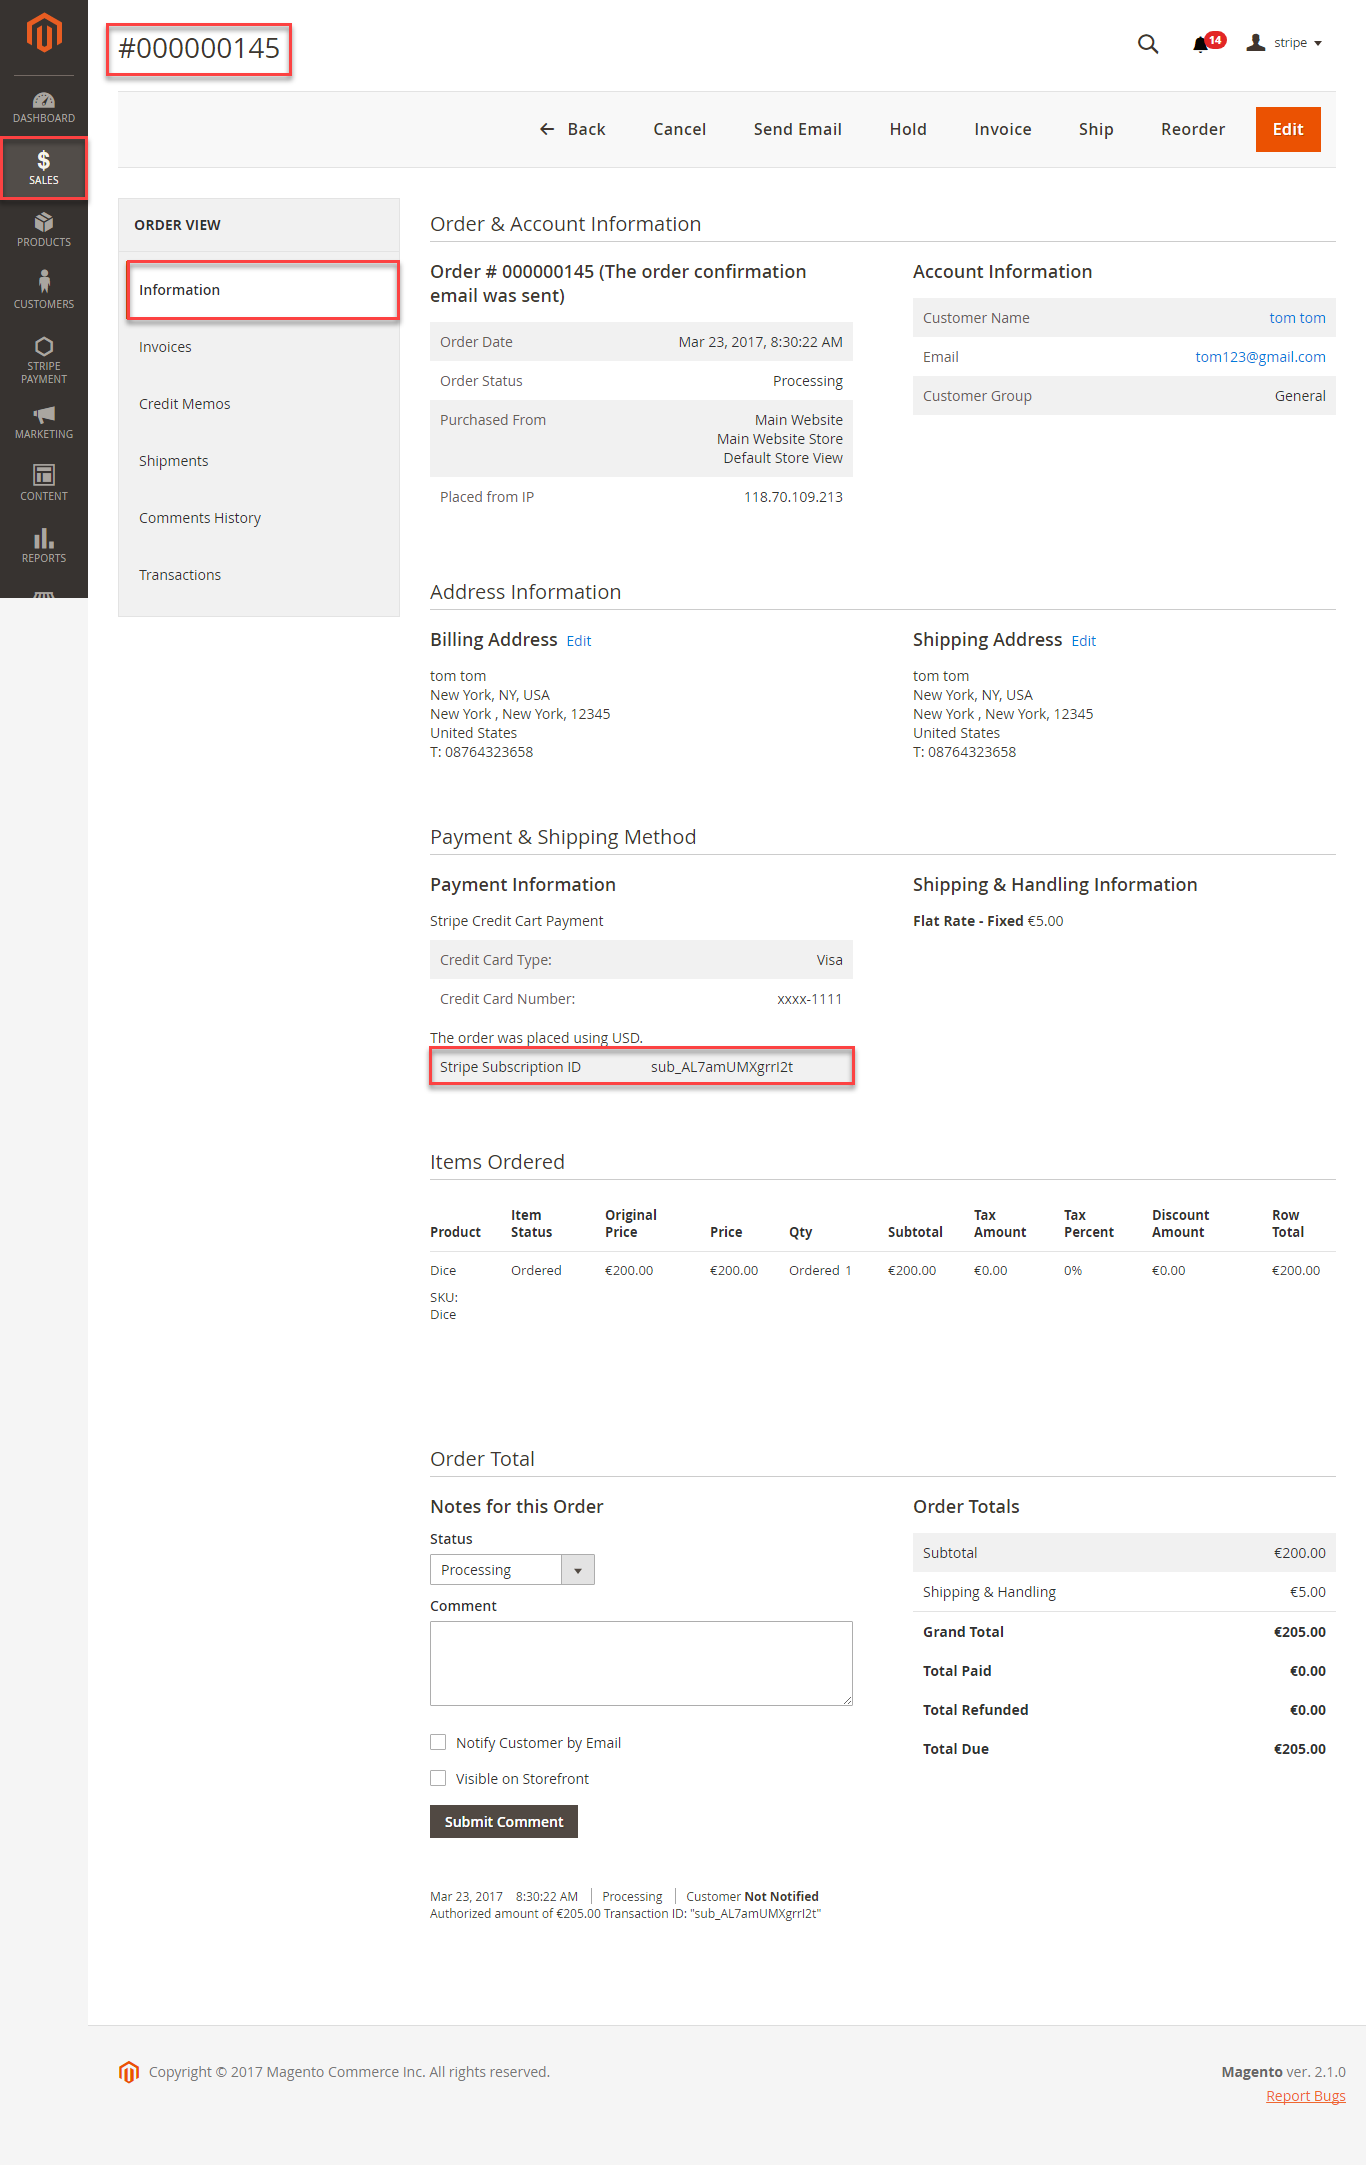
Click on the Subscription ID Number in the first column to see the details of a subscription order.
Easily Checkout Using Credit Card
At the storefront, customer can add subscription items into shopping cart by clicking the Add to Cart button.
![]() NOTE: For the cart that contains the subscription product, we currently support this cart with only one subscription product.
NOTE: For the cart that contains the subscription product, we currently support this cart with only one subscription product.
Then, go to the checkout page. Customer fills in his/her shipping address and selects the payment method.
![]() Checkout with Apple Pay/Google Pay
Checkout with Apple Pay/Google Pay
![]() To use Google Pay (for PC), customers have to add their credit card to the browser.
To use Google Pay (for PC), customers have to add their credit card to the browser.
In case your browser can't pay button to transfer, follow this guide to display Stripe Payment request button.
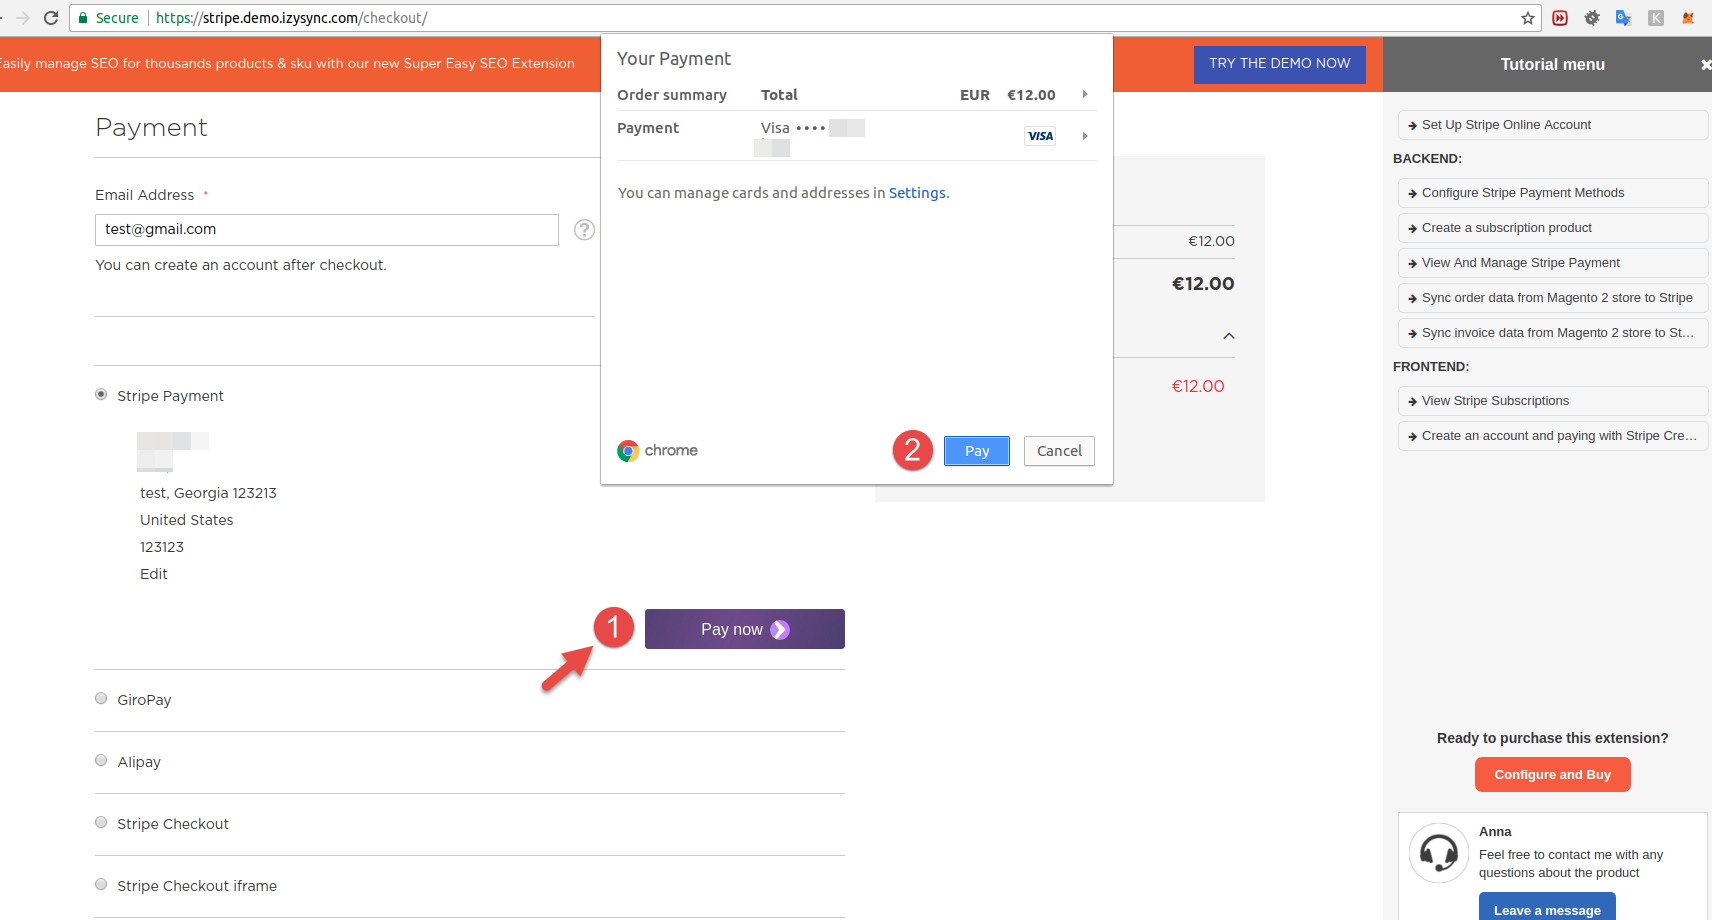
Mark the checkbox "My billing and shipping addresses are the same" if the shipping address and the billing address are not different.
If they are different, fill in the billing address then click "Update".
After filling in all the neccessary information, click Pay now to place the order.
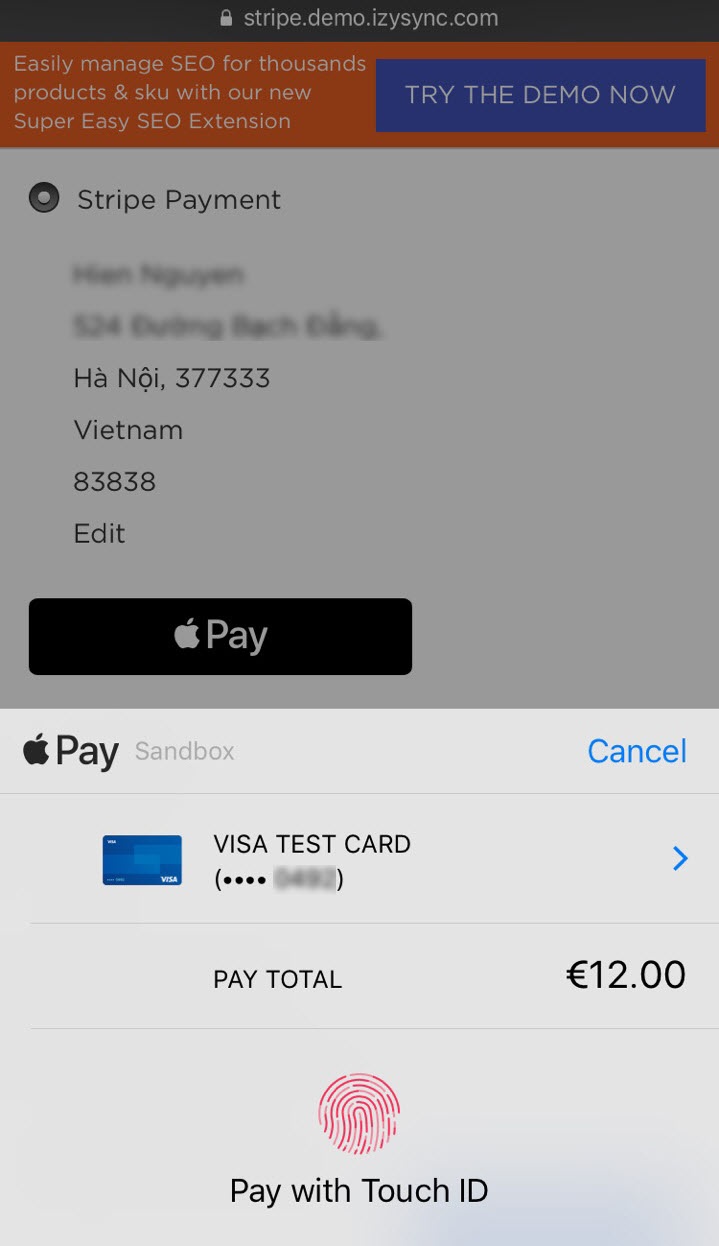
Stripe Apple Pay Checkout
After successful payment, at Payments tab of Stripe, the order will be updated corresponding with Magento.

![]() Checkout with Stripe Giro Pay
Checkout with Stripe Giro Pay
- Mark the checkbox "My billing and shipping addresses are the same" if the shipping address and the billing address are not different.
- If they are different, fill in the billing address then click "Update".
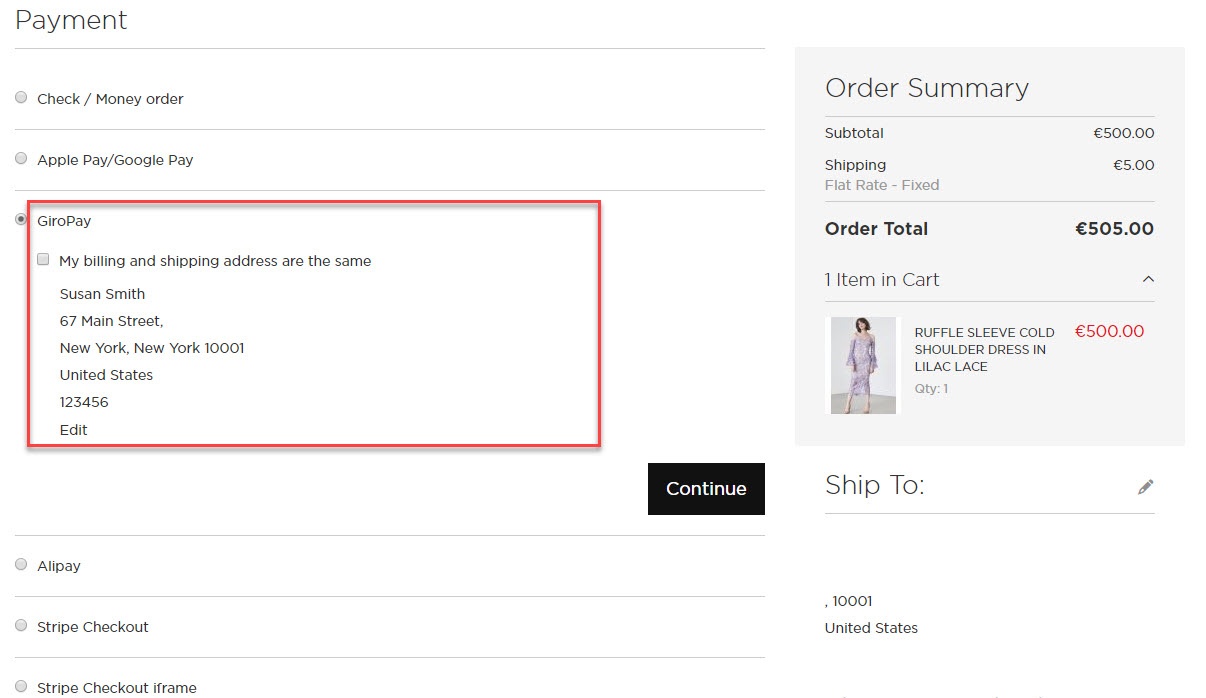
After filling in all the neccessary information, click Continue to place the order.
Then, it redirects to Stripe Giro Pay Payment Page and buyer can finalize his payment there.
![]() Checkout with Stripe Alipay
Checkout with Stripe Alipay
- Mark the checkbox "My billing and shipping addresses are the same" if the shipping address and the billing address are not different.
- If they are different, fill in the billing address then click "Update".
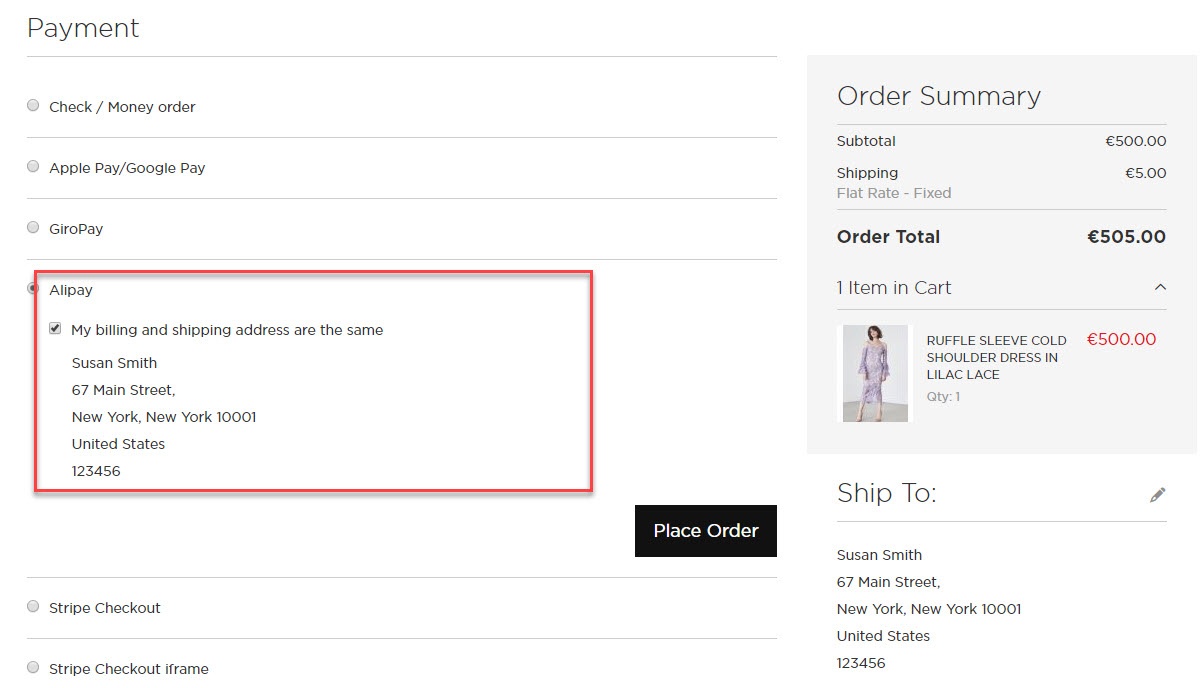
After filling in all the neccessary information, click Place Order
Then, it redirects to Stripe Alipay Payment Page and buyer can finalize his payment there.
![]() Checkout with Stripe Checkout (Direct Checkout)
Checkout with Stripe Checkout (Direct Checkout)
- Mark the checkbox "My billing and shipping addresses are the same" if the shipping address and the billing address are not different.
- If they are different, fill in the billing address then click "Update".
- Fill in the credit card information
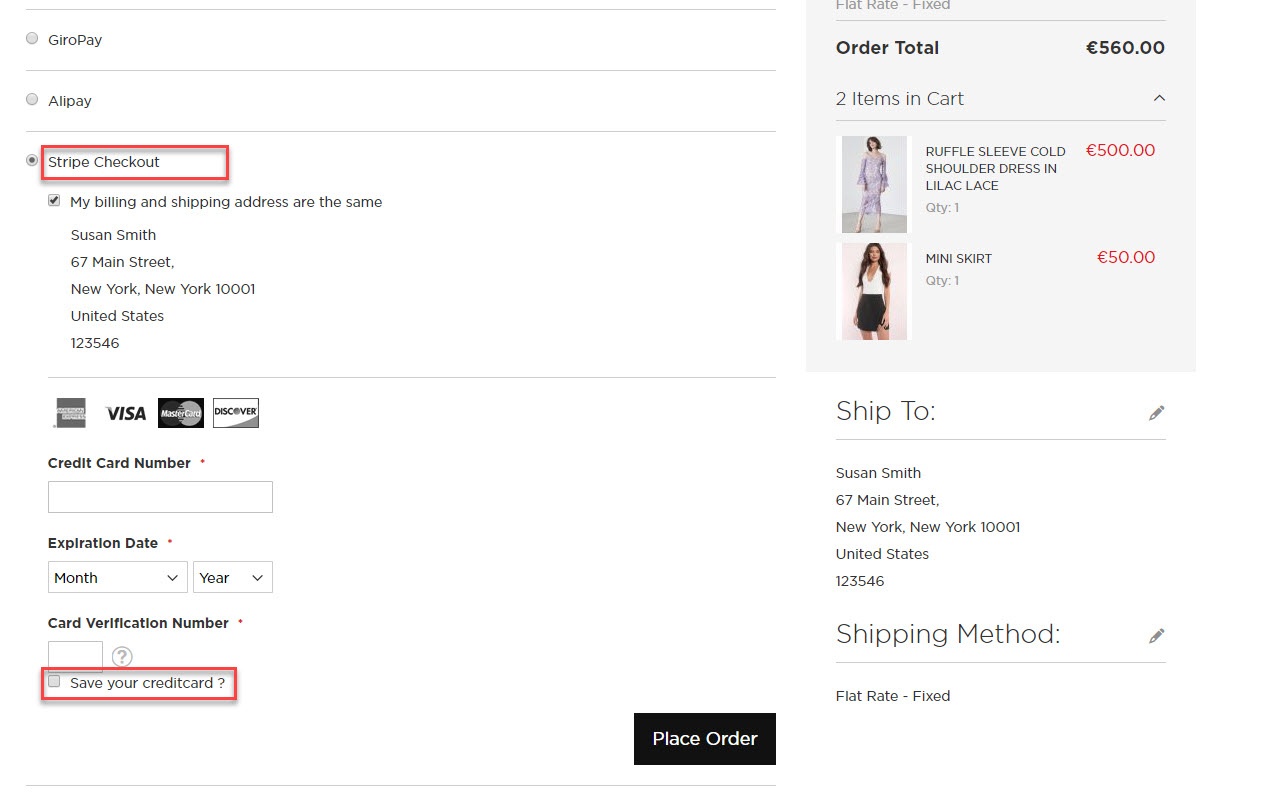
If the customer sign in with an account, he/she can use the save card function by ticking in the Save your credit card box.
After filling in all the neccessary information, click Place Order to finalize the payment.
![]() Checkout with Stripe Checkout (Direct Checkout)
Checkout with Stripe Checkout (Direct Checkout)
Another payment method is Stripe Checkout Iframe. It supports wonderful functions with Credit Card, Alipay, and Bitcoin. Customers can follow the instruction below:
- Mark the checkbox "My billing and shipping addresses are the same" if the shipping address and the billing address are not different.
If they are different, fill in the billing address then click "Update".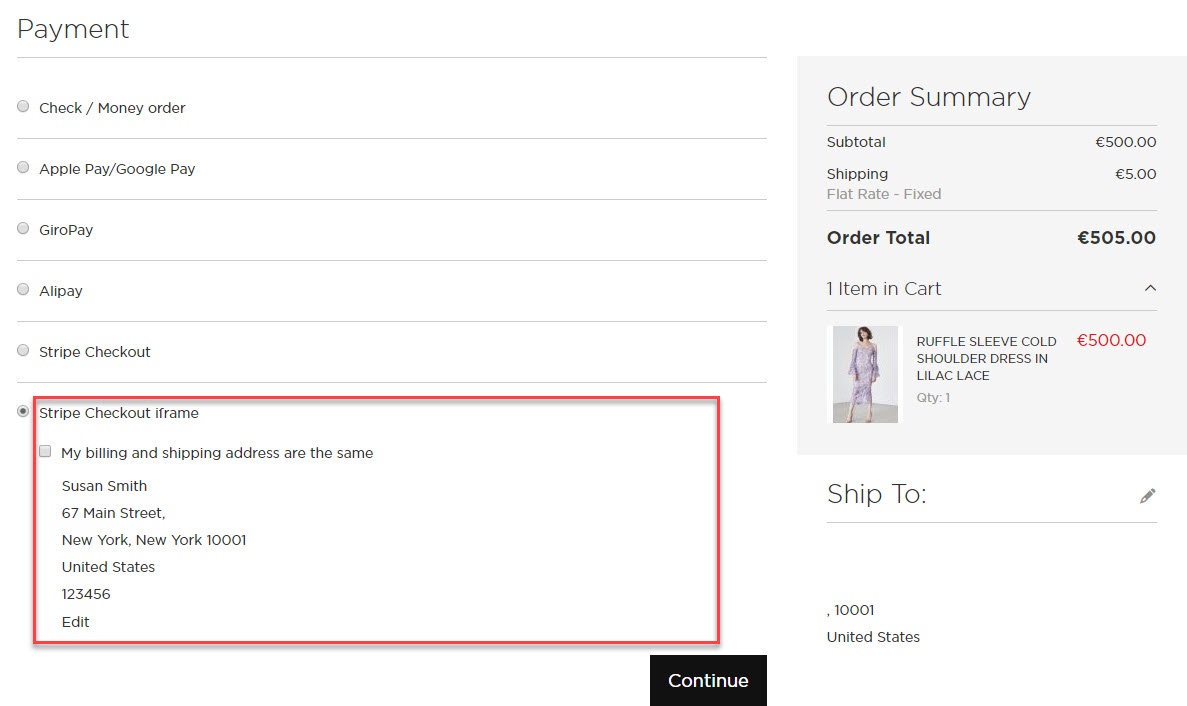
After filling in all the neccessary information, click Continue and an IFrame checkout form will pop up with 3 choices of payment: Credit card, Alipay, and Bitcoin.
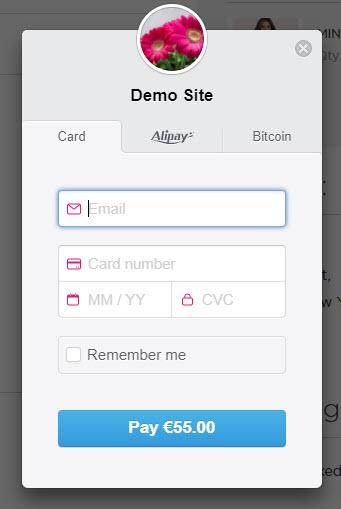
Credit card Iframe checkout form
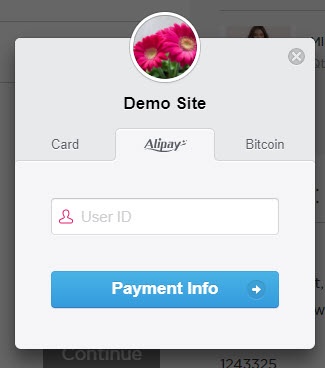
Alipay Iframe checkout form
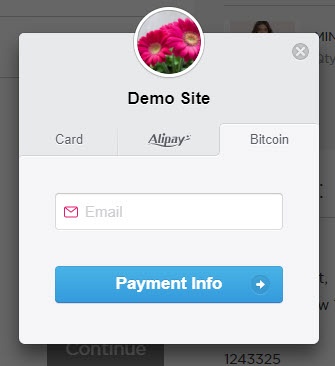
Bitcoin Iframe checkout form
If customer enters his mobile phone number, Stripe will send a 6-number-verification code to confirm his payment info.
![]() Support 3D secure:
Support 3D secure:
When customers use type of card provided with 3D secure function. Stripe will turn on automatic mode to check. The operation will redirect to processing page:

Press Success button. The inform result will sent to customer. Payment successful!
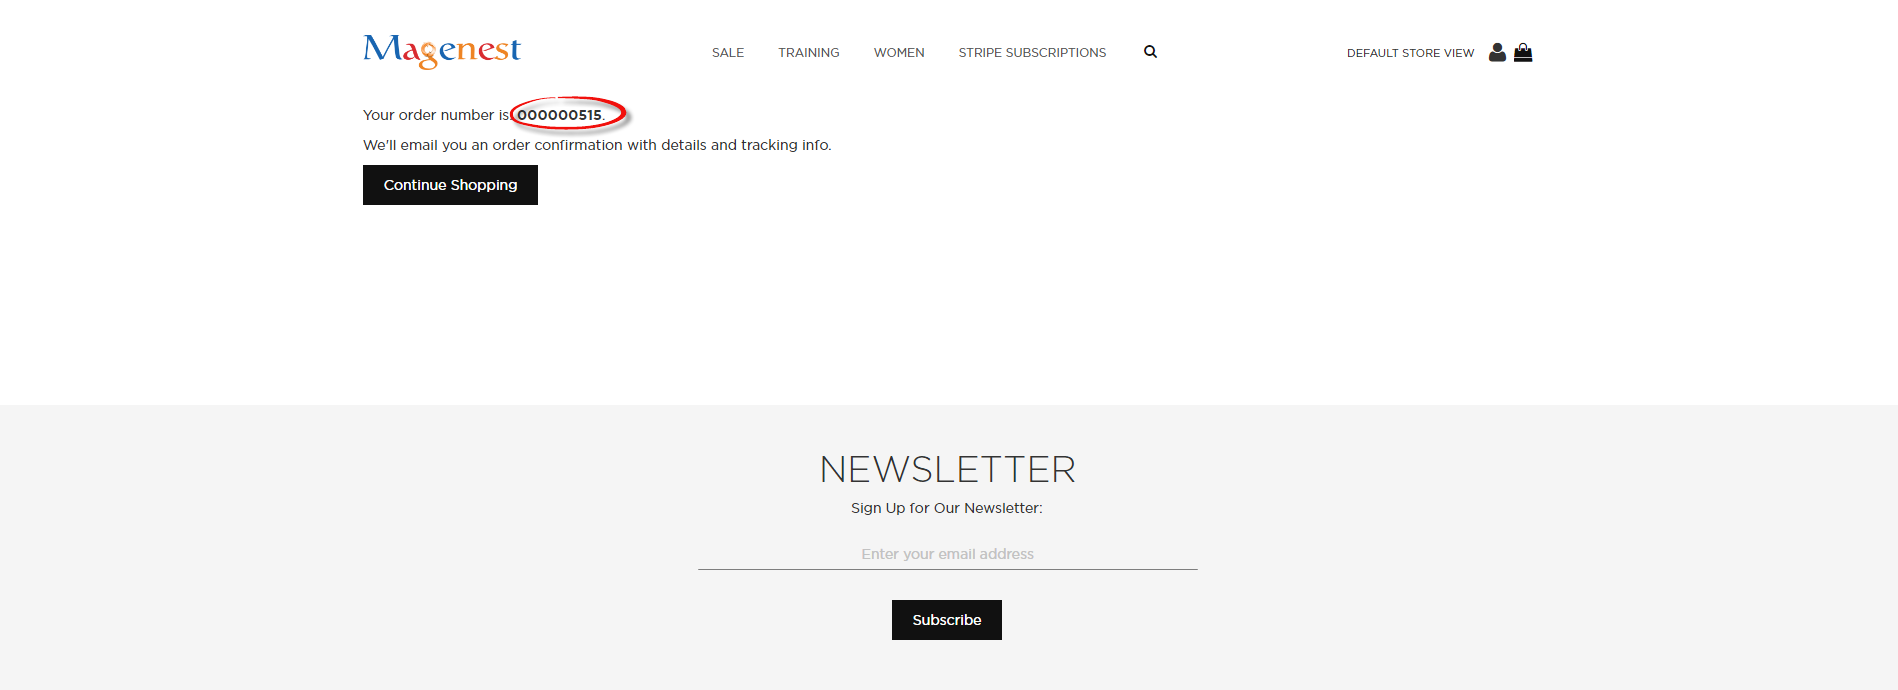
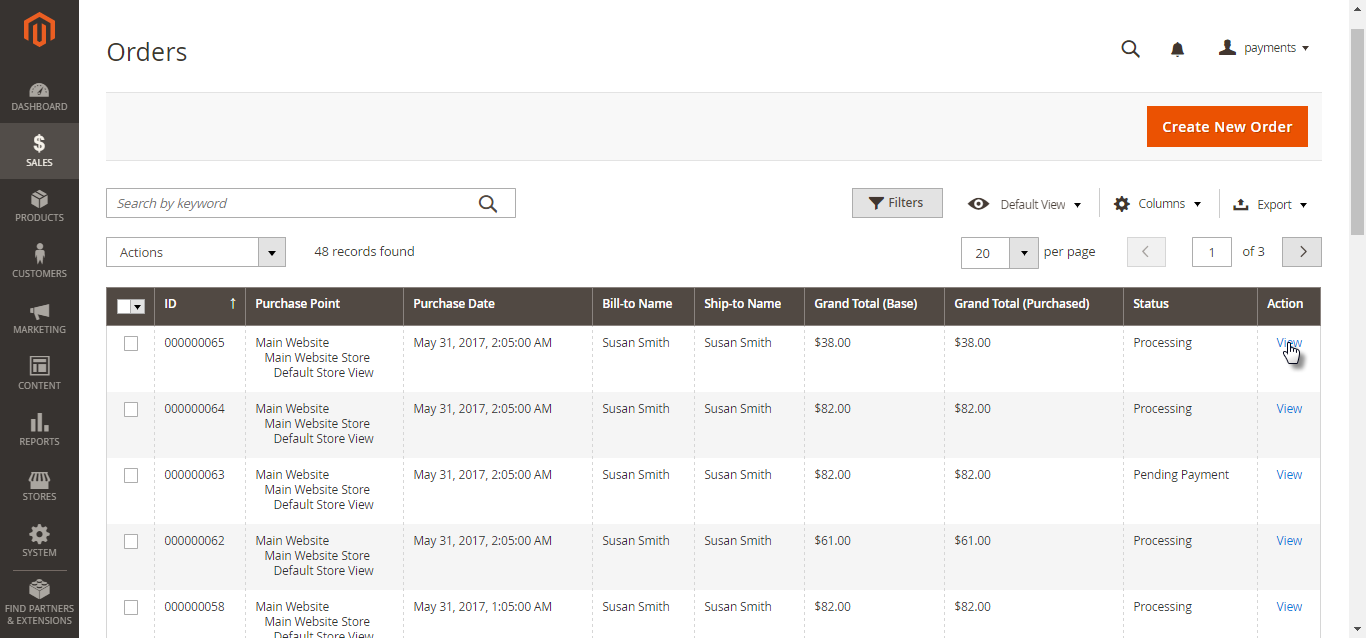
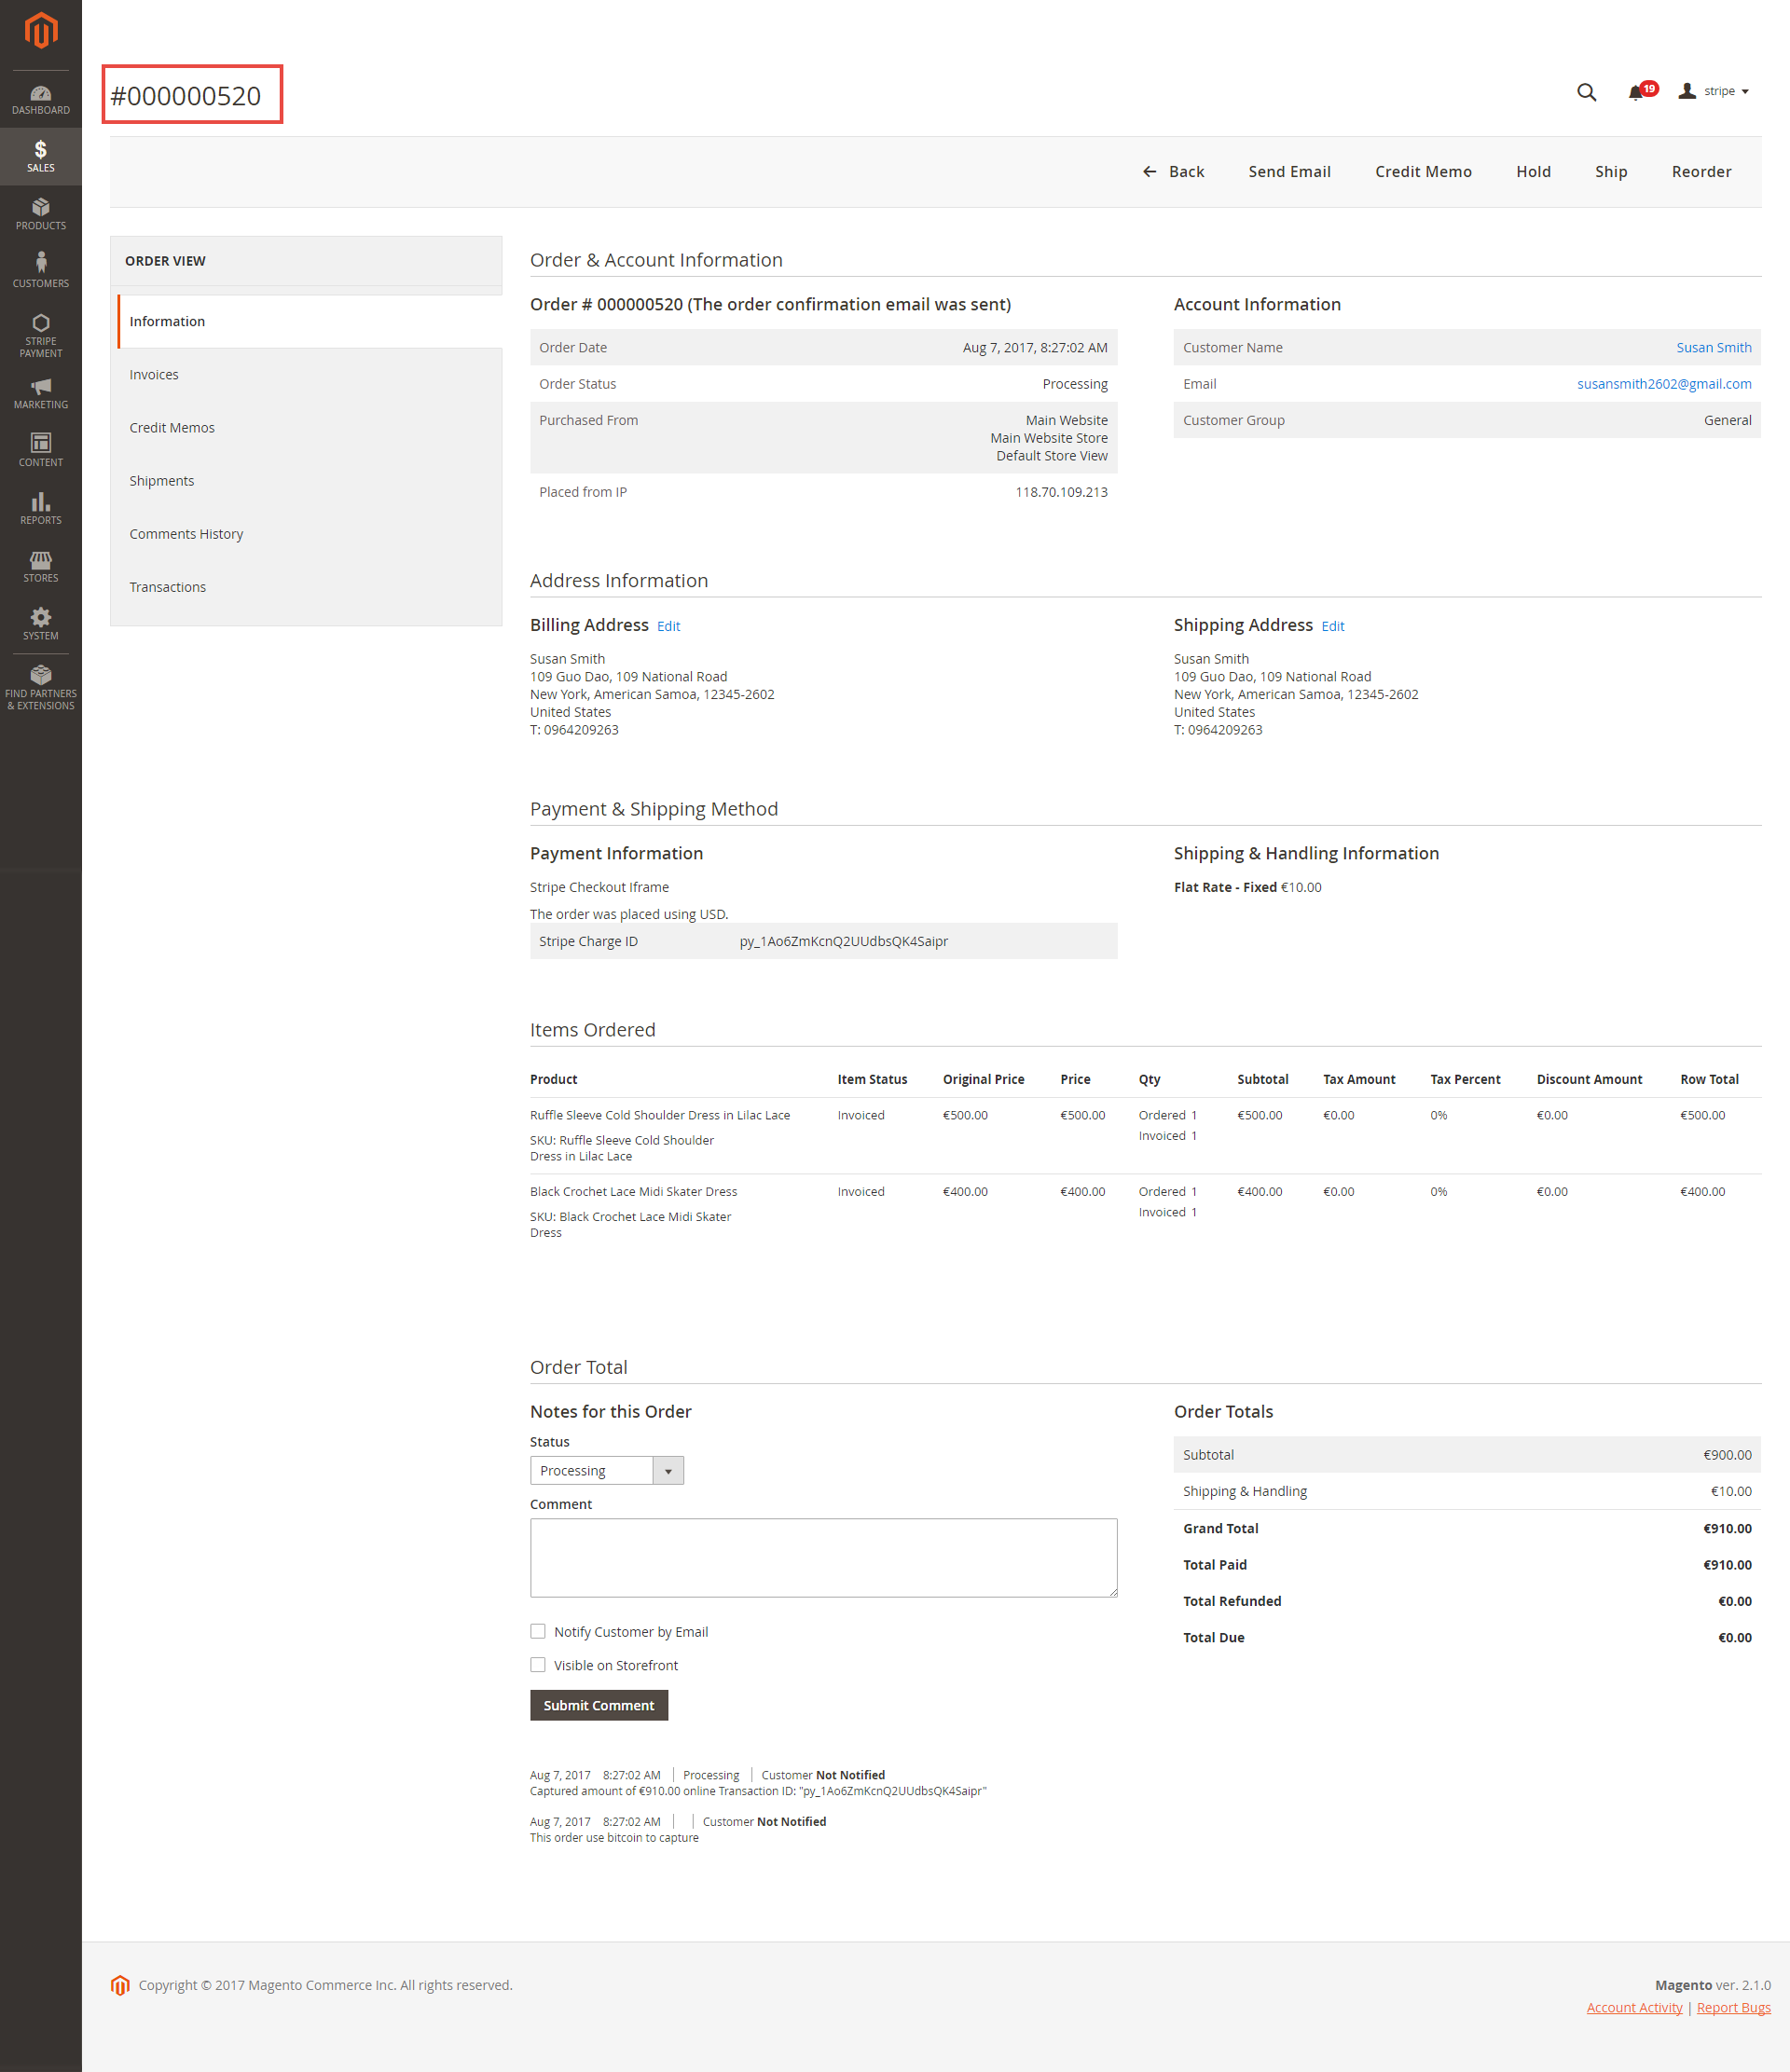
![]() View Order:
View Order:
When the transaction is completed, customers can review their orders by clicking Sales > Orders >View.
![]() Capture Invoice:
Capture Invoice:
While invoice is not created meanings customers select Payment Action in Authorize Only status. Customers can capture invoice in their request. However, quantity of products in new invoice
must be smaller or equal with pre-order and invoice only is submitted once.

![]() View Invoice:
View Invoice:
By clicking invoice and pressing View, customer can see the content of invoice that you want:

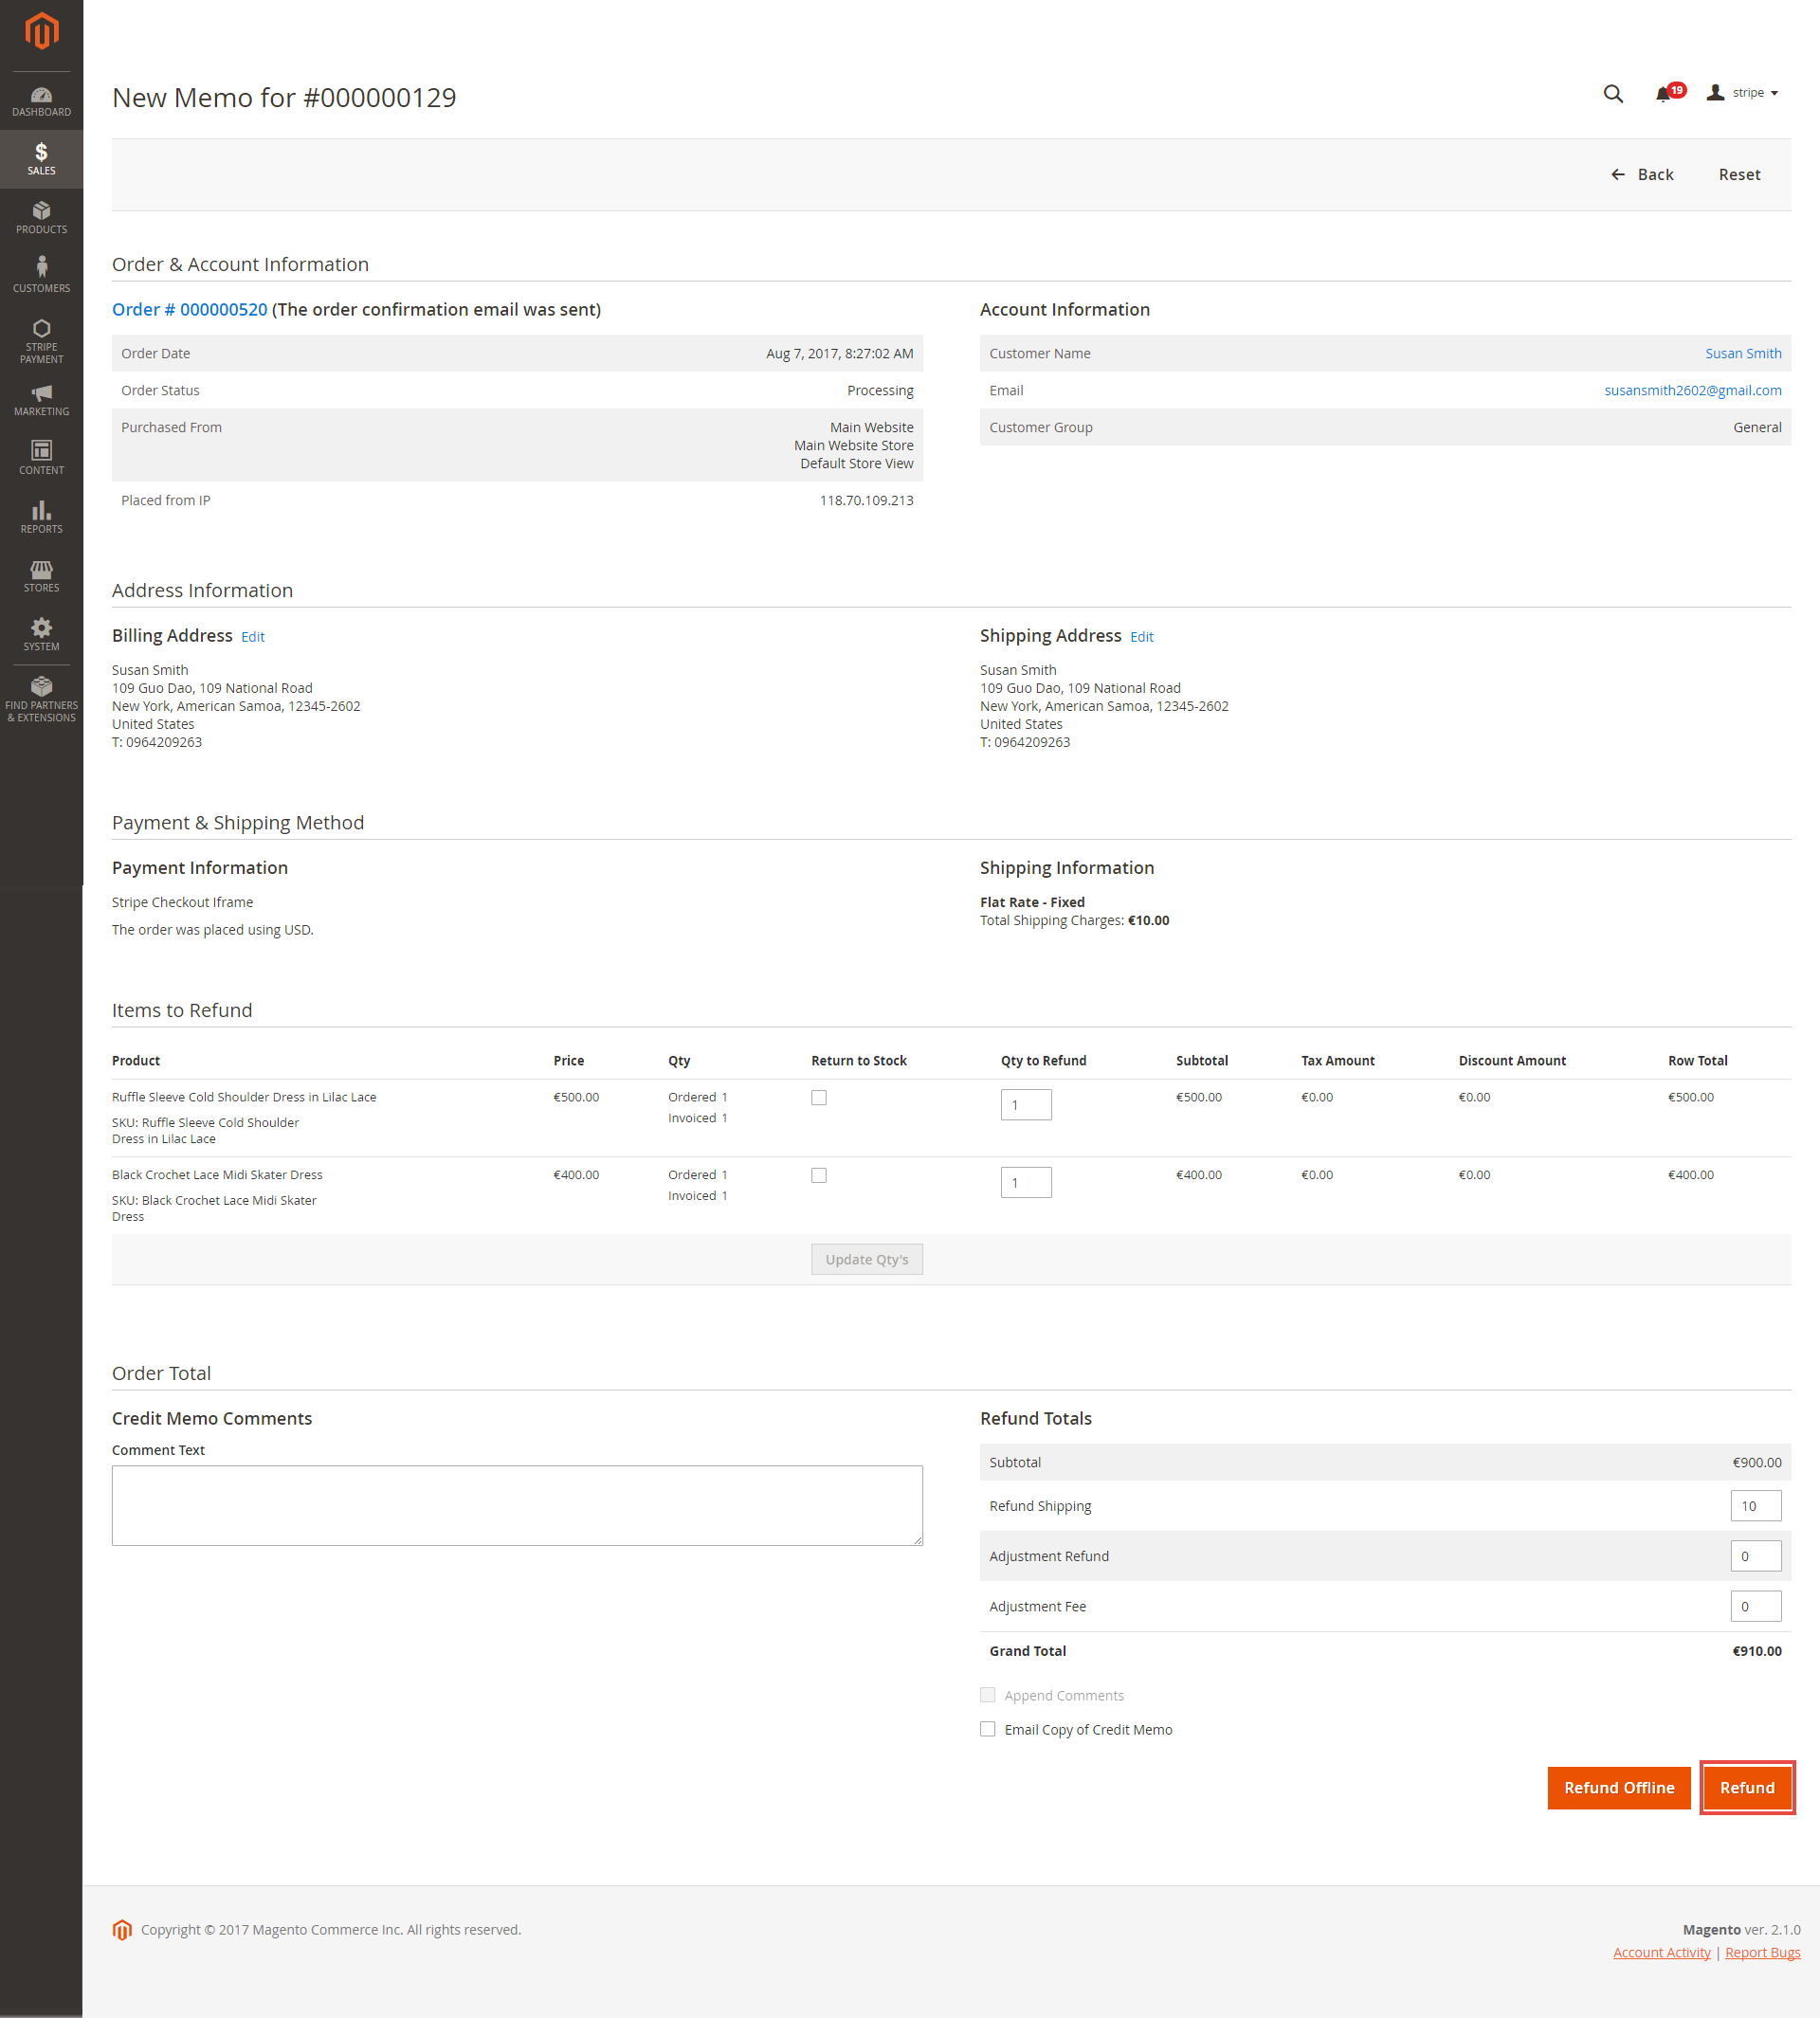
And choose Credit Memo tab and clicking Refund in need
![]() Partial or total refund:
Partial or total refund:
Moreover, Stripe is a great tool. Customer can refund partially or totally by clicking Credit Memo-> Refund.
About partial refund, it applies for many frequencies and up to out of products.
Update
- When a new update is available, we will provide you with a new package containing our updated extension.
- You will have to delete the module directory and repeat the installing steps above.
- Flush the config cache. Your store and newly installed module should be working as expected.
Support
- We will reply to support requests within 2 business days.
- We will offer lifetime free update and 6 months free support for all of our paid products. Support includes answering questions related to our products, bug/error fixing to make sure our products fit well in your site exactly like our demo.
- Support DOES NOT include other series such as customizing our products, installation and uninstallation service.
Once again, thank you for purchasing our extension. If you have any questions relating to this extension, please do not hesitate to contact us for support.