Thank you for purchasing our extension. If you have any questions that are beyond the scope of this document, do not hesitate to leave us an email via our email address below.
Created: 04/07/2015 | By: Magenest | Support Portal: http://servicedesk.izysync.com/servicedesk/customer/portal/94
Introduction
Woocommerce Appointment Booking plugin is a plugin that allows your customers to book appointments for the services directly from your website. It is designed for service professionals like doctors, lawyer, consultants, therapists, tutors, instructors, singer, artist, photographers, stylists and others who need to schedule their time and date with clients through online.
Features:
- Easy booking appointment with three steps: choose the day week via calendar, then fill the time and select the staff member finally
- Have extra tabs for booking products, such as: bookable time, book price range, staff members…
- Powerful at admin panel that allows manage staff members
- Allow export the bookings to csv
- Manage the bookings with Calendar view. Switch between the weekly, monthly and day view
- Manage your staff's availability and mark times when they're not available on staffs's calendars
Live demo here: http://magenest.com/stage/woodemo/demo2/wp-login.php
User name: magenest Pass: demo123 |
|---|
Booking Process
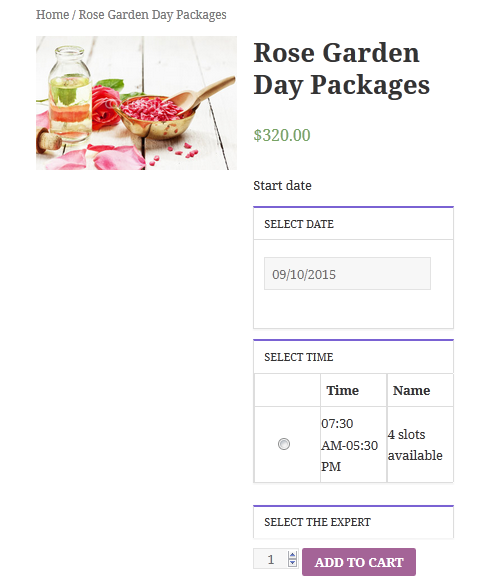
First step of booking is to select service, choose the day of the week, choose available the time slot and select the staff
Add staffs
Add a new staff
You can add new staffs from Booking→ Staff→ Add Staff

You can add name, avatar, email, description, phone number and working schedule.
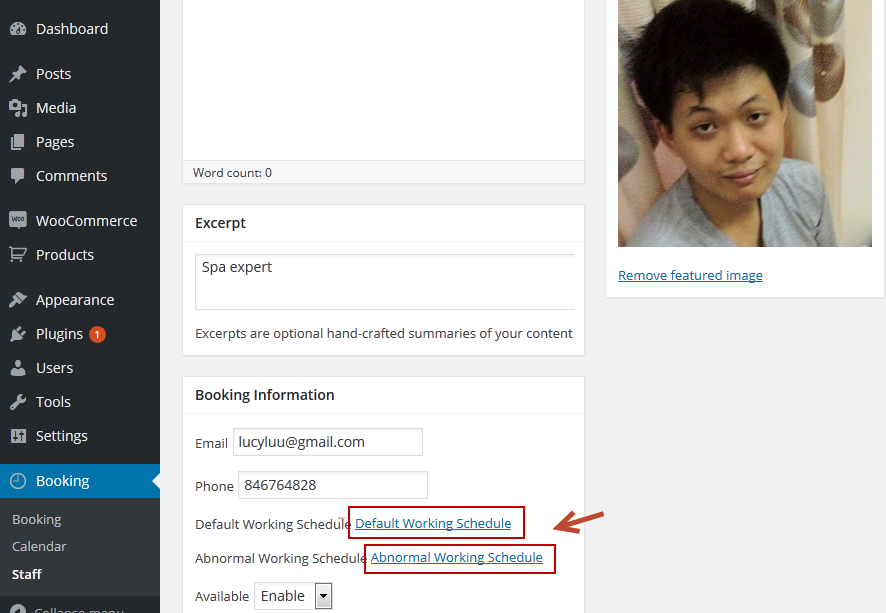
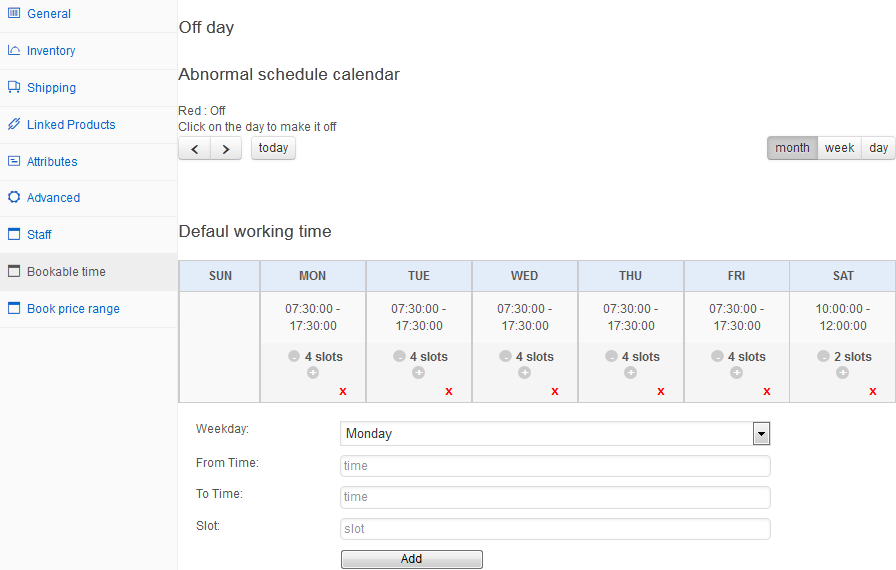
The Default Working Schedule
Click Default Working Schedule in staff detail page to set default working schedule for your staff, you also can go to there by go to staff management table, find person and click working calendar line in Default worktime column.
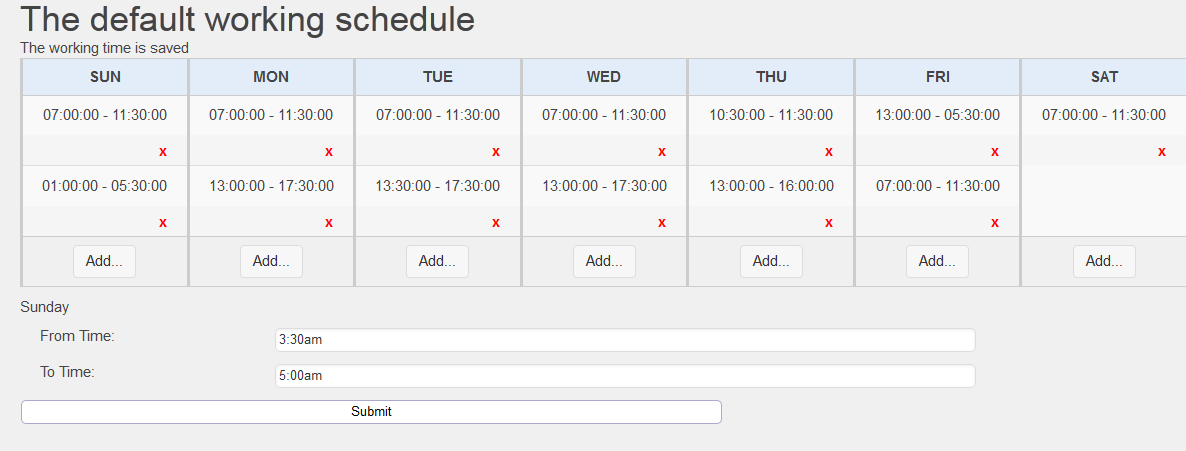
Click Add button on the week of day column you want to add new schedule. Select From Time and To time, then click Submit. If the system displays “The working time is saved” that means your submission is done.
The Abnormal Working Schedule
The non-working days and holidays can be specified not only for the whole company, but for each staff member as well. While creating a staff member account, the information about holidays is taken from the one indicated for the whole company. However, it can be changed later to comply with the staff member schedule. Timeslots for booking are based on the staff member schedule.
Navigate to the Staff tab on the Dashboard, select a person in staff management table, click on the working calendar line in schedule column or you can click on The abnormal working schedule line in staff detail page.
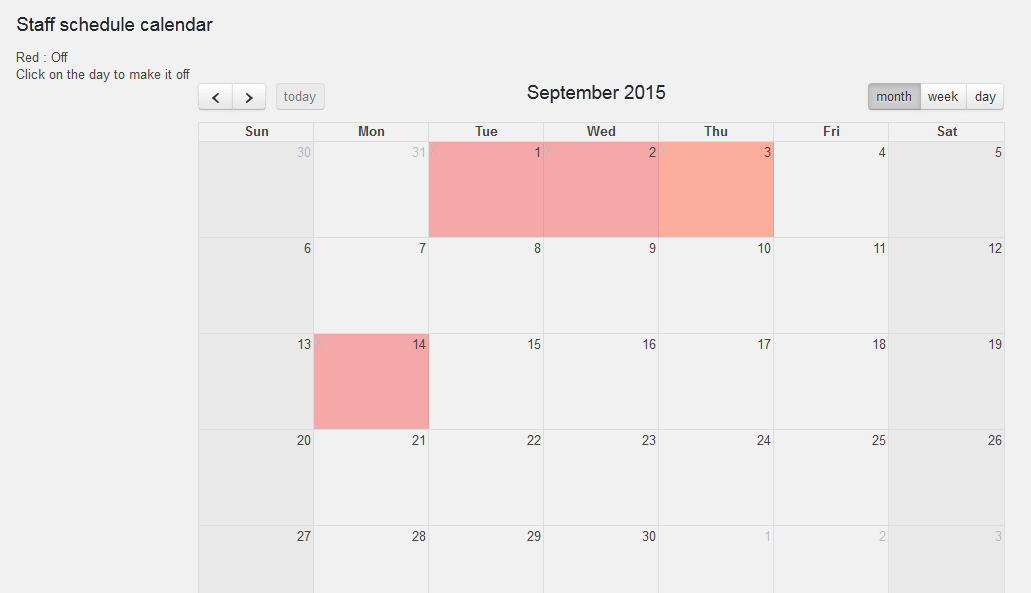
The calendar can be displayed in three modes: by months, by weeks and by days. To switch between the appearance modes, click on the appropriate button at the top of the calendar page.
Click on the day in the calendar to make it off.
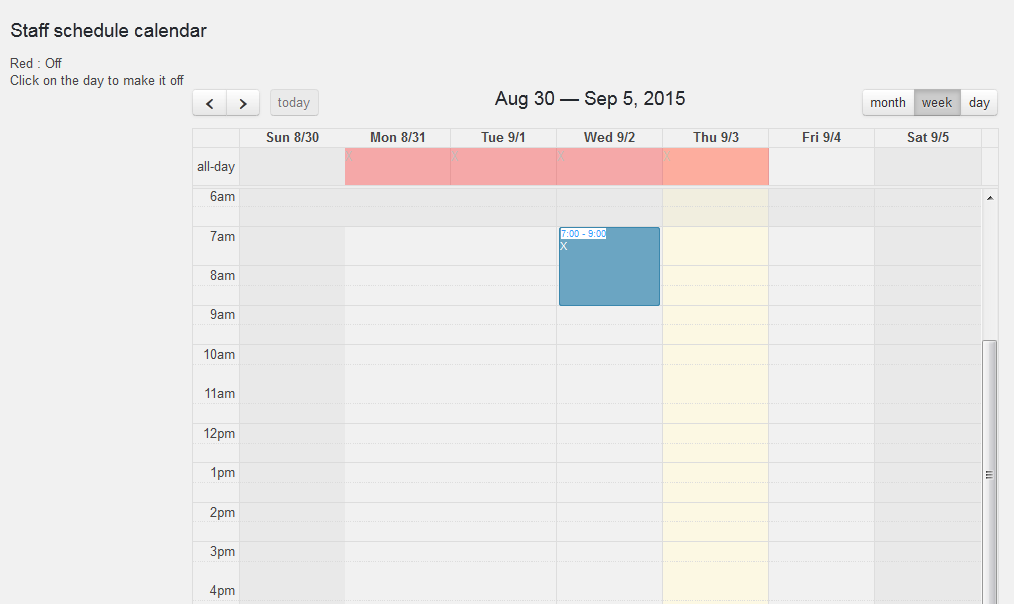
You can add staff's working time in weekly view and day view calendar by click the mouse at a time point, this is considered as the start time, then pull down to a time point that is considered to the end time.
Add products
Add new product
Go to Product → Add new product button. Fill information as need and check bookable product type.
Add schedule time
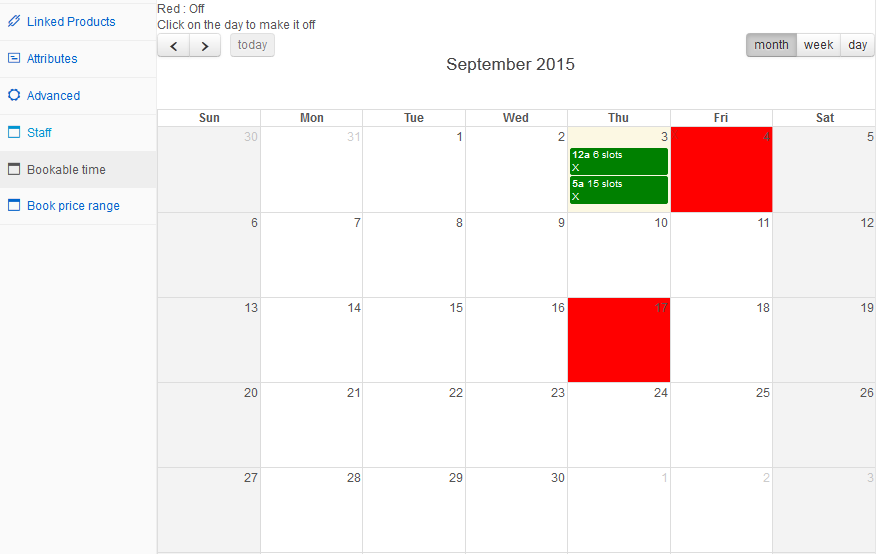
To define working hours for product navigate to the Bookable time tab. In Default working time, it is required to specify the start and end working time and slot quantity for each week day, then click Add button to submit. You can edit the schedule by click “X” symbol to cancel and “+”, “-” symbols to change slot quantity.
Product's abnormal schedule calendar runs like staff's abnormal schedule calendar. Click the date to mark it off in monthly view and add working time by click on the start time point then pull down to end time point in weekly and day view, the system will shown a box to require to fill slot quantity at this time.
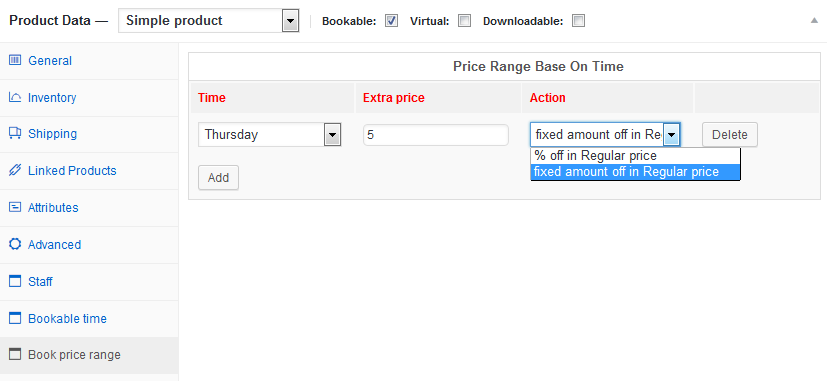
Add price range
In order to add the price range for a product, navigate to Price range tab
In Action field, select action of discount: % discount off and fix amount off then fill the value off in Extra price field
Assign staffs
In order to assign a staff member to a product, click on the staff tab and check the desired staff member.

An important step is to indicate the schedule for the company, as well as for individual staff members. Woocommerce Booking Appointment offers the possibility to indicate product's bookable time.
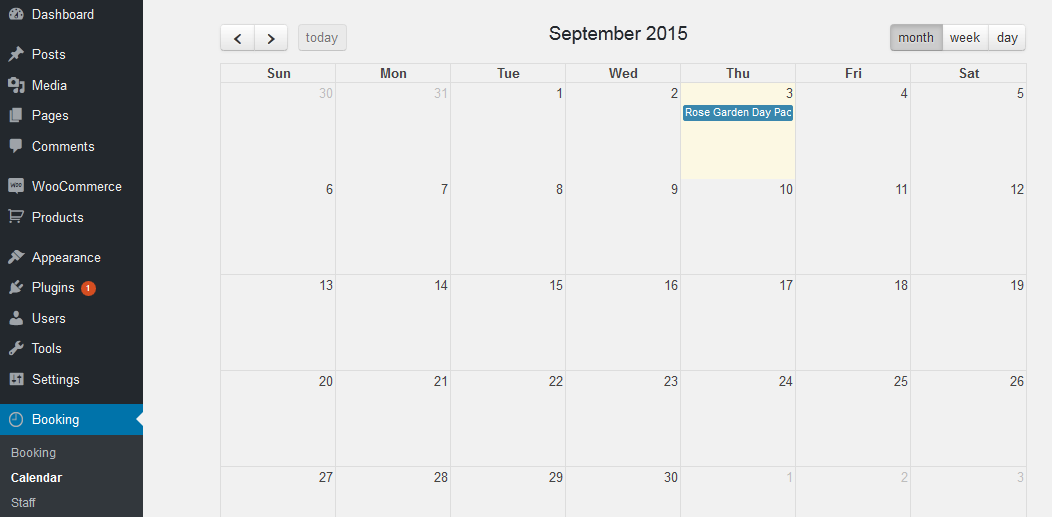
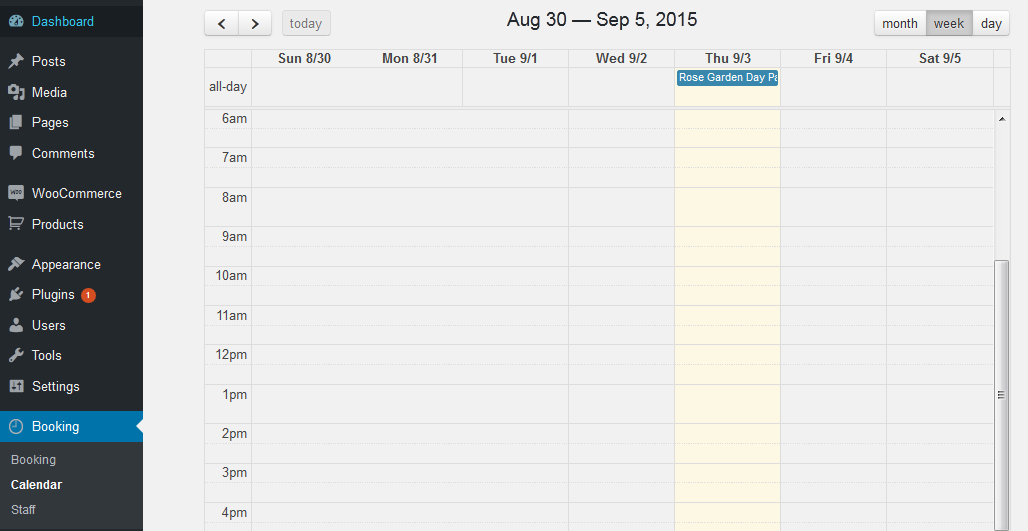
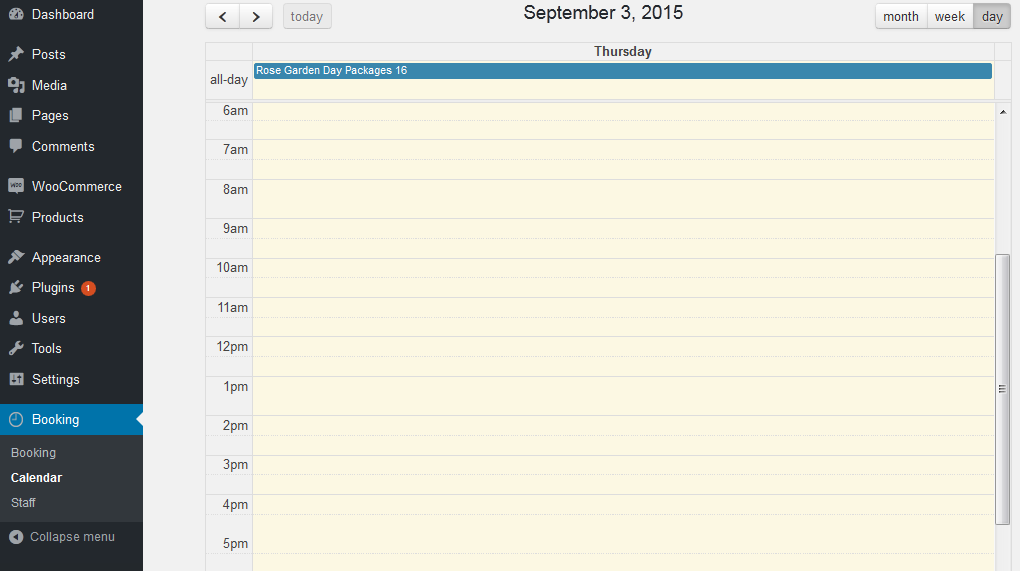
Calendar
The calendar allows looking through the appointments schedule for the particular staffs.
In order to open the calendar, go to Booking → Calendar tab
The calendar can be displayed in three modes: by months, by weeks and by days. To switch between the appearance modes, click on the appropriate button at the top of the calendar page.
If you have want the further features that is not supported in current version, do not hesitate to contact us.