Thank you for purchasing my extension. If you have any questions that are beyond the scope of this help file, please feel free to email via my user page contact form here. Thank you so much!
Created: 16/02/2017 | By: Magenest | Support Portal: http://servicedesk.izysync.com/servicedesk/customer/portal/14
Introduction
Multiple Vendors extension for Magento 2 by Magenest allows you to convert Magento 2 store to a marketplace where multiple vendors can manage sales of their own products.
Features for admins
- Allow marketplace owner to manage vendor information, approve or reject a vendor account from the marketplace.
- Allow marketplace owner to manage, approve or reject a vendor’s products.
- Allow marketplace owner to manage vendor’s orders, including order info, order status, and update order status.
- Allow marketplace owner to manage feedback about vendors: approve and delete feedbacks on vendors.
- Allow marketplace owner to manage all vendor participation request: manage all questions from vendors and approve, delete or answer.
- Allow setting: setting email, setting view vendor store
- Admin Dashboard: show total sales, total credit and show chart
Features for vendors
- Register for a Vendor Account and wait for approval from marketplace owner.
- Set Vendor Profile: vendor information, vendor social network profiles.
- Set up Vendor Store and preview Vendor store.
- Manage vendor’s products.
- View customer orders.
- Send questions to marketplace owner.
- Dashboard: show sales chart, transaction history, product approval status, customer review and feedback.
Features for customers
- View products of different vendors.
- Add products from different vendors to cart.
- View vendor info.
- Review vendors based on their price, quality and value.
- Contact to vendors.
System Requirements
Your store should be running on Magento Community Edition version 2.1.x.
Configuration
We have created MarketPlace tab for this extension which allows store owner easily to control their marketplace.
In order to get the extension up and running properly, we highly recommend that you make some configurations right from the beginning.
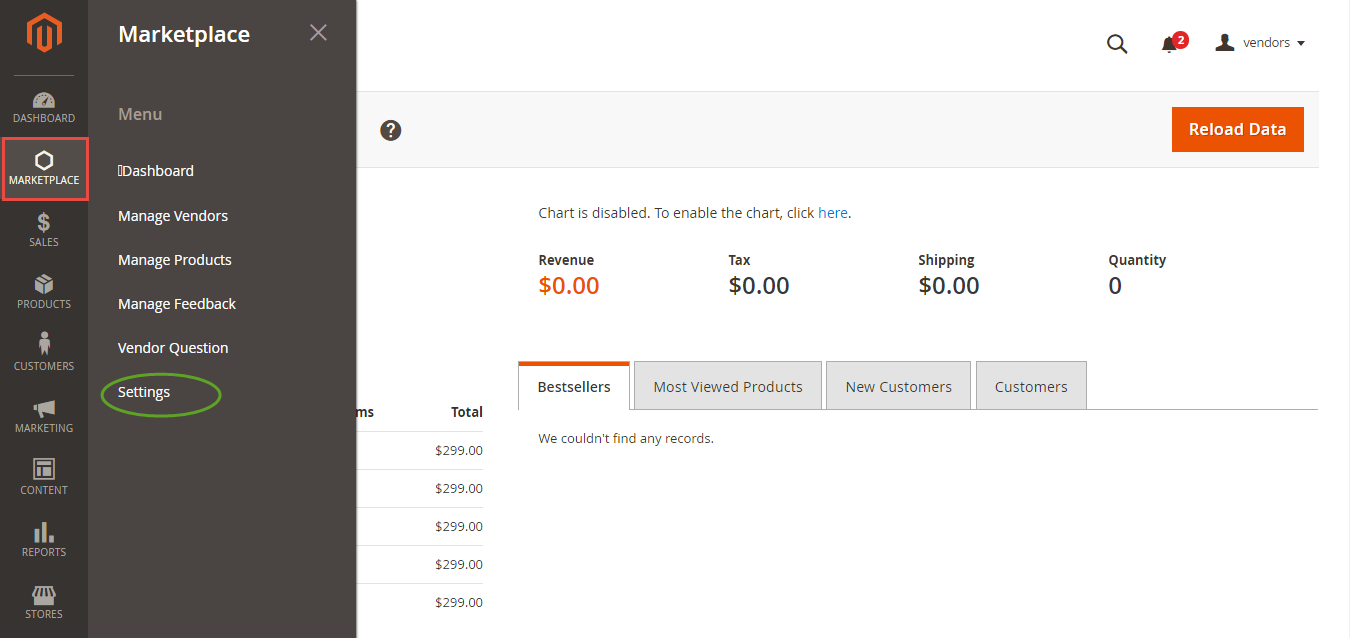
First, go to Market Place > Settings:
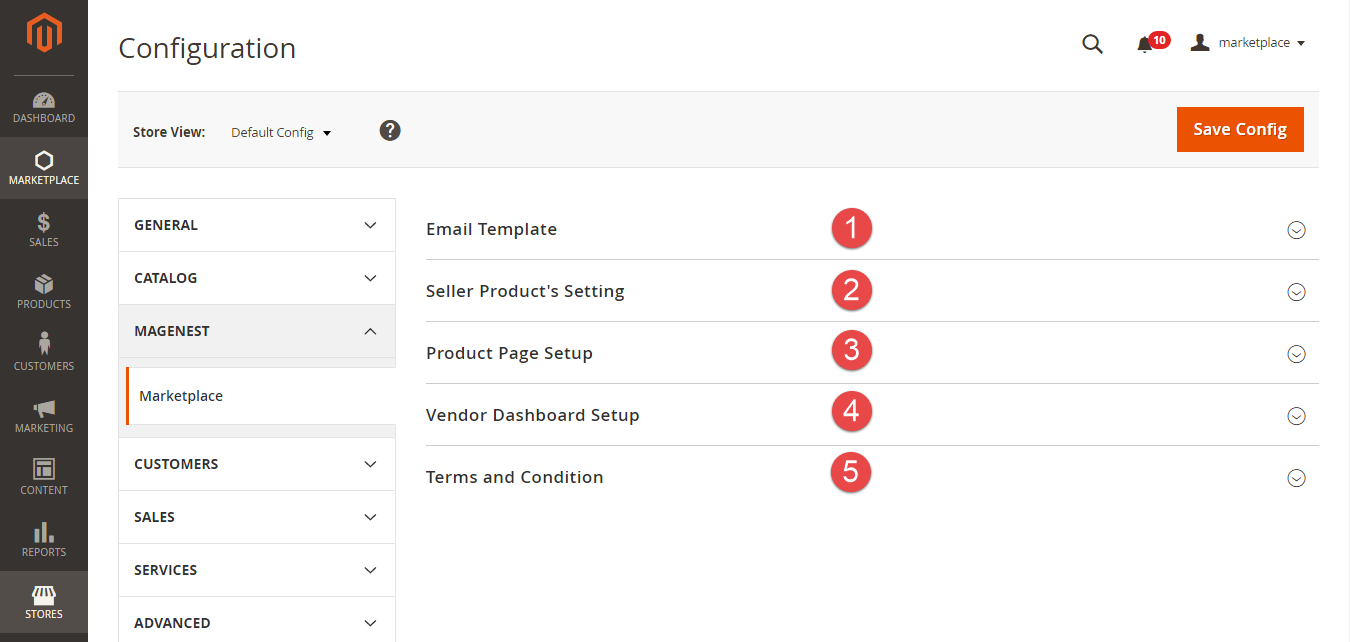
In Settings tab, there are five parts: Email Template, Seller Product's Setting, Product Page Setup, Vendor Dashboard Setup, Terms and Condition.
Email Template:
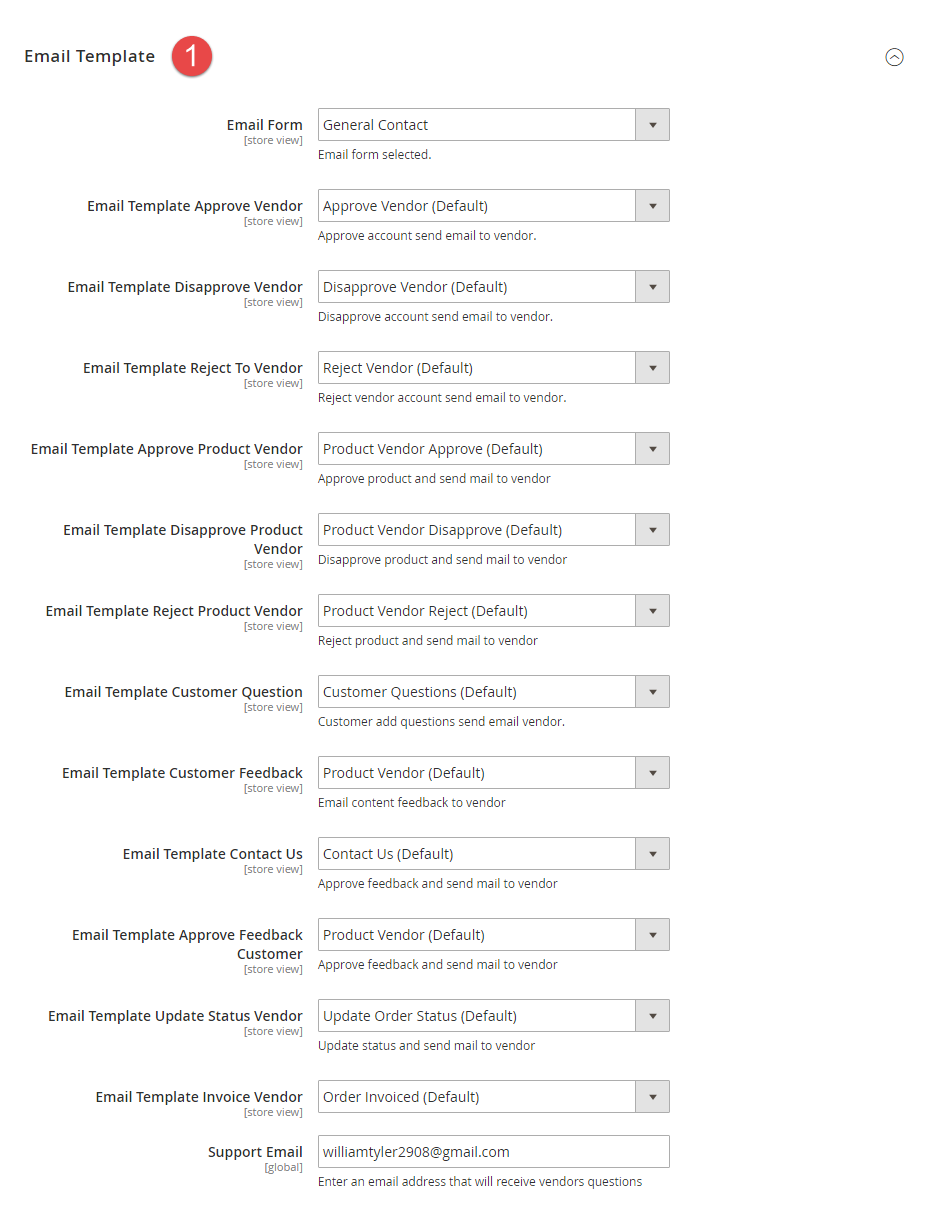
In this tab, admins will be able to select the email templates for their store for each case as below:
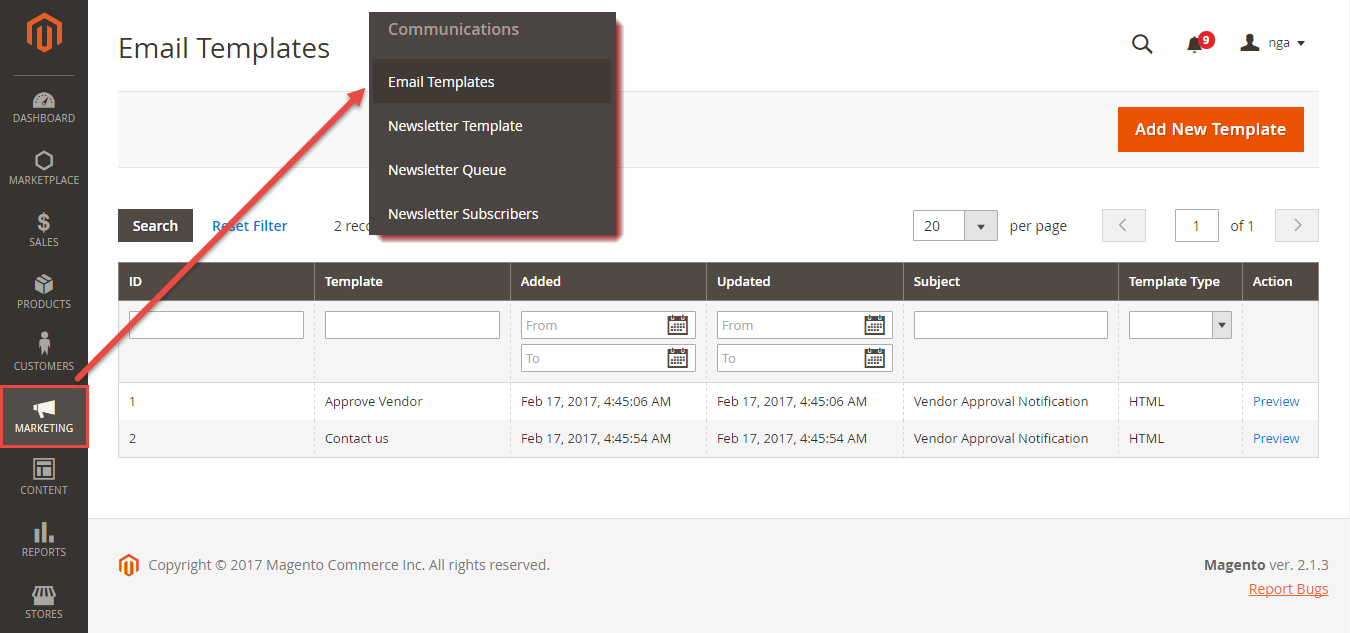
Note that you need to have email templates before going to configure. You can use our default email template or create a new one from Email Templates tab.
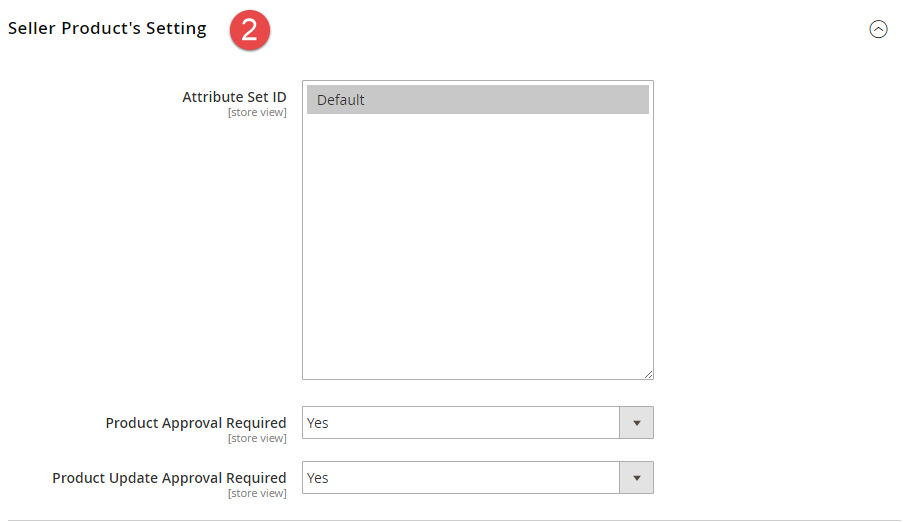
Seller Product's Setting
Admin can decide whether product vendors must be approved before customers can view them on frontend store. Furthermore, admin can also require product approval for both the first time and the update.
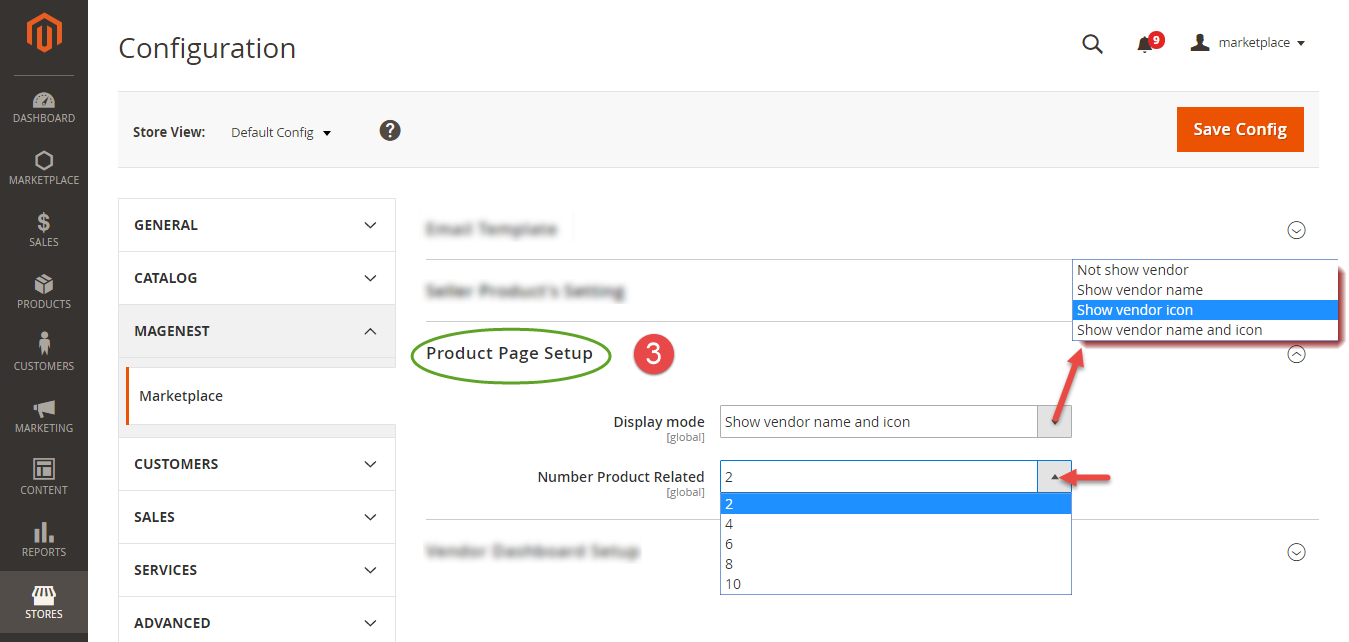
Product Page Setup
This tab allows admin to manage Product Detail Page in frontend store. Admin can decide to show vendor names, vendor icons or both of them. In addition, admins can choose one value from Number Product Related drop down list.
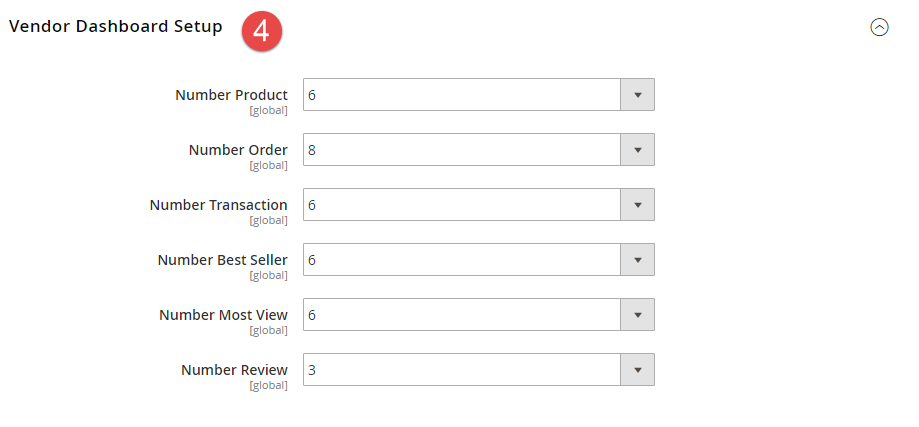
Vendor Dashboard Setup
Admin has the ability to set up Vendor Dashboard with Number Product, Number Order, Number Transaction, Number Best Seller, Number Most View, Number Review.
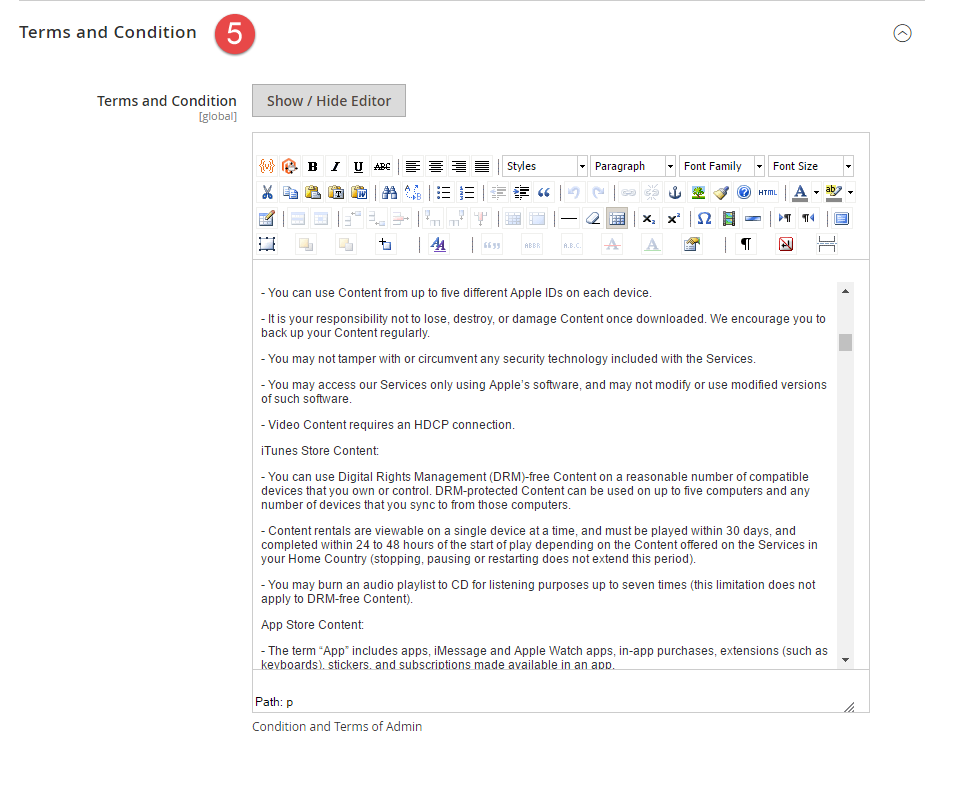
Terms and Condition
Store owners can add content for Terms and Condition for their marketplace:
Main Feature
For Vendor
- Set Up Vendor Account
Login Vendor Account:
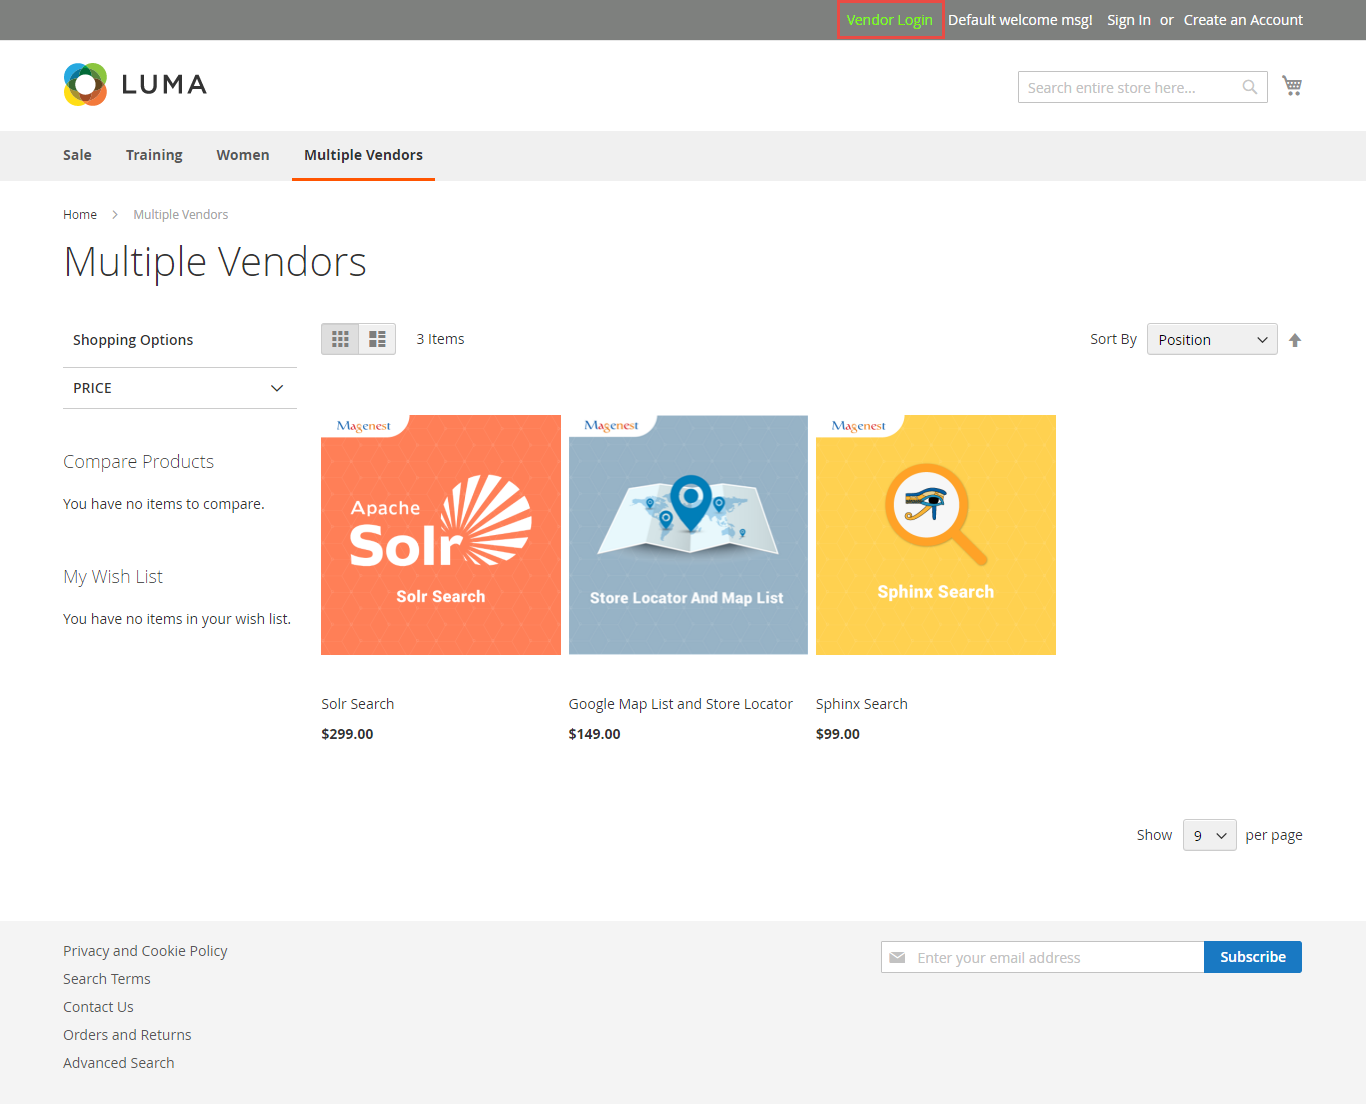
We have created Vendor Login button at the top right-hand corner.
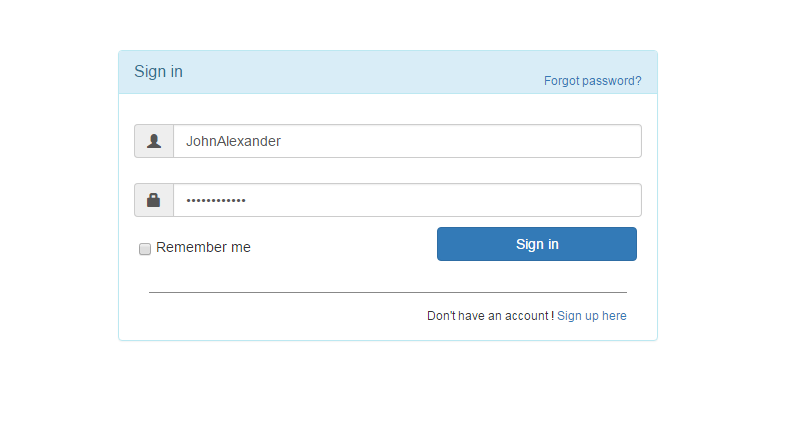
Vendors can sign in their account from here:
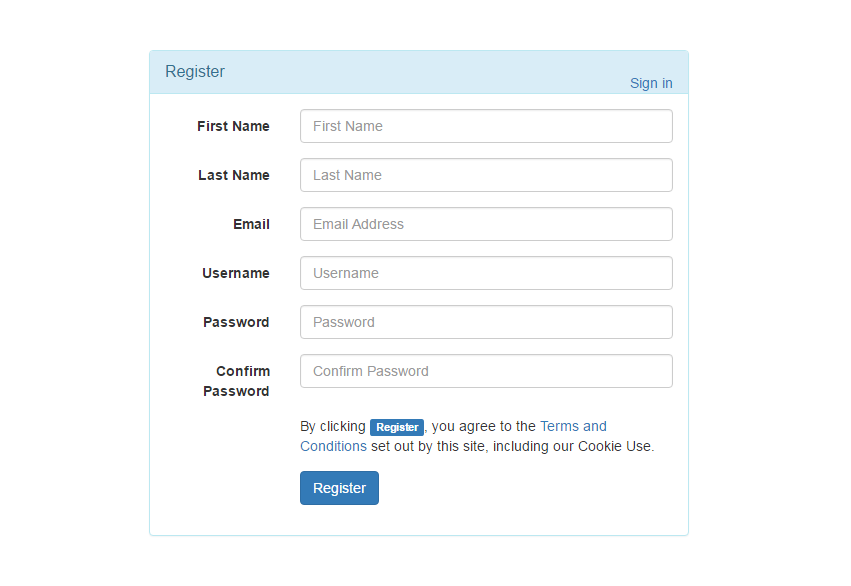
Or click on Sign up here button to create a new vendor account. It must be approved by the store owner to activate that vendor account.
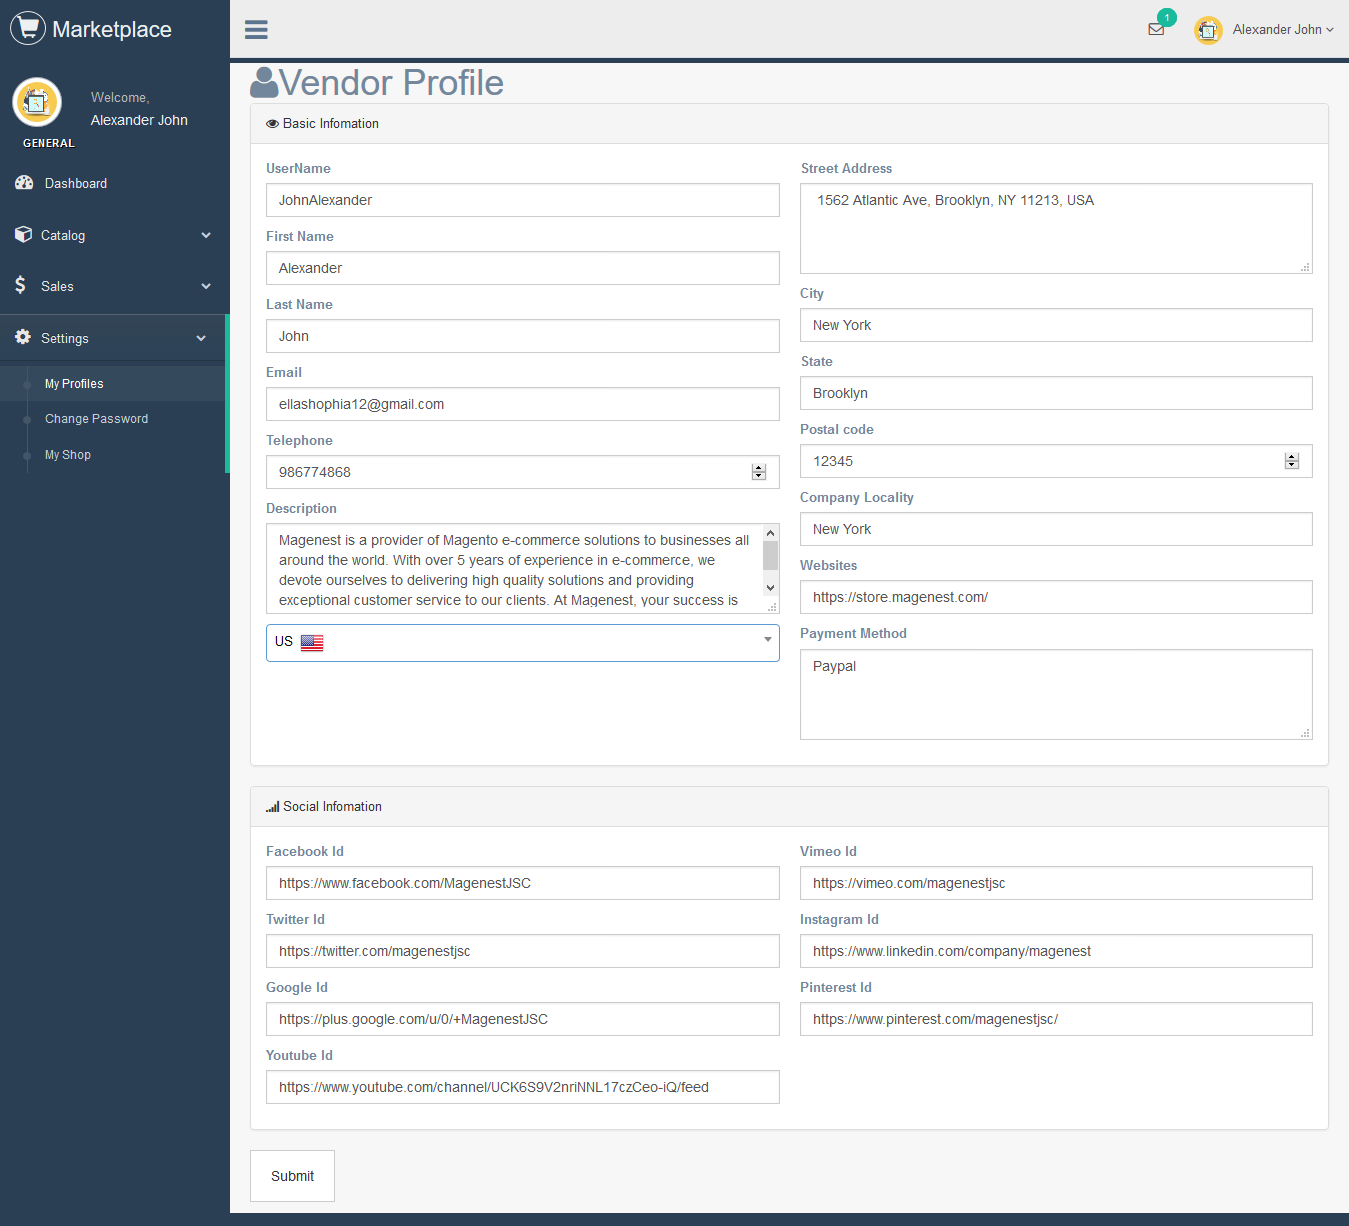
Manage Vendor Profile:
Navigate to Settings > My Profiles, vendors can set up their profile including username, email, telephone, address, payment method, country, social information. etc.
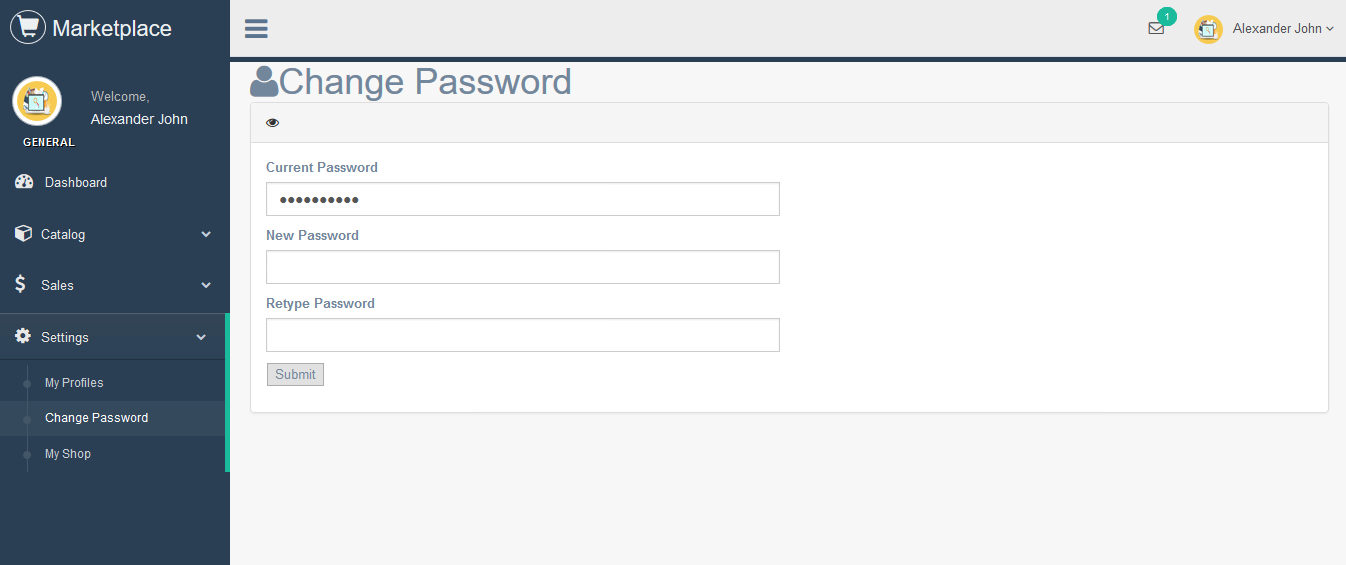
From vendor account, go to Settings > Change Password supplier can change their account password.
Setting Shop:
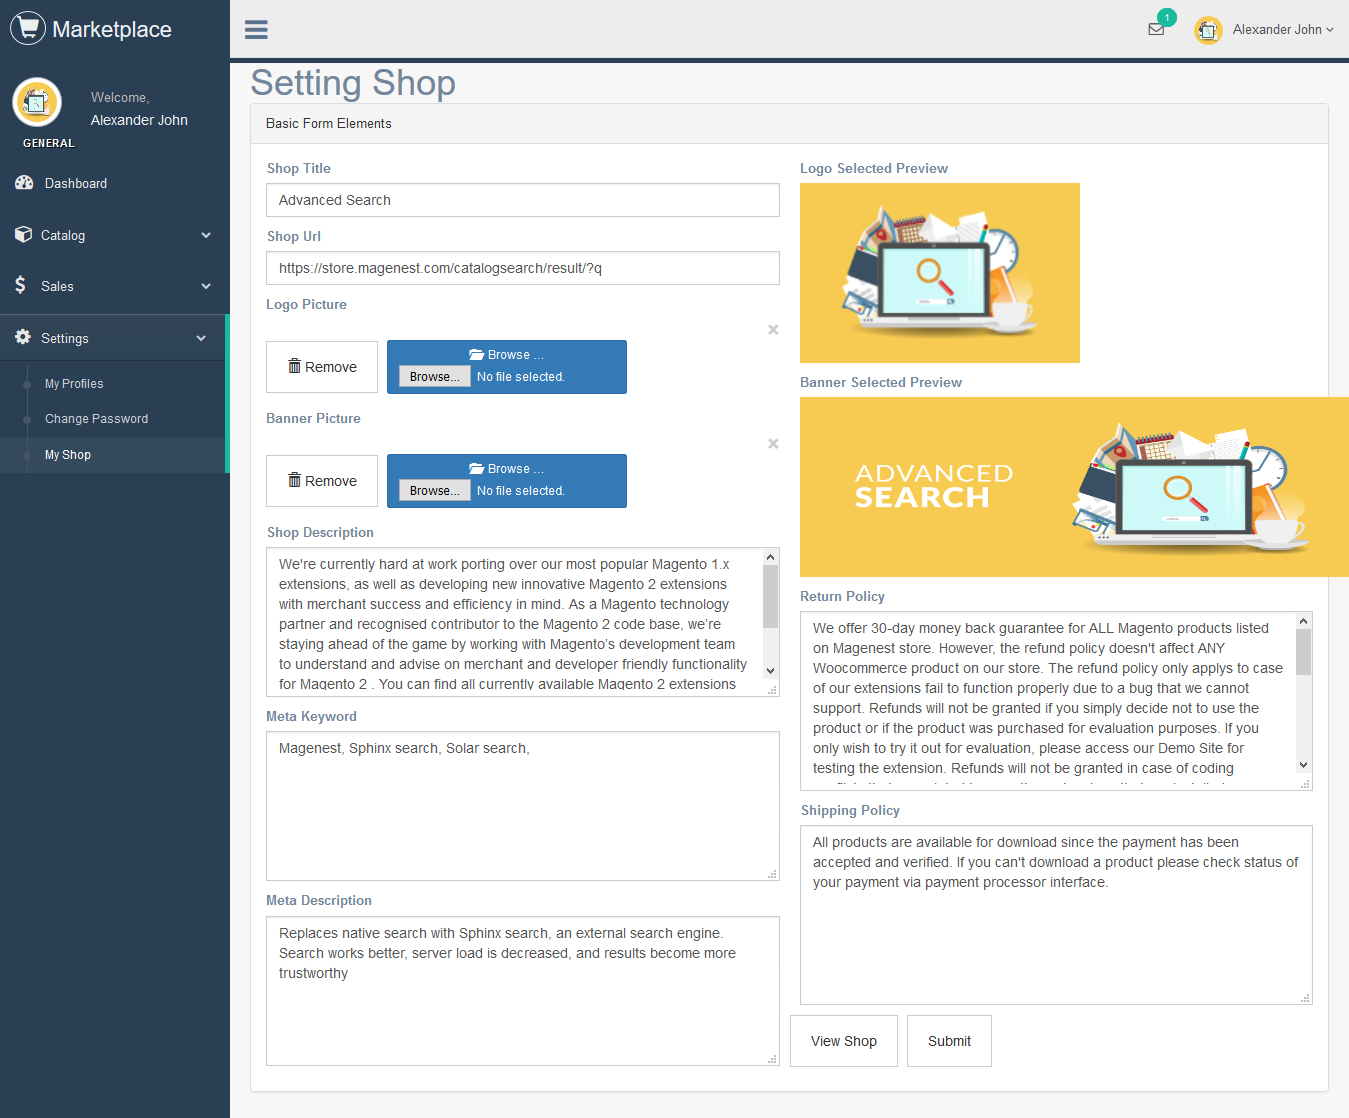
Last, vendors need to go to My Shop to build their store. After filling in form the necessary information and click on Submit button in the bottom right corner, suppliers can quickly view their store with View Shop button next to Submit button.
- Add New Products
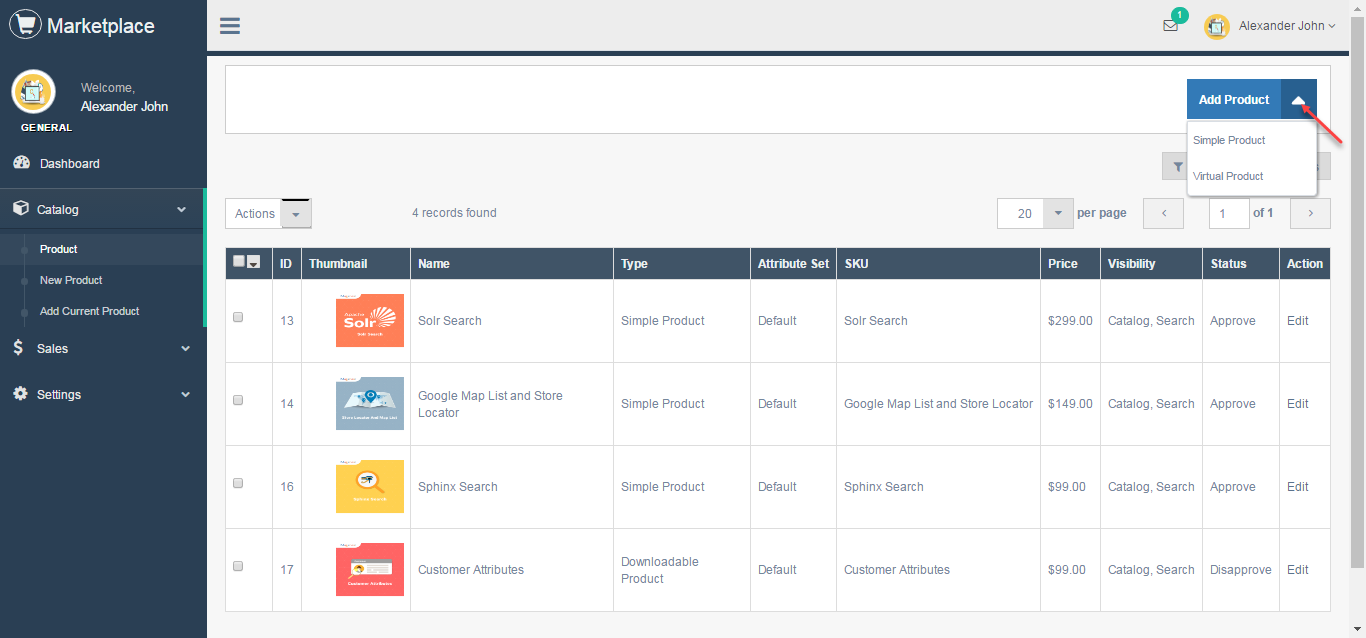
Vendors can click on New Product tab to create a new simple product or they can create another product type by choosing one from Add Product drop down list.
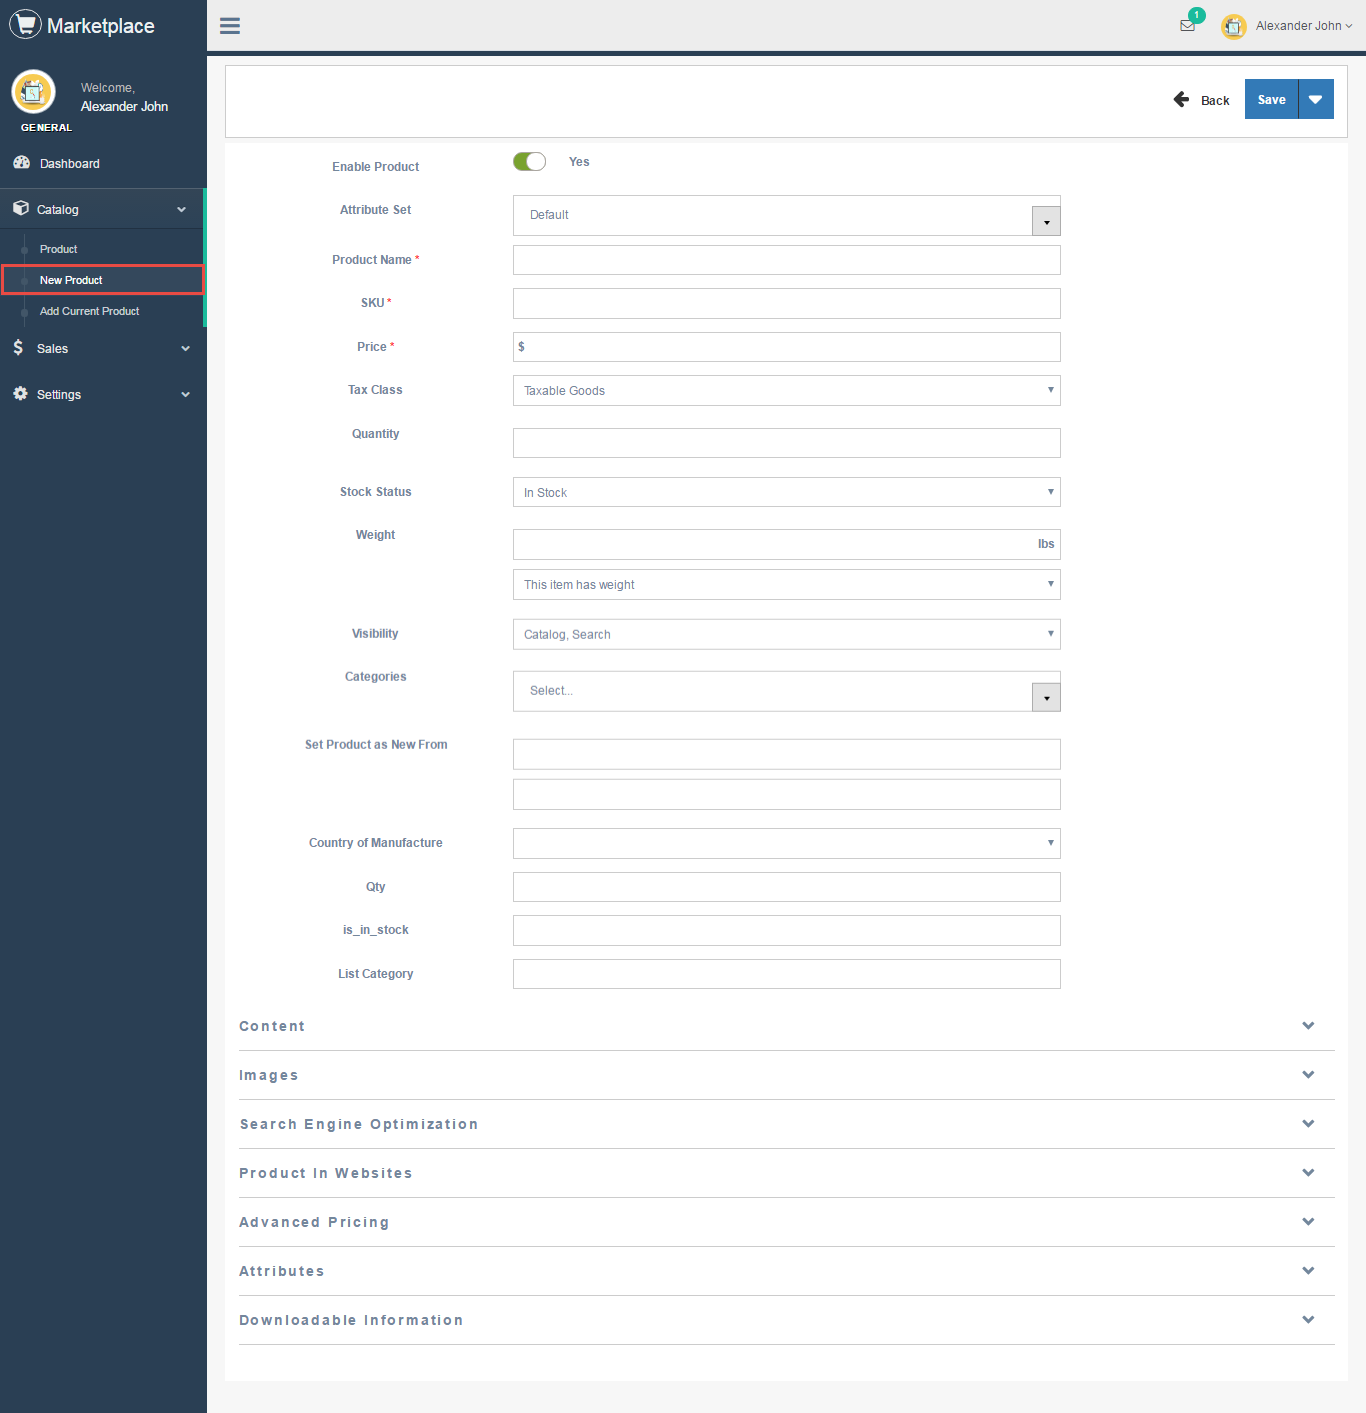
New Product Page appears as below. It is the same with the default of New Product Page in Magento 2 platform.
After that, click on Save Product button to save information entered.
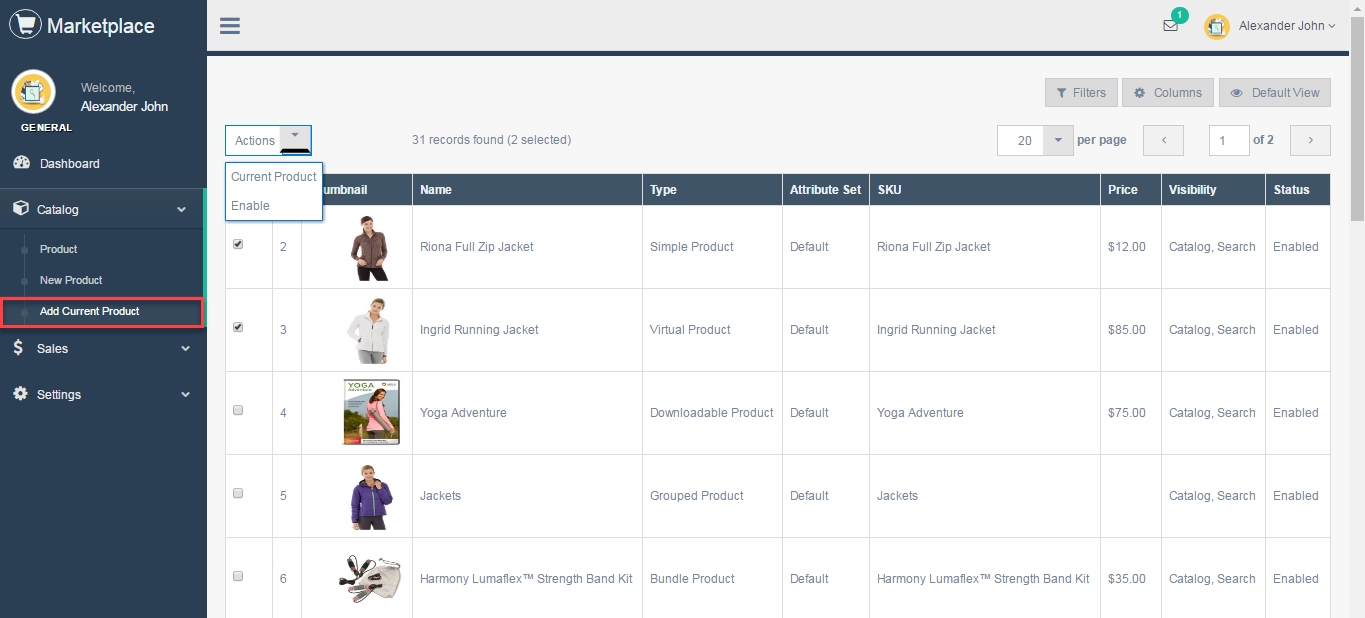
Especially, our extension allows vendors to create a new product from Add Current Product tab. In this way, store owners can help vendors create new products from backend of Magento 2 store. Then vendors just need to select the existing product and change its' product status from disable to enable.
- View Sales
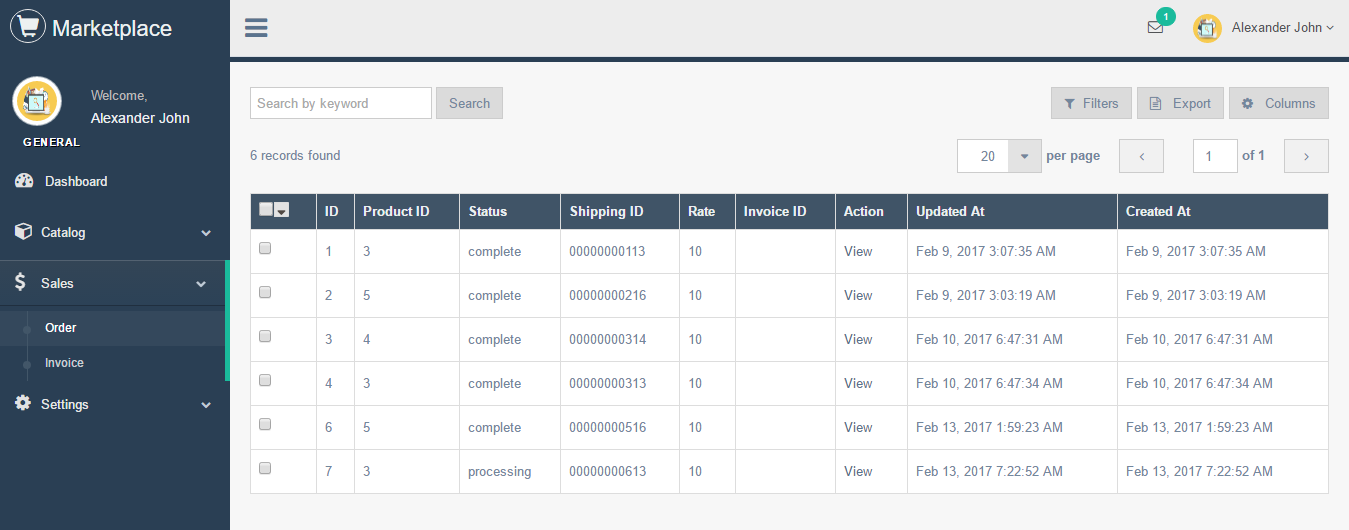
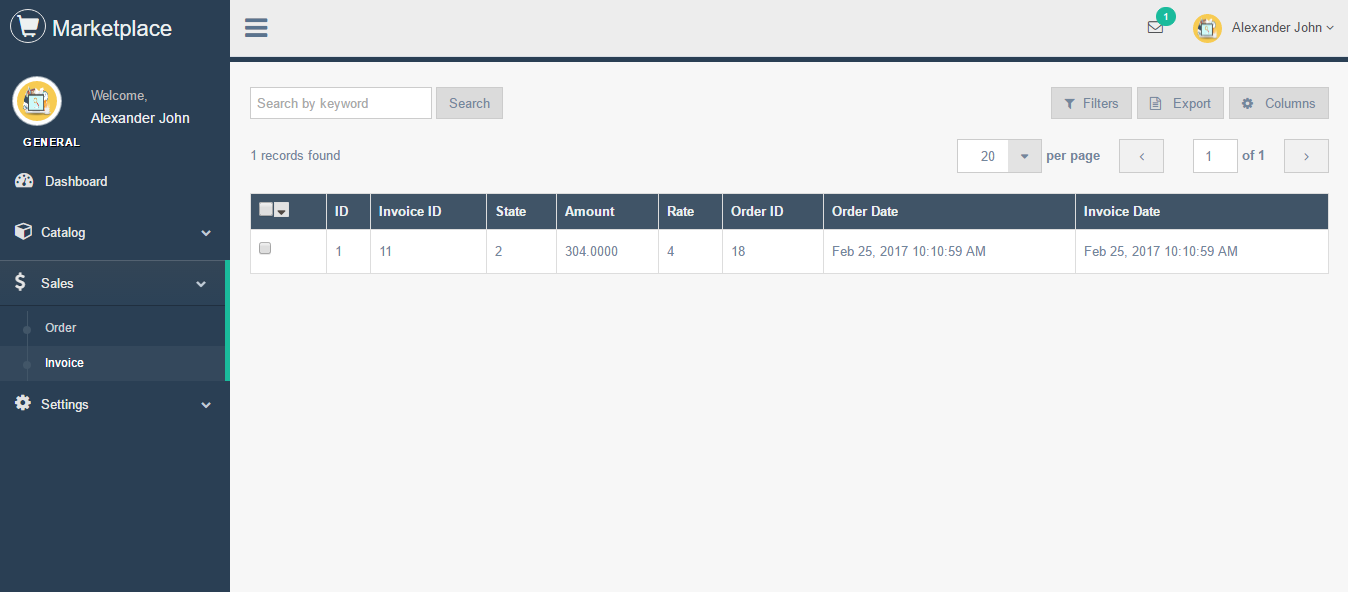
Vendors can view the sales in their shop easily:
Order:
Invoices:
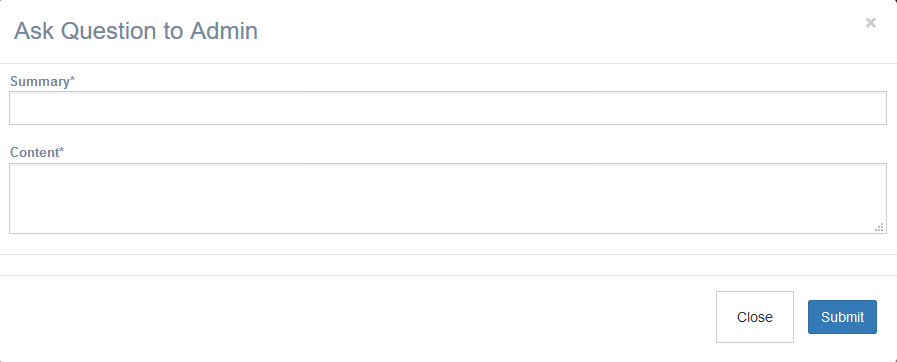
- Ask Question to Admin
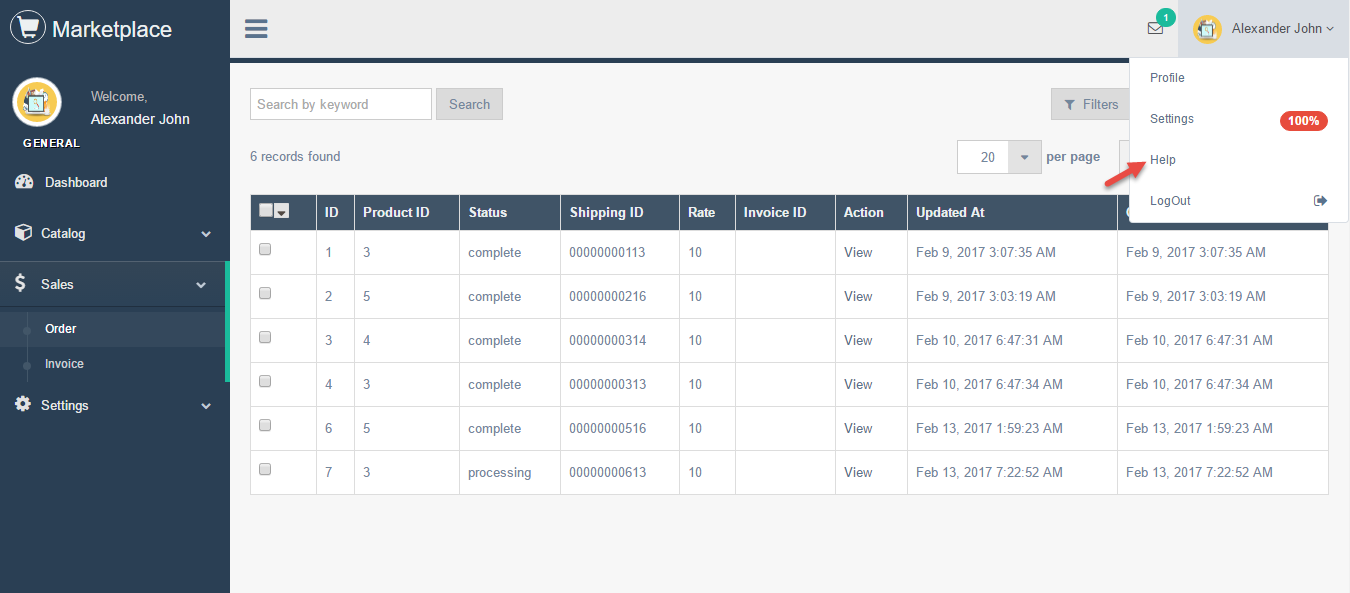
If vendors would like to submit a question to store owner, they can navigate to My account > Help:
Then filling out the form as bellow:
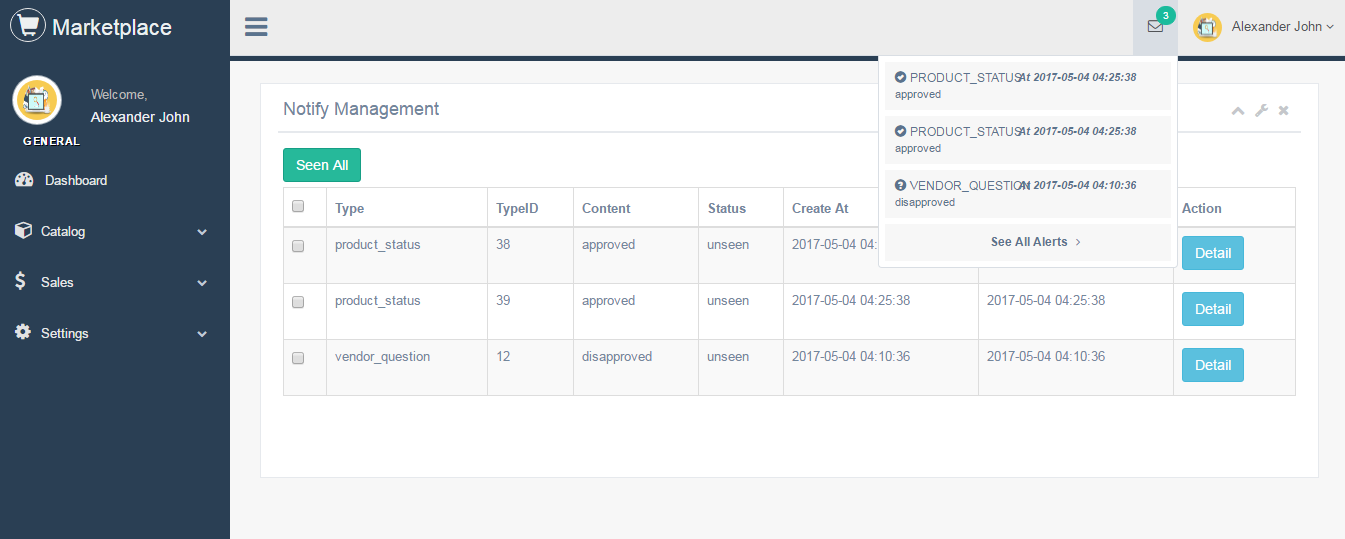
Especially, the system will create a notification when there is any event in vendors' shop:
Vendors can view the notification in more detail by click on Detail button:
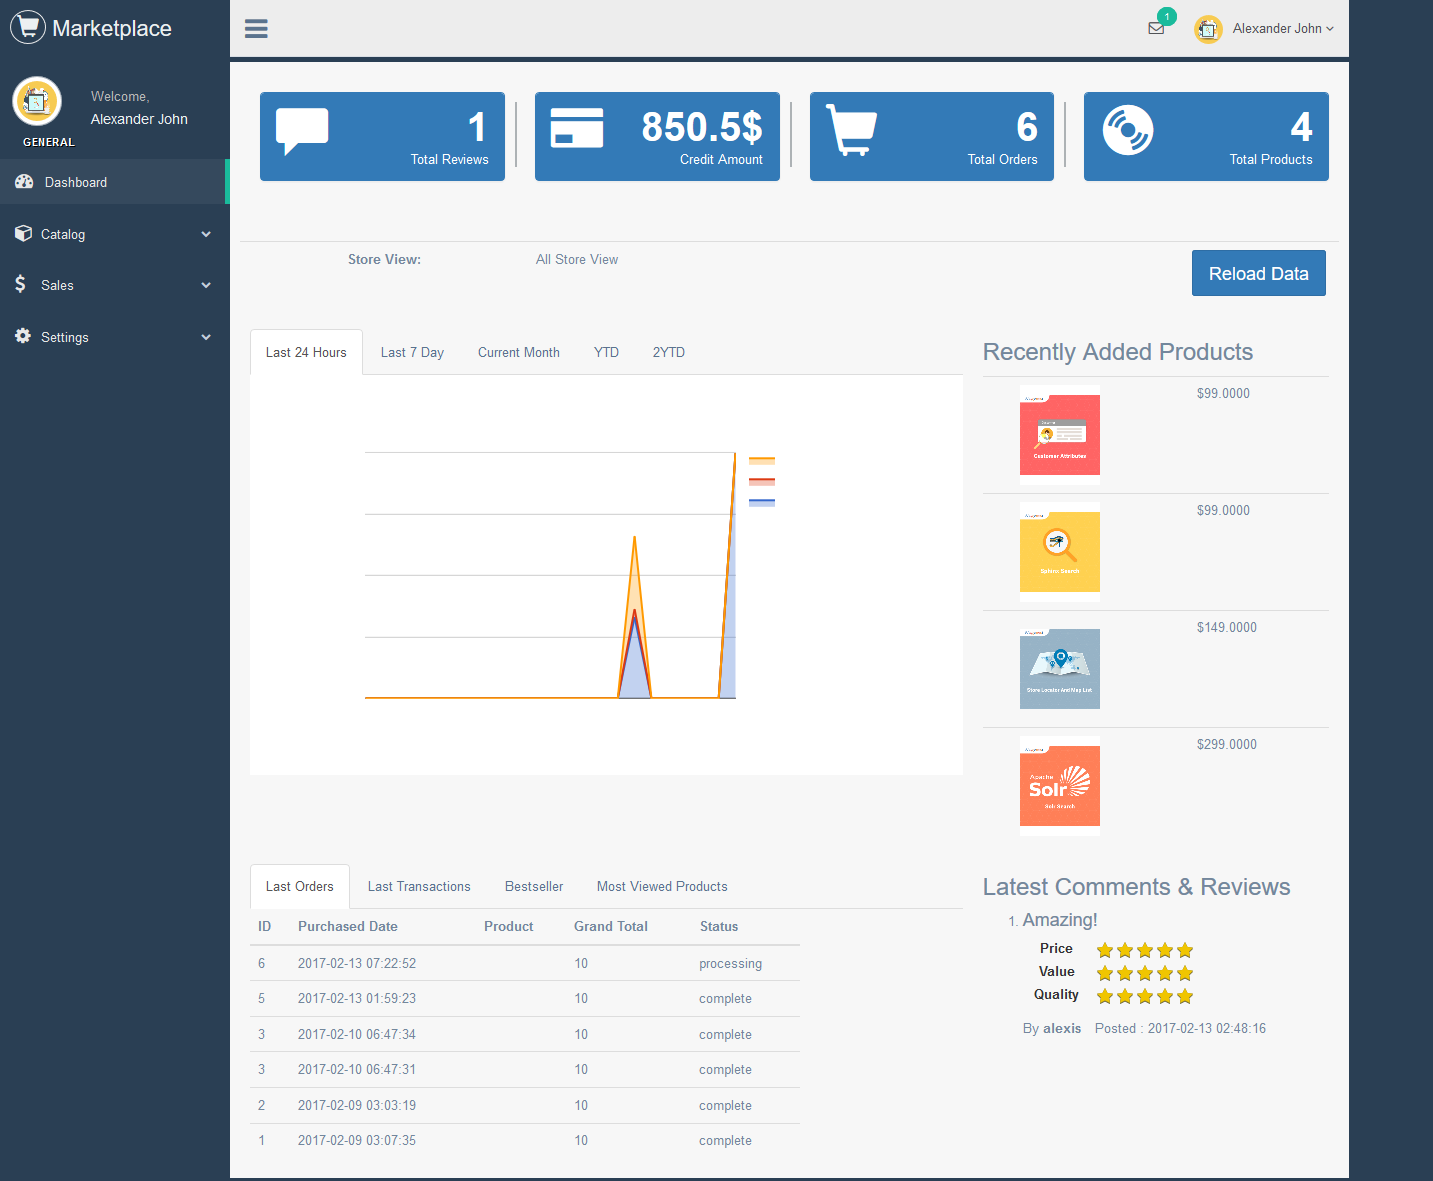
- View Vendor Dashboard:
All information related to vendor account as reviews, credit amount, orders, products will be listed in Vendor Dashboard:
For Customer
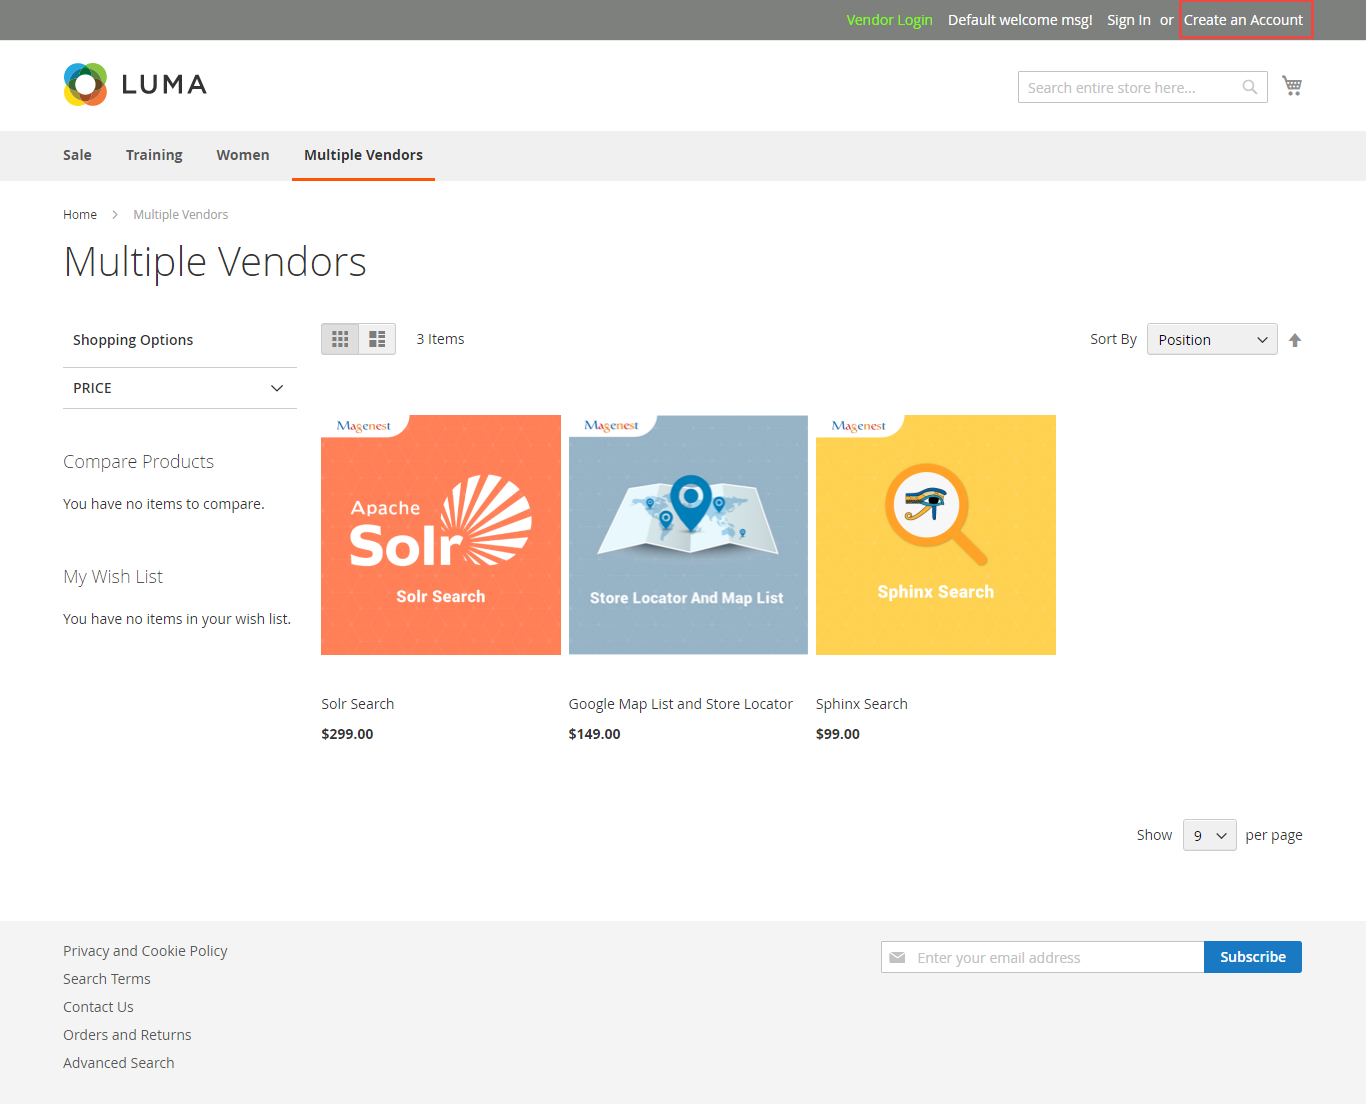
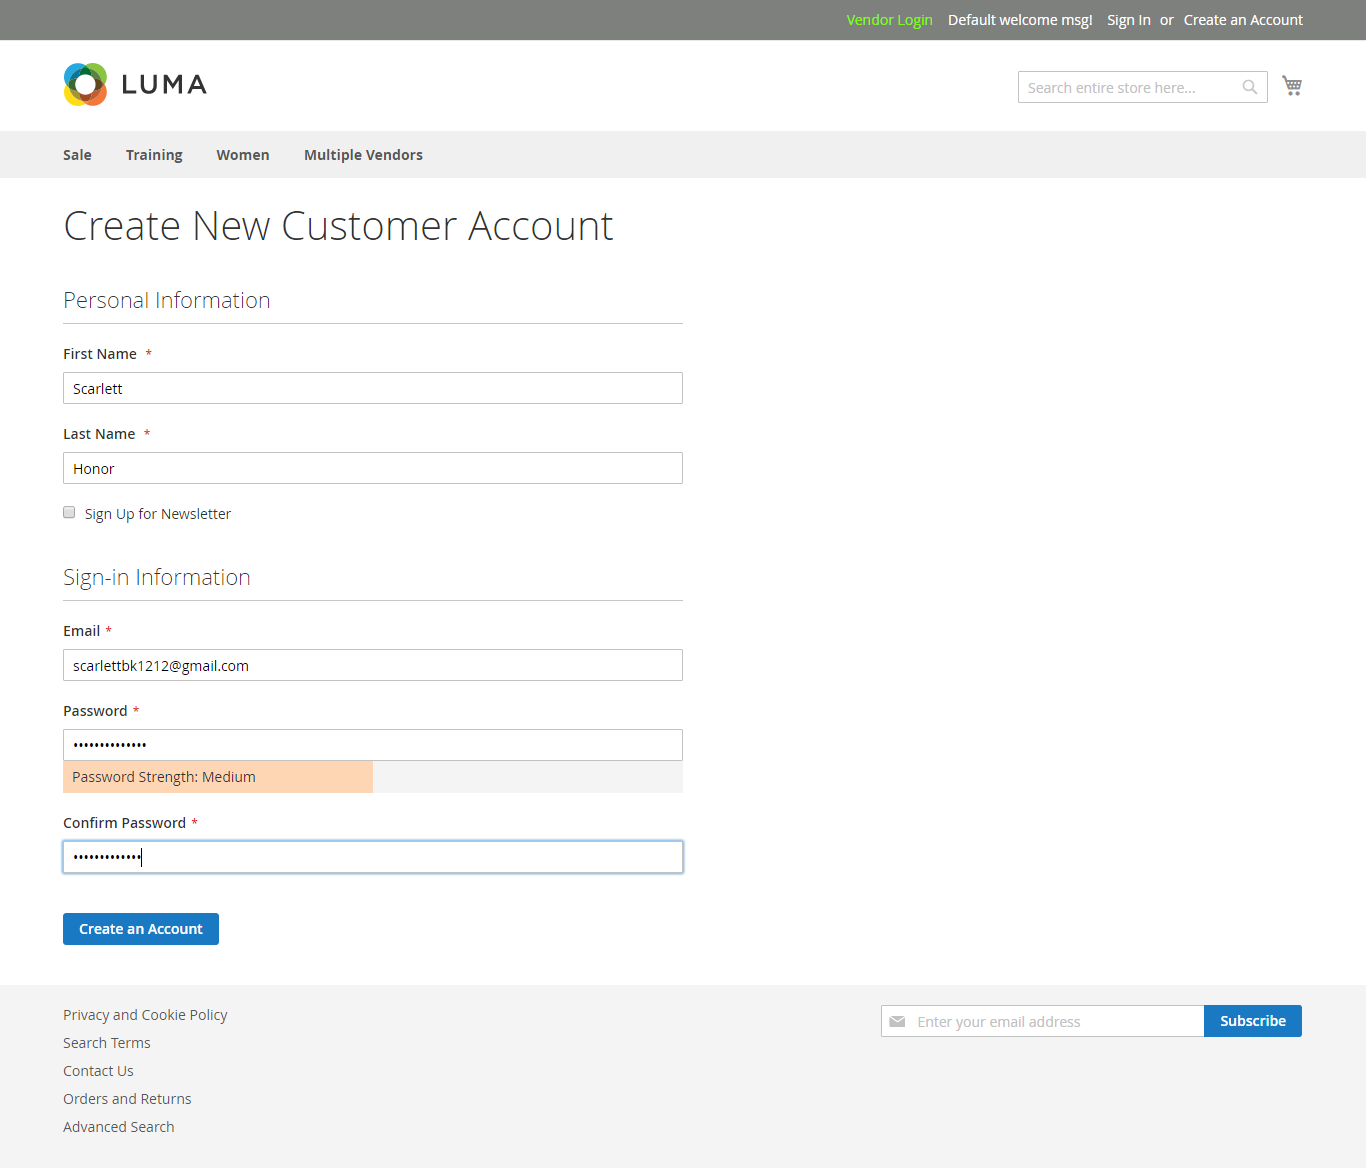
From front end of Magento 2 store, customers can sign up a new account or sign in as usual.
The Customer Registration page is the default in Magento 2 platform.
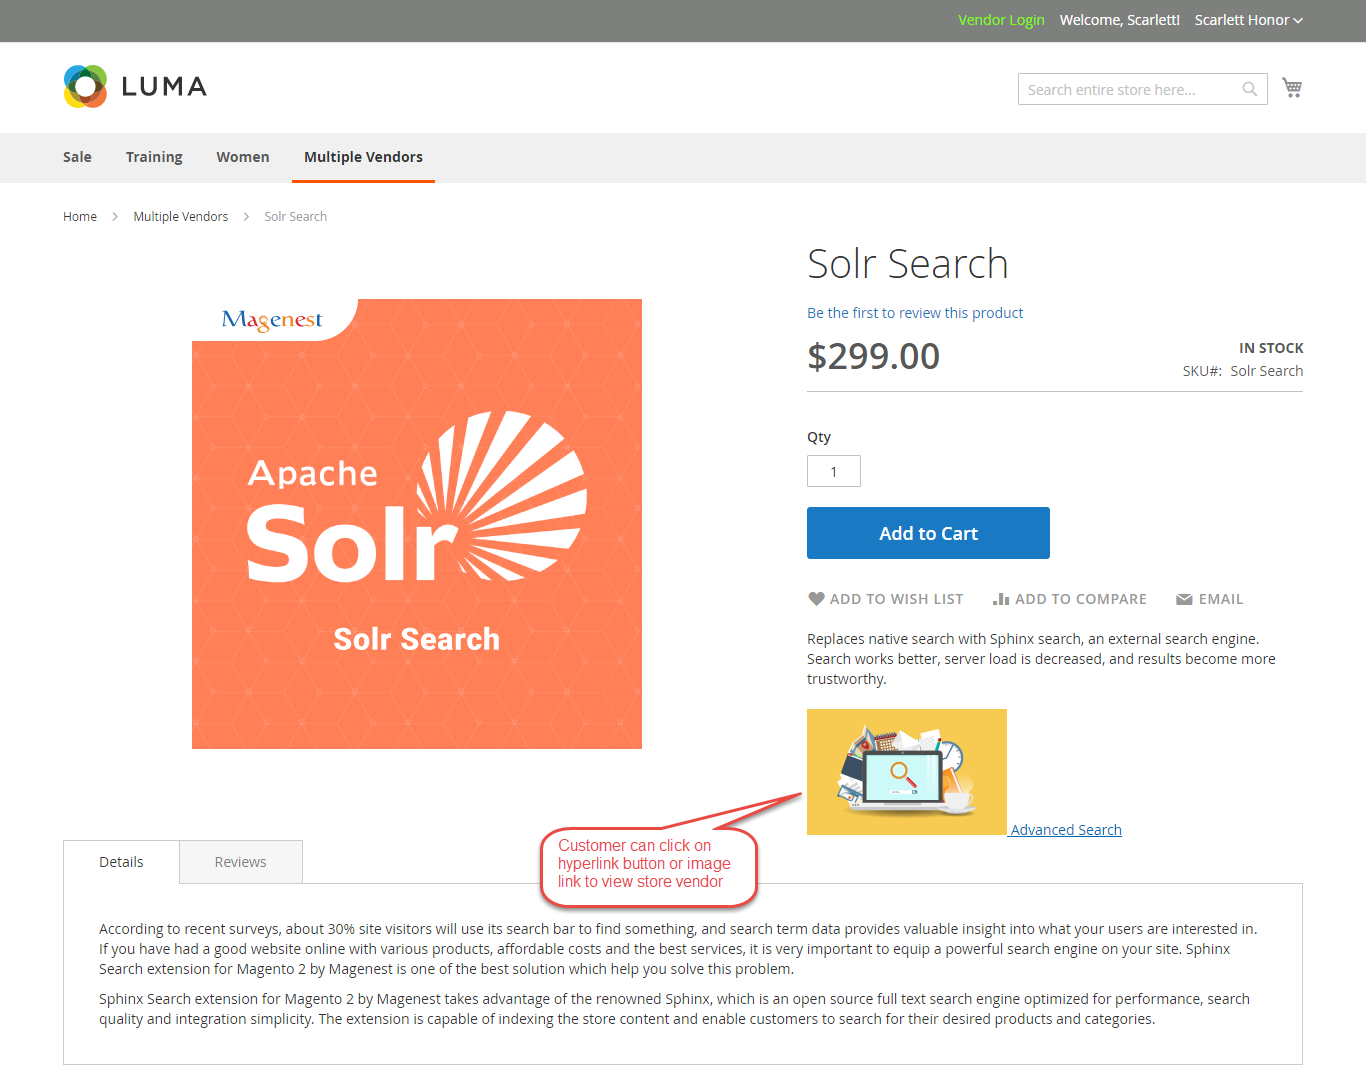
In Product Detail Page, Multiple Vendor extension by Magenest allows store owners to display vendors' shop hyperlink, image link or both of them:
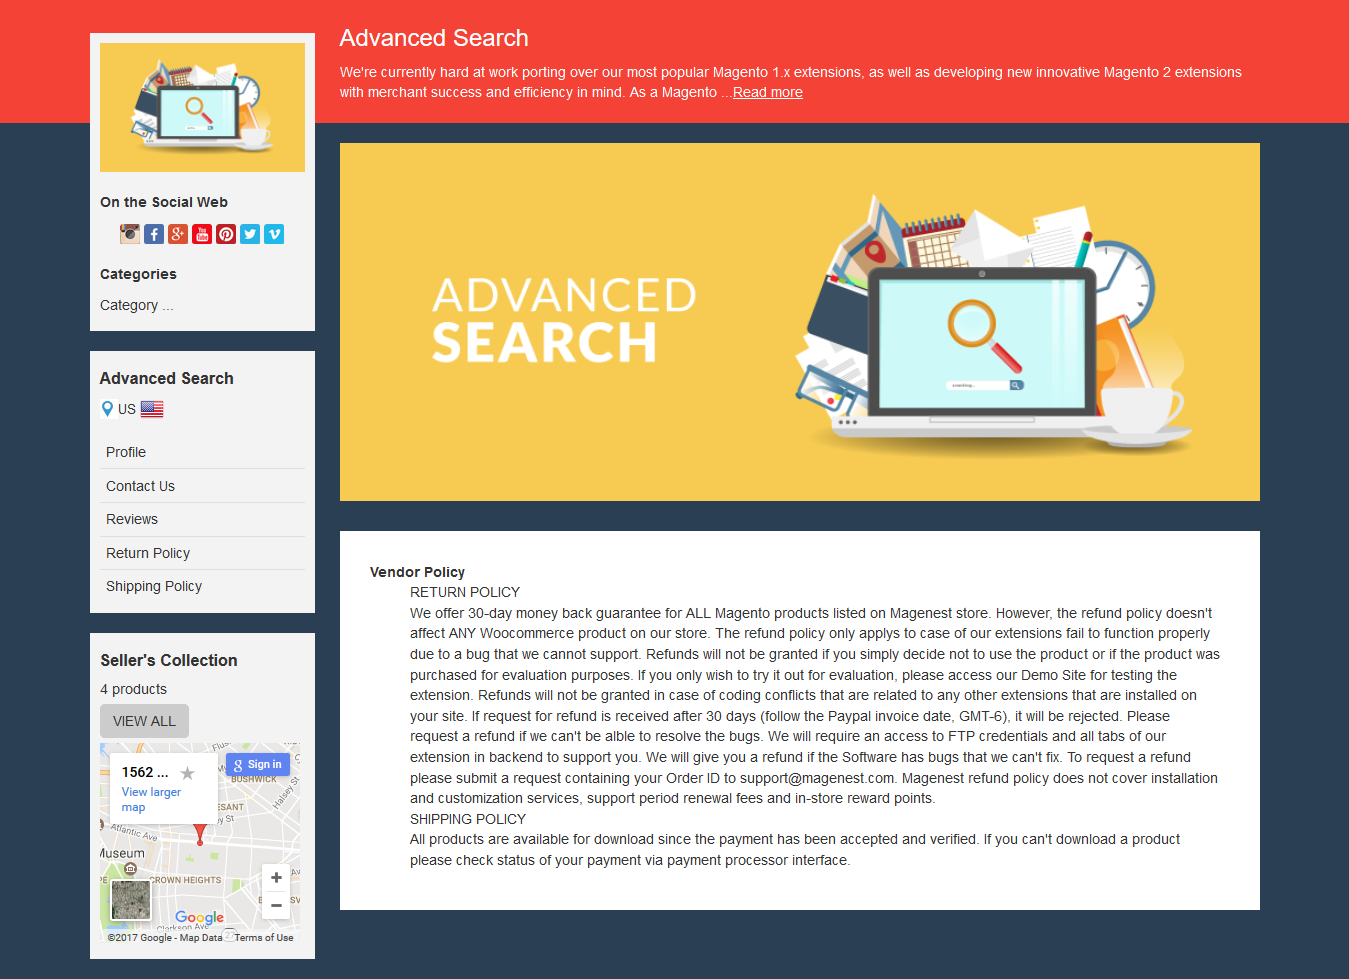
Based on this hyperlink, customers can easily view vendor shop:
Policy:
All vendor policy about return policy and shipping policy will be shown.
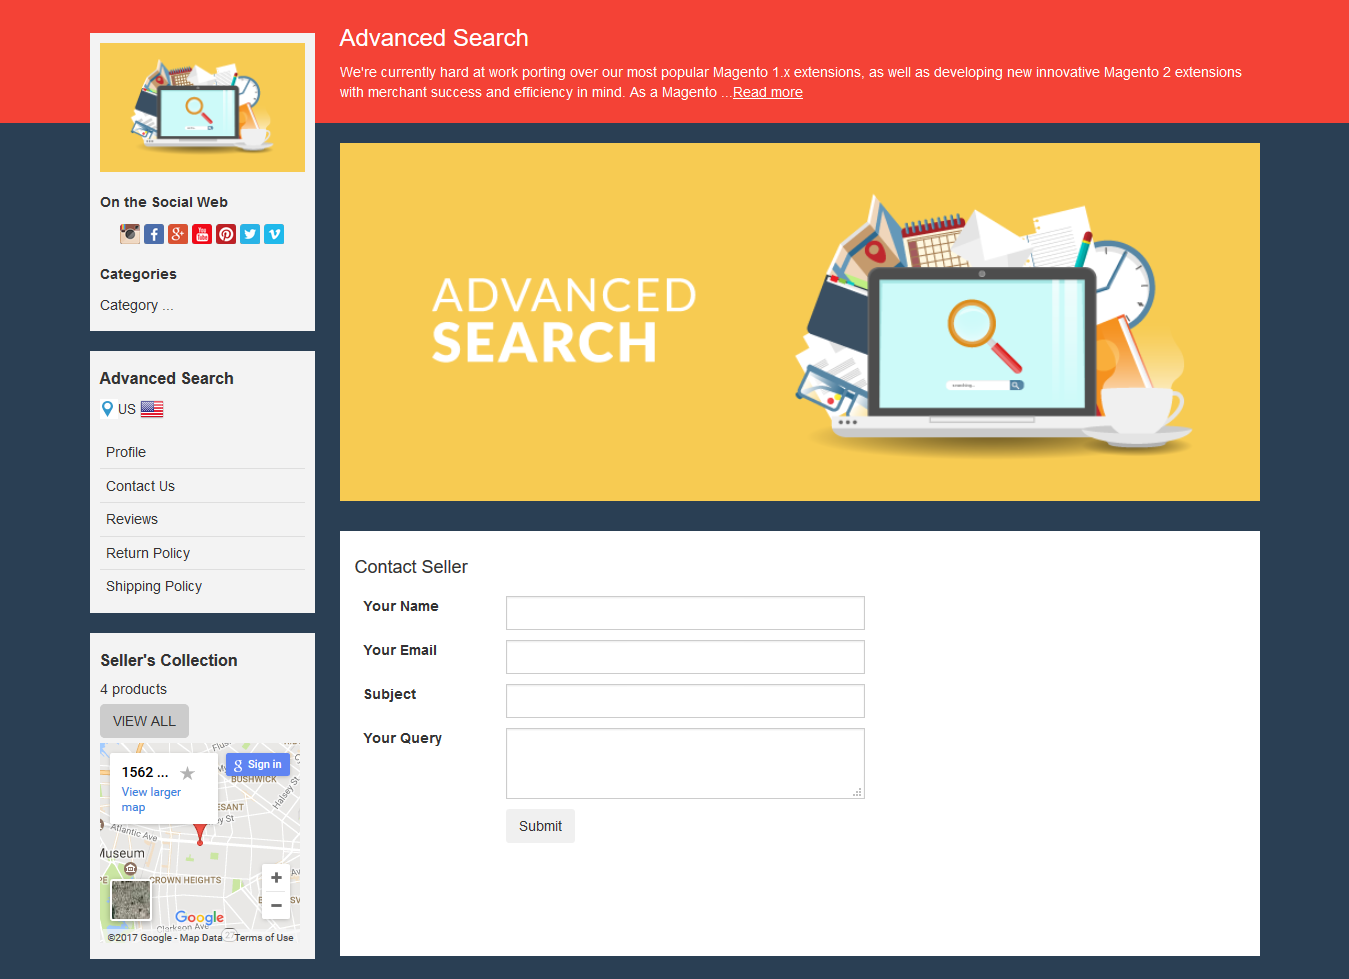
Contact Seller:
Customer can directly make contact with seller or vendor from vendor shop via Contact Seller form:
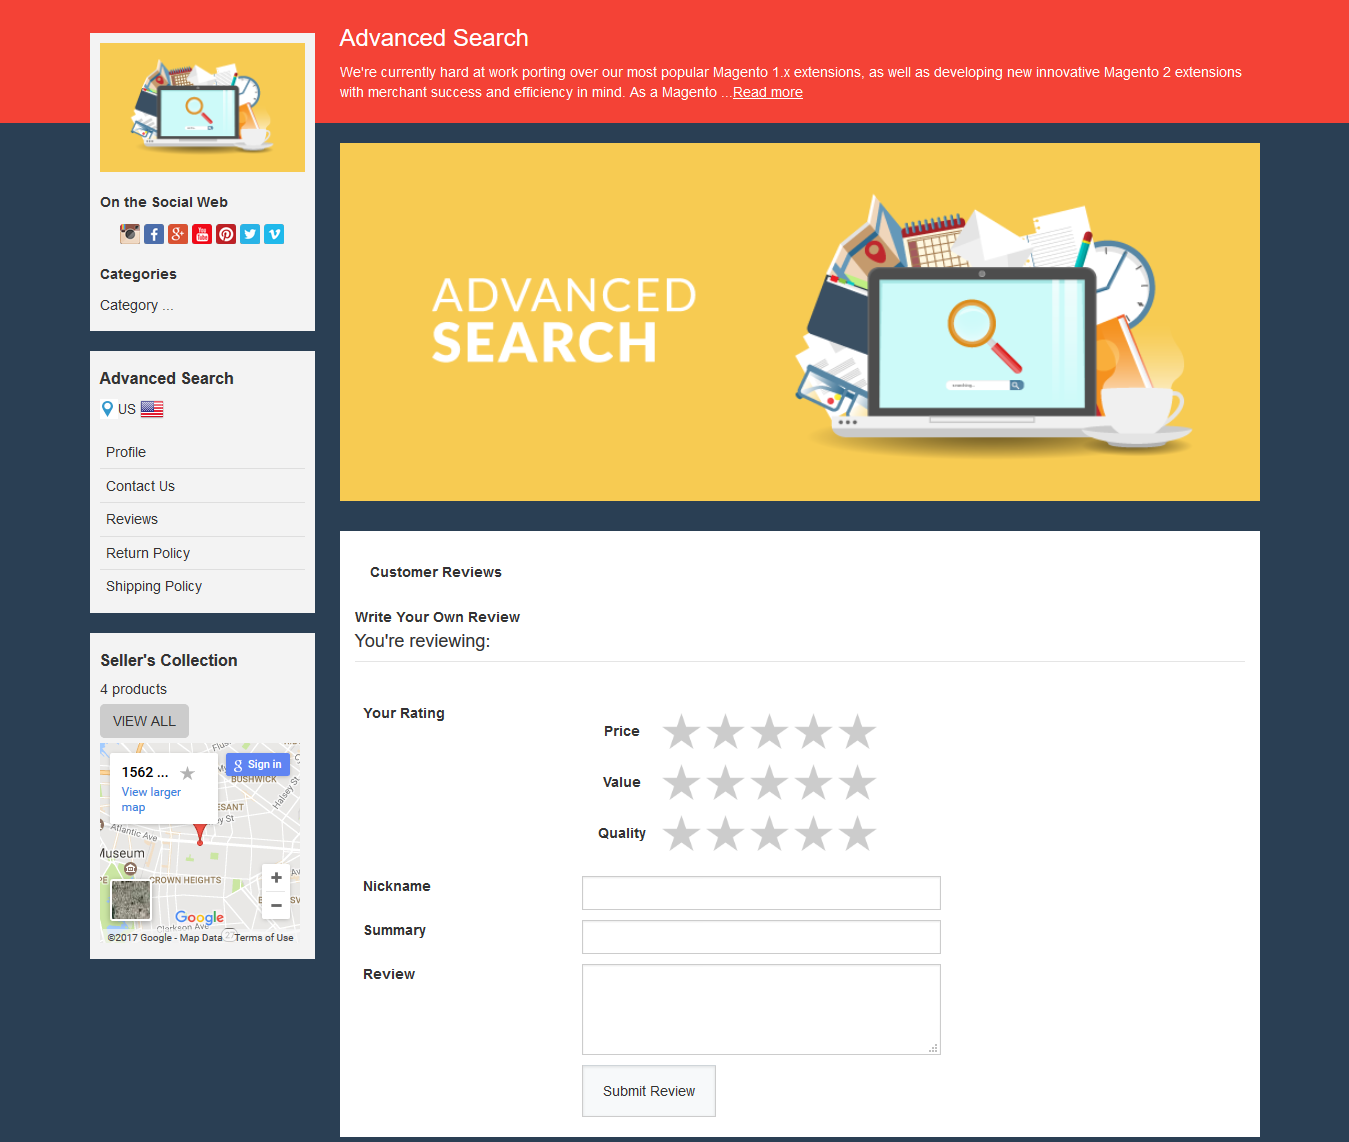
Reviews for vendor shop:
Customer can also write a review for vendor shop:
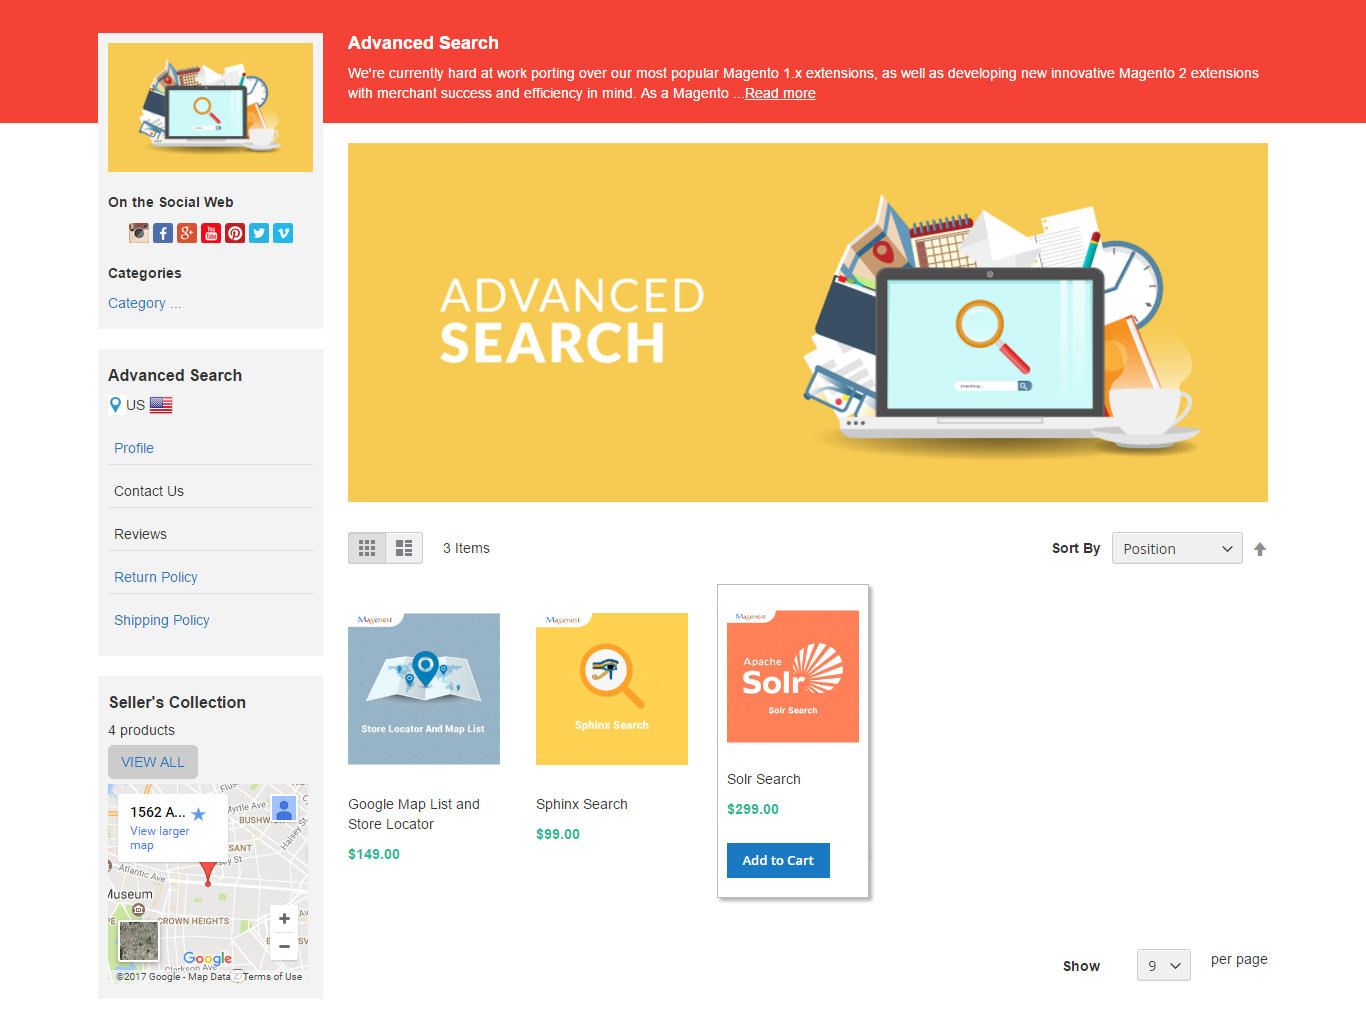
Categories:
Customers can add vendor products to their card from vendor's categories:
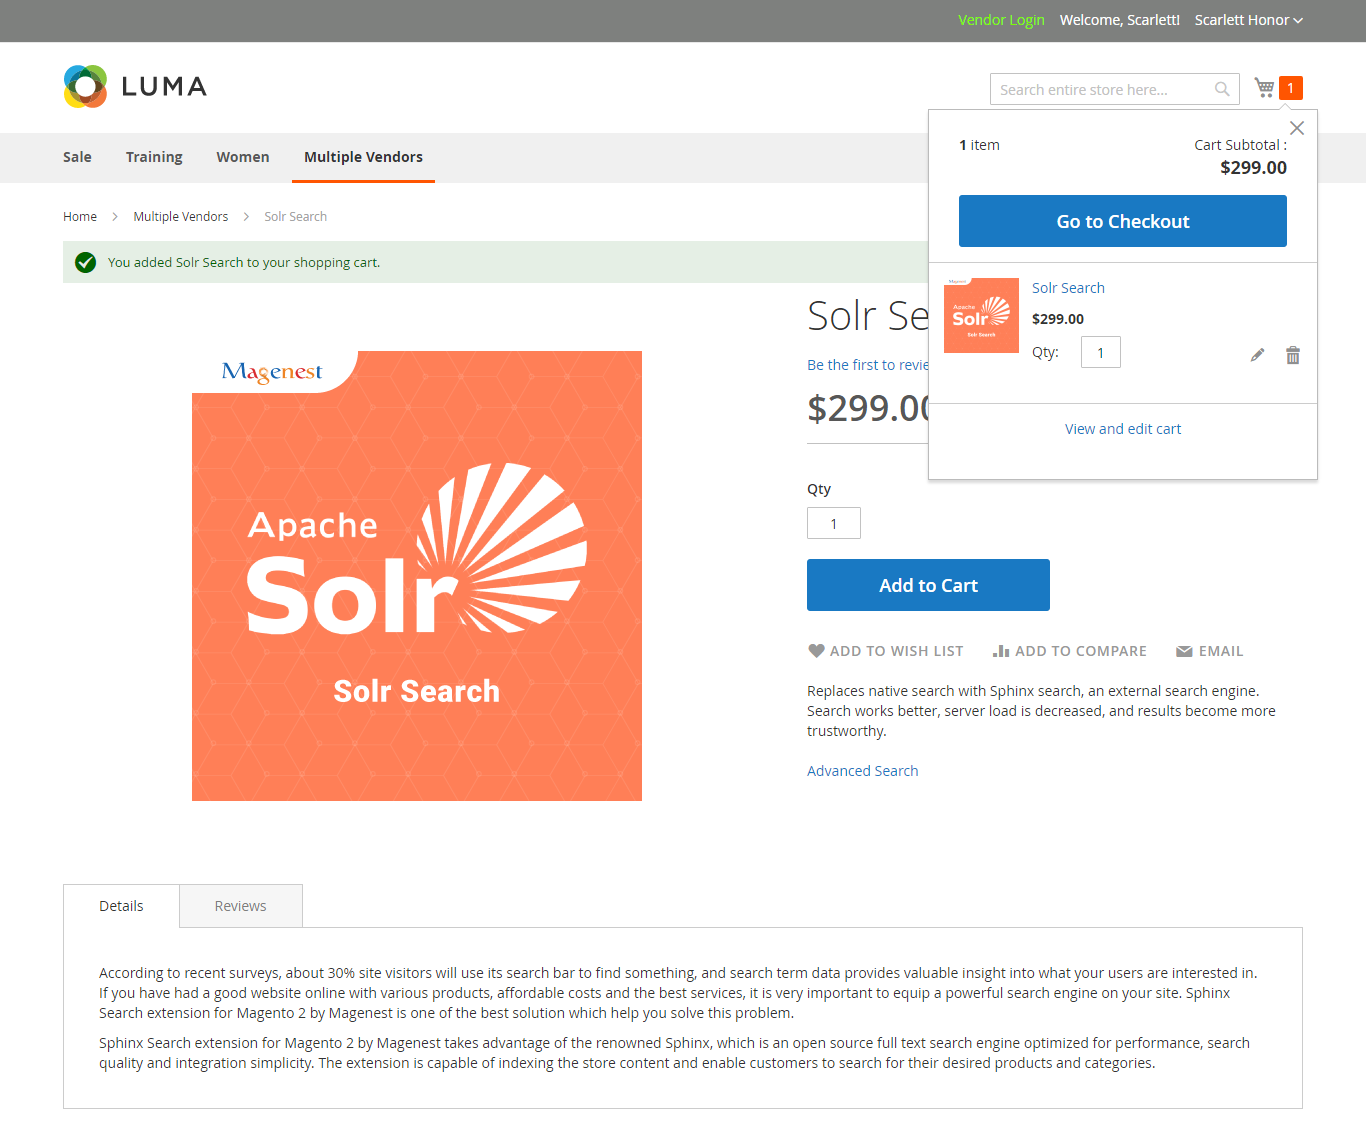
Or go to the product detail page. After that, the customer will checkout using the default in Magento 2 platform.
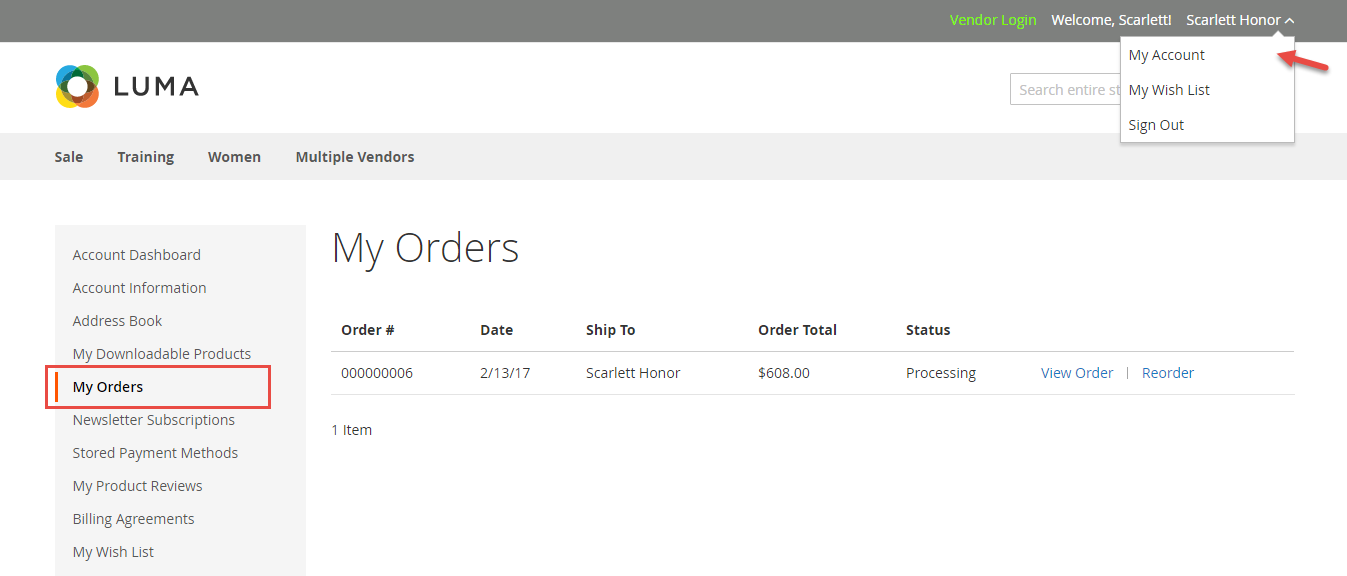
Customers' order will be listed in their account:
For Admin
The following is the great features that this extension brings for admin.
- Manage Vendors
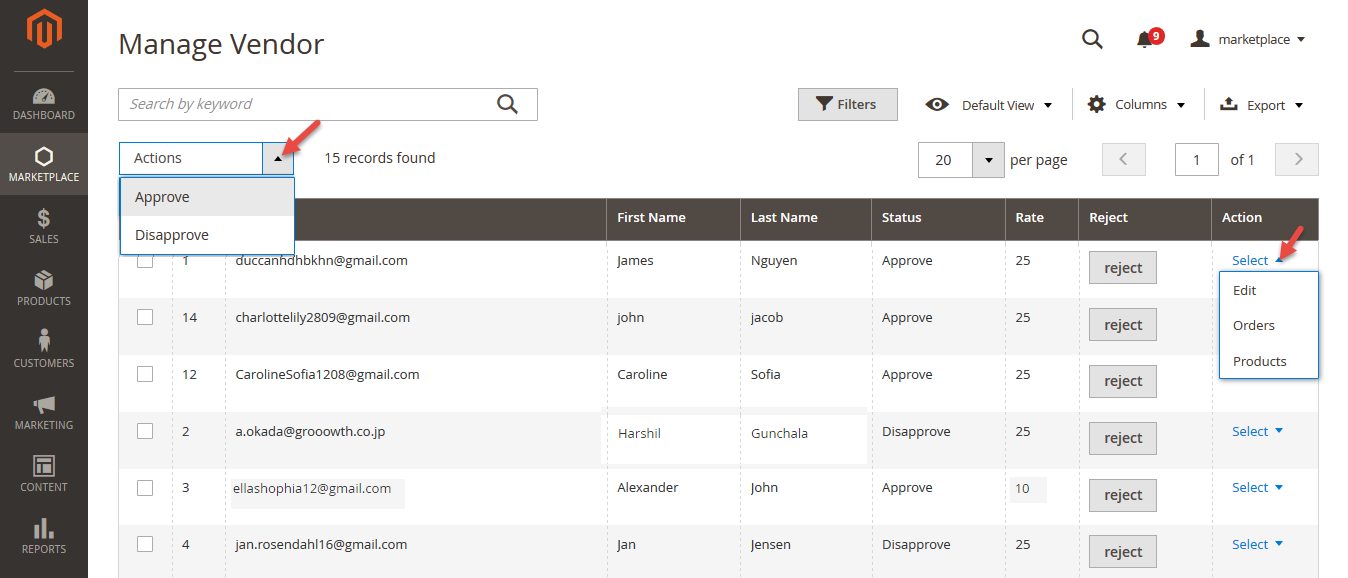
Admin can manage vendor information such as Name Vendor, Email Vendor, Setting Shop... Especially, vendor accounts need approval from store owners before the beginning.
Click Select > Edit button if admin wants to view or implements any changes about the vendor information:
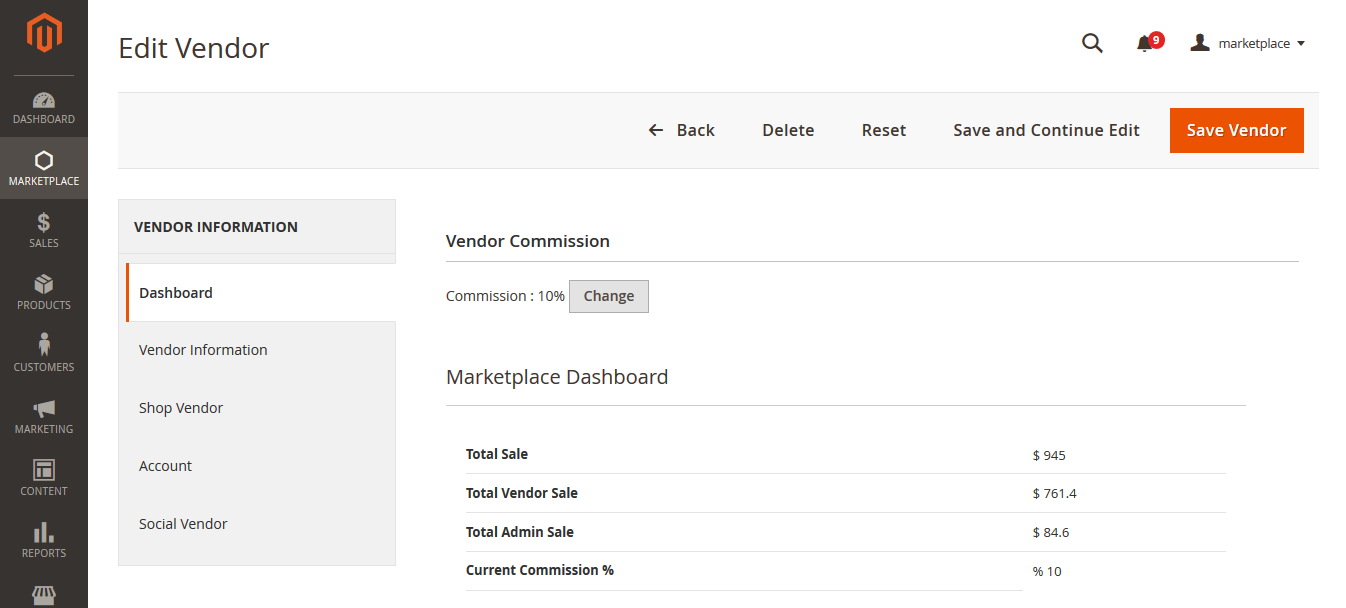
Commission:
The store owner has the ability to set up commission between store owner and vendors. Store owners can decide how much commission a specific vendor must pay for selling an item.
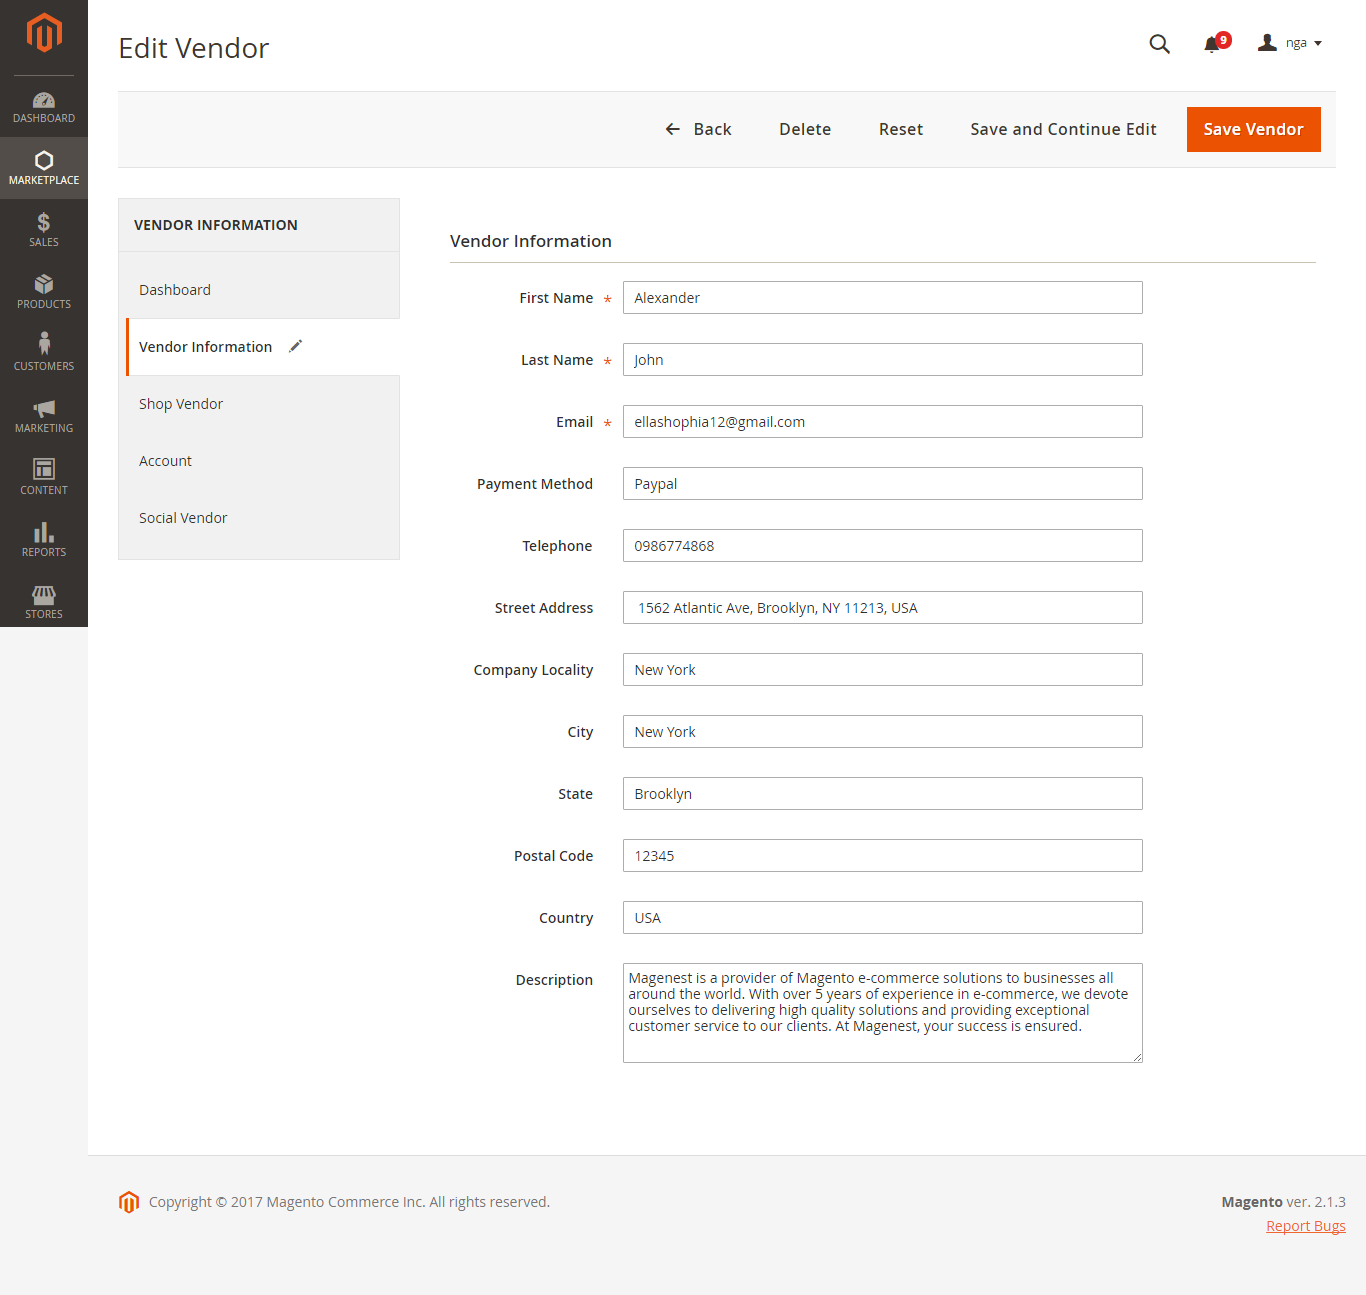
Vendor Information:
This tab shows the profile of vendor.
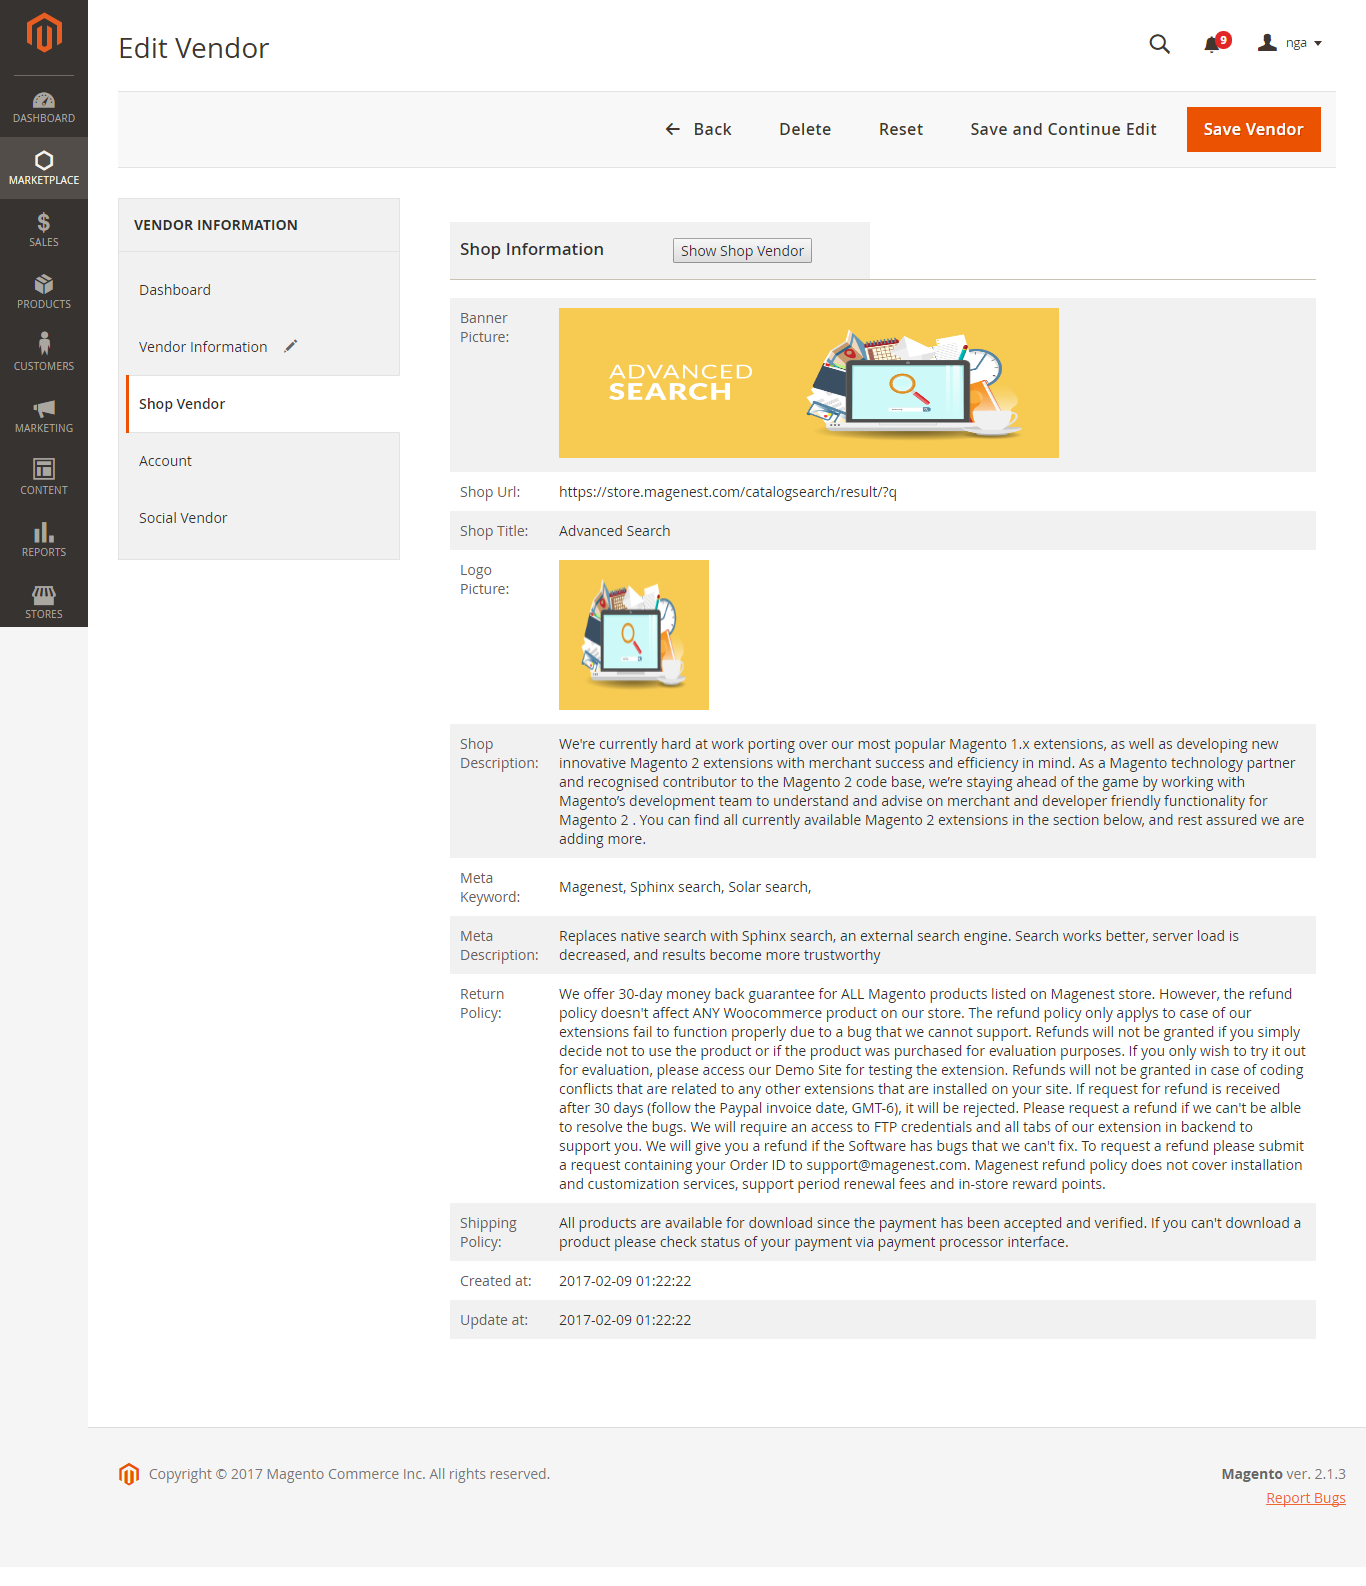
Shop Vendor:
Information related to vendor shop will be shown this tab. In addition, admin can view this vendor store quickly by click on Show Shop Vendor button.
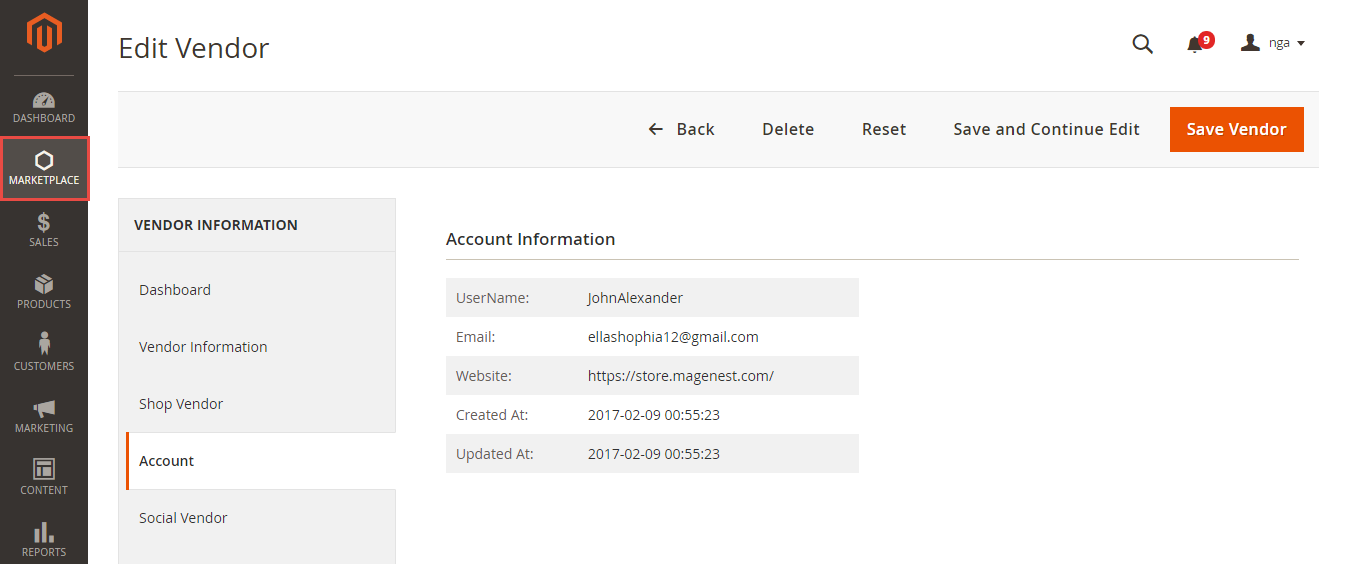
Account:
Store owners can quickly view vendor account information, including, username, email, website, created at, updated at:
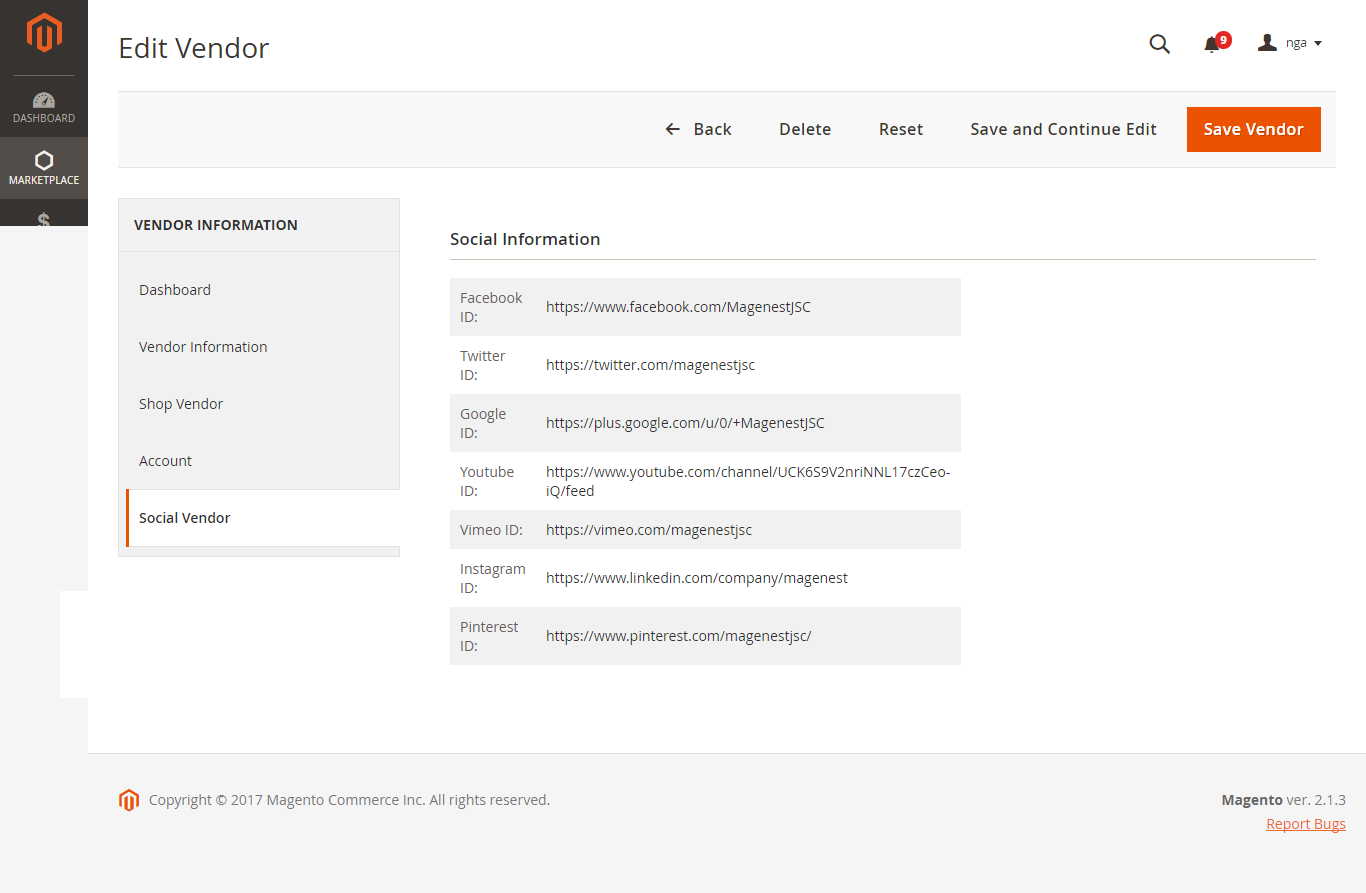
Social Vendor:
This tab display all social ID of vendors, including Facebook, Twitter, Google, etc.
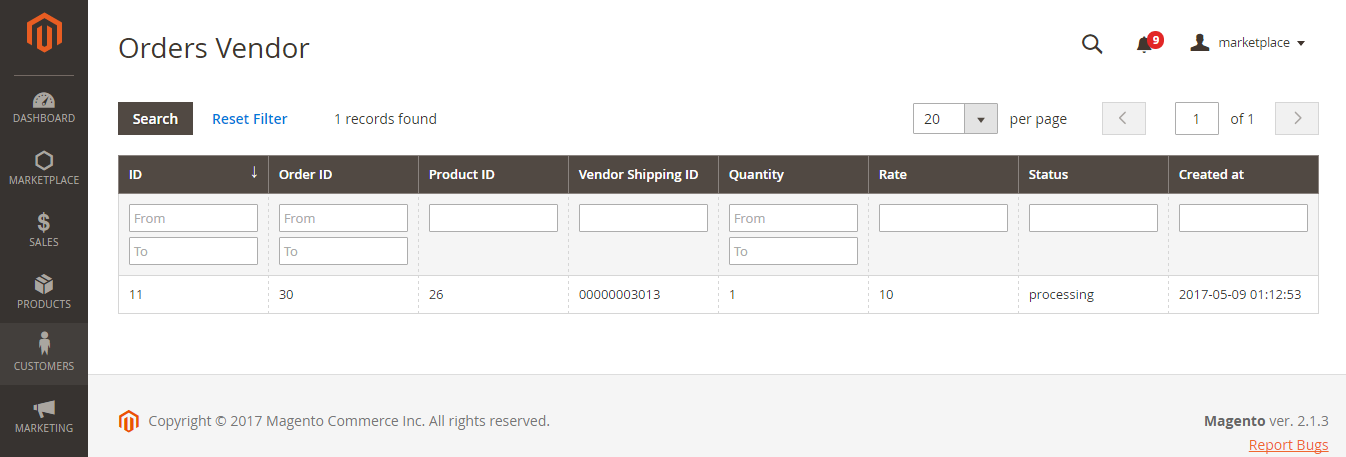
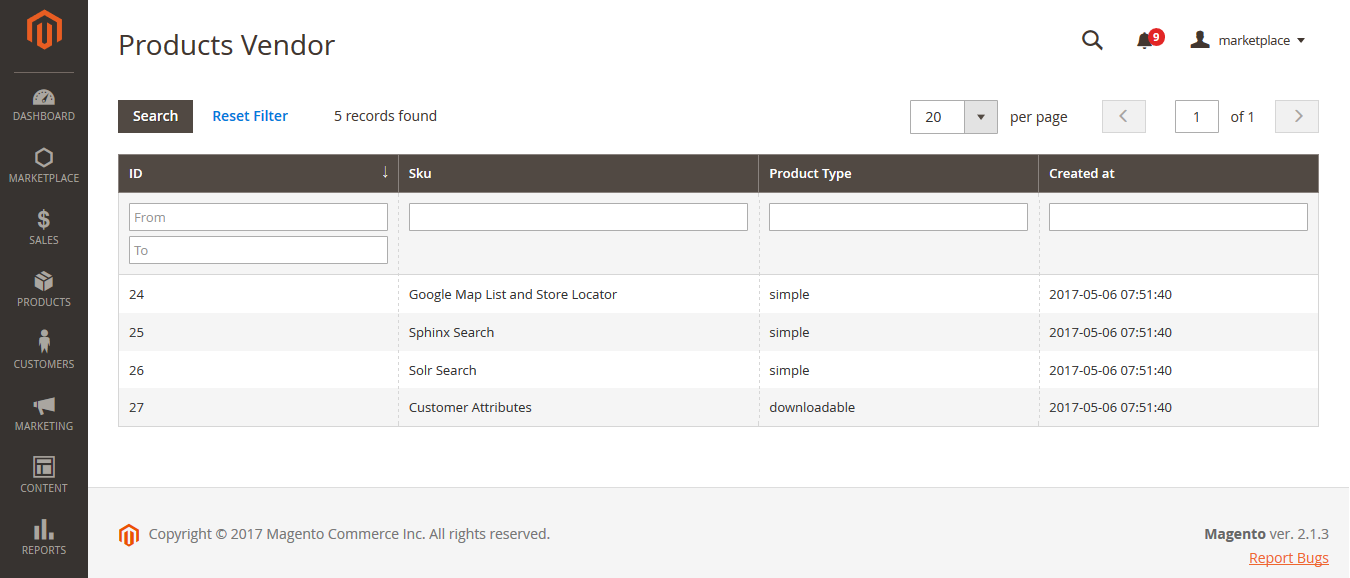
In addition, store owners can quickly view orders and products of each vendor by click on Select > Orders or Products from the grid:
- Manage Products
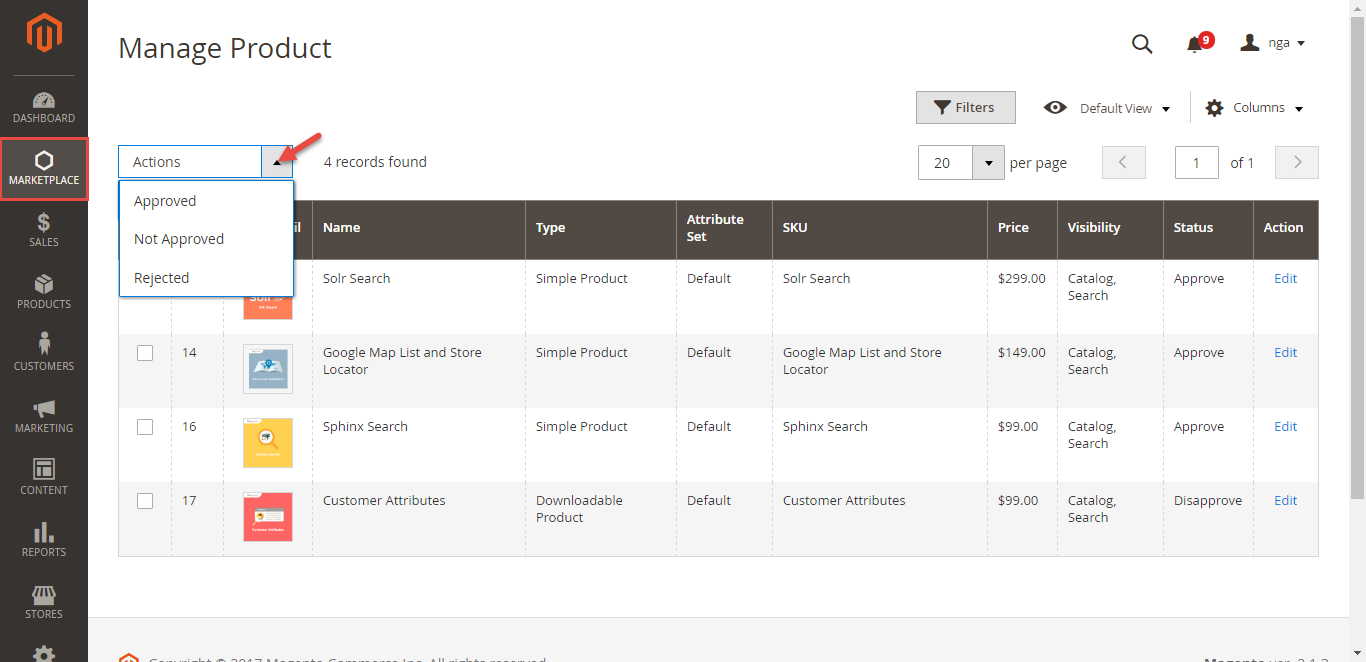
Admin has the ability to manage all products in their store, including vendor products. Admin can set up status for vendor products, including approved, not approved, and rejected.
- Manage Sales
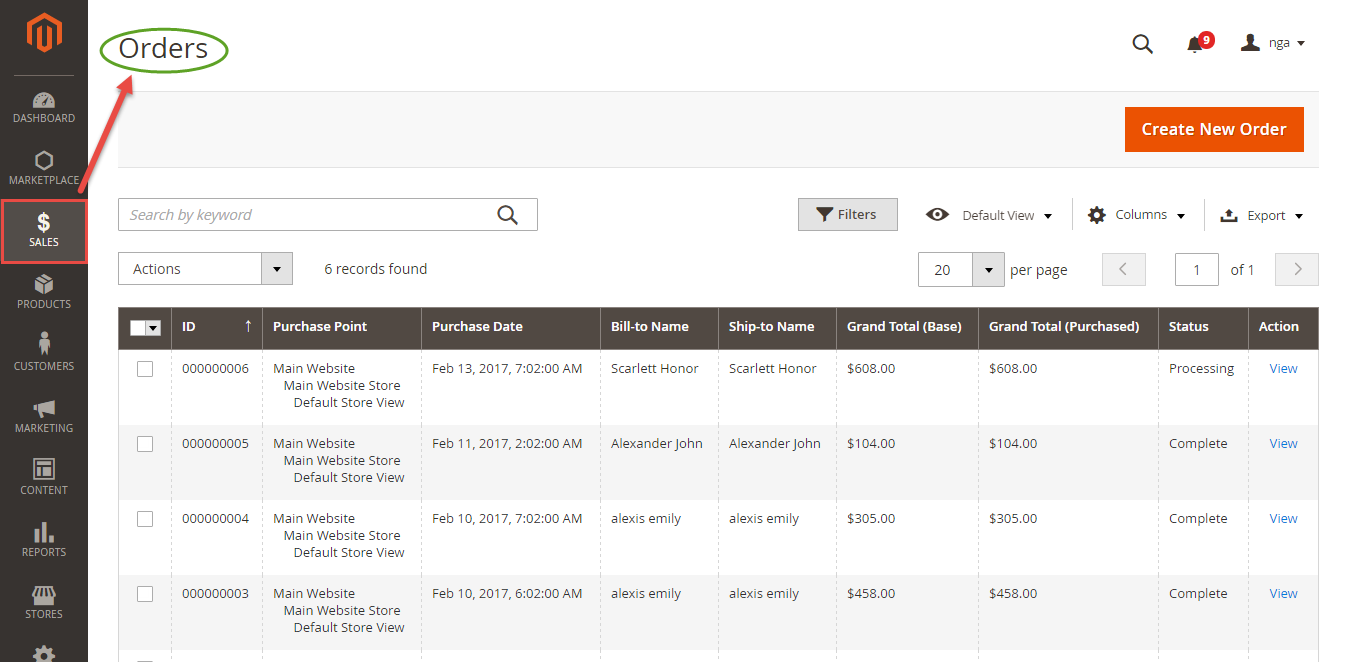
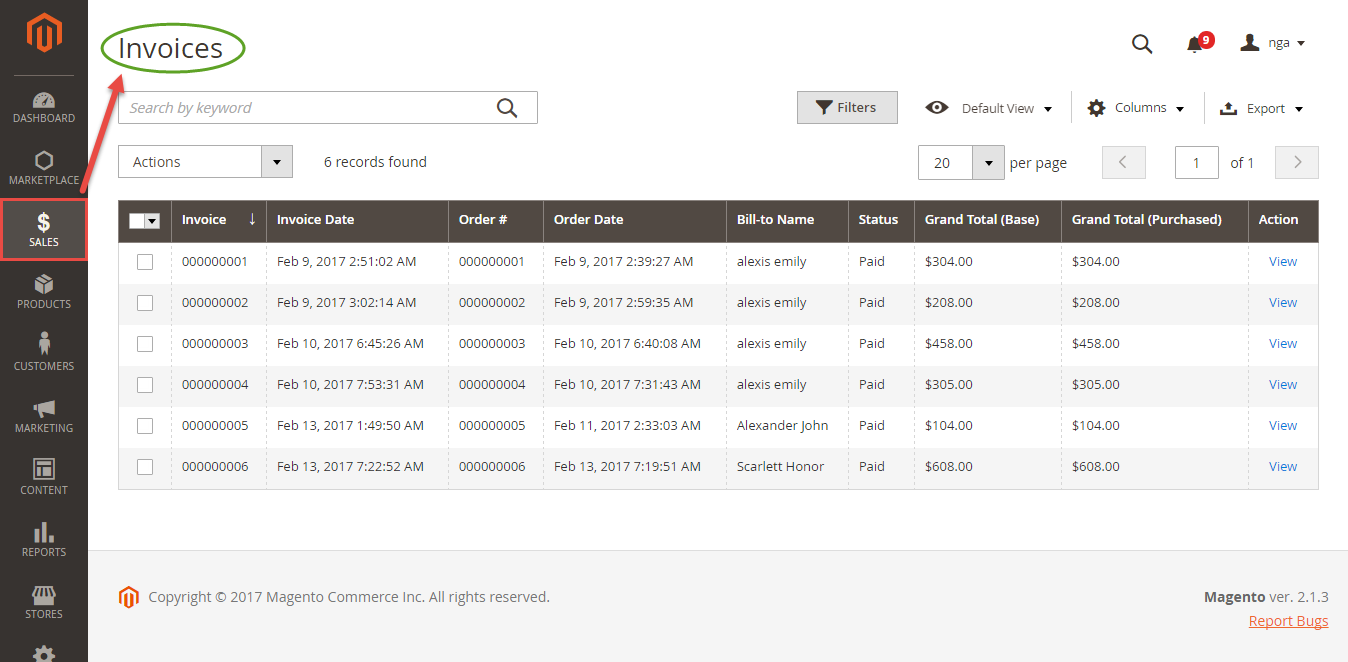
Sales are the default of Magento 2 platform. When customers buy any product in the marketplace, store owners will directly receive all that money.
Orders:
Invoices:
- Manage Feedback
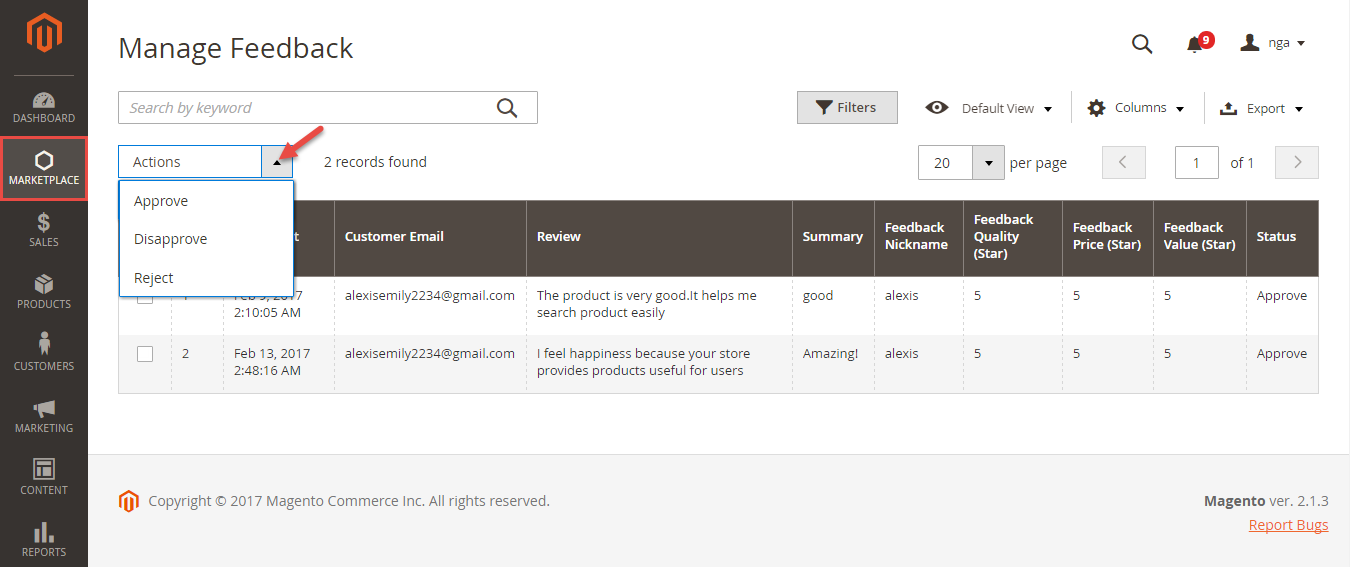
When customers leave a feedback for vendor shops. Admin will view then they can choose whether to approve that feedback.
When the feedback is approved, it will be displayed in vendor shop. Customers can view it.
- Manage Vendor Question
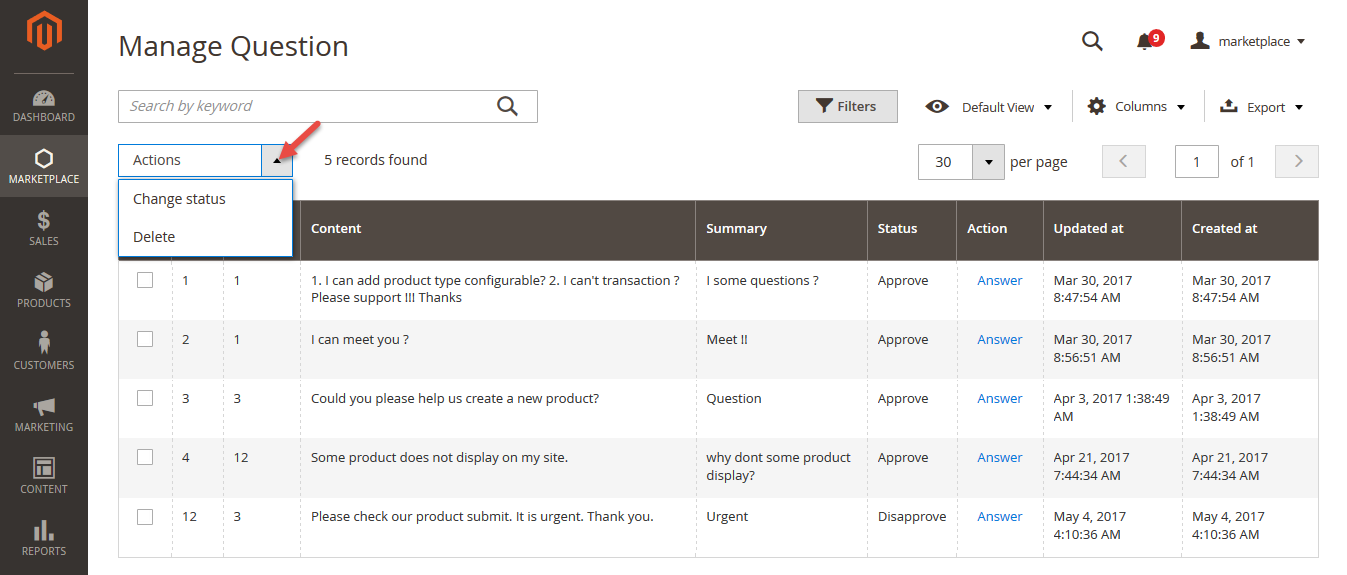
When vendor submits a question, admin can choose whether to answer by click on Answer button.
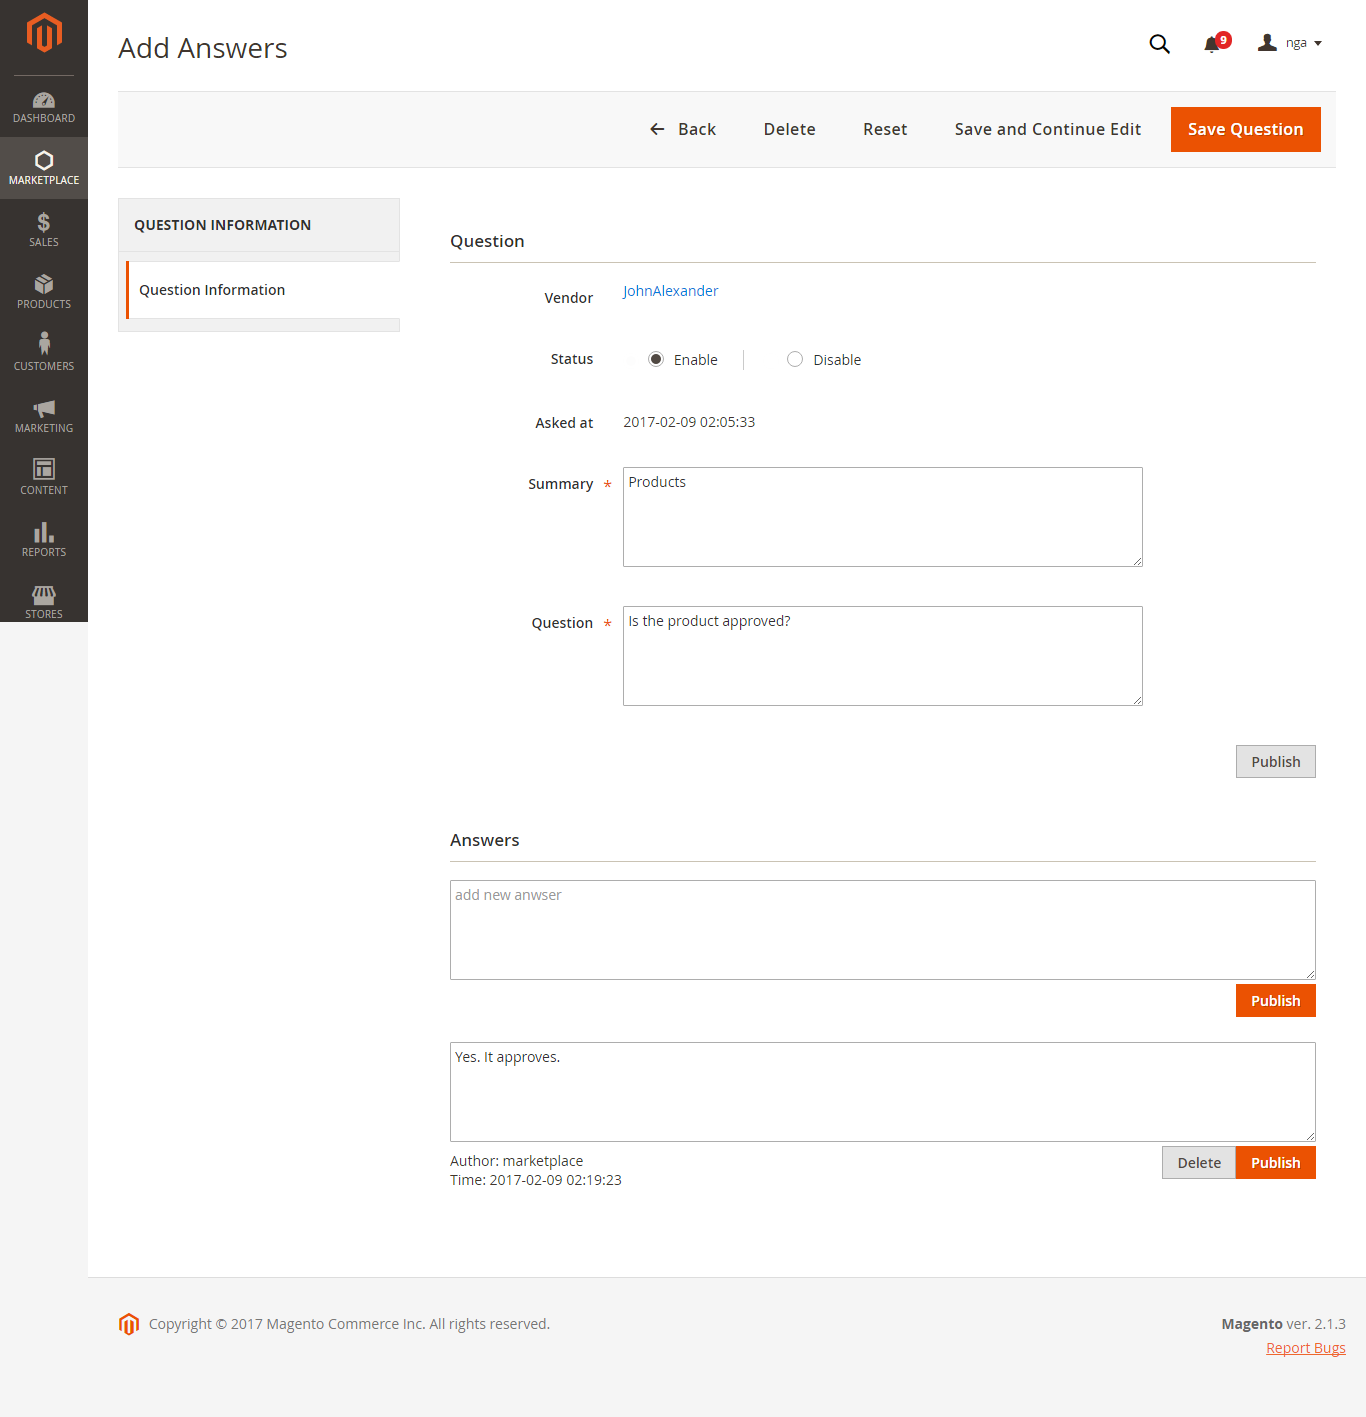
The Add Answers page will appear for admin to enter the answer. Admins need to remember to click on Public button to send out the answer.
- View Admin Dashboard
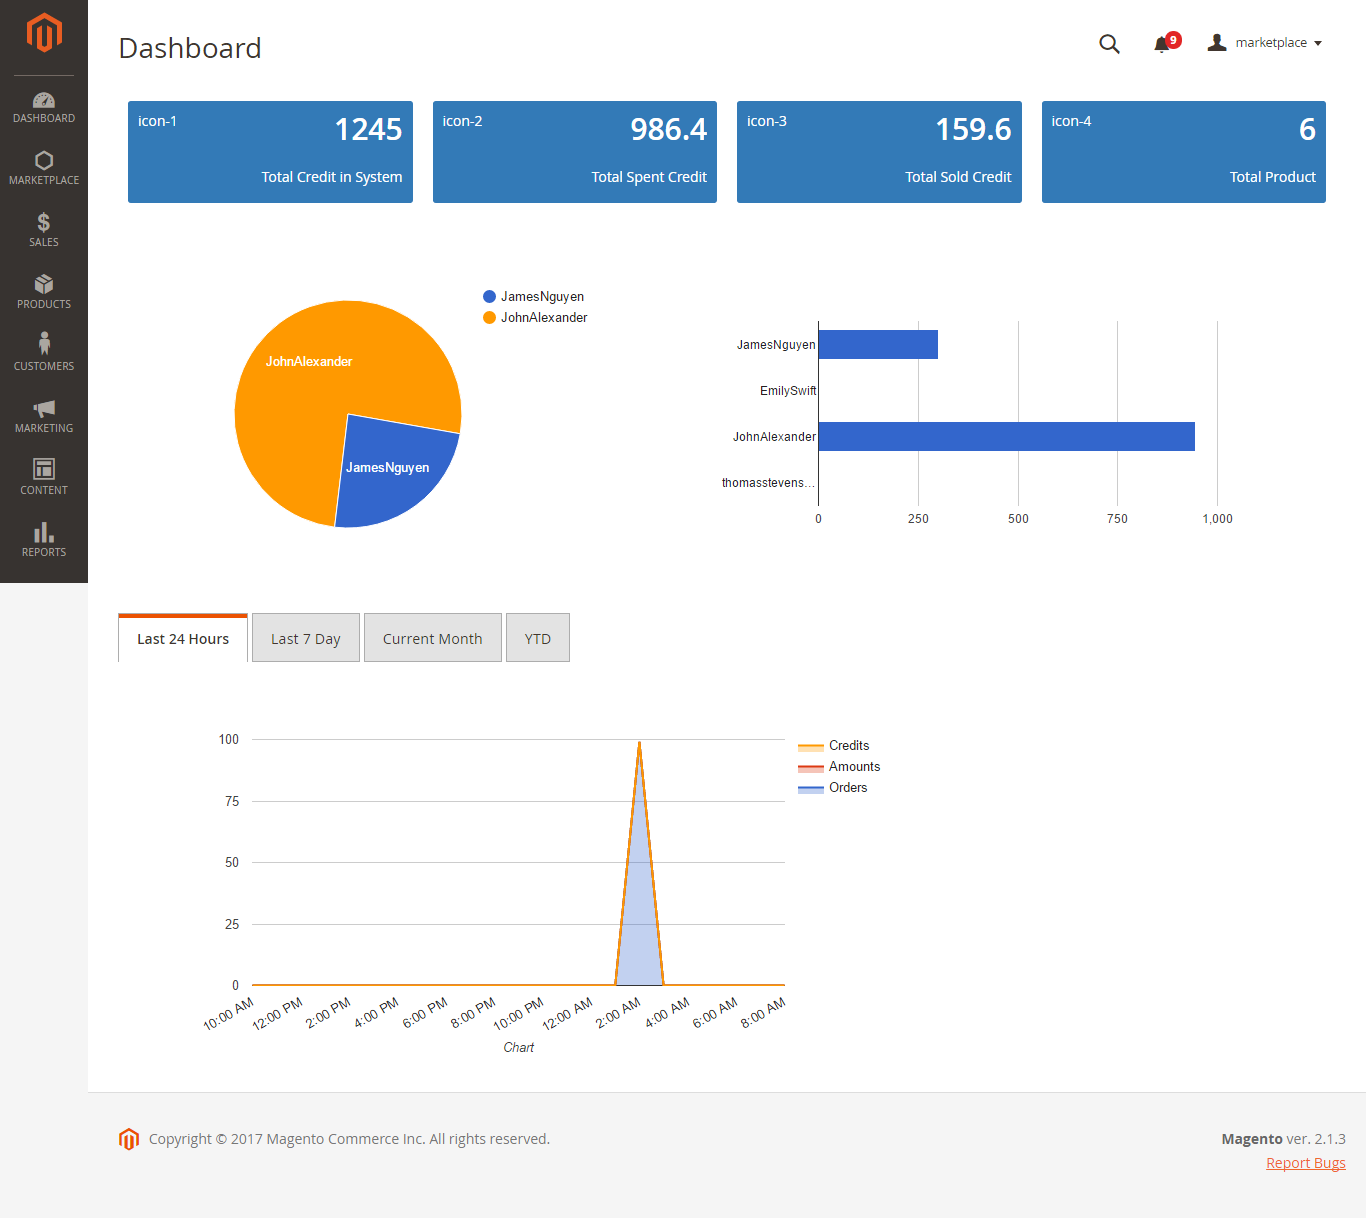
Admin Dashboard helps store owners collates information about their business:
Update
- When a bug fix or new feature is released, we will provide you with the module's new package.
- All you need to do is repeating the above installing steps and uploading the package onto your store. The code will automatically override.
- Flush the config cache. Your store and newly installed module should be working as expected.
Support
- We will reply to support requests after 2 business days.
- We will offer lifetime free update and 6 months free support for all of our paid products. Support includes answering questions related to our products, bug/error fixing to make sure our products fit well in your site exactly like our demo.
- Support DOES NOT include other series such as customizing our products, installation and uninstallation service.
Once again, thank you for purchasing our extension. If you have any questions relating to this extension, please do not hesitate to contact us for support.

