Thank you for purchasing our extension. If you have any questions that are beyond the scope of this document, do not hesitate to leave us an email via [email protected]
Updated: 15/07/2021| By: Magenest | Support Portal: https://servicedesk.izysync.com/servicedesk/customer/portal/163
Your store should be running on Magento 2 version ????
On the Admin sidebar, choose Store > Setting > Configuration > Magenest > Sell On Instagram
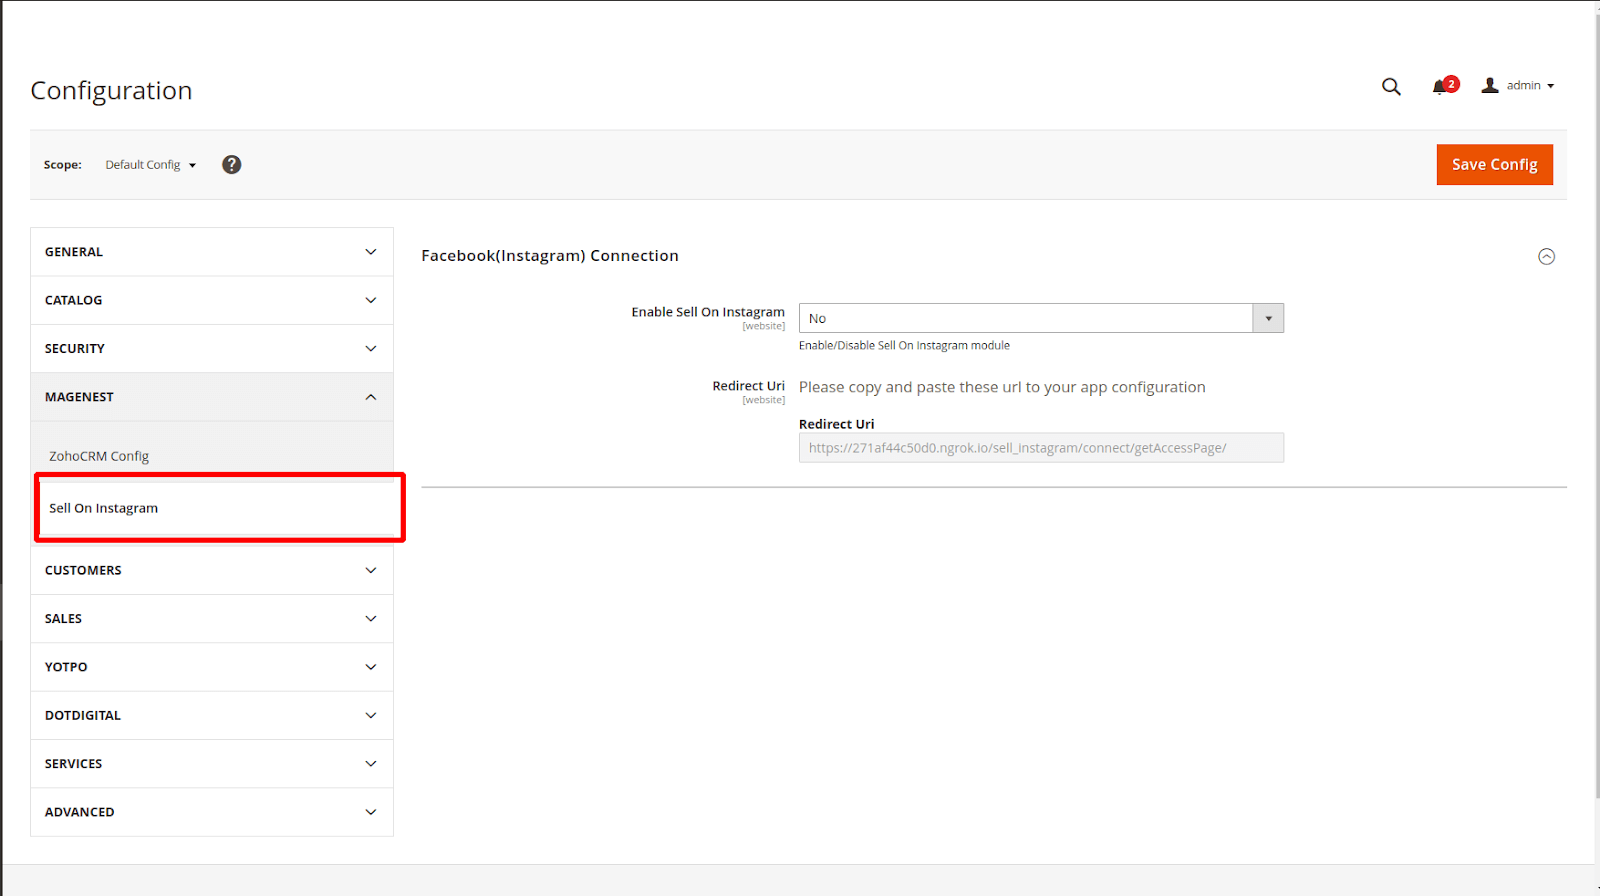
In the Facebook (Instagram) Connection tab, set Yes for field Enable Sell On Instagram and click Save Config to enable the module.
Create your Page:
You would need a Facebook Page. Please navigate here to create a Facebook Page https://www.facebook.com/pages/create
After create your Page, go to your Page
Enter in Page ID field, which appears in URL in Configuration
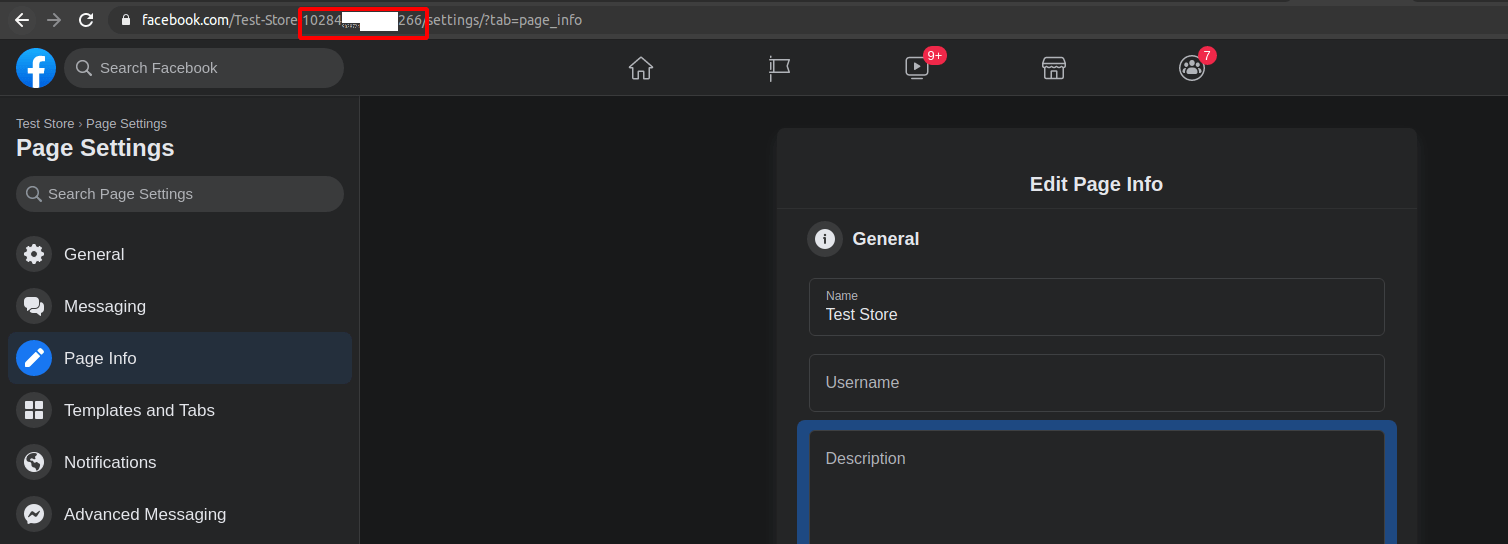
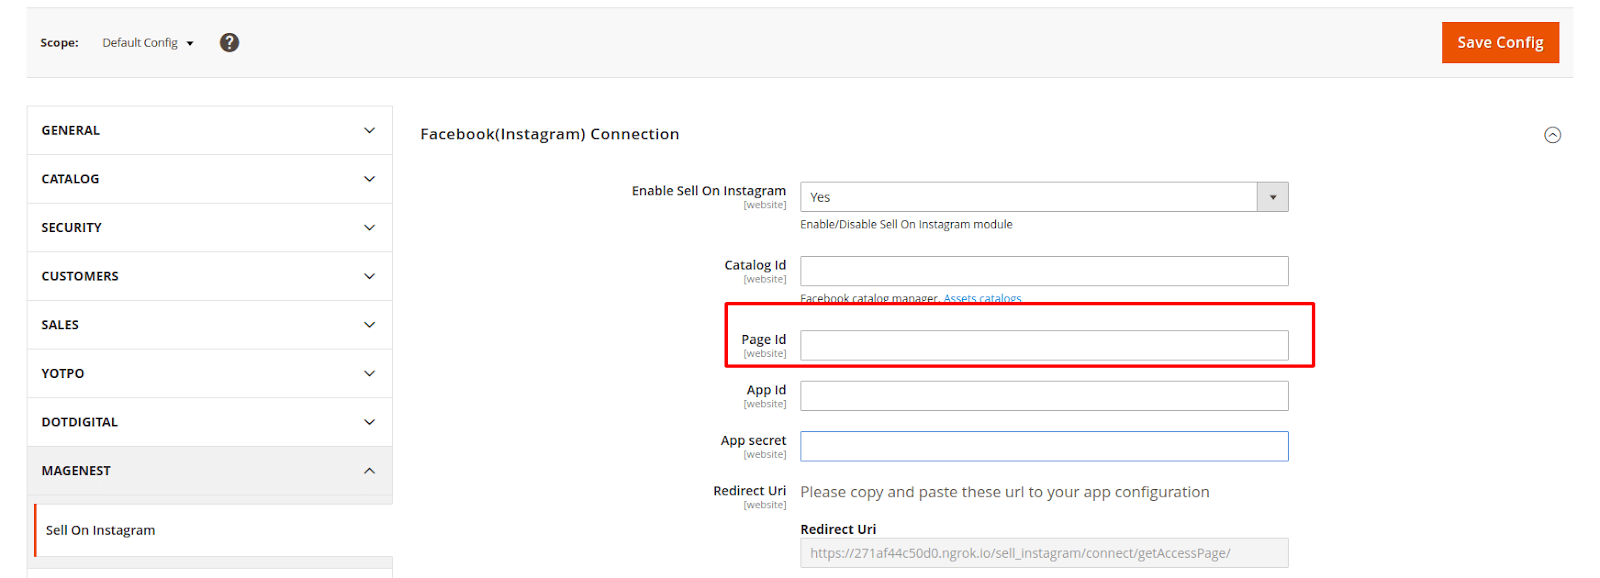
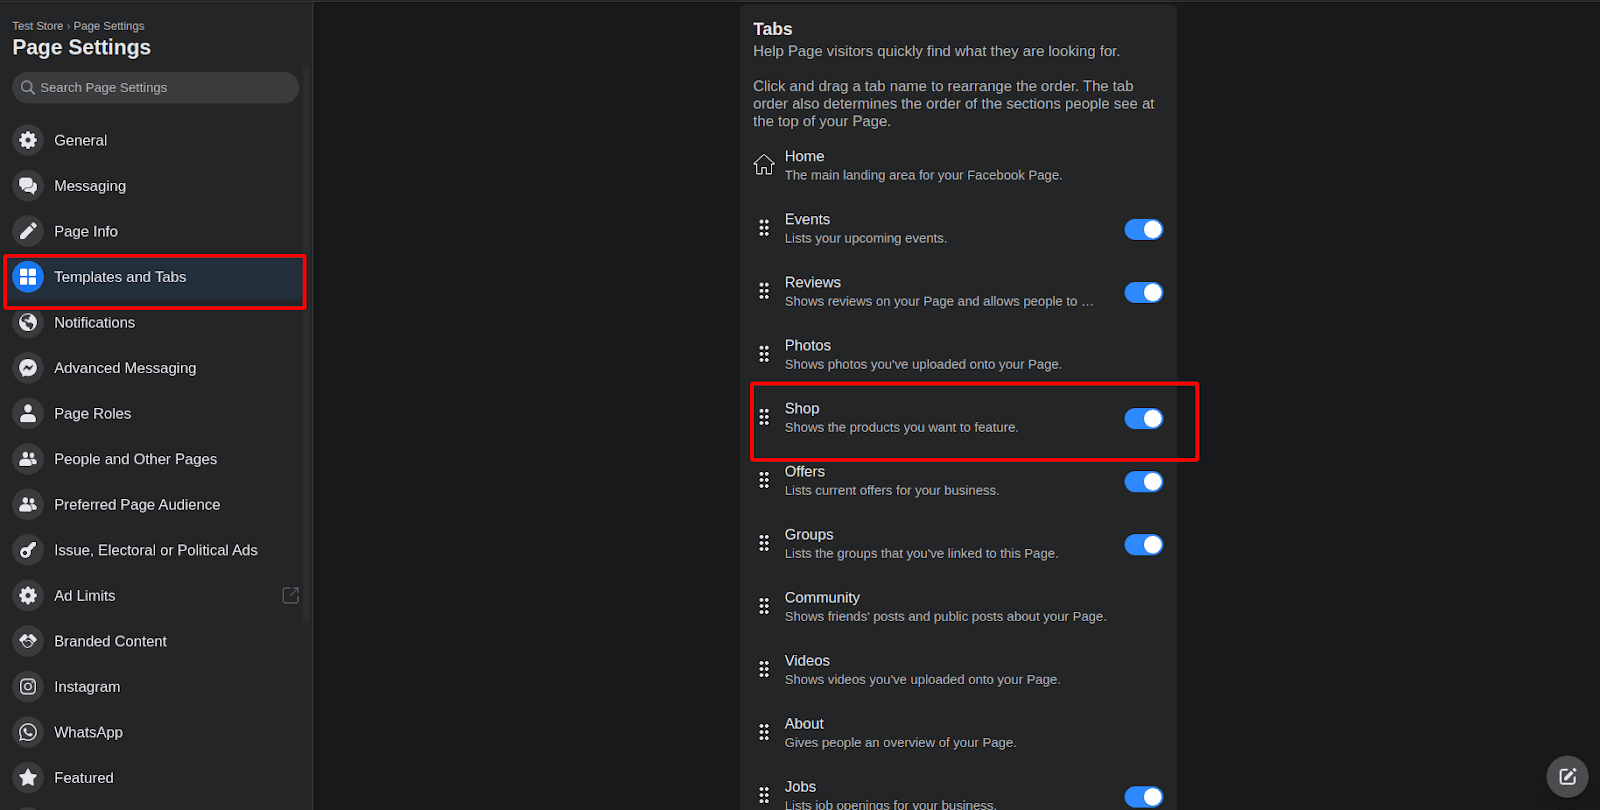
Go to the Page and click Settings
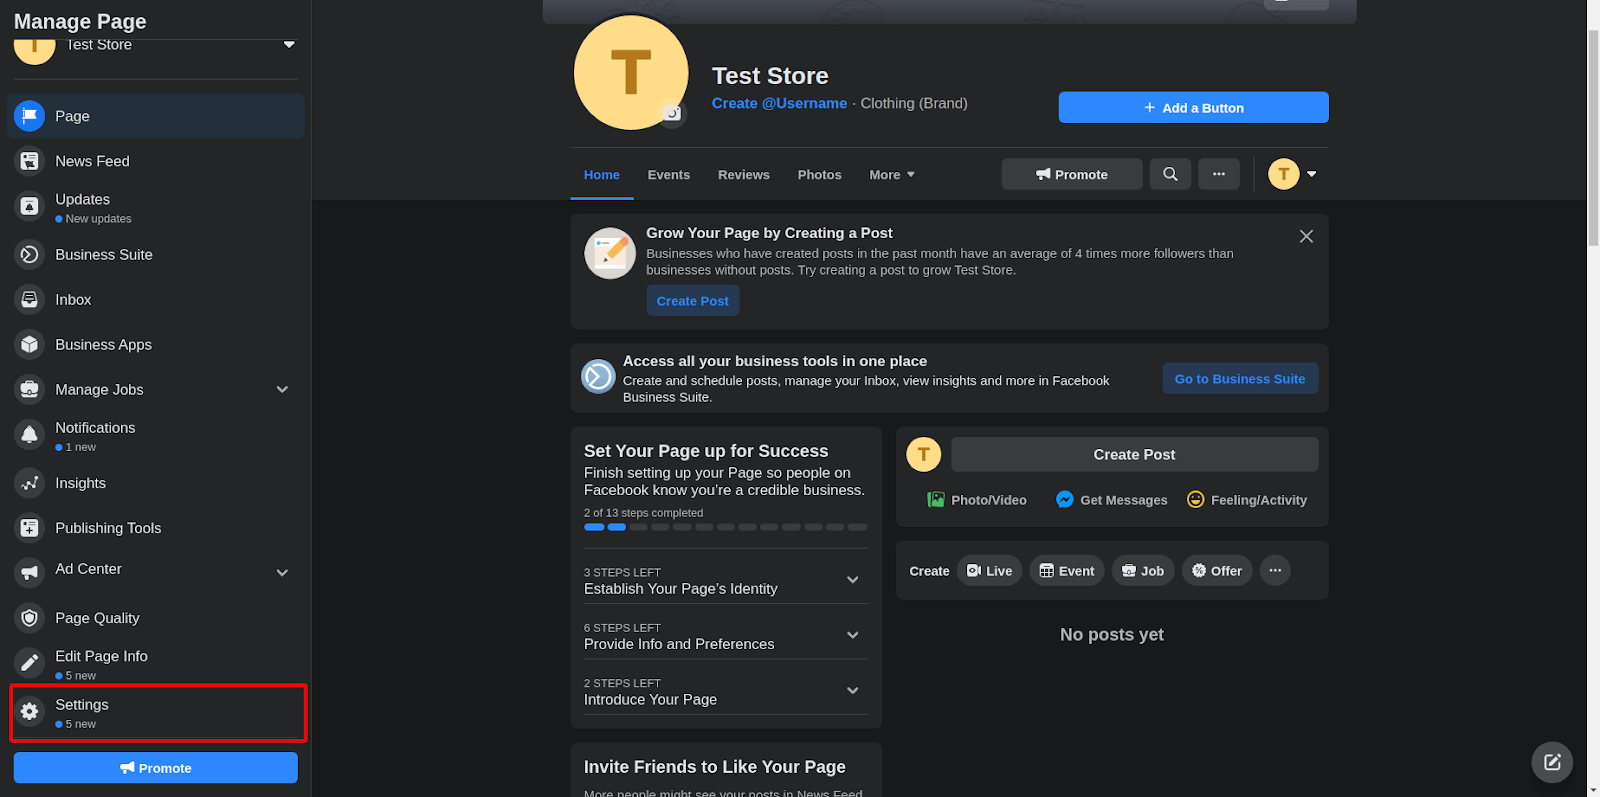
Click on the Templates and Tabs under Page settings and enable the Shop tab
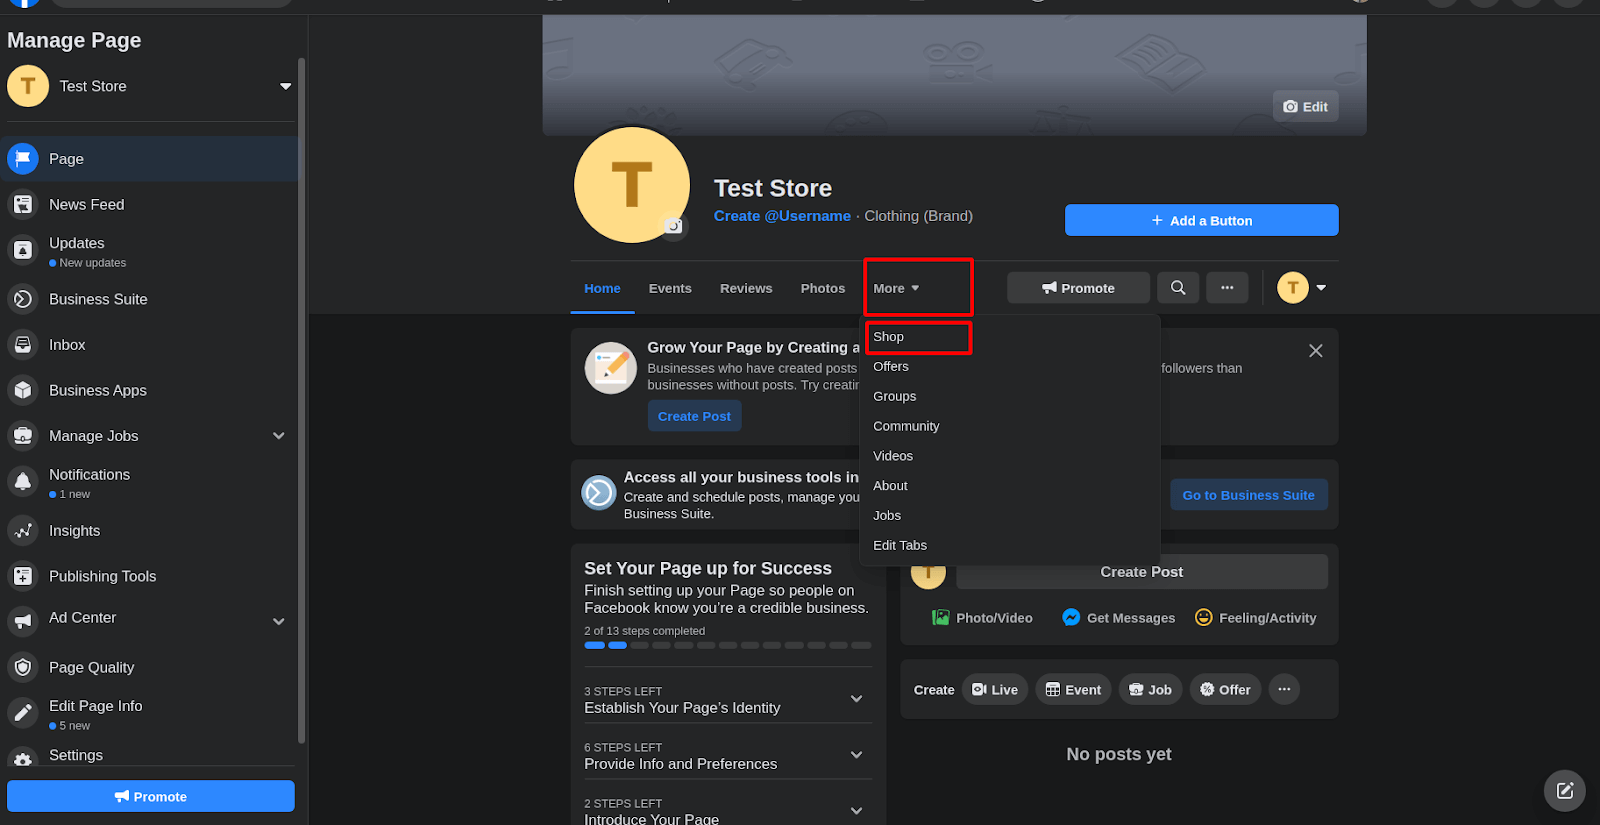
Go to your Facebook page and click More > Shop
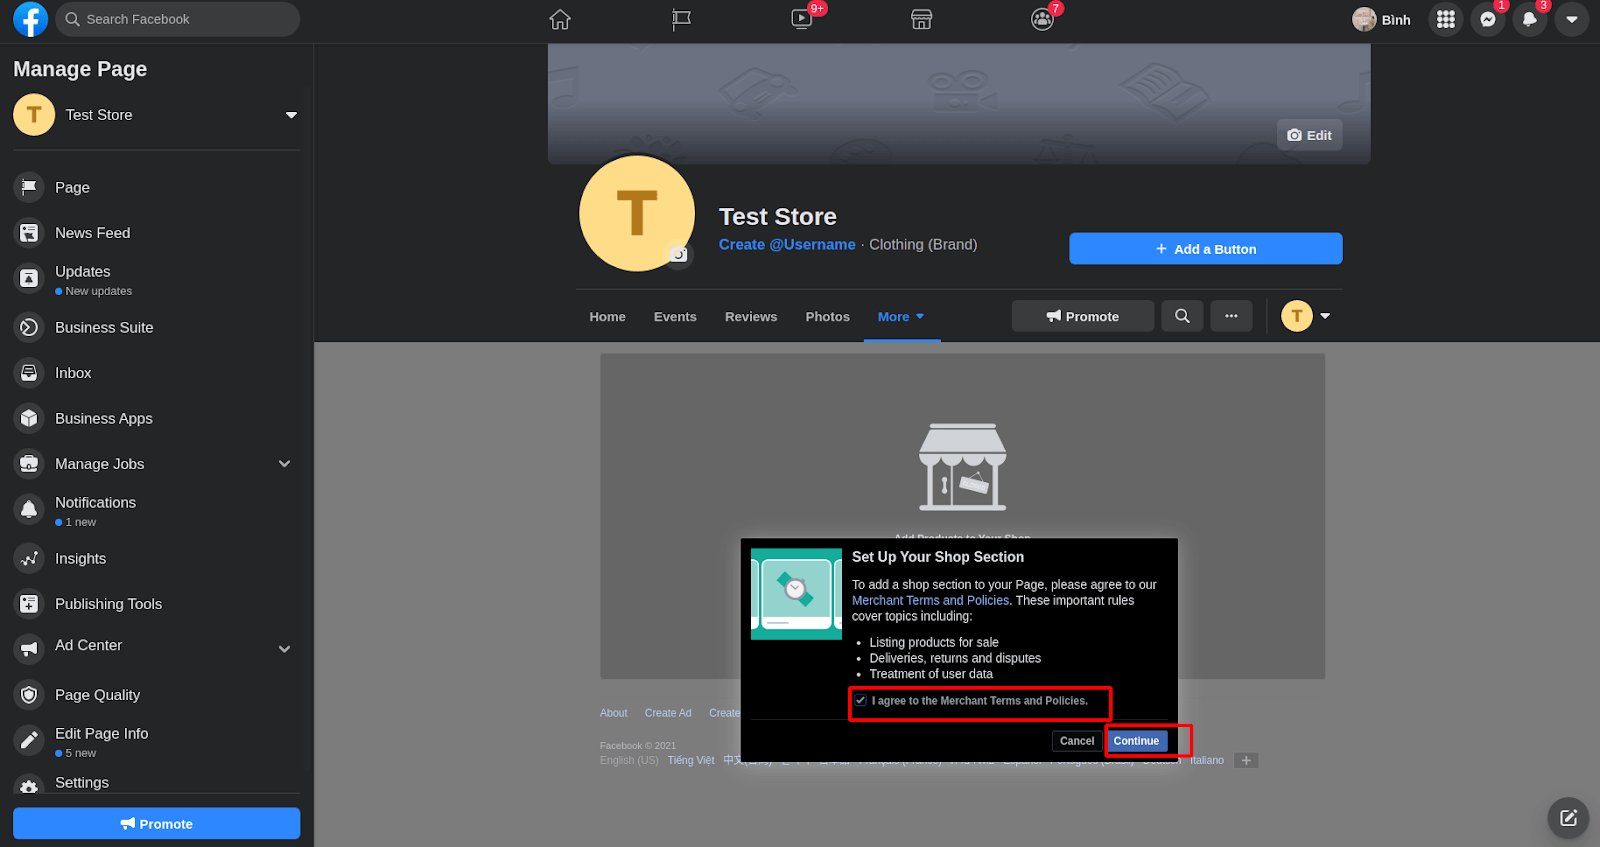
The popup will show up, tick the check box to agree to the Seller’s Terms and Policies and click Continue.
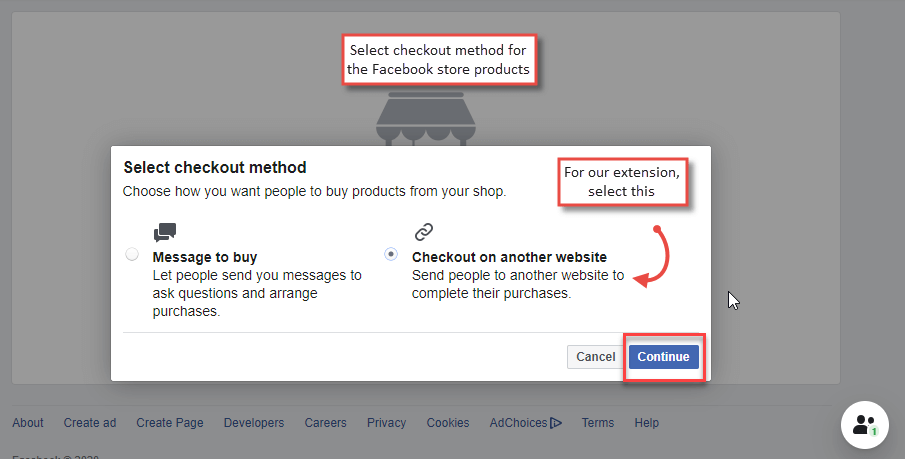
After agreeing, you can see another popup to select the checkout method for the Facebook store products.
Select Check Out on Another Website > Continue
You will be asked to choose the shop currency.
Select the currency that you want to show on Facebook store products, and click Save.
Add a manual product from the Add Product button.
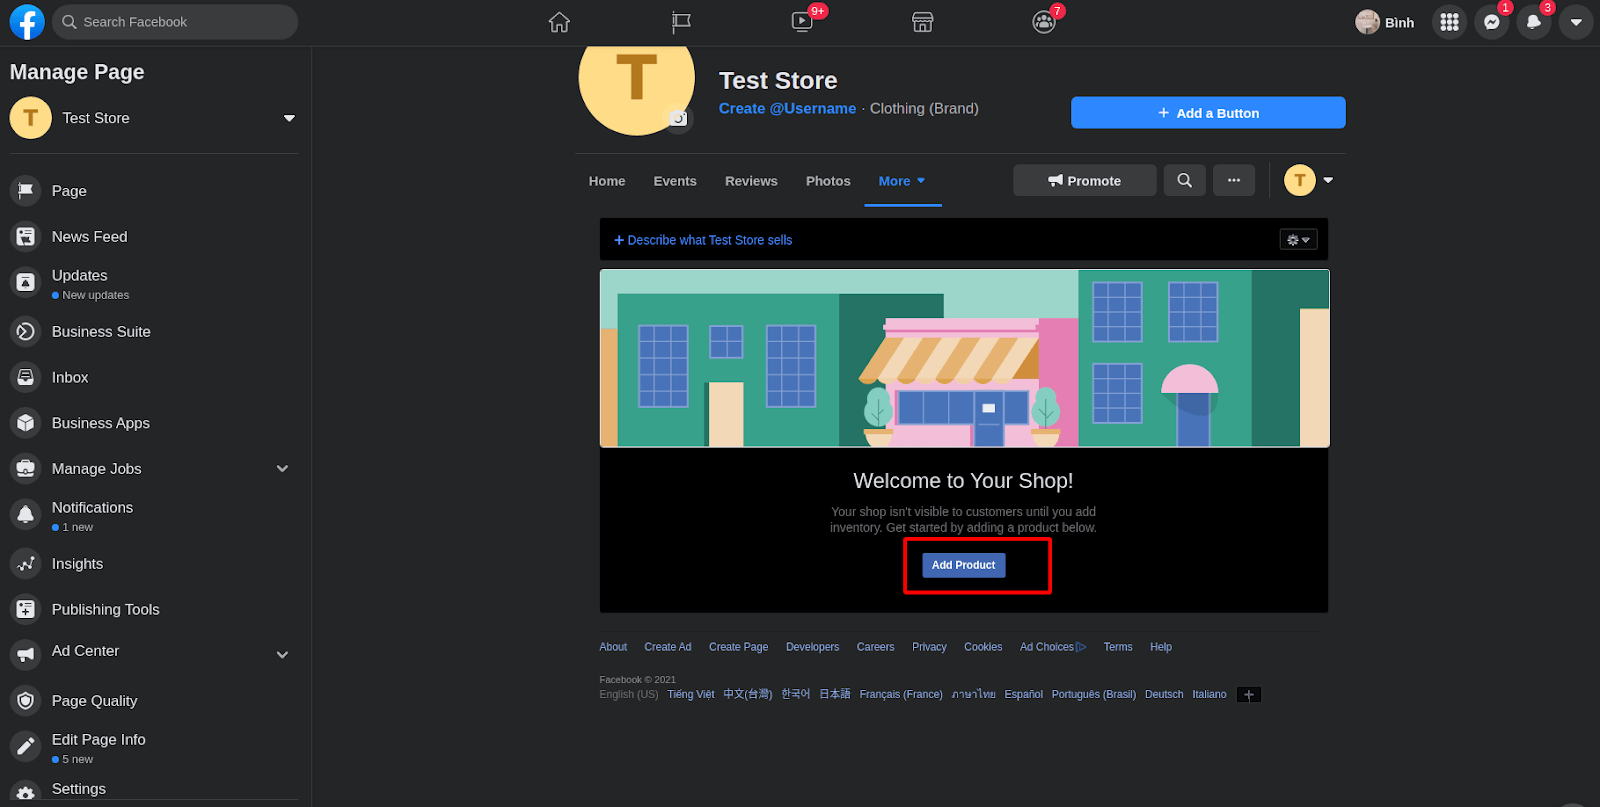
After adding the sample product, the Manage your Catalogue button will show up.

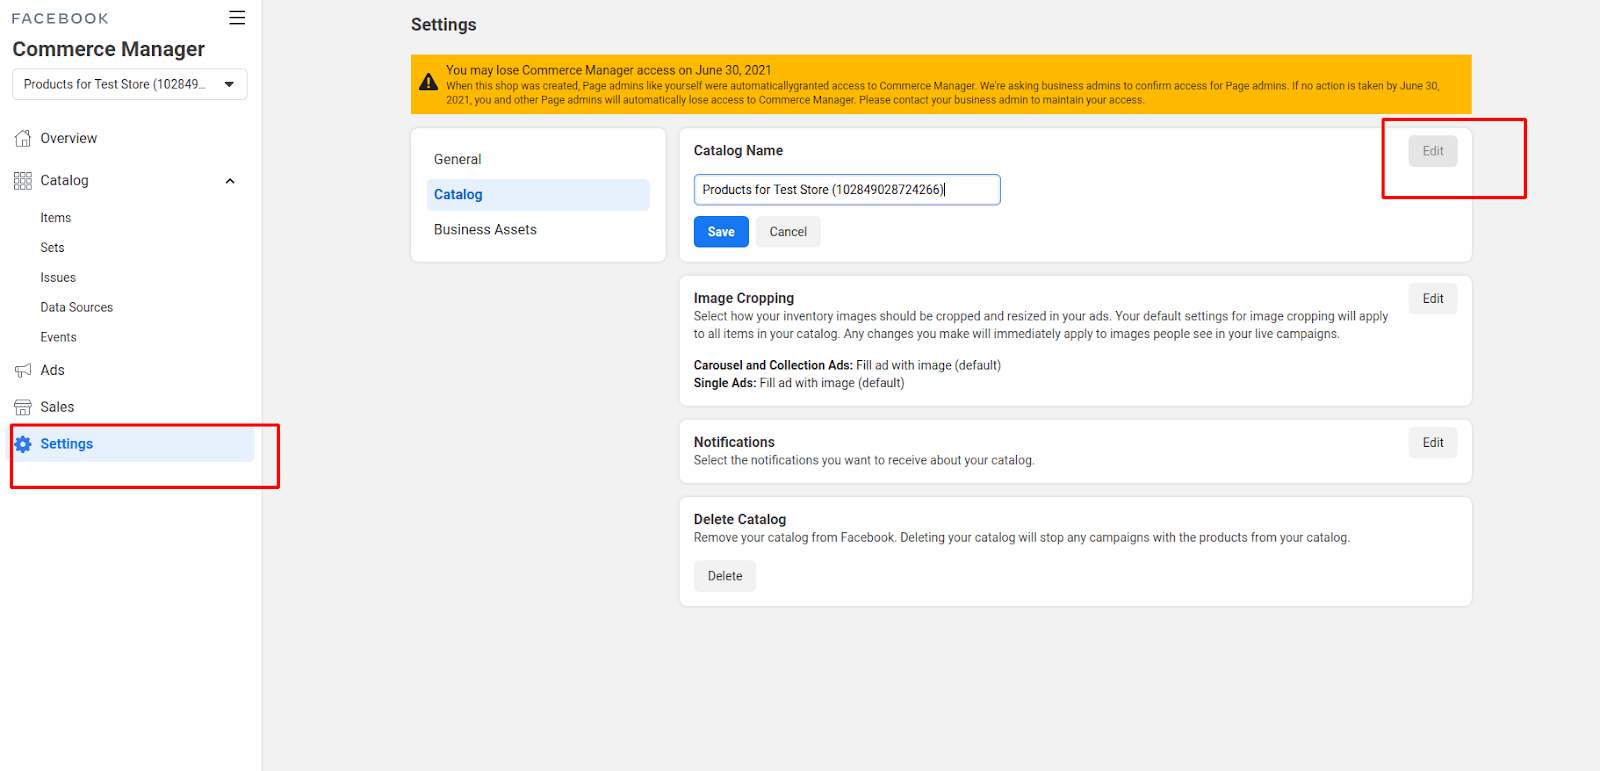
It will create a catalog ID for this Page, You can edit name of catalog by click Setting>Catalog>Catalog Name>Edit
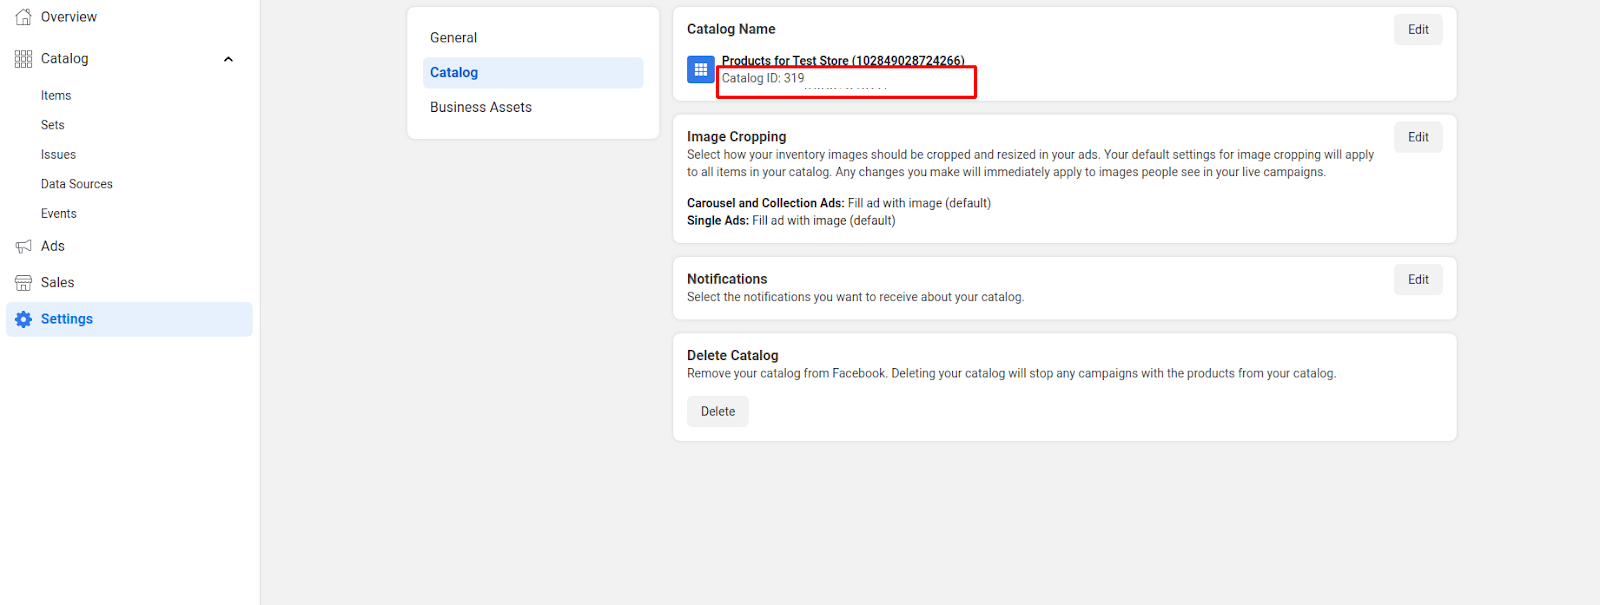
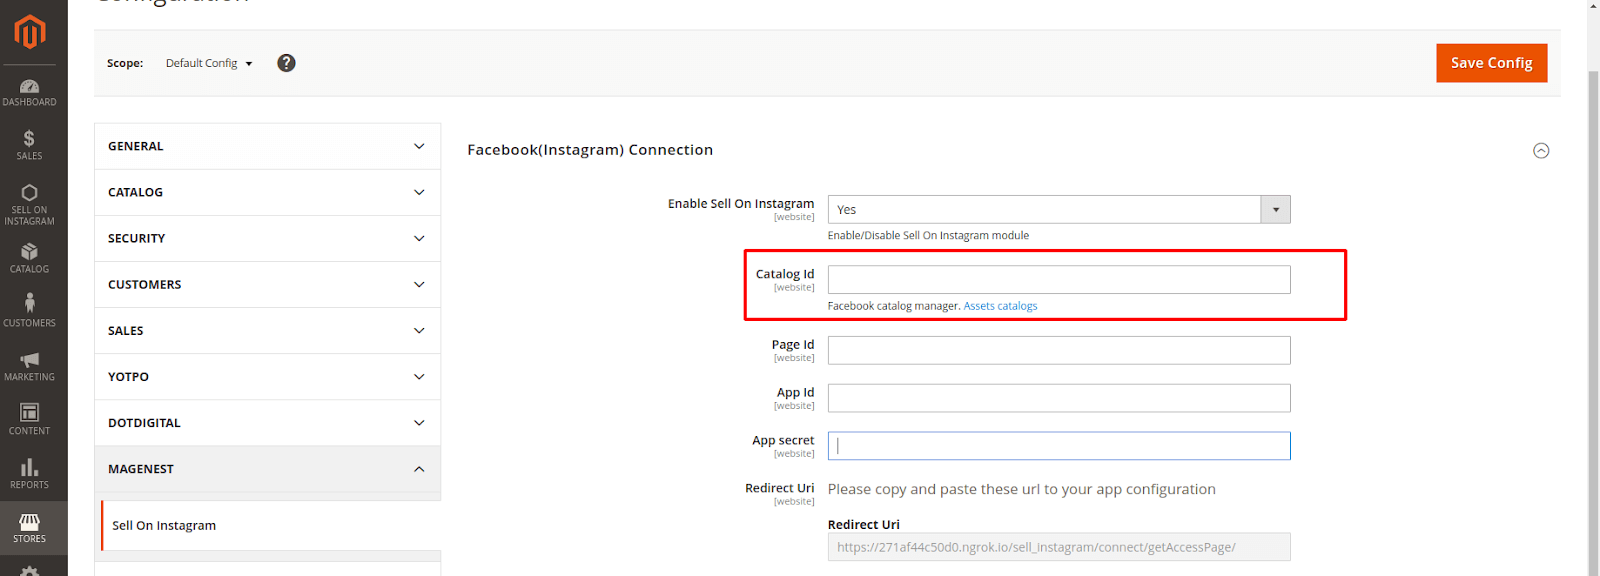
Enter your Catalog ID to Catalog ID field in configuration
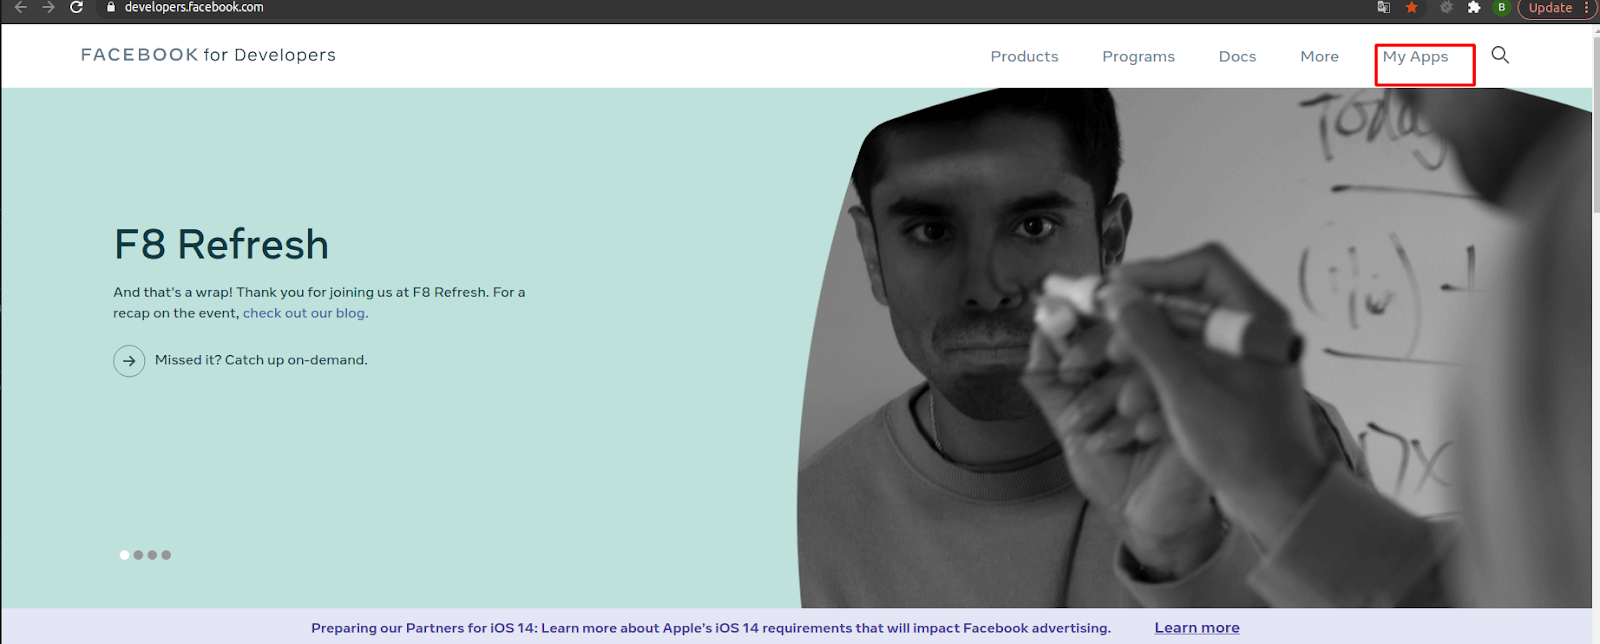
Navigate here https://developers.facebook.com/ to login to your Facebook Developers (Using your Facebook account).
Choose My Apps
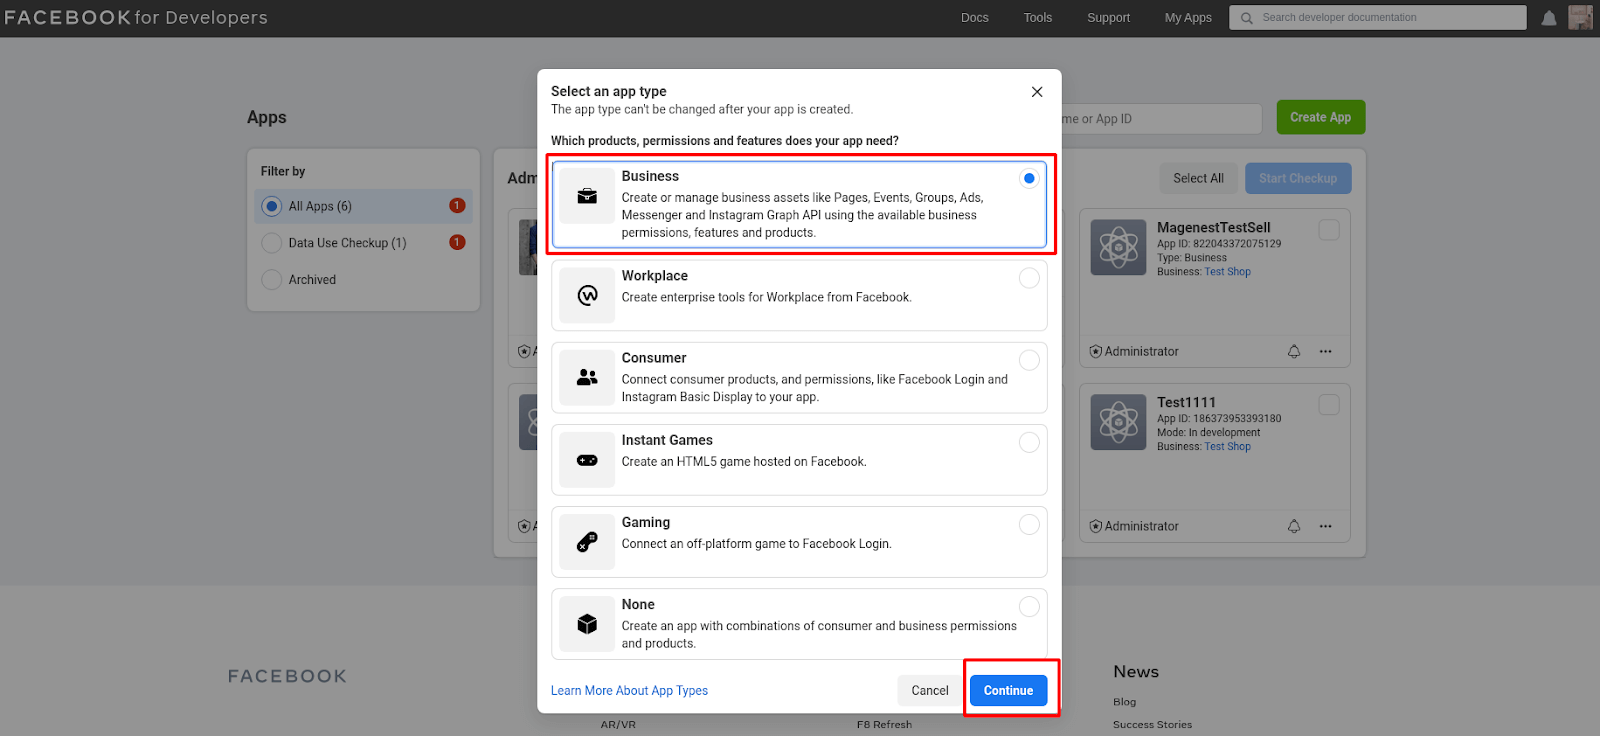
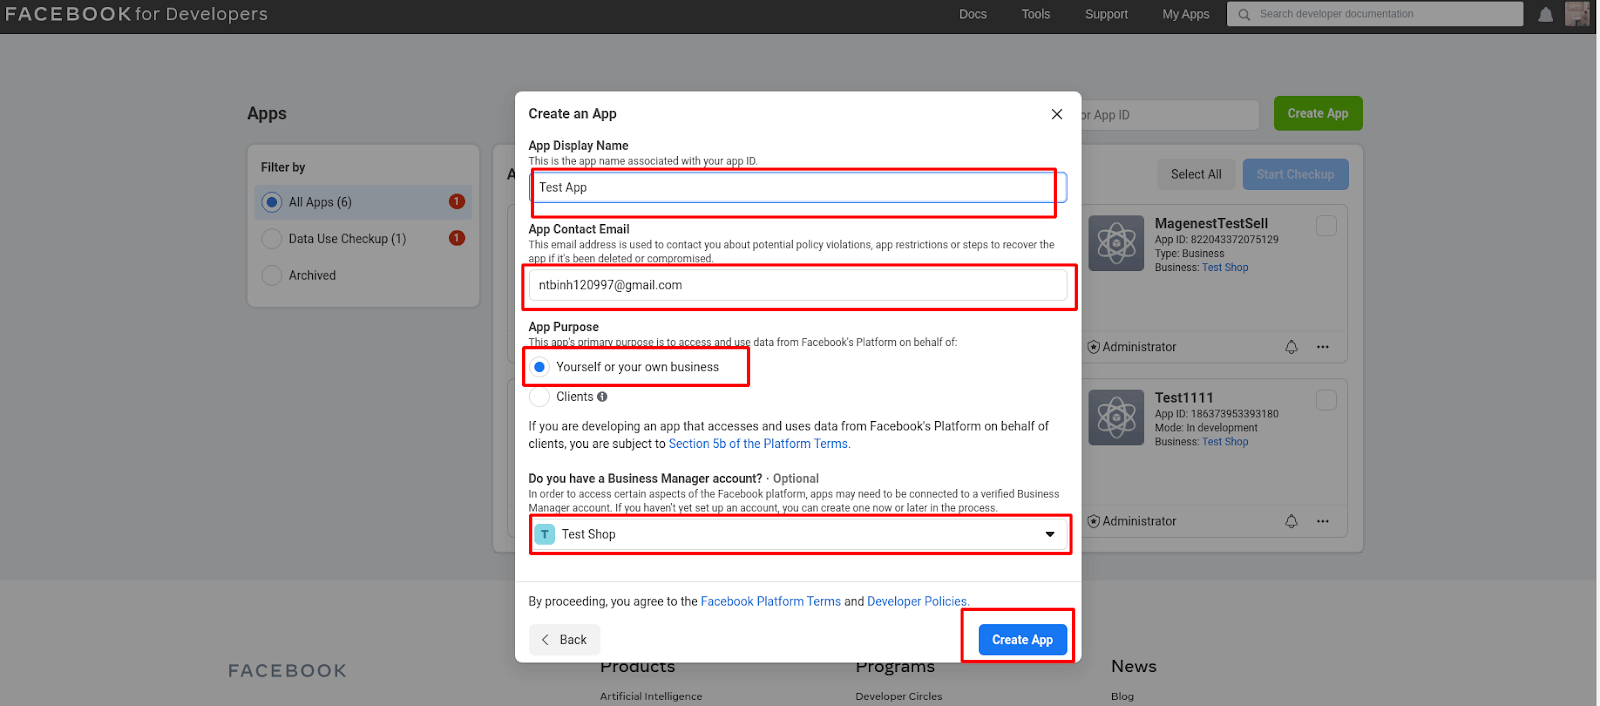
ClickCreate App > Continue, and enter your information
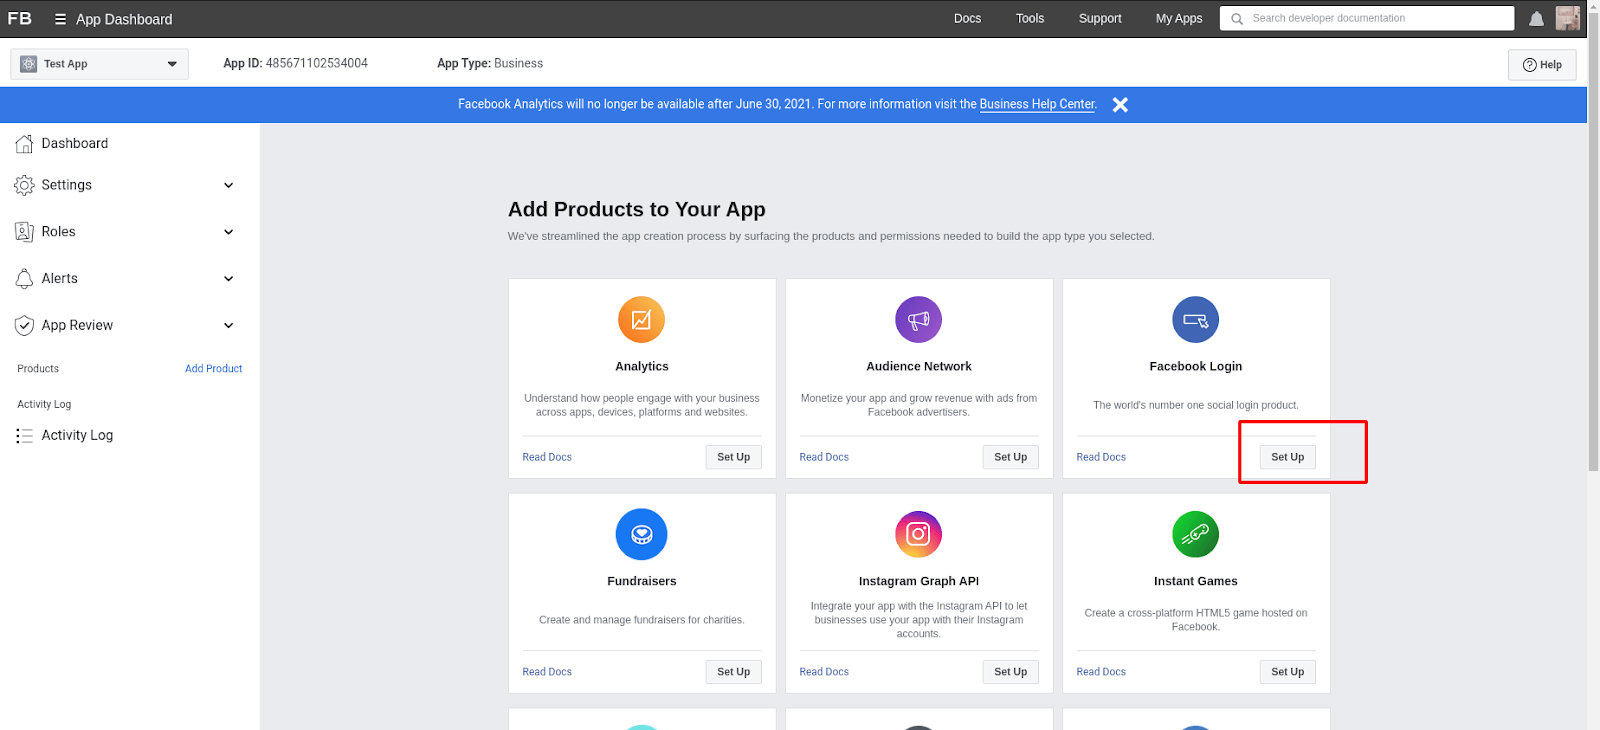
Settings > Basic
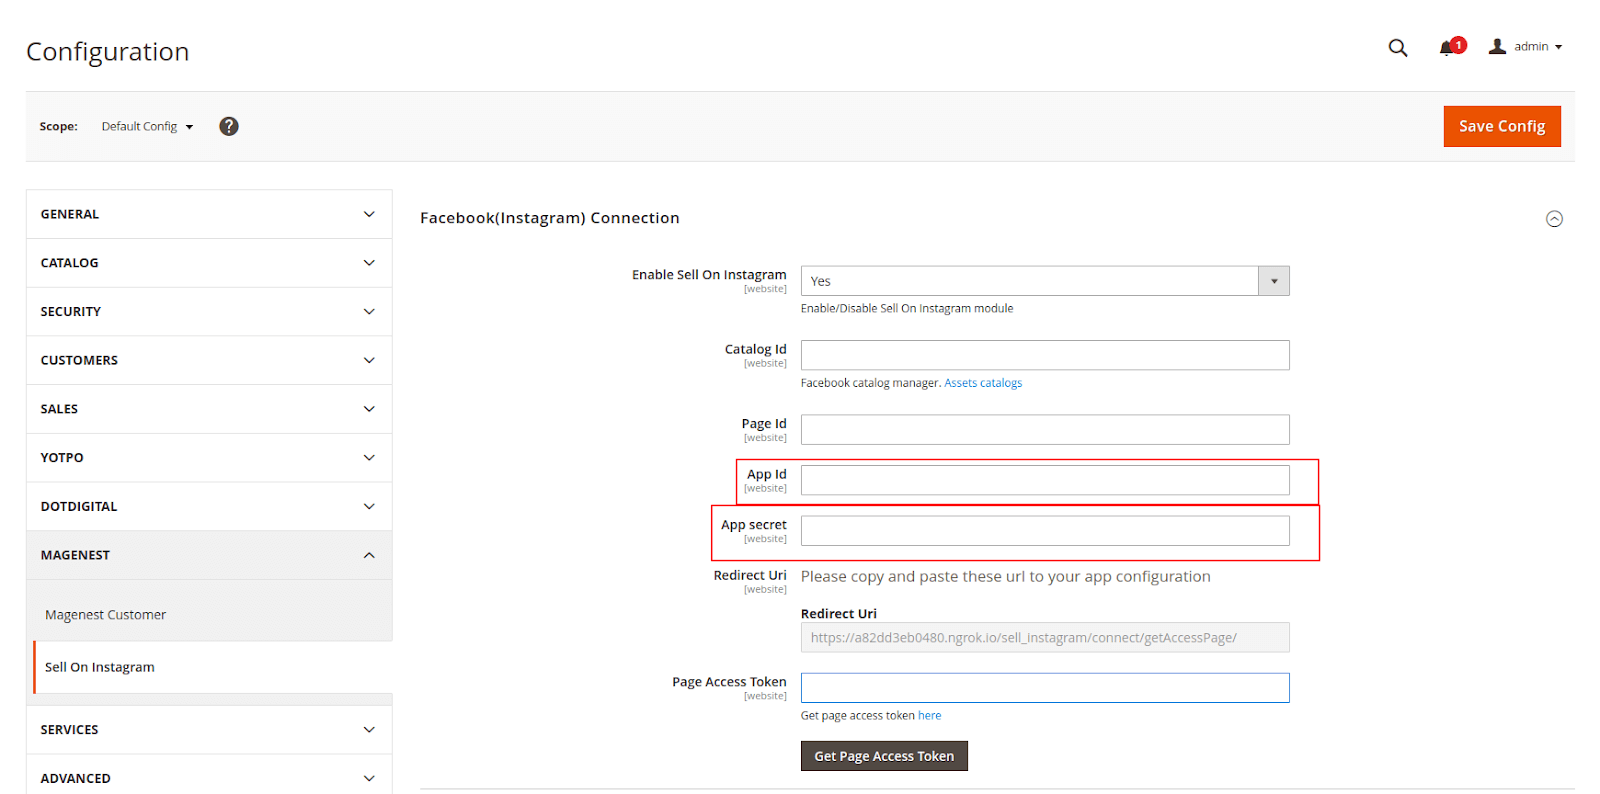
Enter for App ID and App secret in configuration
Set Facebook Login for your app
Go to App Review > Permissions And Features
To using API sync product to facebook store your app must have permission: catalog_management

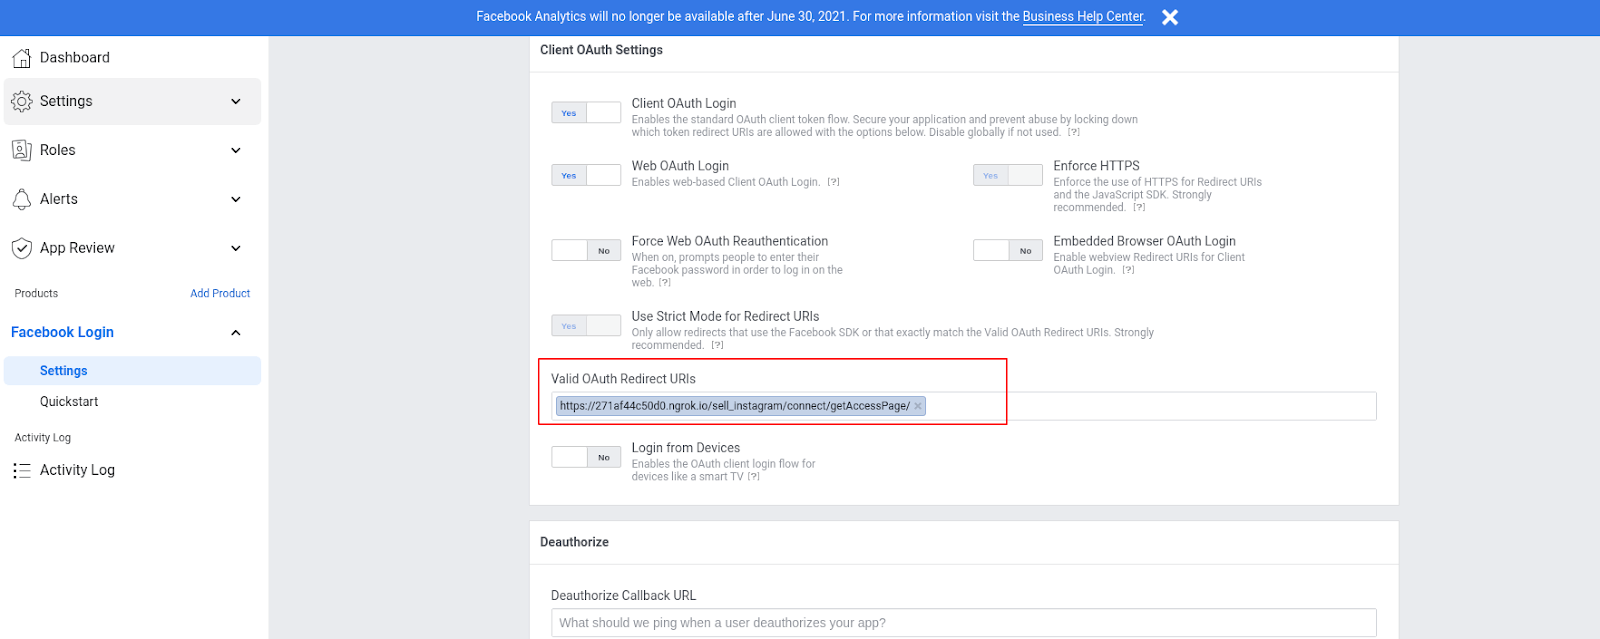
Go to Facebook Log In > Settings and copy the value of Redirect Uri to Valid OAuth Redirect URIs in your app and Save.
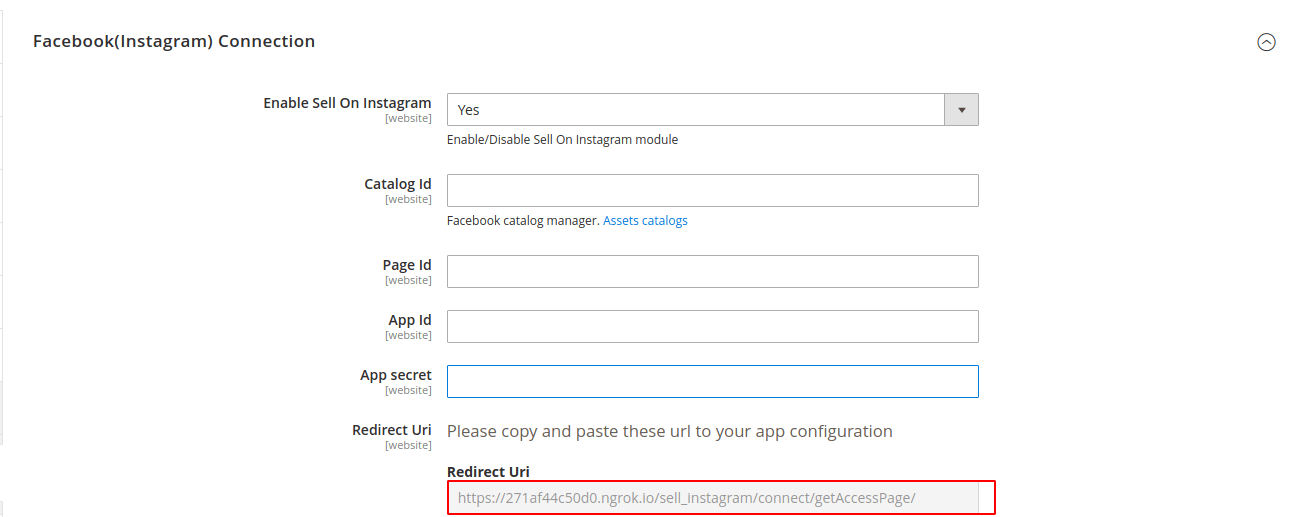
After get all information please click button Get Access Token to get access token
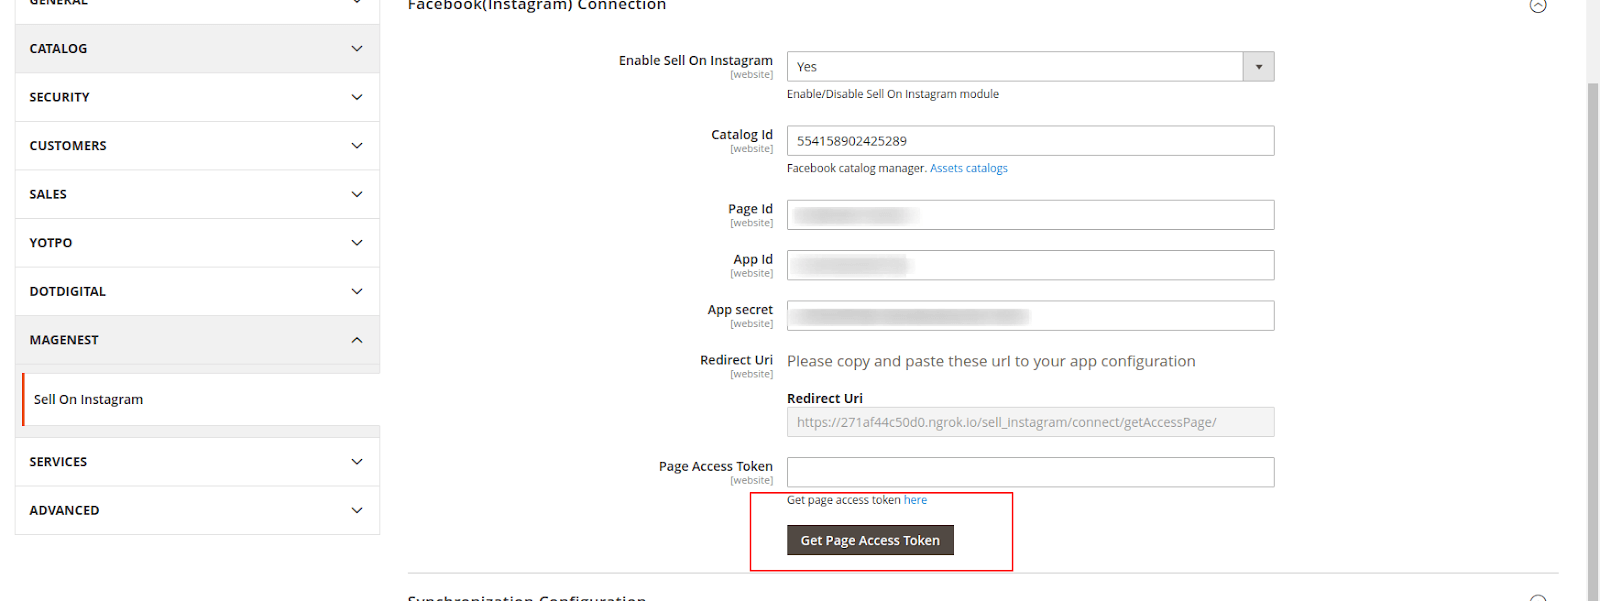

In tab Synchronization Configuration:

Select the product condition to show along with the product in facebook store :
On the Admin sidebar, choose Sell On Instagram > Mapping Attribute
Create template mapping between Magento 2 product attributes and your product in your facebook (Instagram) store.
You can enable, disable, delete, or add new attributes of the product to map with the product’s fields on Facebook merchants.
Magento Fields: Attribute Product
Facebook Product Fields: Attribute Facebook
Status: Status Field of Template
On the Admin sidebar, choose Sell On Instagram > Manage Feed
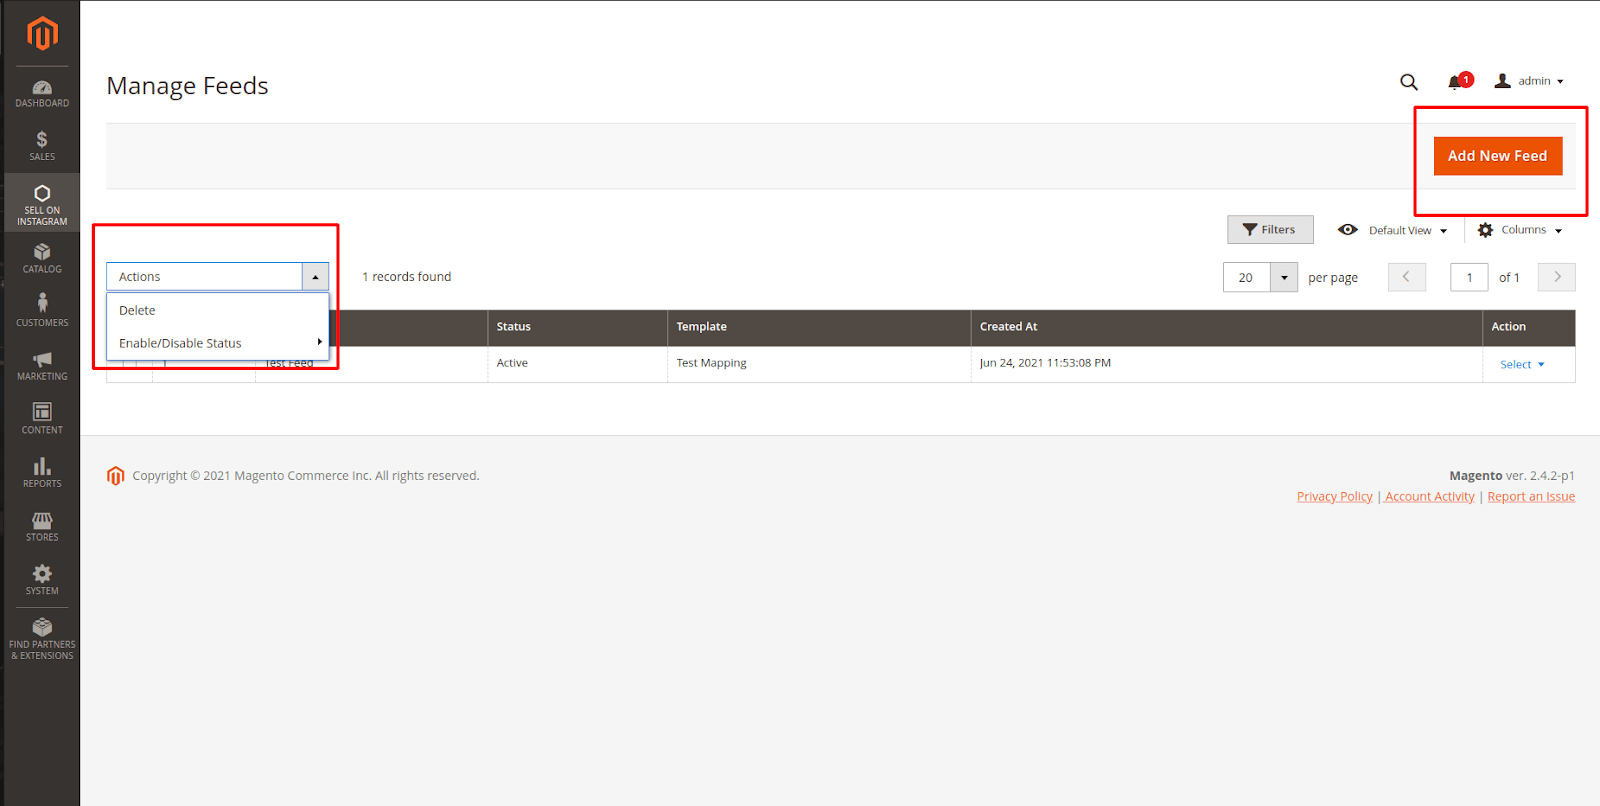
There are ready-made templates.
In this case, the feed will contain all the basic settings for a certain shopping search engine. You can do any custom adjustments while creating a feed or edit it later.
Choose New Feed to create a new feed
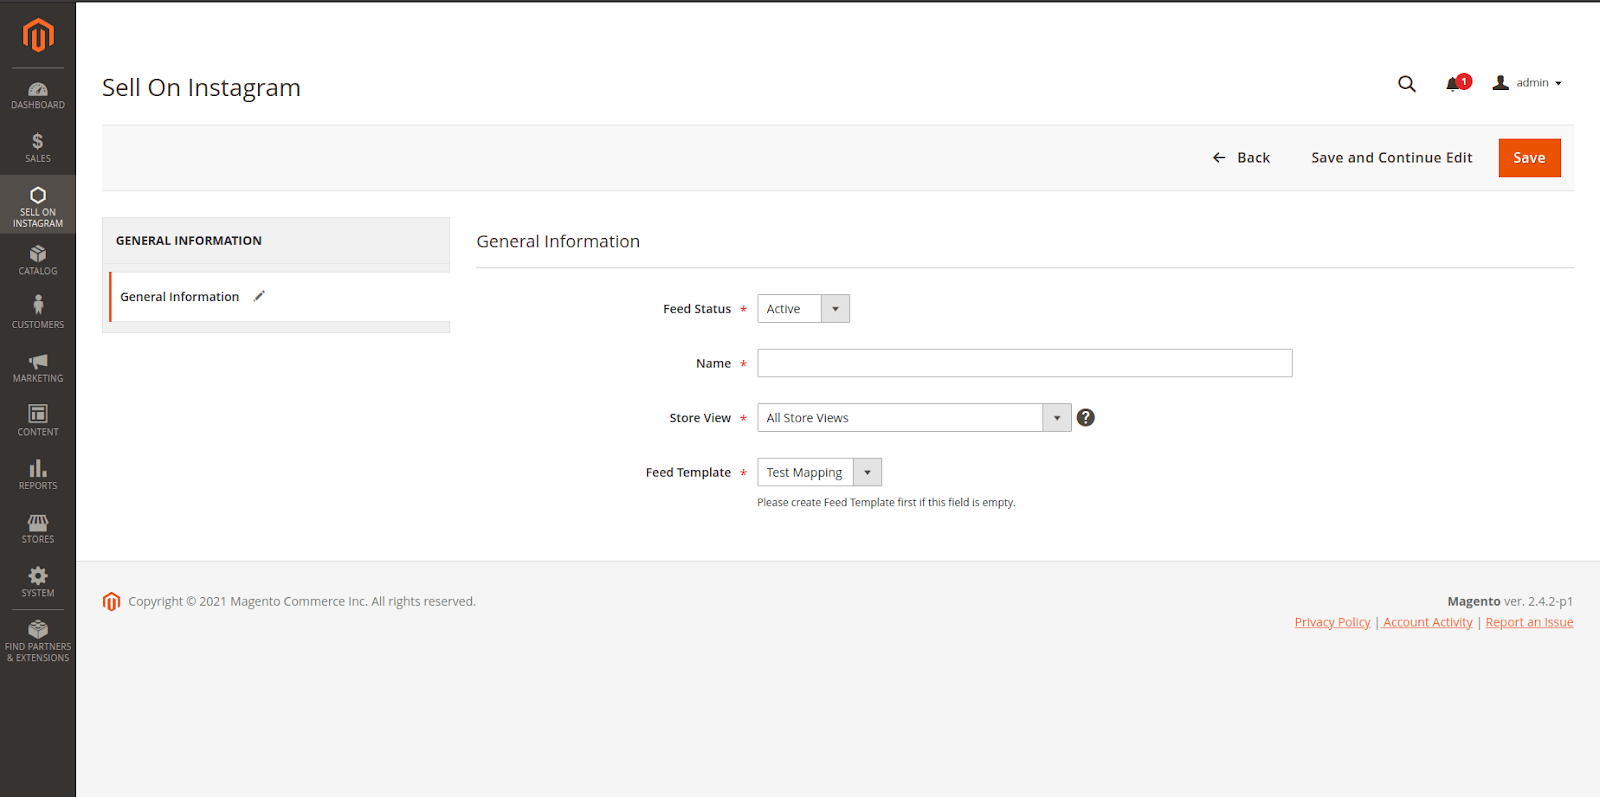
Feed Status: Status of the feed
Set Name and Store View
Feed Template: Choose the template mapping attribute
Click Save / Save and Continue Edit
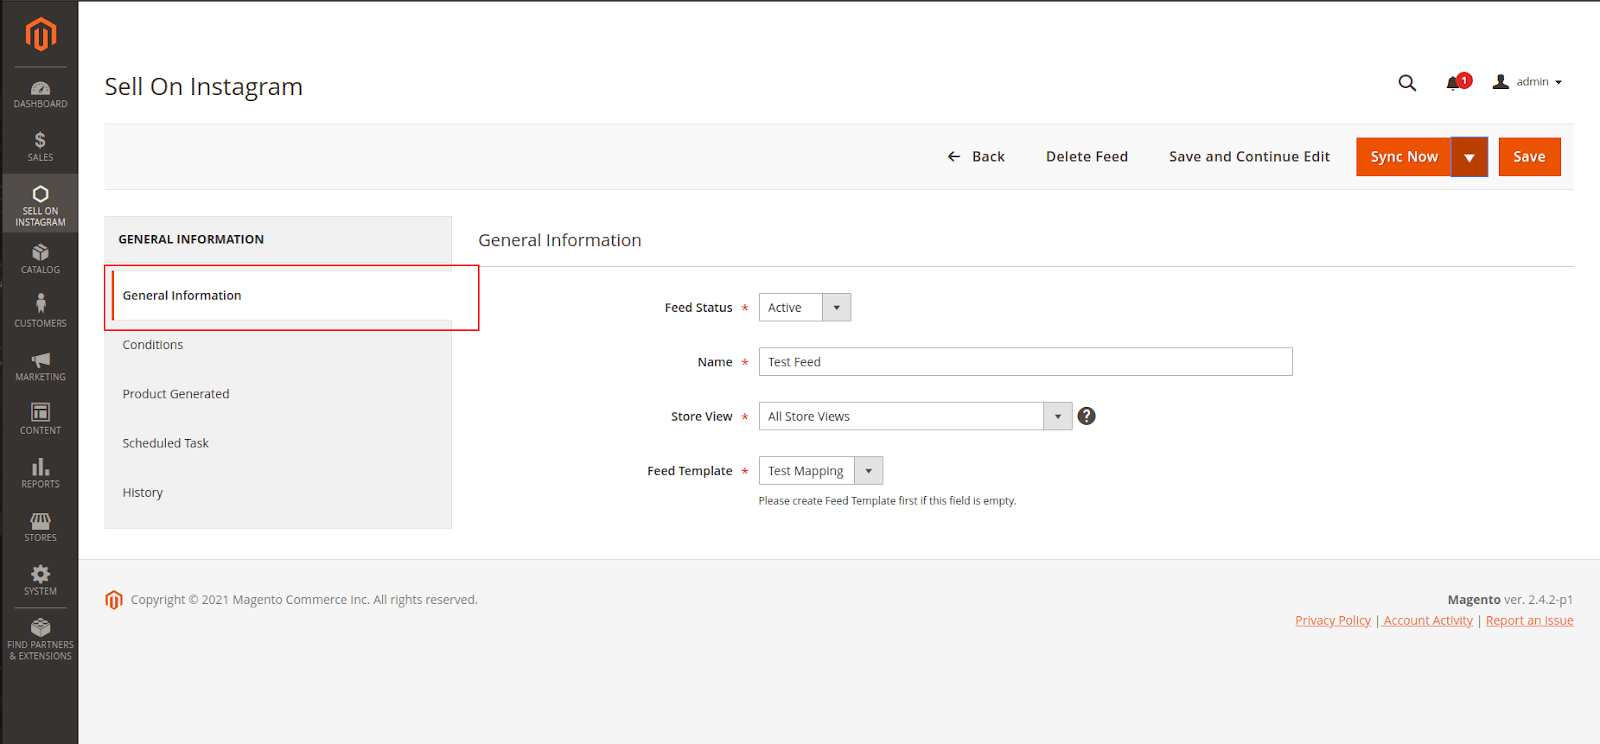
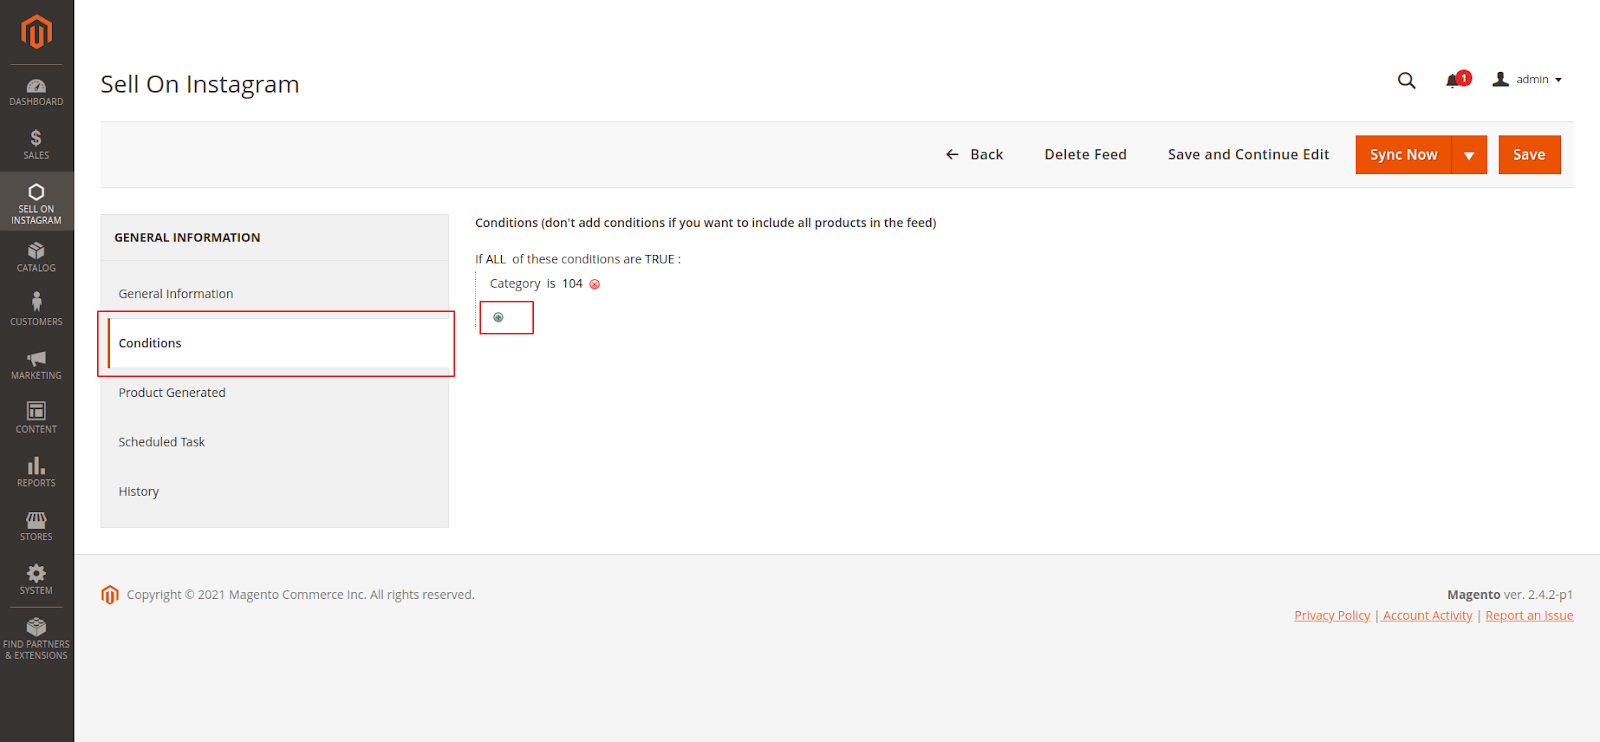
Admin can set conditions to choose suitable products to sync to your Facebook (instagram) store
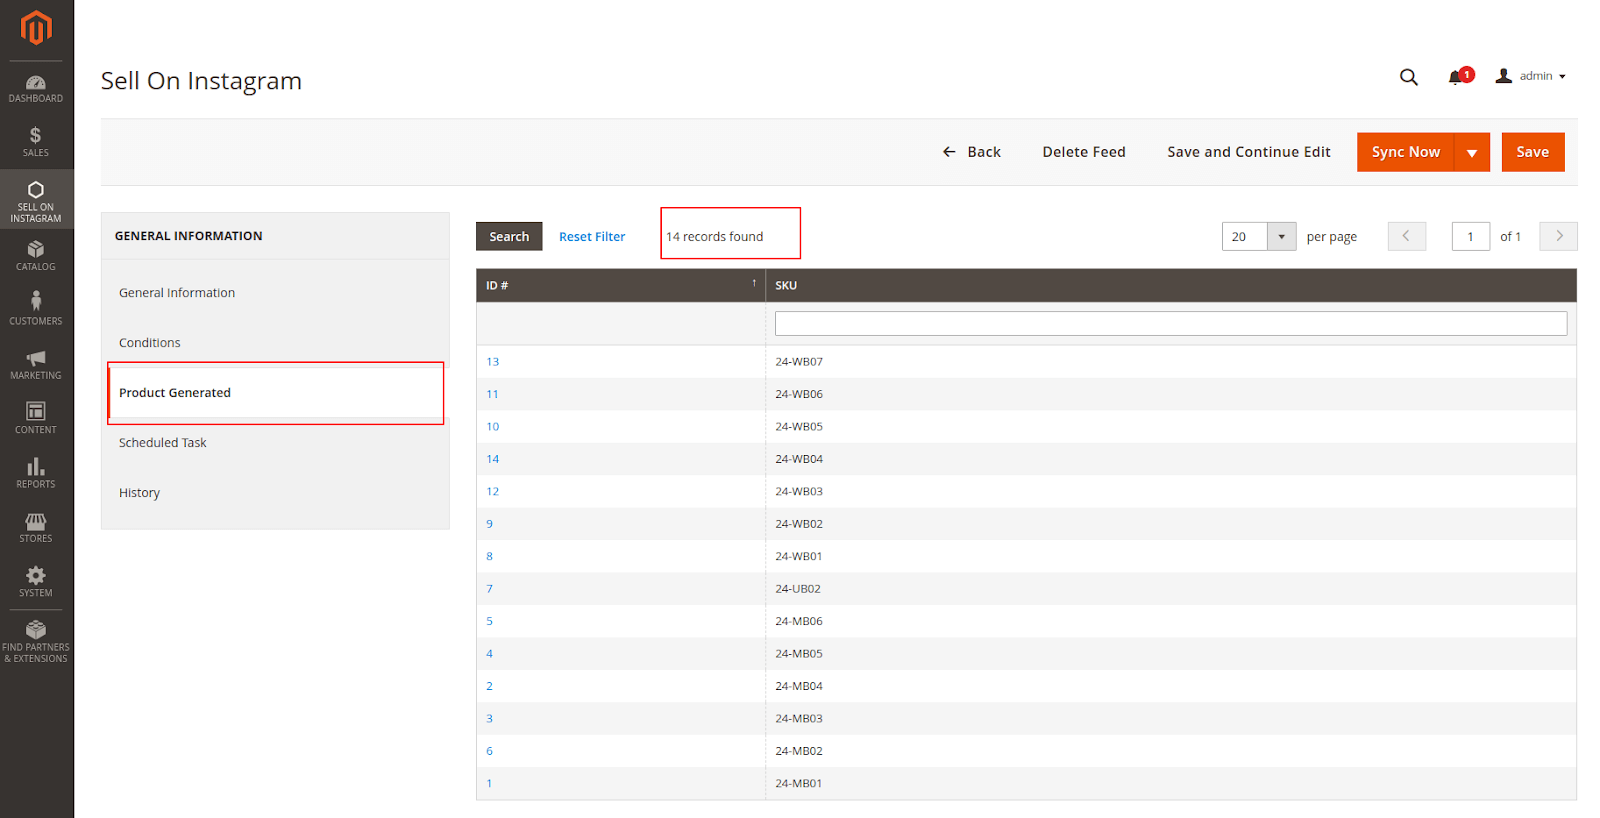
All product after sync to your Facebook (Instagram) store will list here
Enable: Set Yes to sync feed product by schedule
Day of the week: multiselect day will sync product feed
Time of the day: multiselect time will sync product feed
It will show you history of process sync product from Magento to Facebook (Instagram) store
You can sync the product by schedule with set time and day to run cron or you can sync product feed manually by clicking the button Sync Now. And choose action Create & Update or Delete product feed to your shop.
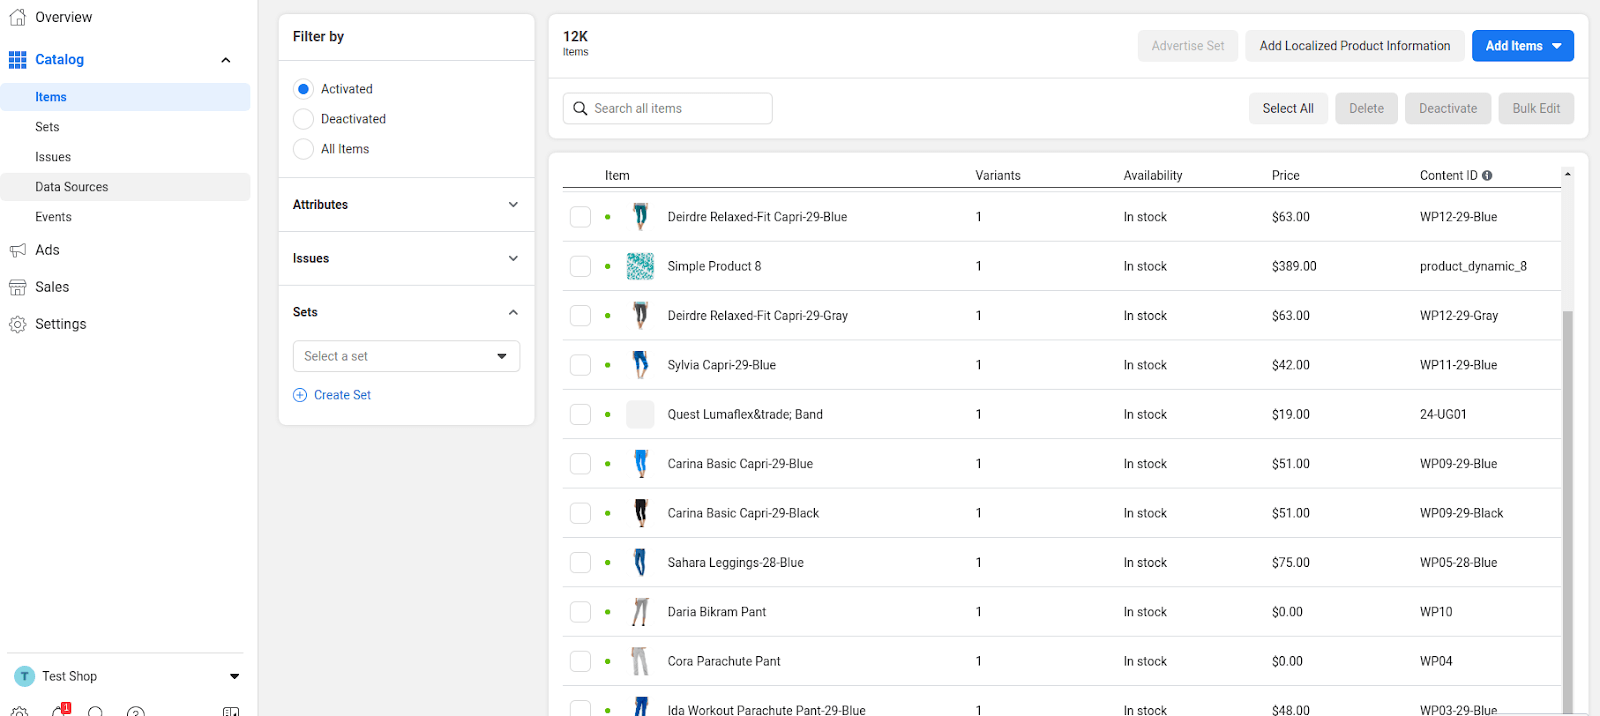
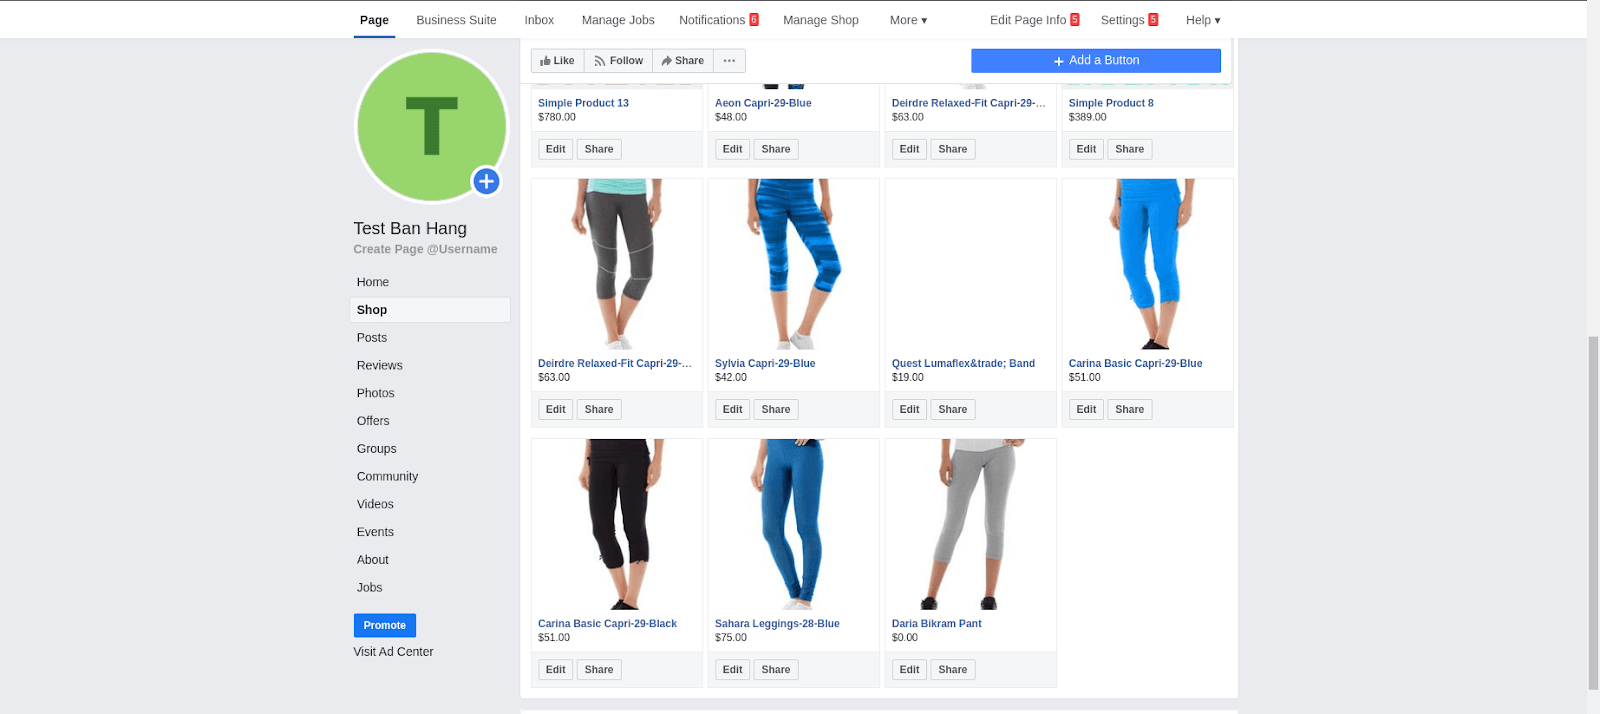
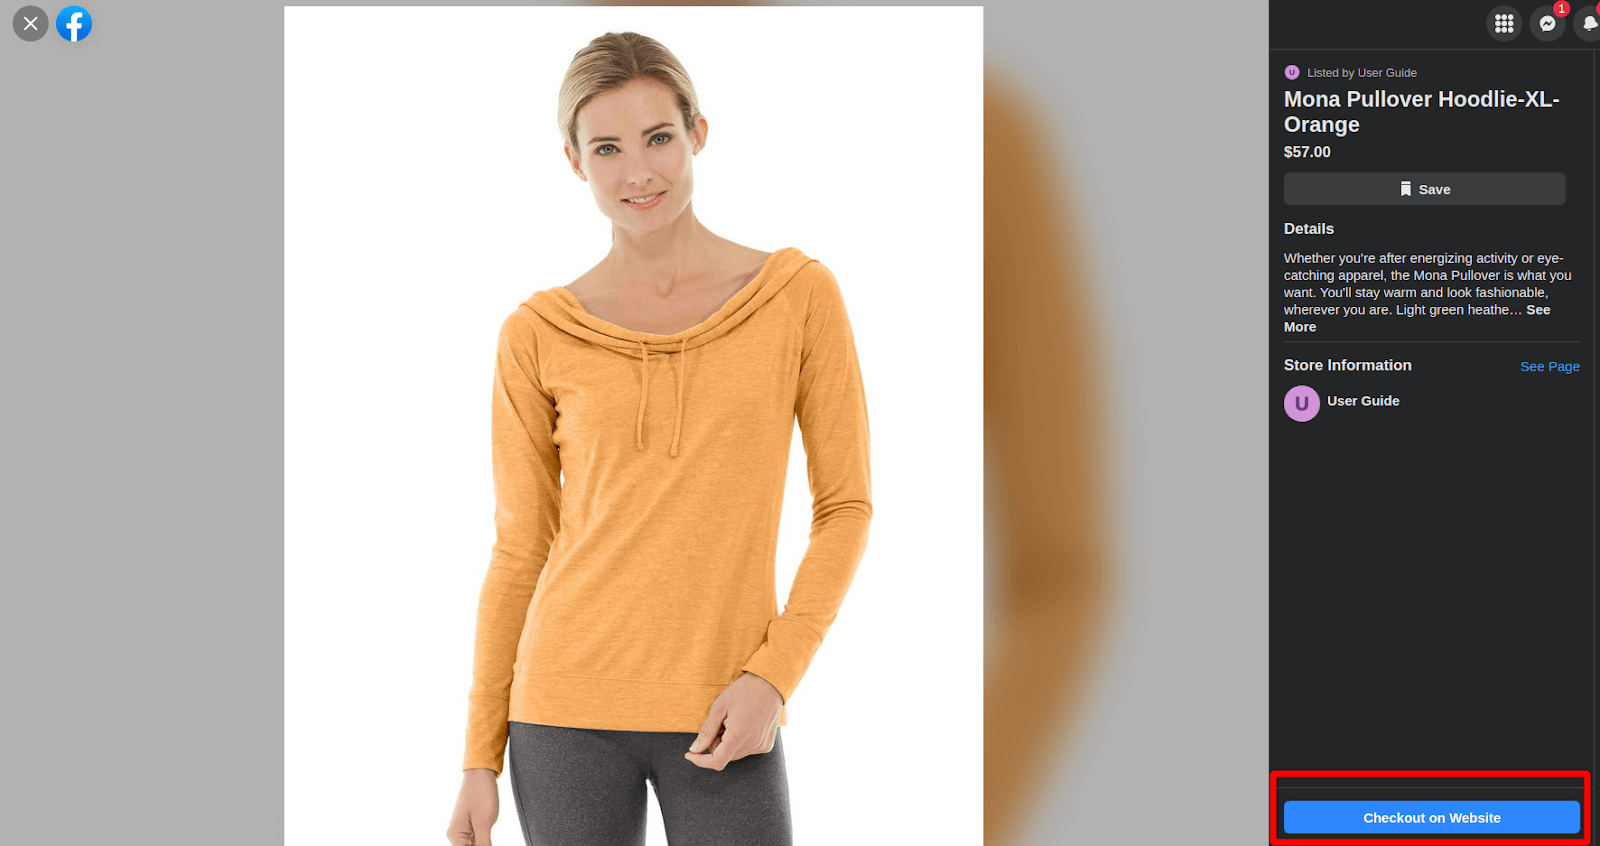
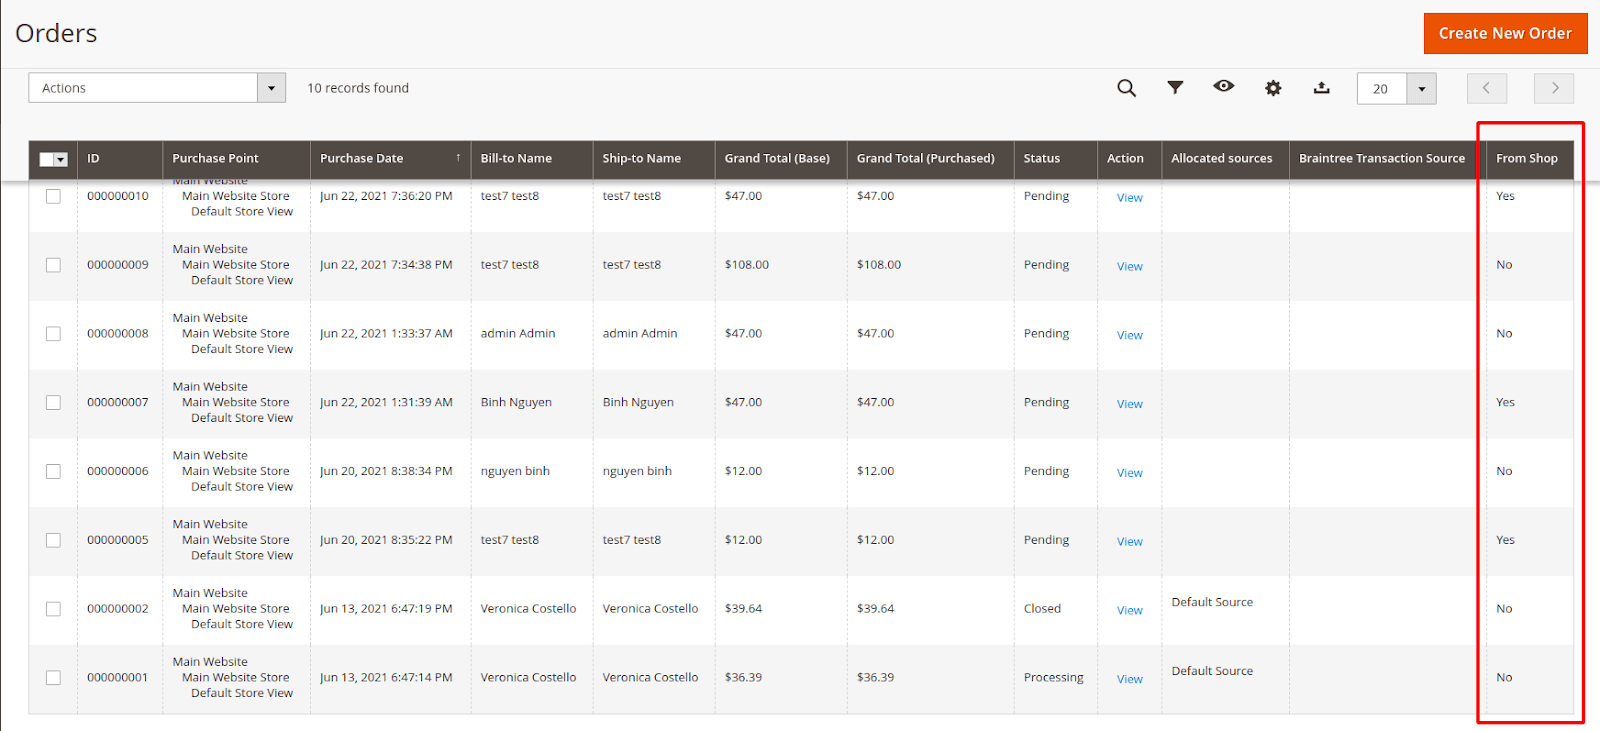
When a customer clicks checkout in Facebook (Instagram) shop, it will redirect to checkout cart page in magento and auto add this product with quantity is 1 to cart.
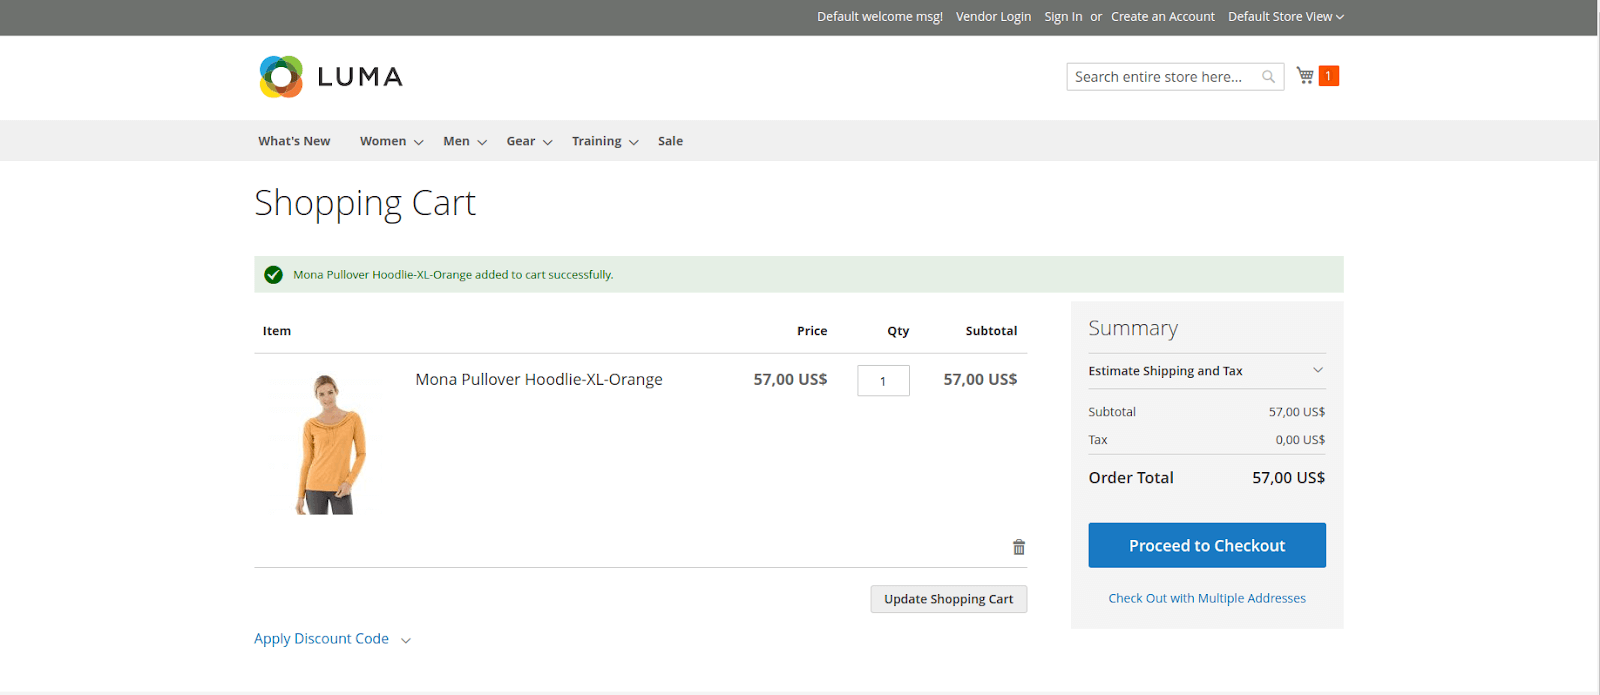
Complete the payment with this product, It will track order from Facebook (Instagram) shop.

To turn on shopping, you must connect Instagram profiles that are switched to business profiles. These profiles must be approved for Instagram Shopping before you can start tagging products in your posts or Stories.
(Click here to get more information )
Set Up a Business Account on Instagram
Click here to get information
Set Up your shop
Go to your Instagram profile
Select the hamburger icon in the top right
Settings > Business > Set Up Instagram Shopping
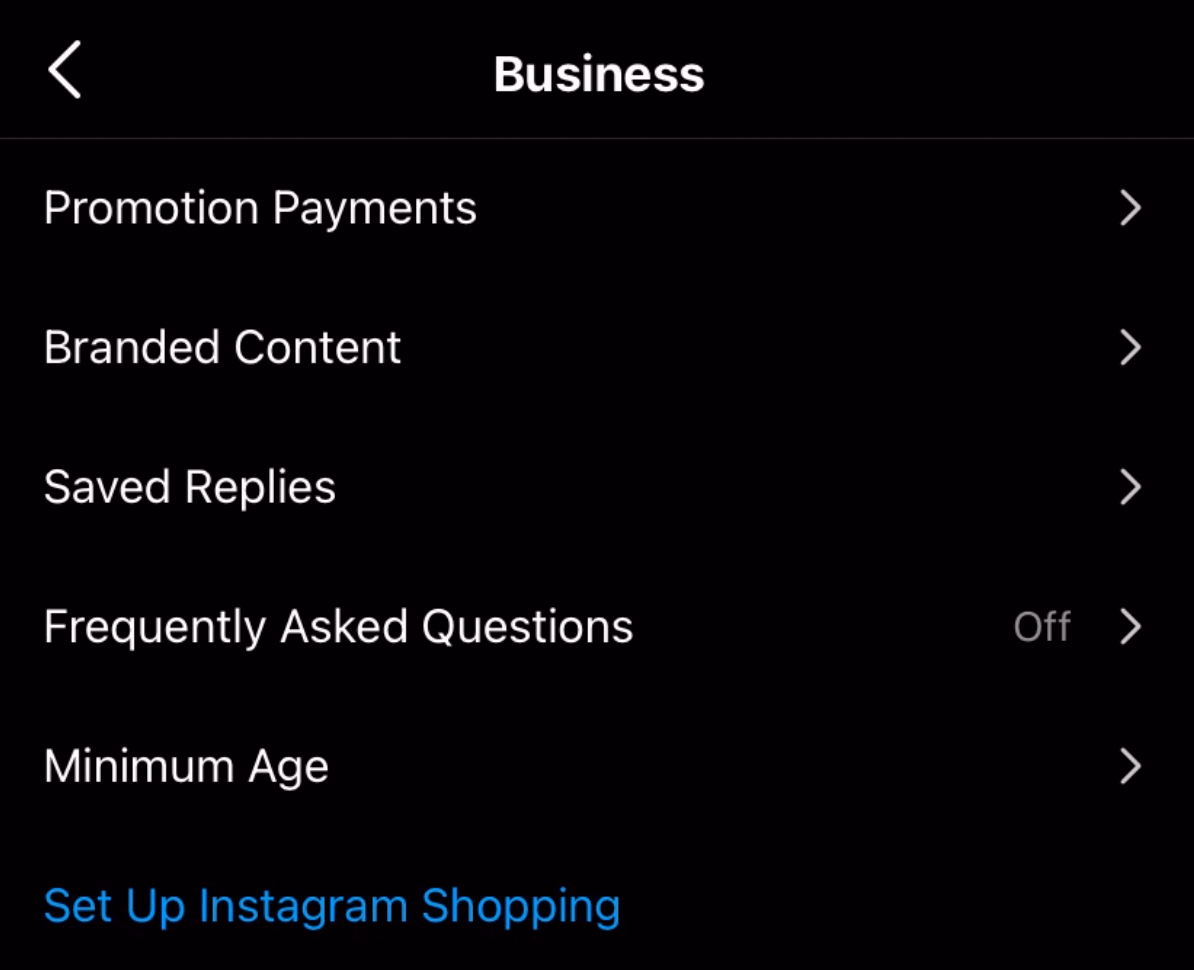
Follow the steps to submit your account for review
You will now have to wait for approval of Instagram Shopping on your account. This can take as little as 24 hours and up to 1 week.
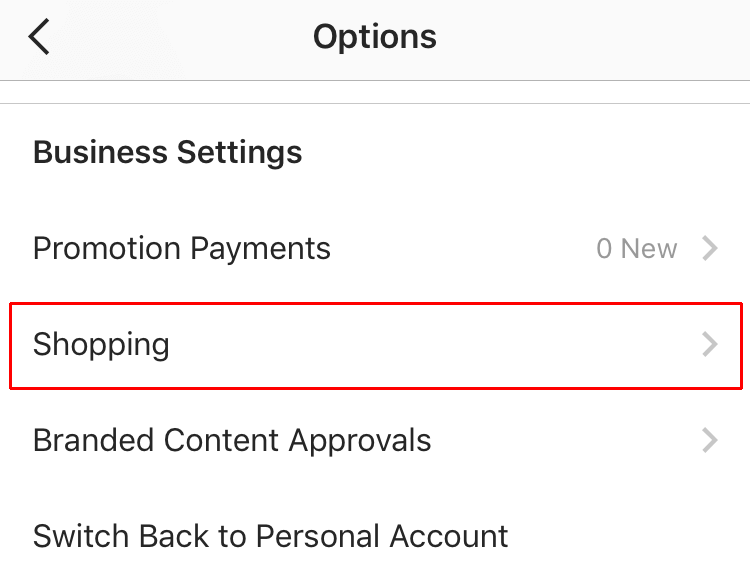
When you’re approved and the Shopping button appears in your Business settings, you will be able to click it to view your active catalogs and products
Select a product catalogue which in your case, would be the one you created in Facebook.

Tag Products in Your Instagram Posts
Add a photo to Instagram as you normally would (select the + icon, choose your image, add filters, a caption, etc)

Select Tag Products
Tap the photo where you’d like a product tag to appear, then select the appropriate product from your catalog

Tap Done and review your post
Share your new, shoppable Instagram image!
Click here for further instruction.
Once again, thank you for purchasing our extension. If you have any questions relating to this extension, please do not hesitate to contact us for support.