Thank you for purchasing our extension. If you have any questions that are beyond the scope of this document, please feel free to contact us via [email protected]
Updated: 10/09/2020 | By: Magenest | Support Portal: http://servicedesk.izysync.com/servicedesk/customer/portal/7

For admin
For customers
Your store should be running on
Magento Open Source 2.2.x, 2.3.x, 2.4
Magento Commerce 2.2.x,2.3.x, 2.4
On the Admin sidebar, go to Stores > Configuration > Magenest > Event Ticket.
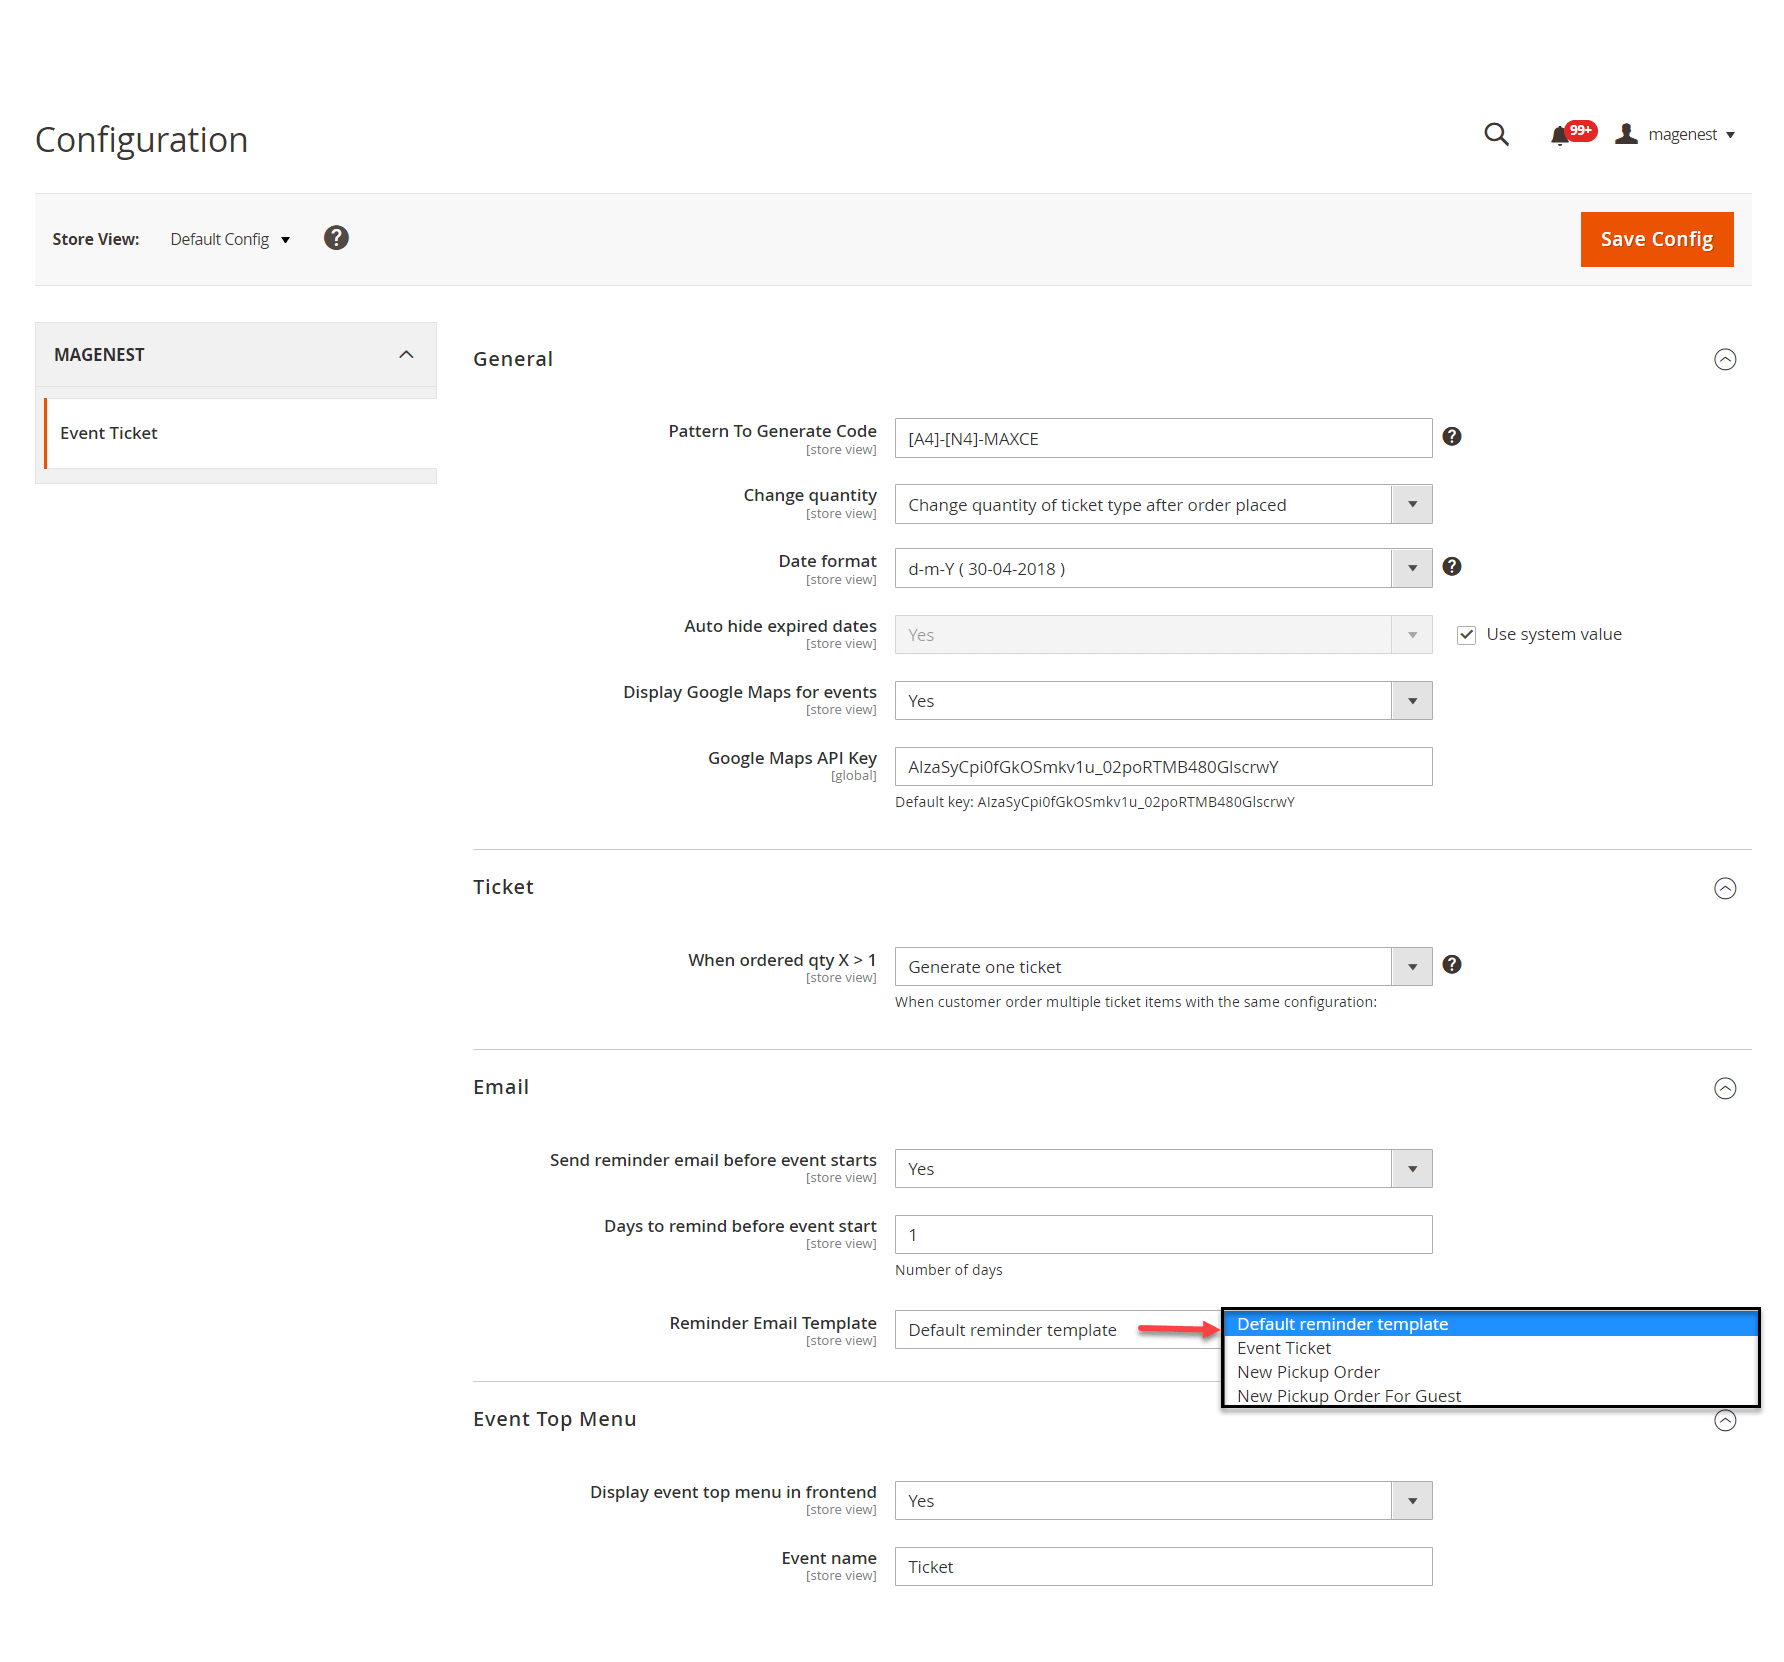
General:
Ticket
Email:
Below is the default email template:
Email Template
1 |
|
Event Top Menu
After saving the configurations, please clear the cache to apply the changes.
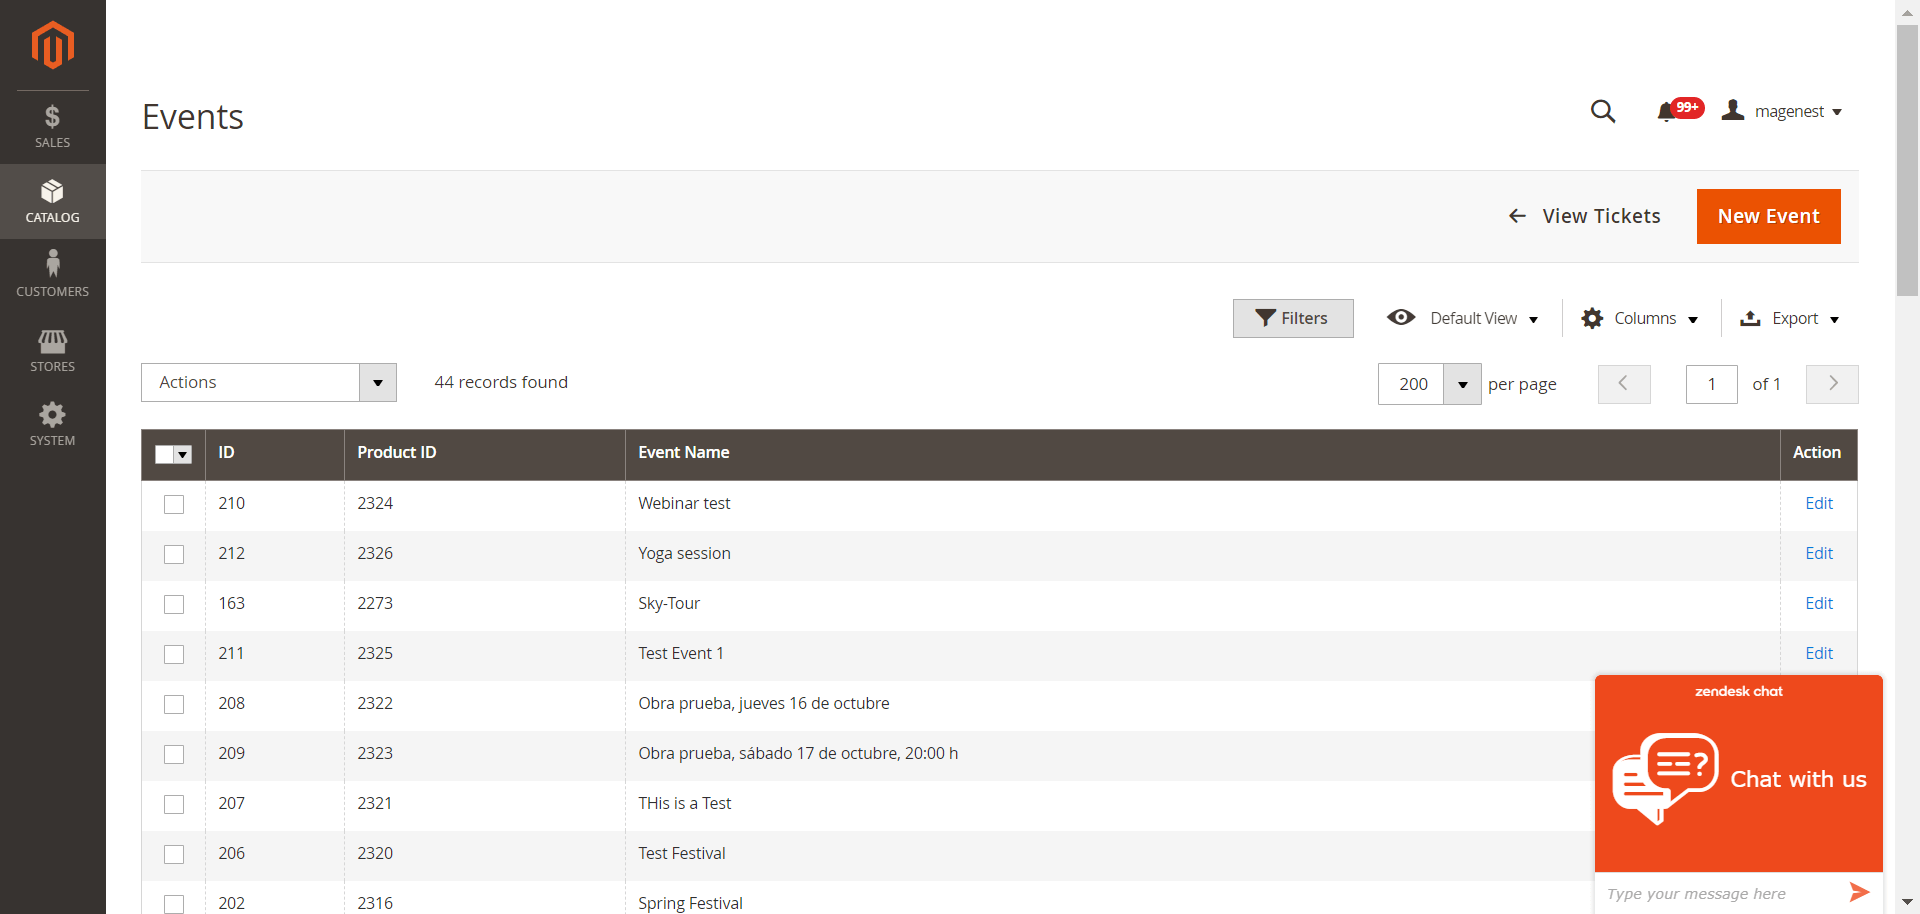
In order to create a new event ticket, go to Catalog > Event Manager > Event
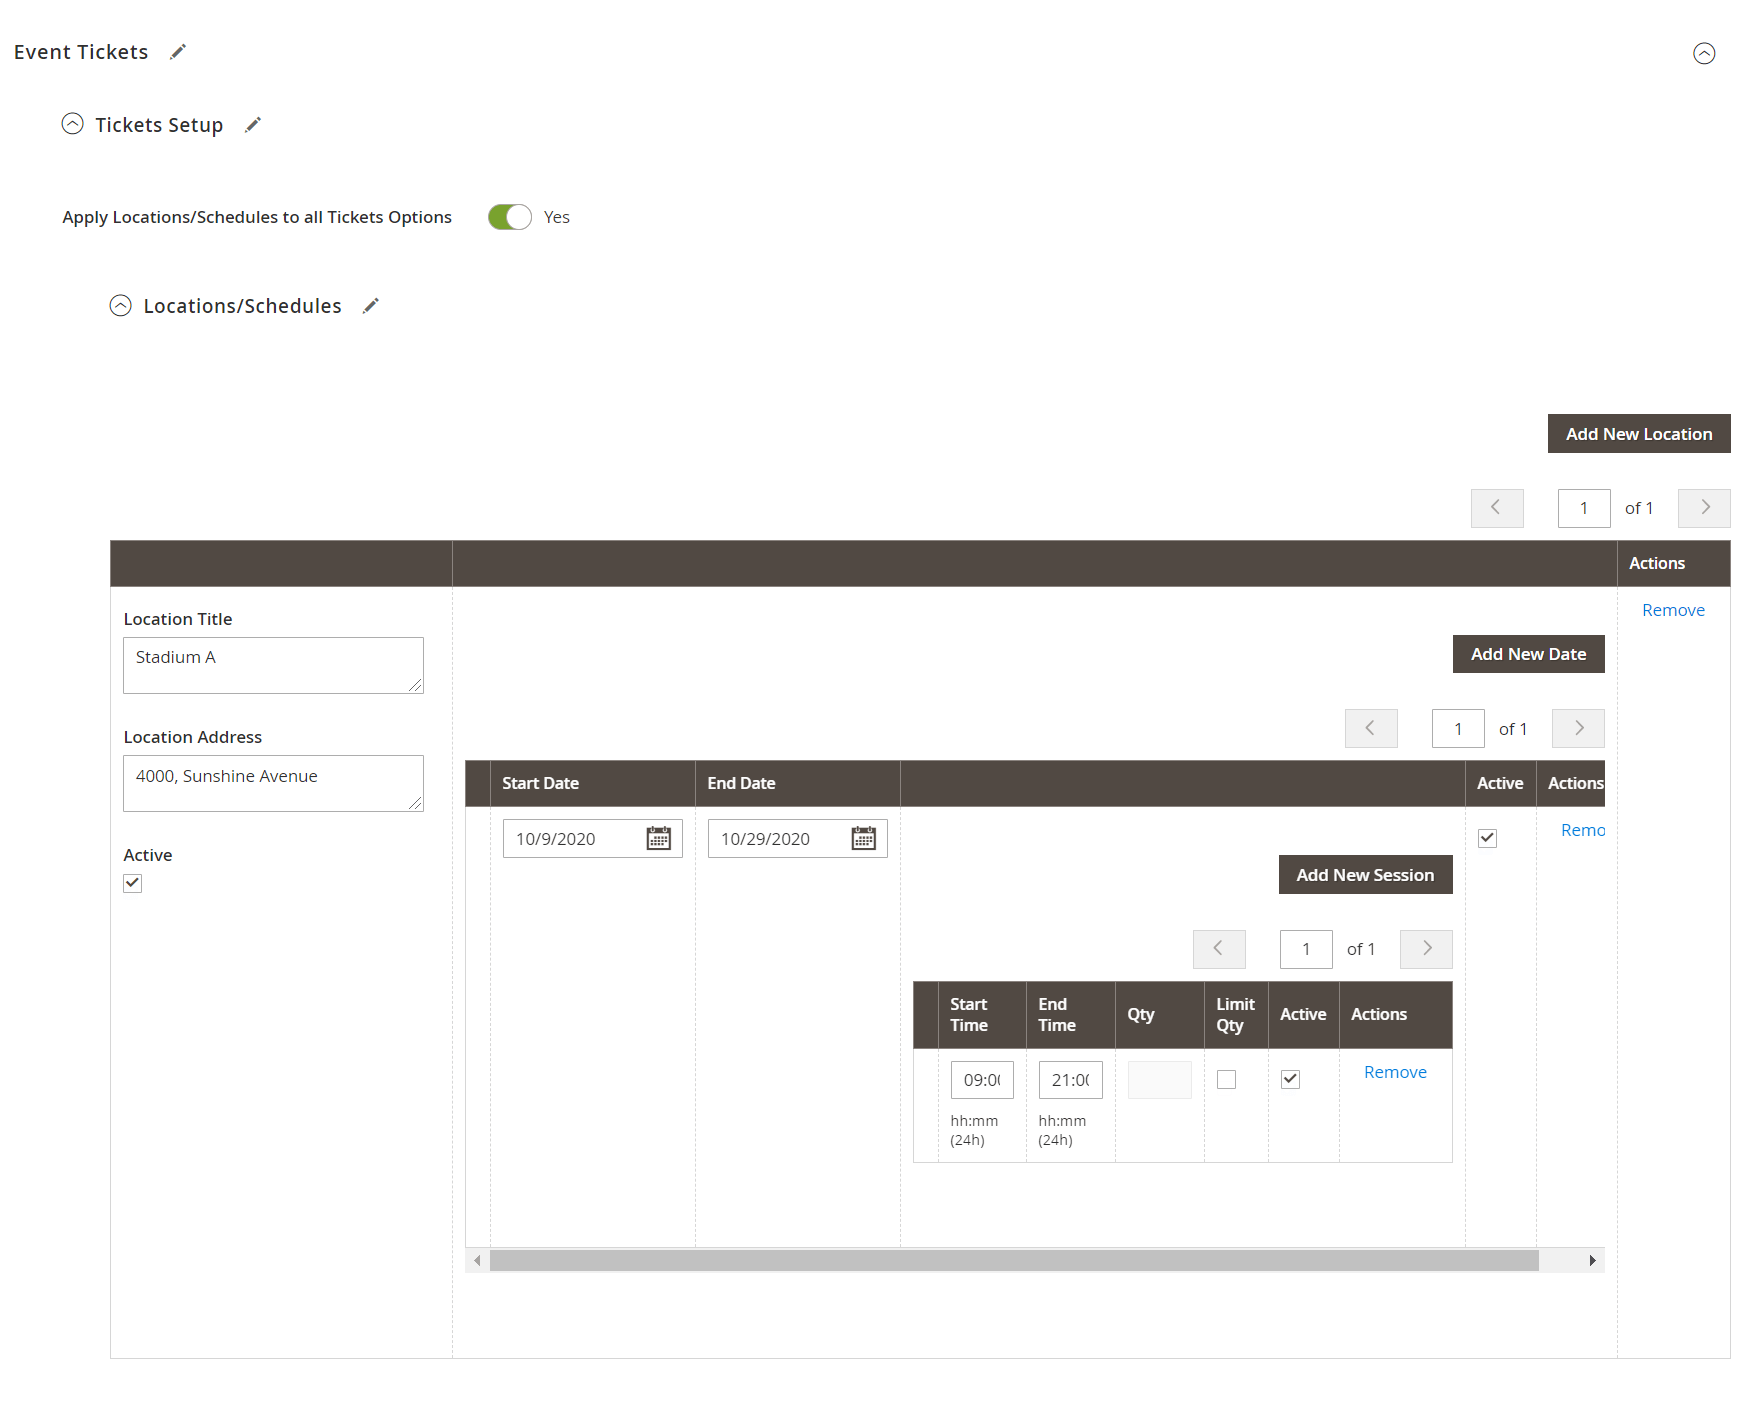
Tickets Setup
The ticket is a product on your site, so to set it up as an event ticket, please scroll down to see Event Ticket.
You can enable the Apply the locations/schedules to all the ticket options.
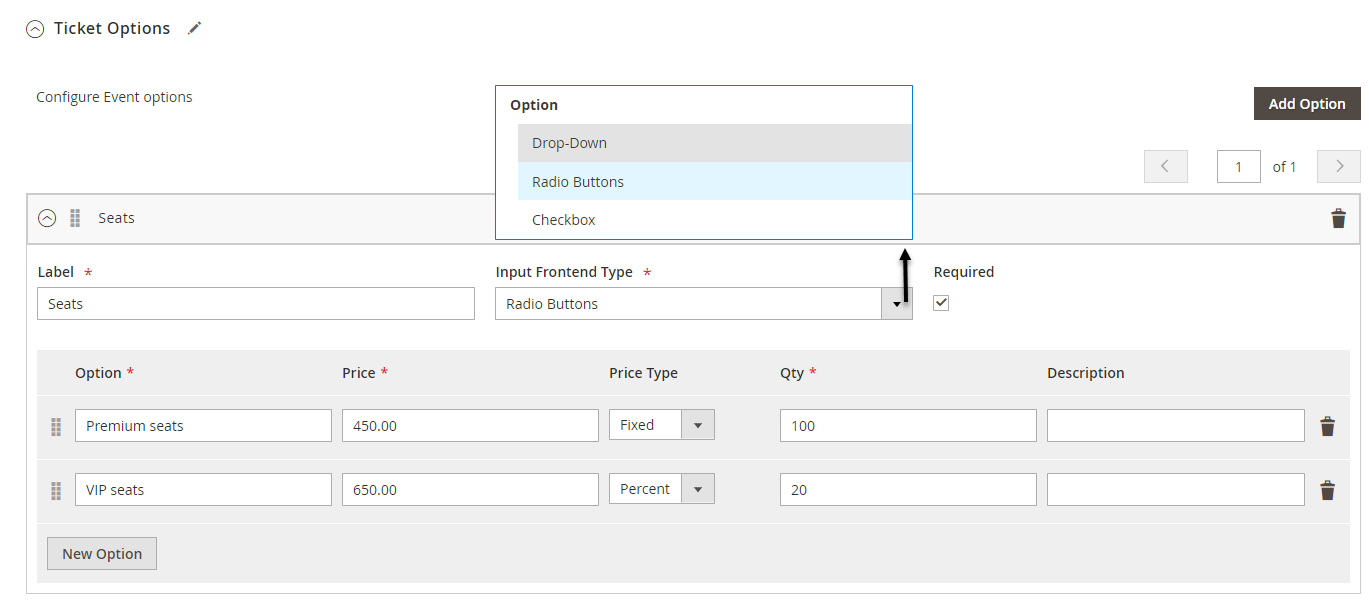
Ticket options:
You can add unlimited ticket options with its own price, quantity and description.
Ticket Template:
You can use the PDF Template created in Catalog > Event Management > PDF Template or a Custom Template. If you use the PDF Template, switch the Use Custom Template to No.

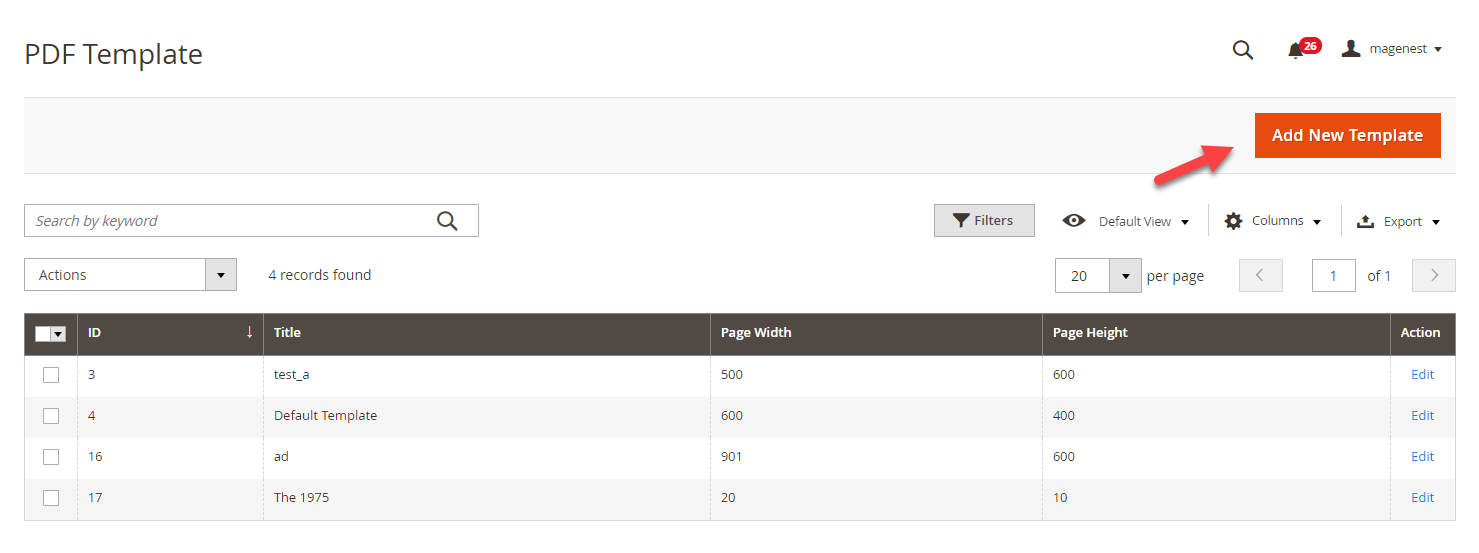
You can create any manage PDF Template in Catalog > Event Management > PDF Template
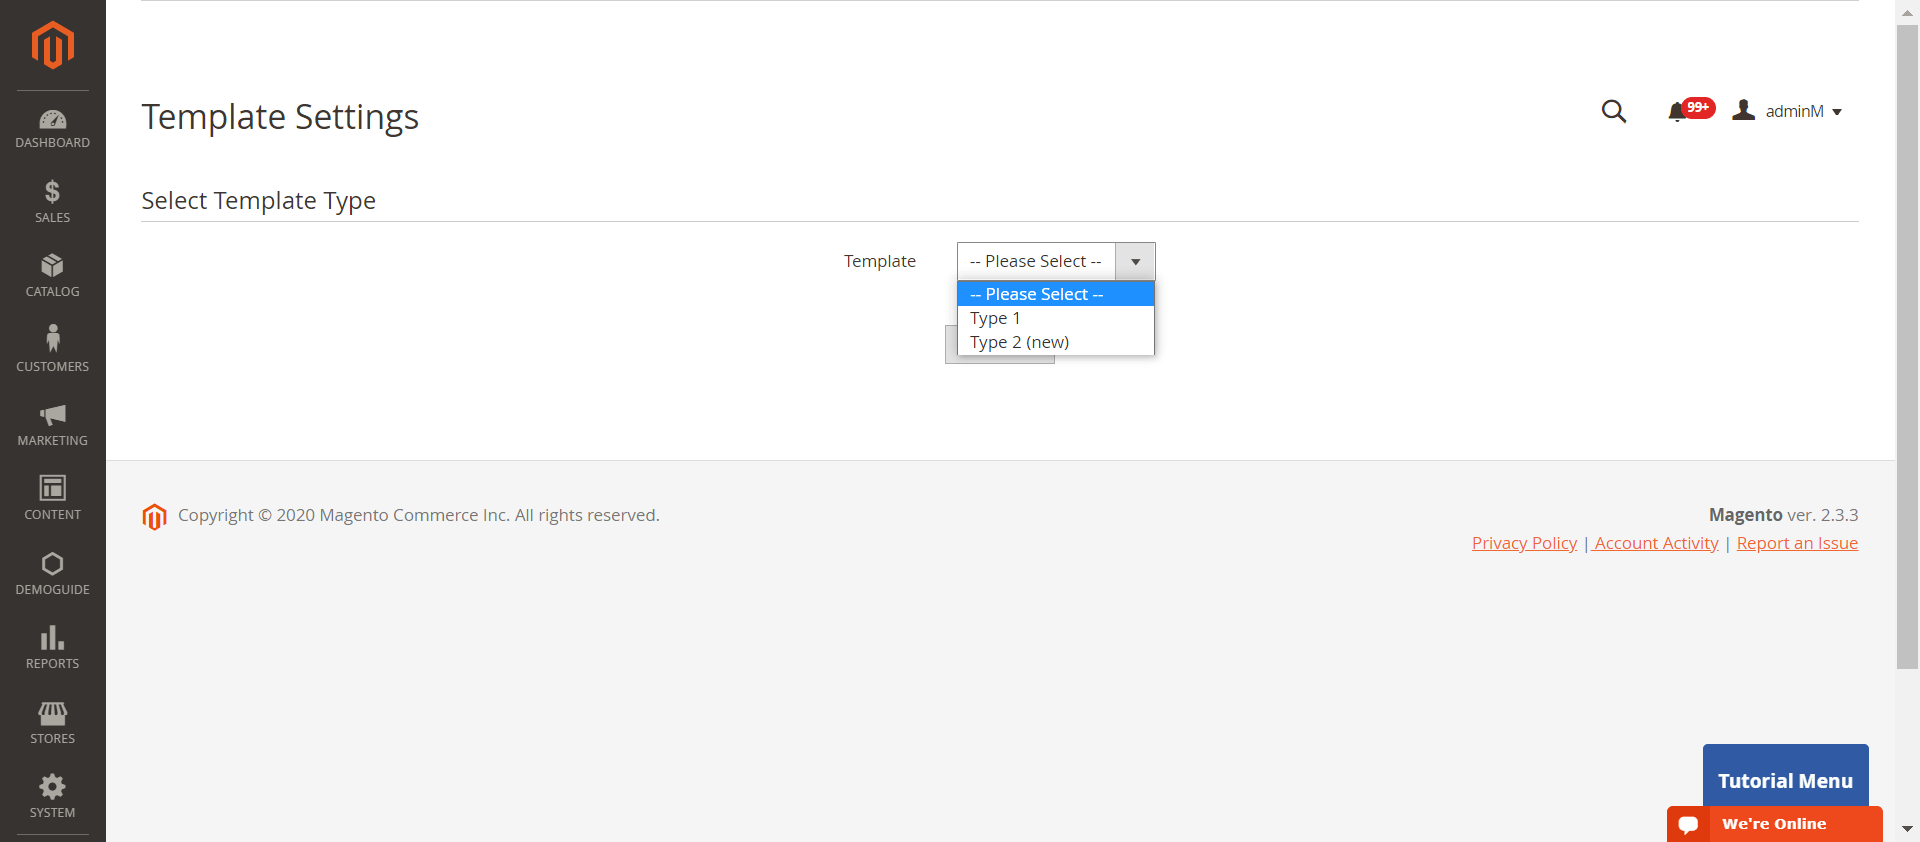
Default Template: You can select between 2 default ticket template designs.
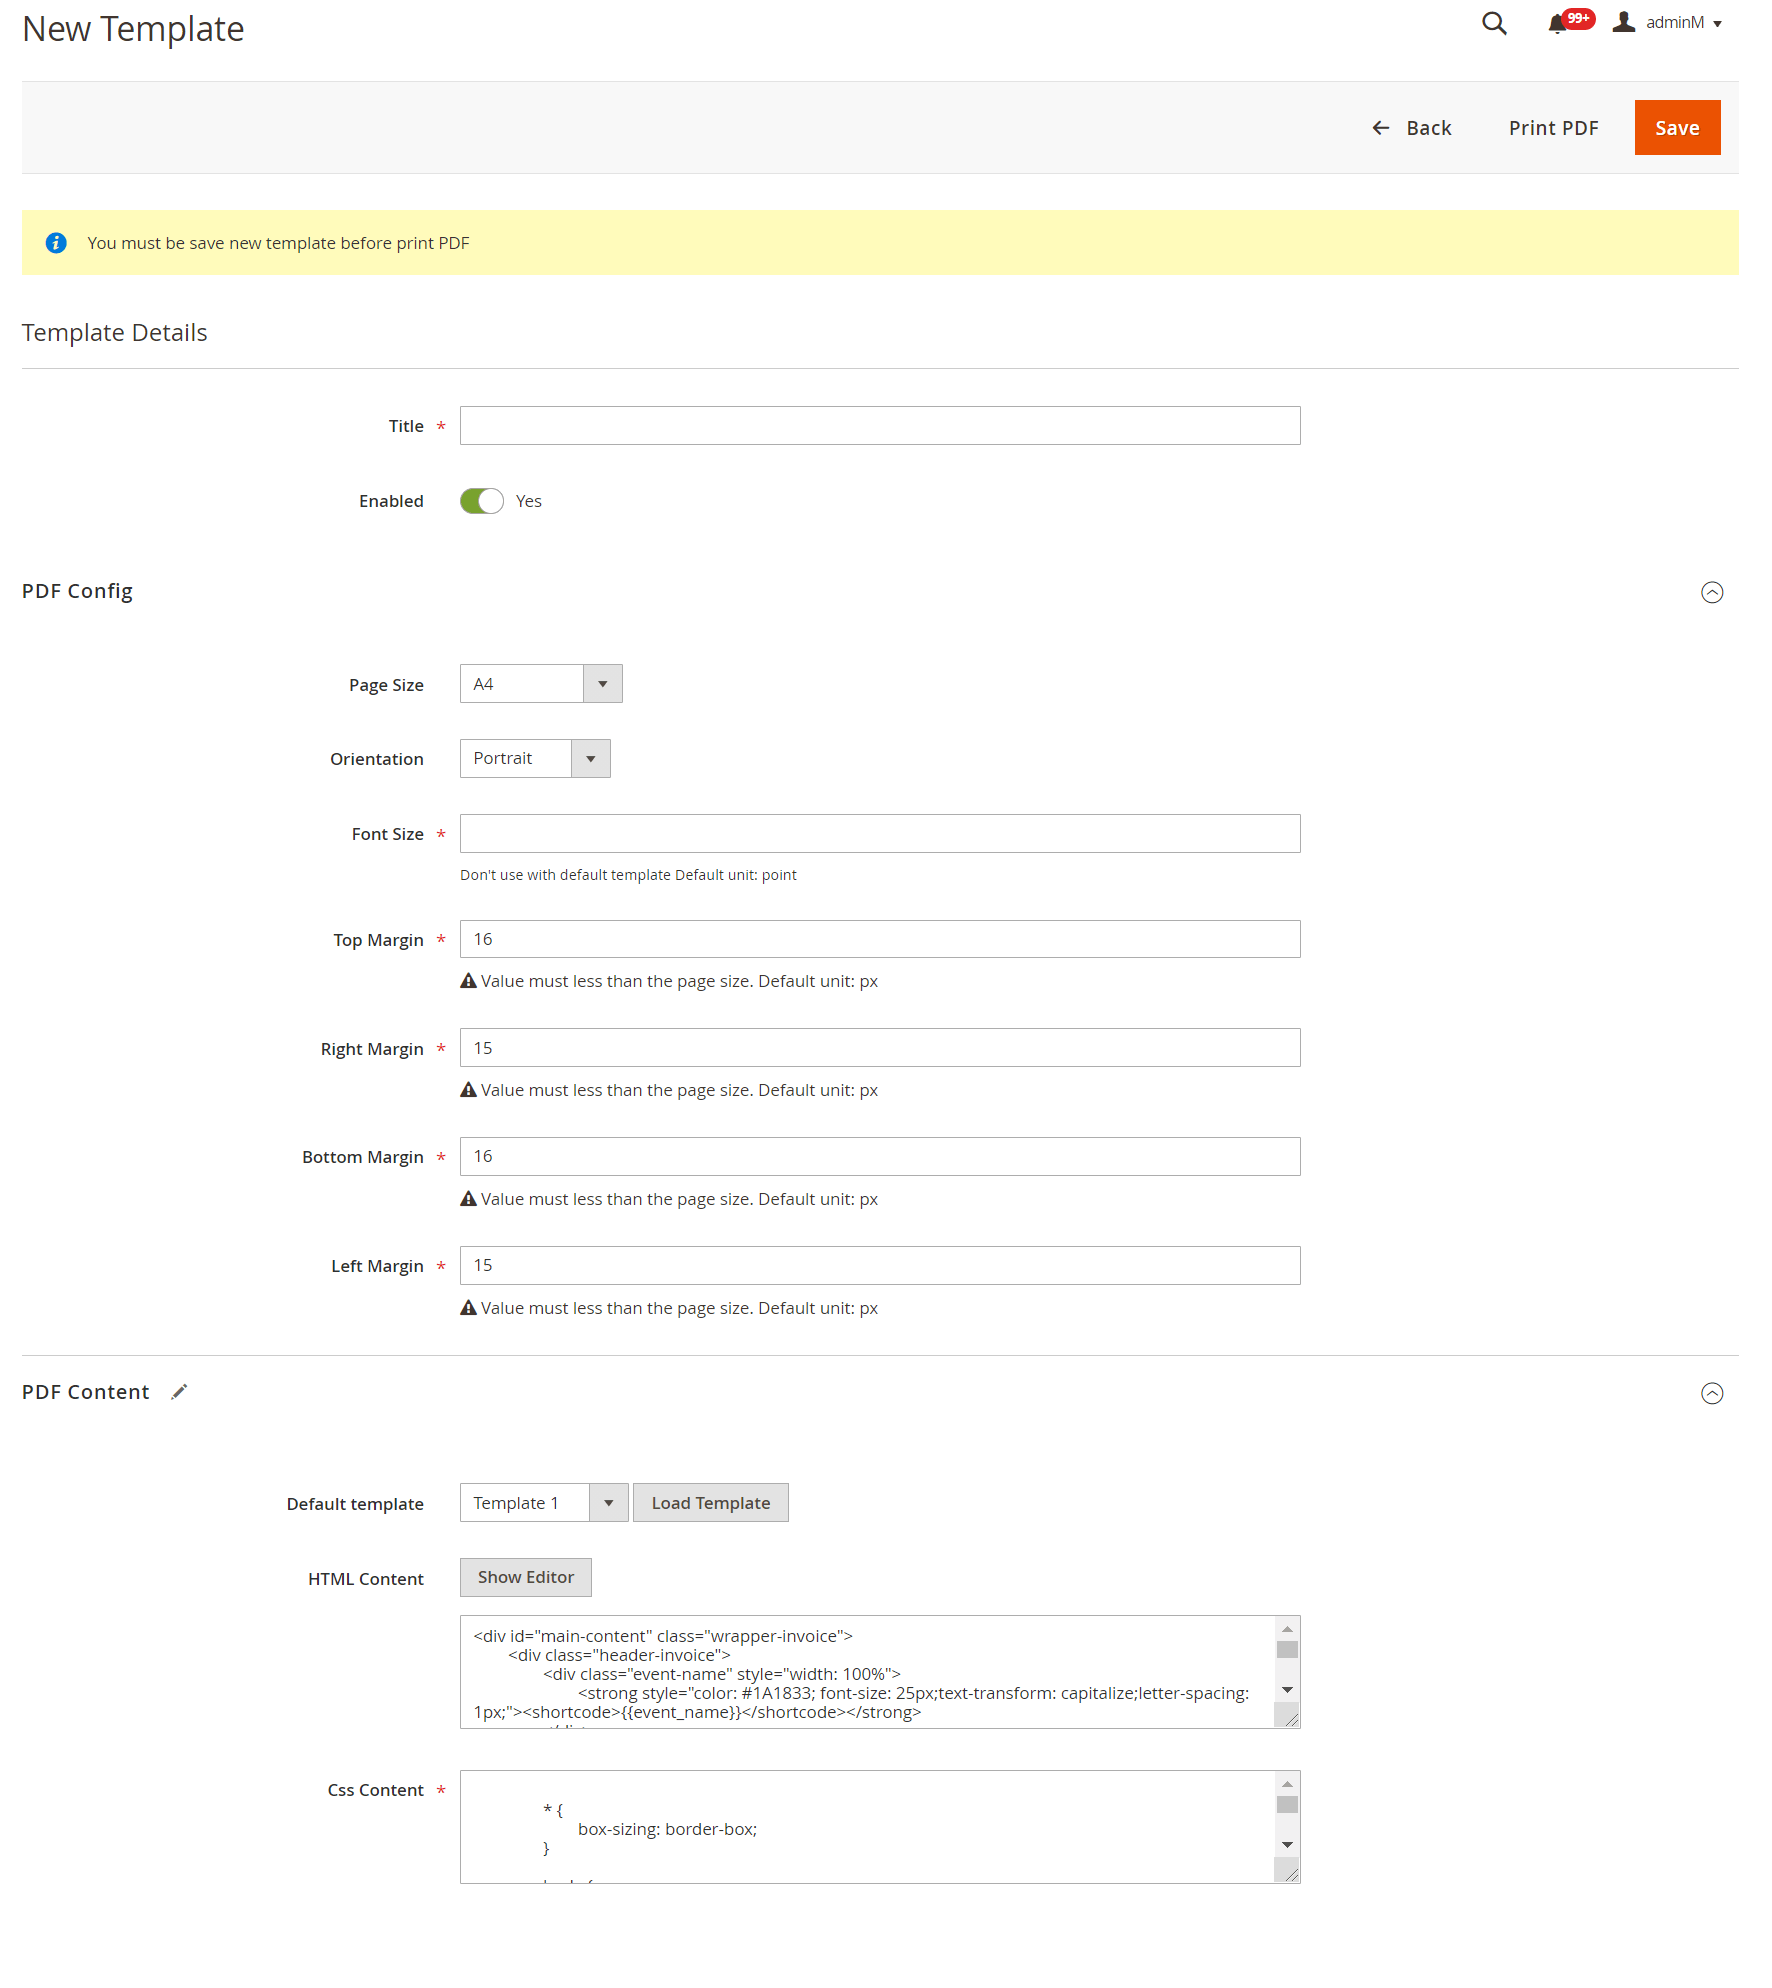
One thing with our new PDF template (Type 2) is that you can click on PDF Content > HTML Content > Show Editor, you'll be able to use Drag and Drop action to design the template,
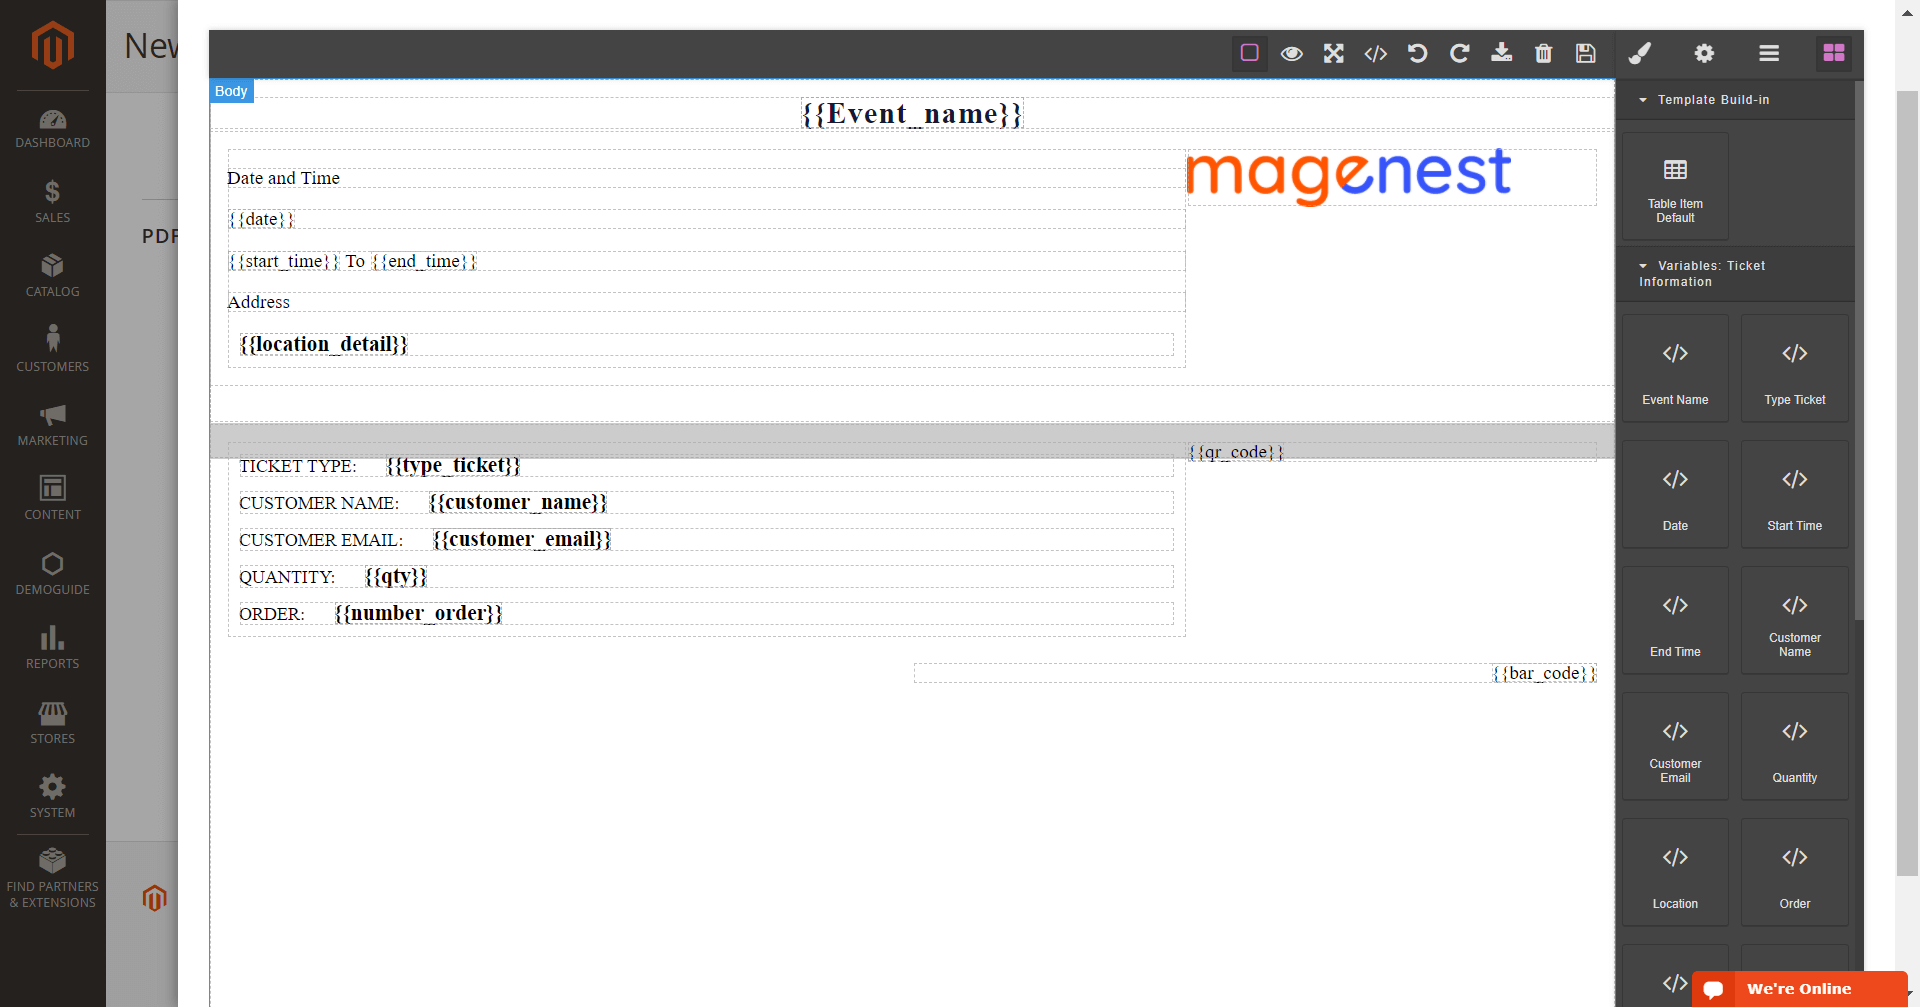
Custom Template
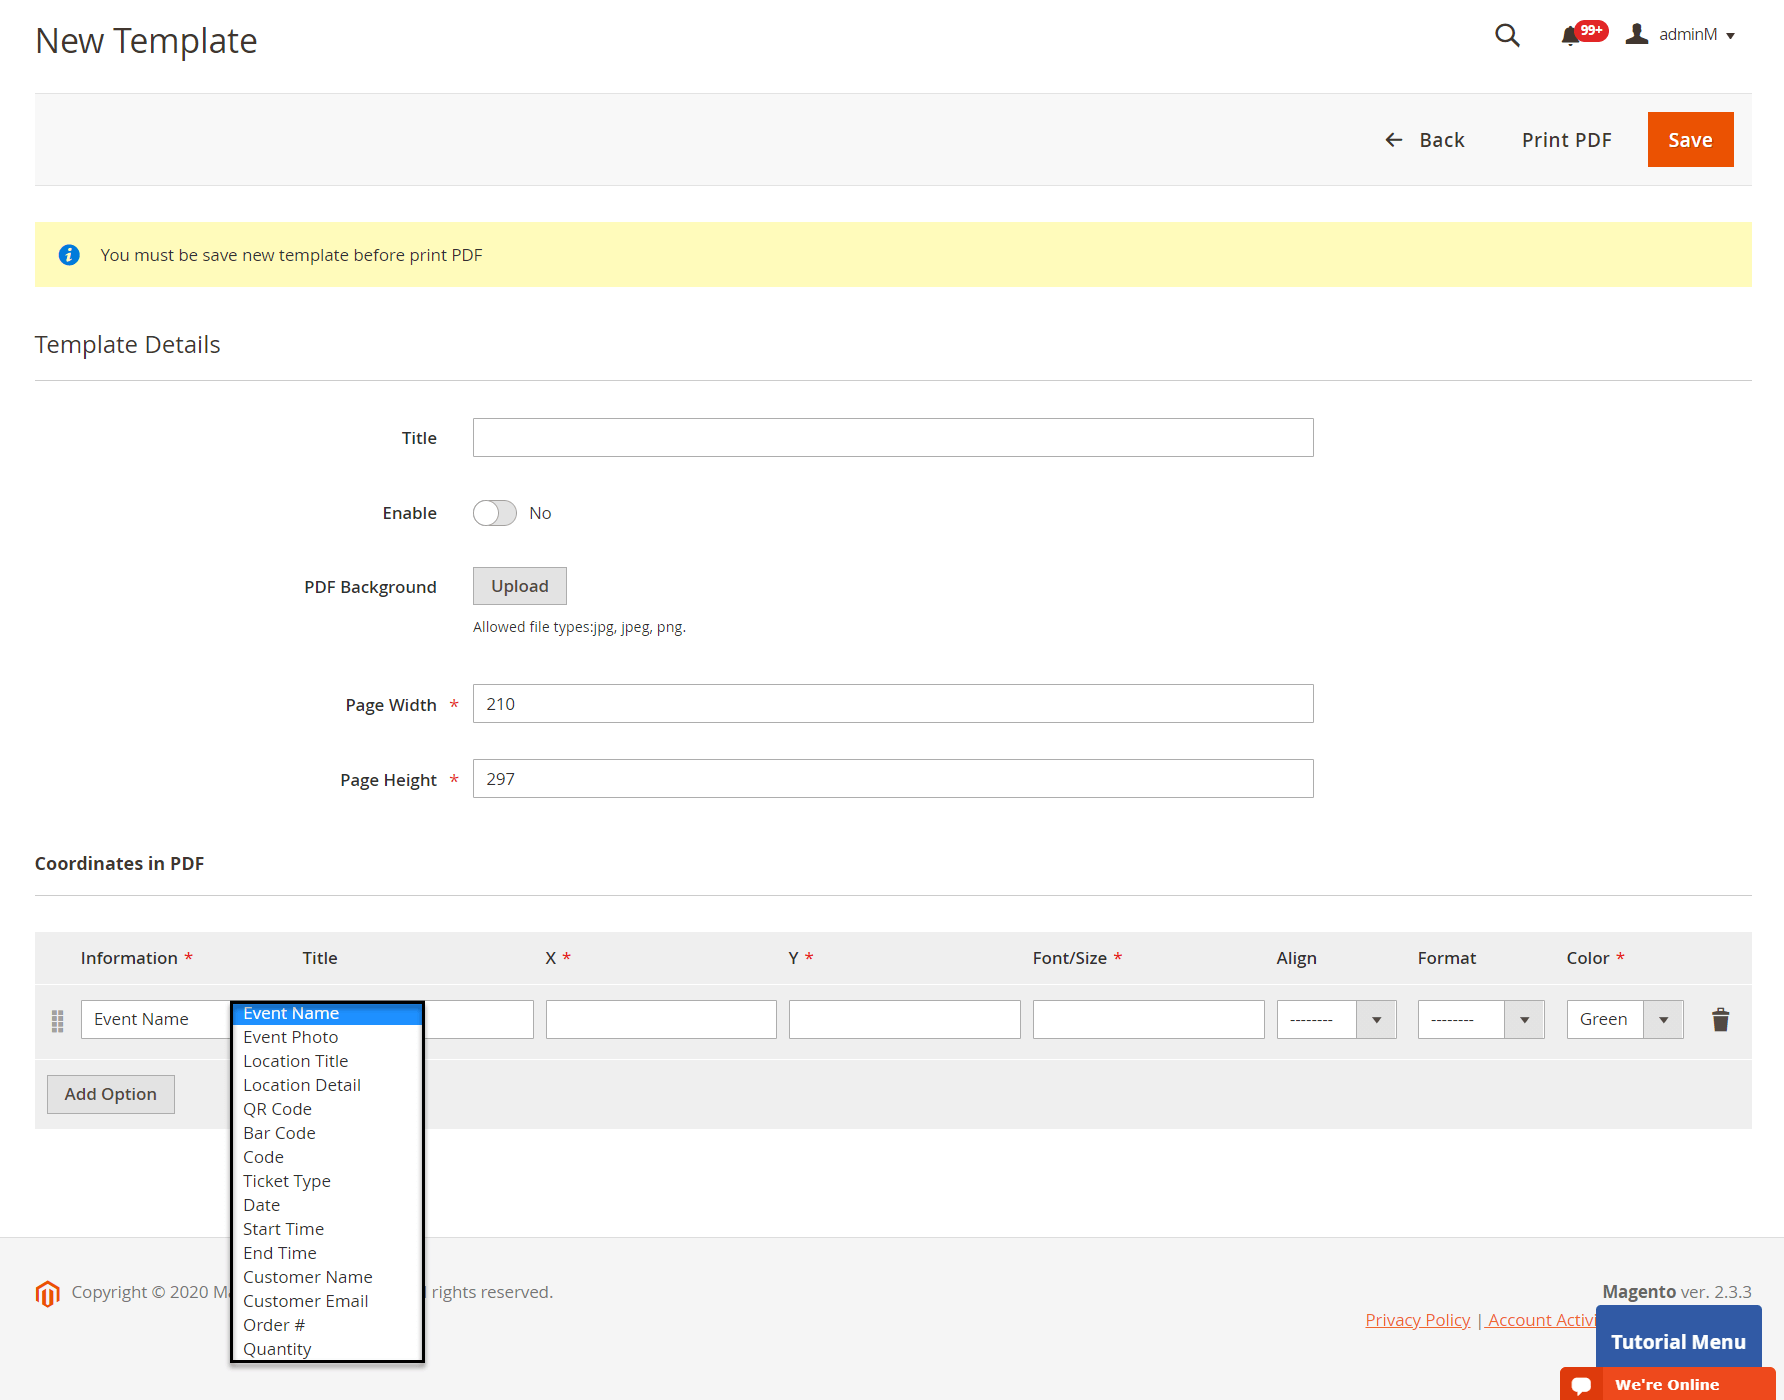
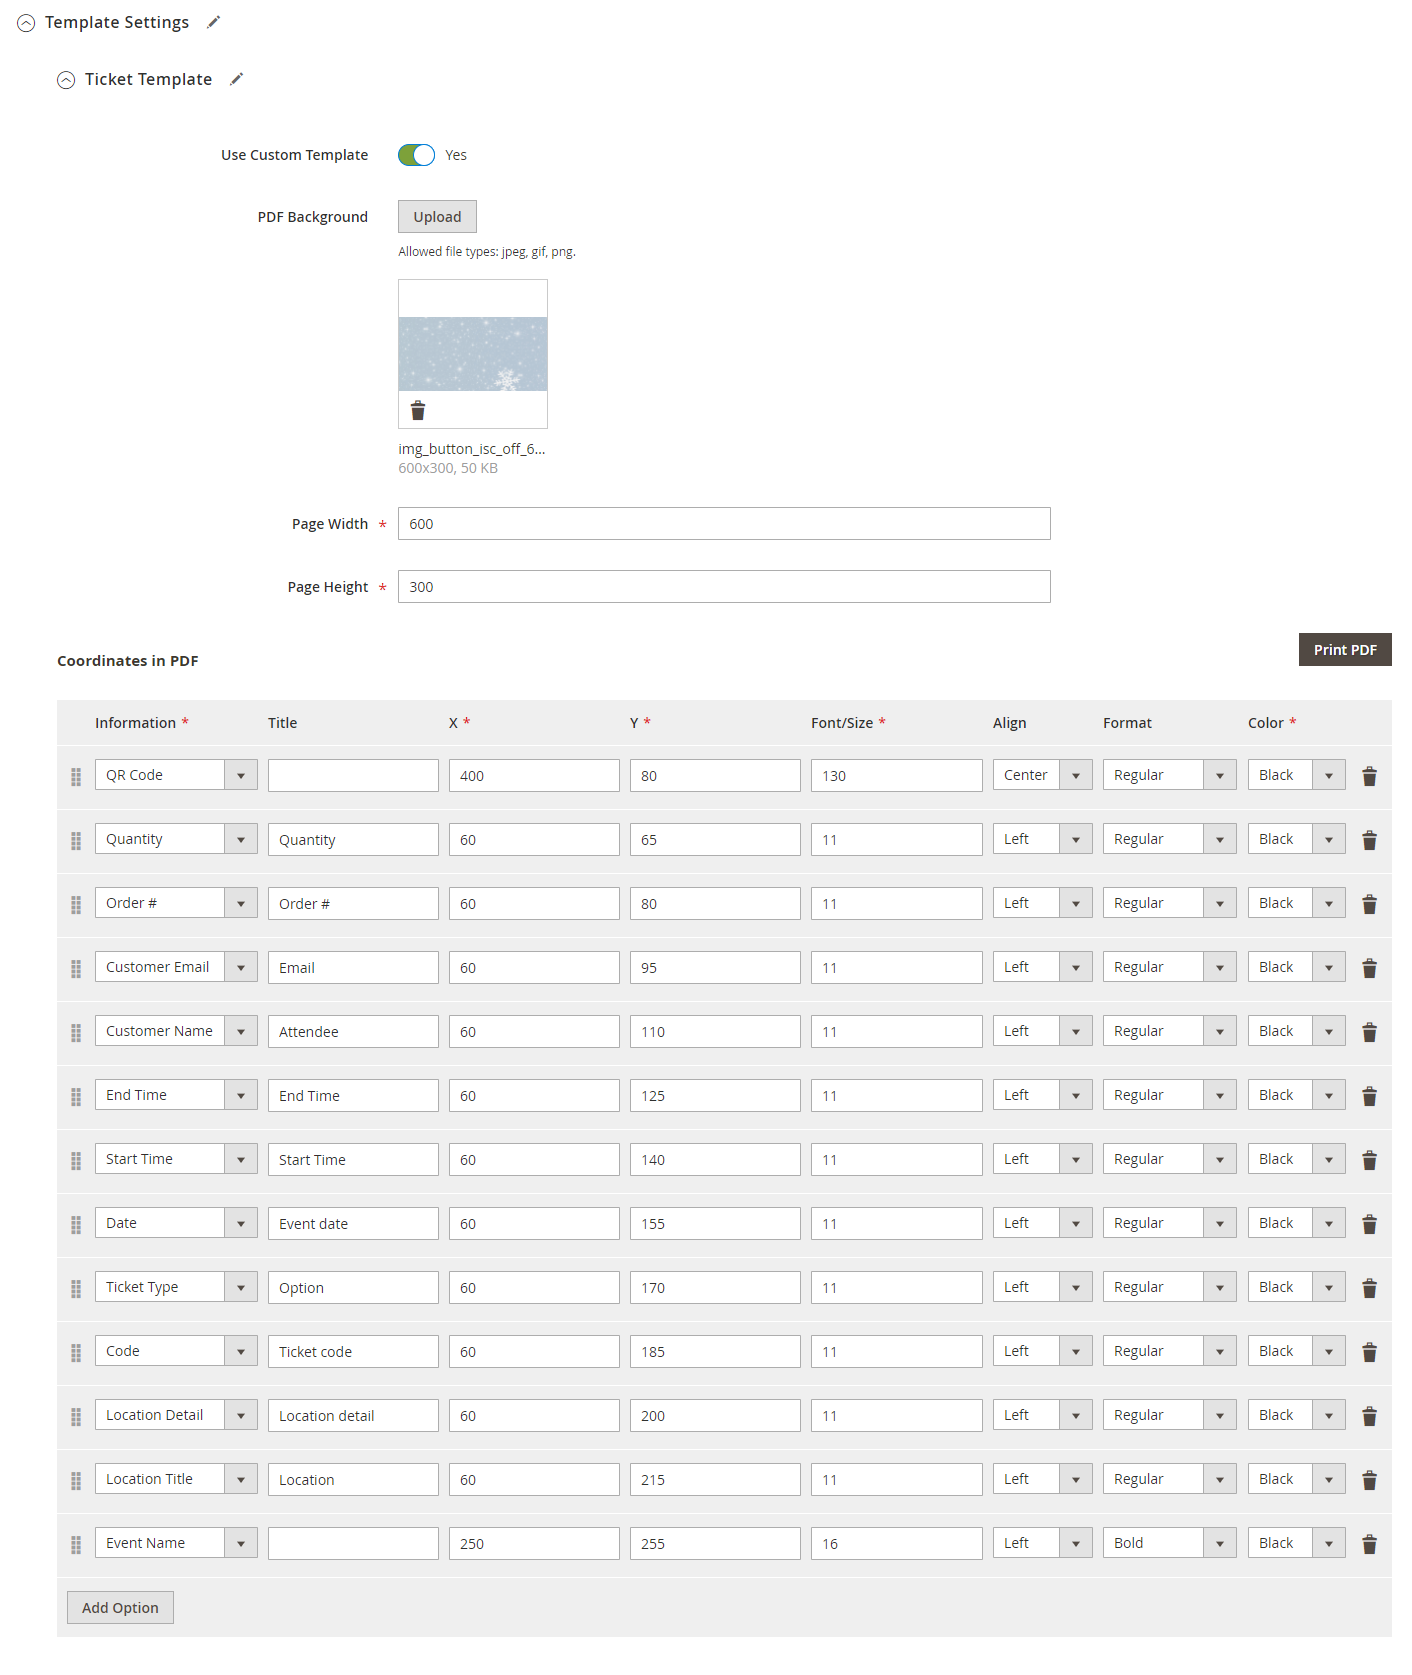
Or you can customize a ticket template right in the product settings by turning on the Use Custom Template.
Then you can upload the PDF background image (in jpeg, gif, png), adjust the page width, and page height.
In the PDF coordinates, you can choose the information fields, fill in the title, set the XY coordinates, and font/size, format, color and alignment for each information.
You can use MB-Ruler software to measure the XY coordinates on your ticket PDF, or watch the following tutorial video.
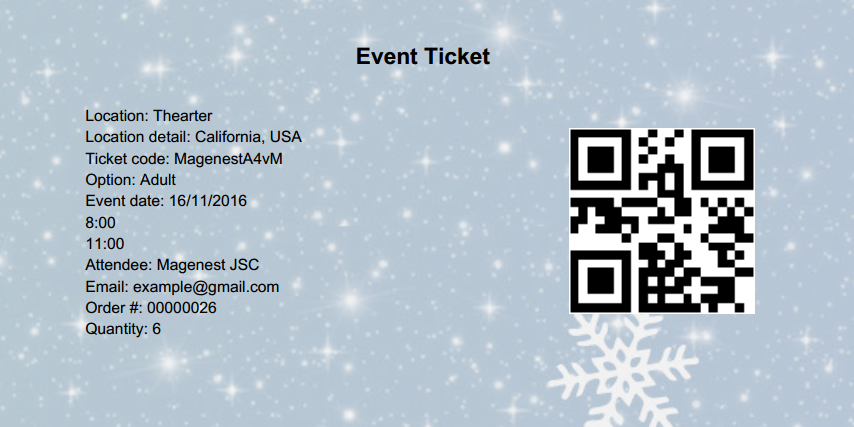
You can preview the template by clicking on the Print PDF button.
Email Template:
You can use the Default Email Template or you can customize your own email template in Marketing > Email Template. Any template created in there will be listed in the email template drop-down for you to select.

Below is the default email template:
{{template config_path="design/email/header_template"}}
<p>{{trans "Welcome to %store_name." store_name=$store.getFrontendName()}}</p>
<ul>
 <li><strong>{{trans "Event Name: "}}</strong> <em> {{var title}}</em></li>
 <li><strong>{{trans "Customer Name: "}}</strong> {{var customer_name}}</li>
 <li><strong>{{trans "My Code: "}}</strong> {{var ticket_code}}</li>
 <li><strong>{{trans "Location Title: "}}</strong> {{var location_title}}</li>
 <li><strong>{{trans "Location Detail: "}}</strong> {{var location_detail}}</li>
 <li><strong>{{trans "Date: "}}</strong> {{var date}}</li>
 <li><strong>{{trans "Time: "}}</strong> {{var time}}</li>
 <li><strong>{{trans "Quantity: "}}</strong> {{var qty}}</li>
 <li><strong>{{trans "Option: "}}</strong> {{var option_type}}</li>
</ul>
{{template config_path="design/email/footer_template"}} |
Personal Information
In this setting, you can enable the attendee information form and set it as required. If it is required, the customer will have to fill in the form before adding the tickets to the cart.
If you do not need this feature, you can turn it down by switching the 2 options to No.

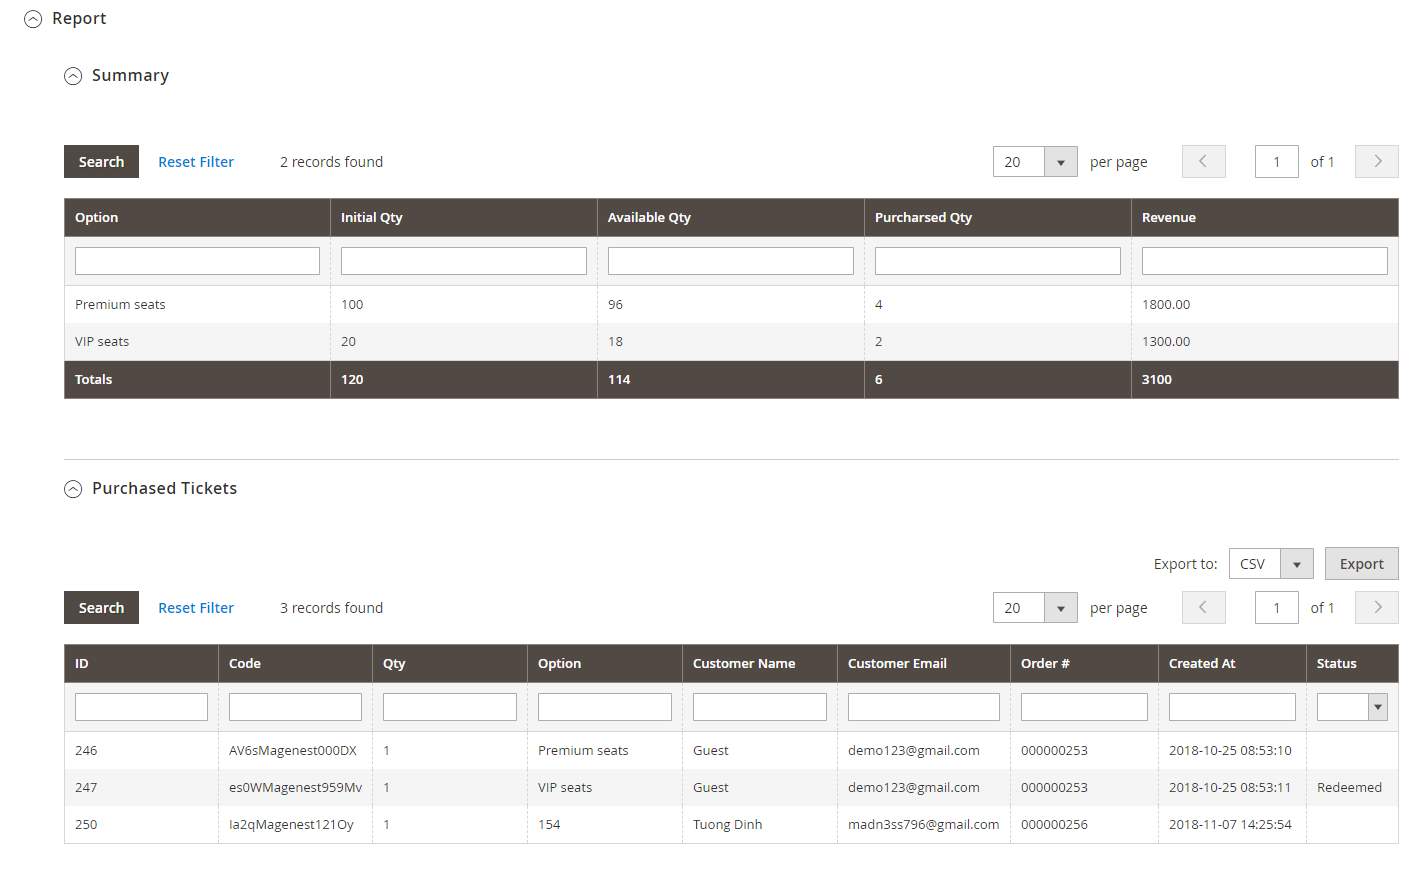
Report
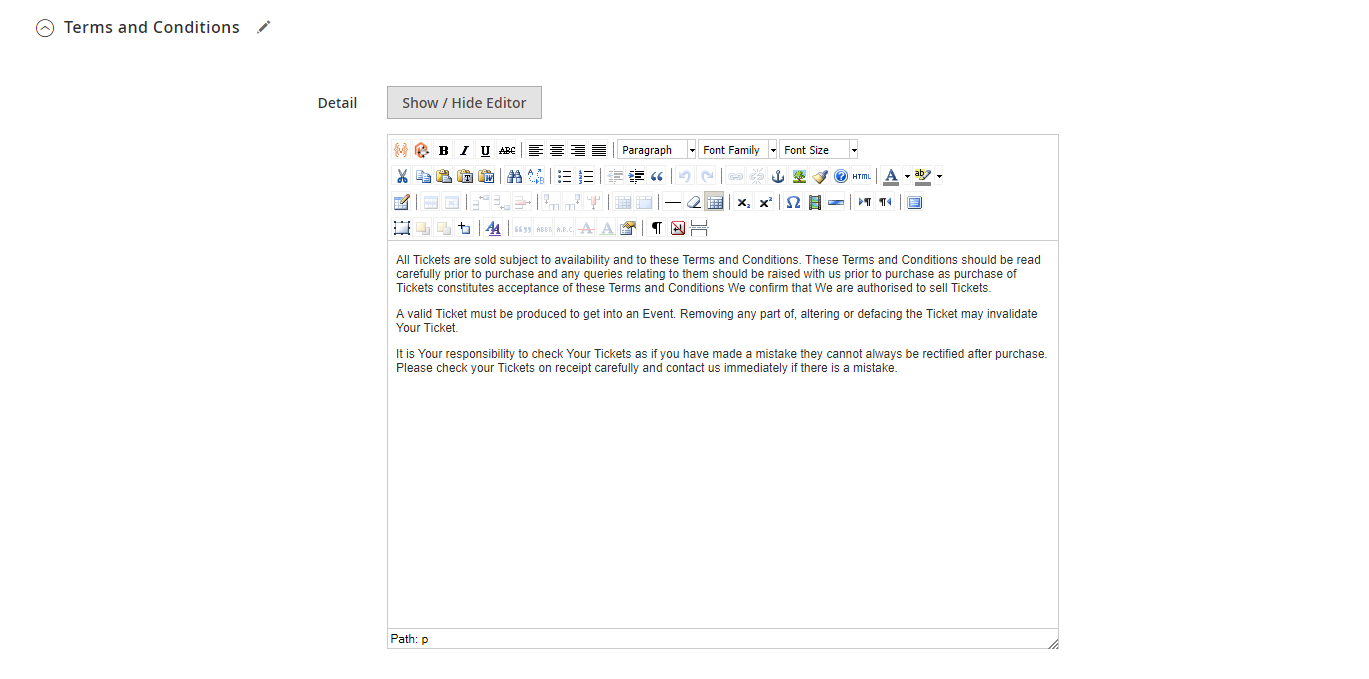
Terms and conditions
You can add the terms and conditions for each event in this setting.
Assign the email template to send a reminder email. You can create an email template in Marketing > Email Templates
Below is the default email template:
{{template config_path="design/email/header_template"}}

<p>{{trans "This is your reminder from %store_name." store_name=$store.getFrontendName()}}</p>
<p>{{trans "Your event starts in the next"}} {{var remind_day}} {{trans "days"}} </p>
<ul>
	<li><strong>{{trans "Event: "}}</strong> <em> {{var title}}</em></li>
	<li><strong>{{trans "Customer Name: "}}</strong> {{var customer_name}}</li>
	<li><strong>{{trans "Your Code: "}}</strong> {{var ticket_code}}</li>
	<li><strong>{{trans "Location: "}}</strong> {{var location_title}}, {{var location_detail}}</li>
	<li><strong>{{trans "Date: "}}</strong> {{var event_date}}</li>
	<li><strong>{{trans "Time: "}}</strong> from {{var start_time}} to {{var end_time}}</li>
	<li><strong>{{trans "Quantity: "}}</strong> {{var qty}}</li>
	<li><strong>{{trans "Option: "}}</strong> {{var option_type}}</li>
</ul>

{{template config_path="design/email/footer_template"}} |
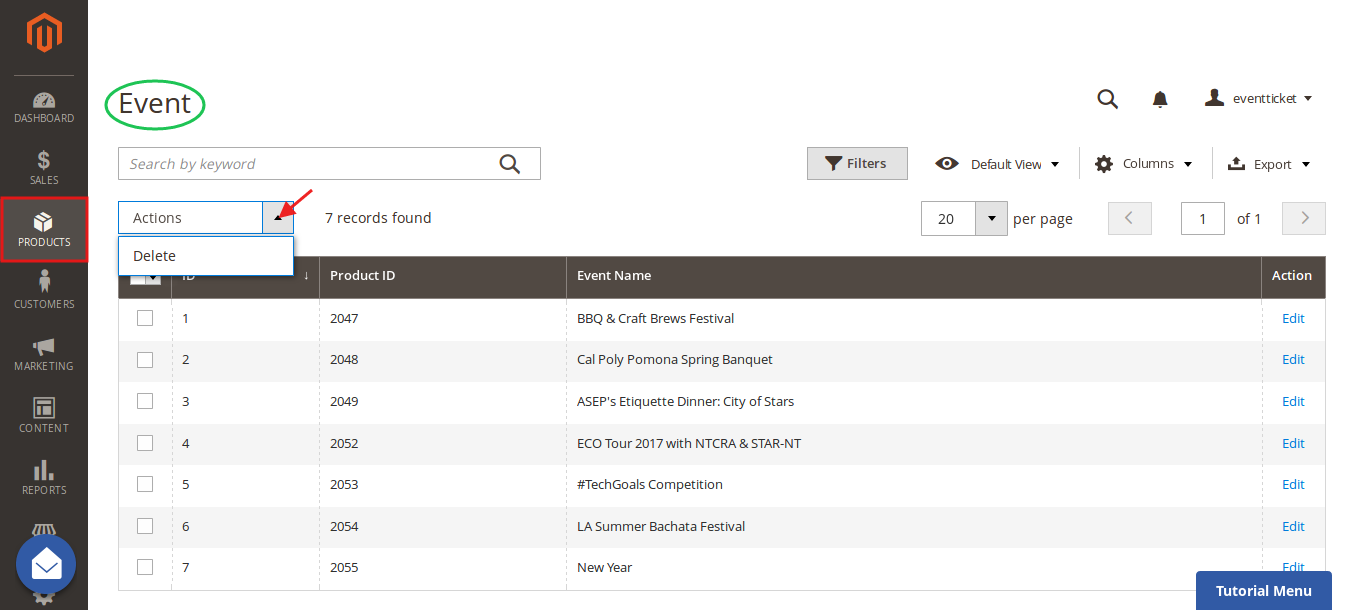
You can manage the events on your store in Catalog > Event Management > Event.
You can export this table to the CSV/XML file.
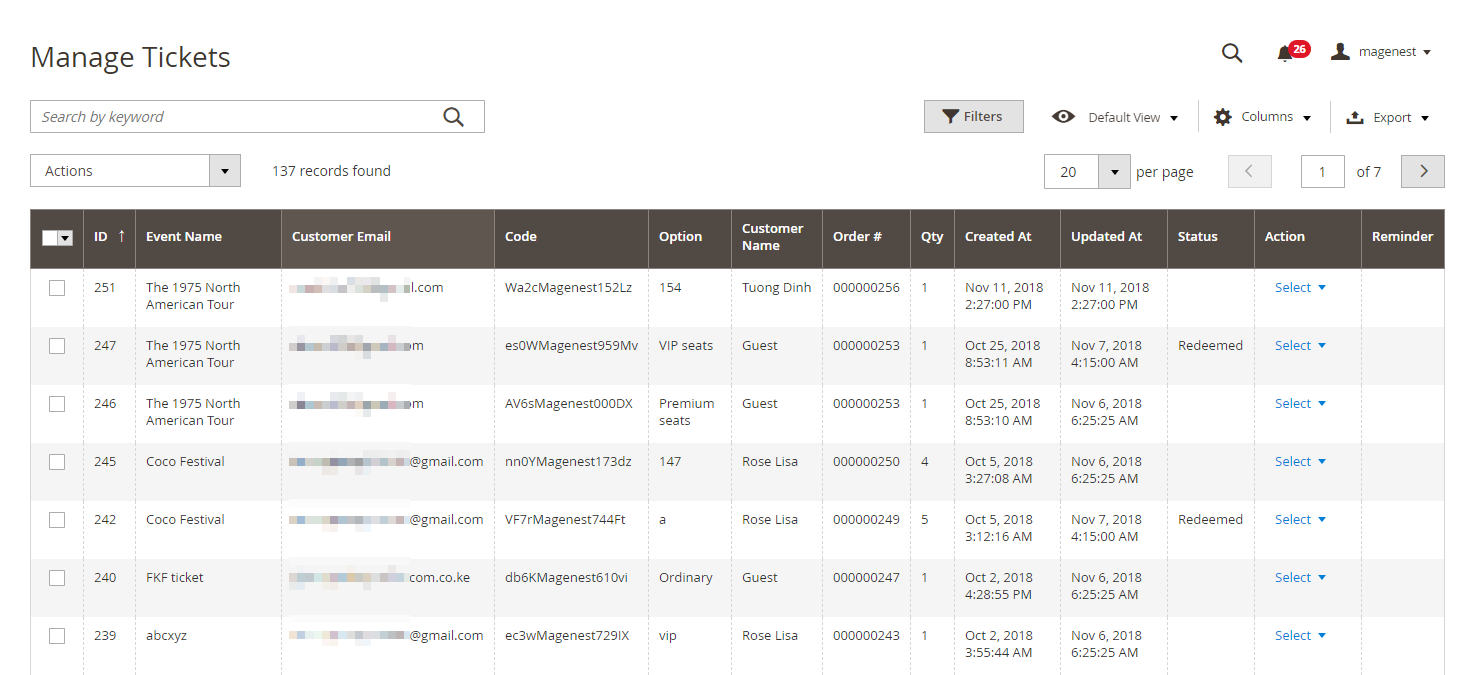
You can manage the events on your store in Catalog > Event Management > Event Ticket.
In this table, you can track the customer and the ticket information (Quantity, Location, Date, Time), especially the ticket status (Redeemed or Redeemable).
You can also export this table to the CSV/XML file.
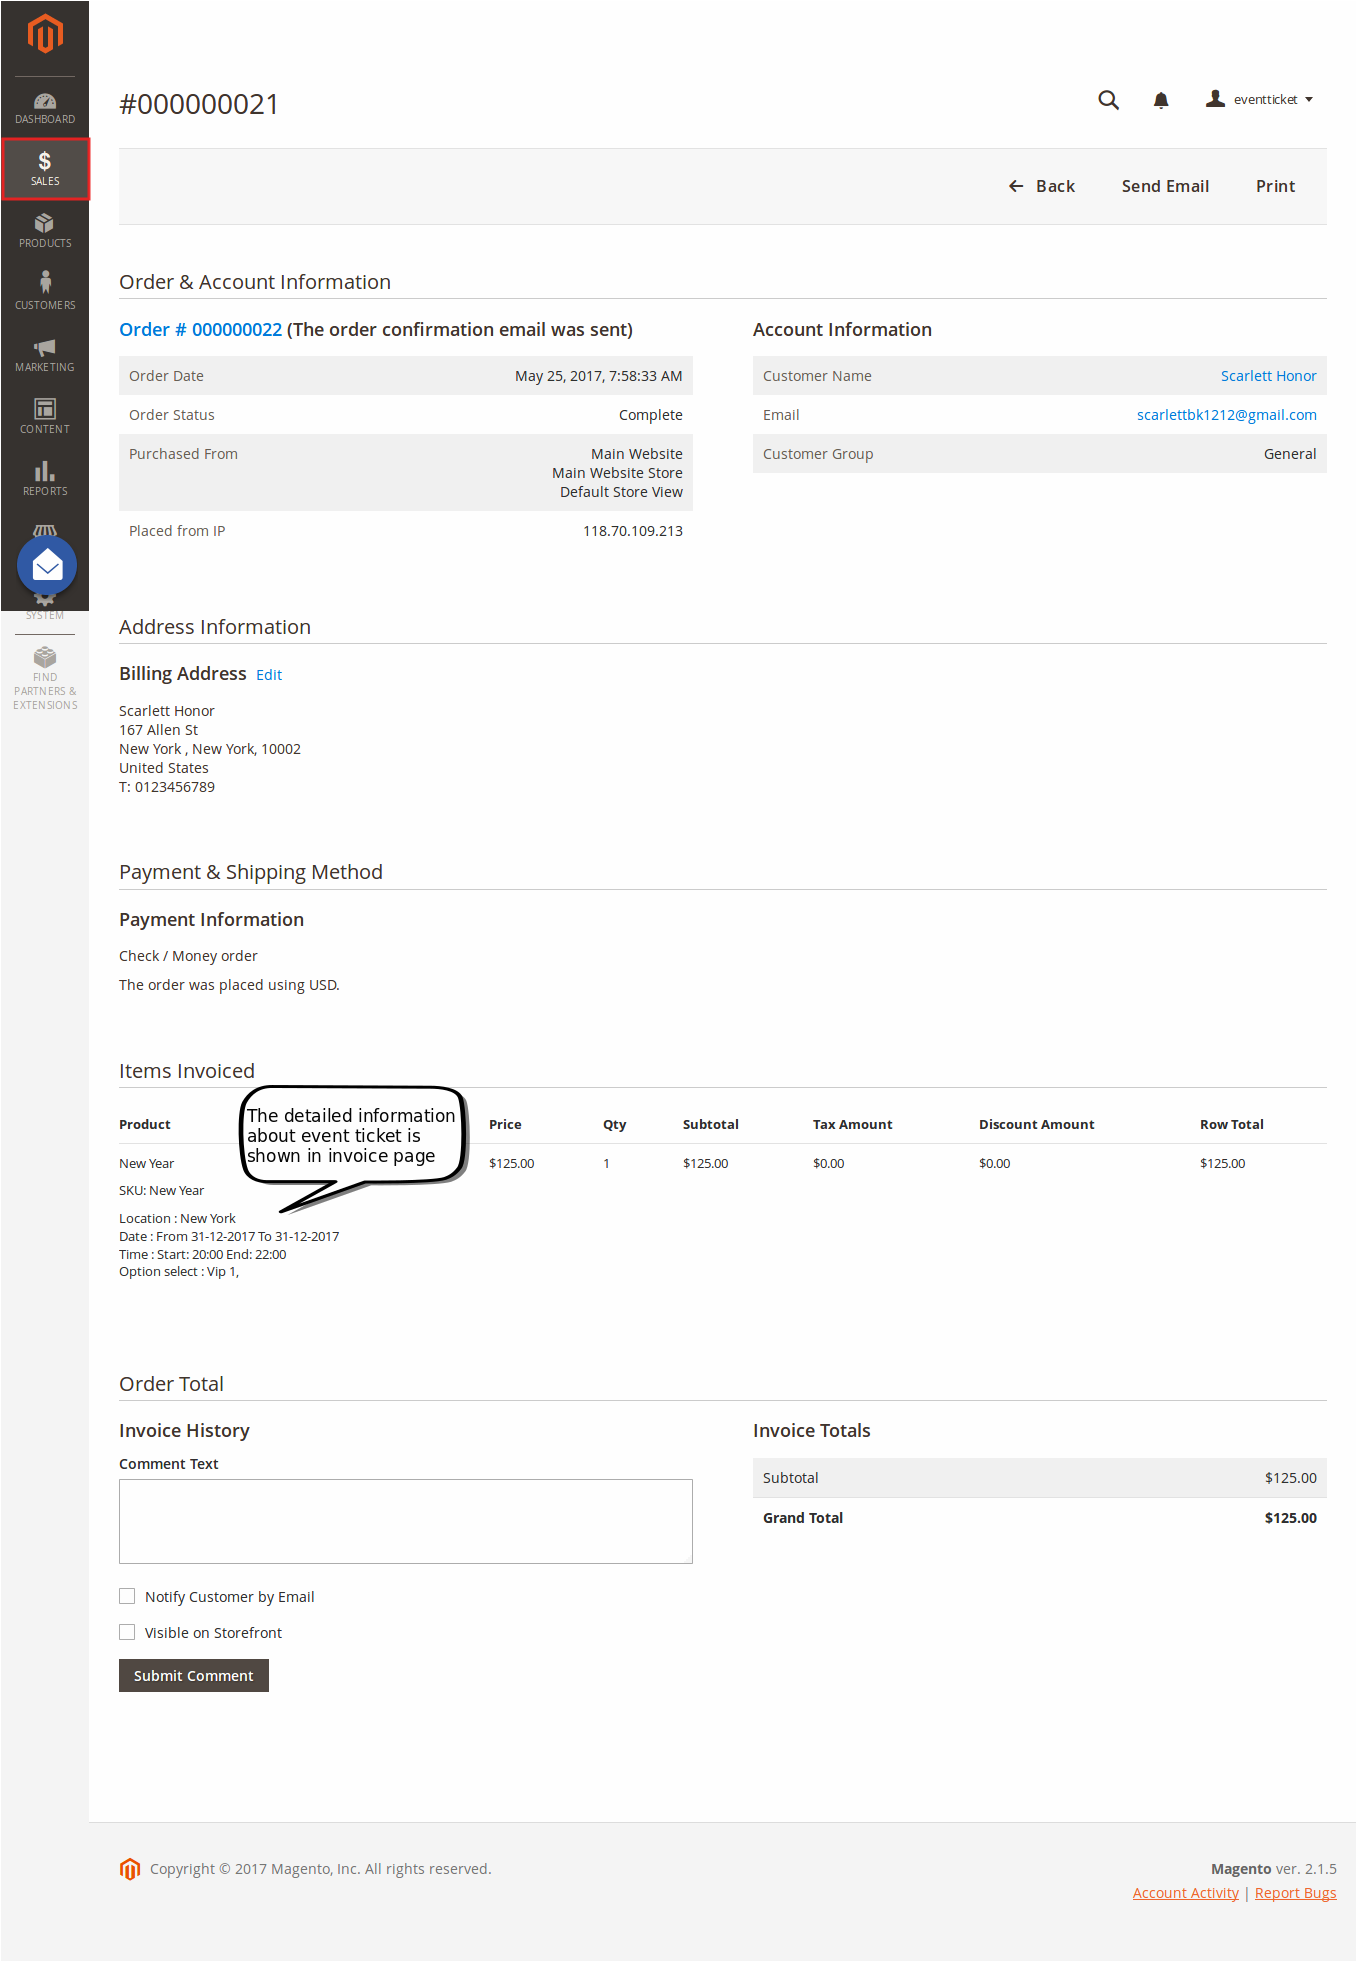
You can view the ticket info in each order
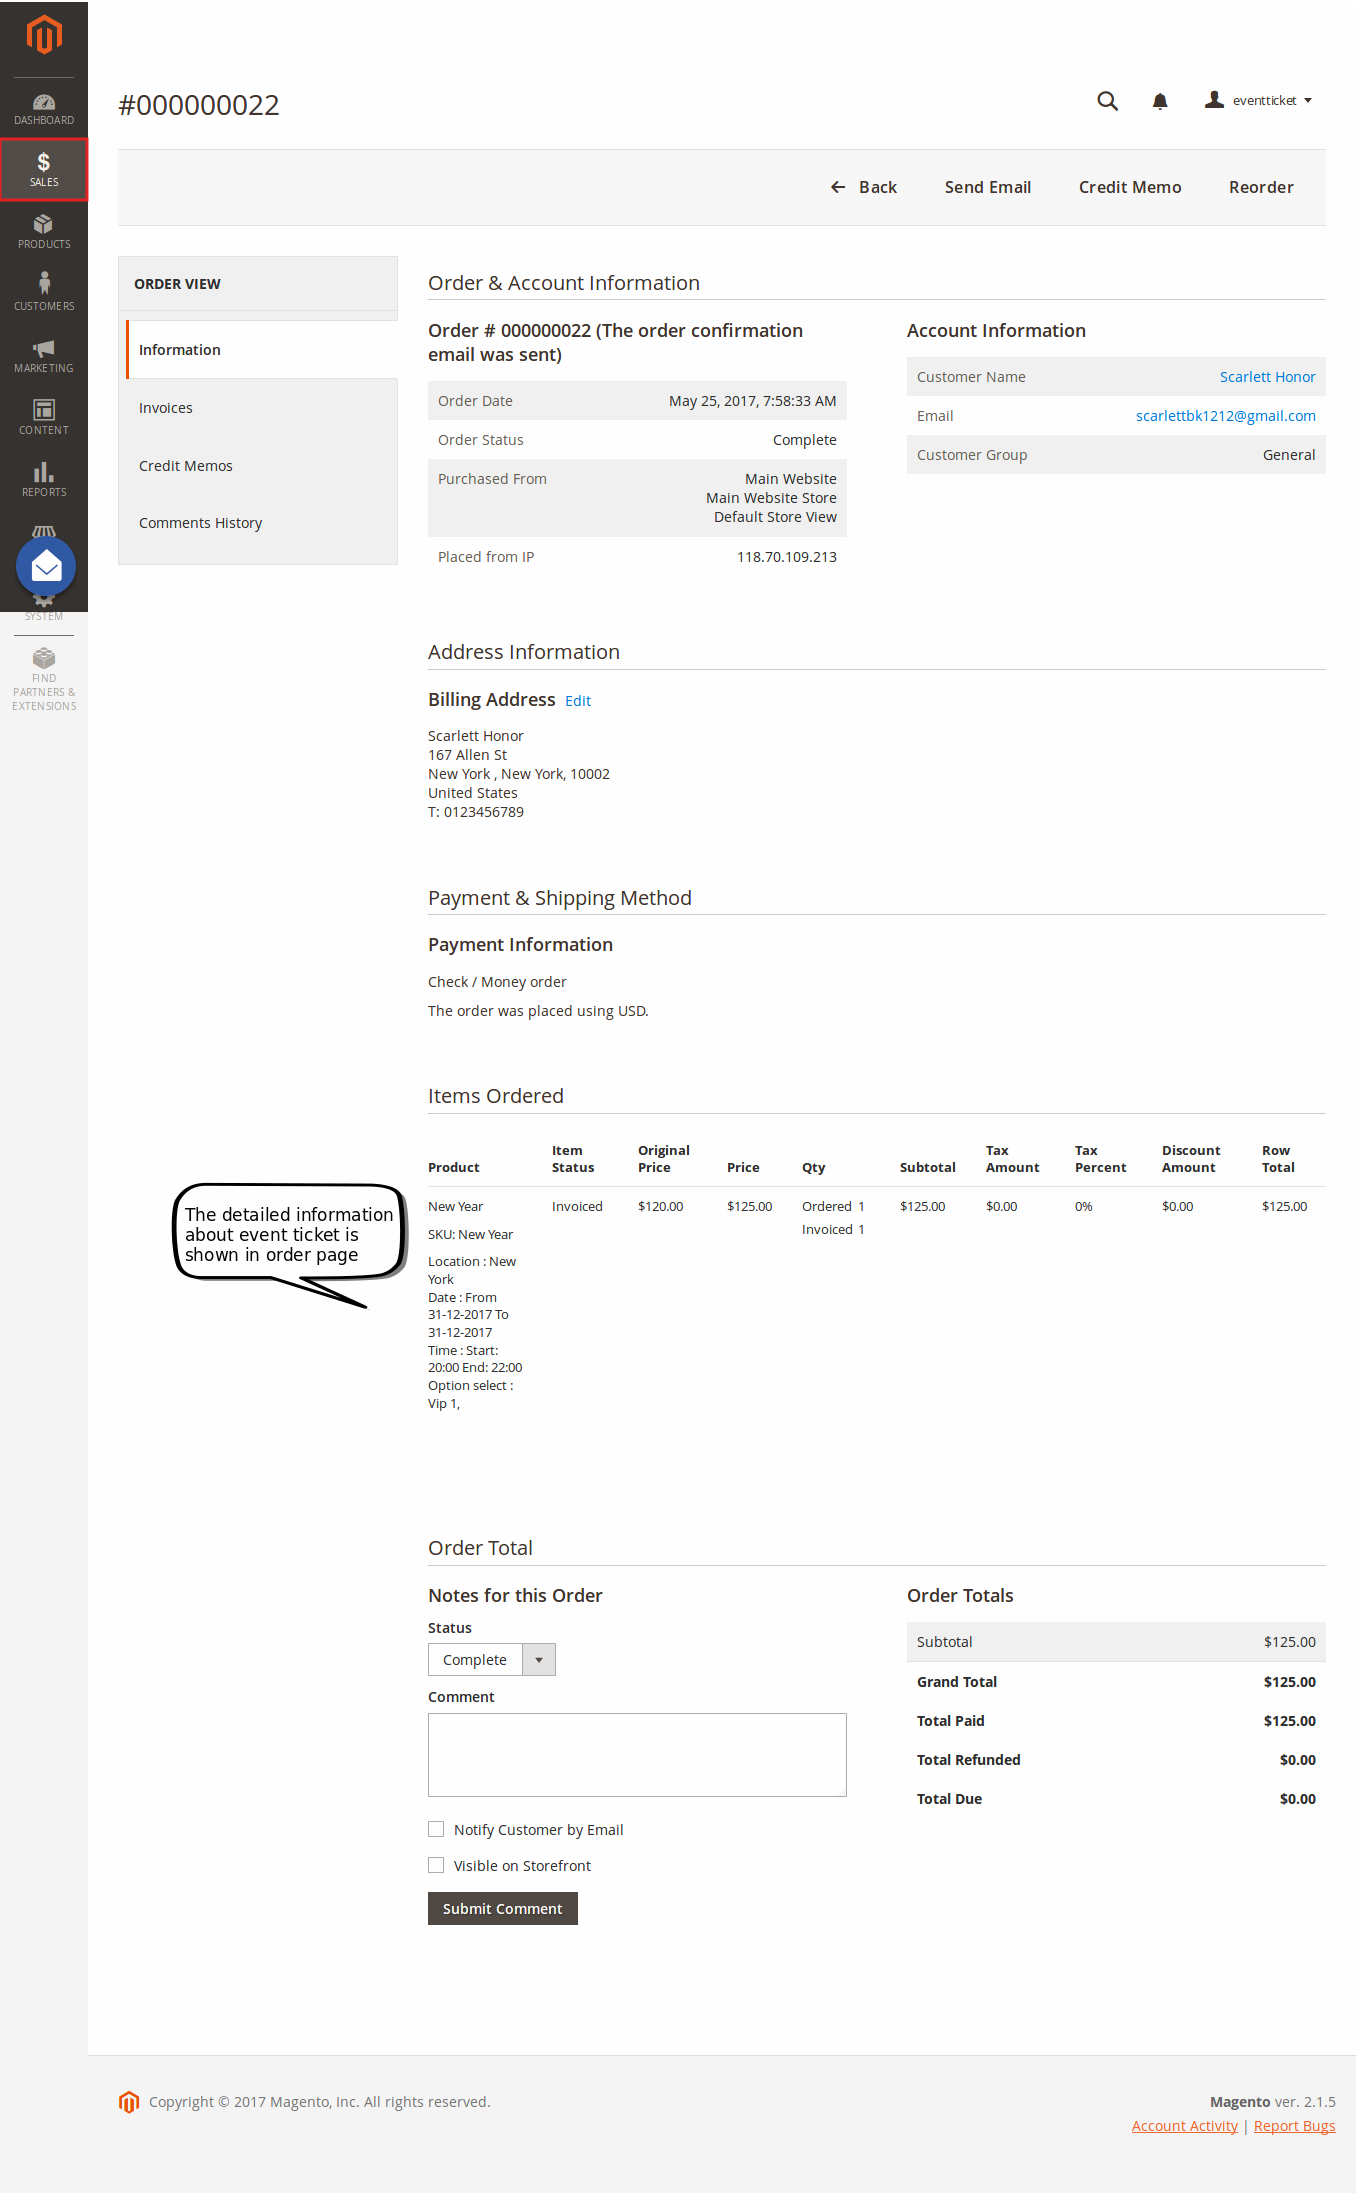
And Invoice:
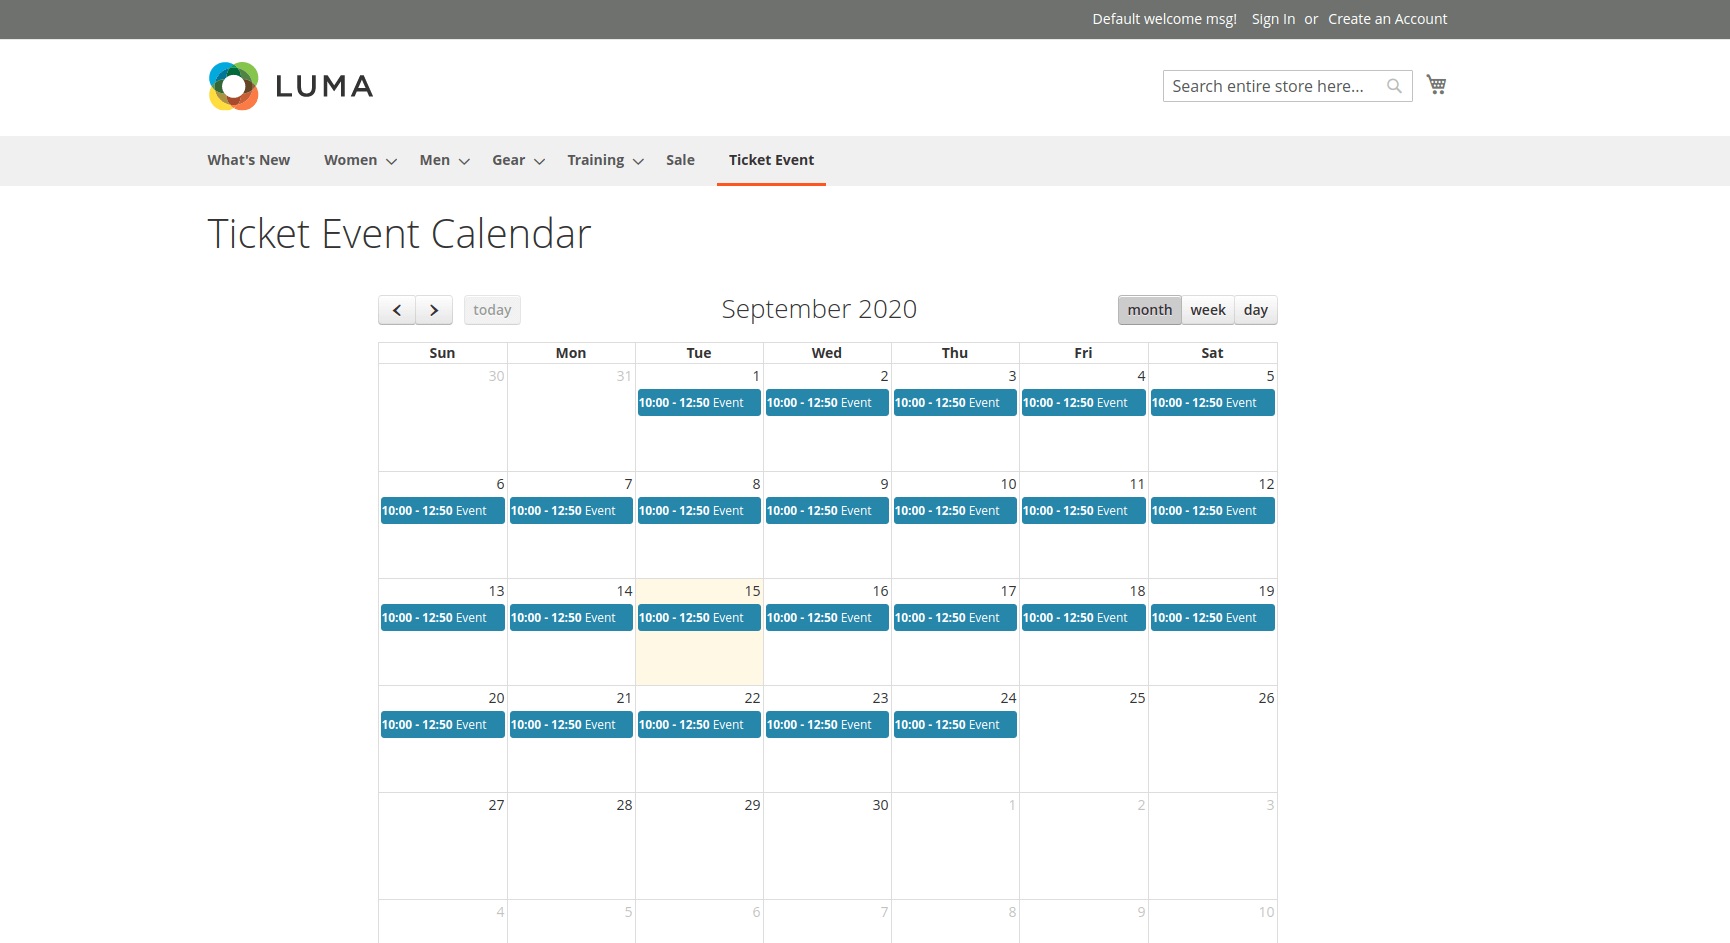
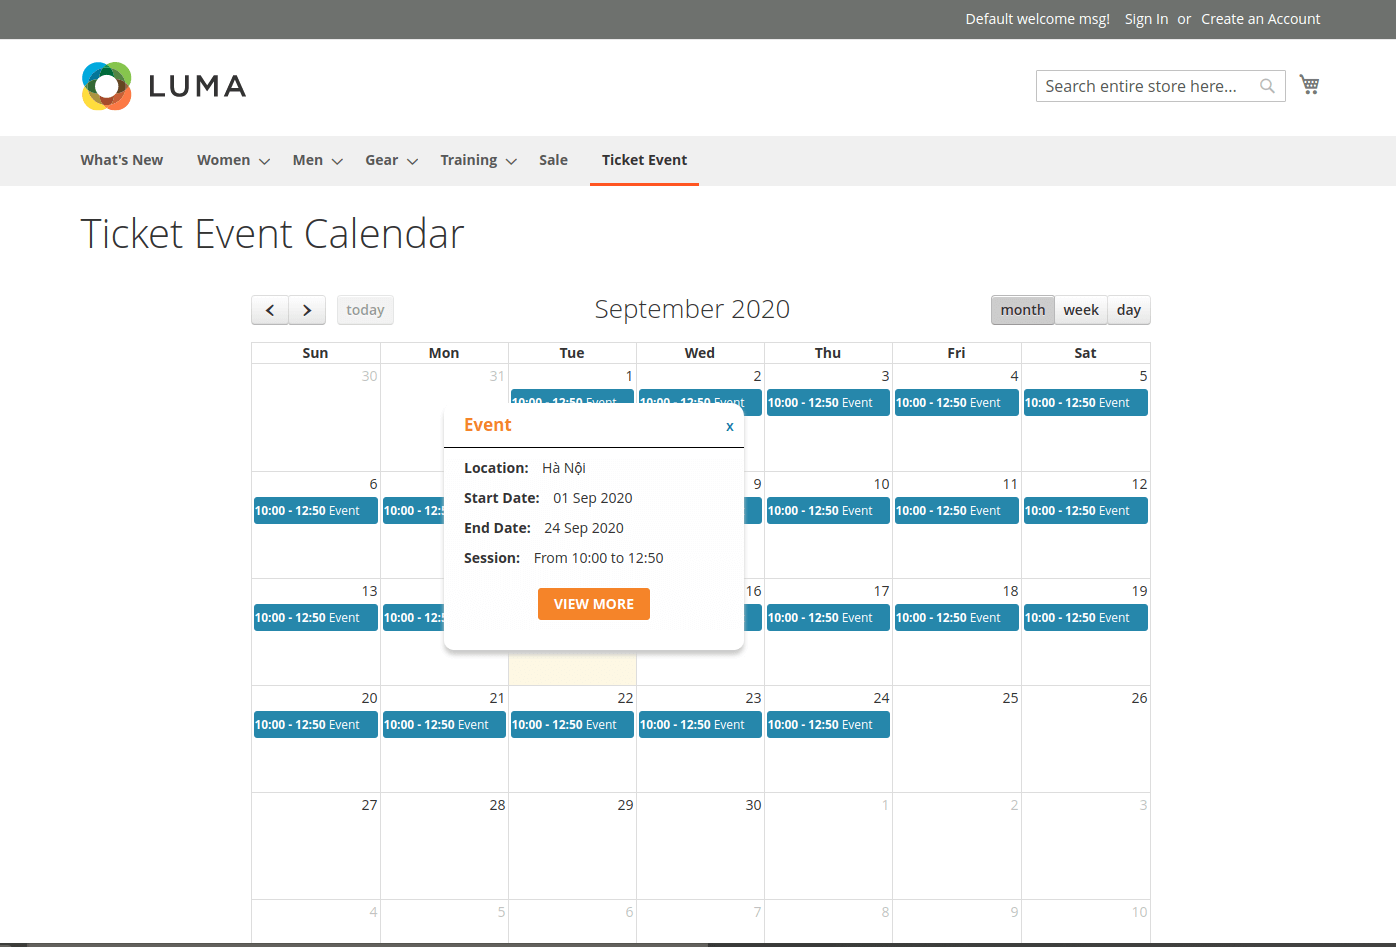
Event Page
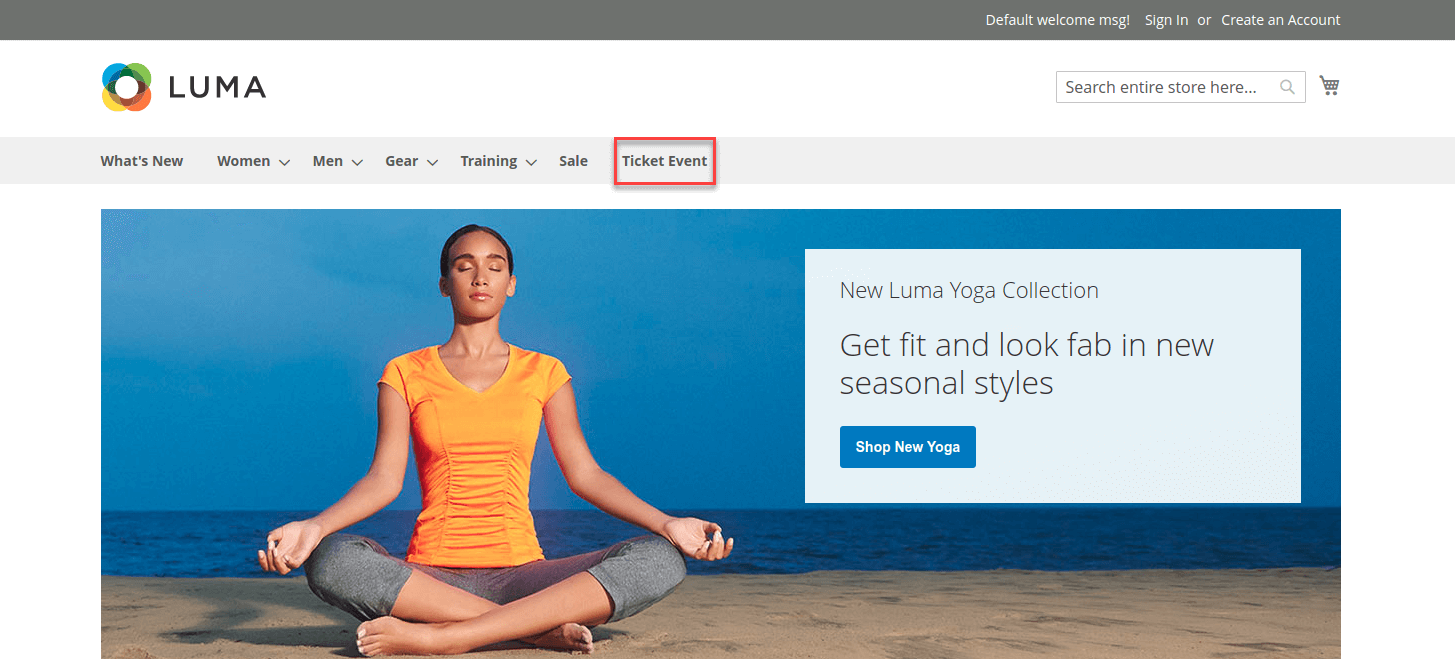
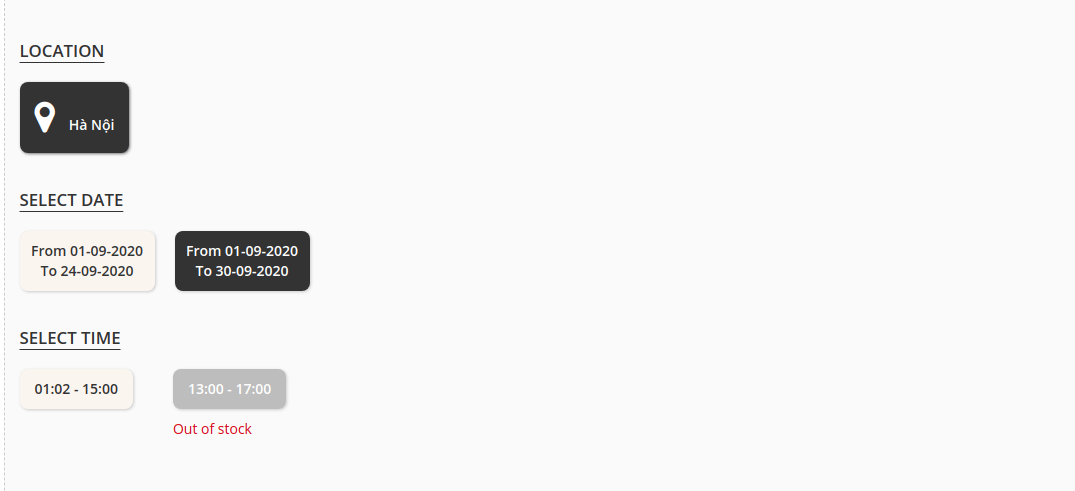
You could easily find the Event that you've added to the top Menu bar
Once again, thank you for purchasing our extension. If you have any questions relating to this extension, please do not hesitate to contact us for support.