Thank you for purchasing our extension. If you have any questions that are beyond the scope of this document, do not hesitate to leave us an email at [email protected]
Updated: 19/03/2019 | By: Magenest | Support Portal: http://servicedesk.izysync.com/servicedesk/customer/portal/12

Mega Menu for Magneto 2 by Magenest is a powerful tool to create beautiful menu layouts. Merchants will be able to customize their own mega menu with flexible options.
Extension's page: Mega Menu
Your store should be running on Magento 2 CE & EE version 2.1.x 2.2.x 2.3.0
![]() General configuration
General configuration
Enable Mega Menu: to enable/disable the module
Select Mega Menu: Set up the menu to be used for the site here. You can create the menu in Mega Menu > Manage Menus
Effect: The effect to show menu and submenu on the store front
![]() Default Menu Configuration
Default Menu Configuration
In this settings, you can customize the default menu text color, hover text color, hover button background color and drop-down background color.
Note that the default menu will only be used if there is no mega menu selected.

Go to Mega Menu > Manage Labels, you can manage all the available labels in the grid table.
You can edit or delete the label by clicking on Select in Action column.
Or you can create a label by clicking on Add New Label button.

Title: The label name displayed in the back end
Text: The content of the label
Position: Set the position of the label on the item name (Top, Left, Right, Top Left, Top Right)
You can change the font size of the text, the label width and height, the text alignment and text color.
You can also add a border to the label with 5 types of border styles: Dashed, Dotted, Double, Solid or No style/None.
Border radius: The rounded corners of the label
You can add the arrow to point the label to the menu item. With the arrow, you can edit the width and color.

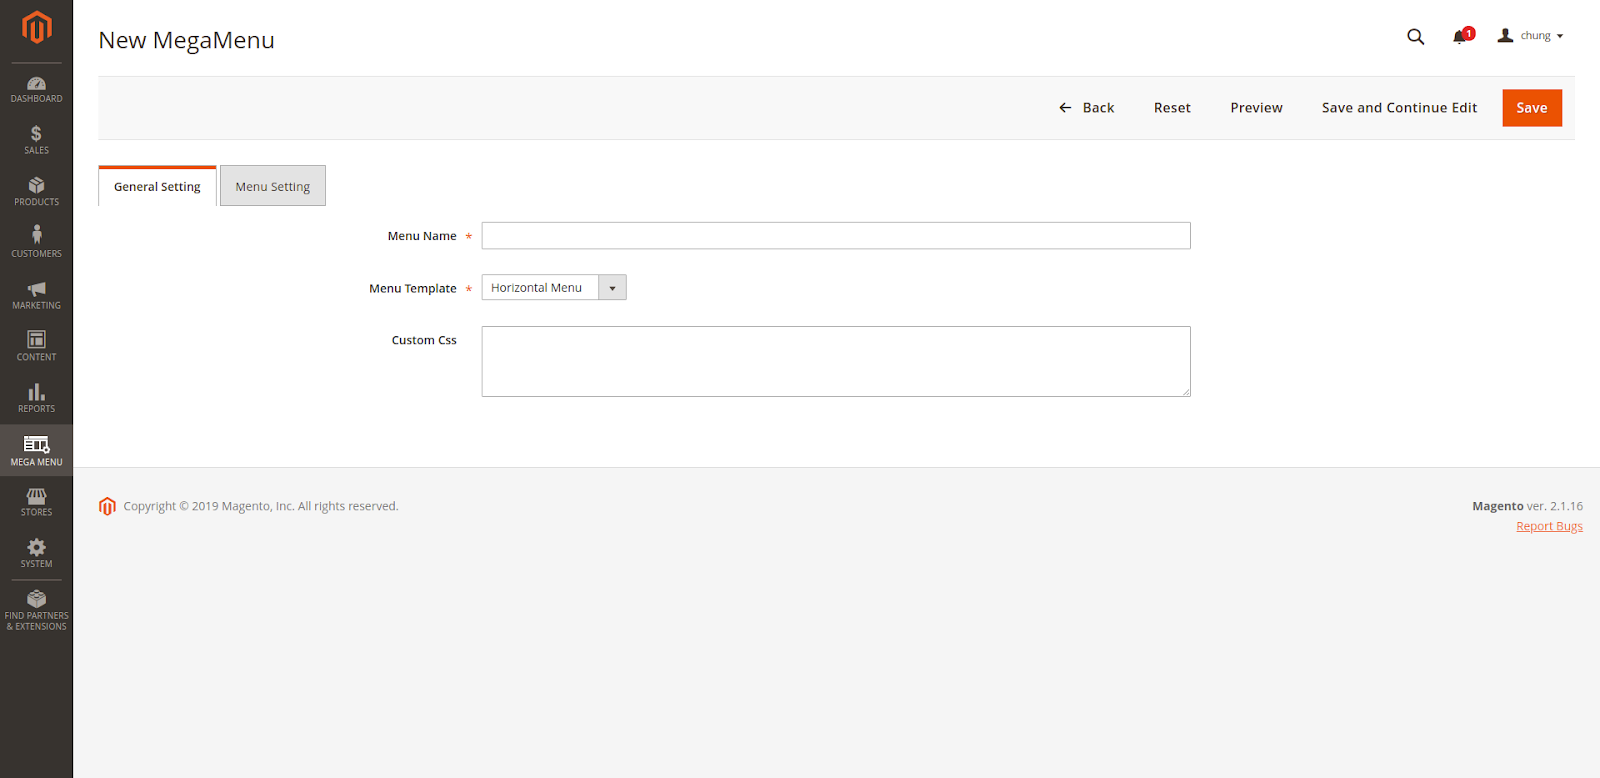
Go to Magento 2 backend > Mega Menu > Manage Menus
You can click on Generate Sample Menu button to generate menus according to your categories with Grid type and default colors.
Or click on Add New Menu to create a custom menu.

On menu settings page,
General Settings
Menu Name: The menu name will be displayed in Magento 2 backend for management.
Menu Template: You can select the menu direction as horizontal or vertical left.
Custom Css: You can customize/style the menu using CSS.
Menu Settings:
In the Menu Structure, users can use drag & drop to configure the menu’s level.
On the right column, there are 3 tabs: Pages, Categories, Custom Item that allow you to add pages, categories or custom page to the menu.
You can add one or more items to the menu by selecting the item(s) then click on Add to menu button.
Then you can drag and drop the item in the menu structure to create the submenu(s).
You can edit each item with the green icon of each one or remove them from the menu list with the delete (red) icon.

![]() Information:
Information:
Name: The menu name that will be displayed on front end.
Link: The menu url or url key.
Class: You can add a class to customize the item with CSS.
Icon: You can upload the icon for each item. It will be displayed on the left of the item on the main menu bar.
Label: You can create the label in Mega Menu > Manage Labels.
![]() Style:
Style:
You can choose the Text Color, Hover Text Color, Hover Button Background Color from RGB color picker.
You can add the content in Header, Footer, Left Block and/or Right Block. You can enable/disable each one and edit with HTML and CSS.
Main Content: You can use wysiwyg editor or use different types of content: default list, grid or tab.
You can preview the mega menu before saving by clicking on Preview button.

Once again, thank you for purchasing our extension. If you have any questions relating to this extension, please do not hesitate to contact us for support.