Thank you for purchasing my extension. If you have any questions that are beyond the scope of this help file, please feel free to email via my user page contact form here. Thanks so much!
Created: 21/06/2016 | By: Magenest | Email: [email protected].
![]()
Quickbooks Desktop Integration extension for magento 2 is a powerful tool which allows automatically synchronize and update accounting data from Magento 2 to Quickbooks Desktop.
Please view more detail here: Quickbooks Desktop Integration
Allows synchronizing and updating Products from Magento 2 store into Quickbooks Desktop Customer.
Allows synchronizing and updating Orders from Magento 2 store into Quickbooks Desktop Sales Orders.
Allows synchronizing and updating Invoices Magento 2 store into Quickbooks Desktop Invoices.
Friendly user interface and easy usage.
Your store should be running on Magento Community Edition version 2.0.0 and more.
Note that our Quickbooks Desktop Integration is compatible with all Quickbooks versions.
You only need to choose the QuickBooks Web Connector which is compatible with your QuickBooks version and download them here.
For existing data related customers and products in Magento 2 and admin want to sync this data from Magento 2 to QuickBooks Desktop.
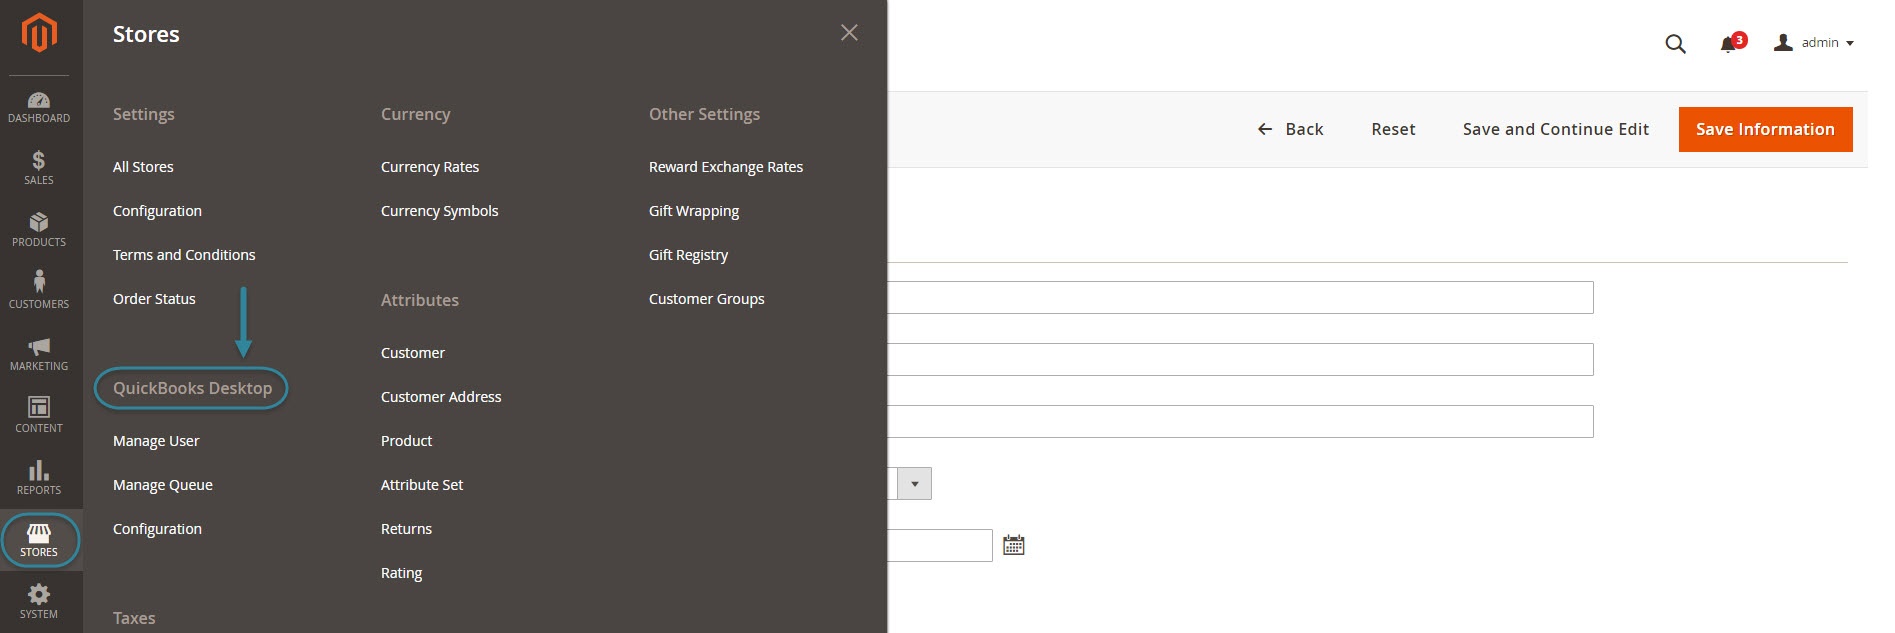
We created a Quickbooks Desktop tab which allows admin to control all of things related Quickbooks Desktop Integration extension.
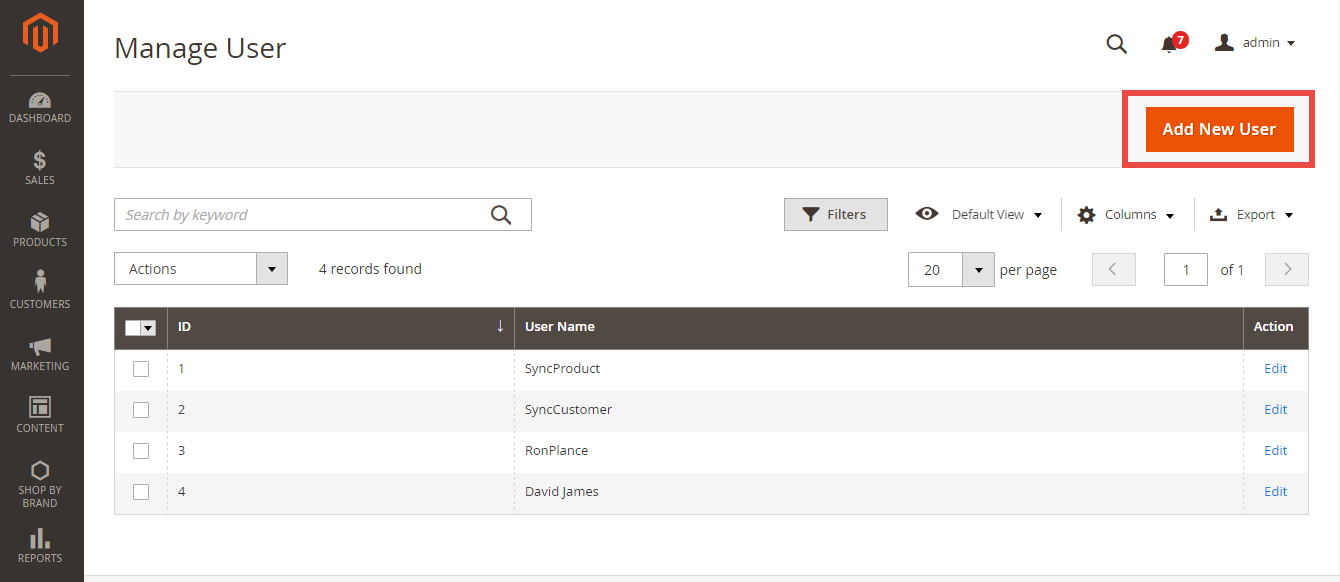
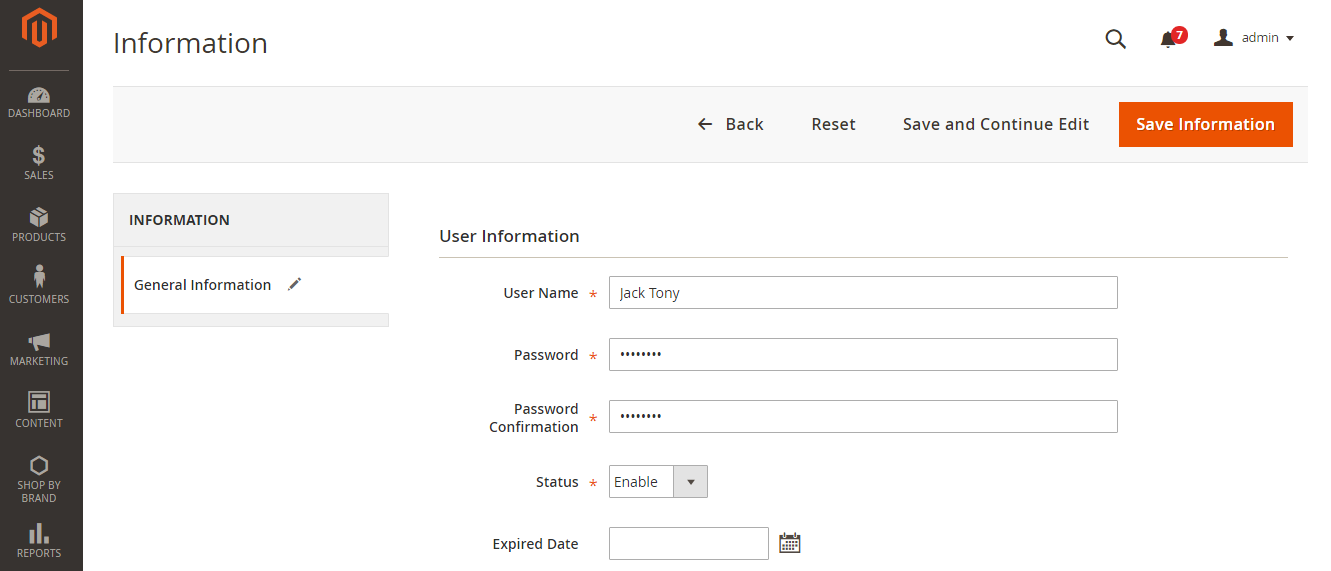
Then, click on Save Information button to save the entered information.
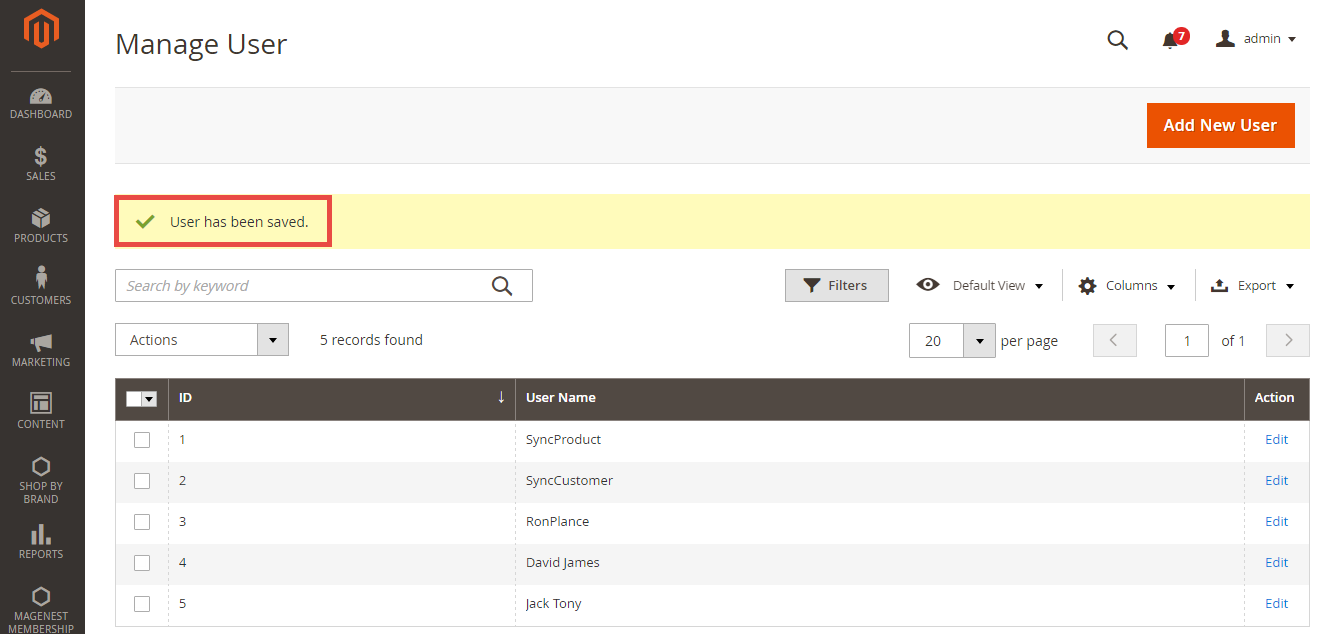
After completing a new user, admins need to set configuration to integrate with QuickBooks.
Go to Stores > Configuration > QuickBooks Desktop, there are two sections which are needed to set before using the extension.
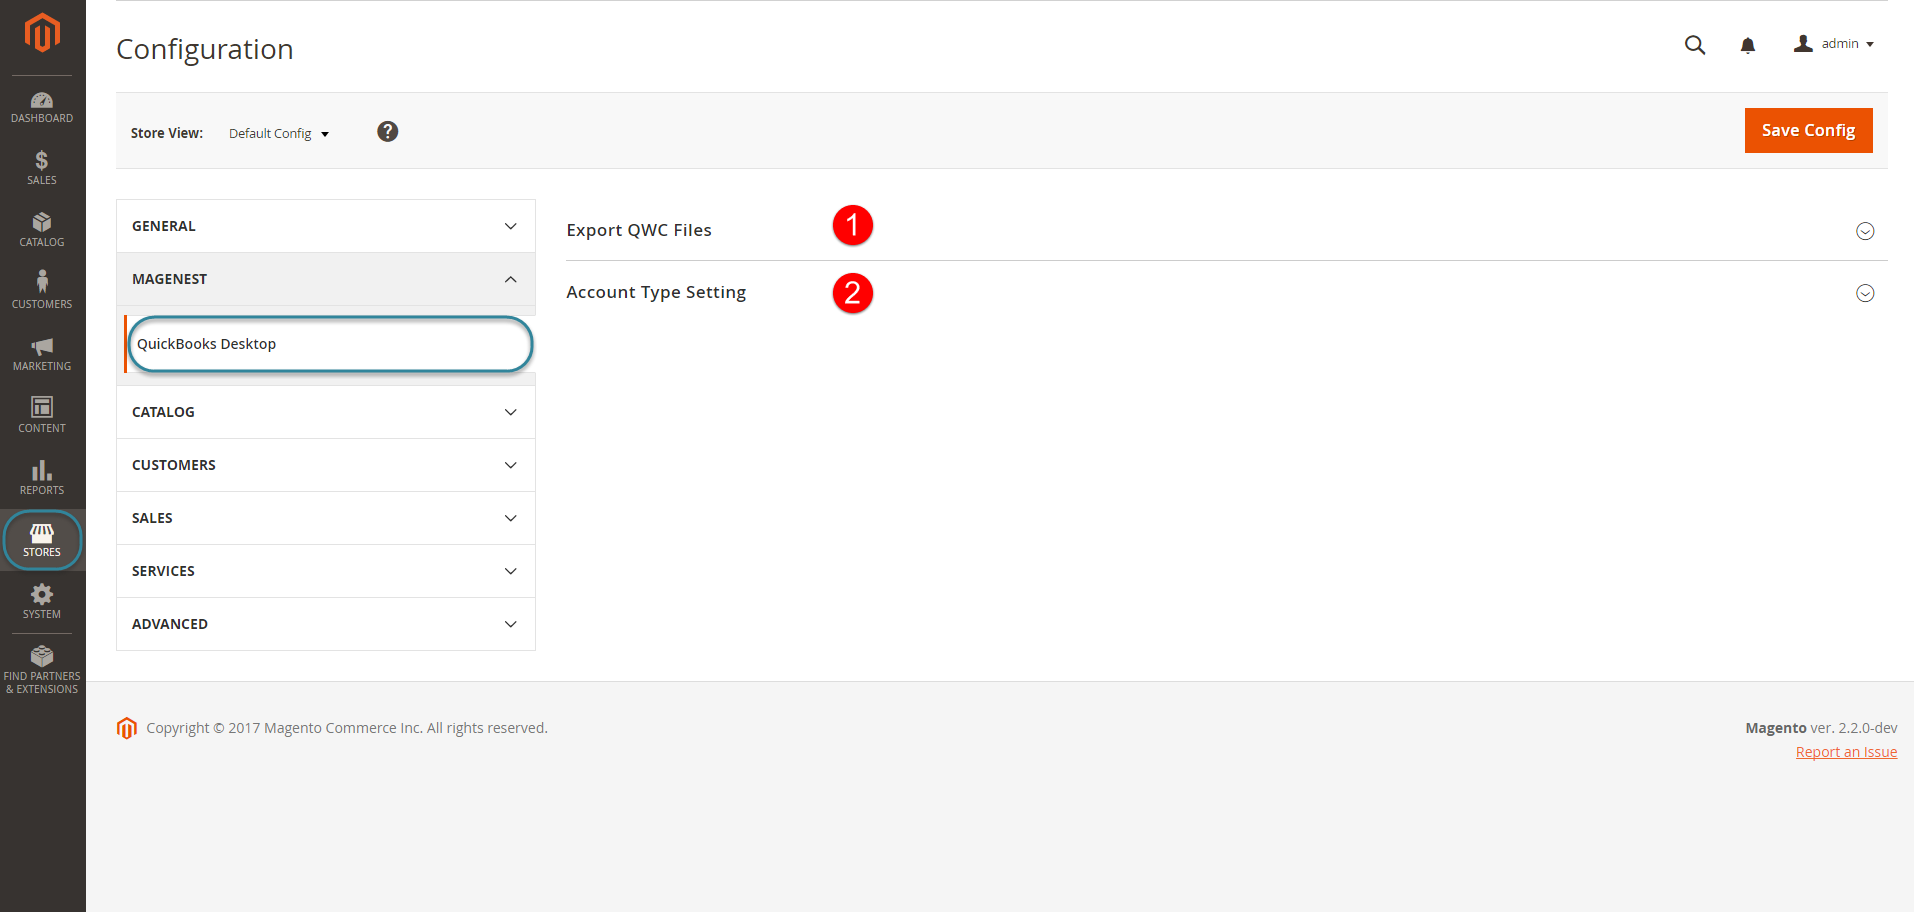
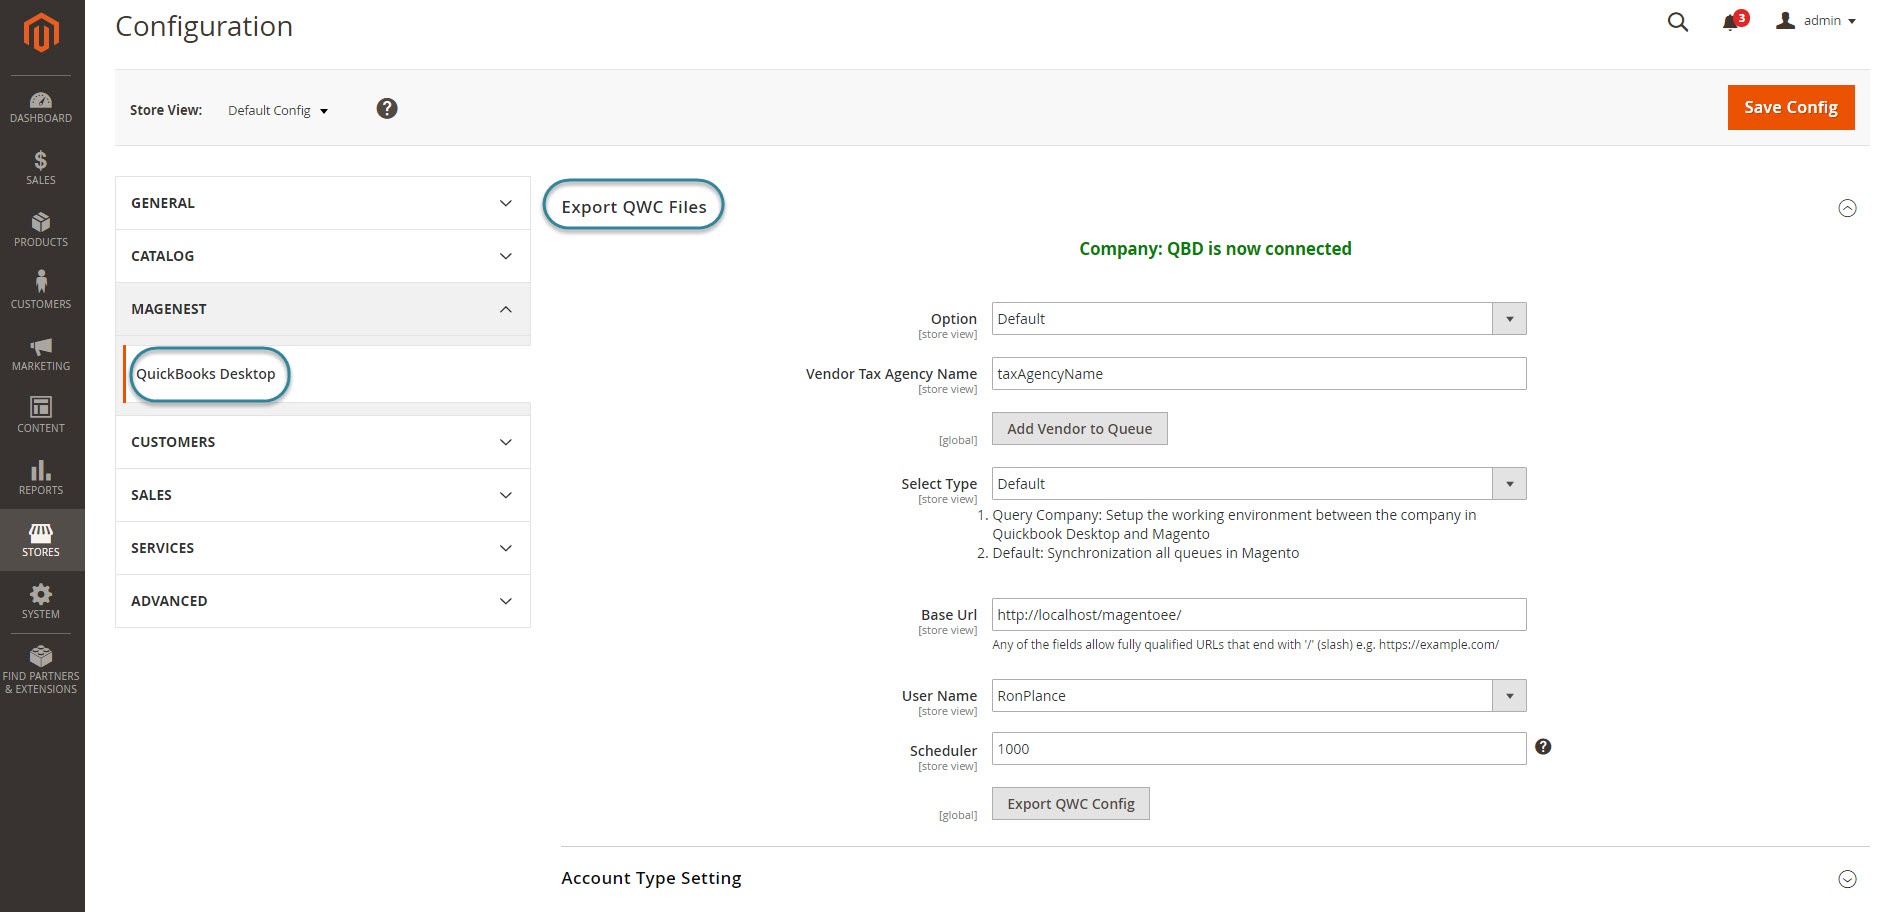
Export QWC Files:
There are some sections that admins need to set before starting to use this extension.
Option: There are two options to choose, include
In Customer Receive, type the CUSTOMER NAME of the customer above as in QuickBooks Desktop
Note: You have to create this customer in QuickBooks Desktop first.
In Vendor Tax Agency Name, name of the vendor you want to create, this field is required in order to sync Tax.
Fill all the other fields, including: Base URL, User name, Scheduler and the 4 Account fields.
Then click Save Config to store all information.
Account Type Settings:
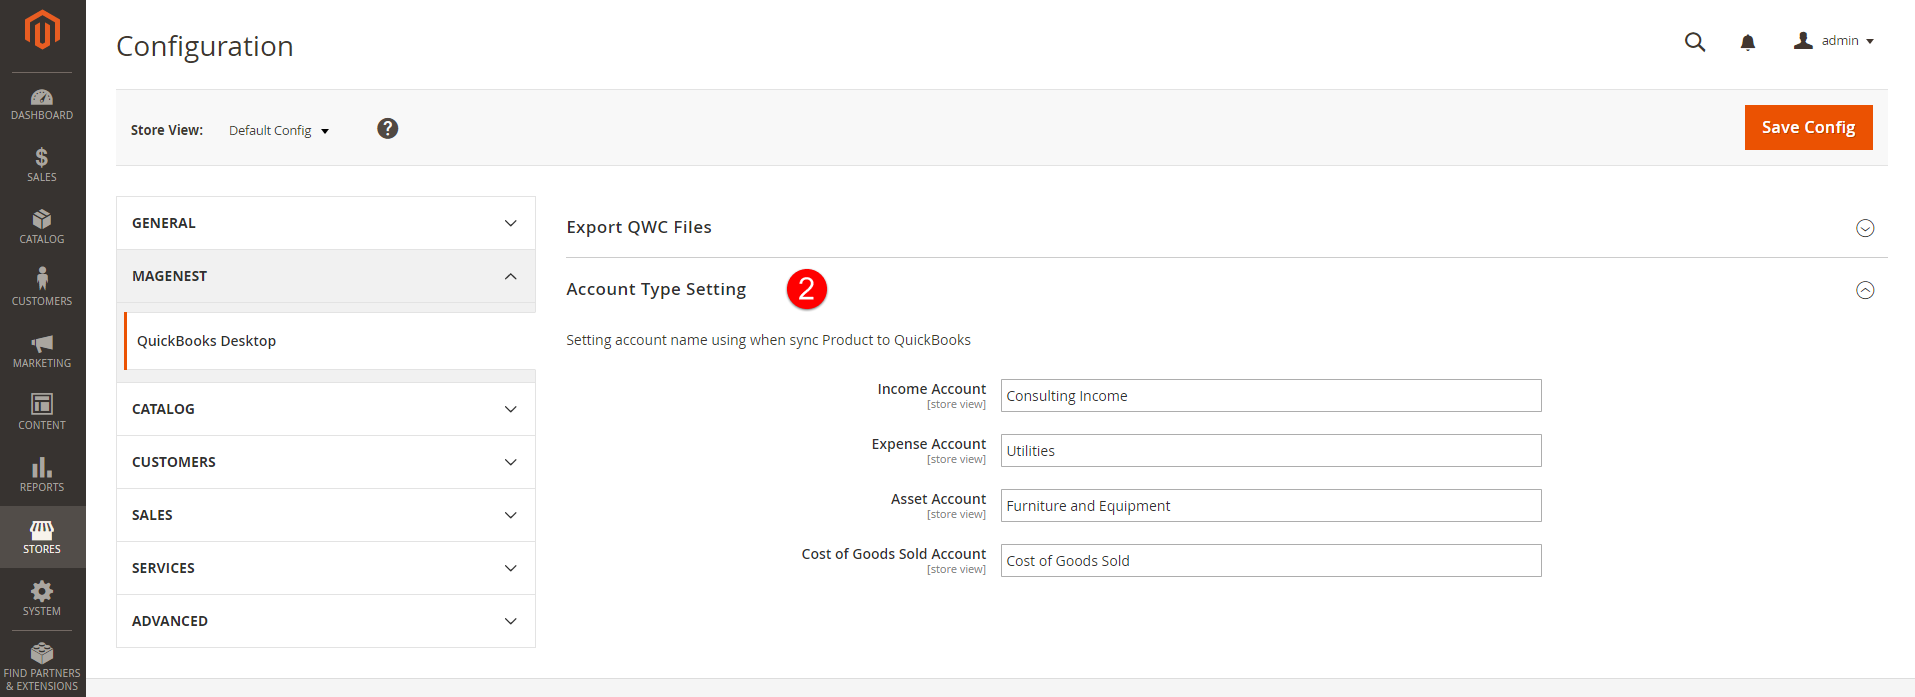
In order to know how to enter exactly 4 fields, include:
Income Account
Expense Account
Assert Account
Cost of Goods Sold Account
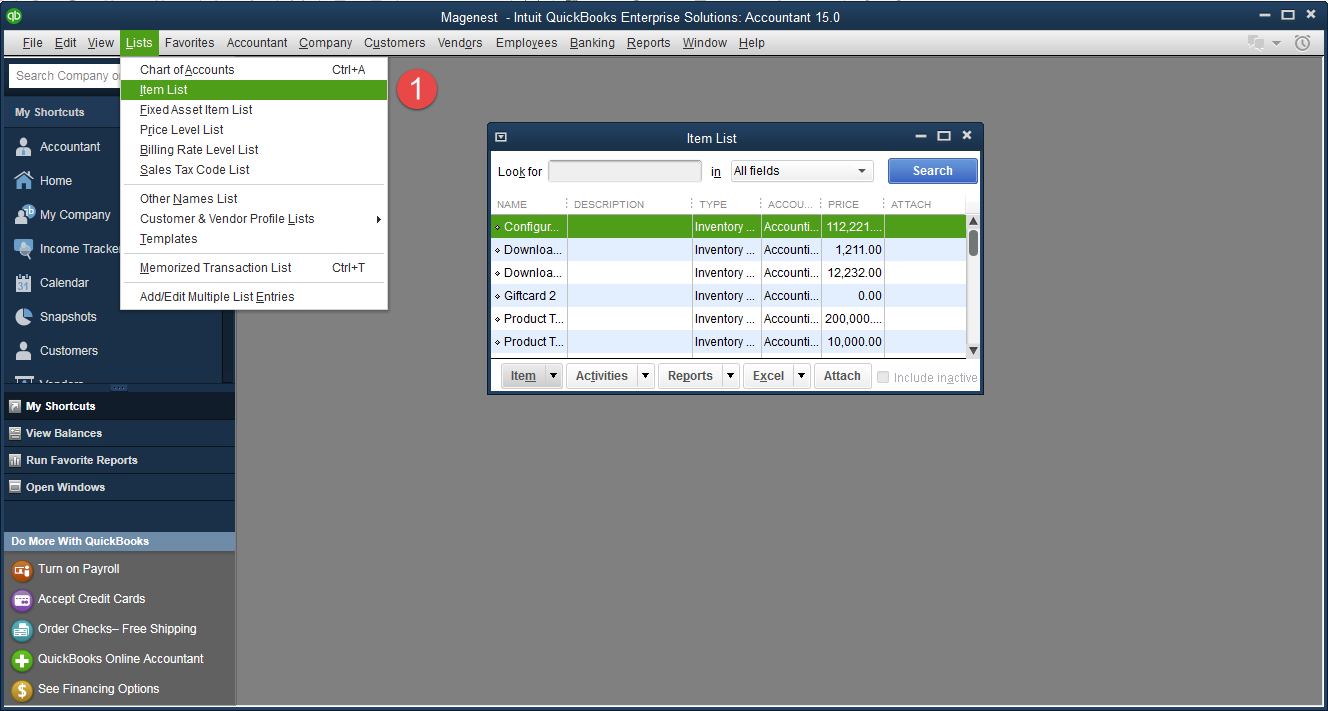
--> Please open the QuickBooks Desktop software and go to Lists > Item List
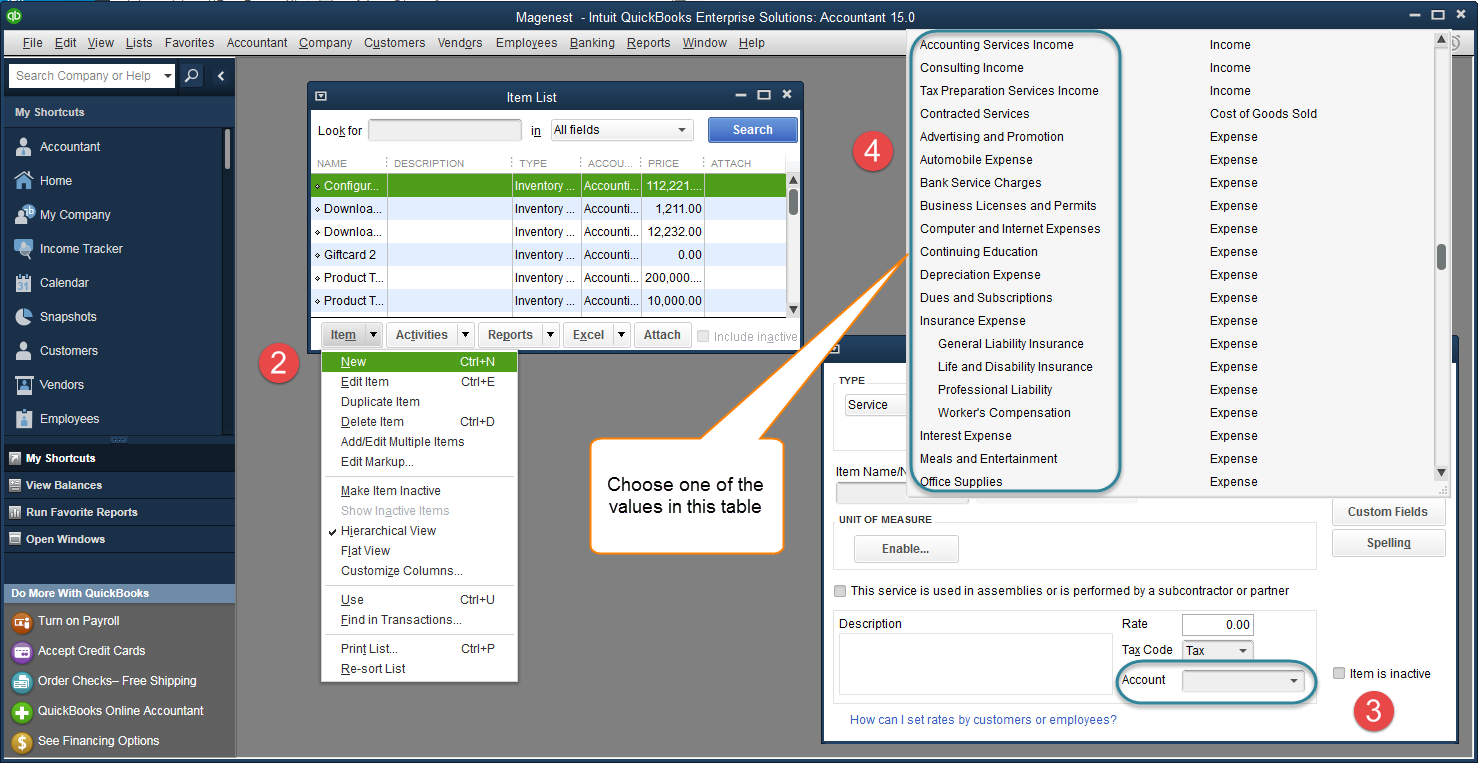
Then, navigate to Item > New > Account and choose one of them to enter 4 fields above.
Only do this step when admins use this extension for the first time or when admins want to change the company in the Quickbooks Desktop application |
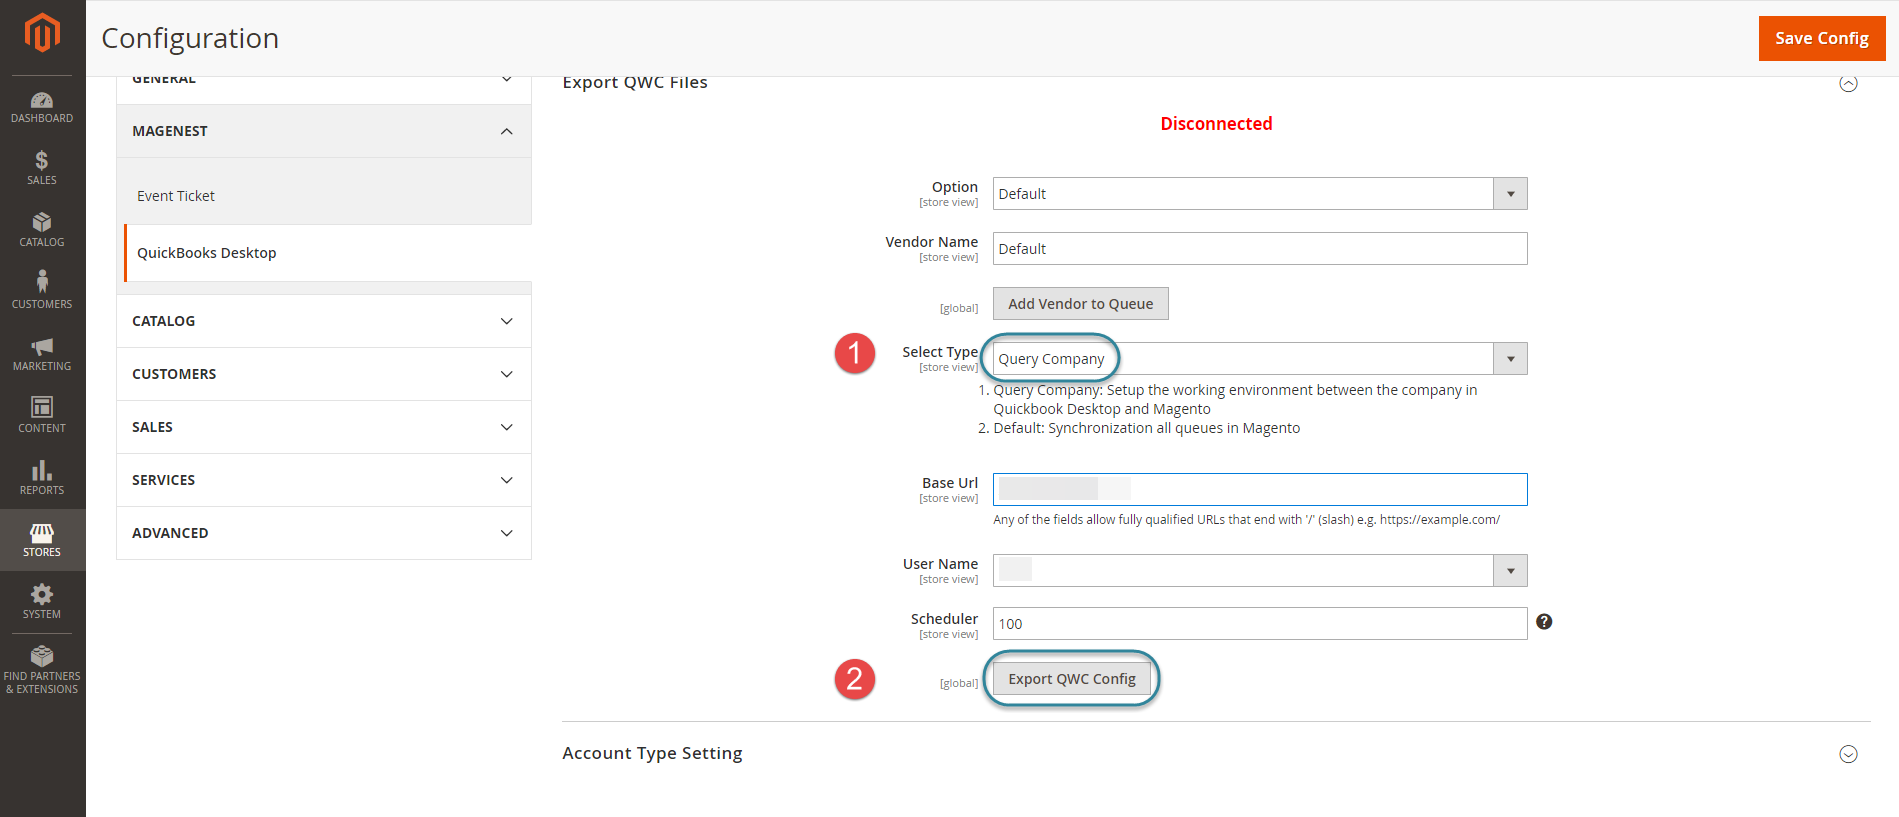
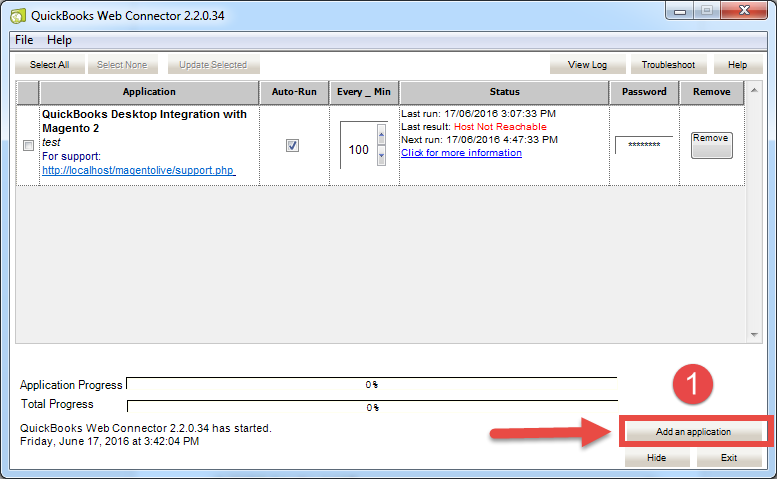
Then, admin have to open the Quickbooks Web Connector software application. Then, admins need to click on Add an application button and choose the Company file which are saved at the step above.
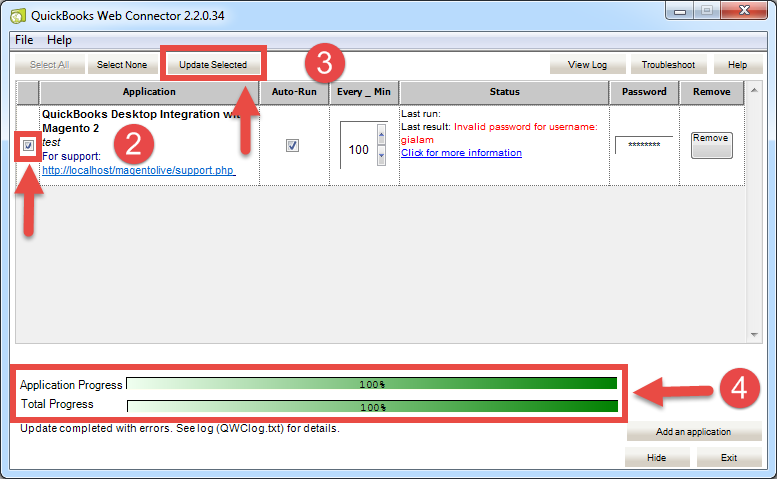
Admin will choose the checkbox and enter password which is set Configuration.
Click on Update Selected button to complete.
Note: If admin wants to use other Company in Quickbook Desktop application, create a company with different name first then query the company again with Quickbooks Web Connector. |
After you query a company for first use, then you will need to add some fields to the Manage Queue table before starting to sync data from the Magento 2 to the QuickBooks Desktop software.
Go to Stores > Manage Queue to do that.
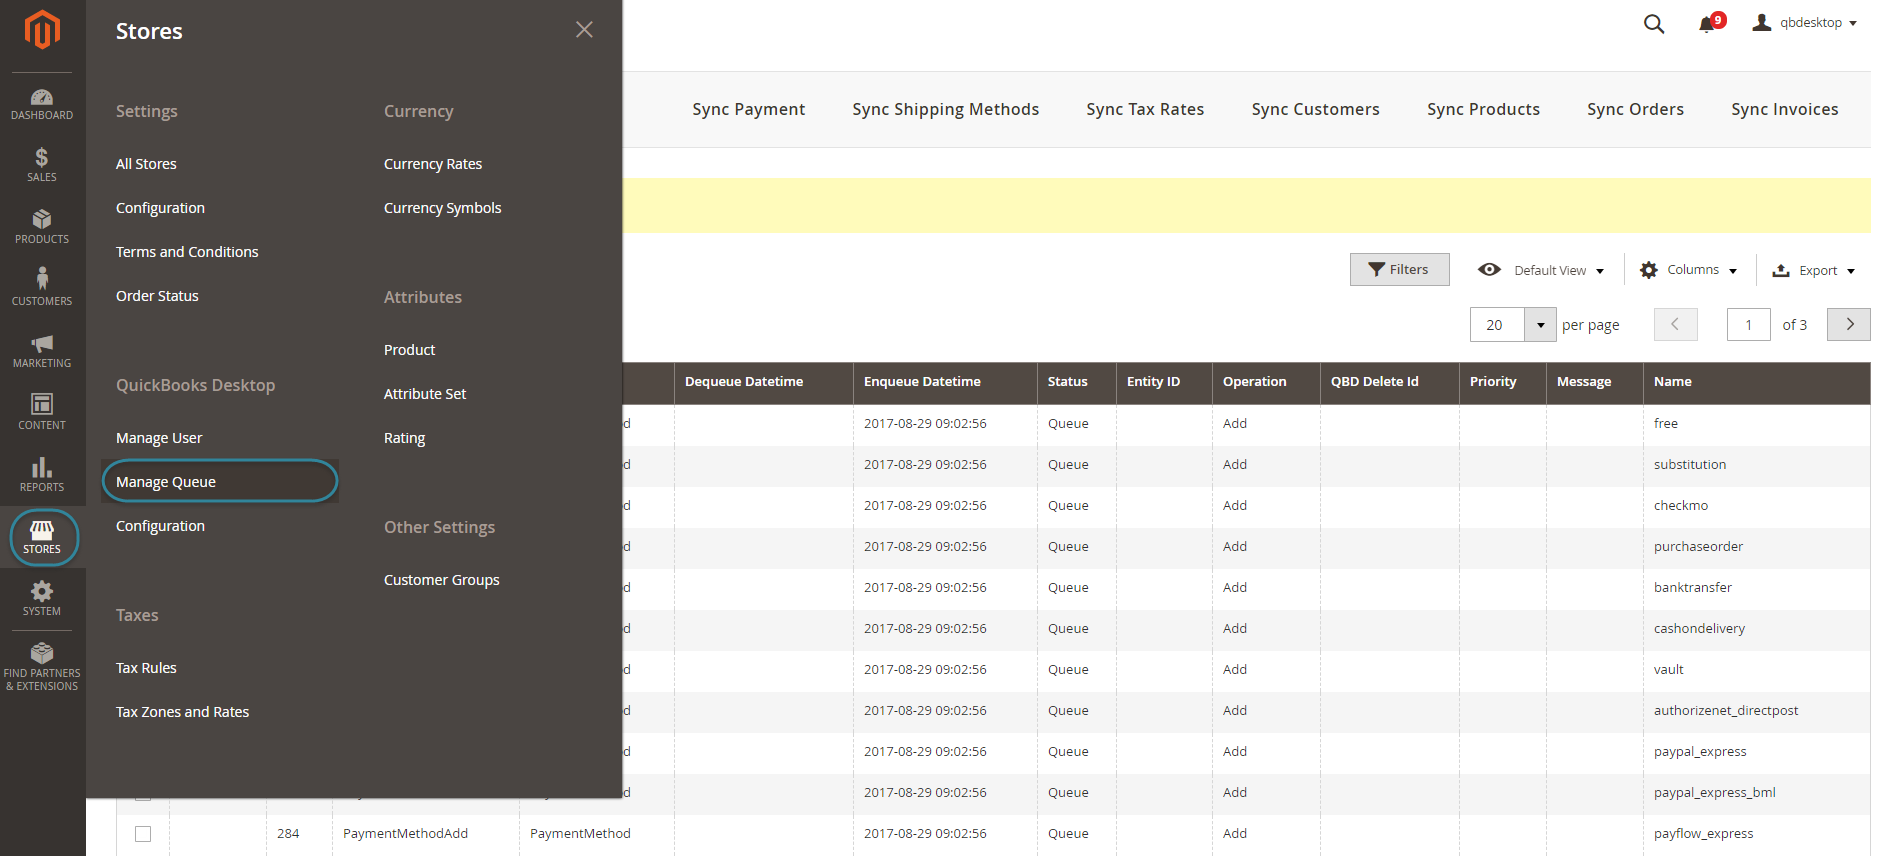
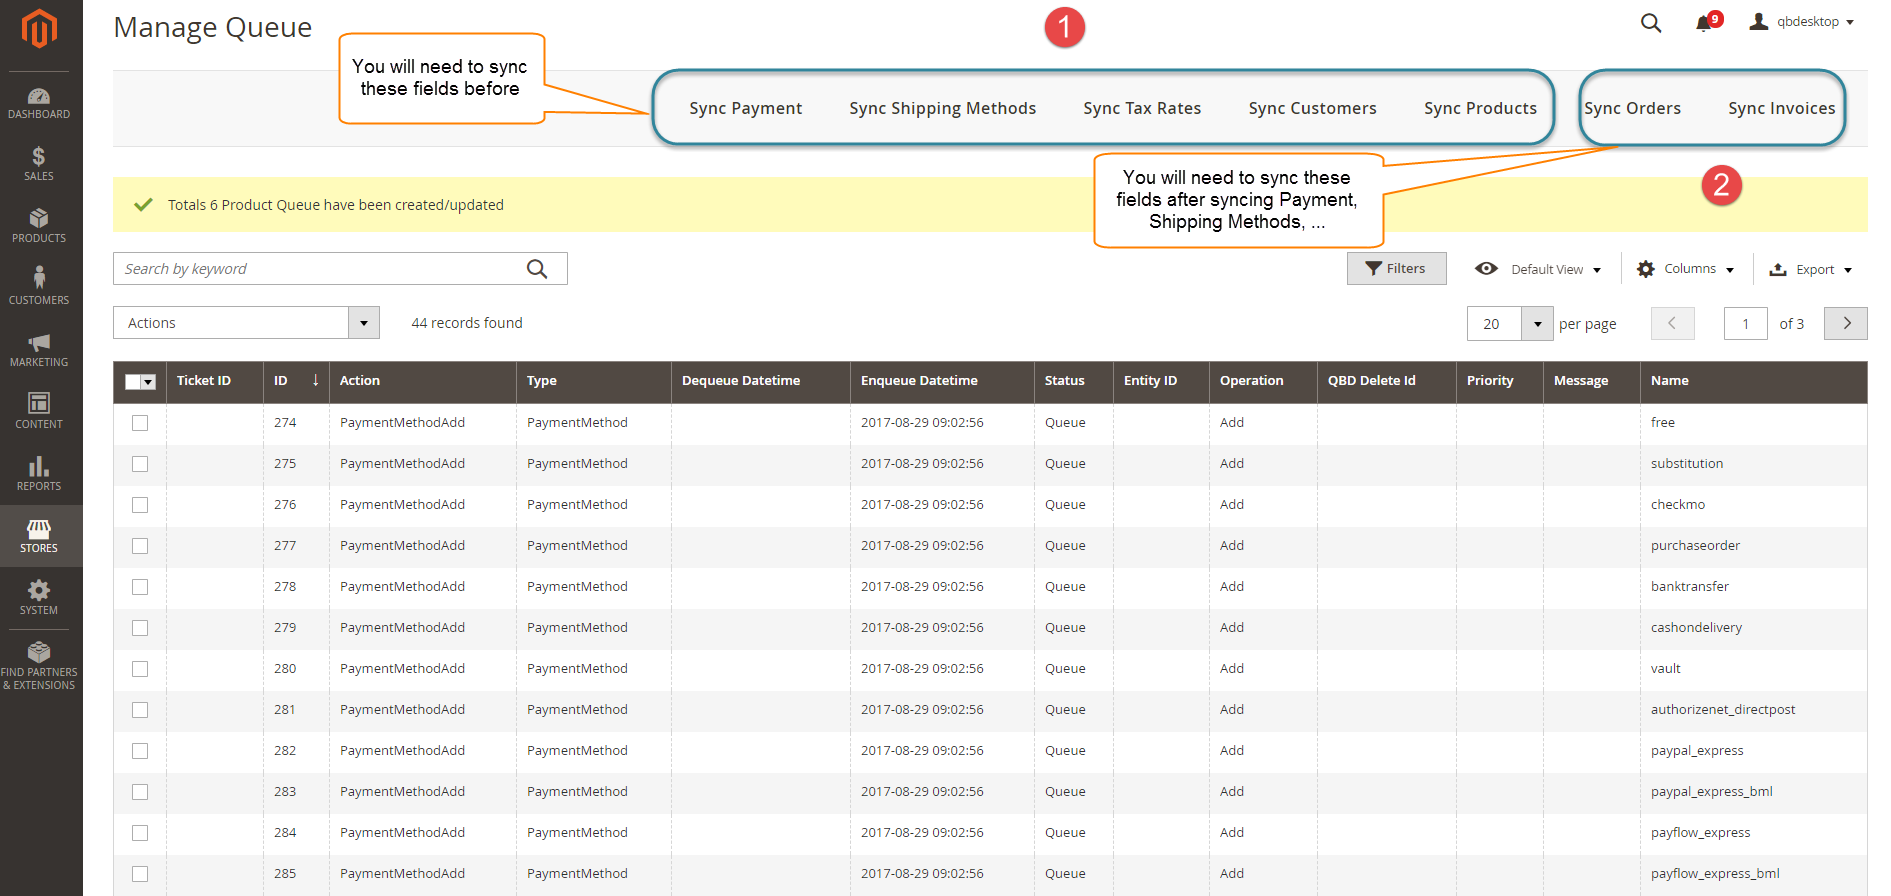
There are 7 options that admins need to consider, include:
Sync Payment, Sync Shipping Methods, Sync Tax Rates: Admins will need to sync three fields before using this extension (must).
Sync Customers: If admins will need to sync this data if they want to sync the old customers.
Sync Products: If admins will need to sync this data if they want to sync the old customers.
Sync Orders: If admins want to sync the old orders, admins will need to sync these fields above before.
Sync Invoice: If admins want to sync the old invoices, admins will need to sync orders before.
In the first time, admin have to open the Quickbooks Web Connector software application. Then, admin need to click on Add an application button and choose the Customer file which are saved at the previous step.

Admin will choose the checkbox and enter password which is set Configuration.
Click on Update Selected button to complete.

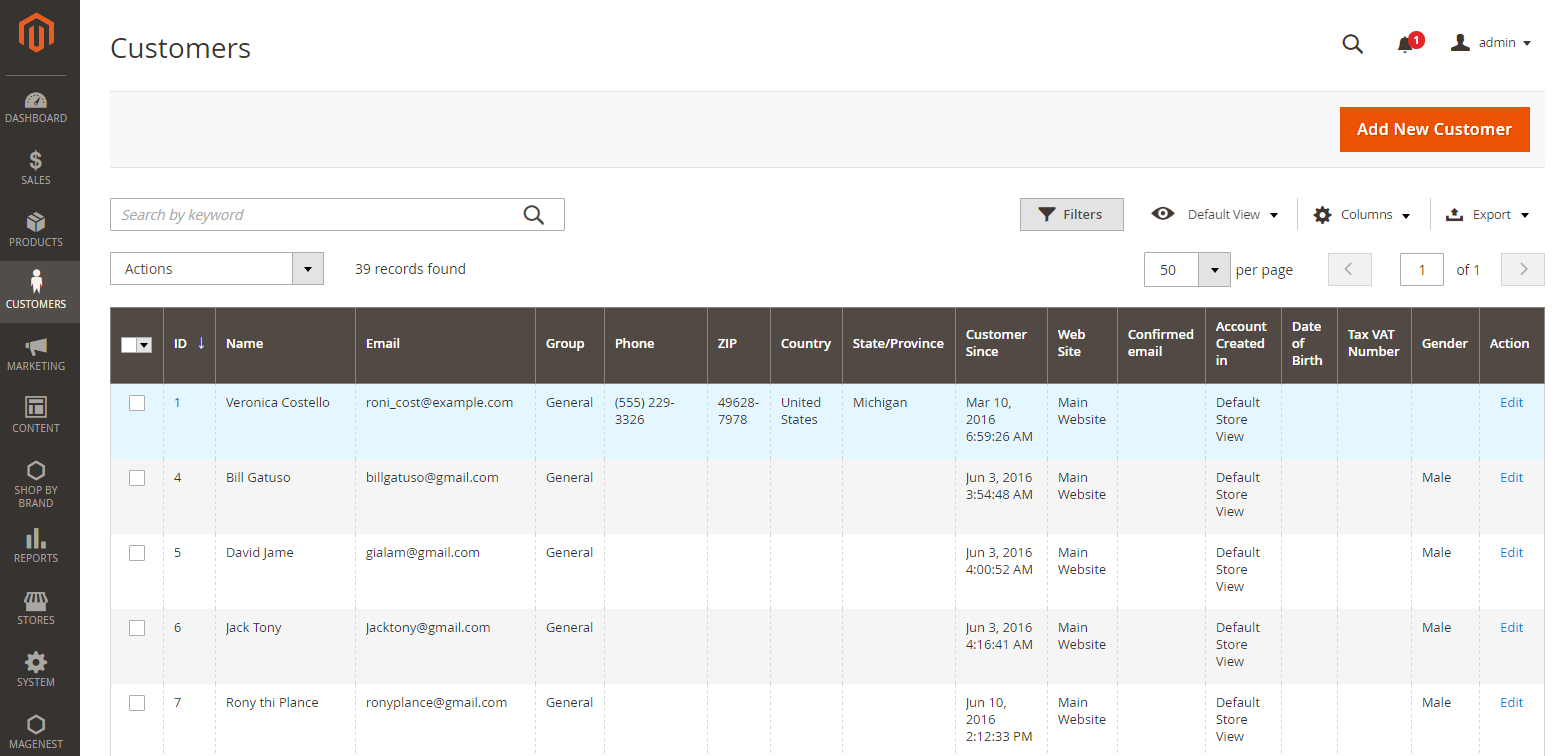
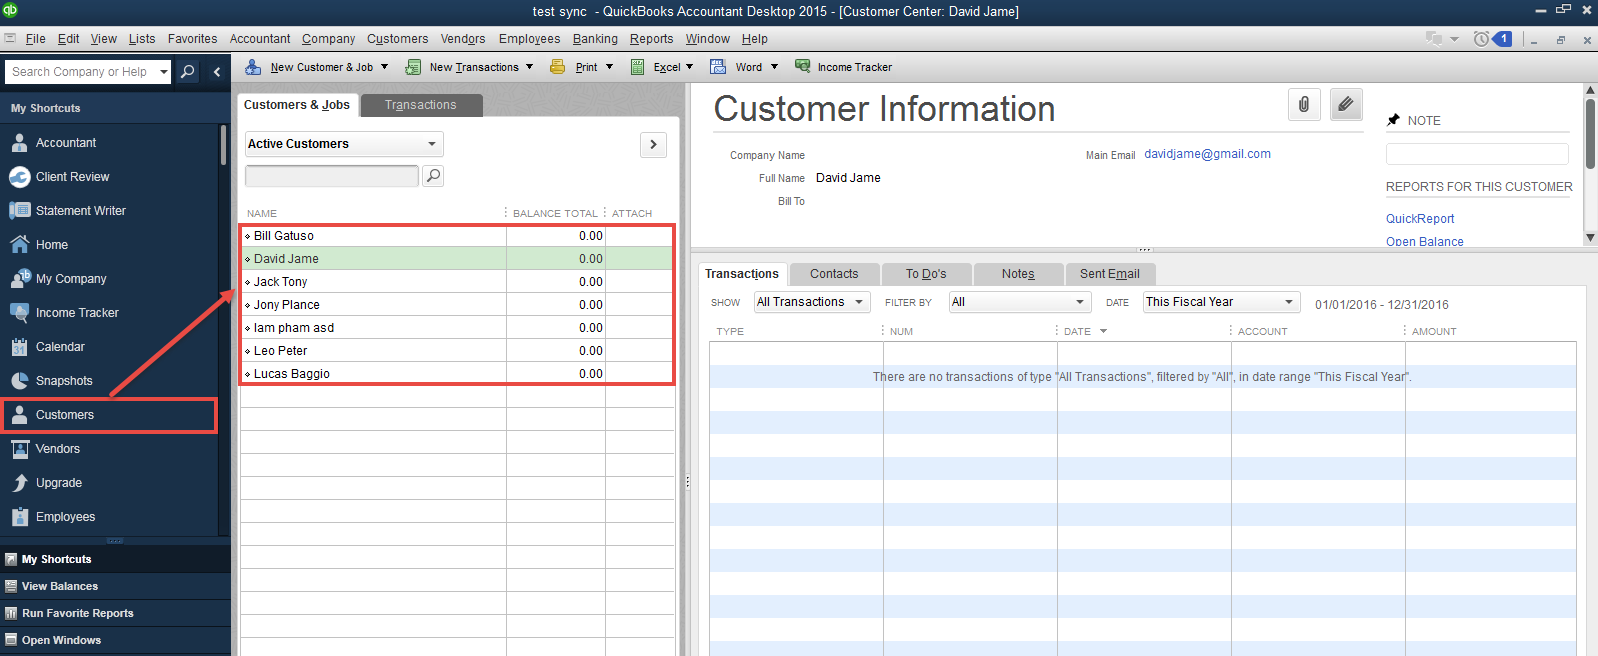
There are two ways to sync data from Magento 2 to QuickBooks Desktop, including:
- Manual updating by clicking on Update Selected button.
- Automatically updated by setting Scheduler.
Thus, all of data about existing customers on Magento 2 will be automatically synced to QuickBooks desktop.
To sync existing products, admins also open the Quickbooks Web Connector and click on Add an application button. Then, admin choose the Product file which are saved at the previous step when admin set configuration and click on Update Selected button to finish.
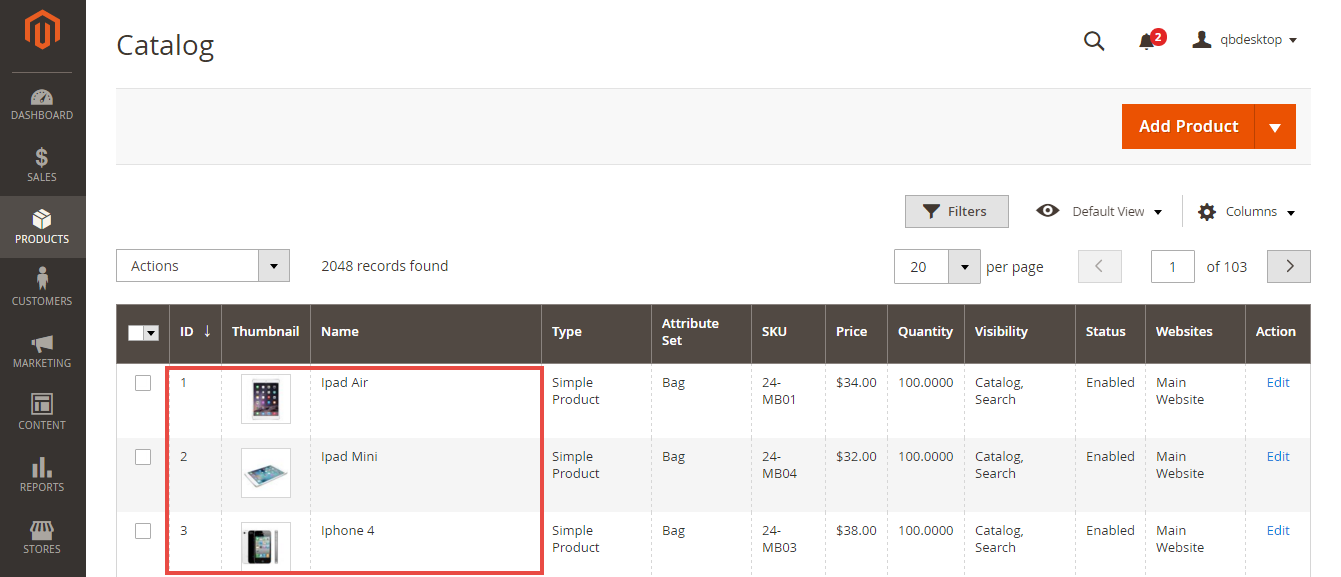
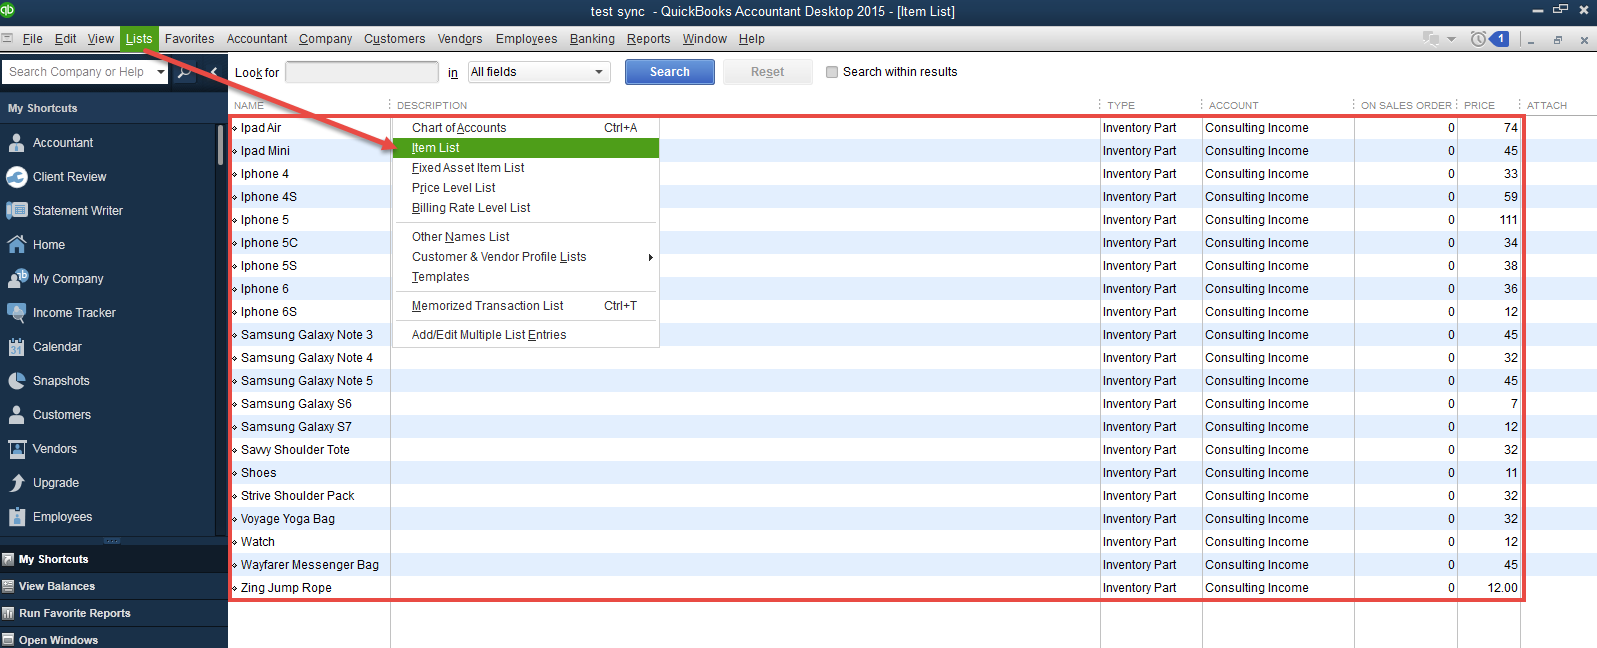
For data from the time of using QuickBooks Desktop Integration to sync from Magento 2 to QuickBooks Desktop.
Firstly, admin need to open QuickBooks Web Connector and click on Add an application button. Then, admin choose the Default file which are saved at the previous step when admin set configuration and click on Update Selected button to finish.
Note that in the next time, data will be automatically updated by setting Scheduler or admin can click on Update Selected button at QuickBooks Desktop.
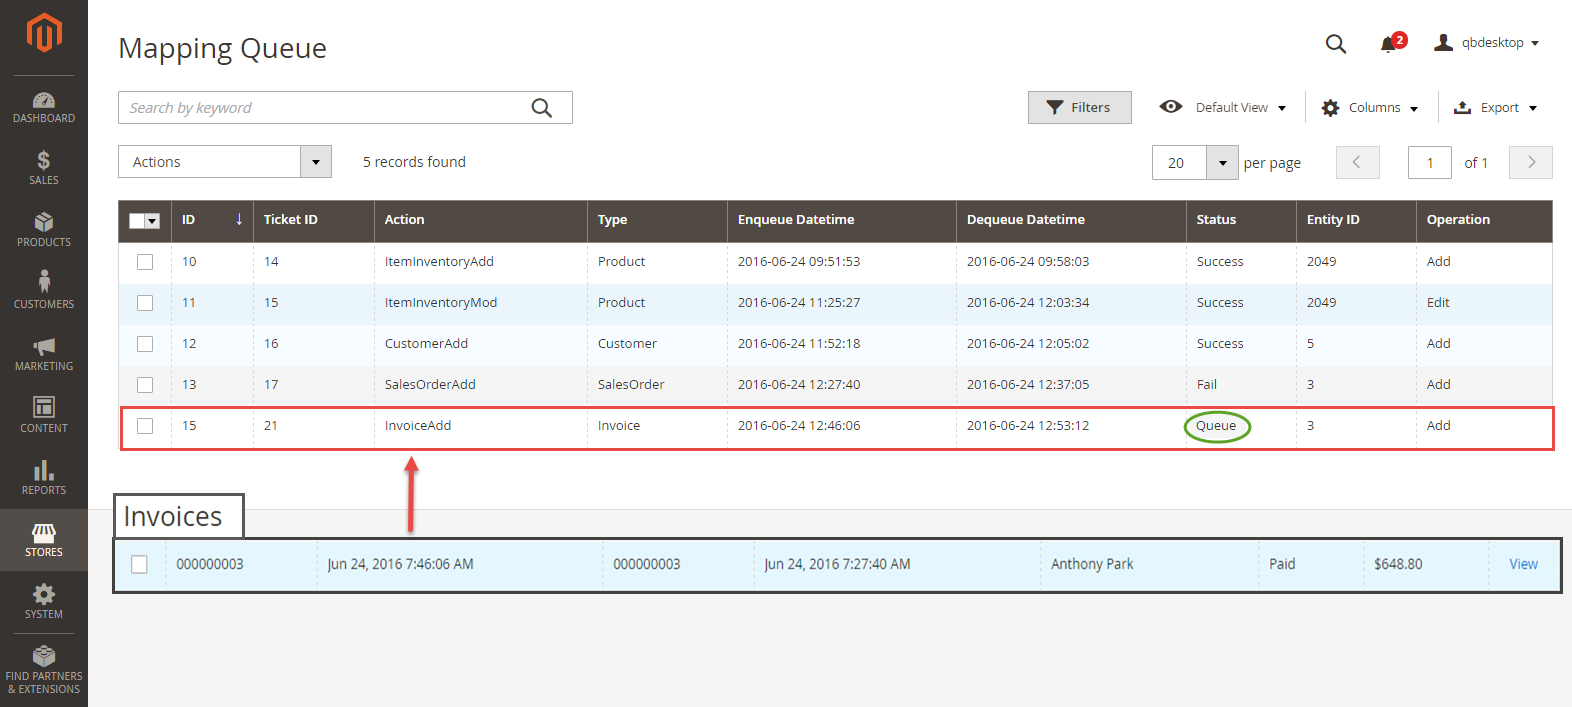
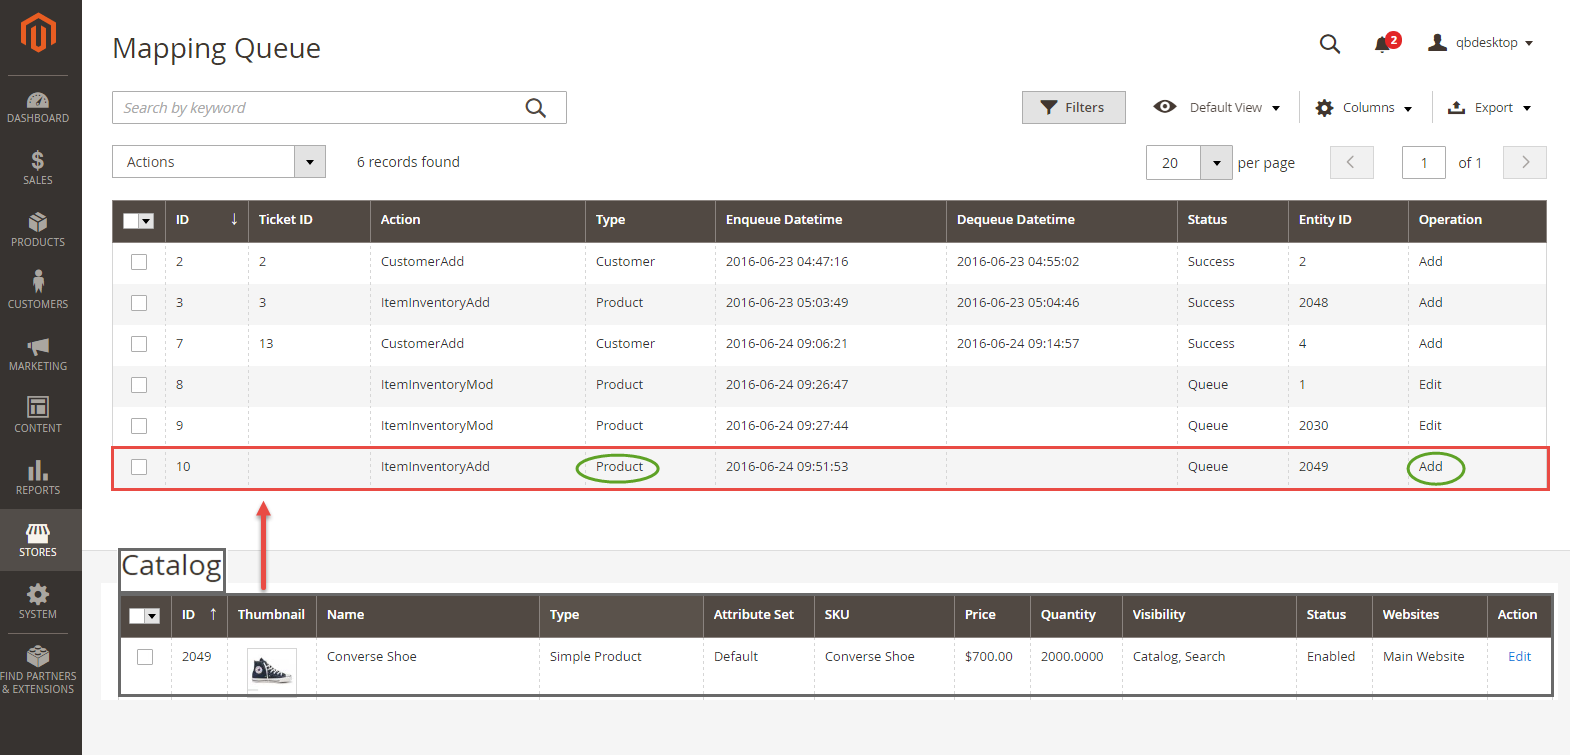
When there is a product created at Magento 2, it will be synced at Mapping Queue. Admin will click on Stores > Quickbooks Desktop > Manage Queue to view.
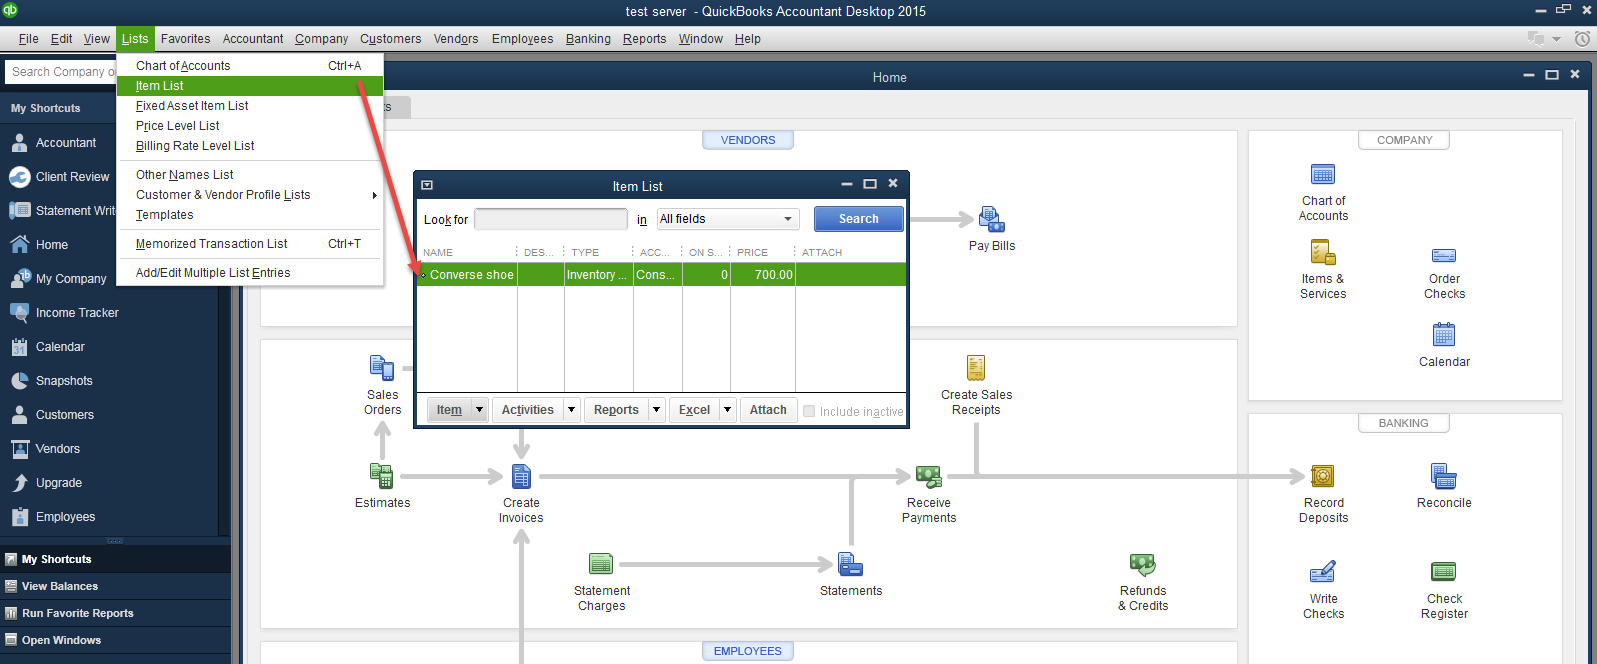
Quickbooks Desktop will be also synced data about the product. To view details this product, admin only click on Lists > Item List.
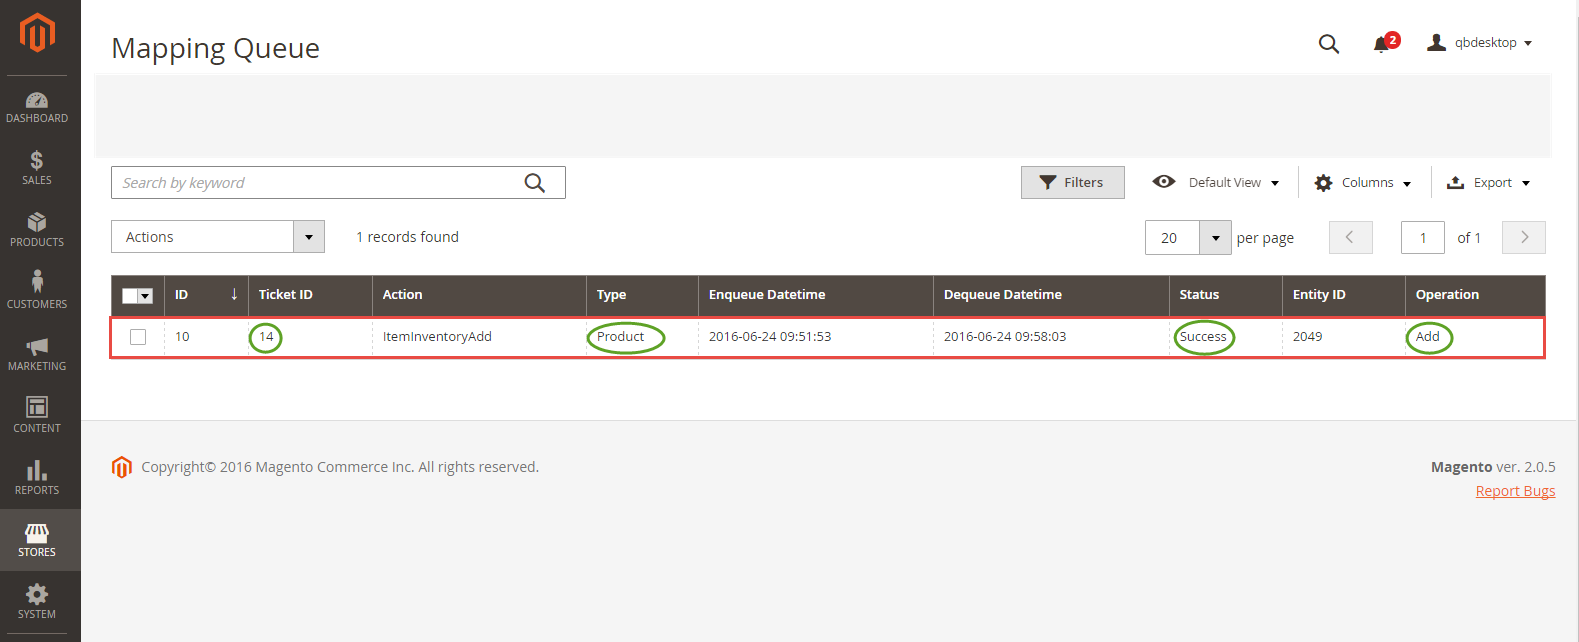
At the same time, the Status will be changed from Queue to Success.
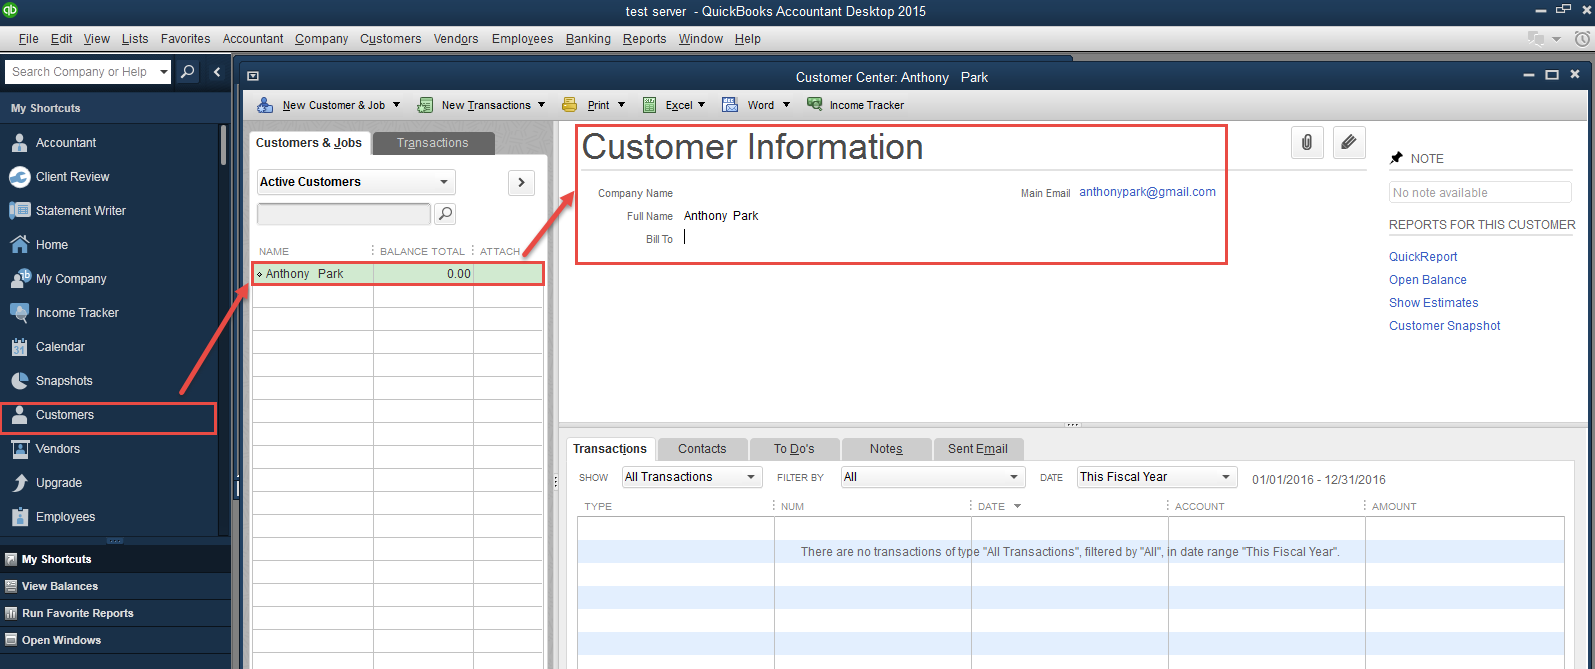
When there is a customer created at Magento 2, it will be synced at Mapping Queue. Admin will click on Stores > Quickbooks Desktop > Manage Queue to view.
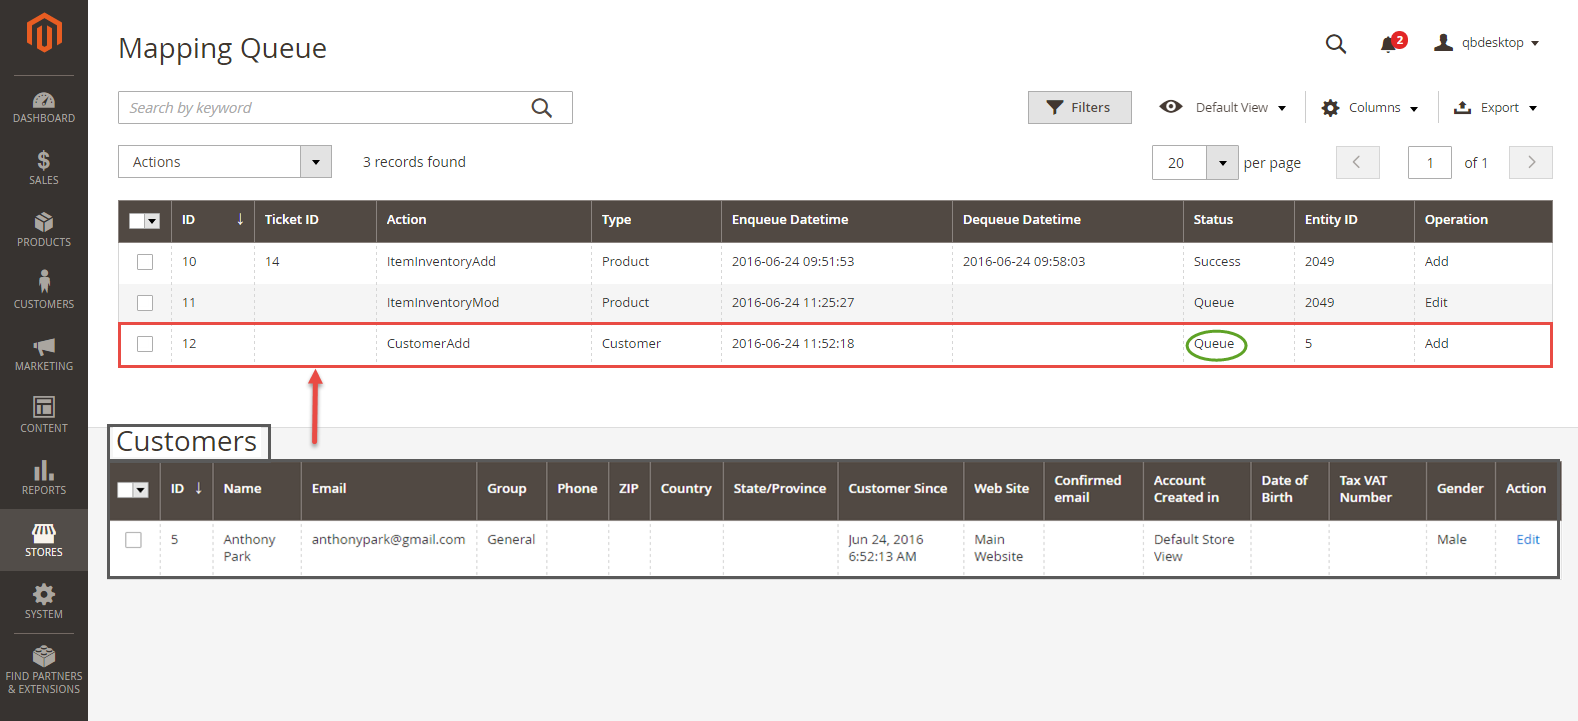
To view details this customer, admin only click on Customer tab.
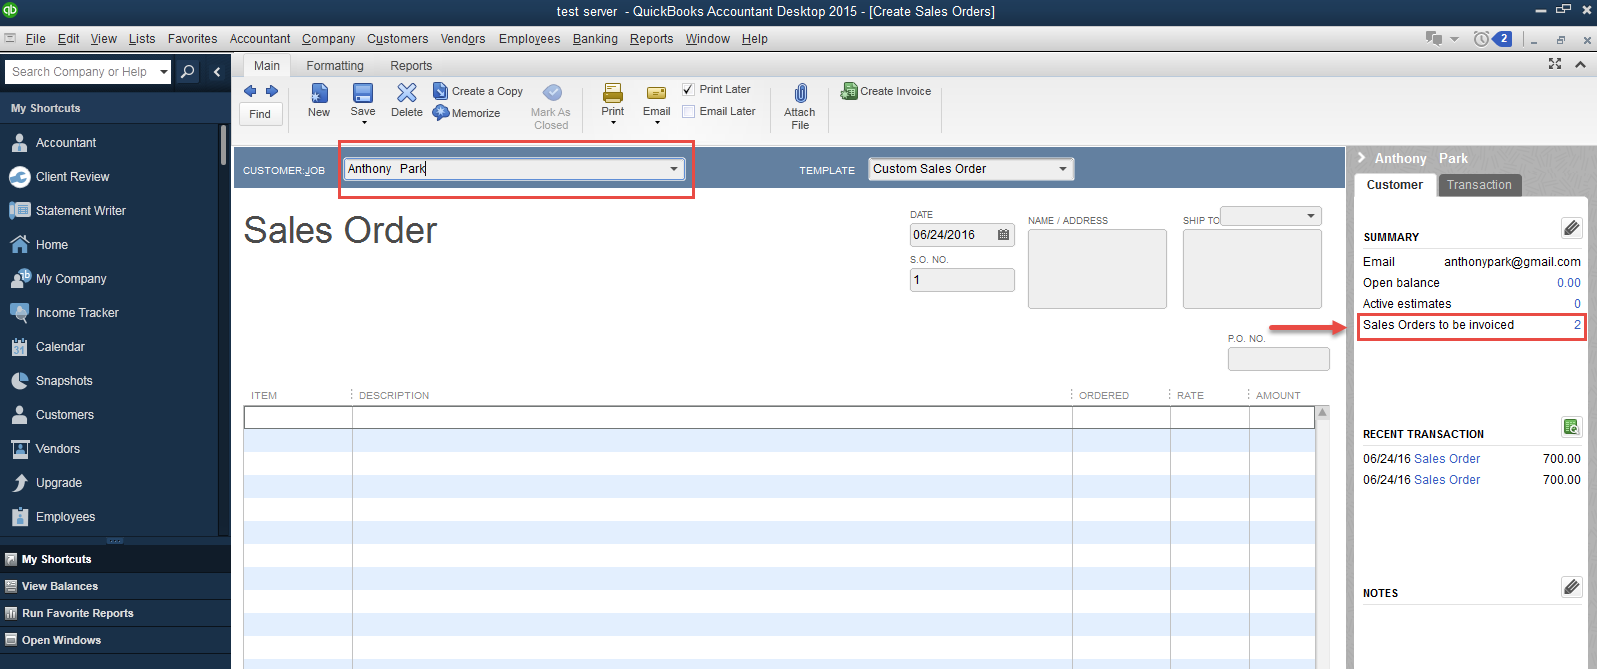
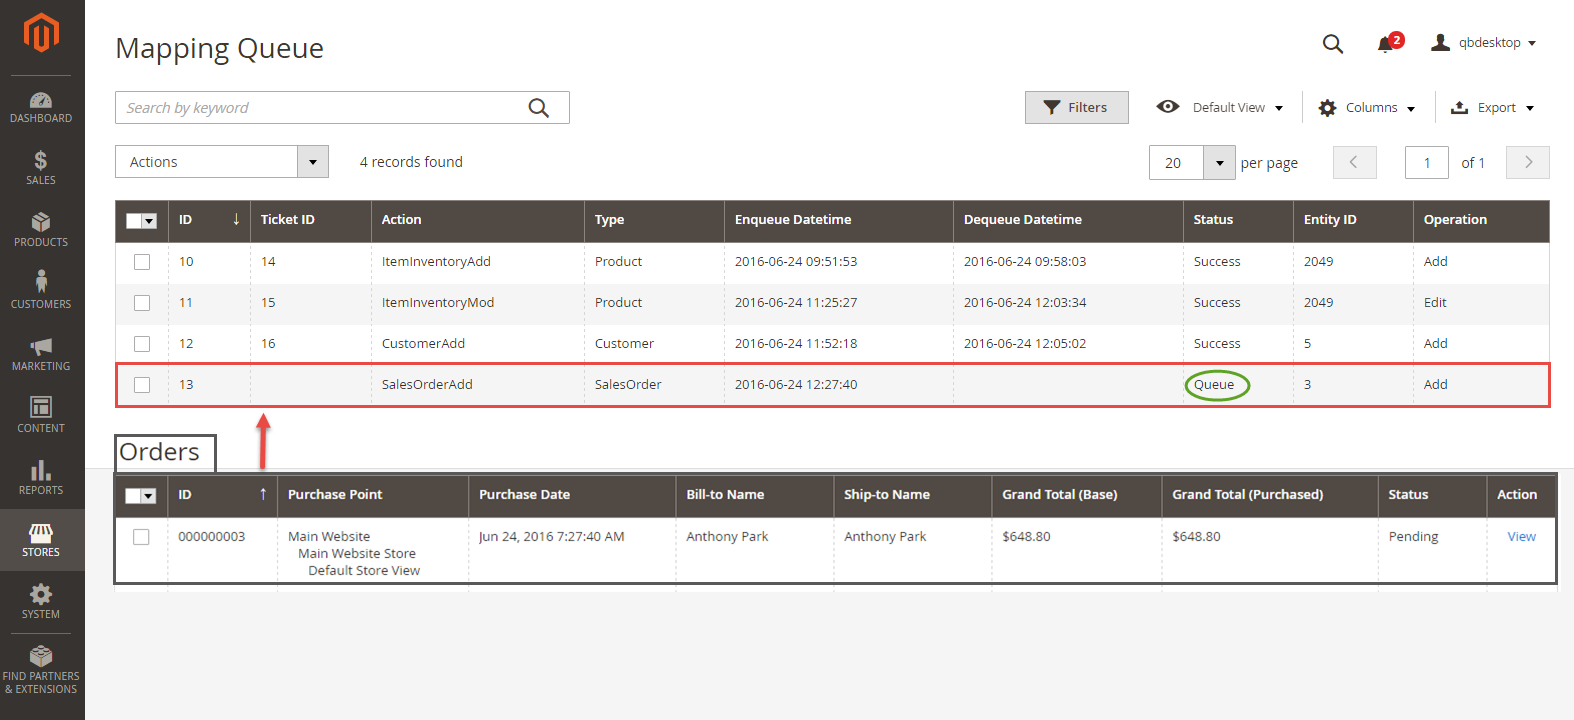
When there is an order created at Magento 2, it will be synced through QuickBooks Desktop.
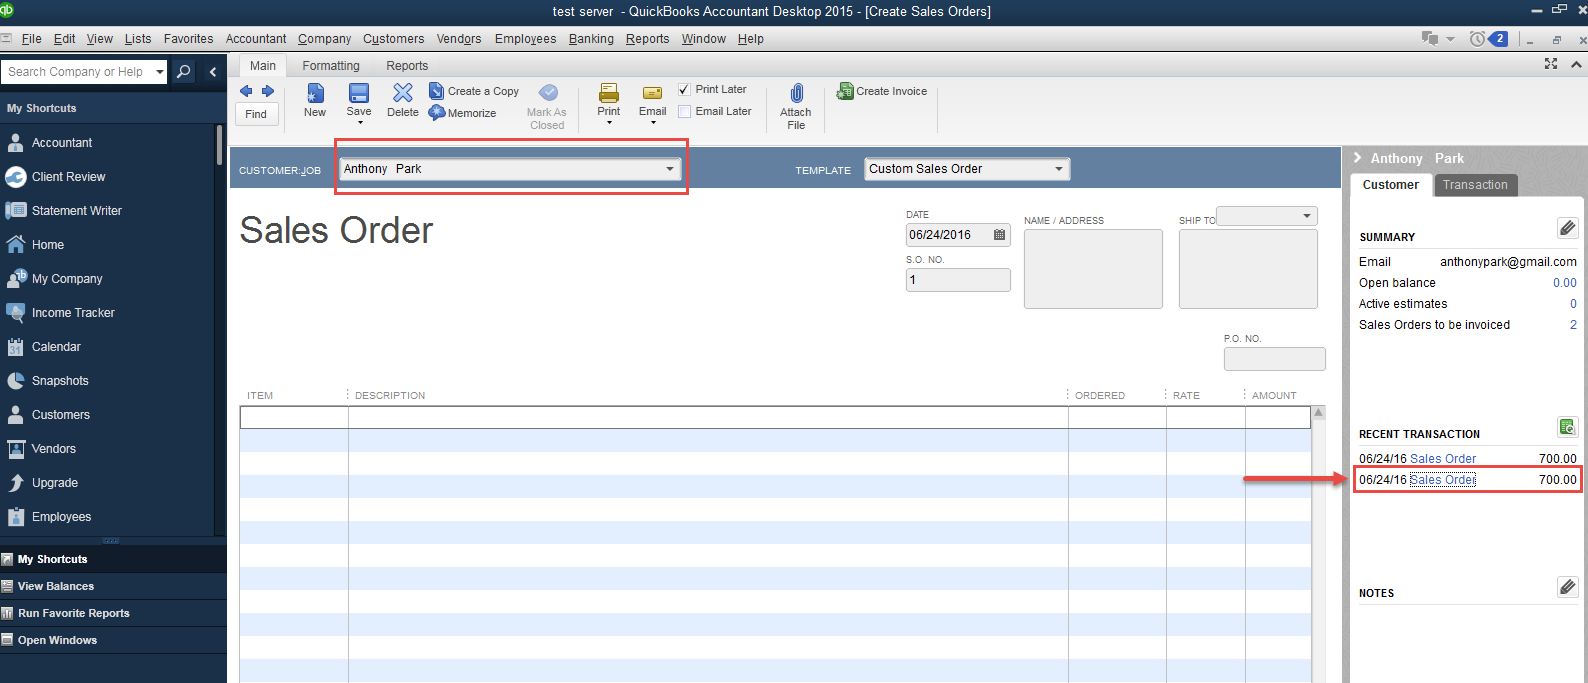
To view details this order at Quickbooks Desktop, admin only click on Sales Orders.
When there is an invoice created at Magento 2, it will be synced through QuickBooks Desktop. To view details this order, admin only click on Create Invoices.
