Thank you for purchasing our extension. If you have any questions that are beyond the scope of this document, do not hesitate to leave us an email via our email address below.
Updated: 18/09/2019 | By: Magenest | Support Portal: http://servicedesk.izysync.com/servicedesk/customer/portal/15
Entities type which can appear in log: customer, product, lead, order, invoice, memo, tax code, shipping method.

Synchronize customers from Magento 2 to Odoo as contacts, manually or automatically
Synchronize customers from Magento 2 to Odoo as leads
Synchronize products from Magento 2 to Odoo, manually or automatically
Synchronize store categories from Magento 2 to Odoo
Synchronize orders, invoices and credit memos from Magento 2 to Odoo, manually or automatically
Synchronize tax rates from Magento 2 to Odoo
Synchronize shipping methods from Magento 2 to Odoo
Map Magento 2 payment methods with Odoo payment journals
View sync history and resync failed requests
Manage sync queue
![]() Your Magento 2 should be running on:
Your Magento 2 should be running on:
Magento Open Source 2.2.x, 2.3.x
Magento Commerce 2.2.x, 2.3.x
![]() Your Odoo company should be running on:
Your Odoo company should be running on:
Odoo Community v12
Odoo Enterprise v12
![]() Your Odoo company should have the following apps:
Your Odoo company should have the following apps:
Contacts (for customer sync)
CRM (for lead sync - optional)
Sales (for product and order sync)
Inventory (for product qty sync - optional)
Ecommerce (for category sync - optional)
Invoicing (for invoice and credit memo sync)
Ensure your Odoo site is running.
On the backend, navigate to Odoo > Configuration, or Stores > Configuration > Magenest > Odoo Integration.
On the Configuration page, under Connection Settings section, fill in the connection parameters.
URL: Odoo base URL.
Port: Odoo port. The common ports are 80 (http) and 443 (https).
Database Name: enter the name of Odoo database (an Odoo installation might have multiple databases).
Admin Username and Password: credentials of Odoo admin account.
![]() Sync Mode and Time (similar for all entities)
Sync Mode and Time (similar for all entities)
![]() Customer
Customer
Sync leads: also sync customers as leads.
Lead Name Prefix: will be added to the name of Lead on Odoo (format: prefix + customer name).
![]() Product
Product
![]() Note: There are some types of product which are synced: simple, virtual, downloadable, configurable, bundle.
Note: There are some types of product which are synced: simple, virtual, downloadable, configurable, bundle.
![]() Order
Order
![]() Invoice
Invoice
![]() Credit memo
Credit memo
![]() Note: Invoice and Memo prefix must be different.
Note: Invoice and Memo prefix must be different.
![]() Enable/disable saving all sync requests and responses to [site root]/var/log/odoo/debug.log.
Enable/disable saving all sync requests and responses to [site root]/var/log/odoo/debug.log.
![]() This log contains connection credentials (url, host, db, username, password).
This log contains connection credentials (url, host, db, username, password).
![]() This section is required for invoice/memo synchronization.
This section is required for invoice/memo synchronization.
![]() When an invoice/memo is synced from Magento to Odoo, its payment entity will be linked to an Odoo journal based on mapping of payment methods Magento.
When an invoice/memo is synced from Magento to Odoo, its payment entity will be linked to an Odoo journal based on mapping of payment methods Magento.
![]() On the backend, navigate to Odoo > Mapping Payment Journals.
On the backend, navigate to Odoo > Mapping Payment Journals.
Step 1: Click Add Payment Methods to get the list of methods on Magento 2.
Step 2: Click Get Journals to get the list of journals on Odoo company.
Step 3: Click on Map to Journal field to map Journal with the method. Mapping is saved automatically.
![]() This section is required for order/invoice/memo synchronization.
This section is required for order/invoice/memo synchronization.
![]() Navigate to Odoo > Shipping Methods > Synchronize.
Navigate to Odoo > Shipping Methods > Synchronize.
![]() On Odoo, you can find synced methods at Sales > Configuration > Delivery Methods.
On Odoo, you can find synced methods at Sales > Configuration > Delivery Methods.
![]() This section is required for order/invoice/memo synchronization.
This section is required for order/invoice/memo synchronization.
![]() Navigate to Odoo > Tax Code Mapping > Add All Tax Codes > Synchronize.
Navigate to Odoo > Tax Code Mapping > Add All Tax Codes > Synchronize.
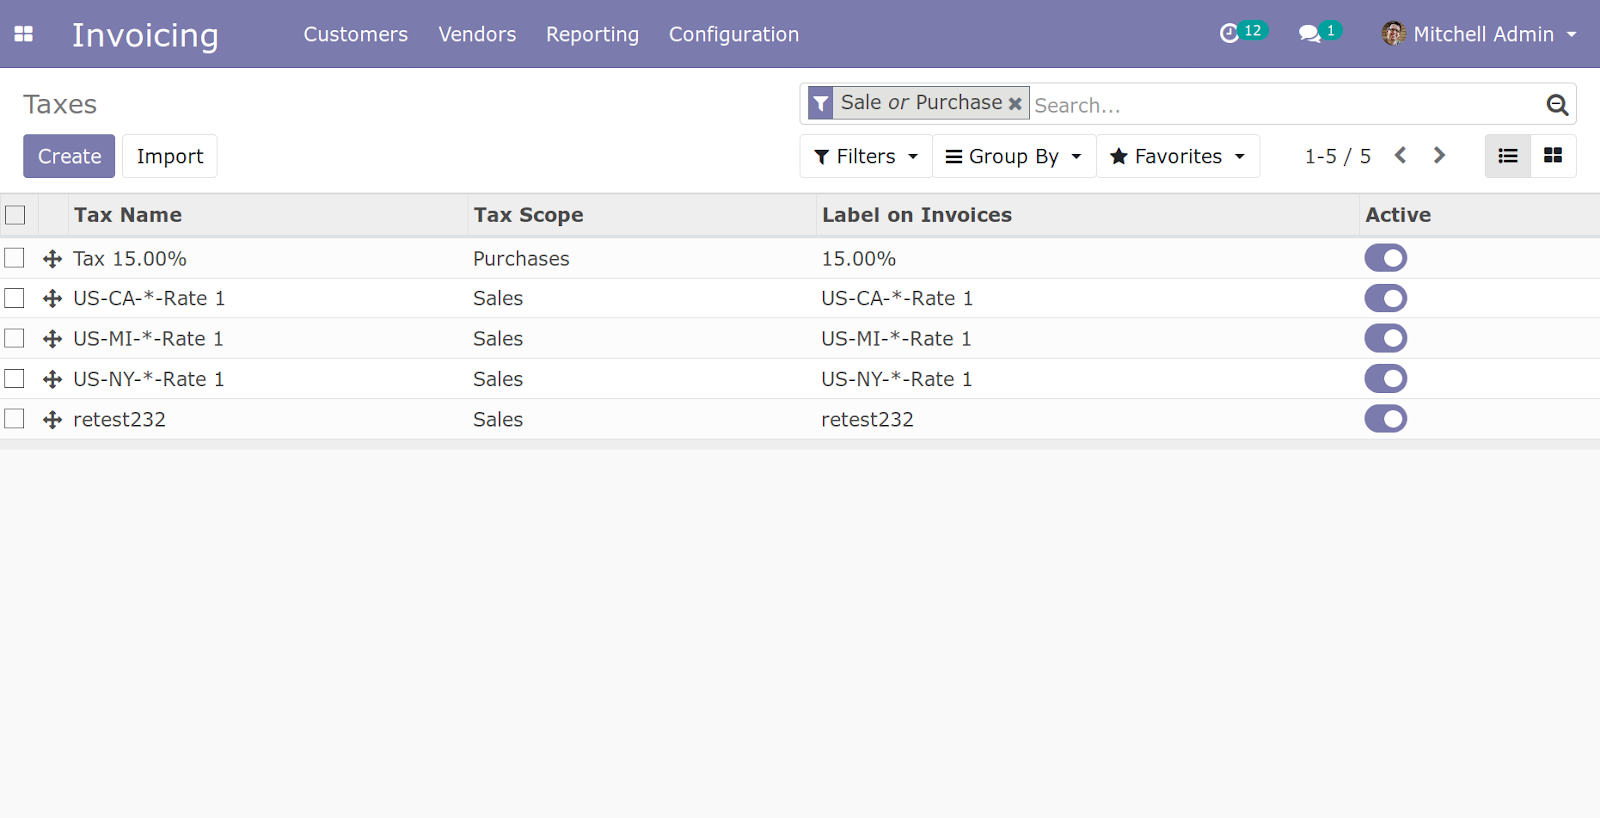
![]() On Odoo, you can view the list of tax codes at Invoicing > Configuration > Taxes:
On Odoo, you can view the list of tax codes at Invoicing > Configuration > Taxes:
![]() Queue management is accessible from Odoo > Sync Queue. Queue contains:
Queue management is accessible from Odoo > Sync Queue. Queue contains:
Entities with Sync mode Cron Job waiting for sync.
Entities added by admin.
![]() To add entities from Queue, choose any of the buttons above to open Add to Queue dialog:
To add entities from Queue, choose any of the buttons above to open Add to Queue dialog:
![]() Select creation date range (with transactions) or last modified range (with customers/products) to add them to queue. Either or both date fields can be skipped (if both are skipped, all entities will be added to Queue)
Select creation date range (with transactions) or last modified range (with customers/products) to add them to queue. Either or both date fields can be skipped (if both are skipped, all entities will be added to Queue)
![]() To sync entities in Queue, wait for the cron to run, or use Sync Now button or Mass Action to sync them immediately.
To sync entities in Queue, wait for the cron to run, or use Sync Now button or Mass Action to sync them immediately.
![]() From Odoo > History Logs, admin can view log of synced entities:
From Odoo > History Logs, admin can view log of synced entities:
![]() There are 3 statuses of the logs:
There are 3 statuses of the logs:
Success: synced to Odoo without errors.
Skip: already exist on Odoo and doesn’t need resyncing.
Failed: failed syncs.
![]() Re-Sync All button: resync all logs with failed status (skip success/skip statuses).
Re-Sync All button: resync all logs with failed status (skip success/skip statuses).
![]() To sync single or several entities in log, use Mass Action.
To sync single or several entities in log, use Mass Action.
Once again, thank you for purchasing our extension. If you have any questions relating to this extension, please do not hesitate to contact us for support.