Thank you for purchasing our extension. If you have any questions that are beyond the scope of this document, please feel free to contact us via [email protected]
By: Magenest | Support Portal:
Odoo OCR helps users extract structured data from uploaded business documents and create corresponding records directly in Odoo.
The module supports AI-powered document extraction, manual or scheduled processing, bulk uploads, and document-specific workflows such as splitting multiple purchase orders from a single file. After extraction, users can review and correct the captured data before creating the final Odoo record.
Before using Odoo OCR, make sure the following requirements are met:
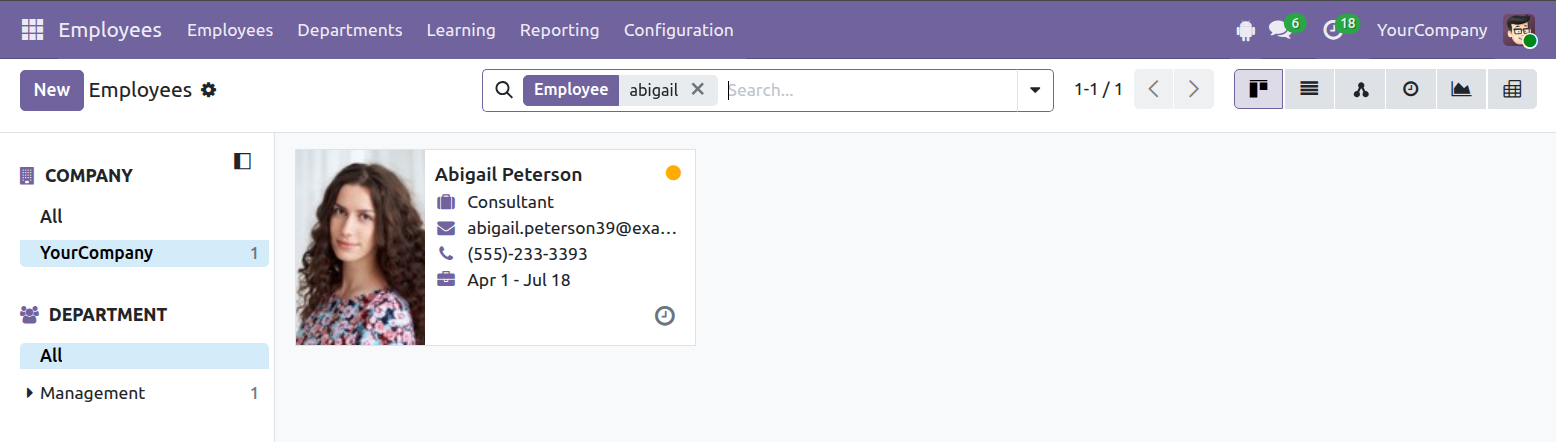
From any screen, users can switch between the available views by clicking the corresponding view icon in the upper-right corner (1).
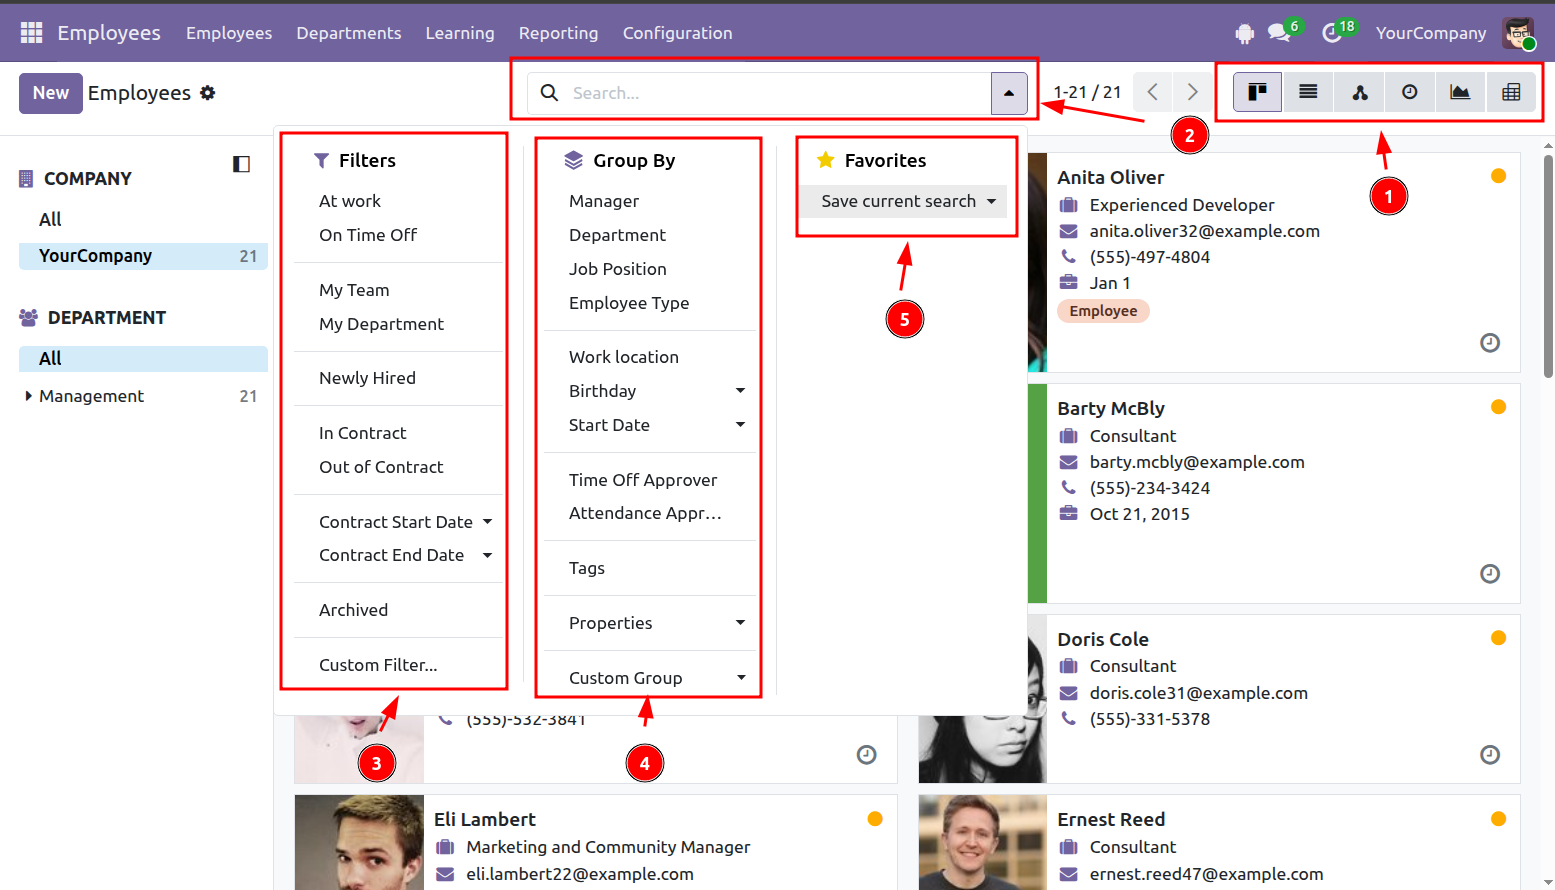
To apply filters or group records, click the search bar (2) and select the options you need. You can use built-in filters and groups or create your own. Multiple grouping levels can also be applied.
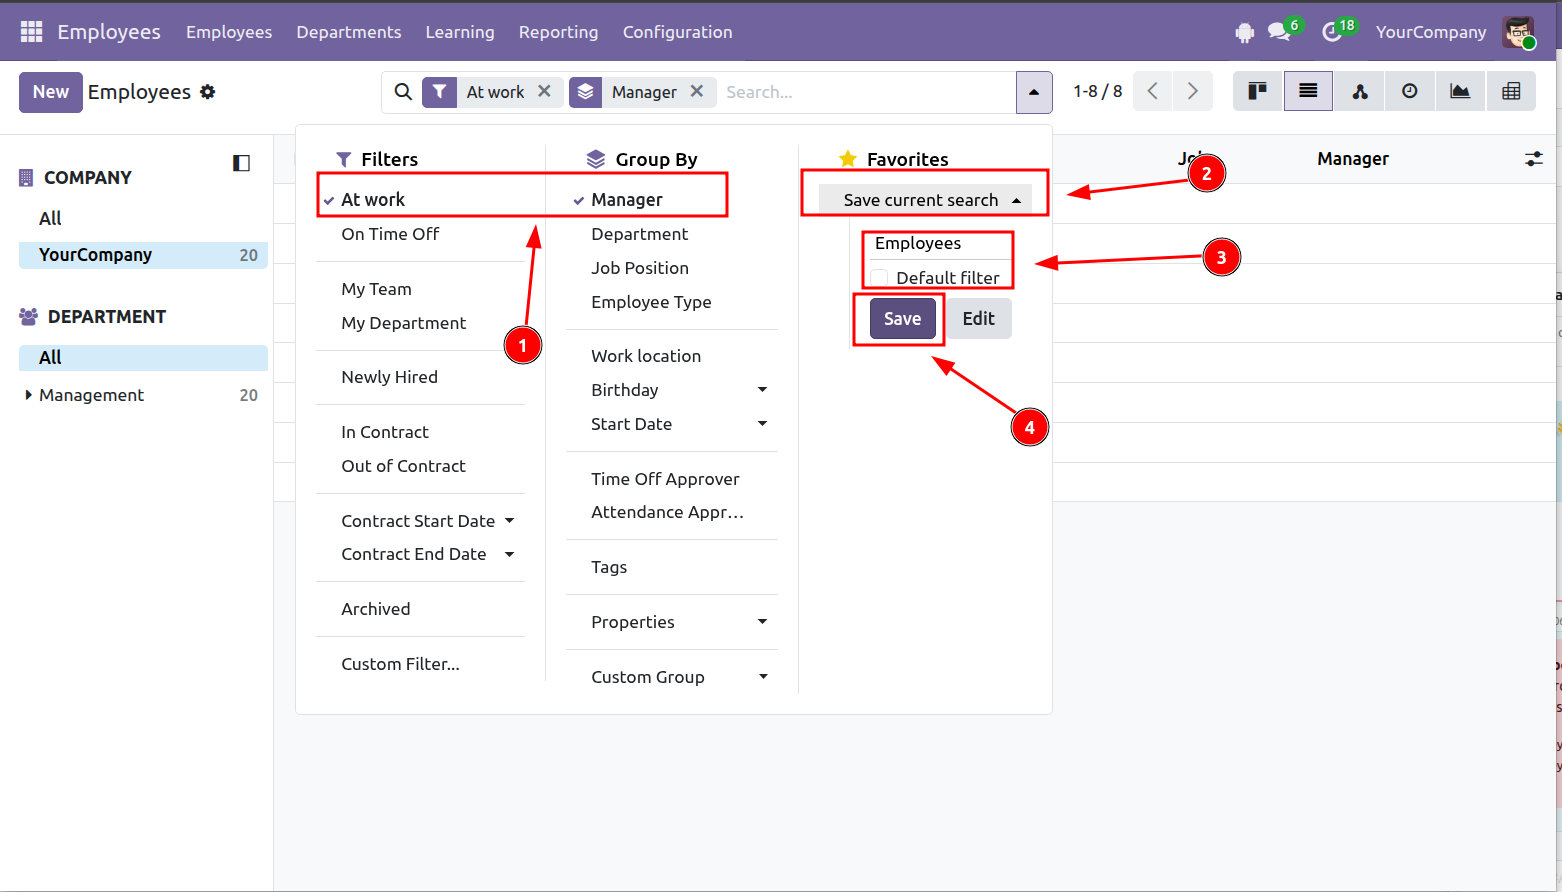
The current filter can be saved to Favorites (5) for later use.
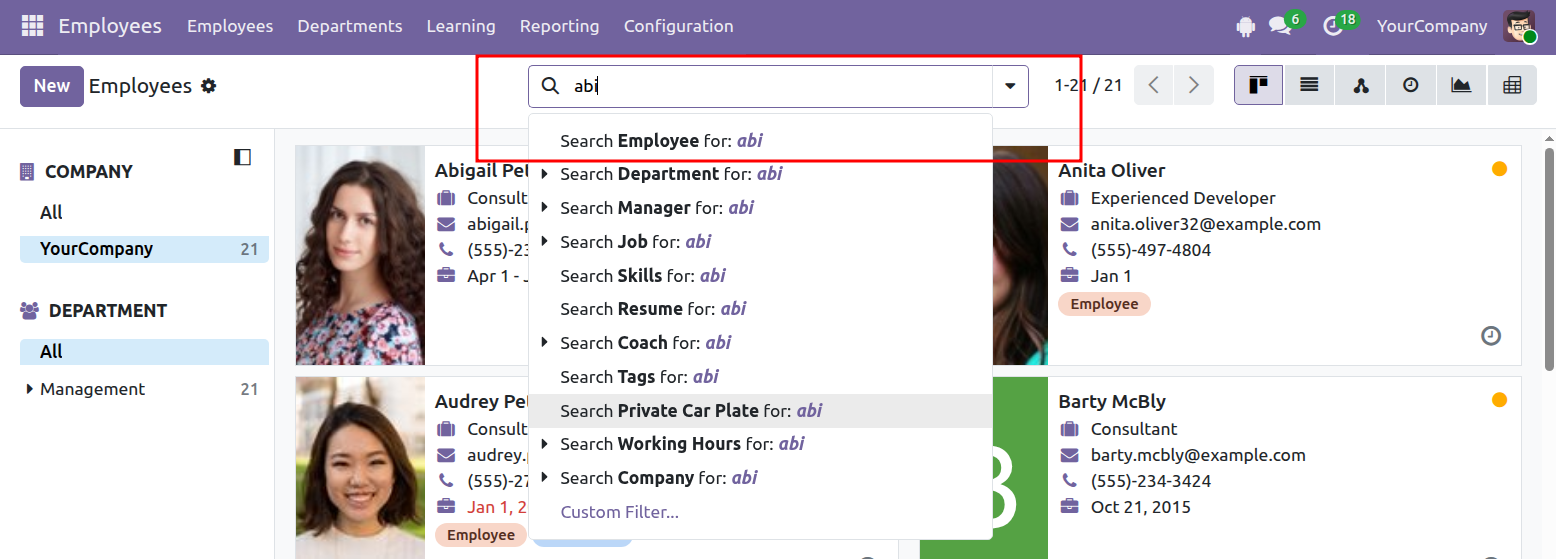
When you enter a keyword in the search bar, Odoo displays the fields that can be searched. Select the appropriate field to filter records using the keyword you entered.
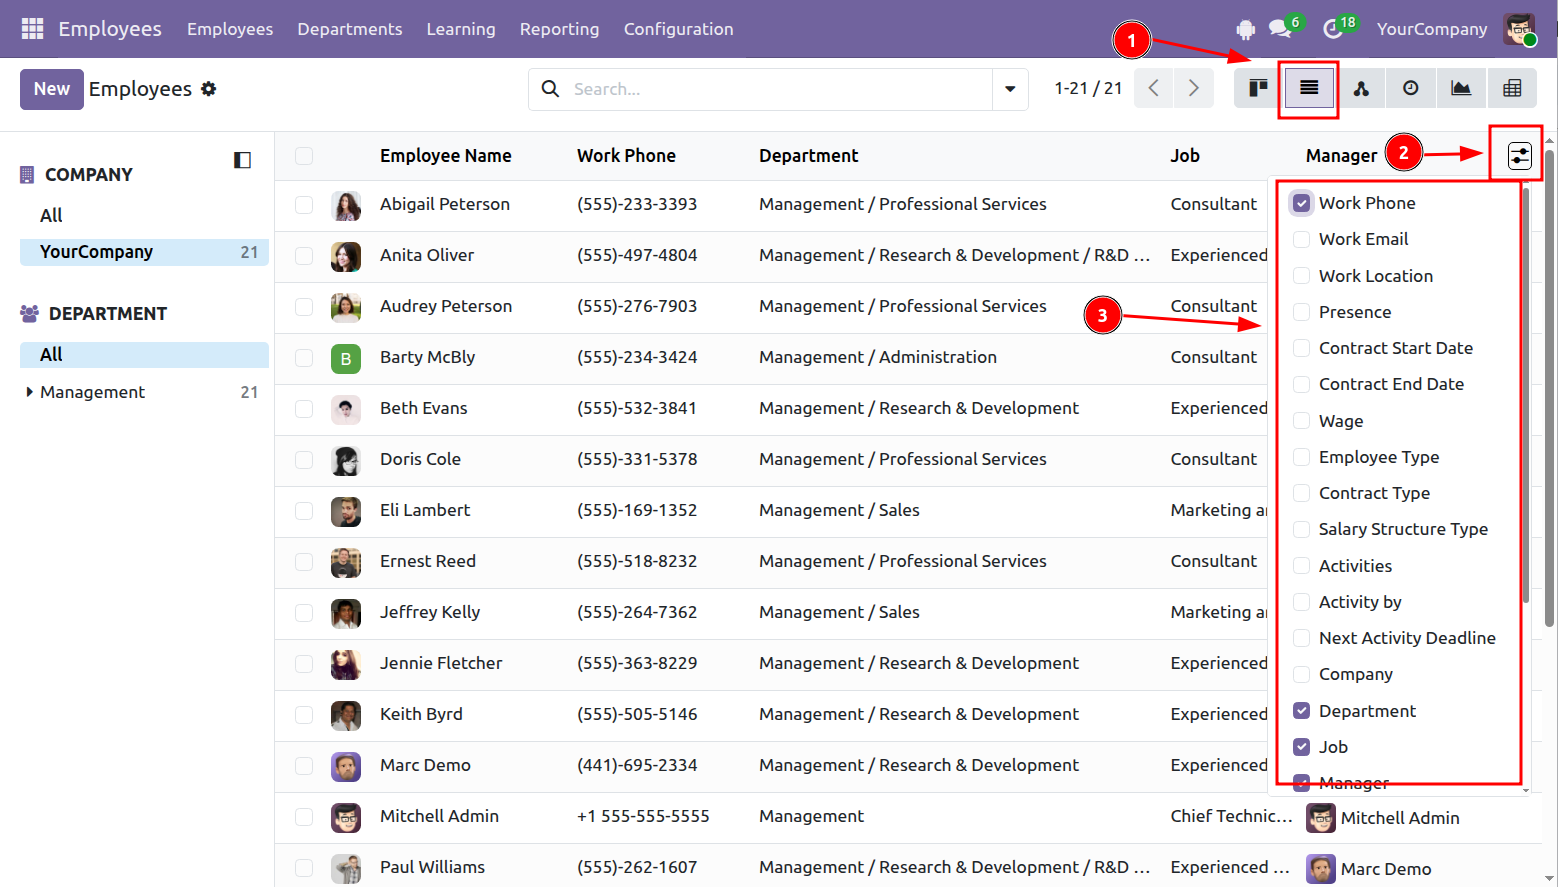
In List View (1), click the column settings icon (2) to choose which columns are shown or hidden.
 Step 1: Apply the filters or grouping options you want (1). You can use existing options or create custom ones.
Step 2: Select Save current search (2).
Step 3: Enter a name for the saved filter.
Step 4: Click Save (4).
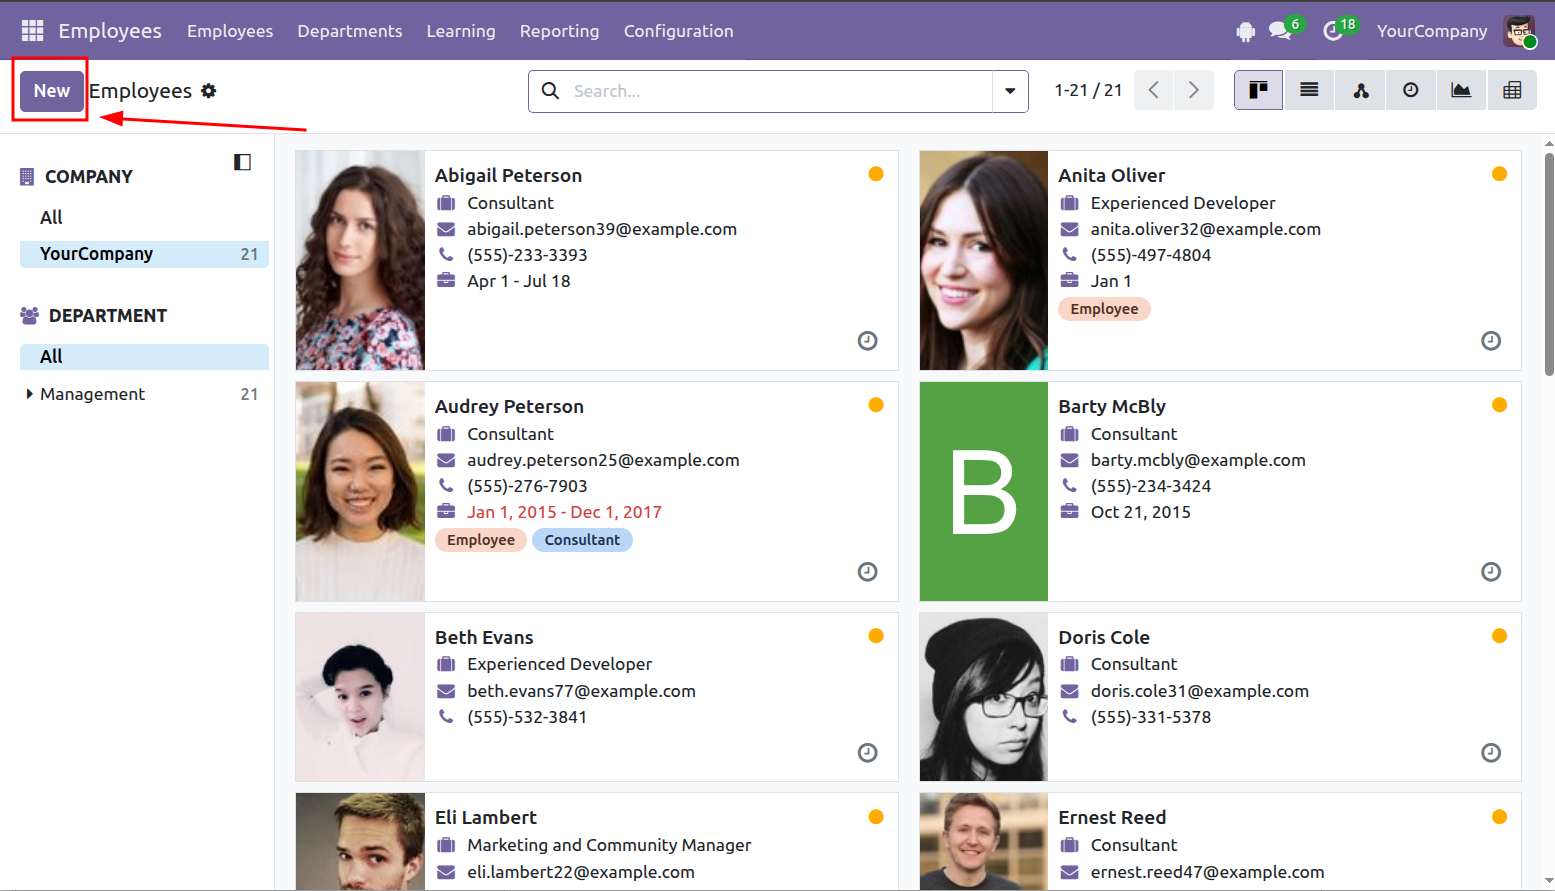
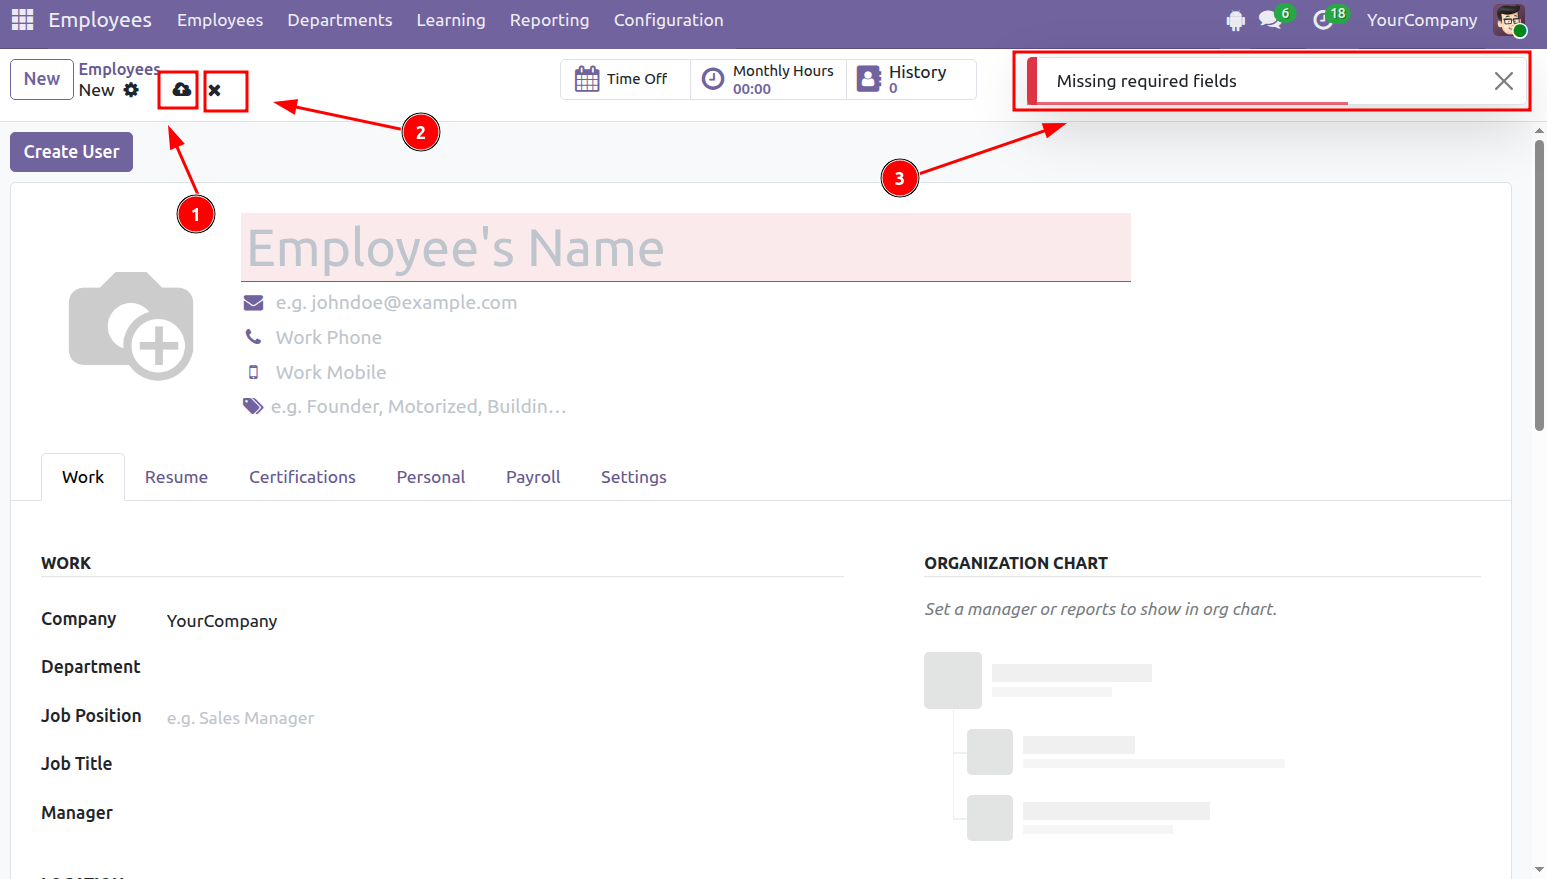
Step 1: Open the section where you want to create a new record, for example Employees, then click New.
Step 2: Enter the required information and click Save (1).
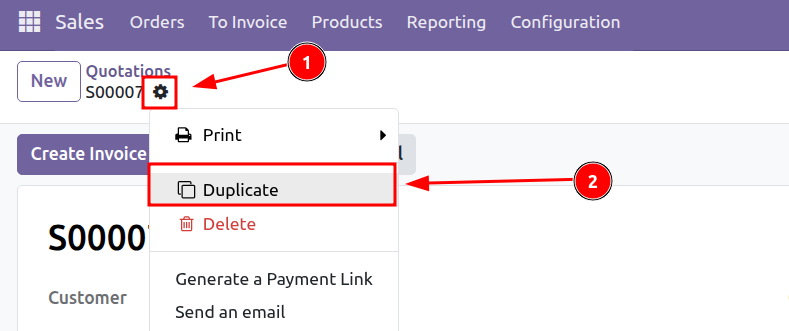
You can also create a new record by duplicating an existing one.
From a record form:
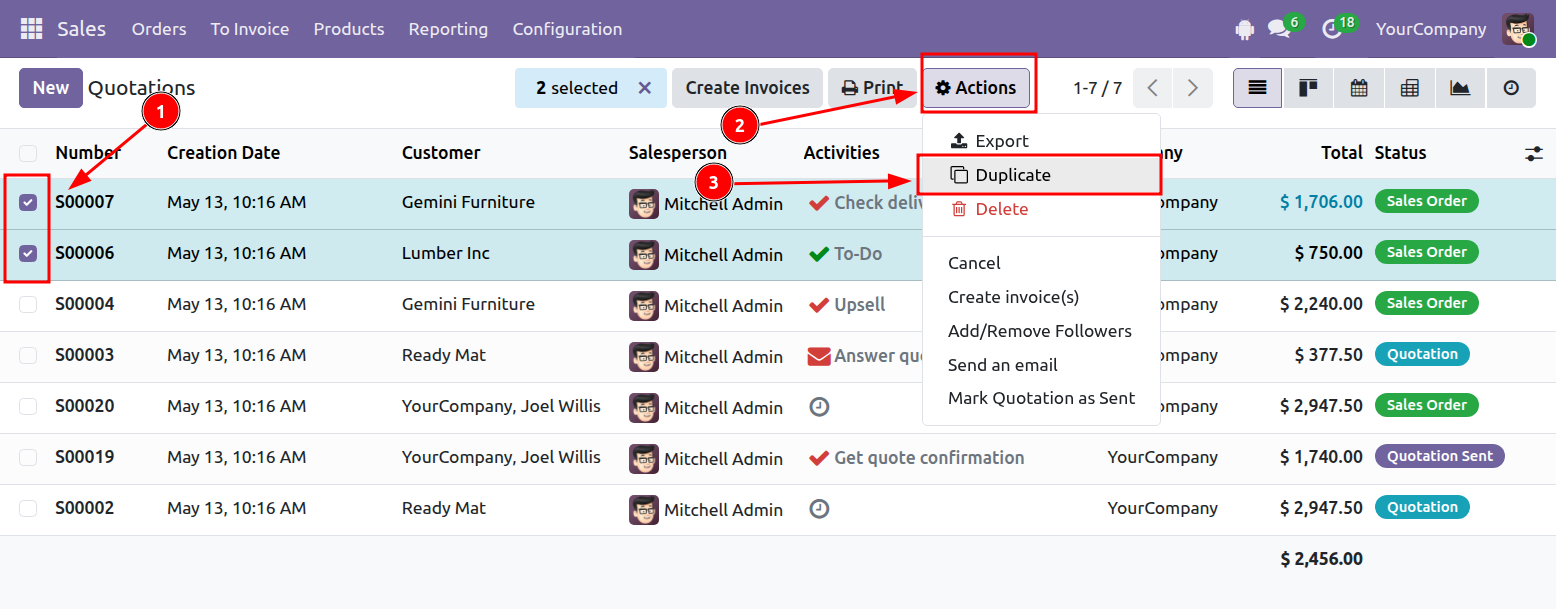
Alternatively, from List View:
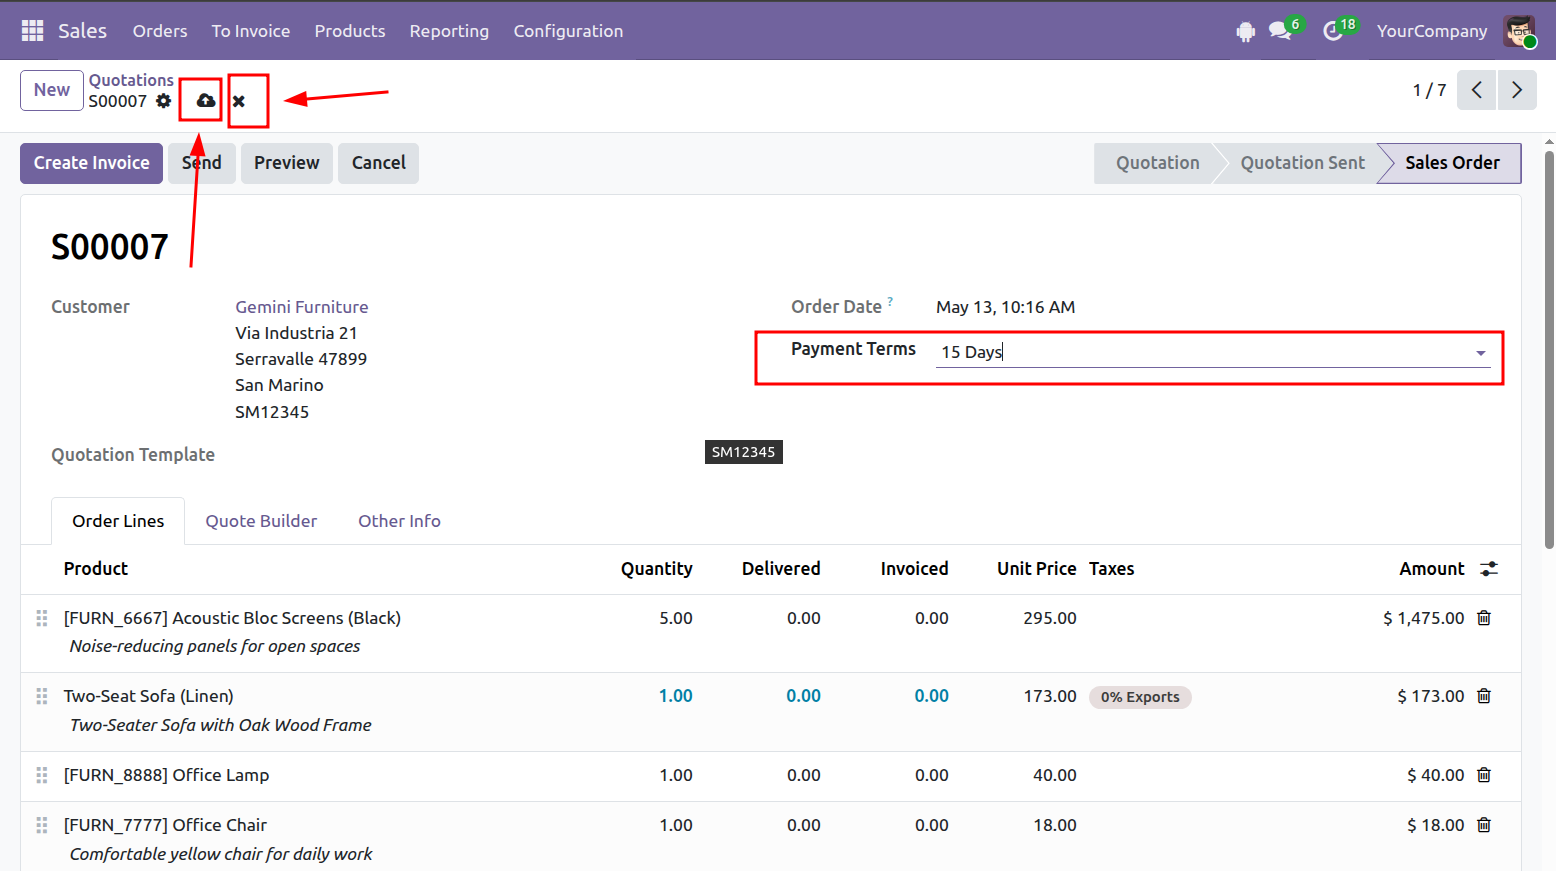
Open the record you want to update and make the necessary changes.
Click Save to apply the changes, or Discard to cancel them.
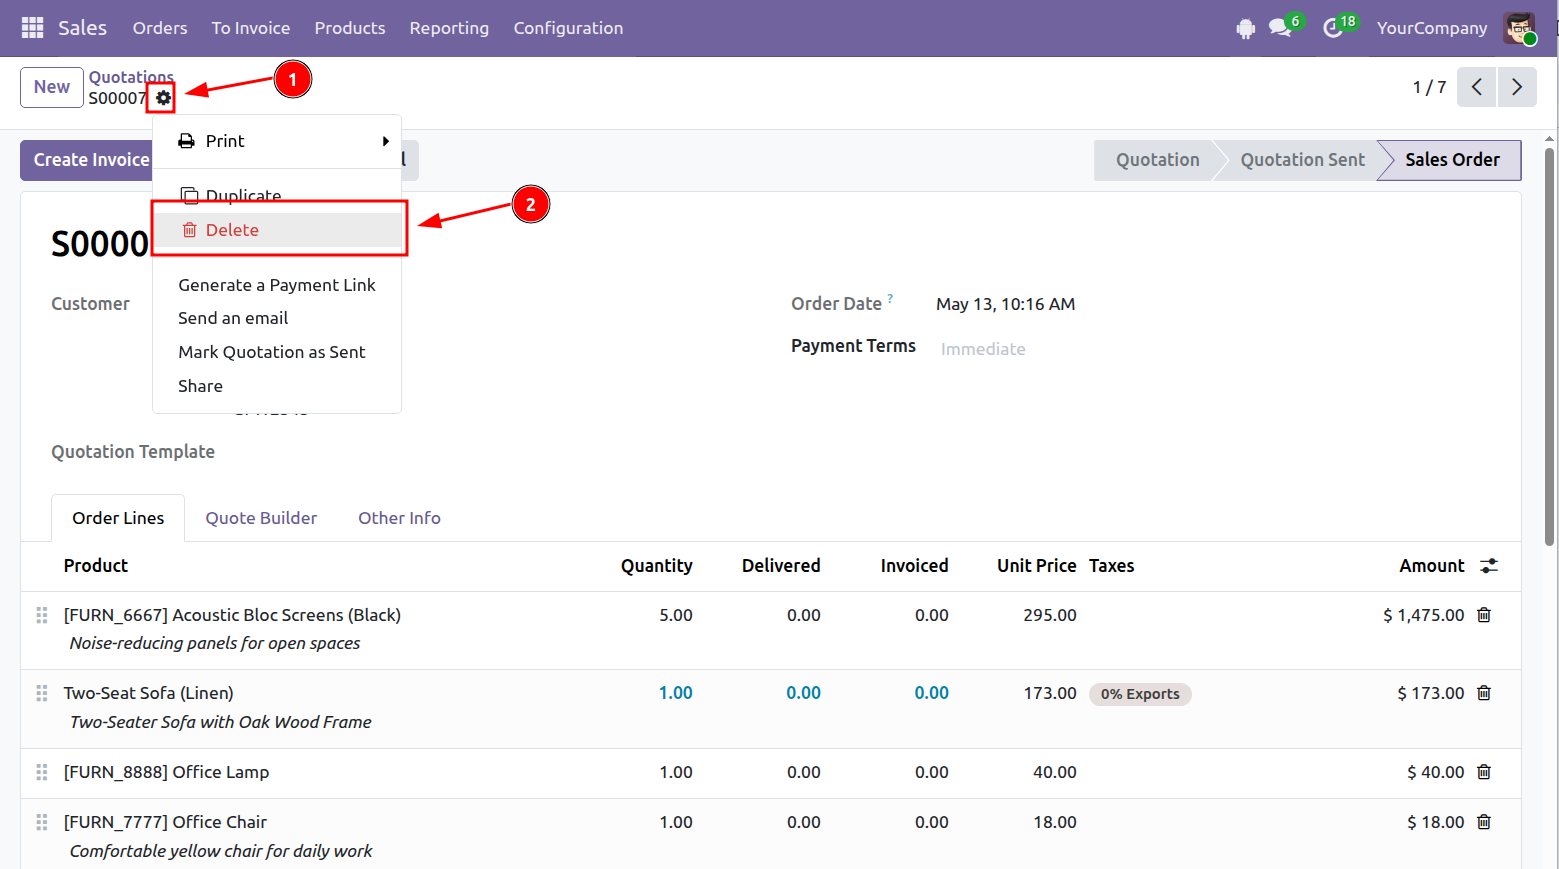
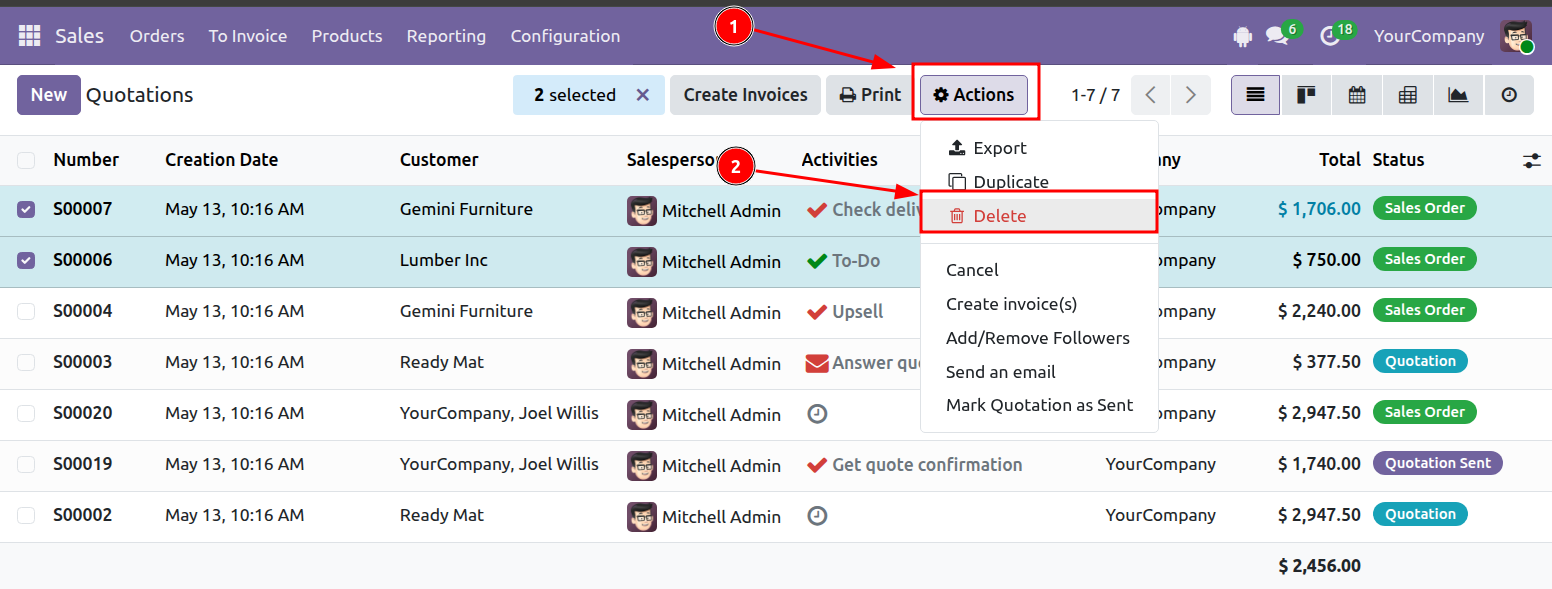
There are two ways to delete records.
Open the record, click the gear icon, then select Delete.
Select the records you want to delete, then choose: Actions > Delete
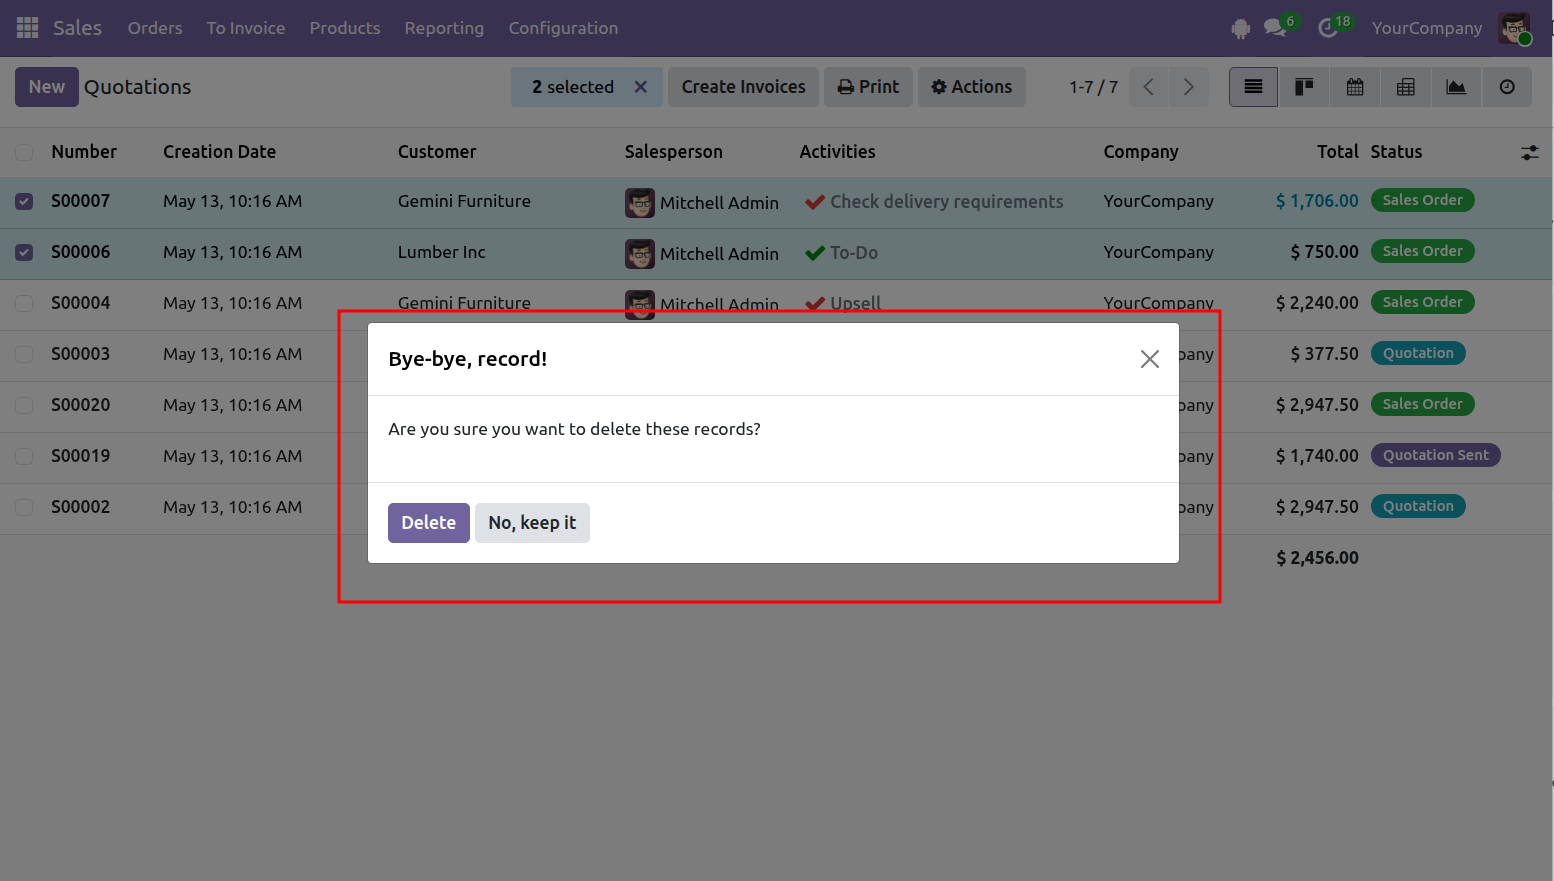
After you click Delete, a confirma
tion dialog appears.
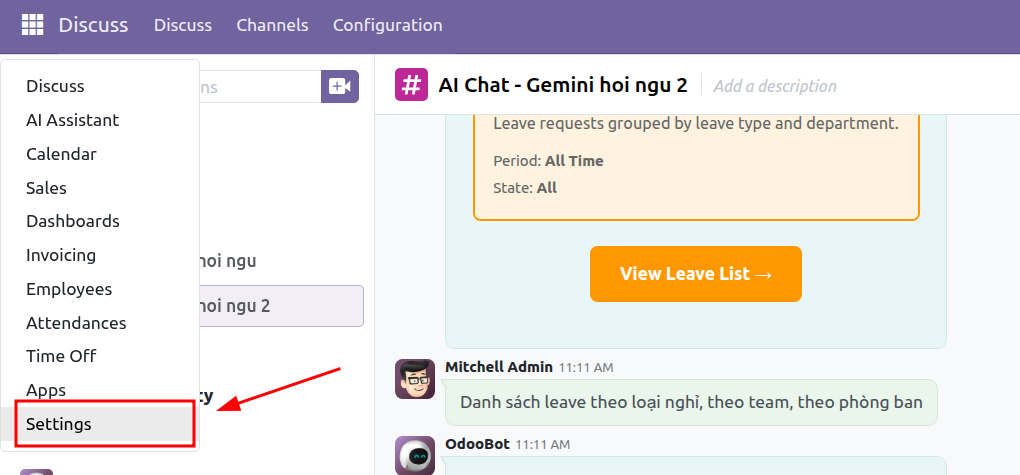
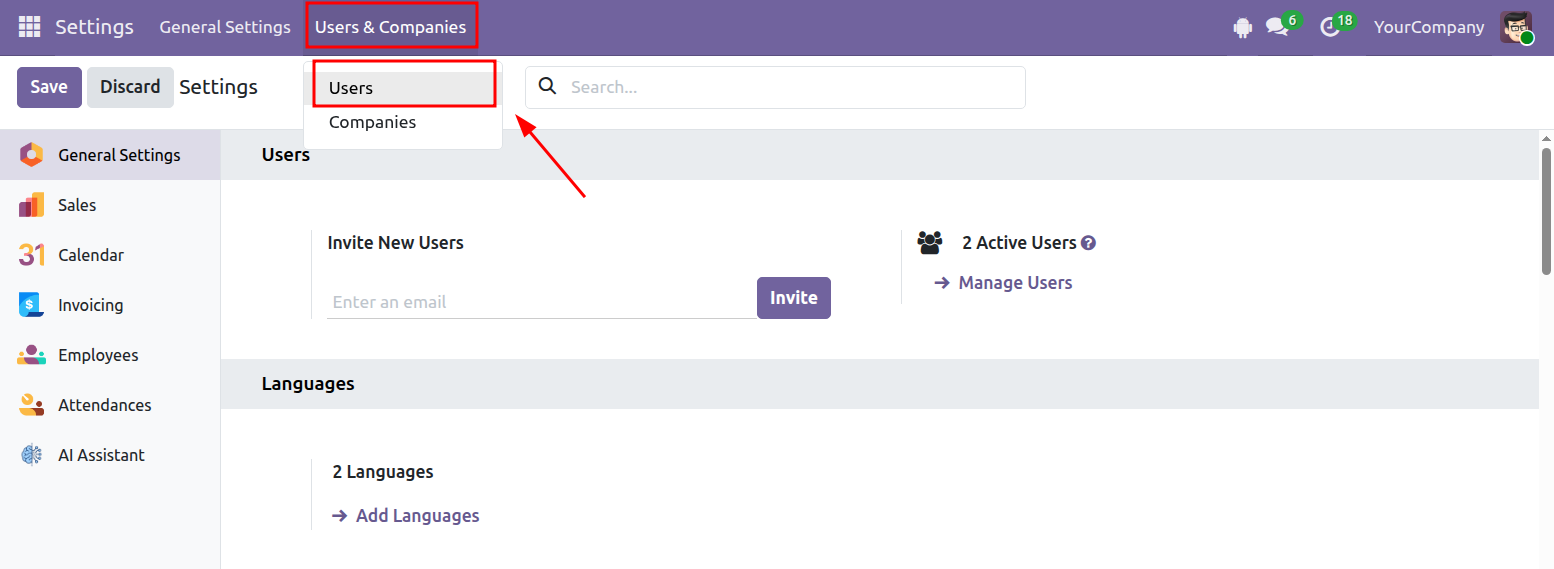
Step 1: Open Settings.
Step 2: Go to: Users & Companies > Users
Step 3: Click New to create a user.
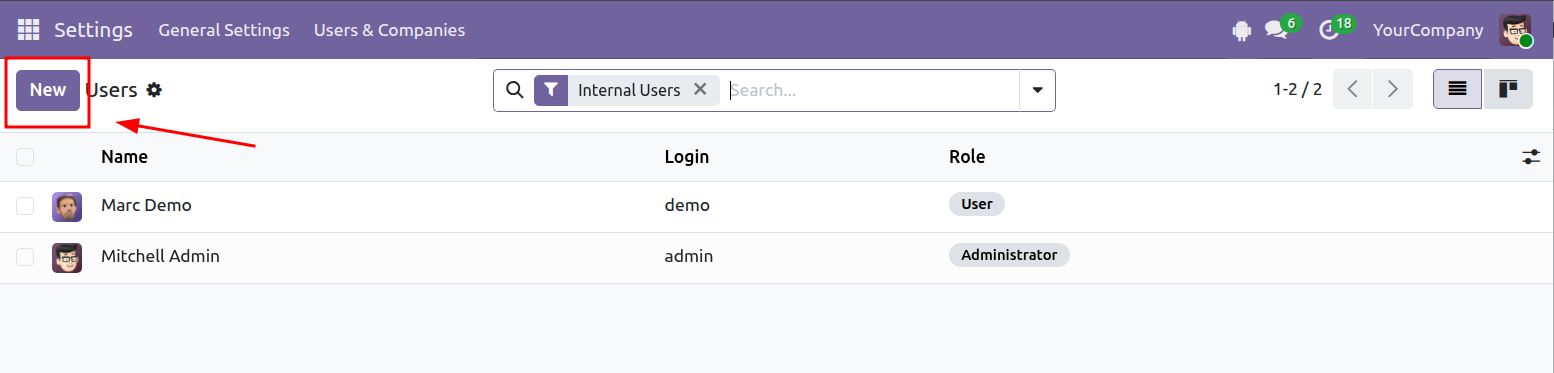
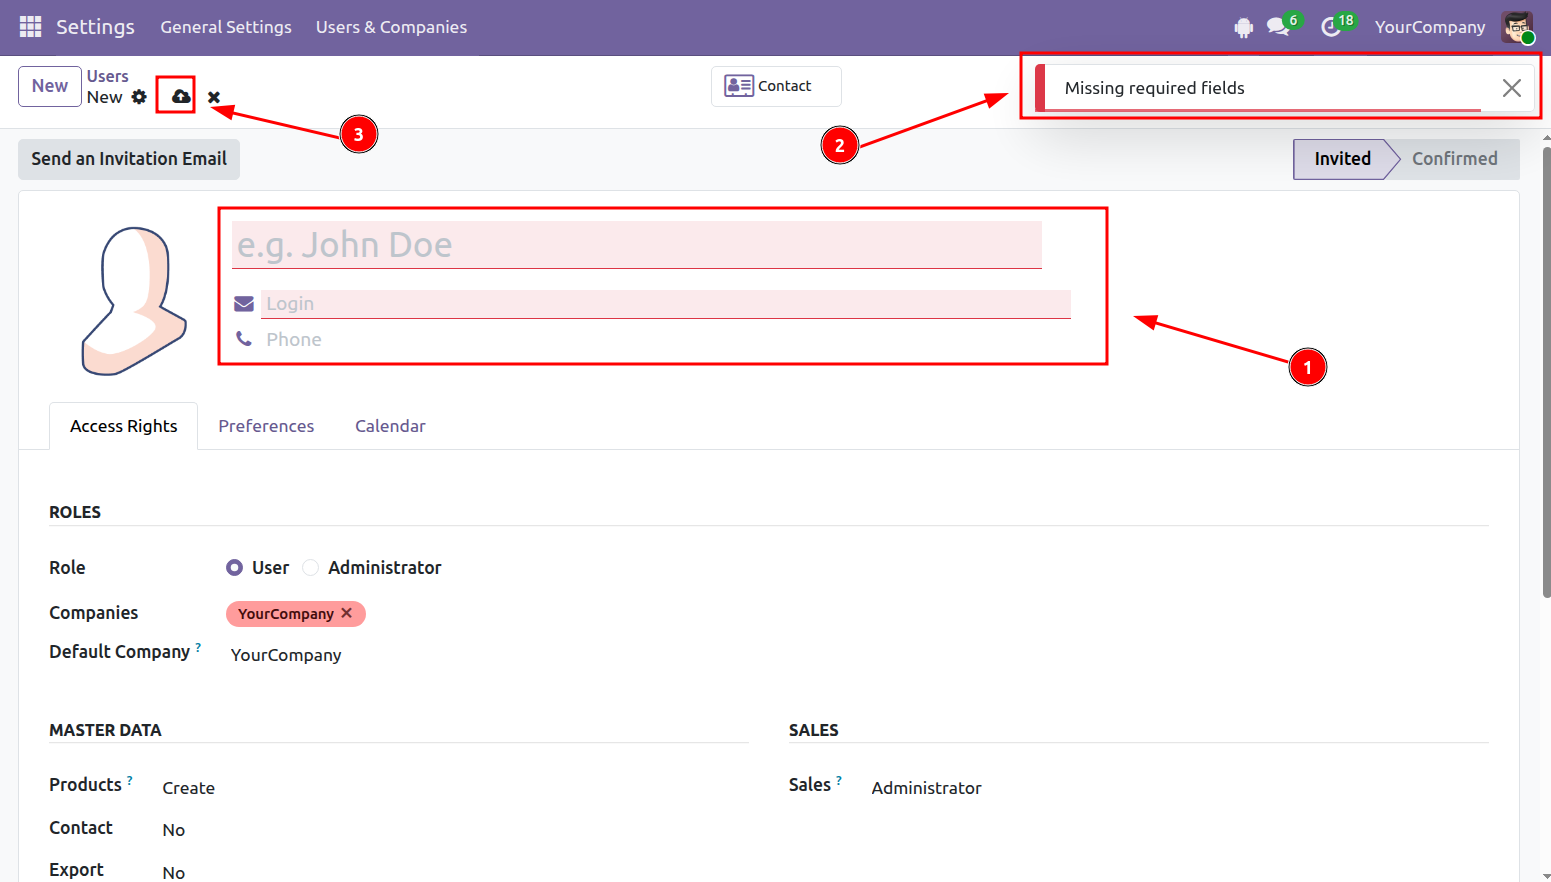
Step 4: Enter the user information.
As a general guideline:
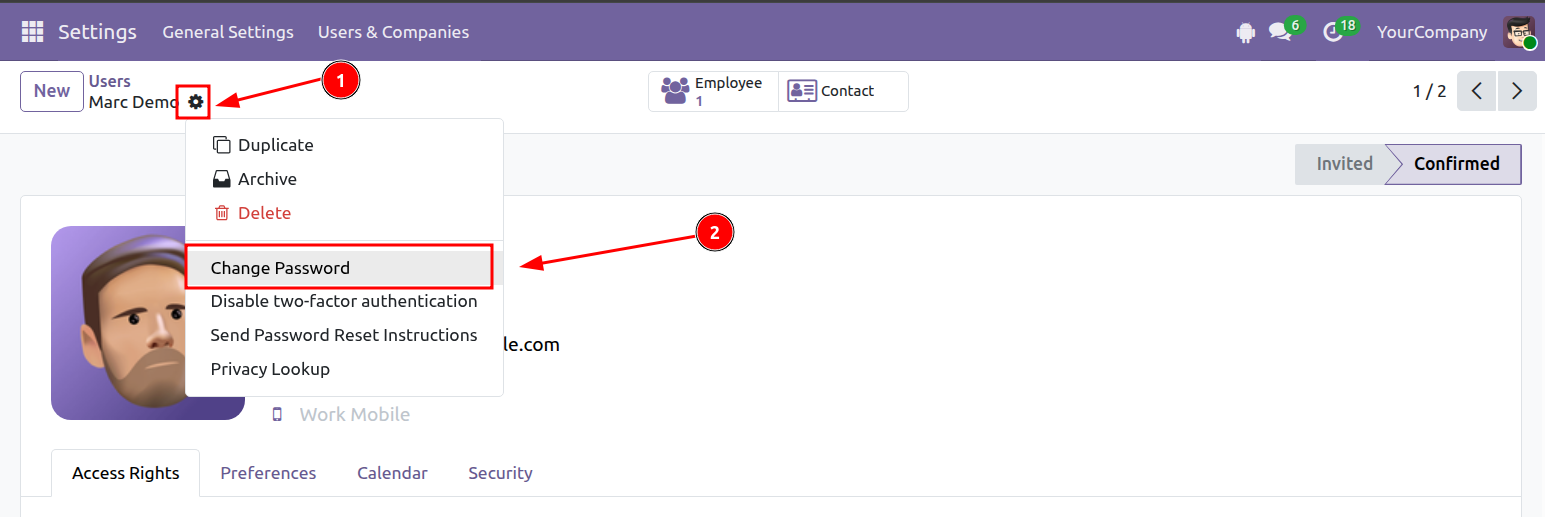
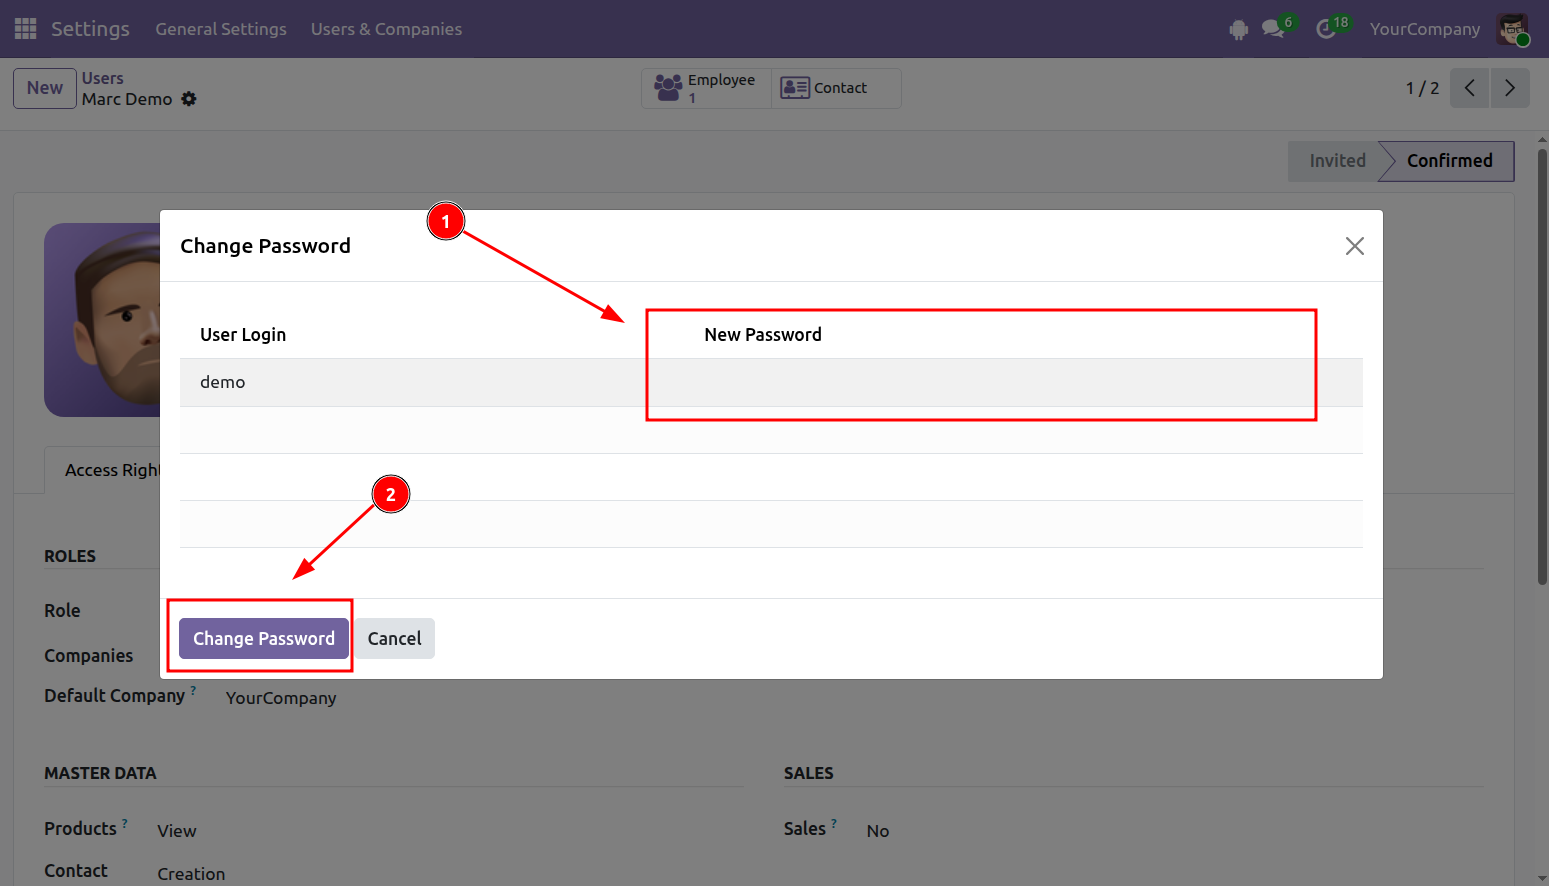
Step 5: To change the user's password, click the settings icon and select Change Password.
Step 6: Set the login password.
After the password has been updated, the user will sign in with:
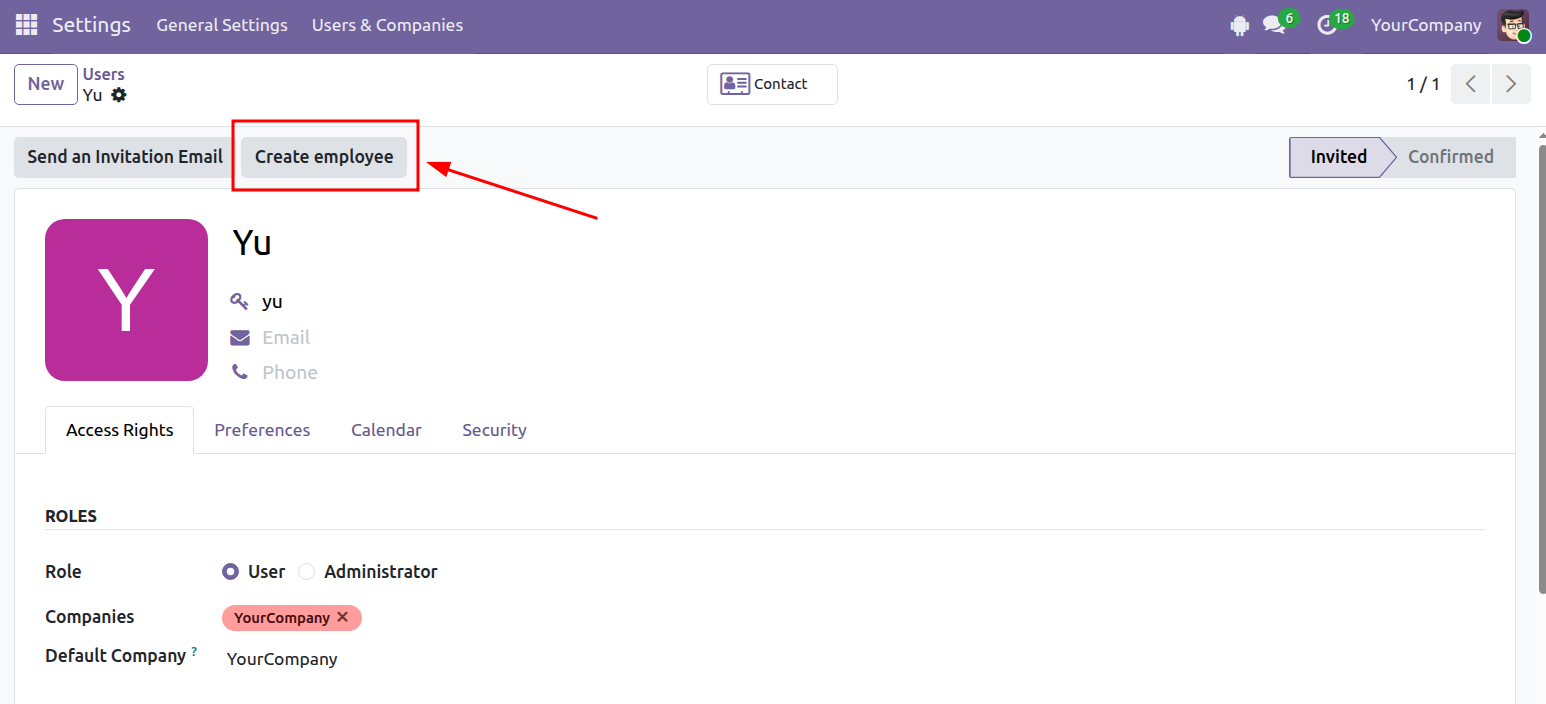
Step 7 - Optional: Click Create Employee to create an employee record for the user.
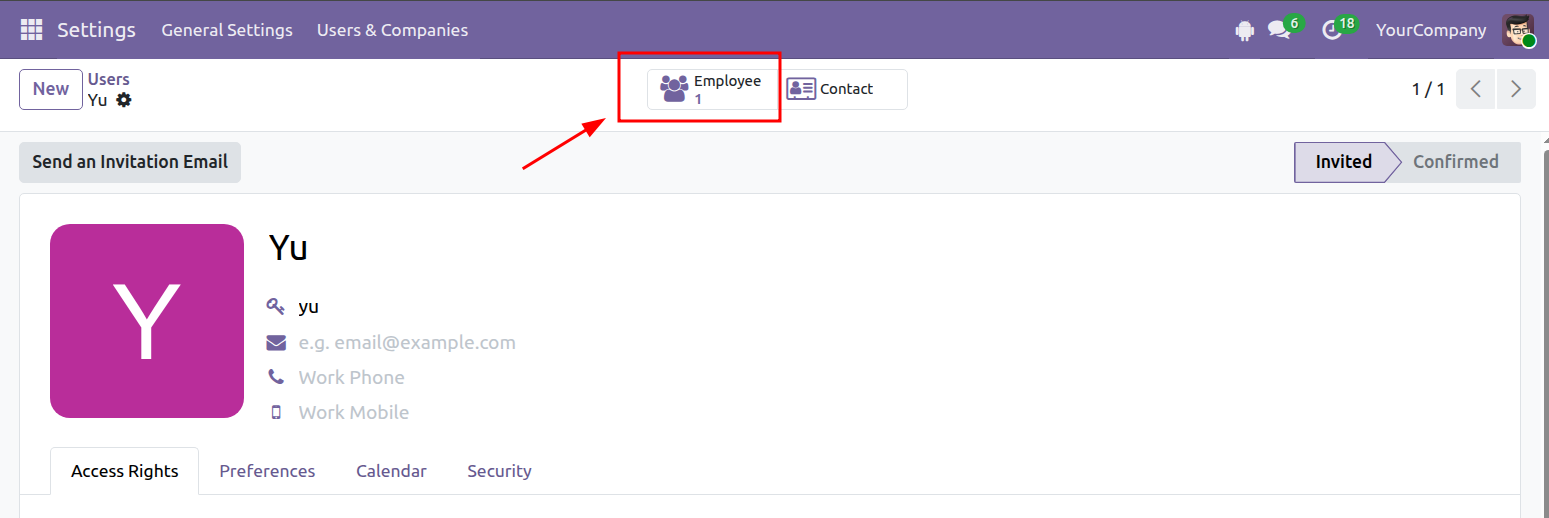
Step 8: Once the employee record has been created, click the employee icon to open it.
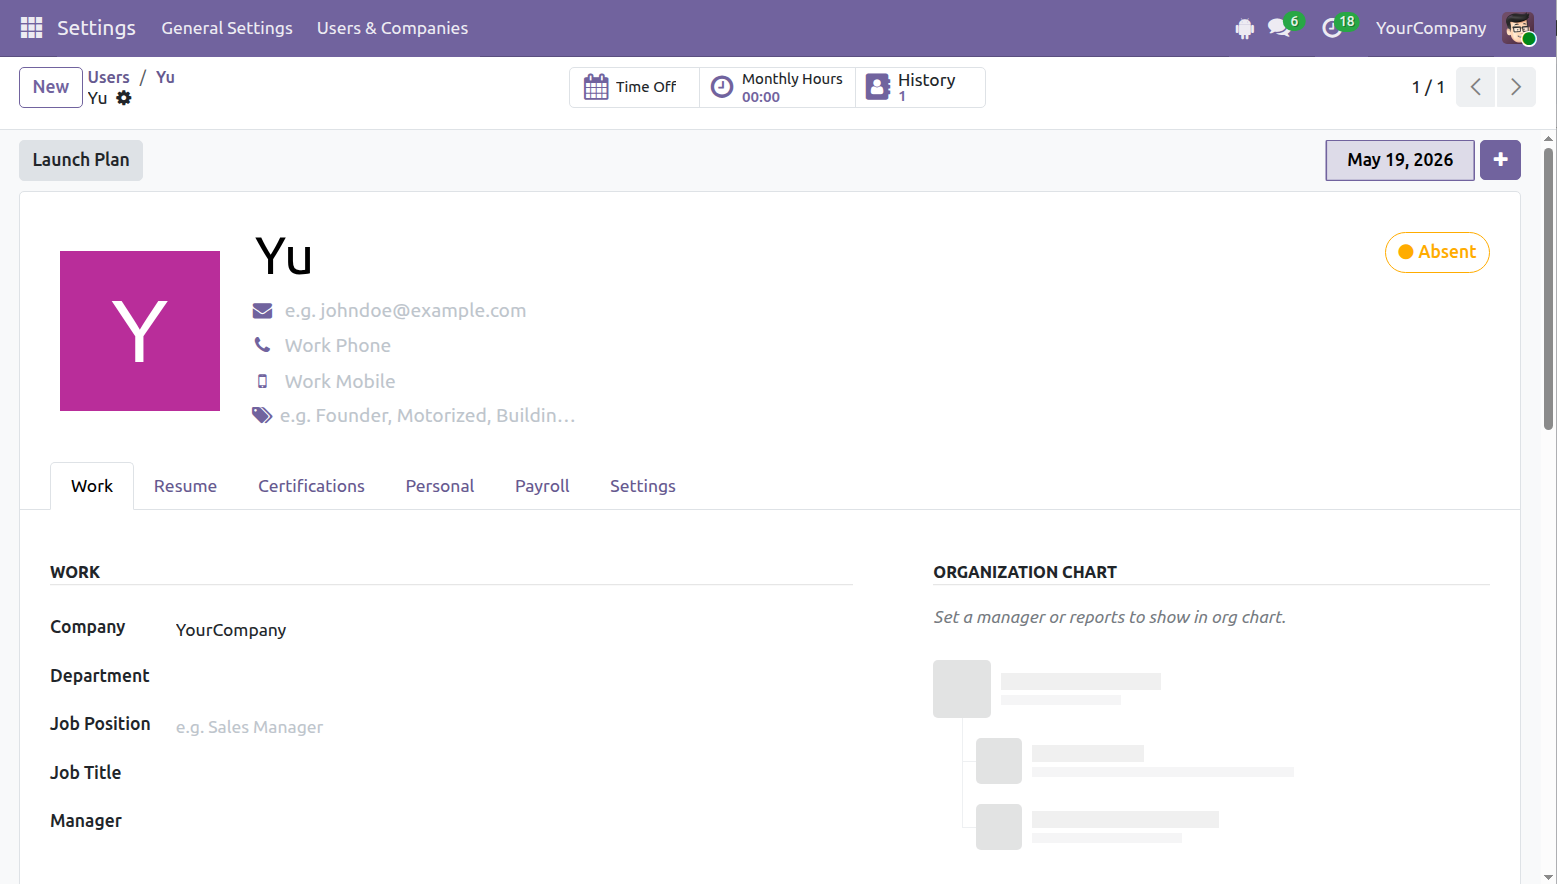
The user account is automatically linked to the employee profile after the employee is created.
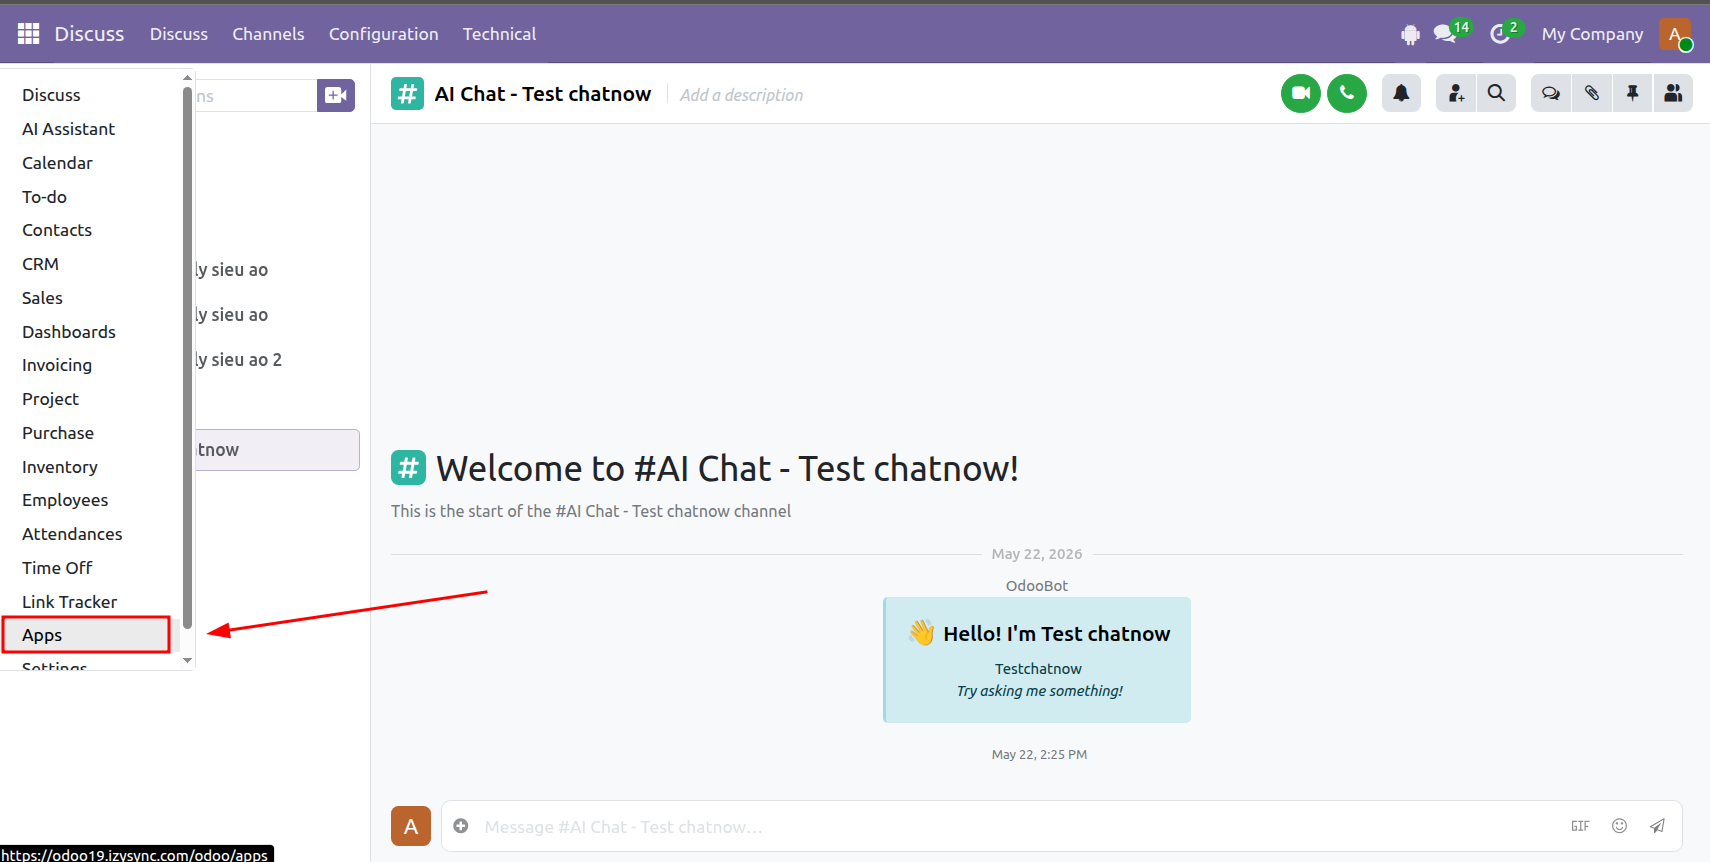
Step 1: Open Apps.
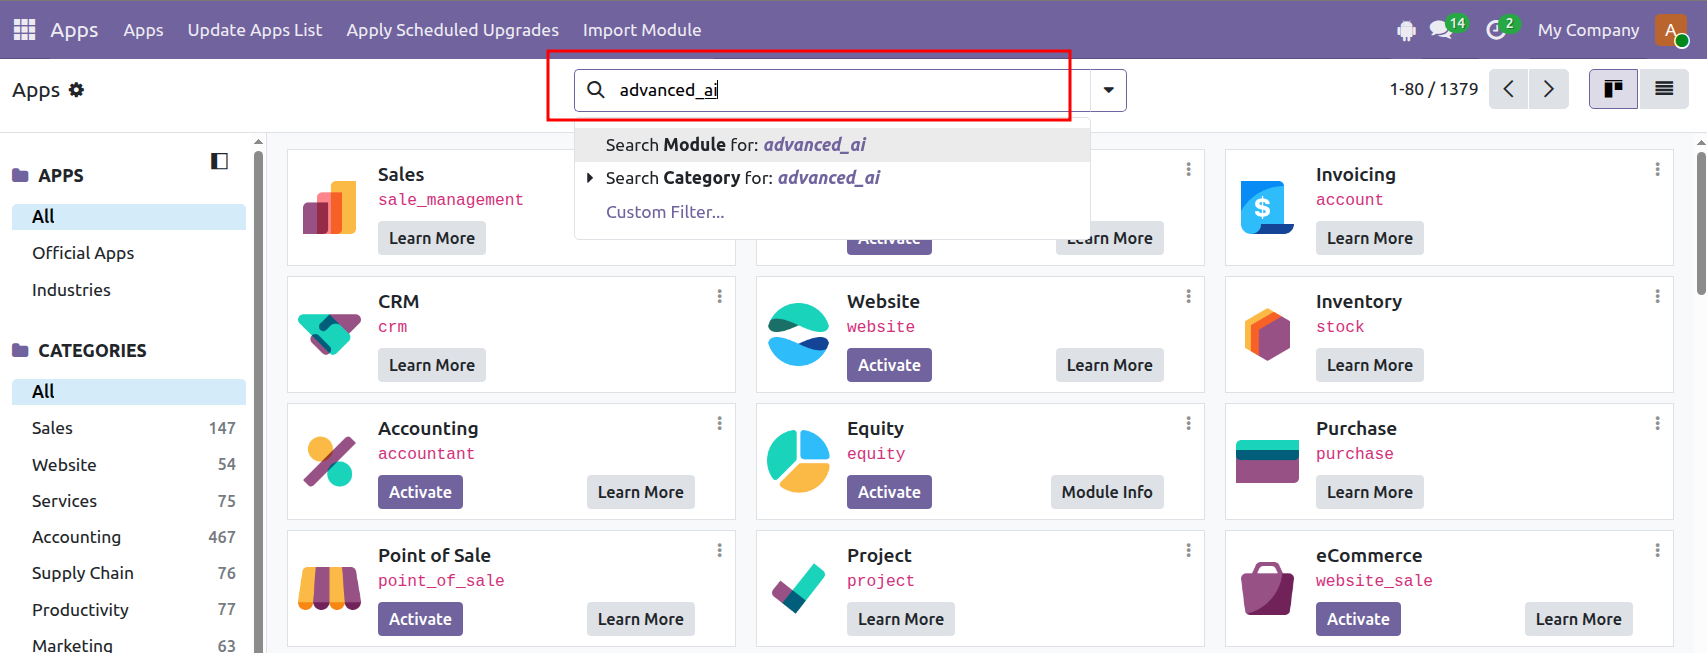
Step 2: Enter advanced_ai in the search bar.
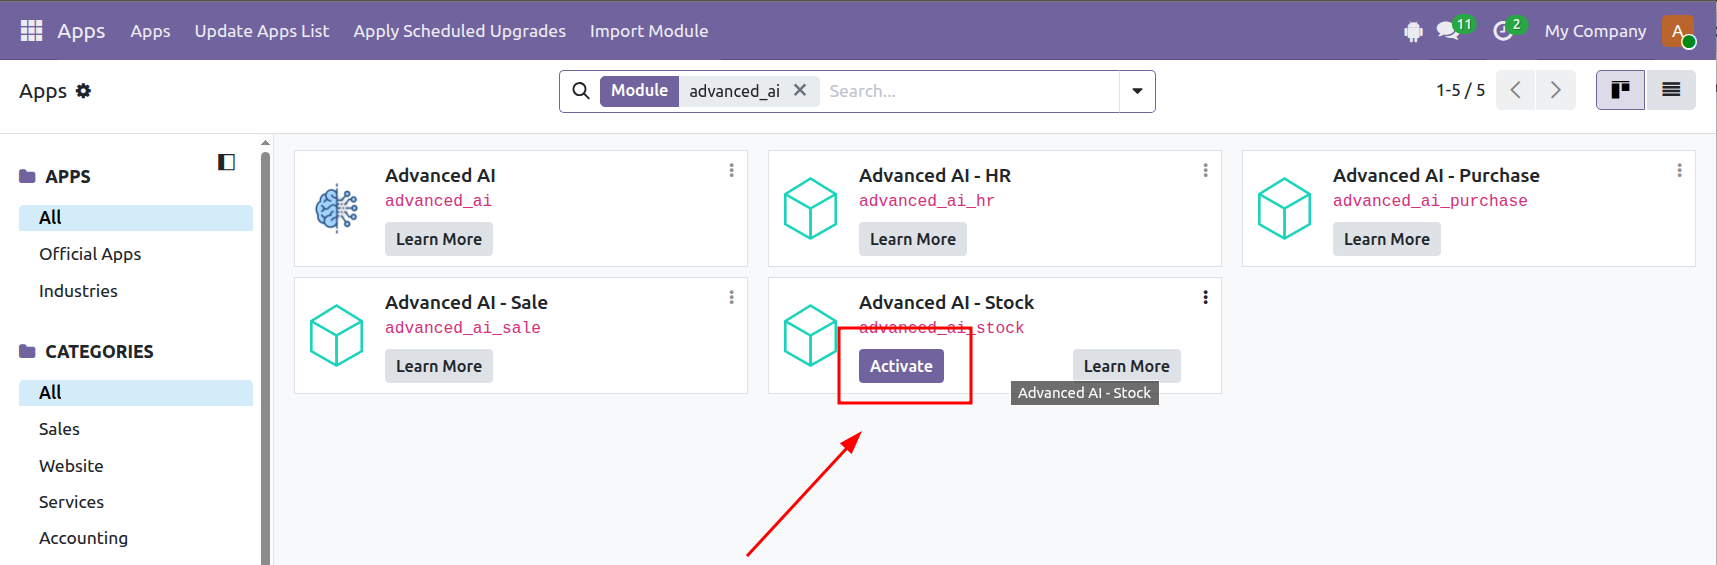
Step 3: Click Activate to install the required module.
System URL: https://aicypher.hungnamecommerce.com
Admin account: admin / Odoo@Magenest
To use OCR features, the Magenest AI OCR module must be activated.
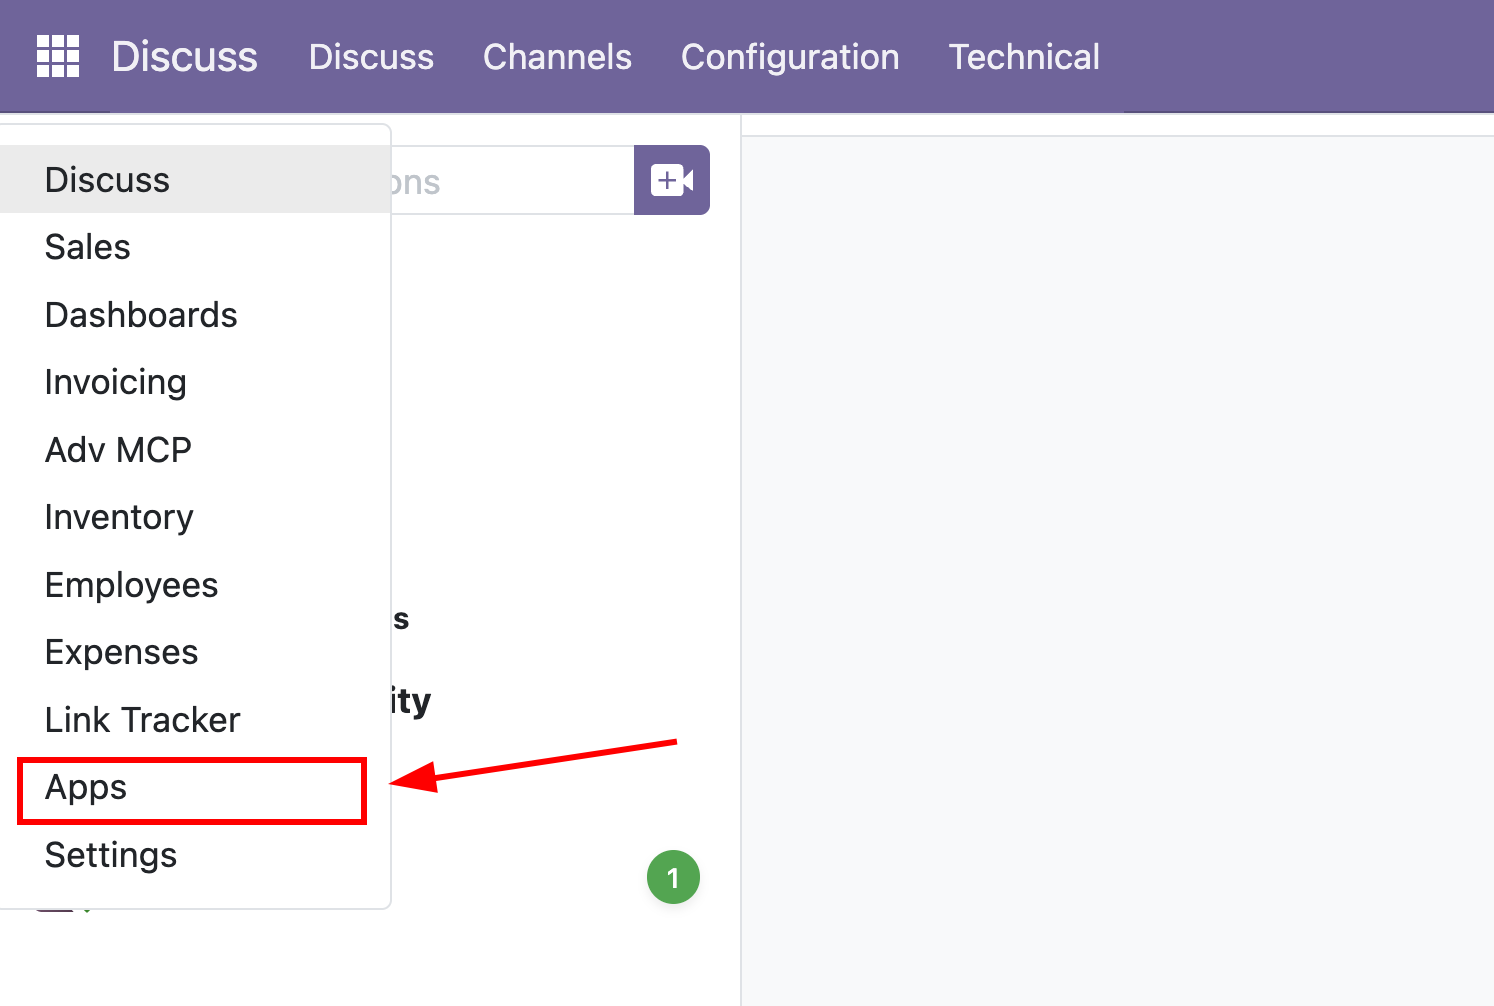
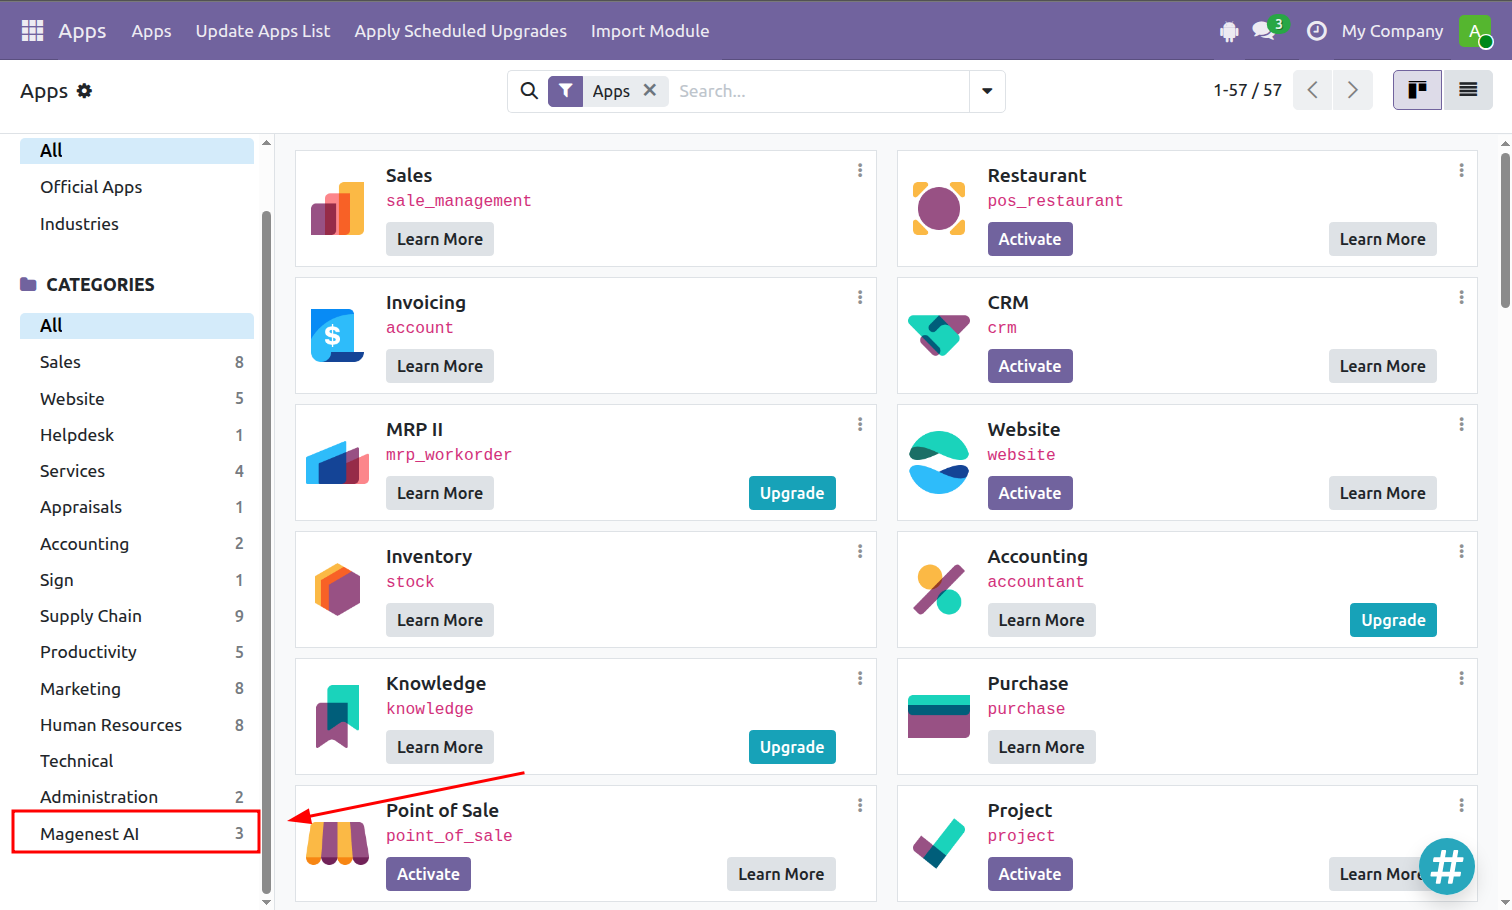
Step 1: Open Apps.
Step 2: Under Categories, select Magenest AI.
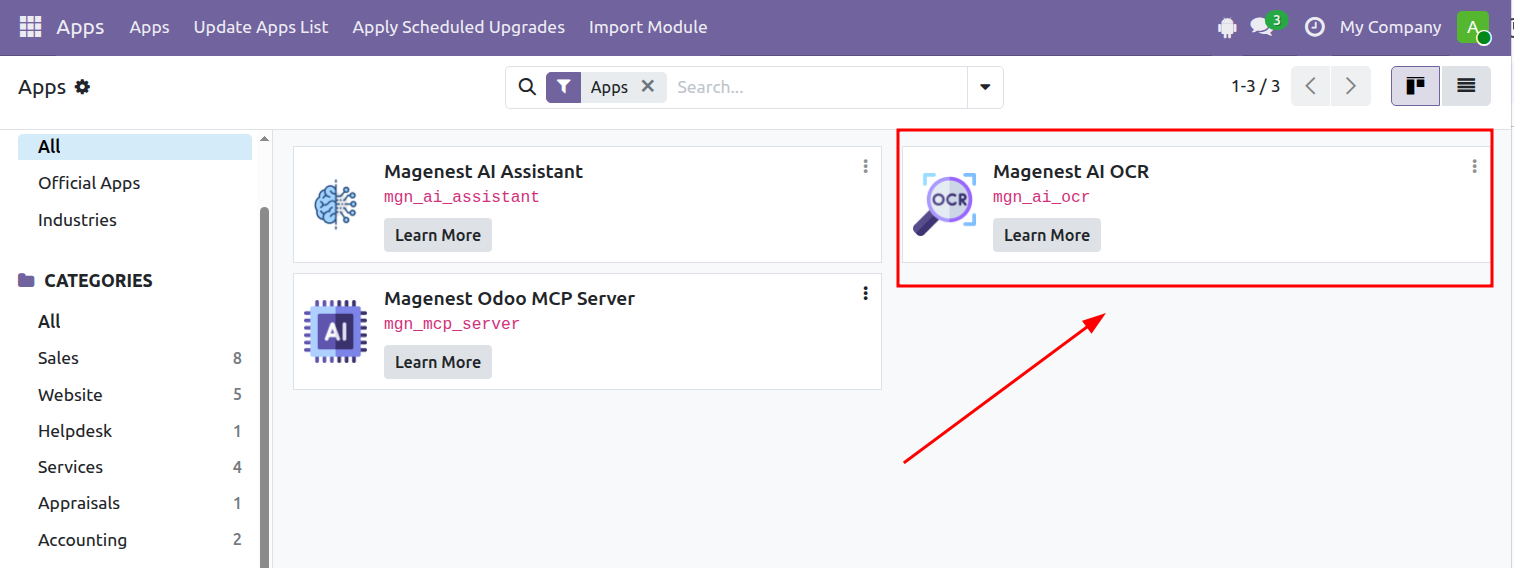
Step 3: Activate Magenest AI OCR.
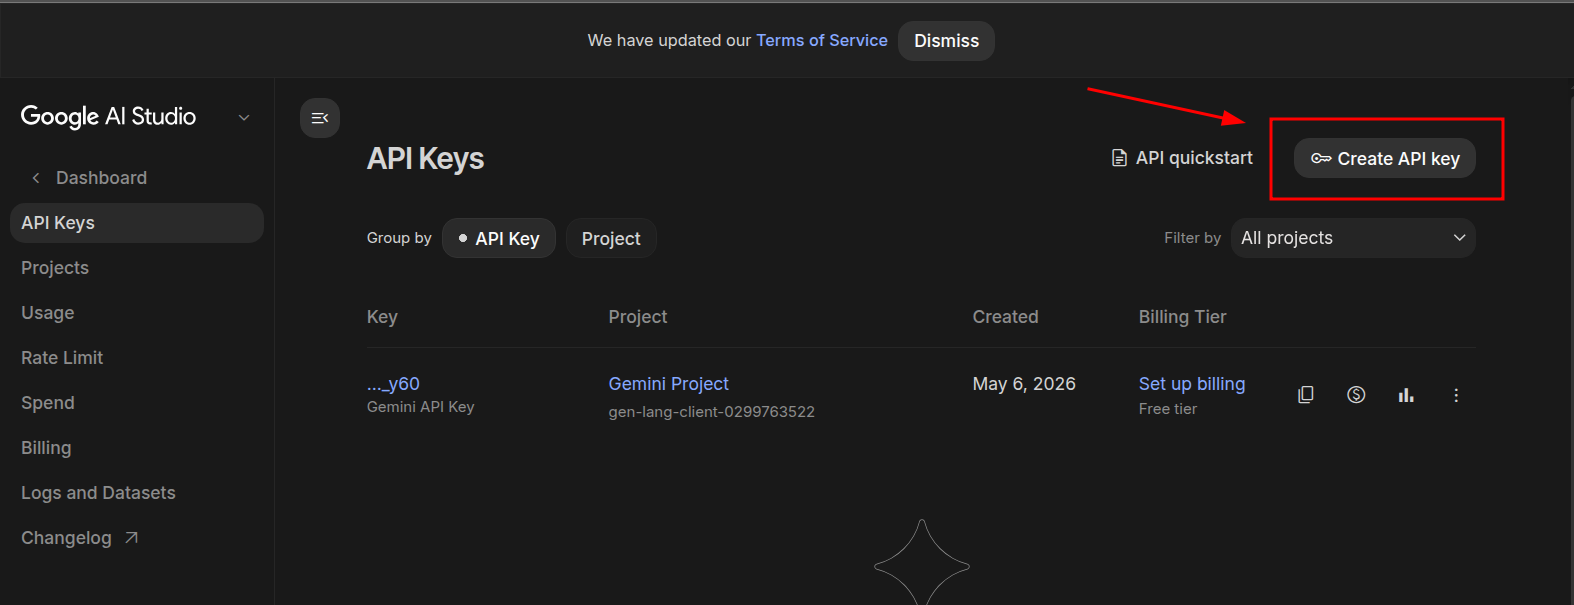
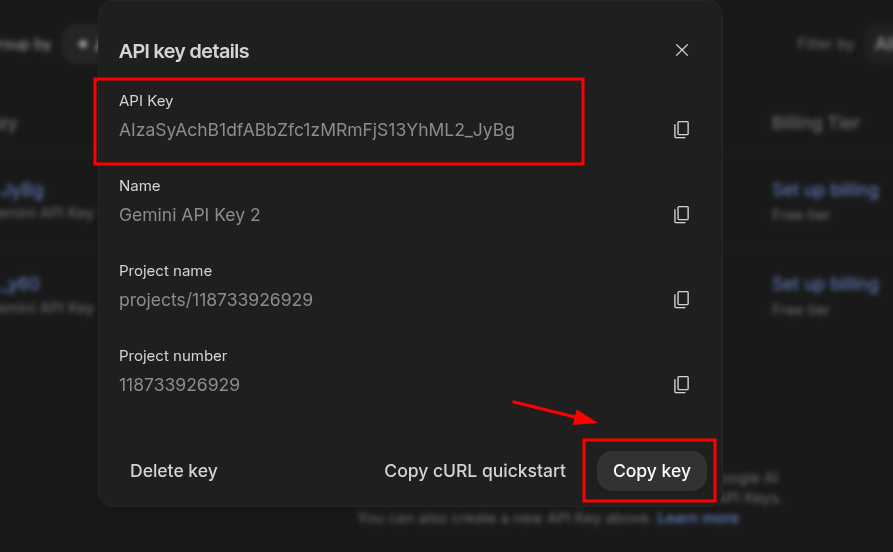
Step 1: Open Google AI Studio and create a new API key.
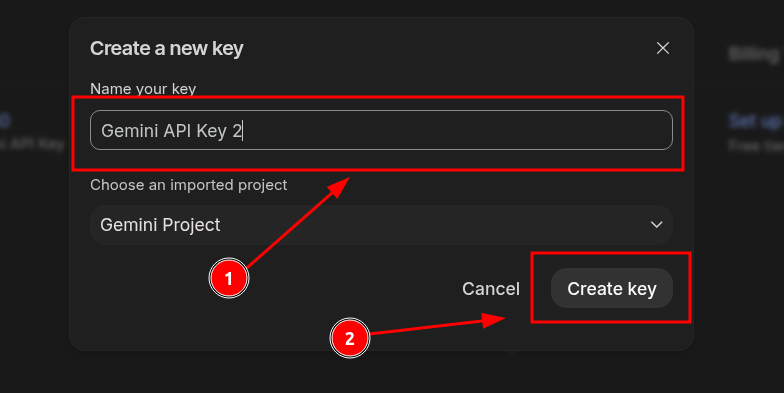
Step 2: Enter a name for the key, then click Create key.
Step 3: Copy the generated key.
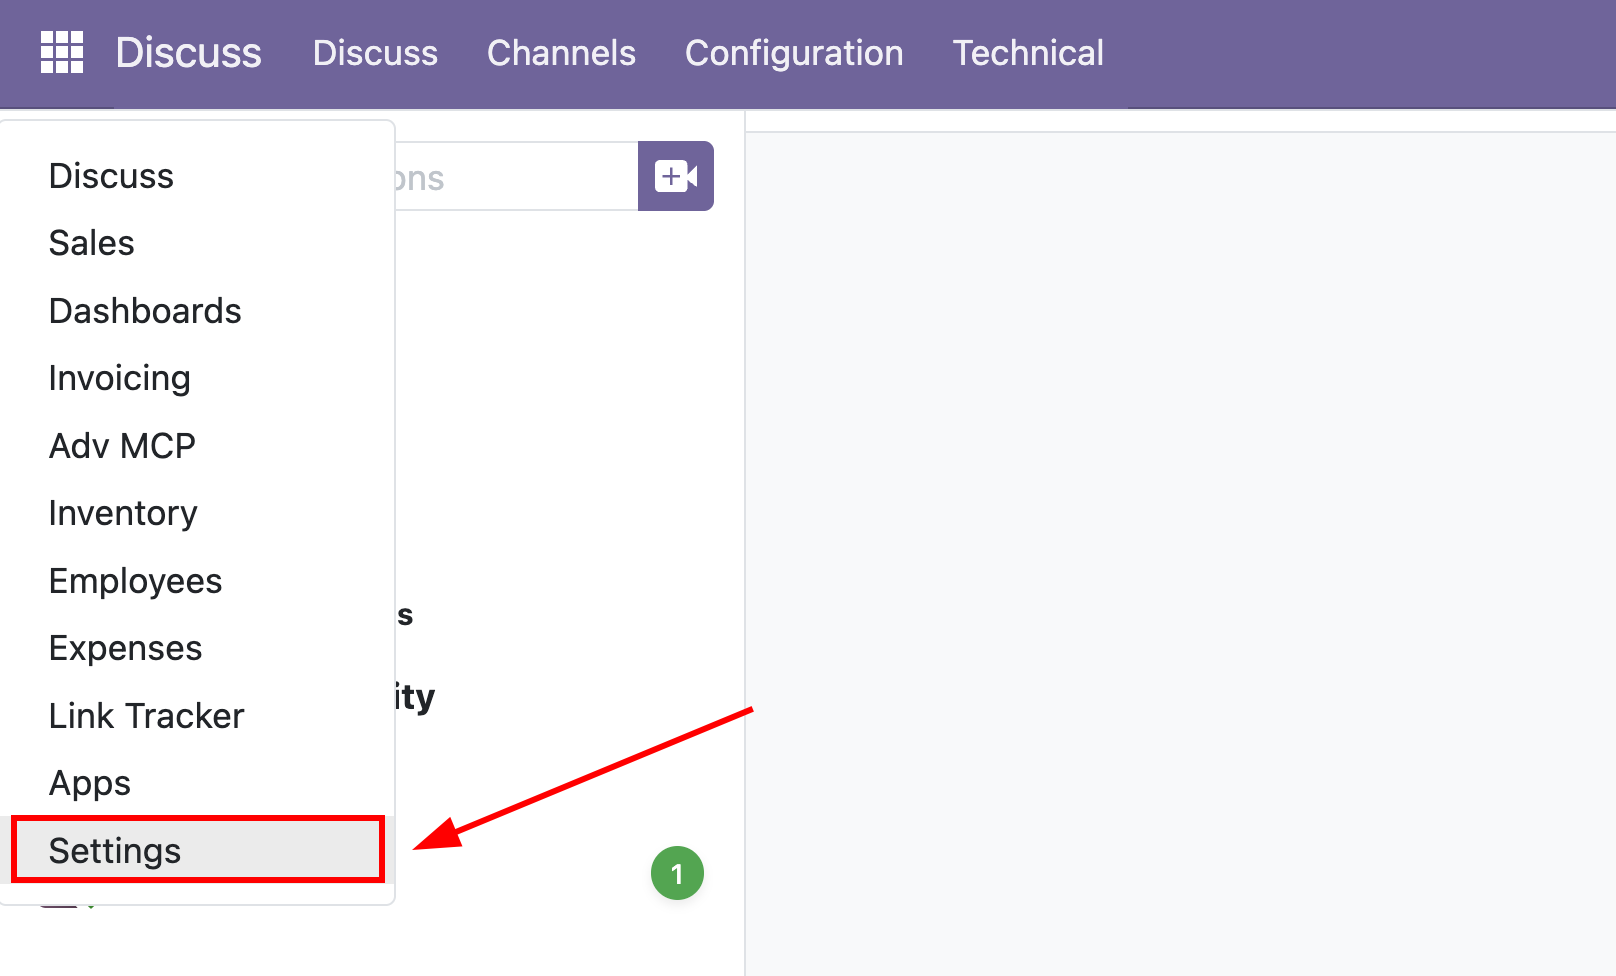
Step 1: Open Settings.
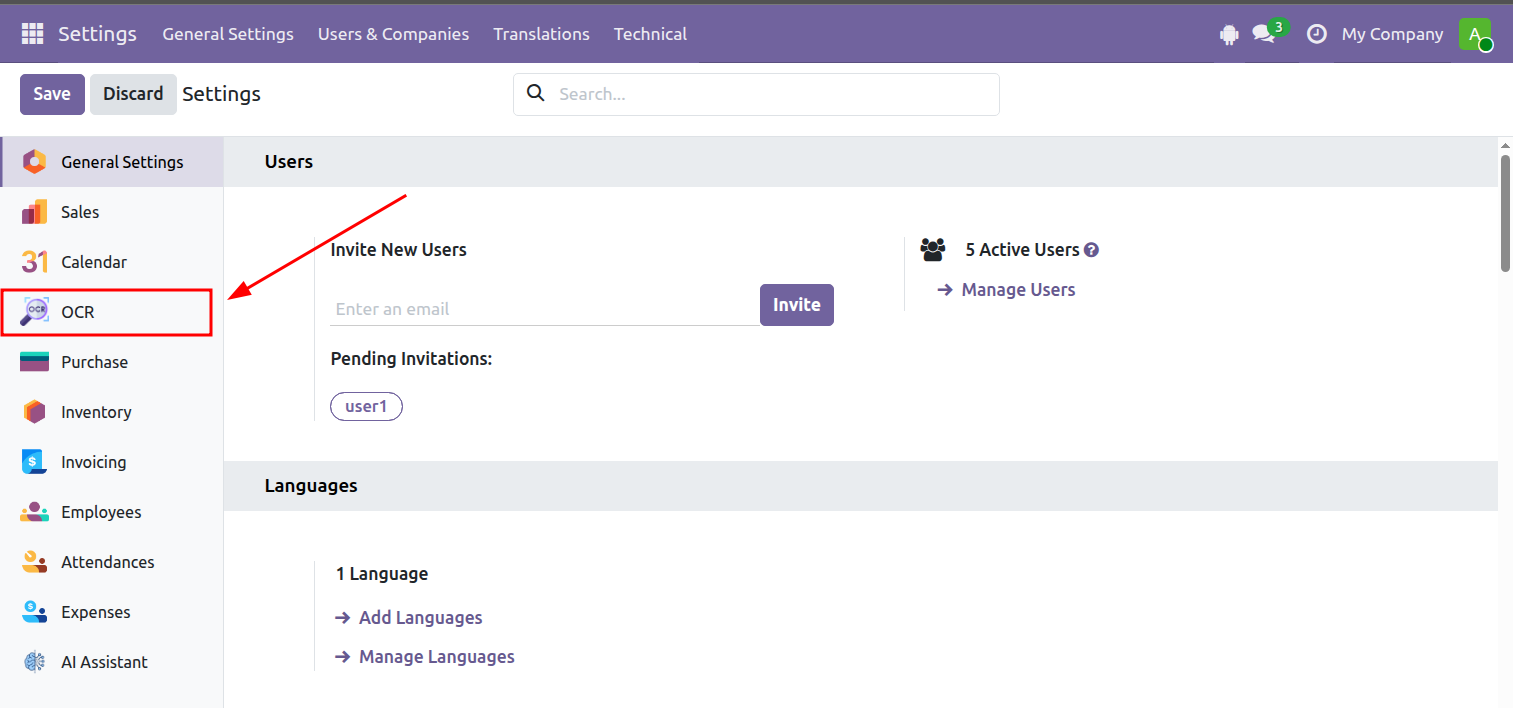
Step 2: Go to OCR.
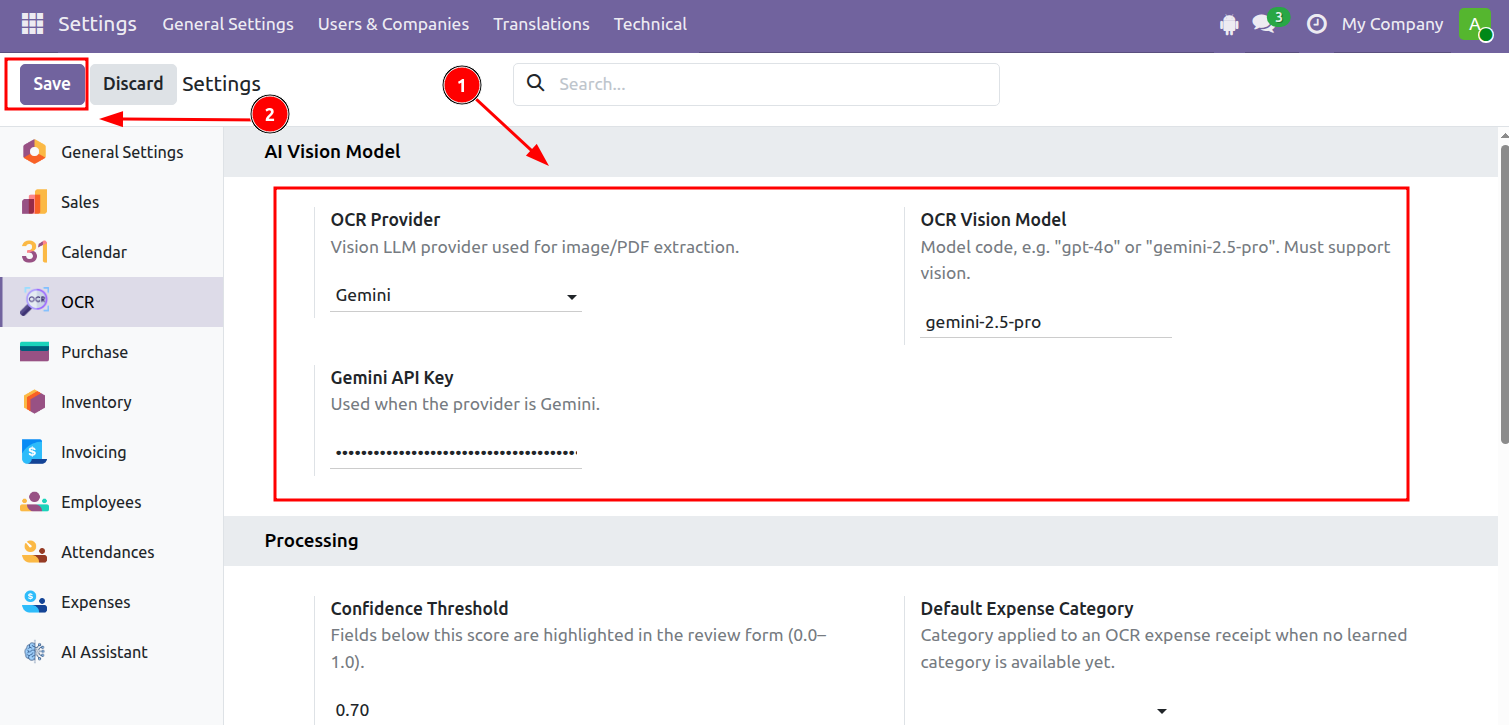
Step 3: Configure the following three fields:
Then click Save.
Step 1: Open OCR Documents.
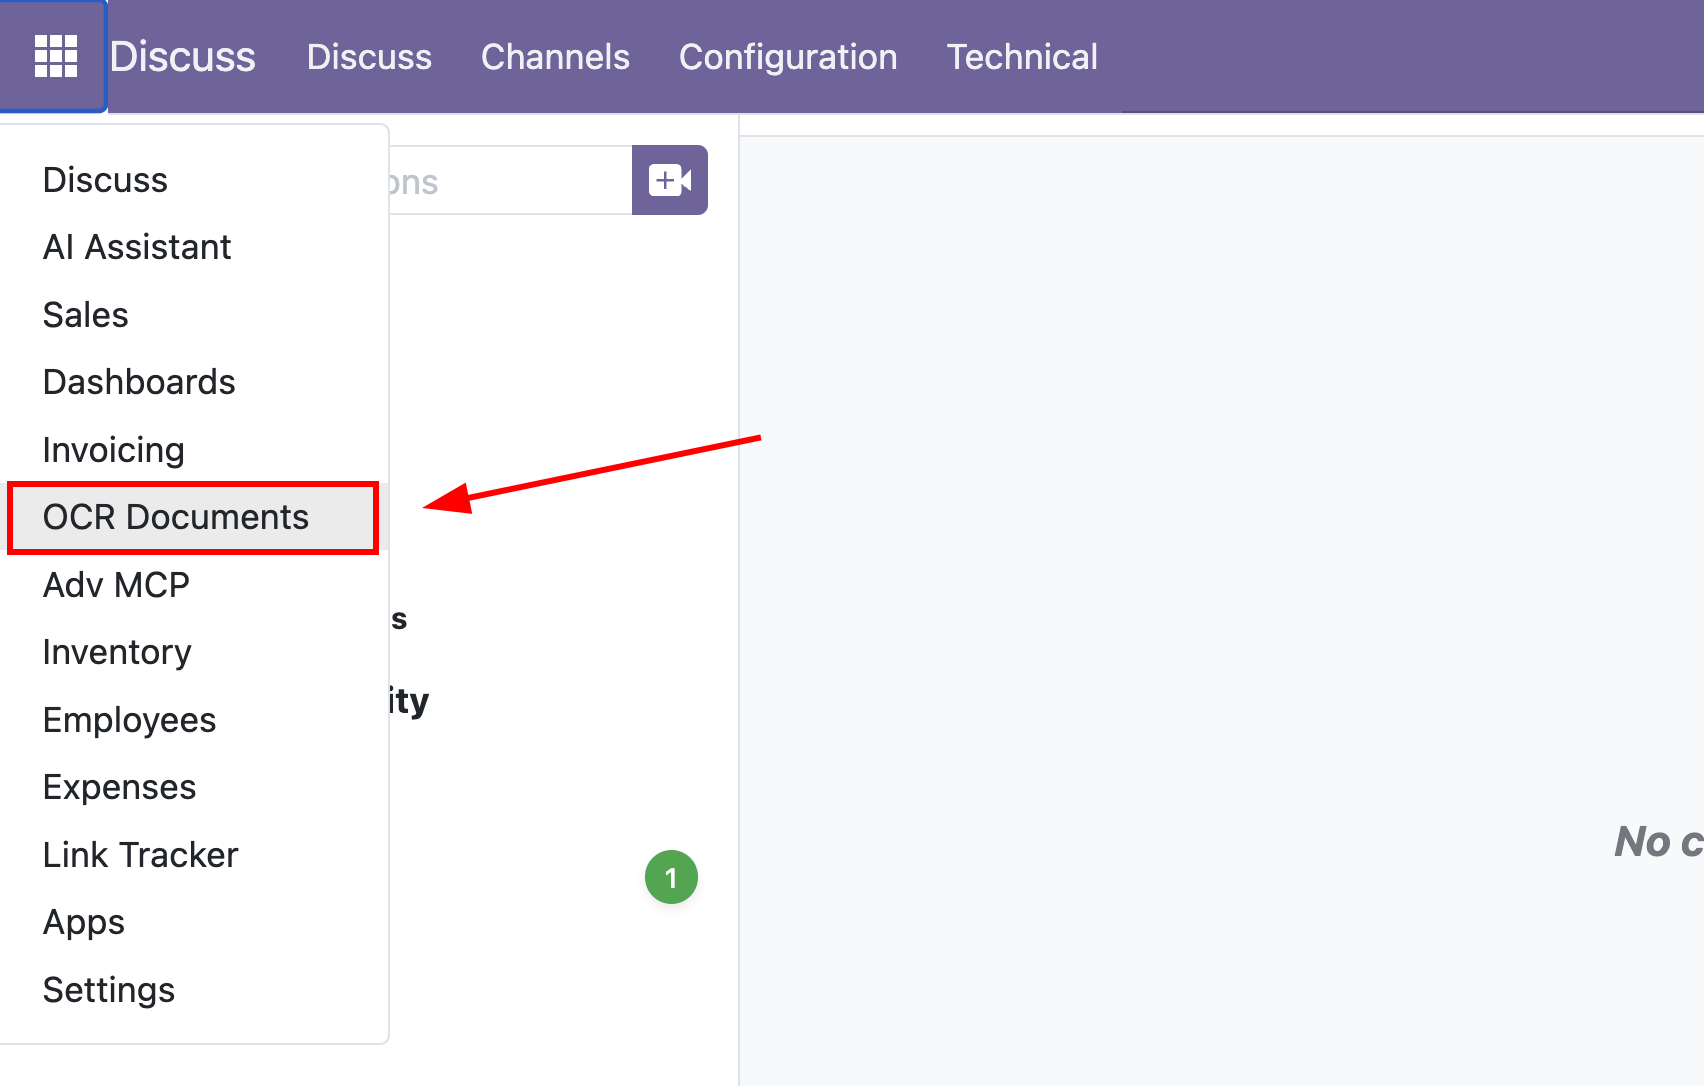
Step 2: Click New.
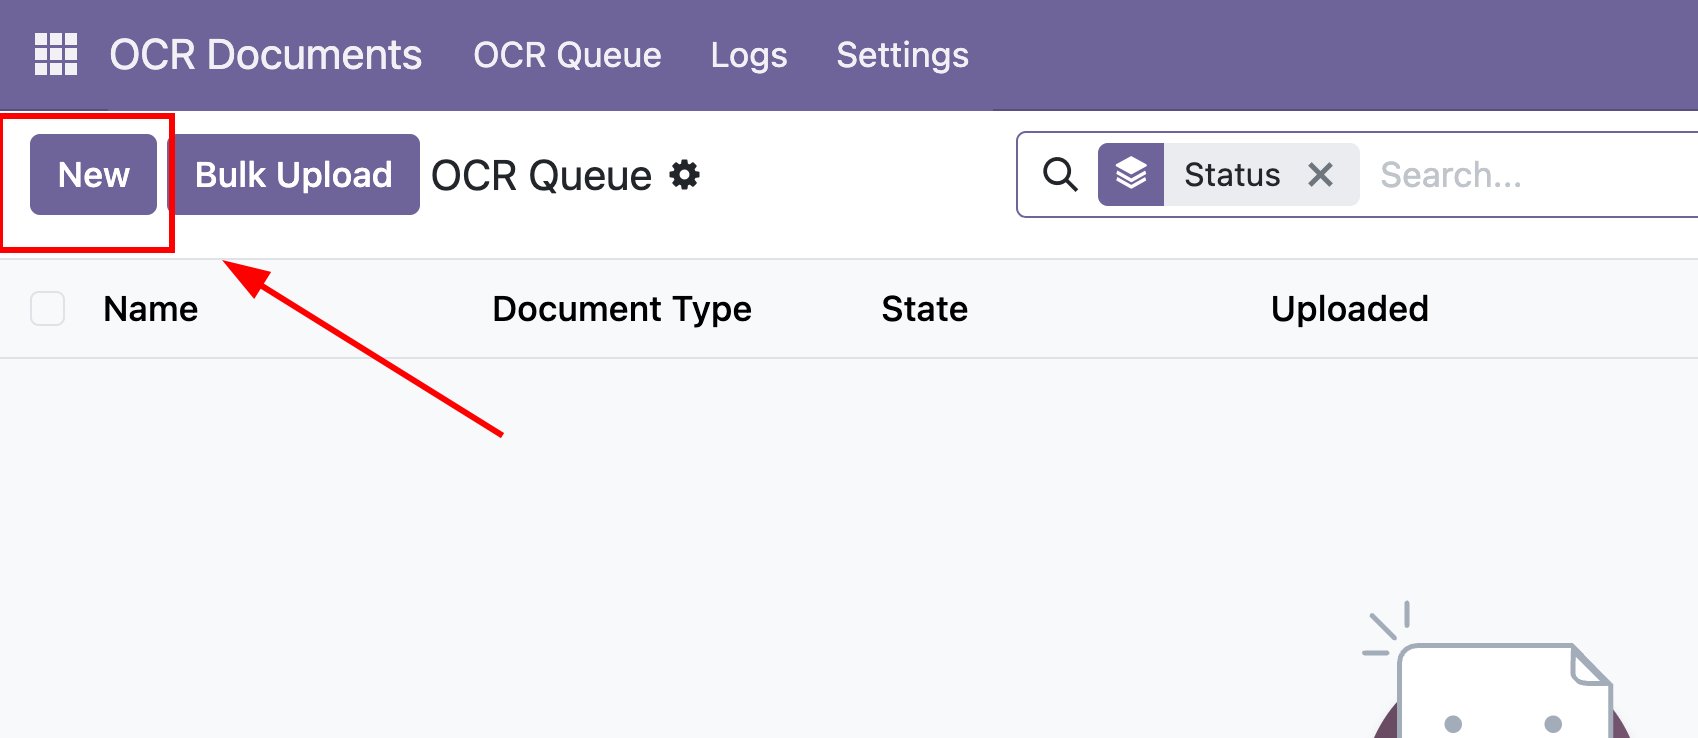
Step 3: Complete the document form, then save it.
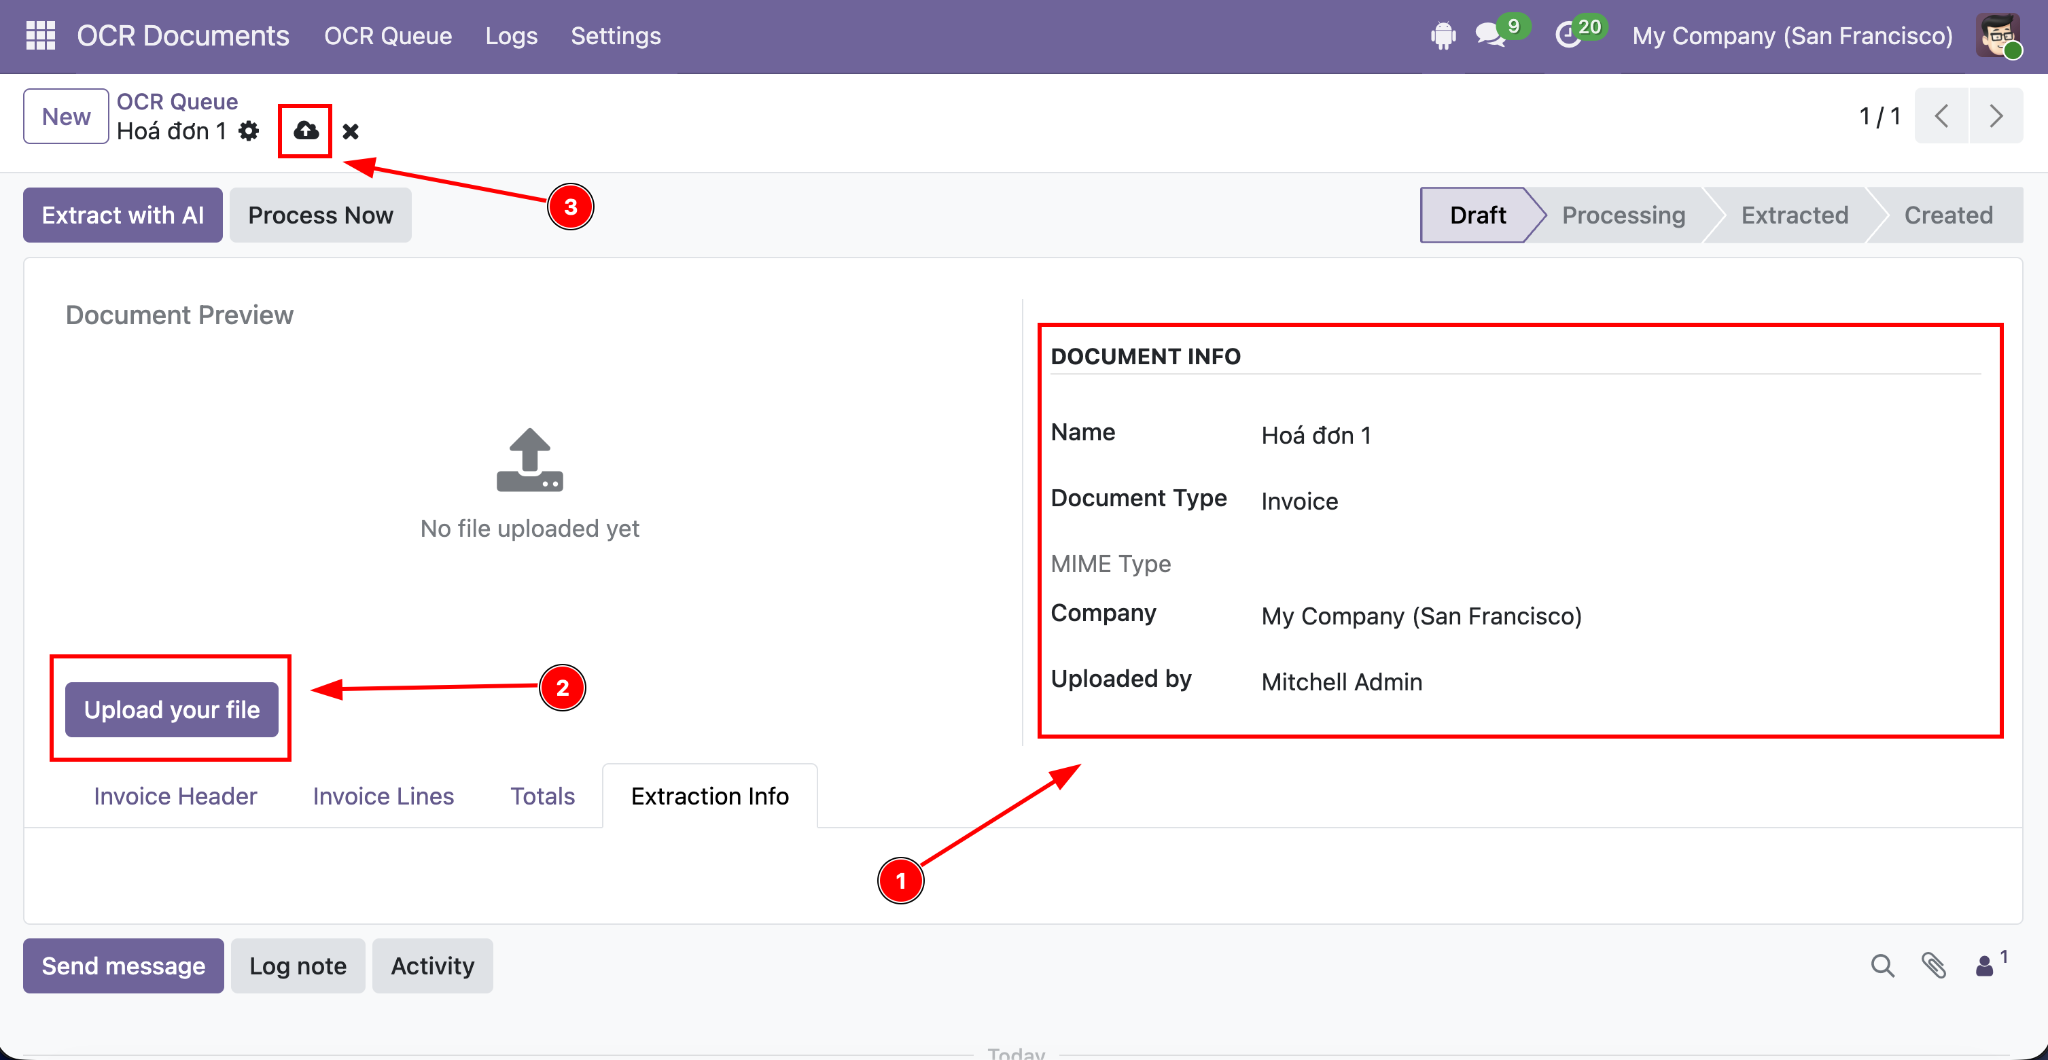
Step 4: Click Extract with AI.
The system will queue the document for background processing through cron.
Alternatively, click Process Now to process it immediately.
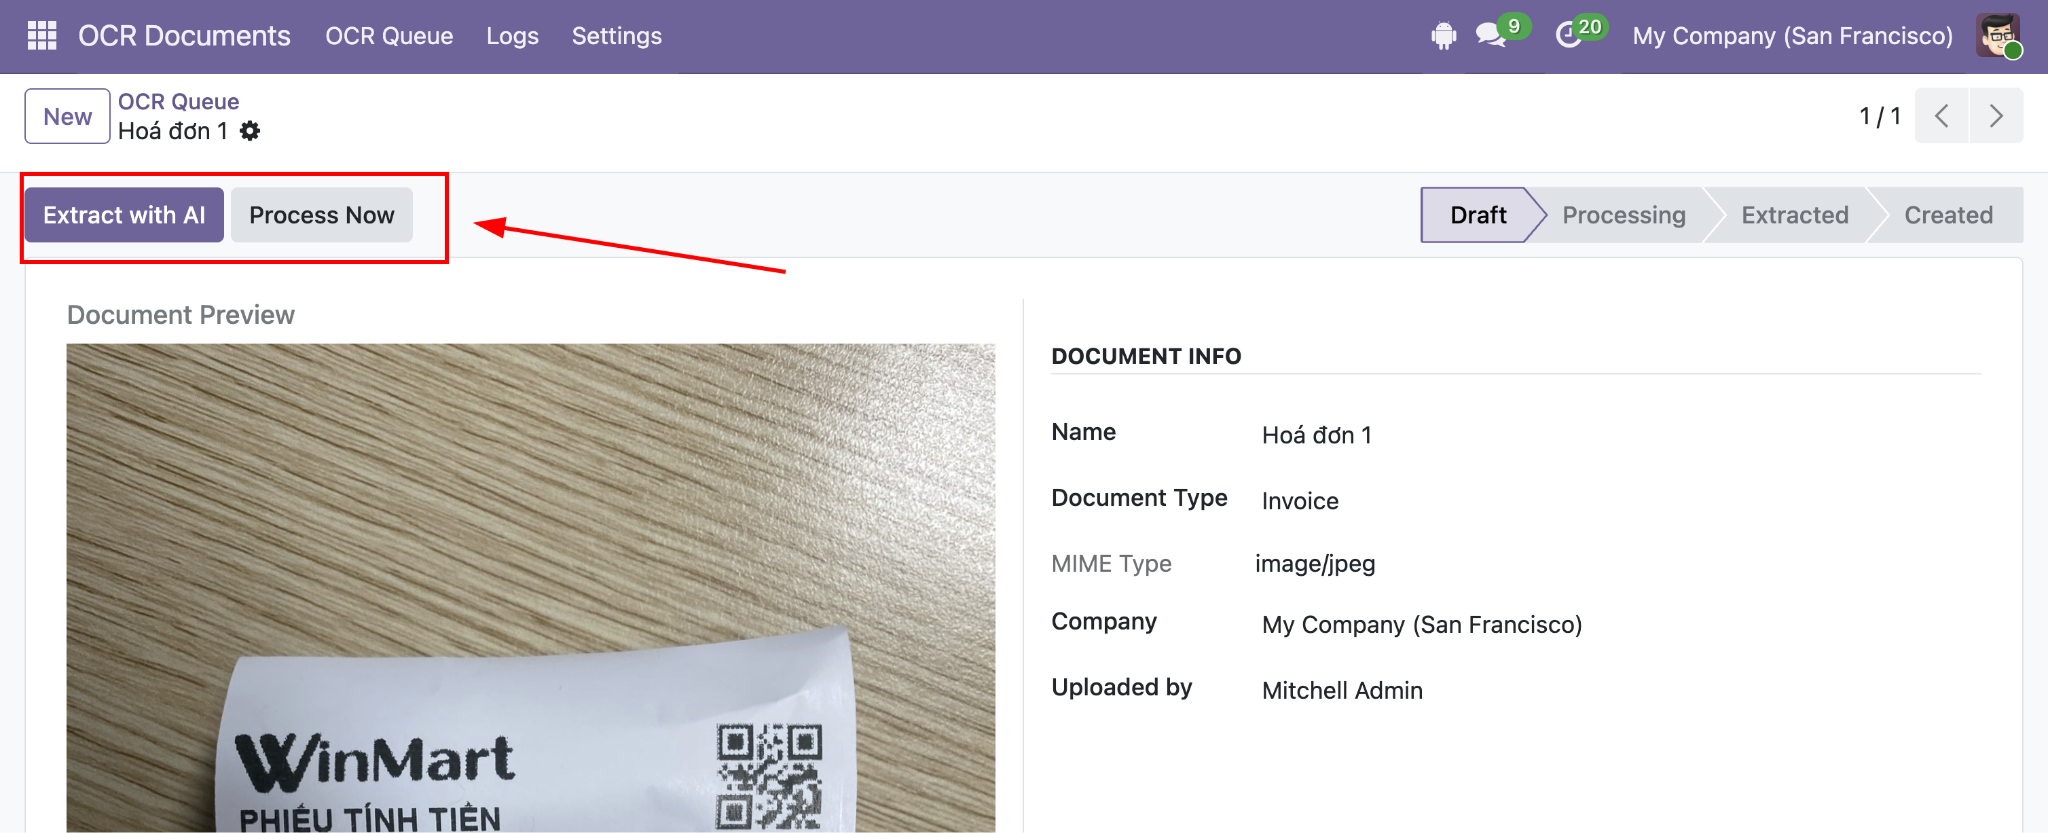
Once processing is complete, the extracted information appears in the available tabs.
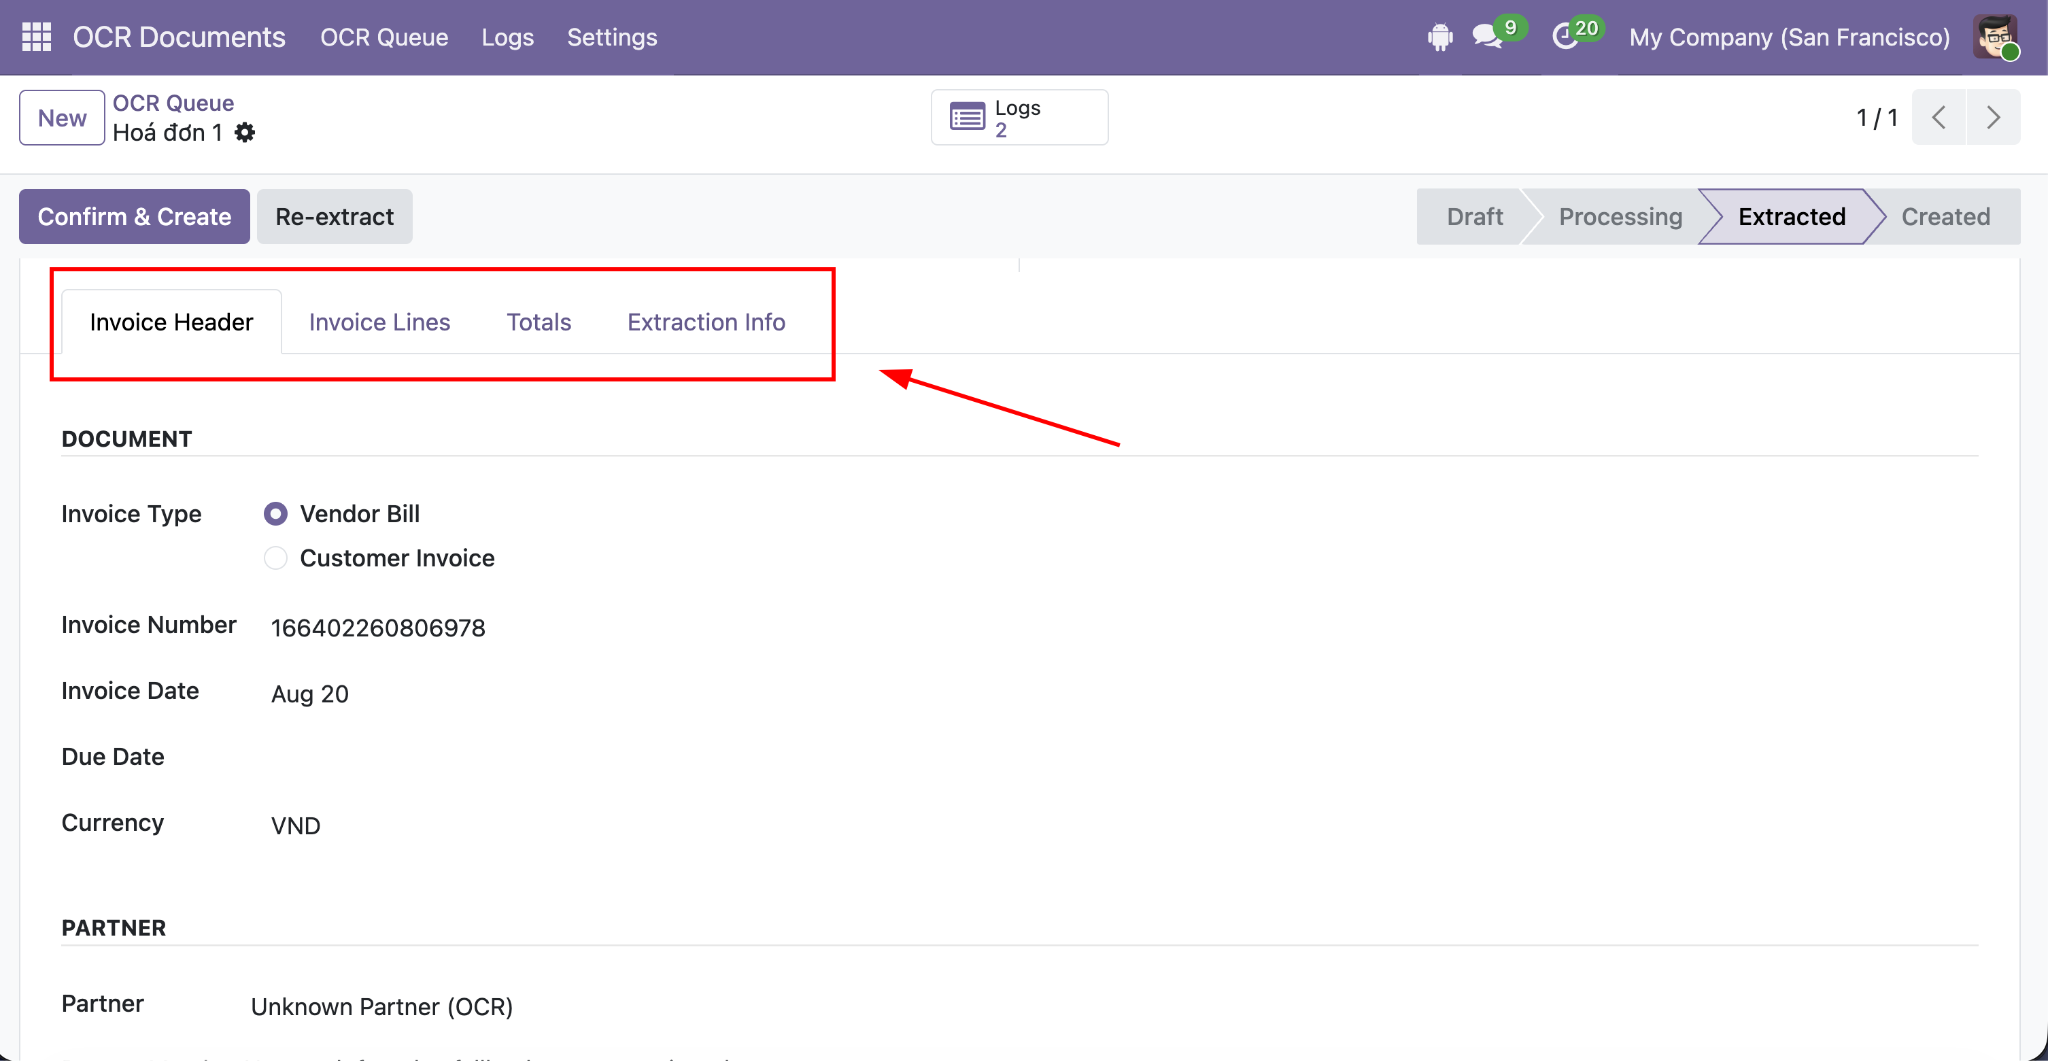
Step 5: Review the extracted information and make any necessary corrections.
Then click Confirm & Create to create the corresponding Odoo record.
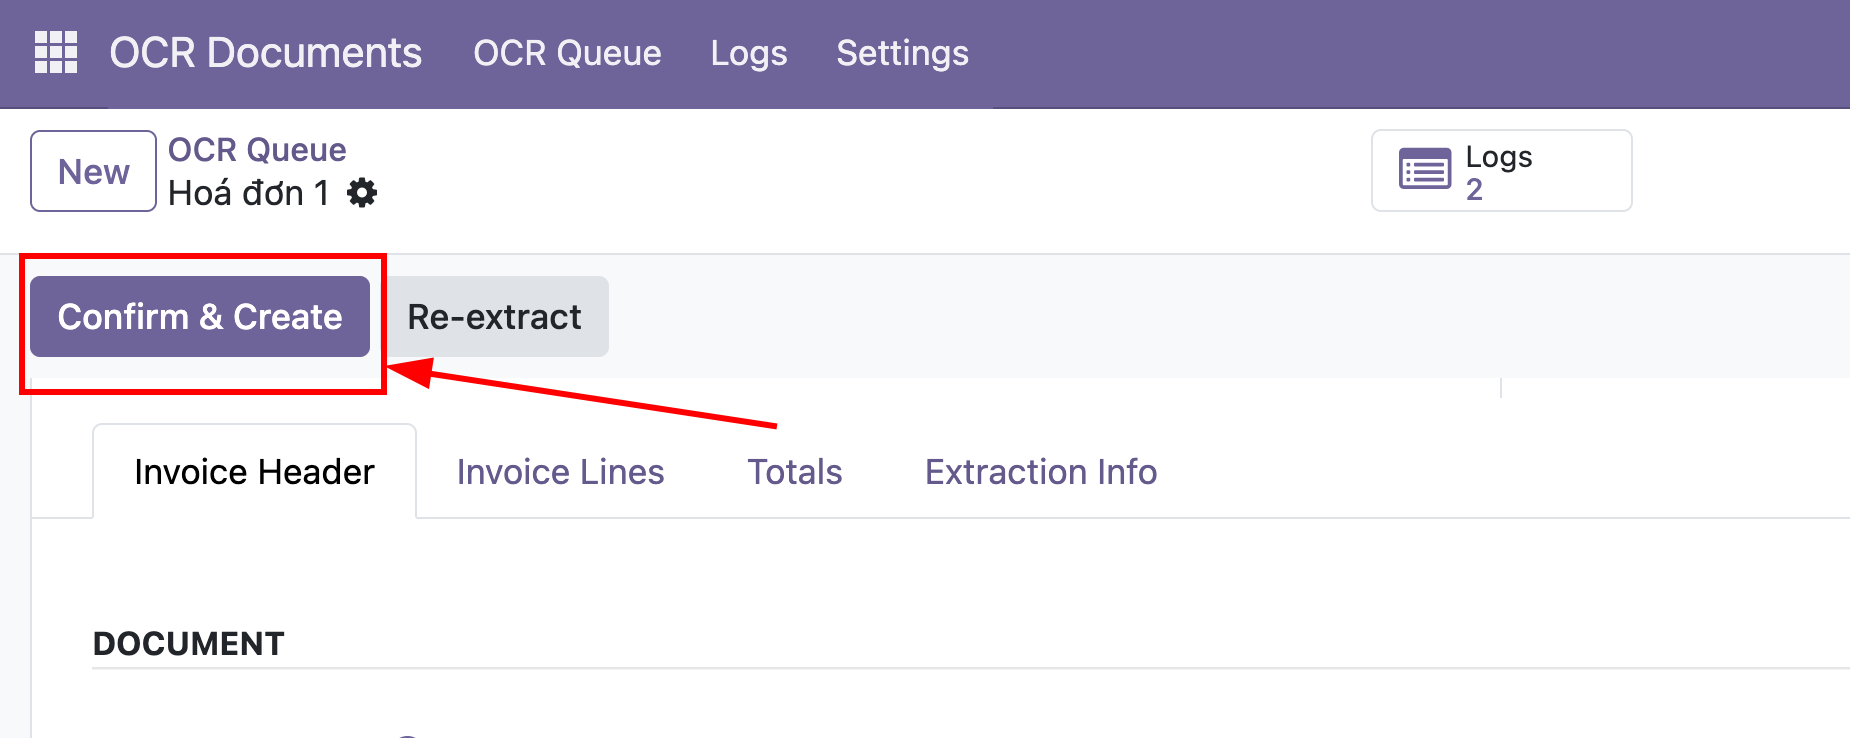
This step can be skipped if the system is configured to create the record automatically when all extracted information is complete and valid.
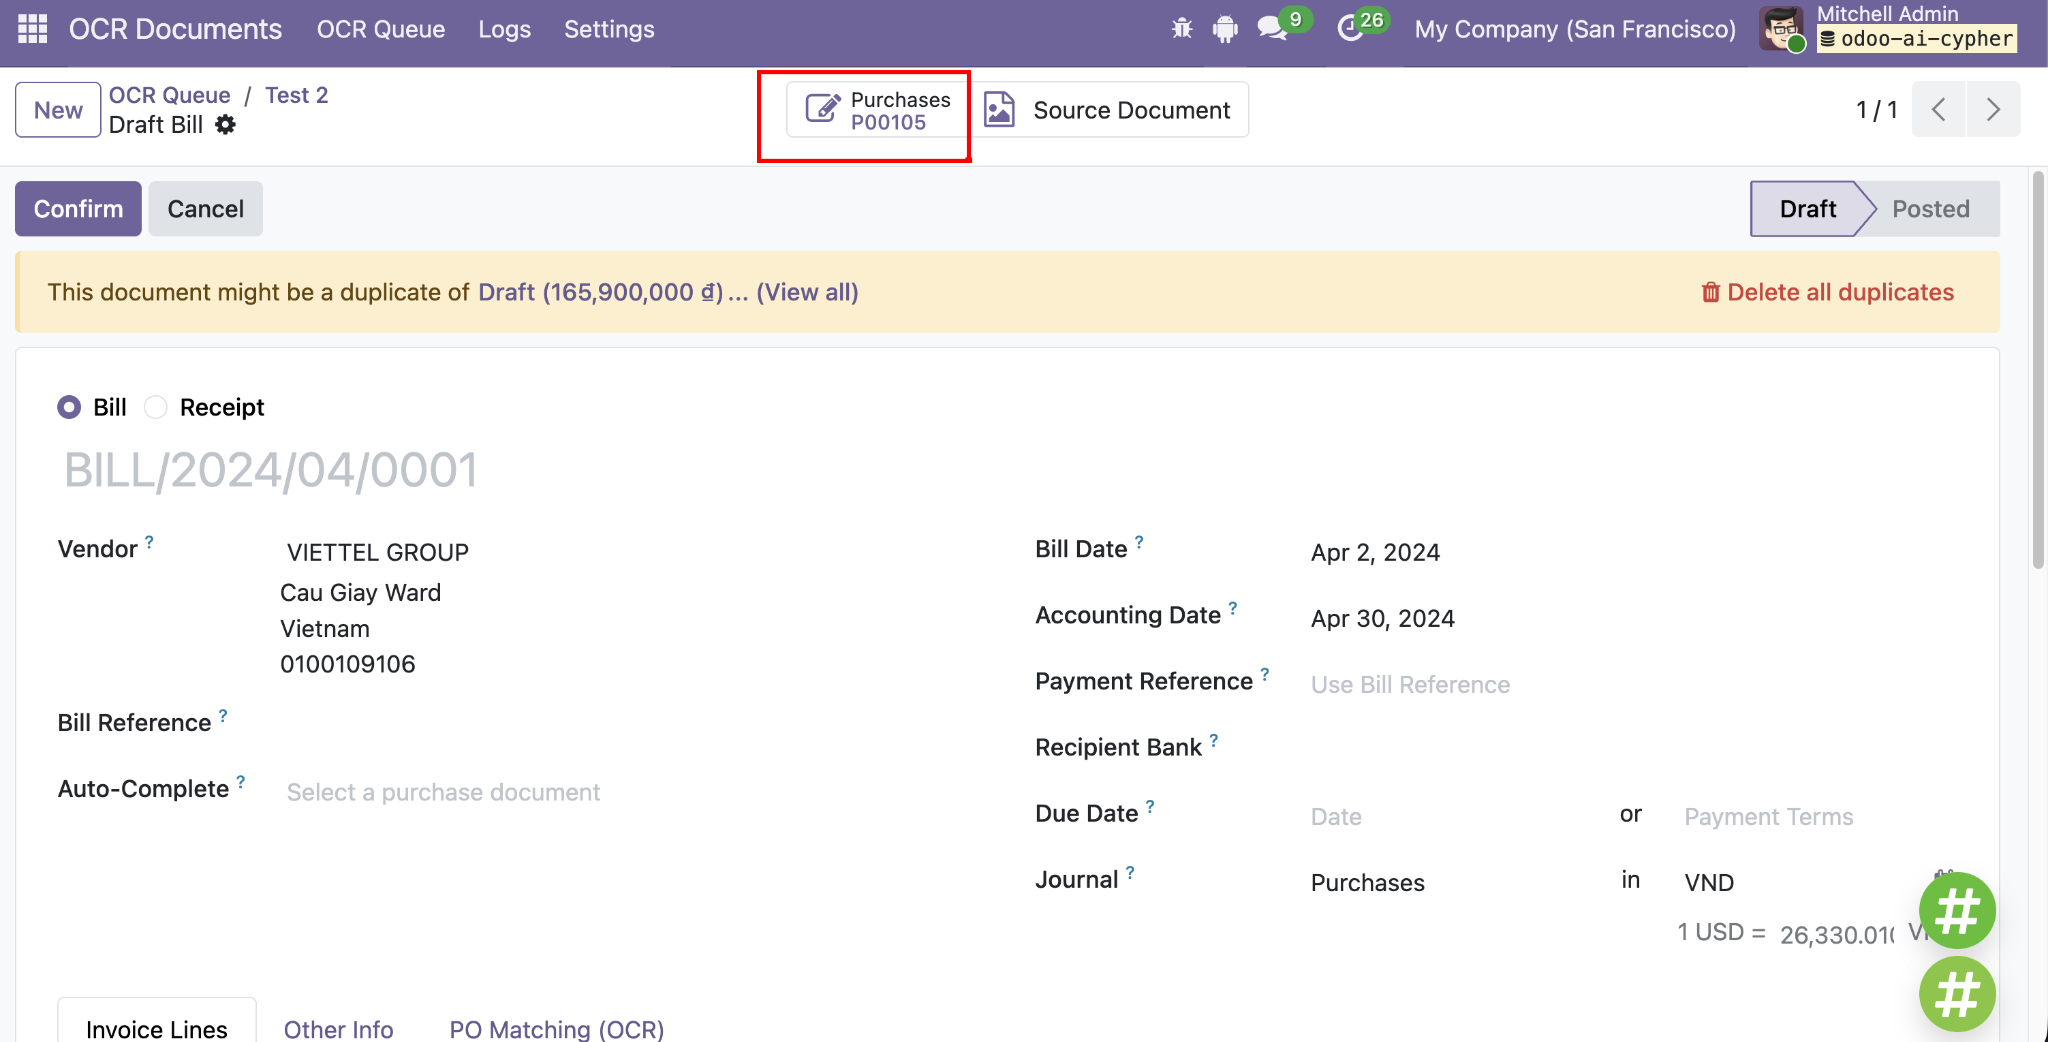
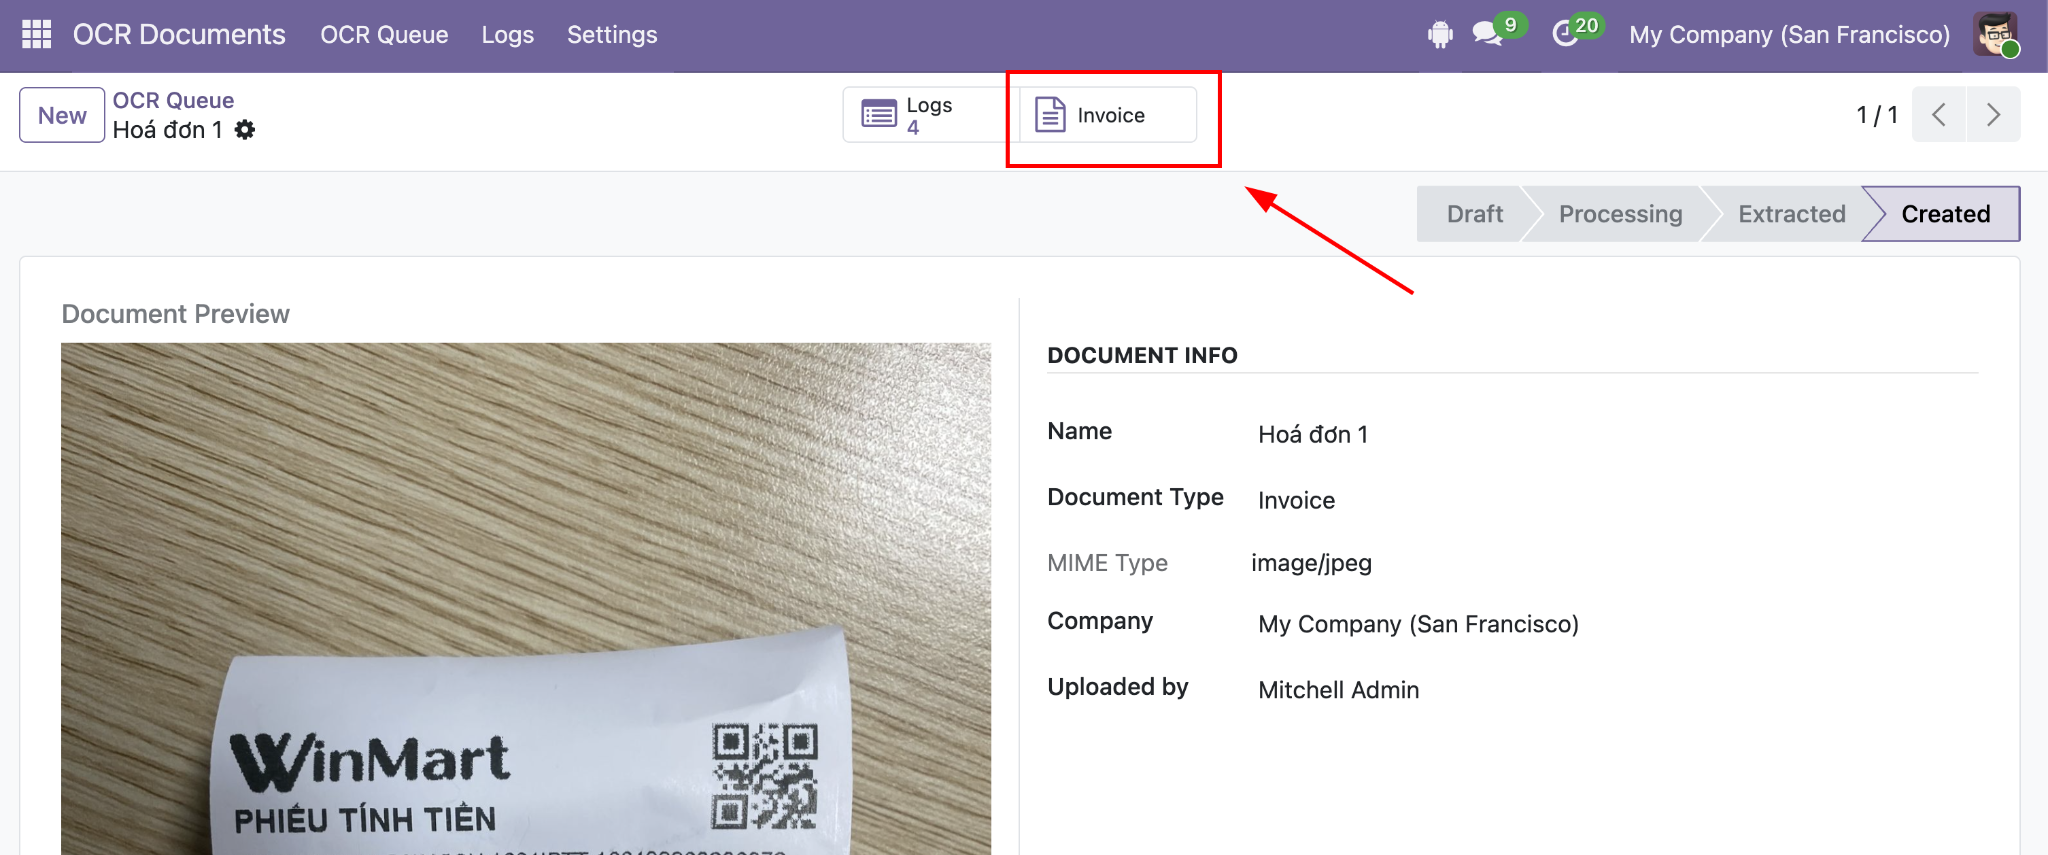
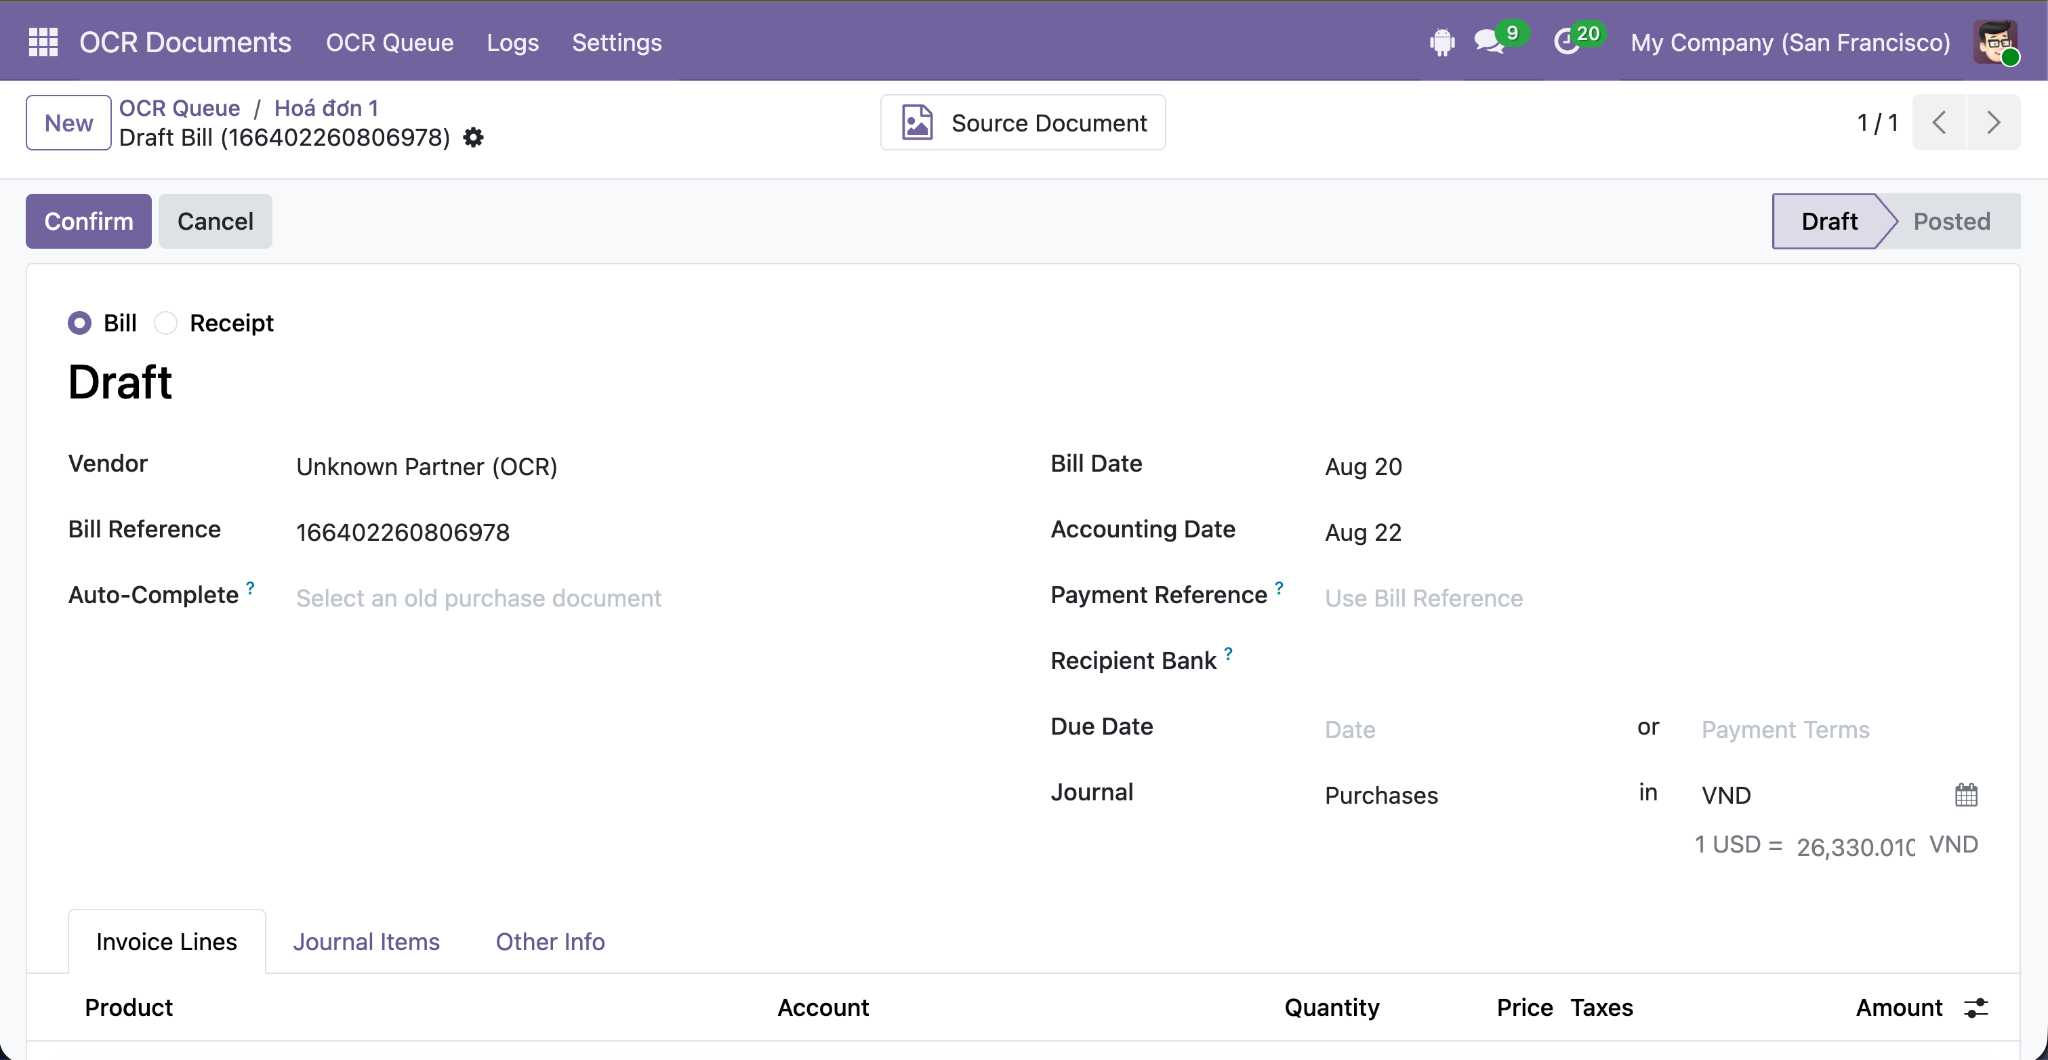
Step 6: Once the record has been created successfully, click the Invoice smart button to open the newly created record.
Users can then continue with the standard invoice workflow in Odoo.
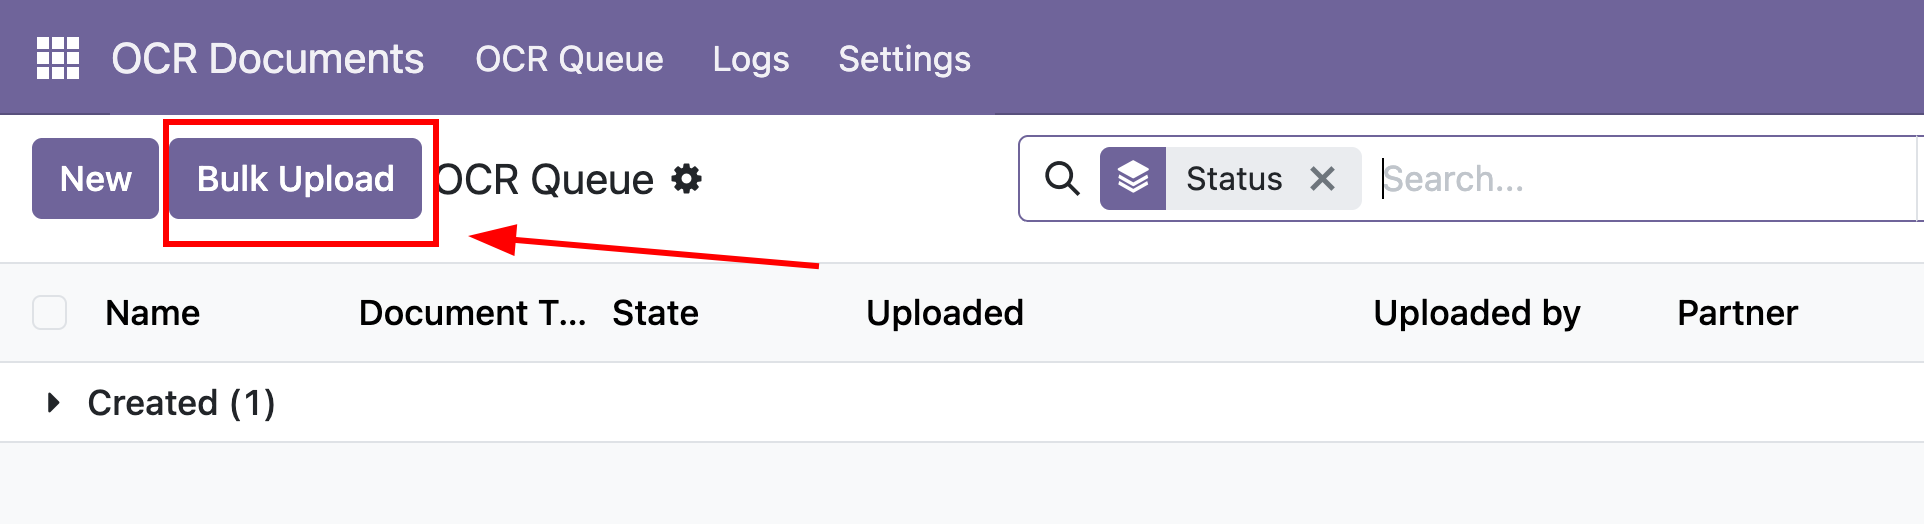
In addition to processing one document at a time, users can upload and process multiple documents in a single batch using Bulk Upload.
Step 1: Click Bulk Upload, for example from the Invoice section.
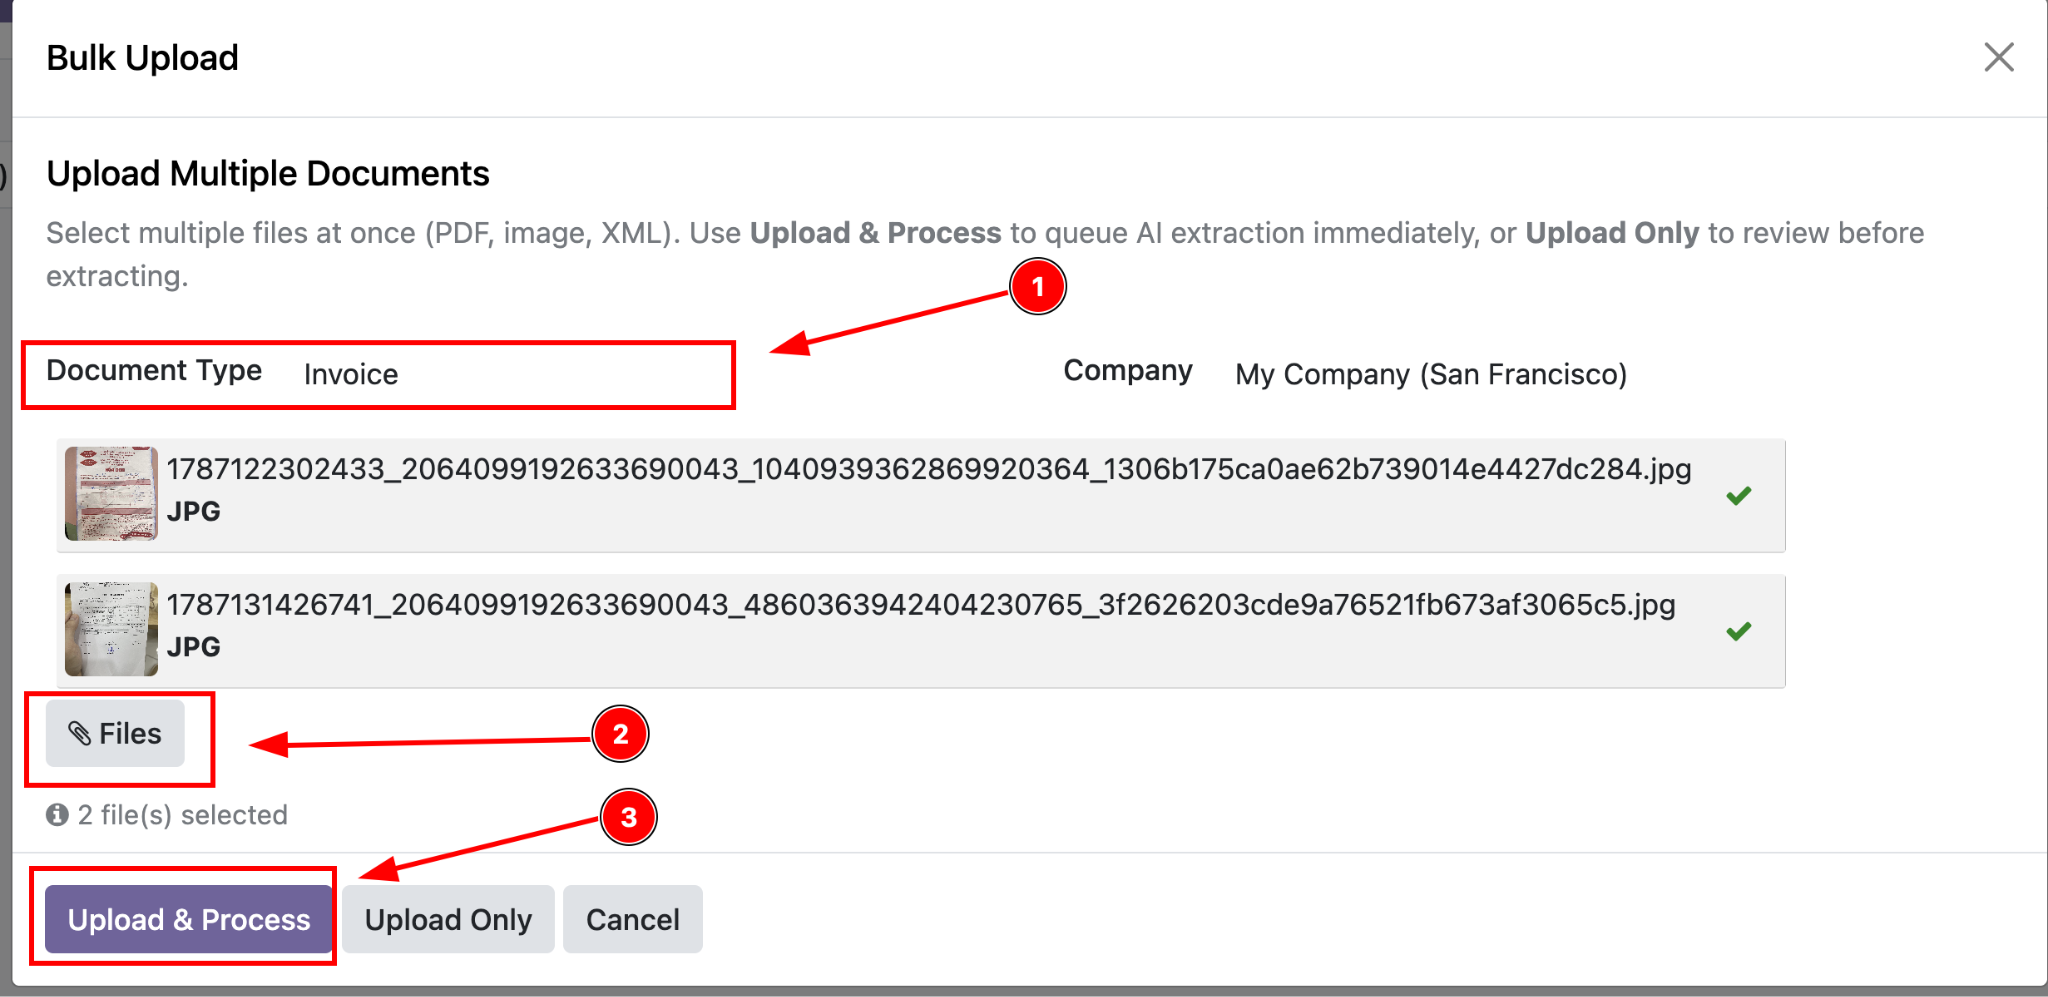
Step 2: Select the Document Type.
Click Files to select multiple documents. Then click Upload & Process to start OCR processing.
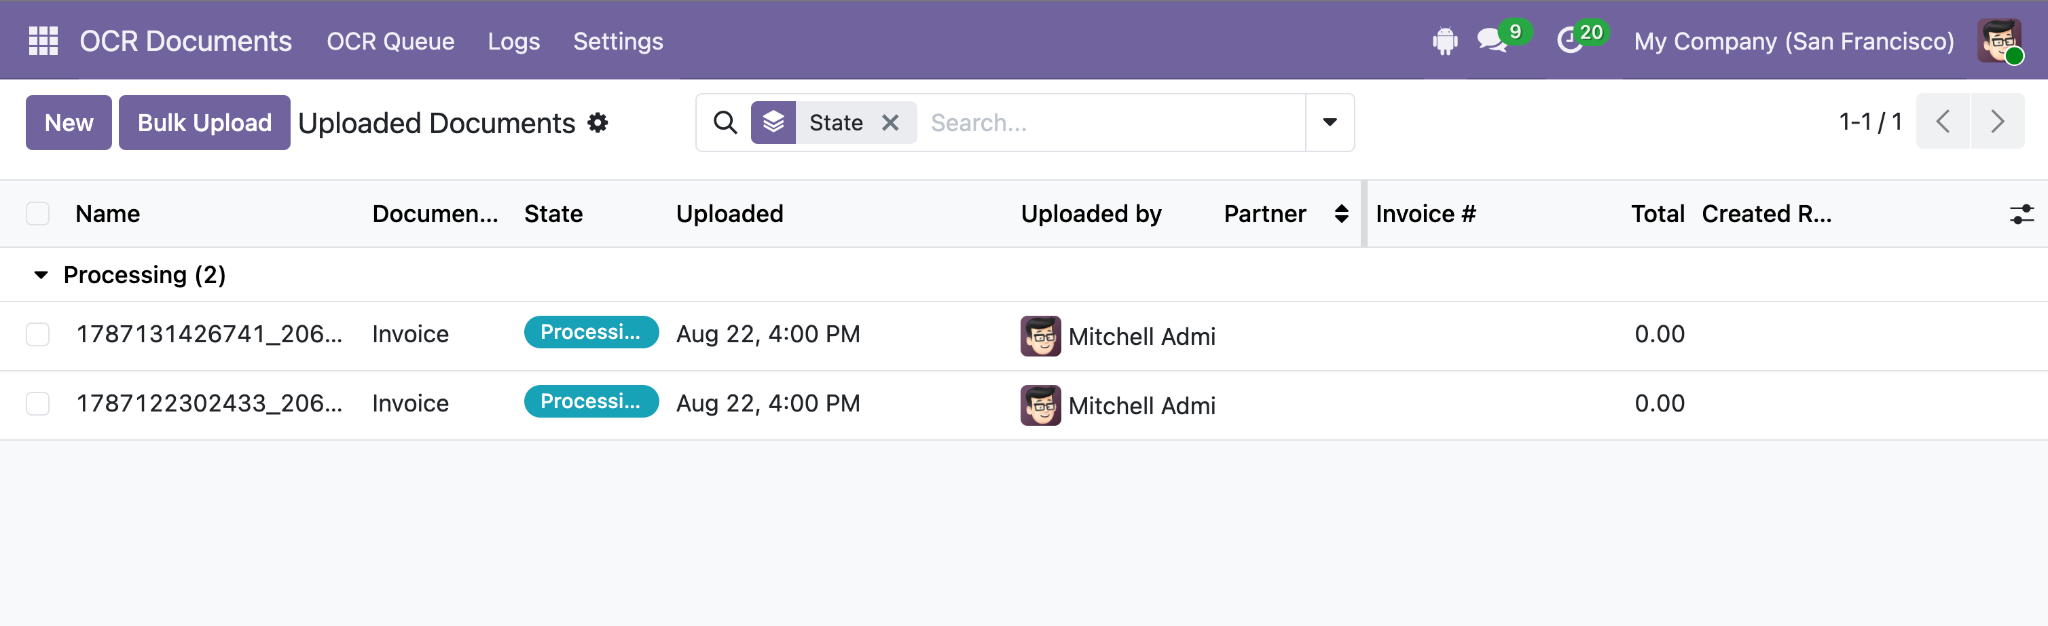
After the upload is complete, the documents appear in the uploaded document list.
Users can also upload documents directly from:
Invoicing > Customers > Invoices
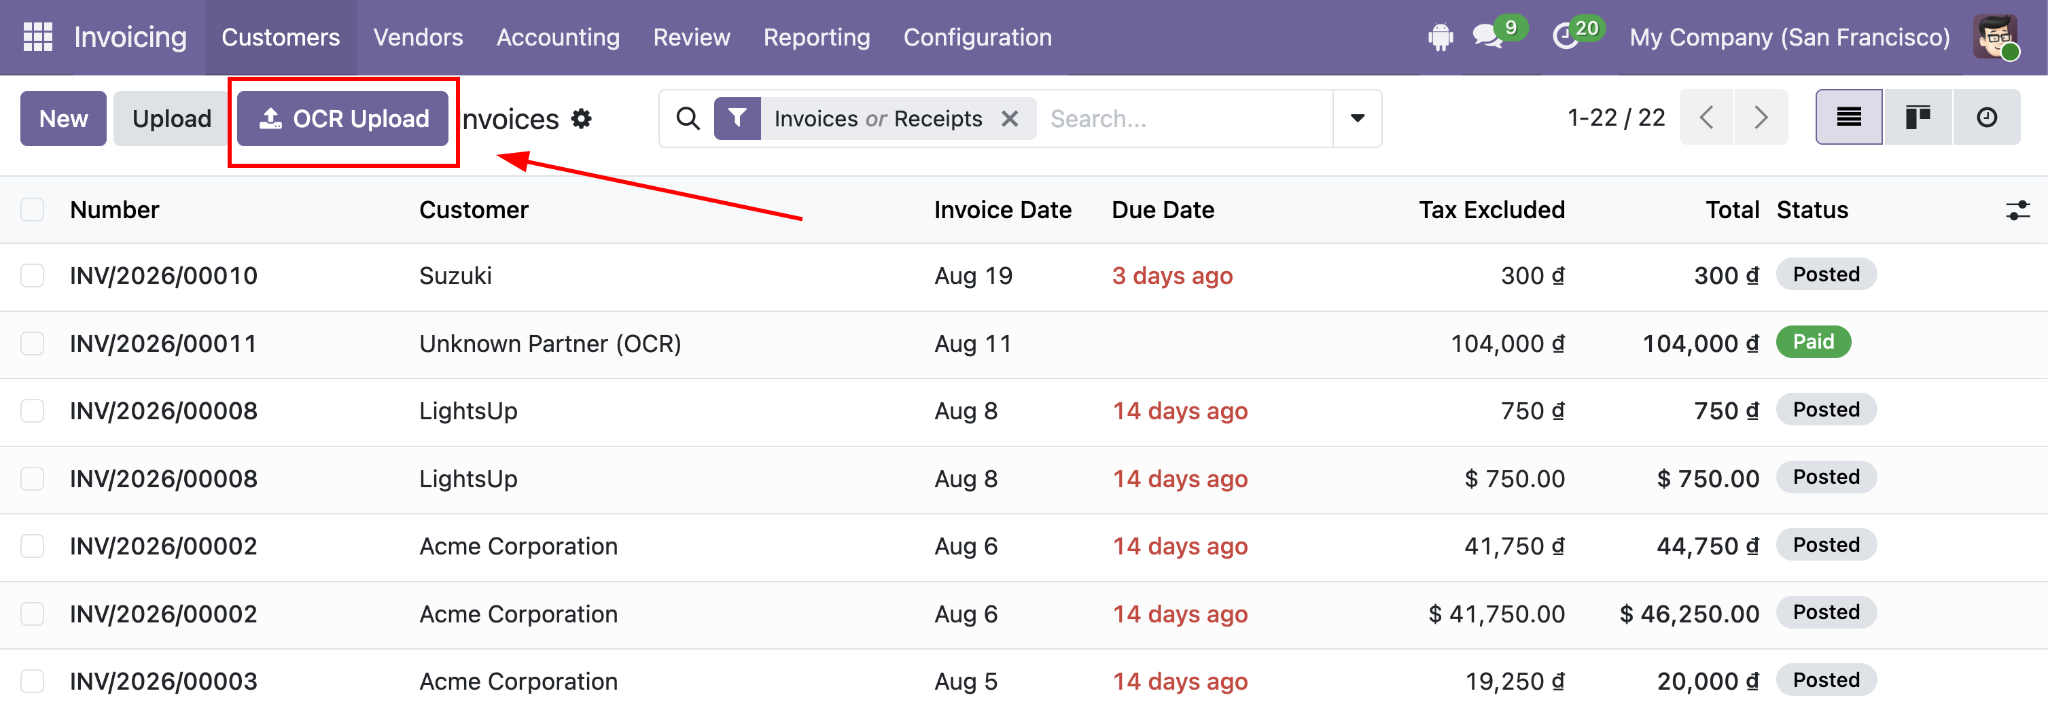
or:
Invoicing > Vendors > Bills
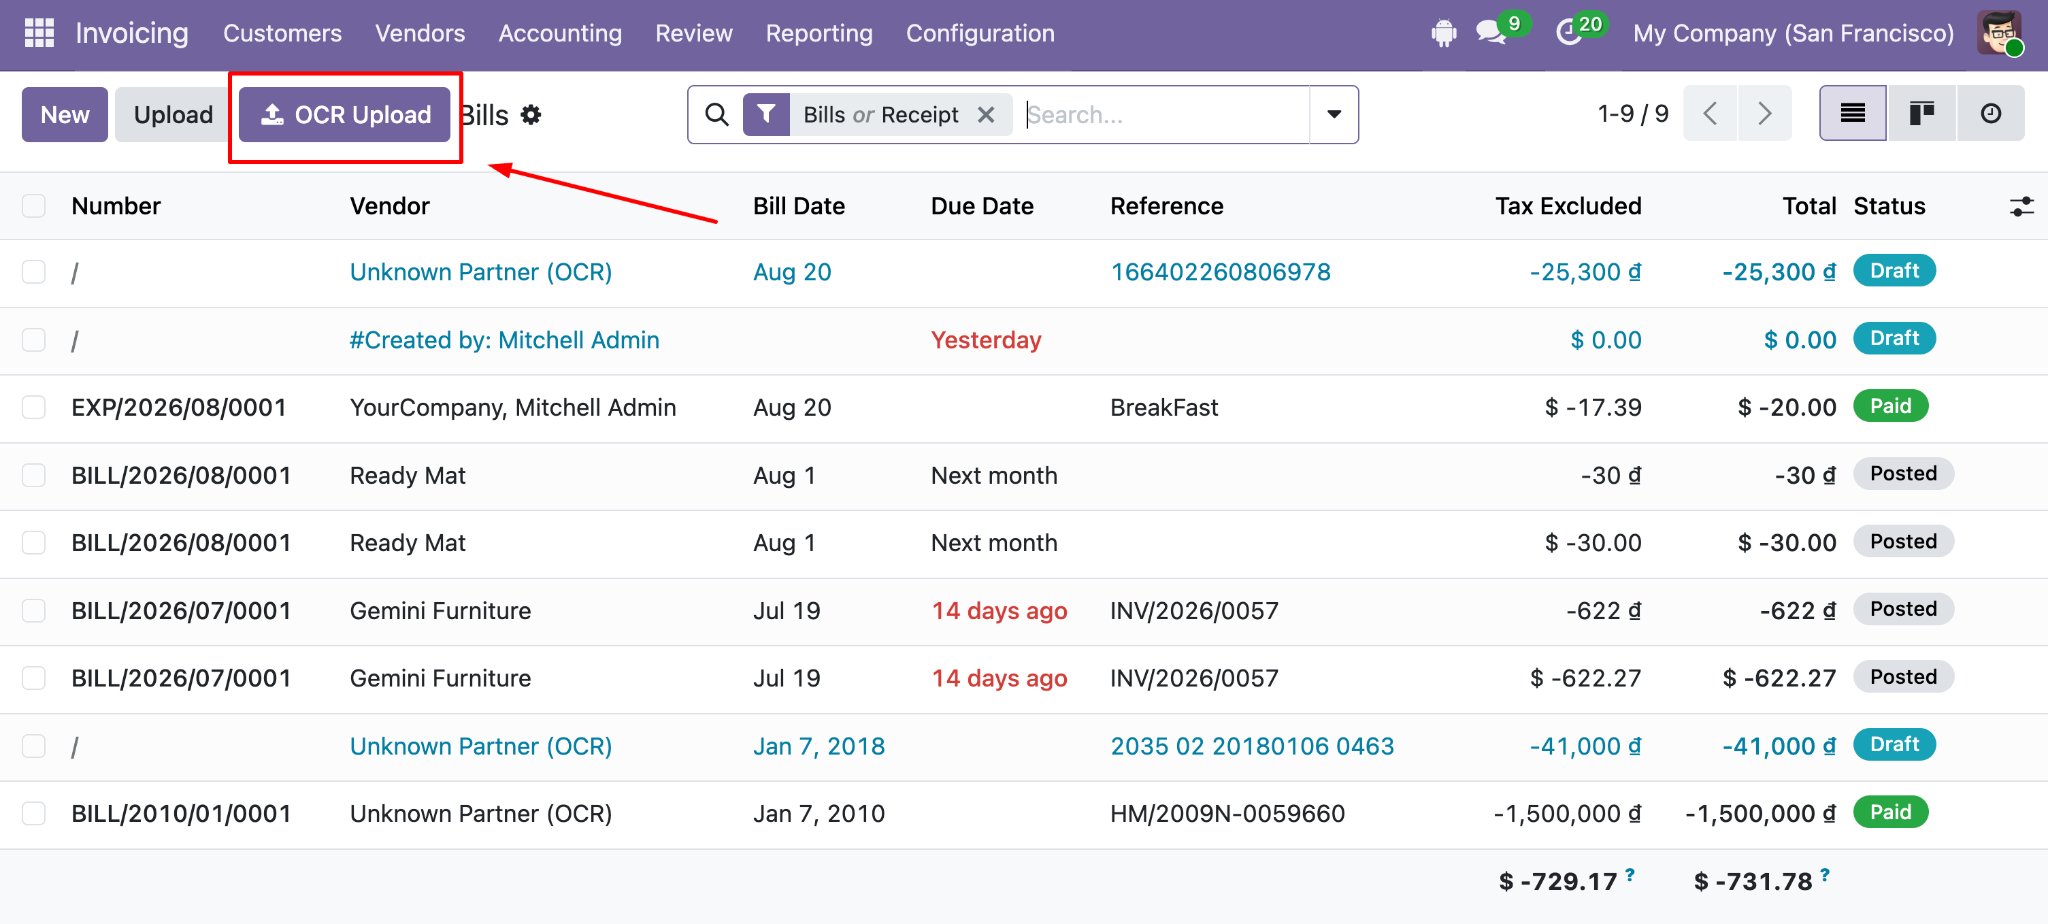
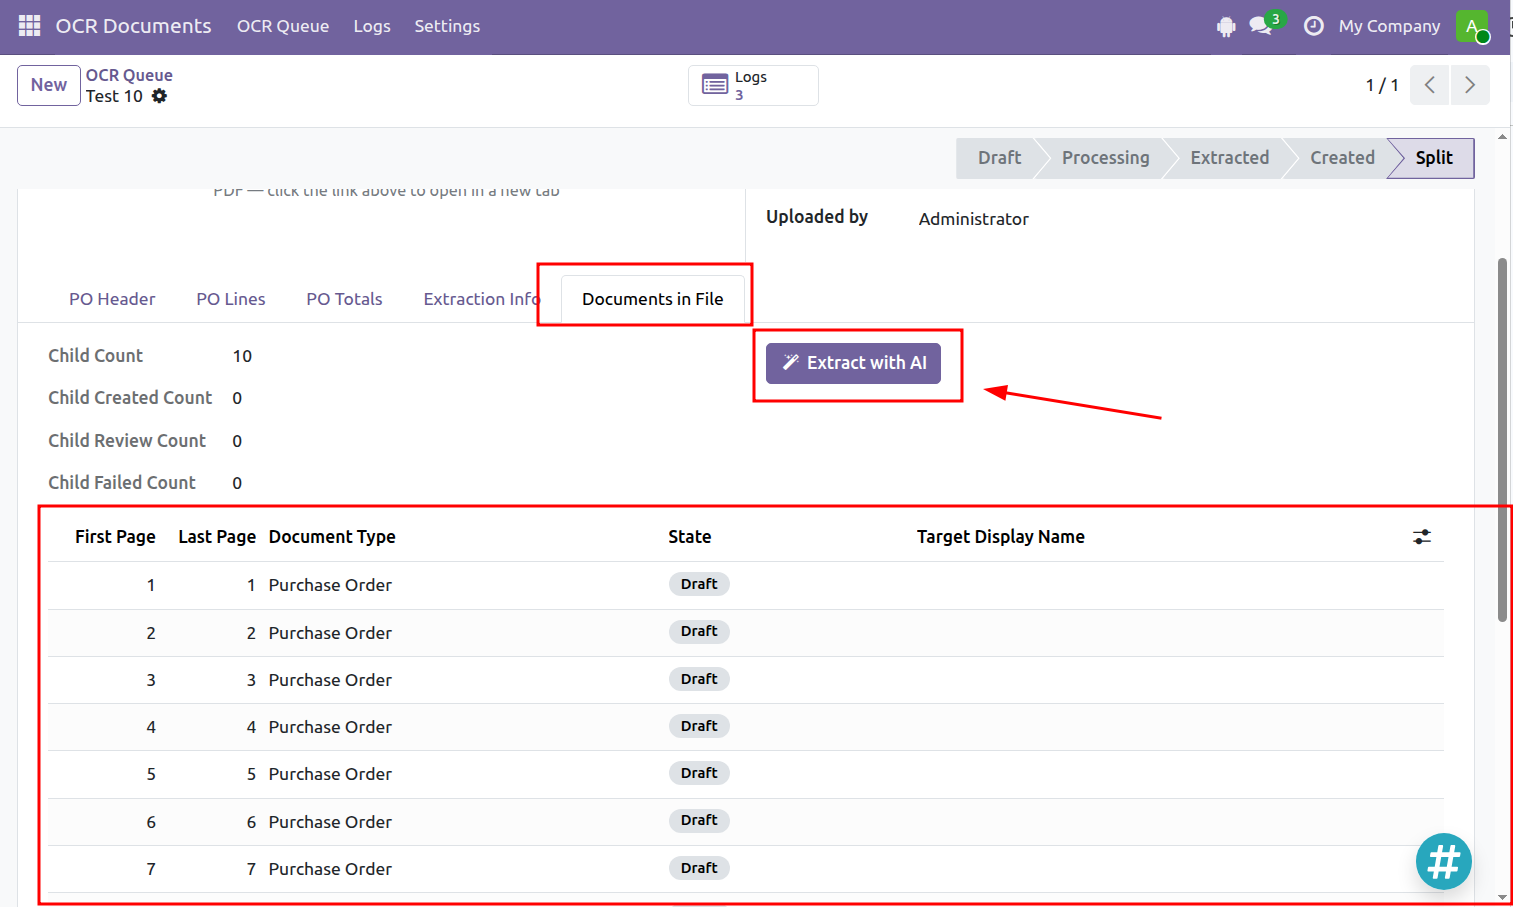
The Purchase Order OCR workflow can split a single file when it contains multiple purchase orders.
Step 1: Upload a file containing multiple purchase orders and set:
Document Type = Purchase Order
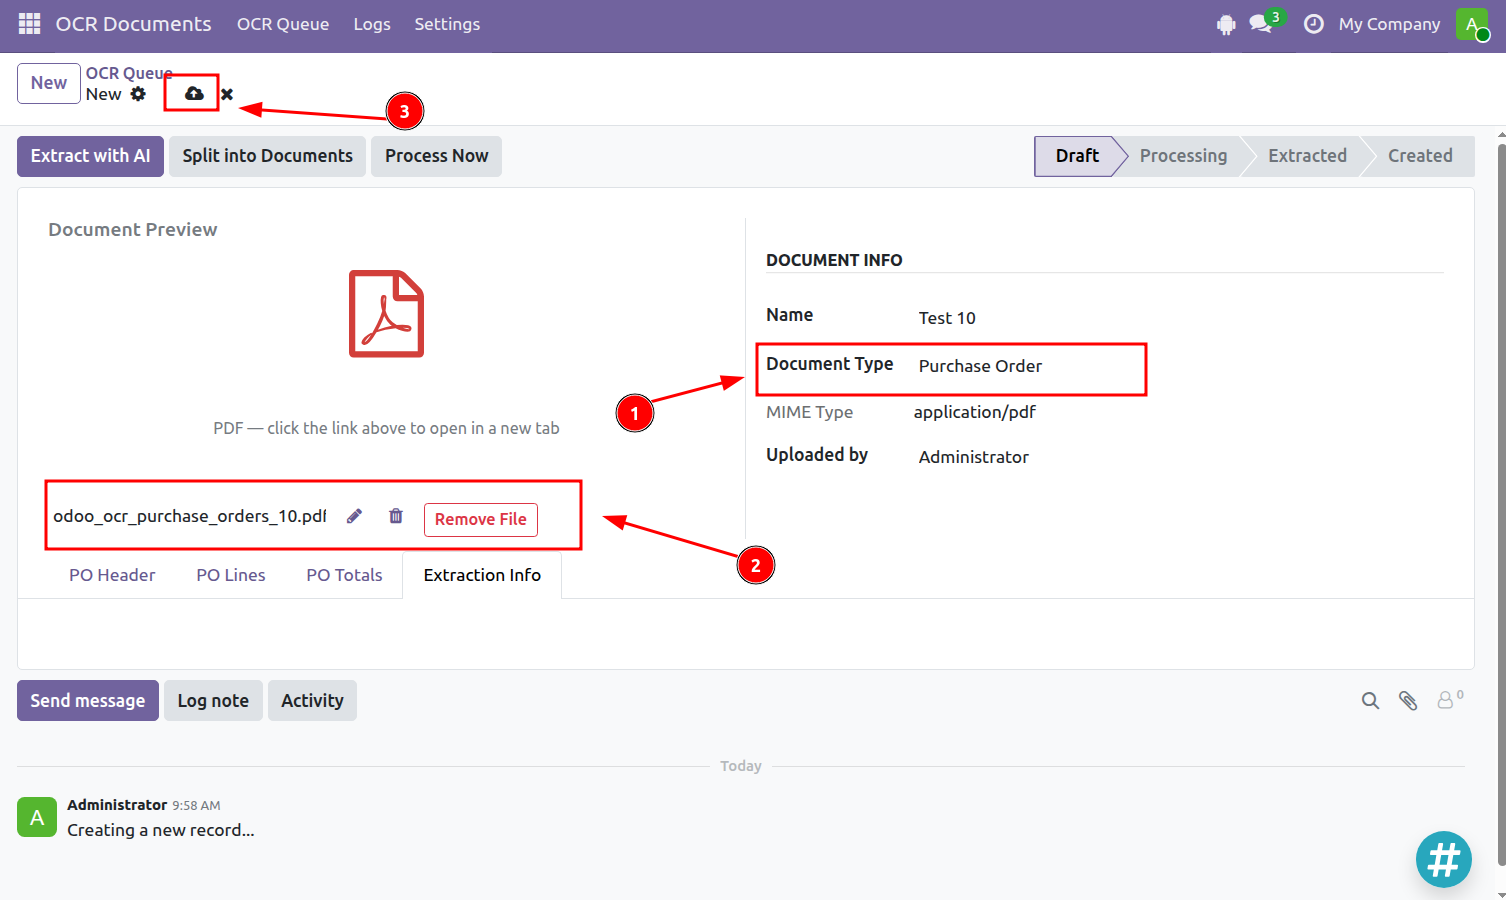
Step 2: Click Split into Documents to split the file automatically.
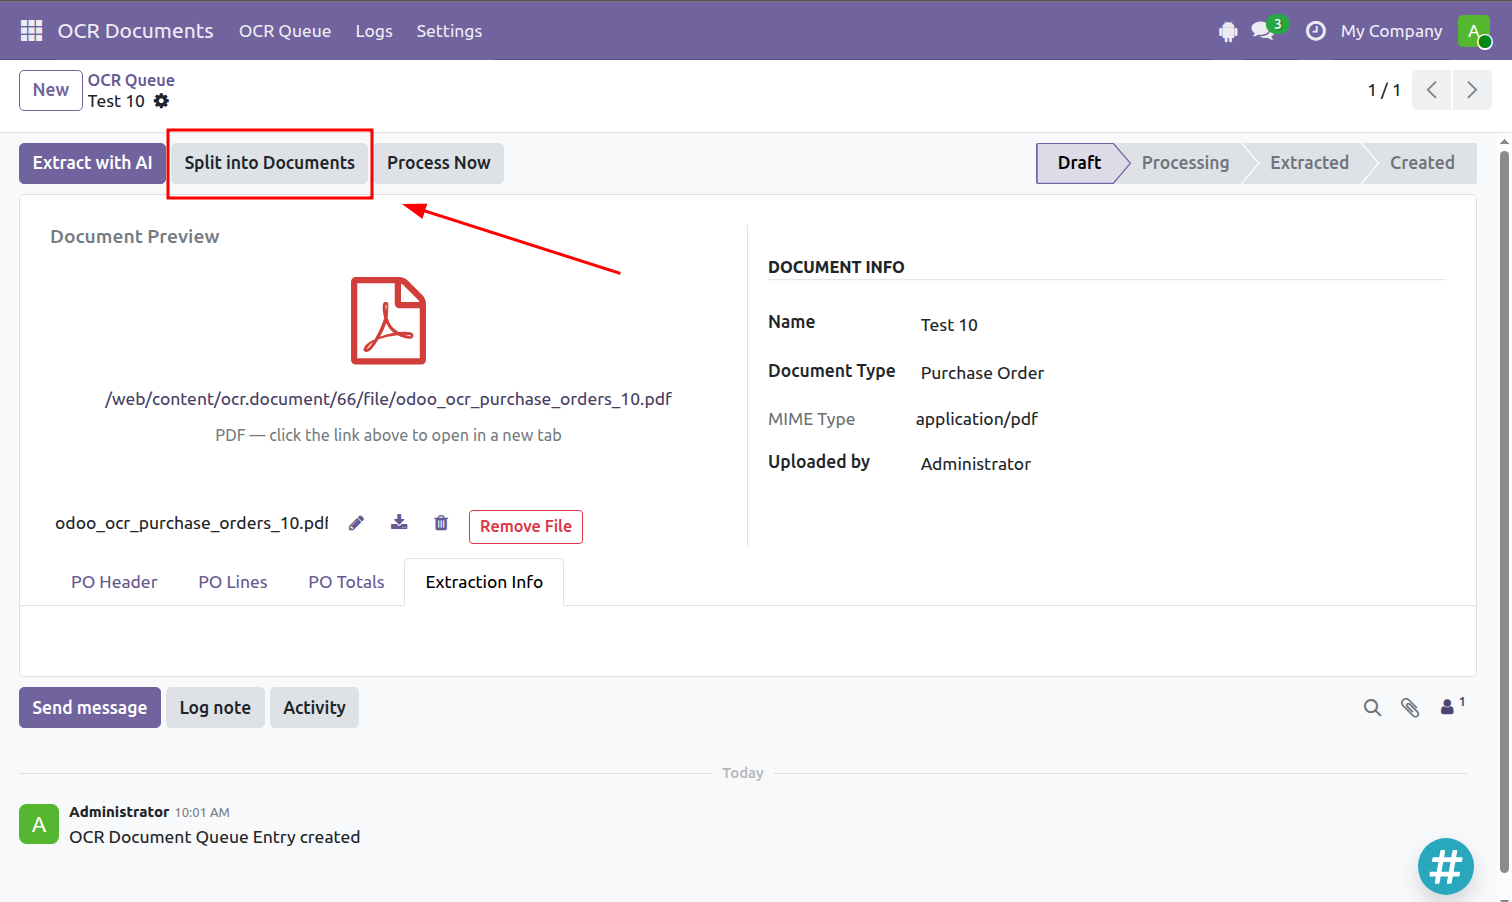
If you click Extract with AI or Process Now before splitting, the system will detect that the file contains multiple purchase orders and prompt you to use Split into Documents first.
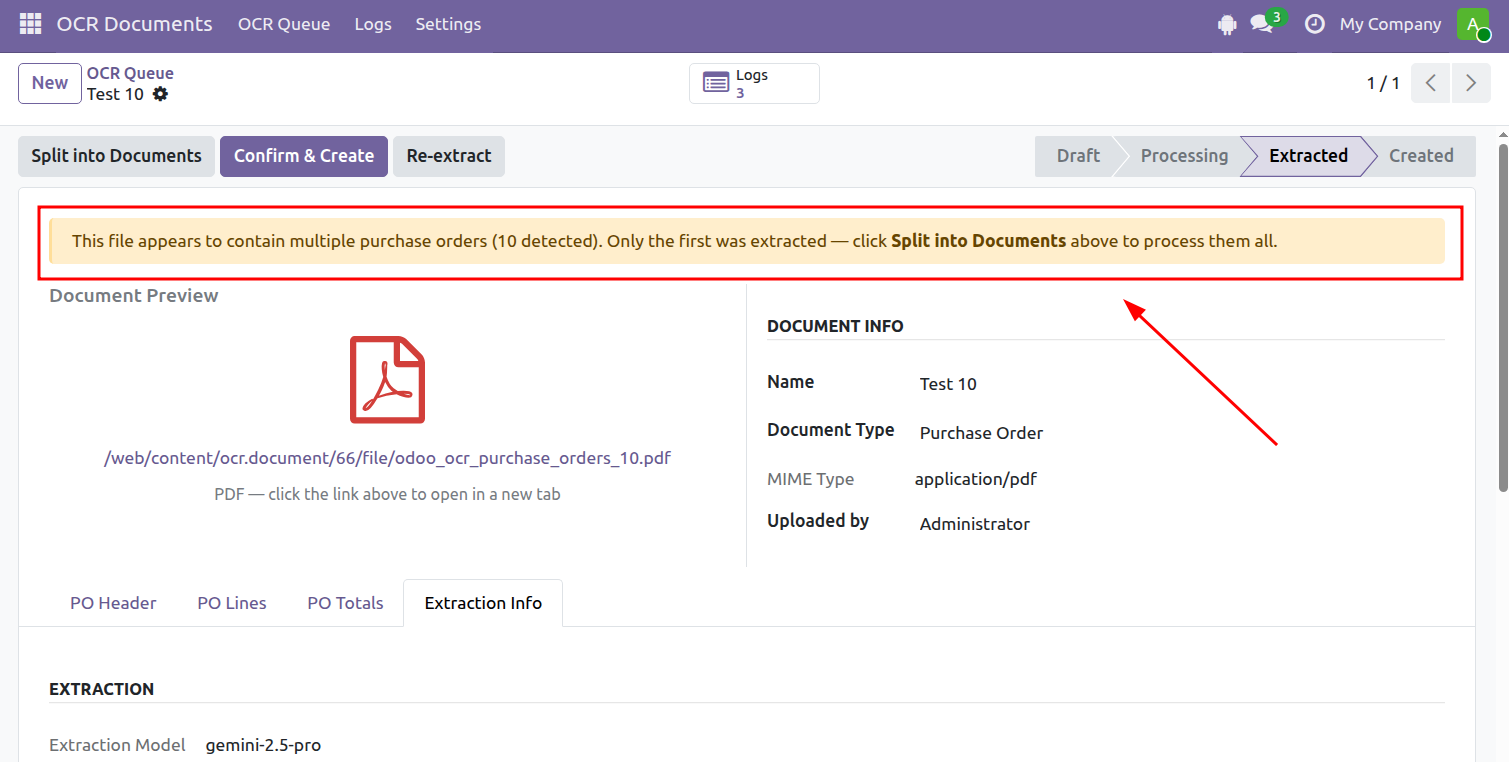
Step 3: Once the file has been split, the system displays the individual purchase orders.
Click Extract with AI to process the newly separated documents.
When an invoice is processed with OCR, the system can automatically look for existing Purchase Orders with matching information. This helps users quickly find the relevant Purchase Order without searching for it manually.
Purchase Orders with an Order Date closer to the Invoice Date are ranked higher, especially when the dates are within 90 days. Purchase Orders outside this period can still appear as suggestions, but they are ranked lower.
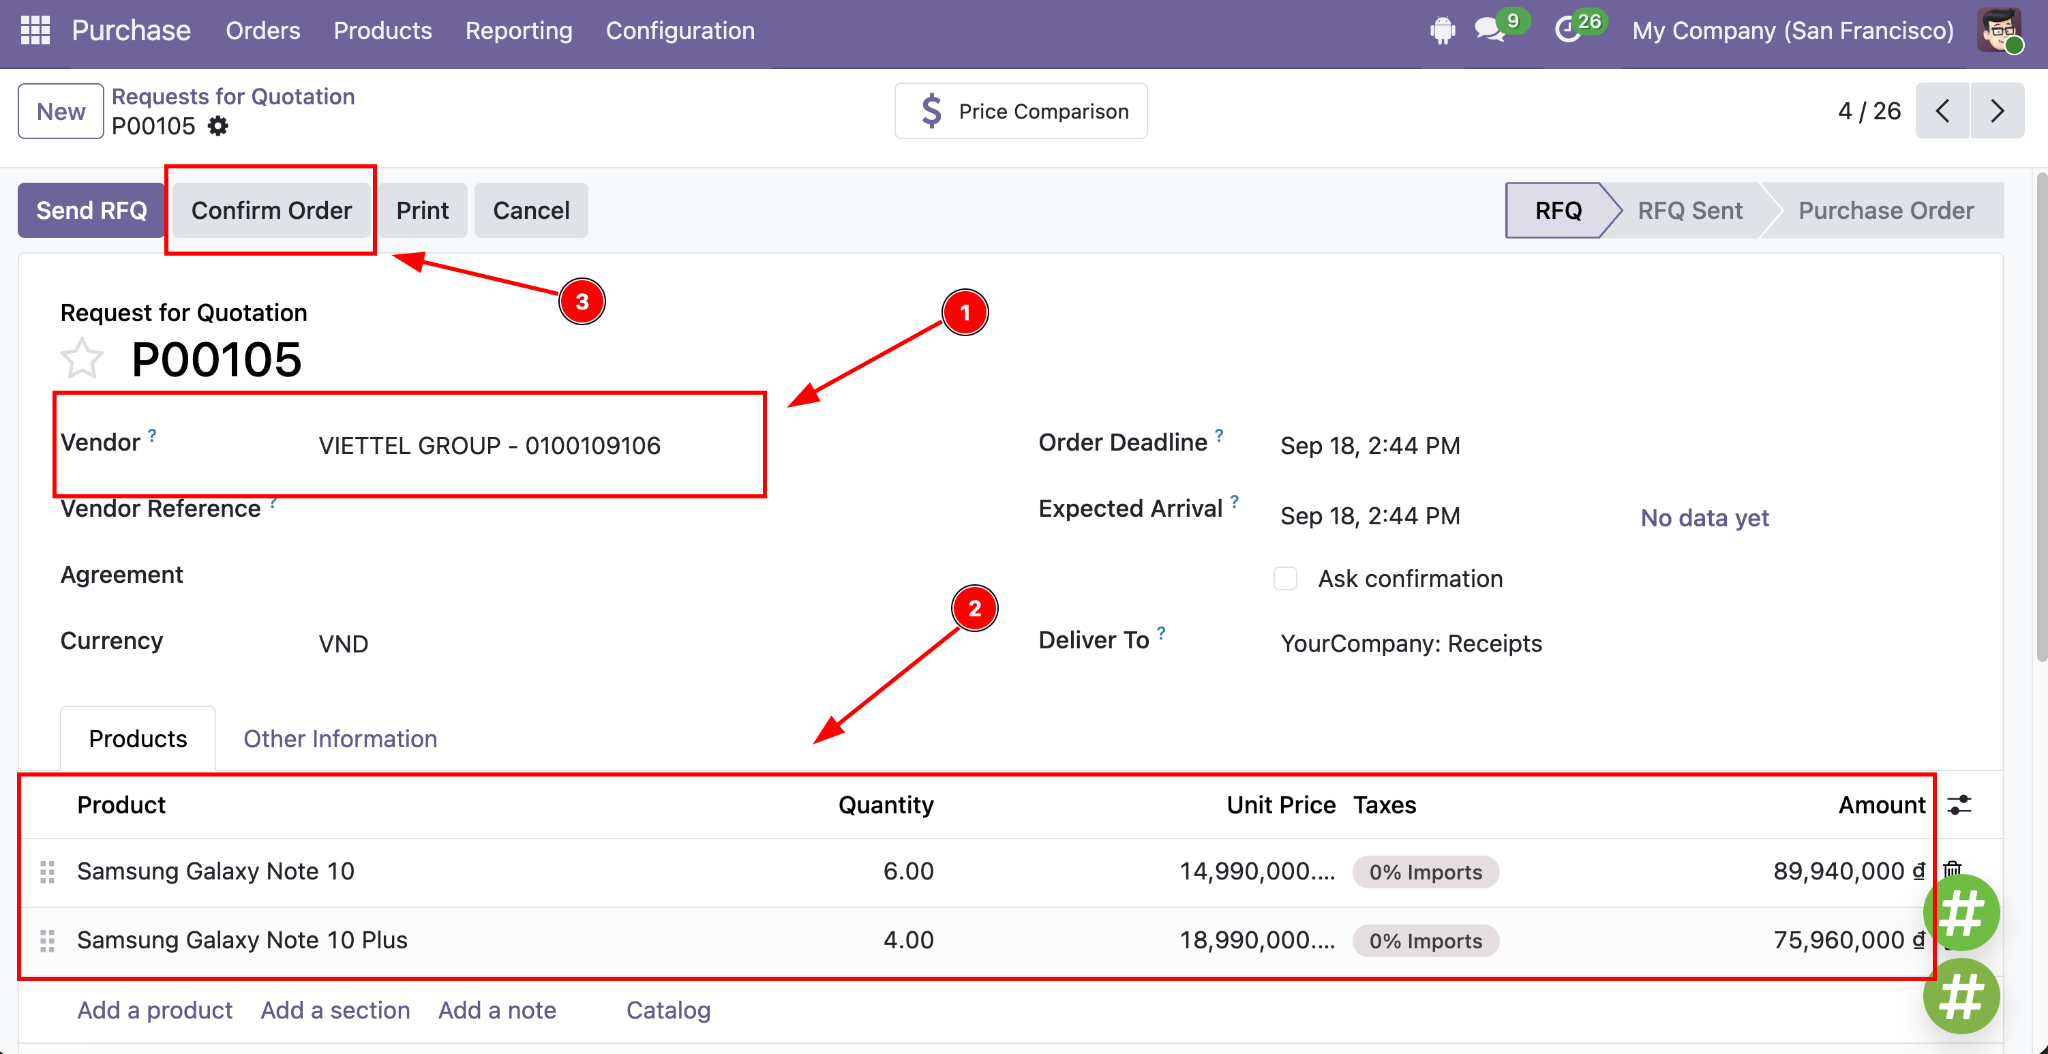
Create or open a Purchase Order in Odoo.
Enter the required information, including:
Then click Confirm Order to confirm the Purchase Order.
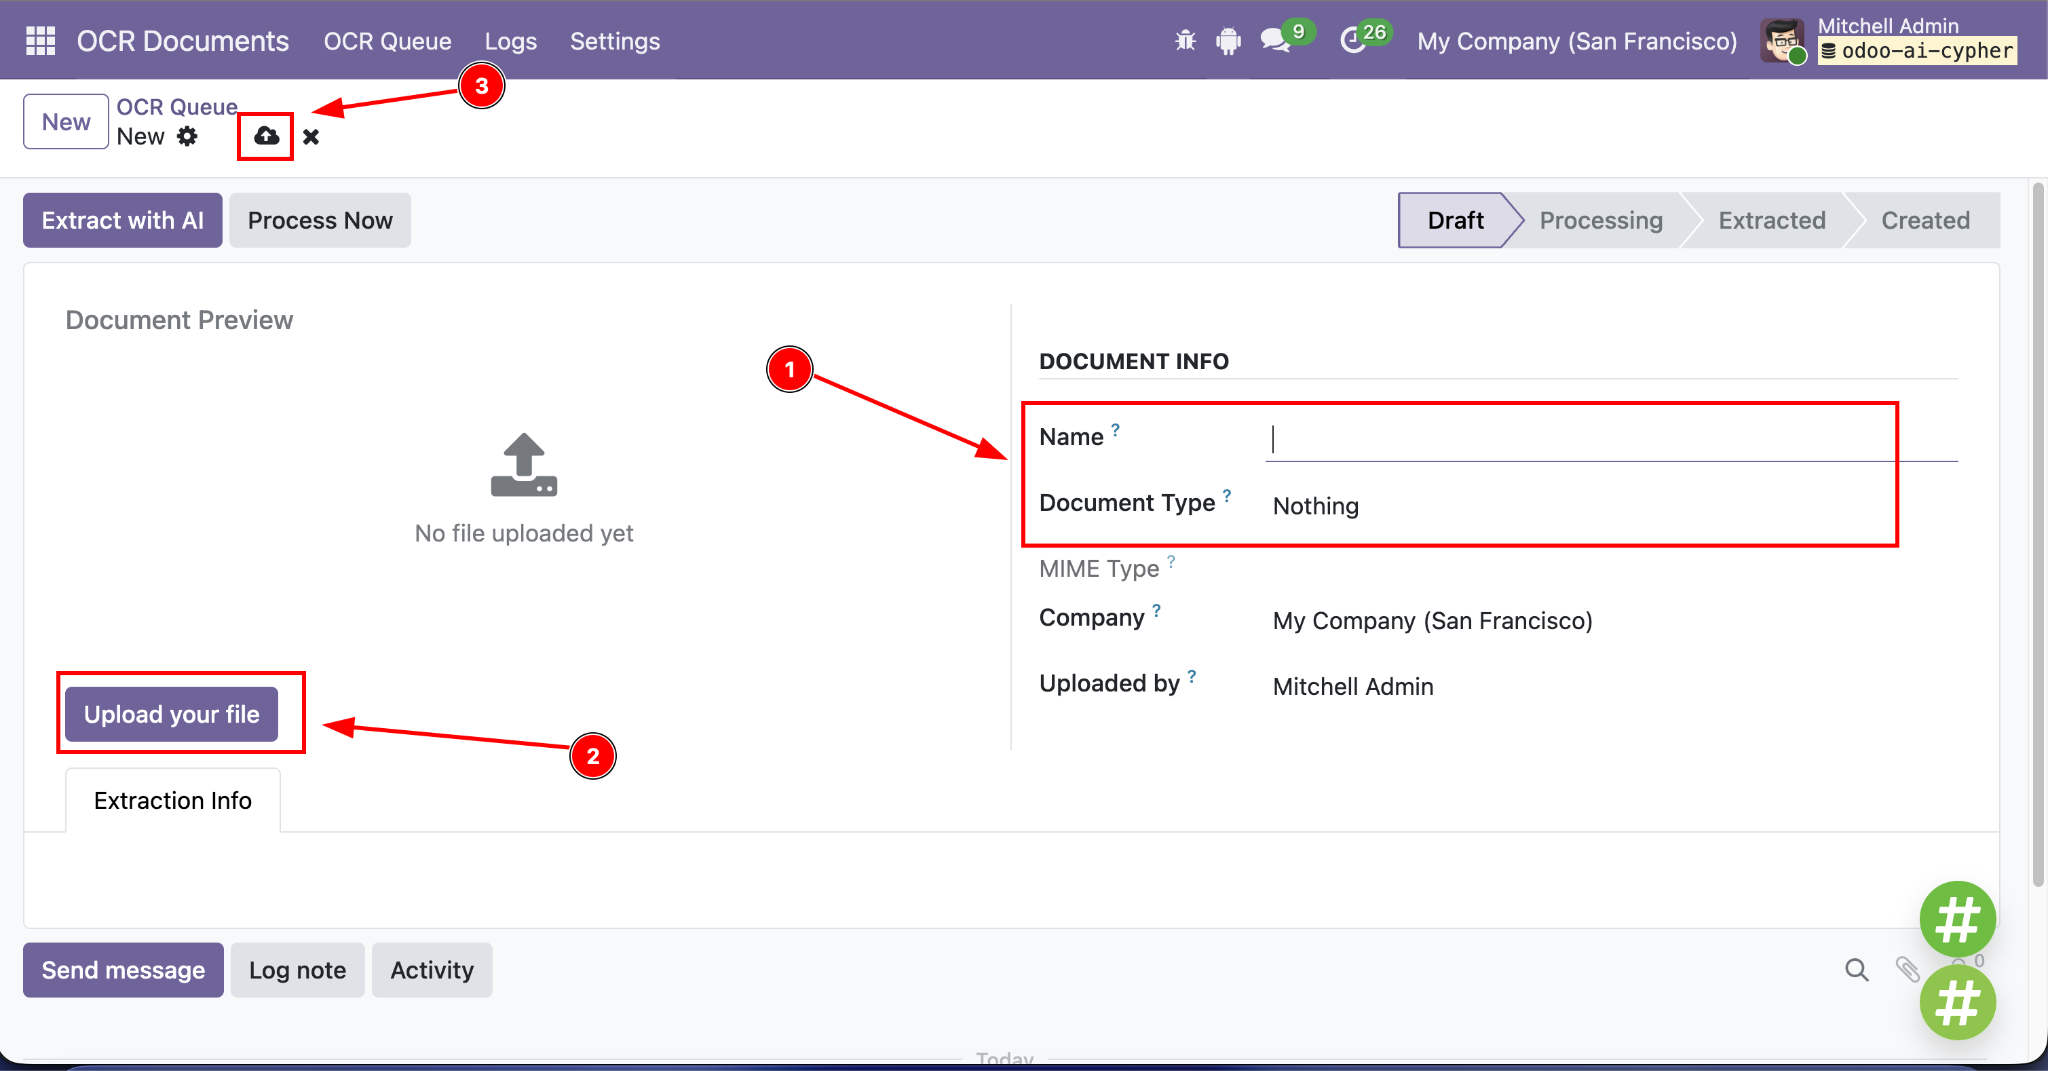
Create a new OCR document and enter:
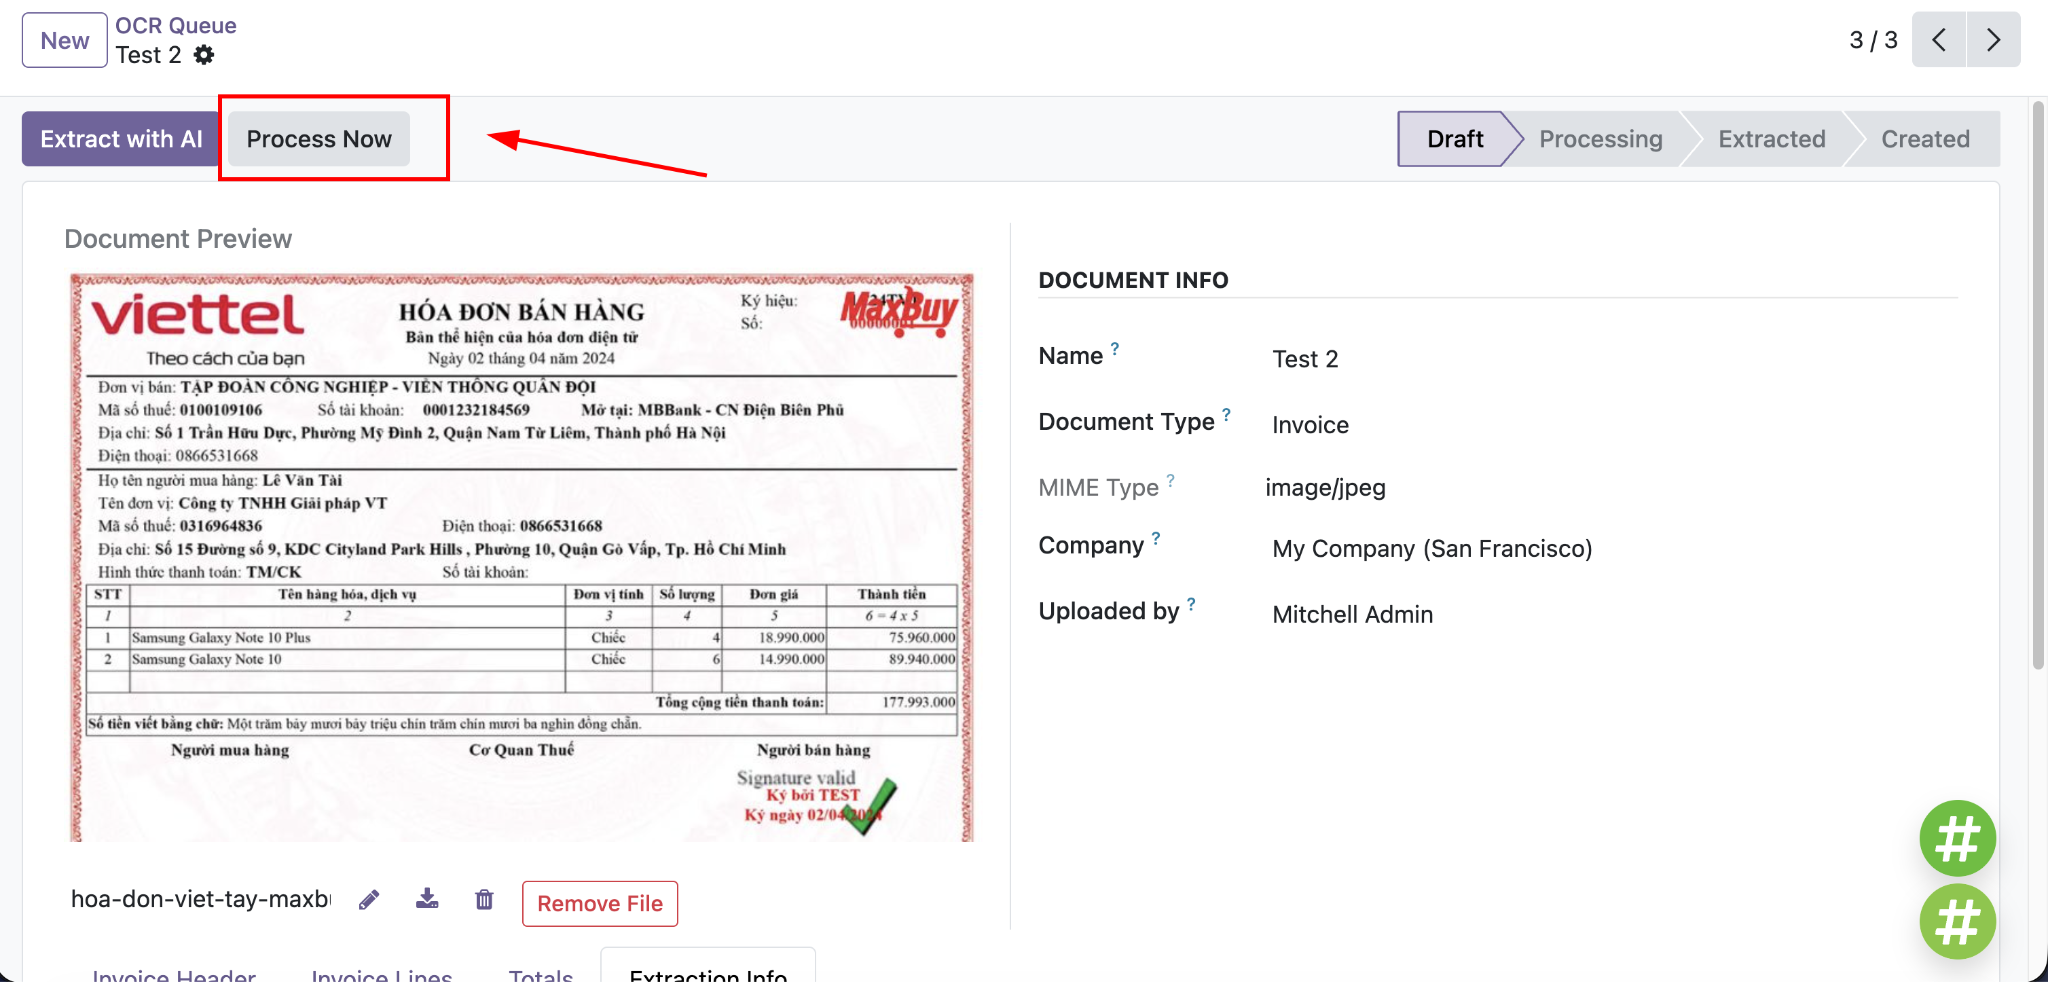
Upload the invoice file, then click Process Now to run OCR.
After OCR processing is complete, open the PO Matching tab. The system compares the extracted invoice information with existing Purchase Orders, including:
Matching Purchase Orders are listed under Suggested POs.
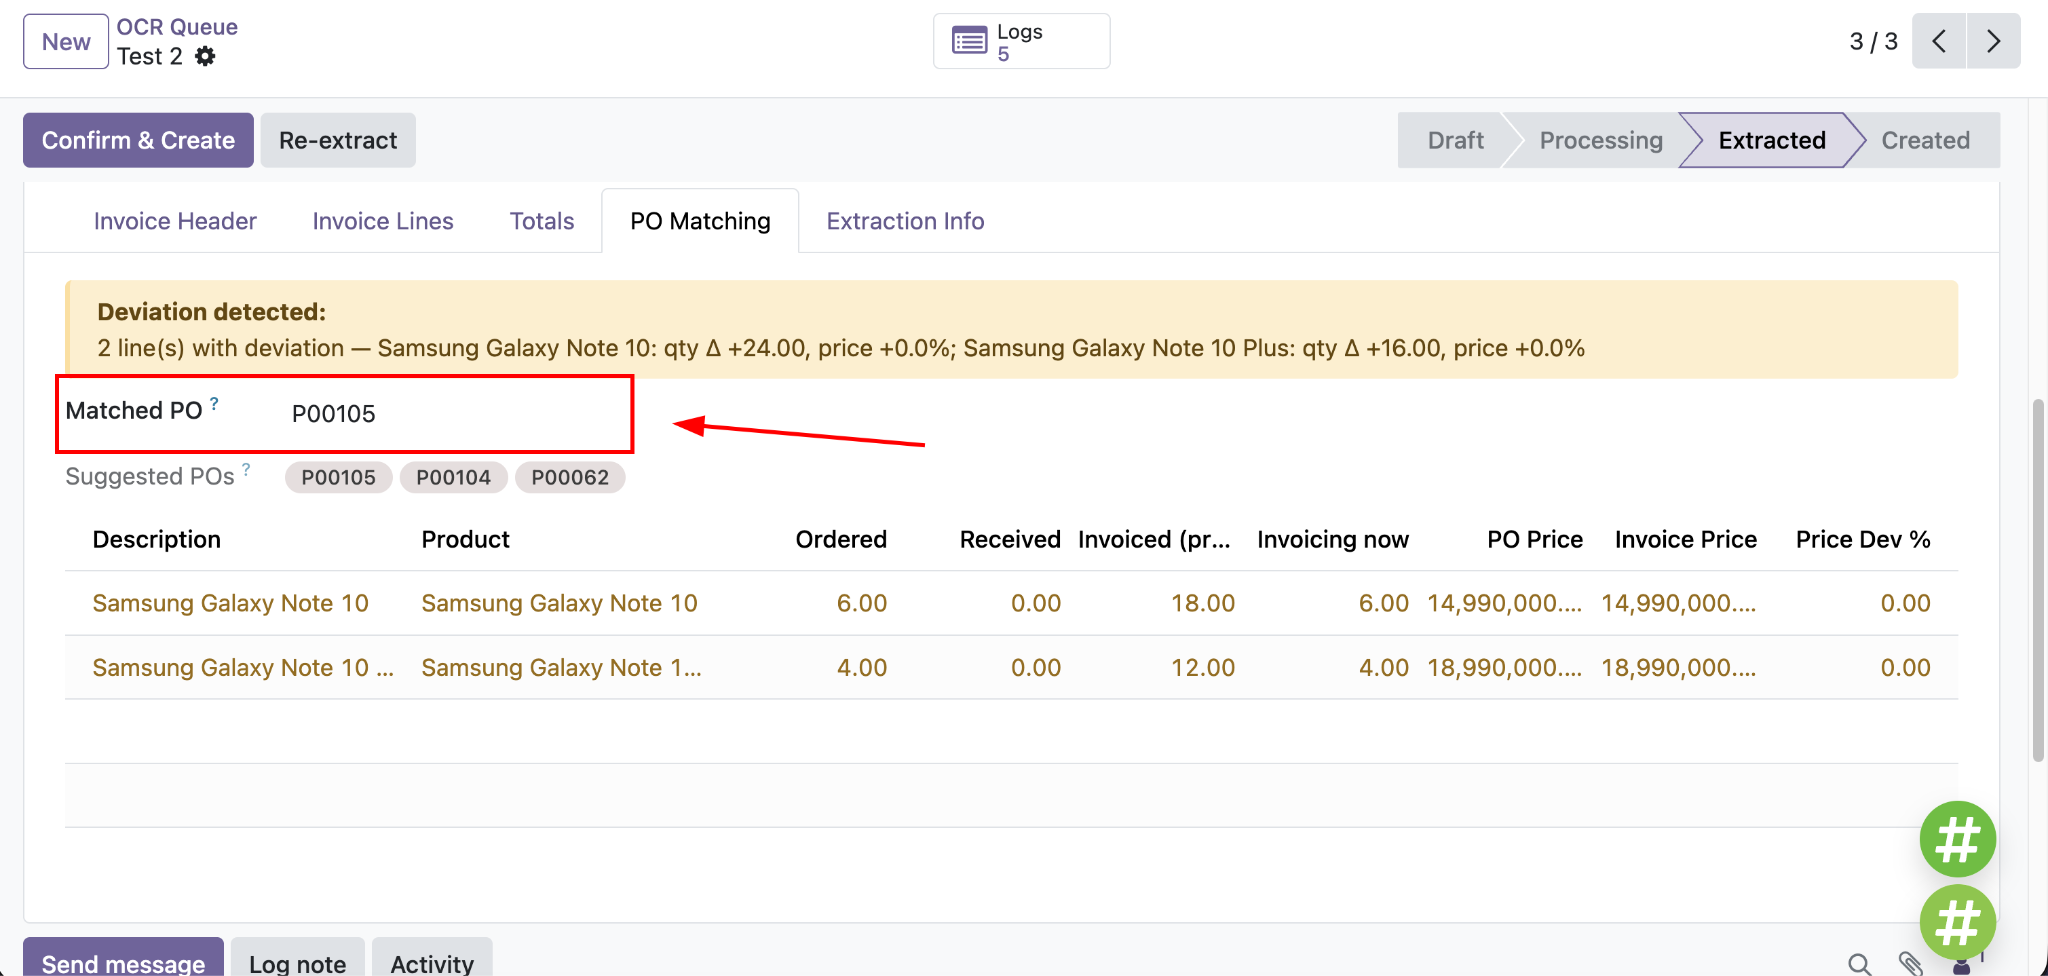
The Matched PO field shows the Purchase Order selected for the invoice.
The system may automatically select the most suitable Purchase Order, or you can choose the correct one from the suggested list.
Before continuing, review the suggested matches and make sure the Matched PO corresponds to the invoice.
Once the correct Purchase Order has been selected, click Confirm & Create.
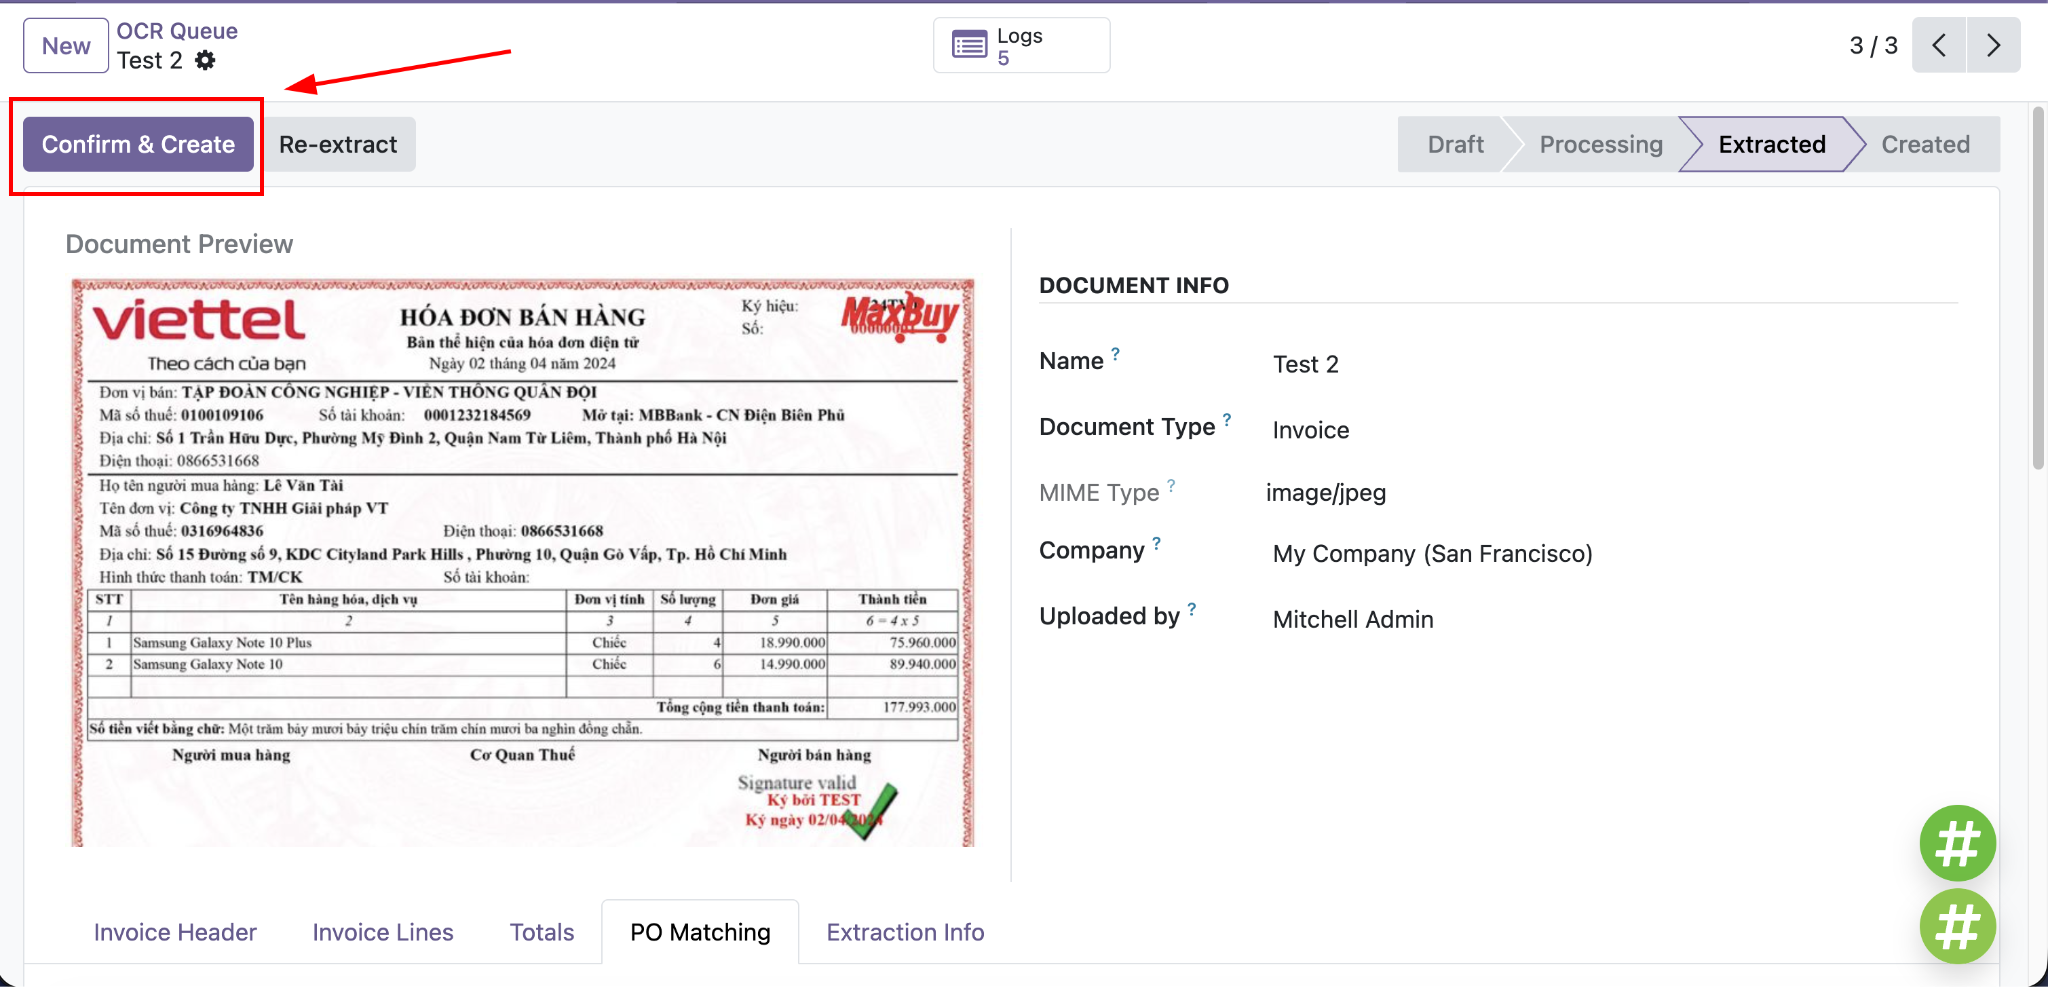
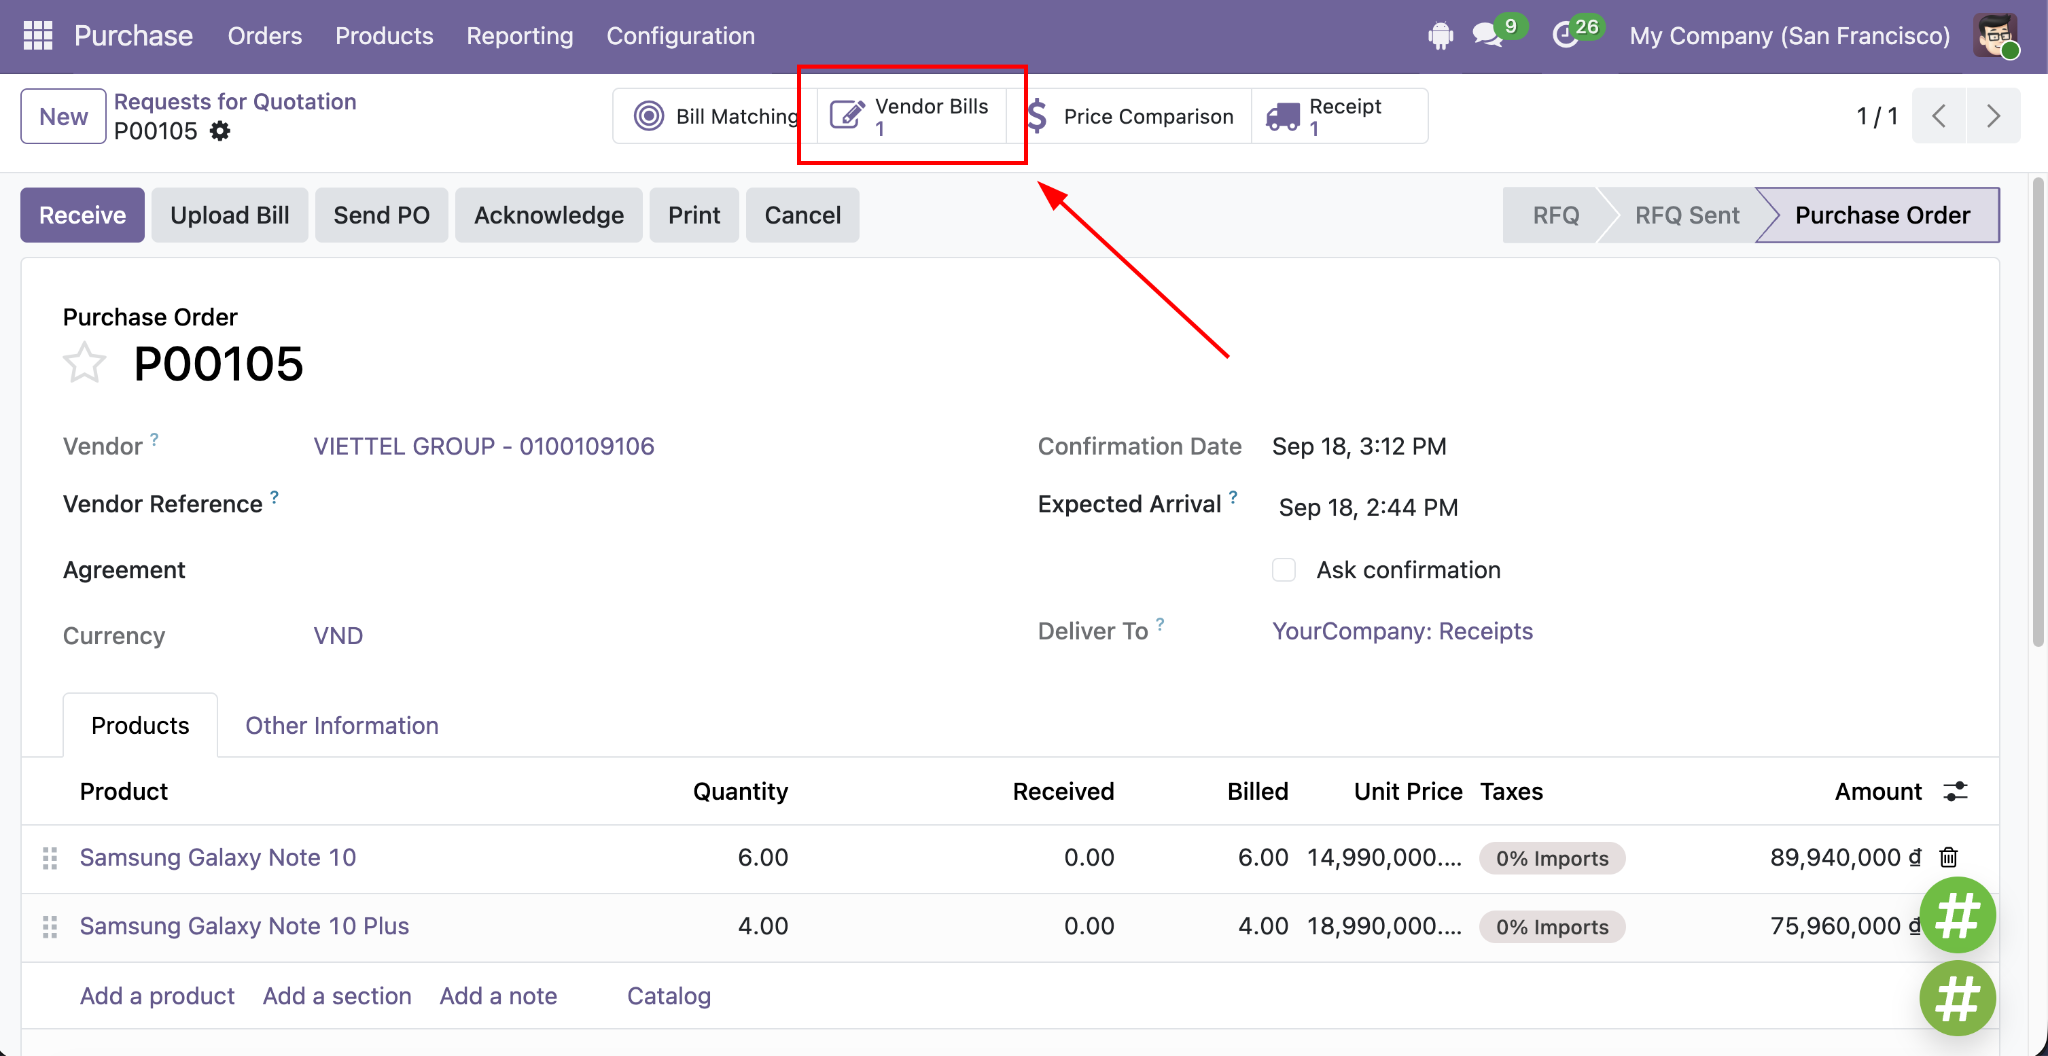
The system creates the Invoice and automatically links it to the selected Matched PO.
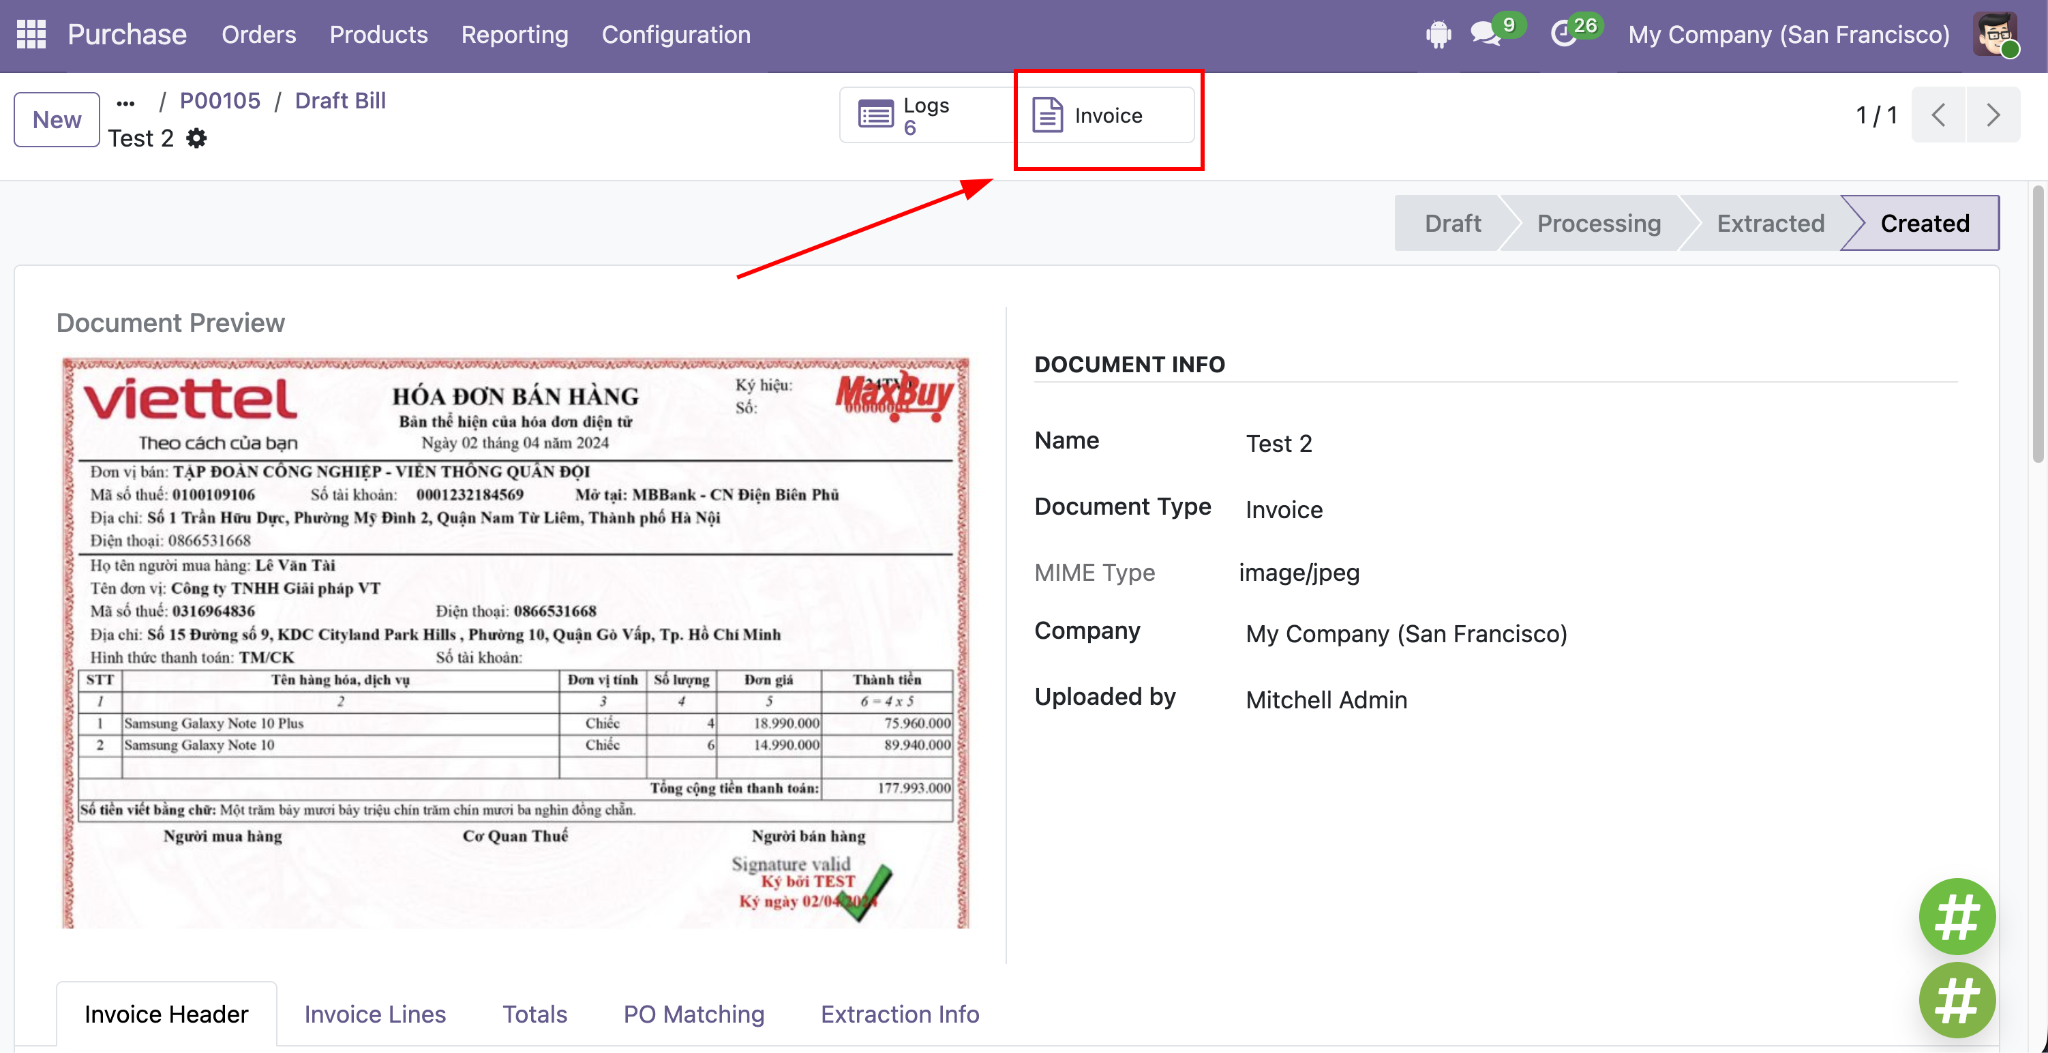
After the Invoice is created, you can open ther side: