Thank you for purchasing our extension. If you have any questions that are beyond the scope of this document, please feel free to contact us via [email protected]
By: Magenest | Support Portal:
Odoo MCP Server connects AI applications such as Claude and Codex with Odoo through the Model Context Protocol (MCP).
Once connected, AI Agents can work with Odoo data within the permissions granted to them. Administrators can control access at two levels: permissions configured for individual Odoo models and Odoo's existing user access controls. This helps ensure that AI Agents can only read, create, update, or delete data that the connected user is authorized to access.
Before configuring Odoo MCP Server, make sure the following requirements are met:
The original guide contains login credentials for test accounts. These should not be included in a public website version of the user guide.
From any screen, users can switch between the available views by clicking the corresponding view icon in the upper-right corner (1).
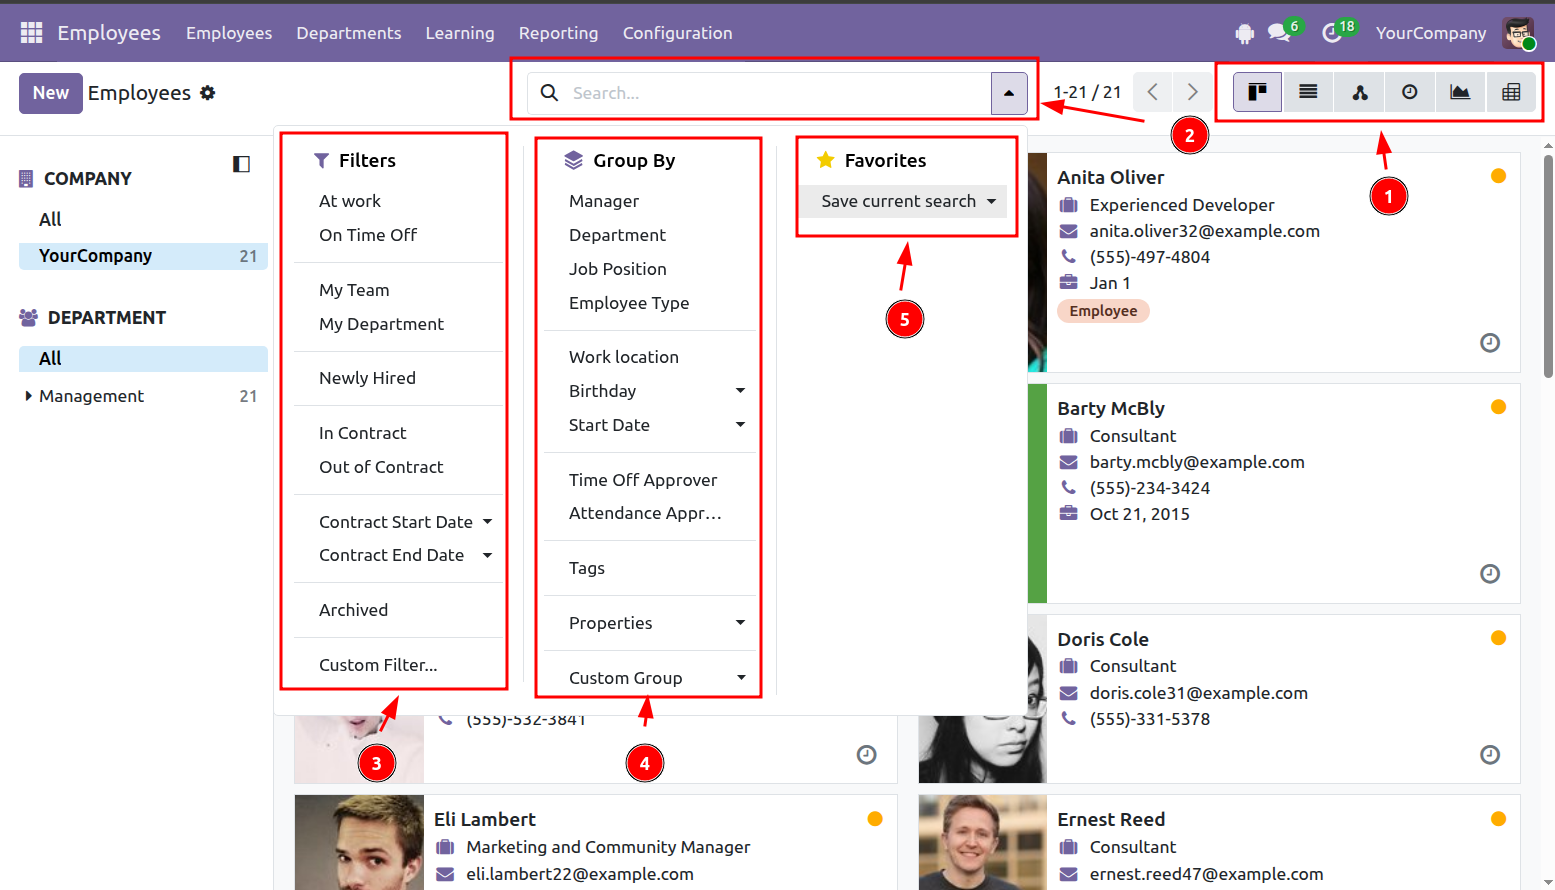
To apply filters or group records, click the search bar (2) and select the options you need. You can use built-in filters and groups or create your own. Multiple grouping levels can also be applied.
The current filter can be saved to Favorites (5) for later use.
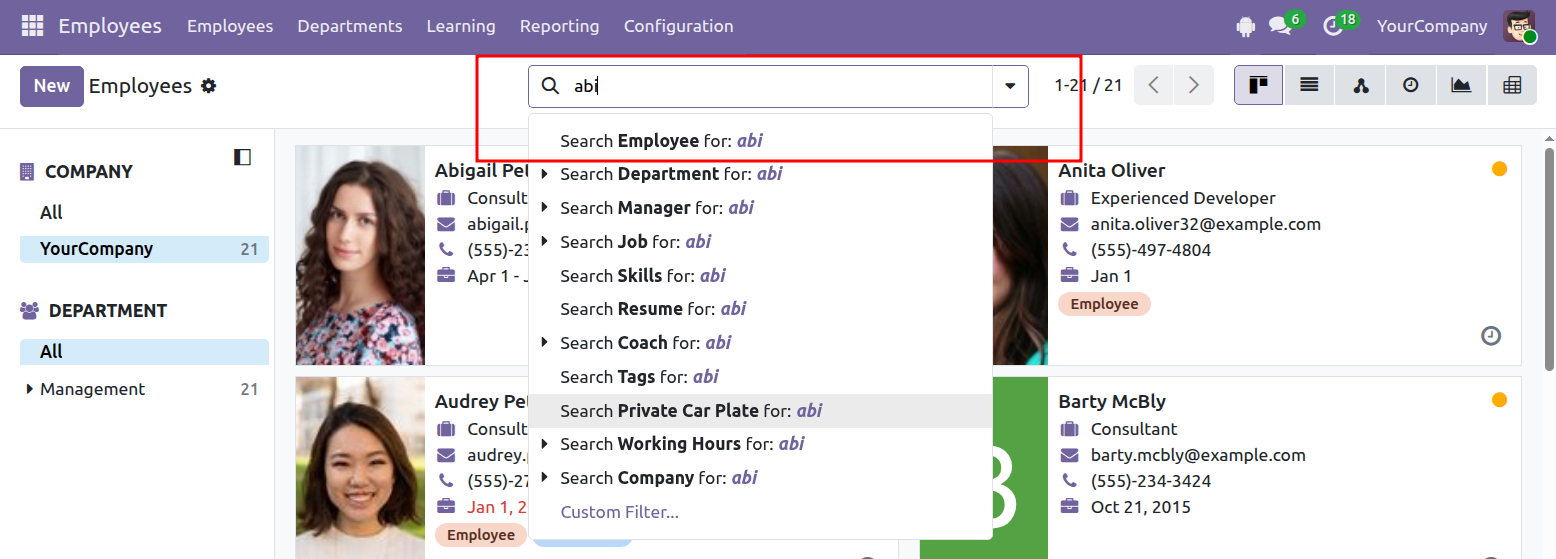
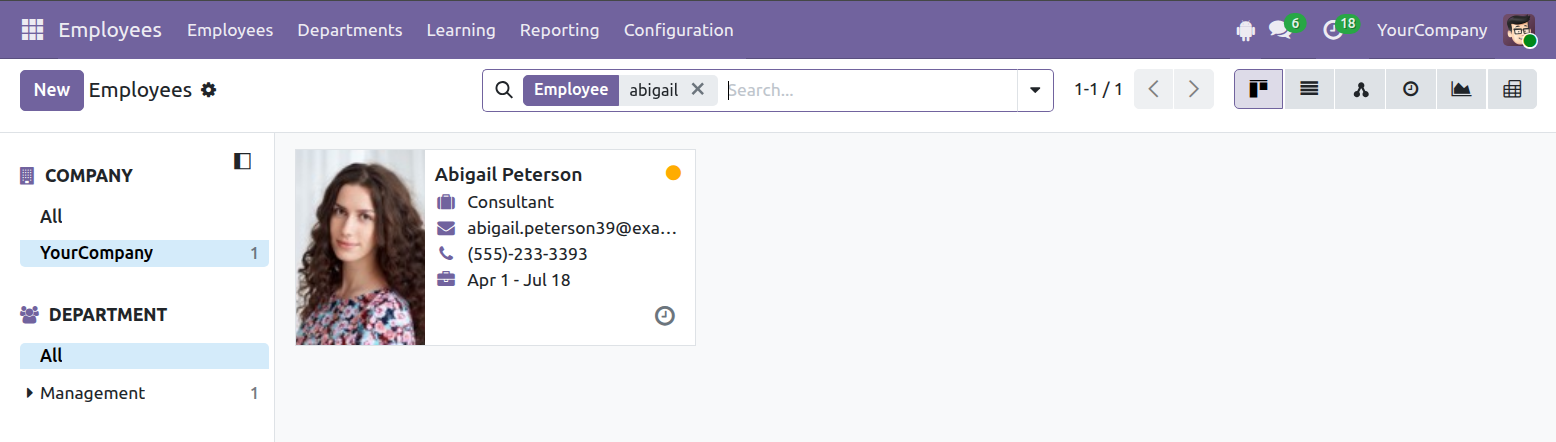
When you enter a keyword in the search bar, Odoo displays the fields that can be searched. Select the appropriate field to filter records using the keyword you entered.
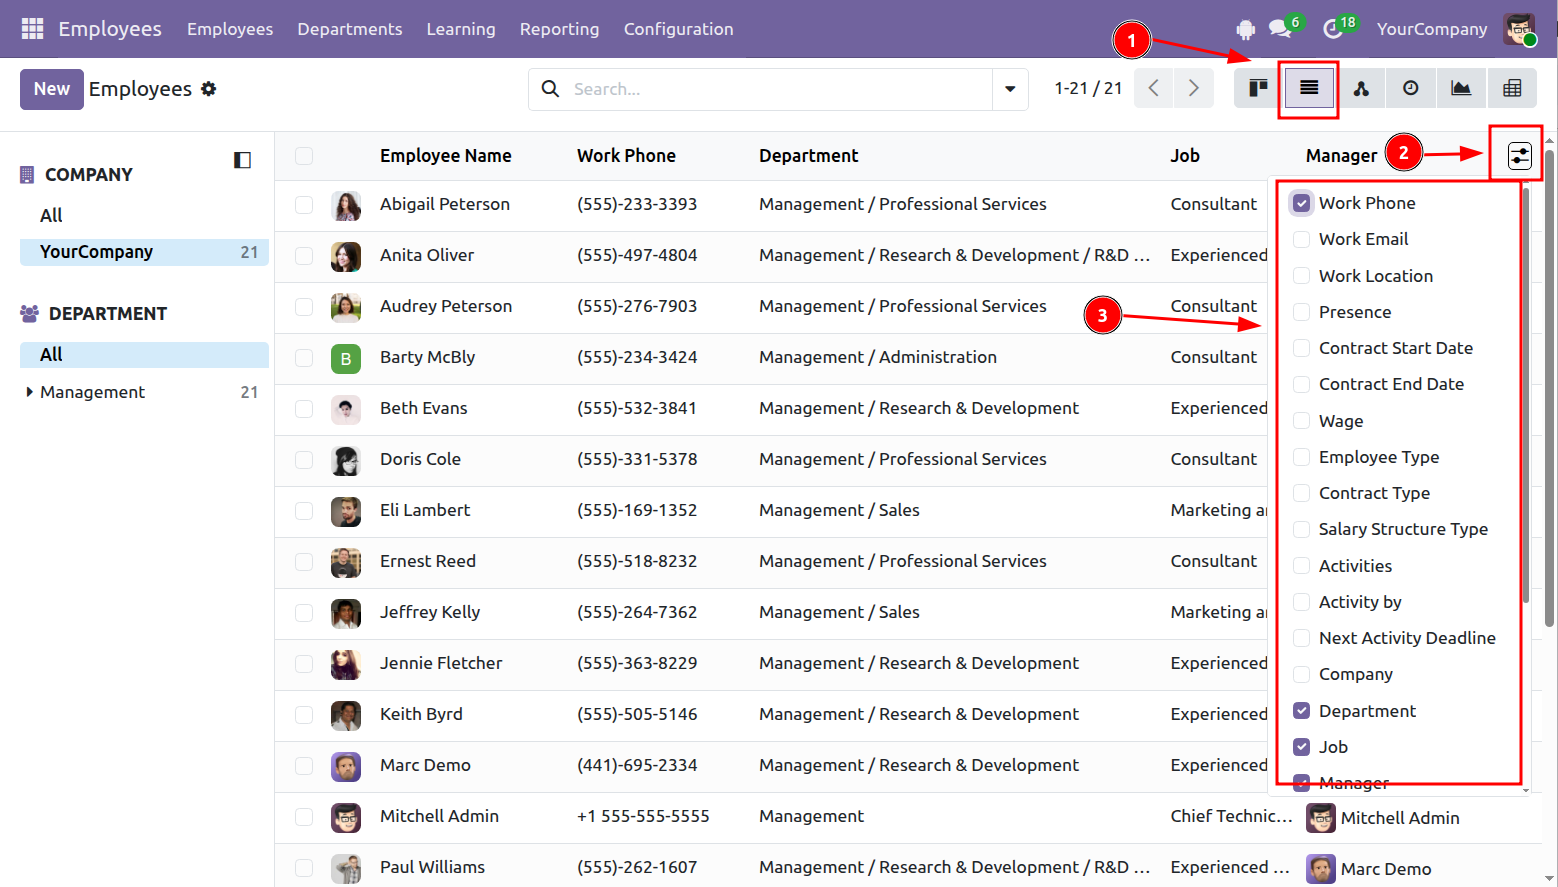
In List View (1), click the column settings icon (2) to choose which columns are shown or hidden.
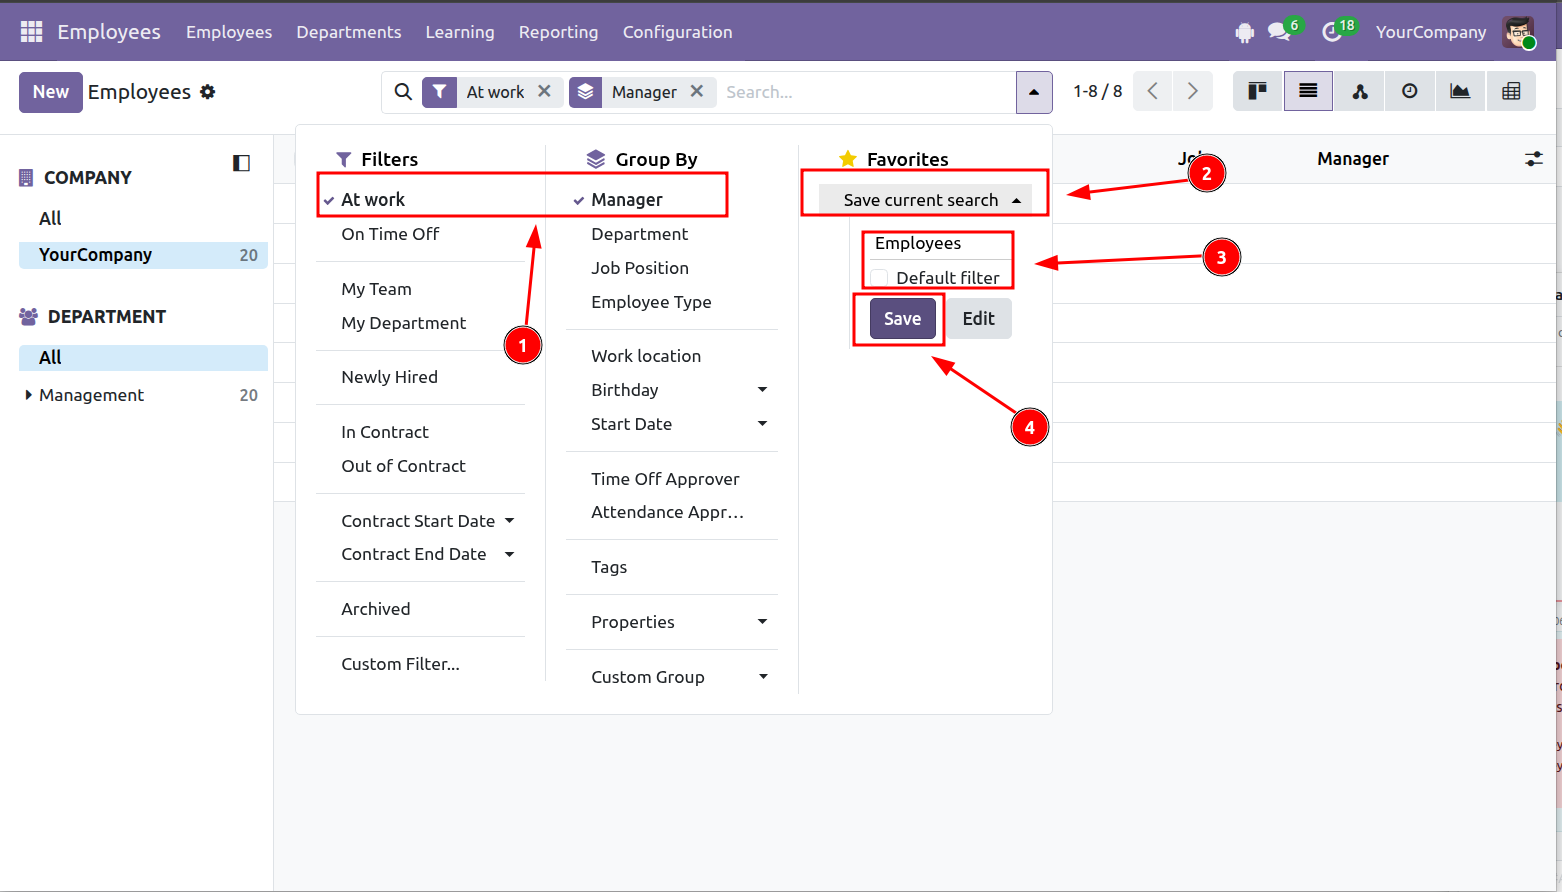
 Step 1: Apply the filters or grouping options you want (1). You can use existing options or create custom ones.
Step 2: Select Save current search (2).
Step 3: Enter a name for the saved filter.
Step 4: Click Save (4).
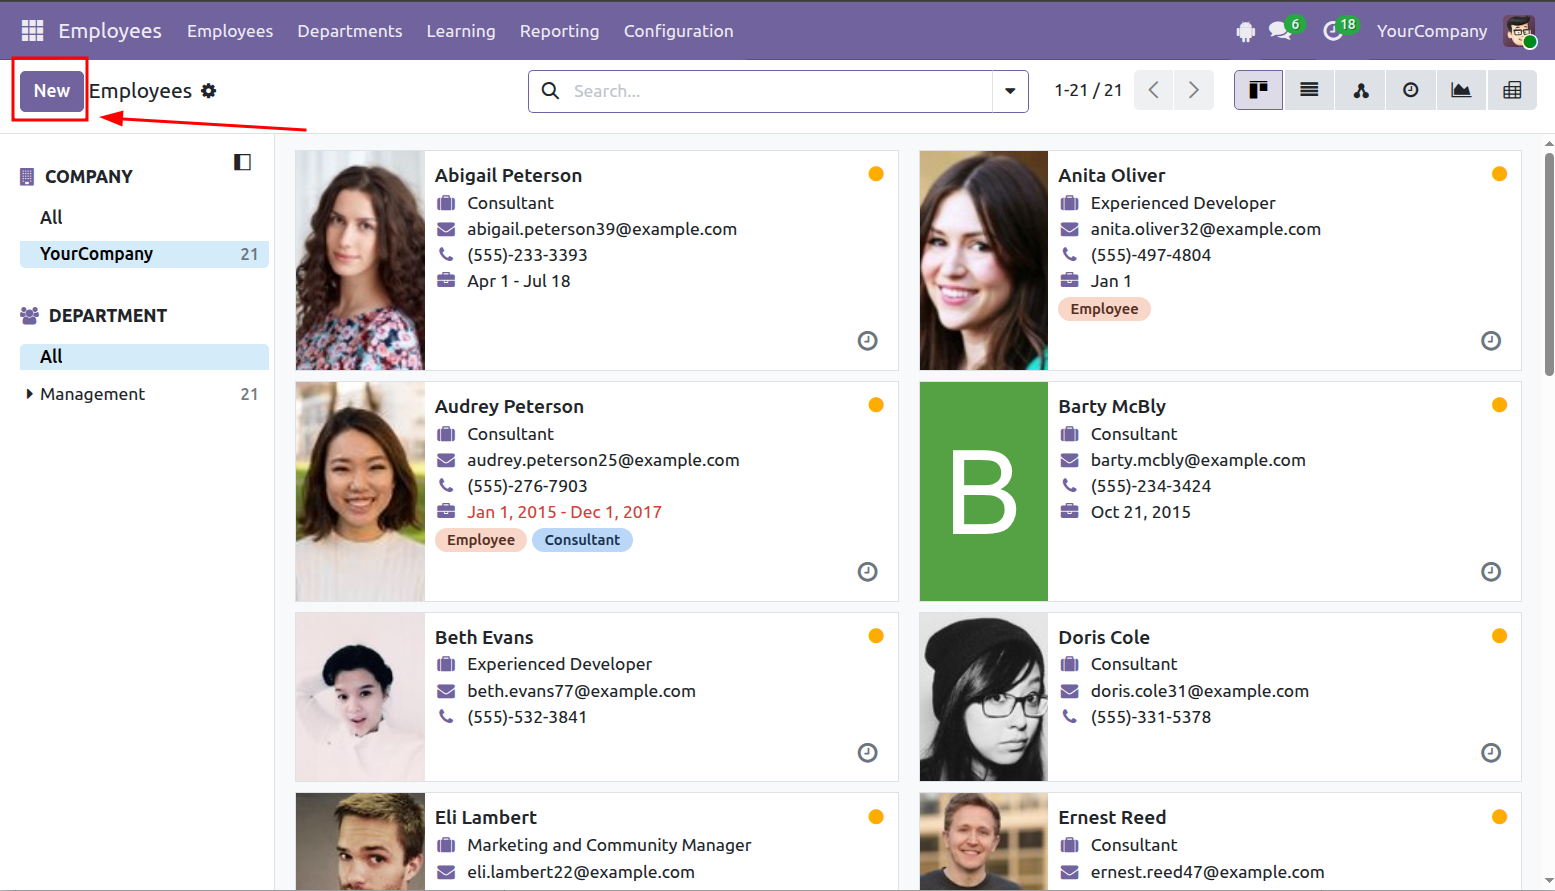
Step 1: Open the section where you want to create a new record, for example Employees, then click New.
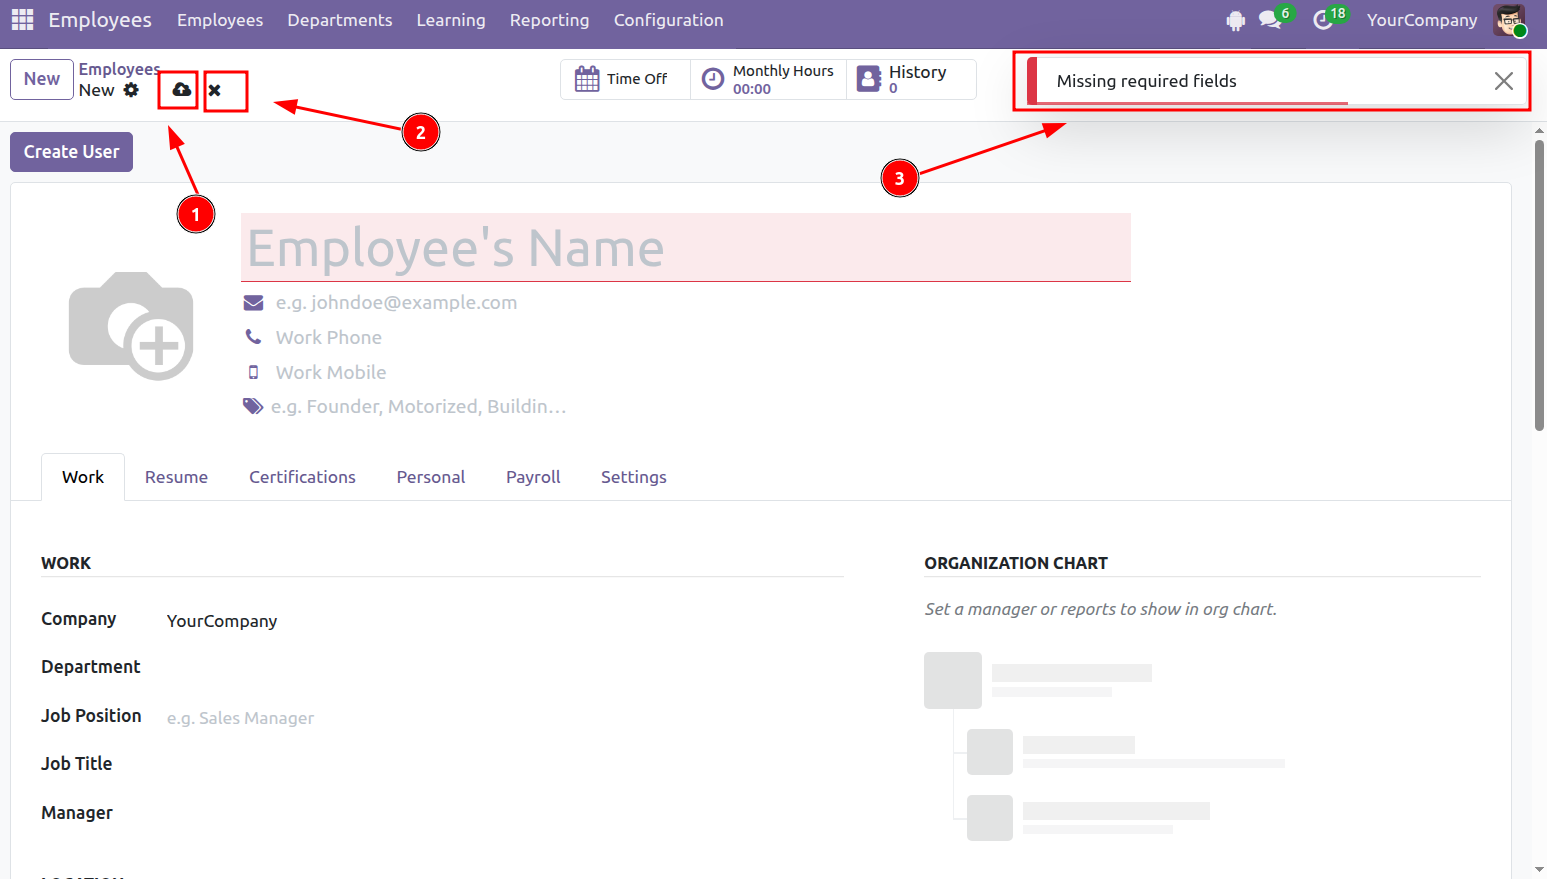
Step 2: Enter the required information and click Save (1).
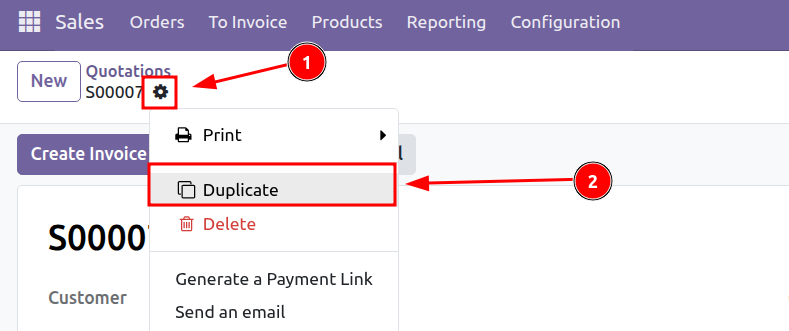
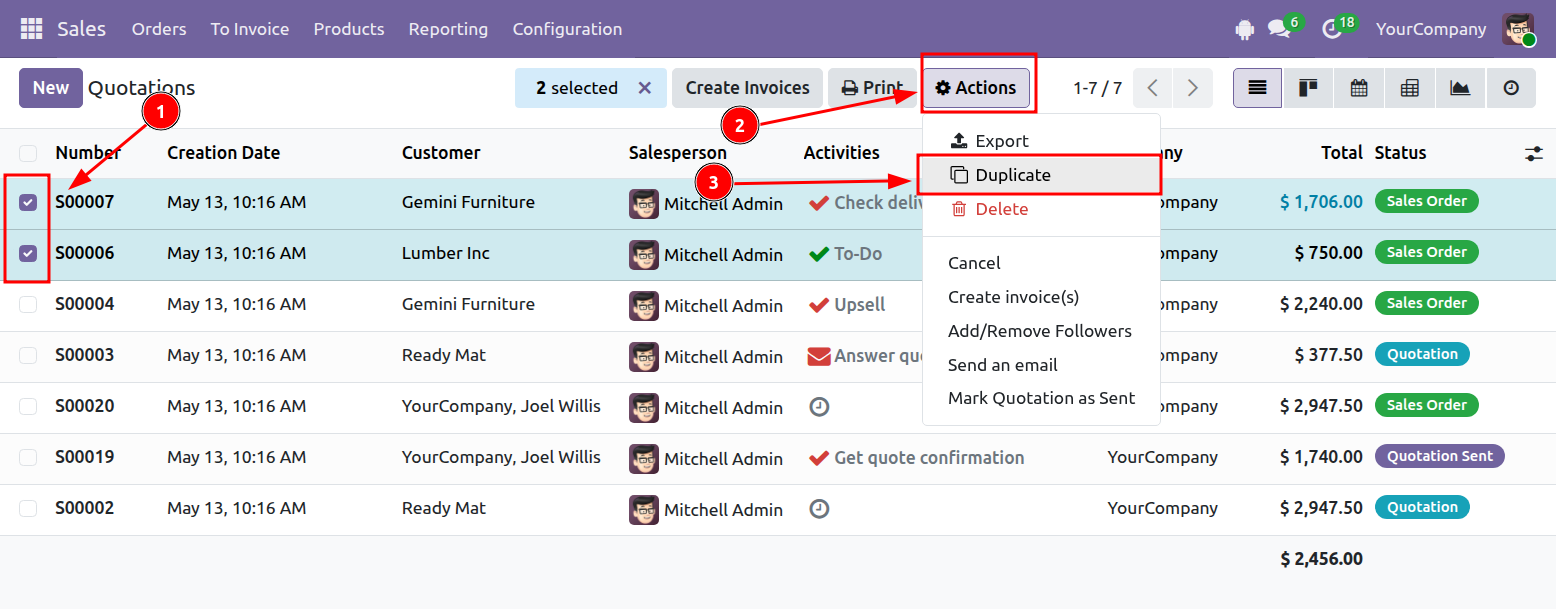
You can also create a new record by duplicating an existing one.
From a record form:
Alternatively, from List View:
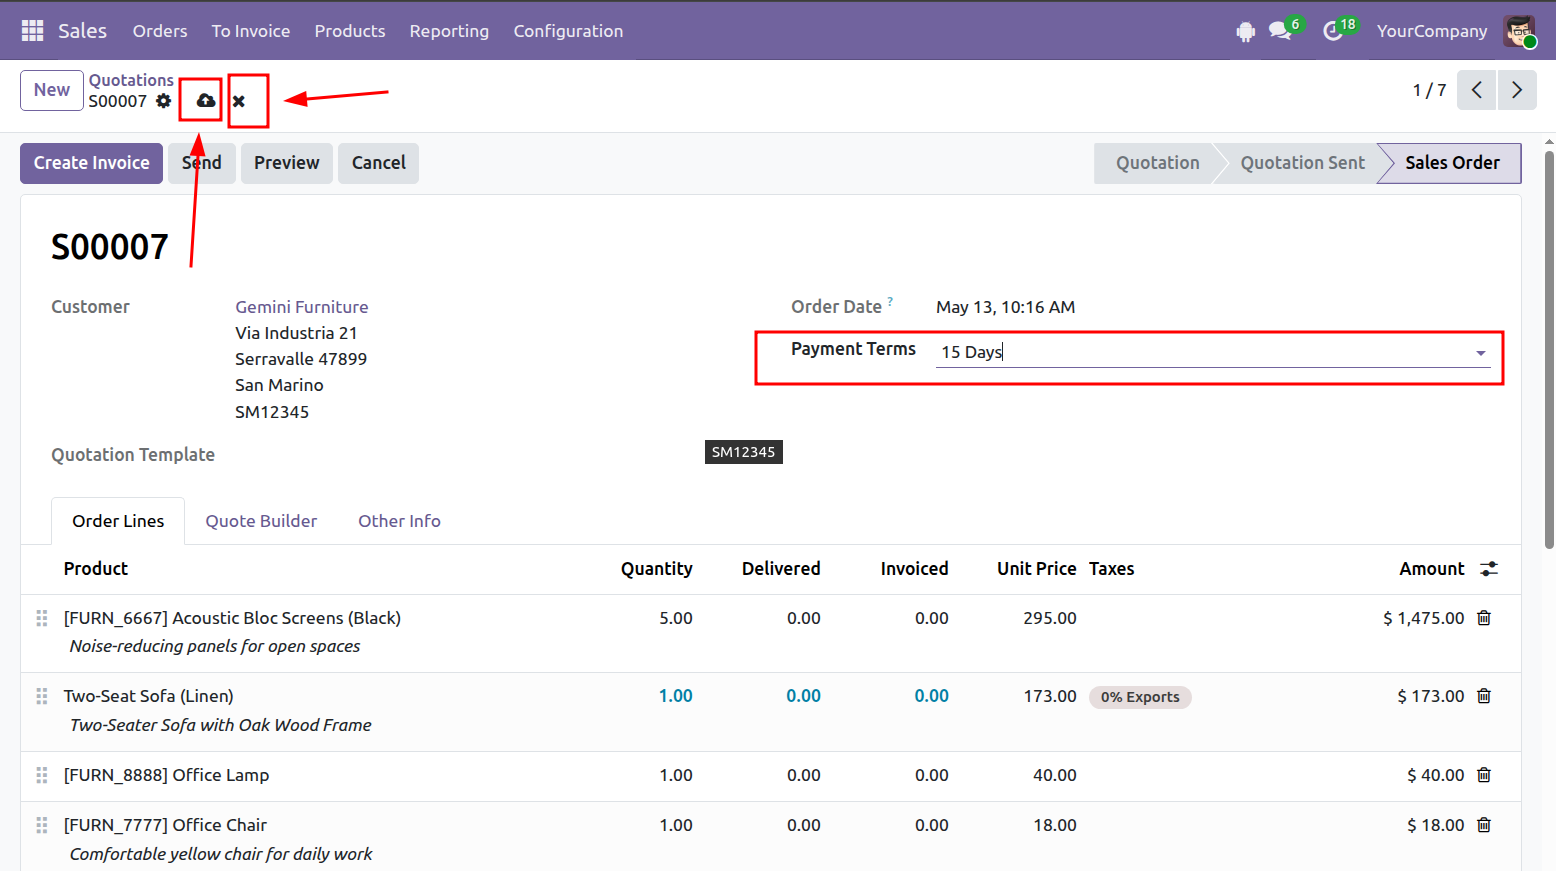
Open the record you want to update and make the necessary changes.
Click Save to apply the changes, or Discard to cancel them.
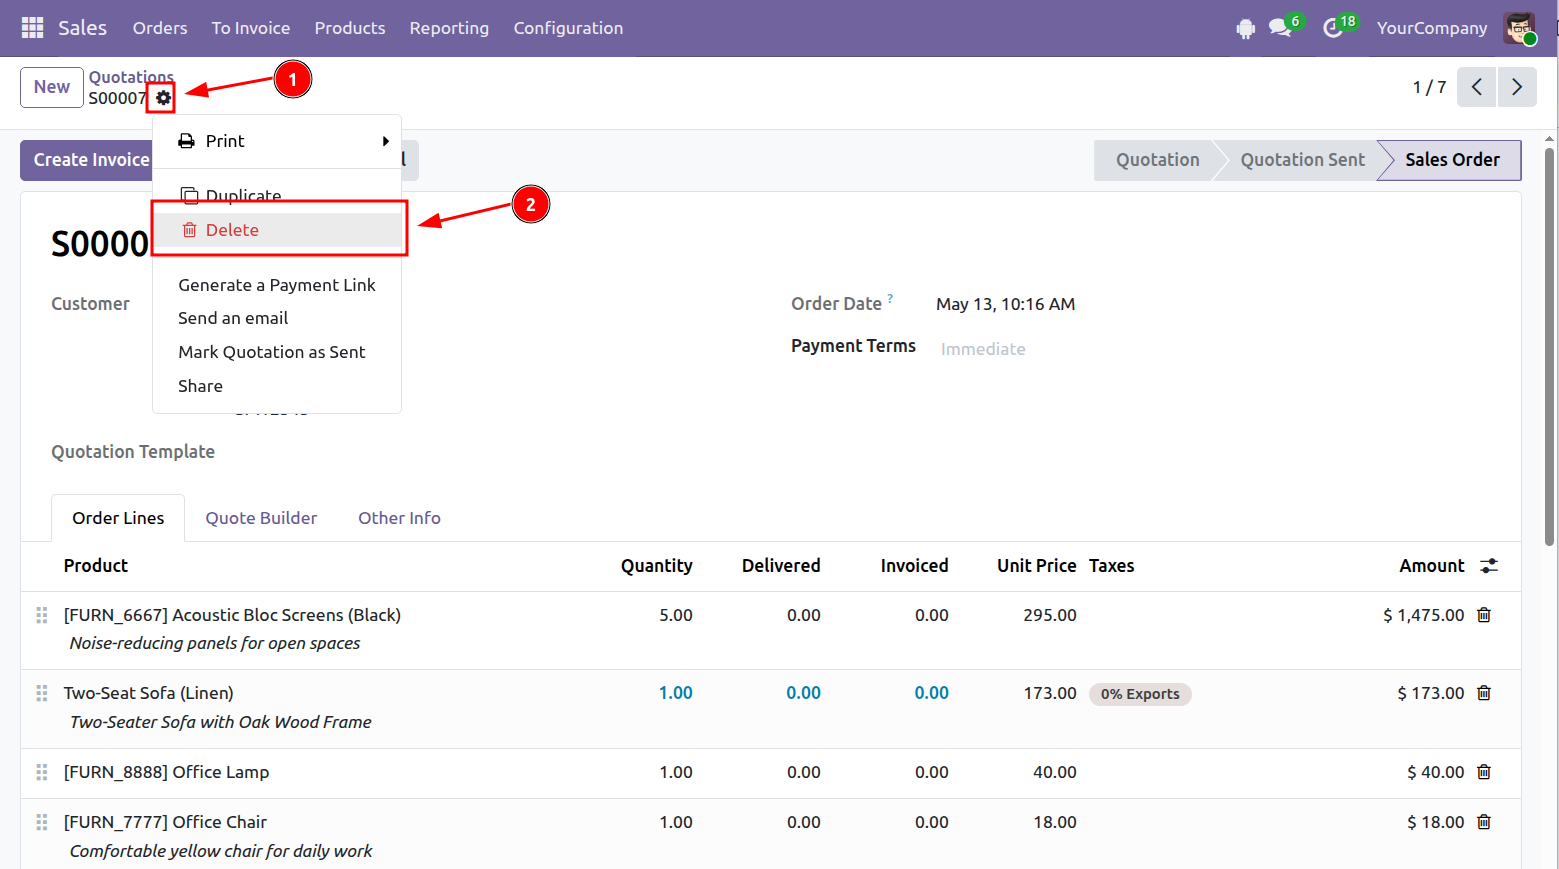
There are two ways to delete records.
Open the record, click the gear icon, then select Delete.
Select the records you want to delete, then choose: Actions > Delete
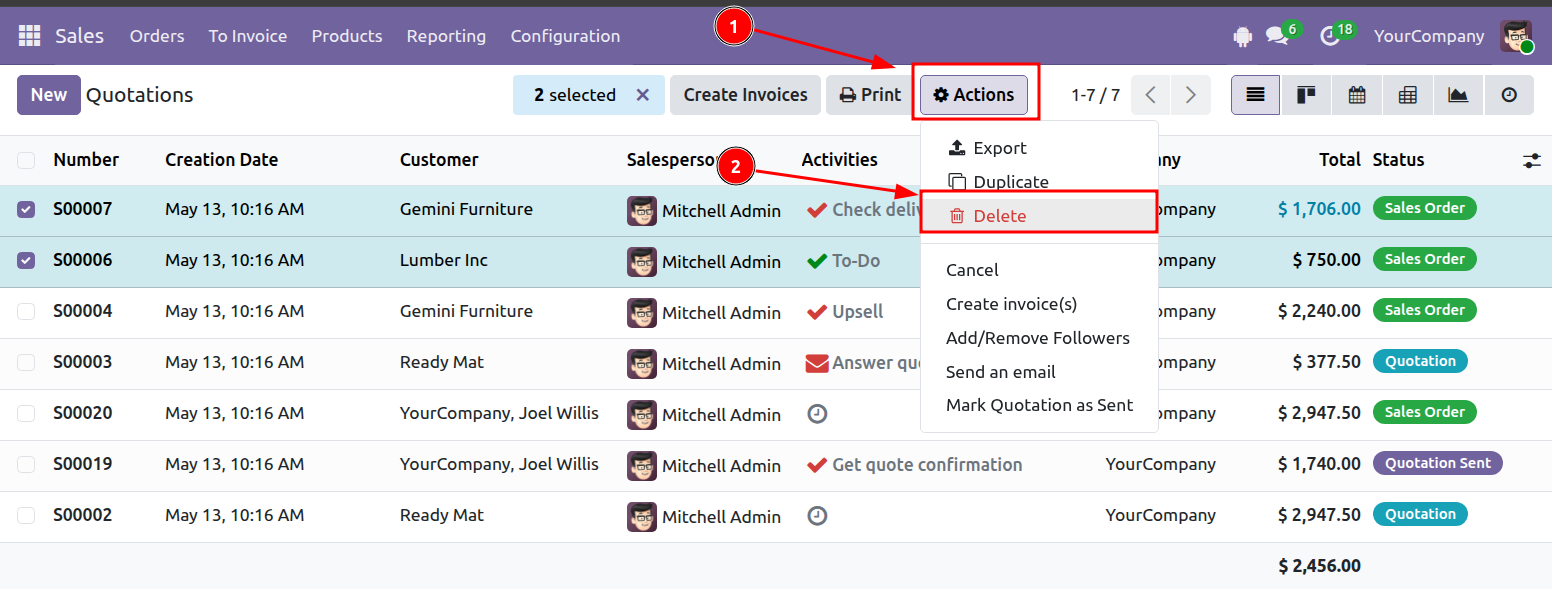
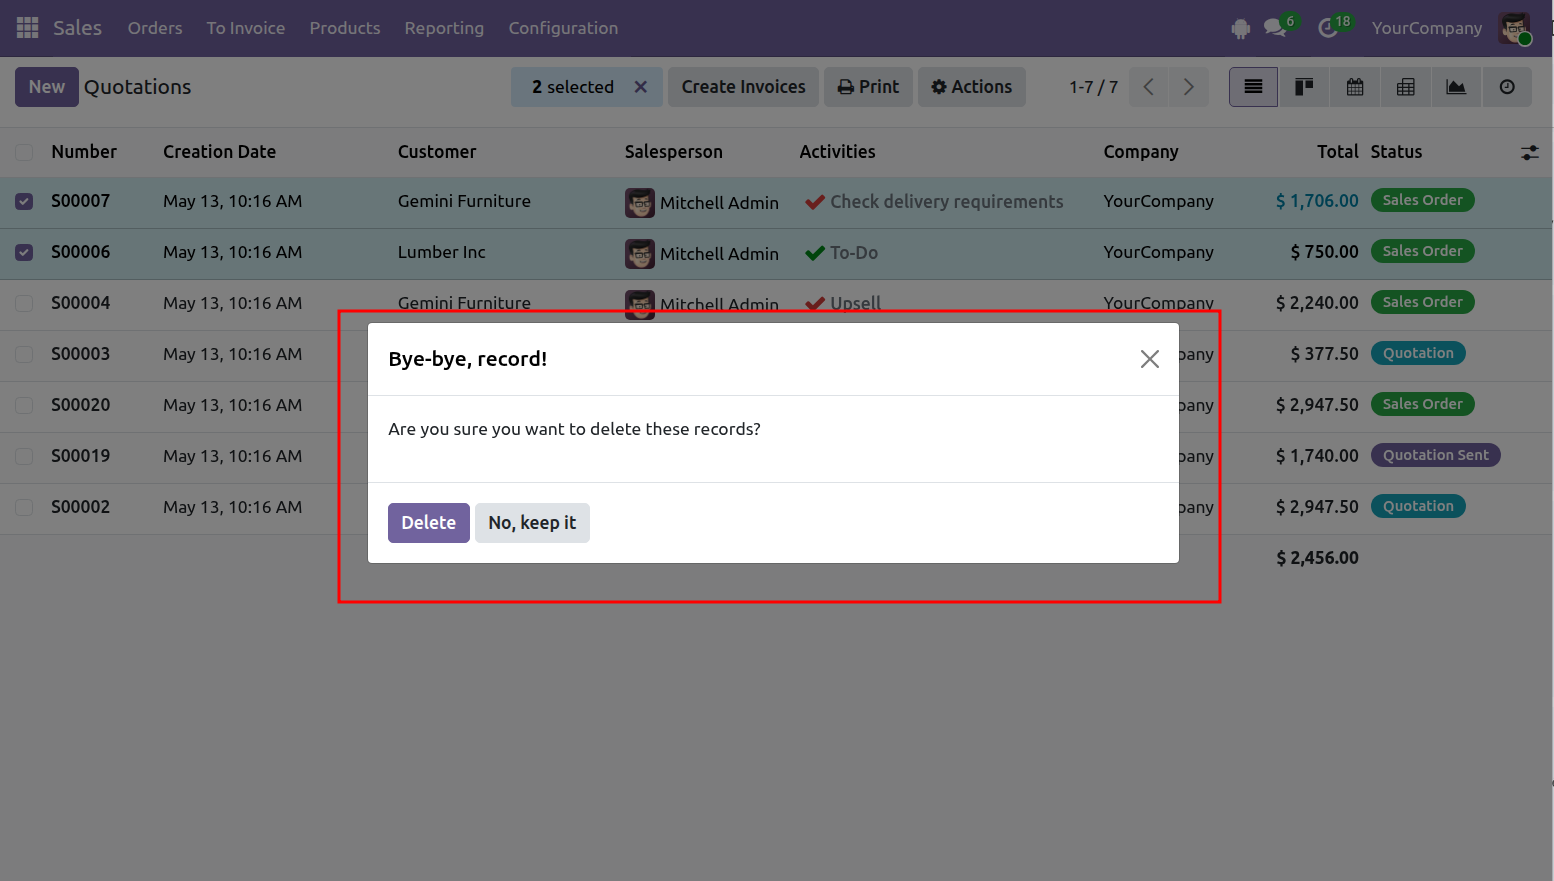
After you click Delete, a confirma
tion dialog appears.
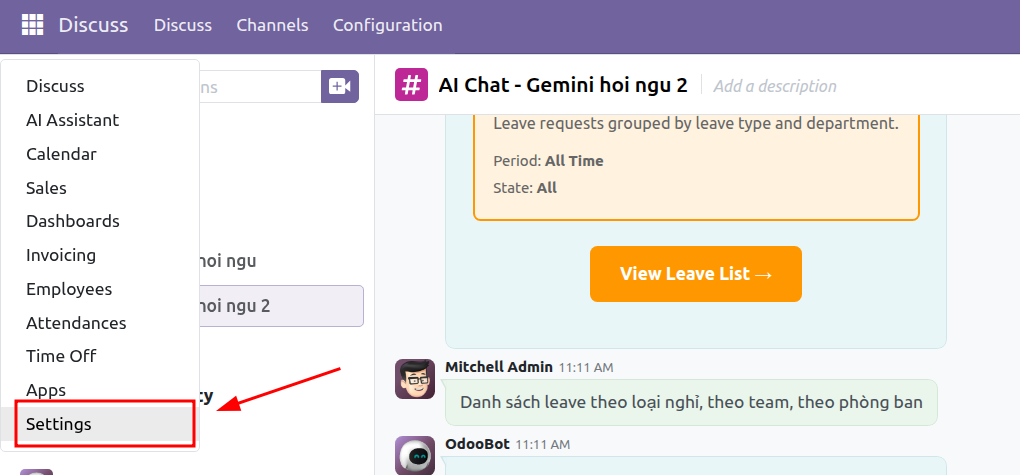
Step 1: Open Settings.
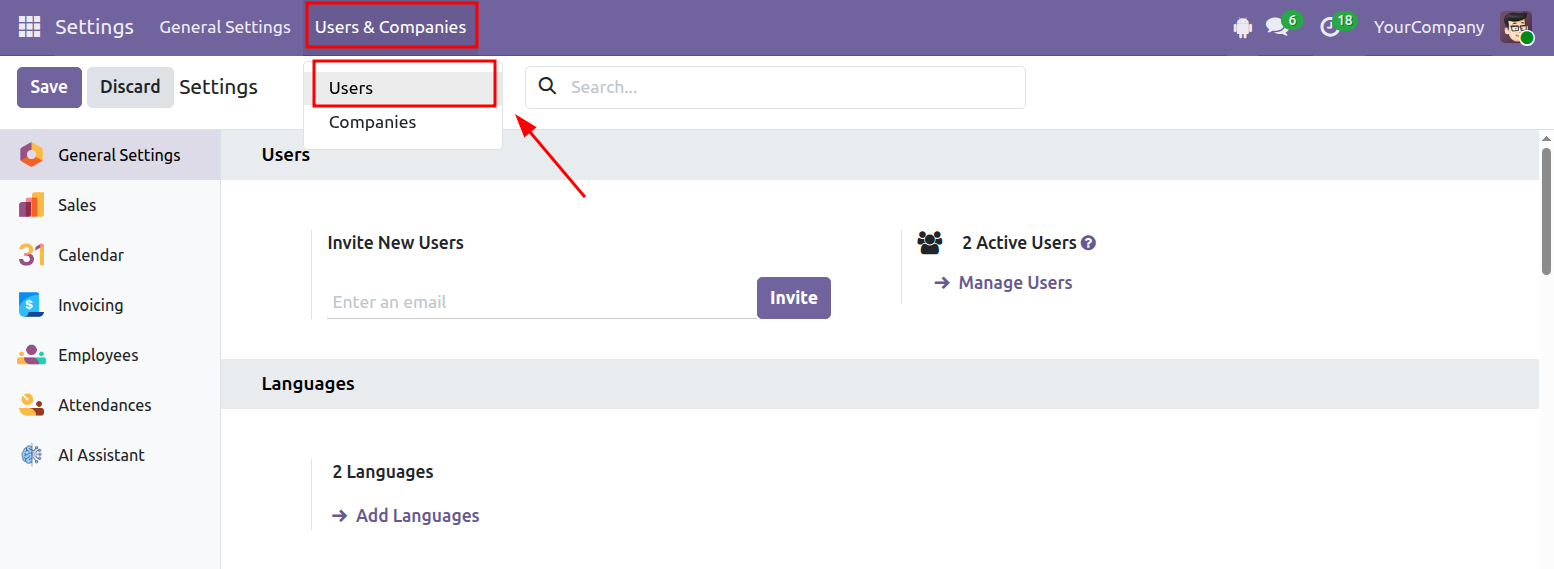
Step 2: Go to: Users & Companies > Users
Step 3: Click New to create a user.
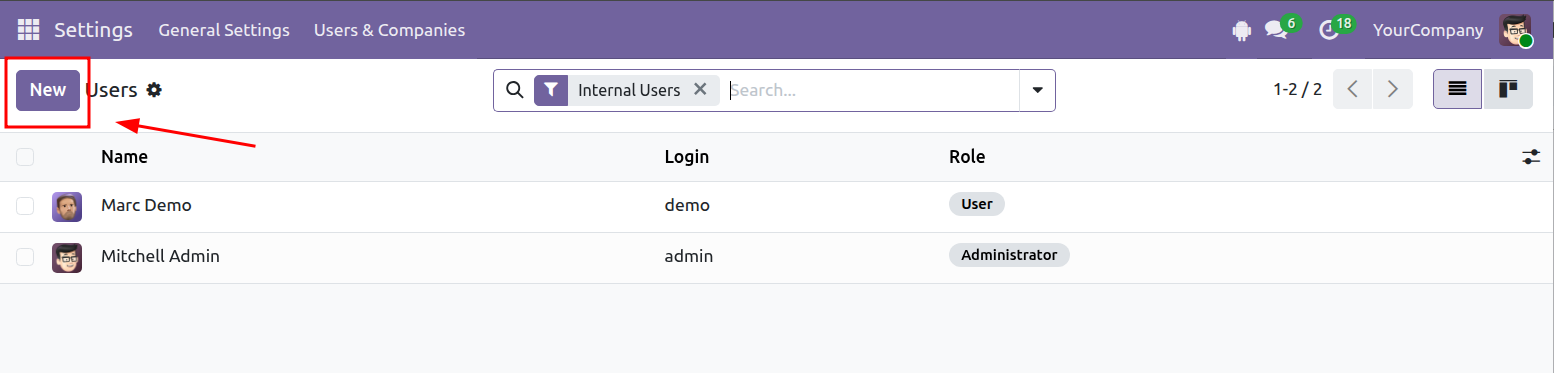
Step 4: Enter the user information.
As a general guideline:
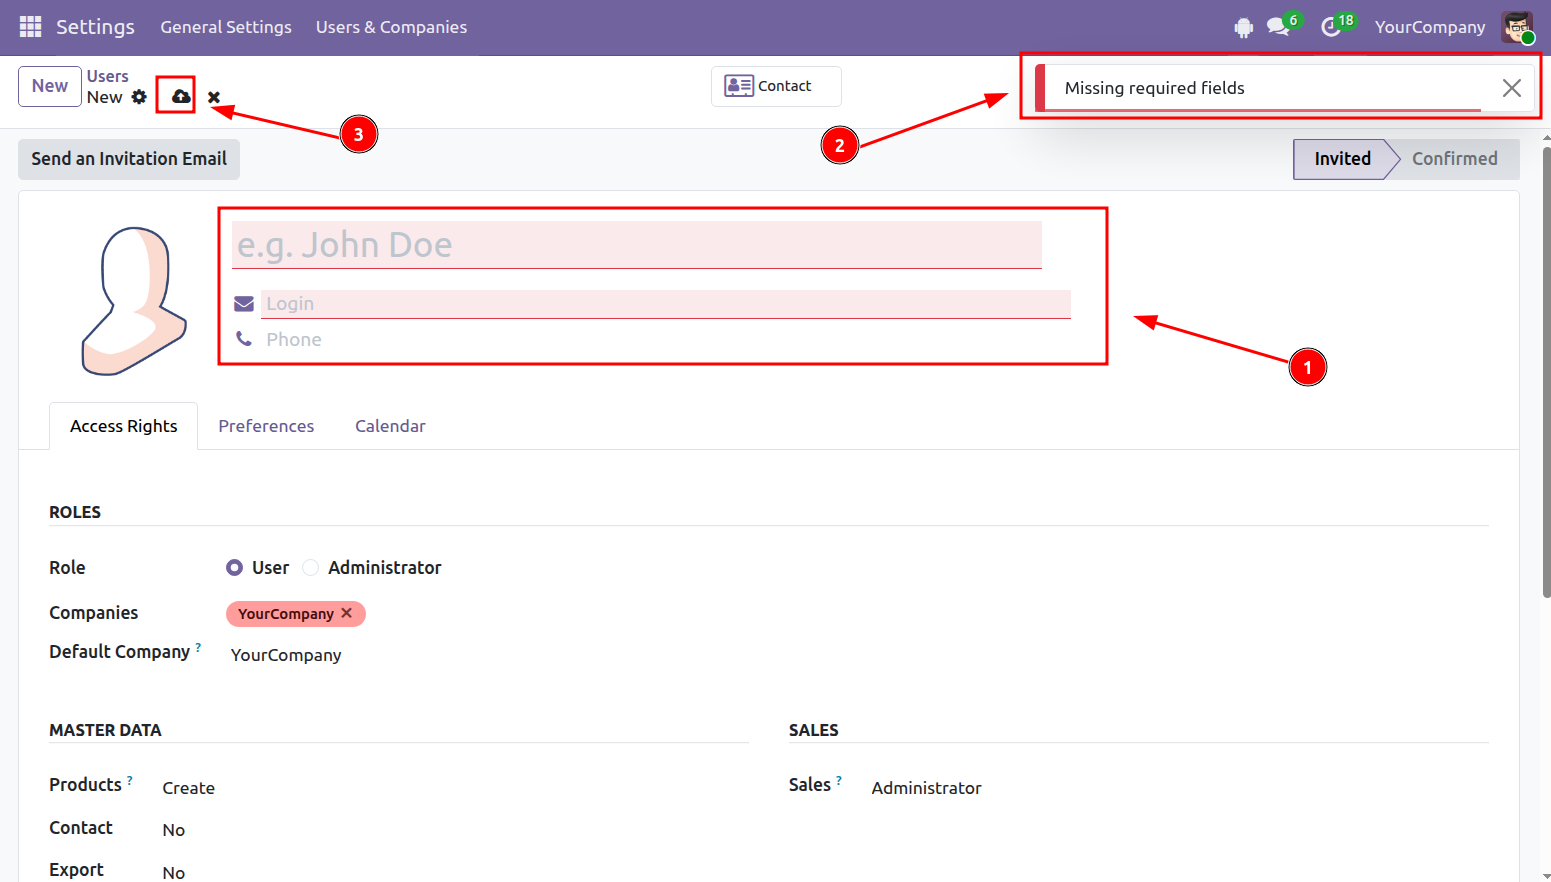
Step 5: To change the user's password, click the settings icon and select Change Password.
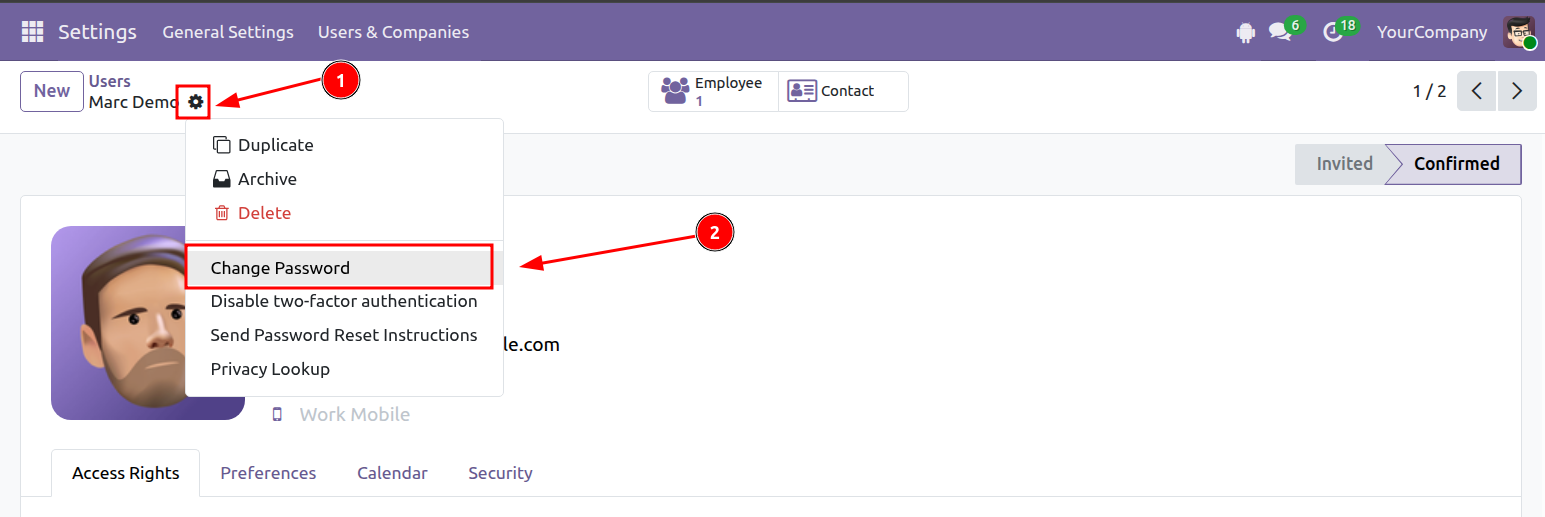
Step 6: Set the login password.
After the password has been updated, the user will sign in with:
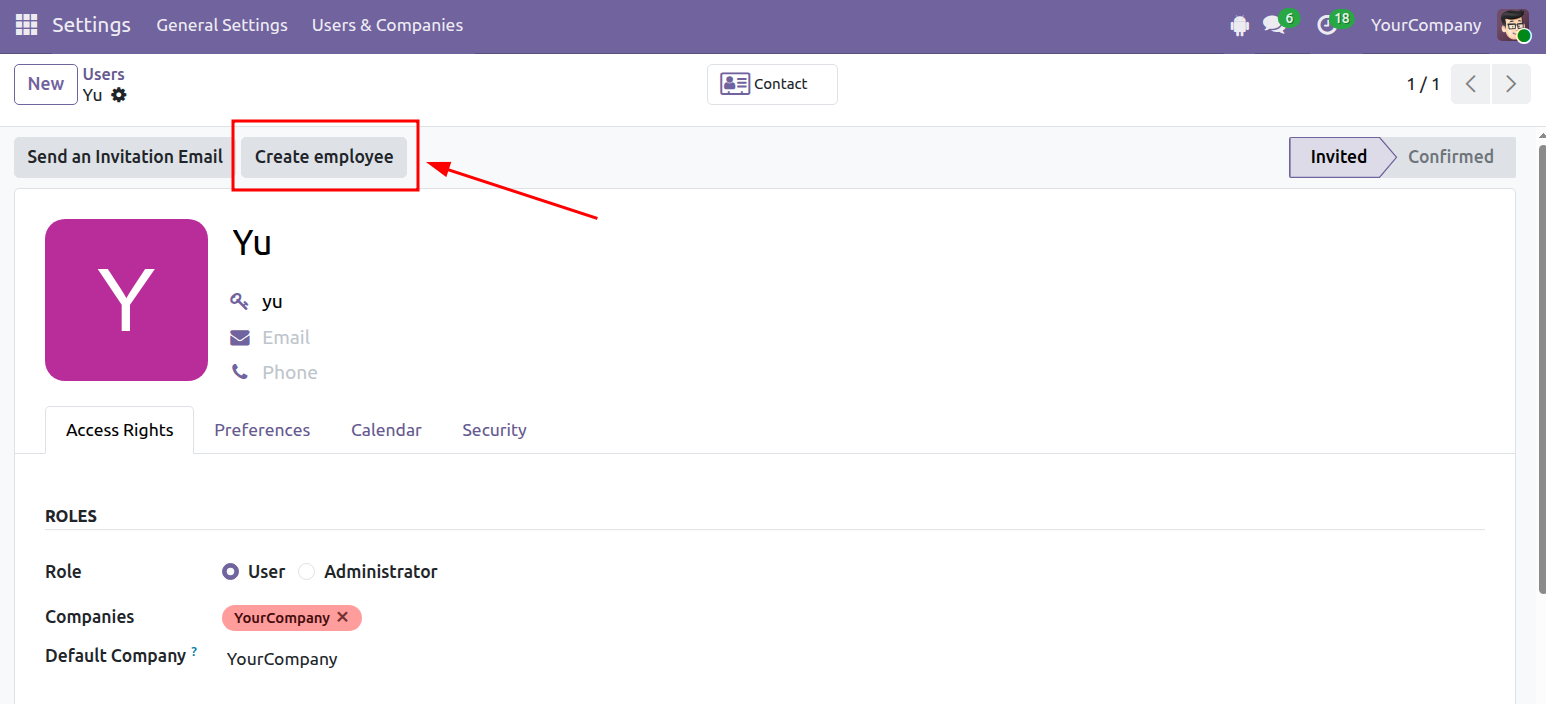
Step 7 - Optional: Click Create Employee to create an employee record for the user.
Step 8: Once the employee record has been created, click the employee icon to open it.
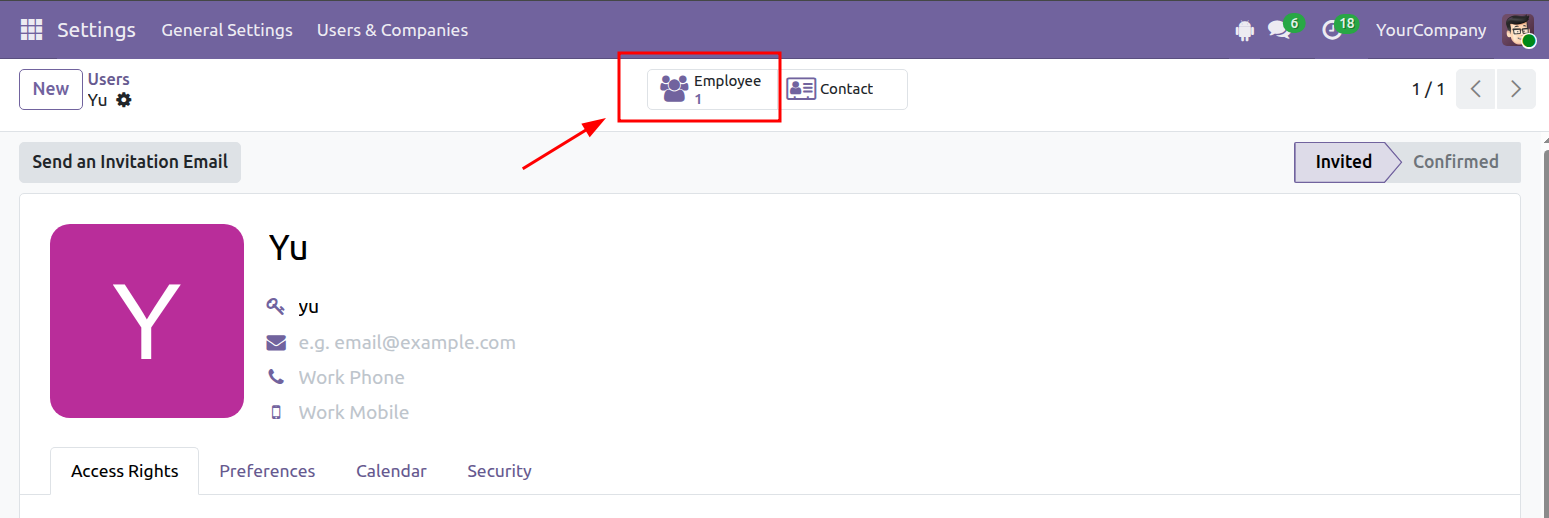
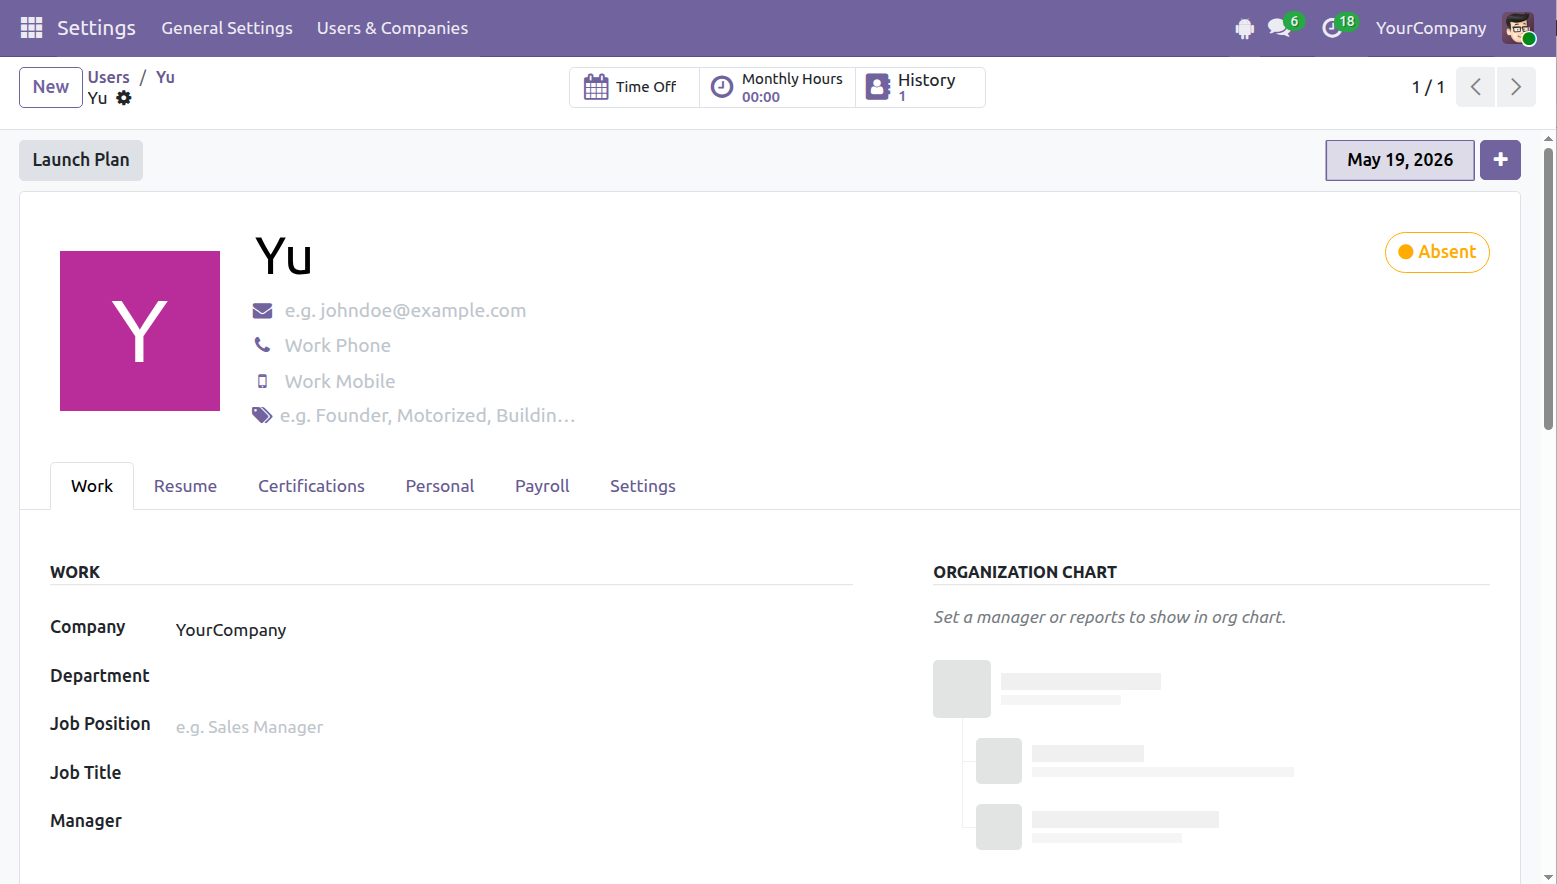
The user account is automatically linked to the employee profile after the employee is created.
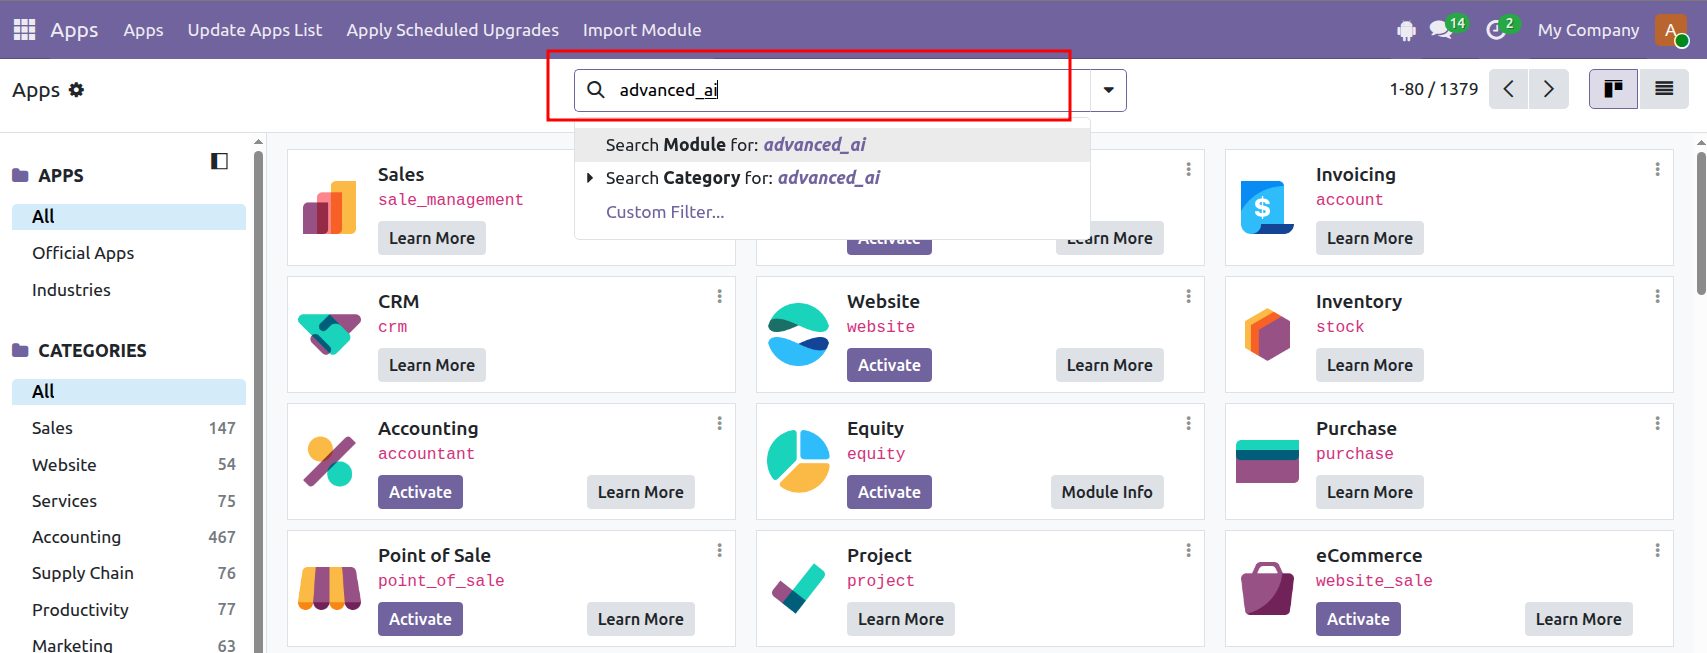
Step 1: Open Apps.
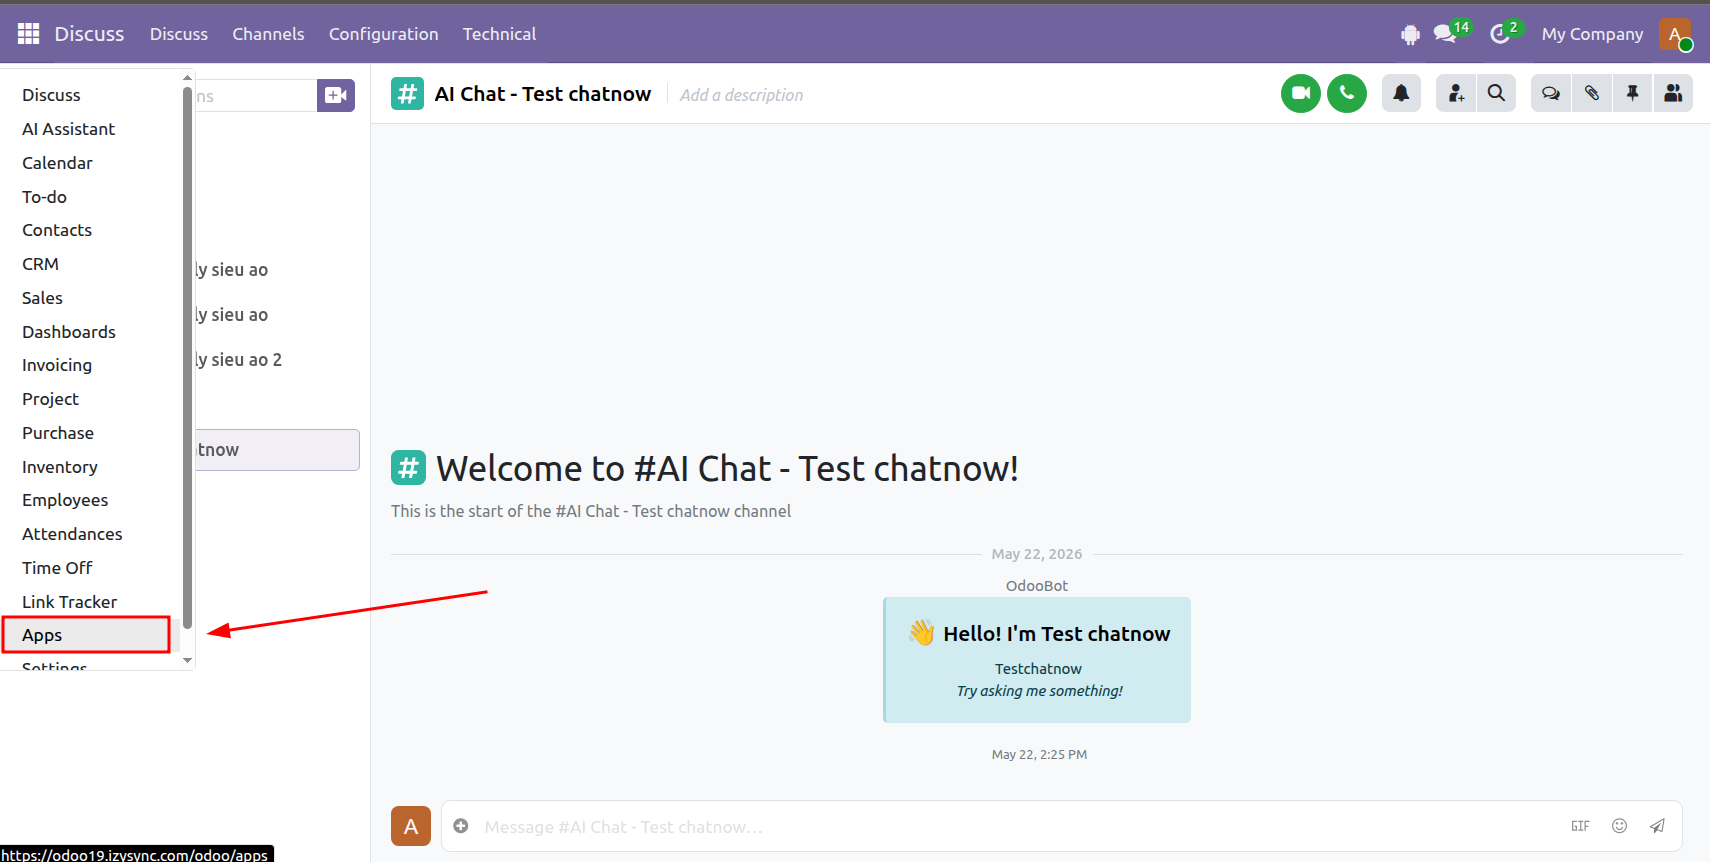
Step 2: Enter advanced_ai in the search bar.
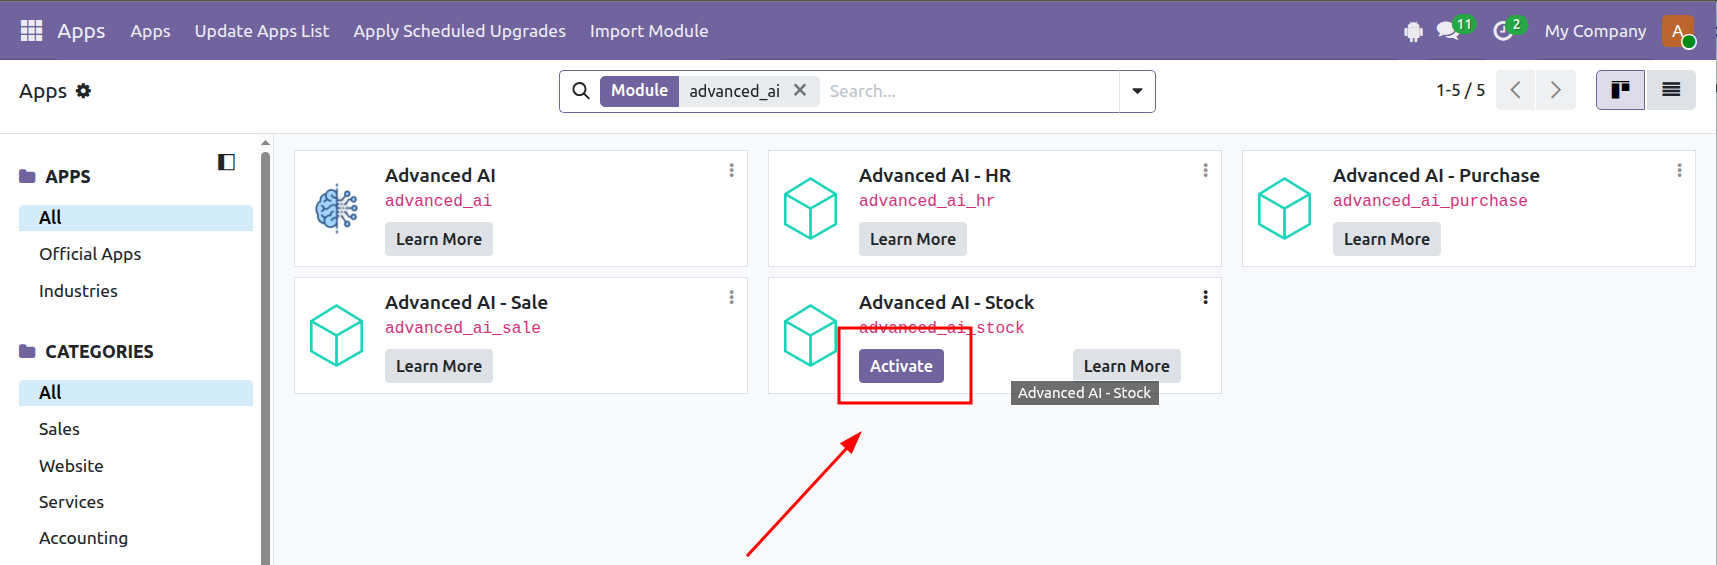
Step 3: Click Activate to install the required module.
Before connecting an external AI application, the MCP Gateway must be enabled in Odoo.
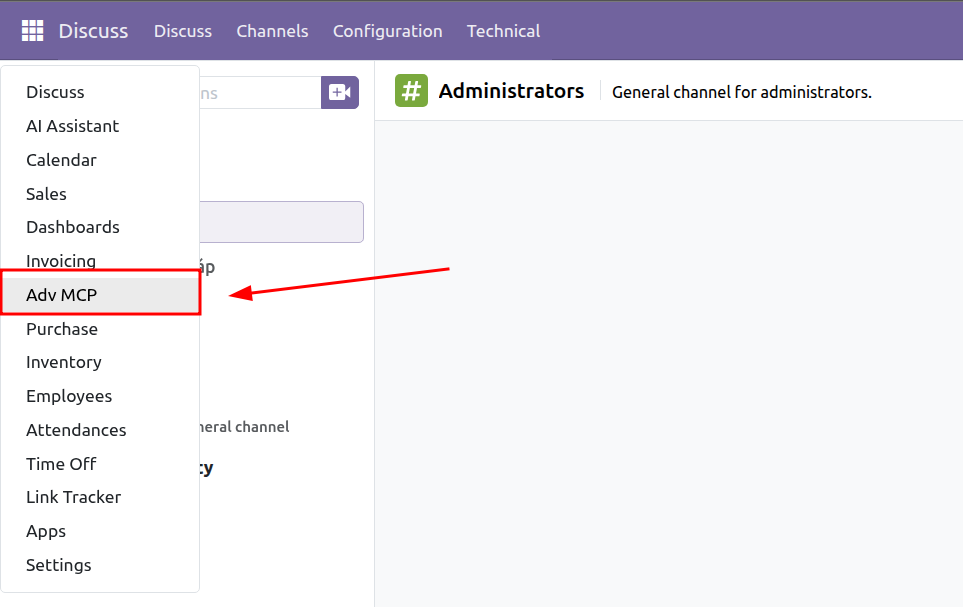
Step 1: Open the Adv MCP module.
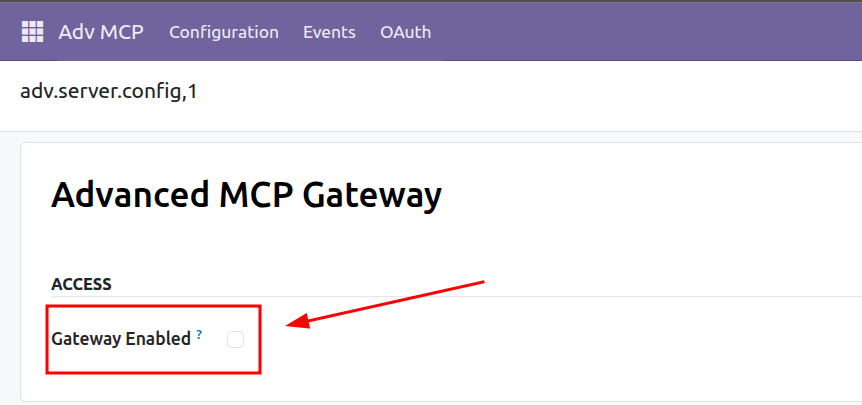
Step 2: Enable Gateway Enabled, then save the configuration.
Step 1: Open Claude, then go to Settings.
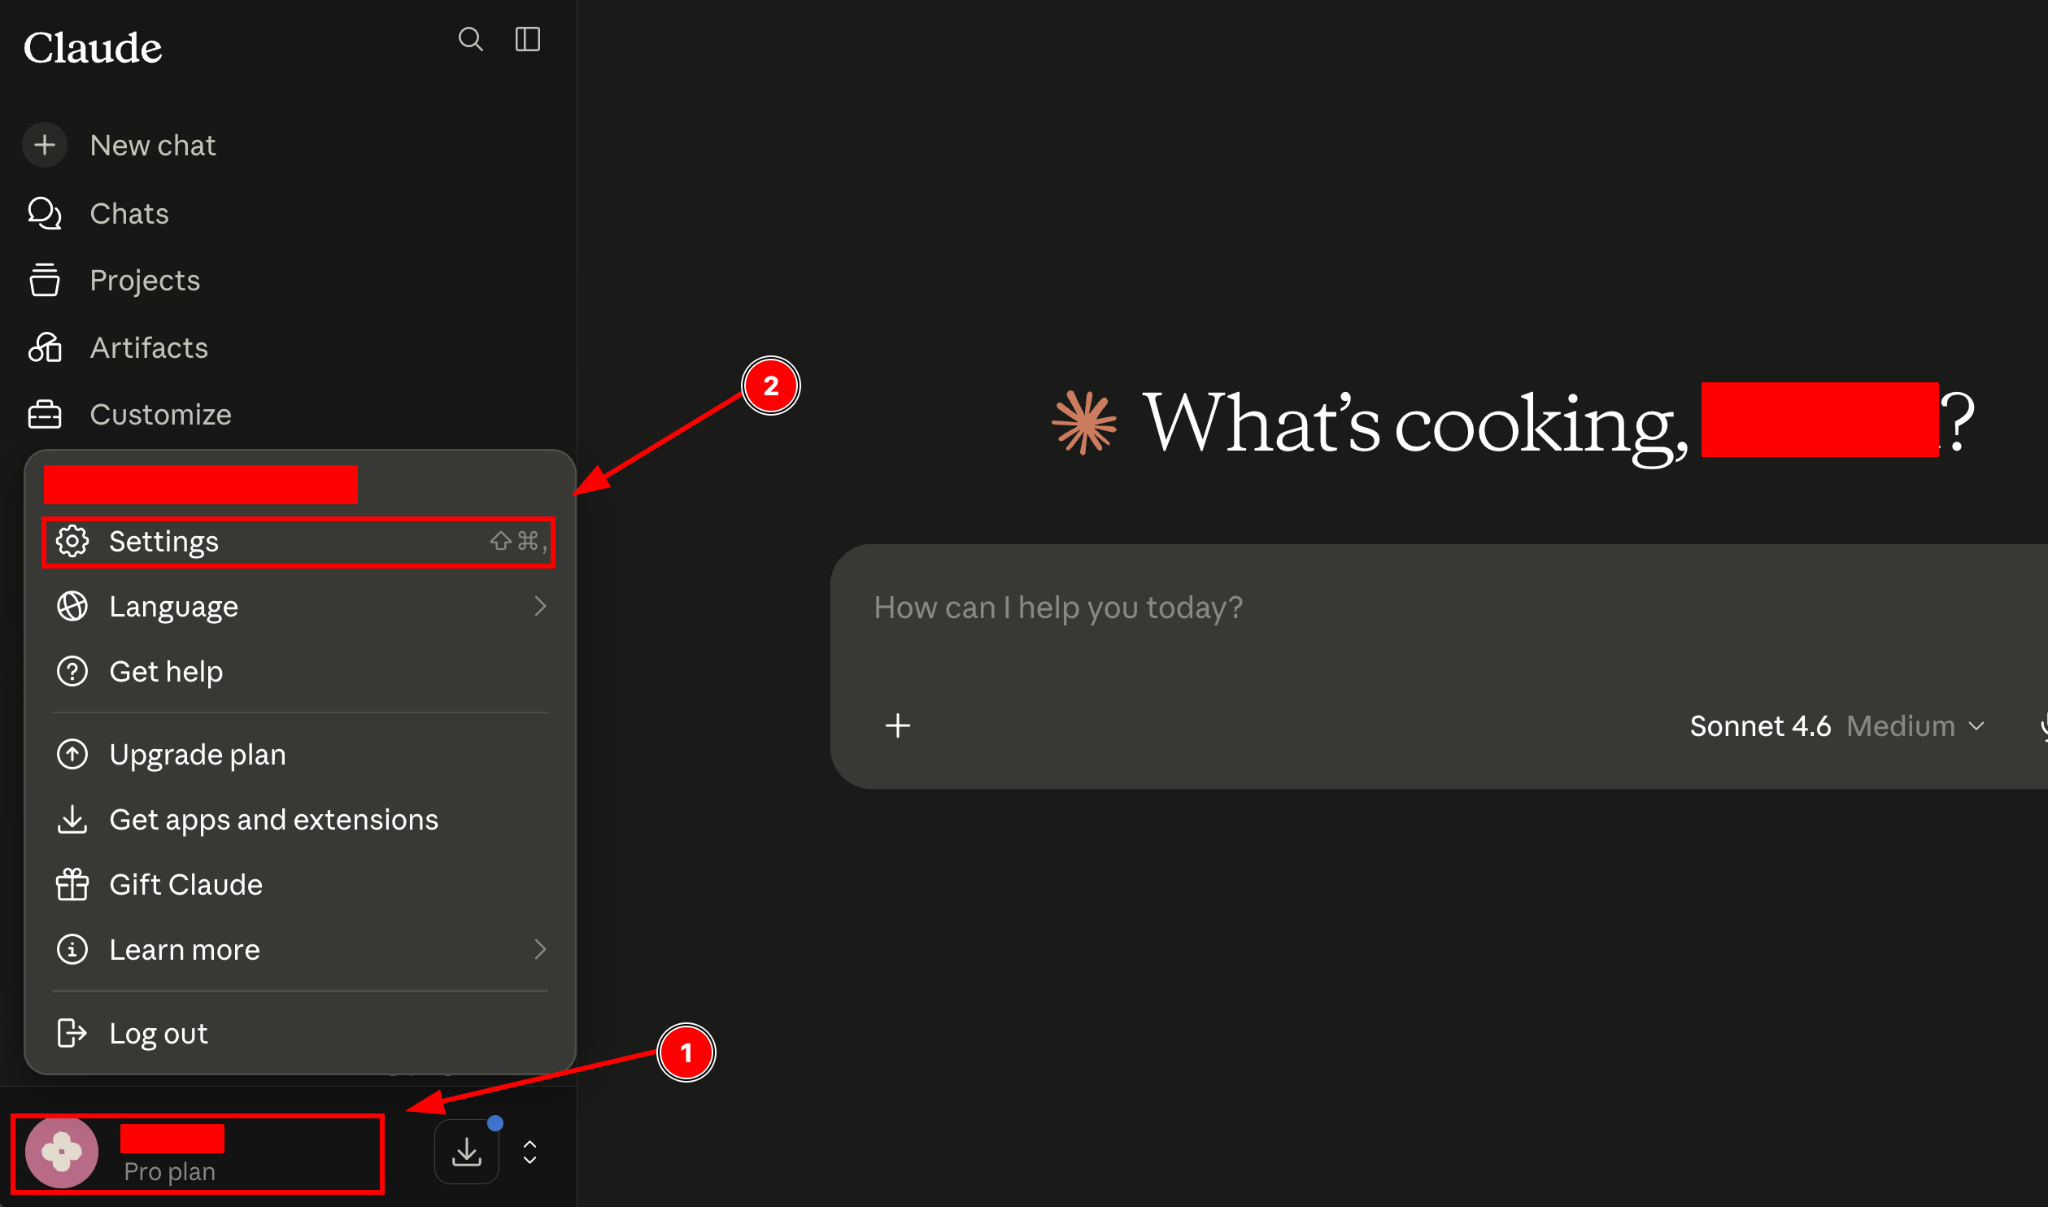
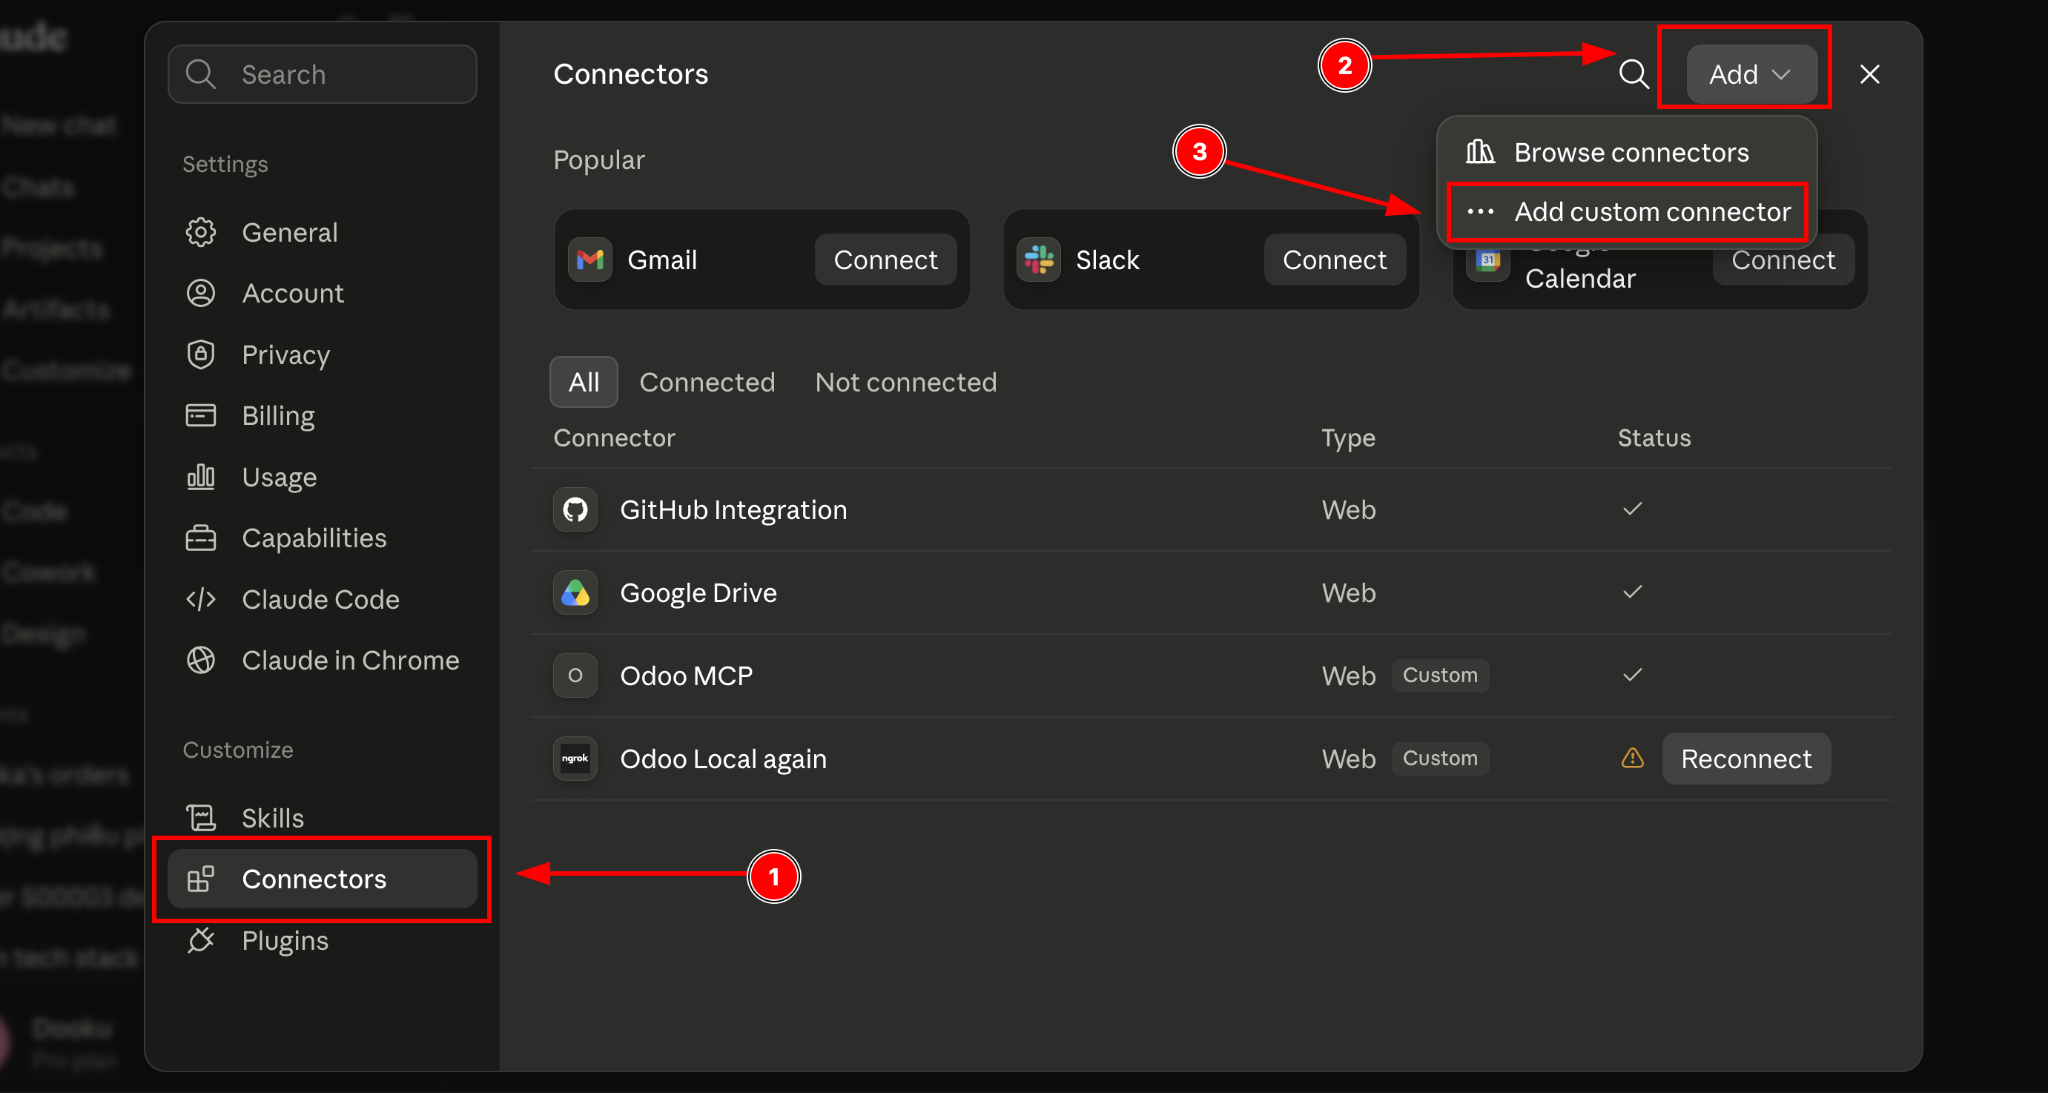
Step 2: Open Connectors, then select: Add > Add custom connector
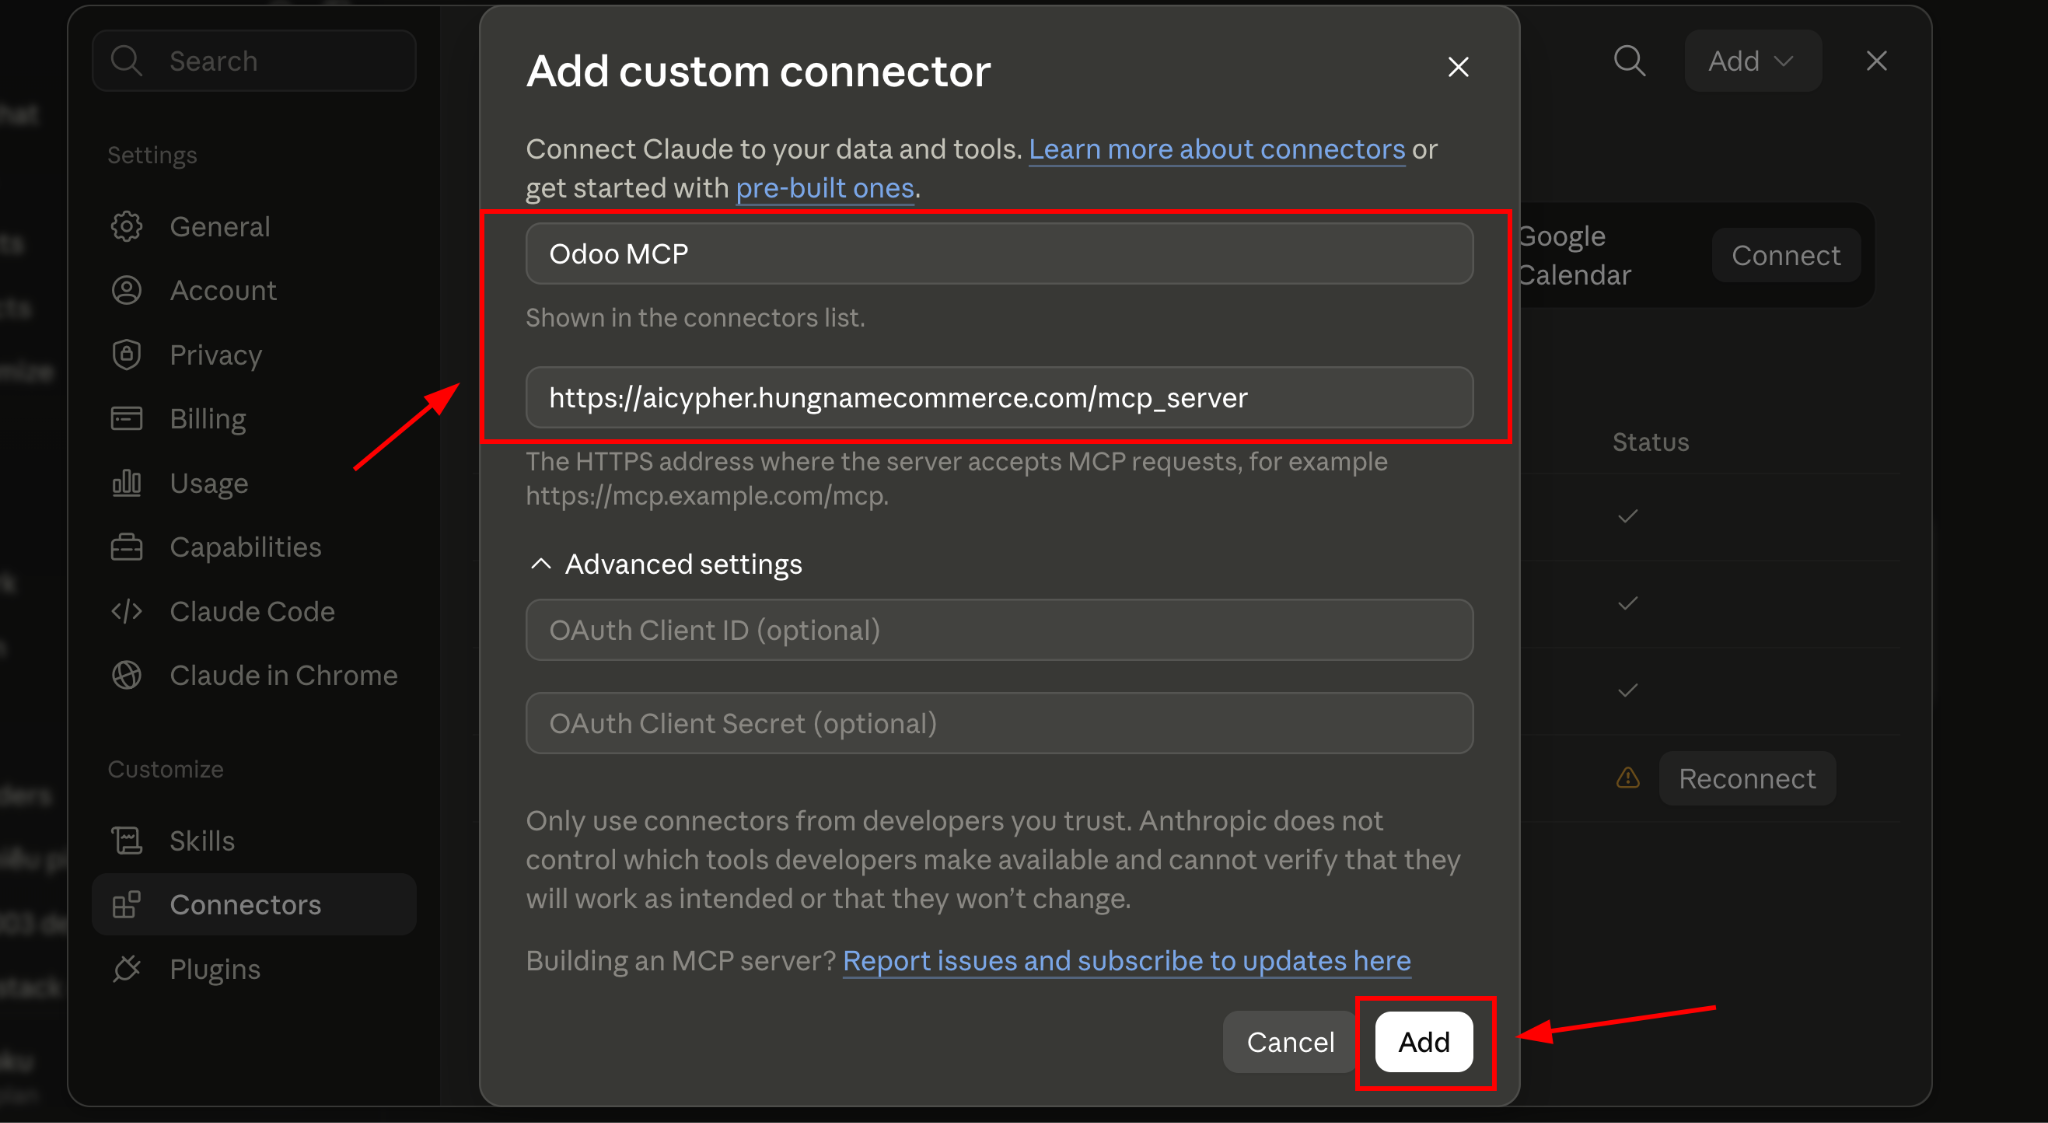
Step 3: Enter a name for the connector and provide the MCP Server URL:
https://aicypher.hungnamecommerce.com/mcp_server
Then click Add.
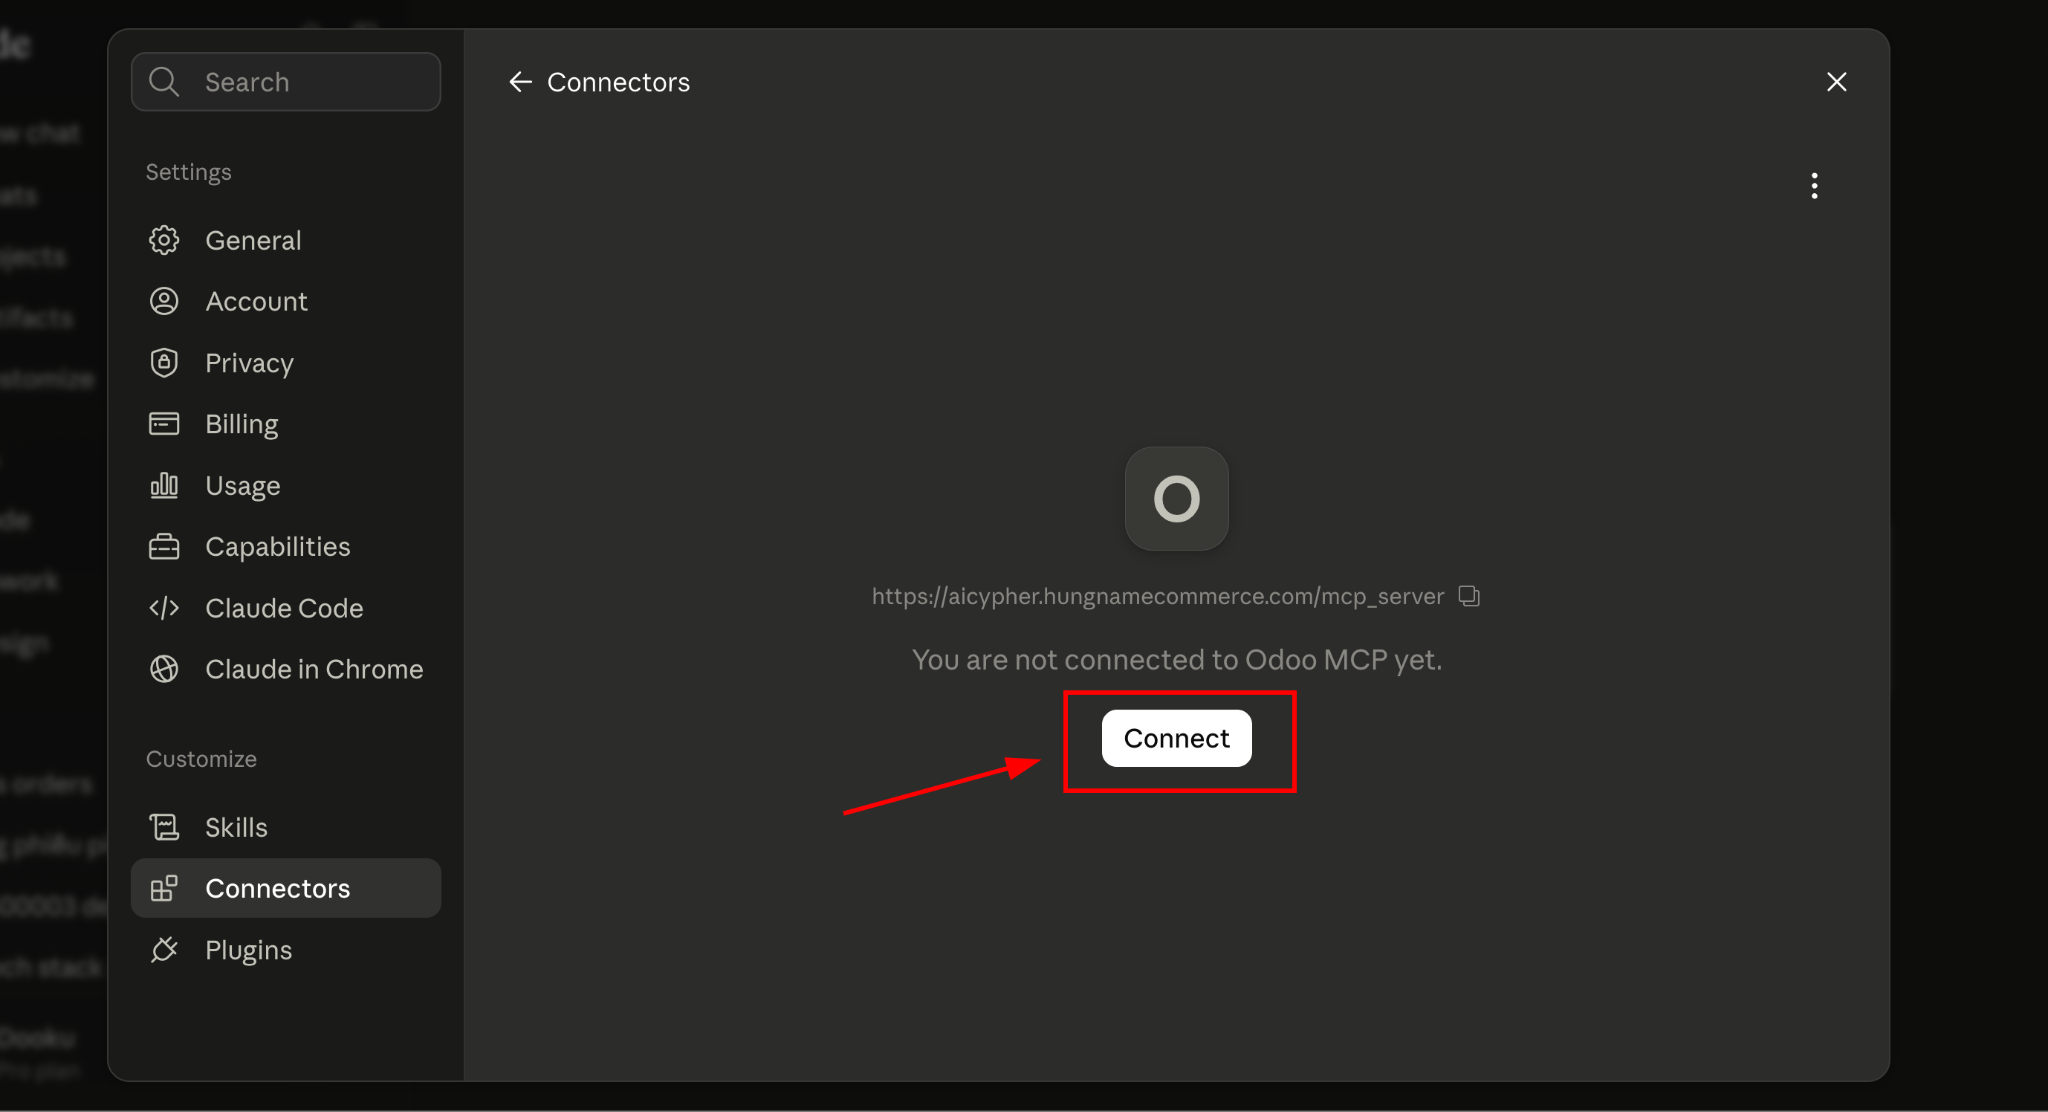
Step 4: The connector initially appears as not connected. Click Connect.
Step 5: Your browser redirects you to the Odoo login page. Enter your Odoo account credentials and sign in.
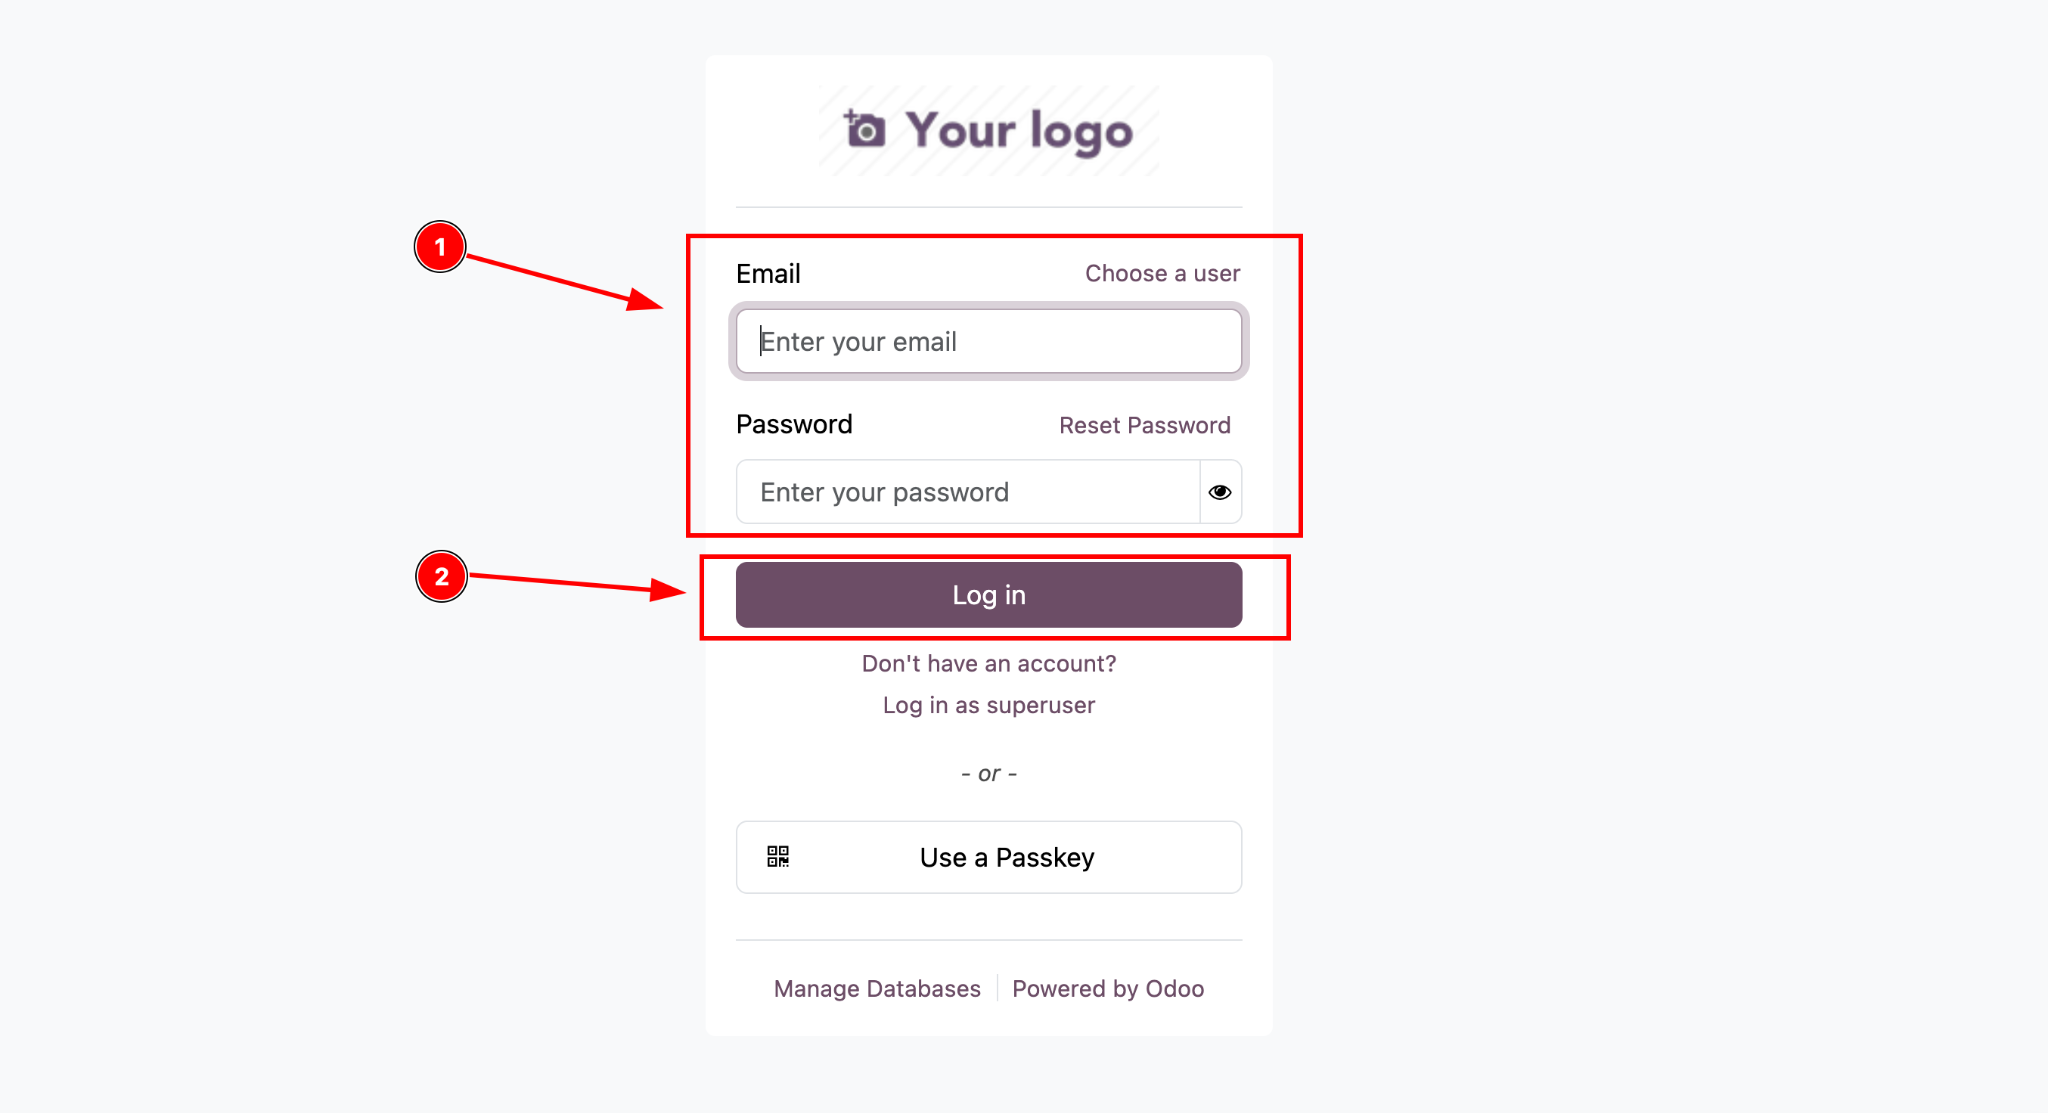
Step 6: After signing in successfully, click Allow.
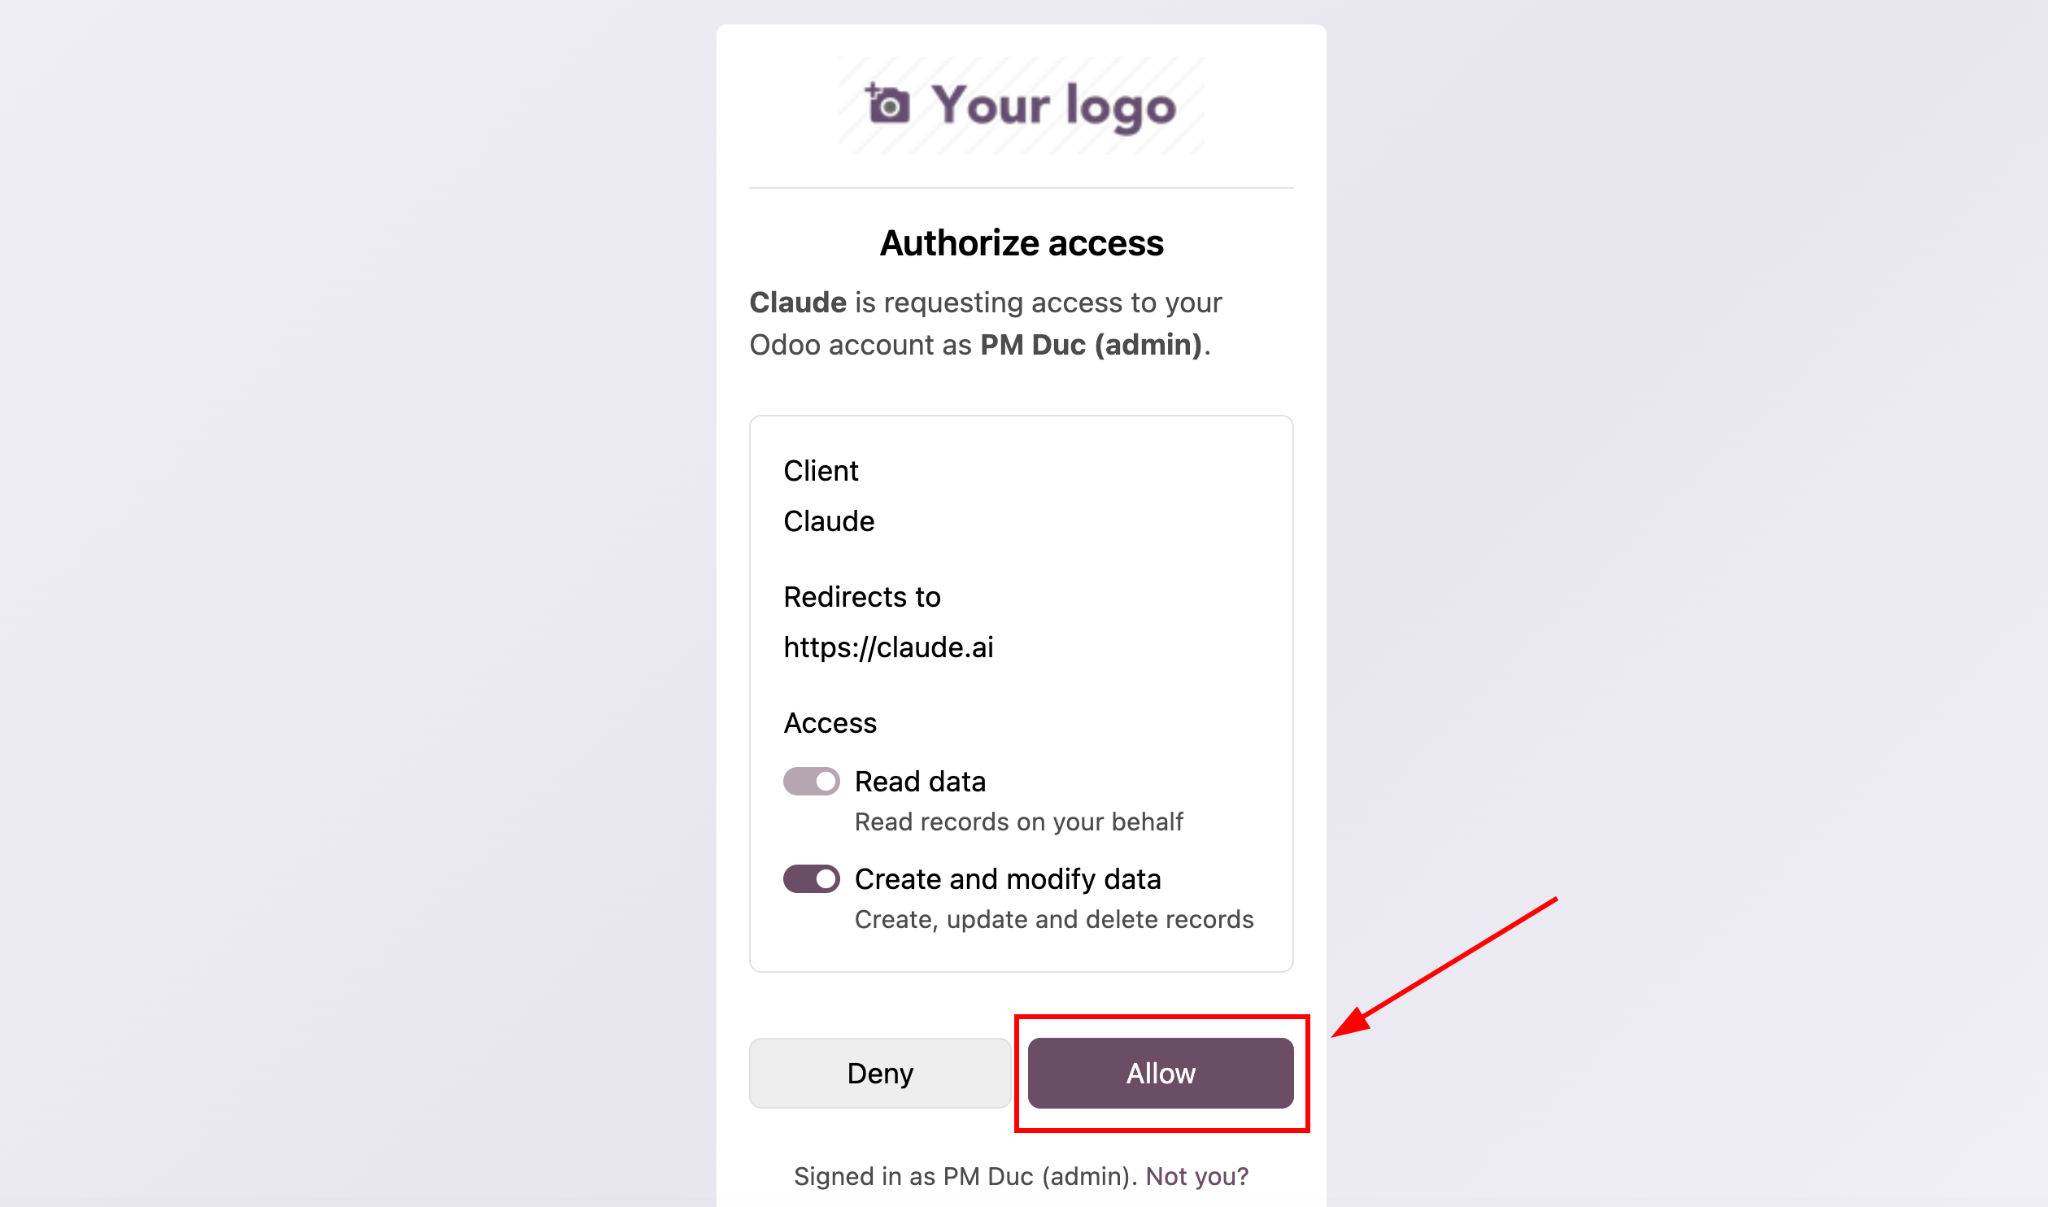
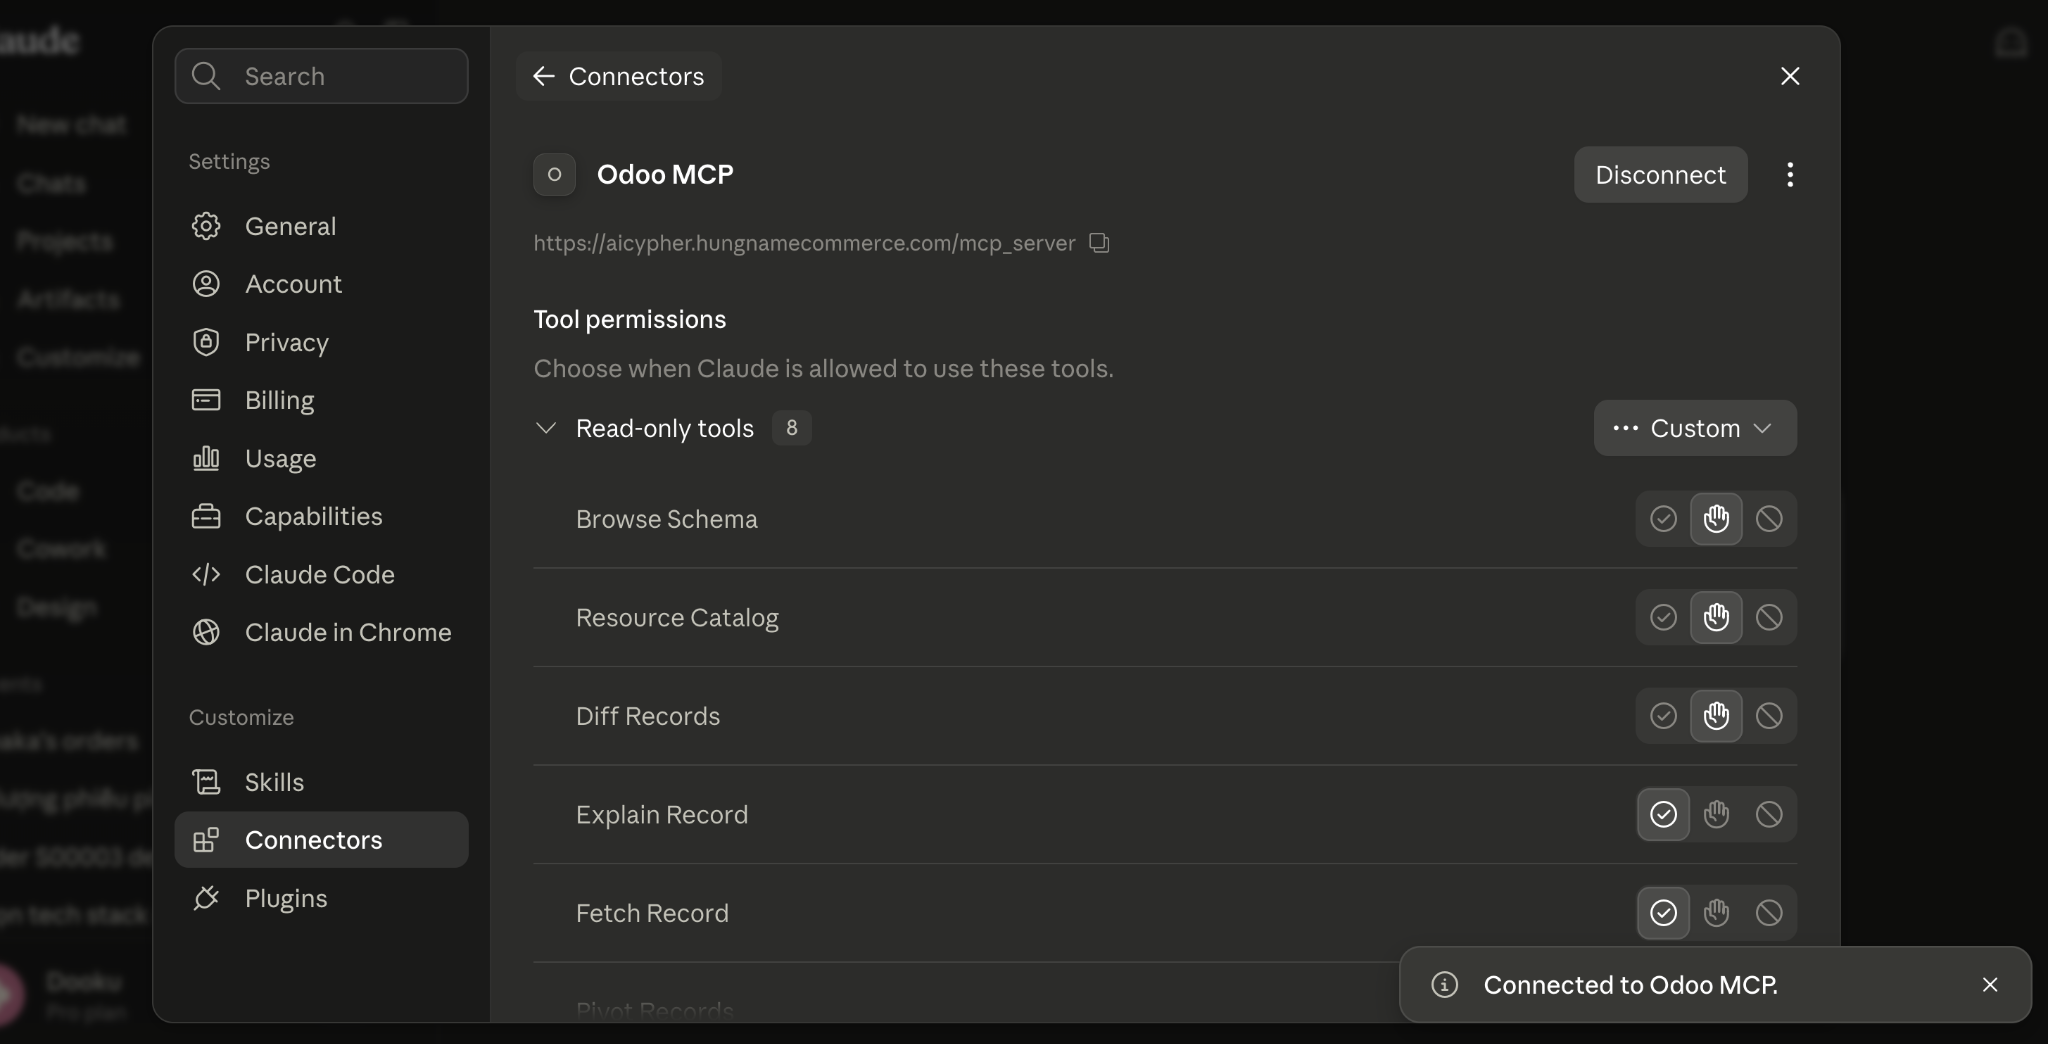
The browser then redirects you back to Claude, where the connector will appear as connected.
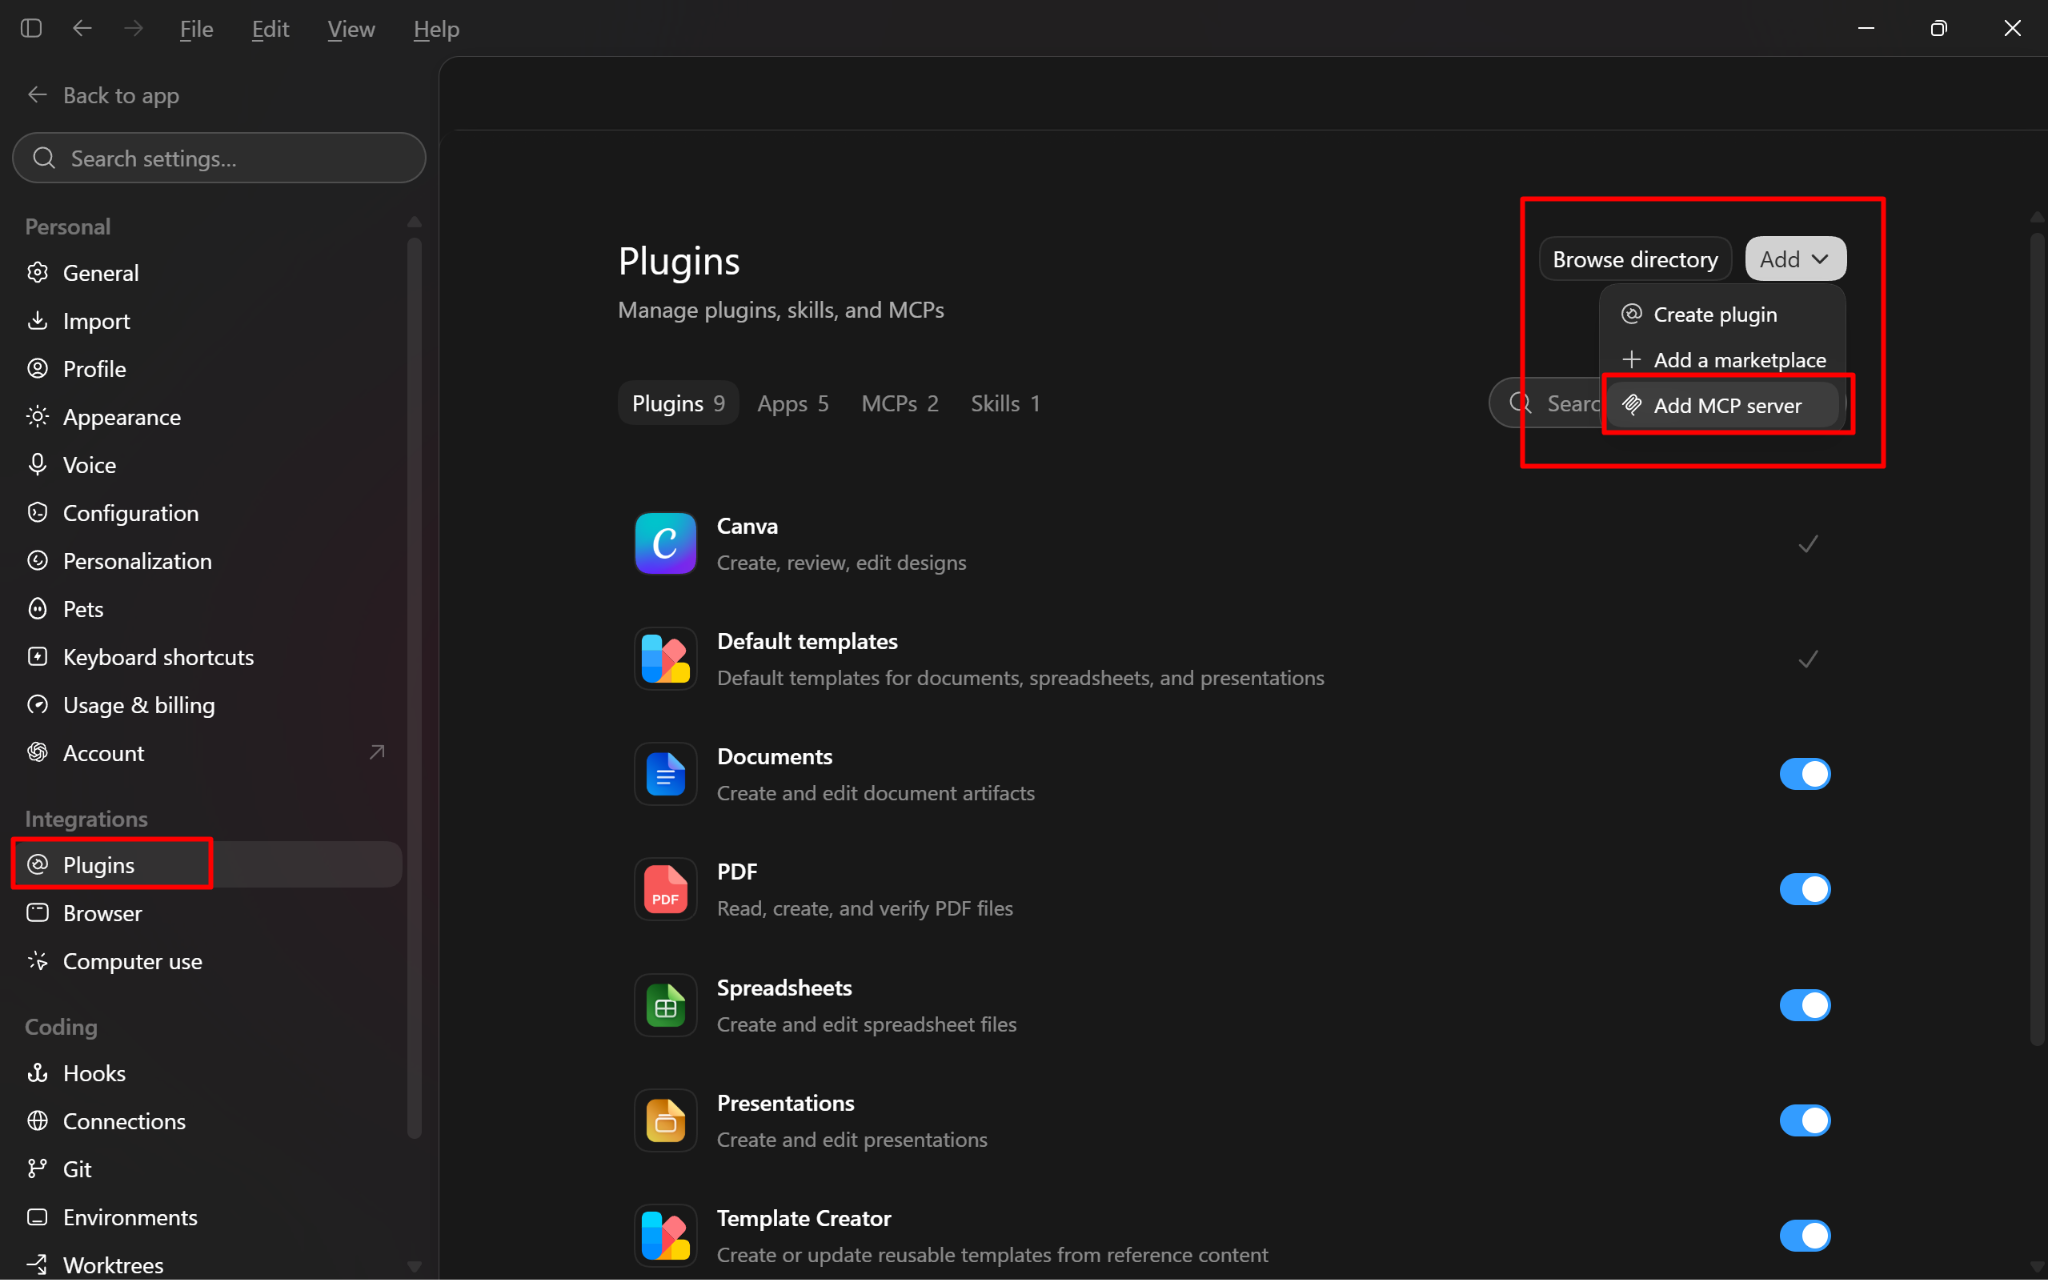
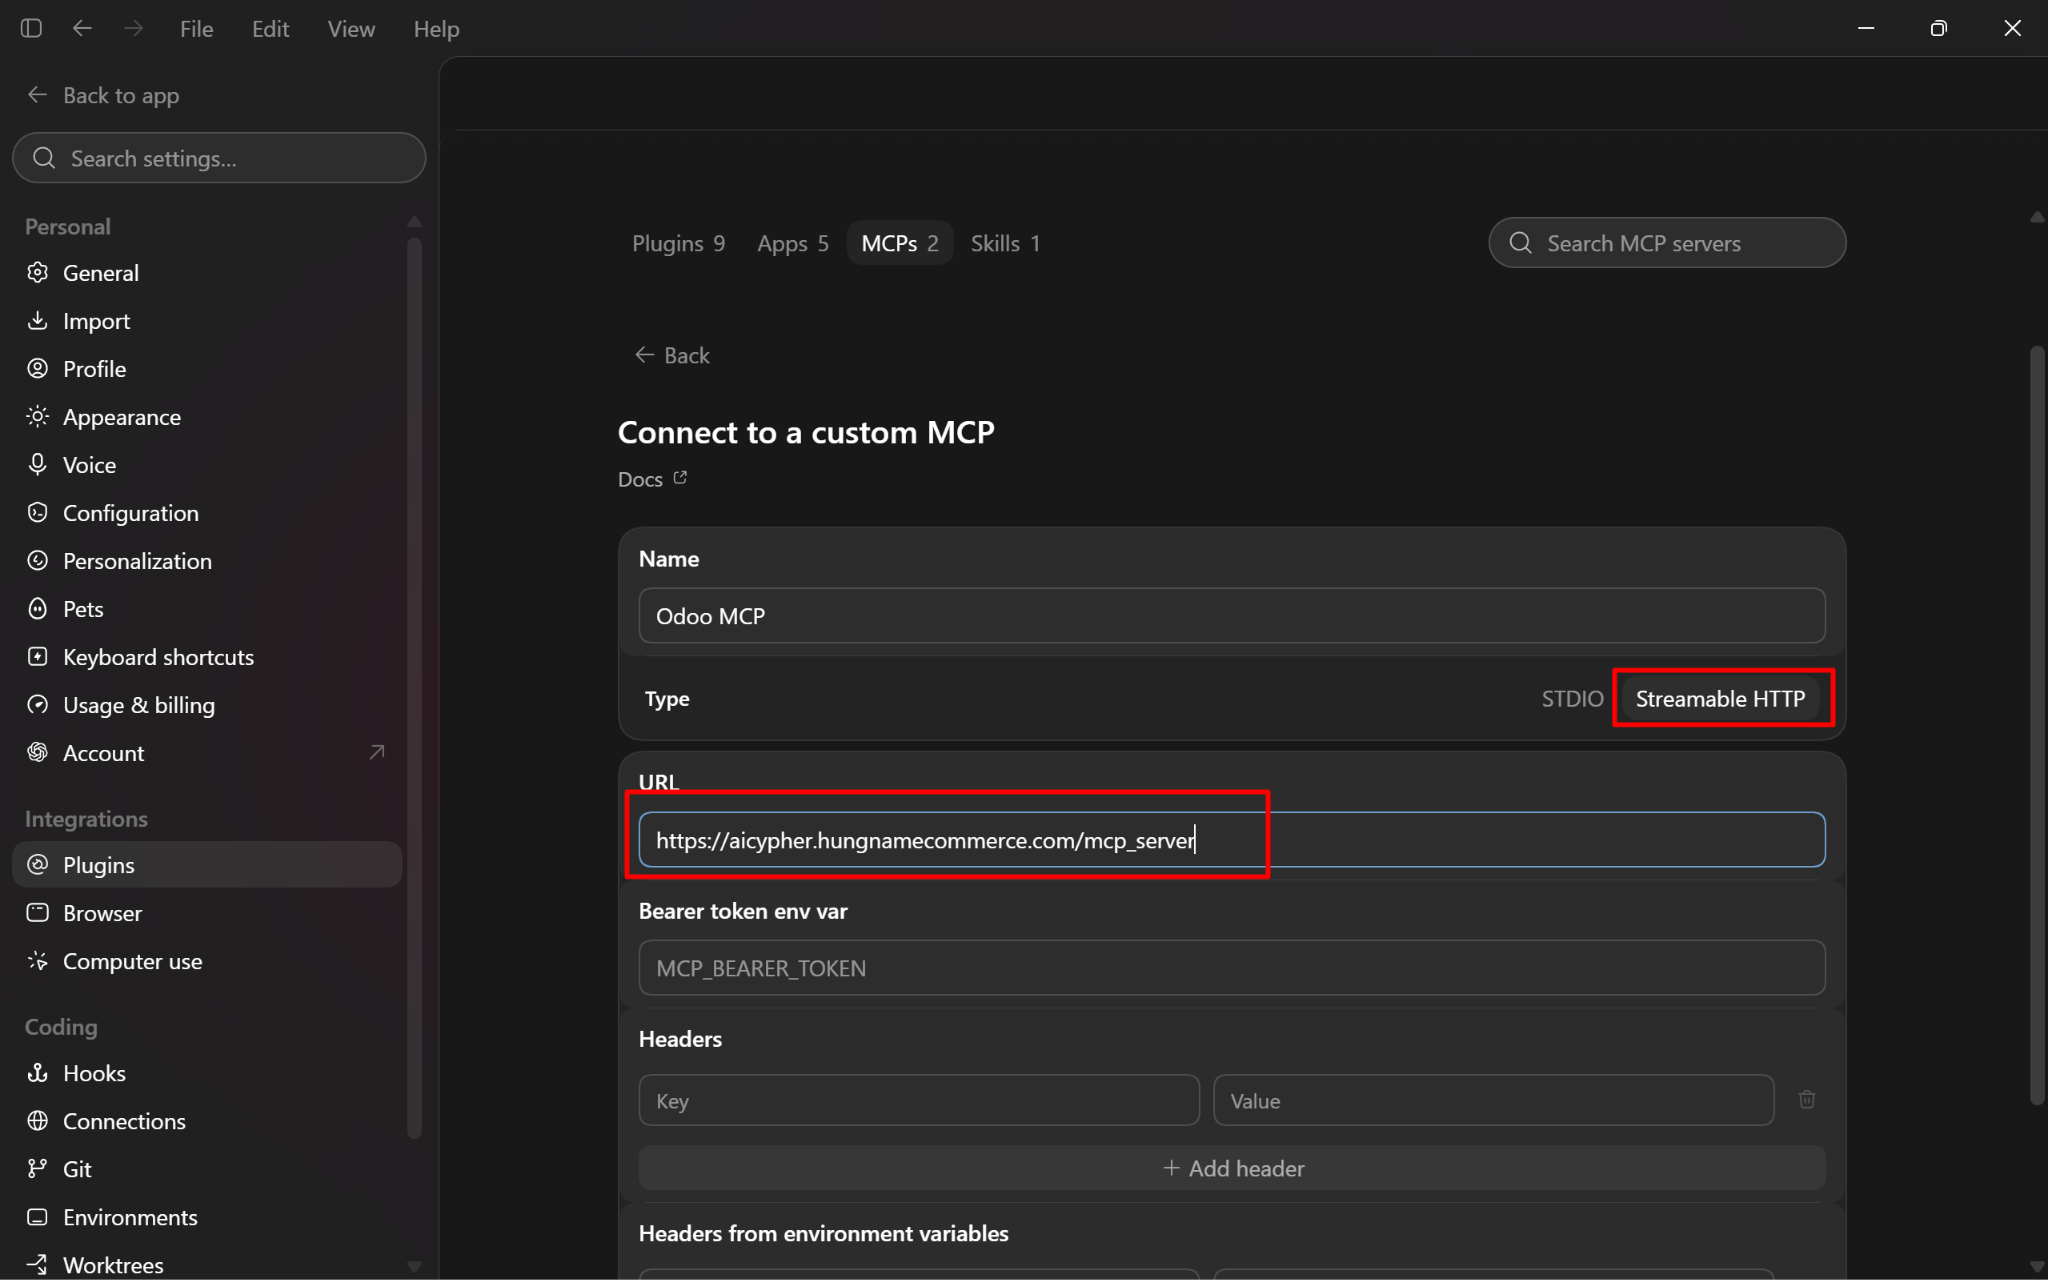
Step 1: Open Codex settings, then go to: Plugins > Add MCP Server
Step 2: Enter the MCP Server URL:
https://aicypher.hungnamecommerce.com/mcp_server
Set Type to: StreamableHTTP
Then click Connect.
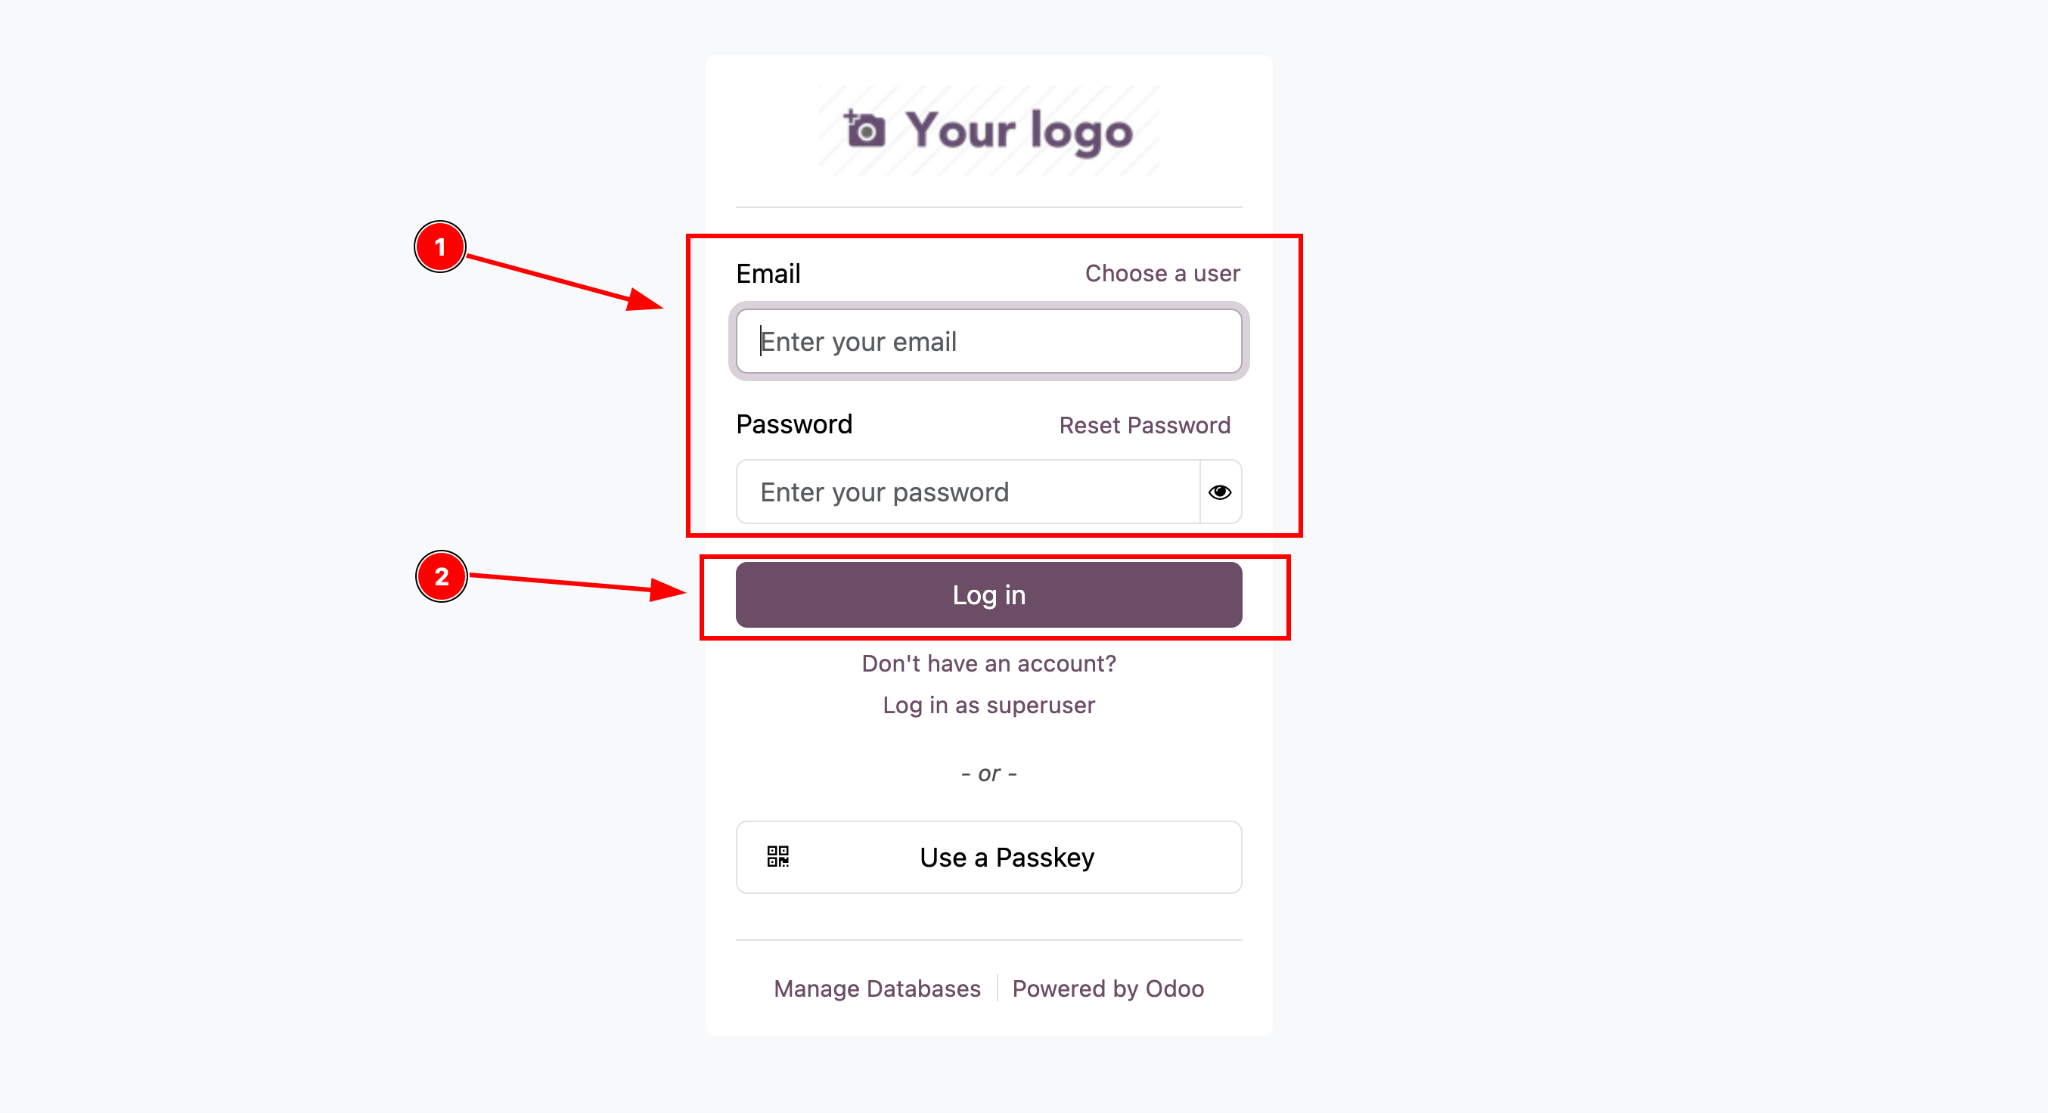
Step 3: Your browser redirects you to the Odoo login page. Enter your Odoo account credentials and sign in.
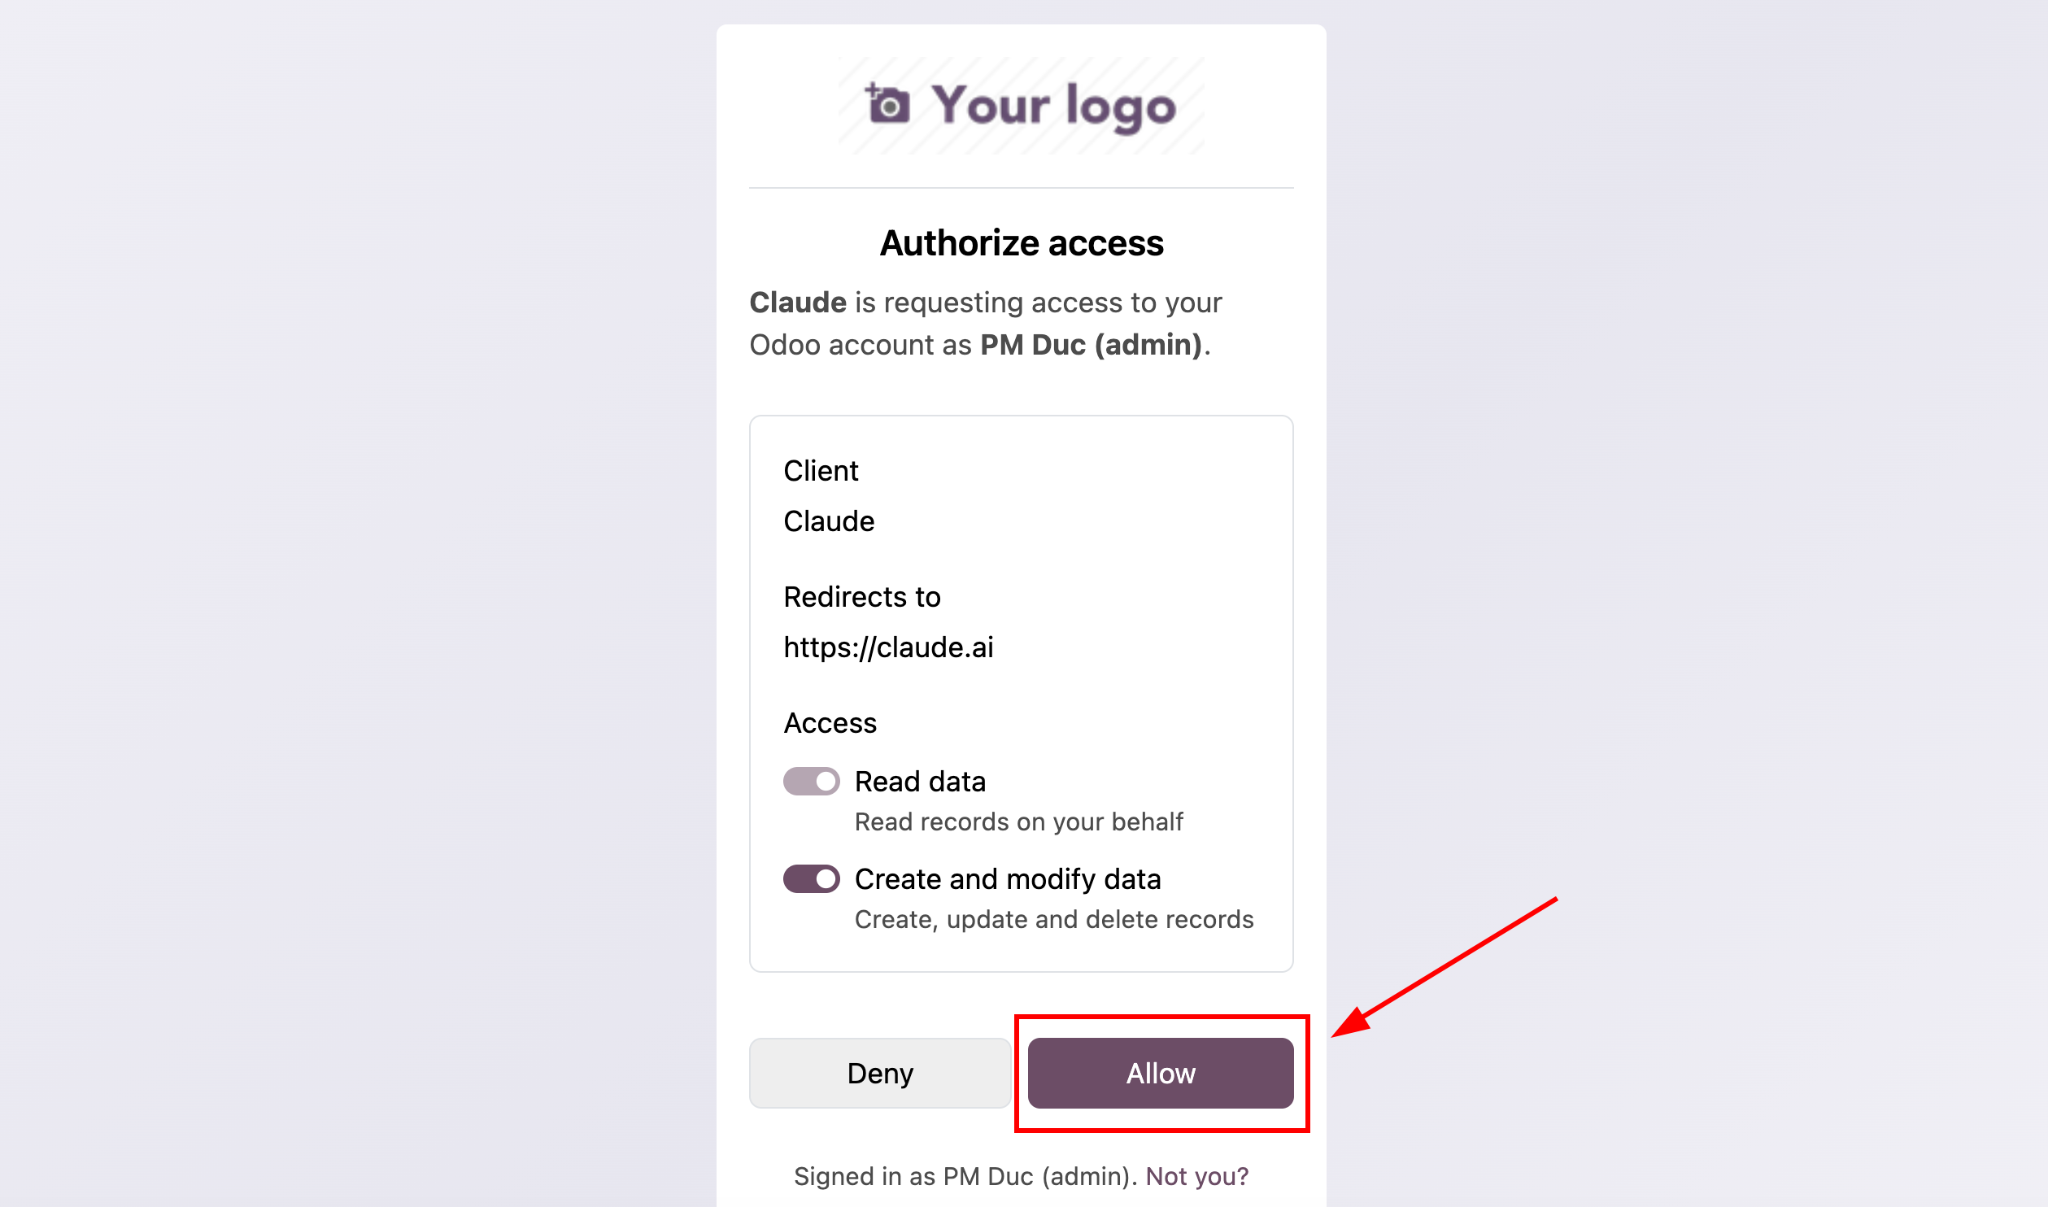
Step 4: After signing in successfully, click Allow.
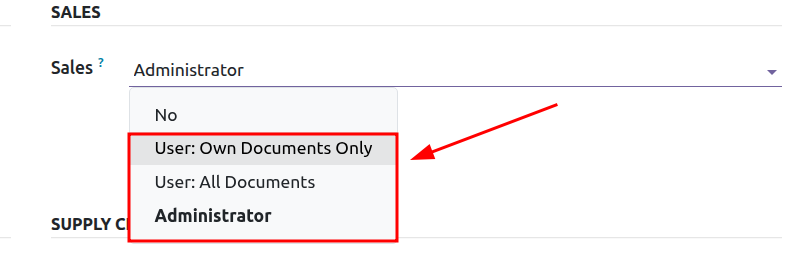
MCP access is controlled through two permission layers:
An AI Agent must pass both permission layers before it can access or modify Odoo data.
For example, to create a Sales Order, the connected user must have:

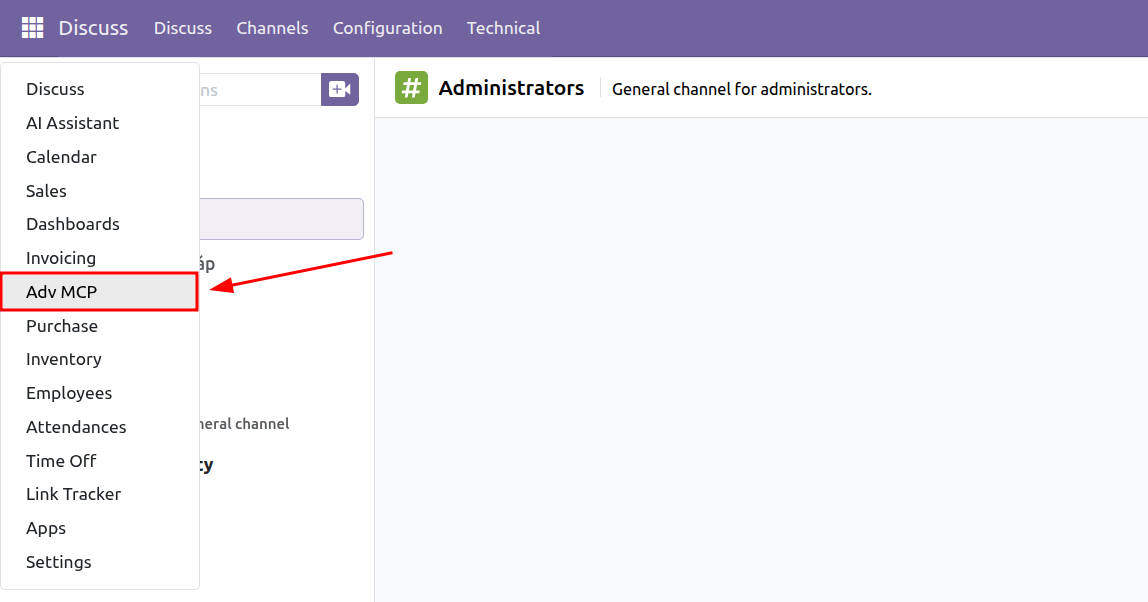
Step 1: Open Adv MCP
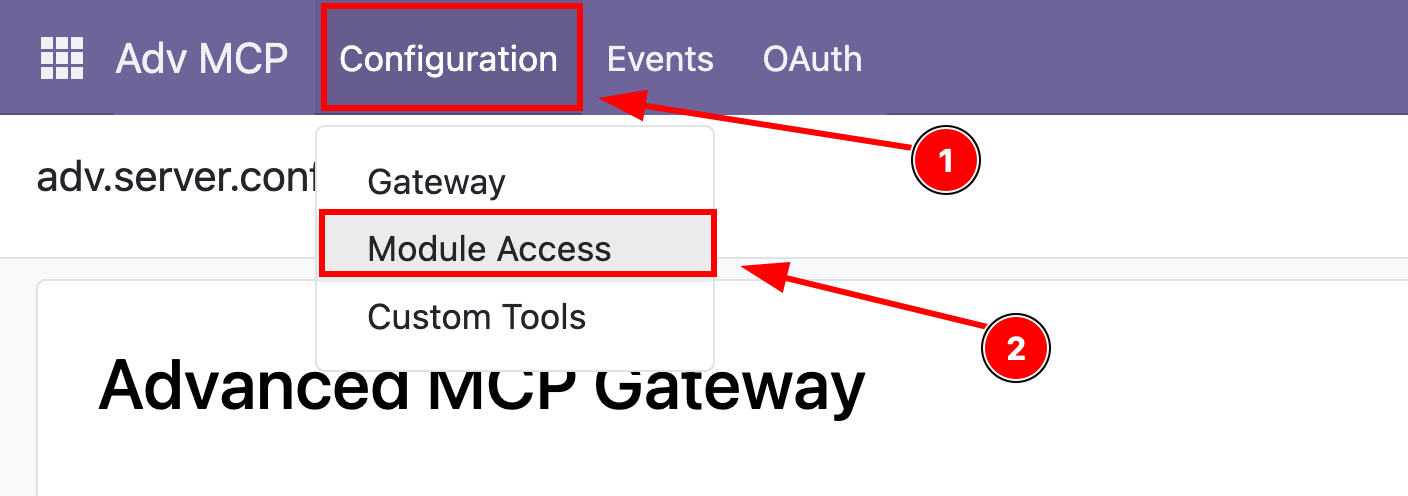
Step 2: Click Configuration > Module Access
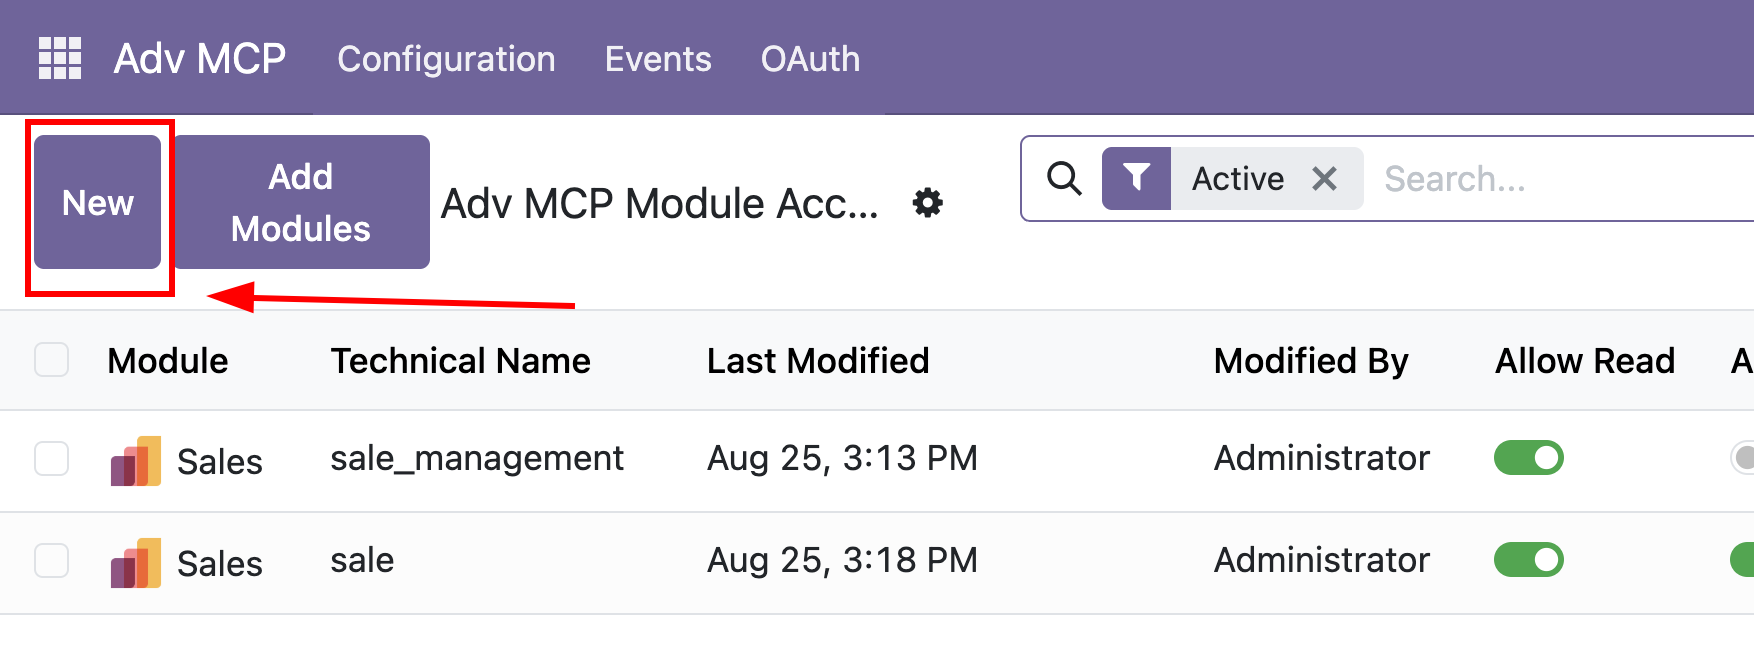
Step 3: Click New
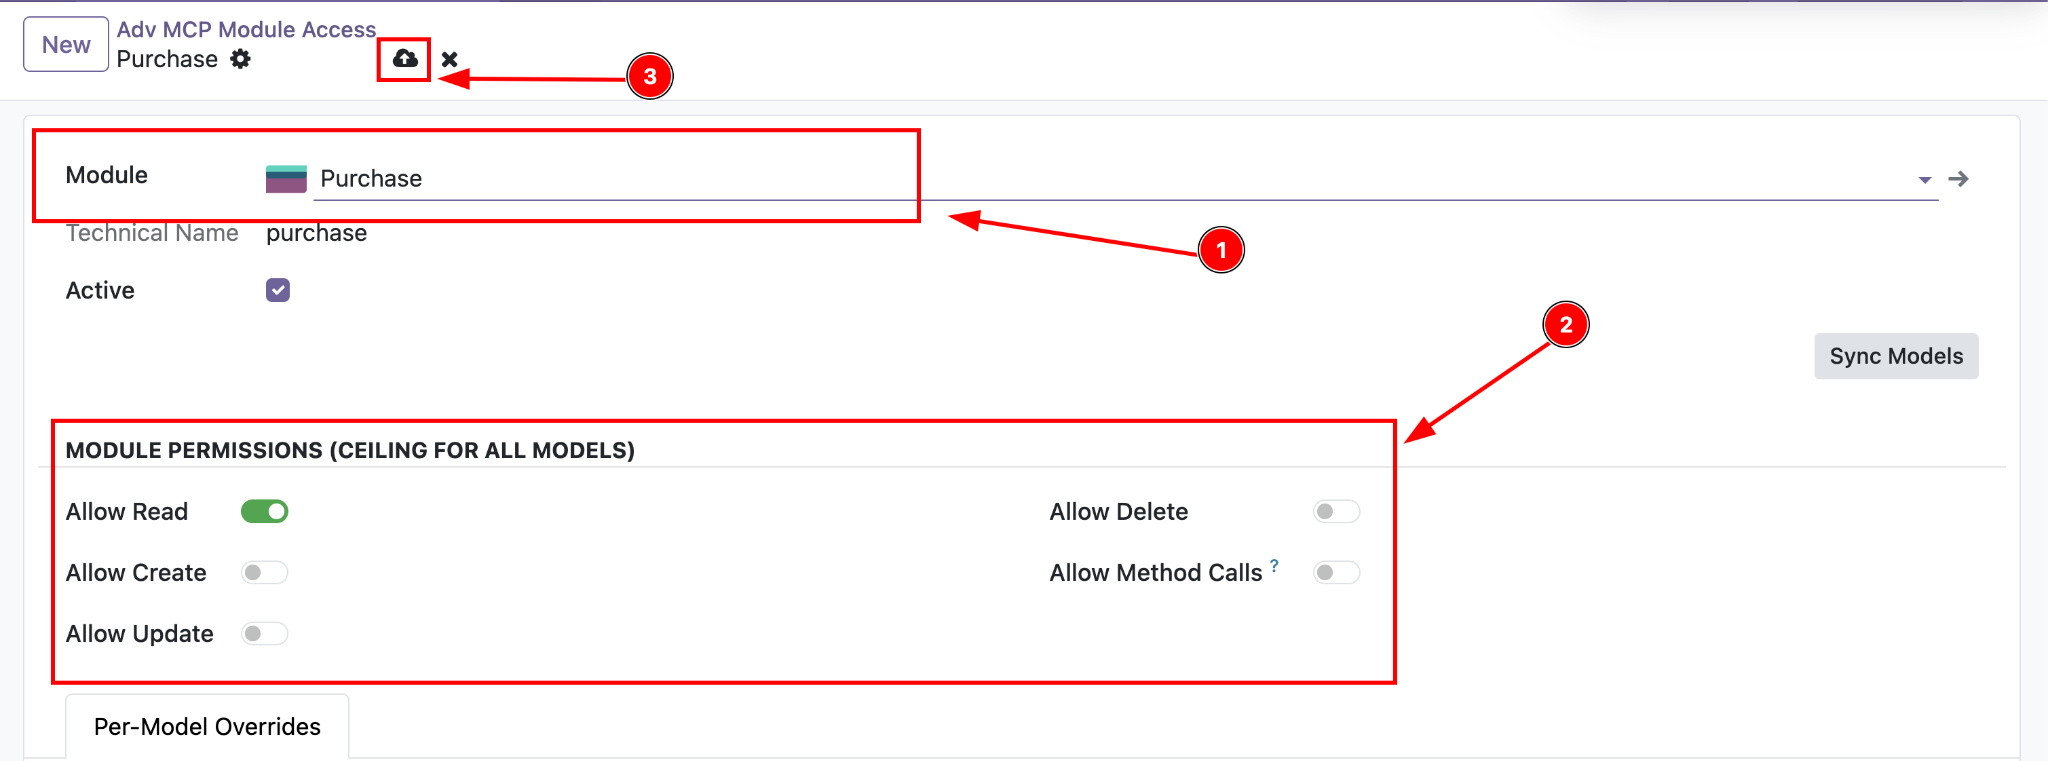
Step 4: Select the model you want to configure, then assign the required permissions:
Odoo also controls access for each user based on modules and business roles.
Step 1: Open Settings.
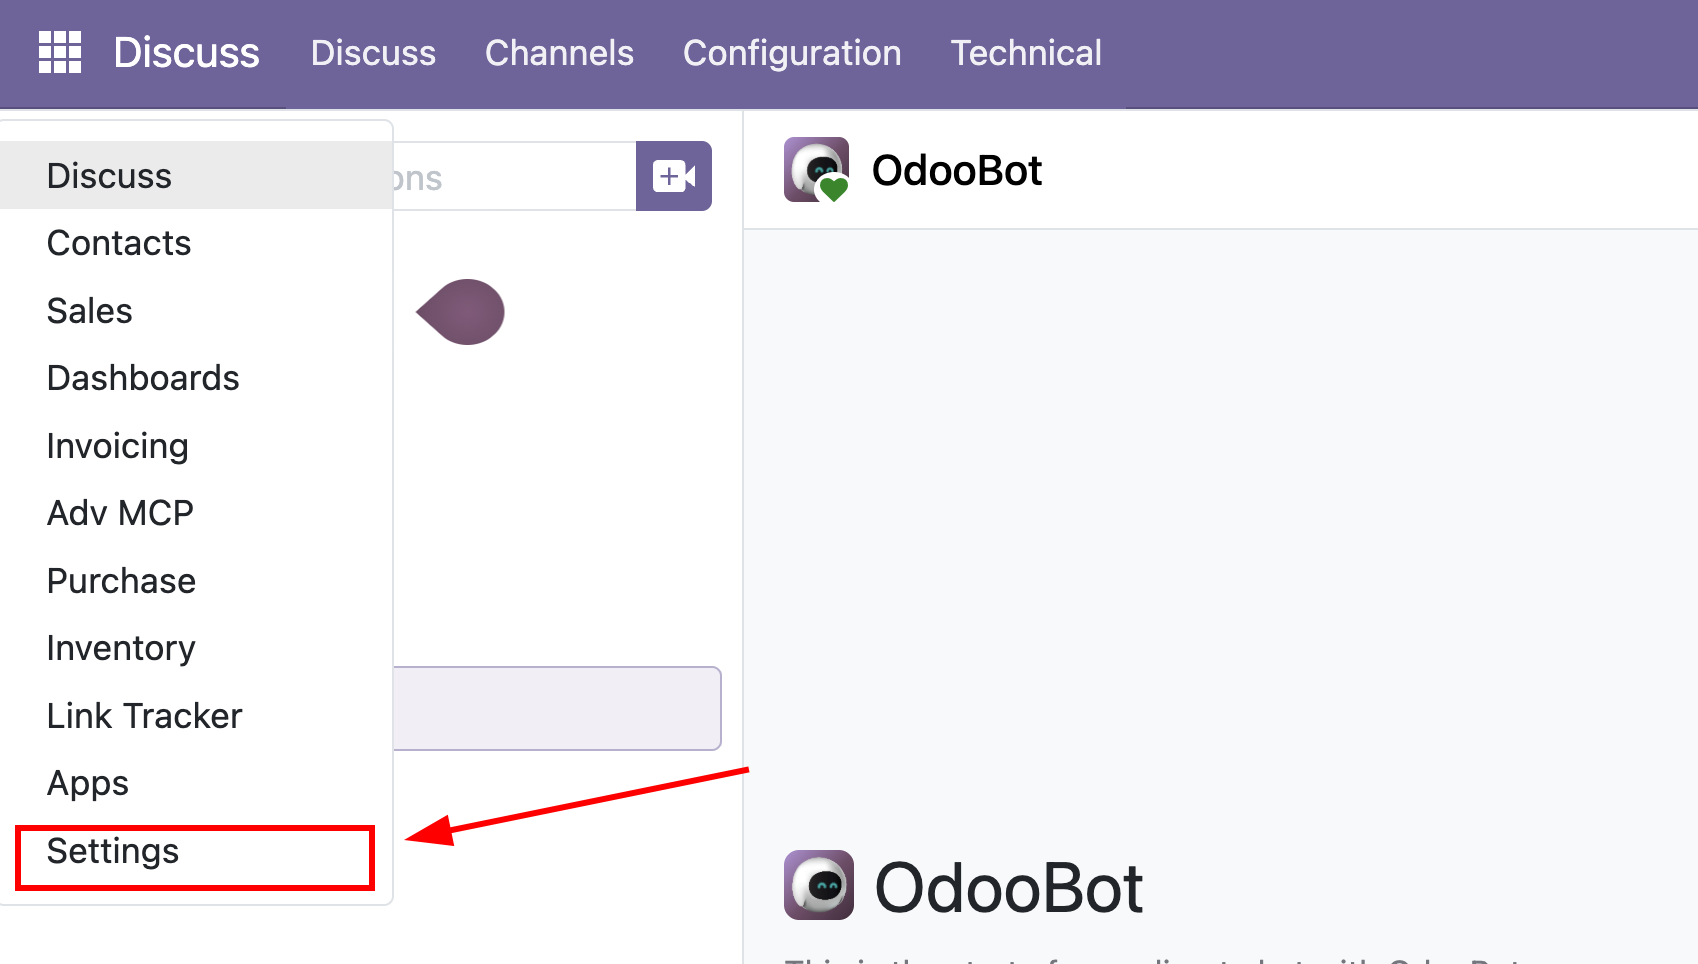
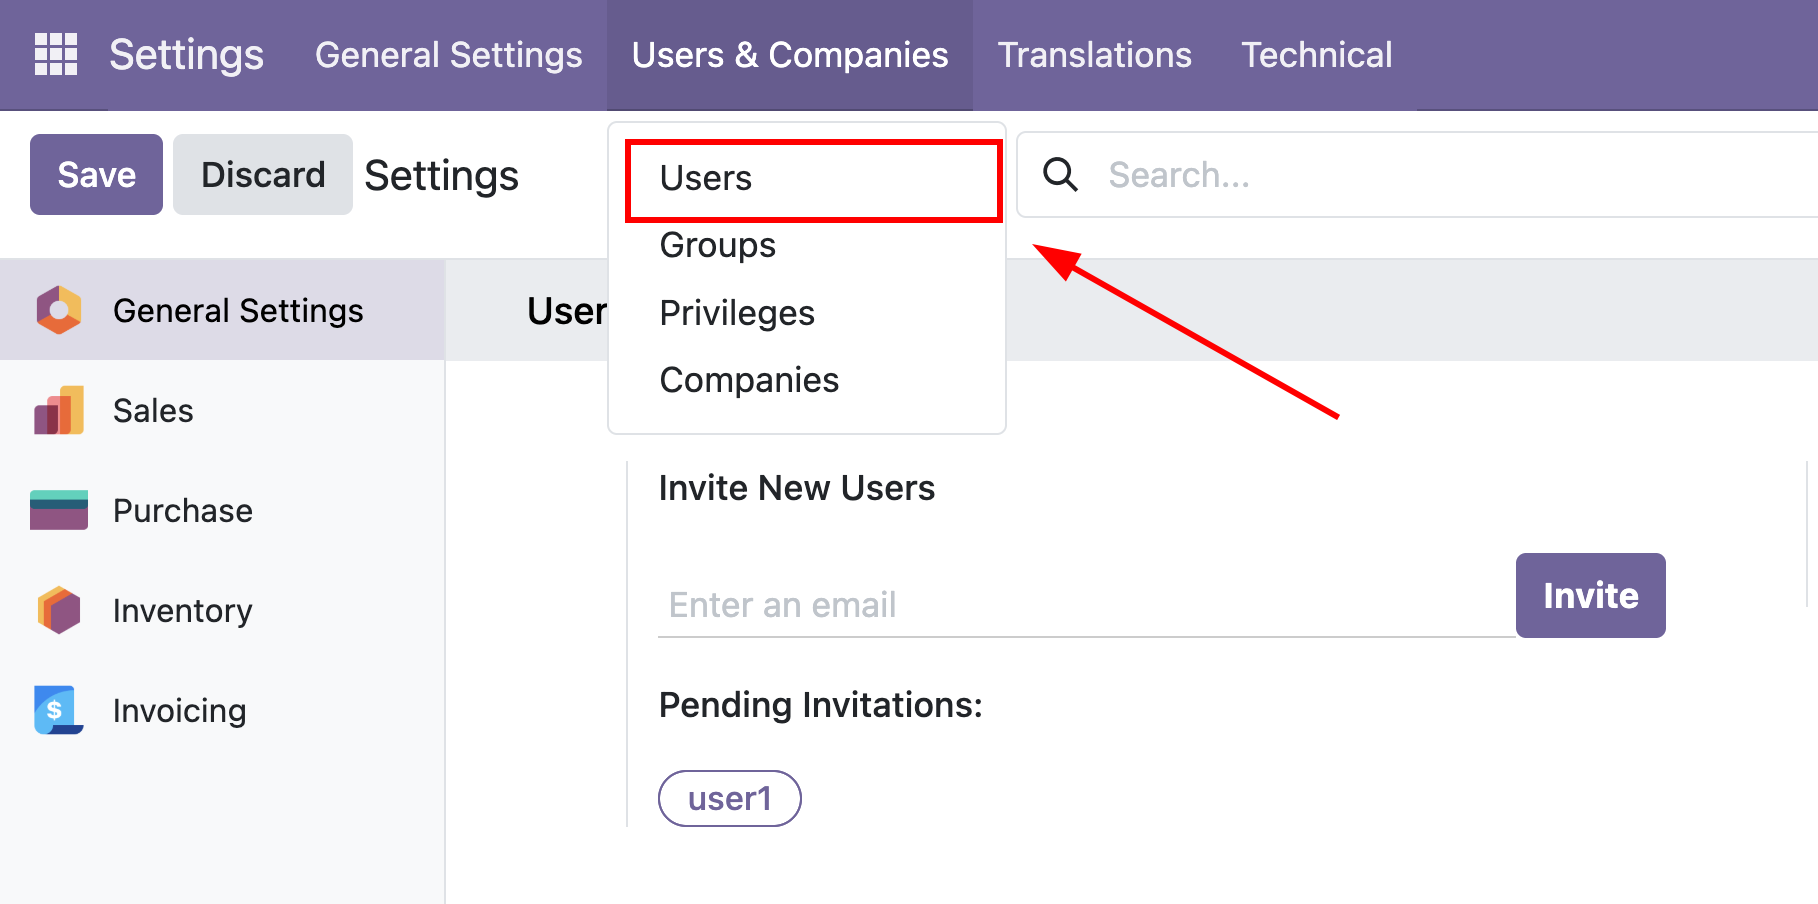
Step 2: Go to: Users & Companies > Users
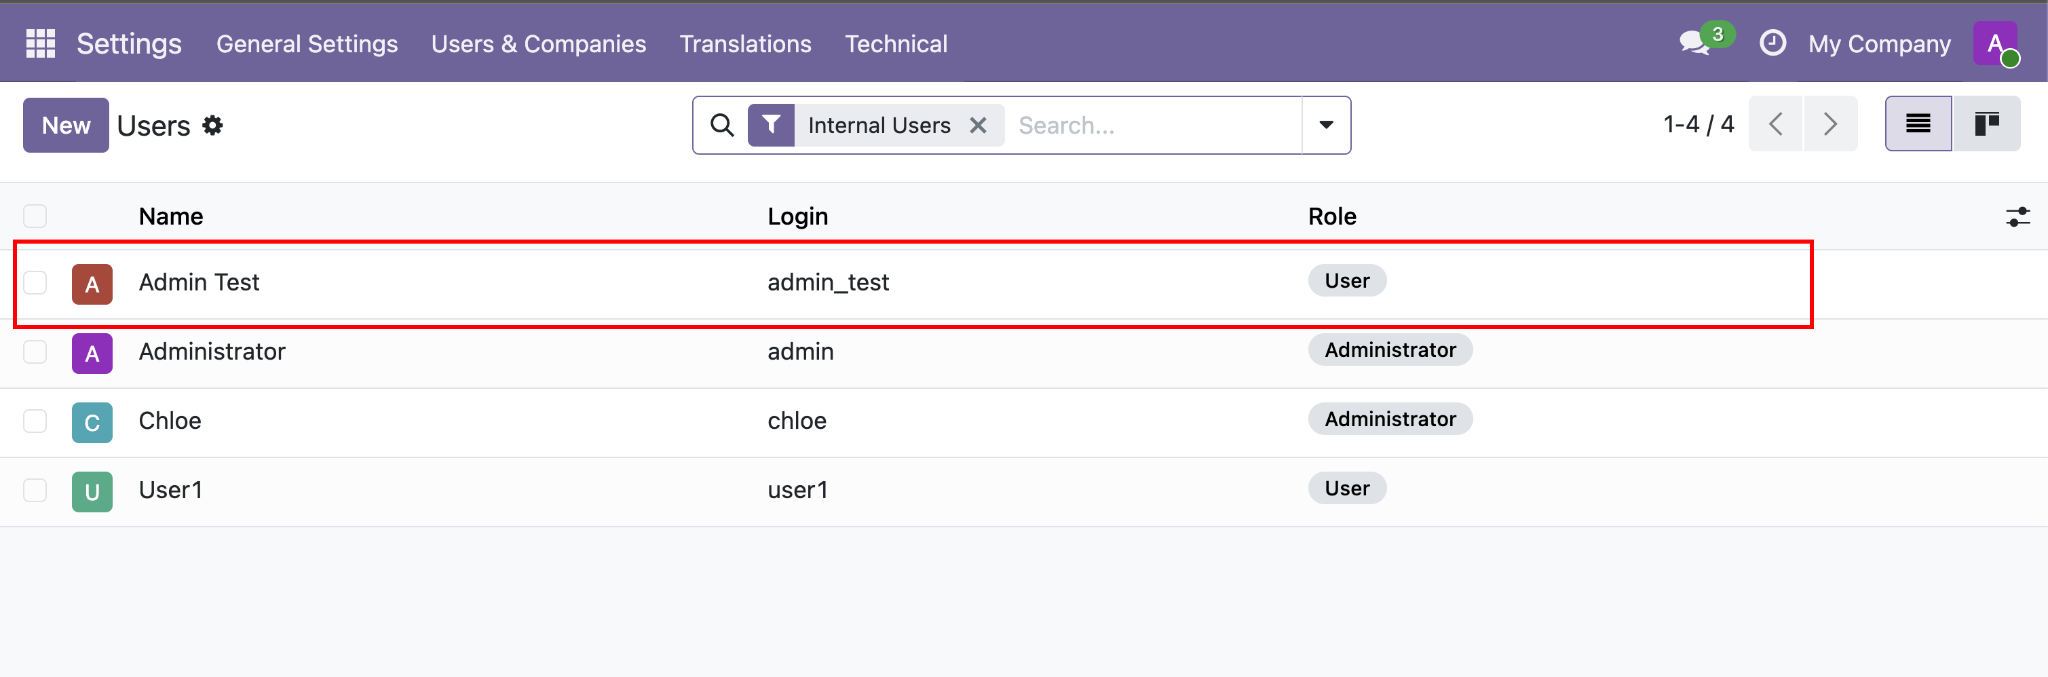
Step 3: Select the user whose permissions you want to configure.
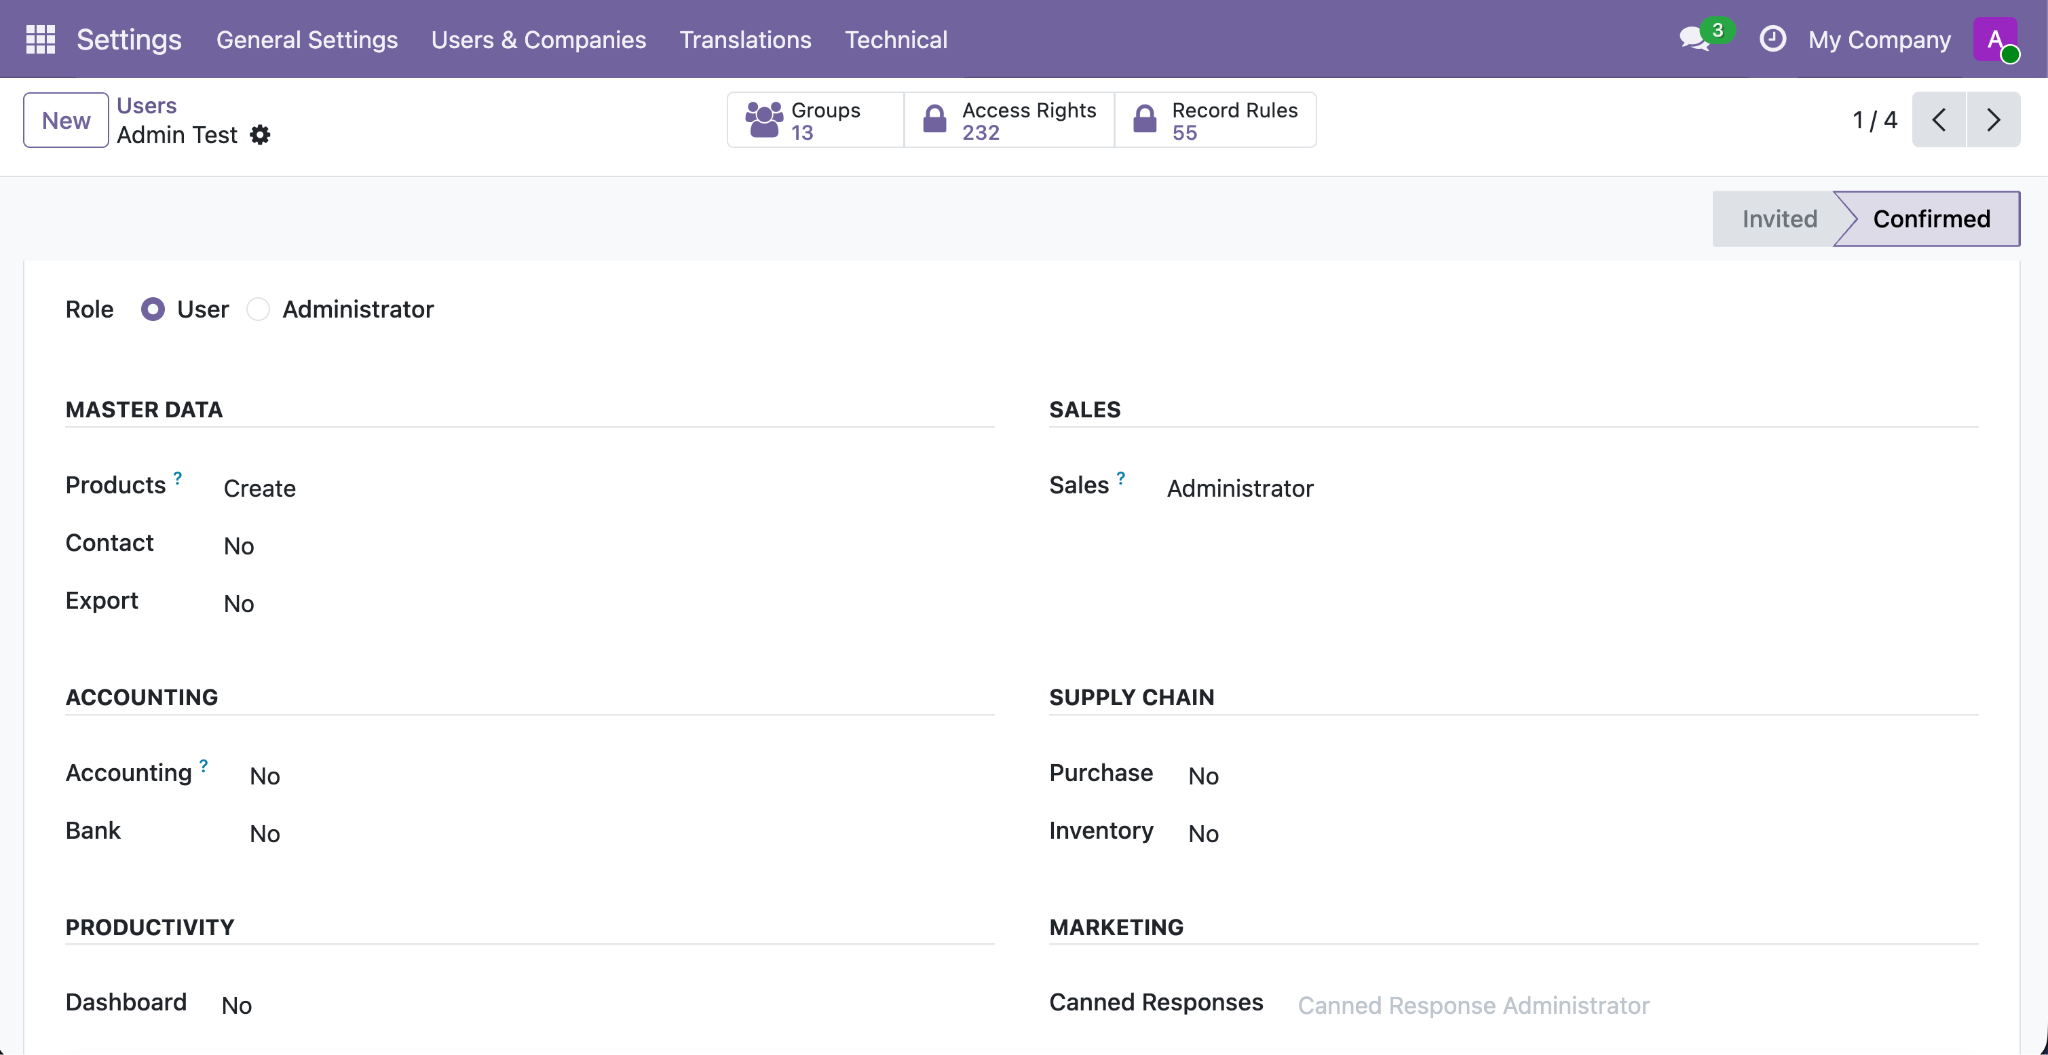
Step 4: Assign the required access rights using Odoo's standard permission settings.
Step 1: Open Claude.
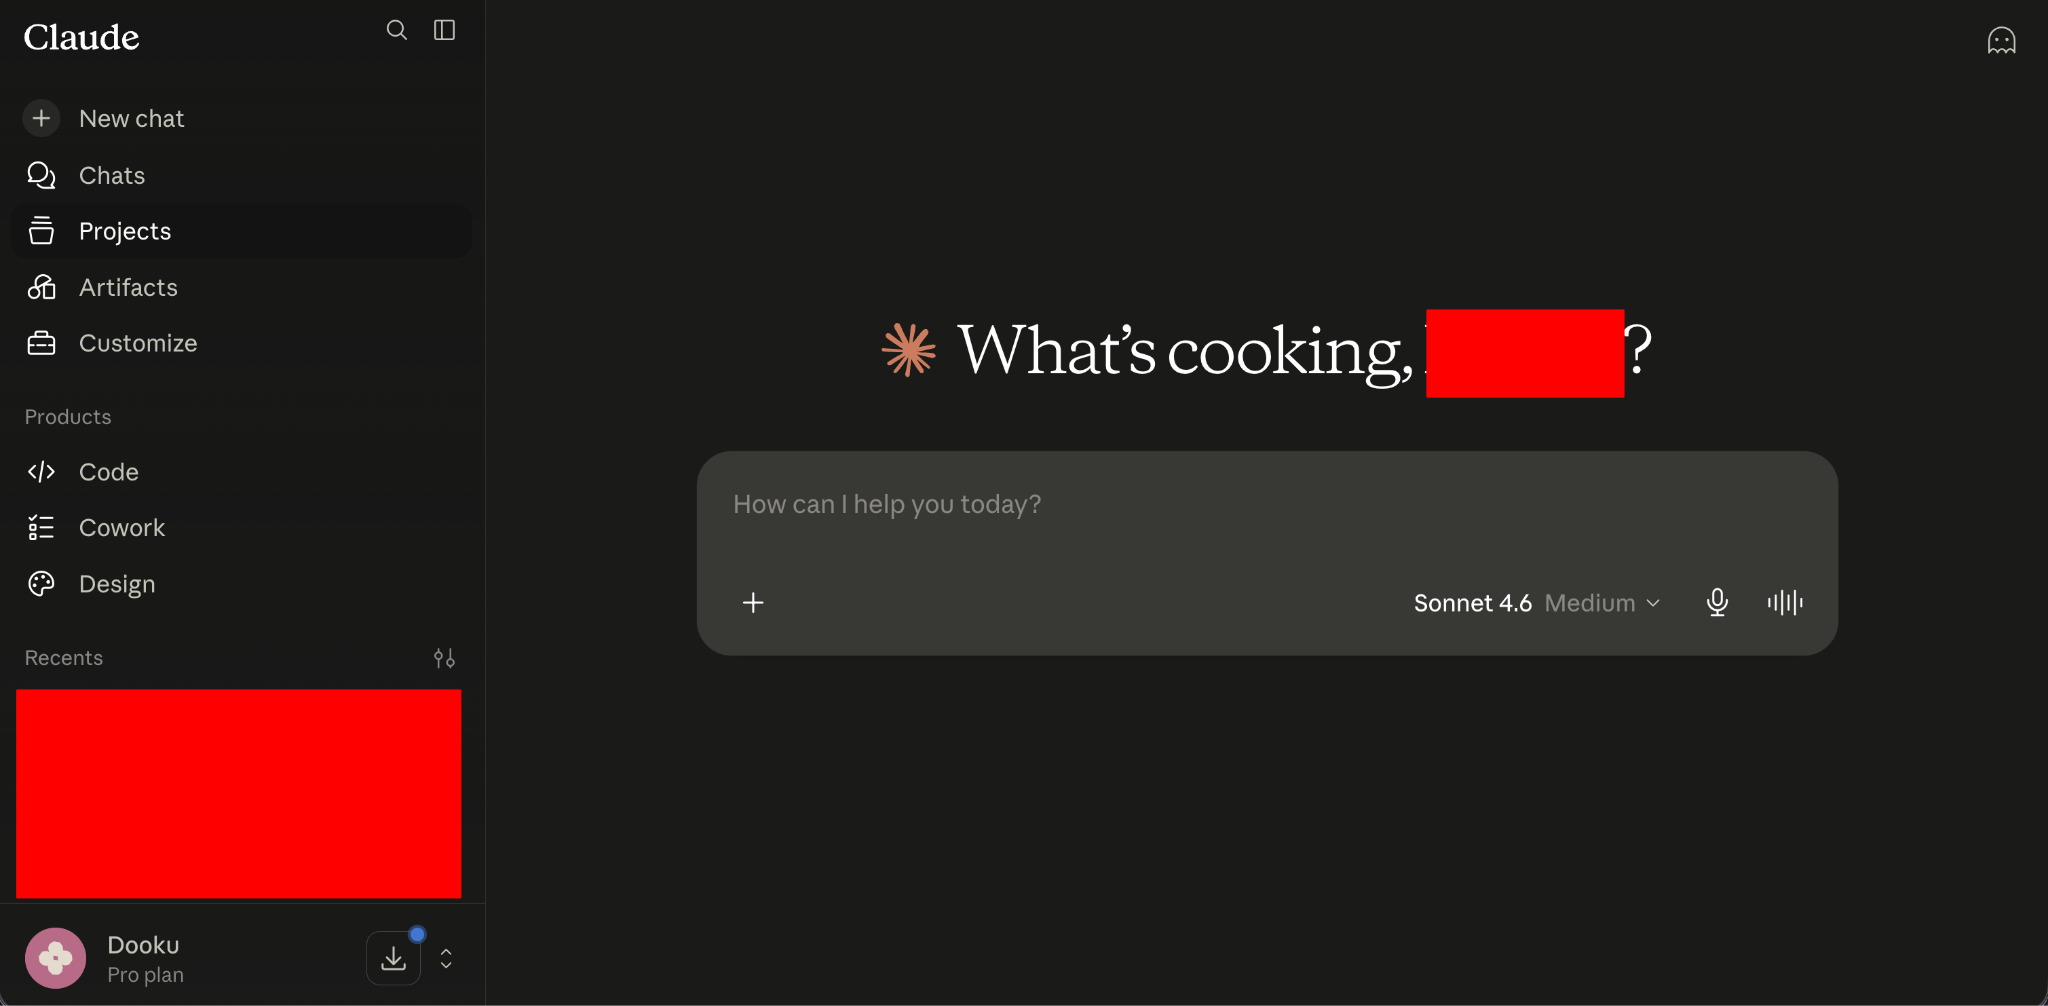
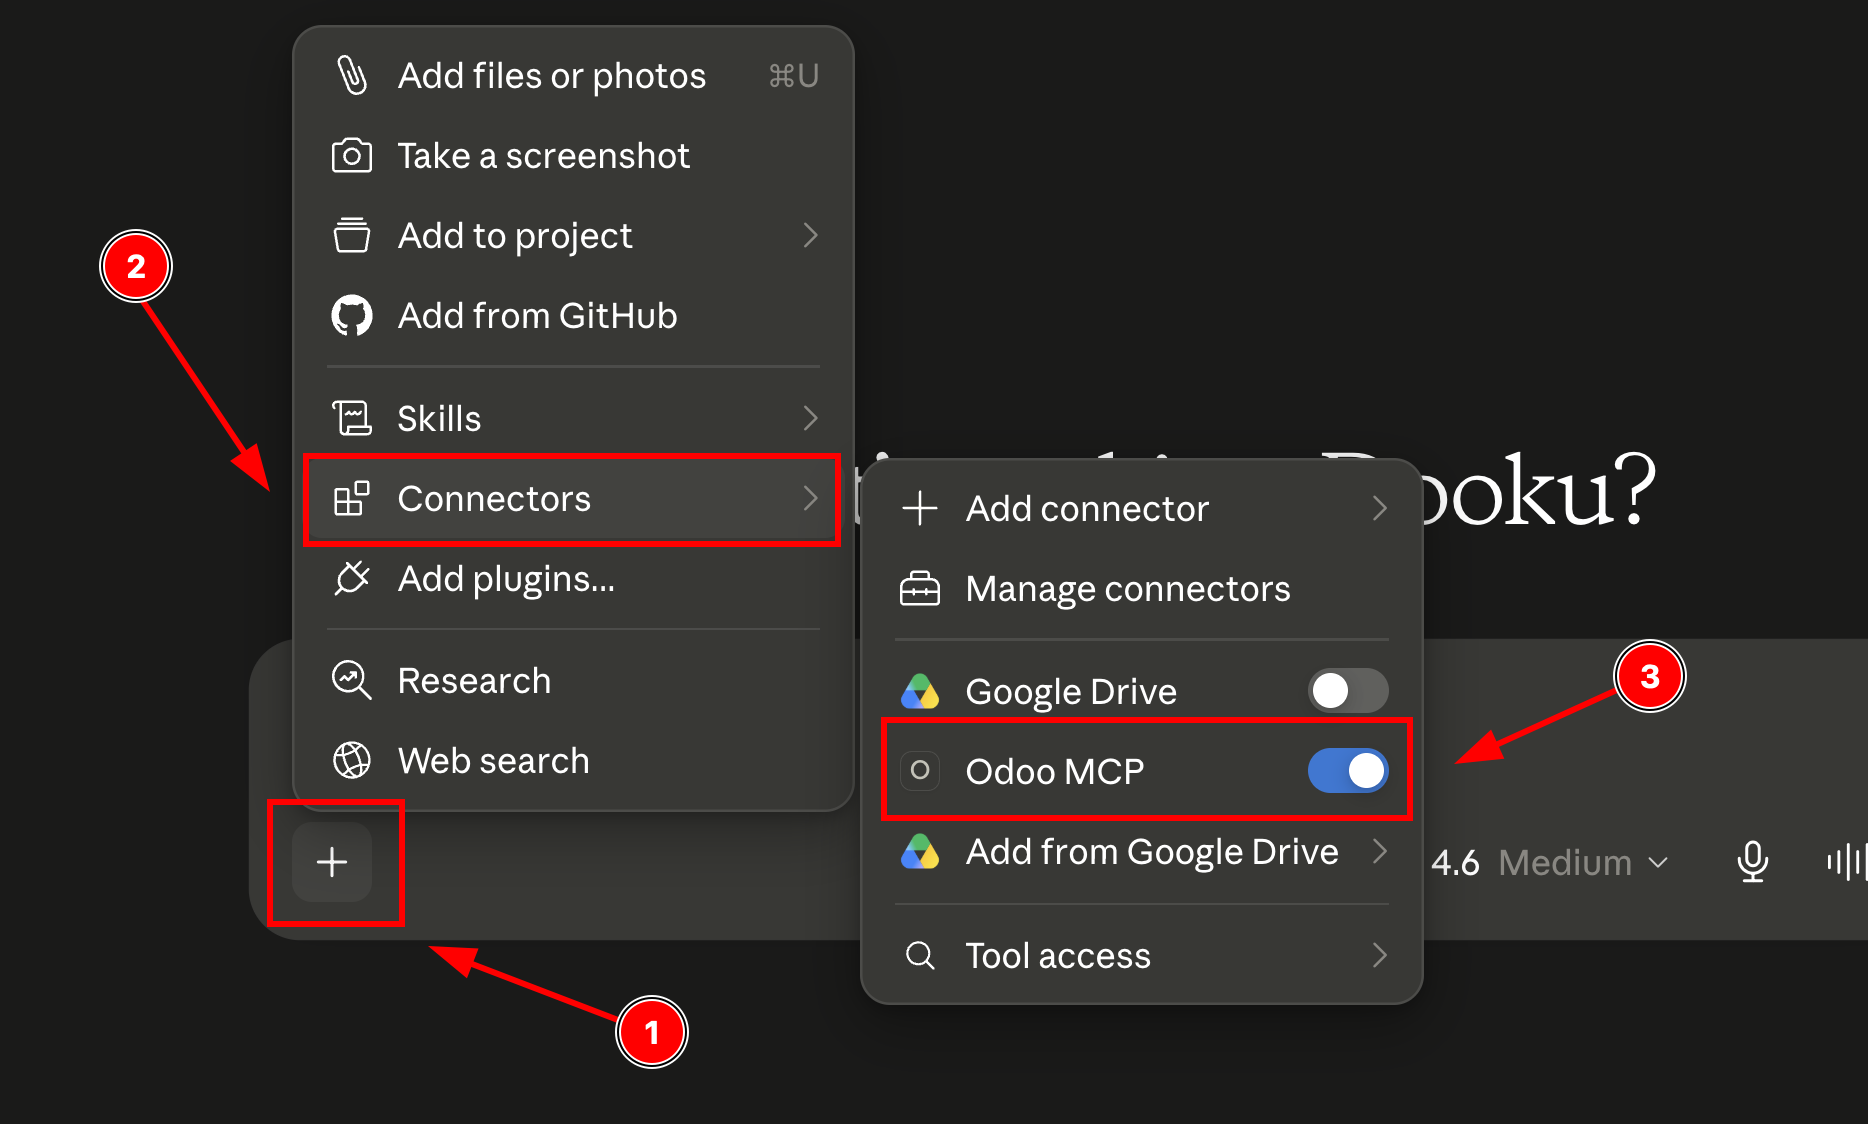
Step 2: Click the + icon shown in the chat interface and select Odoo MCP, or the connector name you created earlier.
Step 3: Start chatting.
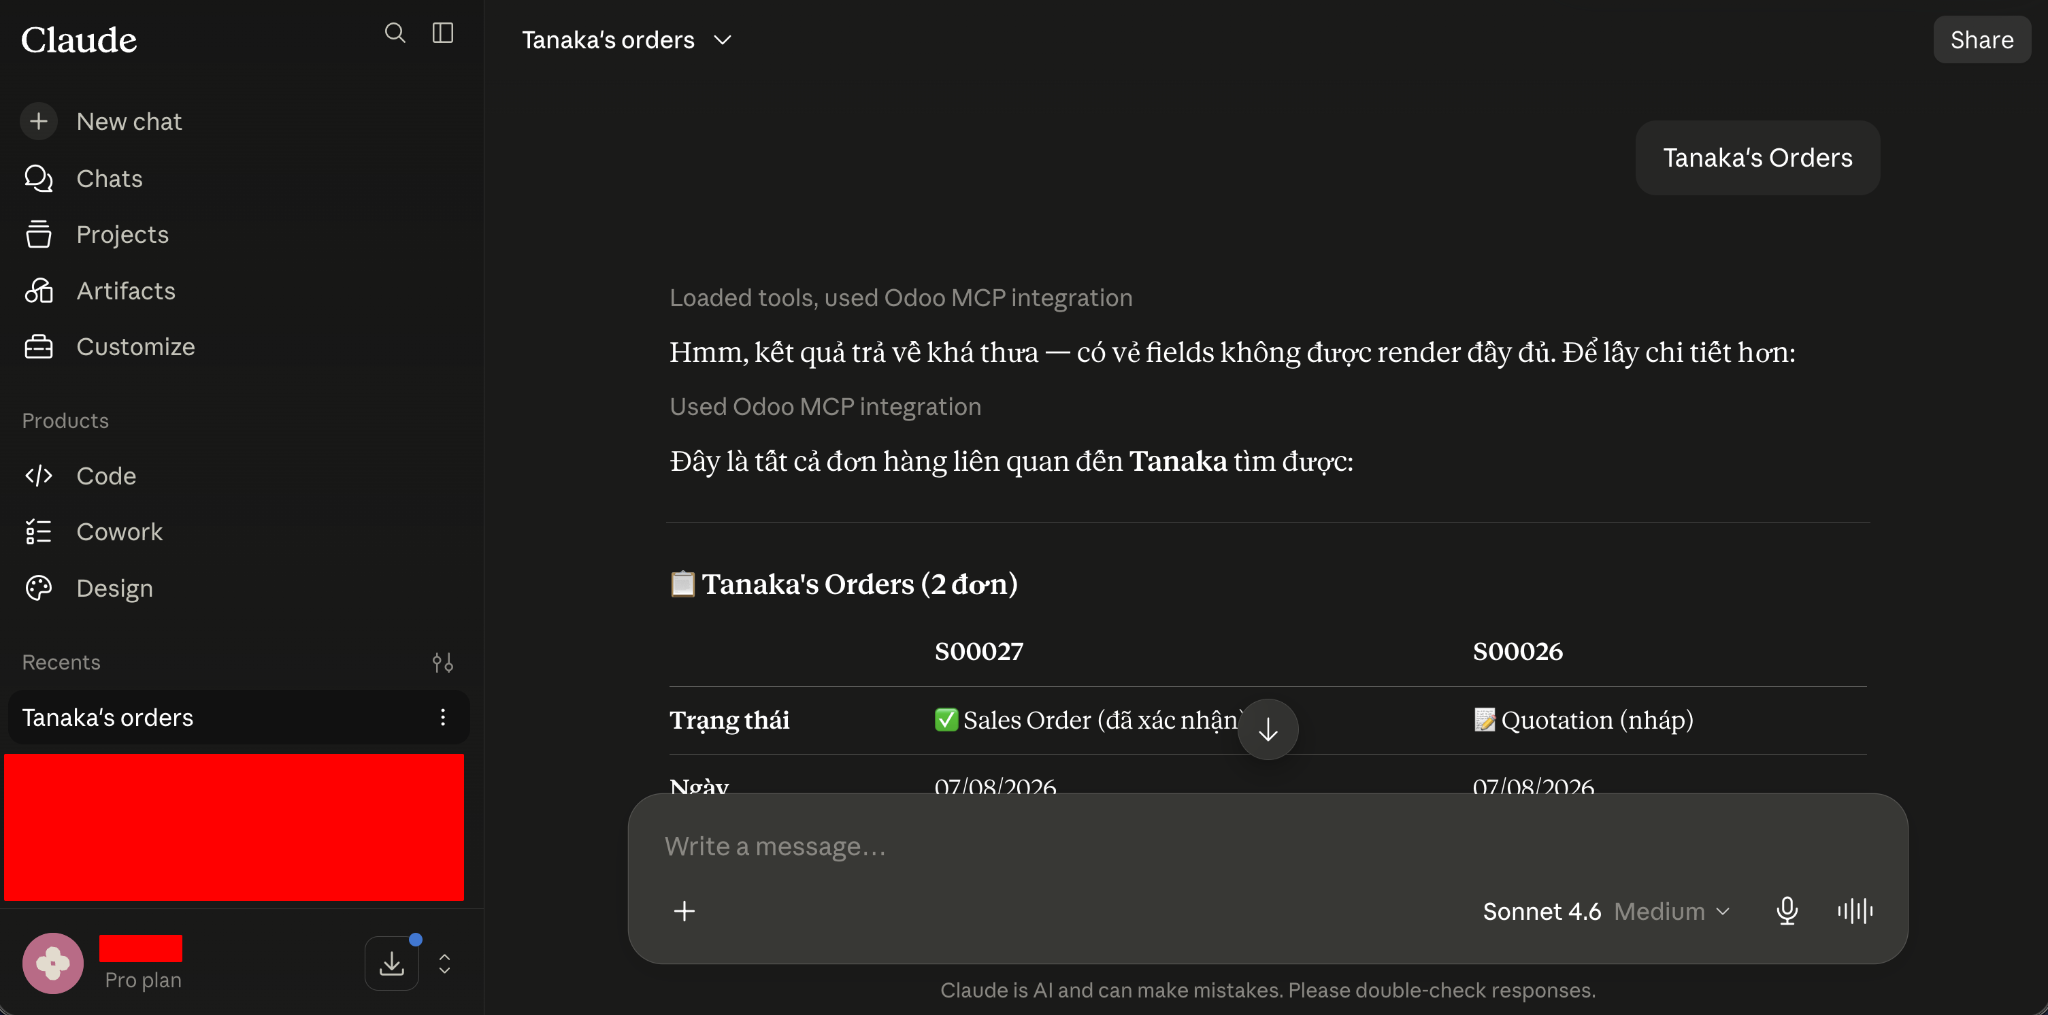
The AI Agent can now use the enabled MCP connection to work with Odoo within the permissions granted to the connected user.
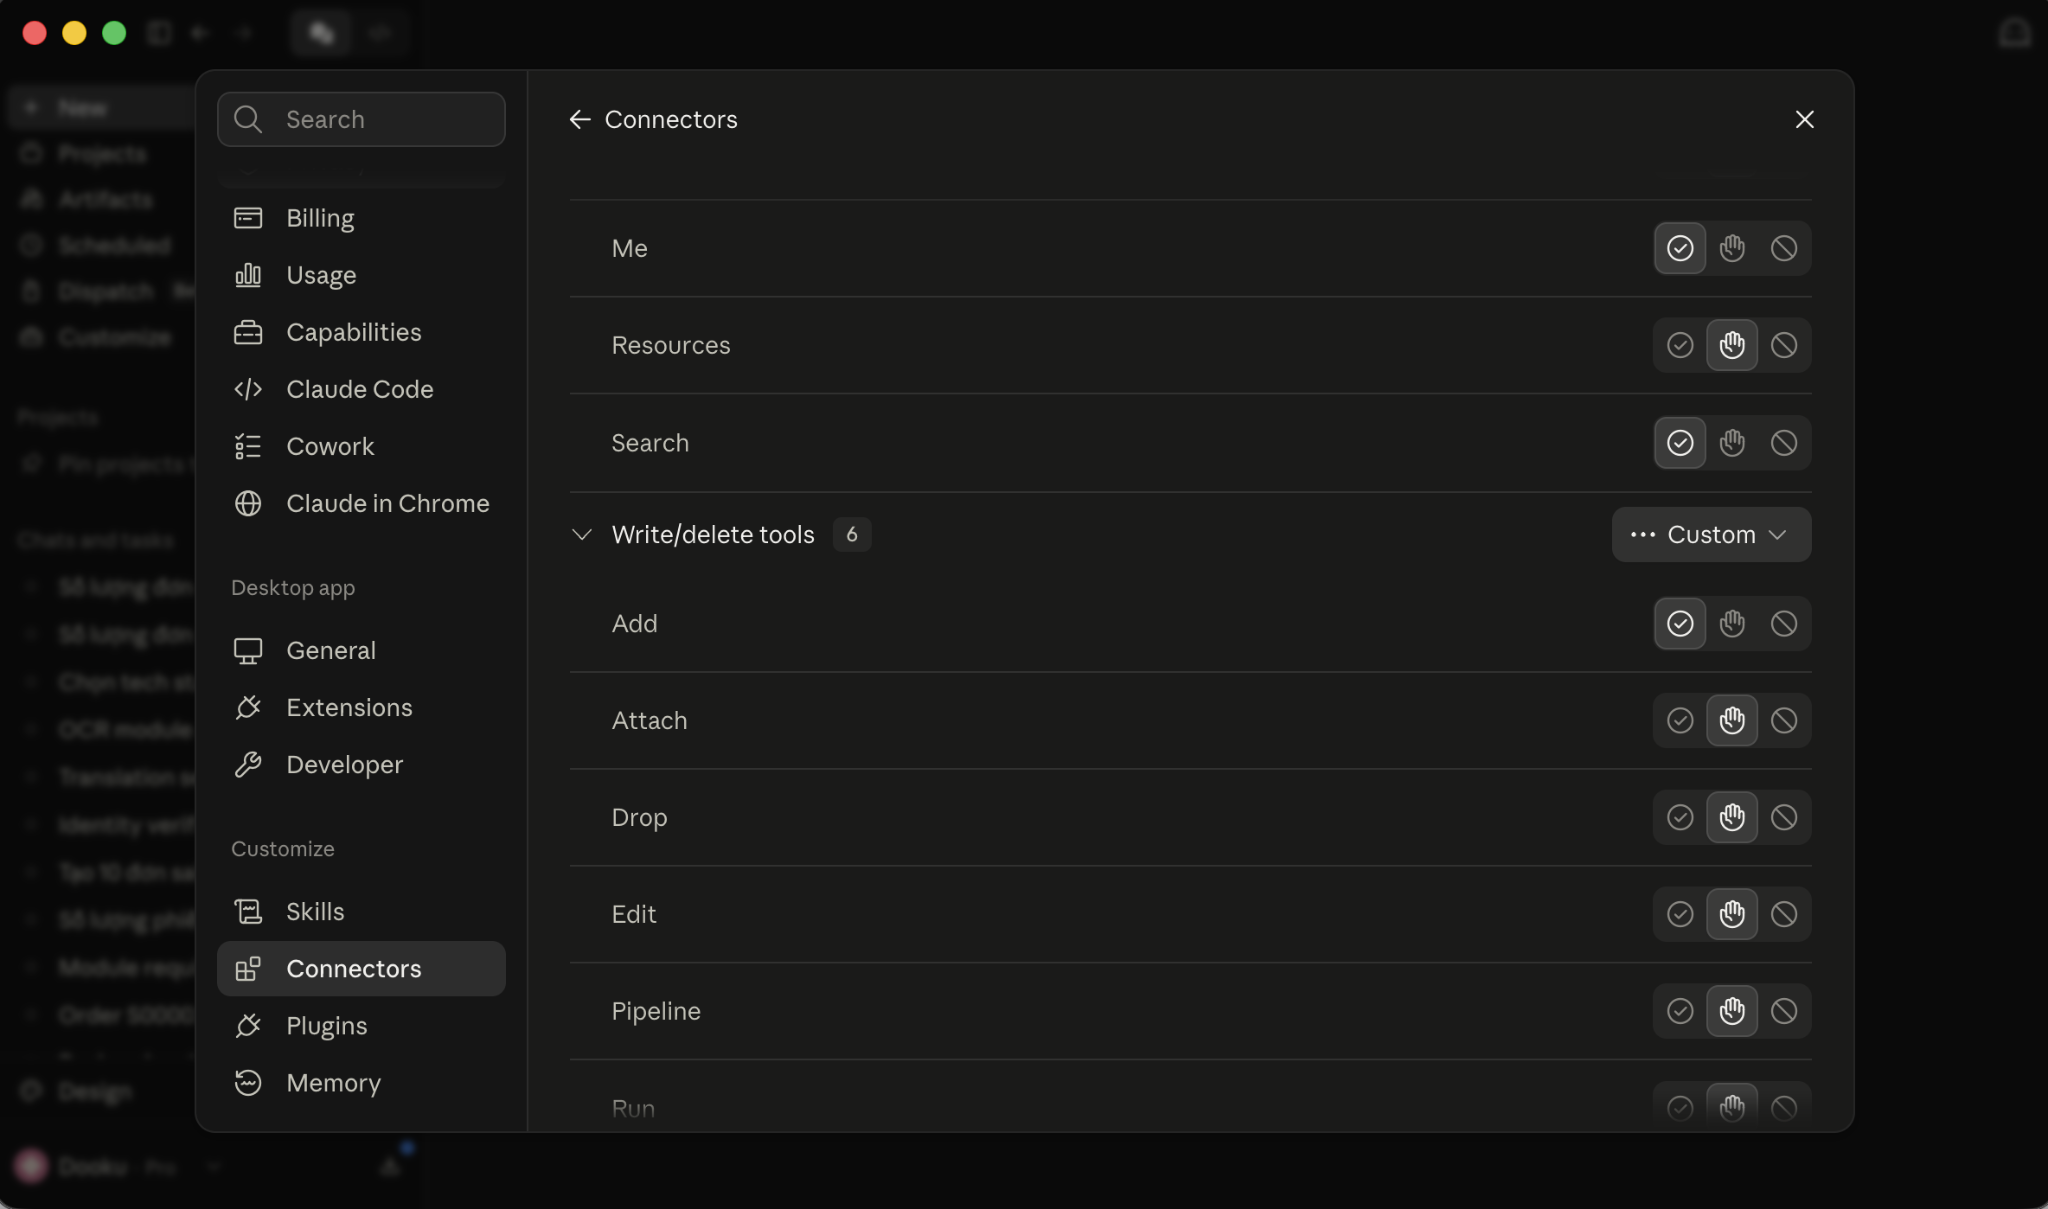
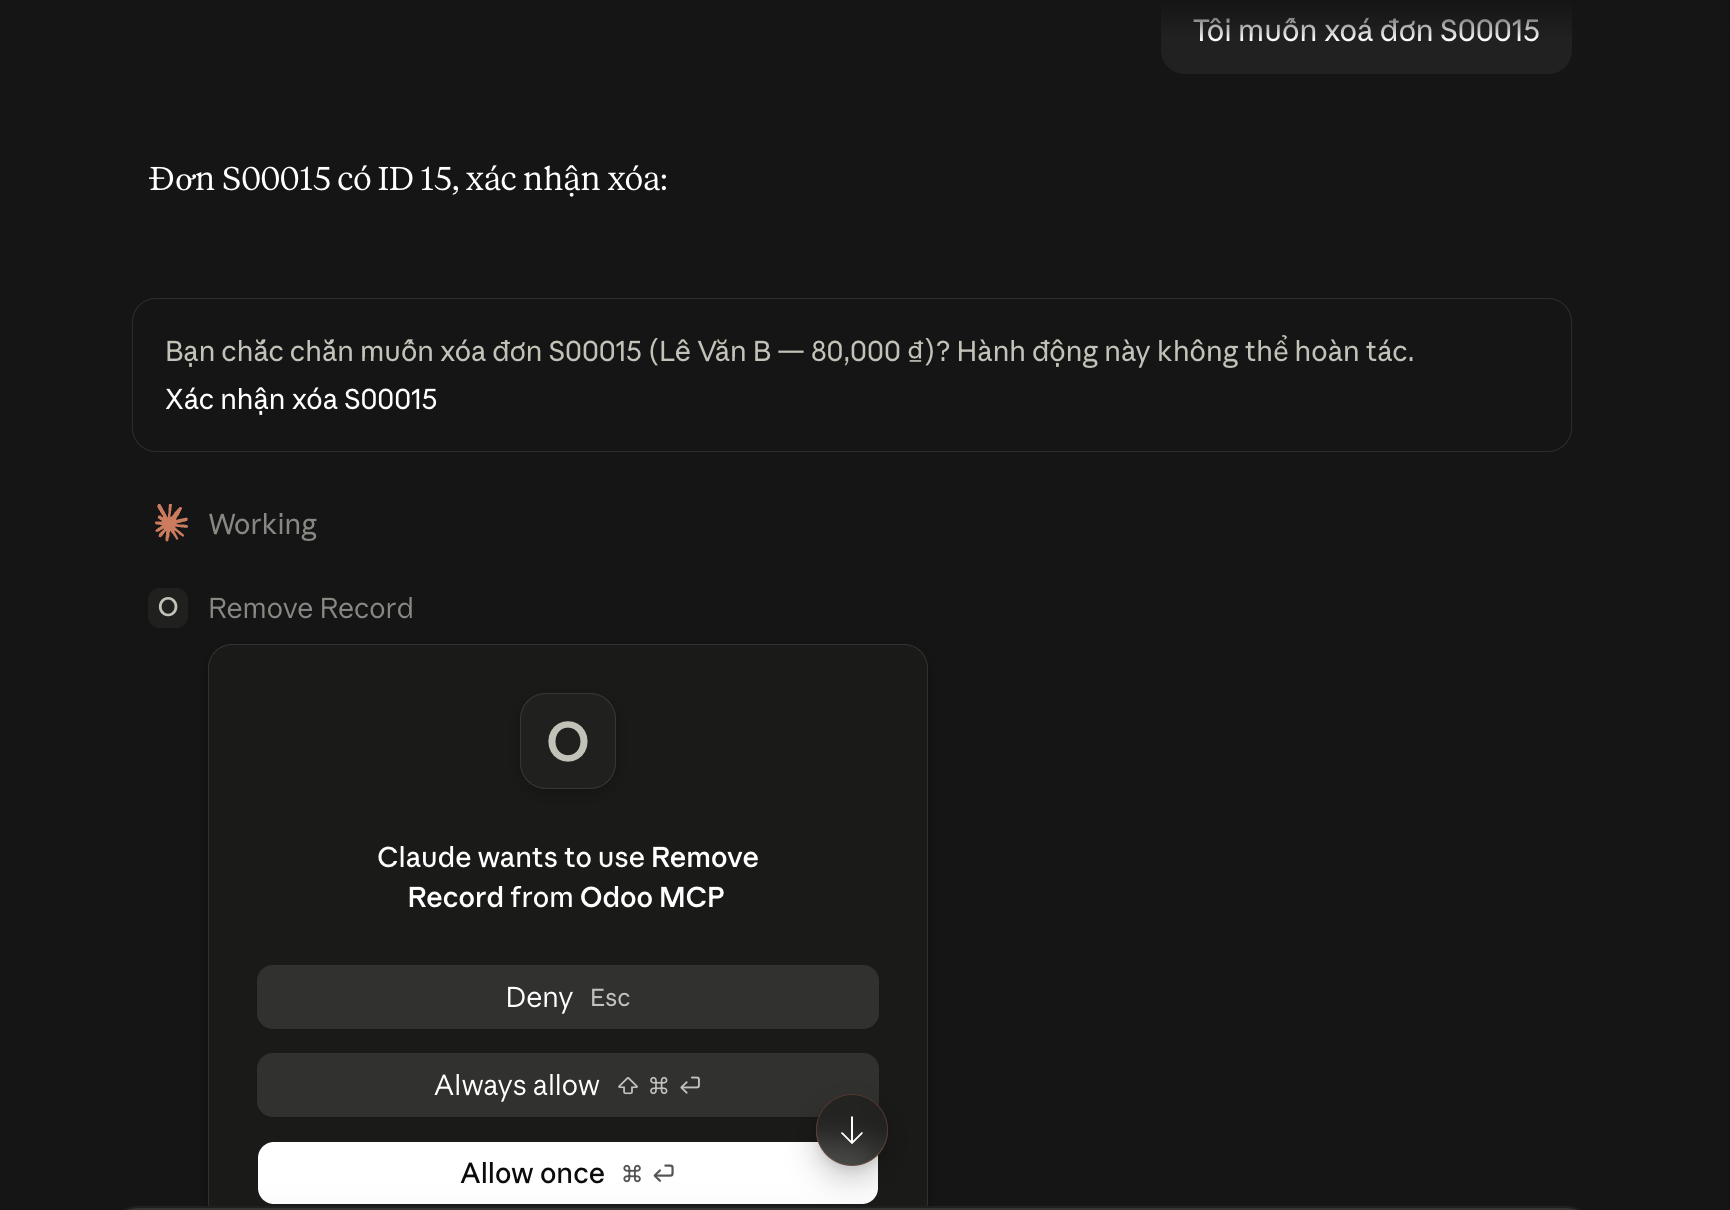
Some tools require user approval the first time an AI Agent attempts to use them.
For example, when a tool such as Remove Record is used for the first time, Claude may ask whether you want to:
Review this choice carefully, especially for tools that can delete or modify data.
Allowing a sensitive tool to run automatically may result in the AI Agent - or a user interacting with the Agent - performing actions beyond the intended business process.
In Claude, you can review which tools are:
For tools that can delete or make significant changes to Odoo data, keeping user approval enabled is recommended.