Thank you for purchasing our extension. If you have any questions that are beyond the scope of this document, please feel free to contact us via [email protected]
By: Magenest | Support Portal:
Odoo AI Assistant is an integrated Odoo module developed by Magenest that allows users to interact with AI directly within the Odoo interface.
Administrators can connect an AI provider, create AI Agents, select the appropriate language model, and configure supported Question Types. Users can then open a chat window and submit questions without leaving Odoo.
The current version responds to predefined Question Types. If a question has not been configured, the assistant will notify the user that the requested question is not supported.
Before installing and configuring Odoo AI Assistant, make sure the following requirements are met:
From any screen, users can switch between the available views by selecting the corresponding icon in the view switcher at the top-right corner (1).
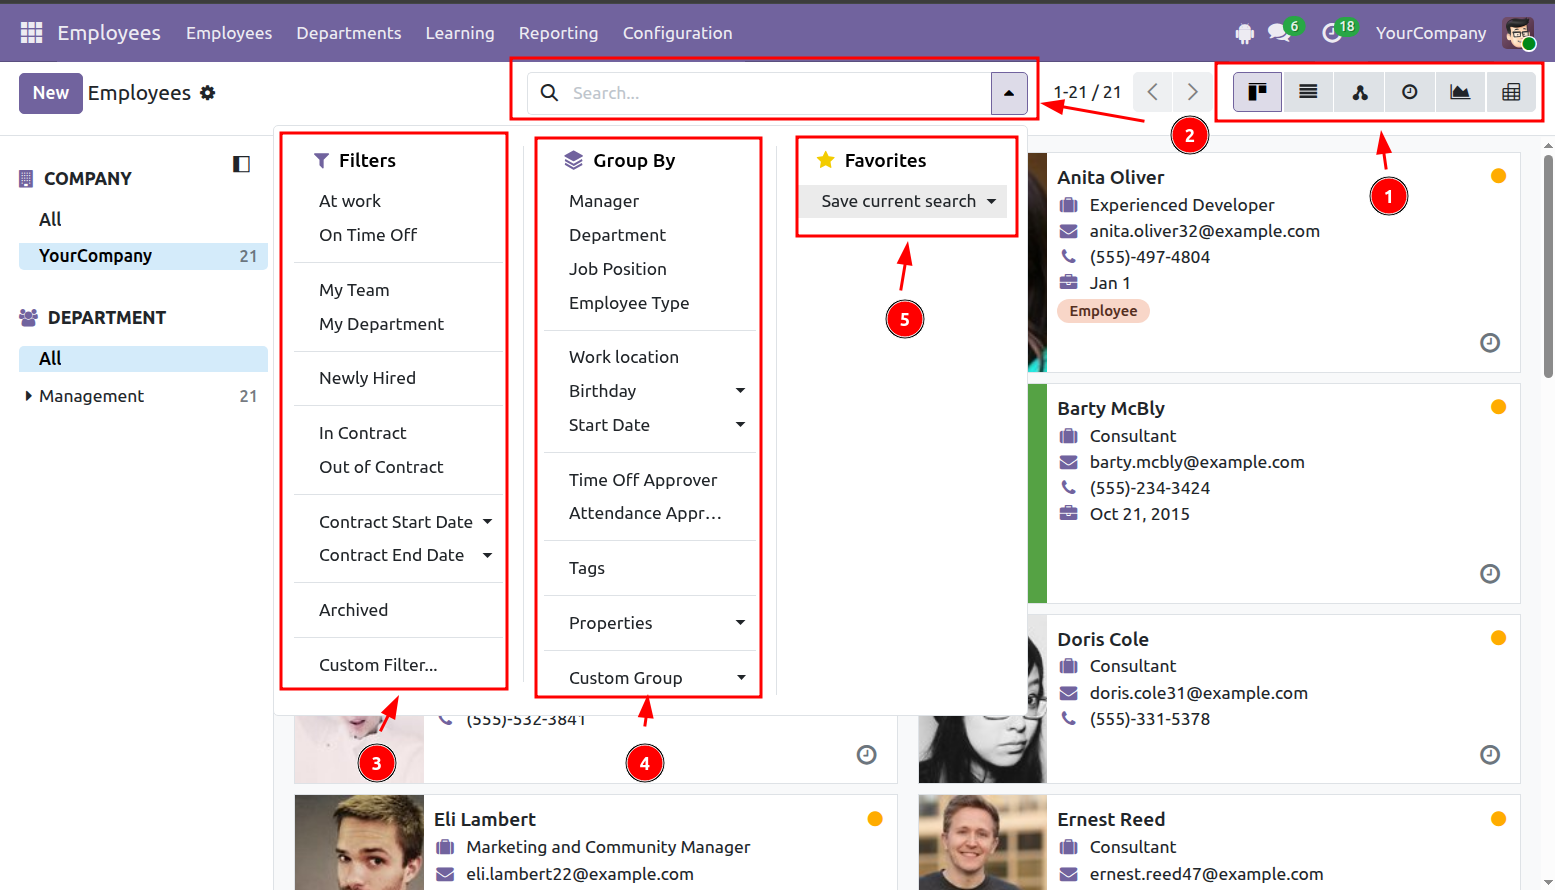
To filter or group records, click the search bar (2) and choose the relevant options. You can:
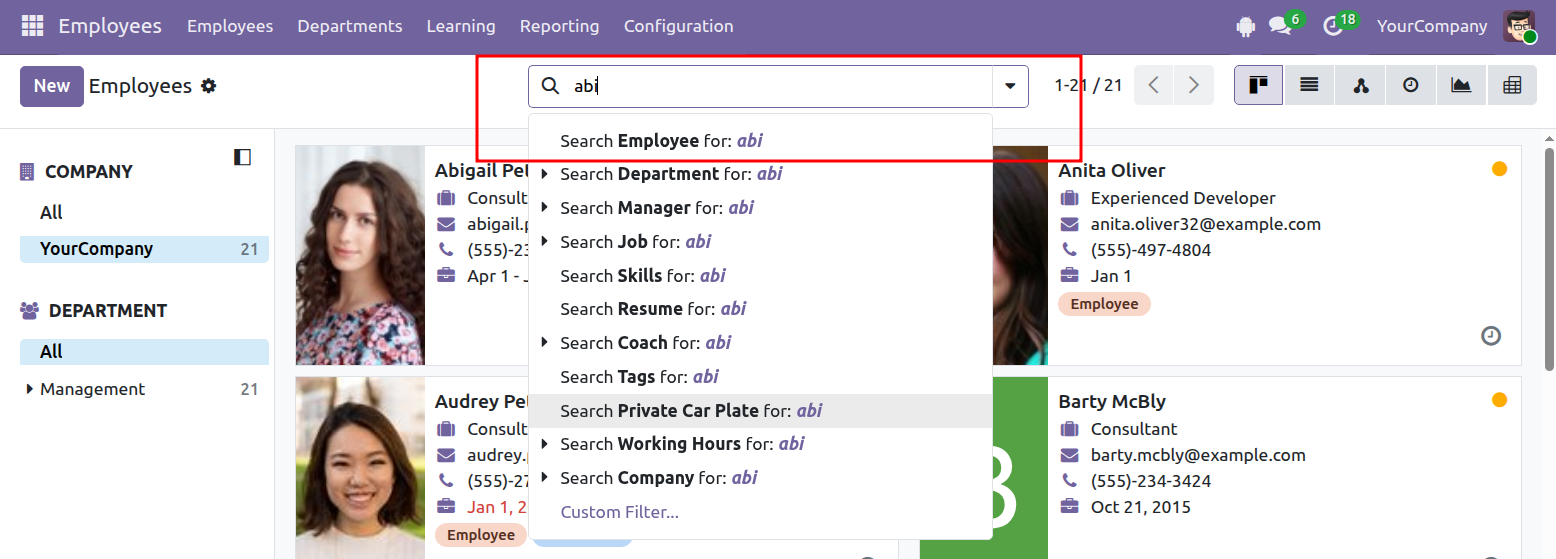
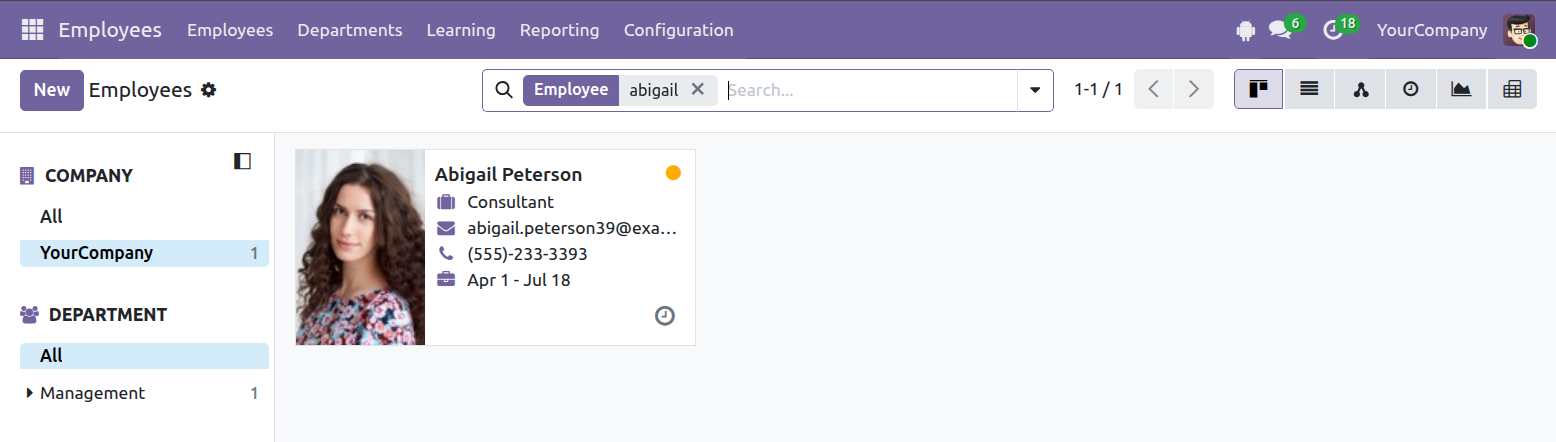
When you enter a keyword in the search bar, Odoo displays the fields that can be searched. Select the appropriate field to find records that match the keyword.
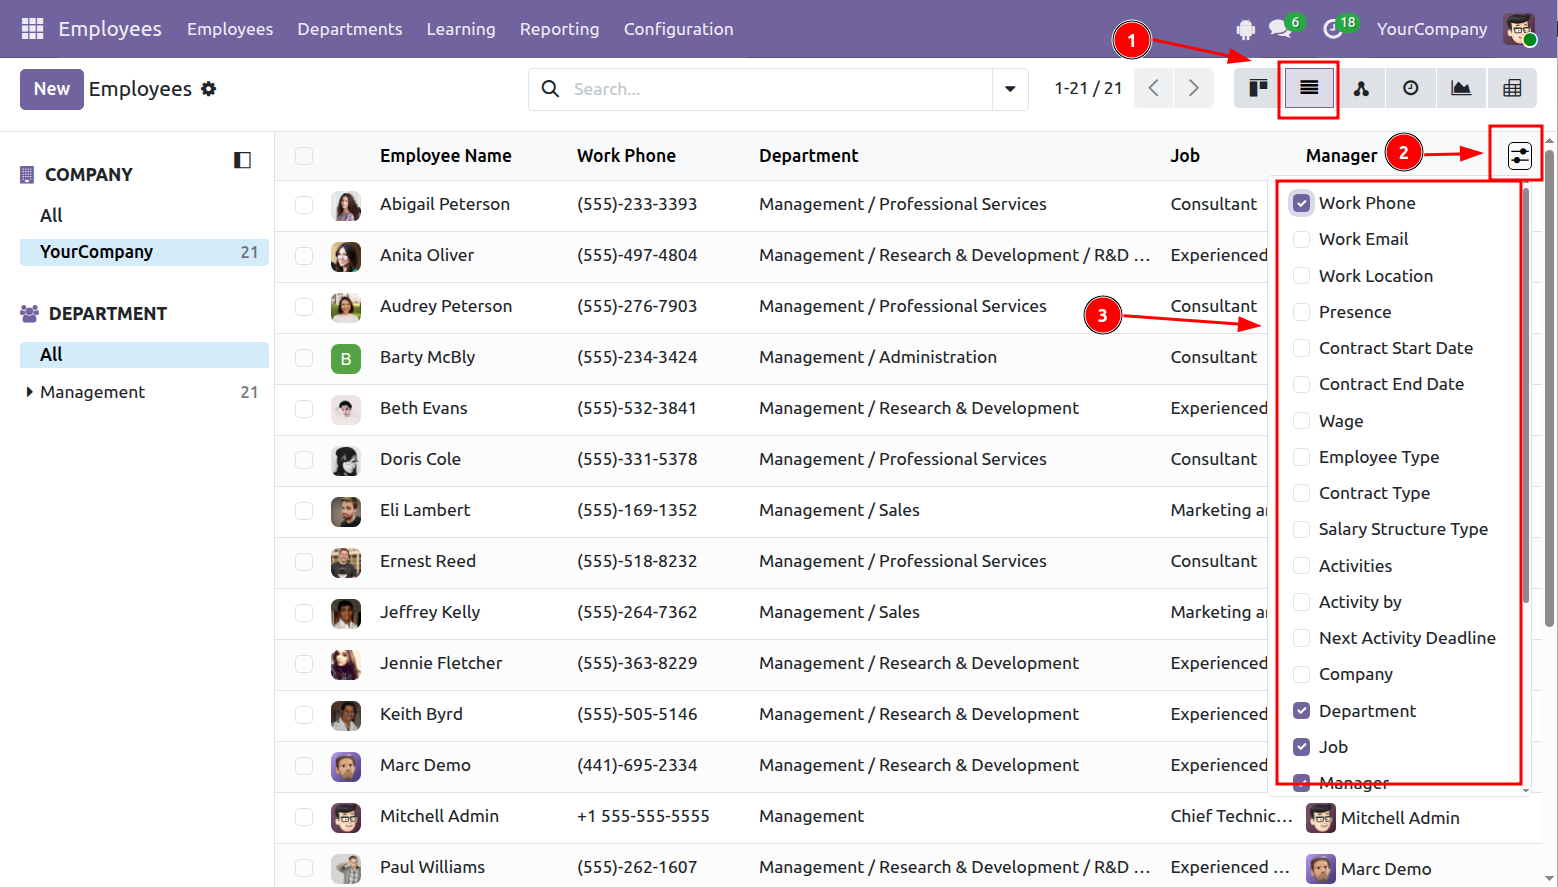
In List view (1), click the column settings icon (2) to choose which columns are shown or hidden.
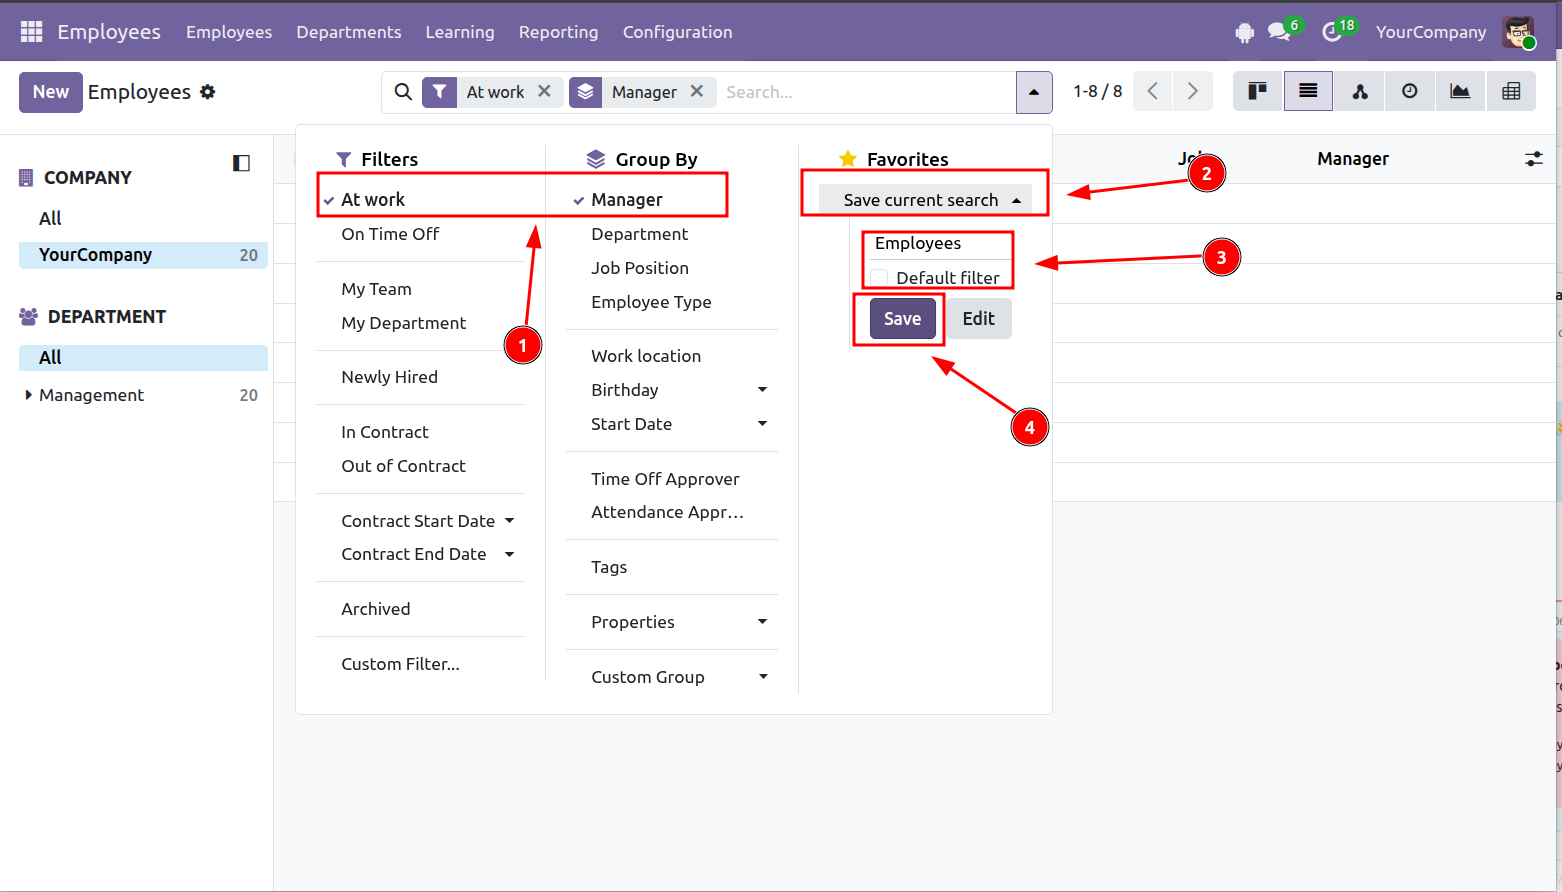
Step 1: Apply the filters or grouping options you need (1). You can use the available options or create your own.
Step 2: Select Save current search (2).
Step 3: Enter a name for the saved search.
Step 4: Click Save (4).
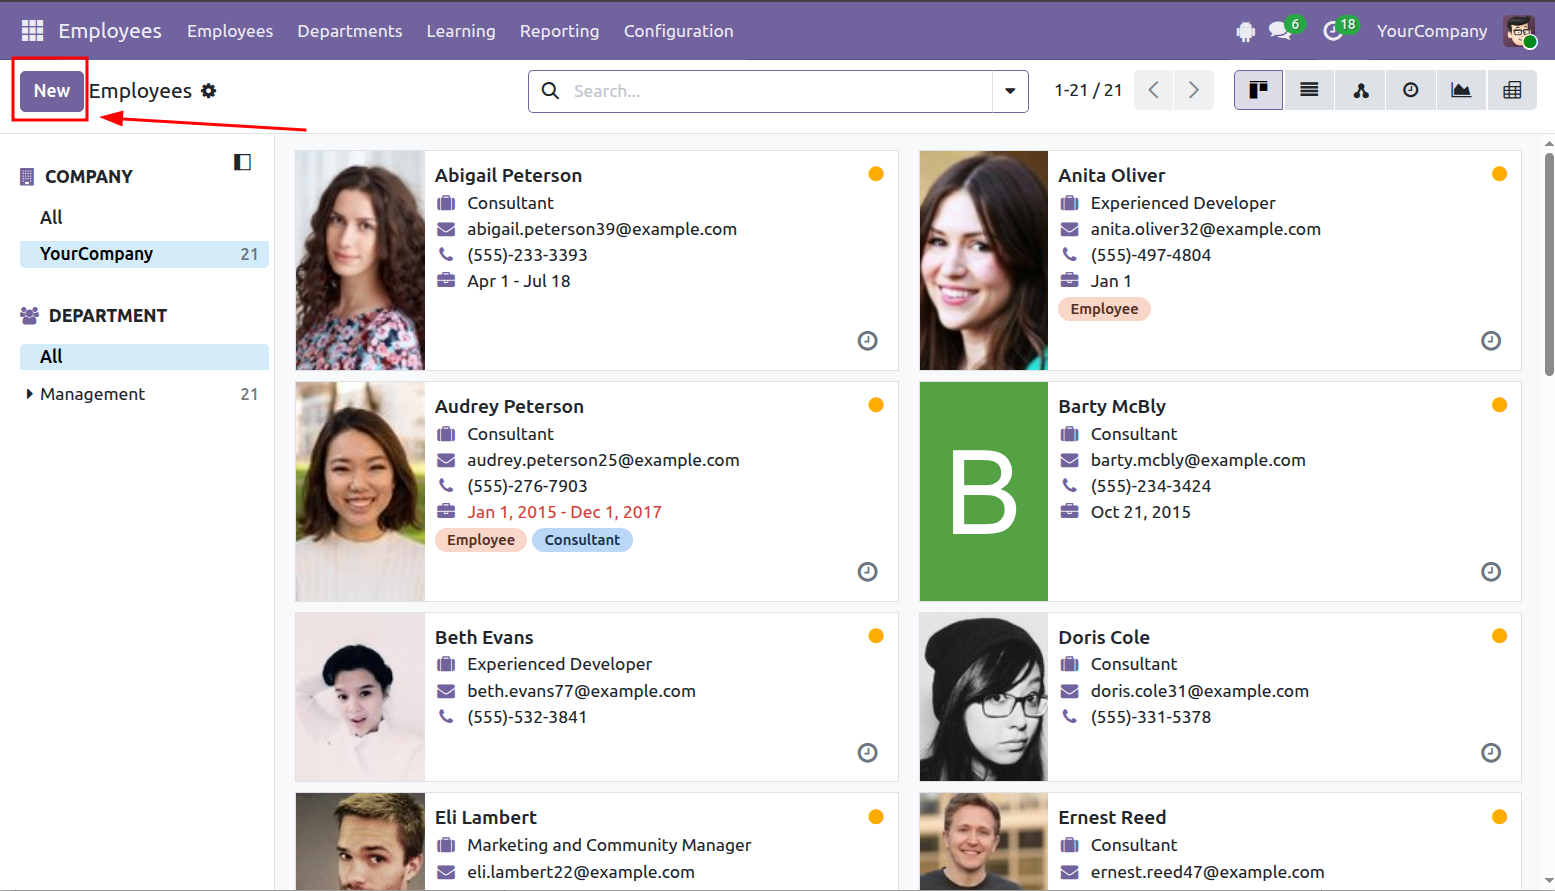
Step 1: Open the relevant section, such as Employees, and click New.
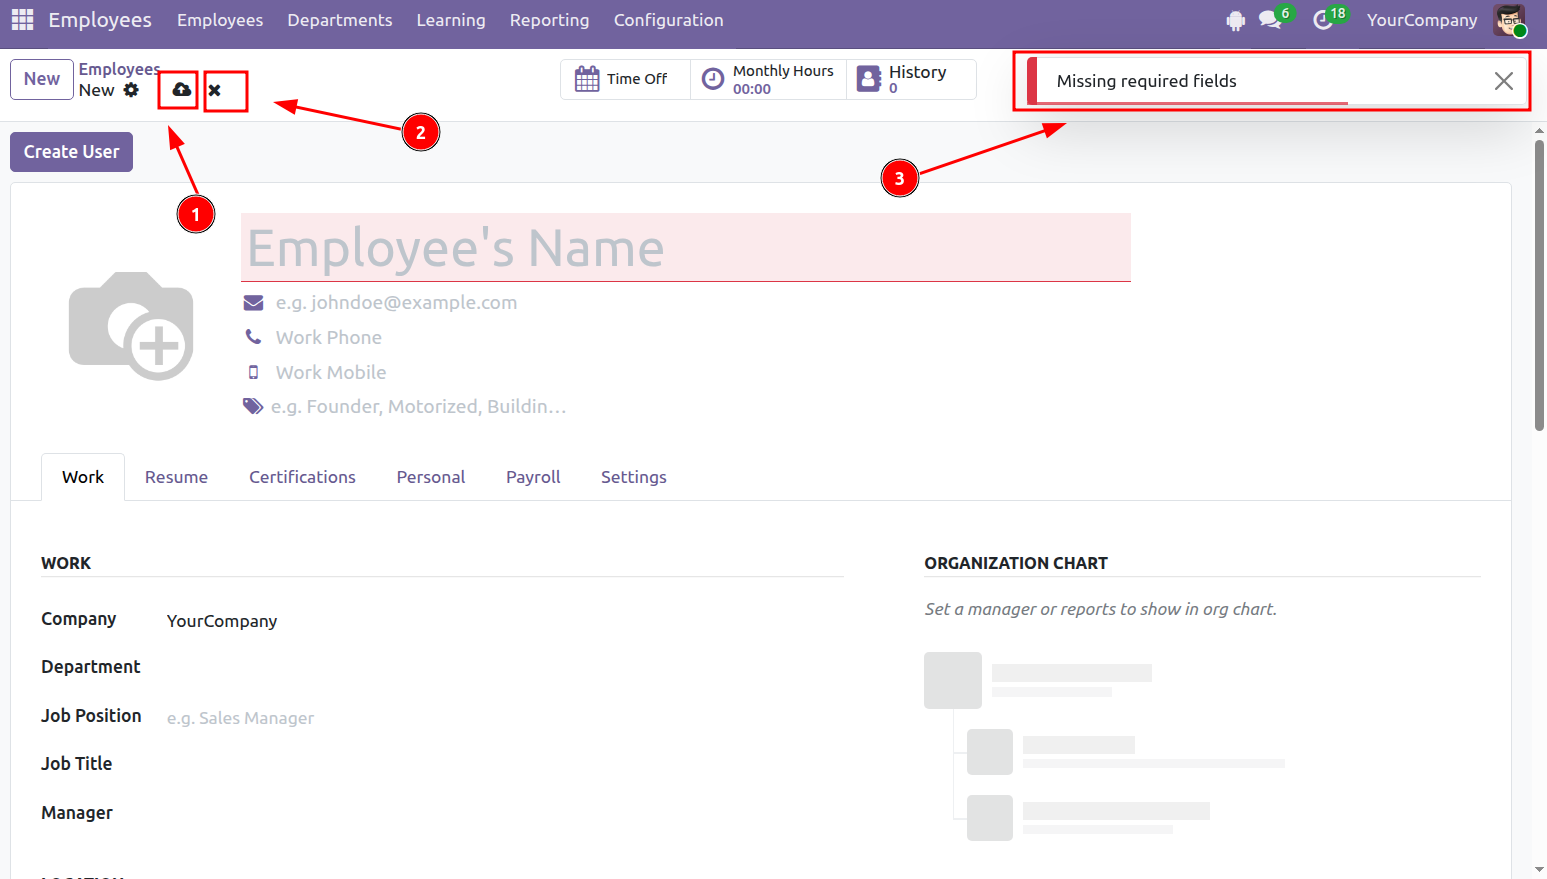
Step 2: Complete the required information, then click Save (1).
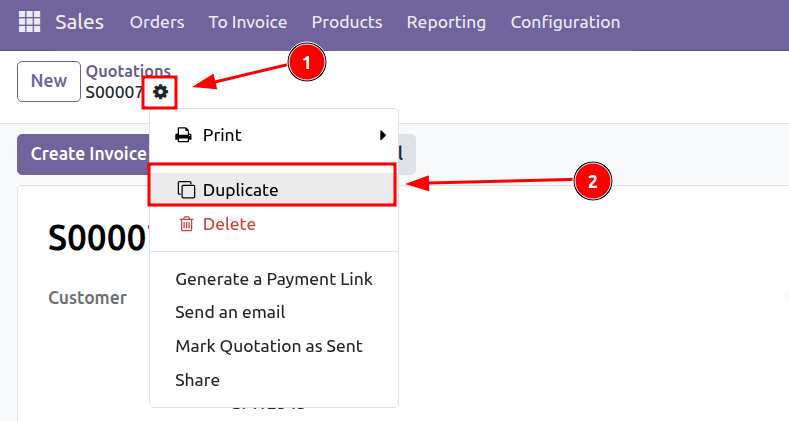
You can create a new record by copying an existing one.
To duplicate a record from Form view:
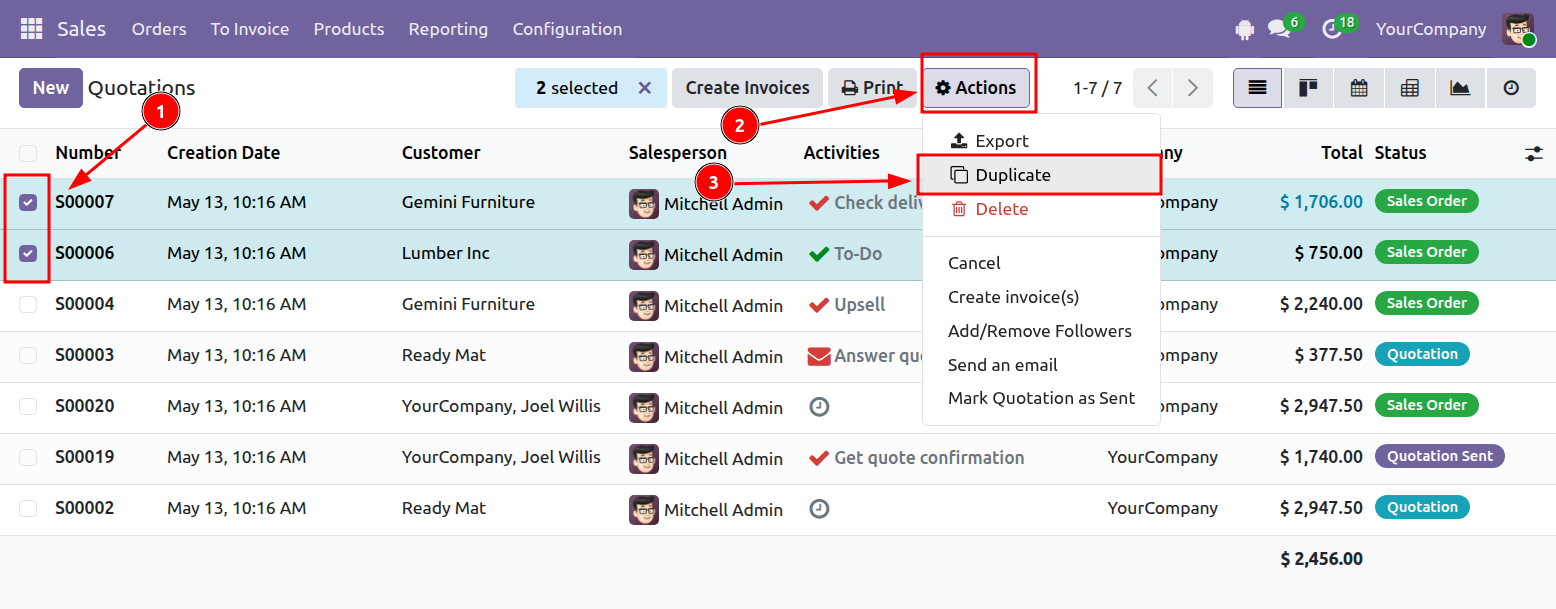
To duplicate one or more records from List view:
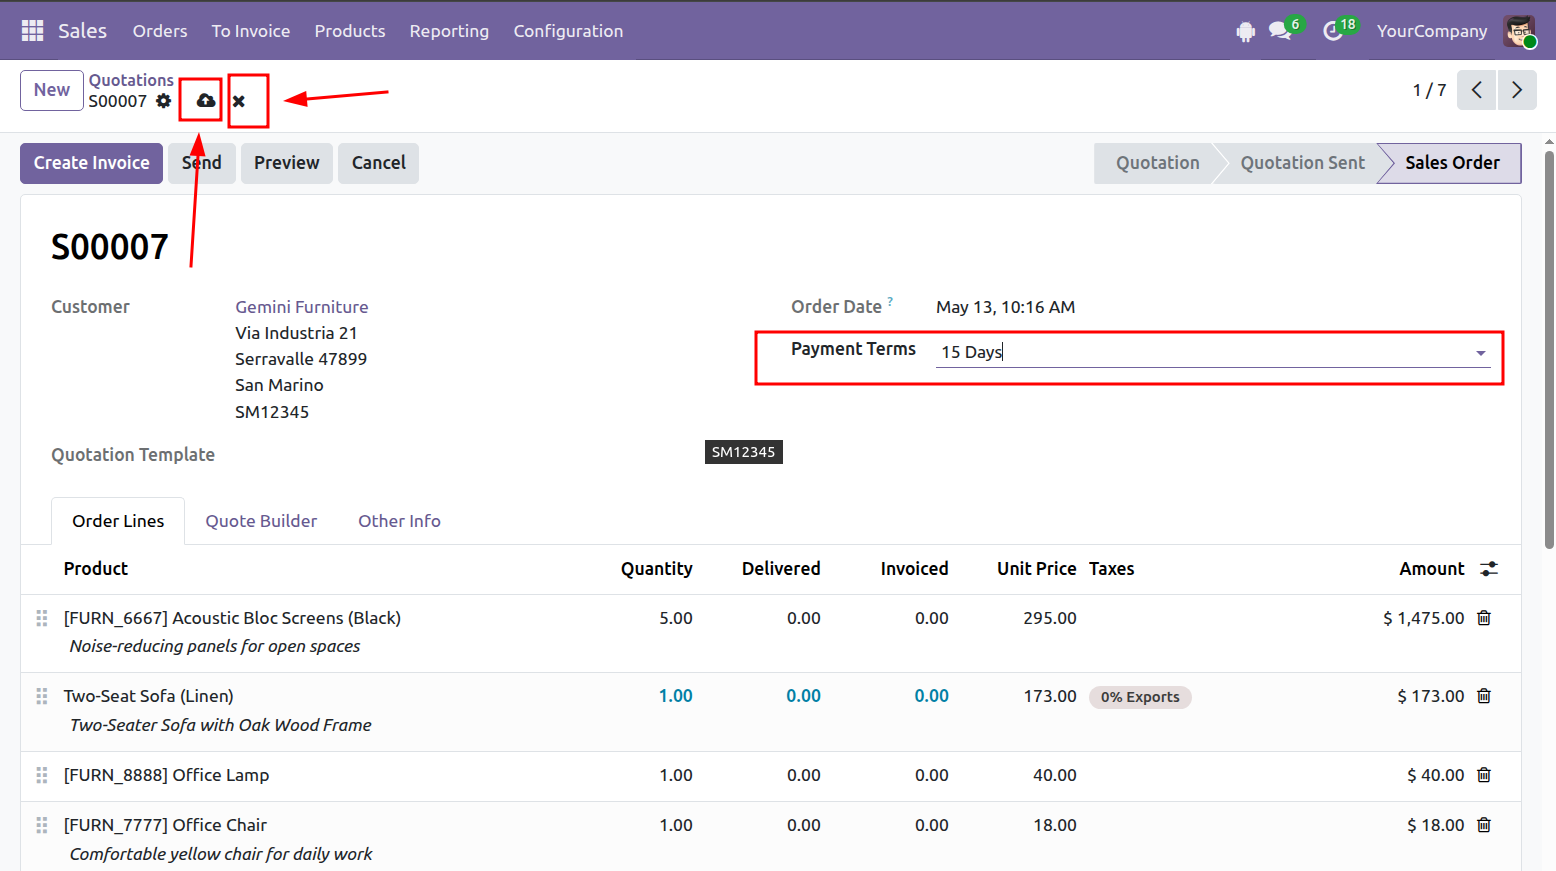
Open the record you want to update and make the necessary changes.
Click Save to apply the changes, or Discard to cancel them.
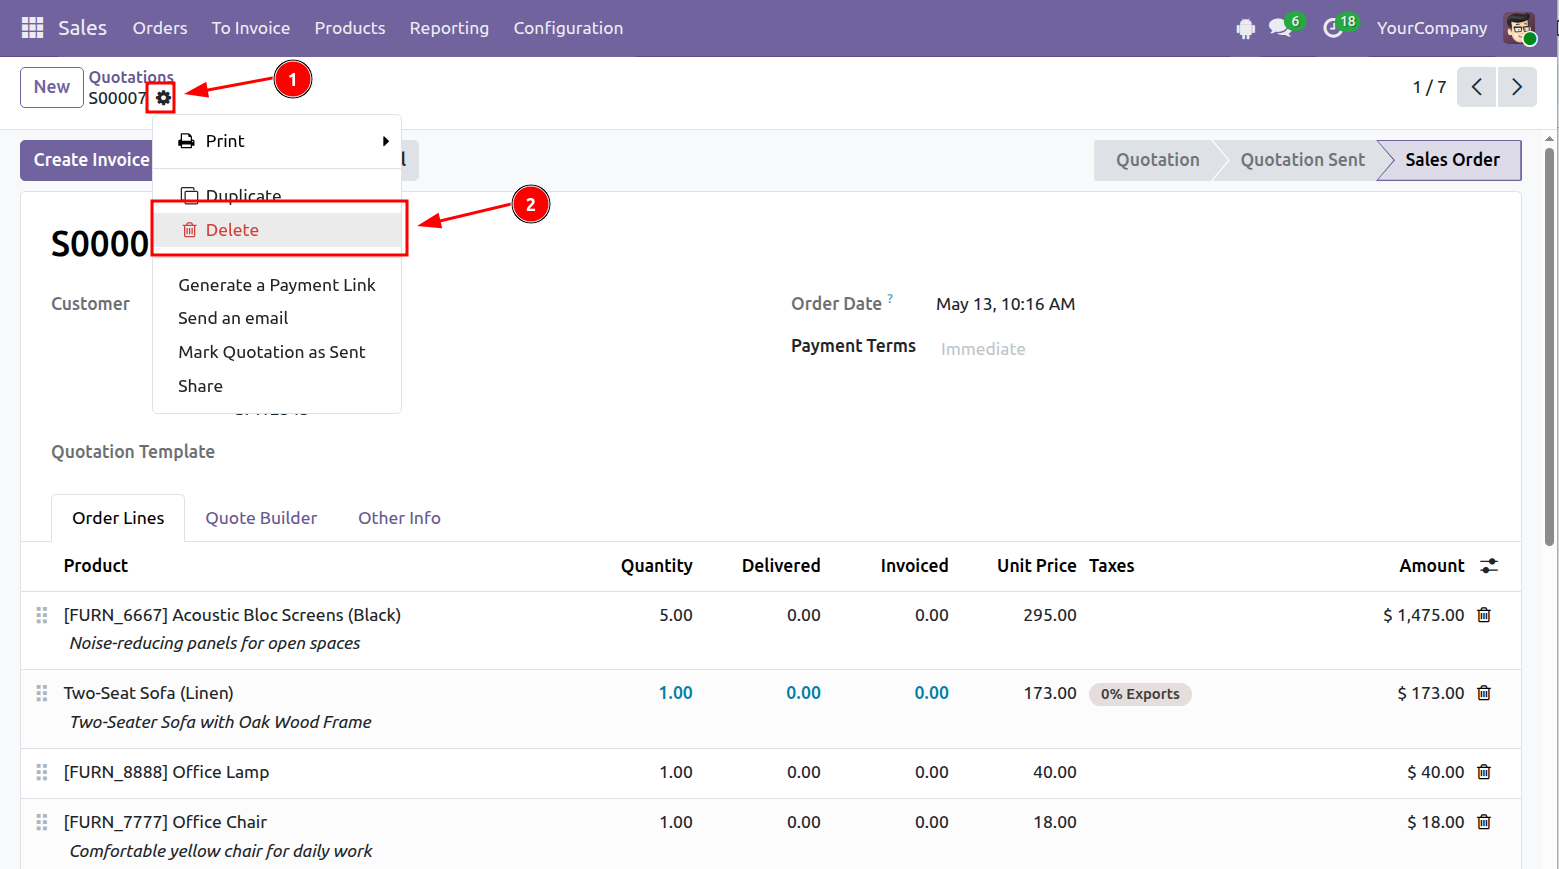
A record can be deleted from either Form view or List view.
Open the record, click the gear icon, and select Delete.
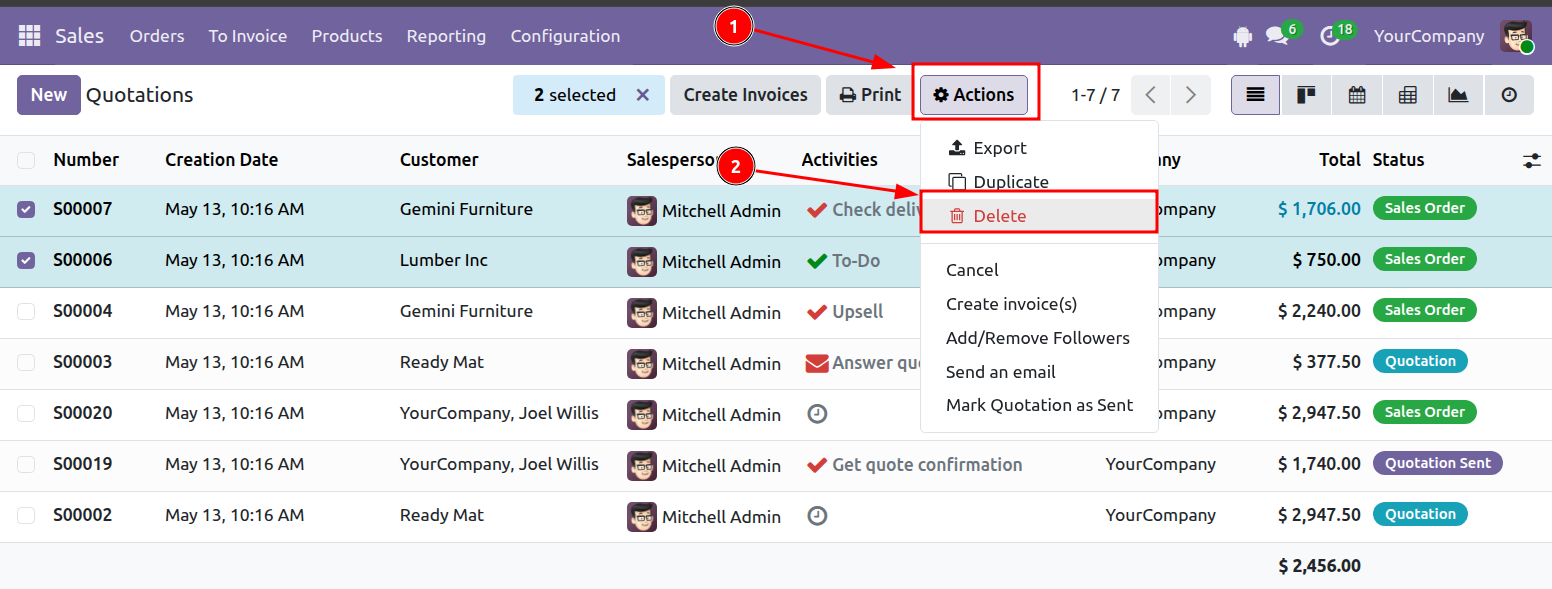
Select the records you want to remove, then go to: Actions > Delete
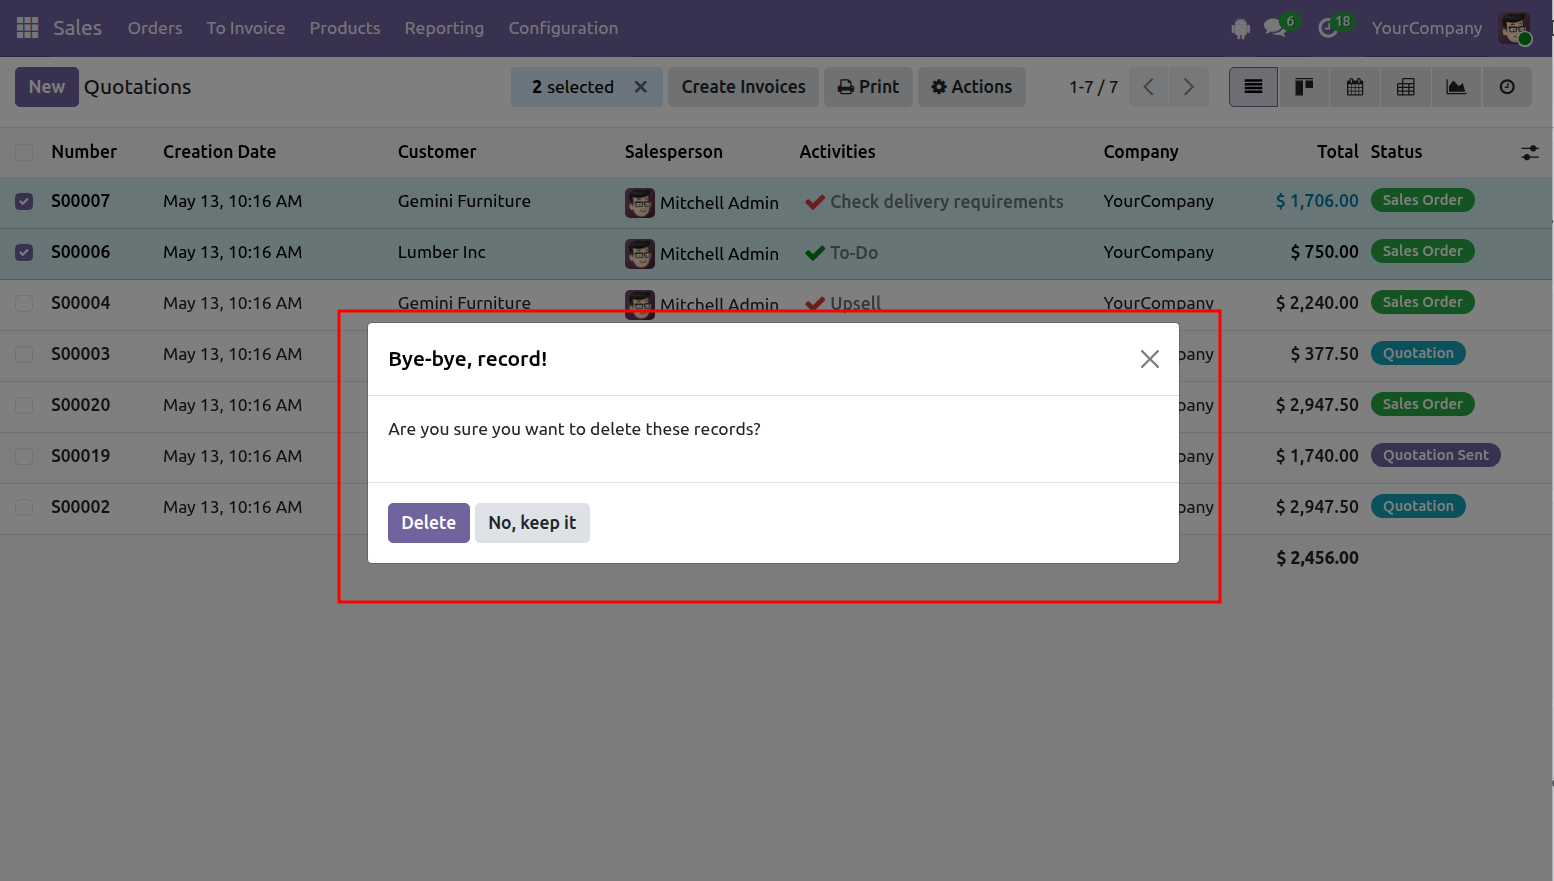
Odoo will ask you to confirm the action.
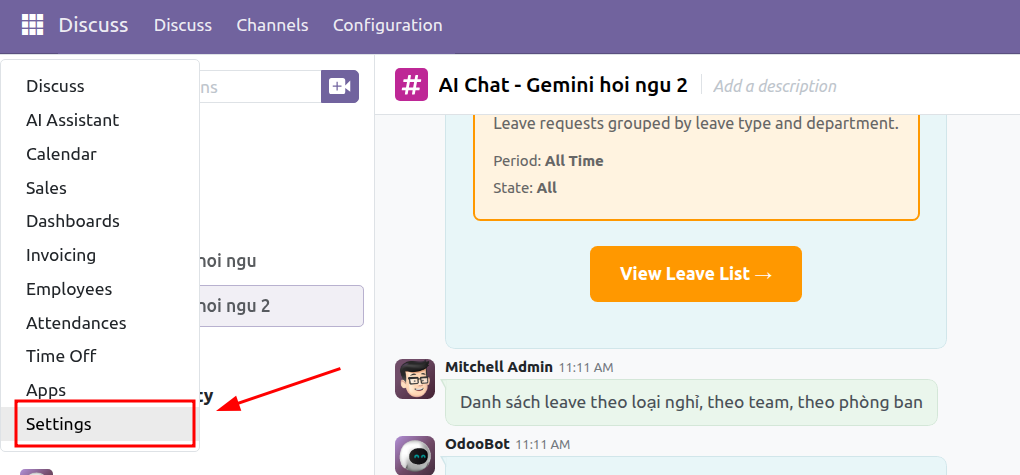
Step 1: Open Settings.
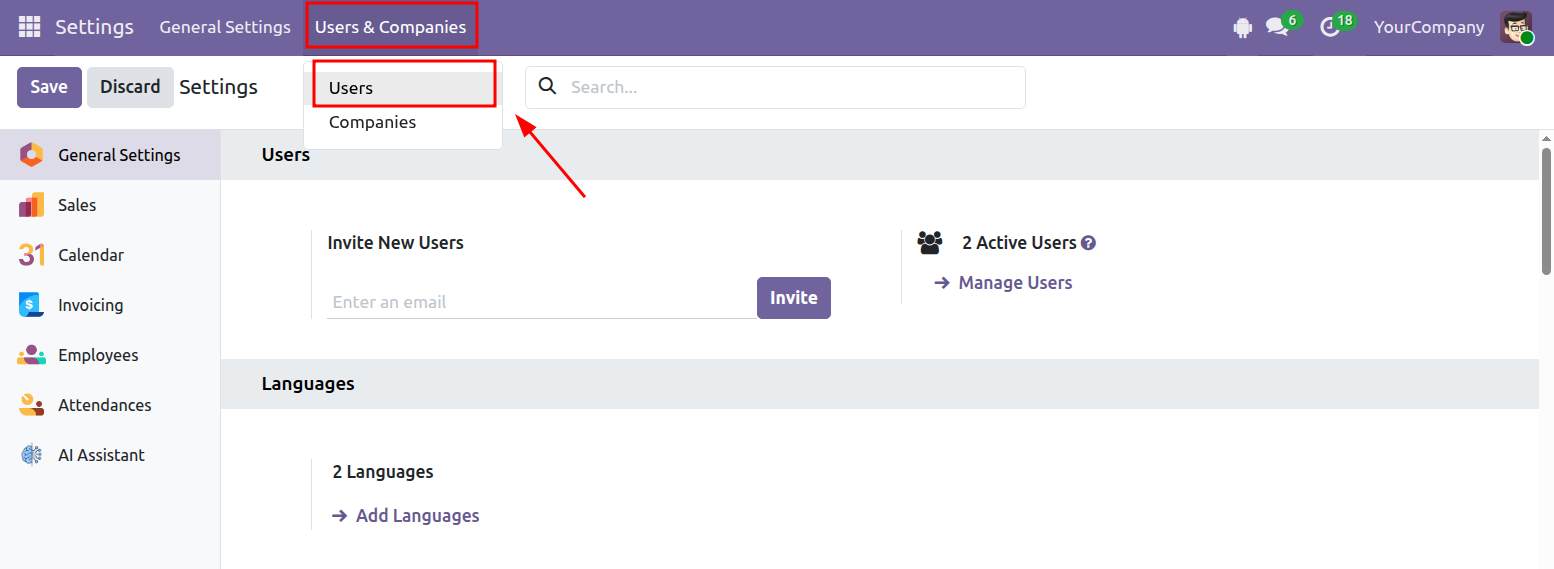
Step 2: Go to: Users & Companies > Users
Step 3: Click New.
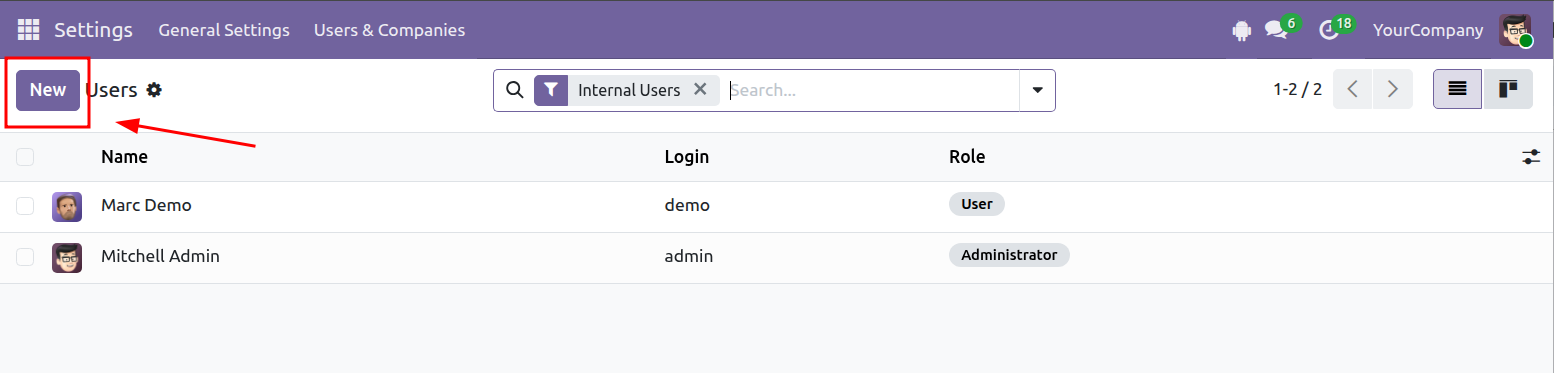
Step 4: Enter the user’s details.
As a general guideline:
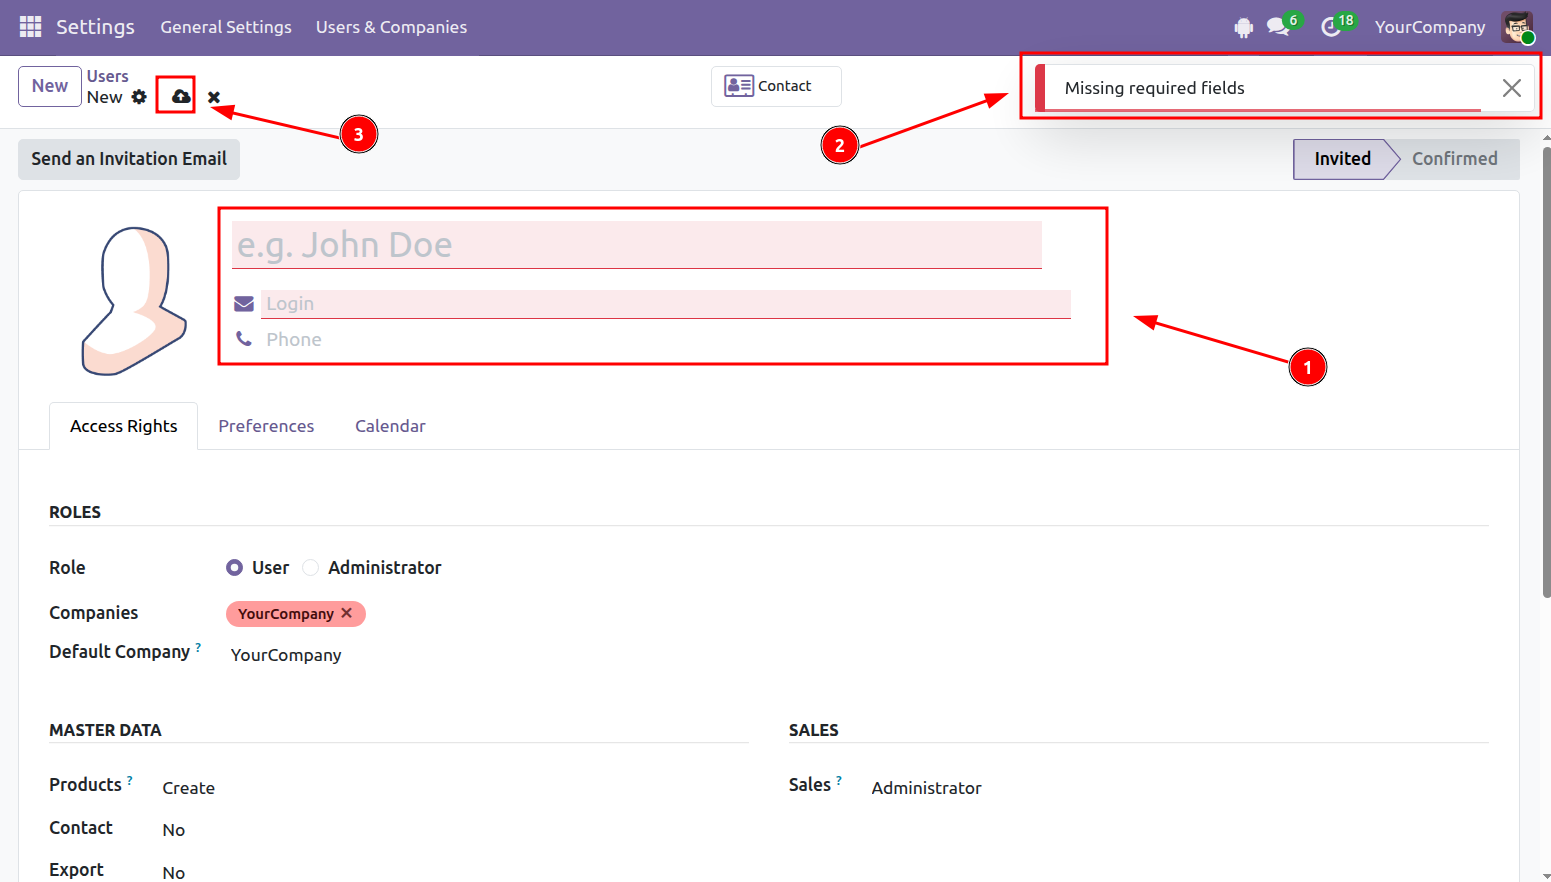
Step 5: Open the gear menu and select Change Password.
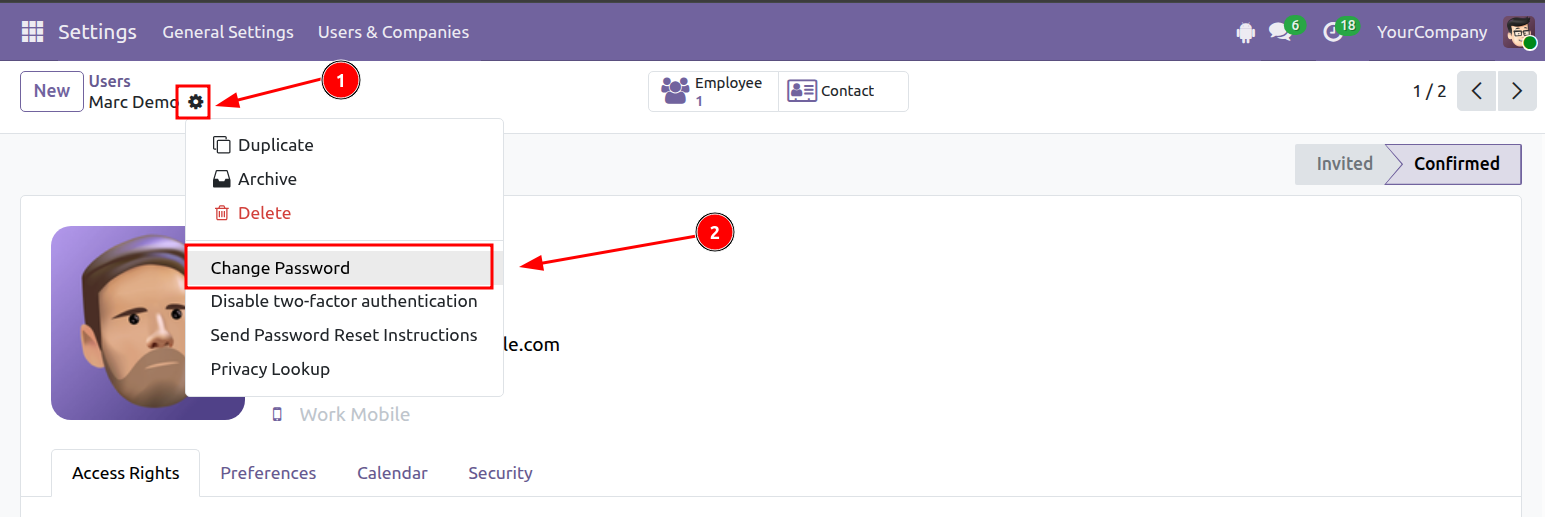
Step 6: Enter the new password in the New Password field, then click Change Password to save it.
After the password has been updated, the user can sign in with:
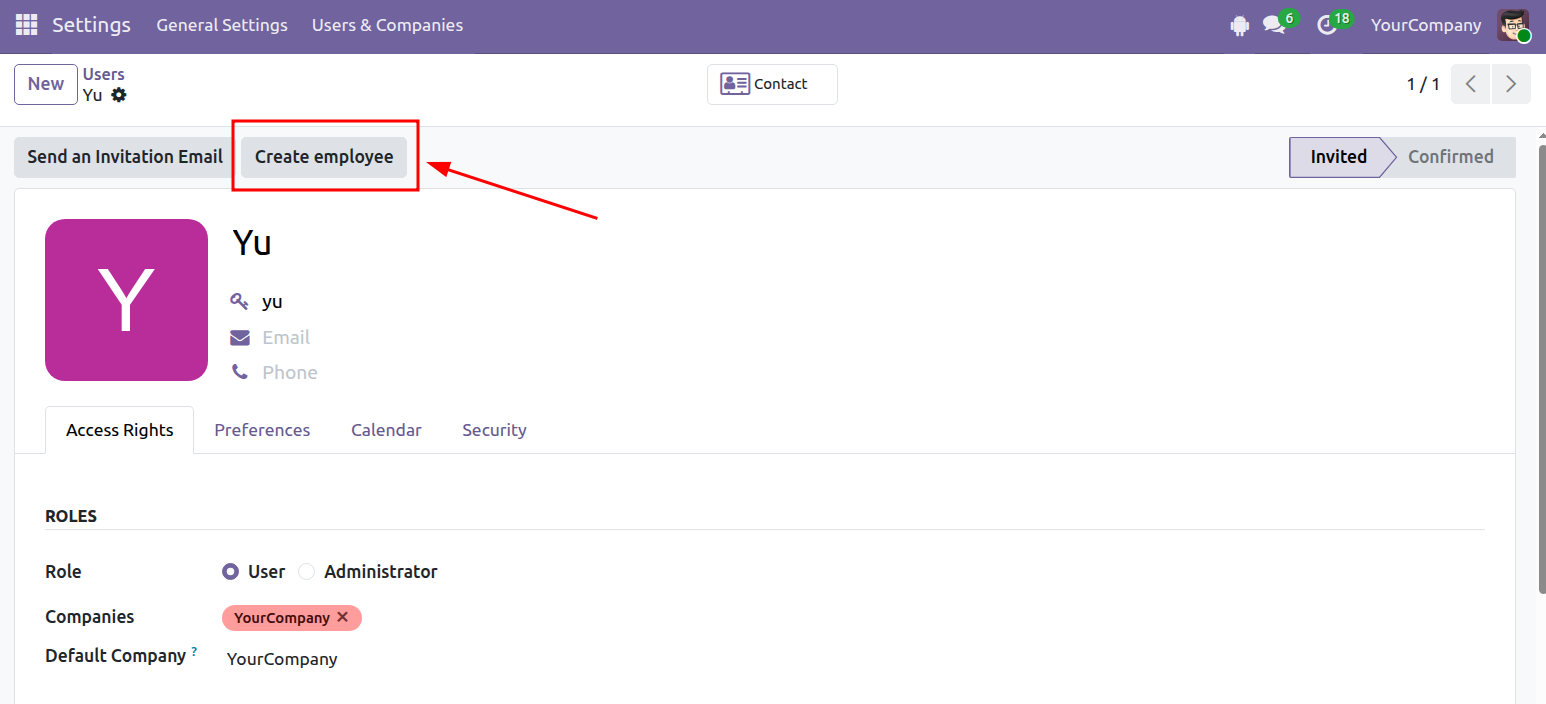
Step 7 (Optional): Click Create Employee to create an employee profile for the user.
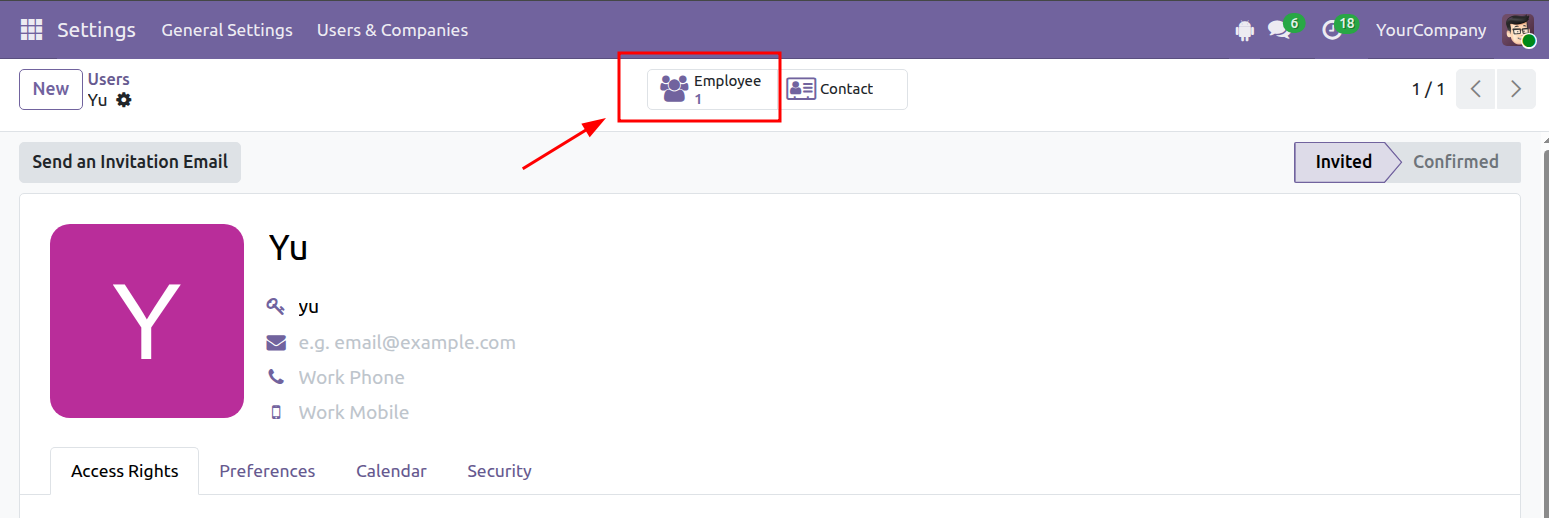
Step 8: Once the employee profile has been created, click the employee icon to open it.
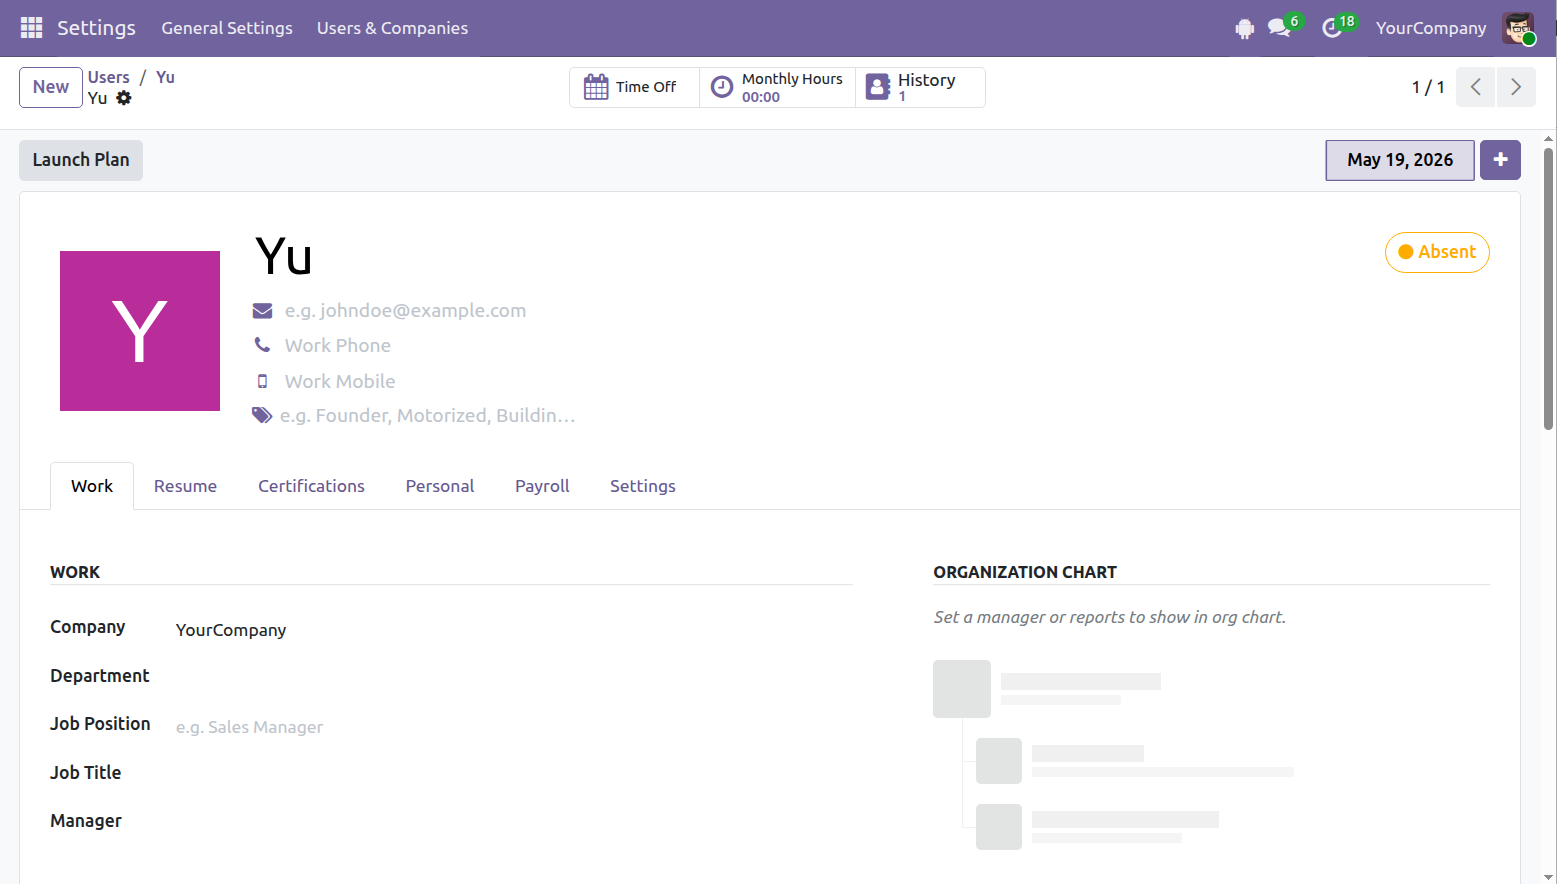
The new employee profile is automatically linked to the user account.
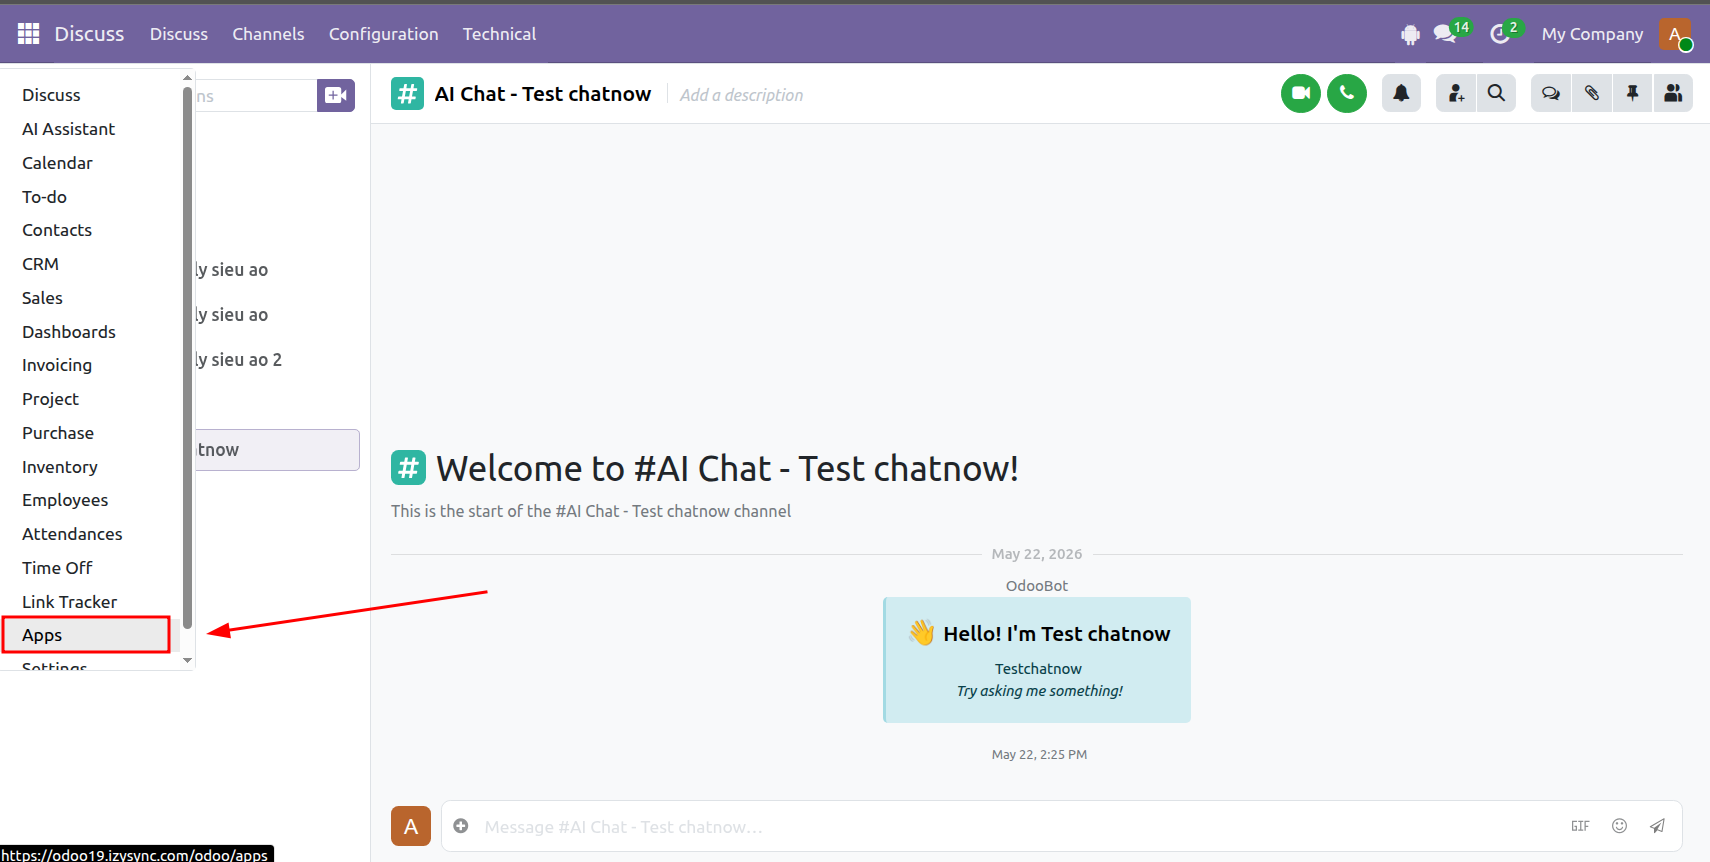
Step 1: Open Apps.
Step 2: Enter advanced_ai in the search bar.
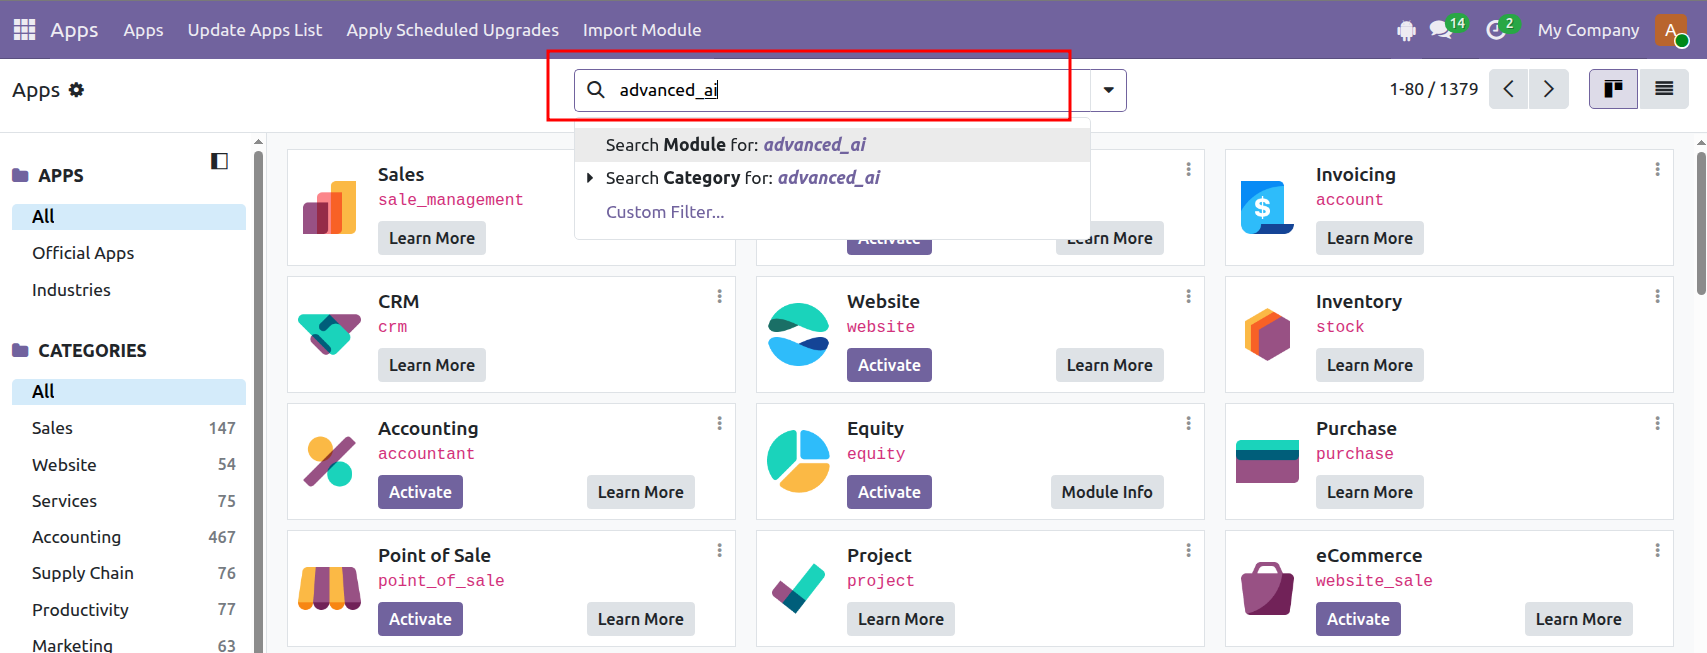
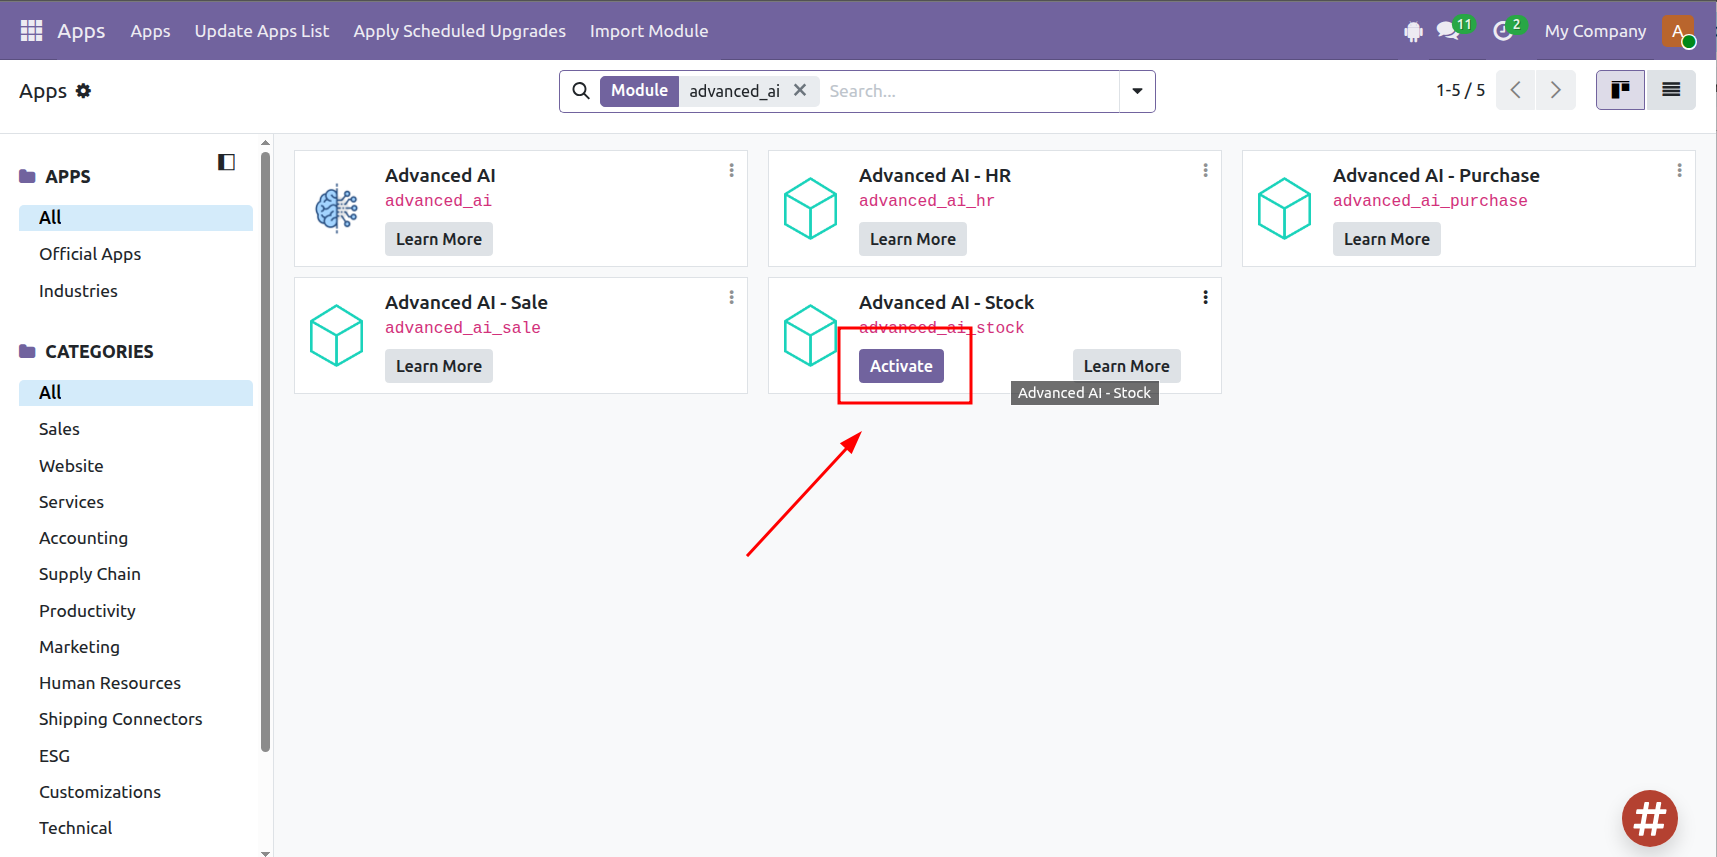
Step 3: Locate the required module and click Activate.
Note: The AI Assistant can only answer questions that match the available Question Types. Refer to the Question Types section for examples. If a question has not been configured, the assistant will return a message indicating that the request is not supported.
System link: https://odoo19.izysync.com/
Admin account: admin/admin
User account: arthur/1
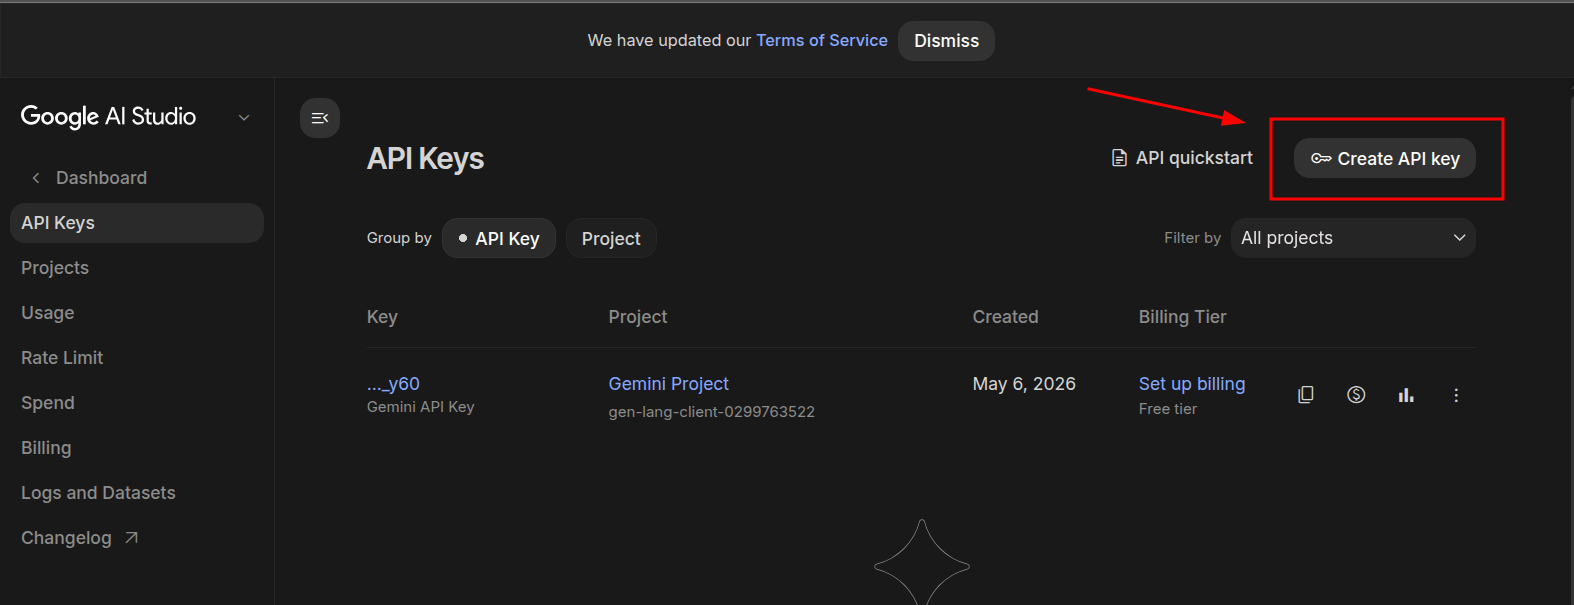
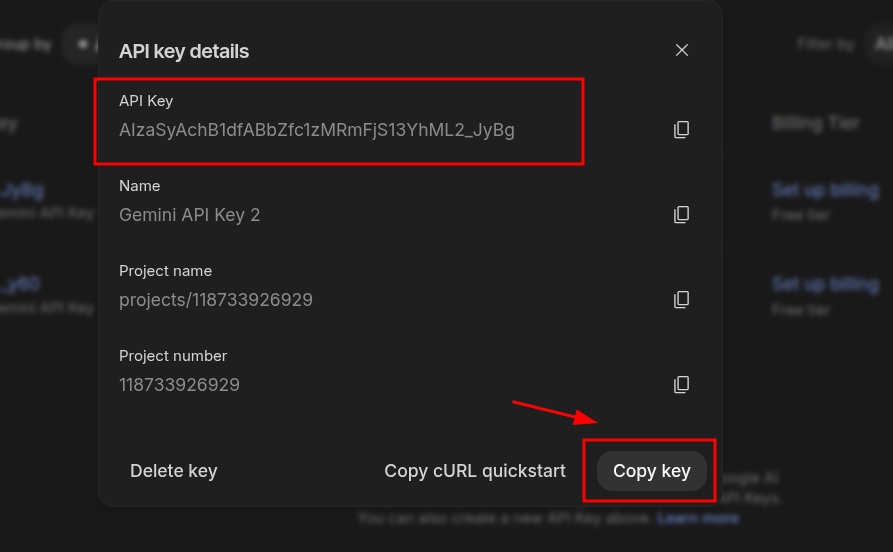
Step 1: Open the Google AI Studio API Keys page.
Create a new API key.
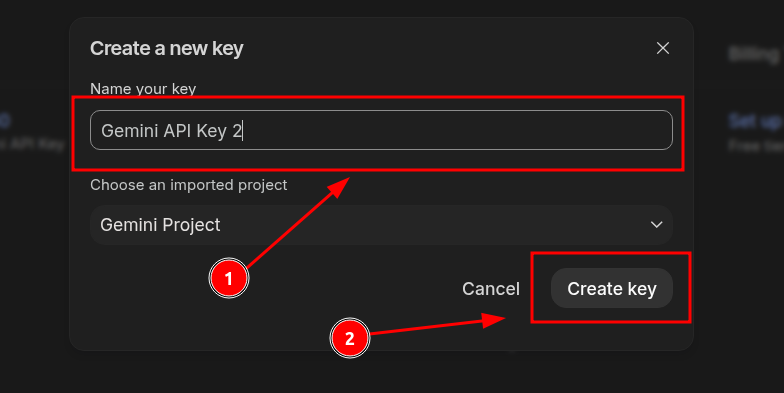
Enter a name for the key, select the relevant project, and click Create key.
Once the key has been generated, click Copy key.
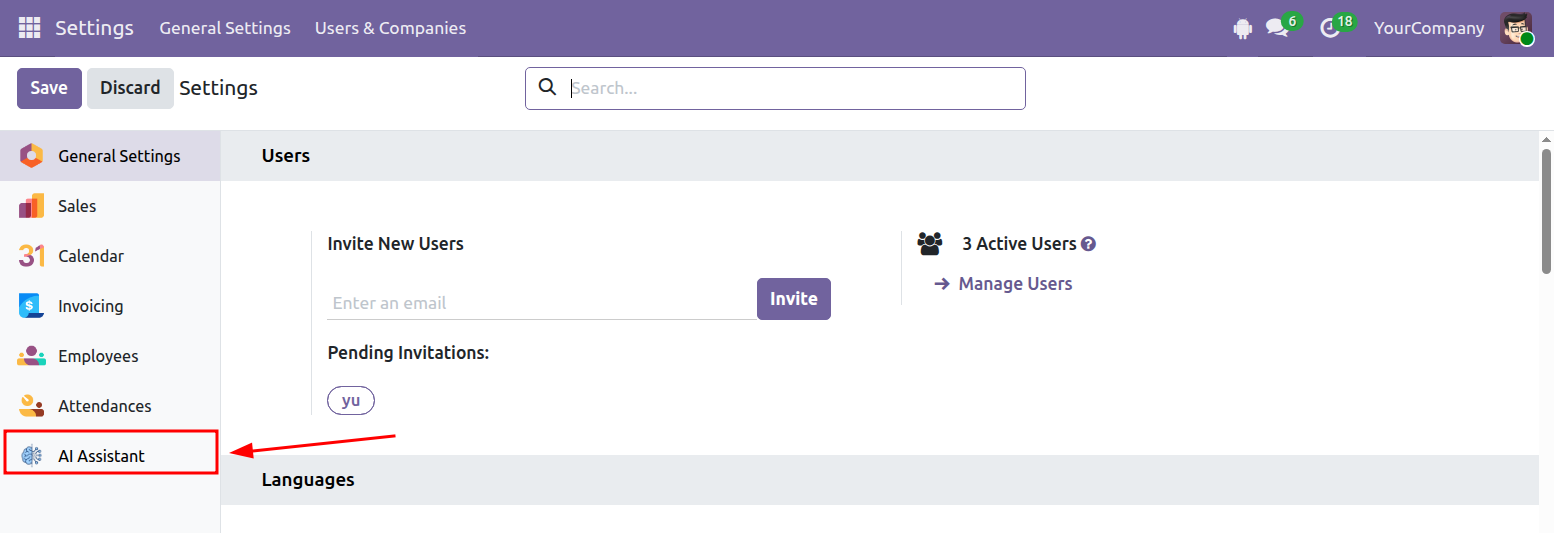
Step 1: Open Settings.
Select the AI Assistant tab.
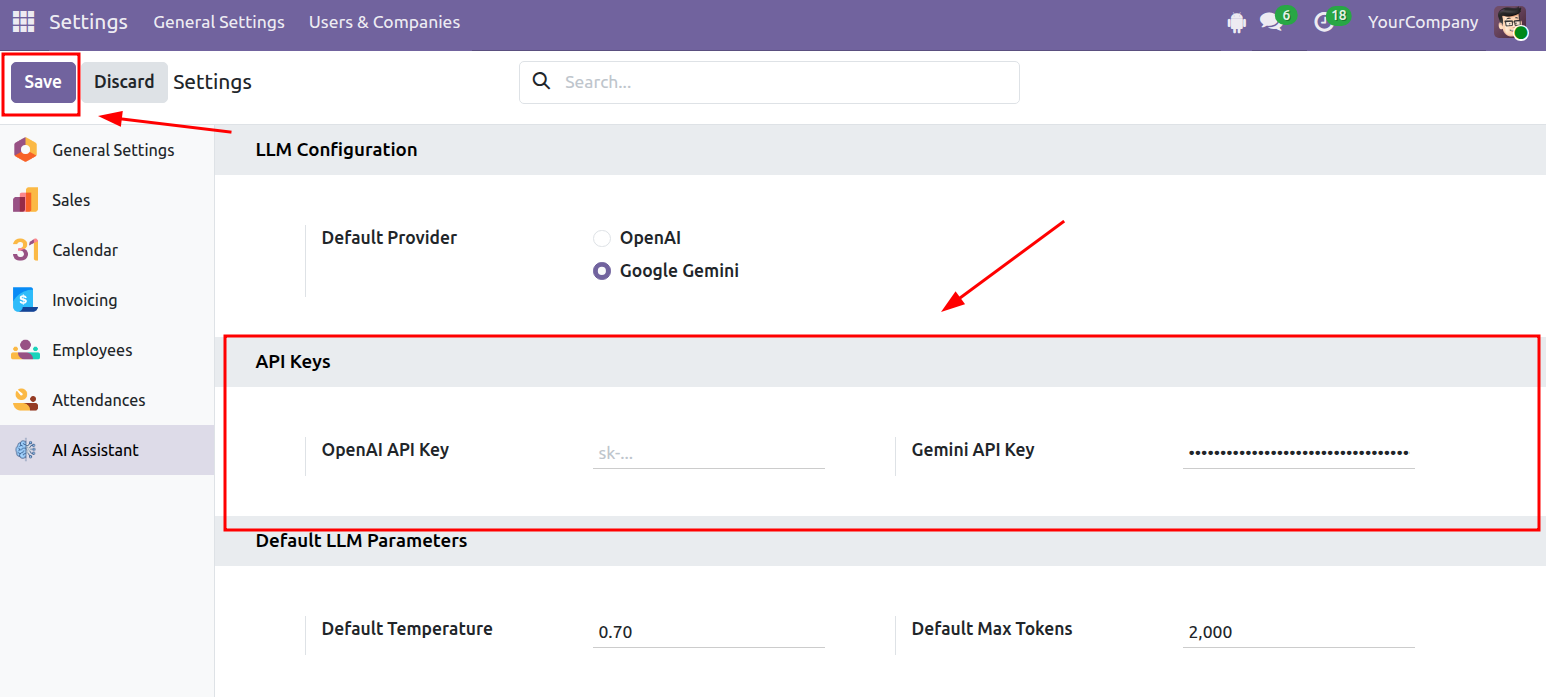
Step 2: Paste the API key into the corresponding field, then click Save.
Step 1: Open AI Assistant.
Click New to create a new AI Agent.
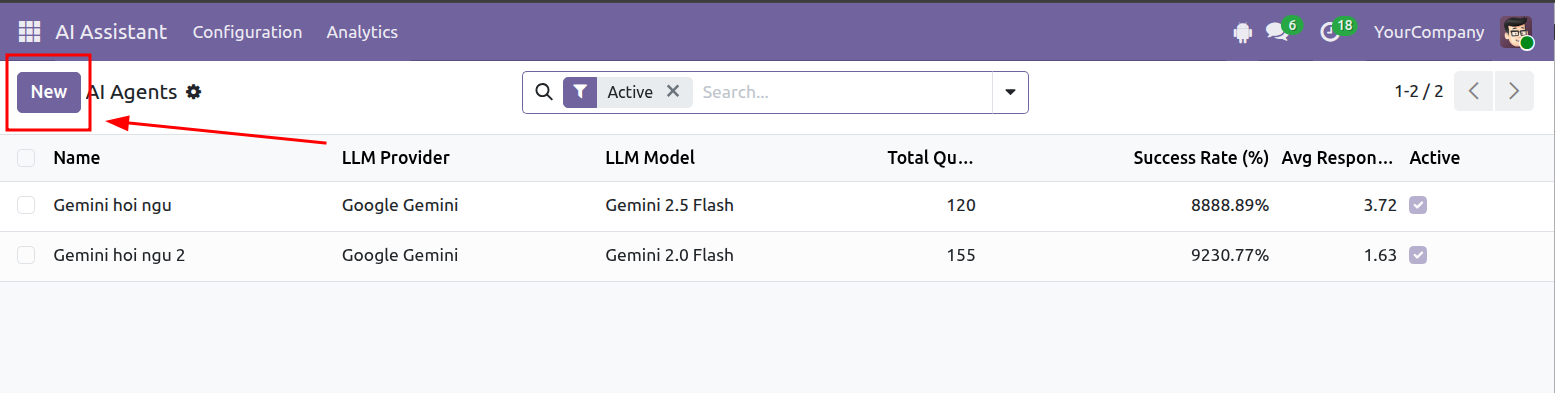
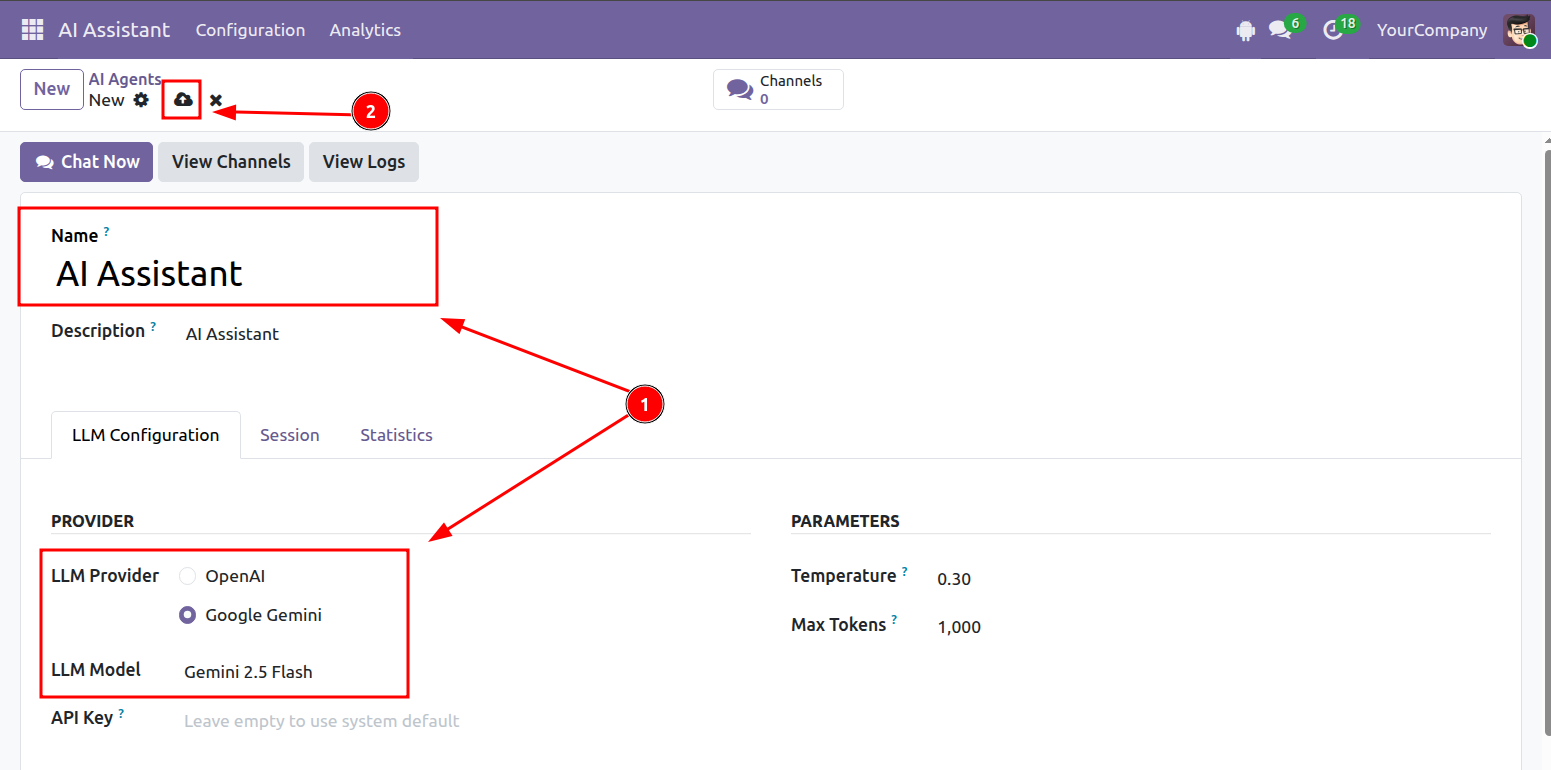
Step 2: Complete the Agent information, then save the record.
The available models may vary depending on the selected provider.
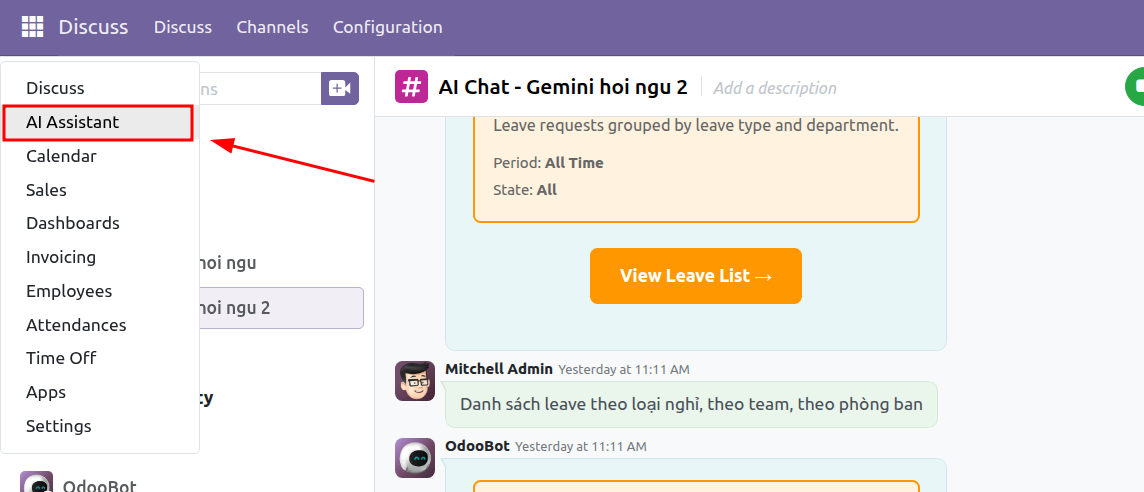
Creating a Chat from the AI Assistant Screen
Step 1: Open AI Assistant.
Step 2: Select the AI Agent you want to use.
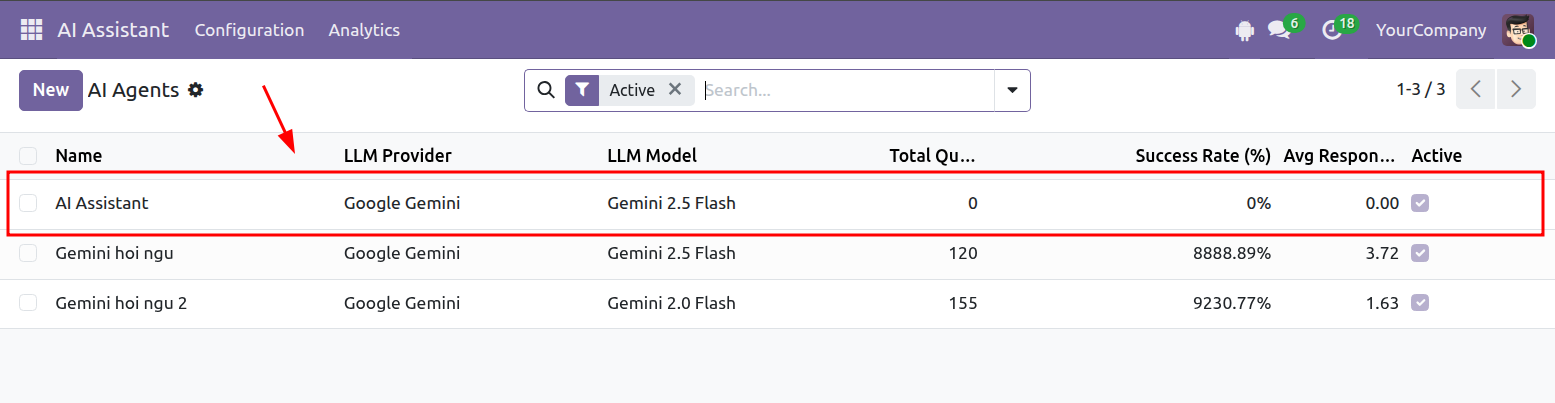
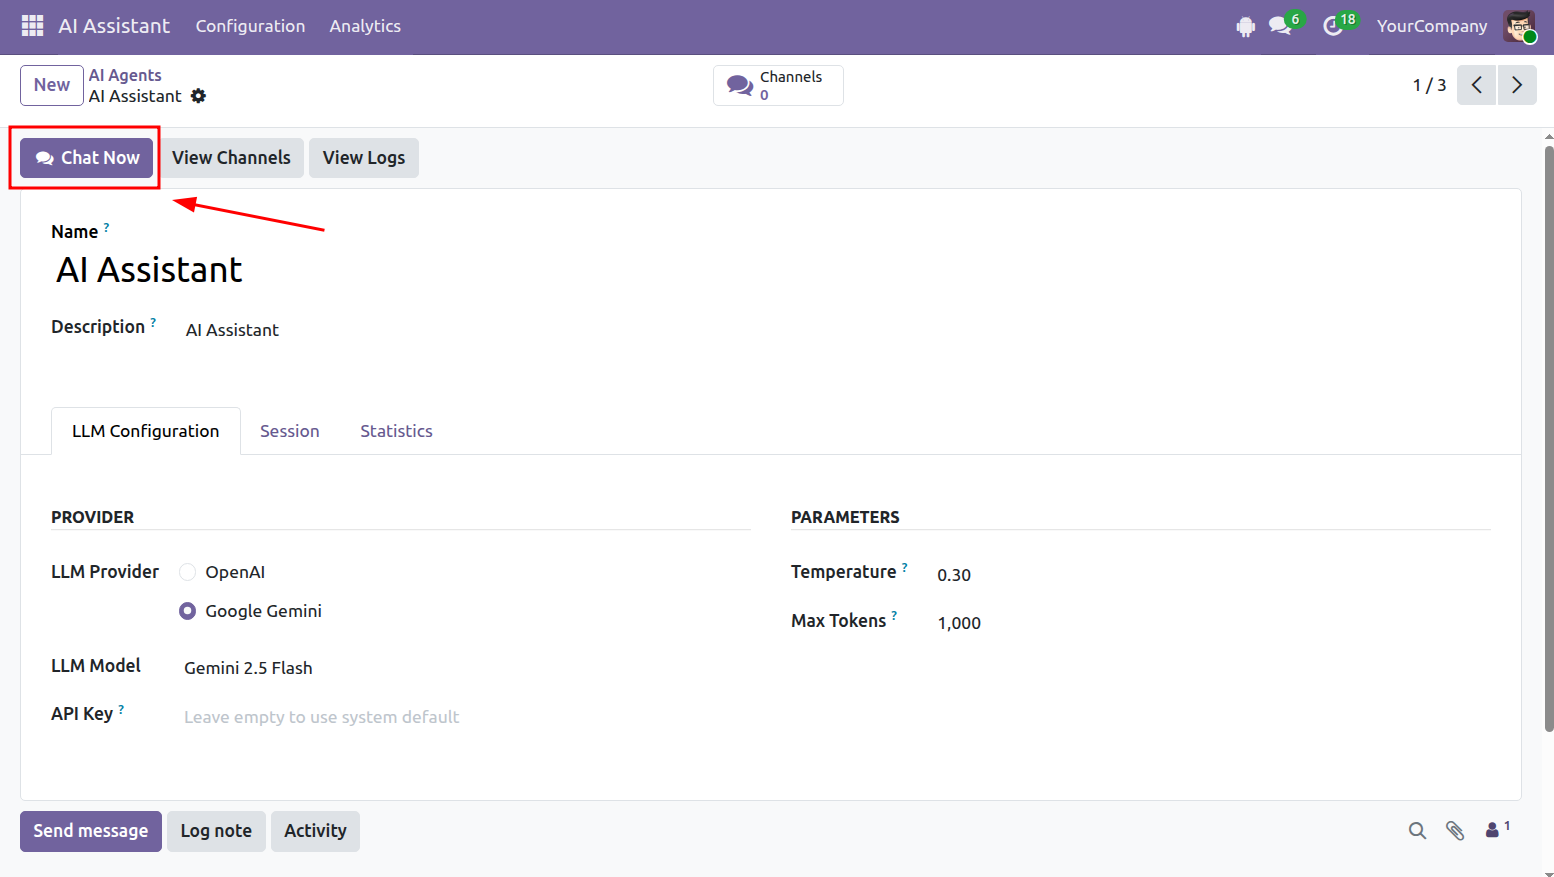
Step 3: Click Chat Now.
If the Agent does not already have a chat channel, Odoo will create one automatically.
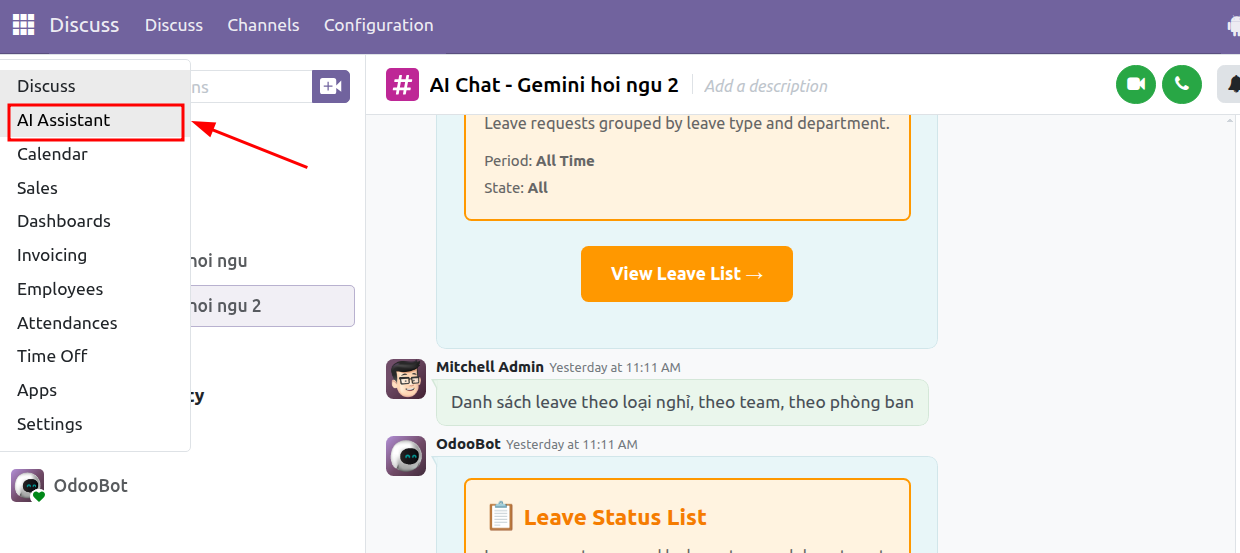
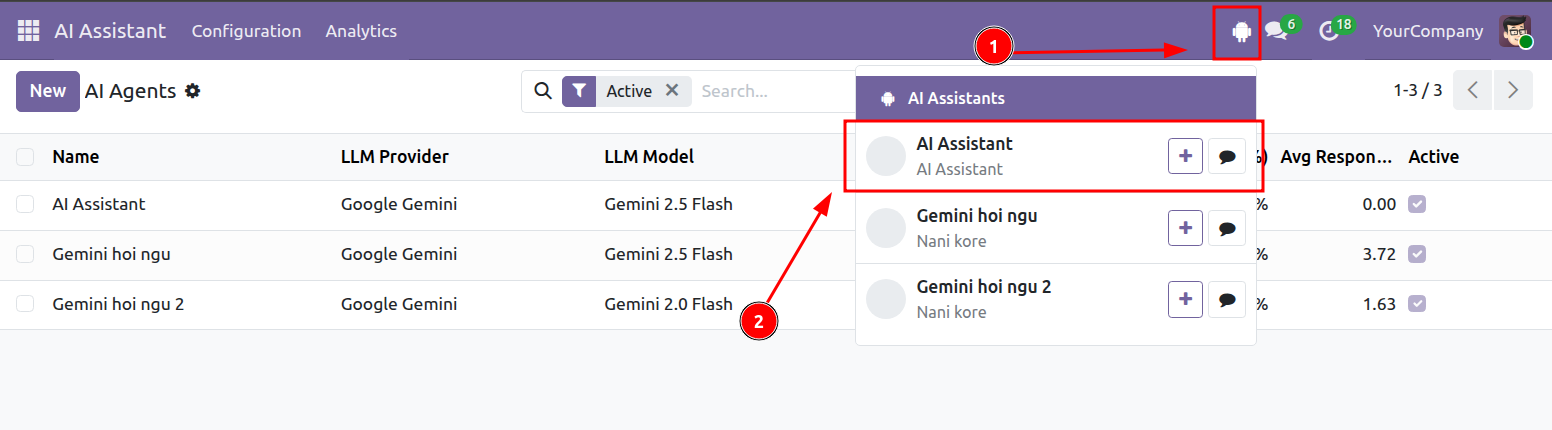
Step 4: Click the AI Assistant icon in the top navigation bar, then select the relevant chat channel.
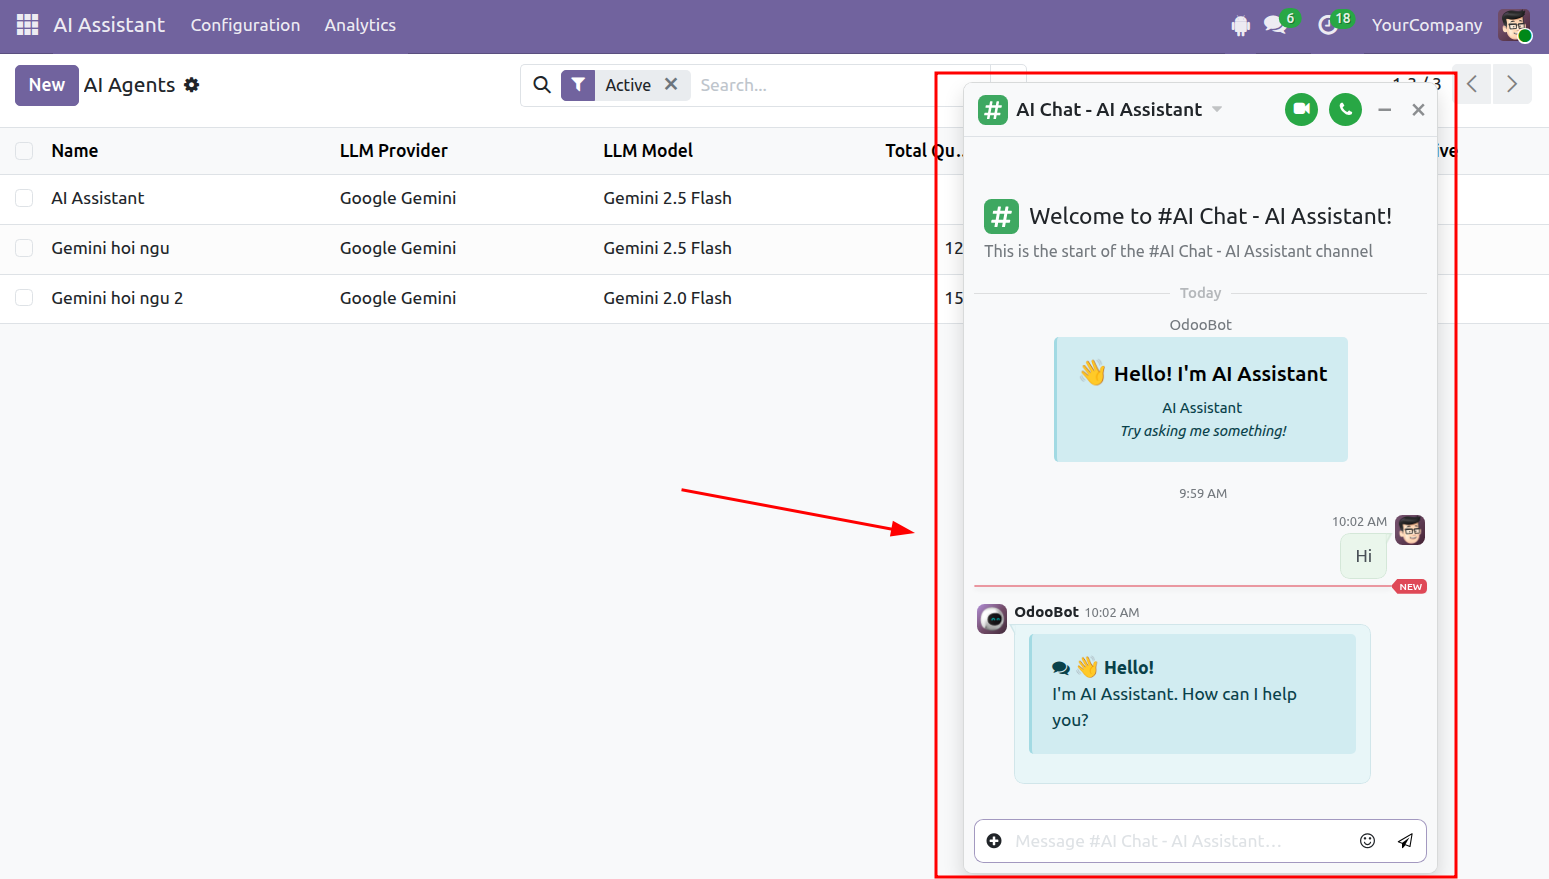
The chat window will open on the right-hand side of the screen. Enter “Hi” to confirm that the AI Agent is responding correctly.
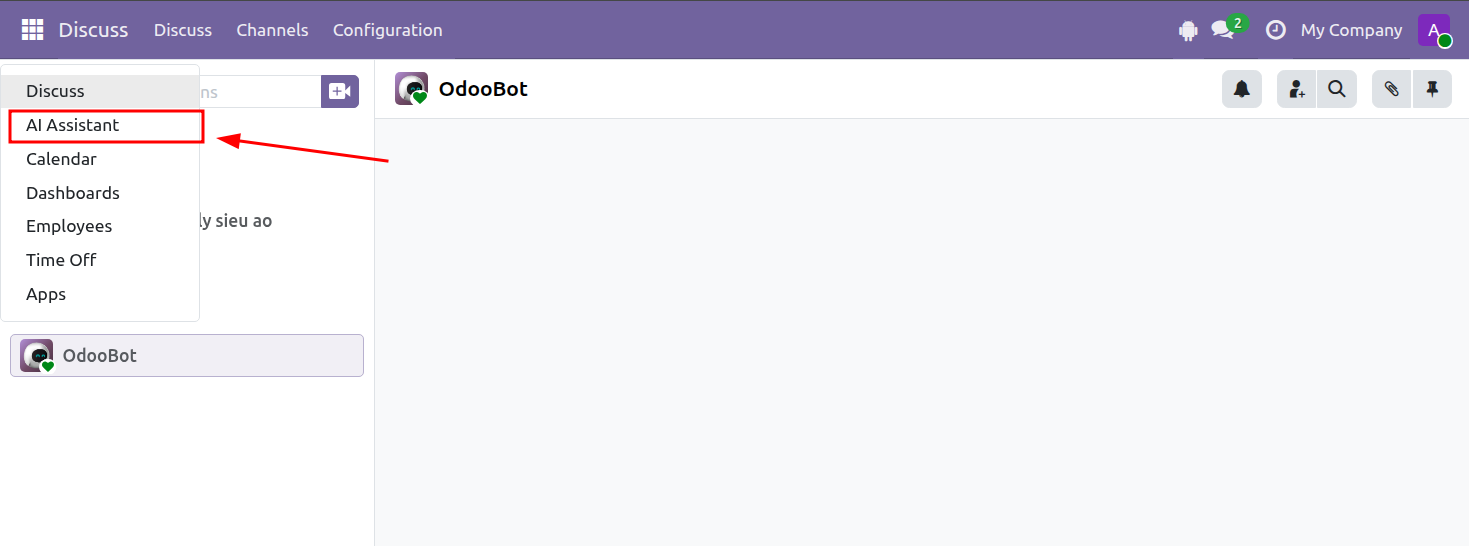
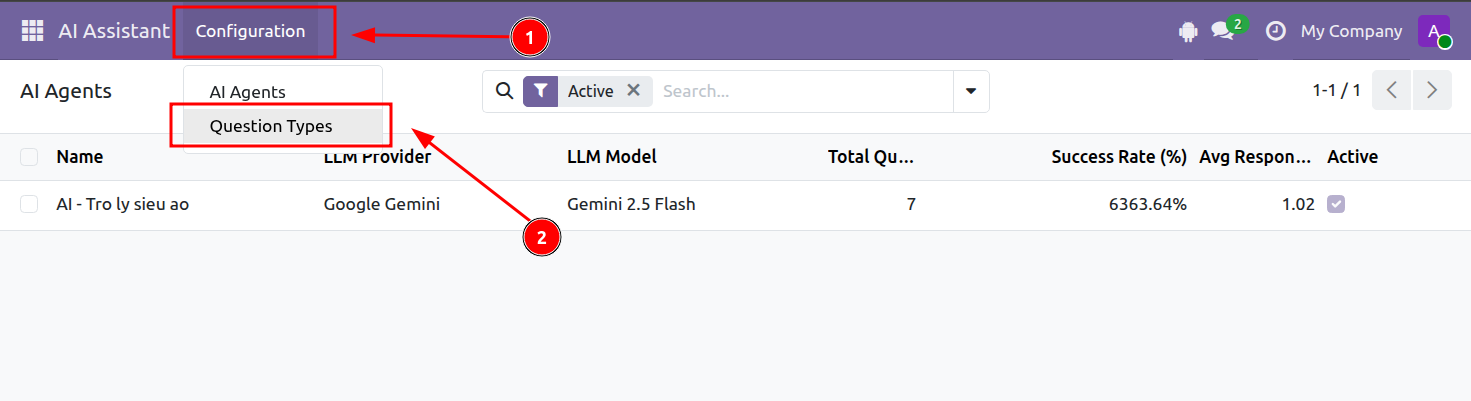
Step 1: Open AI Assistant.
Go to: Configuration > Question Types
The Question Types screen lists the requests currently supported by the AI Assistant.
Step 2: Select a Question Type to open its details.
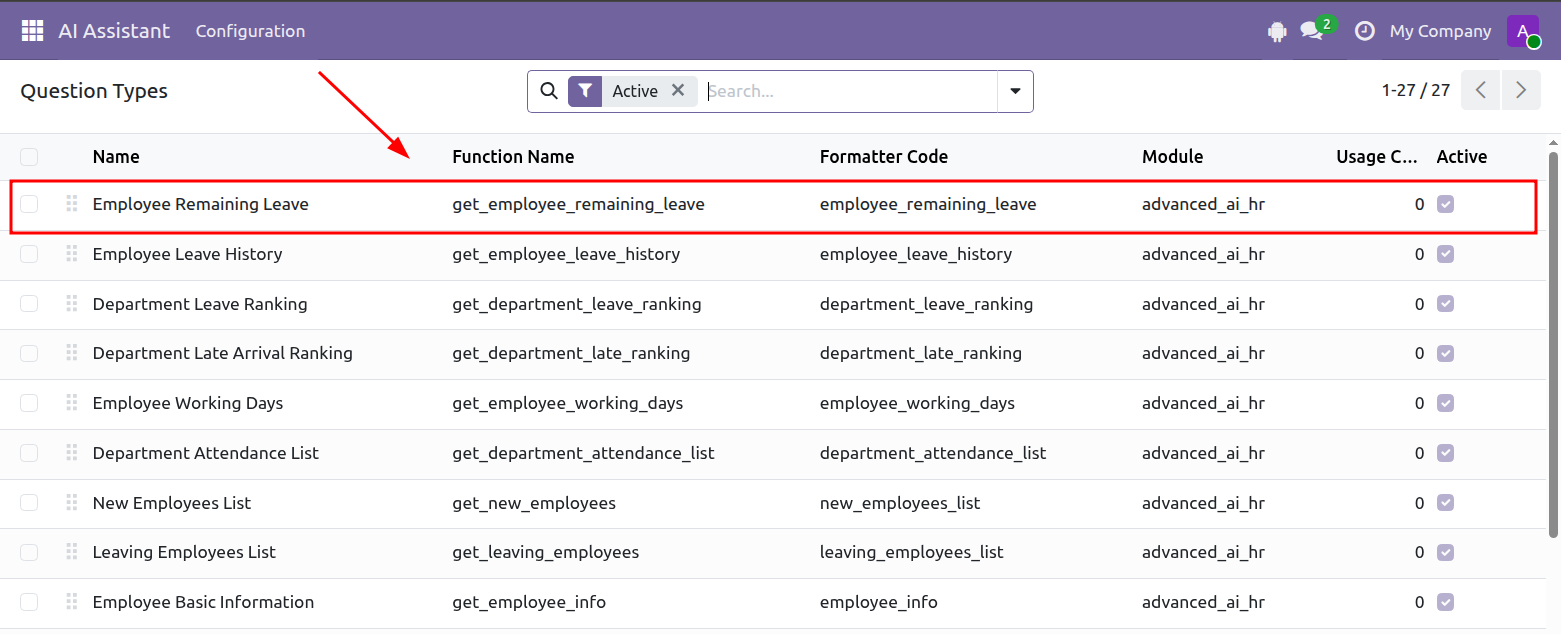
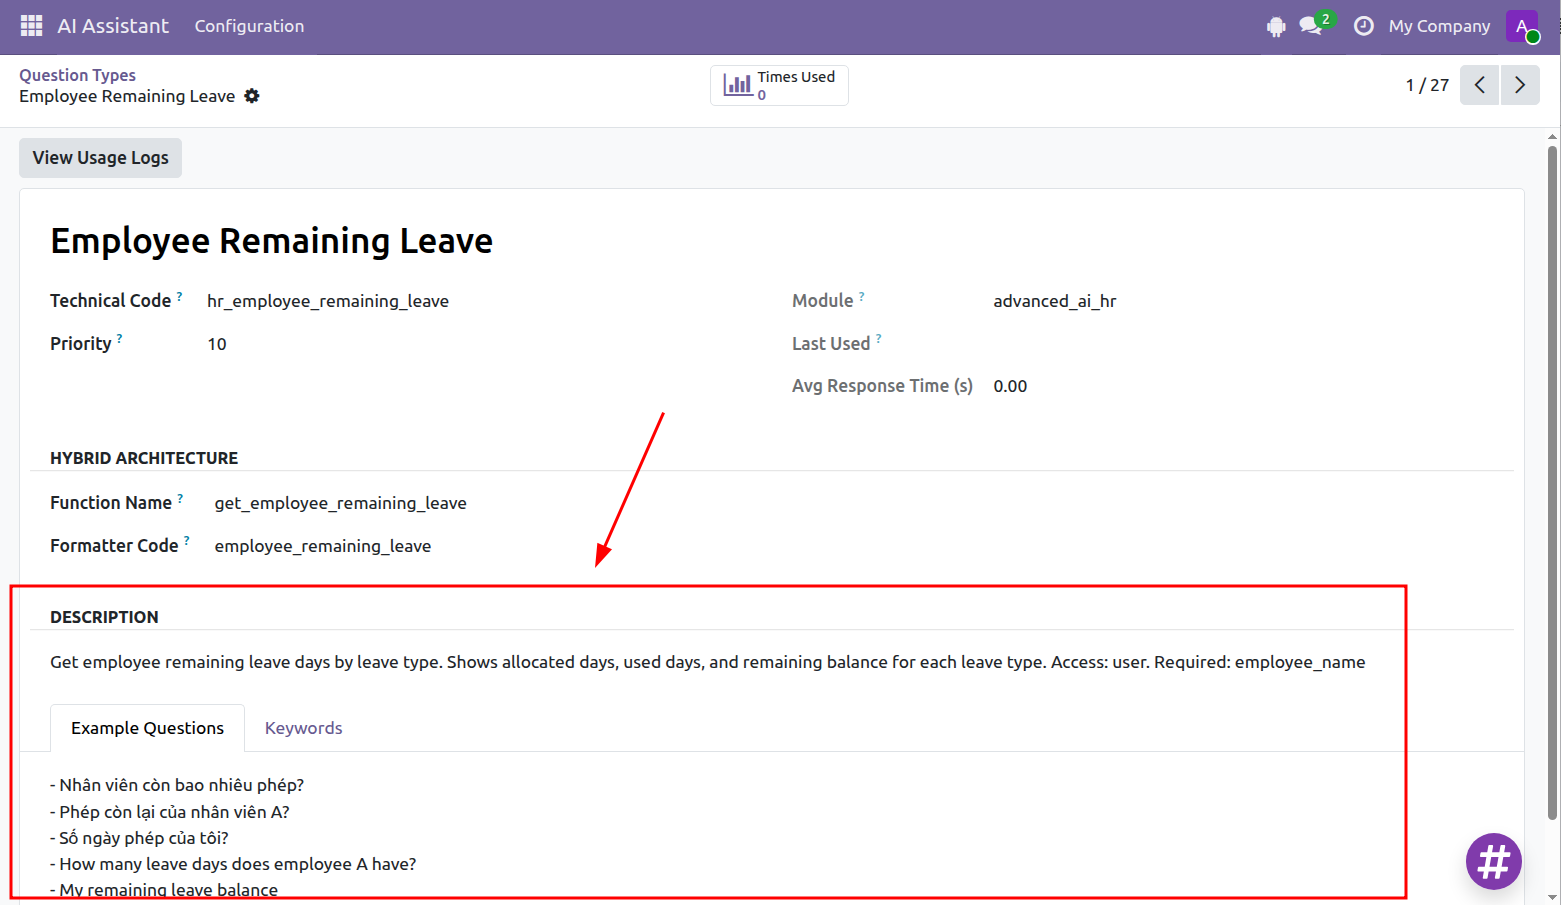
Review the description, keywords, and example questions to understand how the request should be phrased.
For example, a Question Type may allow users to request an employee’s remaining leave balance by using the employee’s name.
Only questions covered by the configured Question Types can be processed by the current version of the AI Assistant.