Support Portal: http://servicedesk.izysync.com/servicedesk/customer/portal/7
...
Created: 26/11/2015 | By: Magenest | Email: [email protected]
| Table of Contents |
|---|
Introduction
Event Tickets by Magenest is the ultimate extension for E-commerce websites that allows store admins to manage events and tickets. Store admin can also create custom ticket such as VIP, regular, adults only,… each with custom template to best fit the event's context. The extension can also send reminder so that your customer won't miss out the event.
For more details, live-demo and user reviews, please visit: http://store.magenest.com/magento-extensions/event-tickets.html
Features
- Admin can create and edit the properties of events such as location, start time, end time, reminder,…
- Admin can add a new ticket type such as VIP, regular, adult only….
- Allows to creat Barcode or QR code for tickets
- The module will automatically send ticket as via email after the customer is done purchasing the ticket.
- The module will send an email to remind customers of the upcoming event.
- Admin can have his own design for a template.
- Allows to track attendees, purchased amount for each ticket
- Admin can toggle redemption status for each sent tickets.
System Requirements
Your store should be running on Magento Community Edition version 2.0.0 and more.
Video tutorial
| Widget Connector | ||||||
|---|---|---|---|---|---|---|
|
Installation
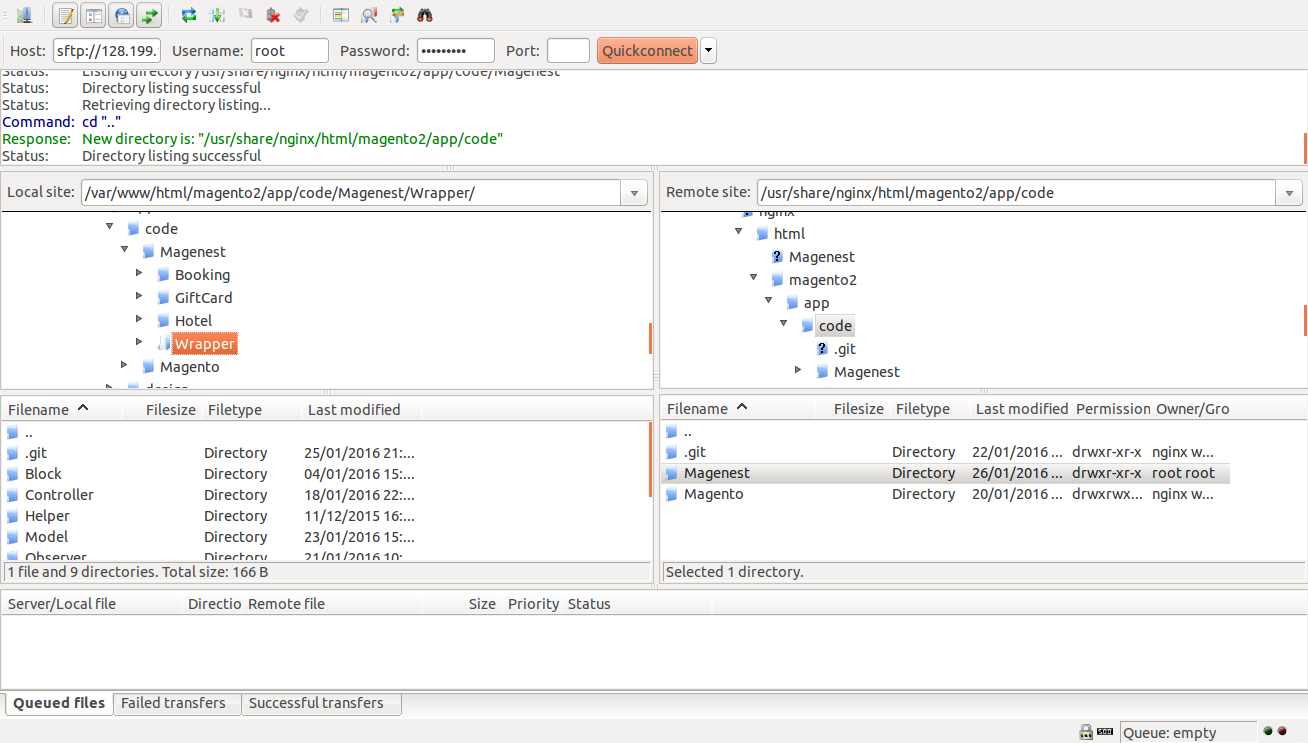
Here we will guide you through the installation process of our extension. First off, open FileZilla, log in to your host as follows:
In the above example we switched the local site to the module directory, and the remote site to the code directory. Now on the remote site window, inside app/code directory, create a folder named Magenest and go inside it. Now on your local site window, right click on Wrapper extension and click Upload. The extension will be uploaded onto your host in a few minutes.
Now, using your Command line/Terminal, log into your ssh server, go to your Magento root directory, say it's named magento2, and execute the following commands:
cd ..sudo chmod -R 777 magento2cd magento2php bin/magento setup:upgradesudo chmod -R 777 var pubAfter running all these, your Command line/Terminal window might look like this:
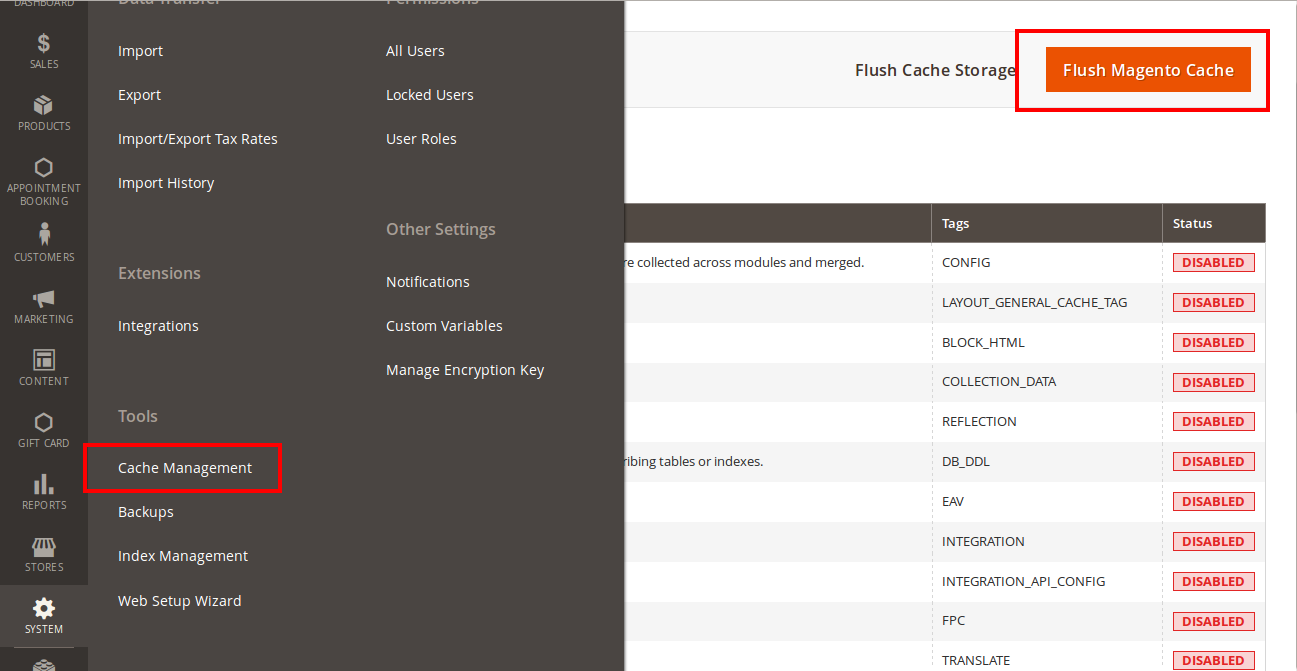
Afterwards, go to your backend site, go to System > Cache Management and flush all caches
Now you can go to your store and check if the extension is working as expected. We are sure it is!
Configuration
Set up | Creating an event | Information | Settings | Summary | Attendees
Set up
The extension's General Settings screen is located at Store > Magenest ( your store's name) > Event Ticket backend page.
- Pattern to generate code: Fill the code format.
- Google API Keys: Fill your Google API key
Creating an event
...
...
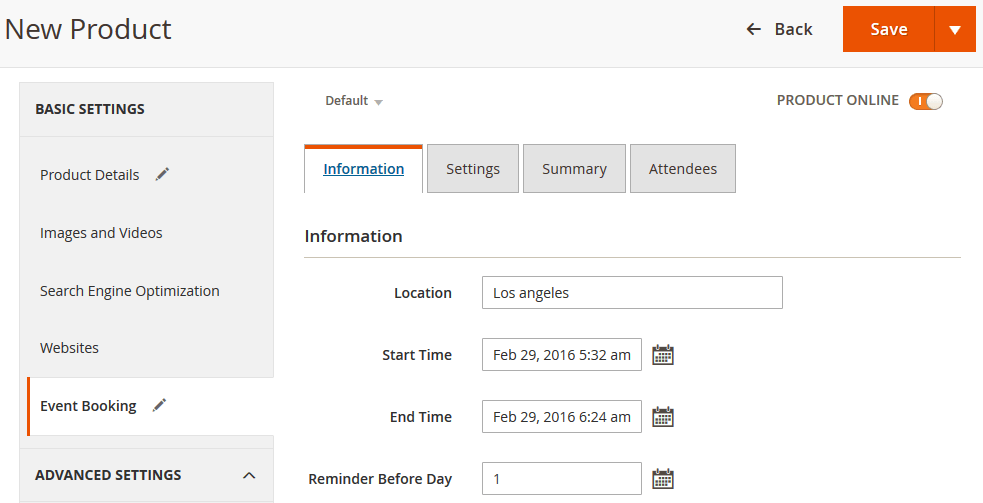
Then add switch to Event Booking Tab.
Information
- Location: Specify the location details
- Date & Time of Event: specify the event date.
Next up, specify some ticket types for the event, in the following demo, such as VIP, General ticket type
Settings
...
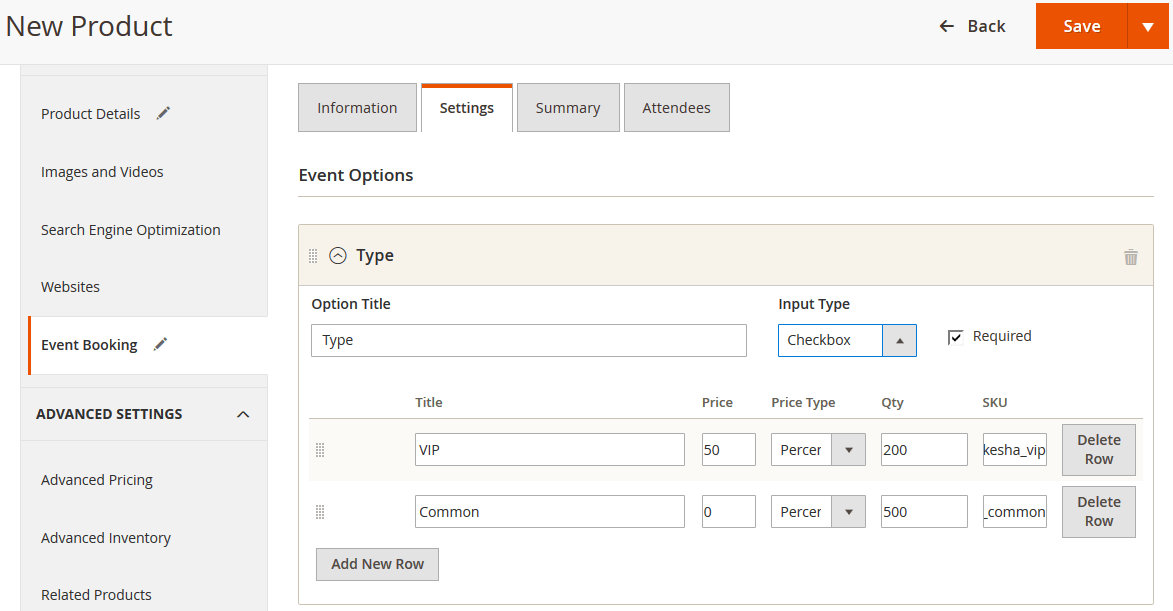
- Title - specify the title text for the ticket type selection section in the frontend product view
- Input Type: You can choose drop down/radio button/check box/multiple select.
- Required: check this box if you want your customer at least choose one ticket type before check out.
- Ticket Types - you can create a number of different ticket types for the same event. The available tickets may differ in price.
A given ticket type has the below options:
...
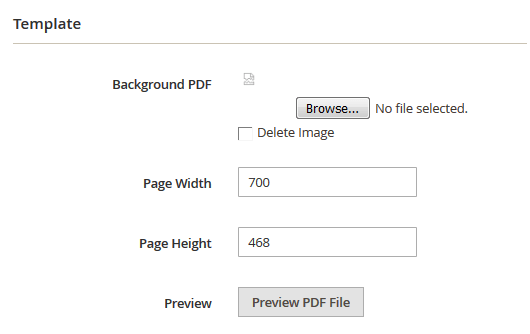
- Background PDF: Upload your image background
- Page width:
- Page height:
Preview: click the Preview button to preview your ticket.
| Note | ||
|---|---|---|
| ||
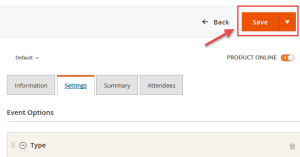
*please note that you must to upload your image background first, then click Save button. After that, you can customize your page width, page height, x, y coordinates and preview your PDF ticket without click Save again. Example:
If you change your image background, you must save this setting by click Save button again before make any changes in PDF setting. |
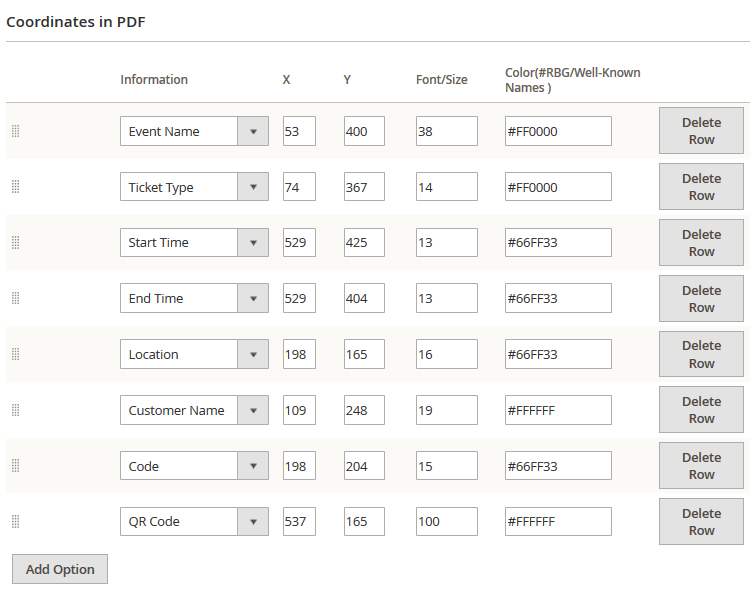
3. Coordinates
You can use MB-Ruler software to measure distances and angles on yout ticket. This application is free download.
We have a video tutorial helping you in this section:
| Widget Connector | ||||||
|---|---|---|---|---|---|---|
|
Summary
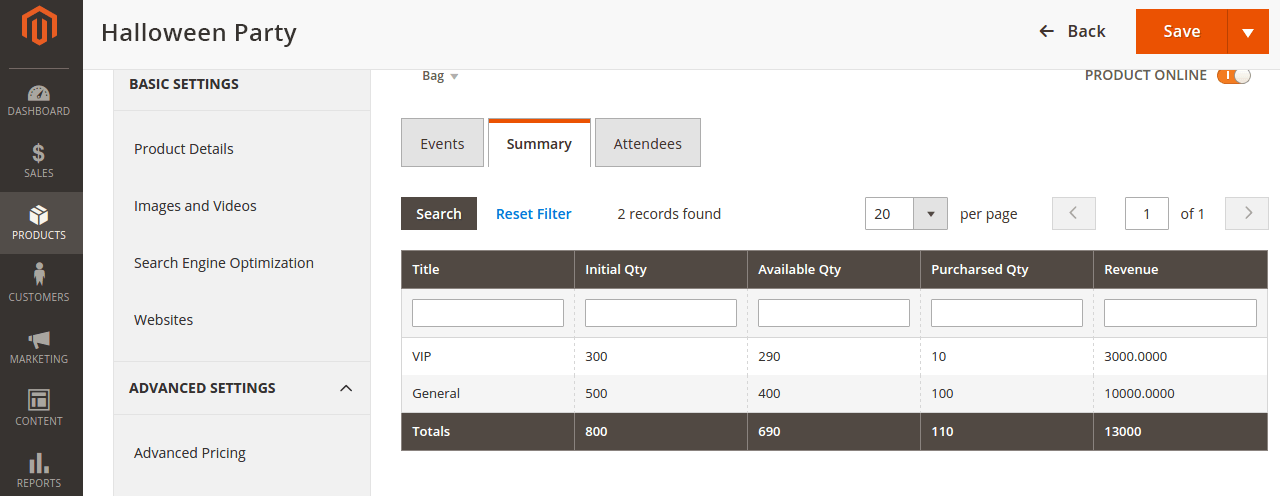
This is basically the Summary for ticket types, with Purchased quantity, Available quantity and revenue for each type, as shown.
Attendees
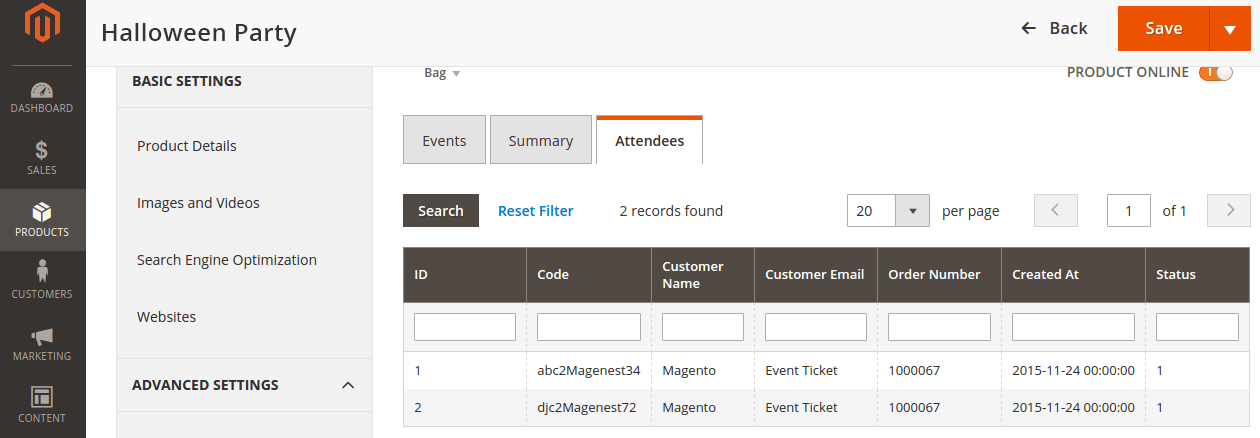
In the Attendees tab, the admin can easily manage the attendees of the event. In this tab, all the event attendees will be listed. Please, note that a customer will appear in this section after their order gets processed.
Management
The Product > Event Tickets > Manage Ticket or Manage Event grid displays the actual event & ticket sales.
In the Manage Event tab:
This grid lists ALL the items which had ever had Event Ticket functionality enabled, include: product ID, event name, start time, end time, reminder day, status and location. You can and export to the CSV/XML file.
In the Manage Ticket tab:
You can see this grid displays the actual ticket sales and export to the CSV/XML file.
My Tickets
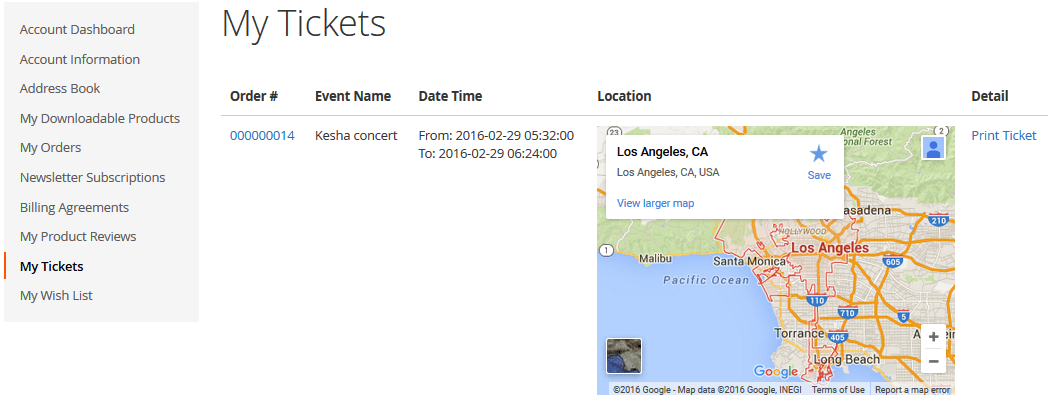
In My Account area, they can see a special tab into My Account area names My Ticket, where customers can view ticket price, status, duration, and location.
| Note | ||
|---|---|---|
| ||
Your customers must to register to buy tickets. if a guest buy a ticket so the Customer name field in PDF will be a blank. |
Update
- When a bug fix or new feature is released, we will provide you with the module's new package.
- All you need to do is repeating the above installing steps and uploading the package onto your store. The code will automatically override.
- Flush the config cache. Your store and newly installed module should be working as expected.
Support
- Magenest offers the response time can be up to 3-5 days.
- We offers lifetime support free for all of our paid products. Support includes answering questions related to our products, bug/error fixing to make sure our products work well in your site exactly like our demo.
- Support DOES NOT include other services as customize our product to fit your own needs, installation service, uninstallation service. We ONLY support you with exist features of module
Once again, thank you for purchasing our extension. If you have any questions relating to this extension, please do not hesitate to contact us for support.

