1. Social Login Installation Guides ![]()
Support Portal: http://servicedesk.izysync.com/servicedesk/customer/portal/30
Thank you for purchasing our extension. If you have any questions that are beyond the scope of this document, do not hesitate to leave us an email via our email address below.
Created: 11/05/2016 | By: Magenest | Email: [email protected]
| Table of Contents |
|---|
Introduction
![]()
Magento 2 Social Login is an extension developed by Magenest, which helps customers connect to the Magento 2 stores in the flexible and easy way.
Extension's page: Social Login and Share
Features For Admins
- Setting app for each social network.
Features For Customers
- Choosing one among up to 6 types of social accounts: Twitter, Facebook, Google, Linkedin, Pinterest, Instagram to login the Magento 2 stores.
- Sharing products on their social networks as: Twitter, Facebook, Google, Pinterest.
- Using Facebook accounts to comment on the Magento 2 stores.
System Requirements
Your store should be running on Magento 2 Community Edition version 2.0.0+.
Installation
Here we will guide you through the installation process of our extension. First off, open FileZilla, log in to your host as follows:
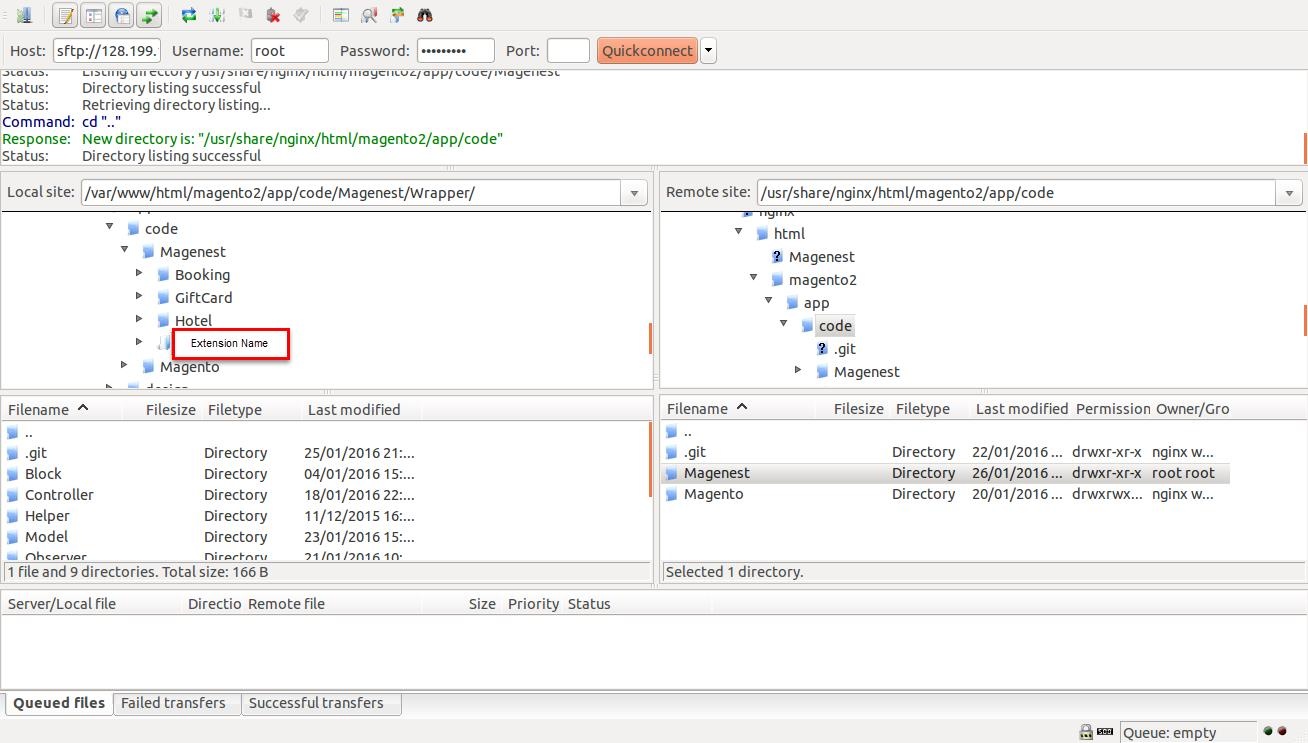
In the above example we switched the local site to the extension directory, and the remote site to the code directory. Now on the remote site window, inside app/code directory, create a folder named Magenest and go inside it. Now on your local site window, right click on Extension Name and click Upload. The extension will be uploaded onto your host in a few minutes.
The second method will require you to compress the extension into .zip or .tar.gz format, then execute the following command in your Command Line/Terminal:
scp <path to your extension> <ssh server>:<path to Magenest directory>Then log into your ssh server, go to Magenest directory and execute the following command to decompress the module:
unzip <.zip compressed extension> Or
tar -xzvf <.tar.gz compressed extension> Now go to your Magento root directory, say it's named magento2, and execute the following commands:
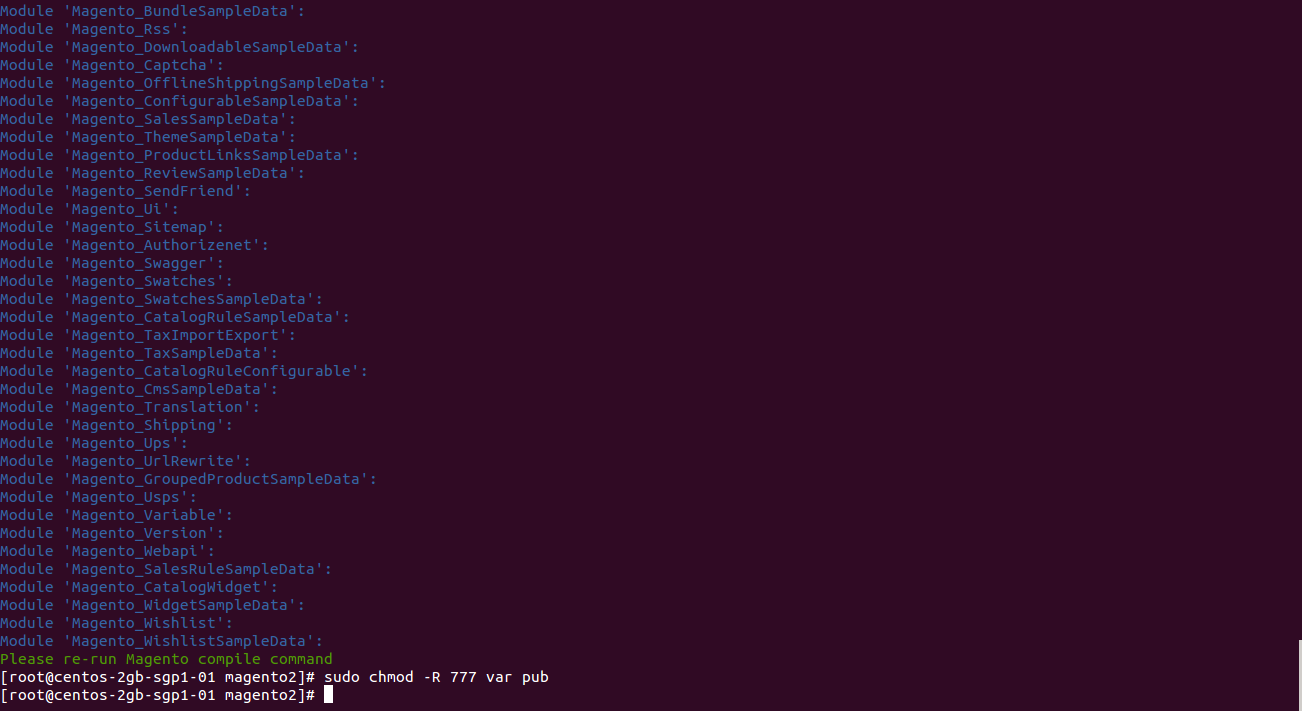
sudo chmod -R 755 . php bin/magento setup:upgrade php bin/magento setup:static-content:deploy sudo chmod -R 777 var pub
After running all these, your Command line/Terminal window might look like this:
Finally, you need to flush the cache by either type this into the Command Line/Terminal:
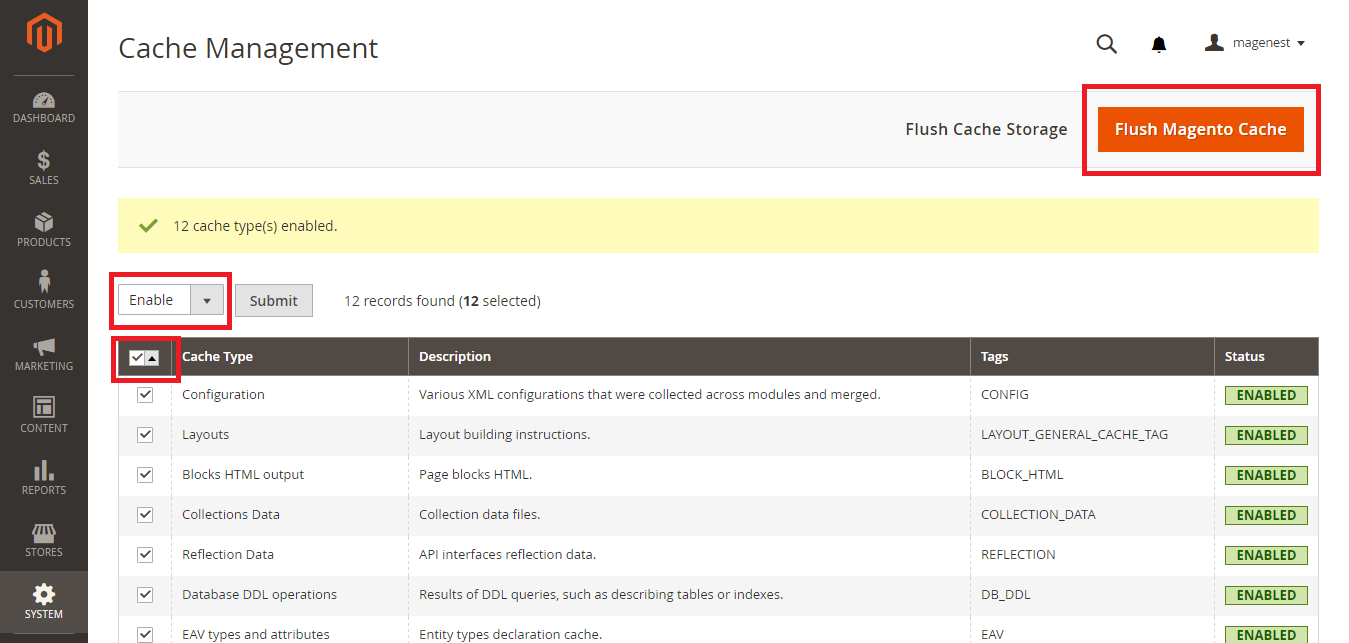
php bin/magento cache:flushOr go to System > Cache Management

Select all and click on Submit for Enable status, then choose Flush Magento Cache to finish.
Now you can go to your store and check if the extension is working as expected.
Configuration
General Configuration
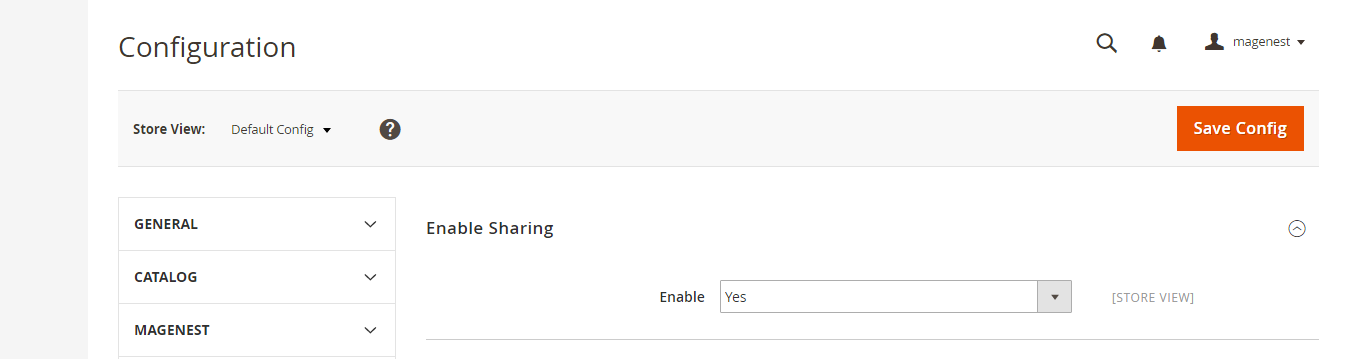
First, navigate to Store > Configuration > Magenest > Social Login, turn on sync operations of your choice. Admins are able to set whether customers can share products on their social login or not.
Specified Configuration
Go to Backend of Magento 2 stores > Stores > Configuration > Social login, under the Magenest section
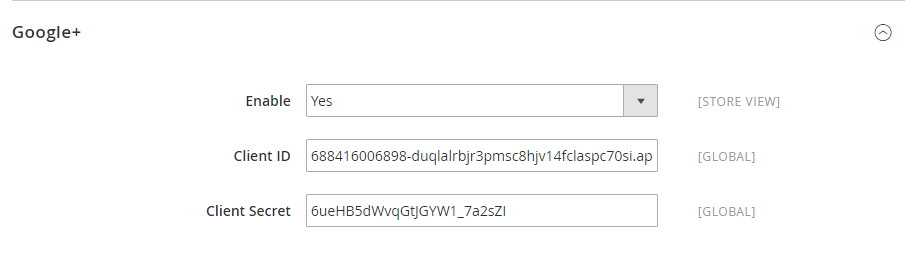
- Enable: allow showing or hiding Google+ login button
- Client ID: Google+ application ID
- Client Secret: Google+ application secret
Go to the Google Developers Console – https://console.developers.google.com/
Select an existing project, or create a new project by clicking Create Project:
- In the Project name field, type in a name for your new project.
- In the Project ID field, the console has created project ID.
- Click on the Create button and the project to be created within some seconds.
In the left sidebar, select APIs under the APIs & auth section.
Find the Google+ API service and set its status to Enable.In the sidebar, select Credentials under the APIs & auth section.
In the OAuth section of the page, select Create New Client ID.
- Create Client ID dialog box would be appearing for choosing application type.
- In the Application type section of the dialog, select Web application and click on the Configure consent screen button.
- Choose Email address, enter Product name and save the form.
- In the Authorized JavaScript origins field, enter your app origin. If you want to allow your app to run on different protocols, domains, or subdomains, then you can enter multiple origins.
- In the Authorized redirect URI field, enter the redirect URL.
- Click on Create Client ID.
Now you can see the Client ID for web application section. Select Client ID and Client Secret then fill in Configuration of Google in Backend of Magento 2 stores.

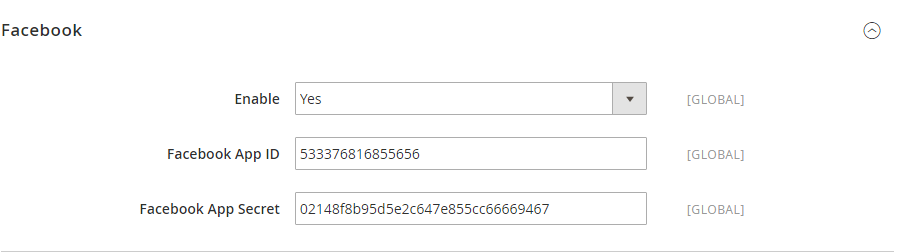
- Enable: allow showing or hiding Facebook login button
- Client ID: Facebook application ID
- Client Secret: Facebook application secret
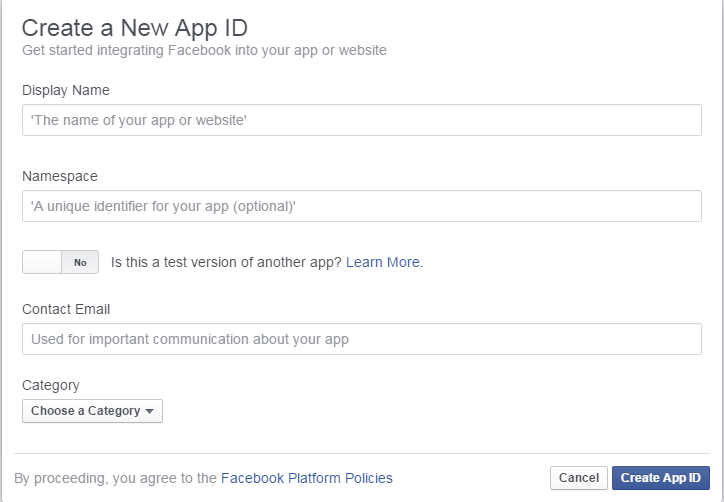
Click My app button on the top right > Website > Skip and Create App ID then fill information in the below screenshot.
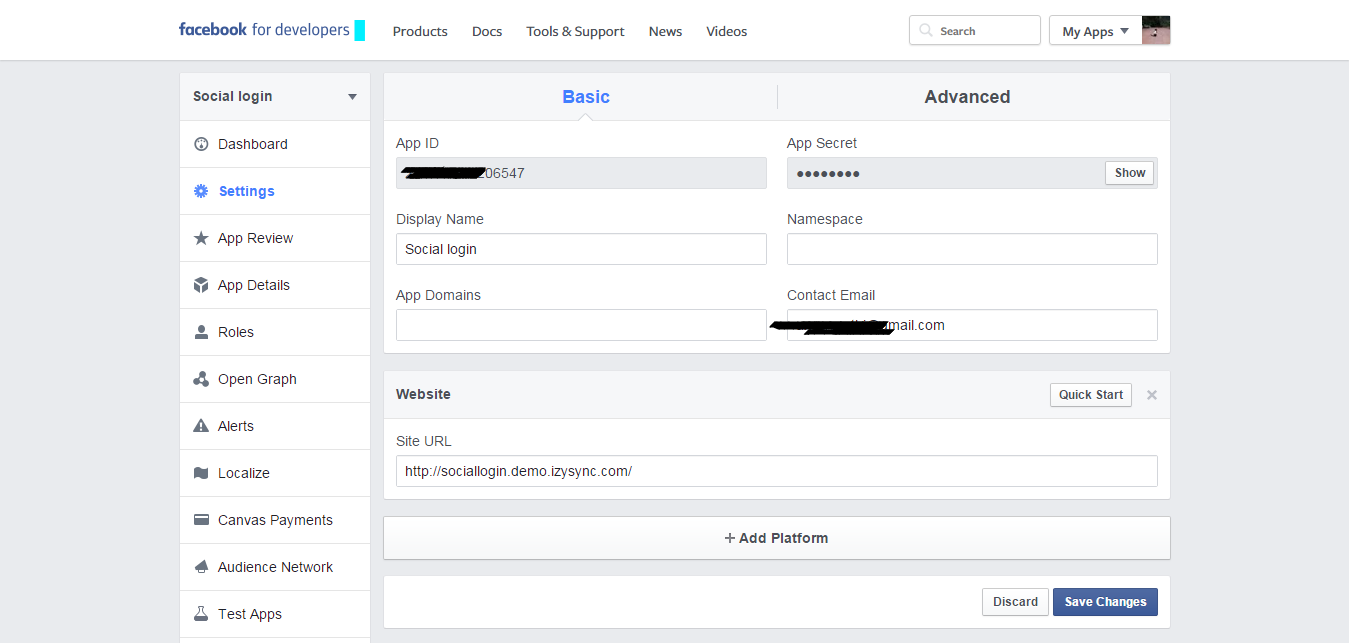
Choose Settings link from the left menu section at the apps page, click on the Add Platform button under app ID and app secret, then enter your site URL.

...
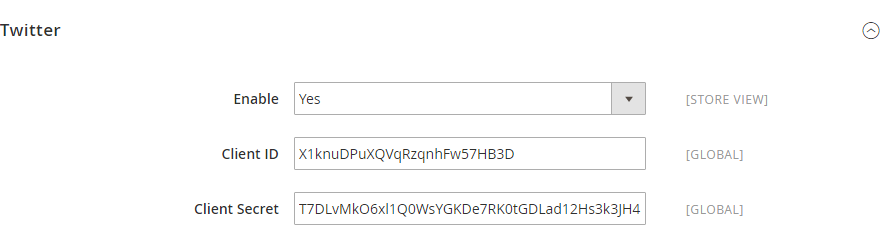
- Enable: allow showing or hiding Twitter login button
- Client ID: Twitter application ID
- Client Secret: Twitter application secret

Click on the Create New App and you would be redirected to the application creation page.

Enter your application details and click Create your Twitter application.
Into the Keys and Access Tokens tab you can find Consumer Key (API Key), Consumer Secret (API Secret) and other Application Settings.
Under the Your Access Token section, click on Create my access token. Now you can see the Access Token details under the Your Access Token section.
Select that API Key and API Secret and enter Configuration of Twitter to finish.
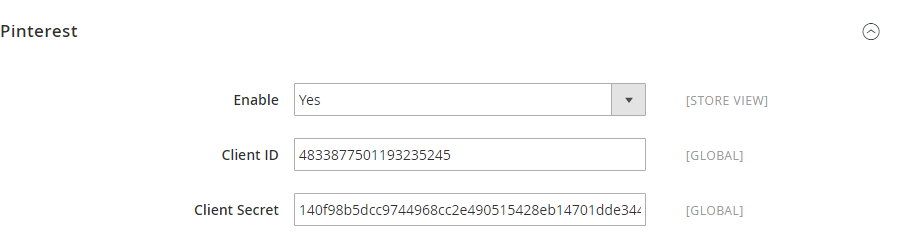
- Enable: allow showing or hiding Pinterest login button
- Client ID: Pinterest application ID
- Client Secret: Pinterest application secret
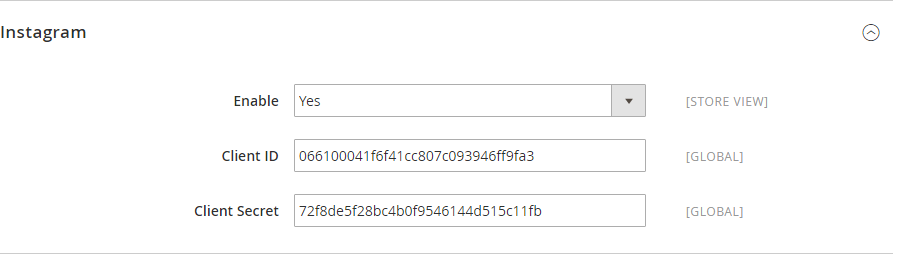
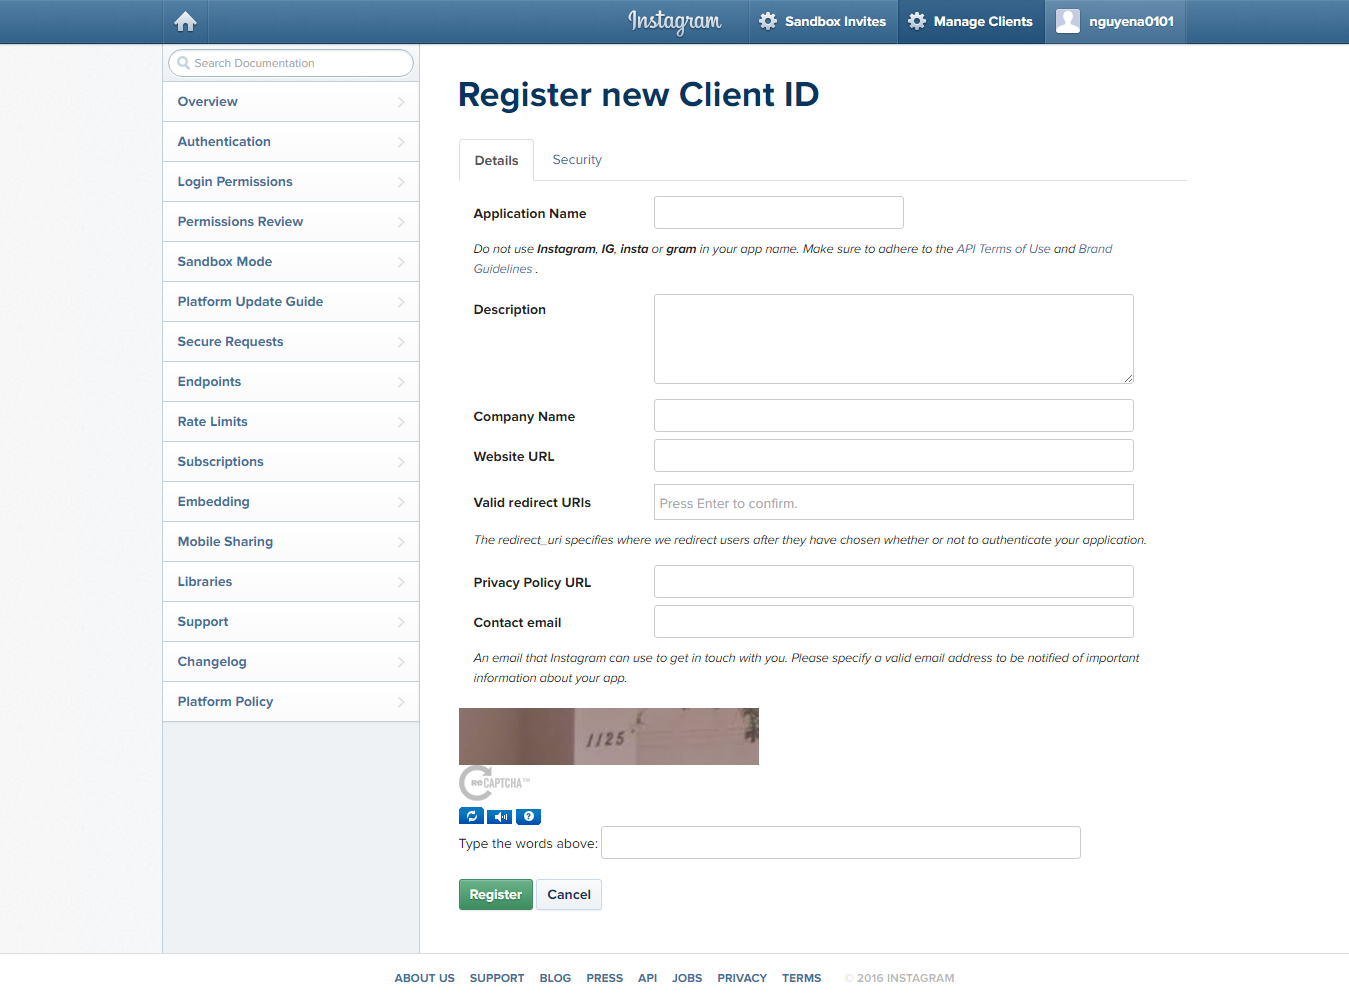
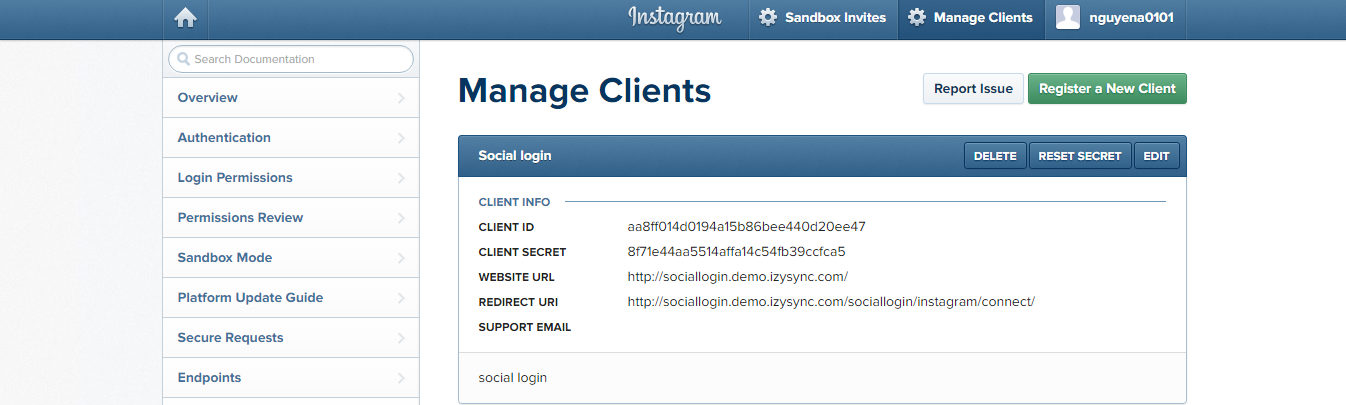
- Enable: allow showing or hiding Instagram login button
- Client ID: Instagram application ID
- Client Secret: Instagram application secret
- Enable: allow showing or hiding Linkedin login button
- Client ID: Linkedin application ID
- Client Secret: Linkedin application secret
...
...
...
...
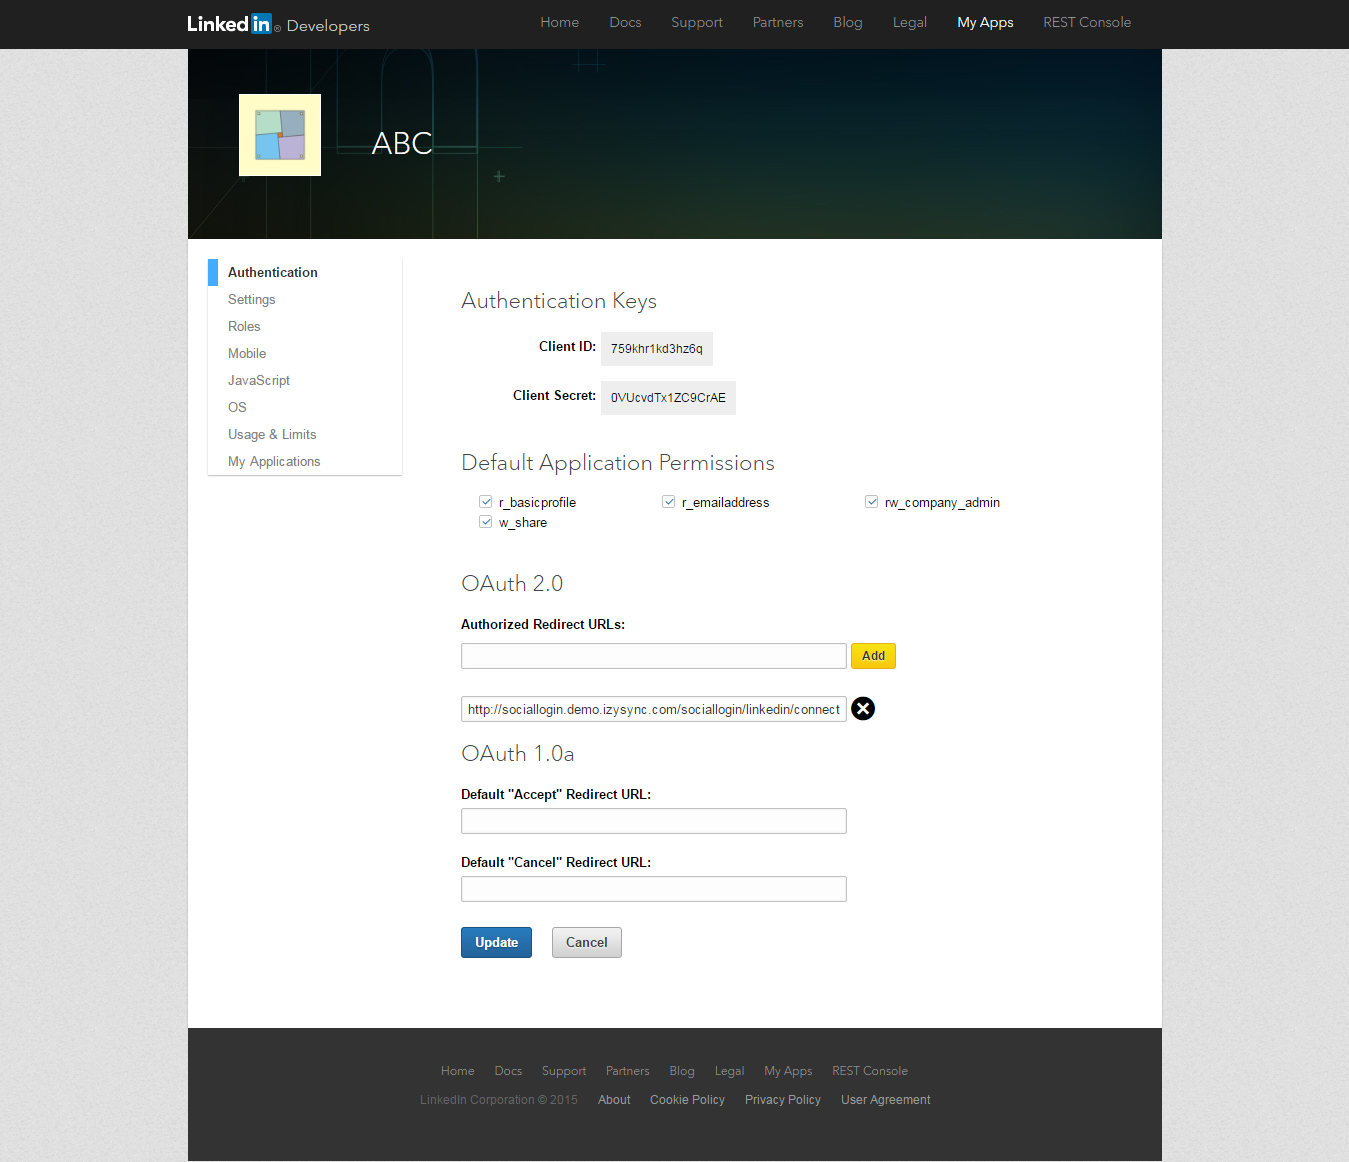
After choosing Submit button, new tab is open, tick all the box in Default Application Permissions and add URLs to authorize your web. Select Client ID and Client Secret for Configuration of Linkedin to finish.
When done, please press Save Config, your configuration is ready to use.
Front end
How the social login button will be represented to your customers
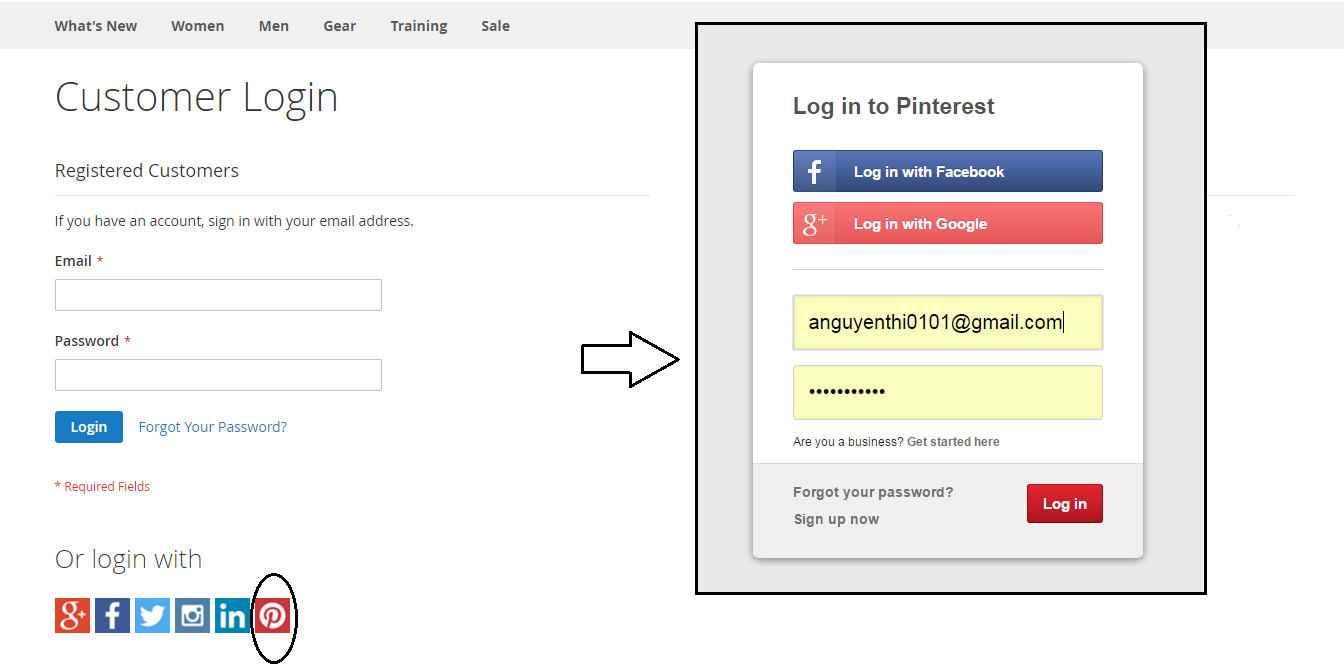
- Show the Social Login buttons below Customer sign in form
...
- Show the Social Login buttons below Customer registration form

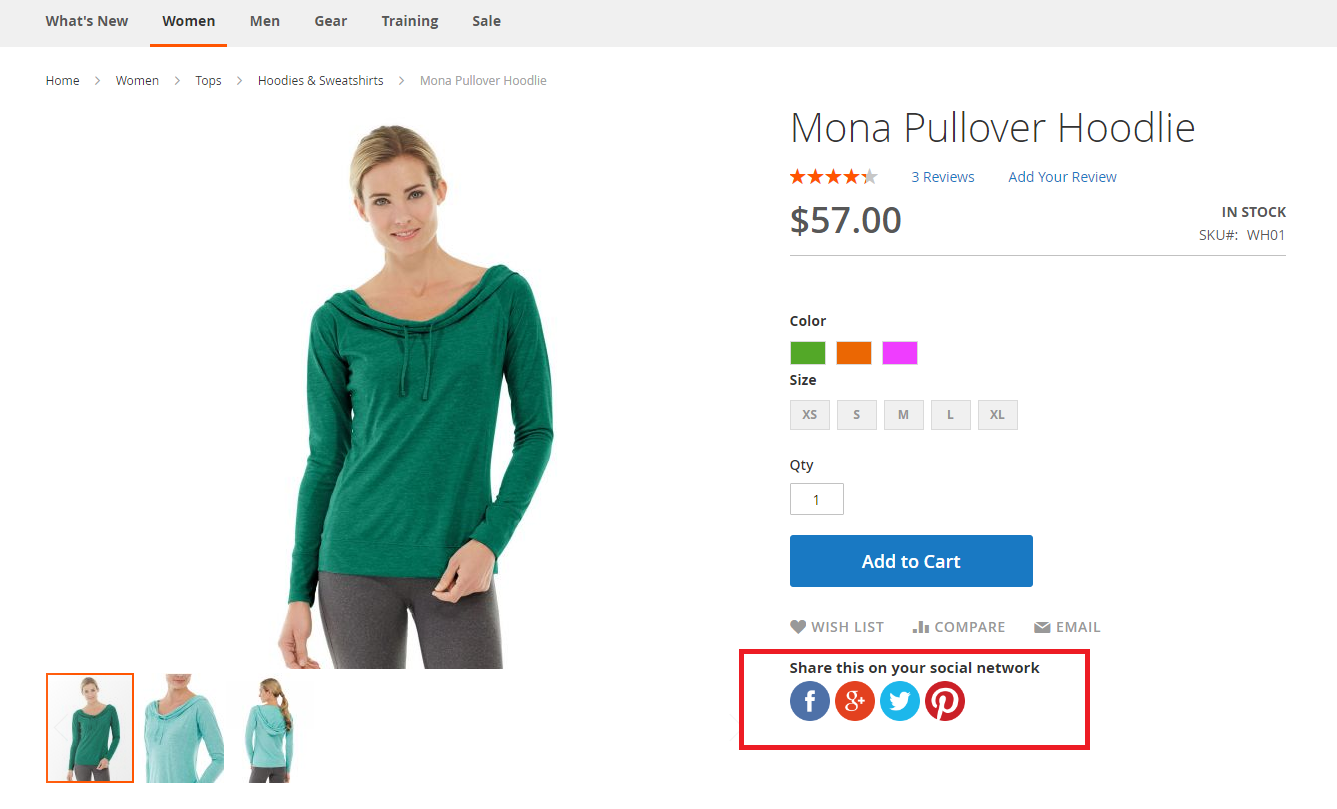
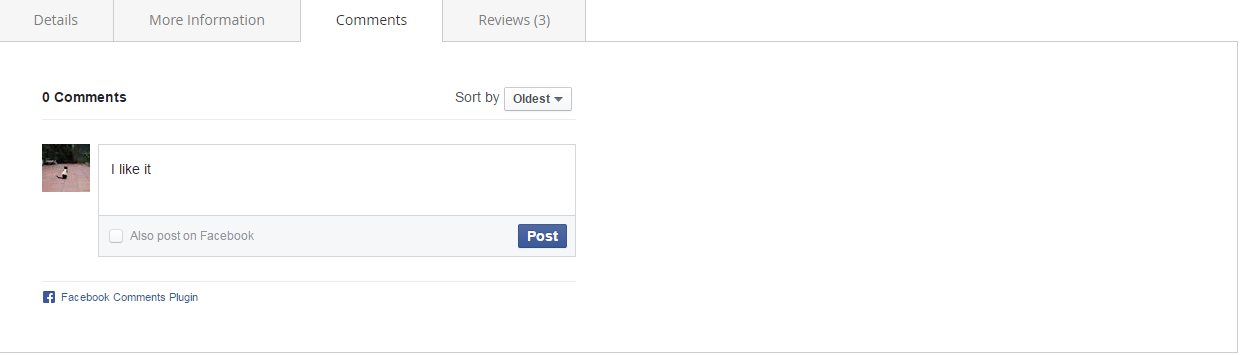
- Show the Social network buttons for sharing as: Twitter, Facebook, Google, Pinterest and show the box for leaving comments by Facebook accounts inside Detailed product information tab
...
How to use social network accounts in Magento 2 stores
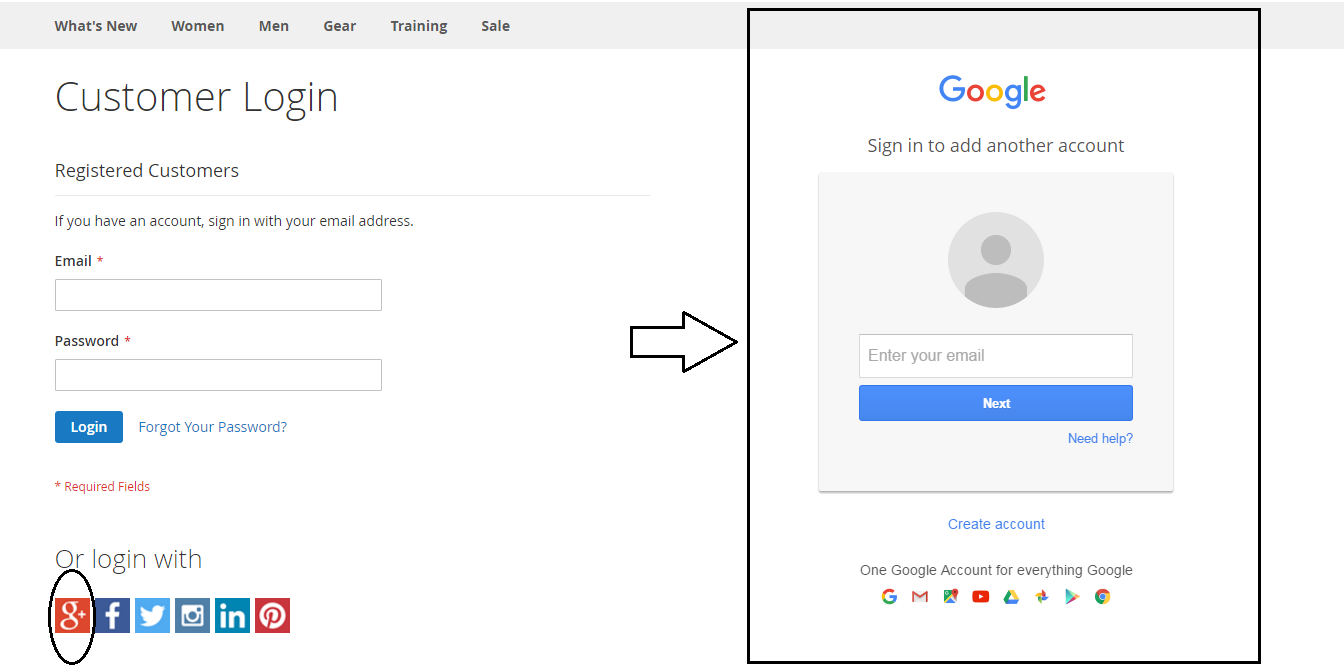
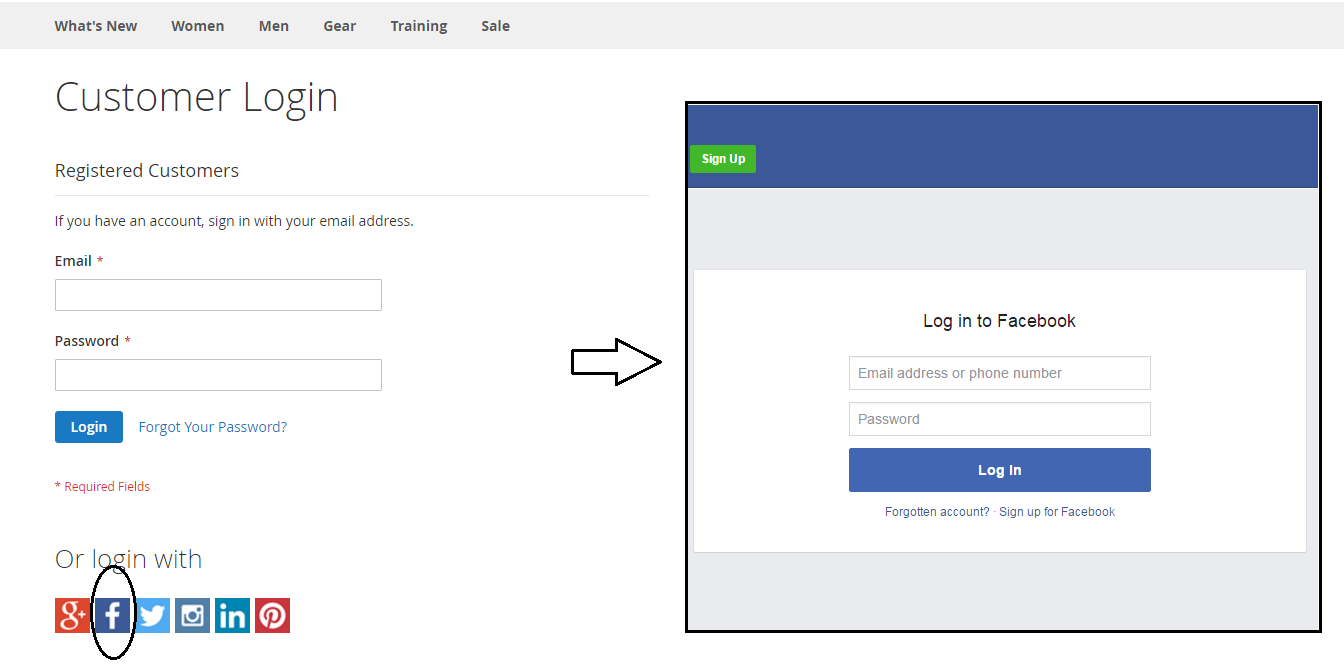
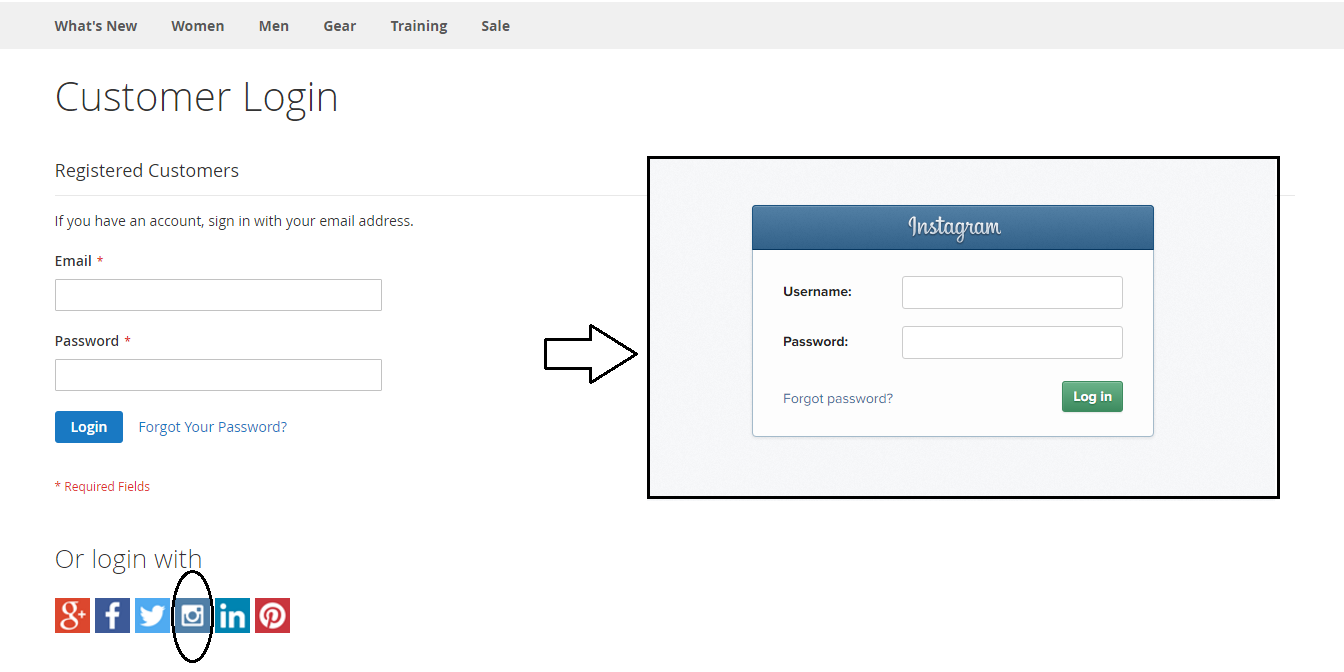
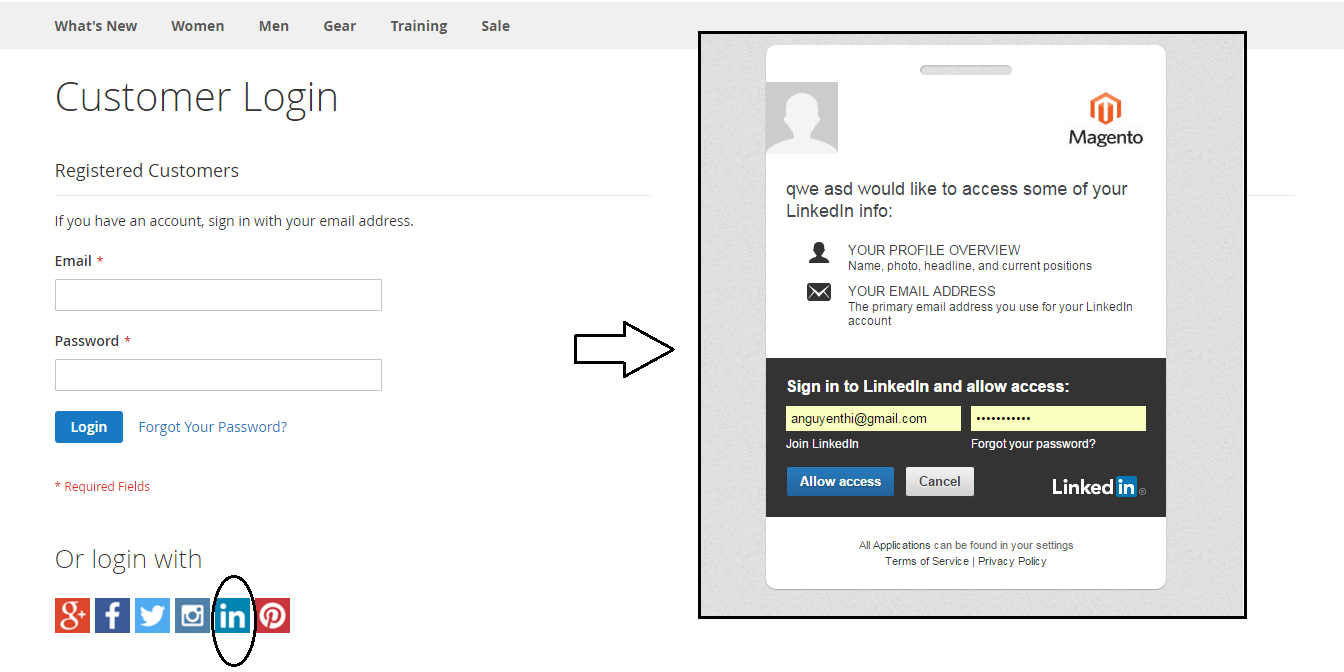
Log in using the social network account
- Google+ accounts
- Facebook accounts
- Twitter accounts

- Instagram accounts
- Linkedin accounts
- Pinterest accounts
Sharing products on their social networks as: Twitter, Facebook, Google, Pinterest
At detailed product information, customers can share product on their social network using one of 4 button: Twitter, Facebook, Google, and Pinterest.
Leaving a comment using Facebook accounts
At detailed product information, click on Comment tab, customers can leave a comment using Facebook accounts. Then click on Post button to finish.
Update
- When a new update is available, we will provide you with a new package containing our updated extension.
- You will have to delete the module directory and repeat the installing steps above.
- Flush the config cache. Your store and newly installed module should be working as expected.
Support
- We will reply to support requests after 2 business days.
- We will offer lifetime free update and 6 months free support for all of our paid products. Support includes answering questions related to our products, bug/error fixing to make sure our products fit well in your site exactly like our demo.
- Support DOES NOT include other series such as customizing our products, installation and uninstallation service.
Once again, thank you for purchasing our extension. If you have any questions relating to this extension, please do not hesitate to contact us for support.