1. Multiple Vendors Installation Guides ![]()
2. Multiple Vendors User Guides
Support Portal: http://servicedesk.izysync.com/servicedesk/customer/portal/14
Thank you for purchasing my extension. If you have any questions that are beyond the scope of this help file, please feel free to email via my user page contact form here. Thanks so much!
Created: 13/05/2016 | By: Magenest | Email: [email protected]
| Table of Contents |
|---|
Introduction
![]()
The Multiple Vendors Extension for Magento 2 provide the capability to your store to run with multiple vendors. It means vendors can easily add, update or sell the products from a single store. The important feature of this extension is admin have all the rights to approve or reject the vendor request at any time. It is useful to customer also, because customer can easily buy the products from the multiple users at a time using single shopping cart.
Please view more detail at the extension page: Multiple Vendors
Features for admins
- Manage vendors and set the vendor approval.
- Manage products and set the product approval.
- Manage and set all of the commission between vendors and the owner store.
- Manage feedback and set the feedback approval.
- Transaction management between vendors and the owner store.
- Set email templates.
Features for customers
- Set vendor profile.
- Easily add and manage products.
- Allow to manage only their orders.
- View market place.
- View sales in the form of charts by month and year from vendor dashboard.
- Manage transaction list.
- Allow consumers to review about the product.
- Manage the feedback list.
System Requirements
Your store should be running on Magento Community Edition version 2.0.0 and more.
Installation
Here we will guide you through the installation process of our extension. First off, open FileZilla, log in to your host as follows:
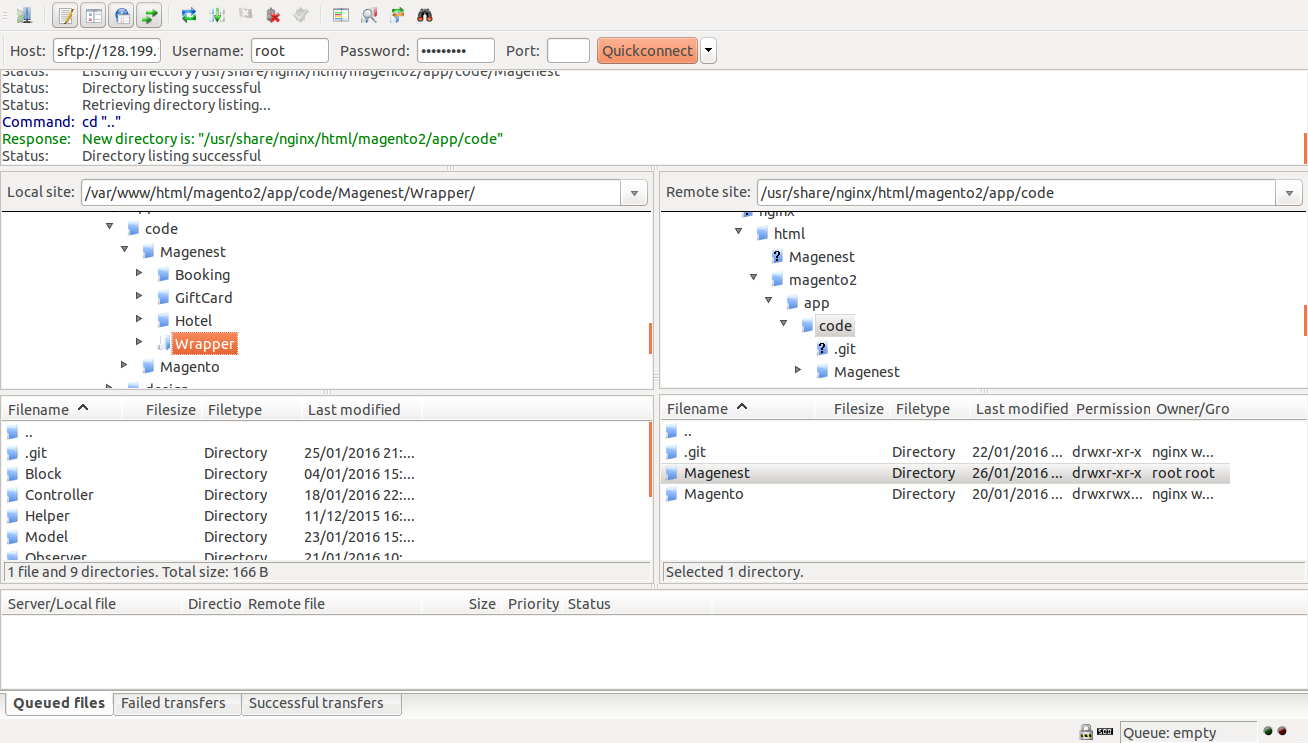
In the above example we switched the local site to the extension directory, and the remote site to the code directory. Now on the remote site window, inside app/code directory, create a folder named Magenest and go inside it. Now on your local site window, right click on Wrapper extension and click Upload. The extension will be uploaded onto your host in a few minutes.
The second method will require you to compress the extension into .zip or .tar.gz format, then execute the following command in your Command Line/Terminal:
scp <path to your extension> <ssh server>:<path to Magenest directory>Then log into your ssh server, go to Magenest directory and execute the following command to decompress the module:
unzip <.zip compressed extension> Or
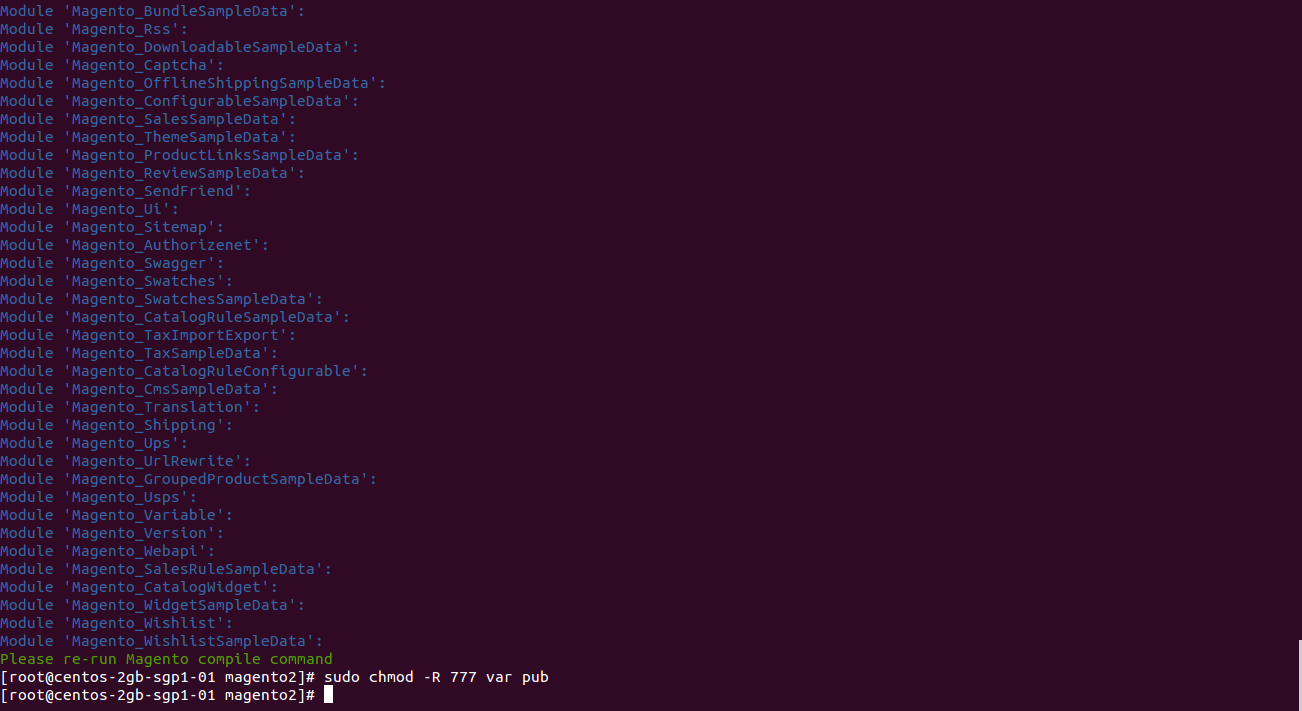
tar -xzvf <.tar.gz compressed extension> Now go to your Magento root directory, say it's named magento2, and execute the following commands:
sudo chmod -R 755 . php bin/magento setup:upgrade php bin/magento setup:static-content:deploy sudo chmod -R 777 var pub
After running all these, your Command line/Terminal window might look like this:
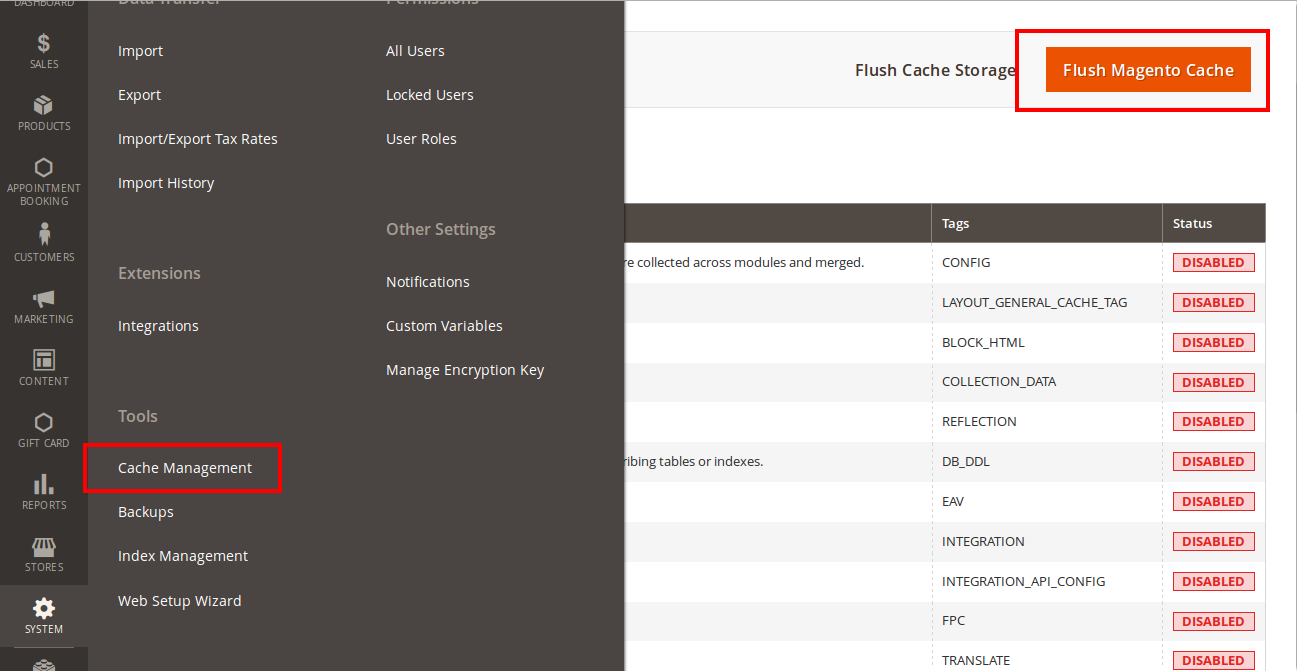
Finally, you need to flush the cache by either type this into the Command Line/Terminal:
php bin/magento cache:flushOr go to System > Cache Management and click Flush Magento Cache
Now you can go to your store and check if the extension is working as expected.
Main Functions
For Admin
We created Multiple Vendors tab which allows admin easily to control all vendors in their store.

The following is the great features that this extension brings for admin.
- Manage Vendors
Admin can manage the list vendors and the information vendor such as ID, Name Vendor, Email Vendor, Shop Url and so on.

Click Edit button if admin wants to view or implements any changes about the information vendors.
Furthermore, admin will also set the vendor approval for all vendors.
Yes: Vendor. No: Not vendor. | 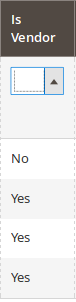 |
|---|
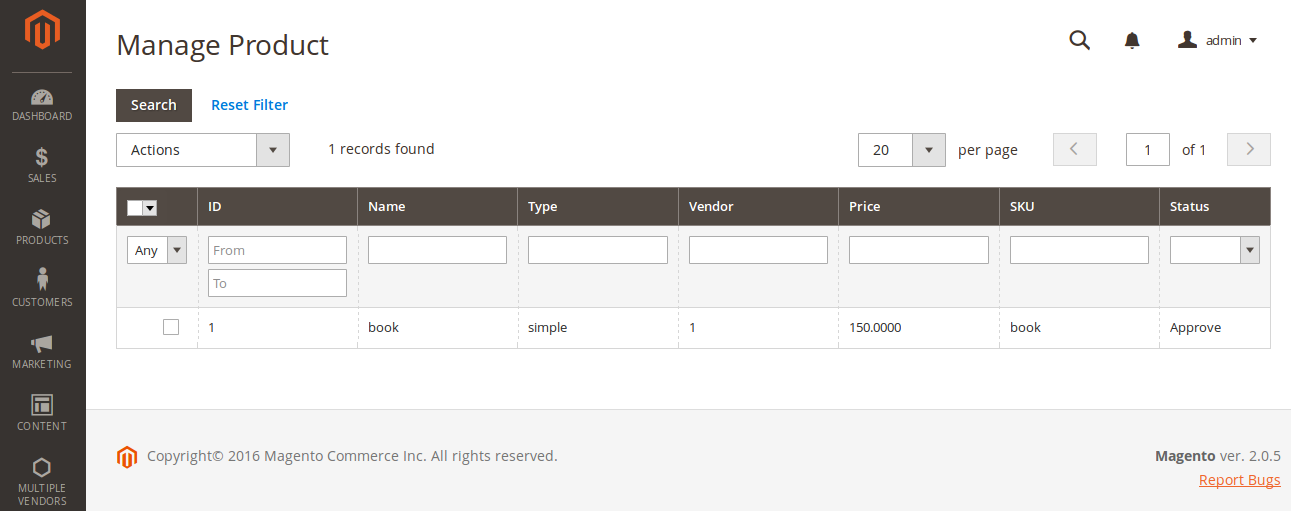
- Manage Products
Admin will manage all products which are sold in their store along with the corresponding vendor ID. This will help to control product an easy way.
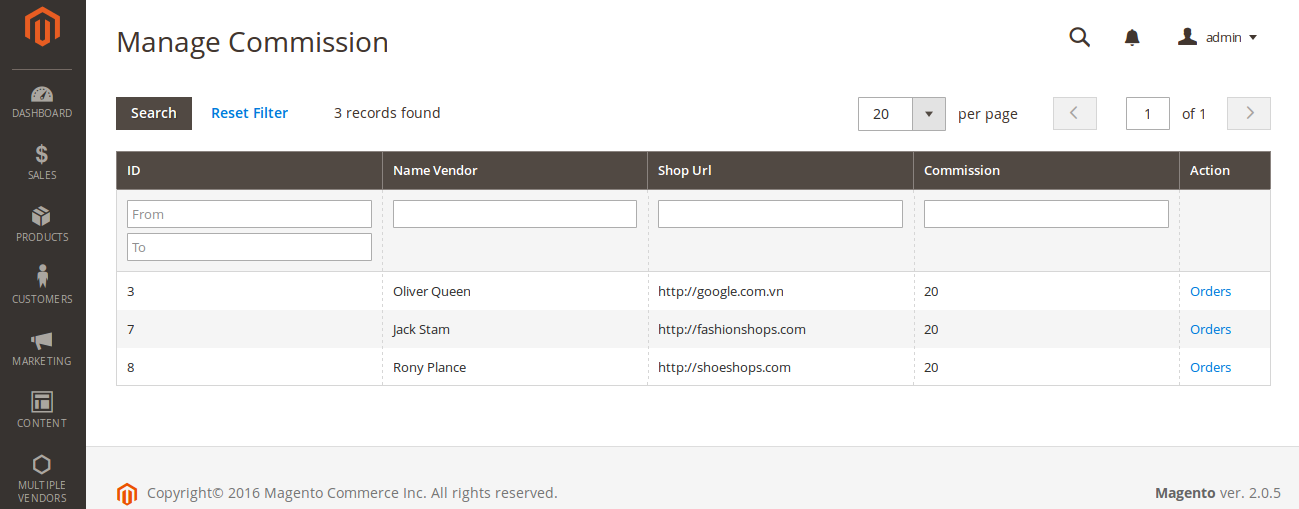
- Manage Commission
At Manage Commission tab, admin can control all commission related each vendor.
- Manage Feedback
Admin will view all of feedback and set the feedback approval
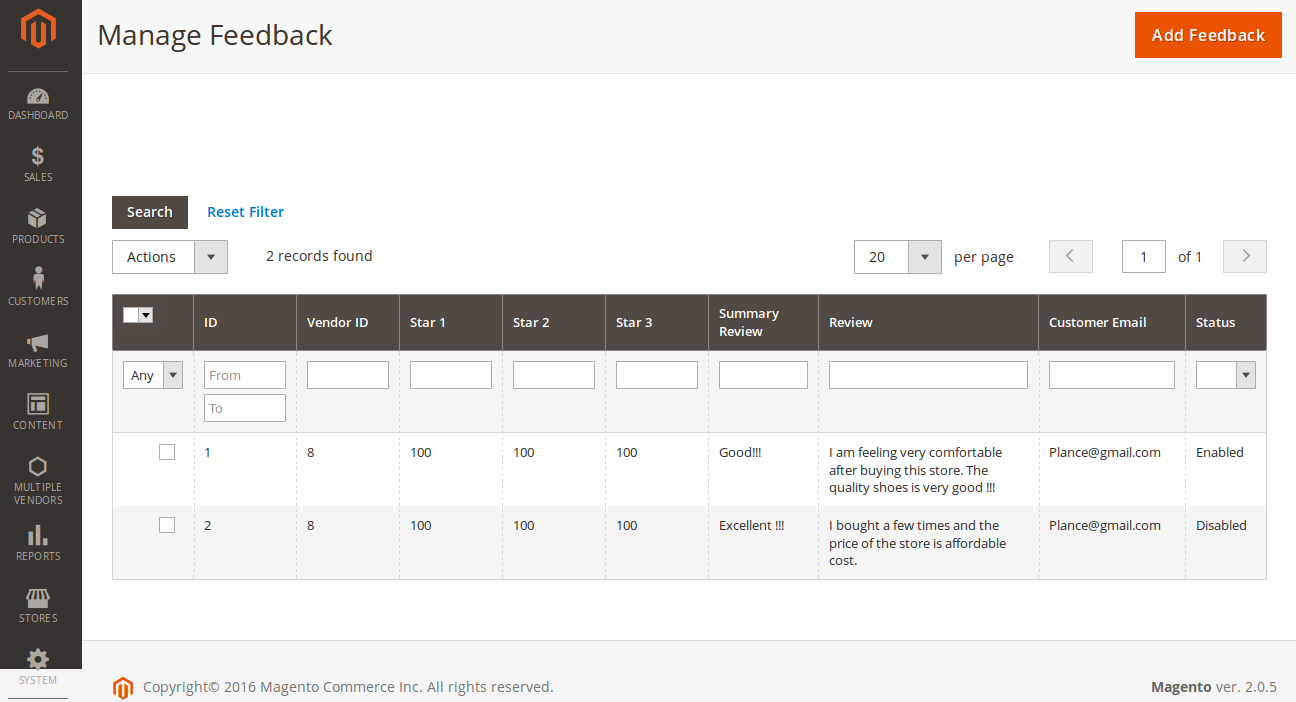
Admin also need to set the feedback approval which allows customer's feedback to be shown on My feedback tab of the owner store.
Enabled: Displayed. Disabled: Not be displayed. | 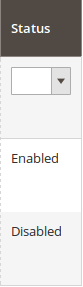 |
|---|
- Manage Vendor Transactions
Admin wiil manage all of information related transaction history by clicking on Multiple Vendors > Vendors Transaction
![]()
...
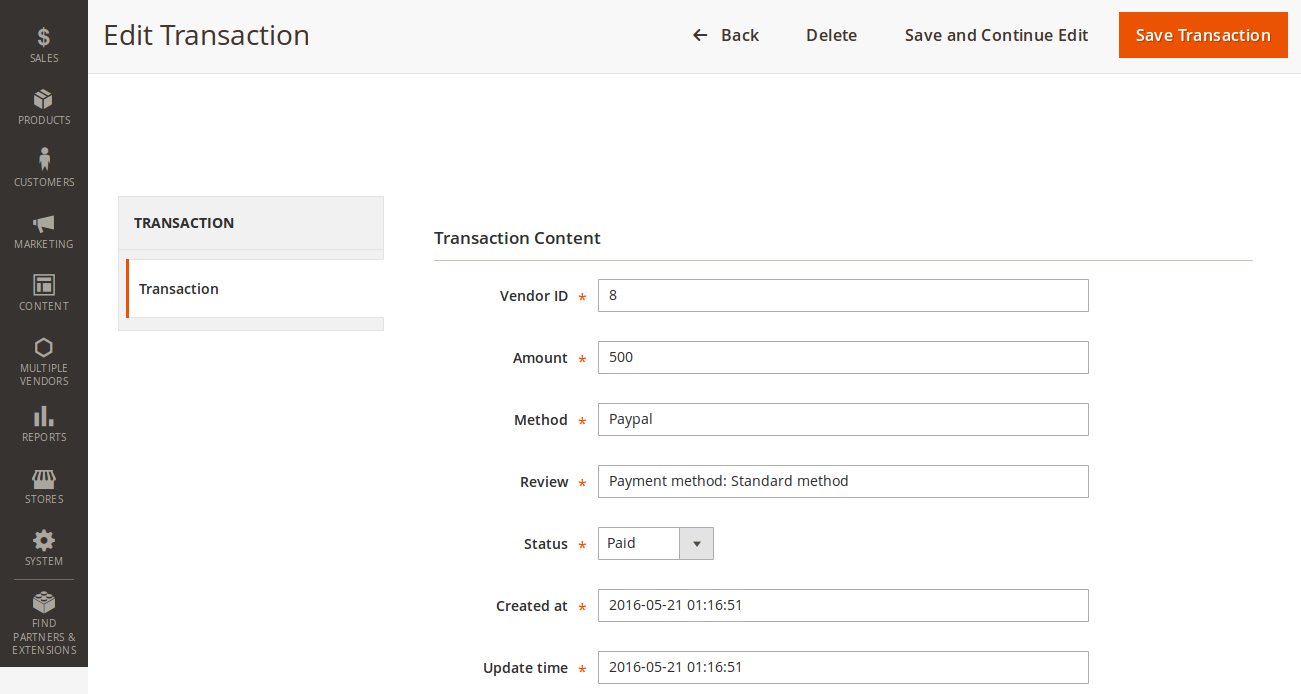
There are four options for admin in order to select, consist of: Pending, Paid, Rejected and Failed.
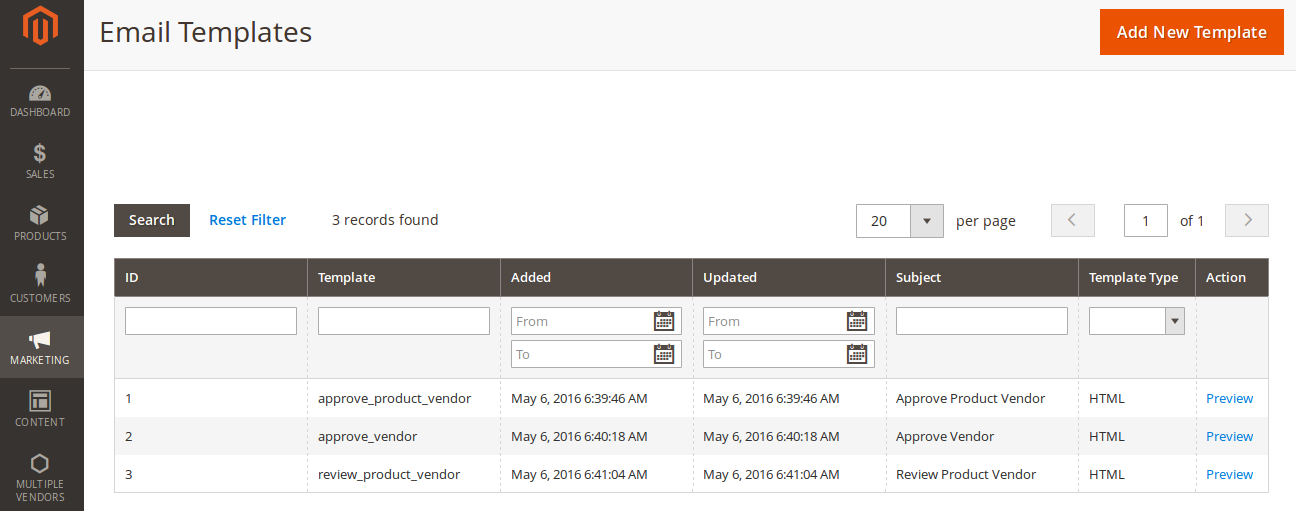
- Set email templates
Admin will set some email template as they wish in order to communicate with vendors of their main store.
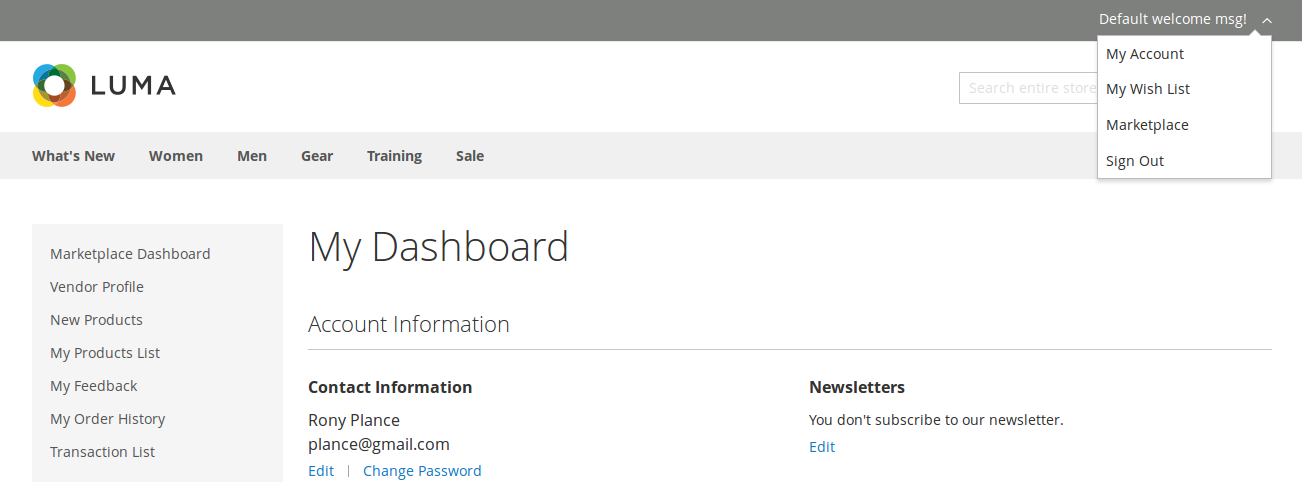
For Customer
- Set Vendor Profile
When customers create a new vendor account, they will be needed the approval of the admin to become a official vendor.
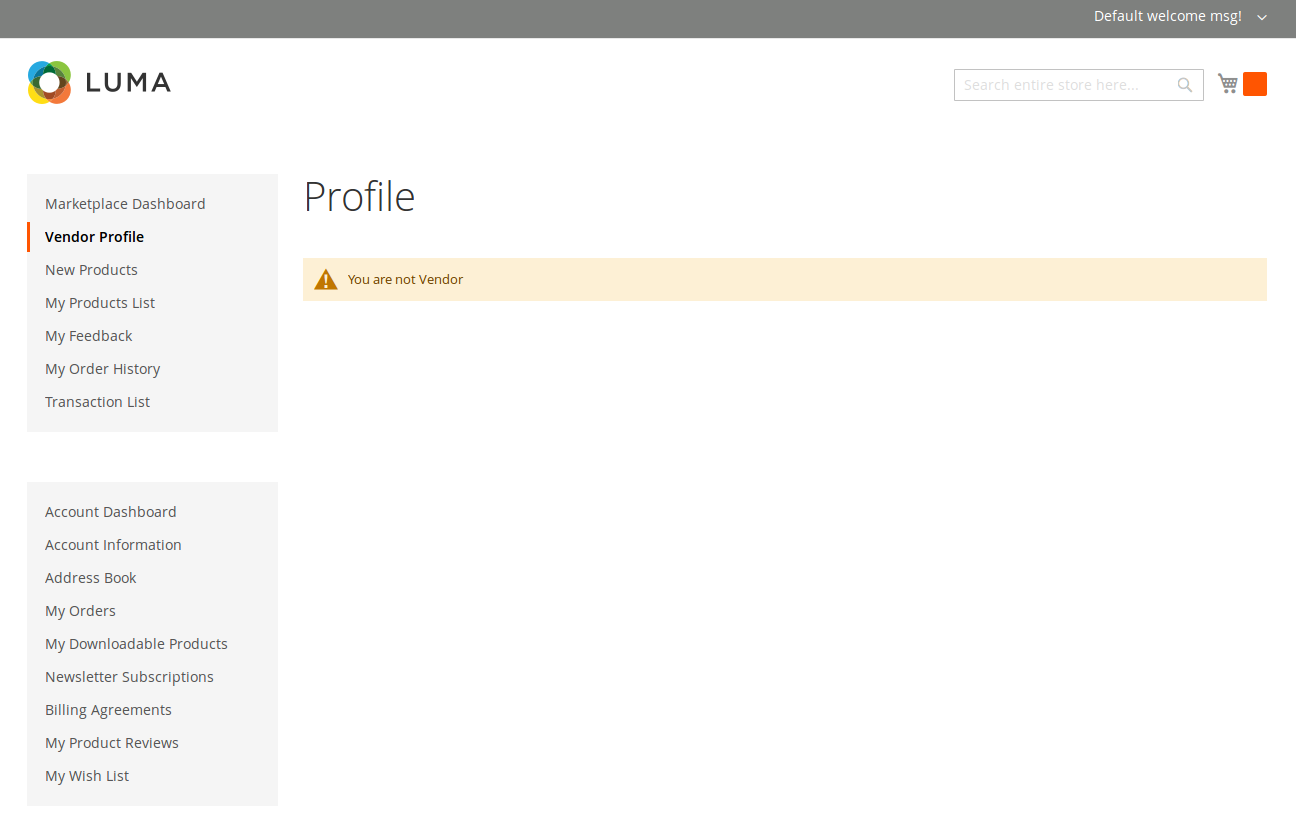
Then, customer will set their profile by clicking on My Account > Vendor Profile.
Seller Details
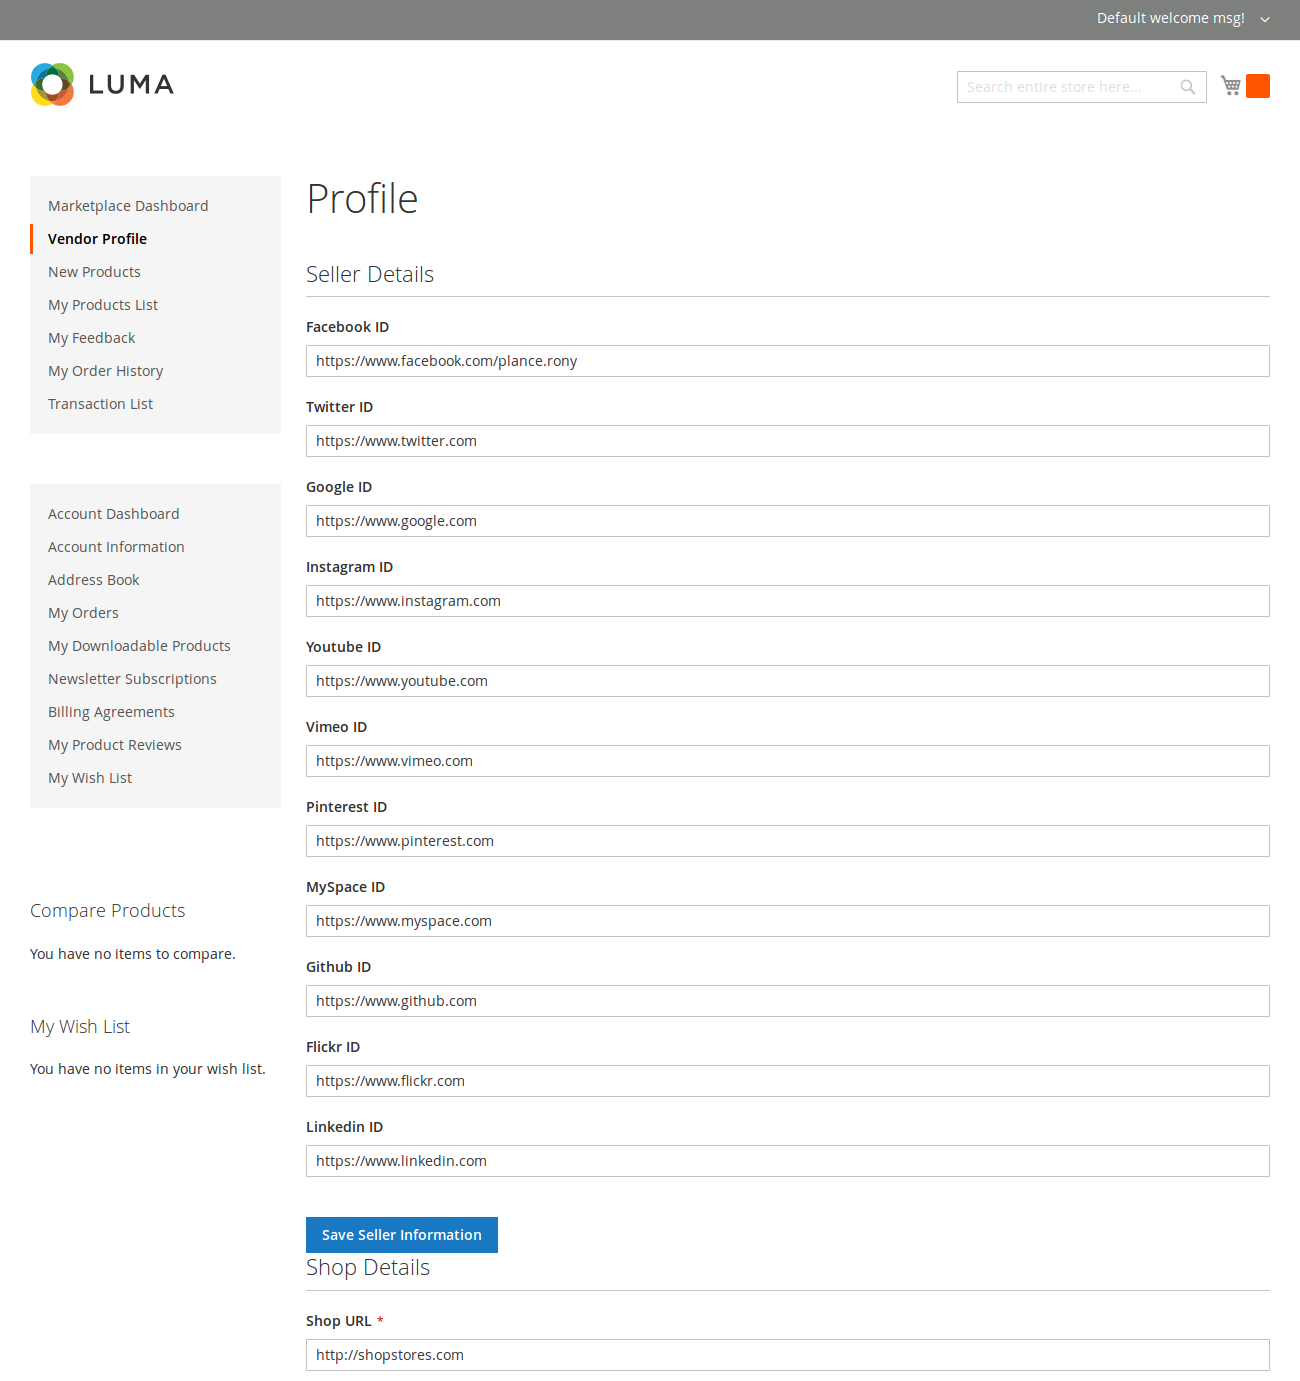
Click Save Seller Information button to save the information entered.
Shop Details
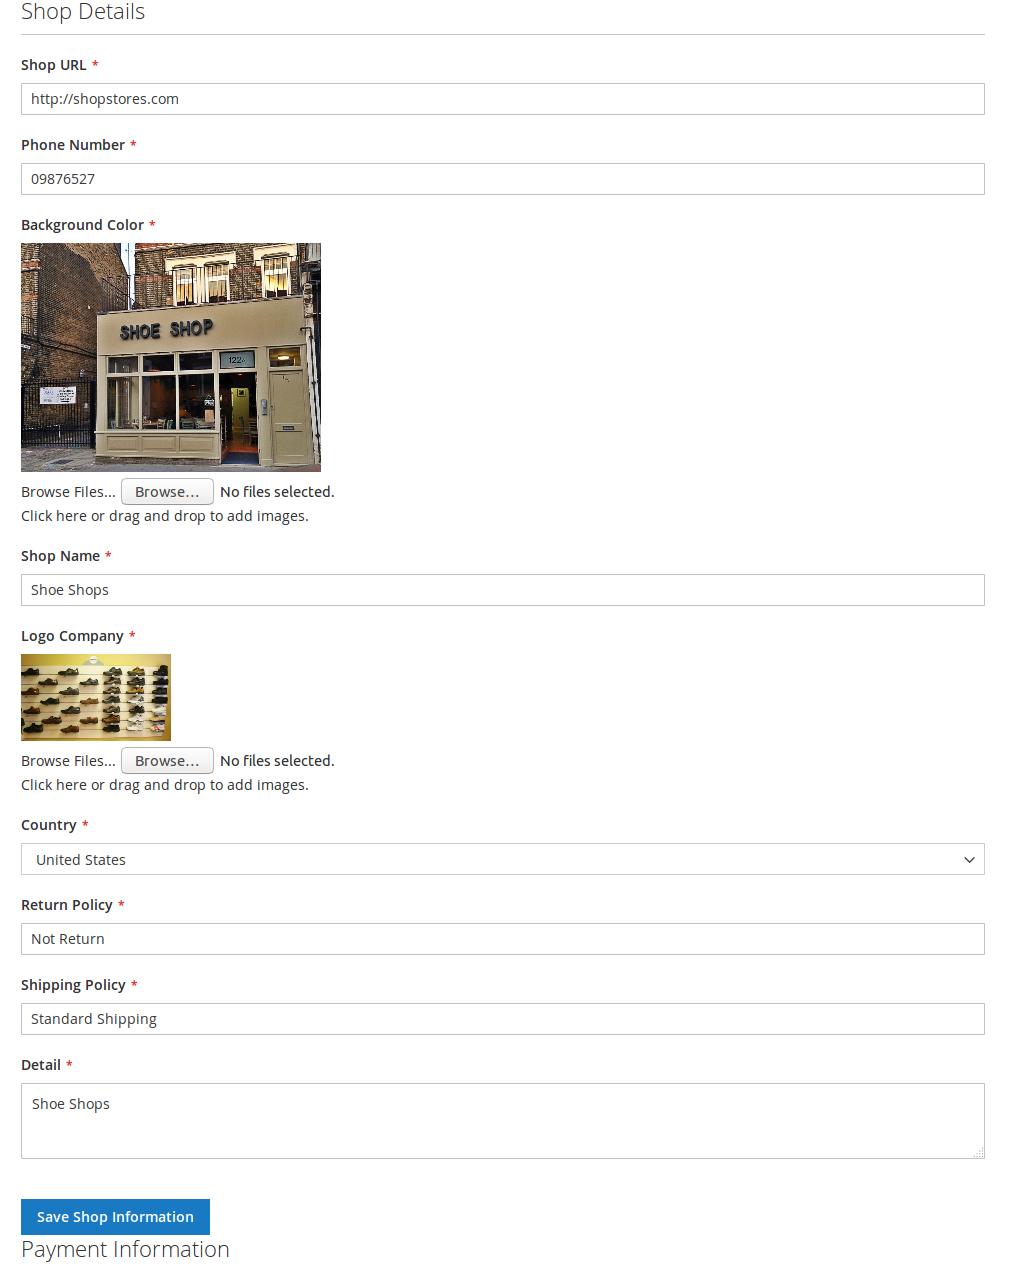
Click Save Shop Information button to save the information entered.
Payment Information
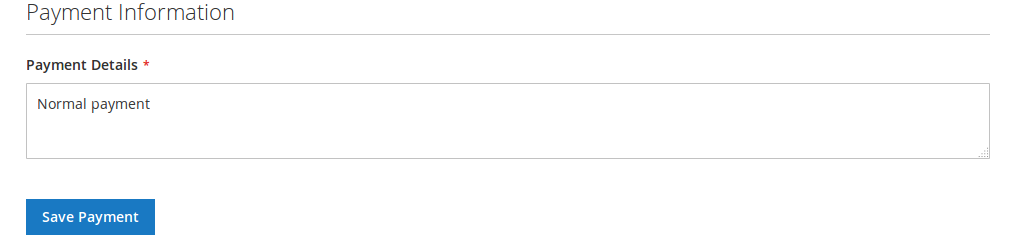
Click Save Payment button to save the information entered.
- Add New Products
After customer entered all of the information related the store. They need to add product into their store by clicking on My Account > New Product.
Currently, we provide two product types for customers so that they can select, includes: Simple Product and Virtual Product.
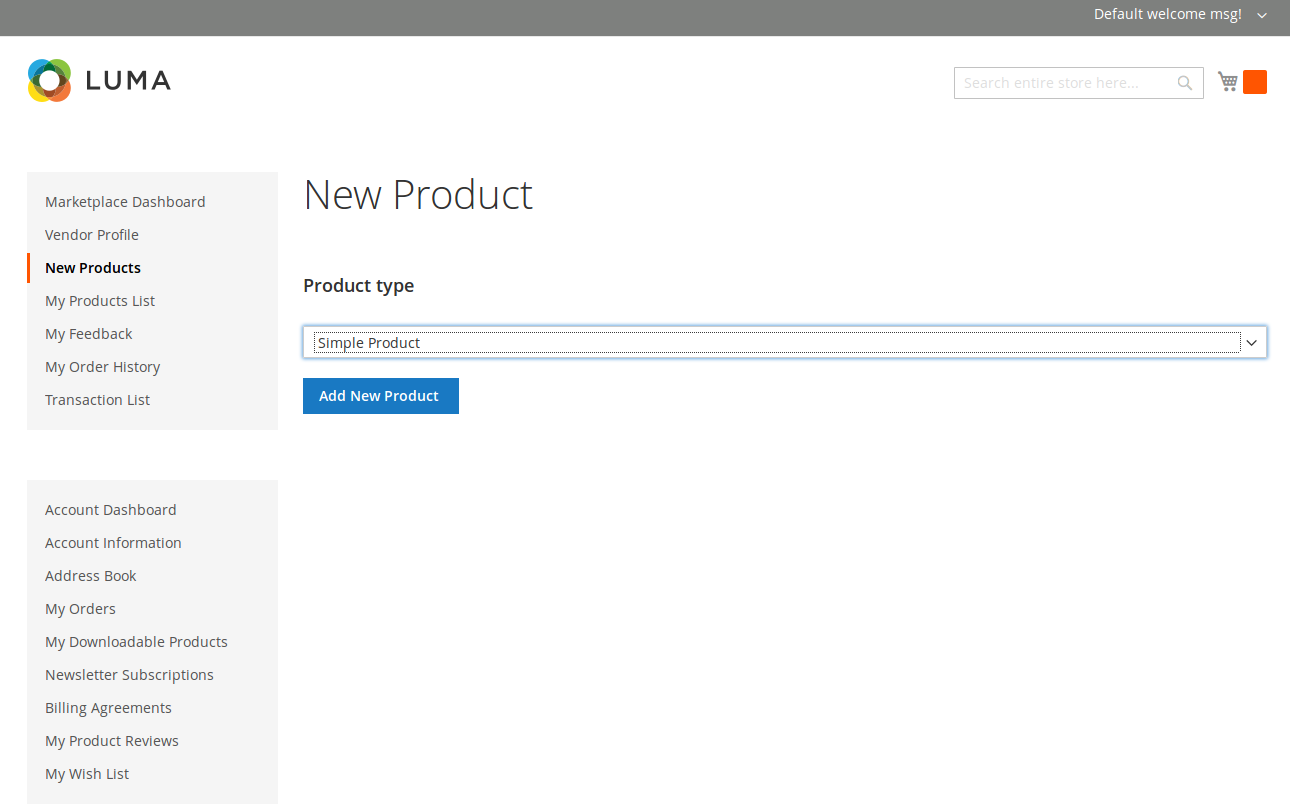
Click on Add New Product button, the Add New Product screen will be shown.
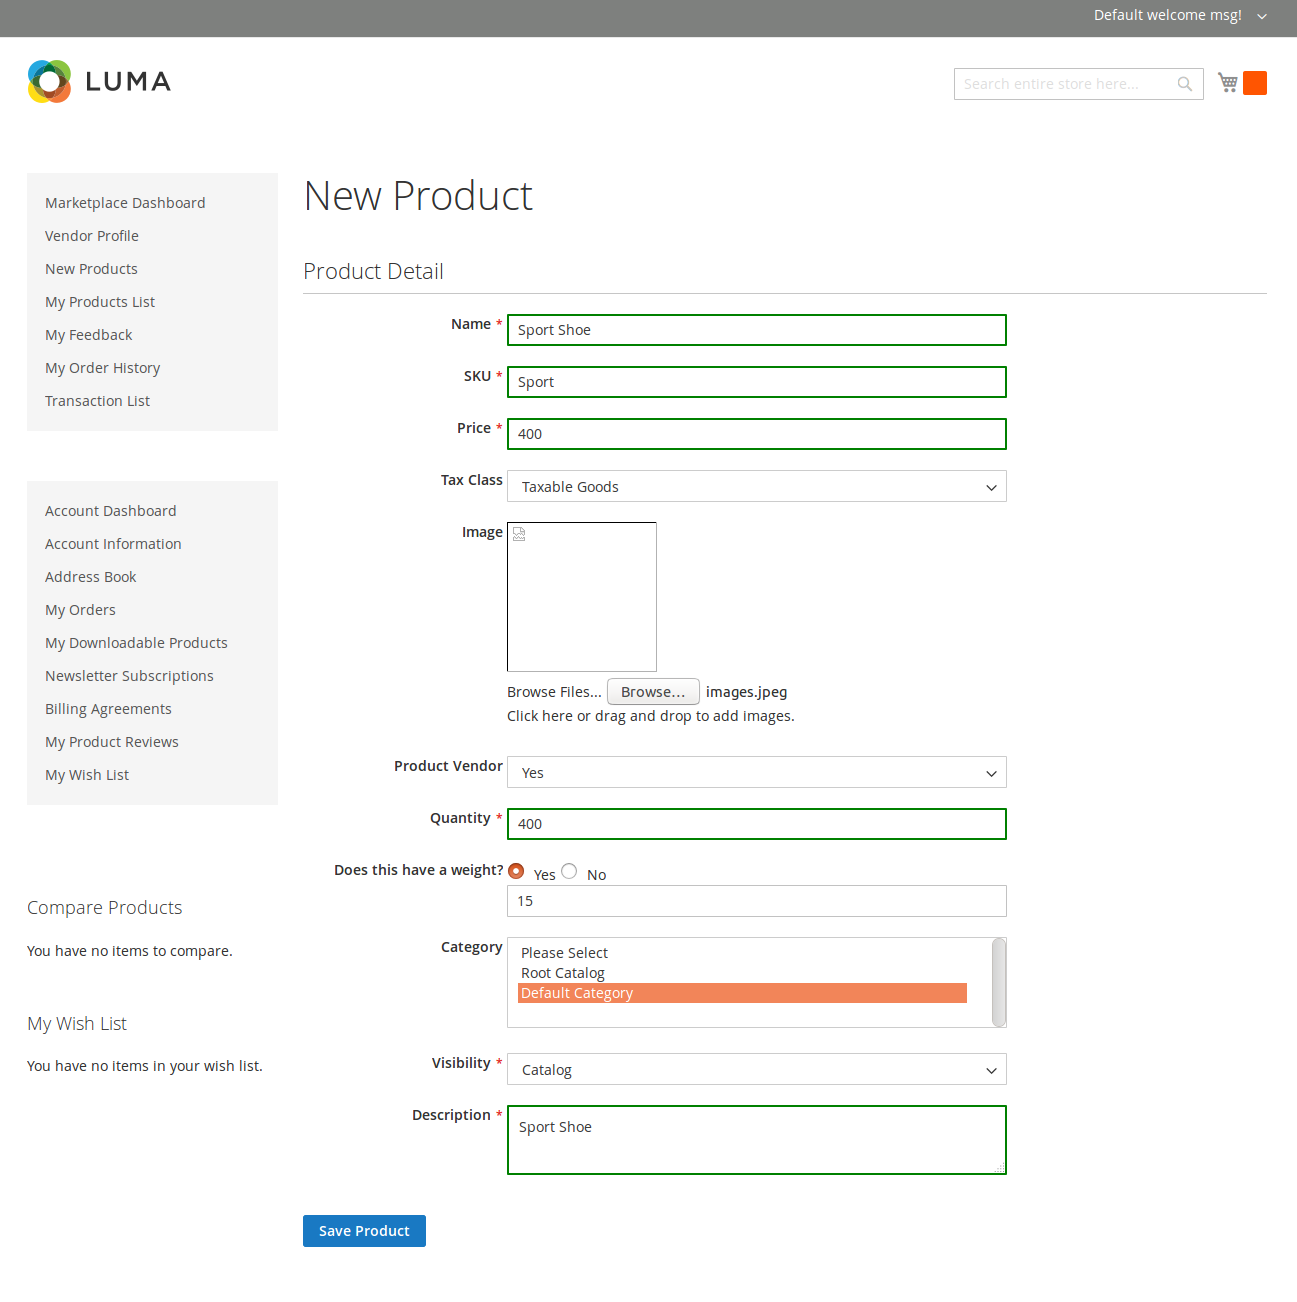
Please click on Save Product button to save information entered.
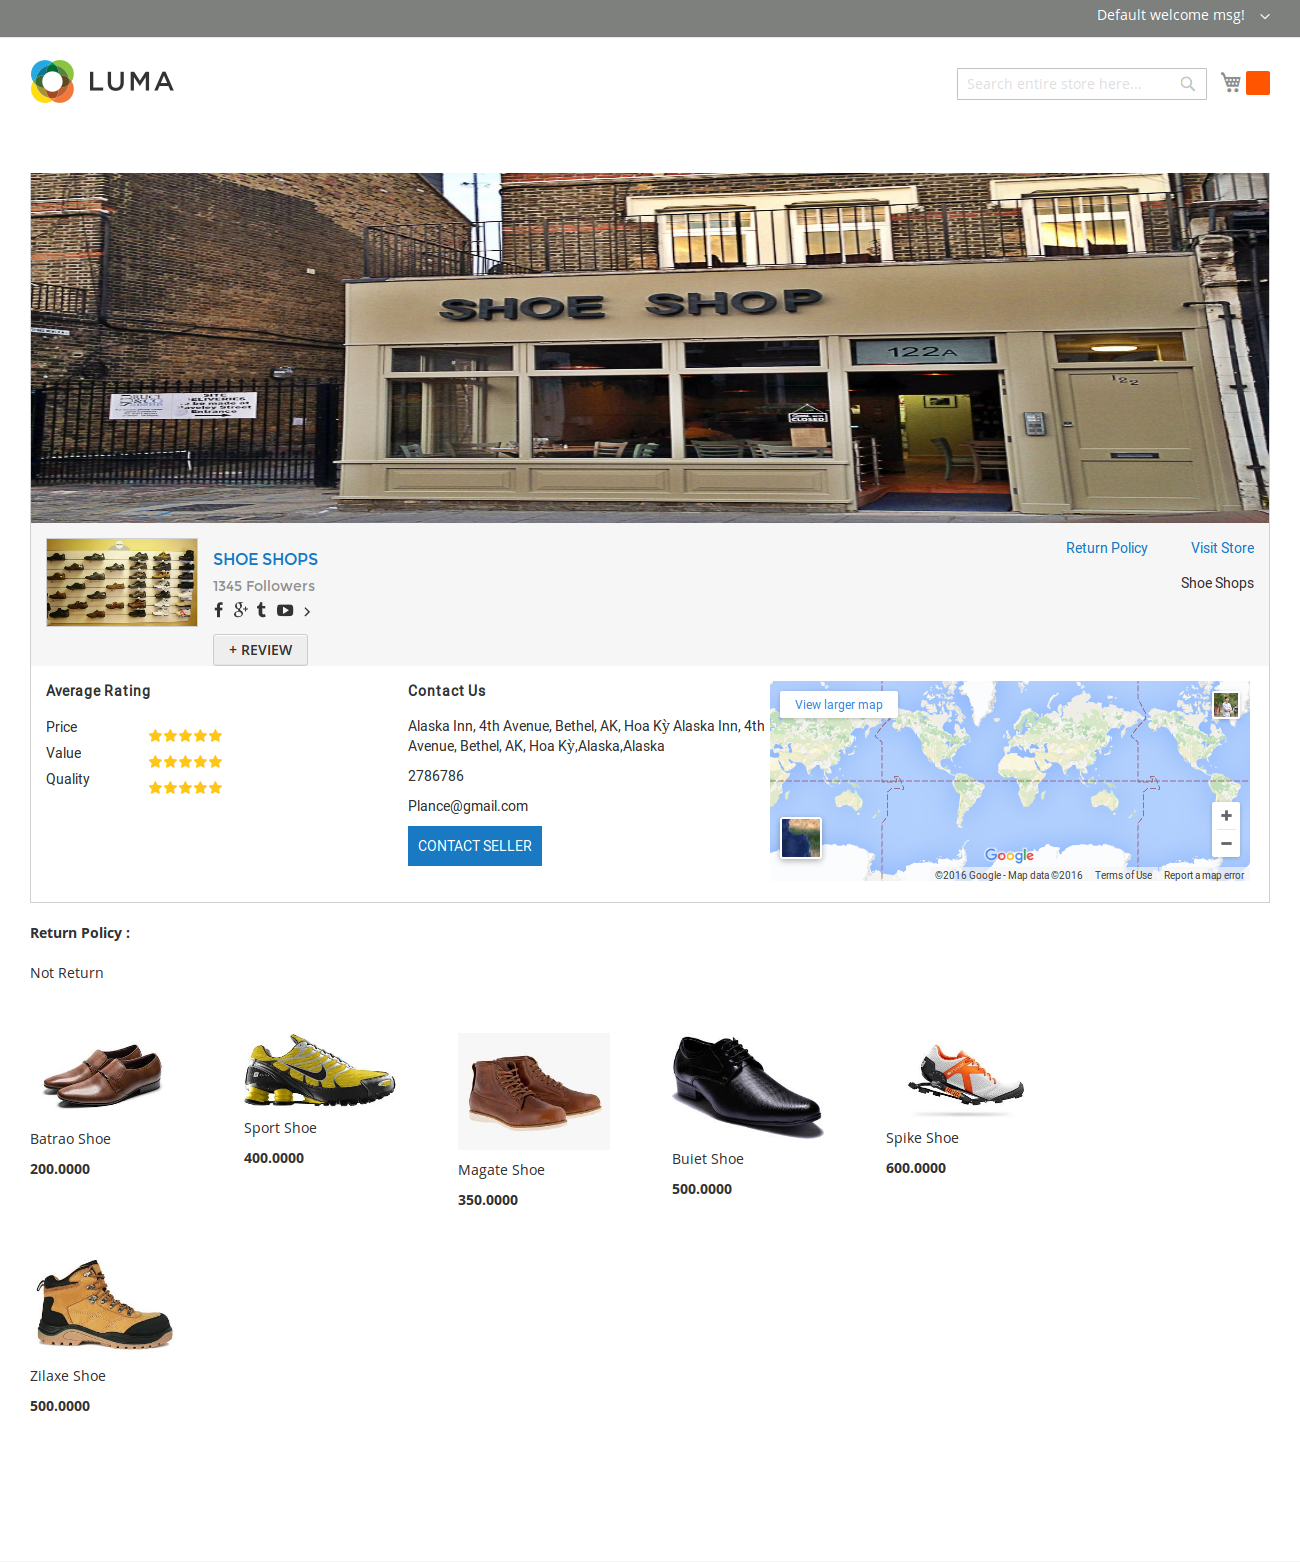
- View Market Place
To view Market Place, customers only click on Marketplace.
Then, customer can select the store which they want.
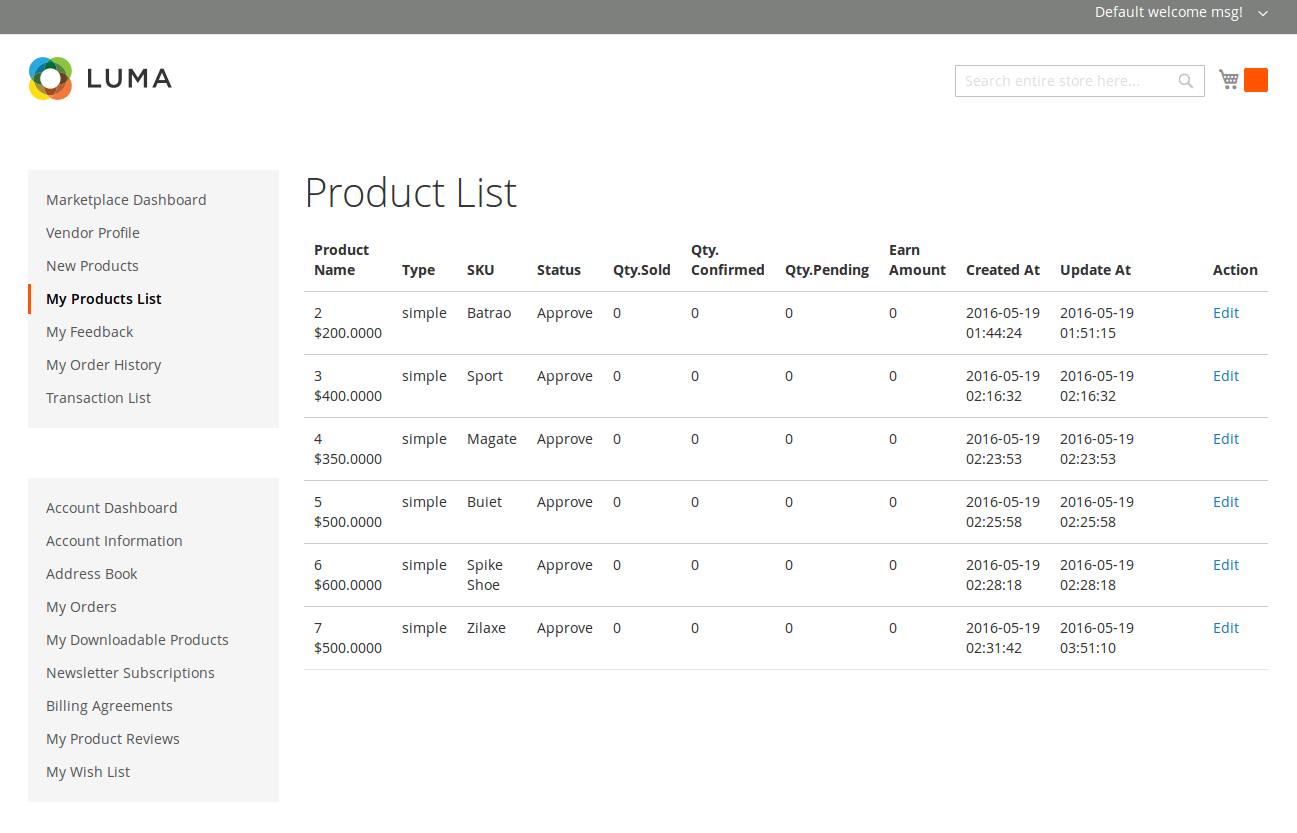
- Manage the product list
Vendors will manage all of the product in their store at here.
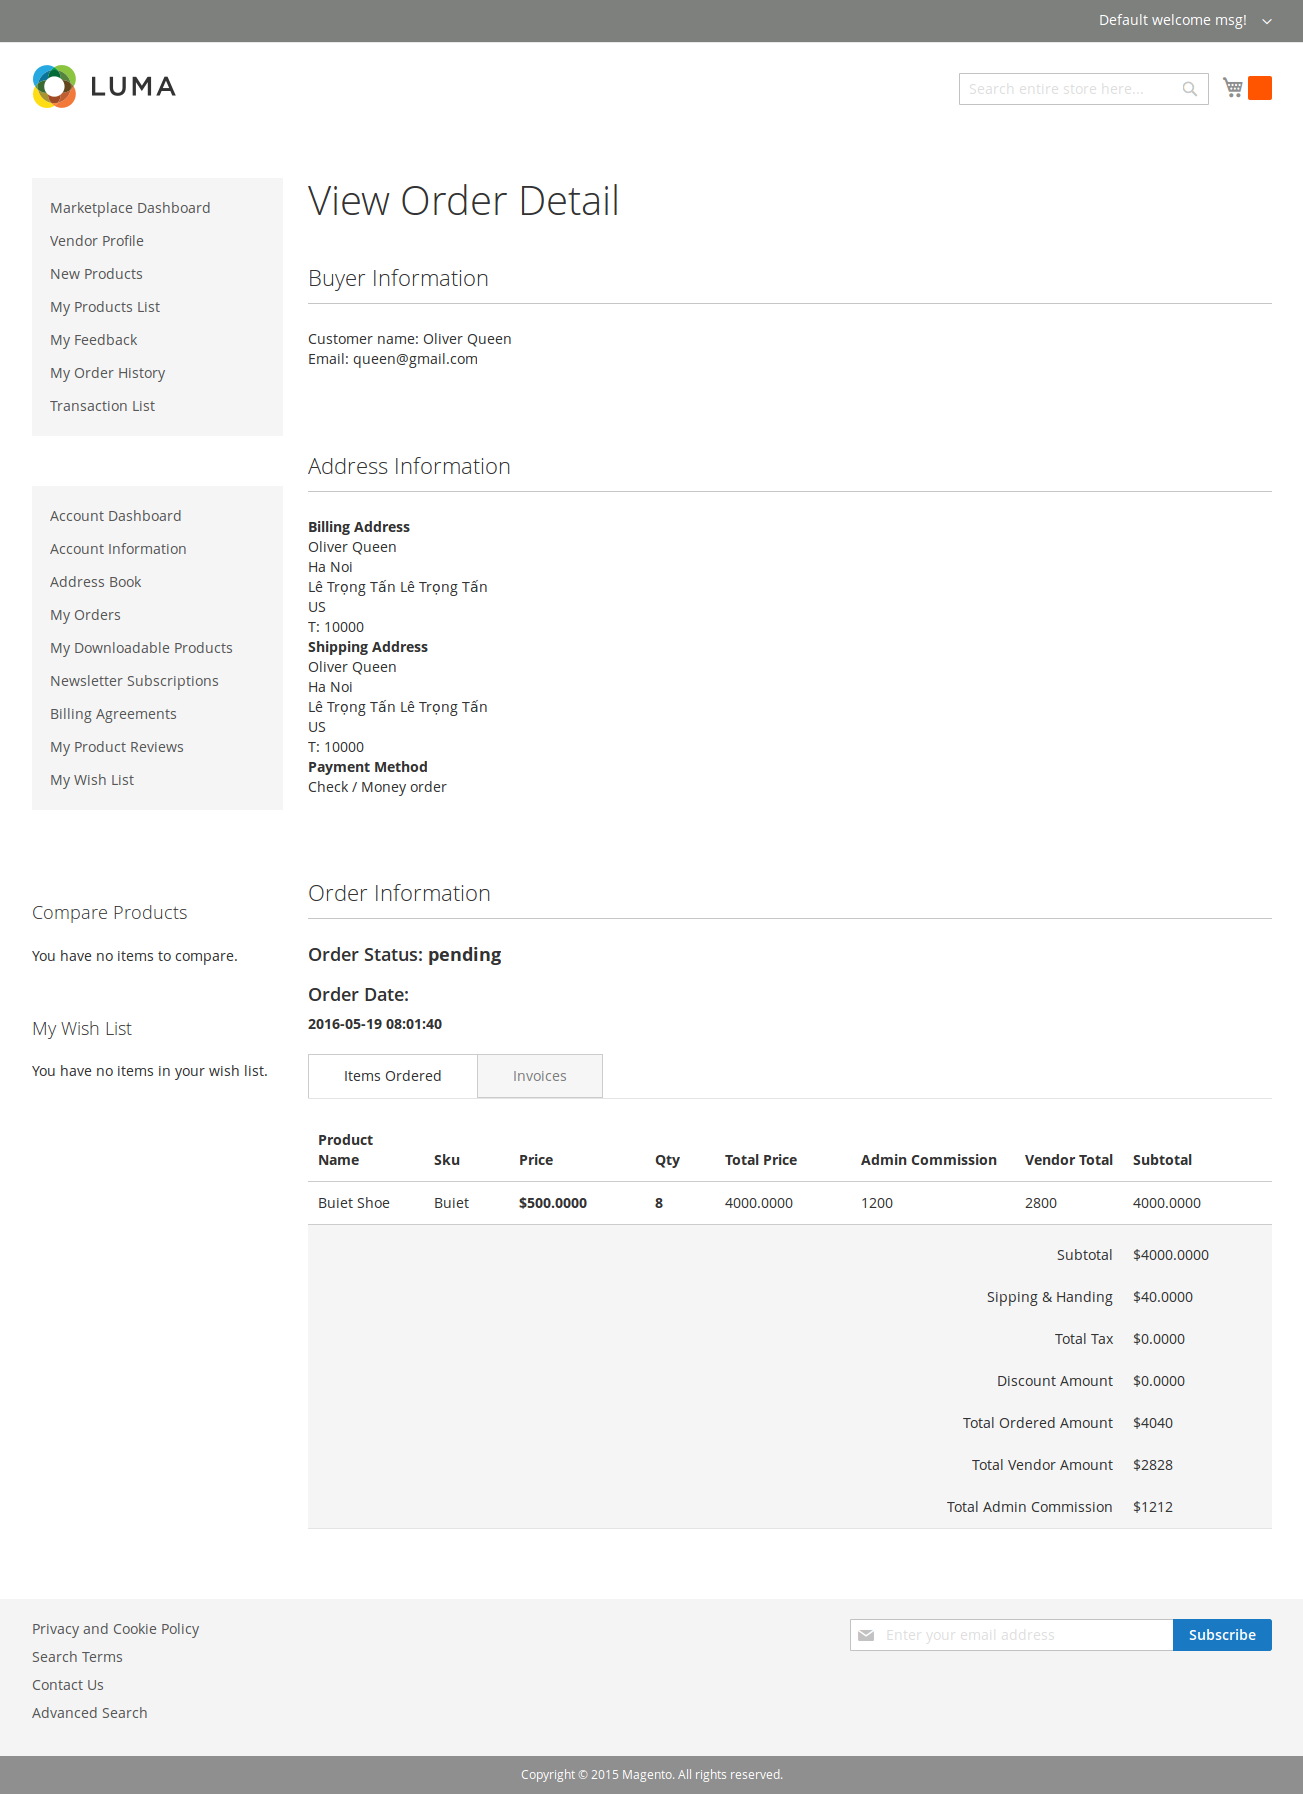
- Manage order history
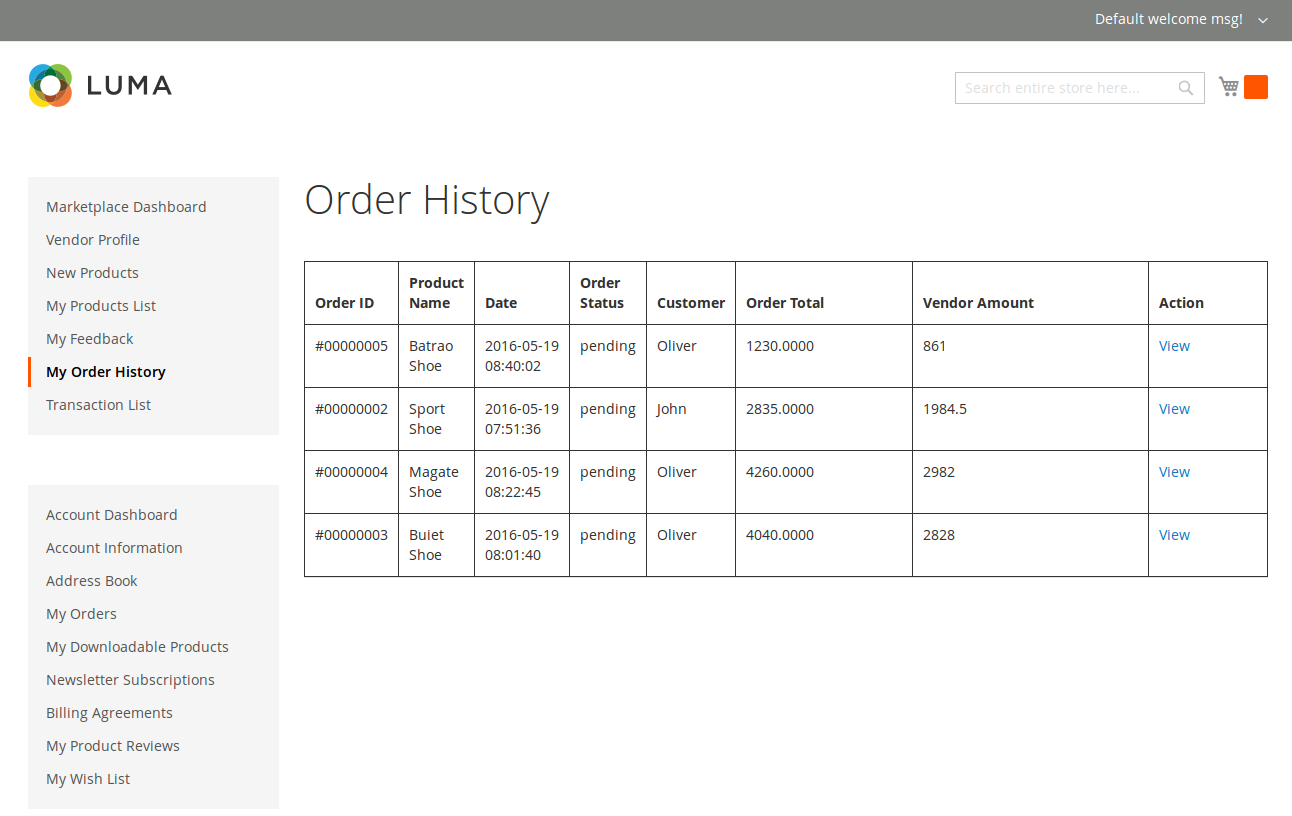
Click View button if customer want to view details.
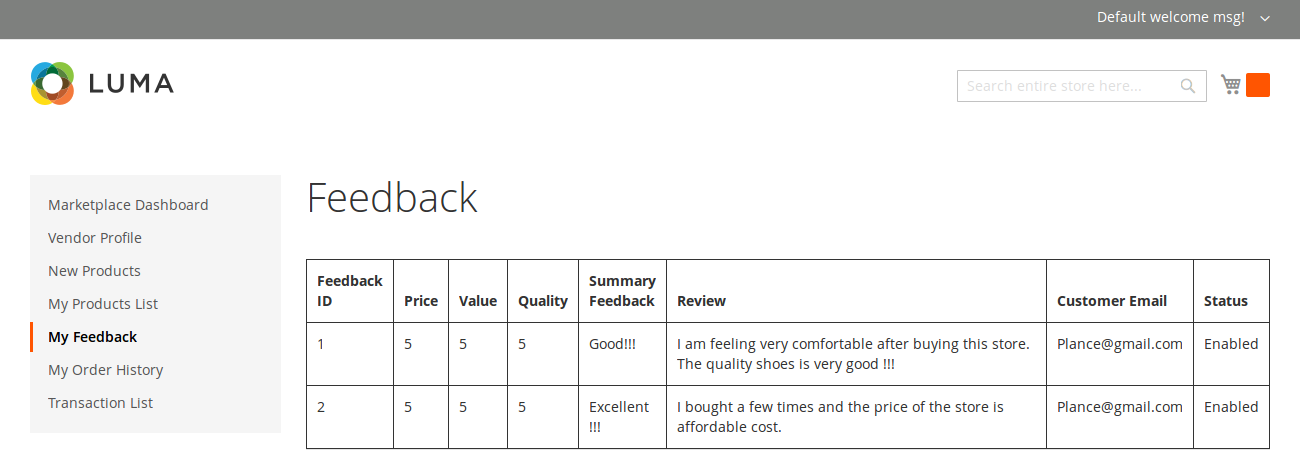
- Manage Feeback
Vendors will manage all of the customer‘s customer about products in their store at My Feedback tab.
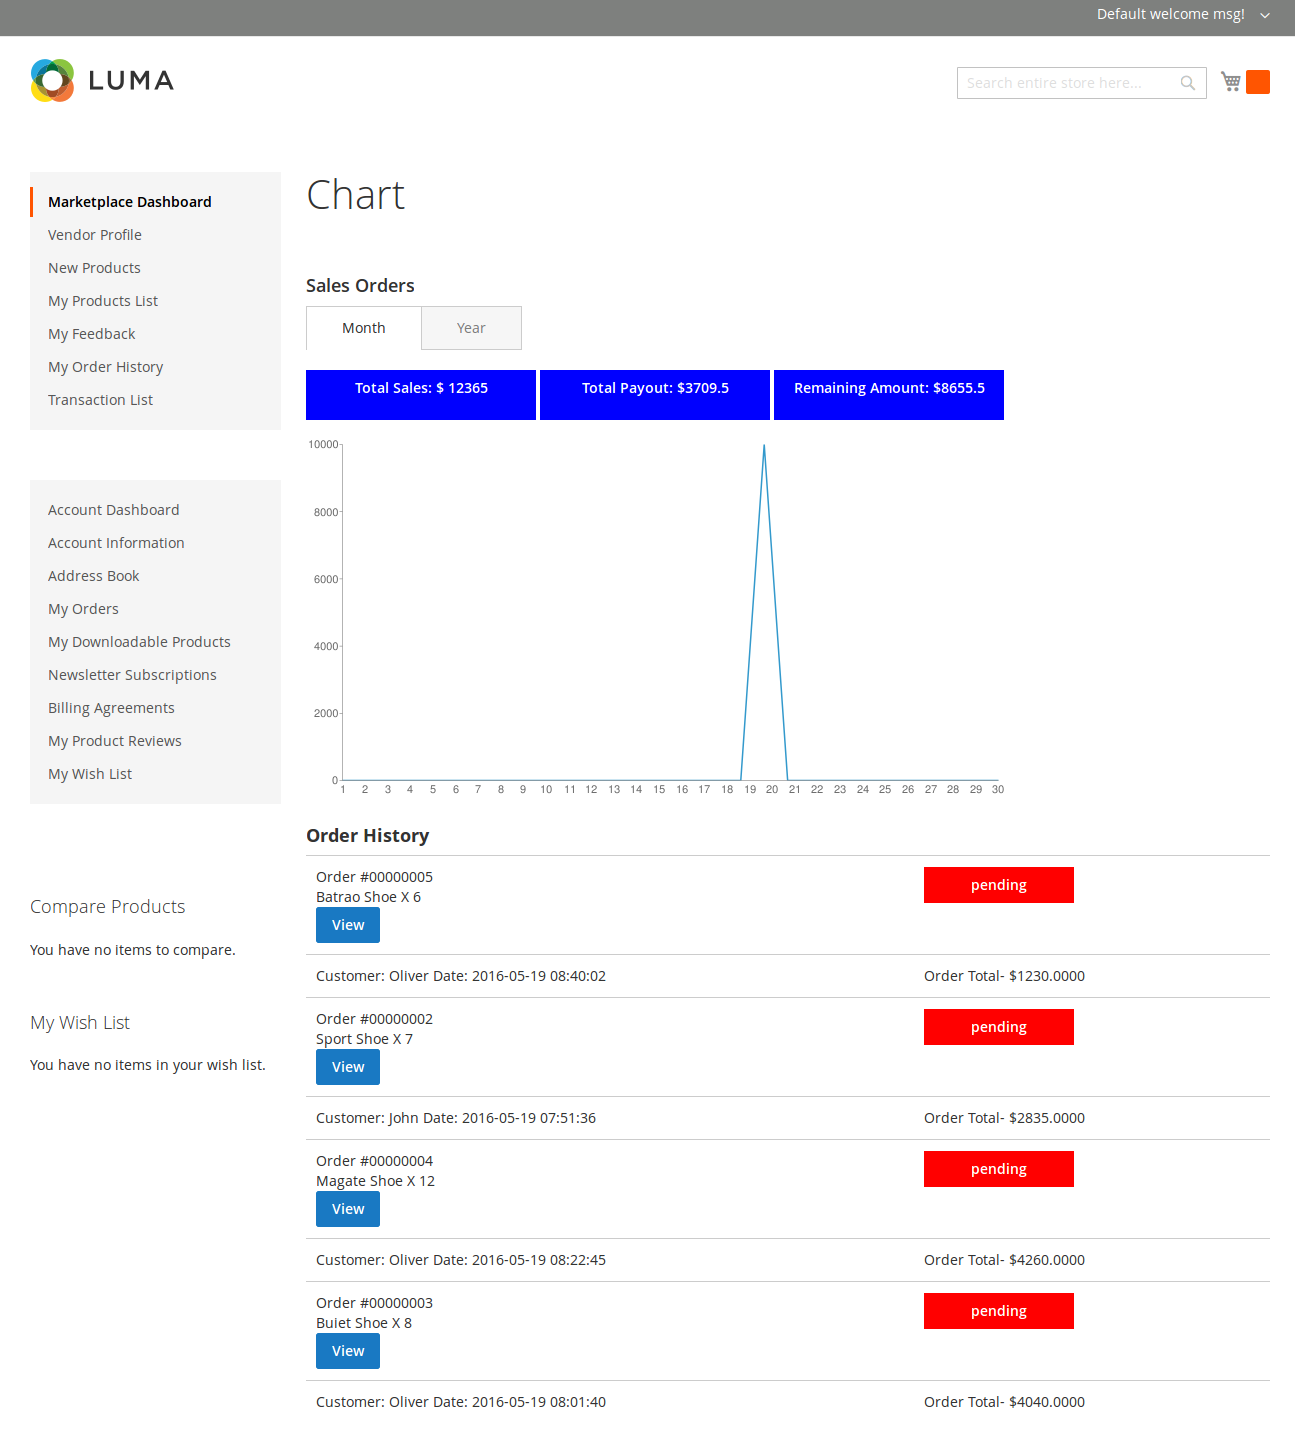
- View Marketplace Dashboard
Vendors can view monthly sales table
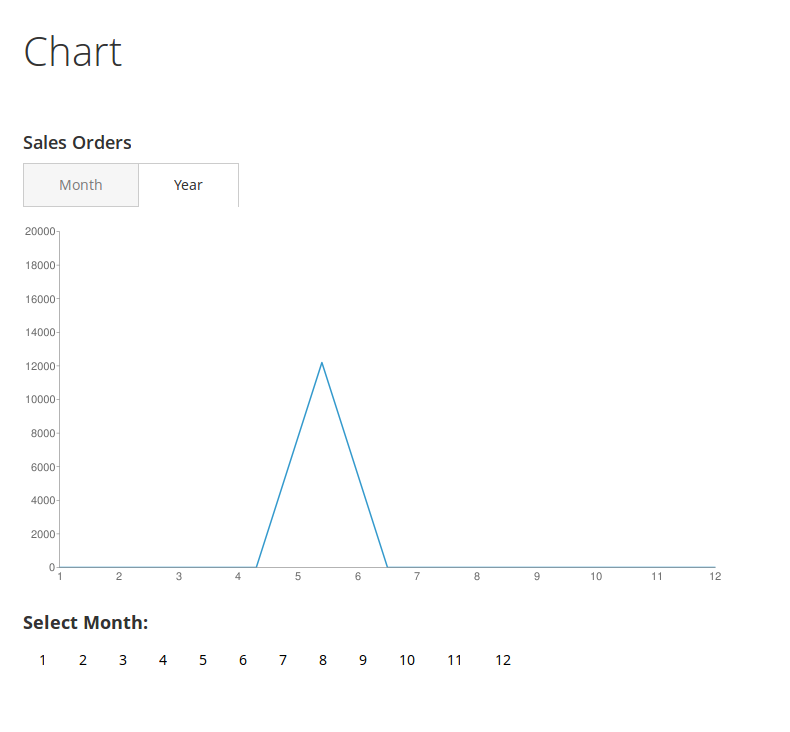
Vendors can view a year sales table
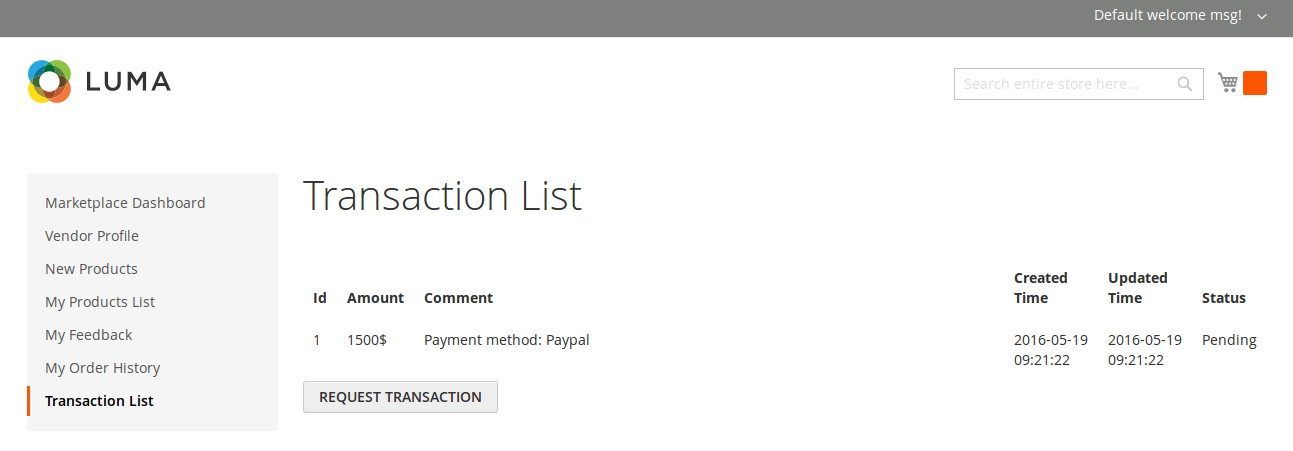
- Transaction Management
To implement a withdrawal request for the ower store, vendors only click on Transaction List tab. Then, they need to enter some information, consist of: amount, details of the withdrawal request and click on Submit button.

The owner store will be received a withdrawal request and process them.
Update
- When a bug fix or new feature is released, we will provide you with the module's new package.
- All you need to do is repeating the above installing steps and uploading the package onto your store. The code will automatically override.
- Flush the config cache. Your store and newly installed module should be working as expected.
Support
- We will reply to support requests after 2 business days.
- We will offer lifetime free update and 6 months free support for all of our paid products. Support includes answering questions related to our products, bug/error fixing to make sure our products fit well in your site exactly like our demo.
- Support DOES NOT include other series such as customizing our products, installation and uninstallation service.
Once again, thank you for purchasing our extension. If you have any questions relating to this extension, please do not hesitate to contact us for support.
i