...
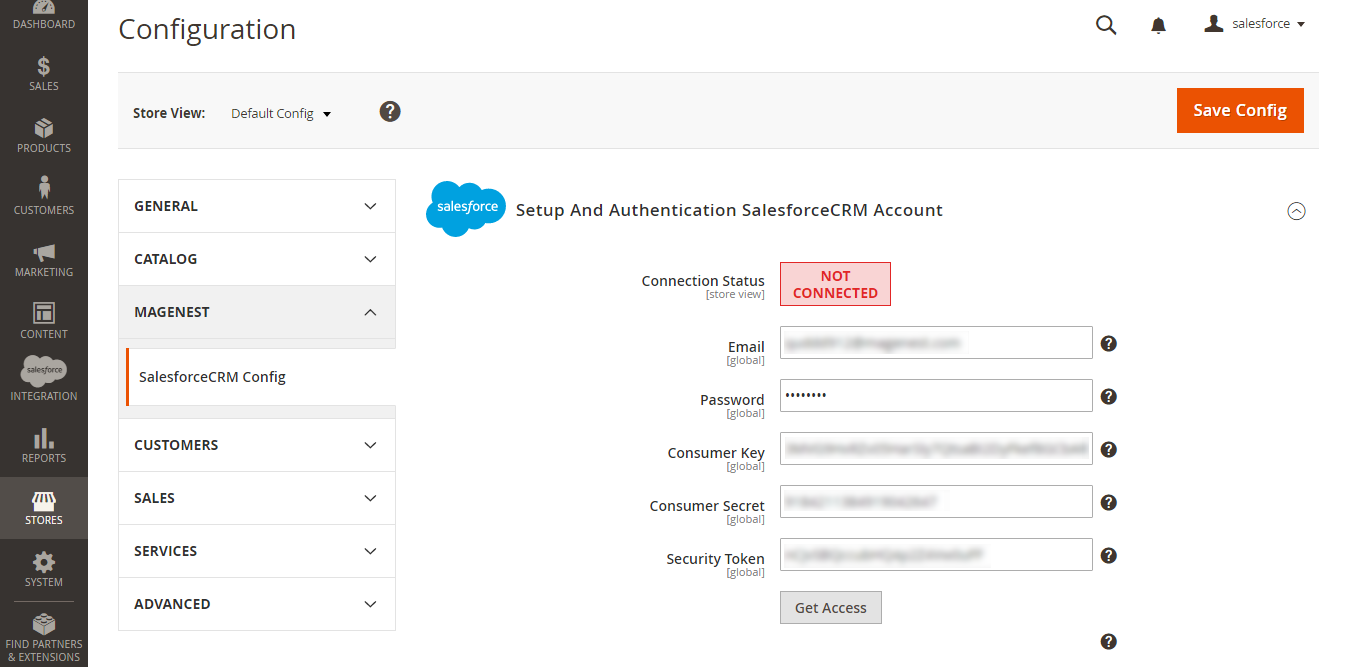
- Email: Your Salesforce login email
- Password: Your Salesforce password
- Consumer Key: search in Home > Platform Tools > Apps > App Manager > "Your app name" (in this demo it is "Magenest") in Salesforce. Check out the above guide "Get consumer key and consumer secret by connected app"
- Consumer Secret: search in Home > Platform Tools > Apps > App Manager > "Your app name" (in this demo it is "Magenest") in Salesforce. Check out the above guide "Get consumer key and consumer secret by connected app"
- Security Token: Check out the above guide "Reset Security Token"
- Salesforce environment: You can choose sandbox environment or production environment
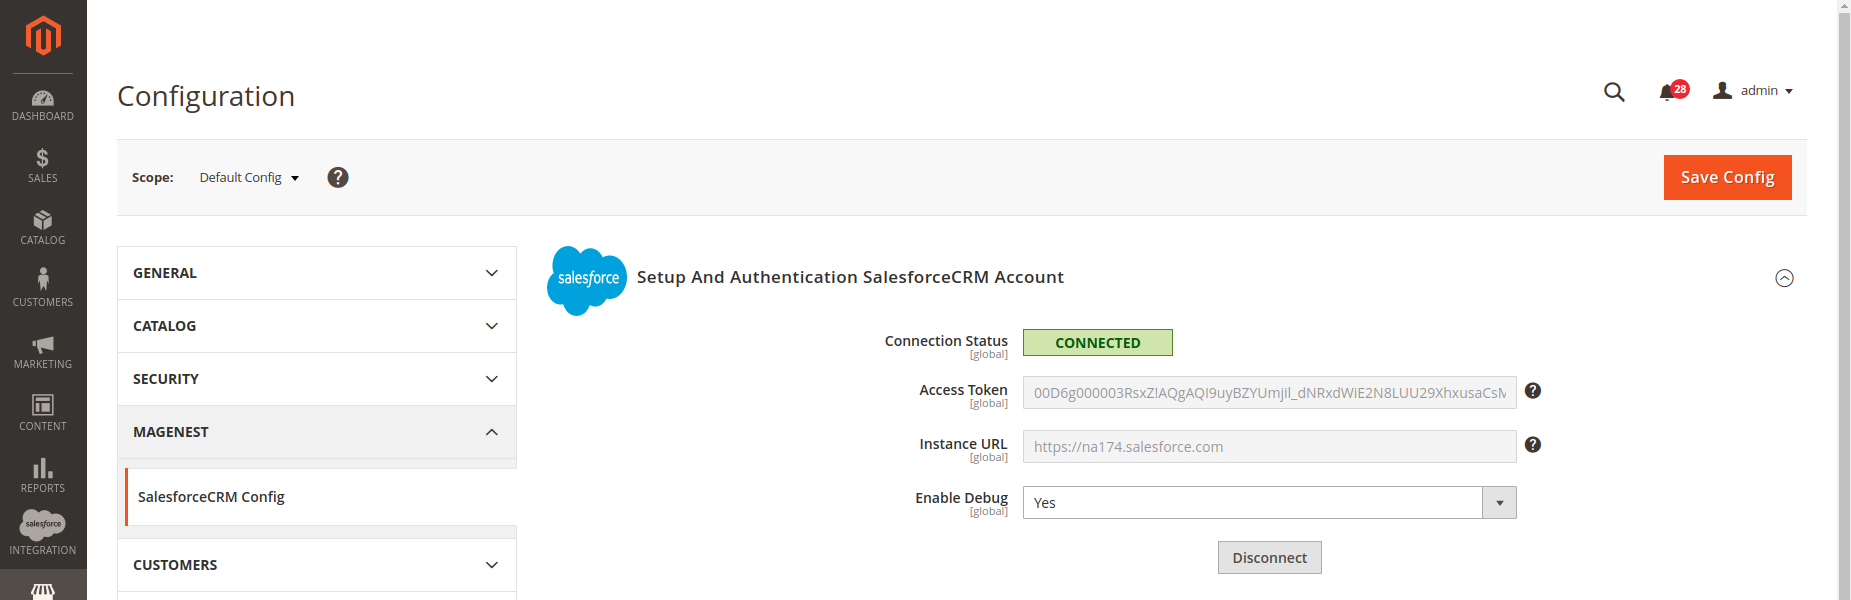
- Enable Debug: the module will log data response to the salesforce.log file into your system
...
![]() We highly recommend that you have to Save config before clicking on Get Access, this will help you avoid making the consumer key error.
We highly recommend that you have to Save config before clicking on Get Access, this will help you avoid making the consumer key error.

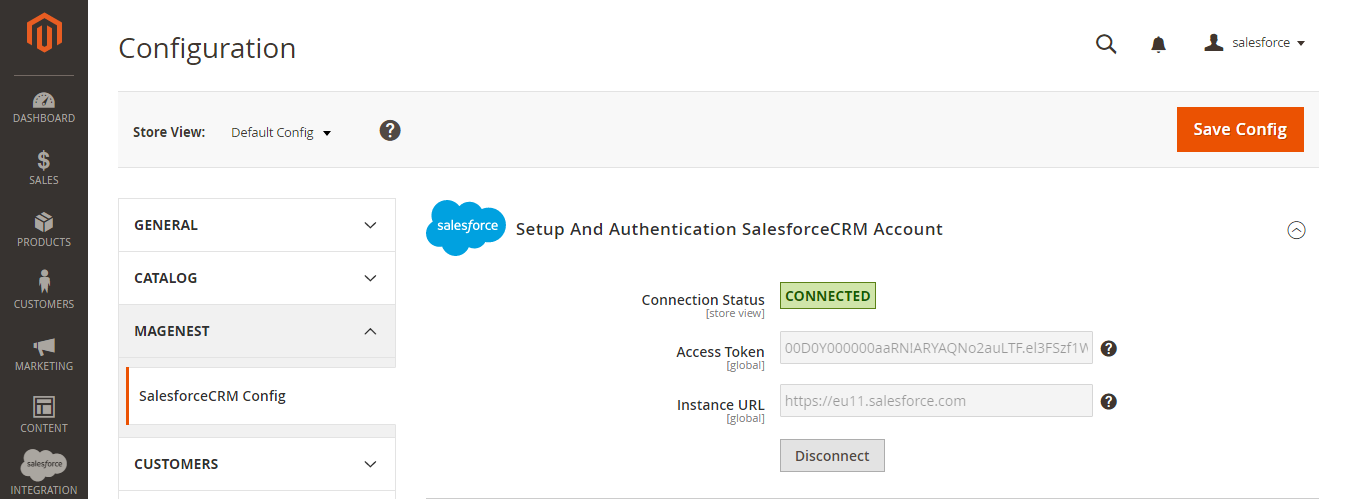
Connection Status will be updated from Not Connected to Connected with all the information as in the image below. Once the integration is successful, the admin can set up bi-directional database synchronization between Magento 2 store and Salesforce CRM account.
...
How to synchronize data from Magento 2 store to Salesforce CRM account
...
![]() For Subscriber data, you don't need to create field mapping.
For Subscriber data, you don't need to create field mapping.
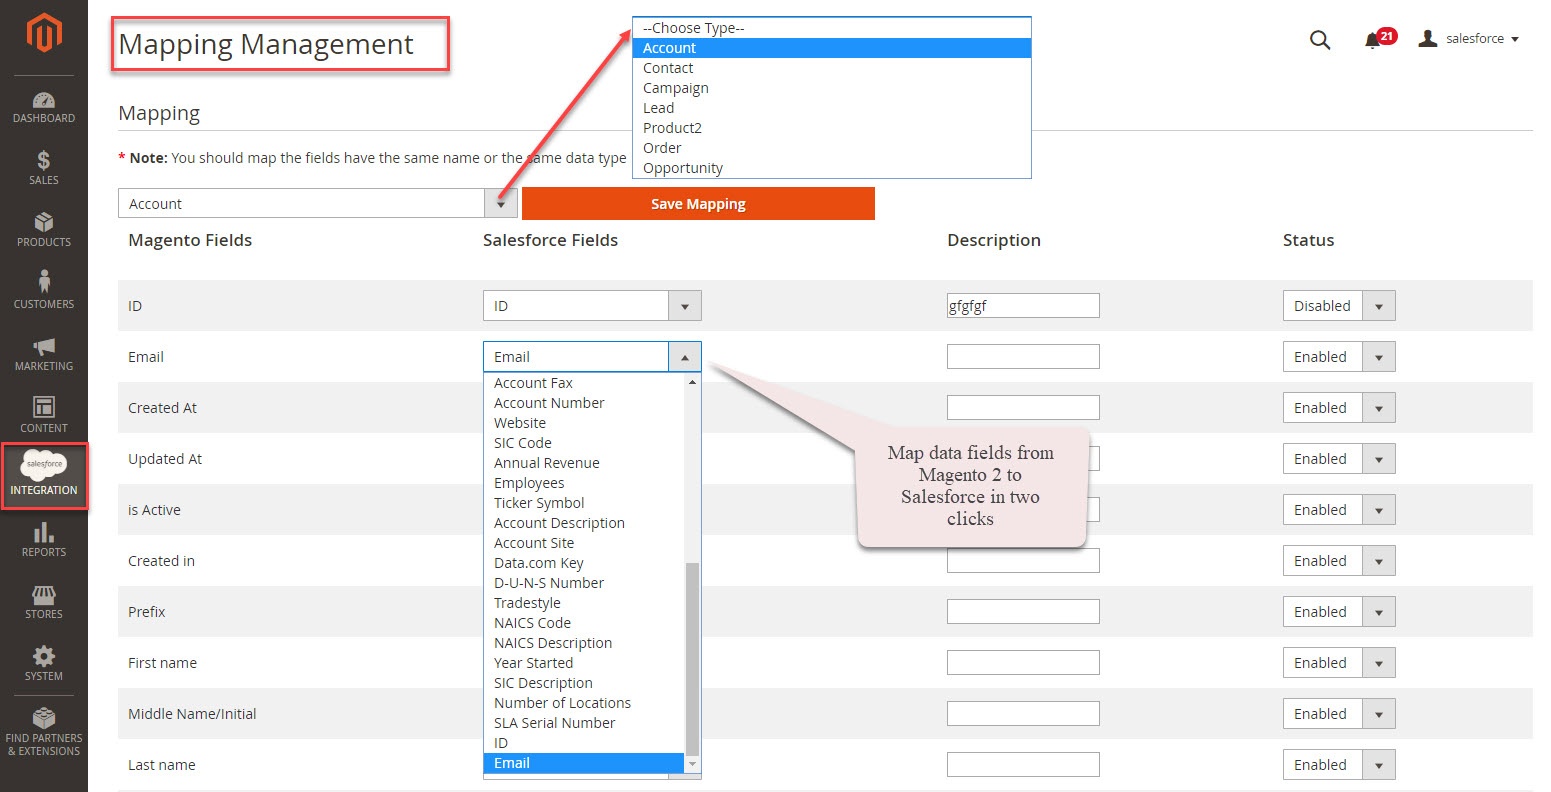

For each field in Magento Fields, choose the matching field in Salesforce Fields to sync data.
...
Description: Describe the mapping fields
Default Value: If one object does not have data to sync, it will get the default value as defined here. If the admin does not set the default value, it will be empty.
Status: You could enable or disable the field map.
...
- Auto Sync: The data will be automatically synchronized to Salesforce when changed.
- Add to Queue: The data will be added to the queue before synchronizing to Salesforce. If you choose this option, Queue Auto Sync Time shows up with 4 options: Sync manually, 15 minutes, 1 hour, 2 hours. These options are the waiting time in the queue of the data before being automatically synchronized to Salesforce.
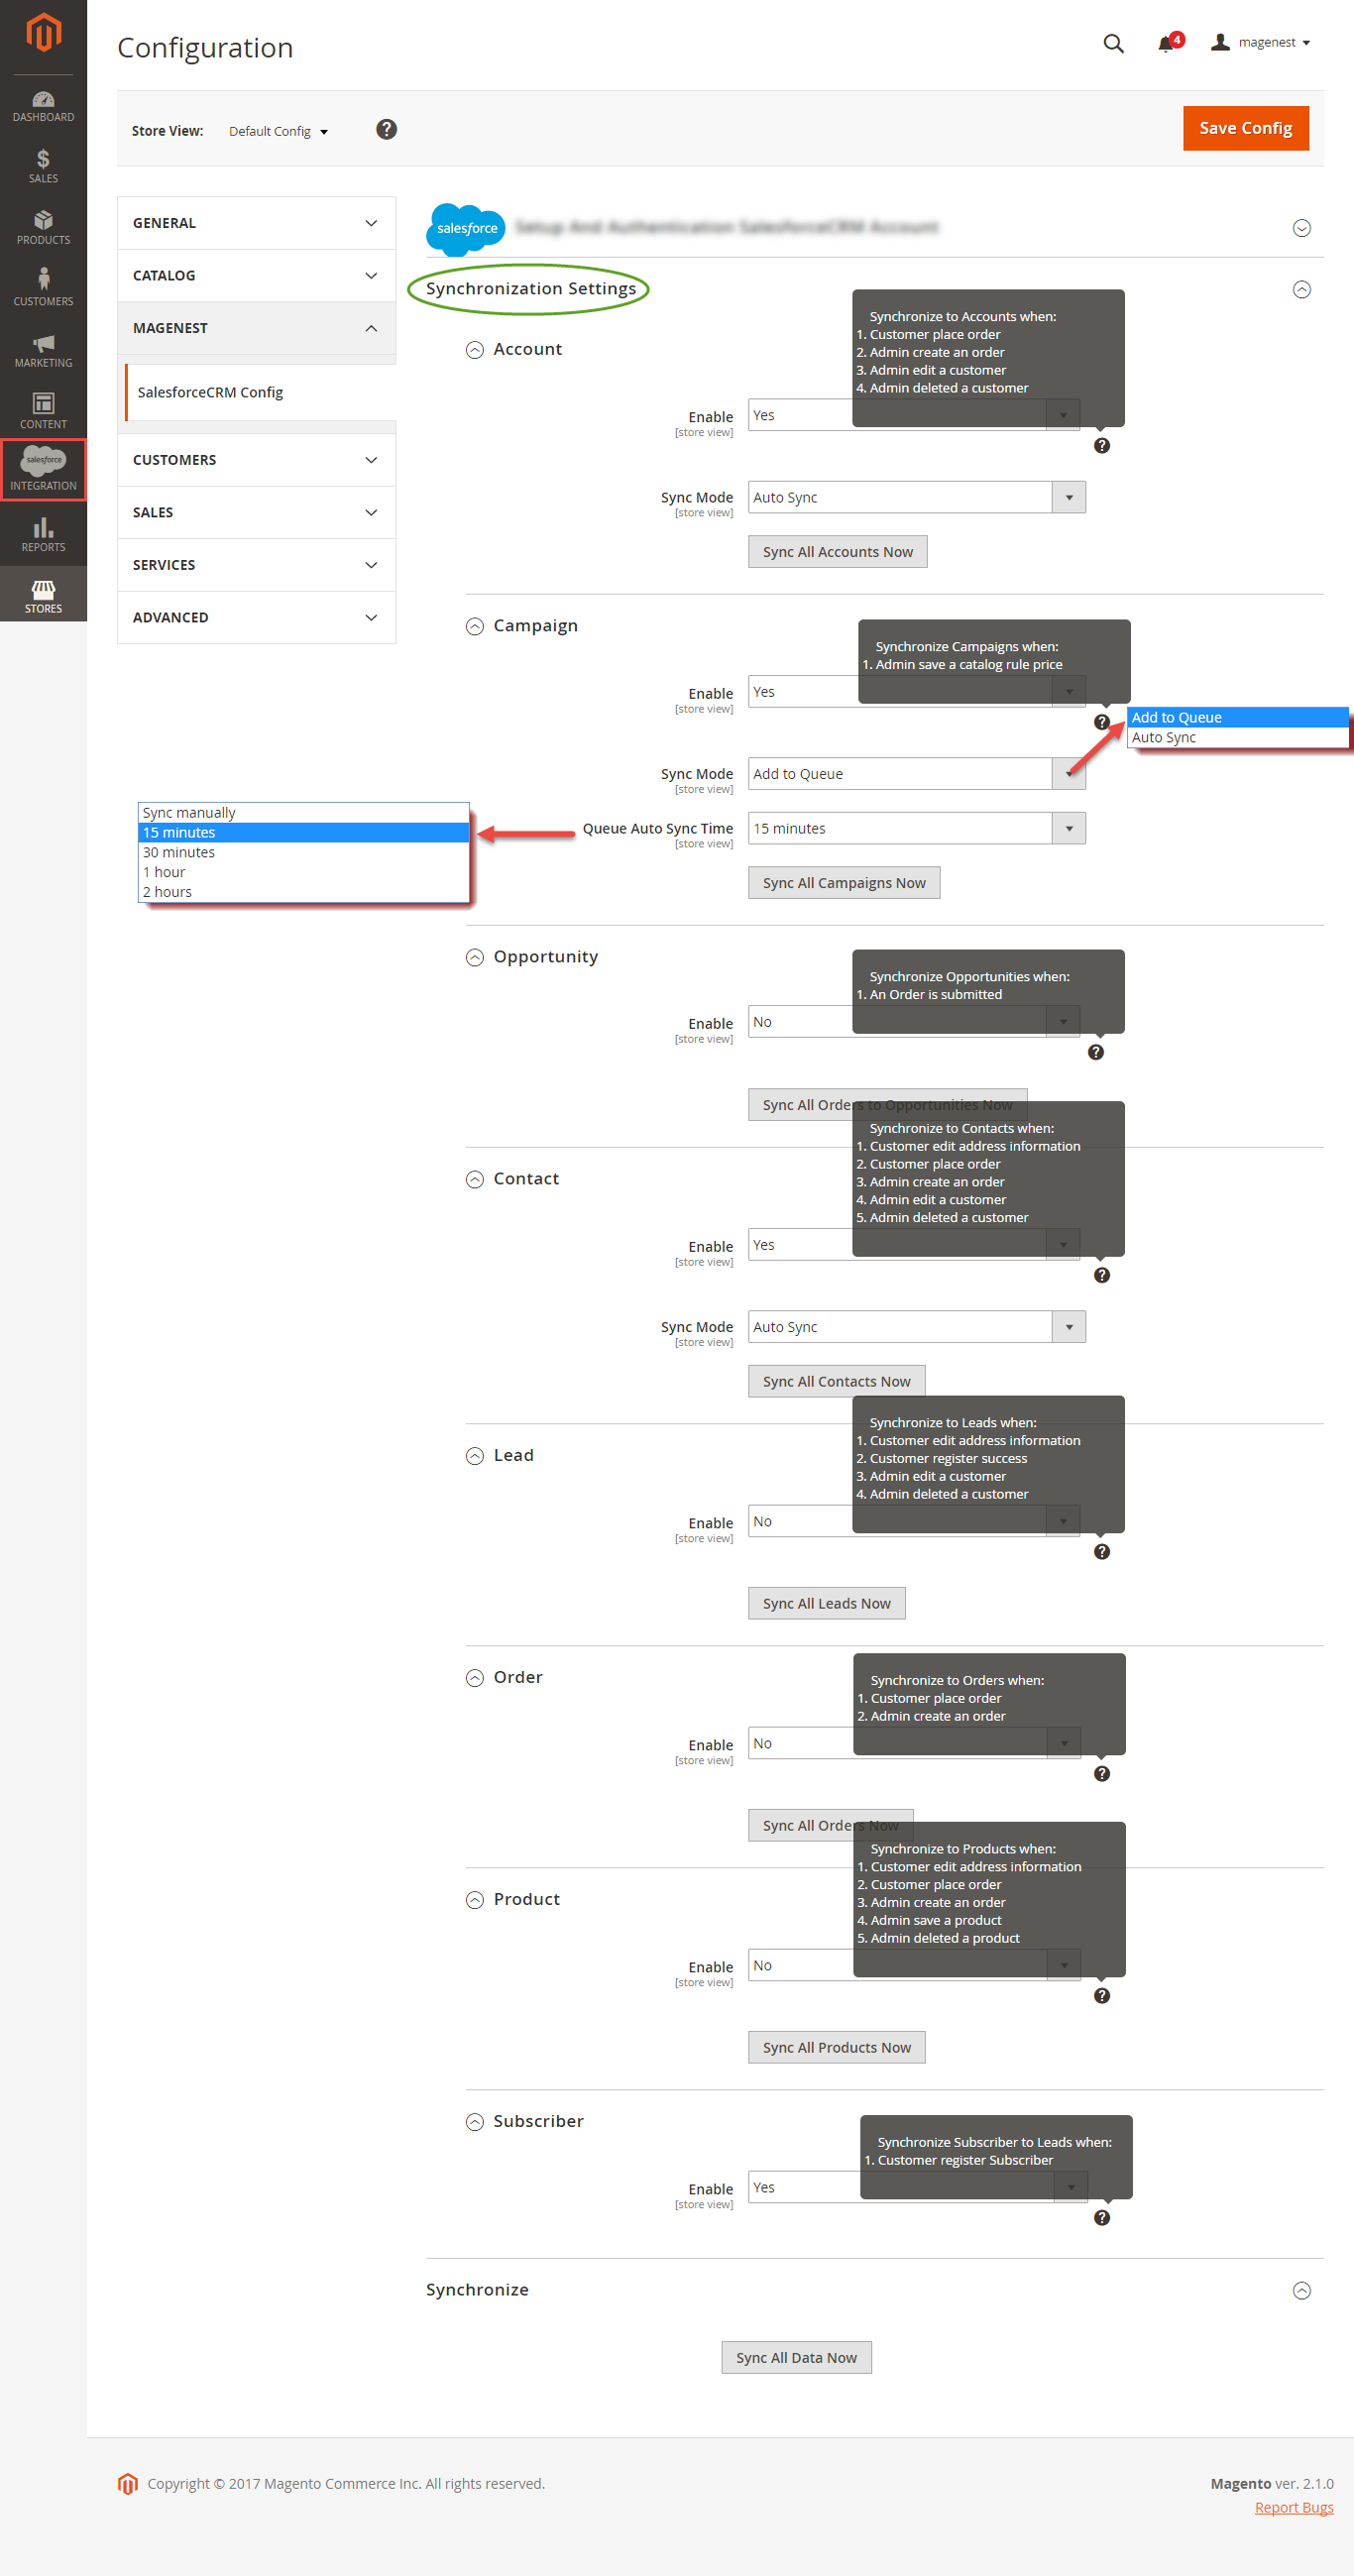
Click Sync All Data Now to sync or add data to the queue. If you set the Add to queue mode, you will be redirected to the Queue page.
...
![]() Note that synchronizing will take some time, the length of time which depends on the size of data.
Note that synchronizing will take some time, the length of time which depends on the size of data.
...
When the synchronization process is donefinishes, you can go to Salesforce Integration > View Report to see the synchronized list
...