Thank you for purchasing our extension. If you have any questions that are beyond the scope of this document, do not hesitate to leave us an email via [email protected].
By: Magenest | Support Portal: http://servicedesk.izysync.com/servicedesk/customer/portal/146.
| Table of Contents |
|---|
...
|
...
Highlight Features

For Admin
- Use new Paya API.
- Use tokenization and saved cards.
- AVS/CVV verification.
- Support direct refund.
- Choose Authorize Only/Authorize and Capture.
- Restrict payments from specific countries.
- Delete Account Vault Paya when deleting a card from Magento.
- Manage all Paya transactions easily (both in Magento & Paya dashboard).
For Customer
Check out easily with Paya form.
Allow customers to checkout using credit card payment.
Support Save-card function for logged in customers in two ways: at the checkout process and on My Account page.
Allow customers to manage Paya saved credit cards.
Support Authorize Only and Authorize & Capture payment.
- Support multiple payment cards
Security Standard: PCI DSS Compliance.
System Requirements
Your store should be running on Magento 2 version 2.2.x, 2.3.x or 2.4.x.
Connect Paya account with Magento
![]() First, admin needs to connect Paya account with Magento store. On the admin sidebar, select Paya > Settings. Go to Configuration page, under Sales tab, select Payment Methods.
First, admin needs to connect Paya account with Magento store. On the admin sidebar, select Paya > Settings. Go to Configuration page, under Sales tab, select Payment Methods.
...
![]() Under the payment settings, expand Paya section to set the configuration for the extension.
Under the payment settings, expand Paya section to set the configuration for the extension.
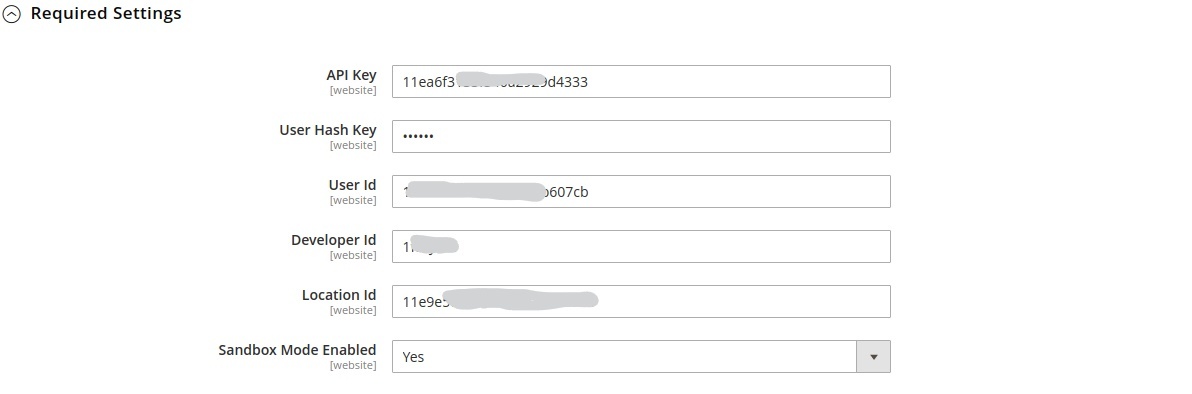
 Required Settings
- Fill the necessary information to connect Magento with Paya account.
- Sandbox Mode Enabled: Choose Yes to enable the test mode for the extension.
How to get the connection information?
Status subtle true colour Green title Developer ID
| subtle | true |
|---|---|
| colour | Green |
| title | Developer ID |
![]() Note: To obtain these credentials, please contact the Paya team by navigating here: https://developer.sandbox.payaconnect.com/
Note: To obtain these credentials, please contact the Paya team by navigating here: https://developer.sandbox.payaconnect.com/
Developer ID is used for sandbox mode only.
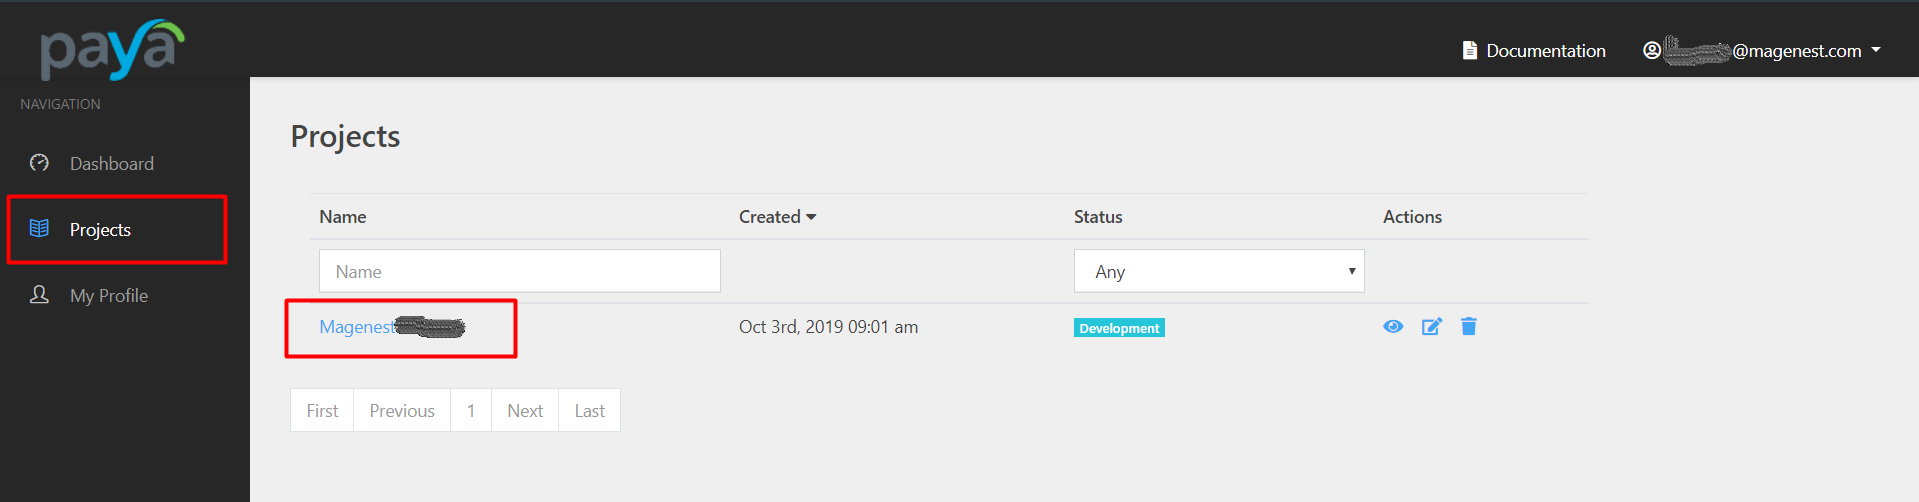
- Log into the Paya account in development
- the developer portal. On the Projects page, click on Projects.
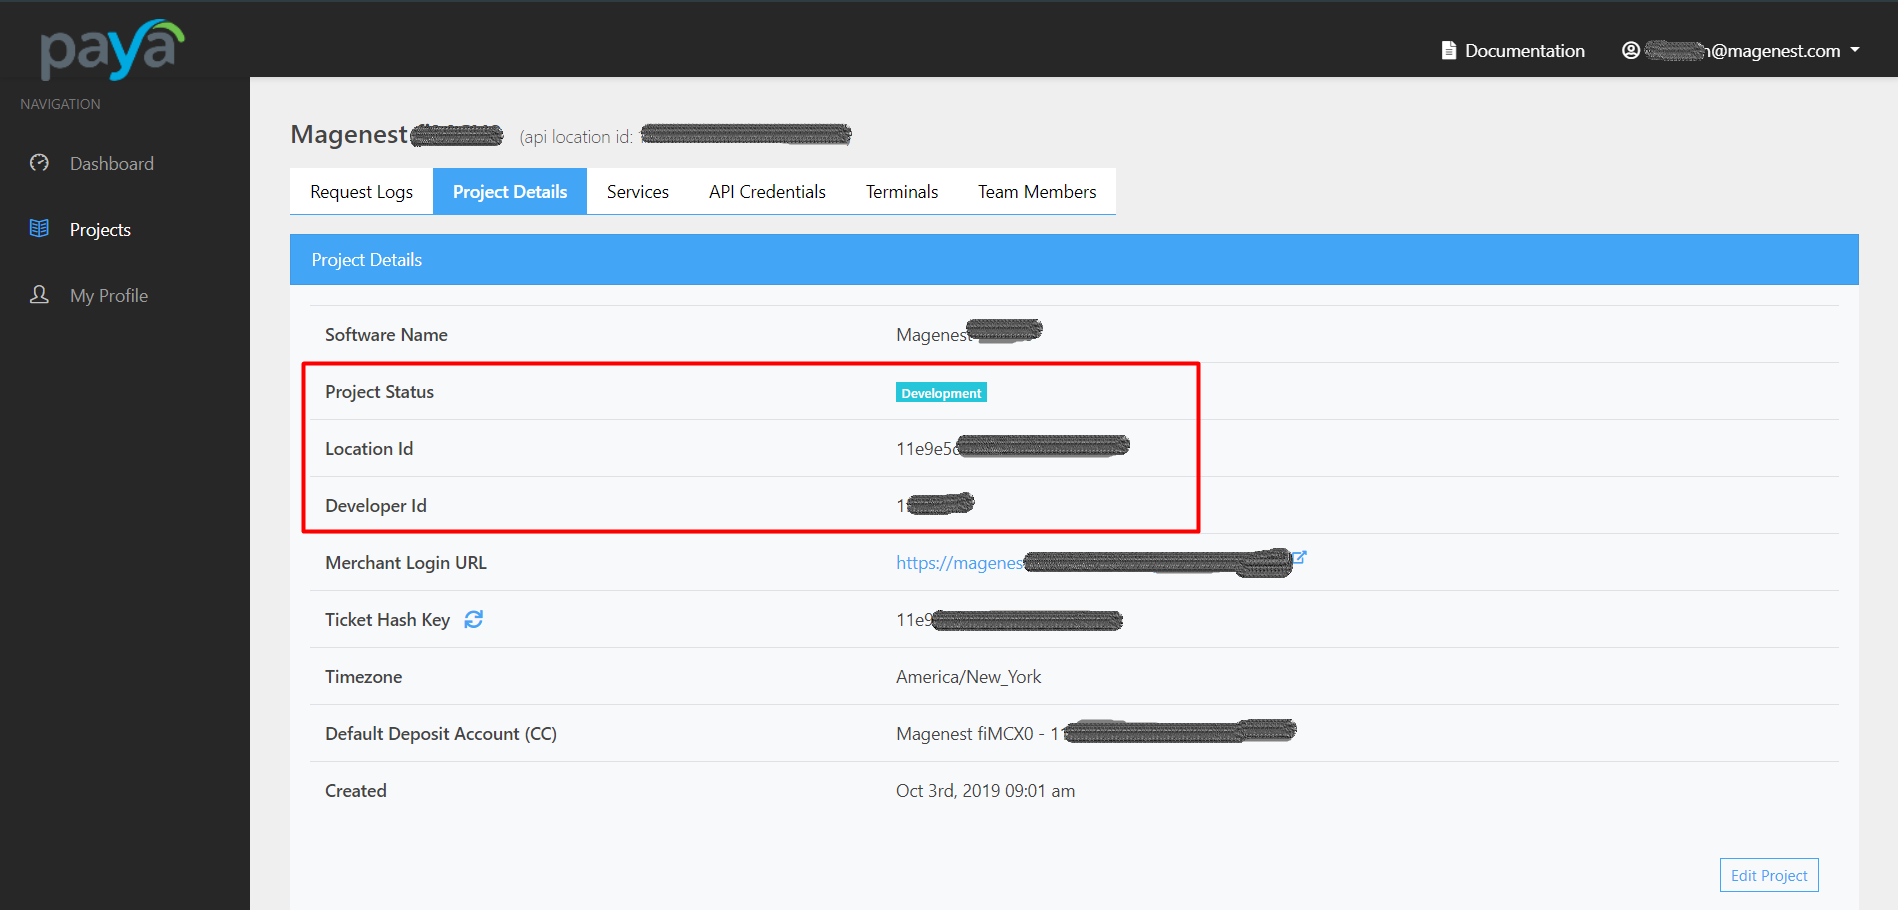
- Go to the project page, click on the Project Details tab. In this section, the admin can get the Location ID and Developer ID.
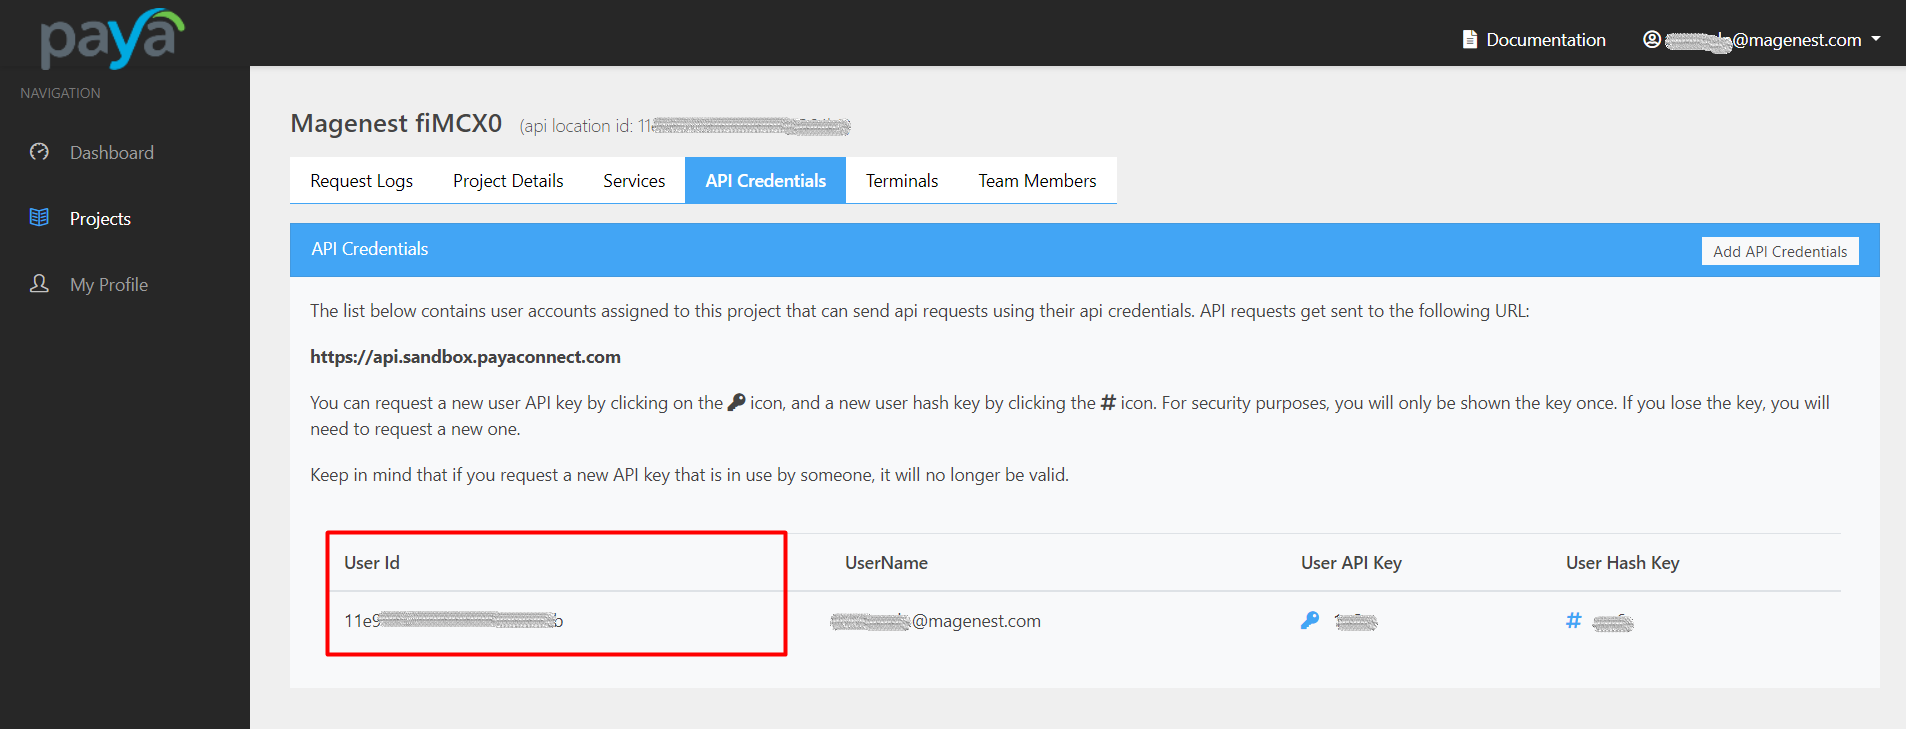
- Click on API Credentials tab, admin can get the User ID in this section.
- Login to Paya account in the merchant portal. On the account options list, select Profile Settings.

- On the Profile Settings page, click on Generate API Key and Generate Hash Key button to get the API Key and Hash Key for the connection.
...
- a Developer ID.
| Status | ||||||
|---|---|---|---|---|---|---|
|
- On the left bar, select Settings > Users > click in a user in the list appears.
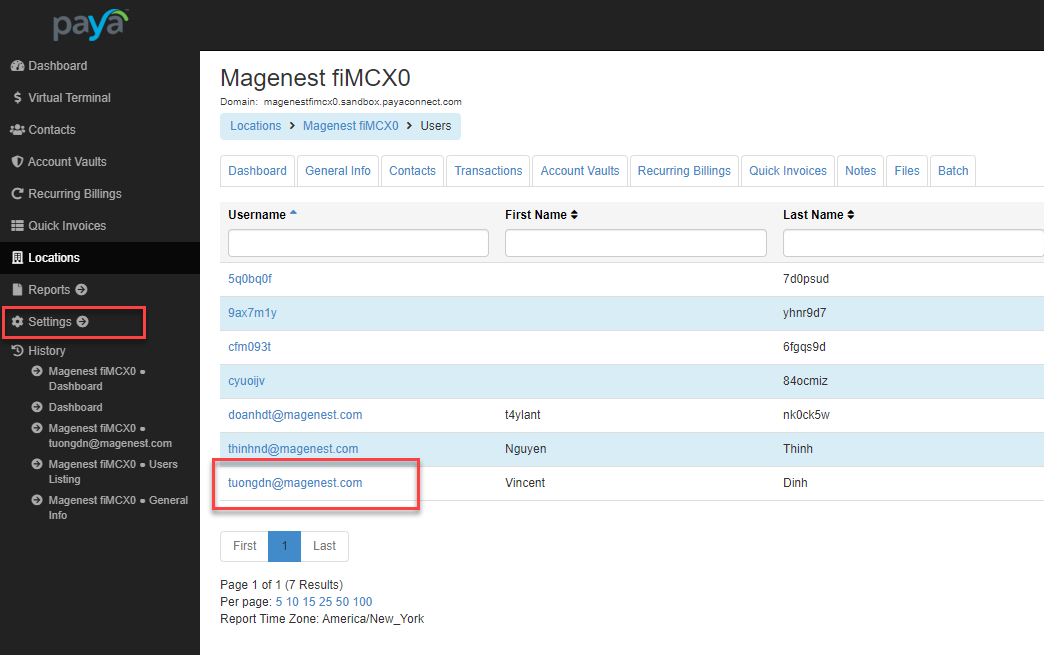
- Go to user setting page, the User ID is at the list bottom.
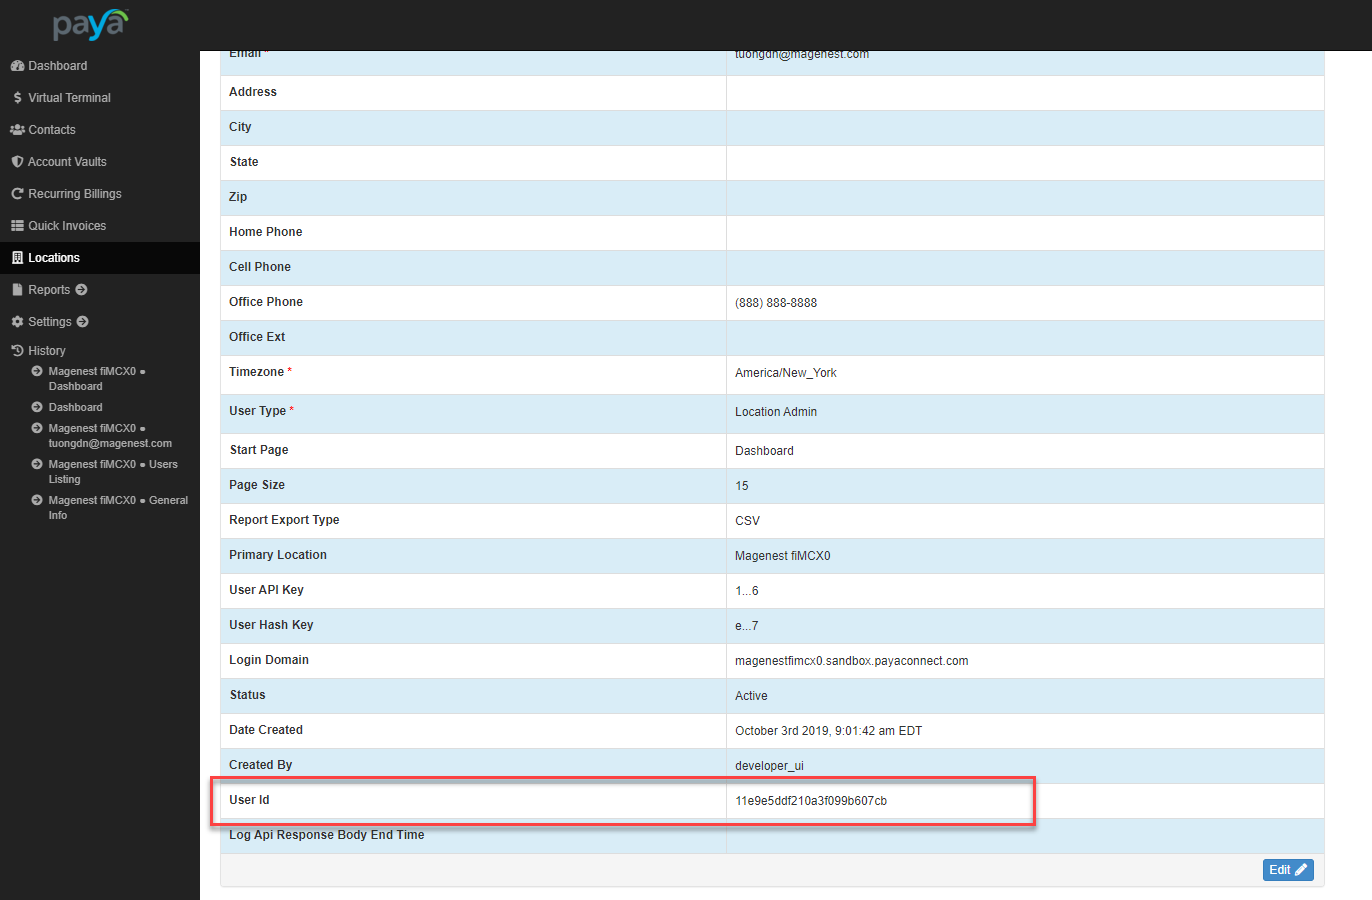
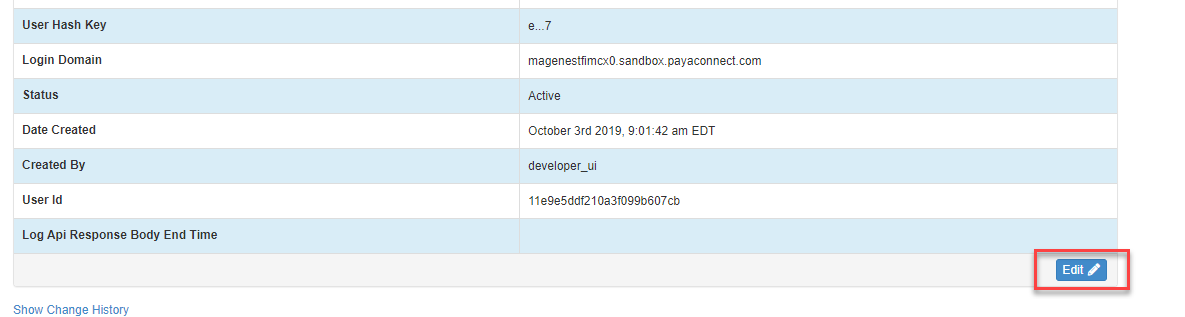
- Click on Edit at the right corner to get the User Hash Key.
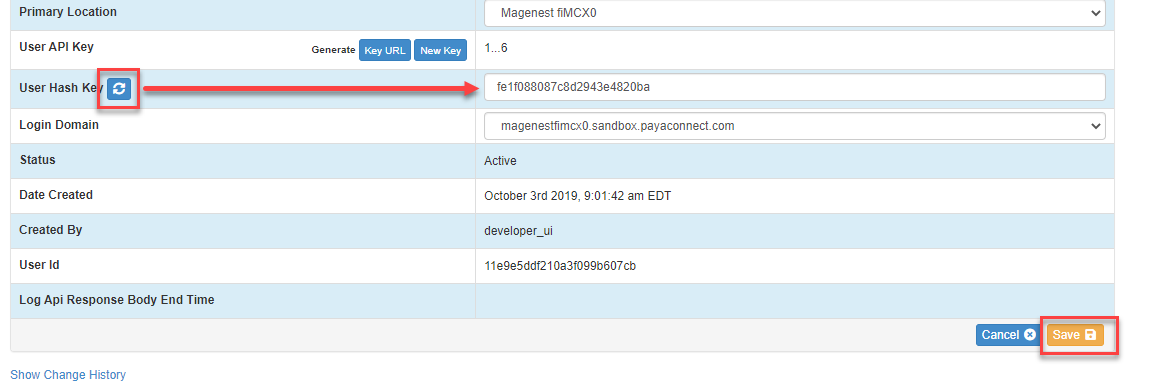
- Click on reset button then confirm to generate a key, get the new key for the connection.
- Click Save to save the changes.
| Status | ||||||
|---|---|---|---|---|---|---|
|
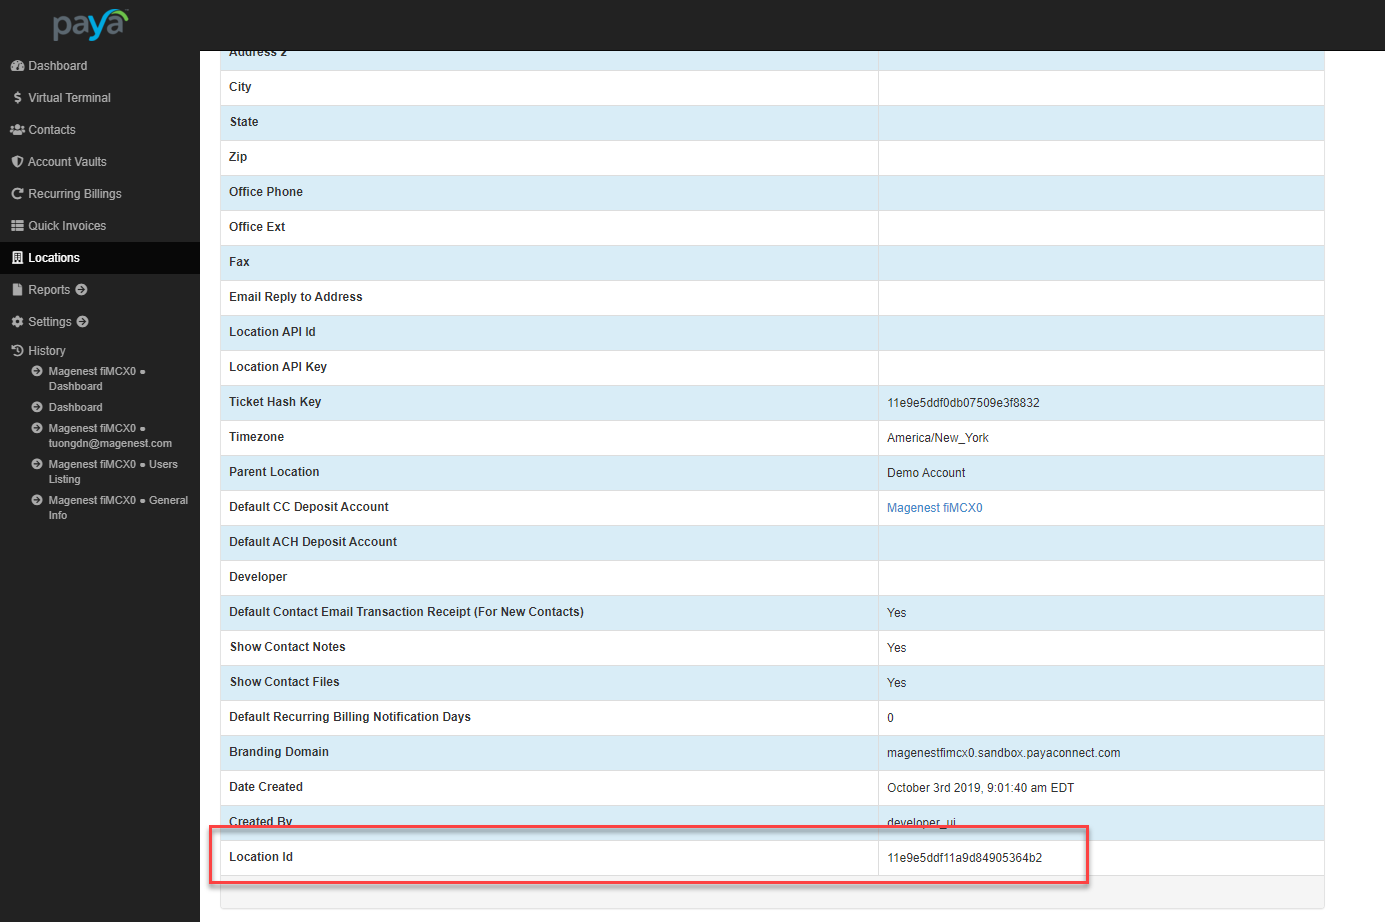
- On the left menu bar, select Location.
- On the Locations page, click on a location.
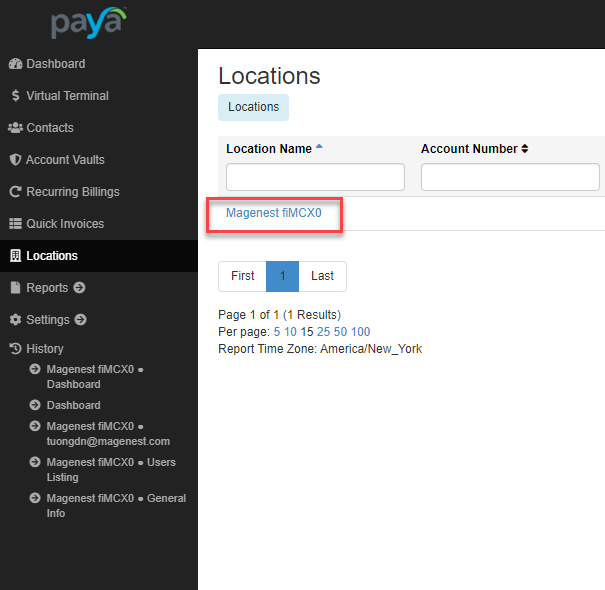
- Go to location details page, the Location ID is at the bottom of the list.
![]() After entering the credentials, click Save button to save the connection.
After entering the credentials, click Save button to save the connection.
...
Configuration
![]() On the admin sidebar, select Paya > Settings. Go to Configuration page, under Sales tab, select Payment Methods.
On the admin sidebar, select Paya > Settings. Go to Configuration page, under Sales tab, select Payment Methods.
...
New Order Status: Select status for new orders with Paya payment. There are two options: Processing and Suspected Fraud.
Sort Order: Set the position of the payment in the payment methods list.
Minimum Order Total: Set a value for the minimum order value. If the order amount is less than this value, Paya payment method will not be displayed on the checkout page. This setting is applied with the authorized payment feature only.
Maximum Order in Total: Set a value for the minimum order value. If the order amount is less than this value, Paya payment method will not be displayed on the checkout page. This setting is applied with the authorized payment feature only.

...
Main Functions
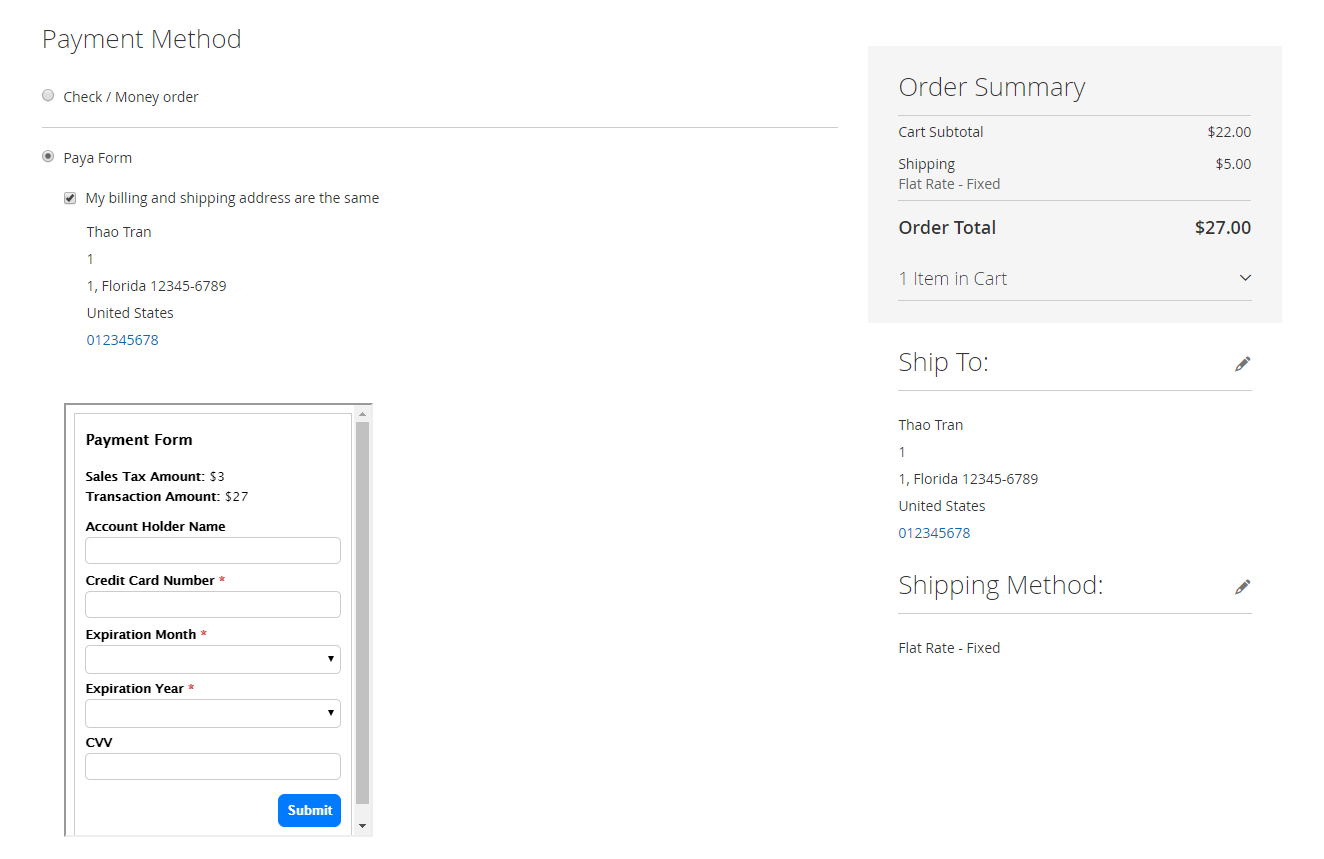
Paya payment form
Save Card
- Customers can save cards on the checkout page to use in the next purchase.

- Customers can save cards in My Account page.

- The checkout processed quickly with the saved cards.

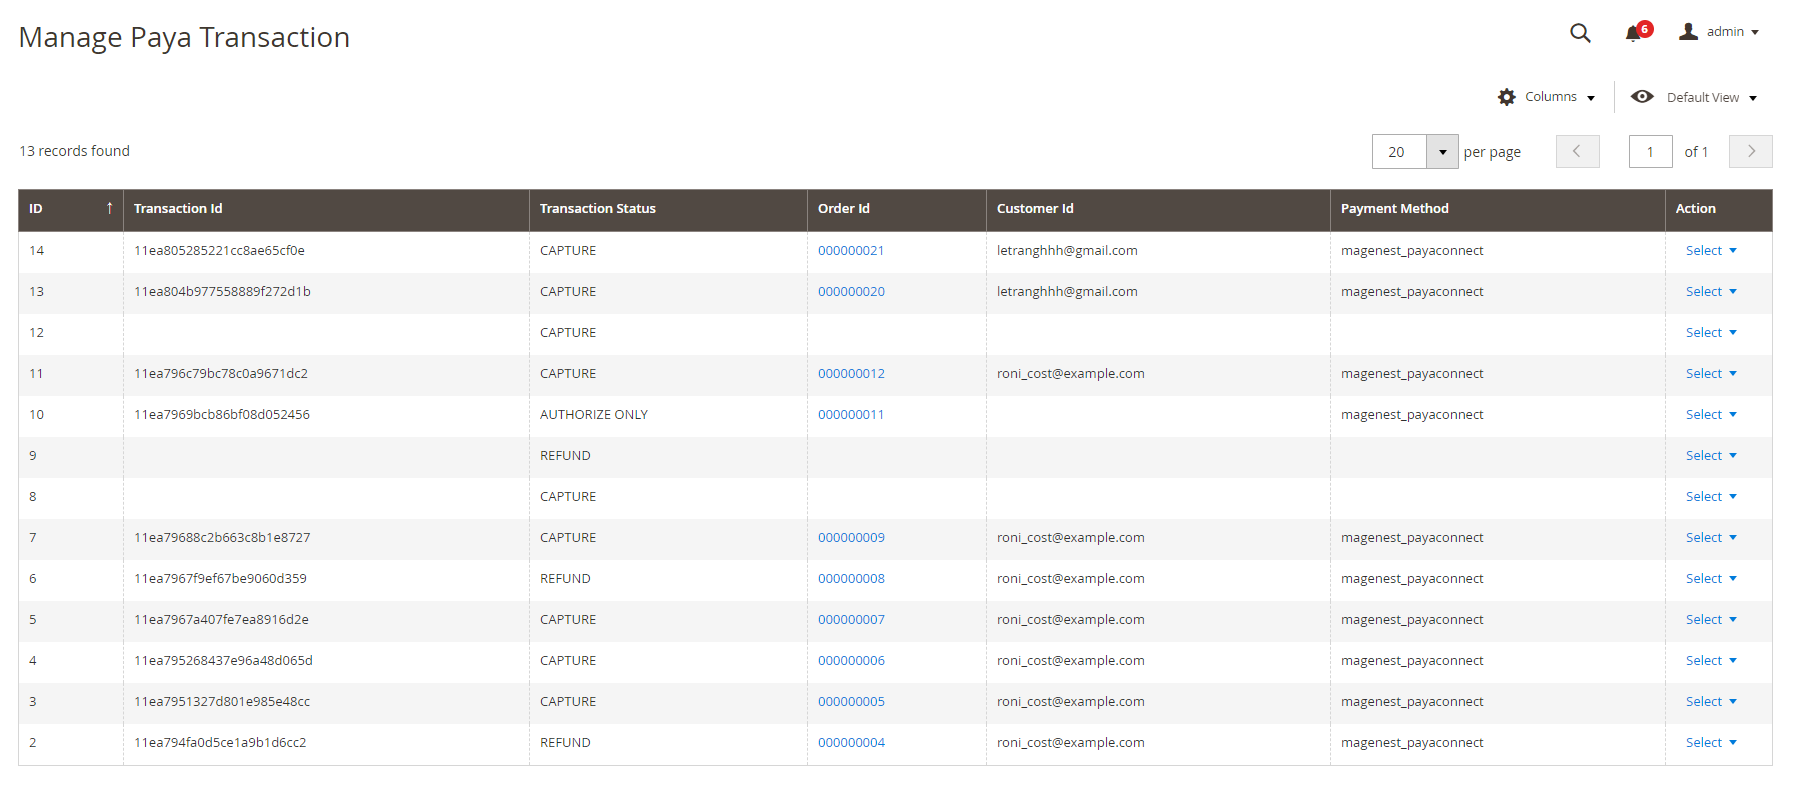
Paya Transaction Management
Update
- When a new update is available, we will provide you with a new package containing our updated extension.
- You will have to delete the module directory and repeat the installation steps above.
- Flush the config cache. Your store and newly installed module should be working as expected.
Support
- We will reply to support requests within 2 business days.
- We will offer lifetime free update and 6 months free support for all of our paid products. Support includes answering questions related to our products, bug/error fixing to make sure our products fit well in your site exactly like our demo.
- Support DOES NOT include other series such as customizing our products, installation and uninstallation service.
Once again, thank you for purchasing our extension. If you have any questions relating to this extension, please do not hesitate to contact us for support.