...
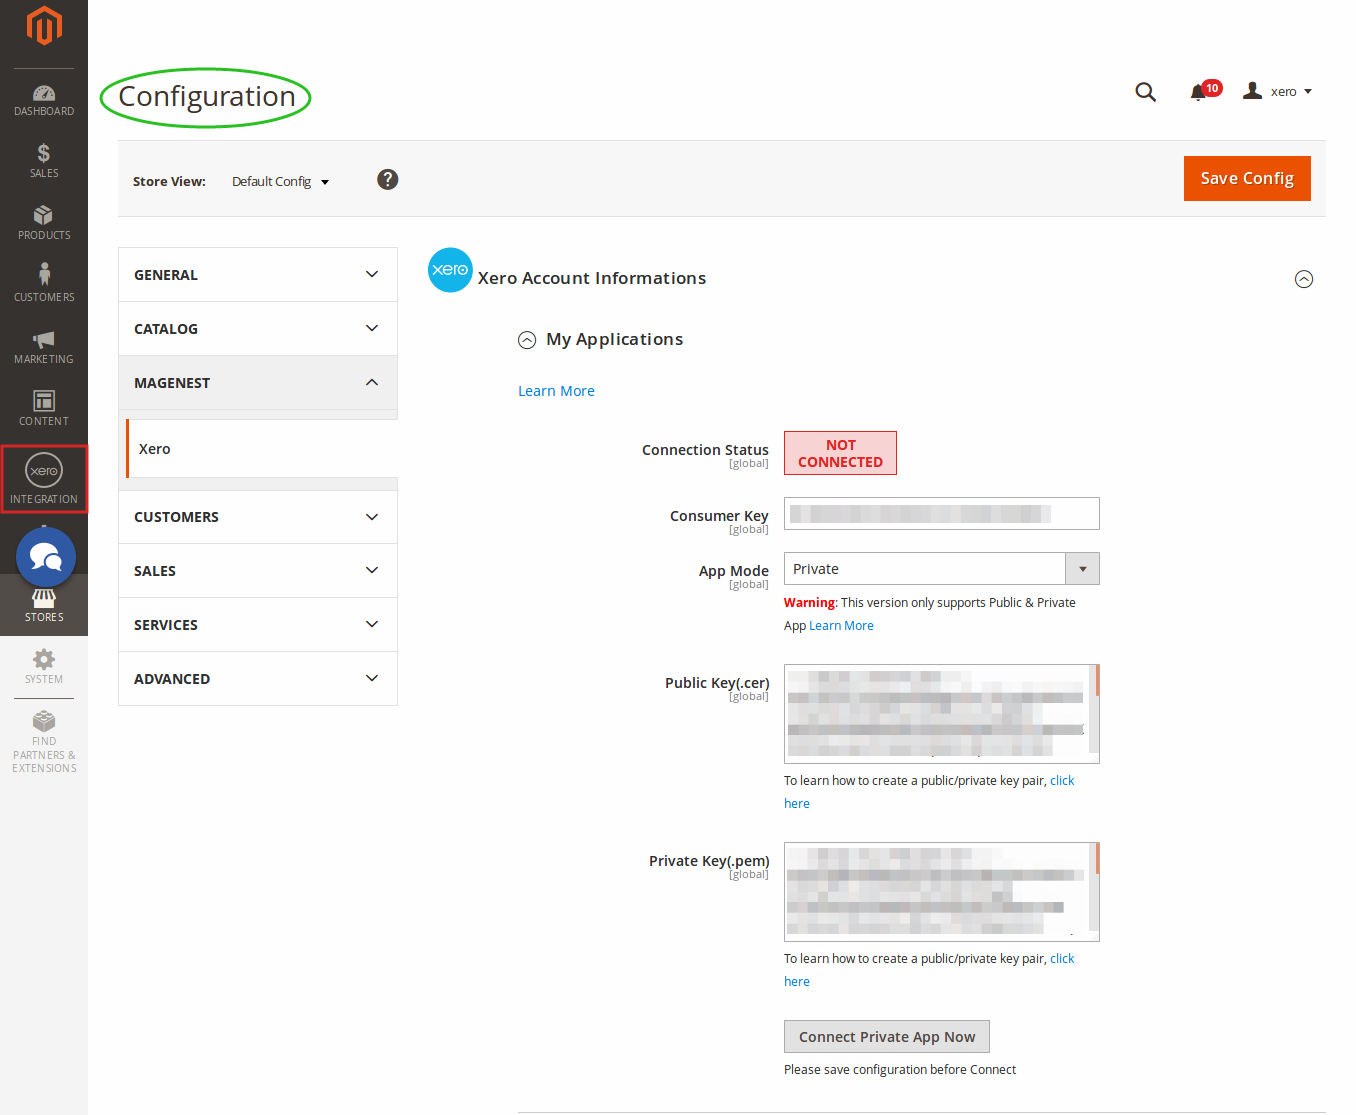
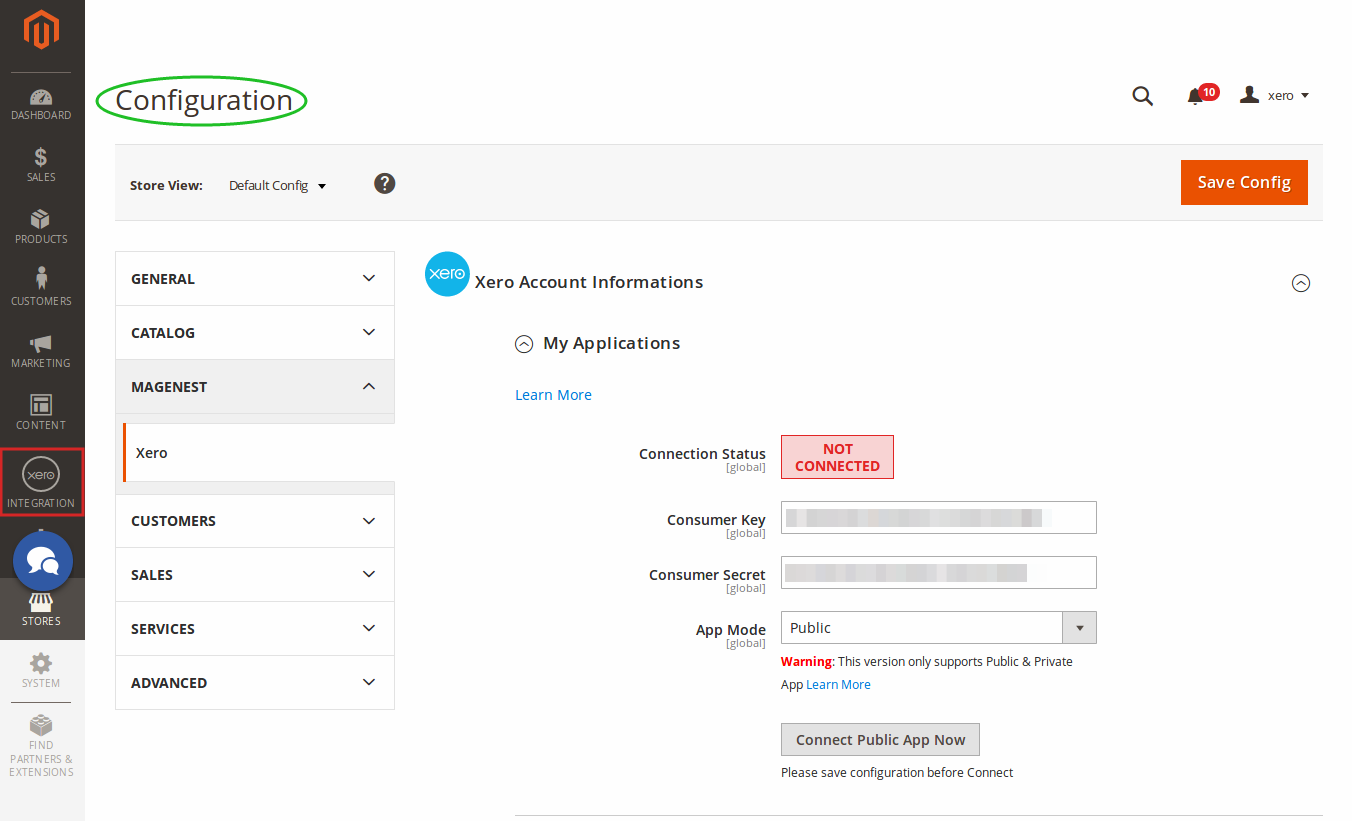
At My Applications tab
Taking Consumer Key that you have just created and paste into Magento 2 backend configuration. Press Save Config after you've done (refresh the cache if needed). Then, click on Connect Now button.
| Note | ||
|---|---|---|
| ||
You need to save config before connecting, this will help you avoid making errors. |
The system allows you to set up one of the two app mode: Private and or Public mode
Private:
If you choose Private mode, you will have to enter Private Key(.cer) and Public Key(.pem) beside Consumer Key
Public:
If you choose Public mode, it will require both Consumer Secret and Consumer Key. In addition, Public mode will only allow
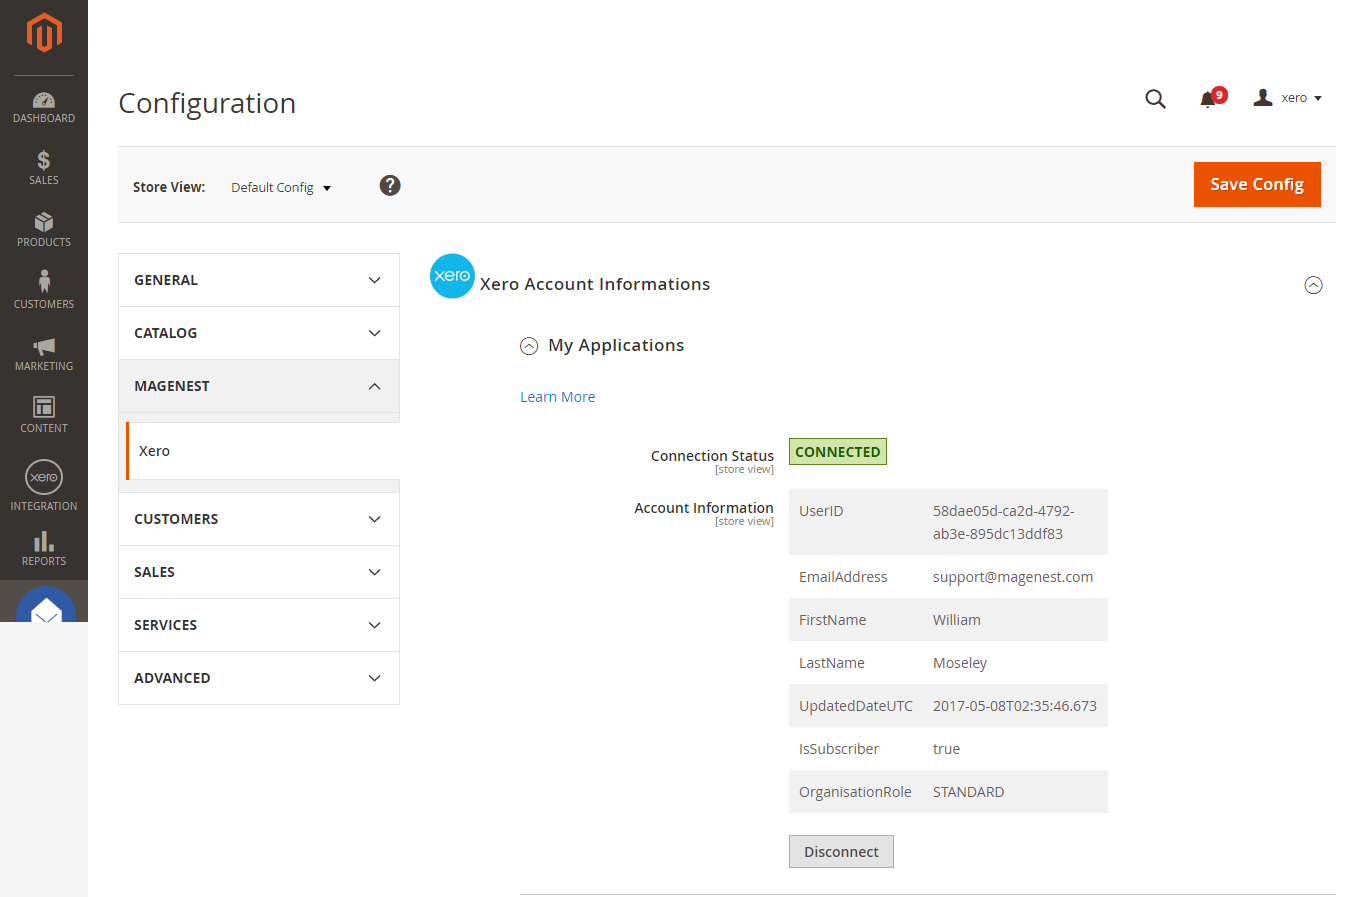
When Magento 2 store is connected with your Xero account successfully, connection status will be transferred from not connected to connected as below:
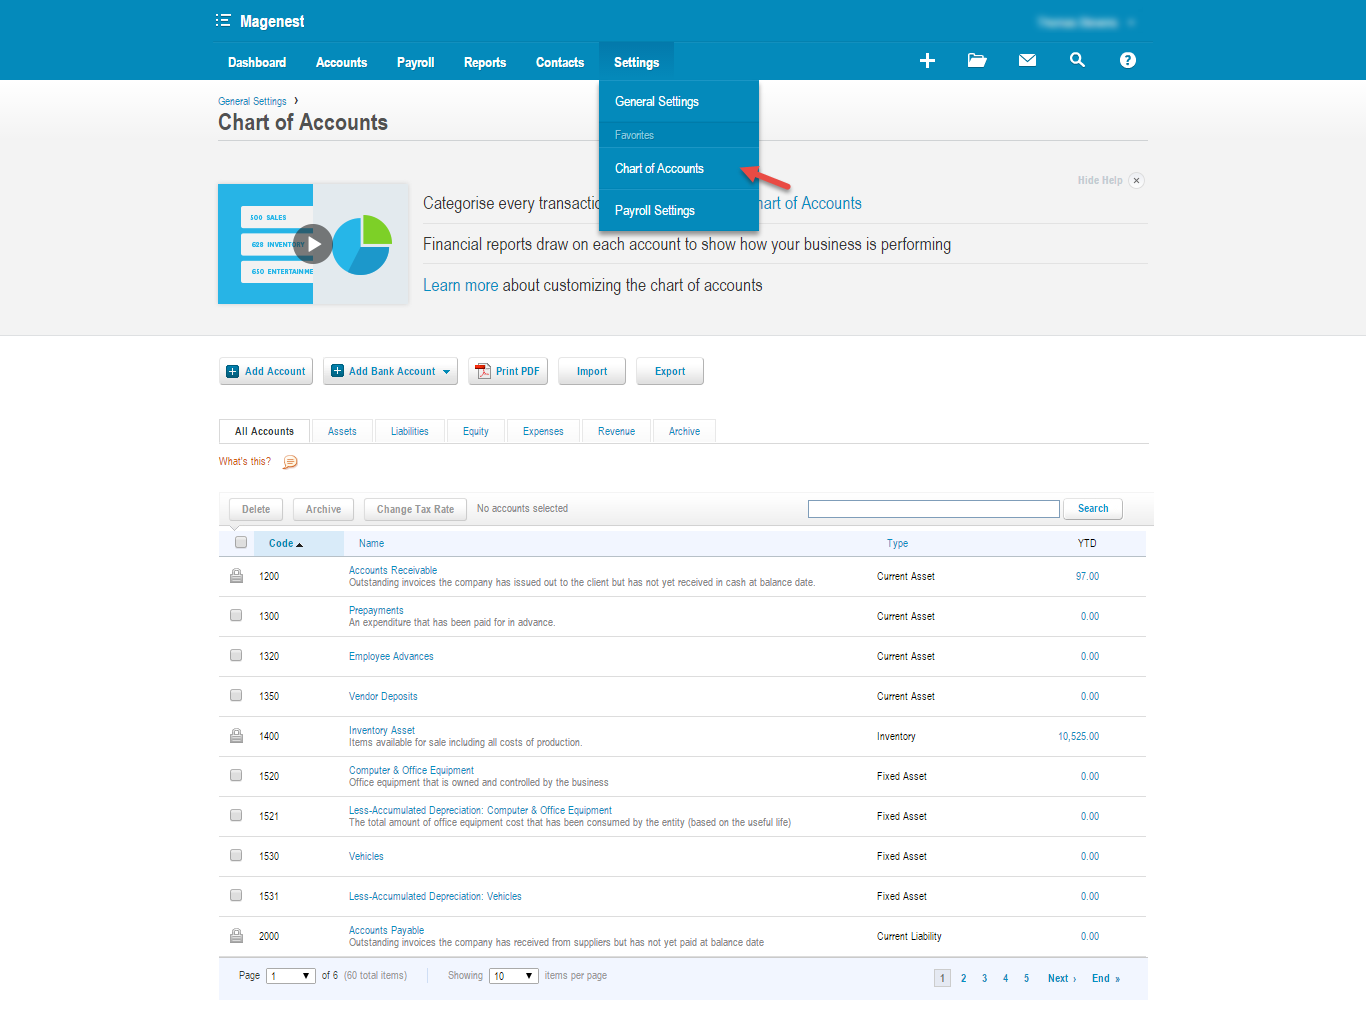
At Configure the Accounts Types in Xero tab
The system will take four account types in the chart of account: Bank account, Sale account, Inventory account, Cost and Good Sold account from Xero account into Magento 2 store. Enter the name you would like to use for each account then click on Add all Data to Queue. The default Xero account name will be used if you do not change it. If there is no account on Xero site, the extension will automatically create a new one.
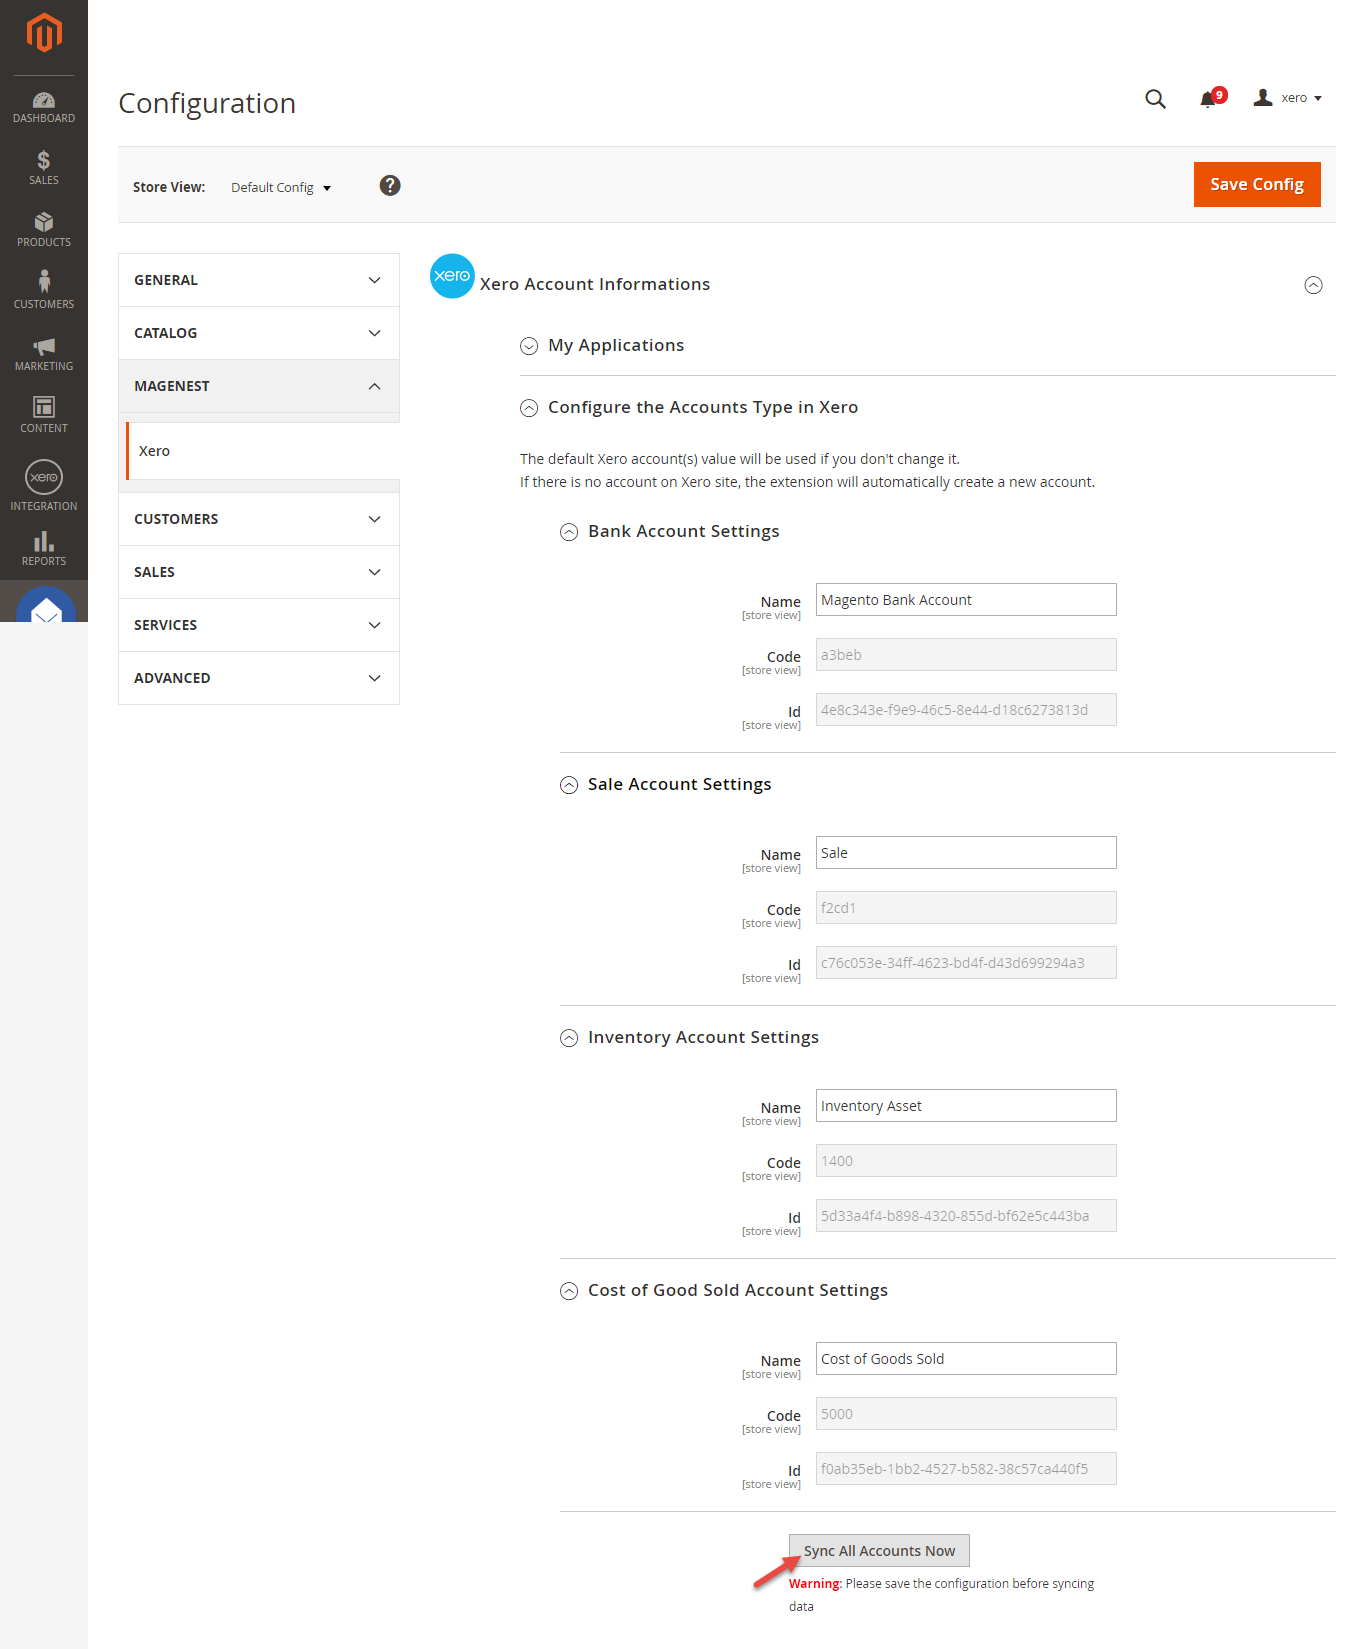
Admins can check changes to accounts on Xero's website.
...
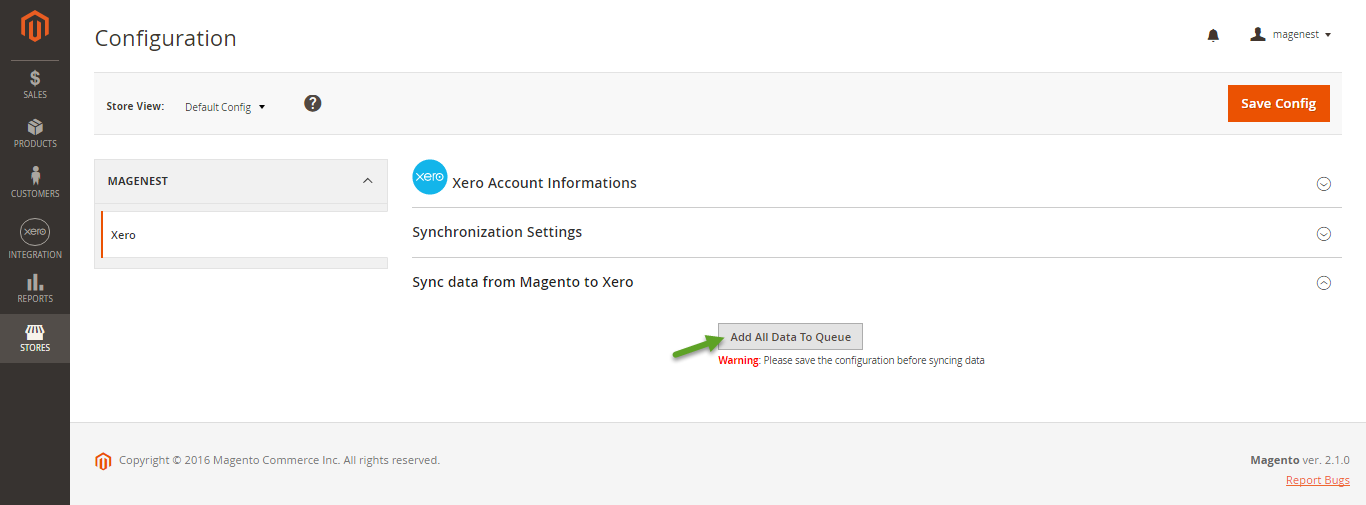
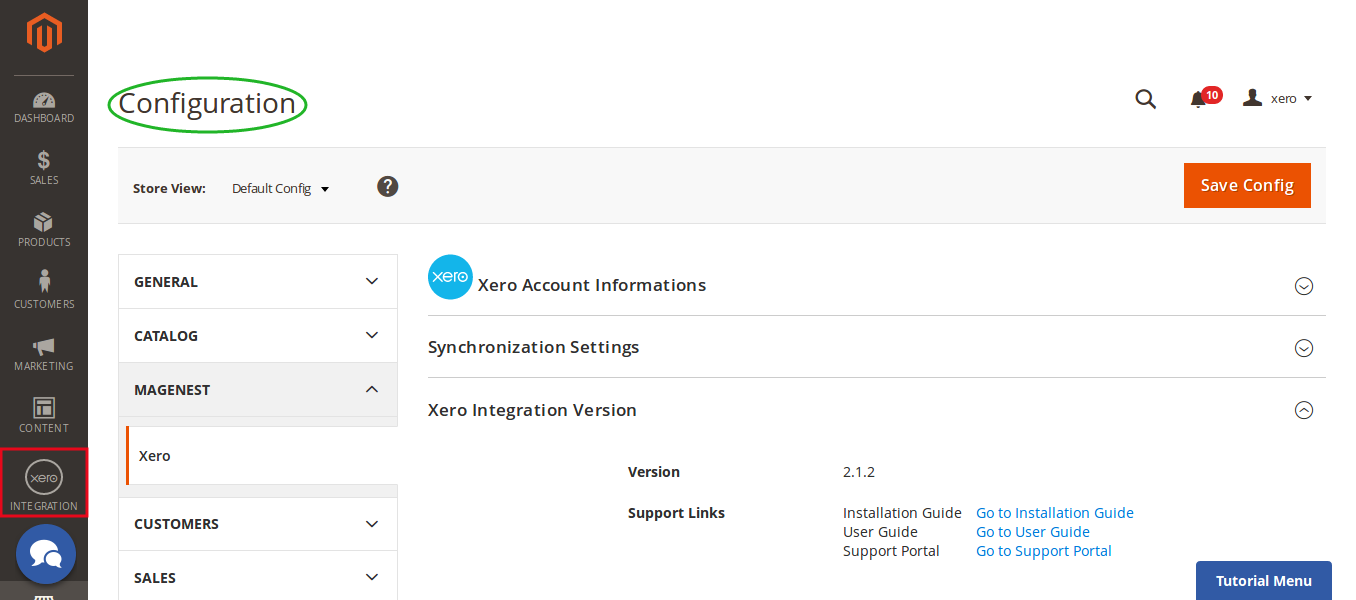
At the end of Configuration, admins can use "Add All Data To Queue" button to add all existed data to Queue, including Customers, Products, Orders, Invoices, Credit Memos.quickly navigate to the online documentation as well as support portal for Xero Integration extension:
Process Synchronization
...