...
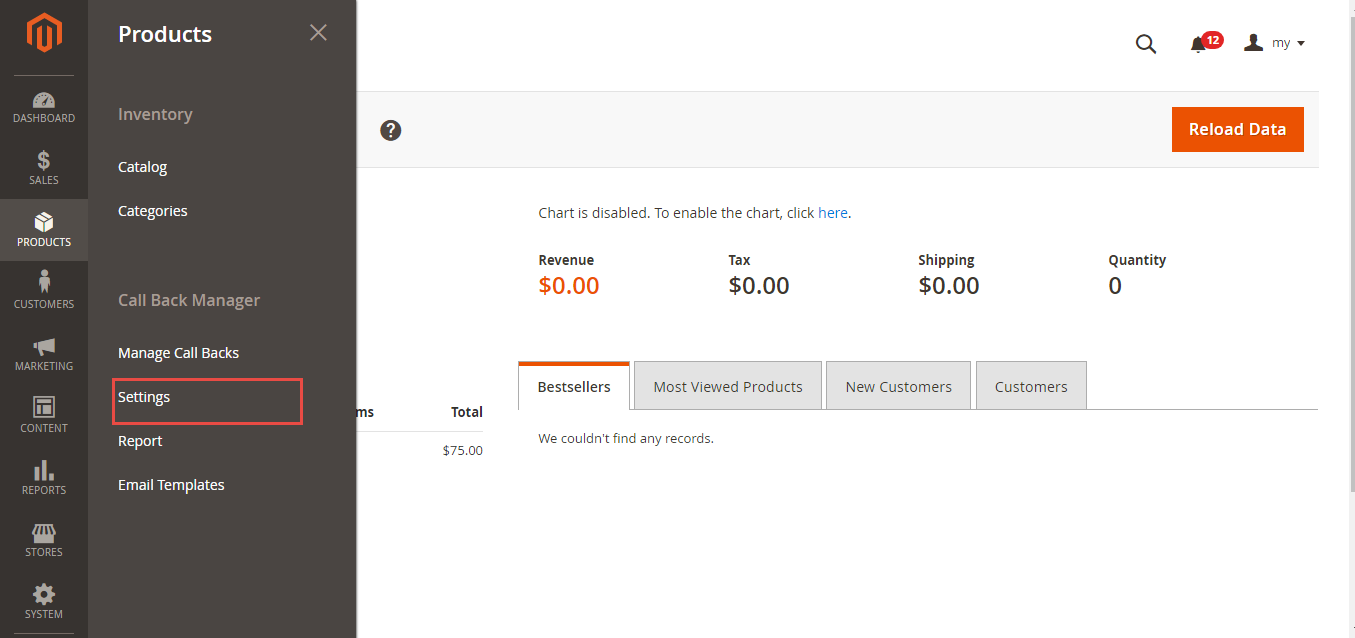
Navigate to your Backend of Magento 2 -> Products->Settings

Change the extension status (Is Enable) to Yes and configure the extension as below:
On the Interface Settings tab:
- Number of questions to display - this option defines how many questions will be shown under the 'Product Questions' section at the product page. If the actual number of questions exceeds this value, the rest will be hidden under an expand link.
- Number of answers to display - this option defines how many answers will be shown under a question by default. If the actual number of answers exceeds this value, the one(s) with the lowest number of vote will be hidden under an expand link.
Email notifications tab:
In this tab, you can configure the notifications settings of the extension. Select the email contact display (which will change the display name of the email sender) and email template used for sending notification to customers question.
Main Functions
After you install this extension, there will be a Product Question tab. Customers will be able to ask questions about a products. If they tick the Private Question option, the question can only be seen in the backend menu of the extension (instead of appearing on the product page). Then lick Ask Question button to send the question.

After being sent, the questions will wait to be approved by admin. To approve questions, go
to the back-end, click on Marketing-> Manage question-> Edit

Tick on Enable to show the question on frontend and type the anwer.

Install general options such as below picture:
Call to order Phone no: it is the telephone number that customers use to order
Click on Save Config button. Configuration ís actived
Main Functions
Save Customer's information
In frontend of extension, you will choose the product that needs buying. Nextly, click call back button.
Home page will redirect to new page. Call Back Information site allows to enter information: name, email, phone, preferred time to call and note.
In Preferred time to call, the call will be counted since customers set time properly.
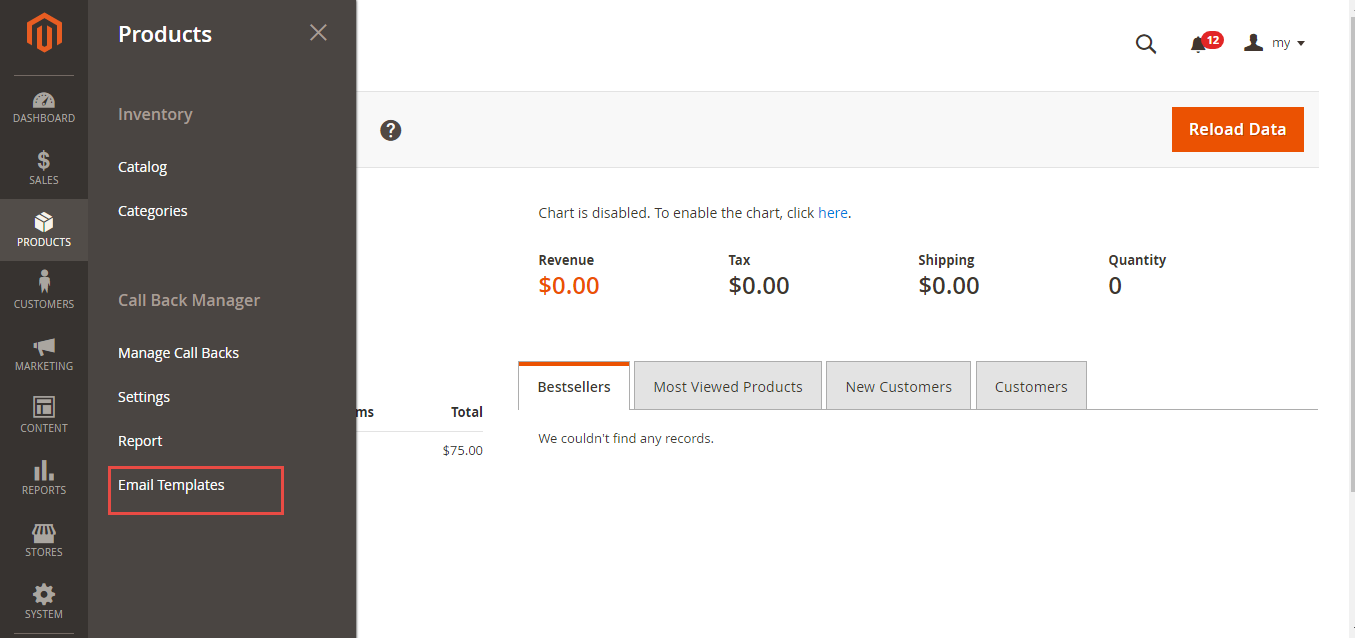
Create Email Templates
At the back end, clicking Products and choose Email Templates:
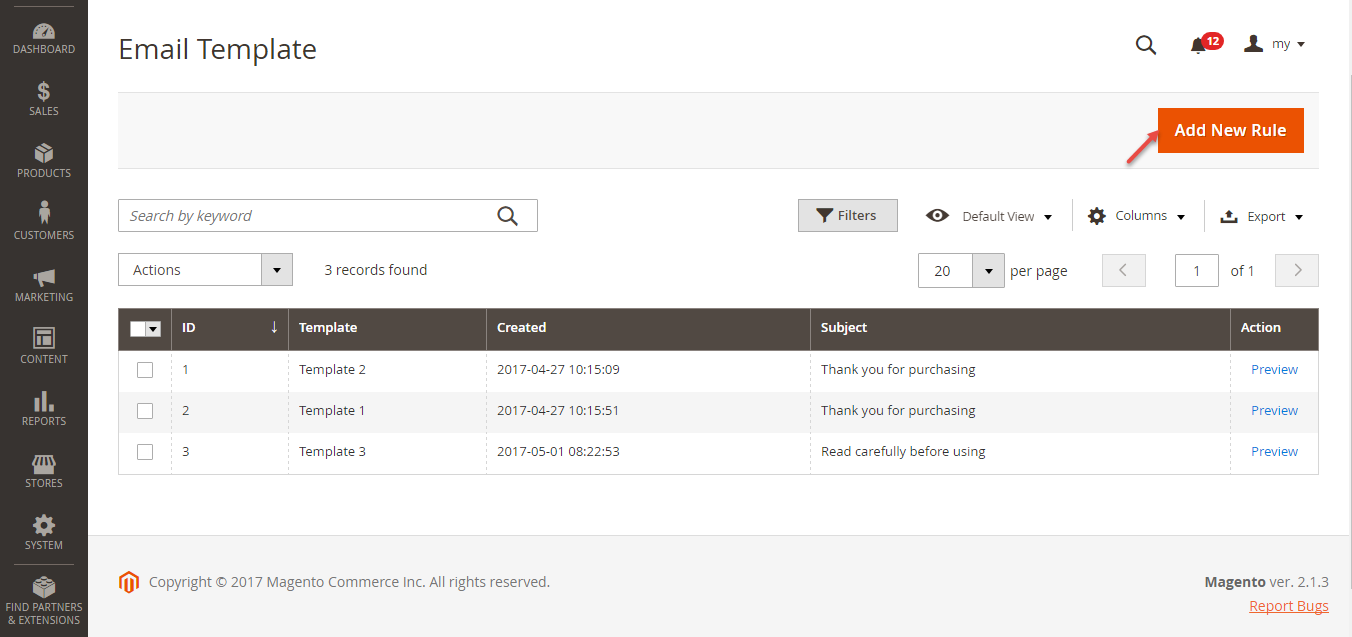
Appearing Email Templates form, click Add New Rule to create new email template
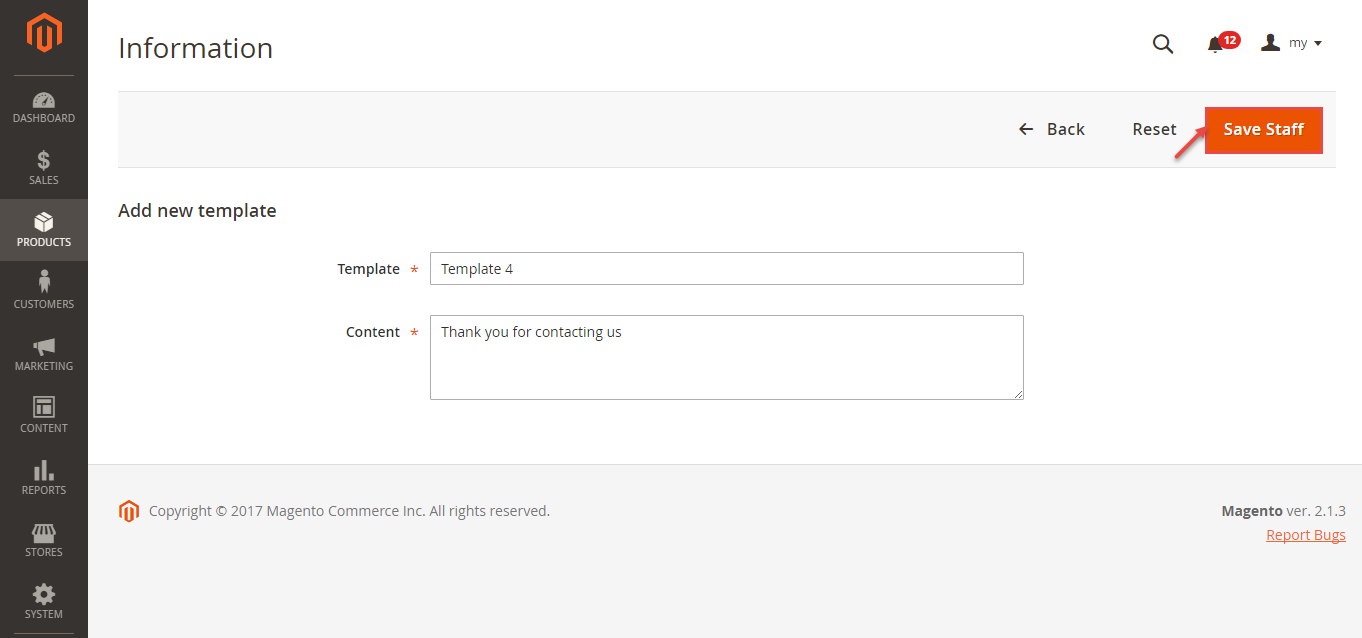
Entering Template and Content then press Save Staff button. New Email Template is saved successfully.
Send notification via email
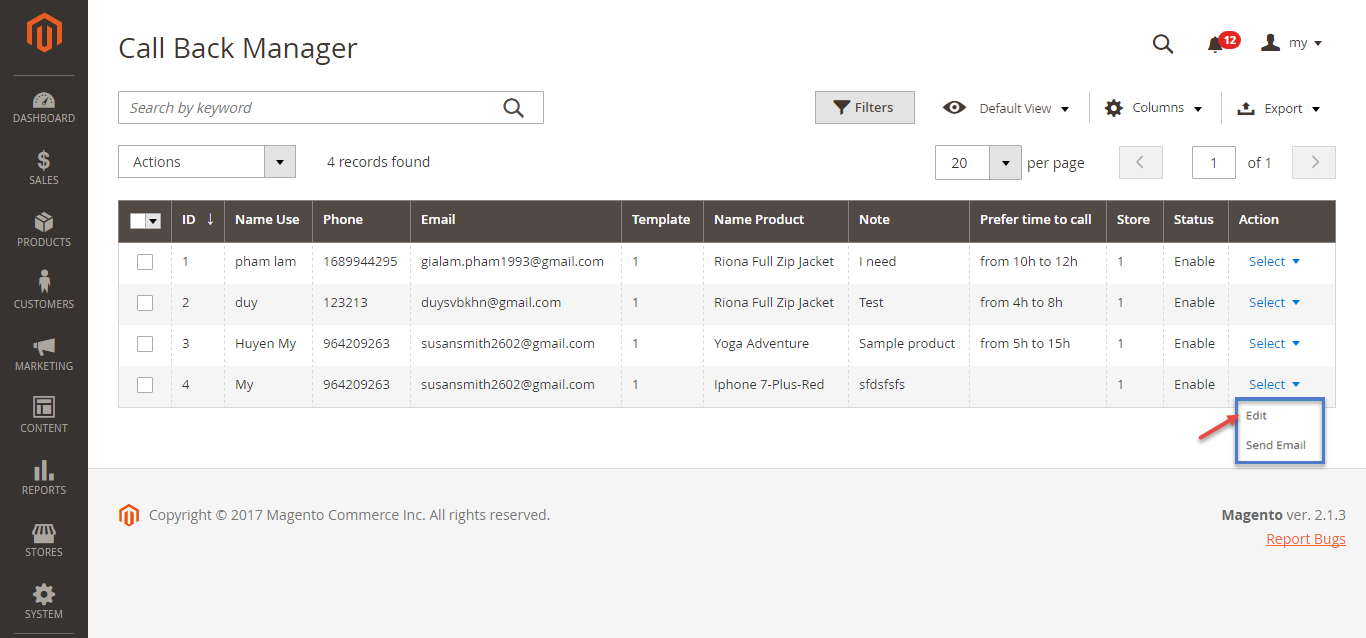
In Manage Call Backs catalogue, user can edit personal information and send notification to email.
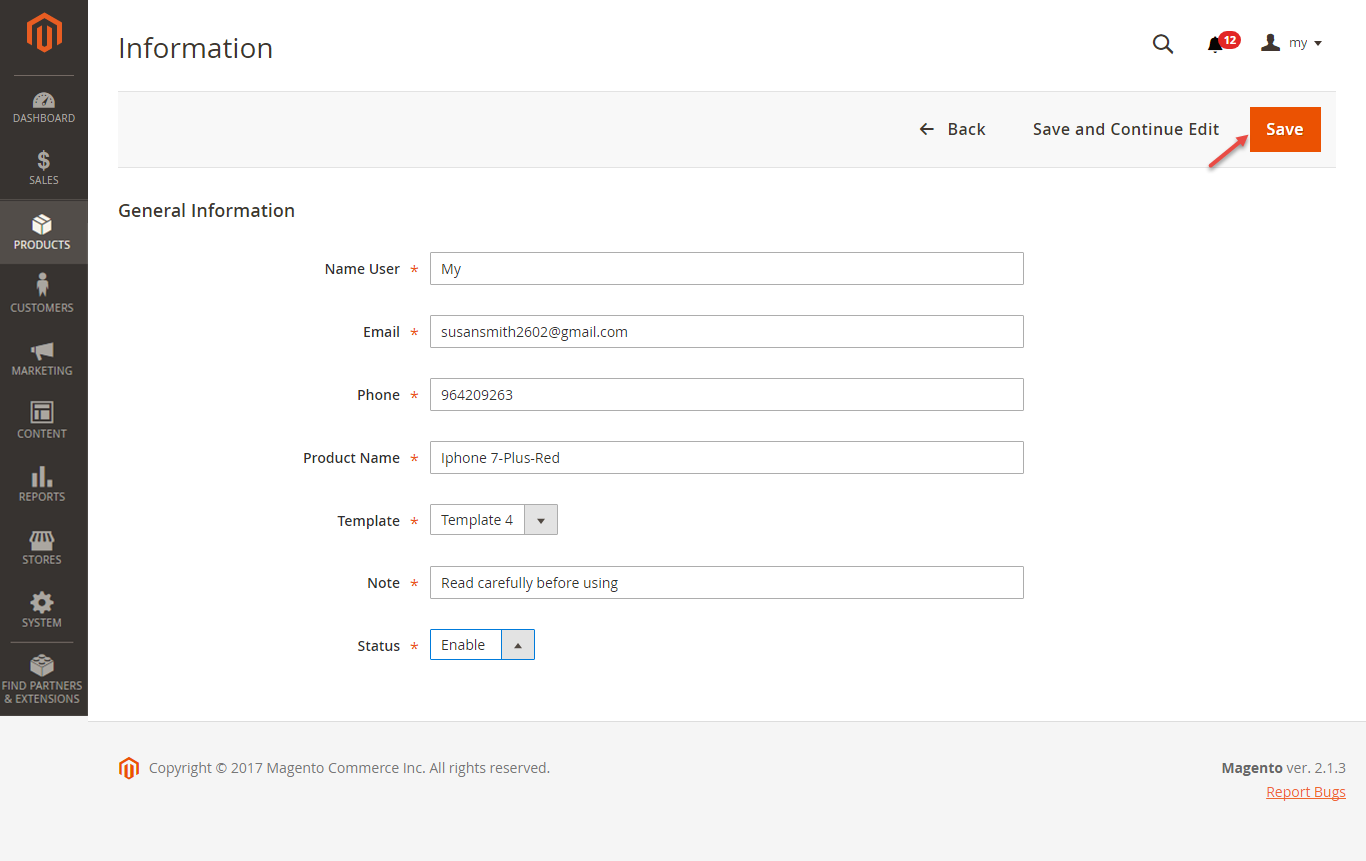
![]() Edit information and set email template:
Edit information and set email template:
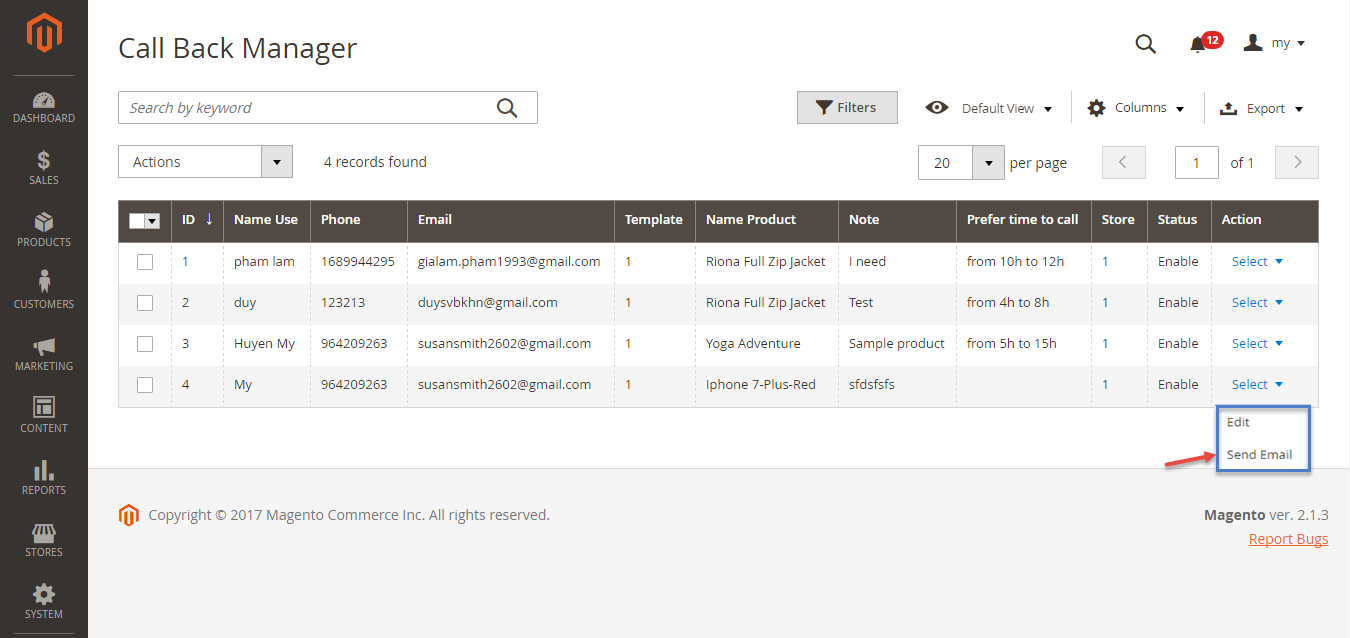
![]() Send email to customer
Send email to customer
When admin has published the answer, it will be shown in the Product Question tab of the product:
To display or hide an answer on the product page, go to the back-end, click on Marketing-> Manage answer.
...
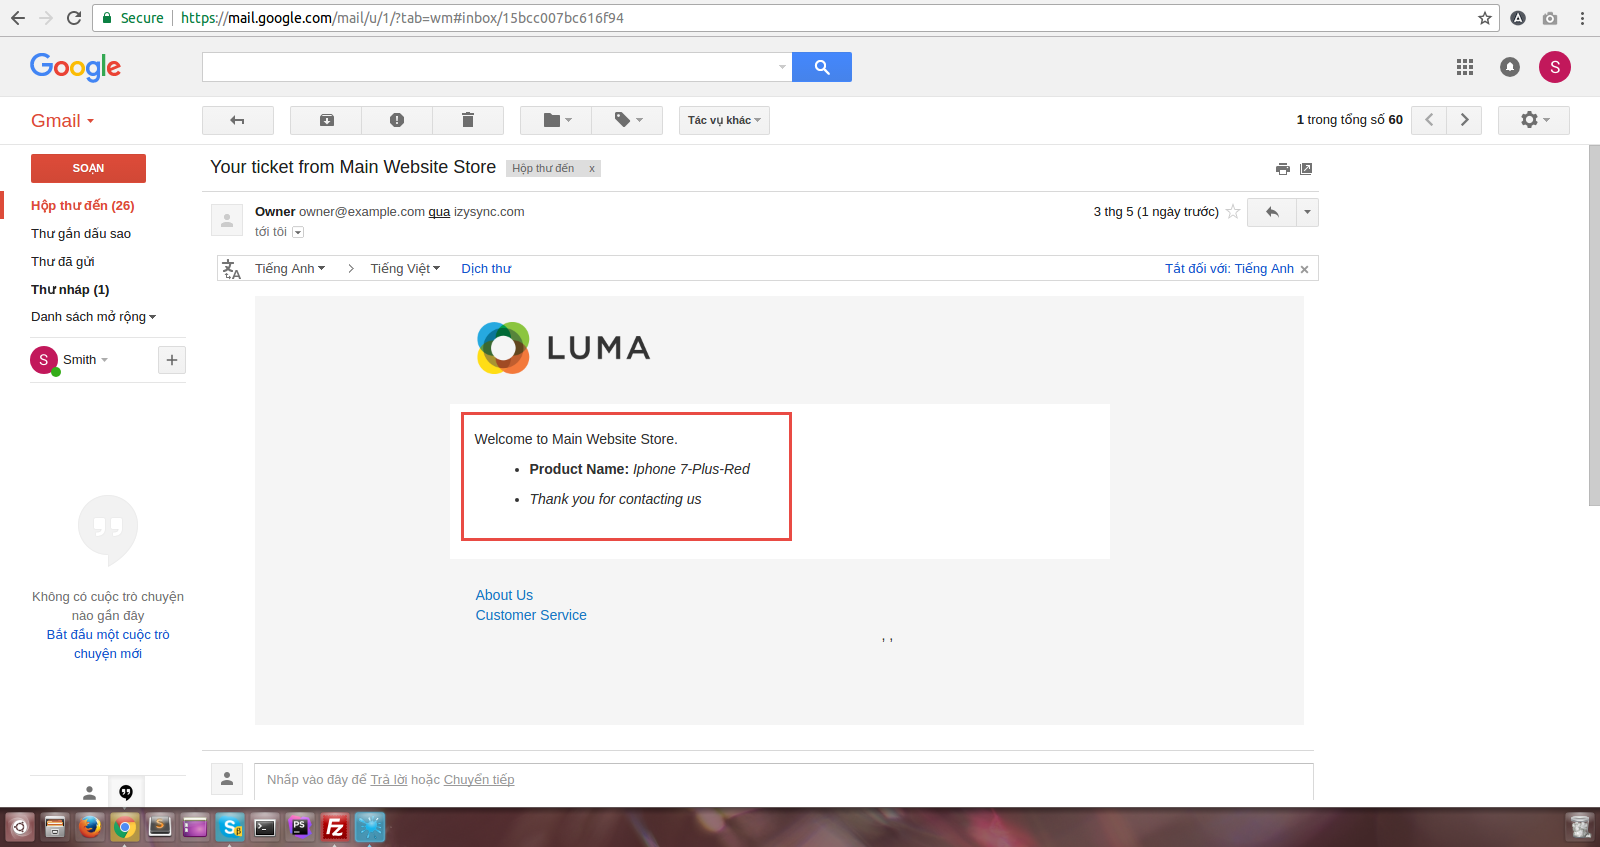
Intermediately, customer have received email from Main Website Store:
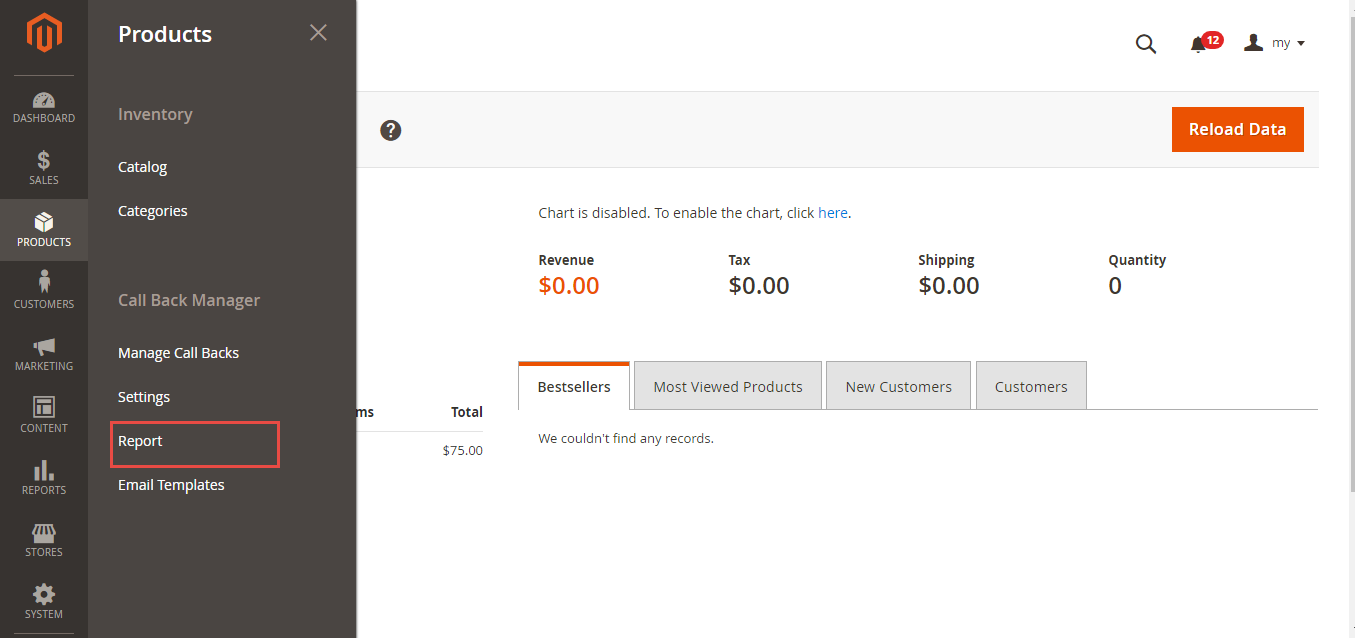
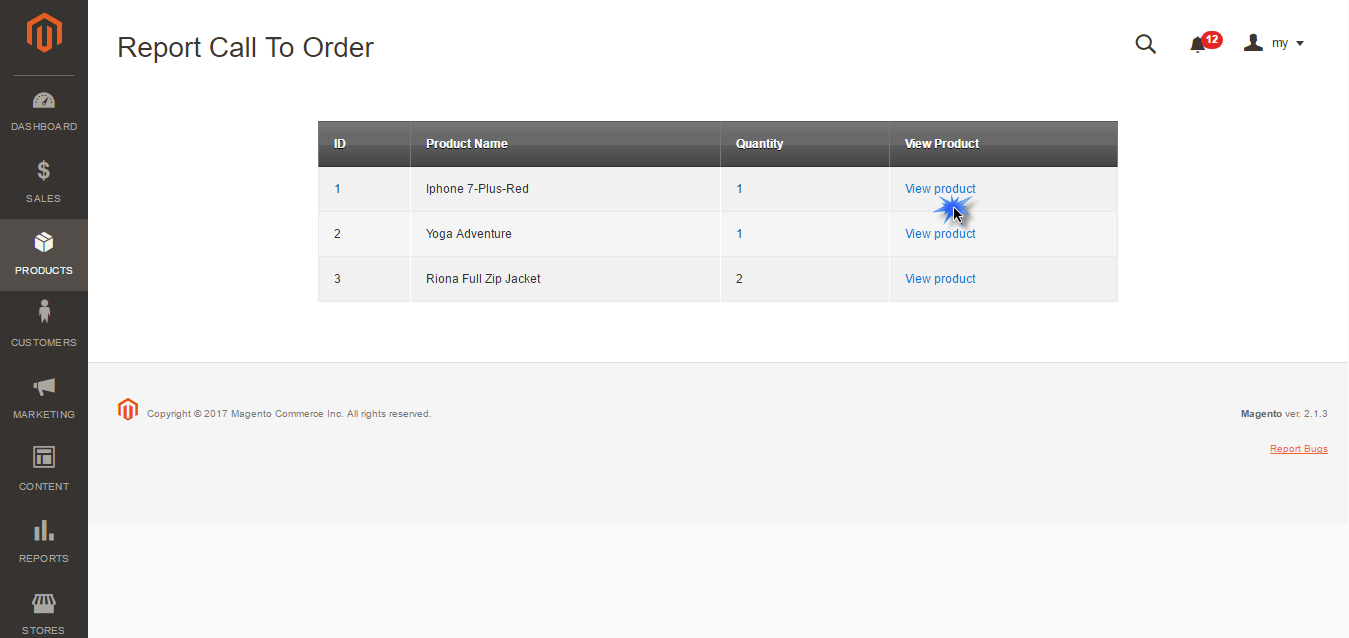
Report Call To Order
In Report item, click View product to report how many people that called.
Next choose the answer that admin wants to display/hide, then click on Actions->Change status->Enable/Disable.
For customers, they can vote for questions, search for questions or filter the Most helpful or Newest questions
In the customer Dashboard, on the Product Questions tab on front end, customers can view details of questions they have asked
When admins answer your questions, a notification email will be sent to you
...
Update
- When a new update is available, we will provide you with a new package containing our updated extension.
- You will have to delete the module directory and repeat the installing steps above.
- Flush the config cache. Your store and newly installed module should be working as expected.
...