Thank you for purchasing our extension. If you have any questions that are beyond the scope of this document, do not hesitate to leave us an email via our email address below.
Created: 08/02/2017 | By: Magenest | Support Portal: http://servicedesk.izysync.com/servicedesk/customer/portal/63
| Table of Contents | ||||
|---|---|---|---|---|
|
...
Introduction
Moneris Payment Gateway extension for Magento 2 by Magenest offers payment services for multiple fields, with industry-specific knowledge that its focus. Moreover, this extension support various types of payment cards especially with customers in Canada. Each year, Moneris processes over 3 million transactions for more than 350,000 different stores.


Features For Admins
...
Save customer info with hosted vault page
- Tokenization
- Support full authorization
- CVC/AVS verification
- 3D secure [NEW]
- Secured saved card feature
- Full and Partial Refund
- Support payments in Canada
...
The primary aim of the extension is to deliver the most fluent and effortless payment experience to the customers:
Easily checkout using a credit card.
- Easy access to online transaction reporting
...
If you already have a Moneris account, skip this step.
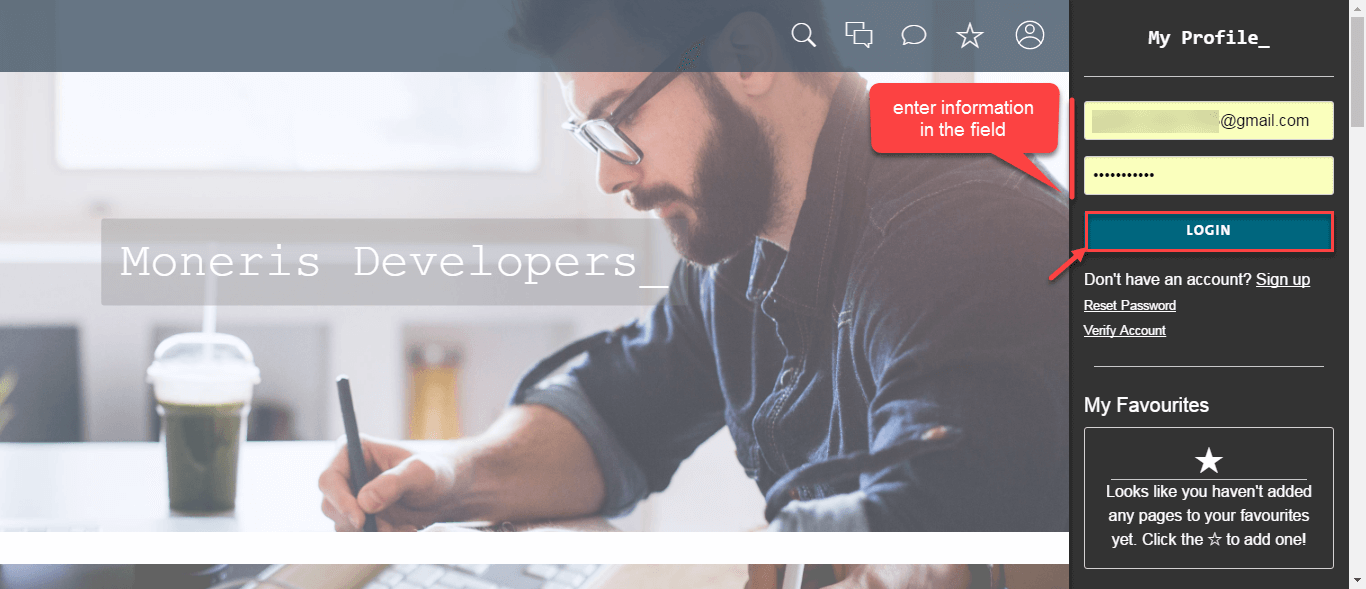
When you log in to your Moneris account, request for test credentials (in Canada)
On the home page, on the right menu bar, click on Full Profile
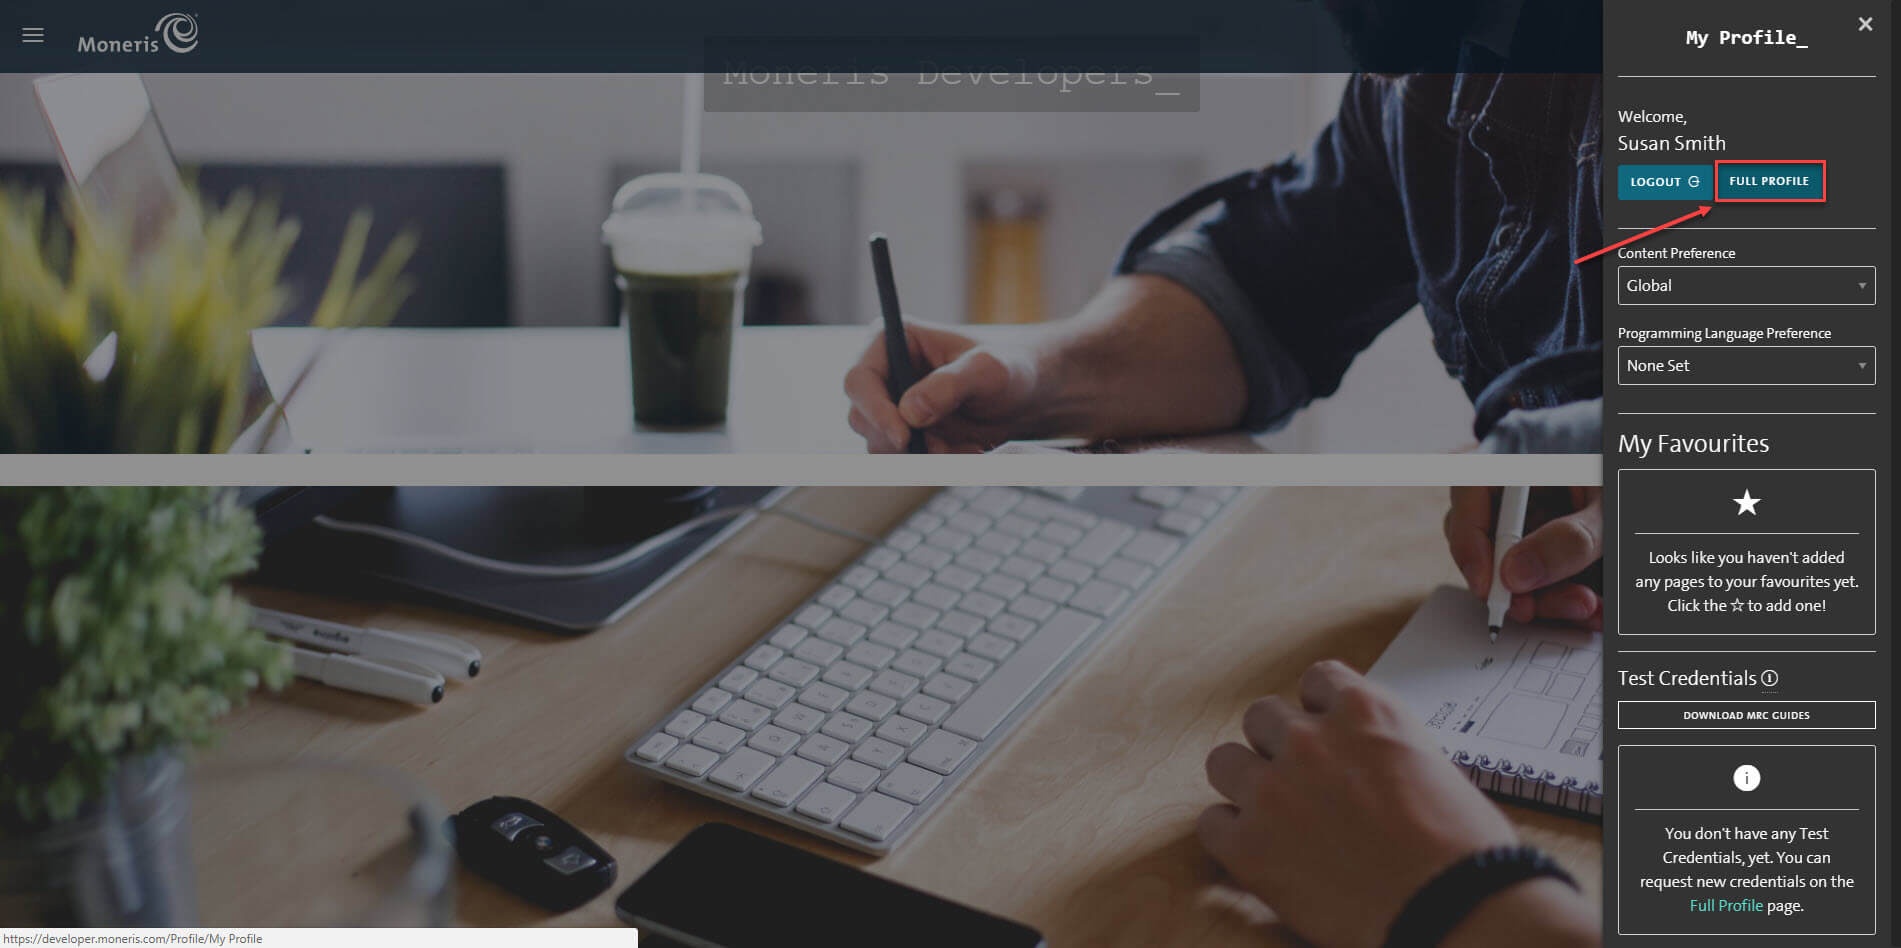
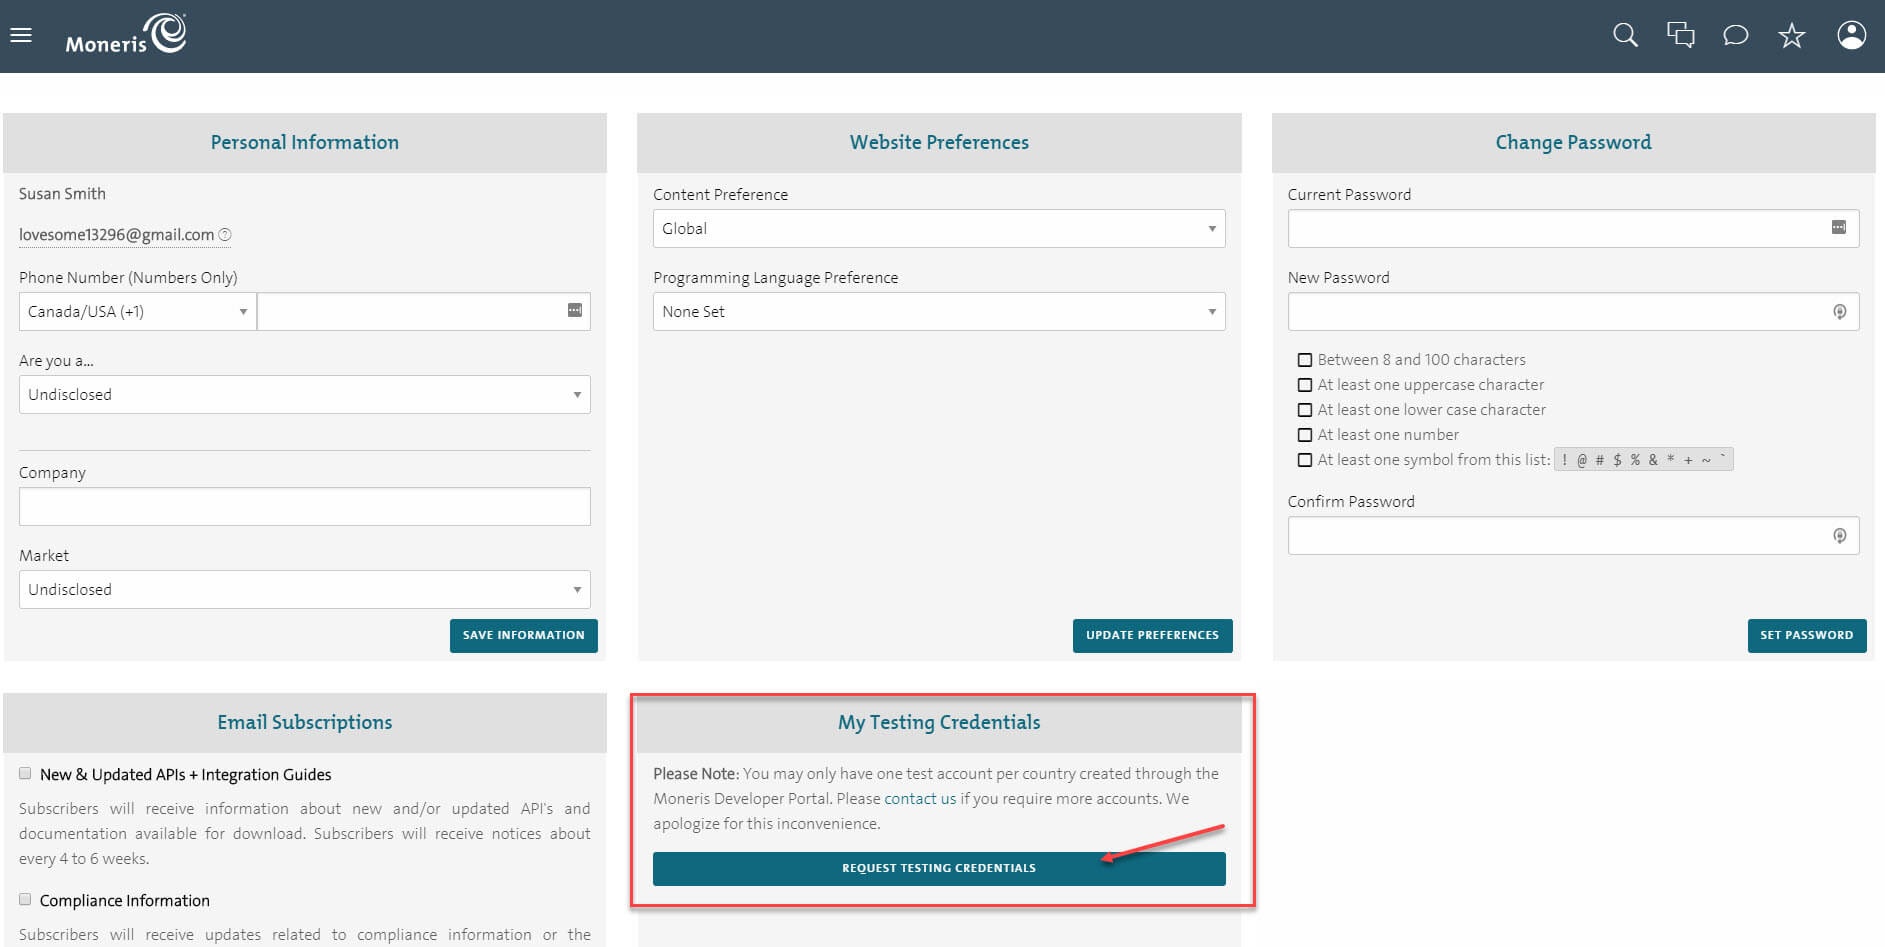
In the Full Profile, there is My Testing Credentials section, click on Request Testing Credentials
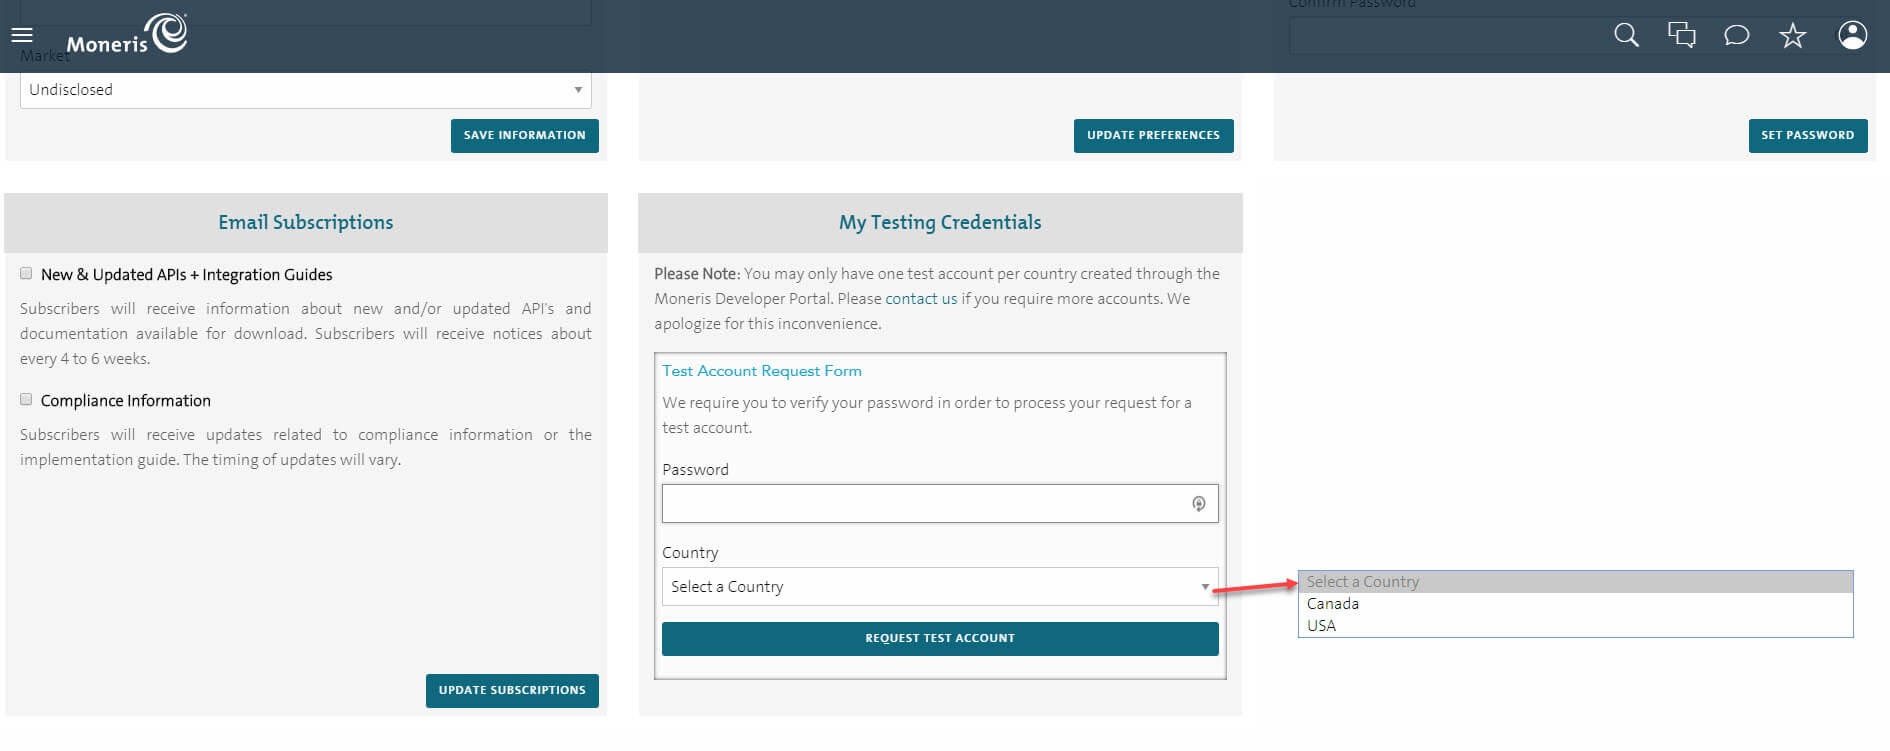
When the Test Account Request Form shows up, fill in your password and choose the country. Then Request Test Account.
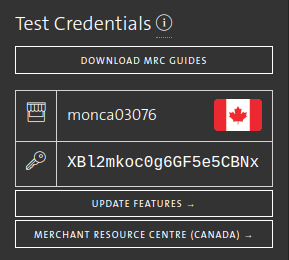
In the home page, the test credentials are on the right menu bar. The first line with a store icon is the Store ID, under the Store ID is the API Token with a key icon. Note that you will need these two for configuration.
Set Configuration
...
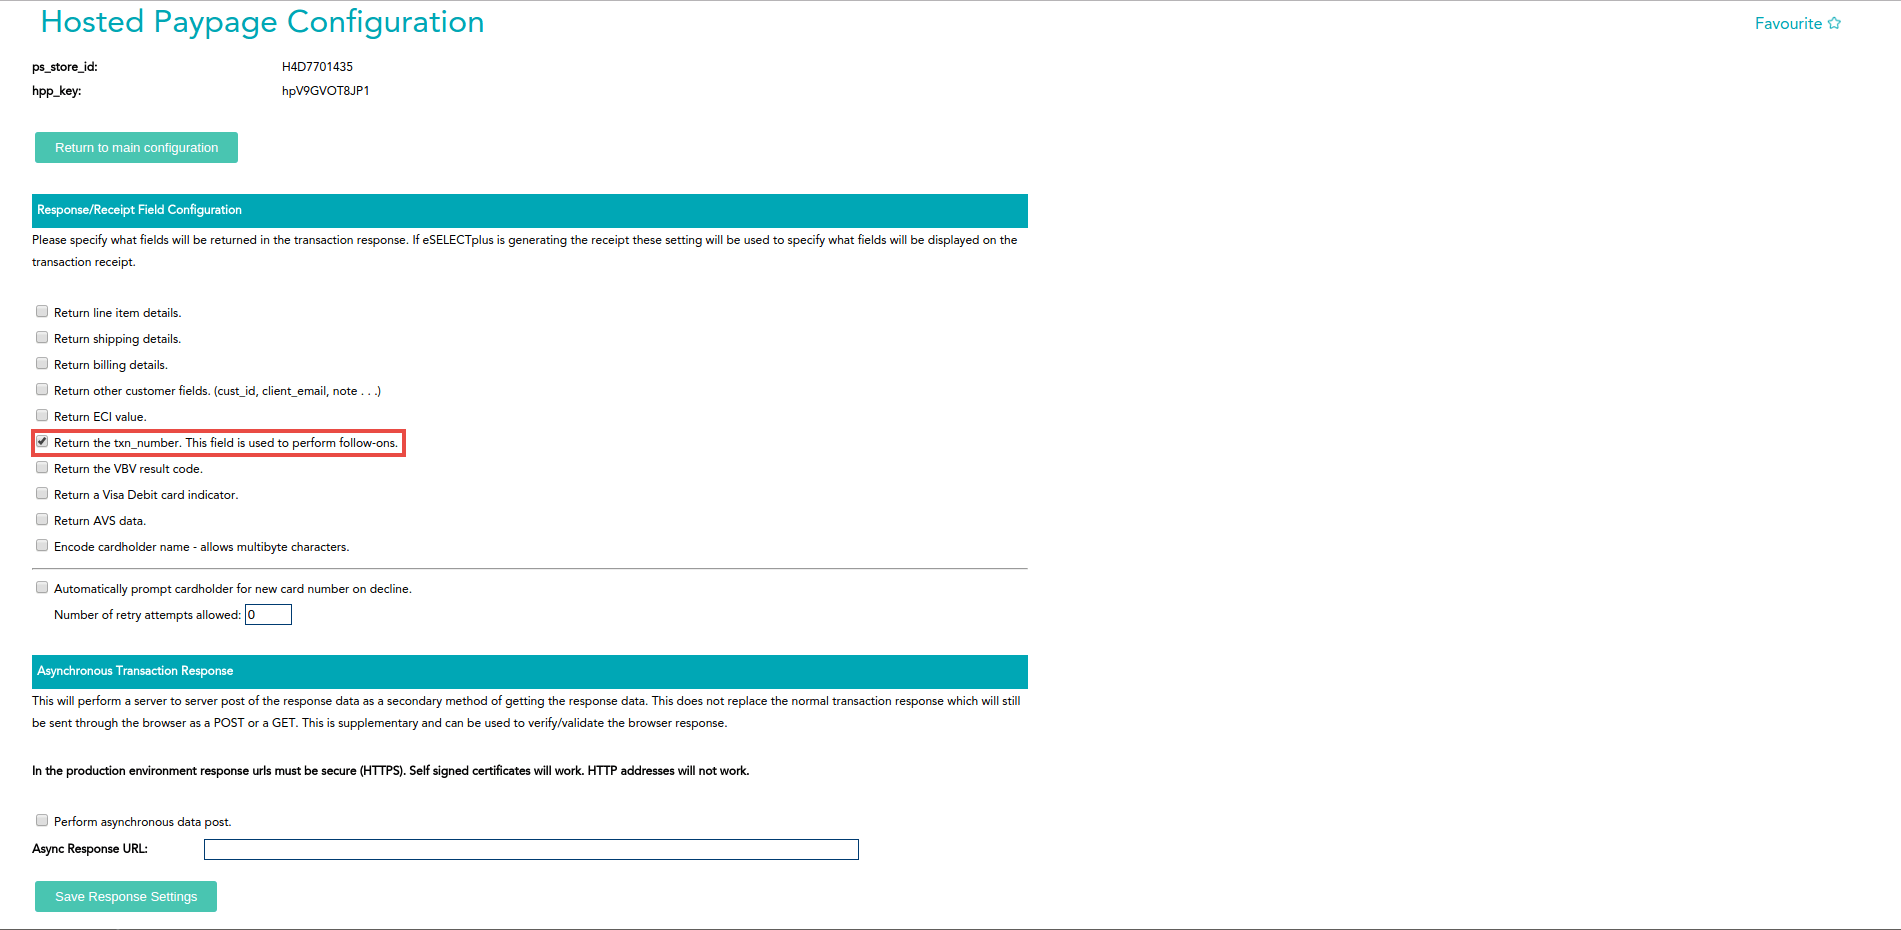
If there is no key, click on Generate a New Configuration to create a new key.
In the Respone/Receipt Field Configuration, tick the Return the txn_number. This field is used to perform follow-ons.
Now you have enough info to configure Moneris in your Magento. In the admin panel of Magento 2, go to Moneris Configuration via Stores > Configuration > Sales > Payment Methods > Moneris
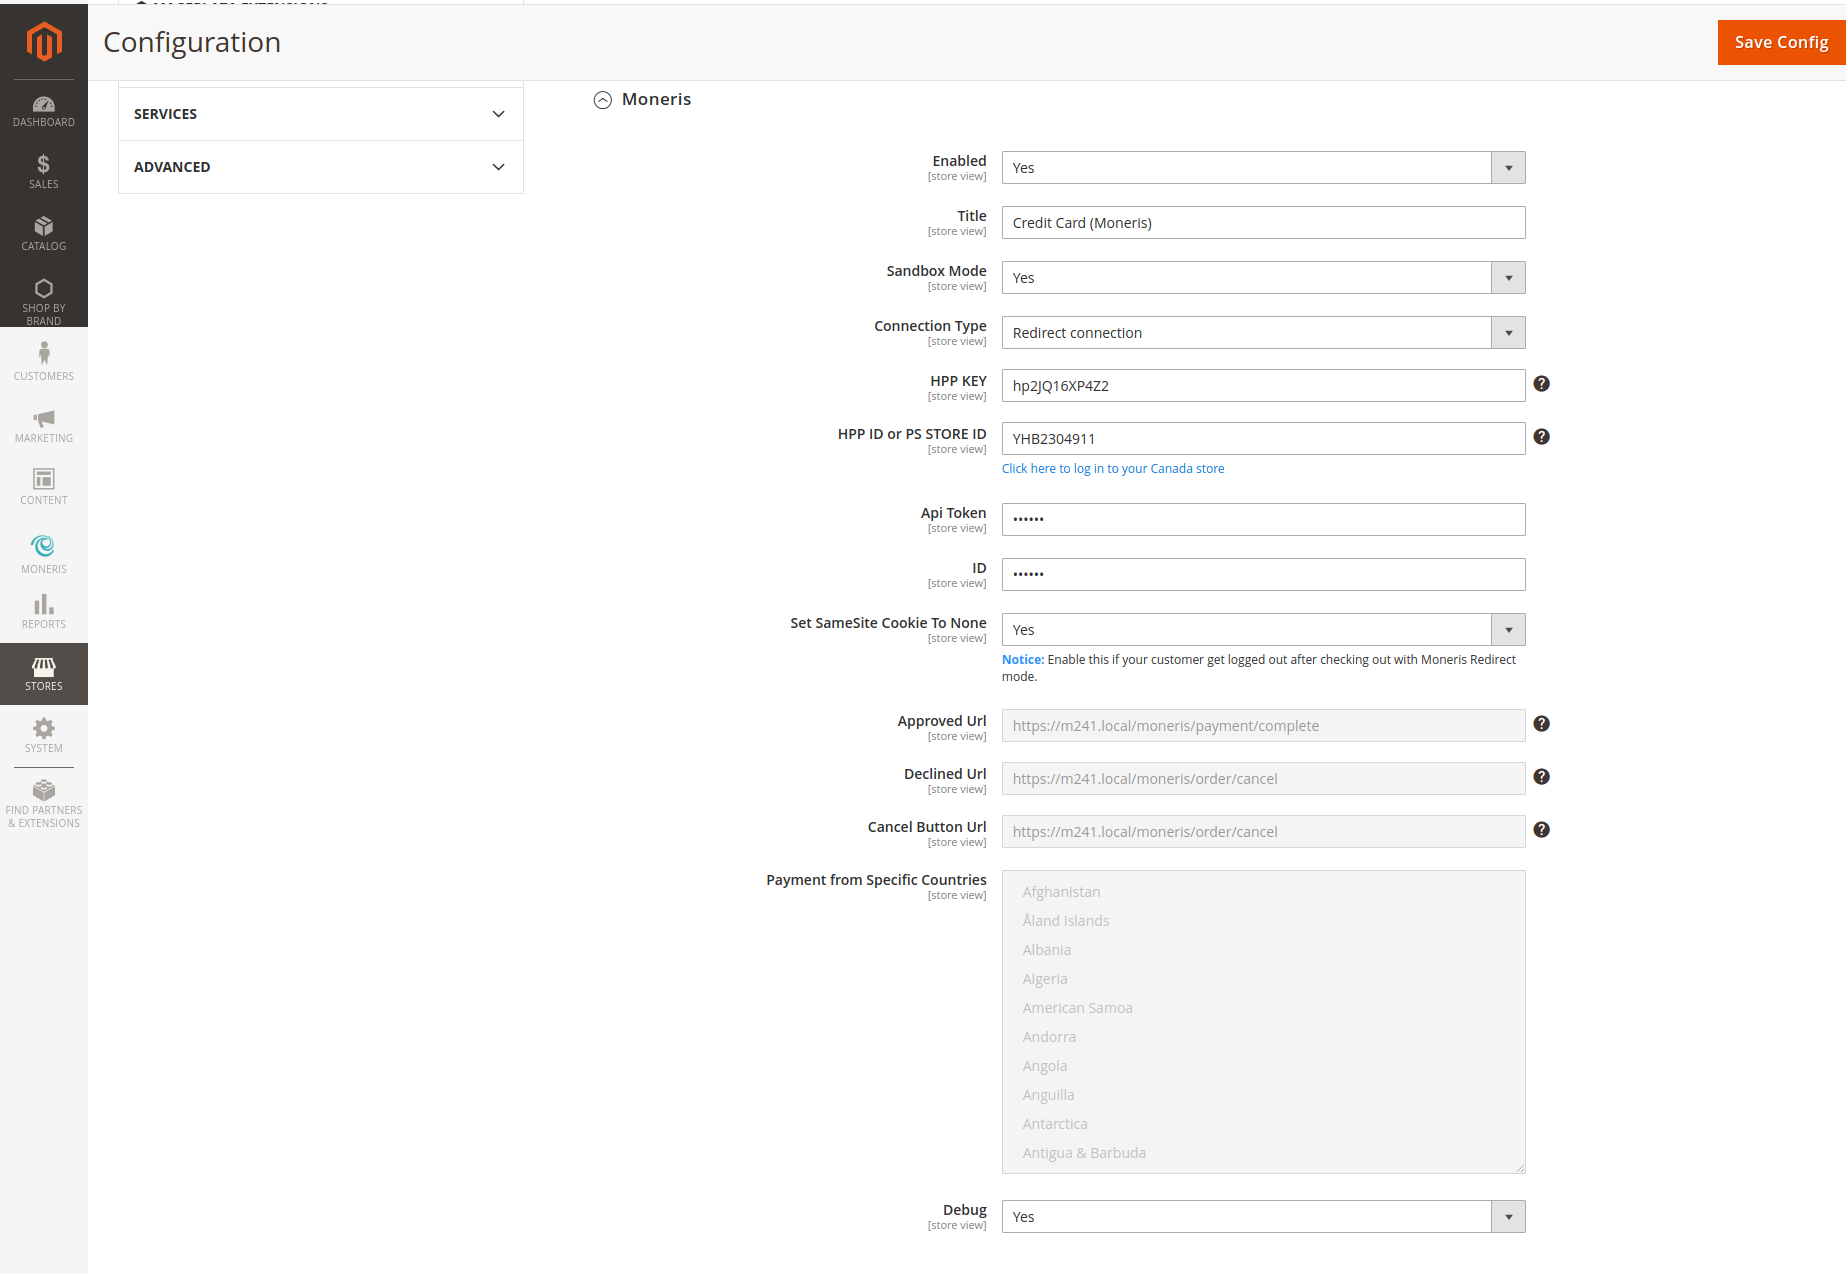
![]() Set up with Redirect Connection:
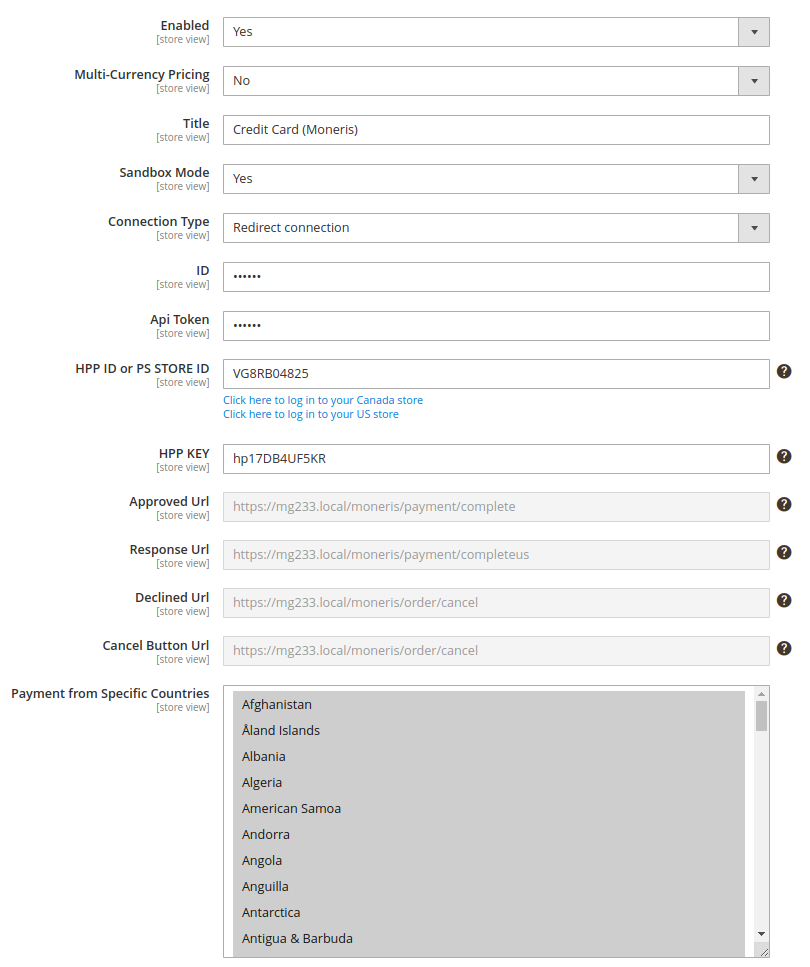
Set up with Redirect Connection:
- Enabled: Choose Yes to enable Moneris Payment
- Multi-Currency Pricing: Choose Yes to enable Moneris Multiple Currency Pricing
- Title: The name of the payment method that will be displayed on the checkout page
- Sandbox Mode: Turn this on if you use the test credentials
- Connection Type: Redirect Connection
- ID: Your store ID or test Store ID
- API Token: the API Token you got from MonerisMoneris
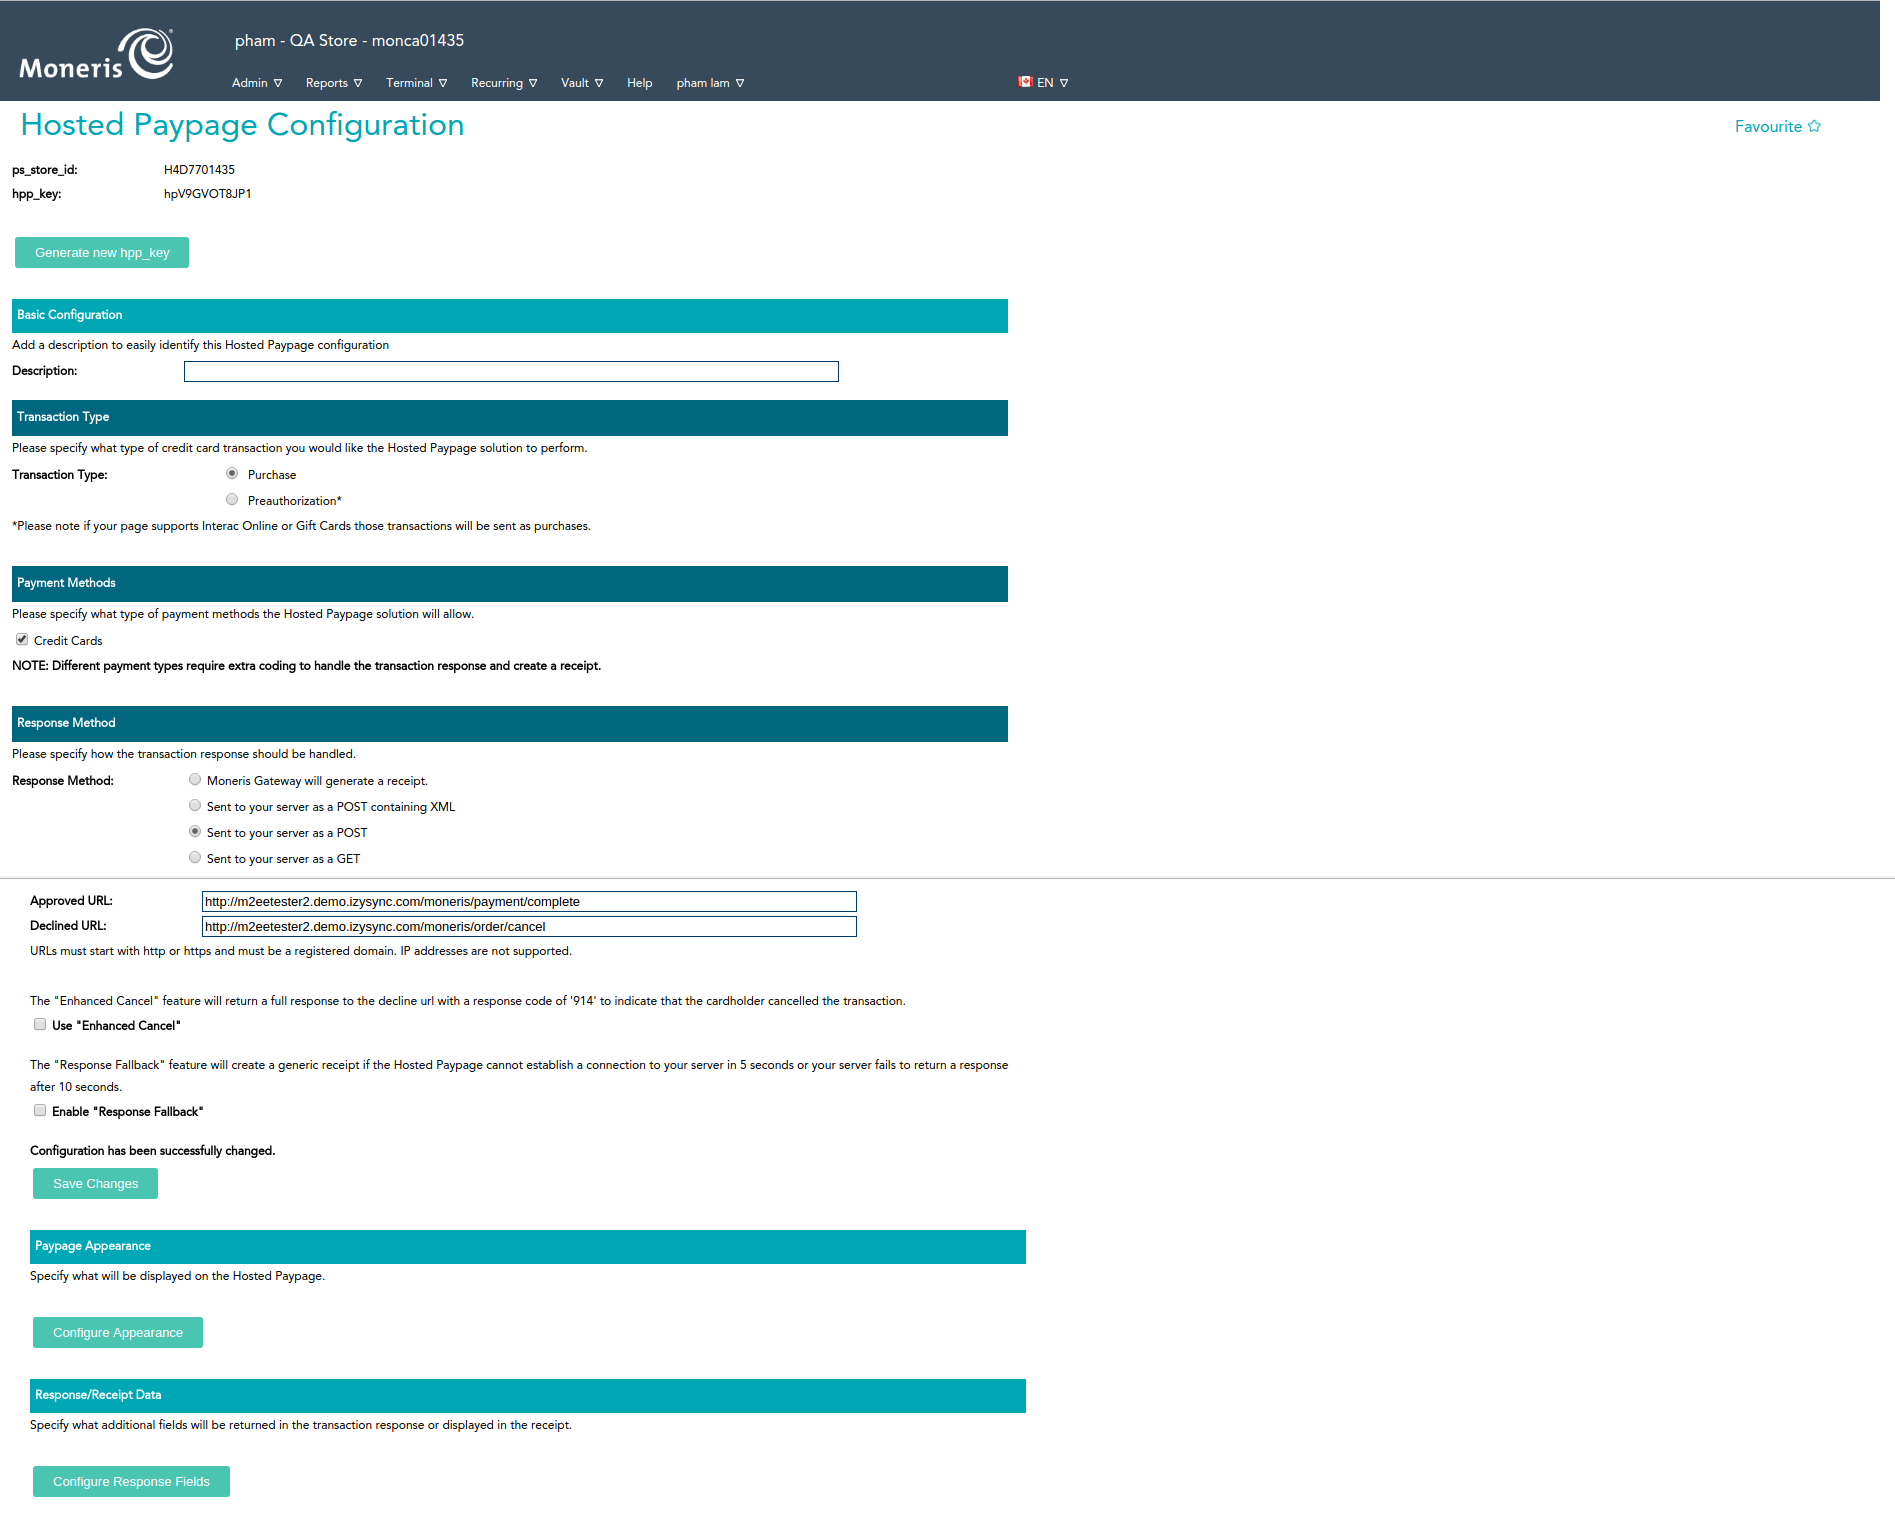
- HPP ID or PS STORE ID: The ps_store_id in the Hosted Paypage Pay page Configuration.
- HPP KEY: The hpp_key in the Hosted Paypage Pay page Configuration
- Approved URL: Use this URL when you configure your Moneris hosted paypagepay page
- Declined URL: Use this URL when you configure your Moneris hosted paypagepay page
- Cancel Button URL: Use this URL when you configure your Moneris hosted paypagepay page
![]() Note: Moneris Multiple Currency Pricing is not supported with Redirect Connection.
Note: Moneris Multiple Currency Pricing is not supported with Redirect Connection.
Click on Save Config button to save the configuration.
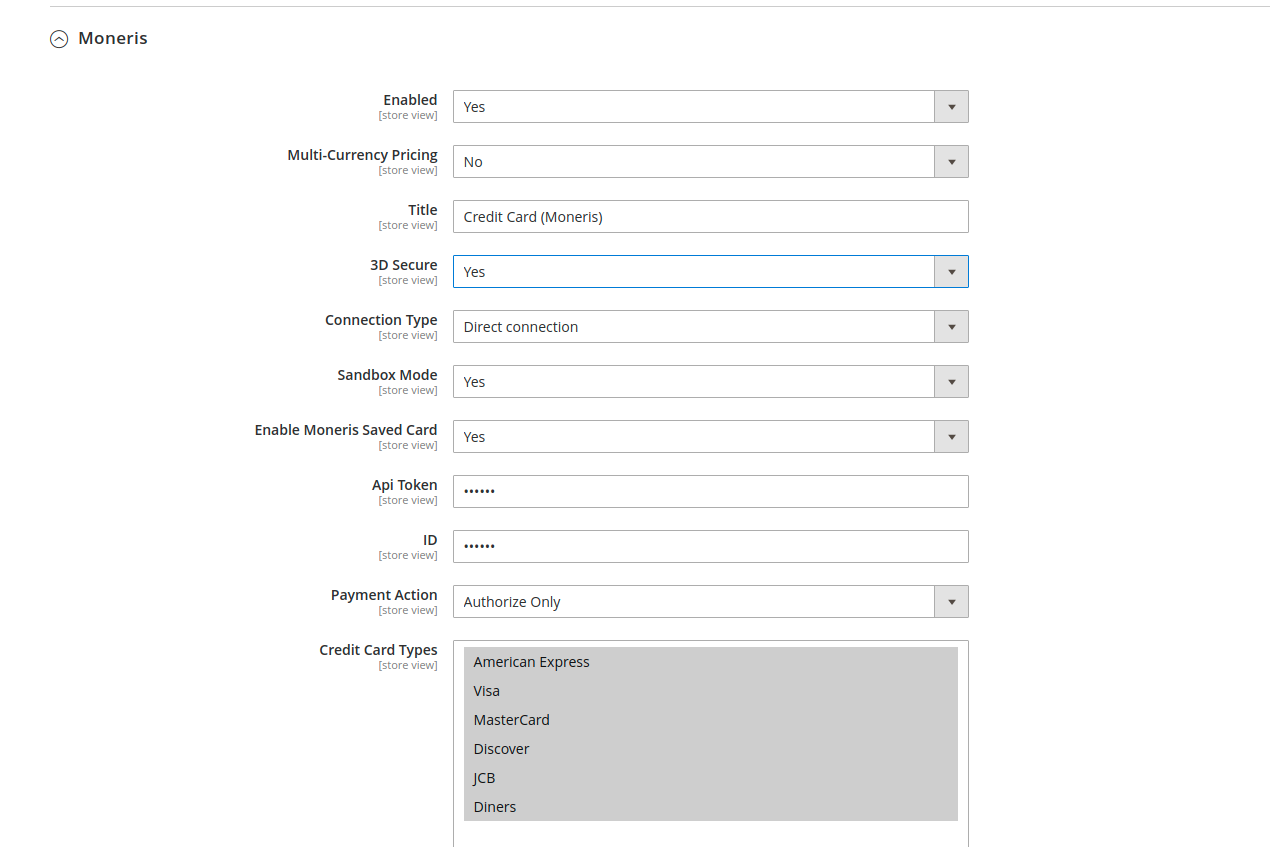
![]() Set up with Direct Connection:
Set up with Direct Connection:
- Enabled: Choose Yes to enable Moneris Payment
- Multi-Currency Pricing: Choose No to accept one kind of currency only
- Title: The name of the payment method that will be displayed on the checkout page
- Sandbox Mode: Turn this on if you use the test credentials
- Connection Type: Direct Connection
- Store ID: Your store ID or test Store ID
- API Token: the API Token you got from Moneris
- You can set the Payment Action to be Authorize and Capture or Authorize Only
- Authorize Only (Authorization): will check the card for validity but not charge the account yet until the order is approved and invoiced.
- Authorize and Capture(Sale): will charge the debit/credit card at the time of the order submission.
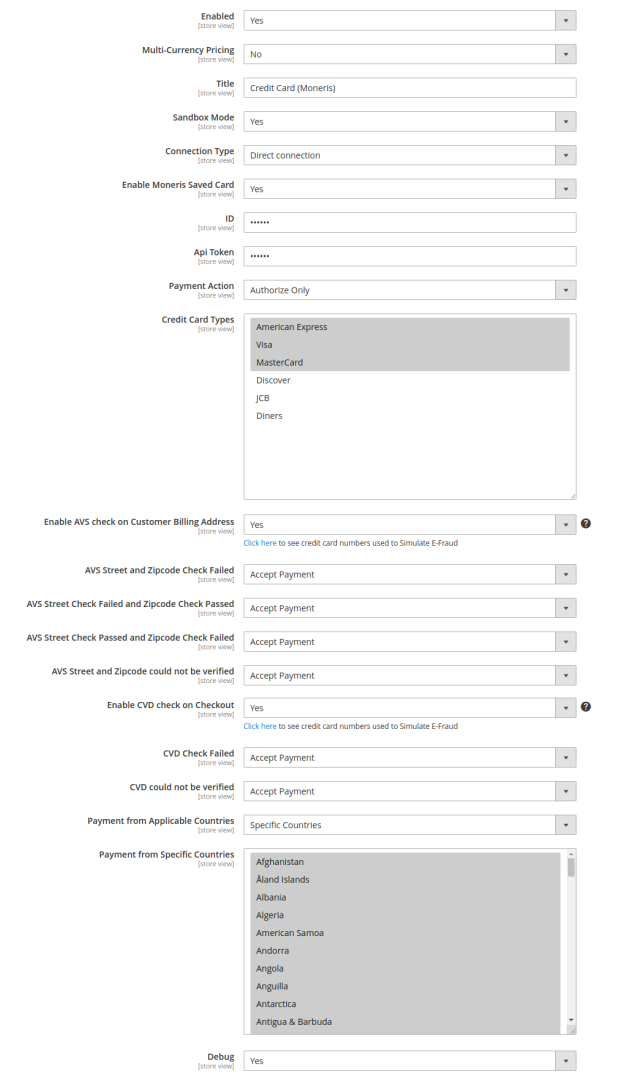
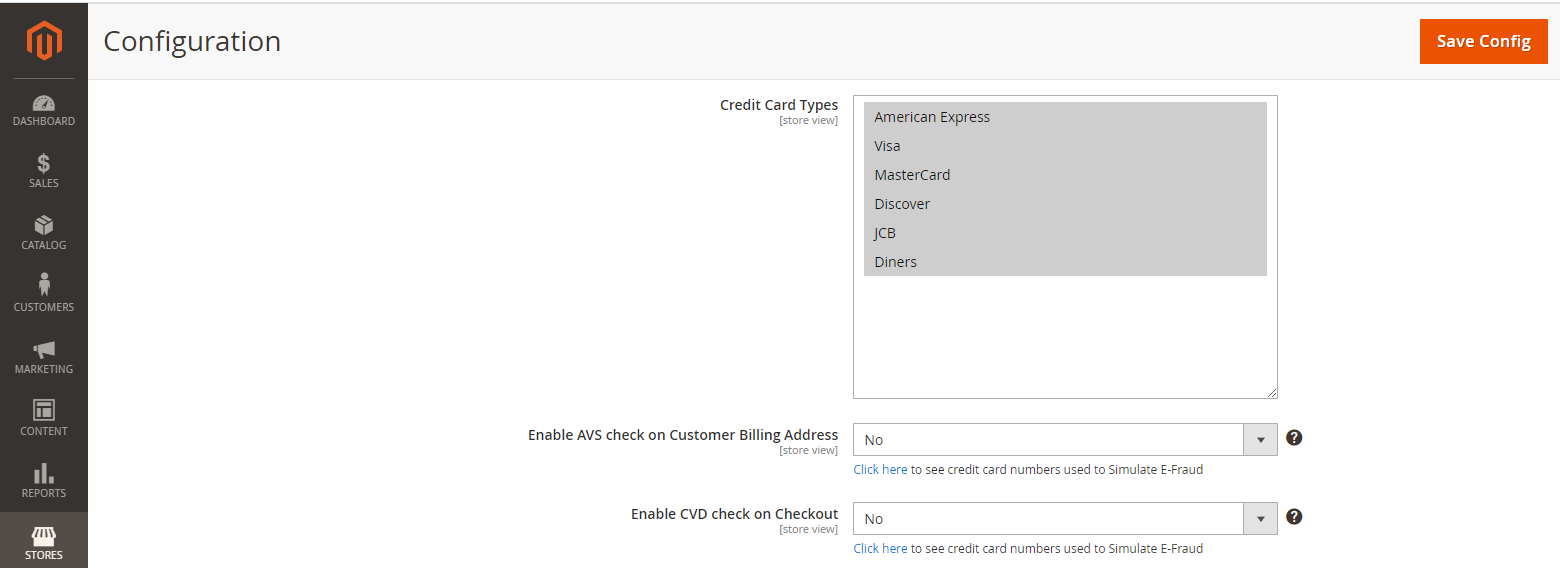
Credit Card Types: You can choose which credit card types you want by choosing one or more items.
- Enable AVS check on Customer Billing Address: By choosing Yes, you enable AVS check on customer billing, including Street Name, Street Number, Zip Code.
- AVS Street and Zipcode Check Failed: In case the AVS and Zipcode Check failed, you can choose 1 among 3 options: Accept Payment, Reject Payment, or Hold Payment.
- AVS Check Failed and Zipcode Check Passed: In case the AVS Check Failed but Zipcode Check Passed, you can choose 1 among 3 options: Accept Payment, Reject Payment, or Hold Payment.
- AVS Check Passed and Zipcode Check Failed: In case the AVS Check Passed but Zipcode Check Failed, you can choose 1 among 3 options: Accept Payment, Reject Payment, or Hold Payment.
- Enable CVD Check on Checkout: Click here to see credit card numbers used to Simulate E-Fraud
- CVD Check Failed: In case the CVD Check failed, you can choose 1 among 3 options: Accept Payment, Reject Payment, or Hold Payment.
- CVD could not be verified: In case CVD could not be verified, you can choose 1 among 3 options: Accept Payment, Reject Payment, or Hold Payment.
- 3D Secure: Enable 3D secure to verify the Customer’s card, thereby preventing payment fraud
![]() Testing 3-D Secure (MPI) Solutions
Testing 3-D Secure (MPI) Solutions
May only be tested in the following test stores on Moneris Gateway Merchant Resource Center
Please fill in the information as the notice section, just replace the store ID
CANADA US
Store ID: moneris
Api Token: hurgle
![]() Note:
Note:
- Only use 3D Secure with connection type direct and Multi-Currency Pricing disabled
- Visa, MasterCard, and American Express cards are supported for customers who have enabled 3DS
Cardholder Name will be required when 3DS is enabled
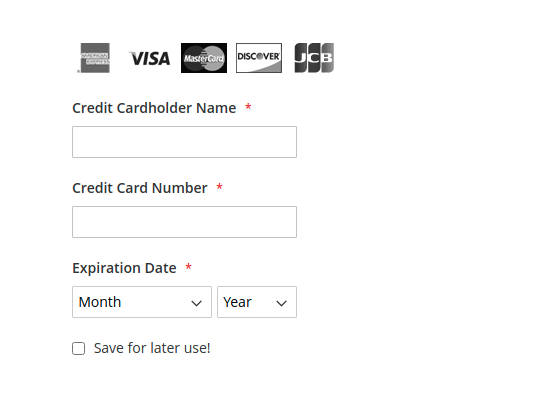
After entering the card information, the system will identify potential risks.
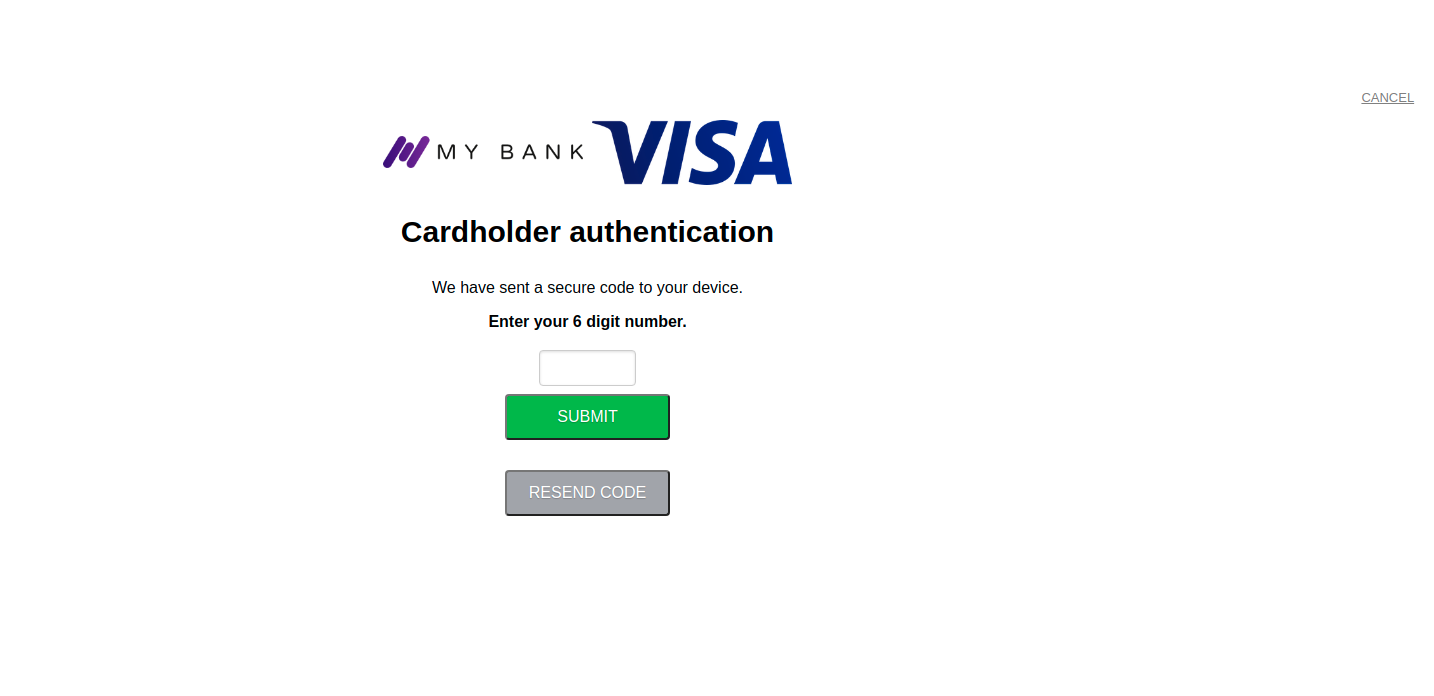
- For low-risk transactions, customers will check out as normal.
- For high-risk transactions, the system will redirect to the authentication page to request an extra step for authentication.
A one-time password (OPT) sent to the customer's mobile number, will be required for verification.
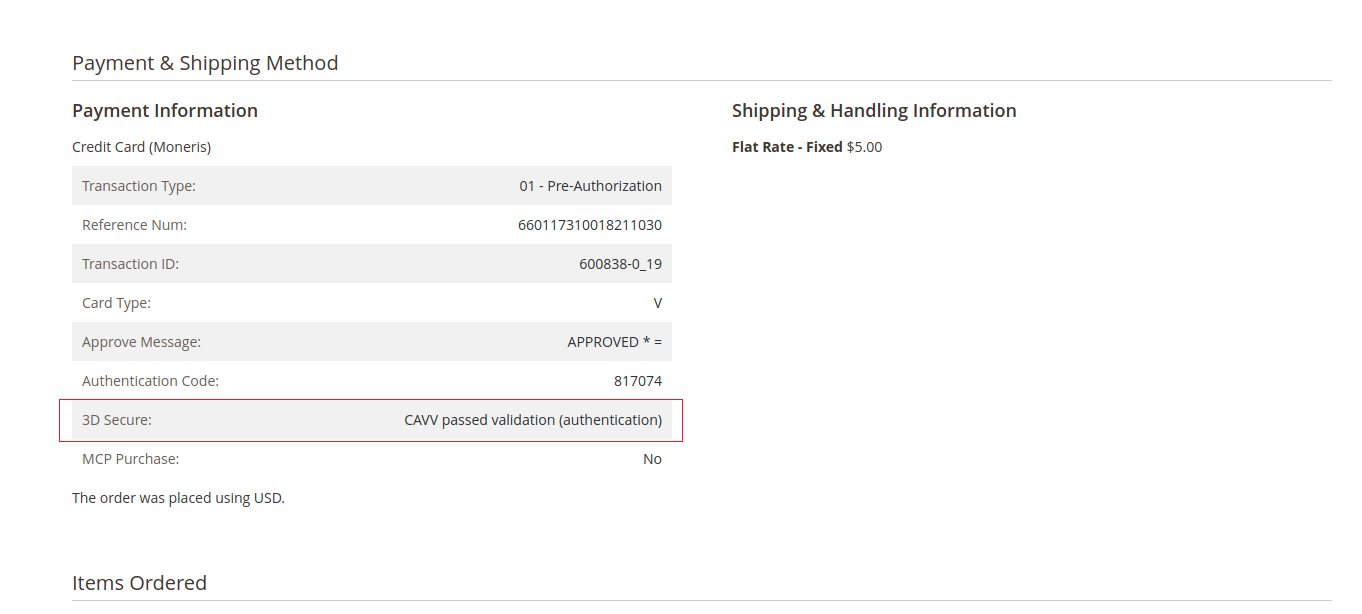
After the transaction is successful, the CAVV will be saved.
![]() Setup with Kount:
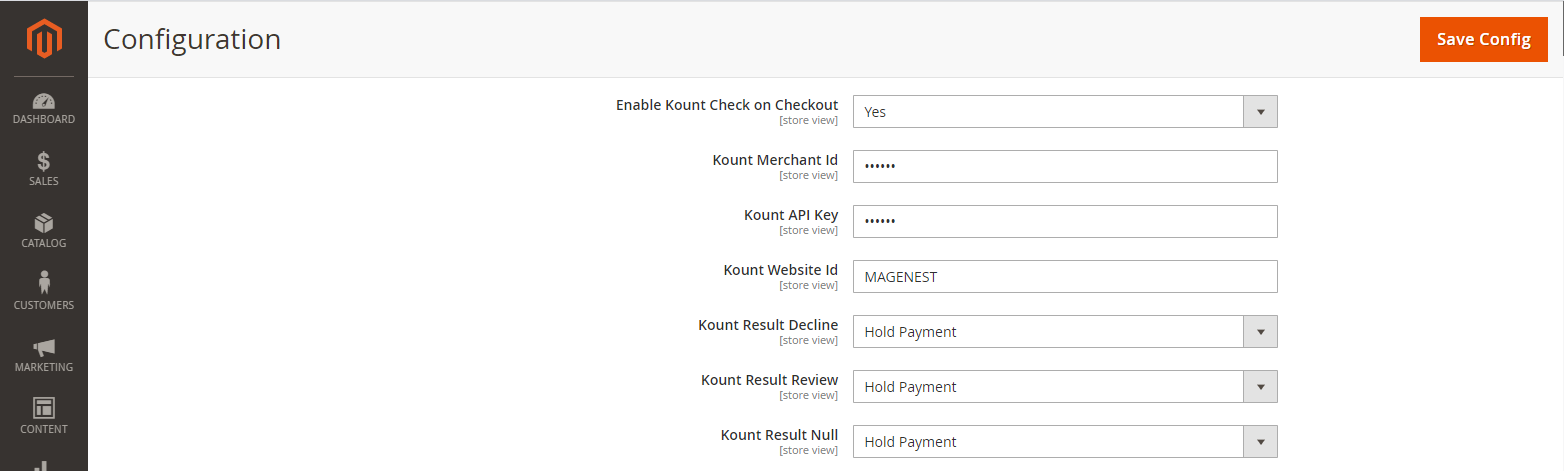
Setup with Kount:
- Enable Kount: Choose Yes to enable Kount
- Kount Merchant Id, Kount API Key, Kount Website Id
![]() For merchants using the Moneris Kount Essential solution please email [email protected] to obtain your production Kount Merchant ID, Kount API Key, and website ID (SITE ID) credentials.
For merchants using the Moneris Kount Essential solution please email [email protected] to obtain your production Kount Merchant ID, Kount API Key, and website ID (SITE ID) credentials.
![]() For merchants using the Moneris Kount Enterprise solution, your Kount credentials (Kount Merchant ID, Kount API Key, and website ID) will be provided by your Kount Client Success Manager.
For merchants using the Moneris Kount Enterprise solution, your Kount credentials (Kount Merchant ID, Kount API Key, and website ID) will be provided by your Kount Client Success Manager.
- Kount Decline: Once the Authorization Status returned to the merchant from the processor is Decline, you can choose 1 among 3 options:
Accept Payment / Reject Payment / Hold Payment
- Kount Review: Once the Authorization Status returned to the merchant from the processor is Review, you can choose 1 among 3 options:
Accept Payment / Reject Payment / Hold Payment
- Kount Null: Once the Authorization Status returned to the merchant from the processor is Review, you can choose 1 among 3 options:
Accept Payment / Reject Payment / Hold Payment
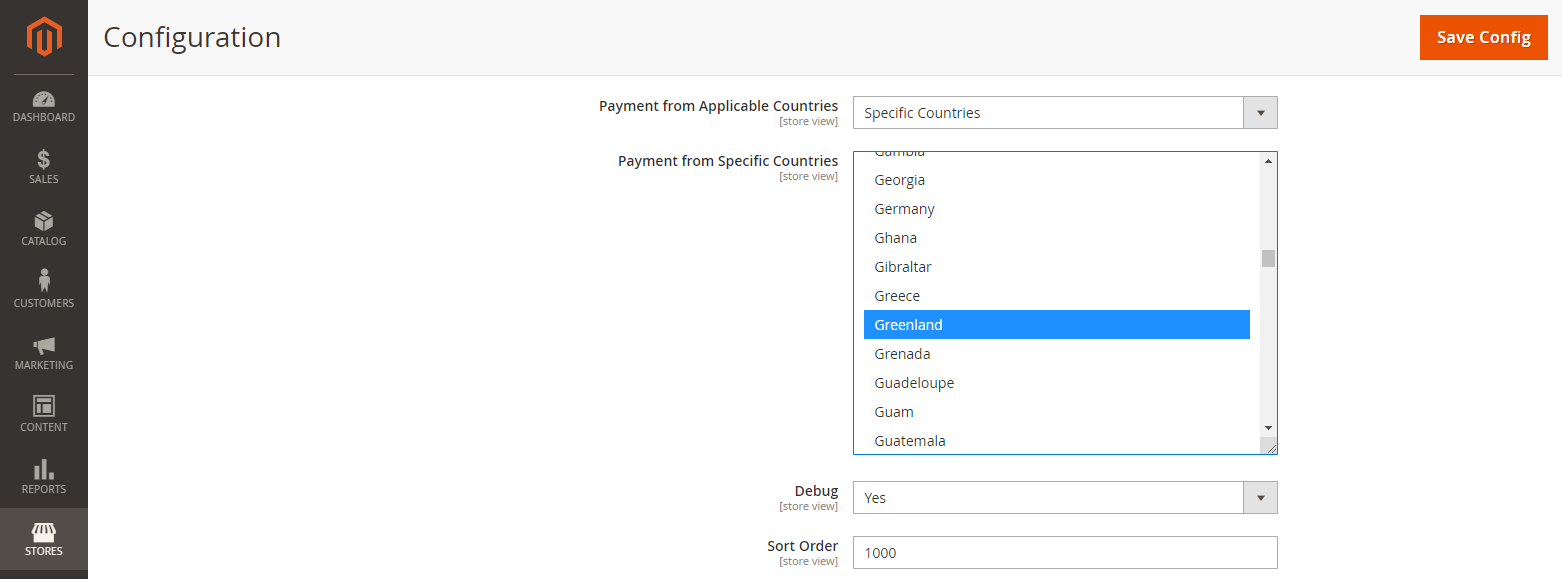
- Payment from Applicable Countries:
- All allowed countries: Enable all allowed countries to make payment.
- Specific Countries: Restrict some countries by unselecting them from the Payment from Specific Countries.
- Debug: Choose Yes to save request and response information to file log
Sort Order: The order of the payment method that will be displayed on the checkout page.
Main Functions
Easily Checkout Using Credit Card
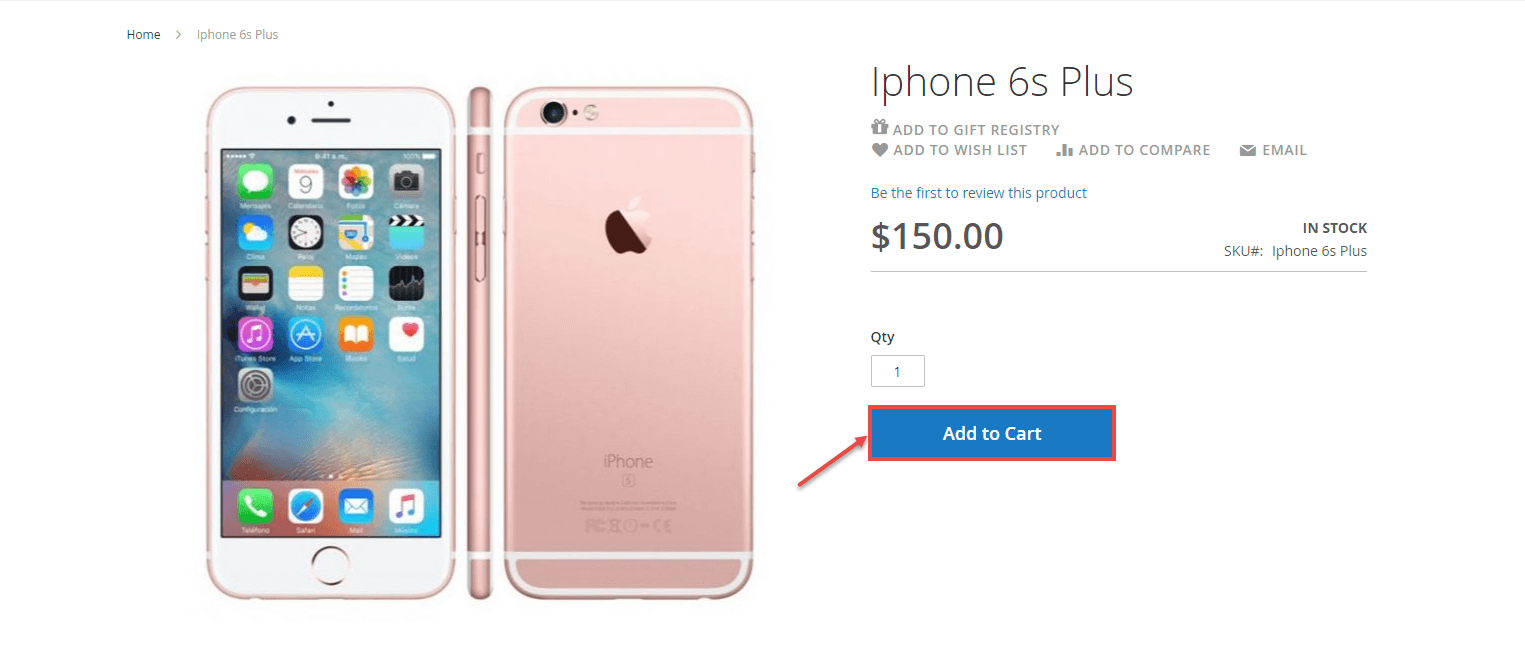
At front end, customer can add the items into shopping cart by clicking the Add to Cart button.
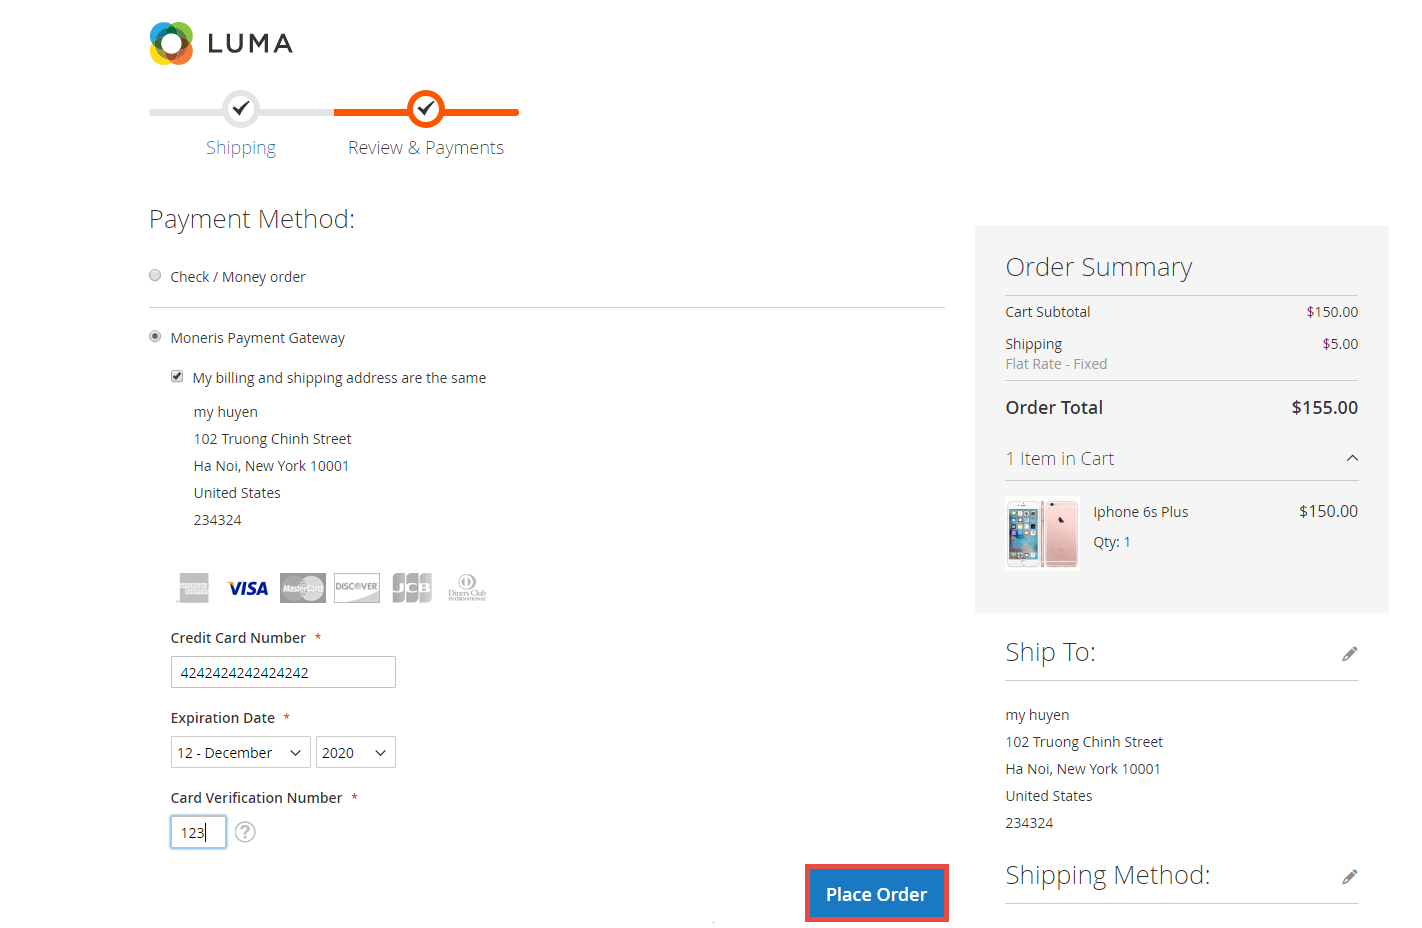
Then, go to the checkout page. Customer fills in his/her shipping address and selects the payment method.
...
Fill in your credit card information, then click Place Order to finalize the payment.
![]() Checkout Redirect Connection Method:
Checkout Redirect Connection Method:
...
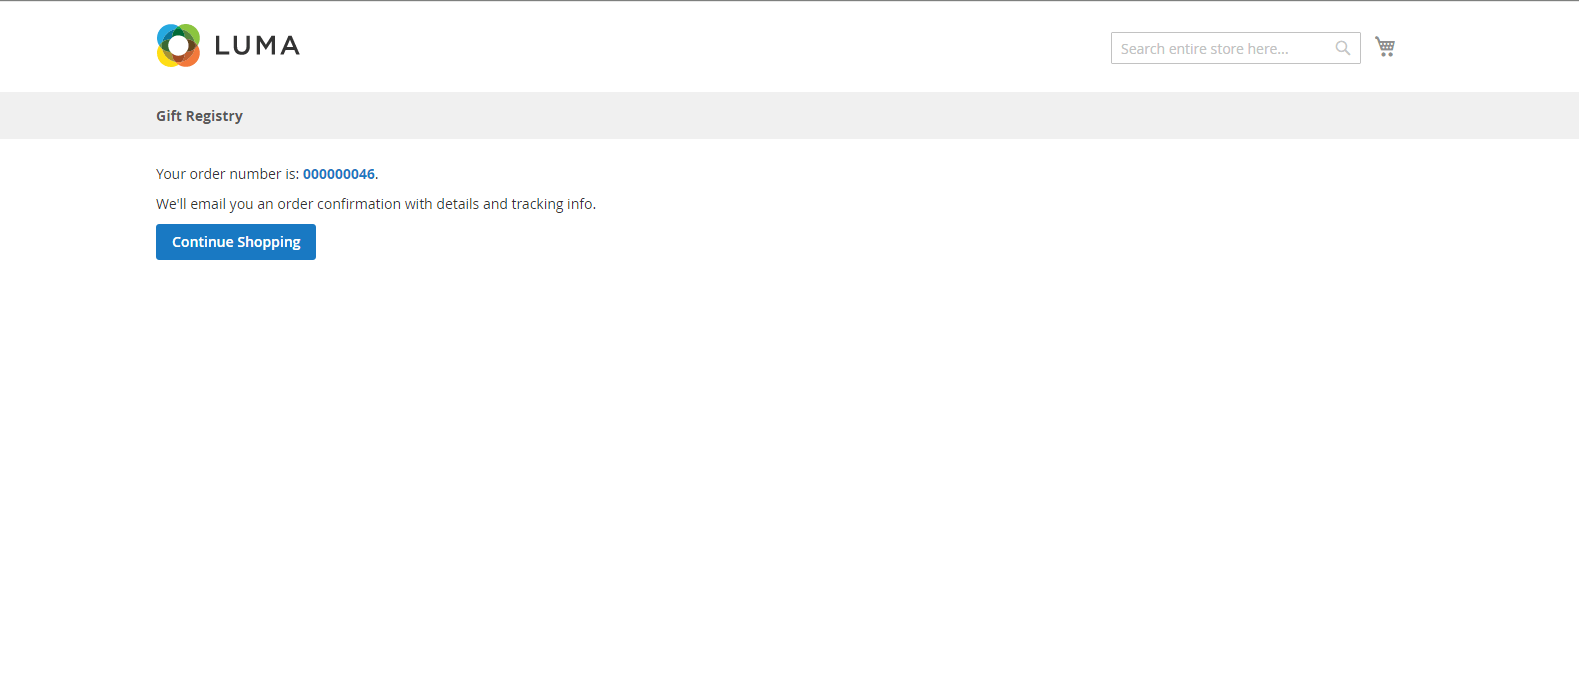
Click Continue to place the order.
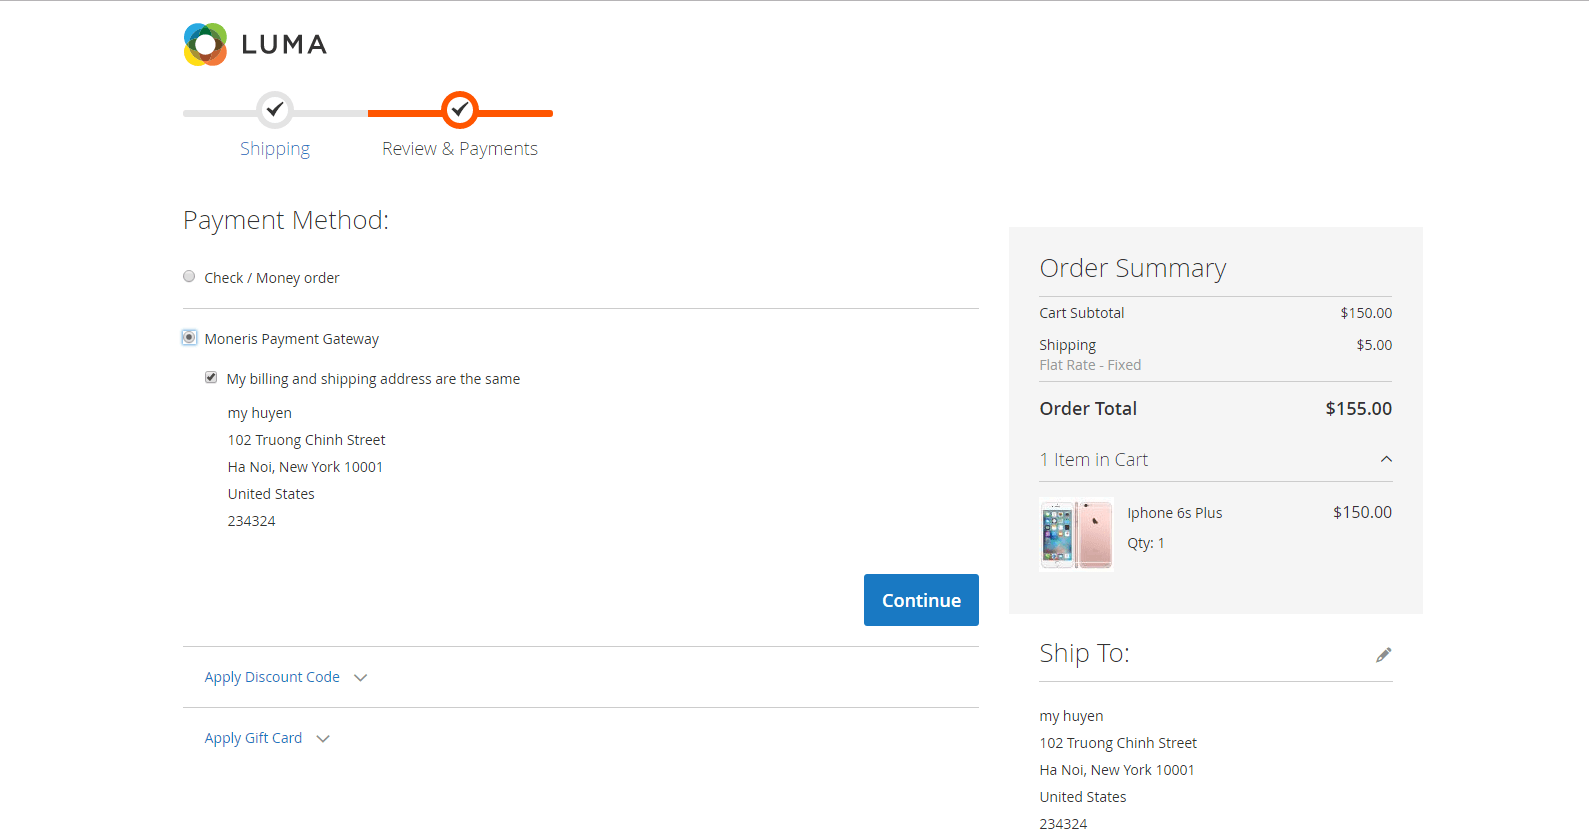
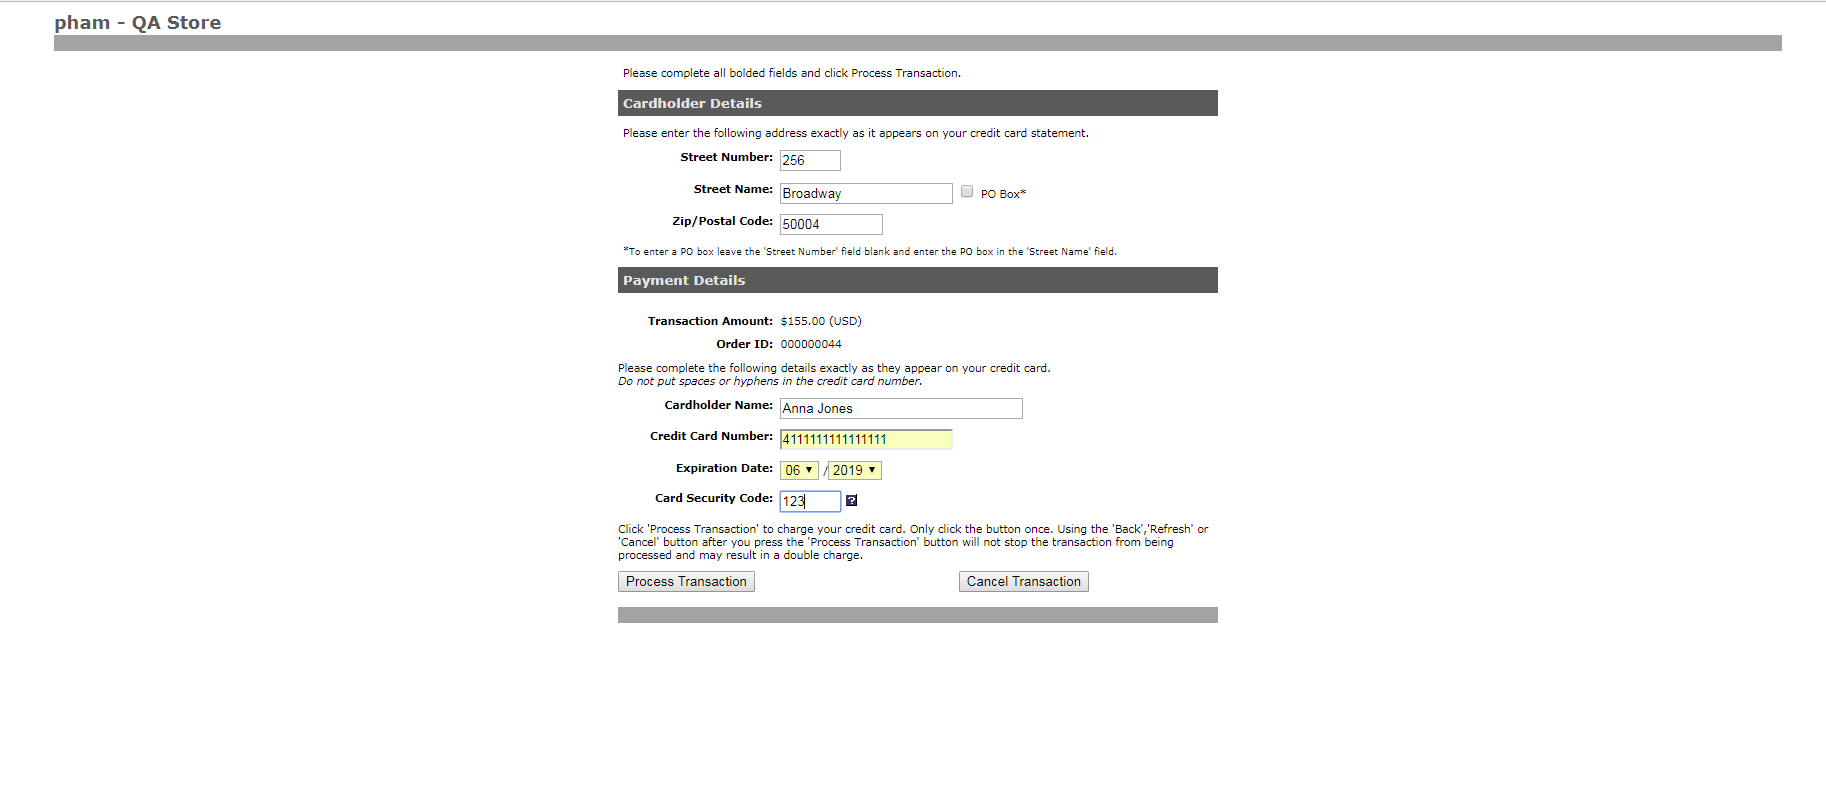
It redirects the customer to Moneris page with a credit card form. Customer fills in the info then click Process Transaction to finalize the payment.
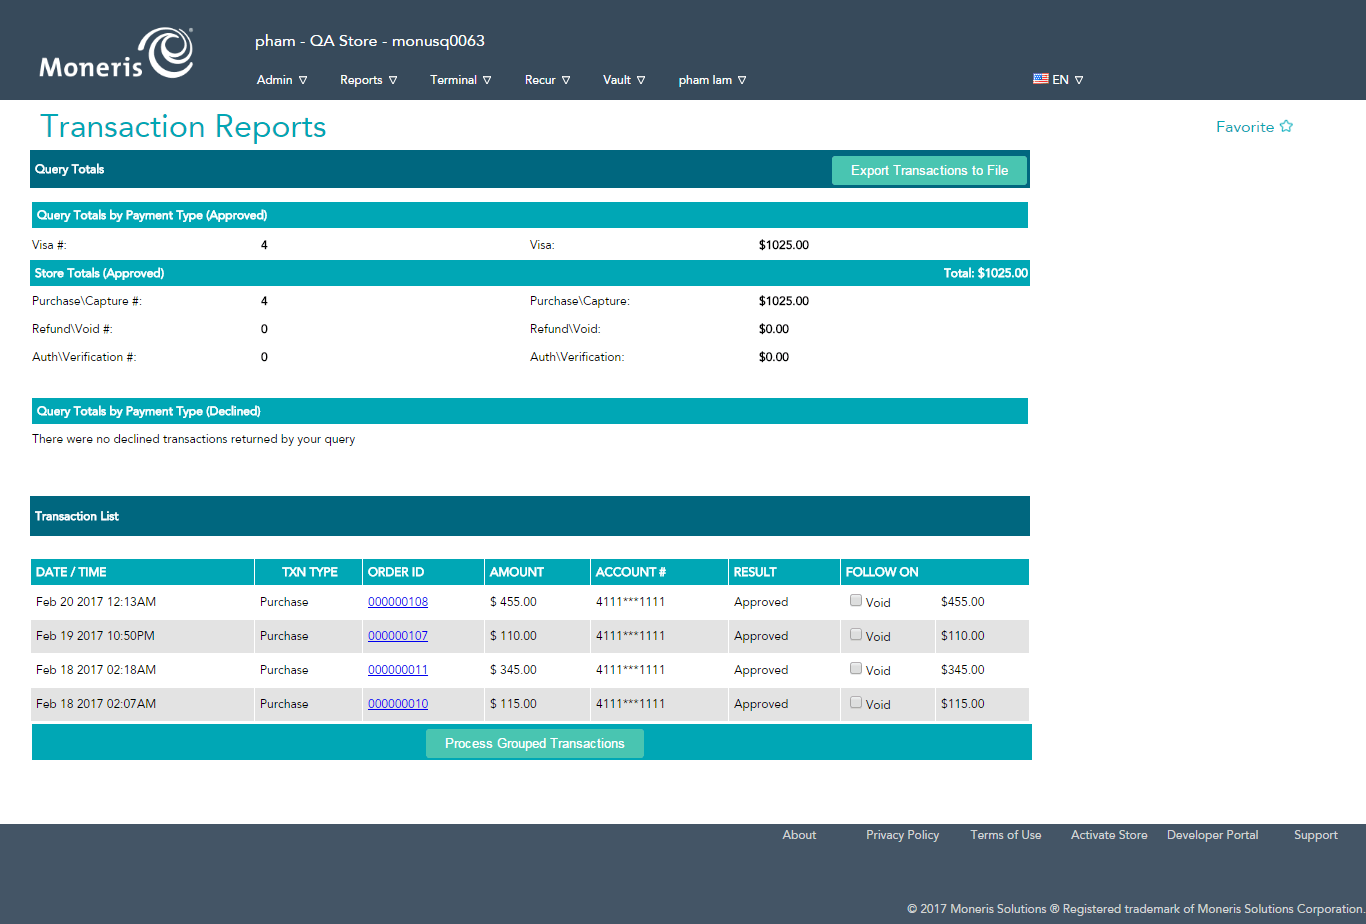
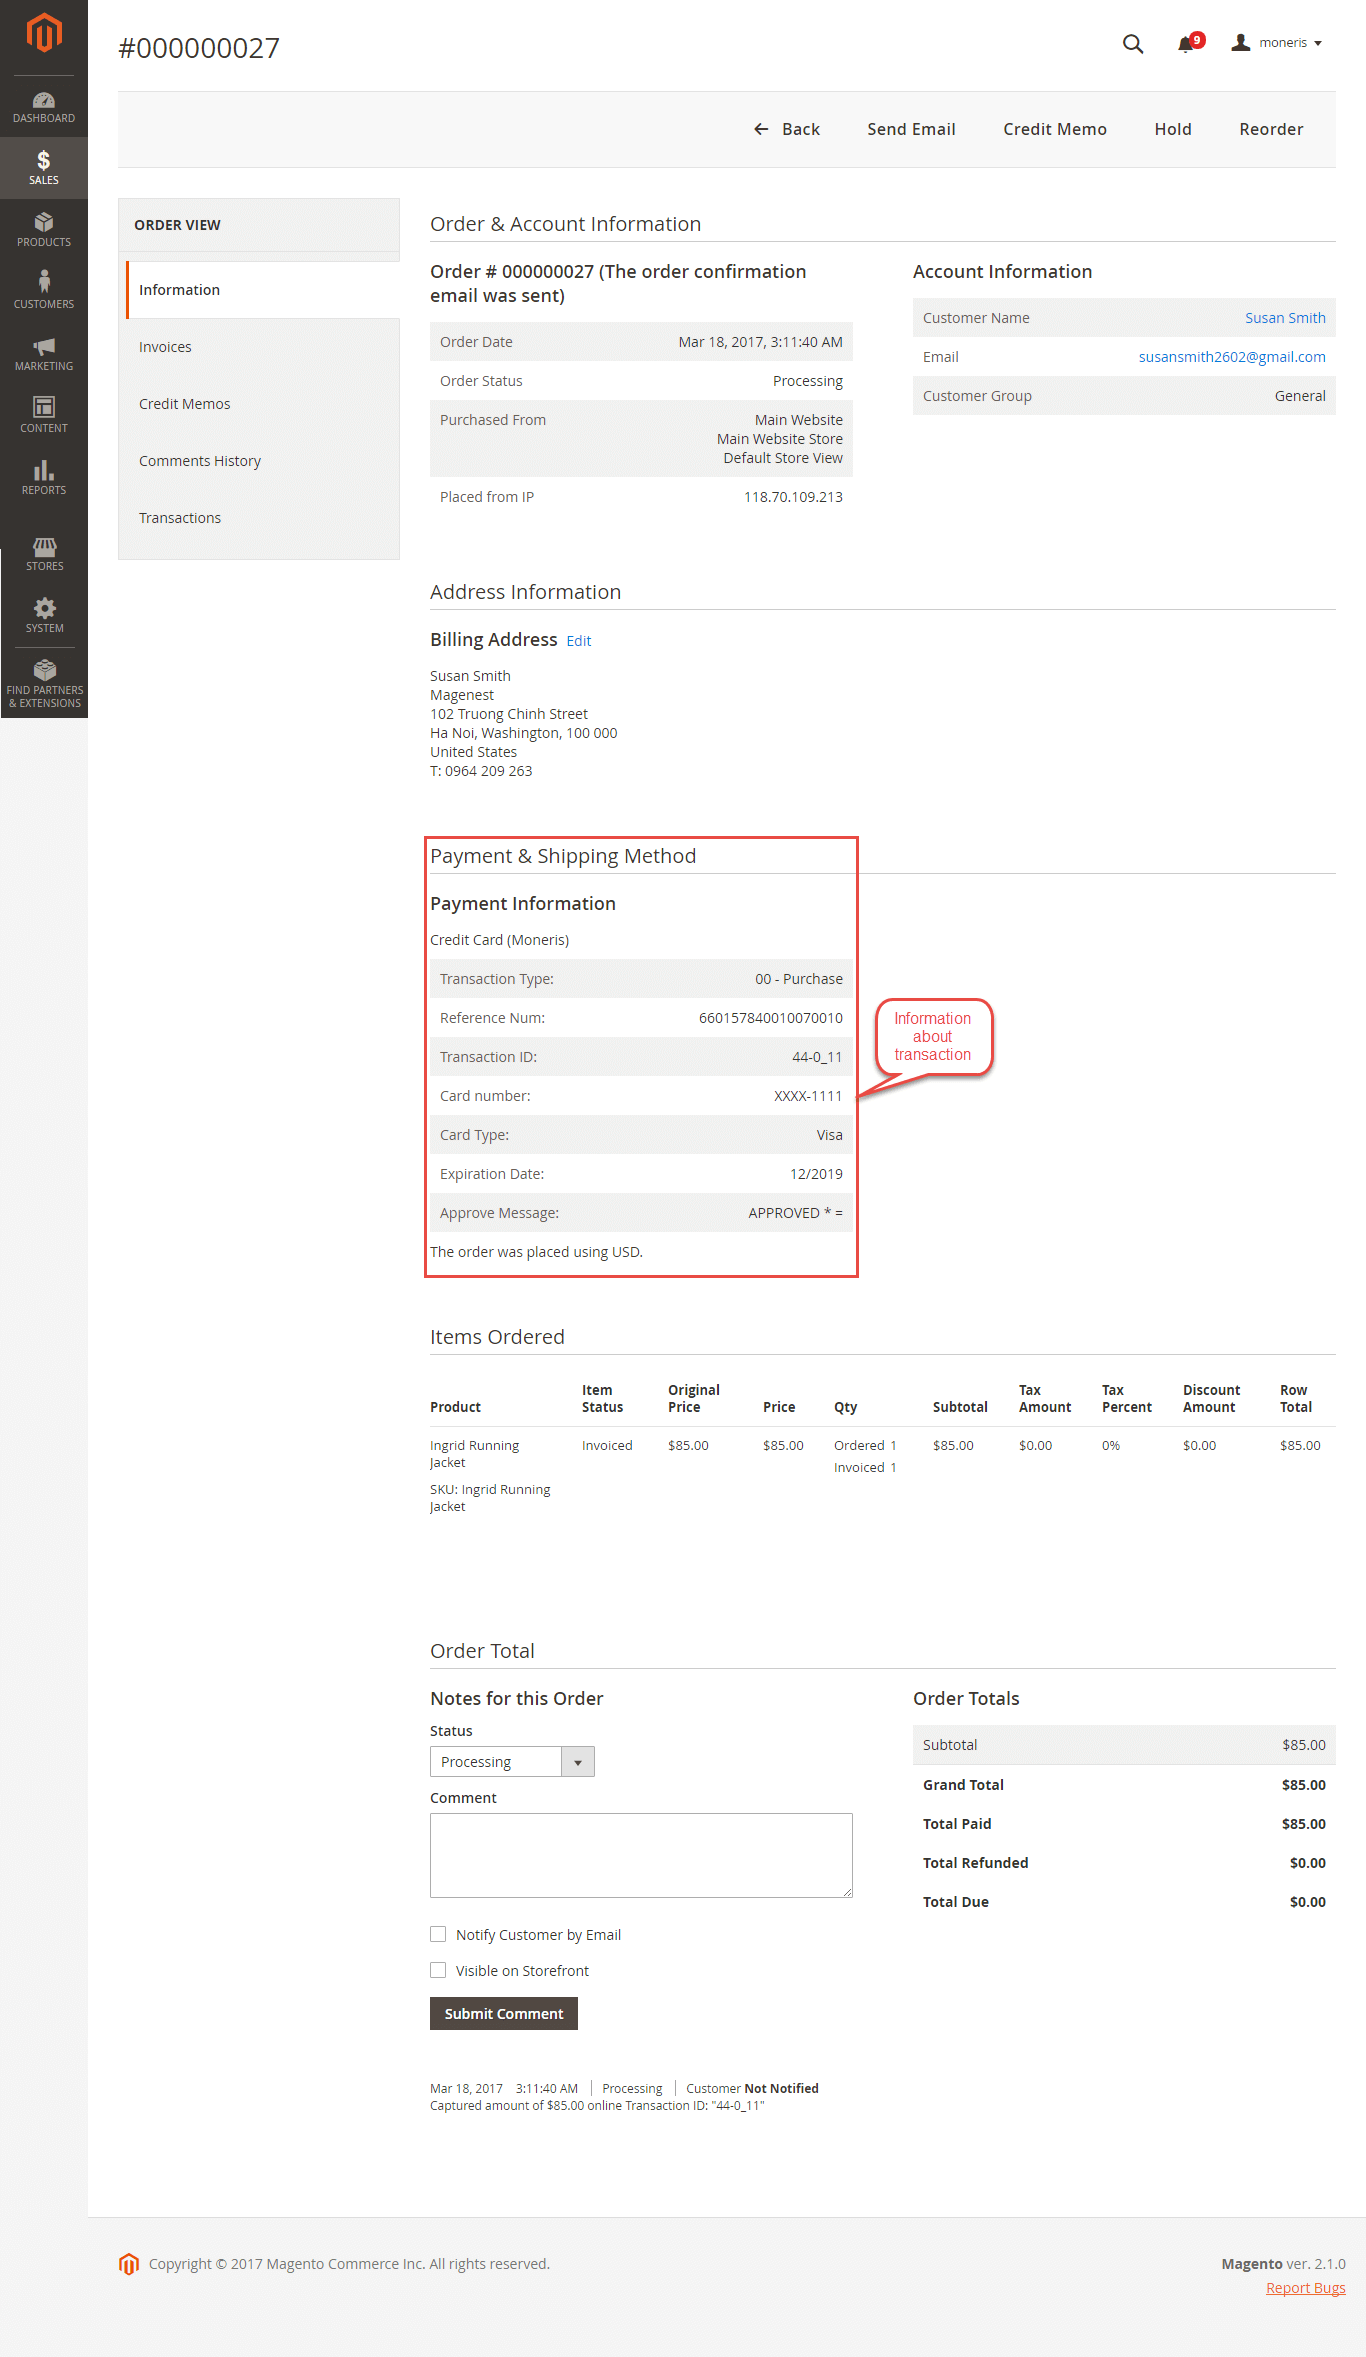
Customer Customers can easily access Moneris Transaction Reports online to view the Transactions.
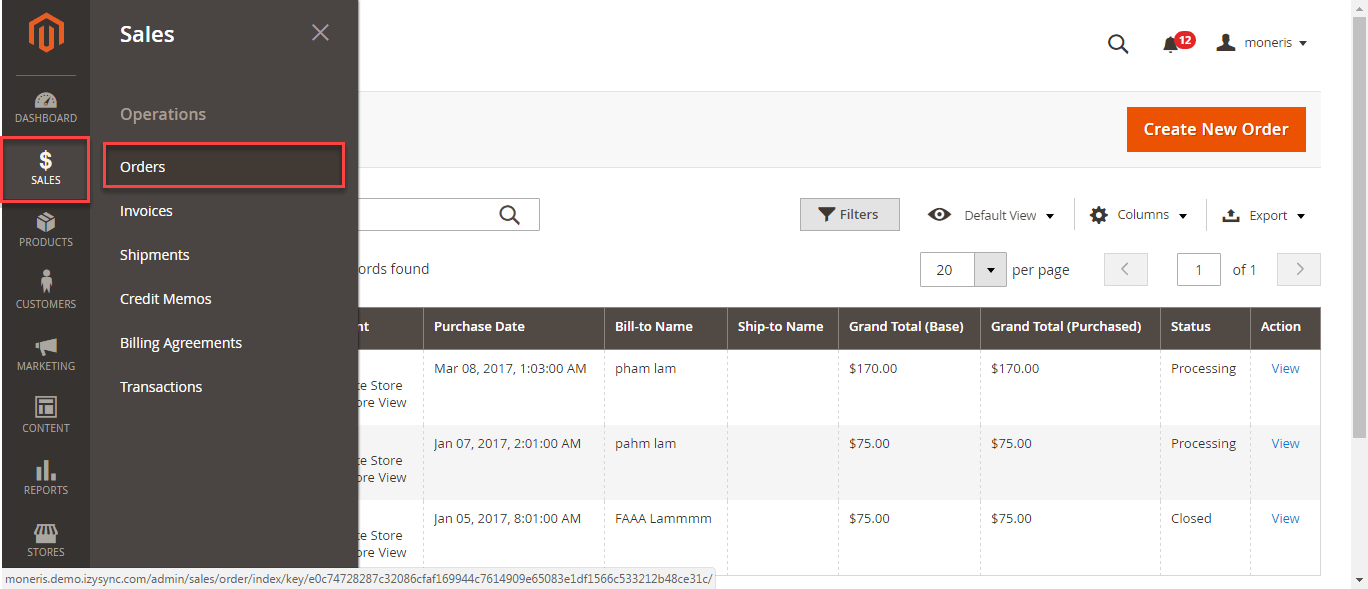
Or go to Backend >Sales >Orders then choose View to see the details about an order.
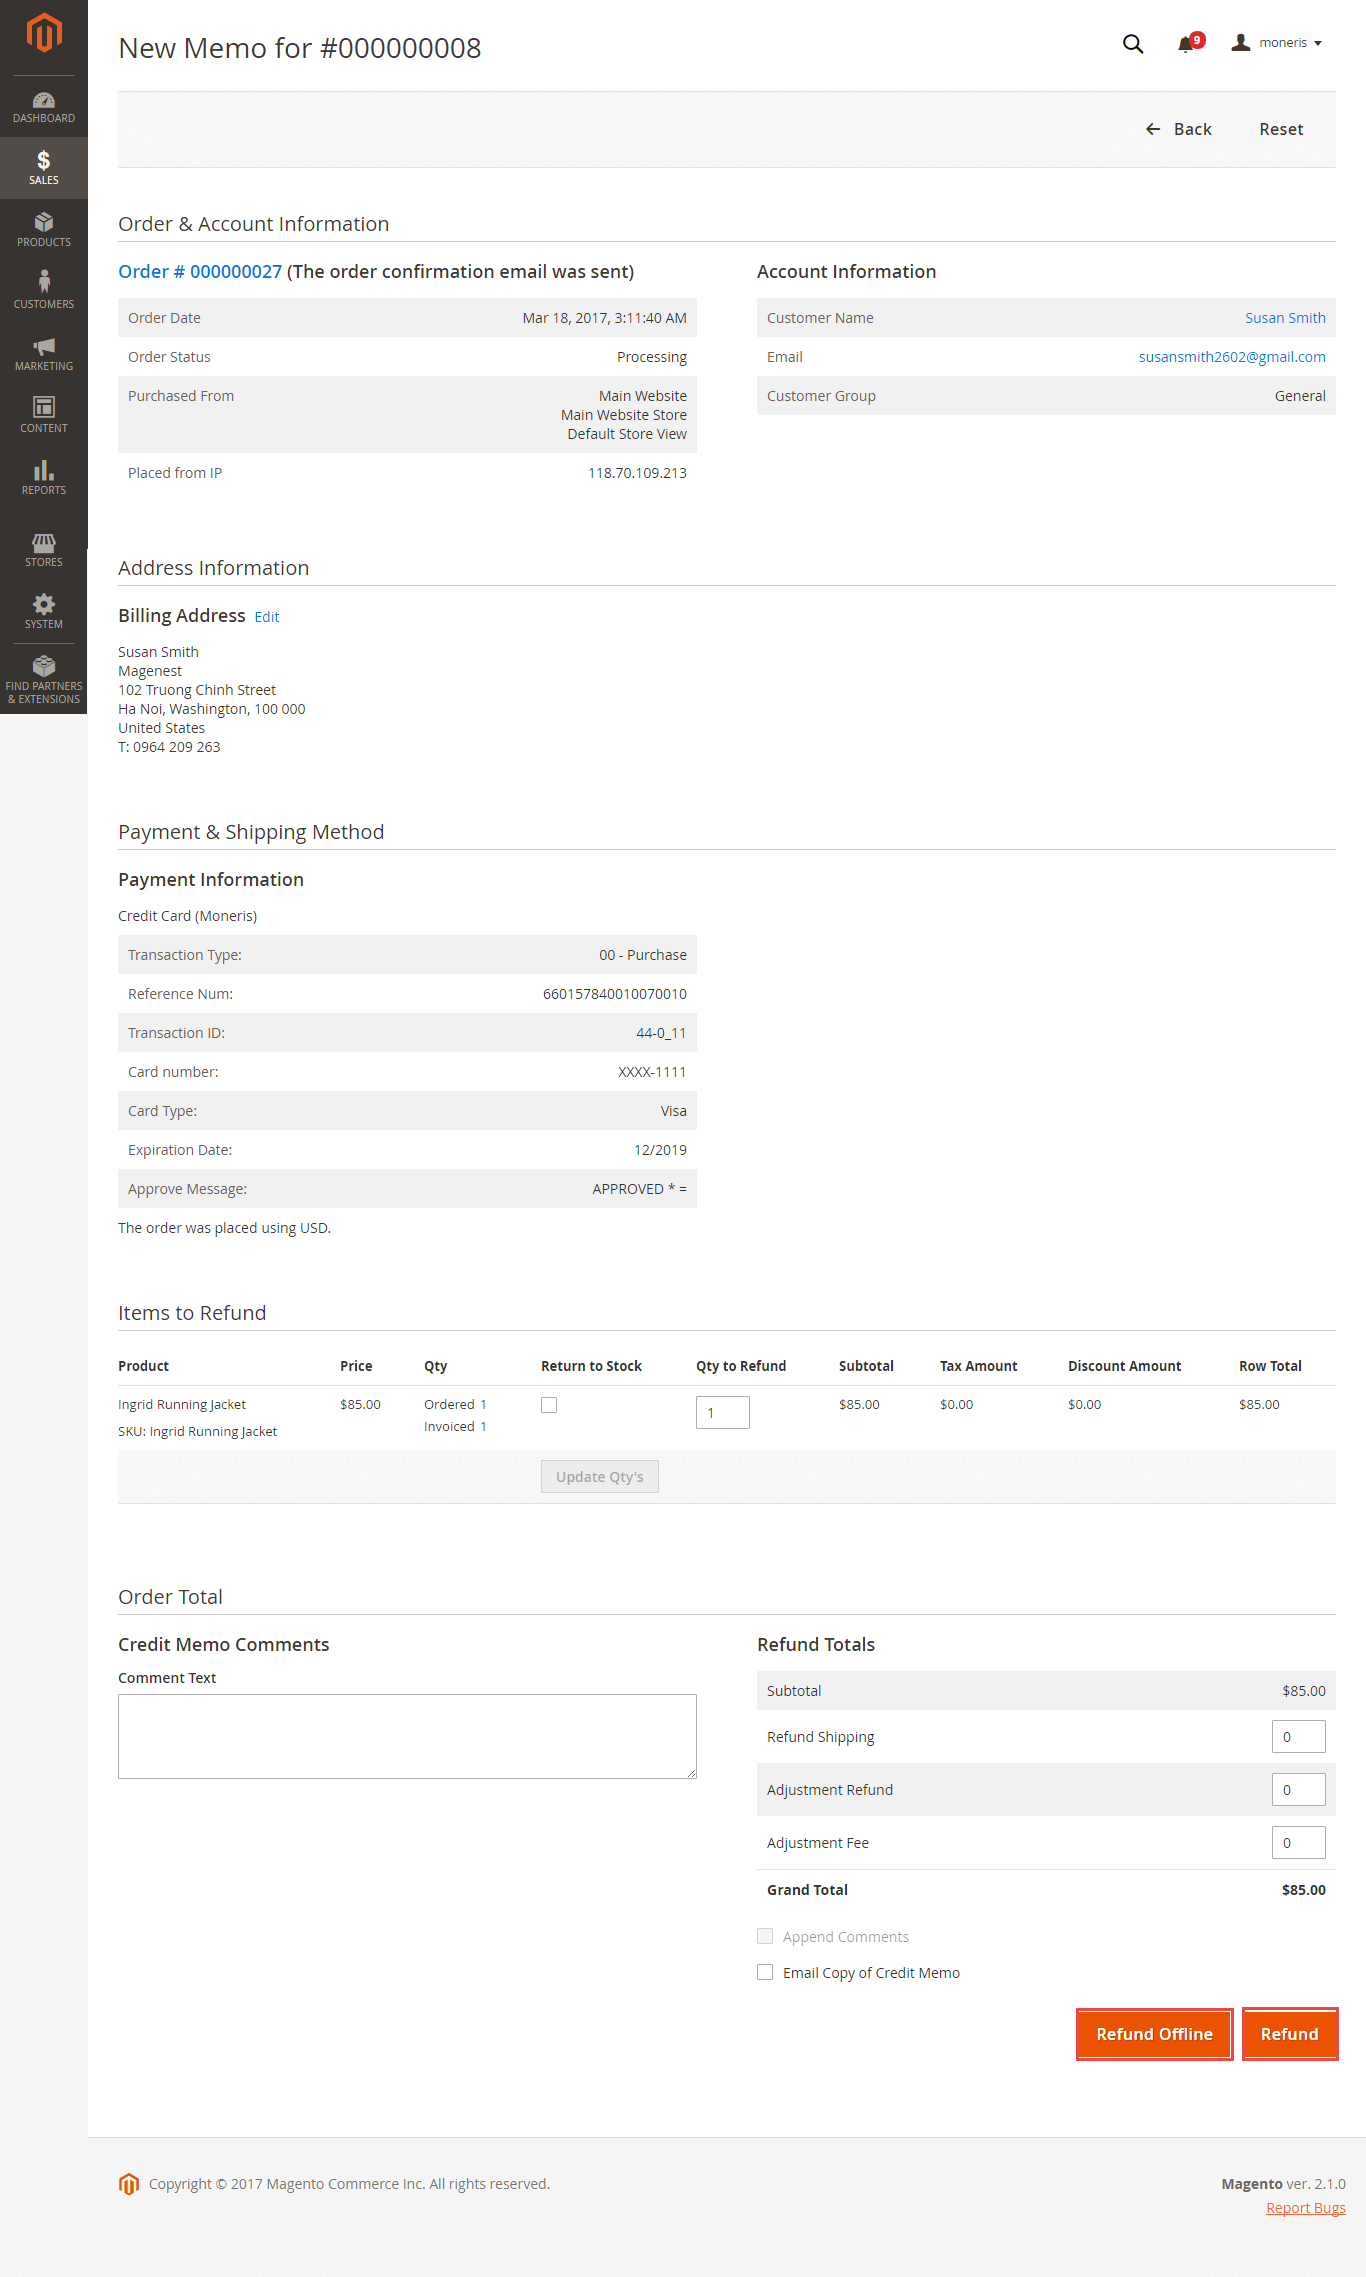
![]() Partial or total refund:
Partial or total refund:
...
About partial refund, it applies for many frequencies and up to out of products.
Update
- When a new update is available, we will provide you with a new package containing our updated extension.
- You will have to delete the module directory and repeat the installing steps above.
- Flush the config cache. Your store and newly installed module should be working as expected.
...