...
Please follow the step in the video here to set up the environment and connection:
https://www.useloom.com/share/ed648f8241974c6cbd95a27766927a73
Widget Connector width 800 url https://www.useloom.com/share/ed648f8241974c6cbd95a27766927a73
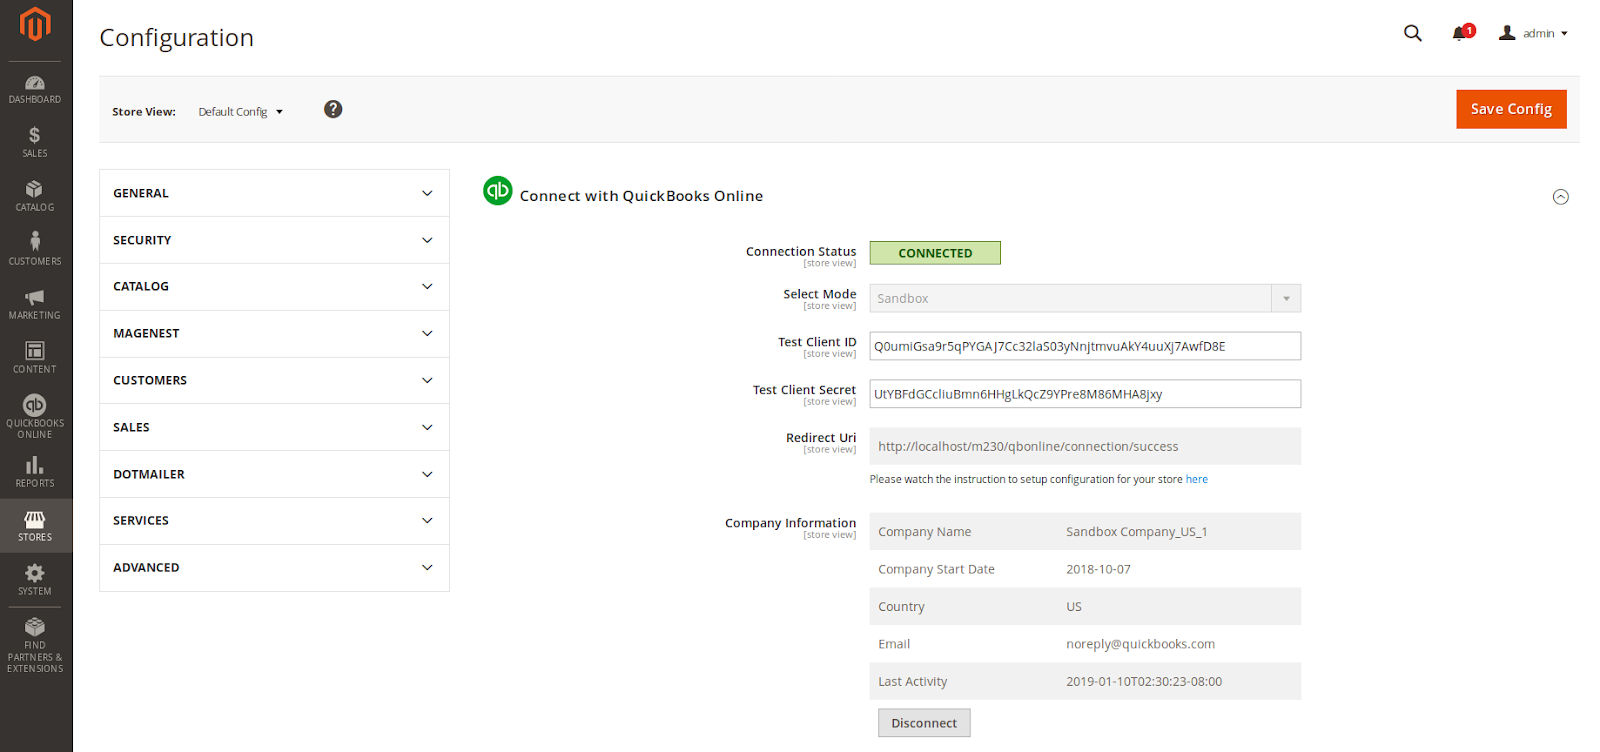
When connecting successfully, the backend page will be displayed as below. Click on Save Config button before continuing. This will help you avoid making the error.
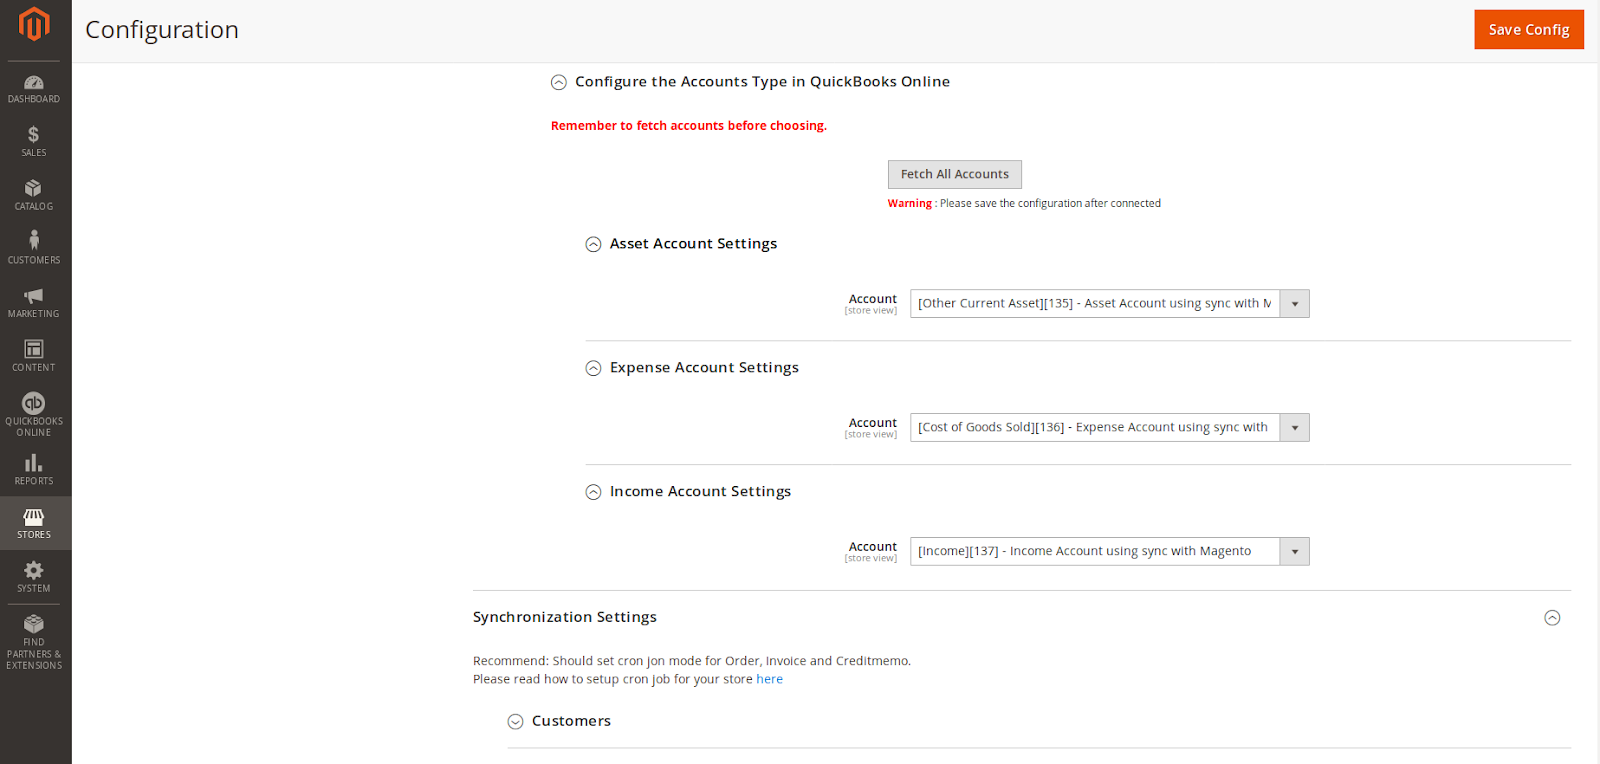
Then, admins need to navigate to the Configure the Accounts Type in QuickBooks Online section and expand it.
Admins will need to set three account types (Asset Account Settings, Expense Account Settings and Income Account Settings) by clicking on the Fetch All Accounts button.
Then, the accounts will be fetched. If accounts are not automatically selected, admin need to select accounts from the drop-downs:
- Asset Account: an account with ‘Other Current Asset’ type
- Expense Account: an account with ‘Cost of Goods Sold’ type
- Income Account: an account with ‘Income’ type
![]() After changing company, you have to sync accounts, tax codes and payment methods again
After changing company, you have to sync accounts, tax codes and payment methods again
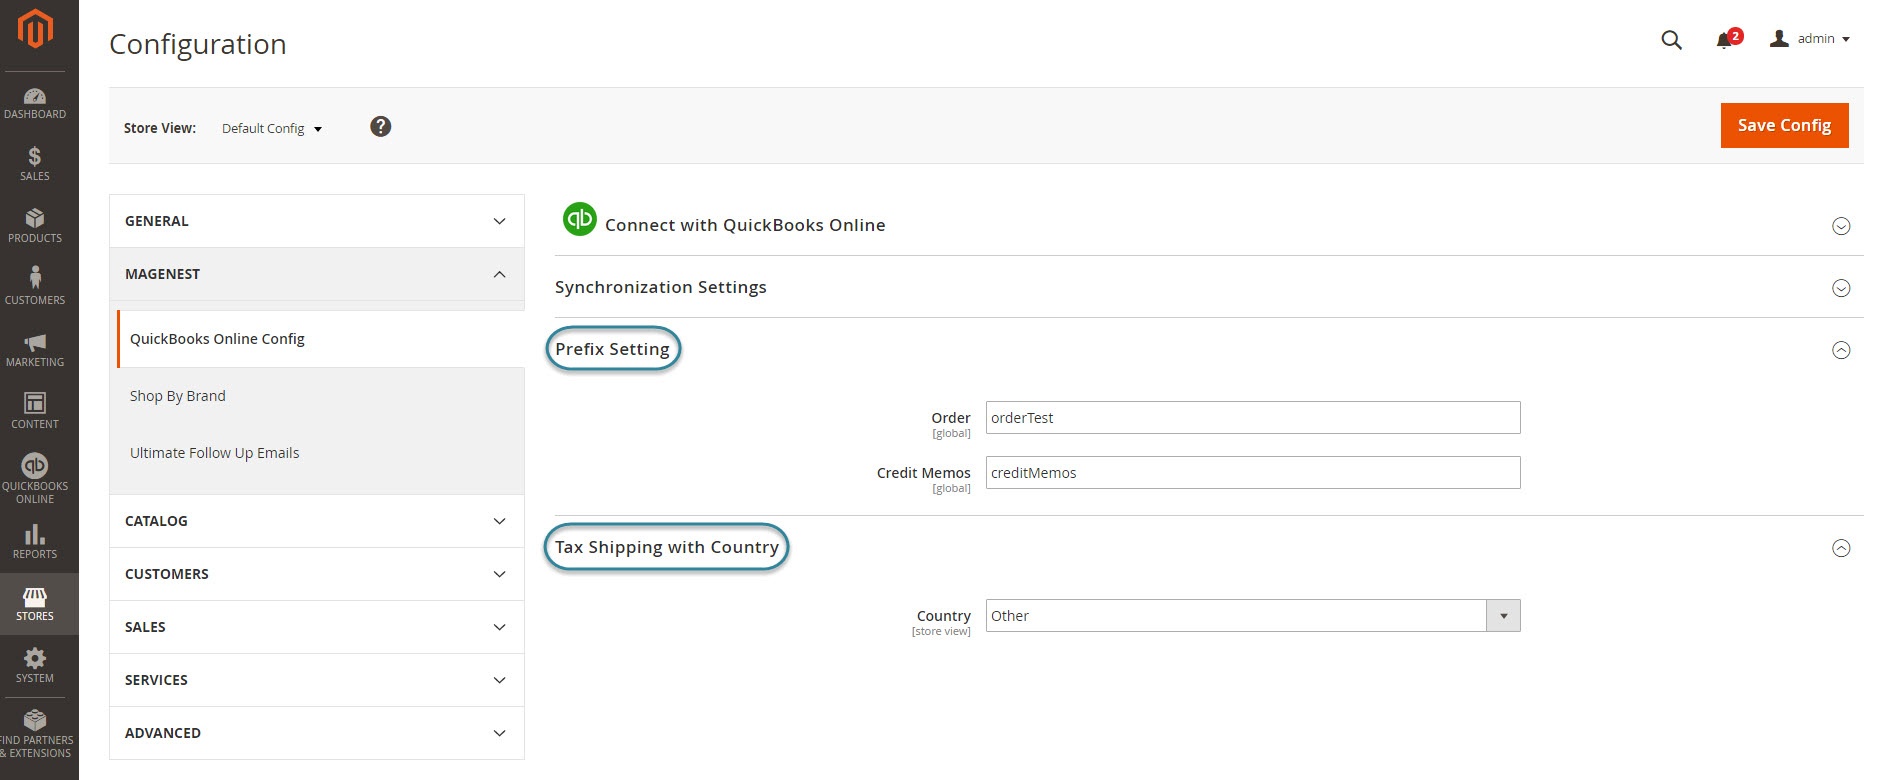
Finally, admins go to Prefix Settings and Tax and Country Settings section and expand them.![]() Prefix Settings: In order to make sure that the synchronization process works correctly, admin should set a prefix for Invoice and Credit Memo, to differentiate between transactions synced from Magento and created on QBO. On QBO Company Settings -> Sales -> Use Custom Transaction number should be OFF.
Prefix Settings: In order to make sure that the synchronization process works correctly, admin should set a prefix for Invoice and Credit Memo, to differentiate between transactions synced from Magento and created on QBO. On QBO Company Settings -> Sales -> Use Custom Transaction number should be OFF.
Example: If admins enter "InvoiceTest" at the Invoice field, the invoice will be synced from Magento to QuickBooks Online with the format InvoiceTestXXXXXXXXXXX.
| Note |
|---|
| Please note that the maximum number of characters allowed in this field is 12 |
![]() Tax and Country Settings: Admins need to choose their country and set a tax shipping type.
Tax and Country Settings: Admins need to choose their country and set a tax shipping type.
| Note |
|---|
There are two fields that admins need to consider:
Please note that if your Country Setting is not Other, it is required to have a shipping tax in QuickBooks Online. So, admins need to set a tax type for the shipping fee. If admins want to choose a free shipping tax, they only need to choose the tax named Tax Shipping Zero created by the extension. If admins want to choose a shipping tax (no free), admins need to create a tax rule before. Then, it will be shown at drop-down options and admins will choose this tax. |
| Note |
|---|
|
...