...
Last updated at 23/08/2018 | By: Magenest | Support Portal: http://servicedesk.izysync.com/servicedesk/customer/portal/26
| Table of Contents |
|---|
...
Introduction
Xero Integration extension for Magento 2 is a great tool which that allows you to synchronize accounting data automatically from Magento 2 store to Xero Website.
...
- Sync customer data from Magento 2 store to Xero both manually and automatically.
- Sync product data from Magento 2 store to Xero both manually and automatically.
- Sync order data from Magento 2 store to Xero both manually and automatically.
- Sync invoice data from Magento 2 store to Xero both manually and automatically.
- Sync Credit Memos from Magento 2 store to Xero both manually and automatically.
- Allow admin to view sync history log to see what is synchronized between two apps.
- Allow admin to manage the sync queue to see what will be synchronized next.
- Allow admin to request a report on the Backend of Magento 2.
- Support multiple-website
- Add to queue mass action in customer listing, product listing, order/invoice listing, and credit memo listing
- Sync to Xero mass action in customer listing, product listing, order/invoice listing, and credit memo listing
System Requirements
Your store should be running on Magento 2 Community Edition version 2.0.x, 2.1.x., and 2.2.x
...
How to create a new consumer key
Video Tutorial
...
| Widget Connector | ||||||
|---|---|---|---|---|---|---|
|
...
First, you need to create a Xero consumer key to connect from Magento 2 to Xero if you haven't got one. Go to https://www.xero.com/ and register an a Xero accounts (click on "Try xero Xero for free" or "Free Trial").
Fill in the required information click on "Get started". If everything goes right, Xero send sends you an account activation email.
...
When your account is activated, you can login log in on the page https://login.xero.com/.
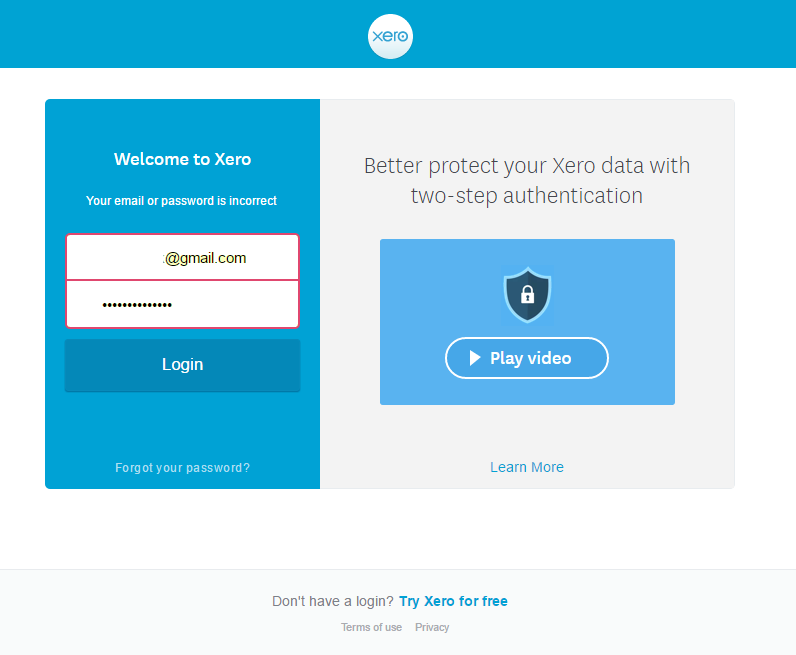
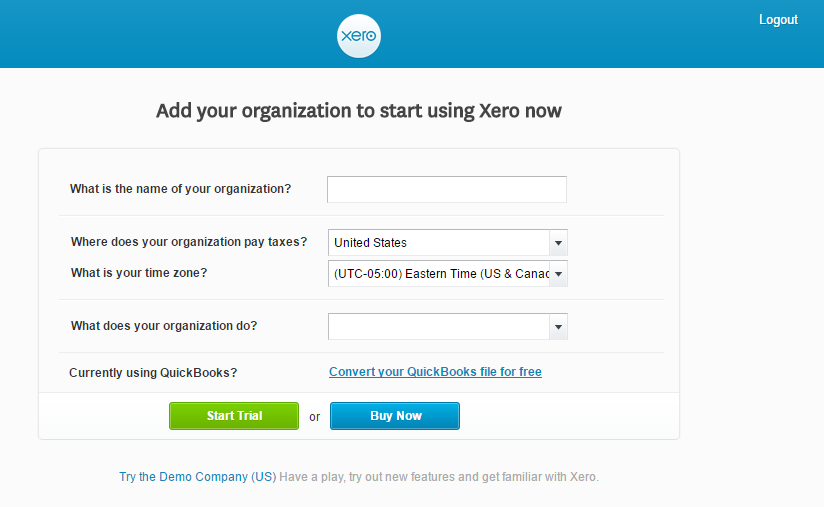
If you log in to the account for the first time, Xero will ask you to create an organization. Enter the details of your organization. Press on Start Trial, or Buy Now to continue.
Now you can create a new consumer key of for Xero account. There are two types of Application Mode you can choose: Private Application Mode or Public Application Mode
...
Go to http://developer.xero.com/ > Docs then search with Create a public/private key pair
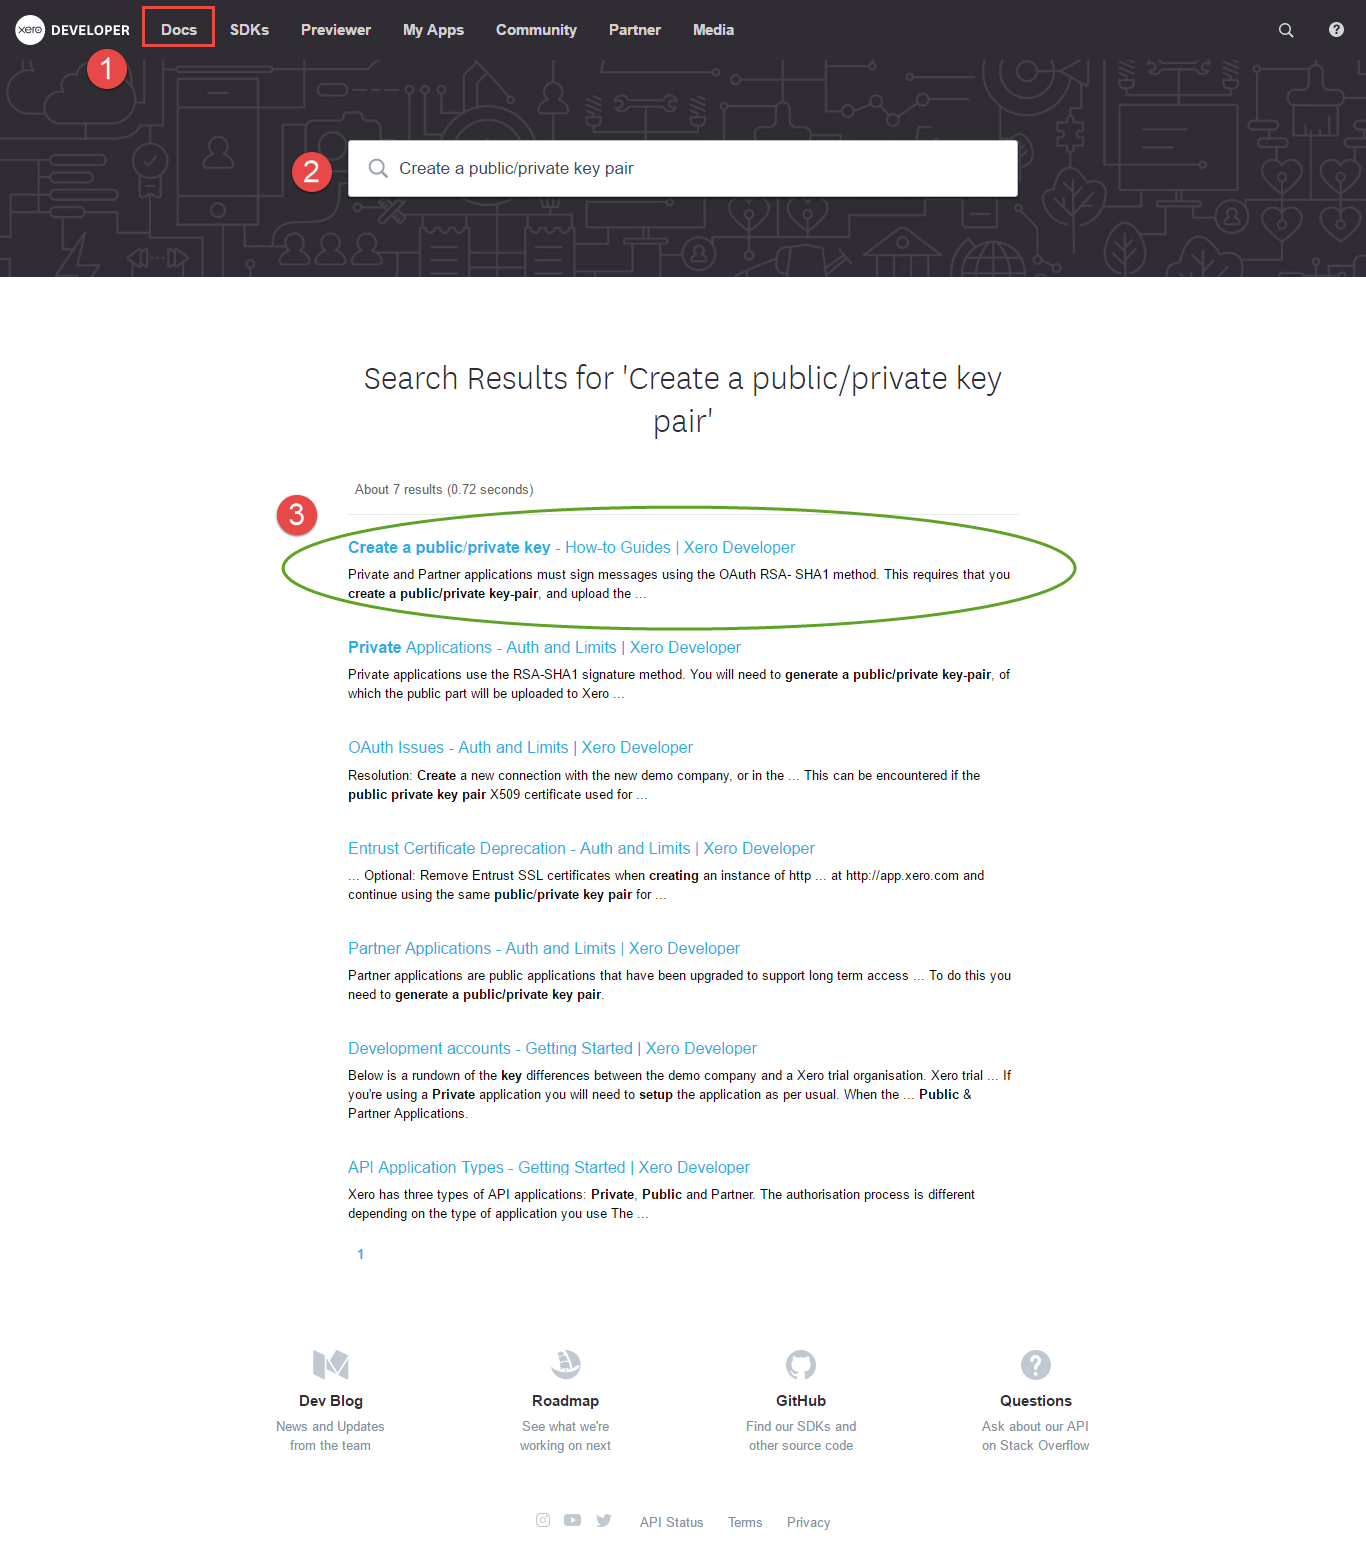
Create a public/private key pair page appears as below. Follow the user guide of Xero to get 2 file: public key(.cer) and private key(.pem).

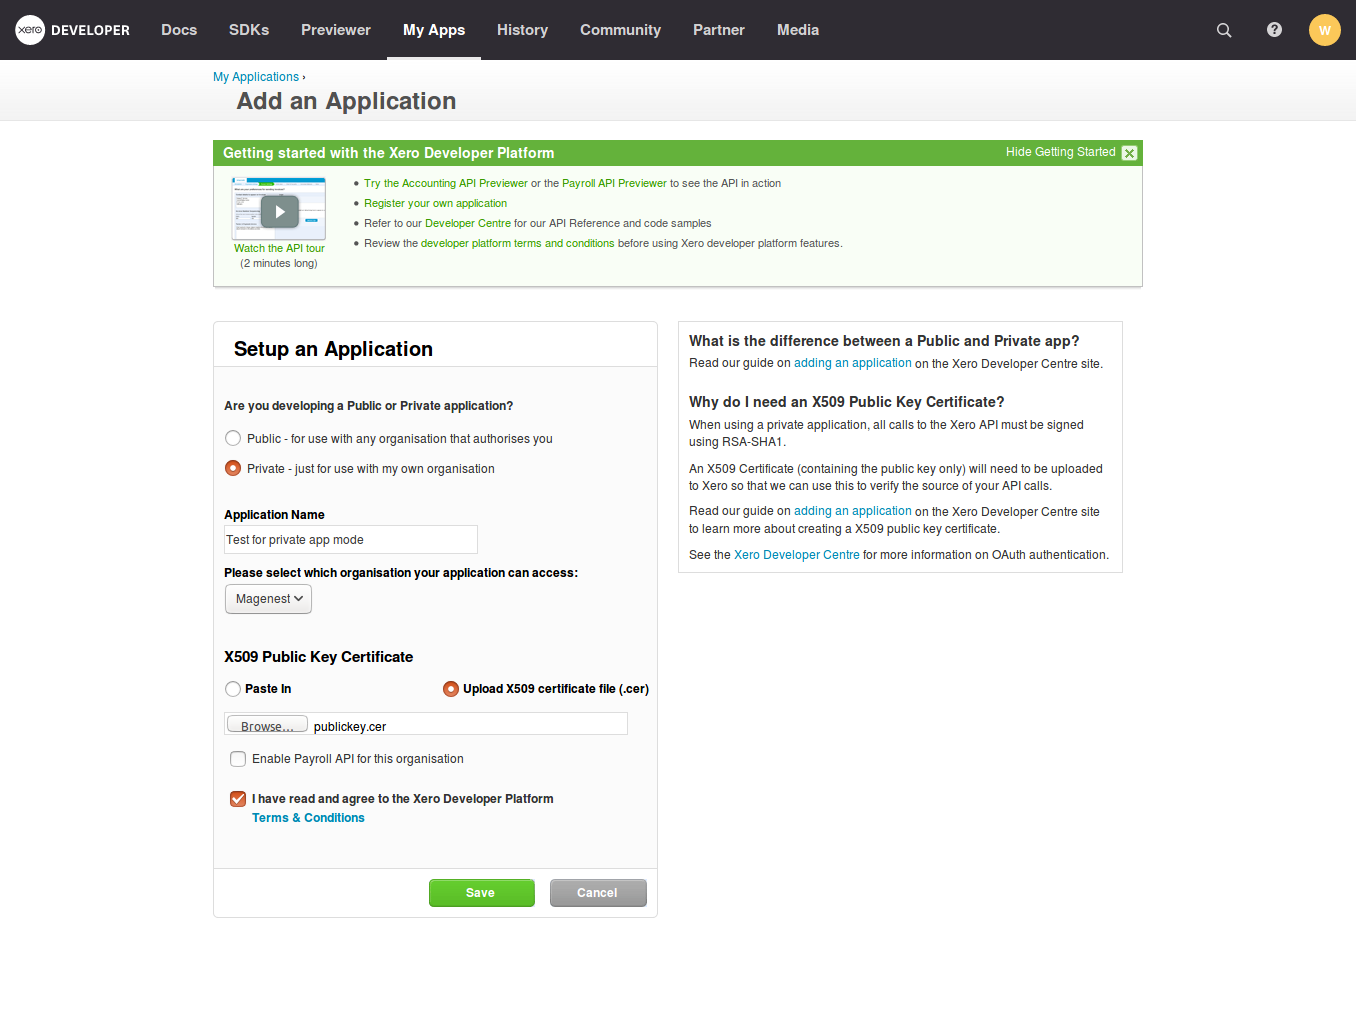
When you have file public key.cer, please go to: to https://app.xero.com/Application to create the Application.
Choose Private application mode, application name (the name for the application is not very important), choose your organization (this is where the Magento 2 data will be synced into). You need to copy and paste the content or upload the file Public key.cer into X509 Public Key Certificate field.
Check the information again then choose "I have read and agree to the Xero Developer Platform". After that click Save button.
If everything goes right, you will see the following content. Click on the "Show" button to get the Consumer Key for Private App Mode.
...
Last, click on Show button to take Consumer Key and Consumer Secret for Public App Mode.
...
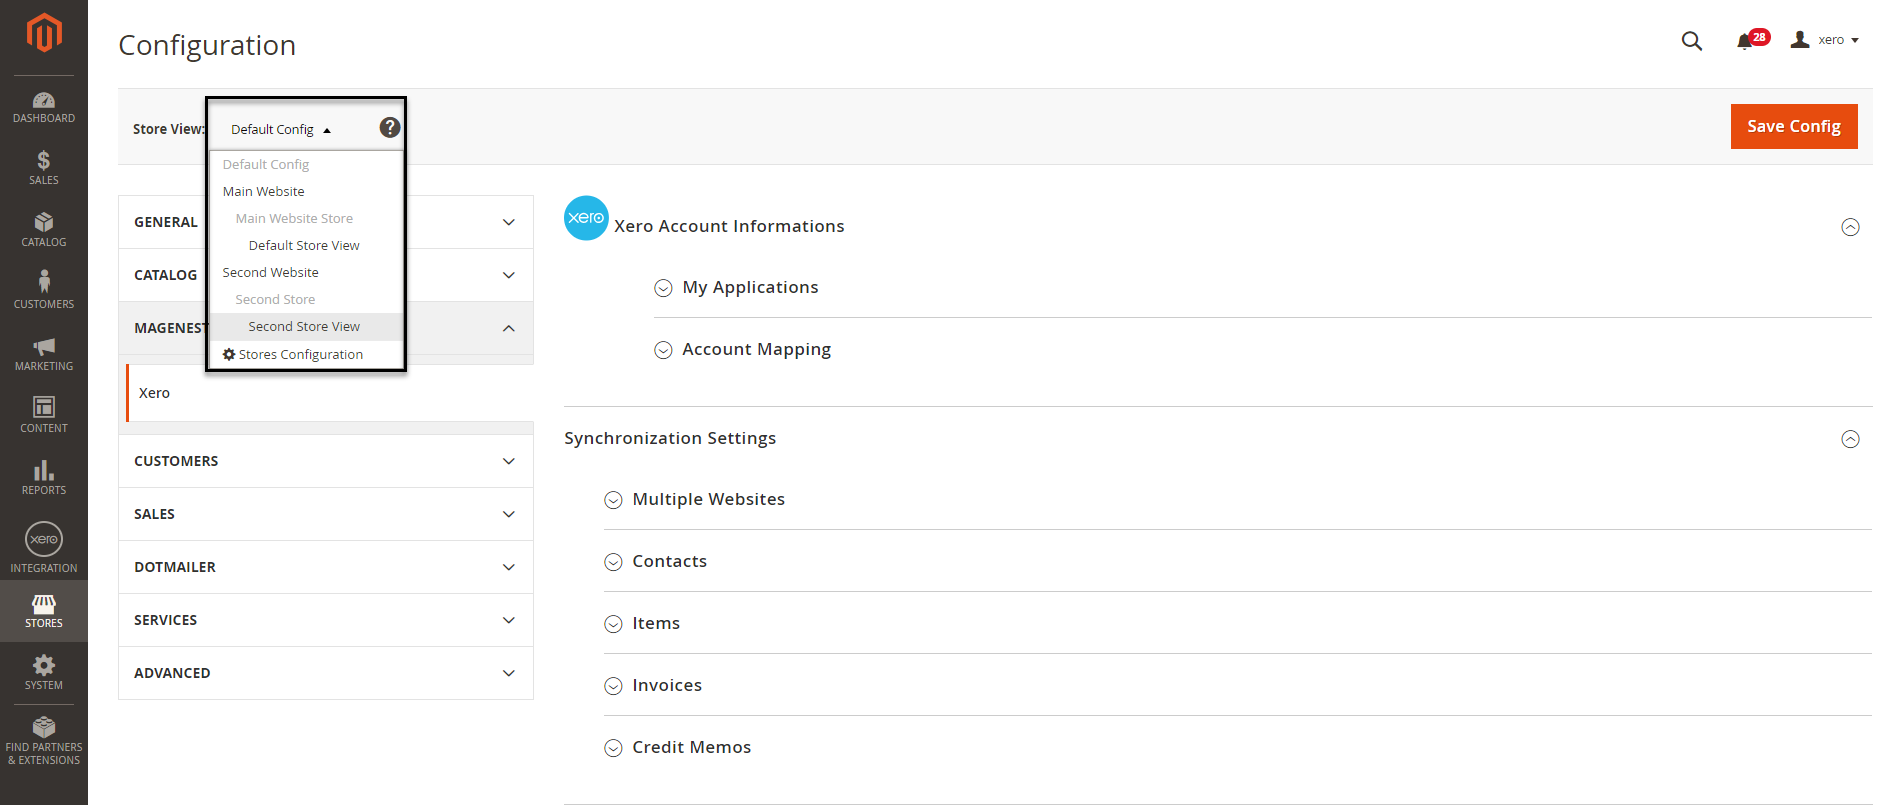
Configuration
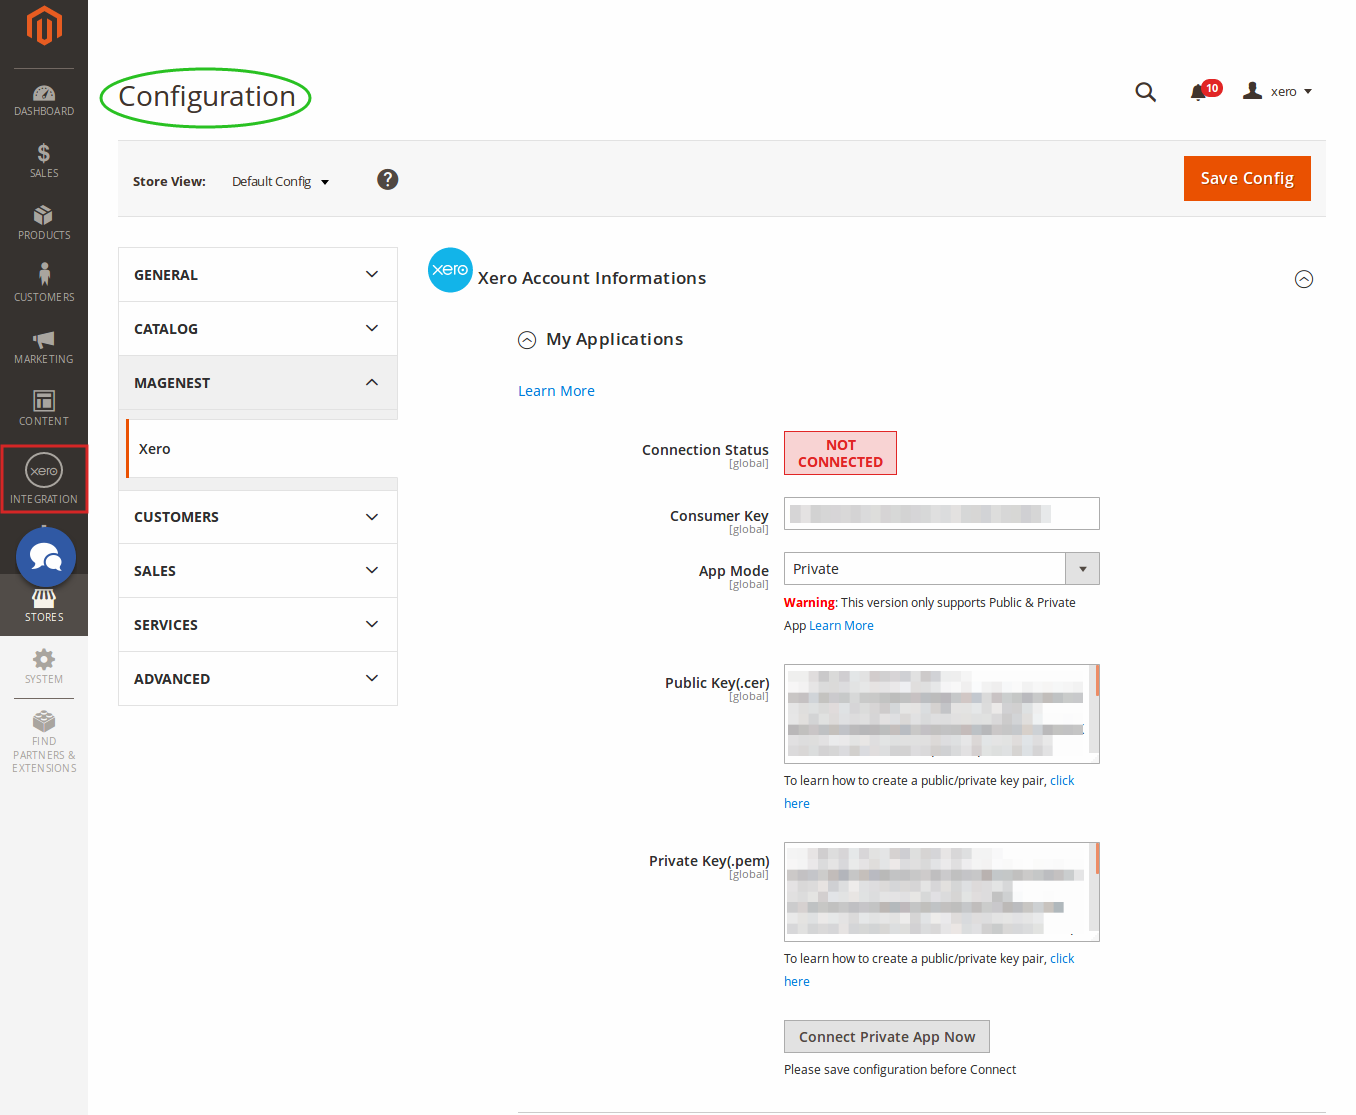
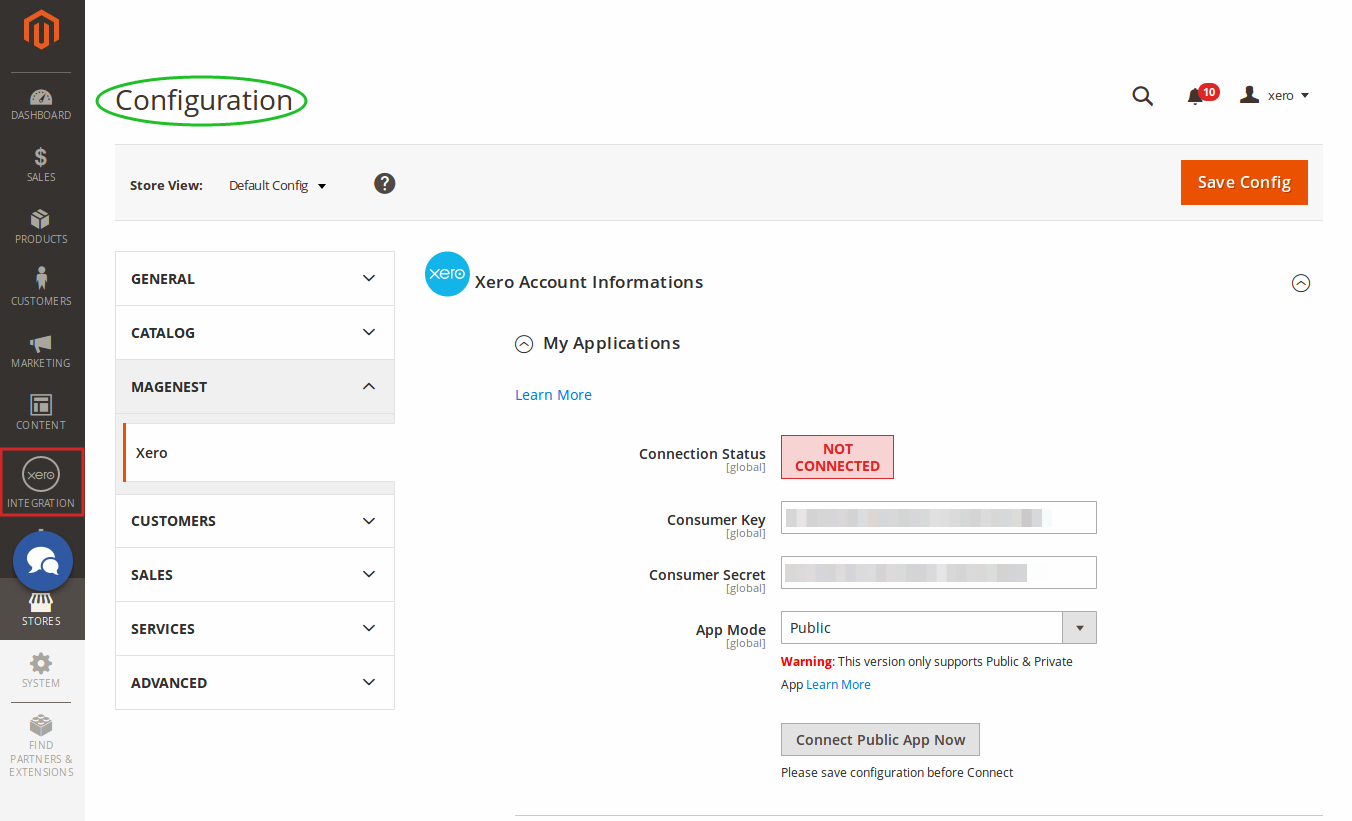
Set up Xero Account Informations
...
At My Applications tab
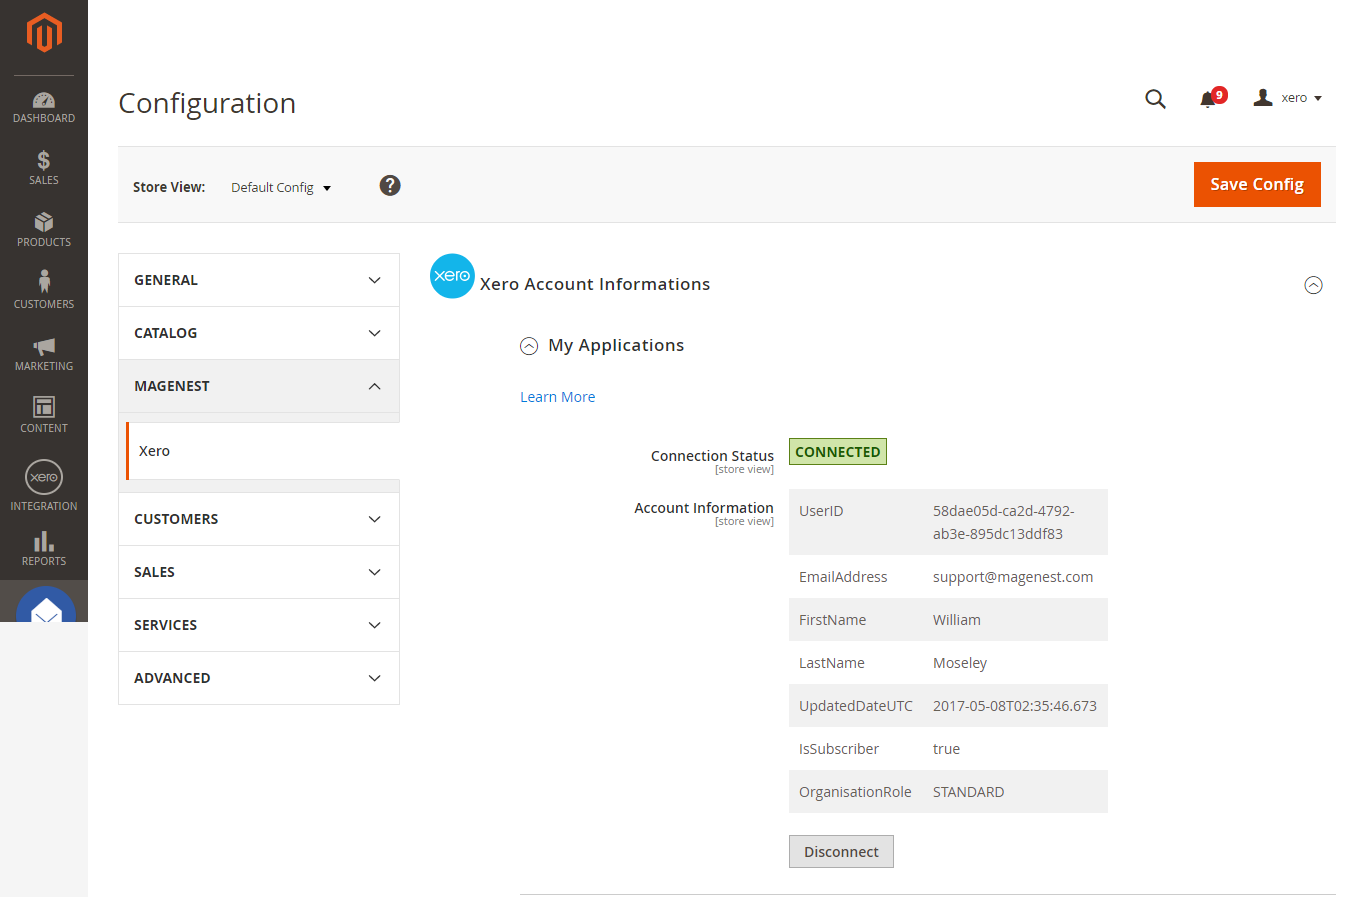
Taking Consumer Key that you have just created above and paste into Magento 2 backend configuration. Press Save Config after you've done (refresh the cache if needed). Then, click on Connect Private App Now button for private application mode or Connect Public App Now button for public application mode.
| Note | ||
|---|---|---|
| ||
You need to save config before connecting, this will help you avoid making errors. |
Setting My Applications in Configuration of your Magento 2 store will base on their app mode types.
Private App Mode:
If you choose Private mode, you will have to enter the content of Private Key(.pem) and Public Key(.cer) beside Consumer Key
Public App Mode:
If you choose Public mode, it will require both Consumer Secret and Consumer Key. The expiration for each connection time is 30 minutes. After that, you need to reconnect Magento 2 store to your Xero account.
When Magento 2 store is connected with your Xero account successfully, connection status will be transferred from not connected to connected as below:
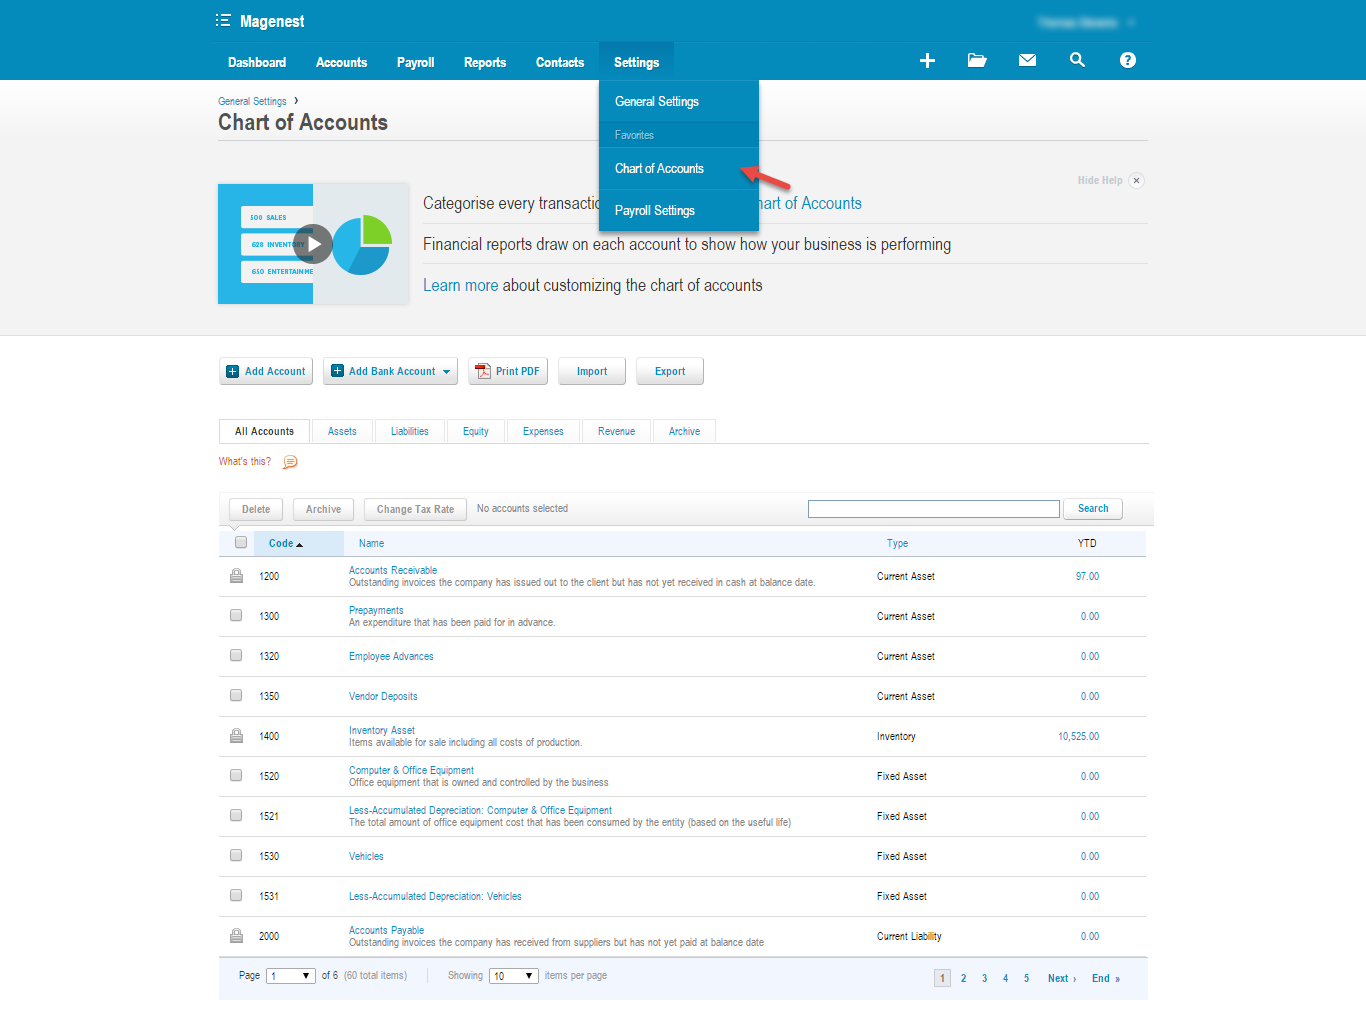
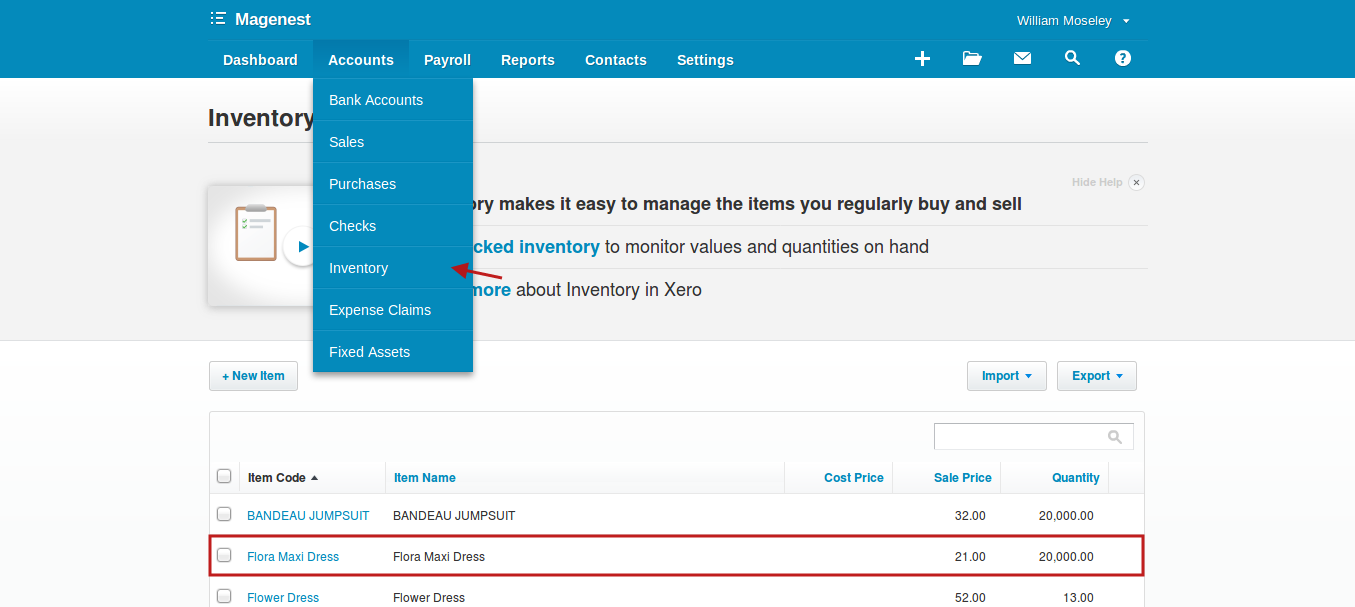
At Configure the Accounts Types in Xero tab
The system will take four account types in the chart of account: Bank account, Sale account, Inventory account, Cost and Good Sold account from Xero account into Magento 2 store. Enter the name you would like to use for each account then click on Add all Data to Queue. The default Xero account name will be used if you do not change it. If there is no account on Xero site, the extension will automatically create a new one.
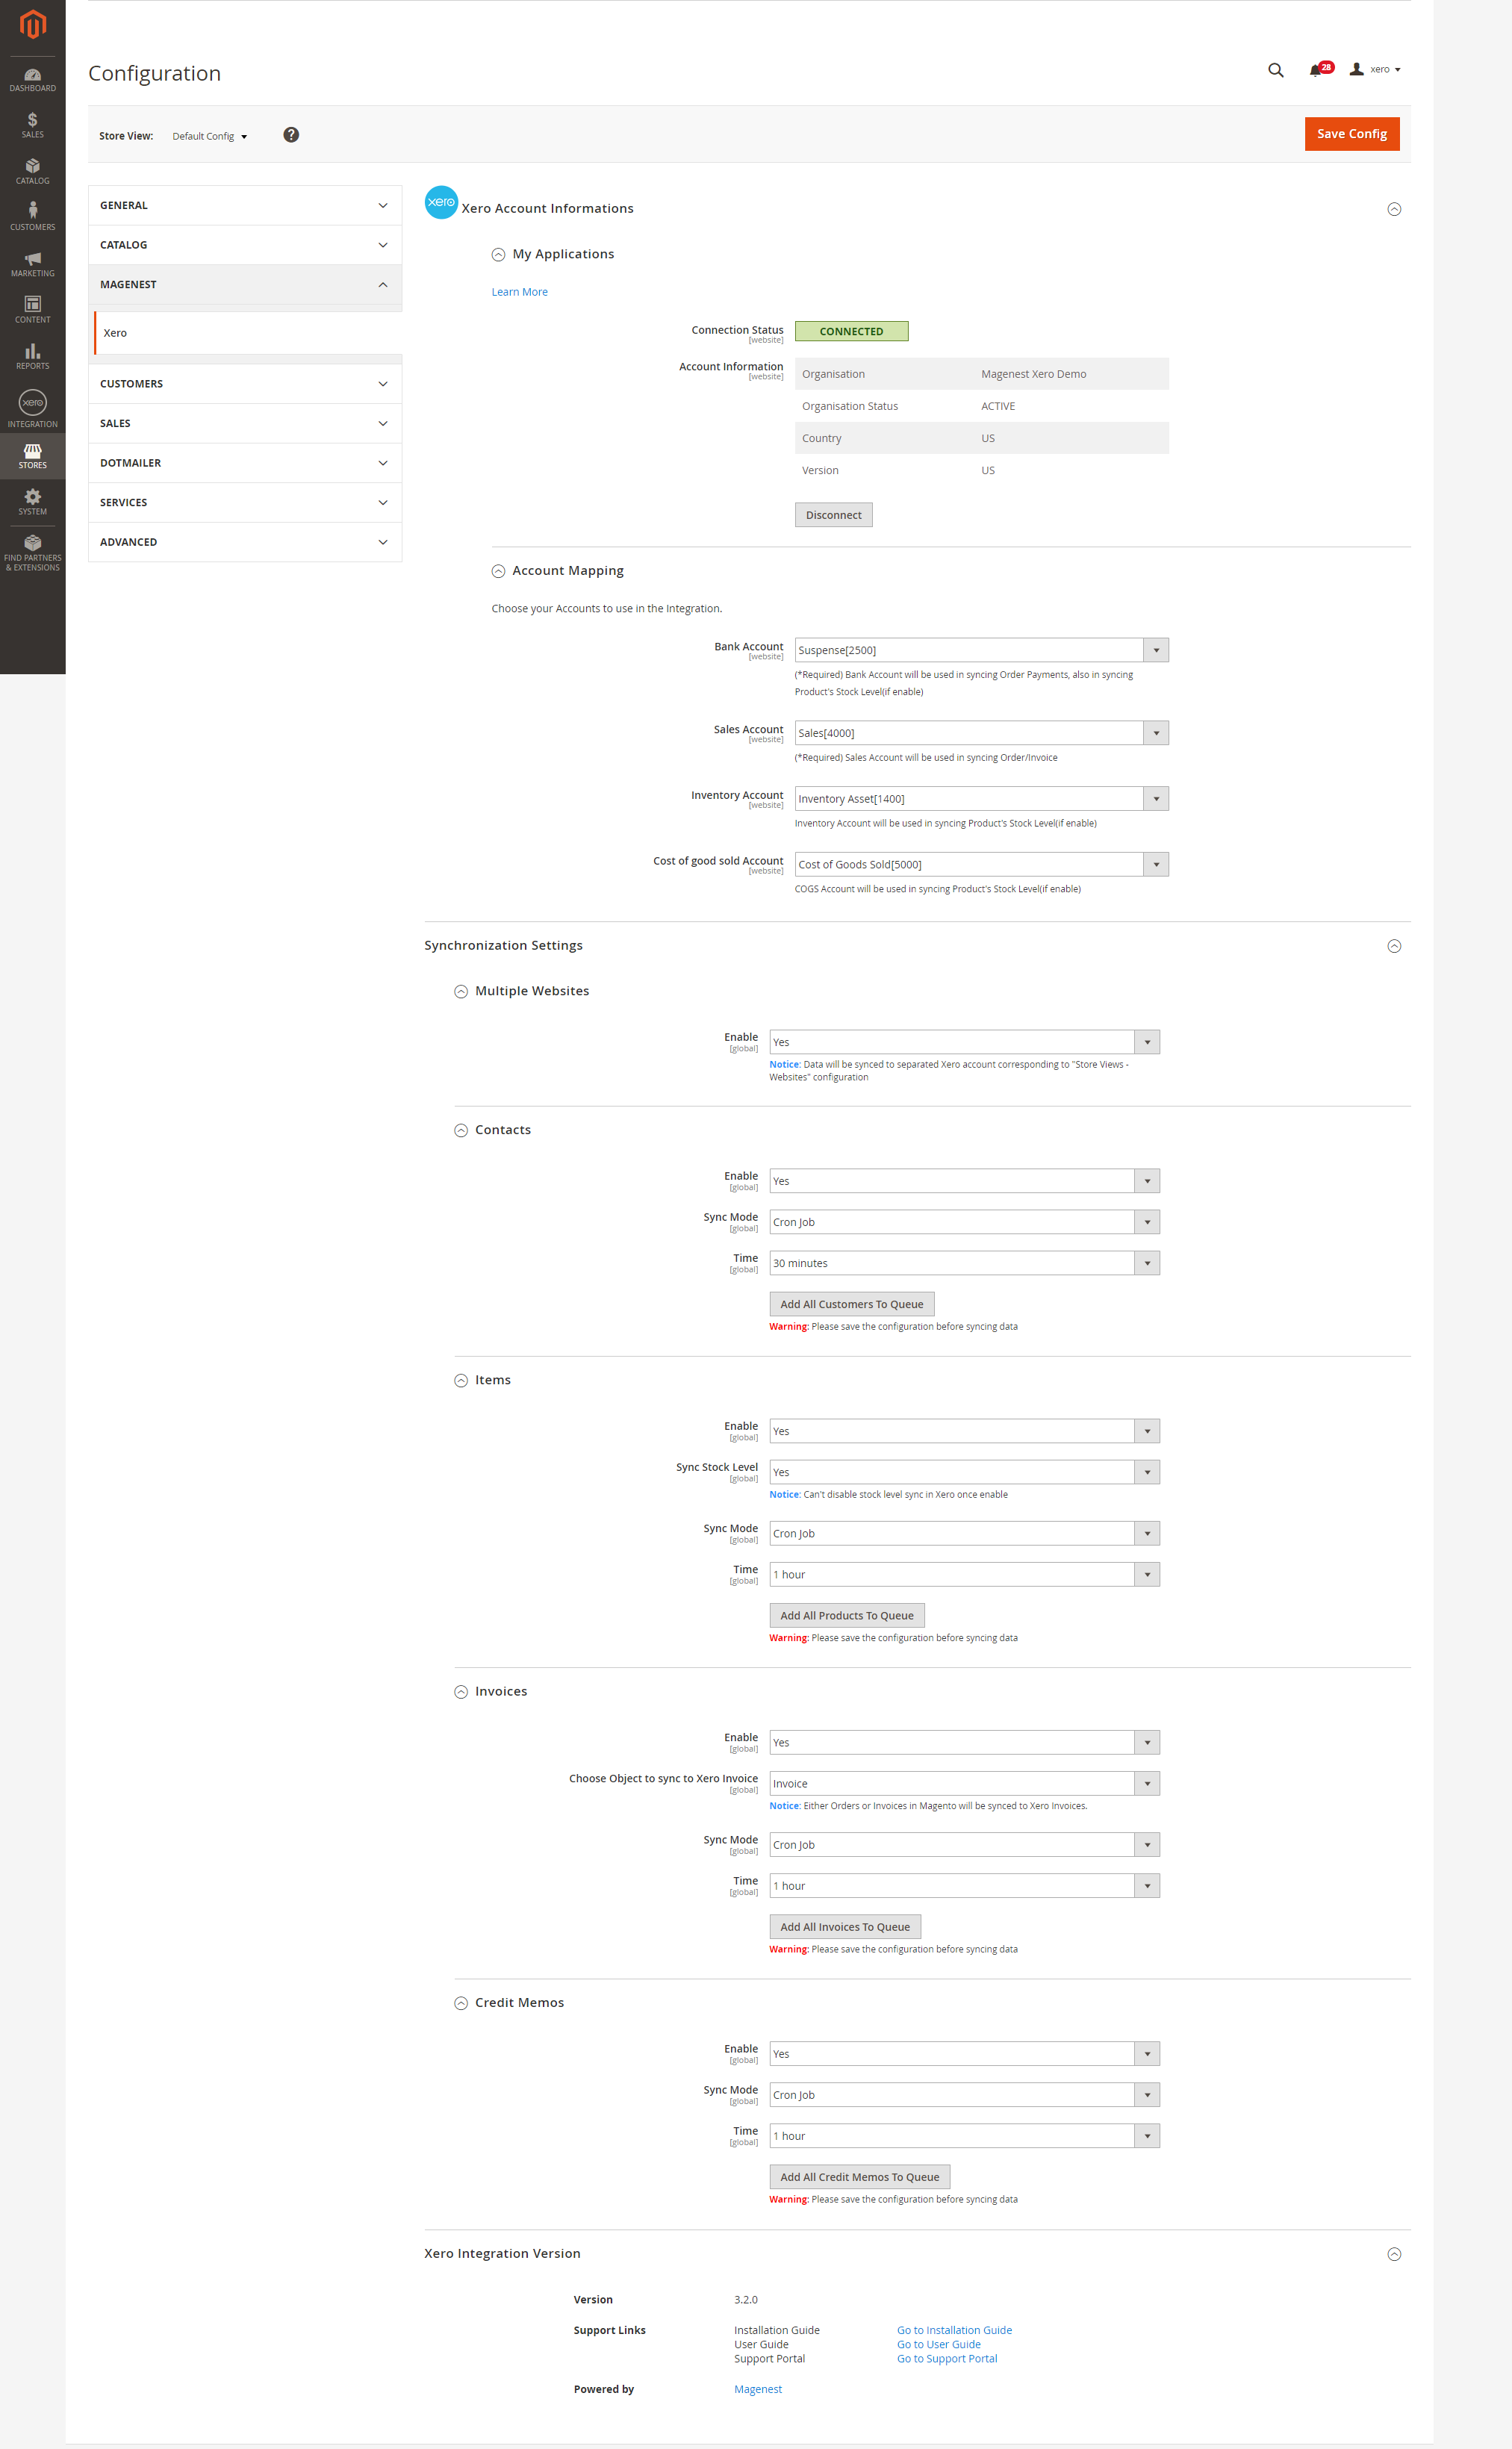
![]() Multiple Website: Enable multiple website synchronization. Note that data will be synced to separated Xero account corresponding to "Store Views - Websites" configuration.
Multiple Website: Enable multiple website synchronization. Note that data will be synced to separated Xero account corresponding to "Store Views - Websites" configuration.
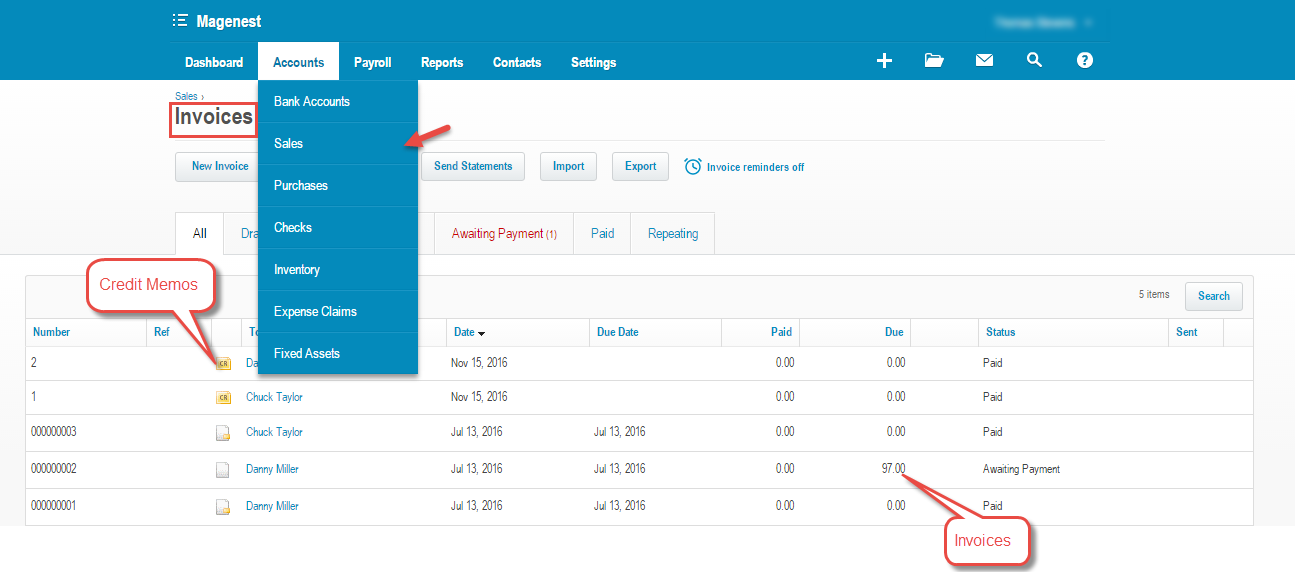
You can check changes to accounts on Xero's website.
...
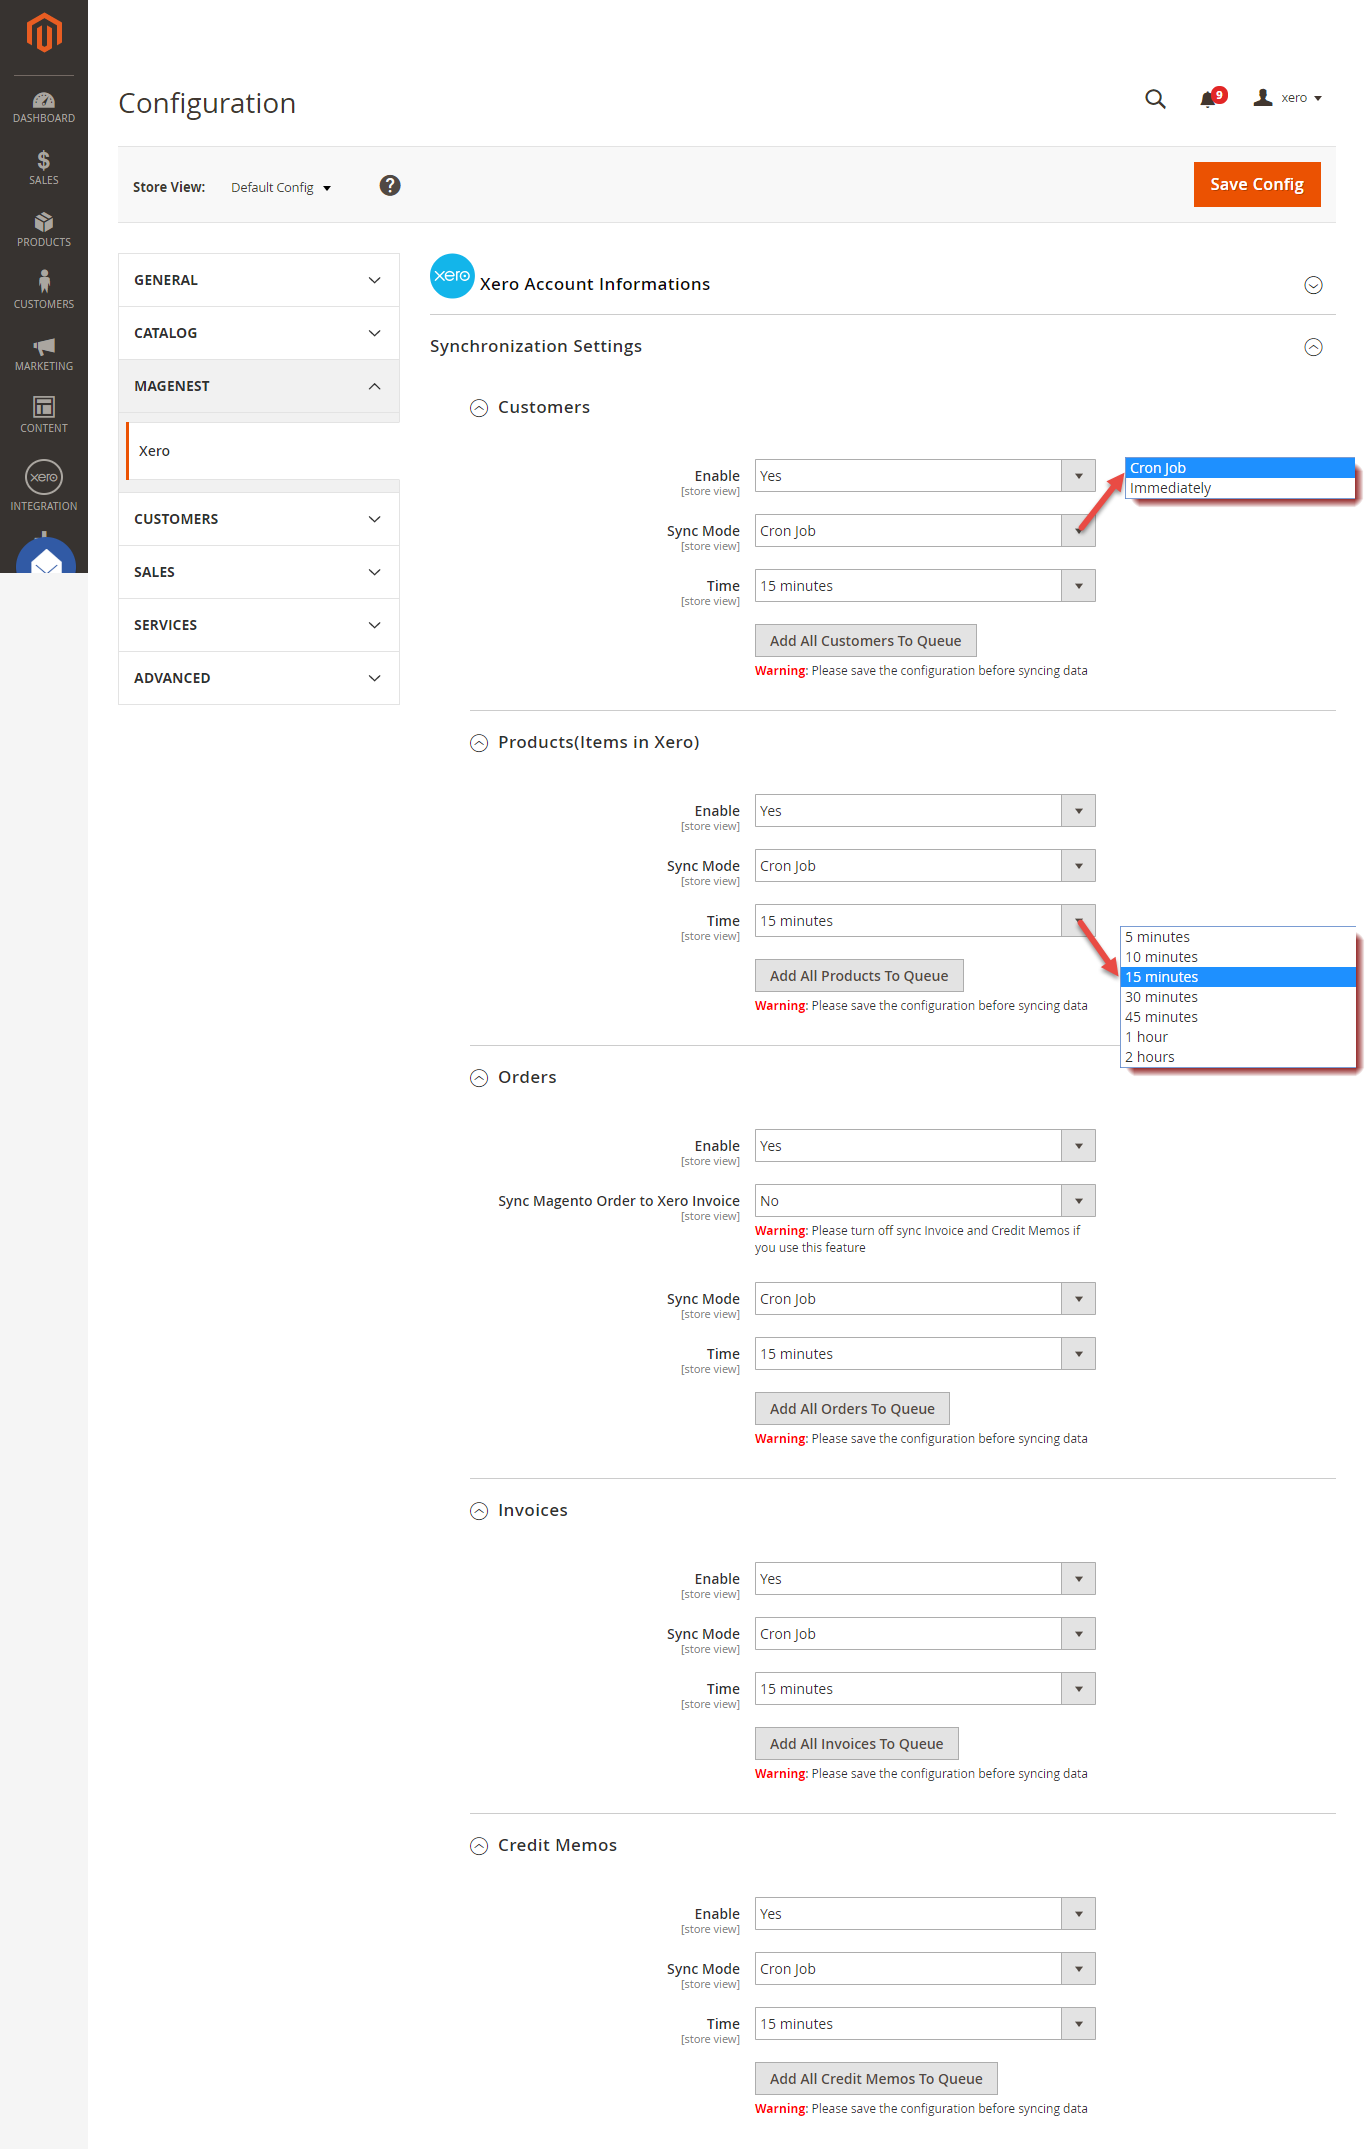
Admins are able to choose which type of data to sync from Magento 2 to Xero: Customers, Products(Items in Xero), Orders, Invoices, Credit Memos. In addition, admins can choose the way to synchronize data Immediately use Cron Job. Admins can also Add All data To Queue or add invididual data individual data group queue for synchronizing.
| Tip | ||
|---|---|---|
| ||
|
...
At the end of Configuration, admins can quickly navigate to the online documentation as well as support portal for Xero Integration extension:
...
Note that syncing time will vary, depending on the size of database.
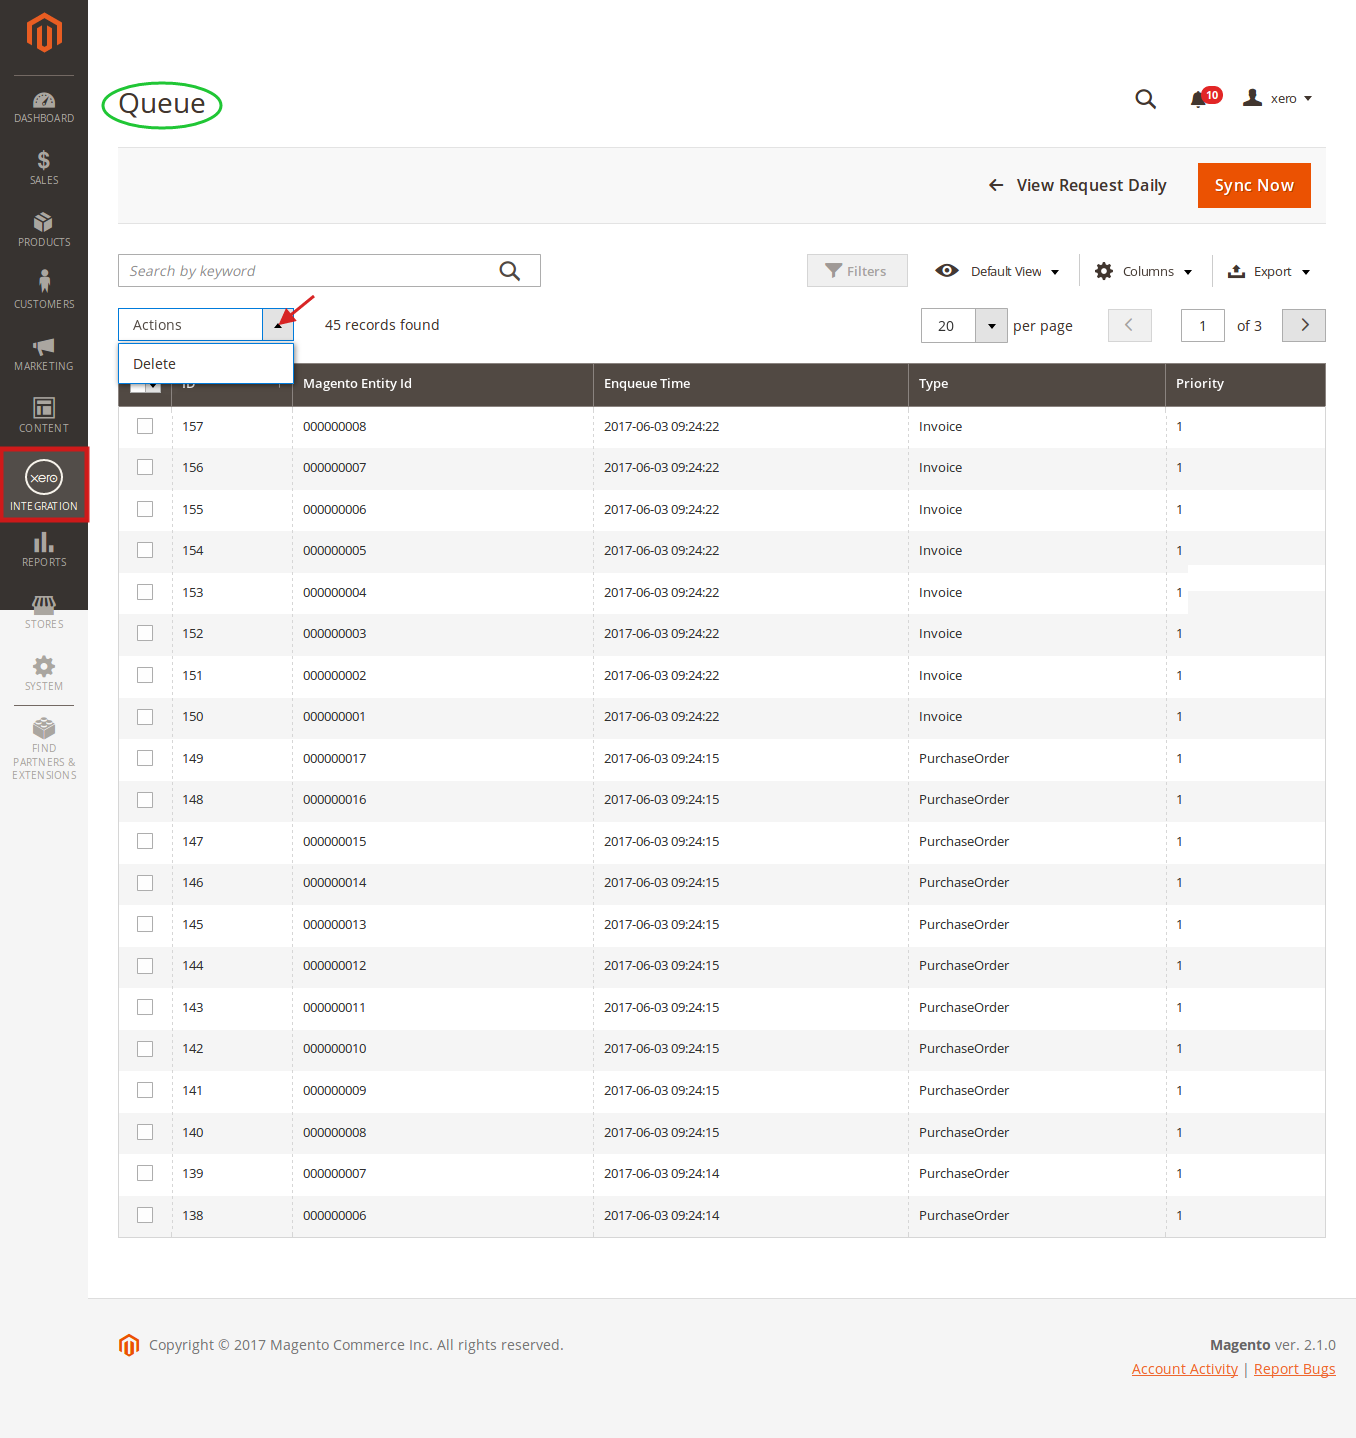
When the process is completed, go to Xero Integration > View Log to check what has been synced.
...
Admin can easily check the synchronization log for the day by clicking on View Request Daily or view individual sync log by clicking on View on Xero
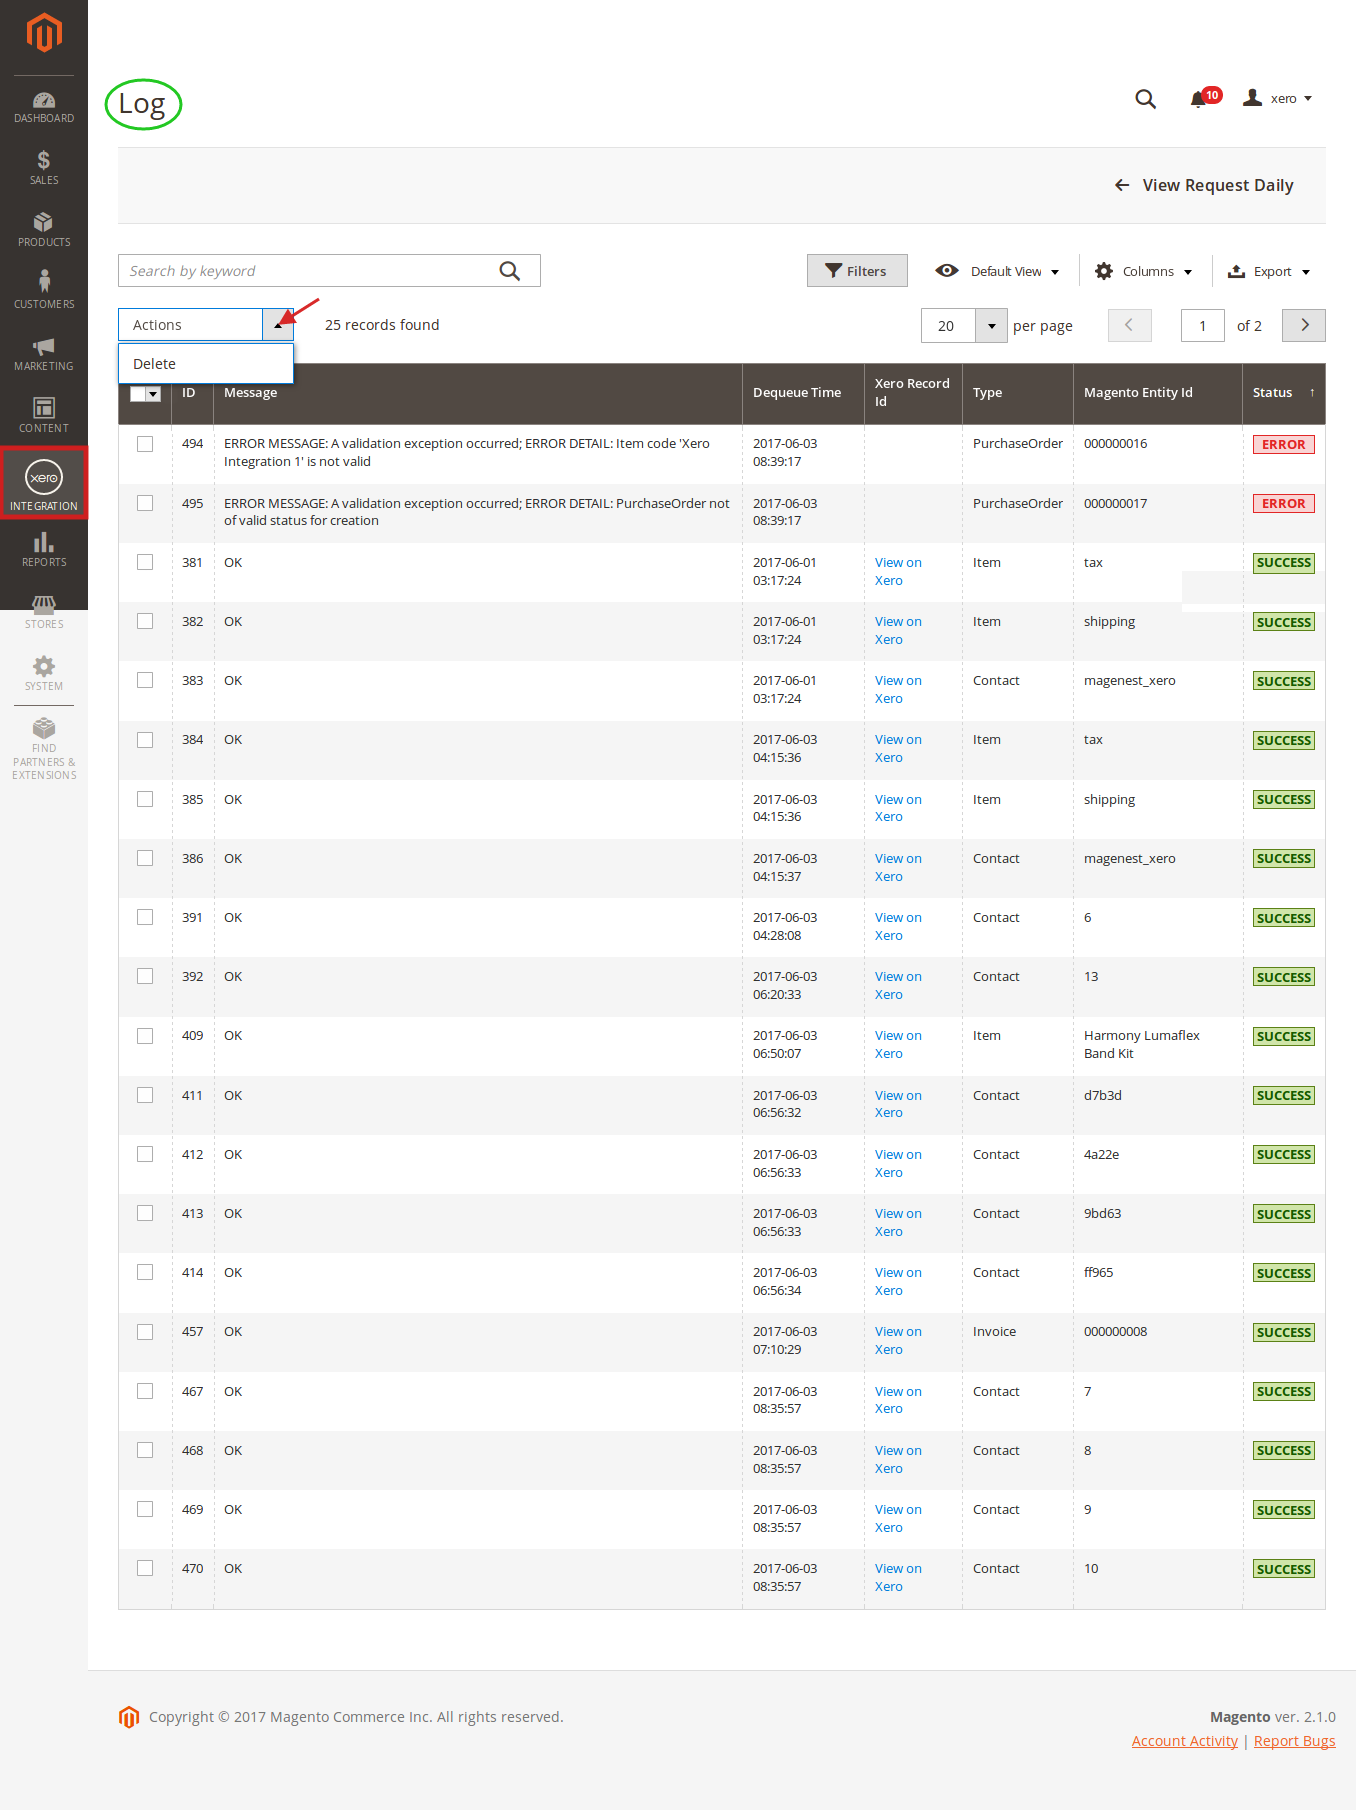
Navigate to Xero Integration > Request Daily Report, admins can easily see their synchronization status.
...
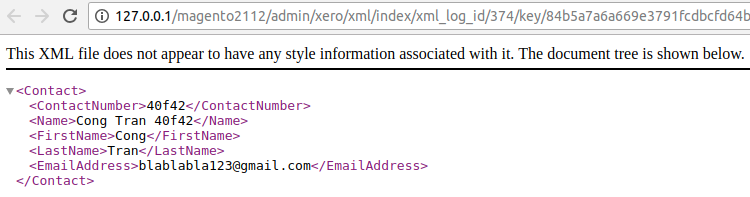
You can also view the xml data that is synced to Xero. This helps you debug easily in case there is a bug.

...
Main Functions
Video Demonstration
| Widget Connector | ||||||
|---|---|---|---|---|---|---|
|
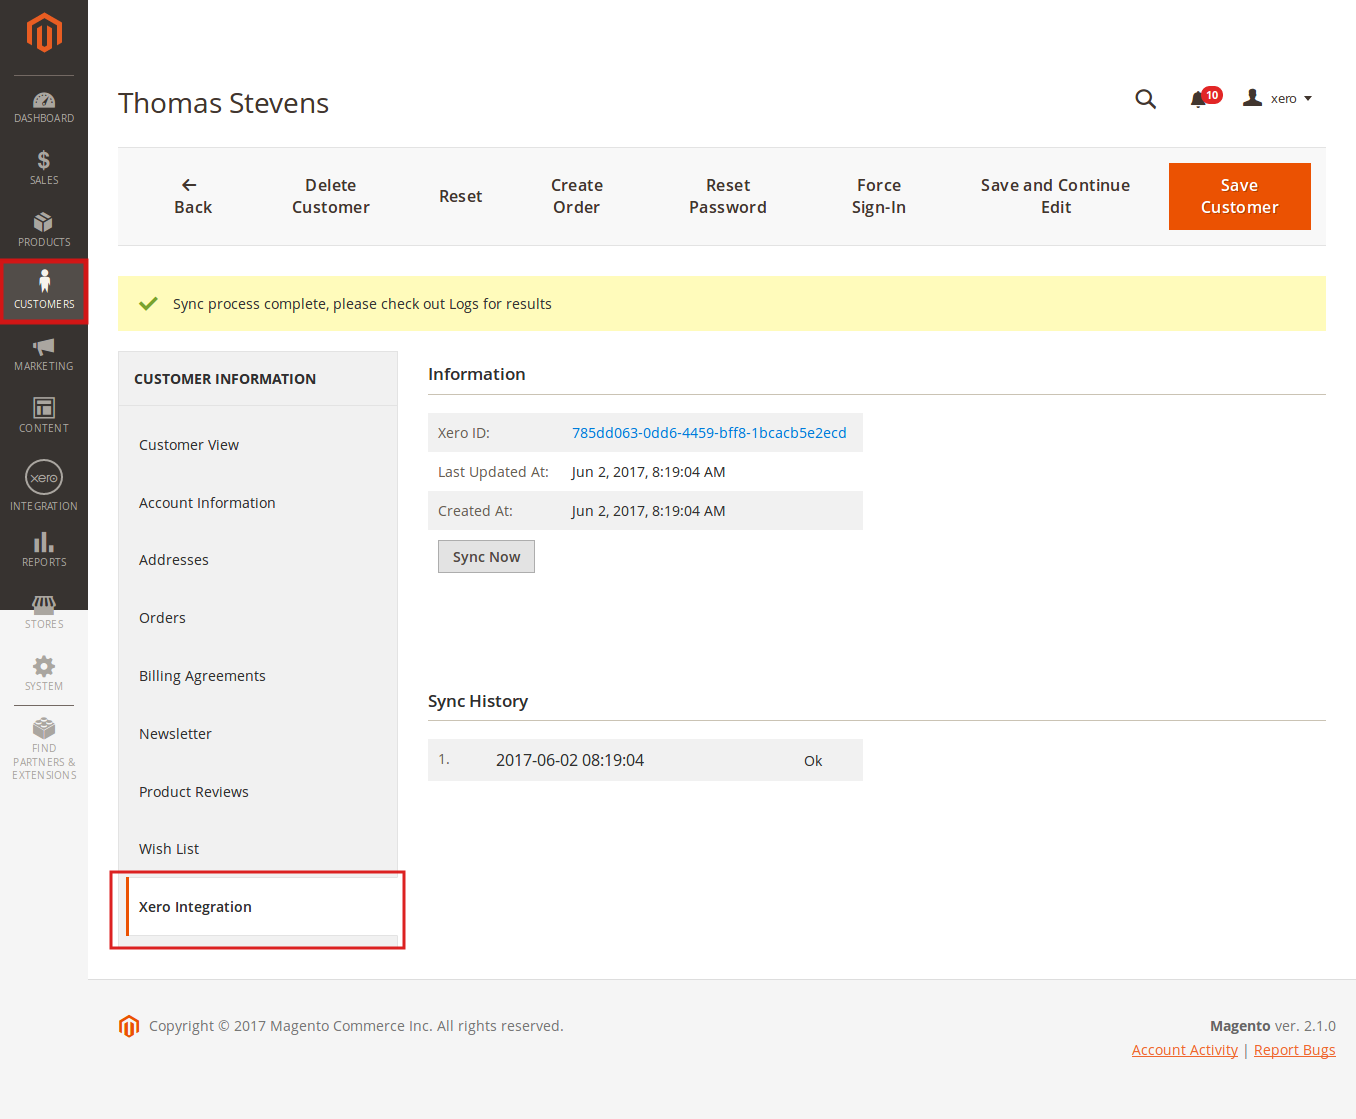
When a new account is registered on the frontend of Magento 2, Xero Integration extension will automatically add a new record on Xero site. 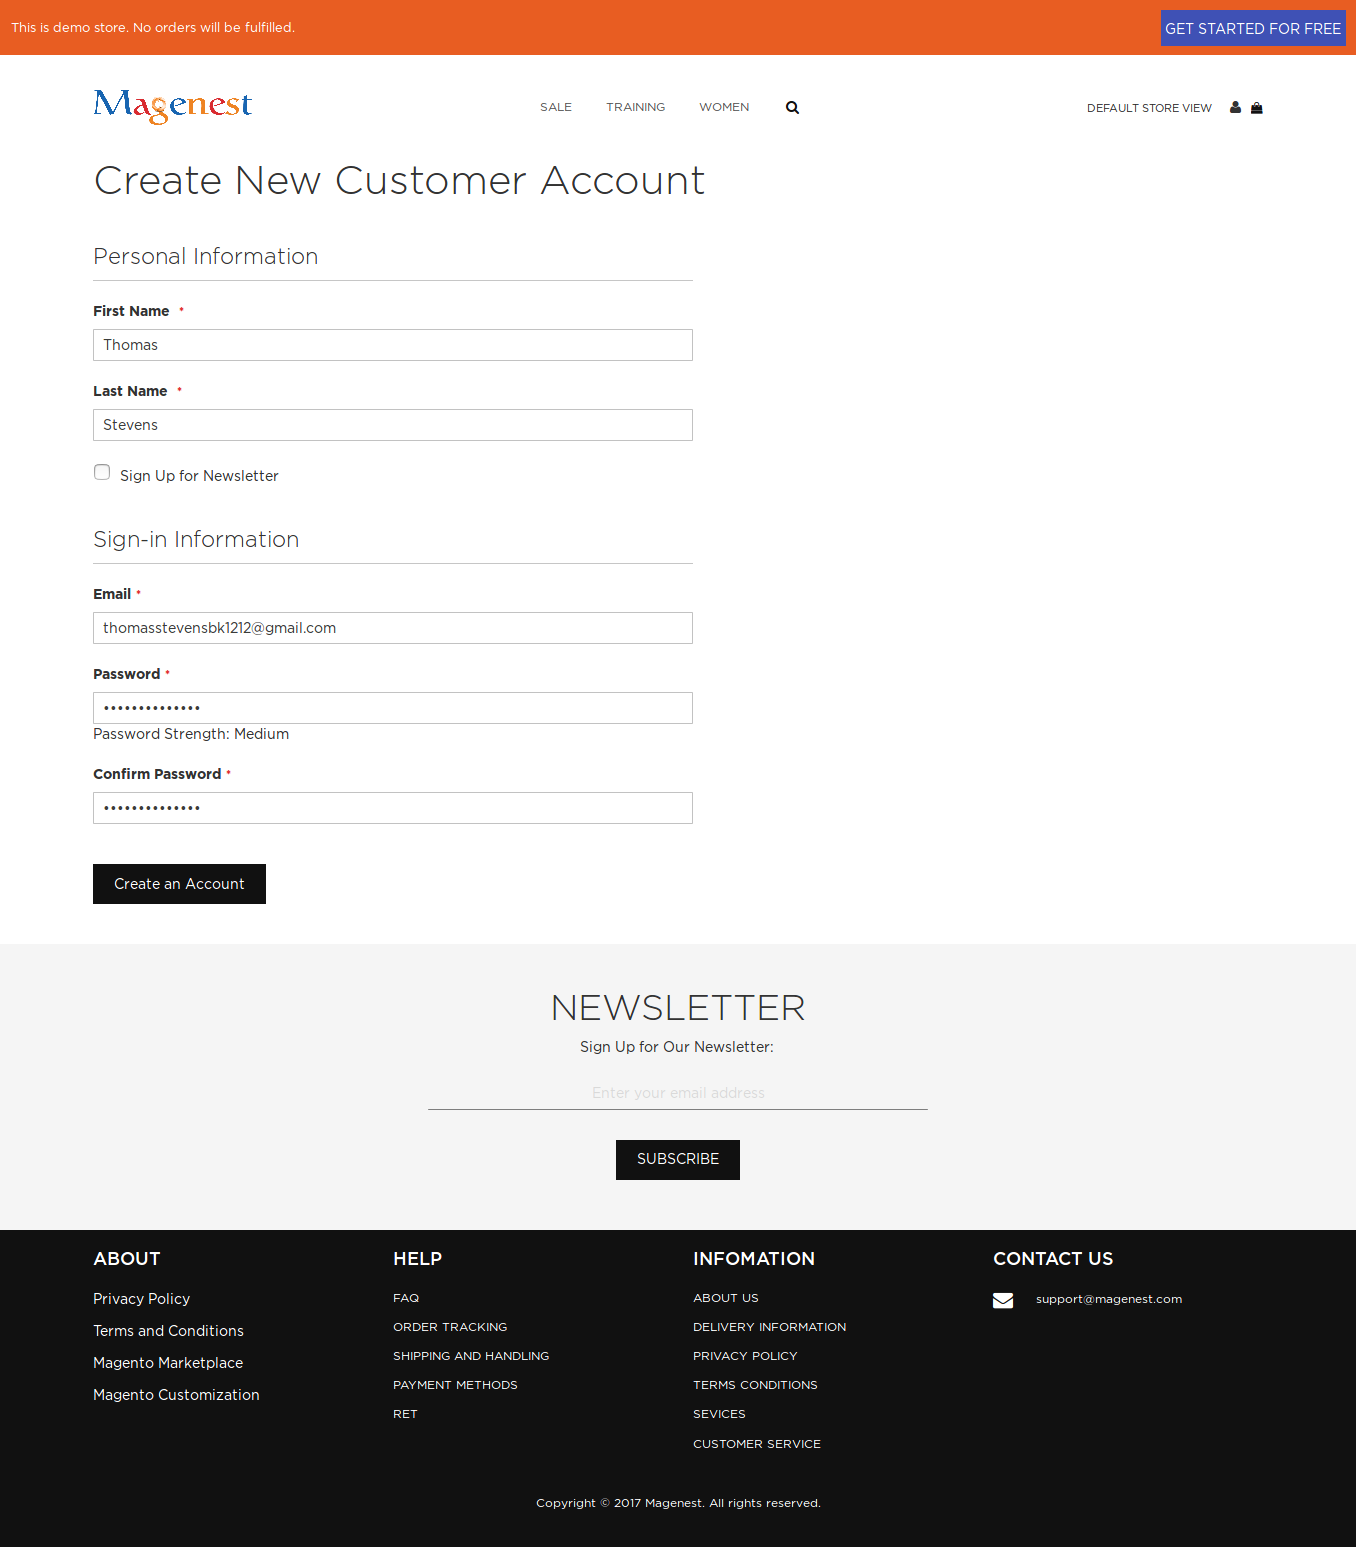
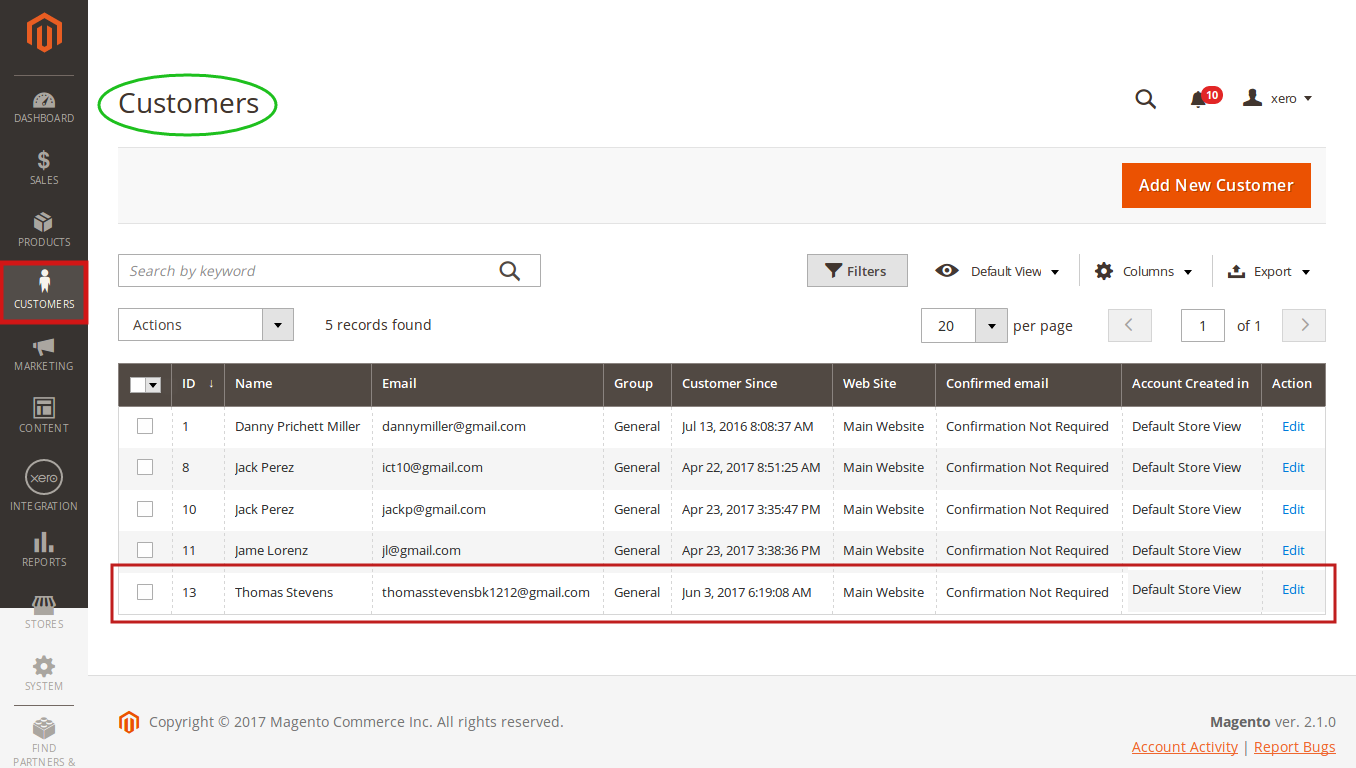
Or you can click on Sync Now button within each customer info dashboard to synchronize a specific customer data manually.
...
- Whenever admins create a new order, invoice, and product or edit them on Magento 2 store successfully, The data will be synced to Xero automatically.
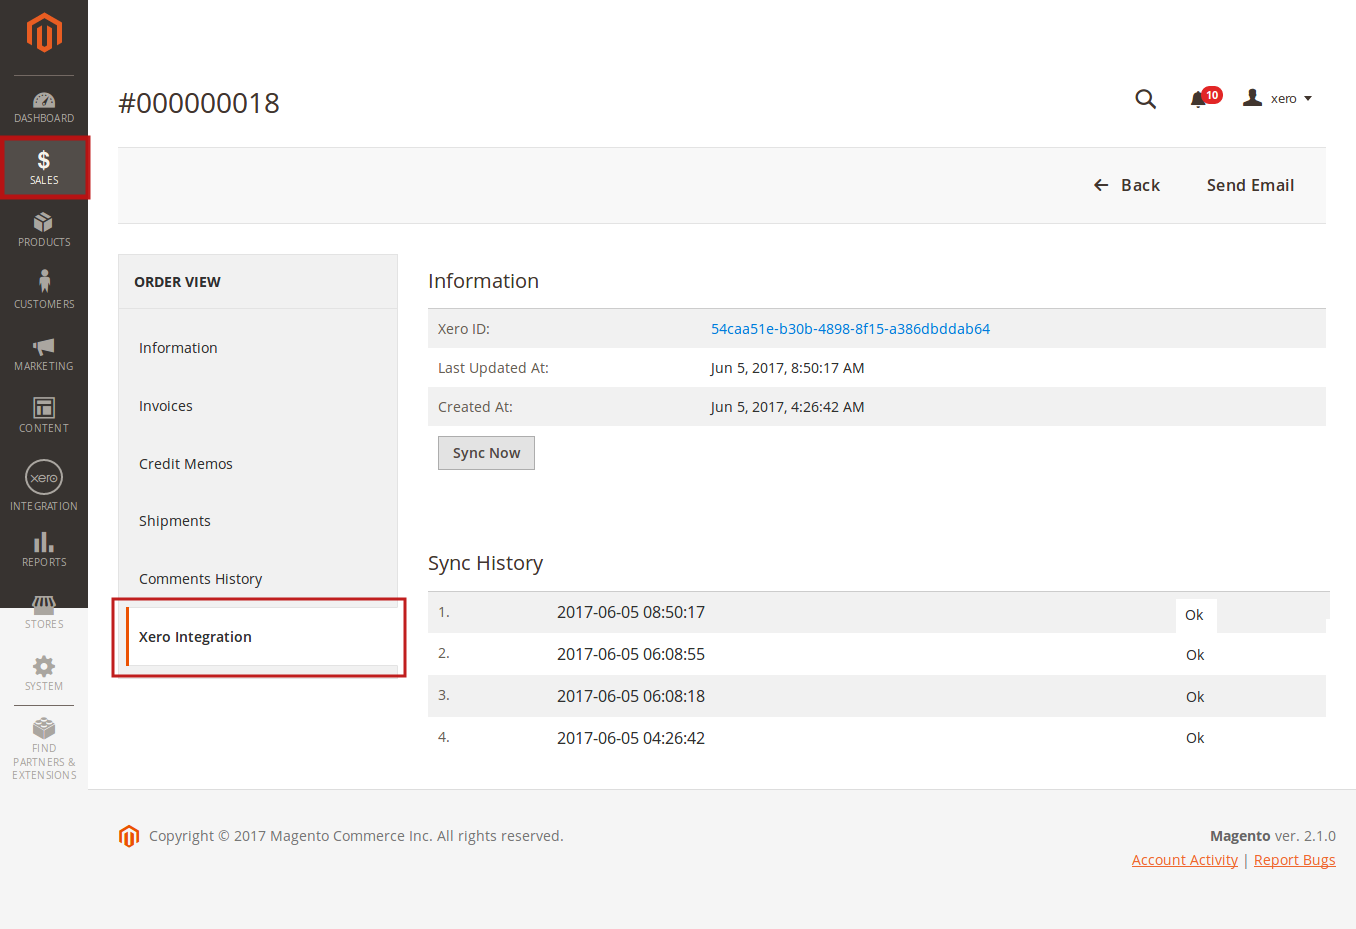
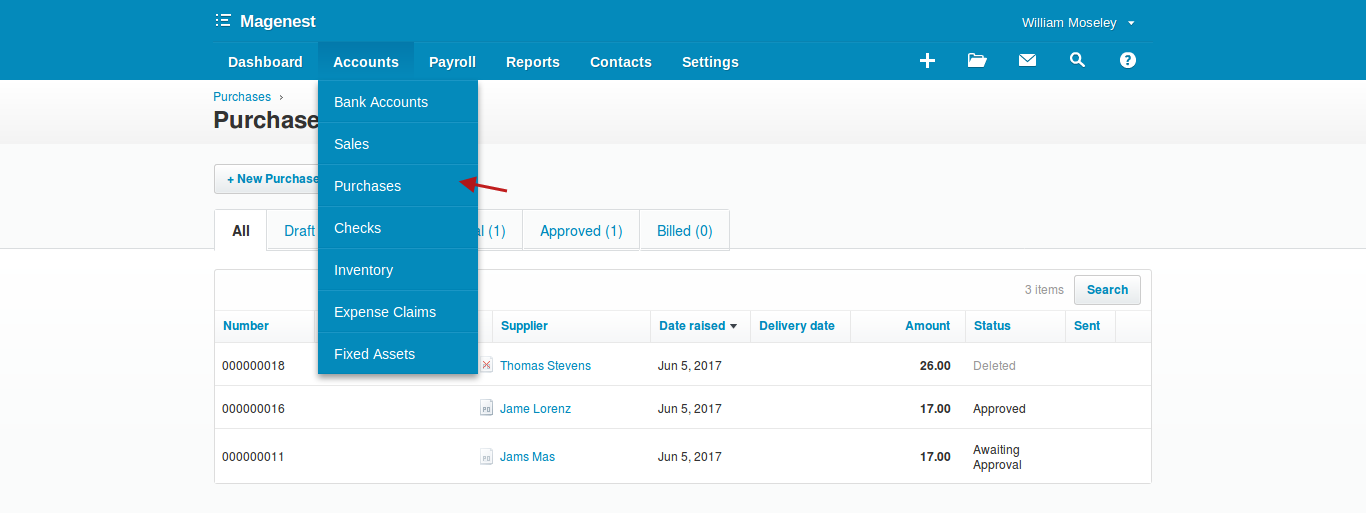
- Orders
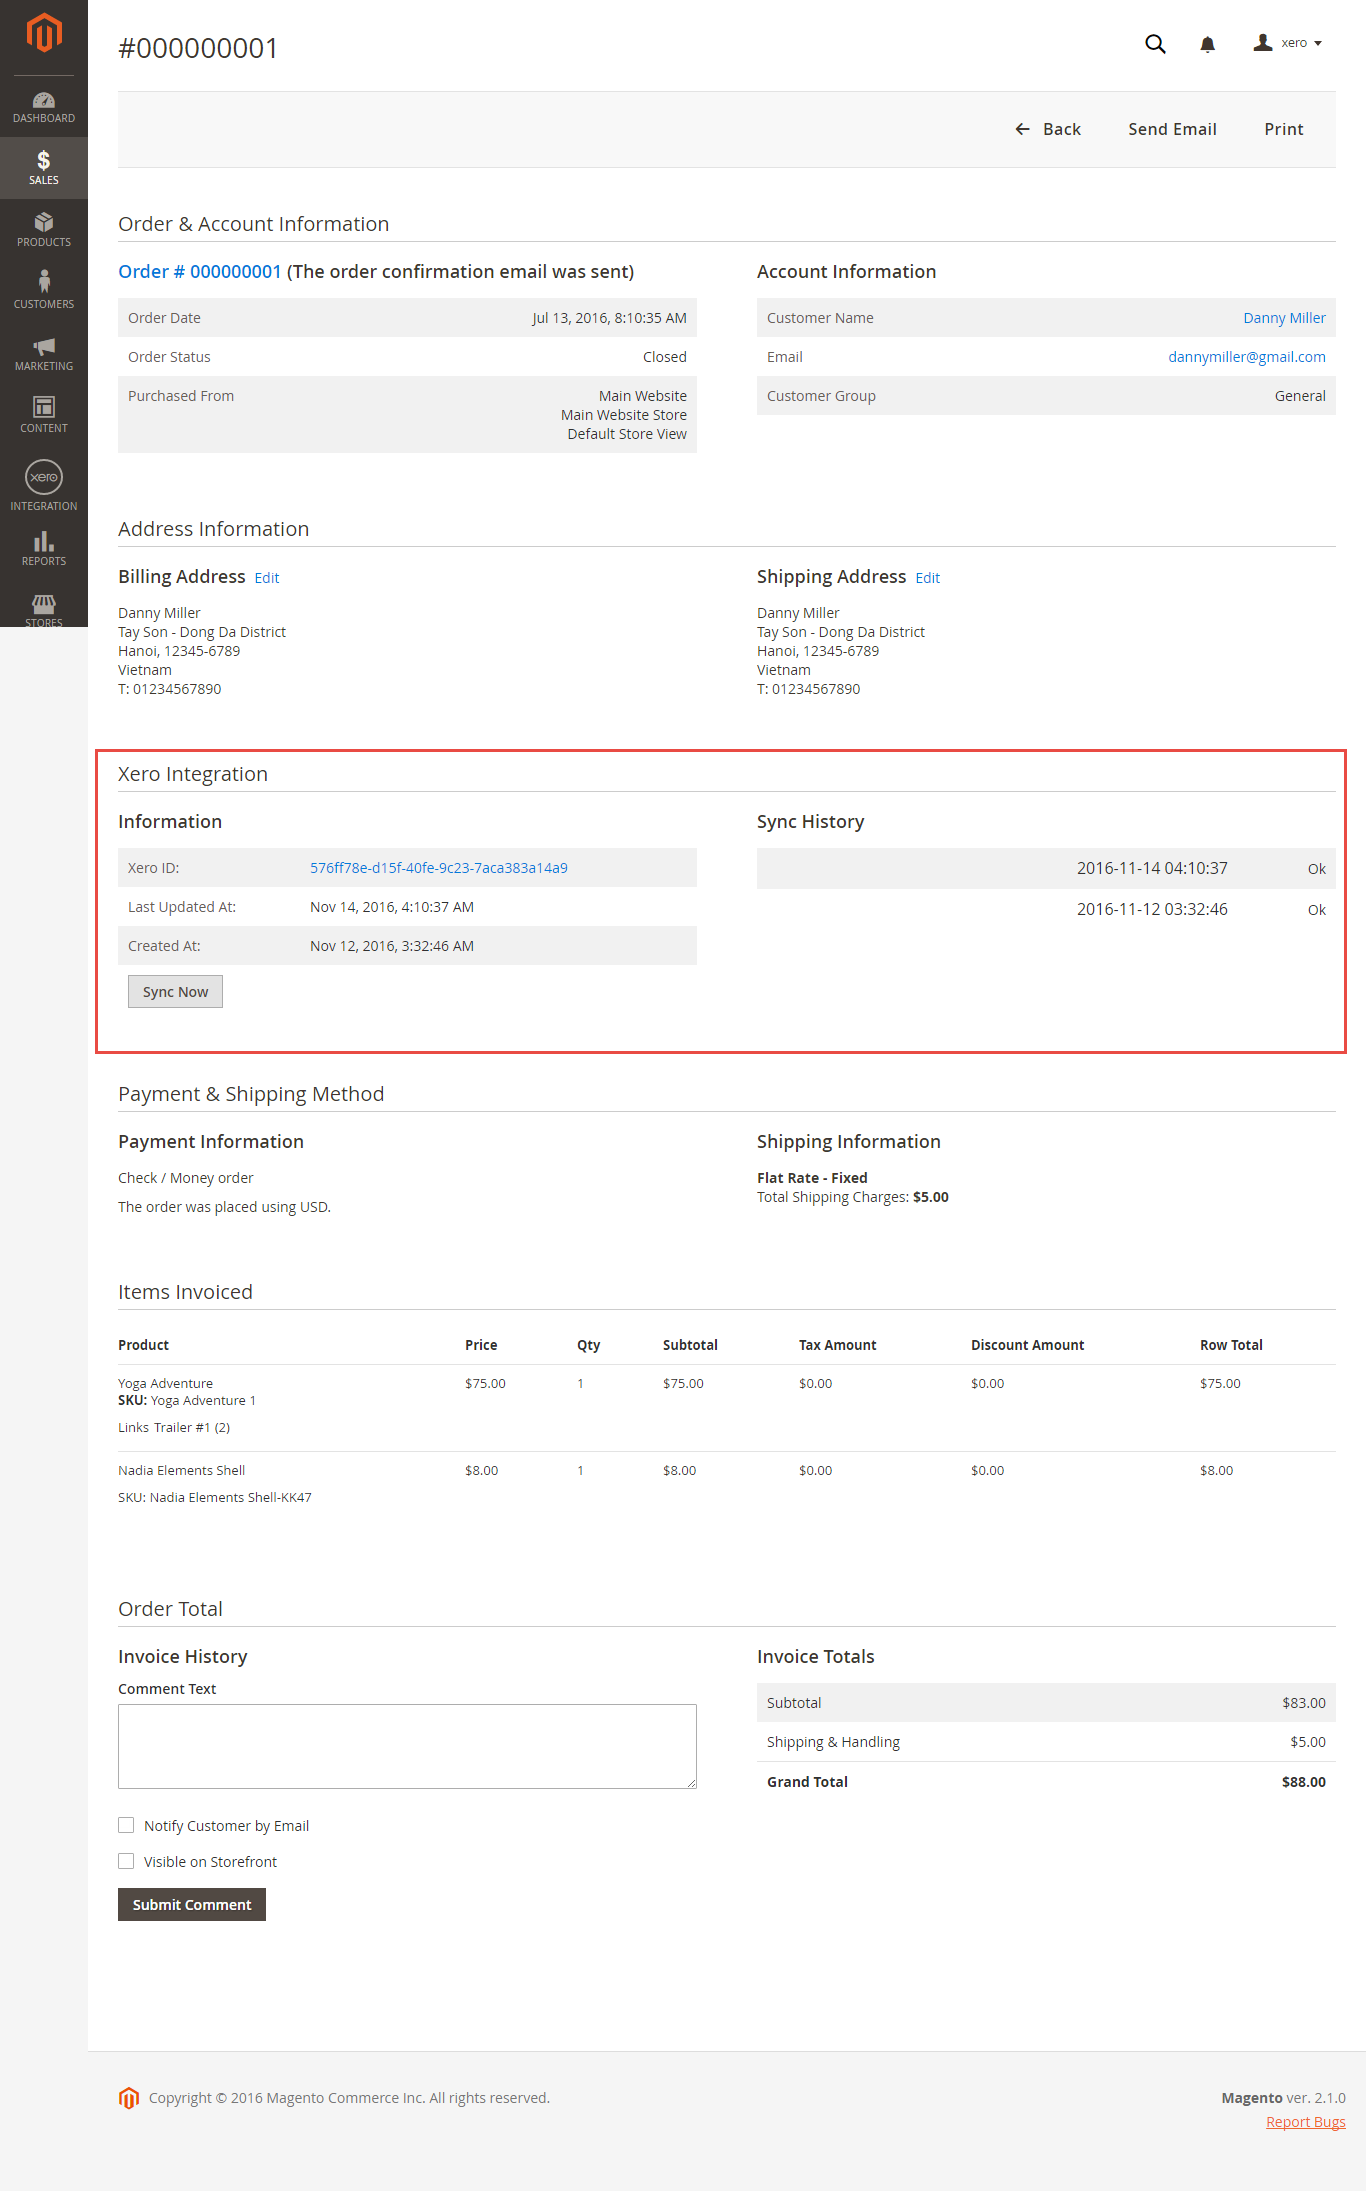
Admins can synchronize a specific order by manually by clicking on Sync Now button on each order.
- Products
* Note: The products name must be less than or equal to 50 characters otherwhile it would be cut off to fit in since Xero only allows maximum 50 characters in product name.
In addition, the products SKU must be less than or equal to 30 characters otherwhile it can't be synced to Xero since Xero only allows maximum 30 characters in product SKU.
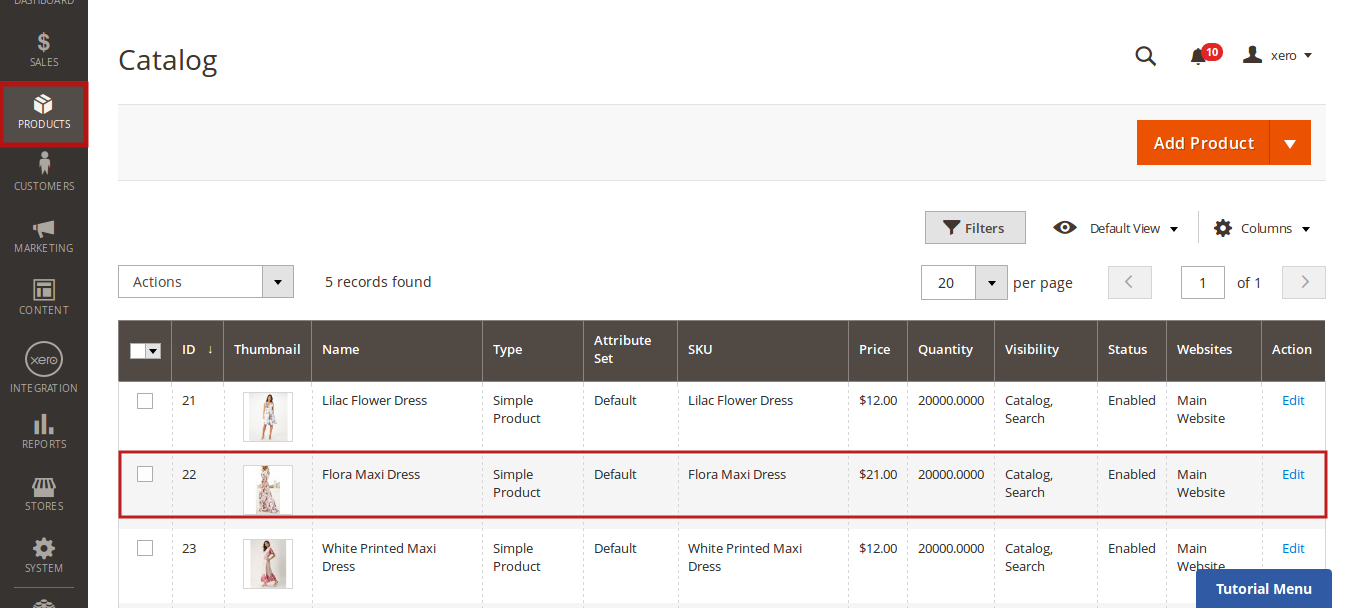
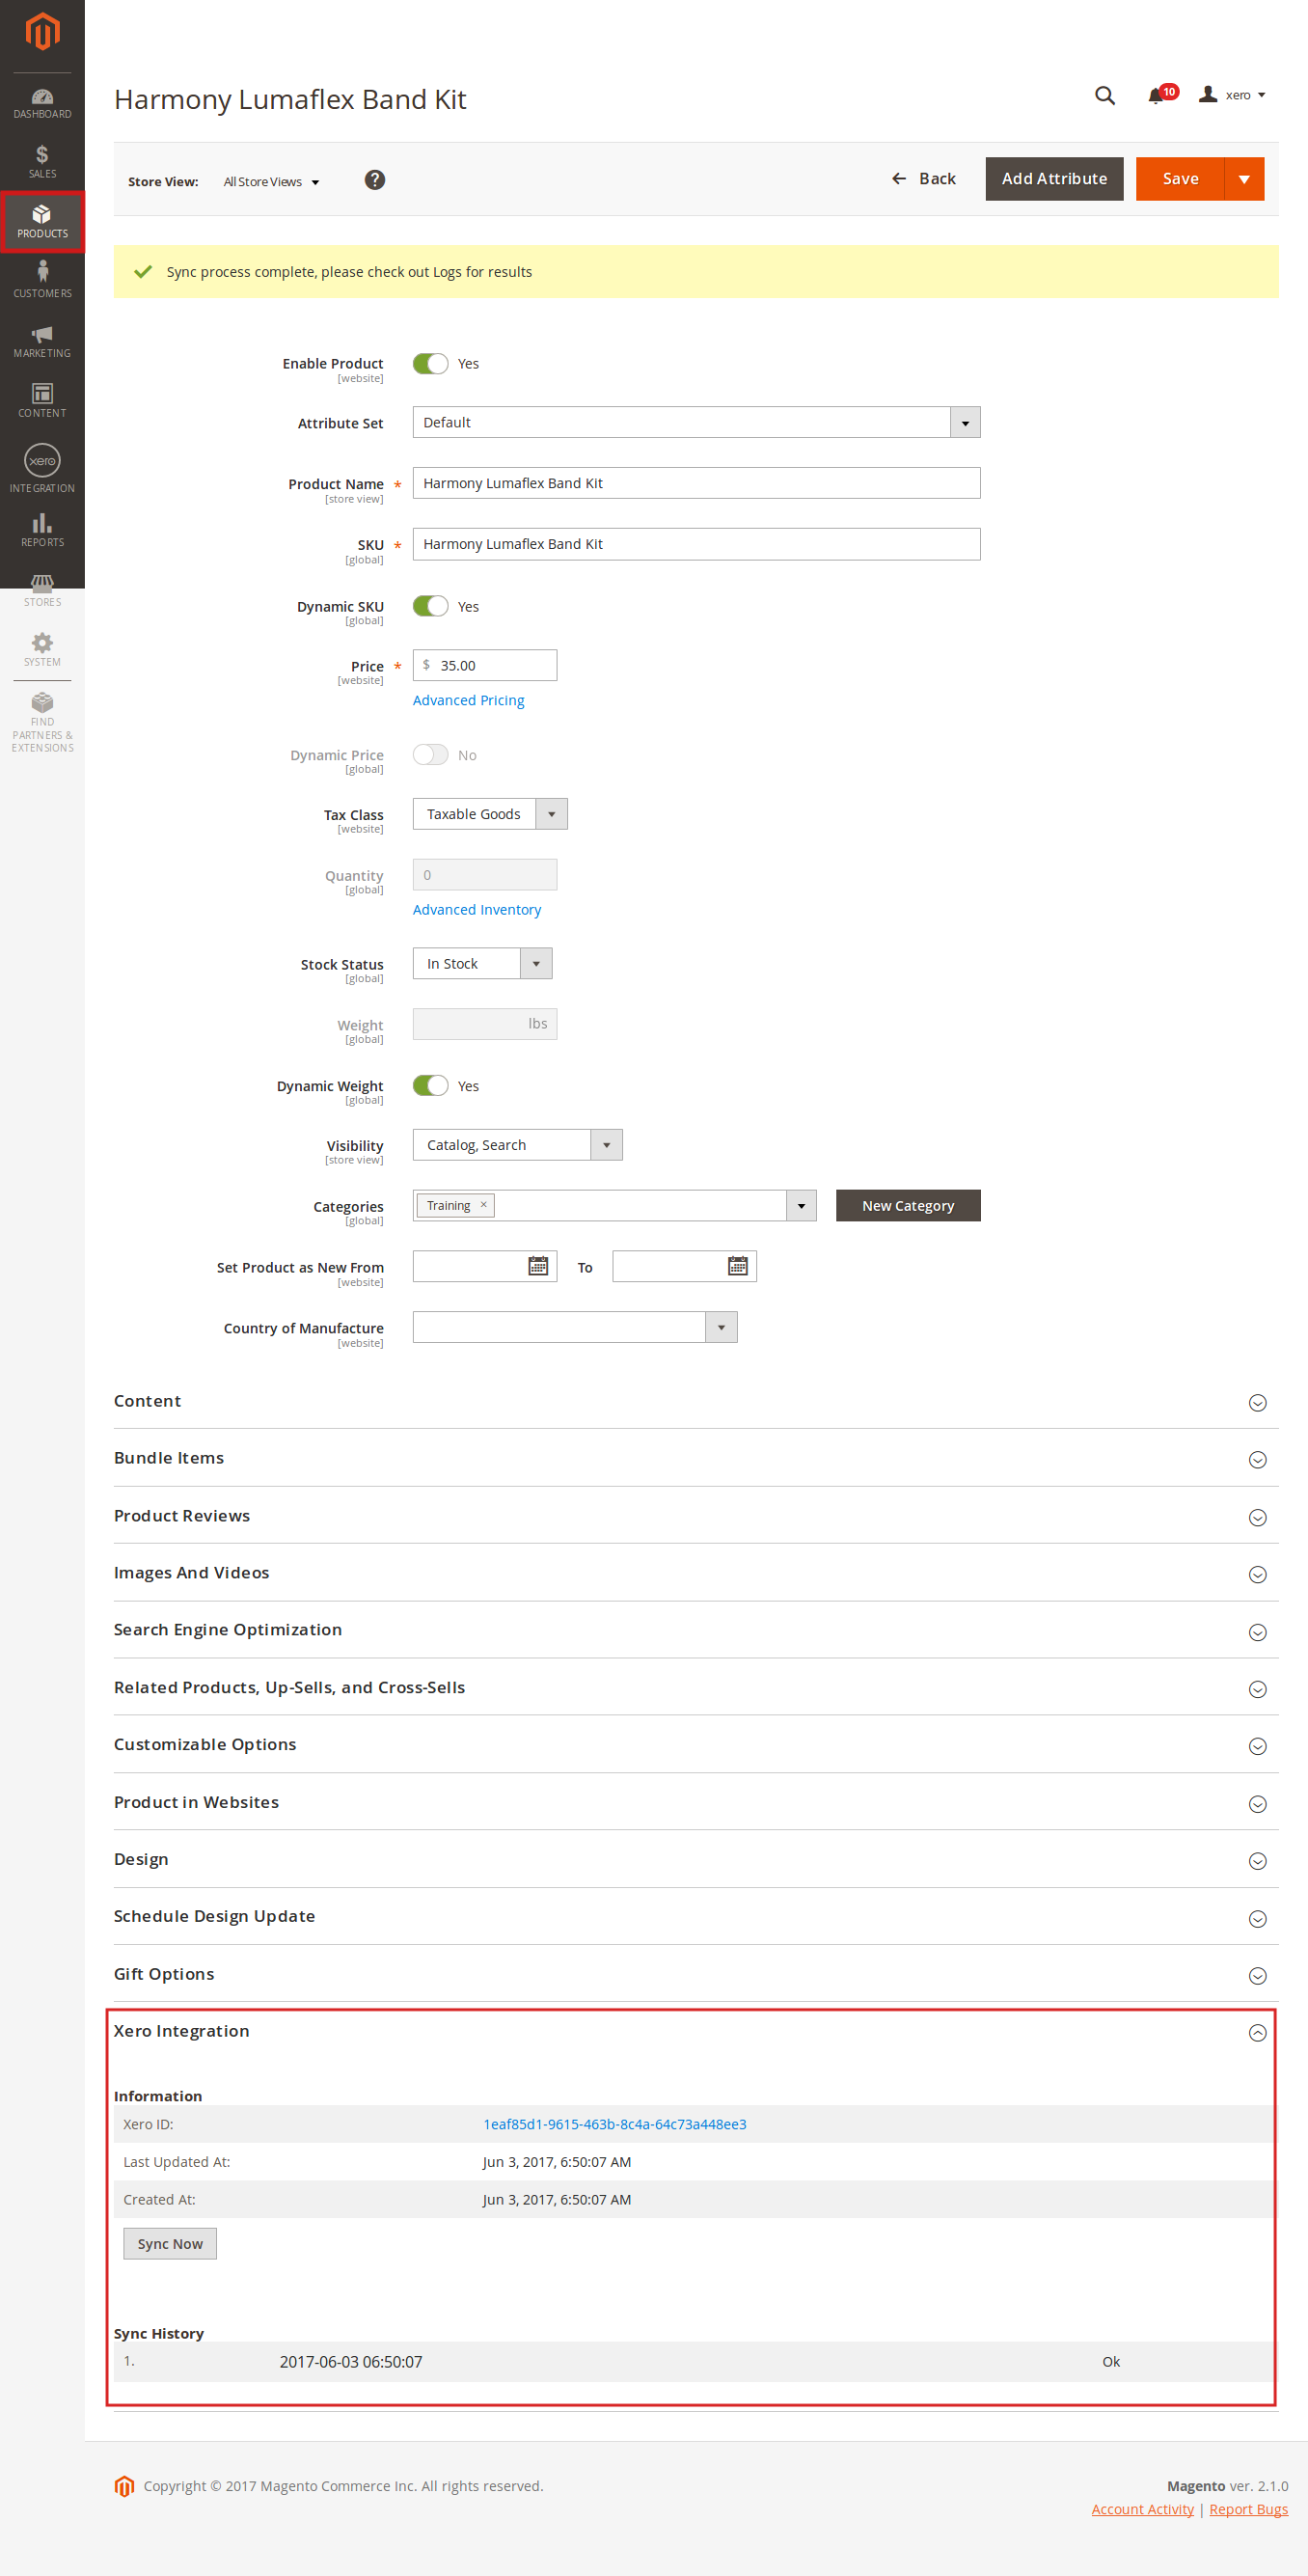
For each product, this extension created Xero Integration tab that allows admins to synchronize a specific product to Xero.
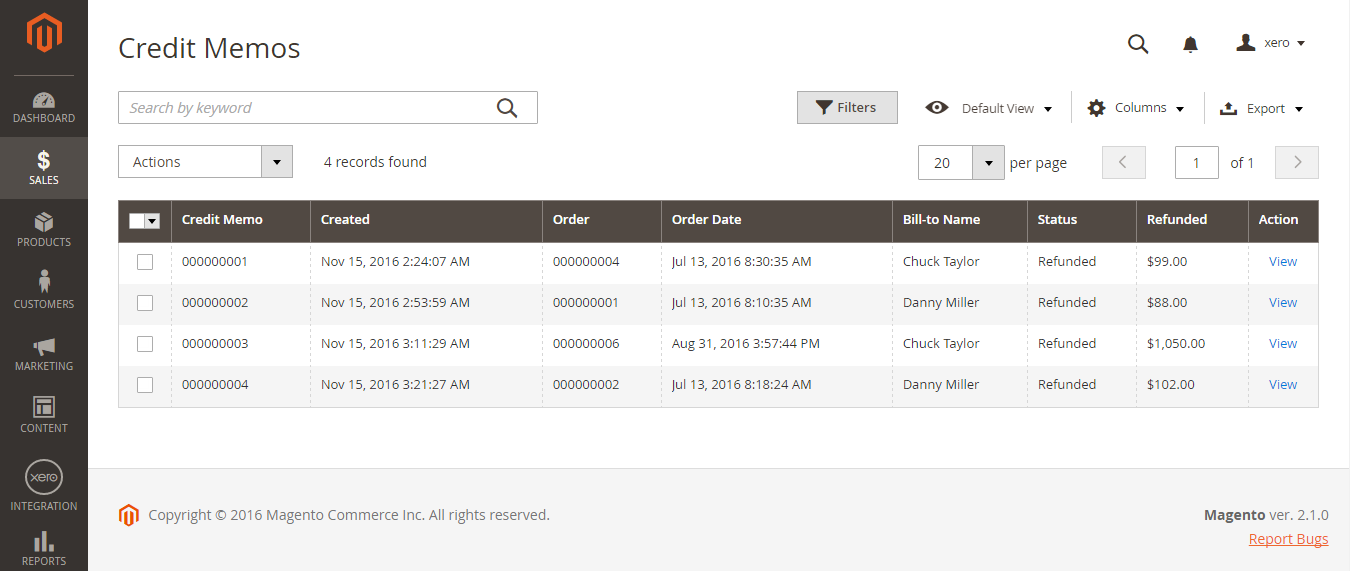
- Invoices + Credit Memos:
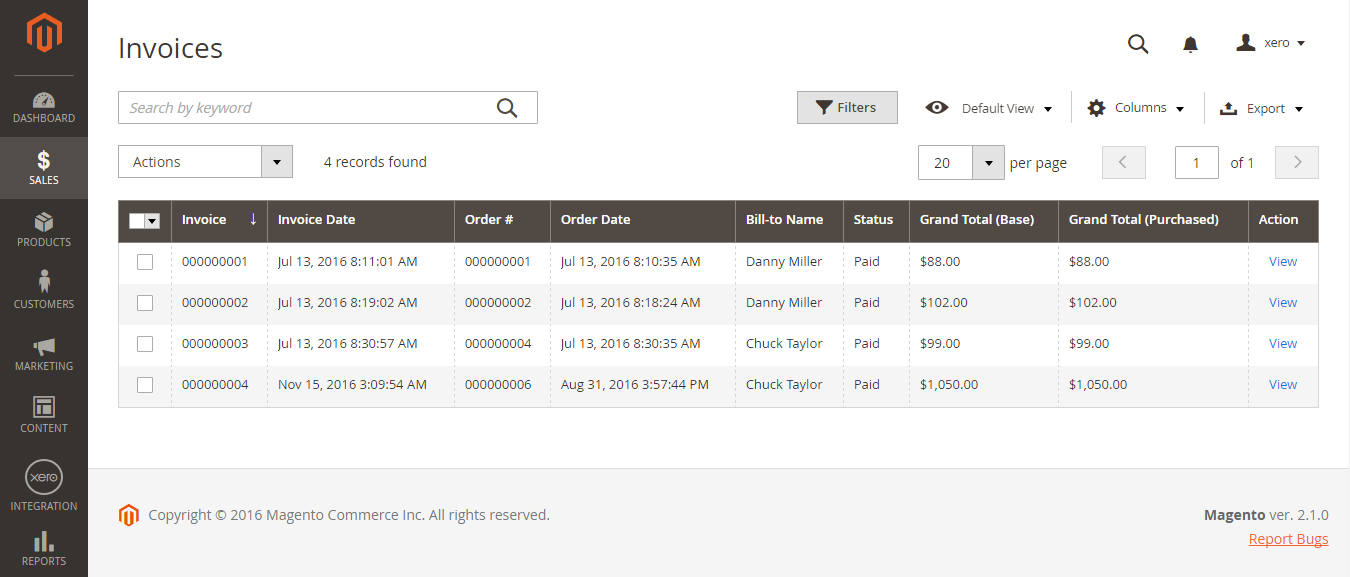
Synchronizing a specific data is the same with Invoice.
...
Troubleshooting
...
- ERROR MESSAGE: A validation exception occurred; ERROR DETAIL: Item code 'shipping' is not valid
...
=> Please disconnect and re-connect your Xero account in Xero Integration -> Configuration.
- ERROR MESSAGE: A validation exception occurred; ERROR DETAIL: Item code 'demo-product' is not valid
...
=> Please sync related items first, then re-sync the order/invoice or turn on setting “Sync Needed Data”
- ERROR MESSAGE: A validation exception occurred; ERROR DETAIL: An existing contact could not be found using the specified contact details. The contact name field is required to create a new contact.
...
=> Please sync related customer first, then re-sync the order/invoice or turn on setting “Sync Needed Data”
- ERROR MESSAGE: A validation exception occurred; ERROR DETAIL: Organisation is not subscribed to currency
...
=> Please check your Xero currency and your order currency, make sure that your Xero account support the order currency
- ERROR MESSAGE: A validation exception occurred; ERROR DETAIL: The specified bank account details does not match a known bank account.
...
=> Please check your Xero bank account and make sure it is correctly configured in Xero integration configuration.
- ERROR MESSAGE: A validation exception occurred; ERROR DETAIL: Invoice could not be found
...
=> Please check invoice error with above errors and then re-sync the order/invoice first
- ERROR MESSAGE: A validation exception occurred; ERROR DETAIL: Invoice not of valid status for modification, This document cannot be edited as it has a payment or credit note allocated to it.
...
=> This invoice in Xero is already in the status that does not allow to modify anymore.
...
Update
- When a new update is available, we will provide you with a new package containing our updated extension.
- You will have to delete the module directory and repeat the installing steps above.
- Flush the config cache. Your store and newly installed module should be working as expected.
...
...
Support
- We will reply to support requests within 2 business days.
- We will offer lifetime free update and 6 months free support for all of our paid products. Support includes answering questions related to our products, bug/error fixing to make sure our products fit well in your site exactly like our demo.
- Support DOES NOT include other series such as customizing our products, installation and uninstallation service.
...
...
Once again, thank you for purchasing our extension. If you have any questions, please do not hesitate to contact us for support.