Thank you for purchasing our theme. If you have any questions that are beyond the scope of this help file, please feel free to contact us via email [email protected]. Thanks so much!
Created: October 14th, 2016 | Updated: February 4thAugust 10th, 2020 2021 | By: Magenest | Support Portal: https://servicedesk.izysync.com/servicedesk/customer/portal/51
| Table of Contents |
|---|
Introduction
Among thousands and thousands of websites, one needs to stand out from the other in order to catch the attention of the customer. And to achieve that eye-catching impression, merchants need to choose the correct theme for their websites. A theme is the overall look, feel and style of your website. This includes things like the color scheme, layout and style elements. In essence, your website theme is a direct representation of your brand and has a direct impact on your users' experience.
Couture Fashion Theme is a Magento 2 theme with
a very elegant
and minimalist design. It is designed specially for clothing, fashion, shoes, handbags, watches, accessories shop. This theme is easy to customize and ready to use. With this theme, you can install and set up the theme with ease.
Requirements
Your store should be running on Magento Community Edition and Magento Enteprise Edition version
2.3
.x, 2.
4.x
Your theme is the overall look, feel and style of your website. This includes things like the color scheme, layout and style elements. In essence, your website theme is a direct representation of your brand and has a direct impact on your users' experience.
Configuration
Enable the theme
![]() In order to To enable the Couture Fashion theme, on the Admin sidebar, go to Content > Schedule > Add Design Change > General SettingsConfiguration > Edit.
In order to To enable the Couture Fashion theme, on the Admin sidebar, go to Content > Schedule > Add Design Change > General SettingsConfiguration > Edit.
- Store: select the store in which you want to change the theme.
- Custom Design: select Magenest CF theme 02 default.
- Date From/To: The duration for the theme to be available.
- Click on the Save button to save the configuration.
![]() After saving, you would need to clear the Magento cache, go to System > Cache Management > Flush Magento Cache.
After saving, you would need to clear the Magento cache, go to System > Cache Management > Flush Magento Cache.

Logo & Favicon
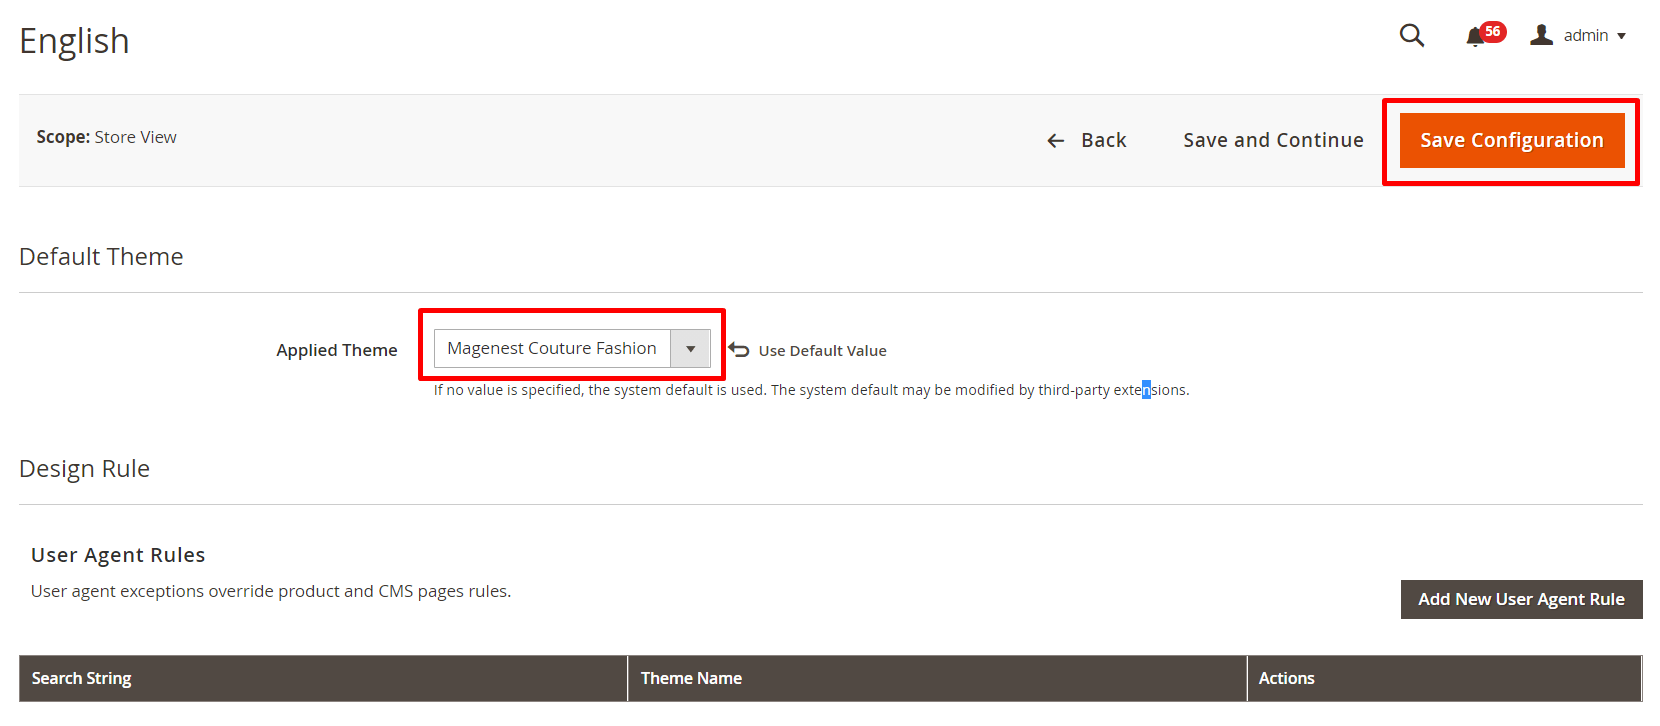
![]() Then in Applied theme options, choose Magenest Couture Fashion > Save configuration
Then in Applied theme options, choose Magenest Couture Fashion > Save configuration
Sample Data
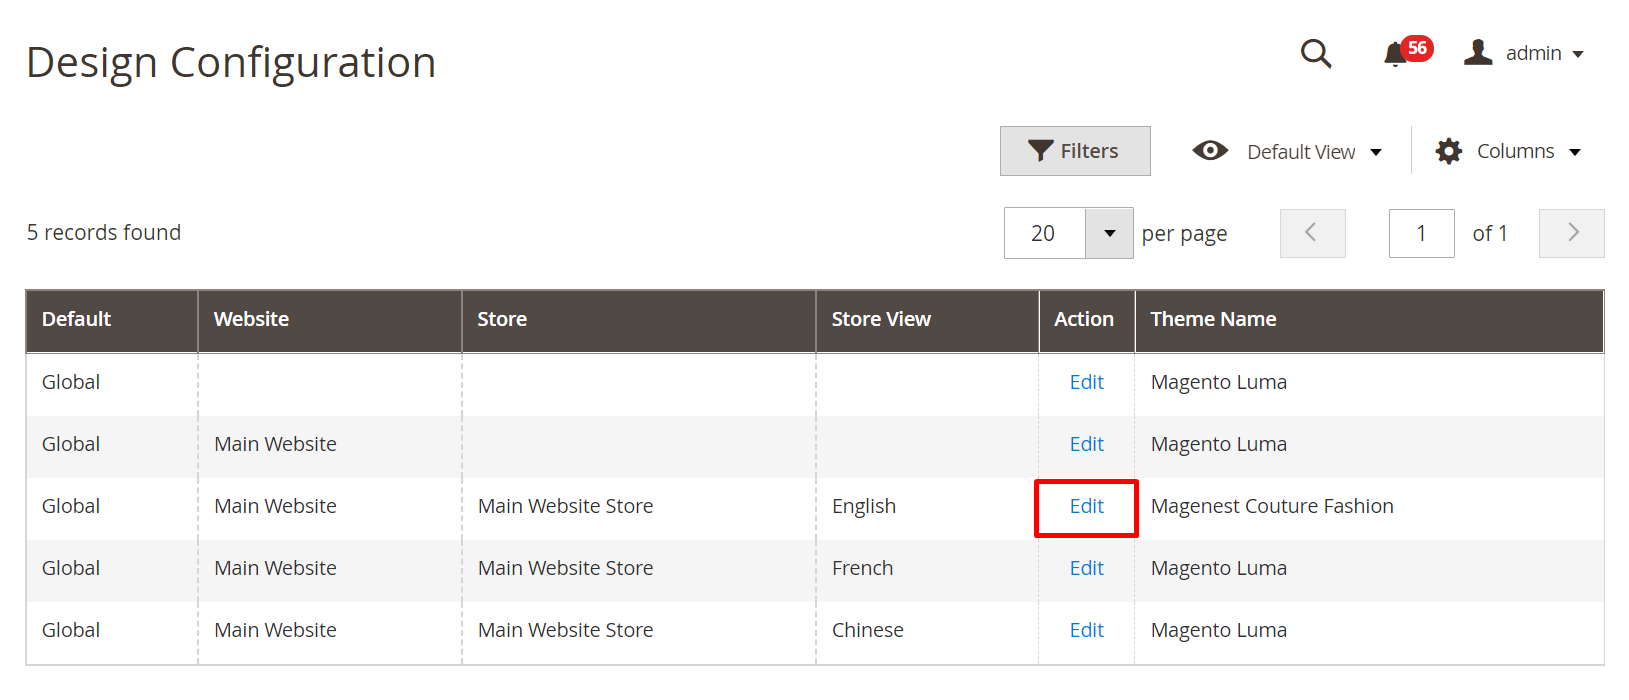
![]() On the admin sidebar, go to Content > Configuration, on the grid, select the theme with the store view set in General Settings, then click on Edit.
On the admin sidebar, go to Content > Configuration, on the grid, select the theme with the store view set in General Settings, then click on Edit.

- Under the Header section, upload or select the image for the logo on the Logo Image field.

- Under the HTML Head section, select or upload images for the Favicon icon.

Copyright
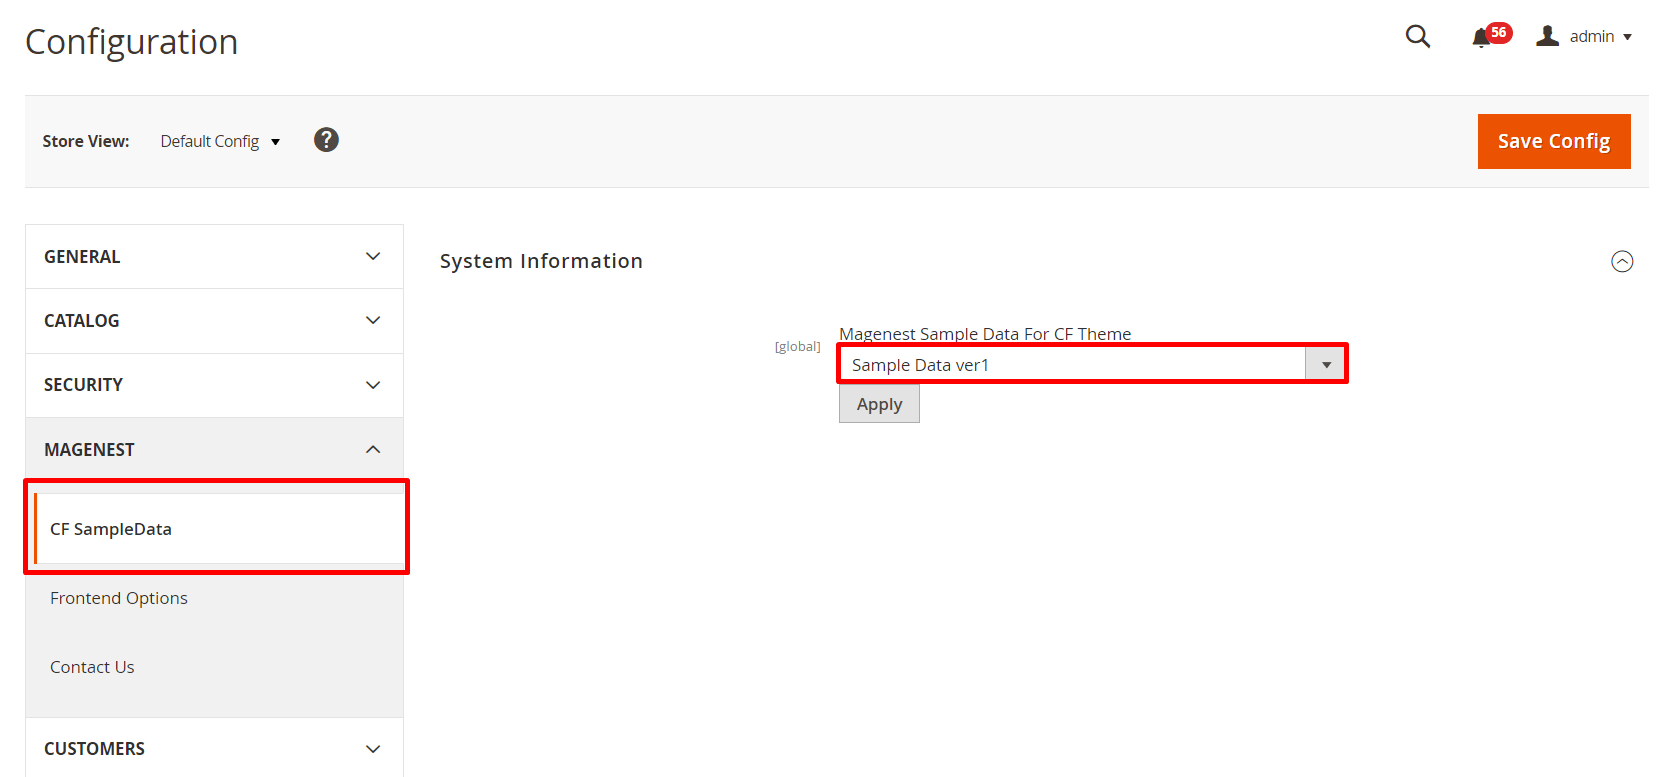
to Stores > Configuration > Magenest > CF Sample Data
![]() Then for Magenest Sample Data for CF Theme, choose Sample Data ver 1, after that click in Apply
Then for Magenest Sample Data for CF Theme, choose Sample Data ver 1, after that click in Apply
Home Page and 404 Customization
![]() On the admin sidebar,
On the admin sidebar,
go to
Content > Configuration, in the grid, select the theme with the store view set in General Settings, then click on Edit.![]() On the Configuration page, under the Footer section, enter the content for the copyright on the Copyrights field.
On the Configuration page, under the Footer section, enter the content for the copyright on the Copyrights field.

![]() For the Sample Data, go to Store > Configuration > Maggenest > CF SampleData.
For the Sample Data, go to Store > Configuration > Maggenest > CF SampleData.

Front end Display: CMS Blocks, Widgets
Home Slider Block
![]() On the back end, you can configure the Homepage display. Go to Content > Block > Search: Home Slider
On the back end, you can configure the Homepage display. Go to Content > Block > Search: Home Slider
![]() On the Home Slider Page
On the Home Slider Page
- Block Title: Home Slider
- Identifier: home.slider

- Click on Magenest Slider widget to see all the home slider settings. Admin can set up to 5 banners, each banner with a differrent image, alt-text, content and custom link. Click on the SAVE button once you finish.

- Home Page display on the storefront.

Home Vertical Menu Block
![]() On the back end, go to Content > Blocks > Search: Home Vertical Menu
On the back end, go to Content > Blocks > Search: Home Vertical Menu
- Block Title: Home Vertical Menu
- Identifier: home.vertical.menu
![]() Note: This block uses static content only, if you want more options, please install the Mega Menu extension here.
Note: This block uses static content only, if you want more options, please install the Mega Menu extension here.

- Click Show/ Hide Editor button to see Source code. You can add/edit/delete each <li class="itemMenu subparent ">
<nav class="navigation nav-magemenu-menu vertical vertical_left hover-menu "><span class="btn-menu-vertical">All Categories</span>
<div class="magemenu-menu vertical-menu">
<ul class="nav-exploded explodedmenu">
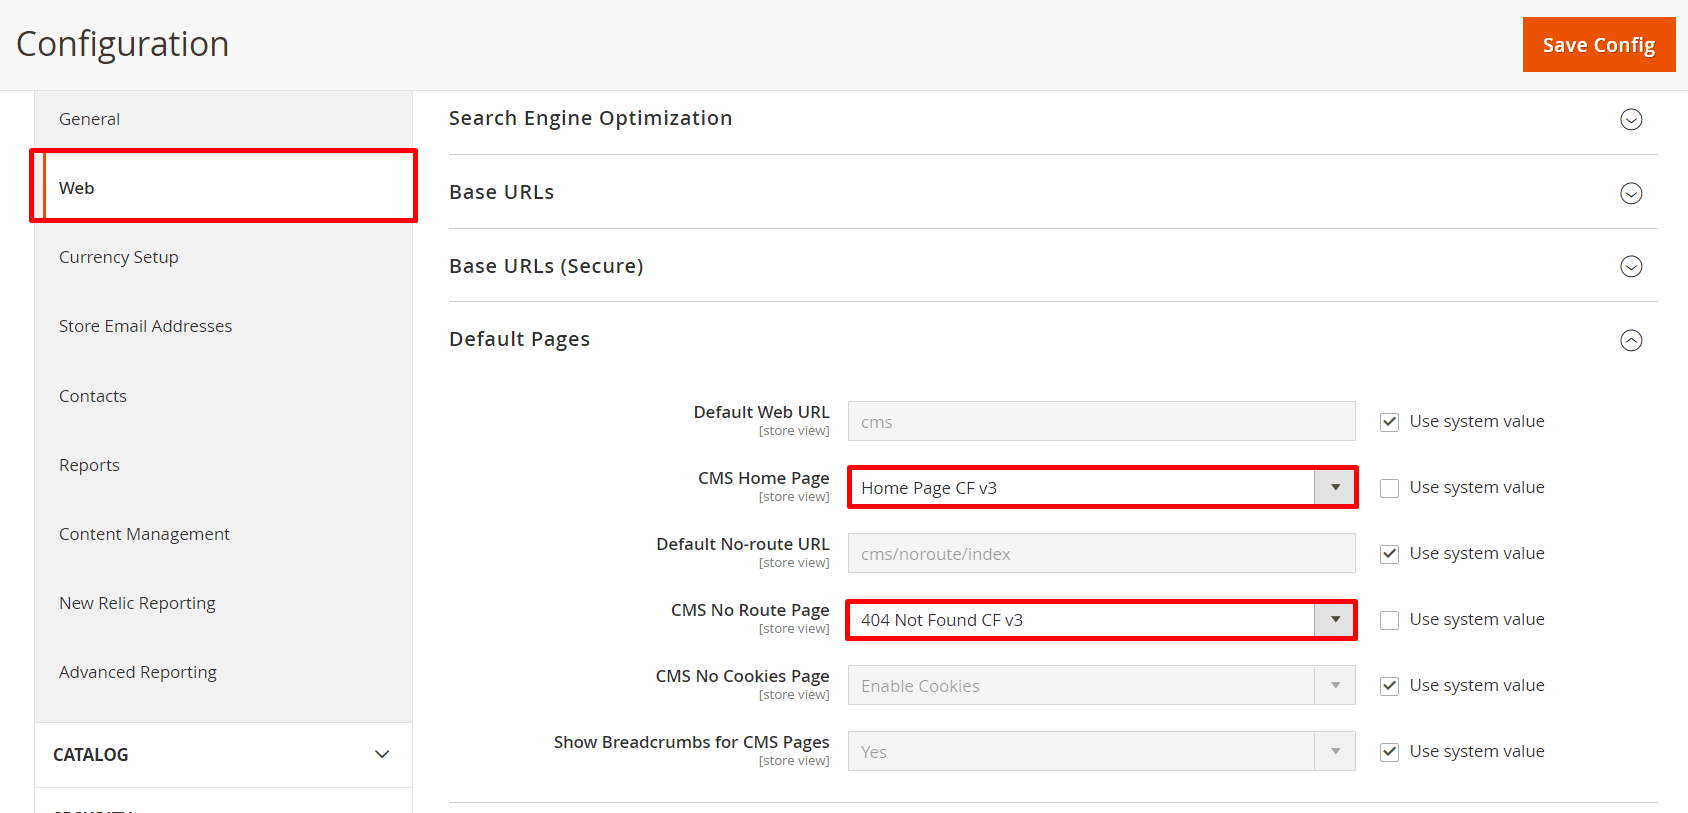
Stores > Configuration > General Web > Default Pages
![]() In CMS Home Page options, choose Home Page CF v3
In CMS Home Page options, choose Home Page CF v3
![]() In CMS No Route Page options, choose 404 Not Found CF v3
In CMS No Route Page options, choose 404 Not Found CF v3
![]() Then to save, click in Save Config button
Then to save, click in Save Config button
Front End Options
On the admin sidebar, go to Stores > Configuration > Magenest > Frontend Options > General Setting
- In this section, you can enable/disable sticky header; change the color, background color of header/ footer
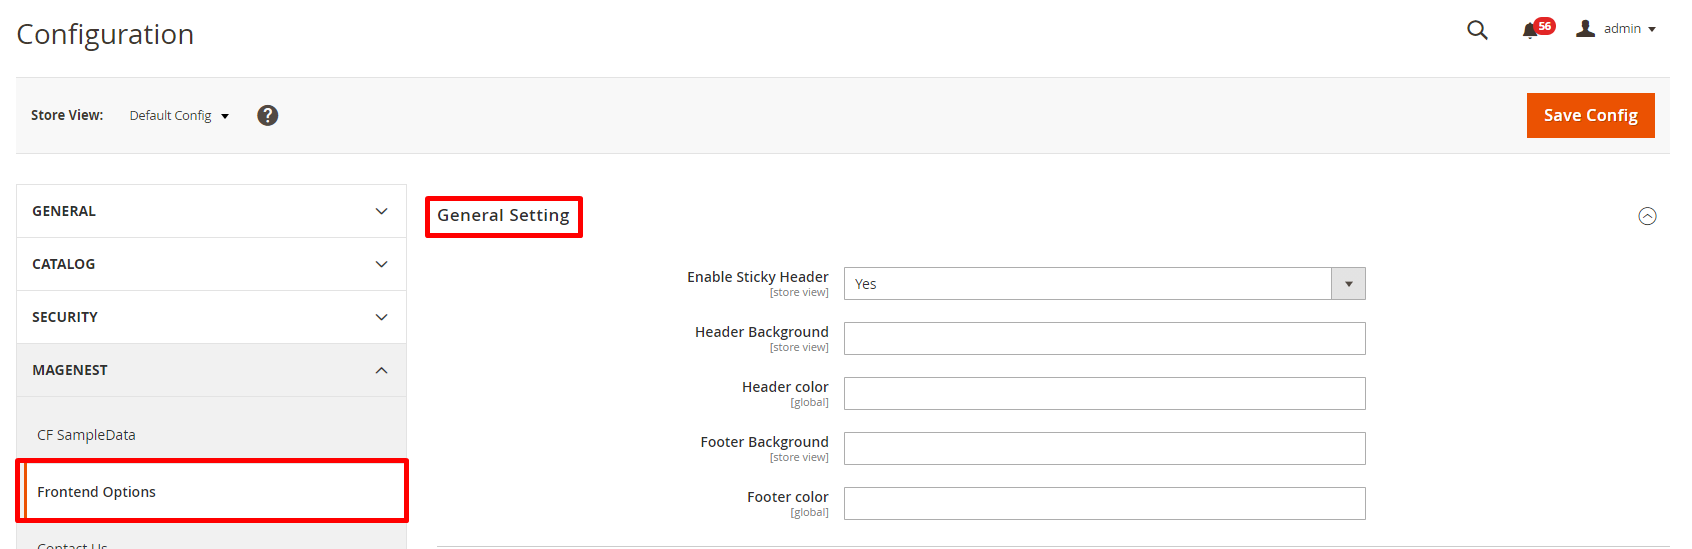
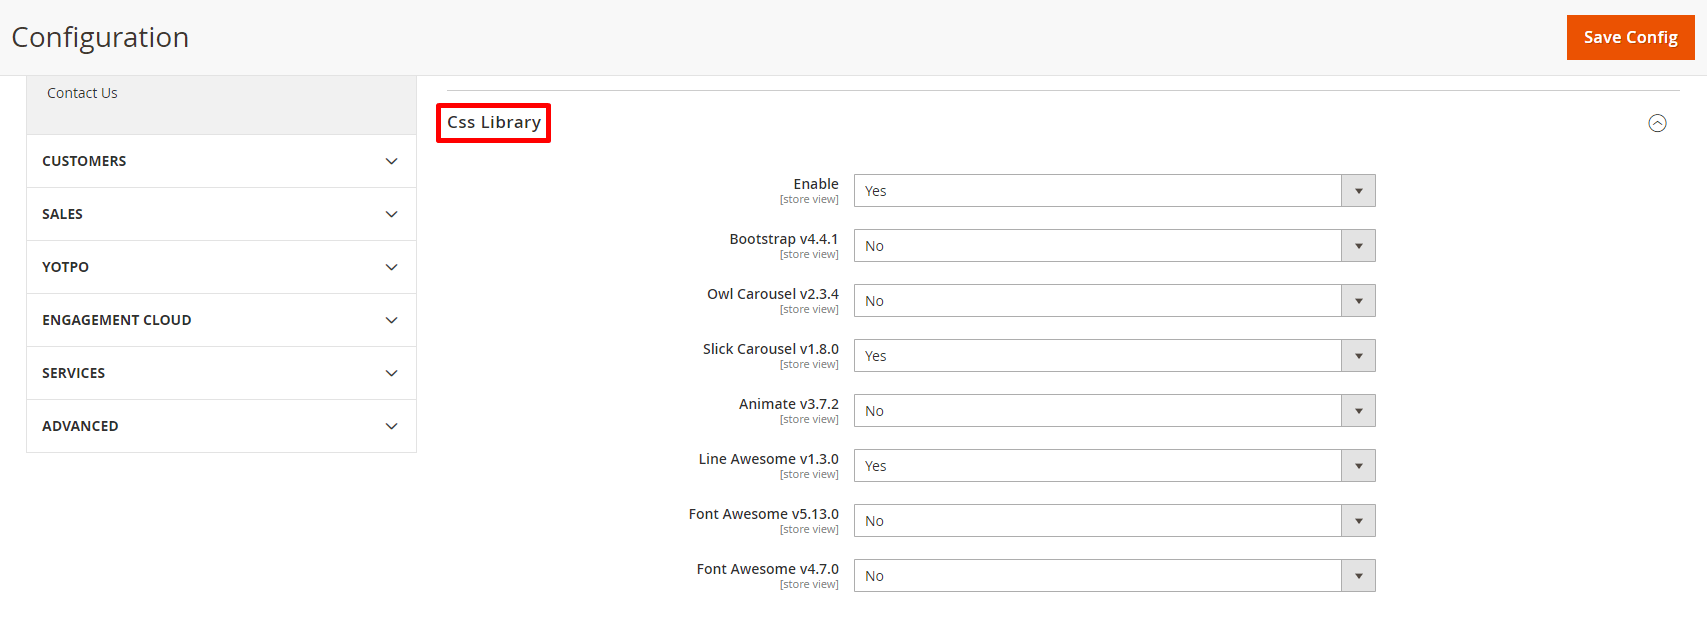
- Options of CSS Library are also customizable
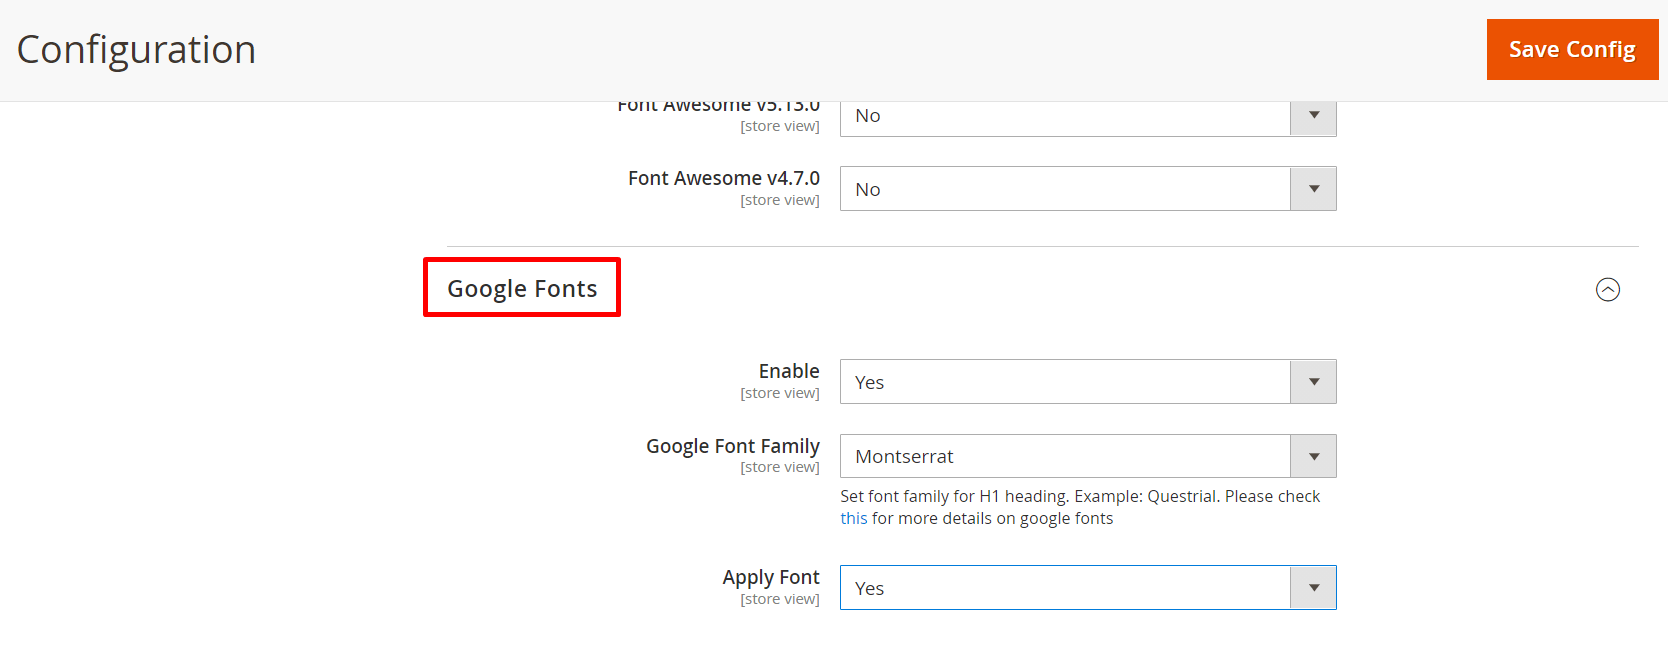
- Configure Google Fonts in order to change your font
- Enable: Choose Yes to start
- Google Font Family: Choose your preferrable one
- Apply Font: Choose Yes if you want to apply your chosen font on Store View
Theme's Features
Add customized Header link
<li class="itemMenu subparent "><a href="{{store url='clothes/women.html'}}" target="_self"> <span style="position: relative; display: inline-block; hover: color: #ffffff;"> <img class="menu-icon" src="{{view url='images/home/menu-icons/icon-menu-2.png'}}"> Women </span> </a></li><li class="itemMenu subparent "><a href="{{store url='clothes/men.html'}}" target="_self"> <span style="position: relative; display: inline-block; hover: color: #ffffff;"> <img class="menu-icon" src="{{view url='images/home/menu-icons/icon-menu-1.png'}}"> Men </span> </a></li><li class="itemMenu subparent "><a href="{{store url='clothes/women.html'}}" target="_self"> <span style="position: relative; display: inline-block; hover: color: #ffffff;"> <img class="menu-icon" src="{{view url='images/home/menu-icons/icon-menu-10.png'}}"> Outerwear </span> </a></li><li class="itemMenu subparent "><a class="" href="{{store url='clothes/women.html'}}" target="_self"> <span style="position: relative; display: inline-block; hover: color: #ffffff;"> <img class="menu-icon" src="{{view url='images/home/menu-icons/icon-menu-6.png'}}"> Sweatshirts </span> </a></li><li class="itemMenu subparent "><a href="{{store url='clothes/women.html'}}" target="_self"> <span style="position: relative; display: inline-block; hover: color: #ffffff;"> <img class="menu-icon" src="{{view url='images/home/menu-icons/icon-menu-2.png'}}"> Dresses </span> </a></li><li class="itemMenu subparent "><a href="{{store url='clothes/women.html'}}" target="_self"> <span style="position: relative; display: inline-block; hover: color: #ffffff;"> <img class="menu-icon" src="{{view url='images/home/menu-icons/icon-menu-9.png'}}"> Pants </span> </a></li>
<li class="itemMenu subparent "><a href="{{store url='clothes.html'}}" target="_self"> <span style="position: relative; display: inline-block; hover: color: #ffffff;"> <img class="menu-icon" src="{{view url='images/home/menu-icons/icon-menu-8.png'}}"> Outterwear </span> </a></li>
<li class="itemMenu subparent "><a href="{{store url='clothes/men.html'}}" target="_self"> <span style="position: relative; display: inline-block; hover: color: #ffffff;"> <img class="menu-icon" src="{{view url='images/home/menu-icons/icon-menu-10.png'}}"> T-shirts & Polos </span> </a></li>
<li class="itemMenu subparent "><a href="{{store url='clothes.html'}}" target="_self"> <span style="position: relative; display: inline-block; hover: color: #ffffff;"> <img class="menu-icon" src="{{view url='images/home/menu-icons/icon-menu-9.png'}}"> Pants </span> </a></li>
</ul></div>
</nav>
- Home vertical menu display on the store front

Home page customization
![]() On the admin sidebar, go to Content >
On the admin sidebar, go to Content >
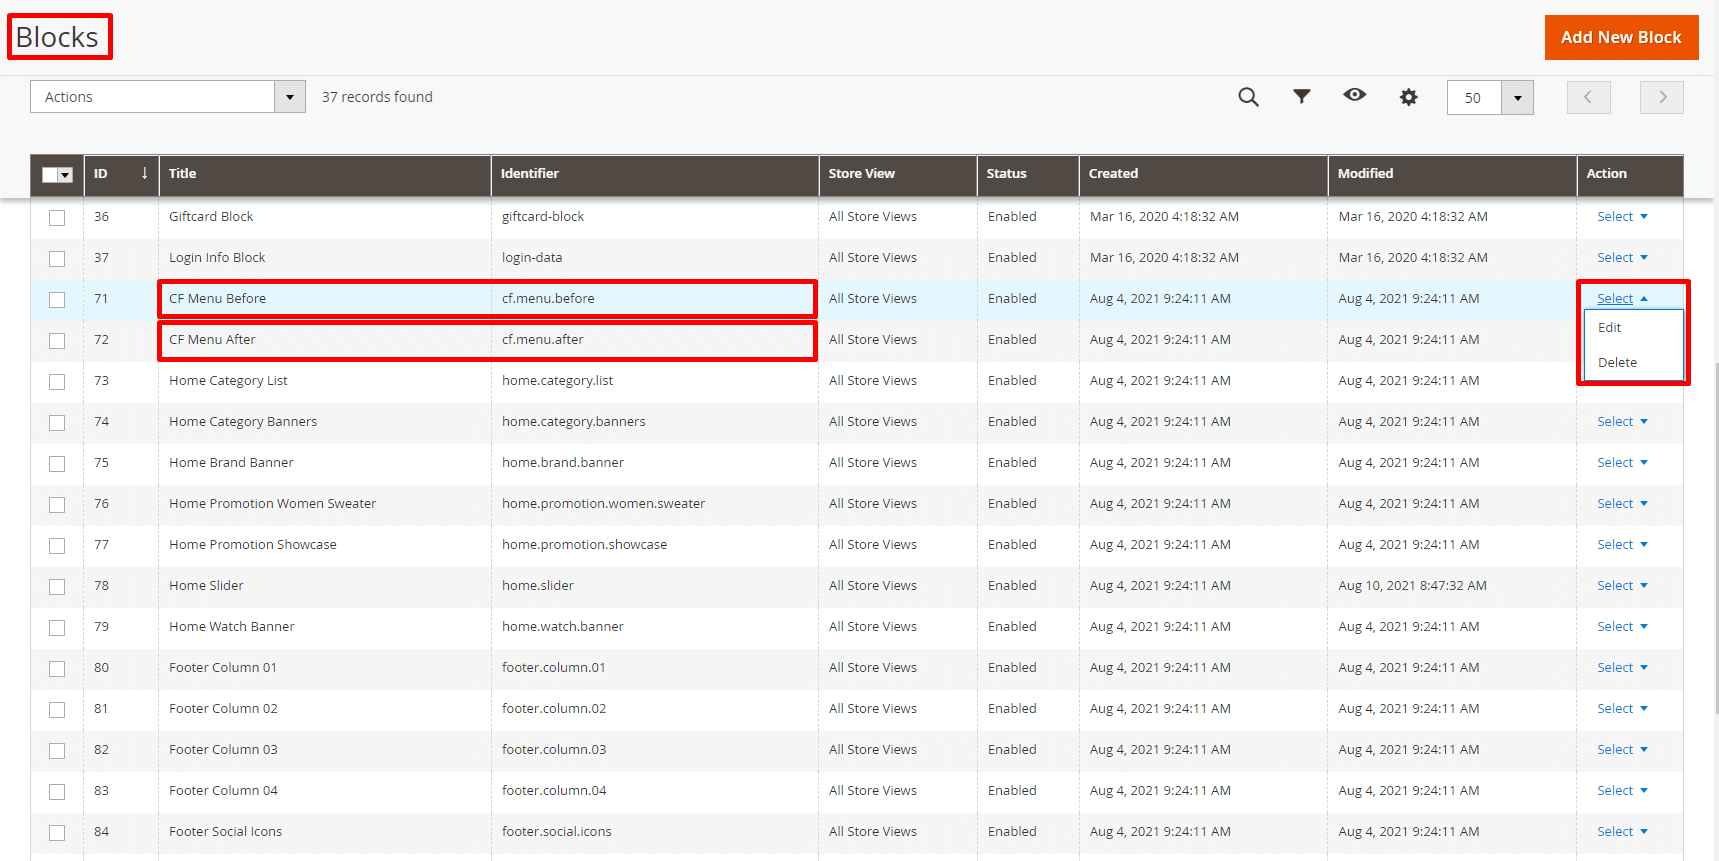
Blocks
![]()
Select Edit of:
- CF Menu Before to customize link at the beggining of your header
- CF Menu After to customize link at the end of your header
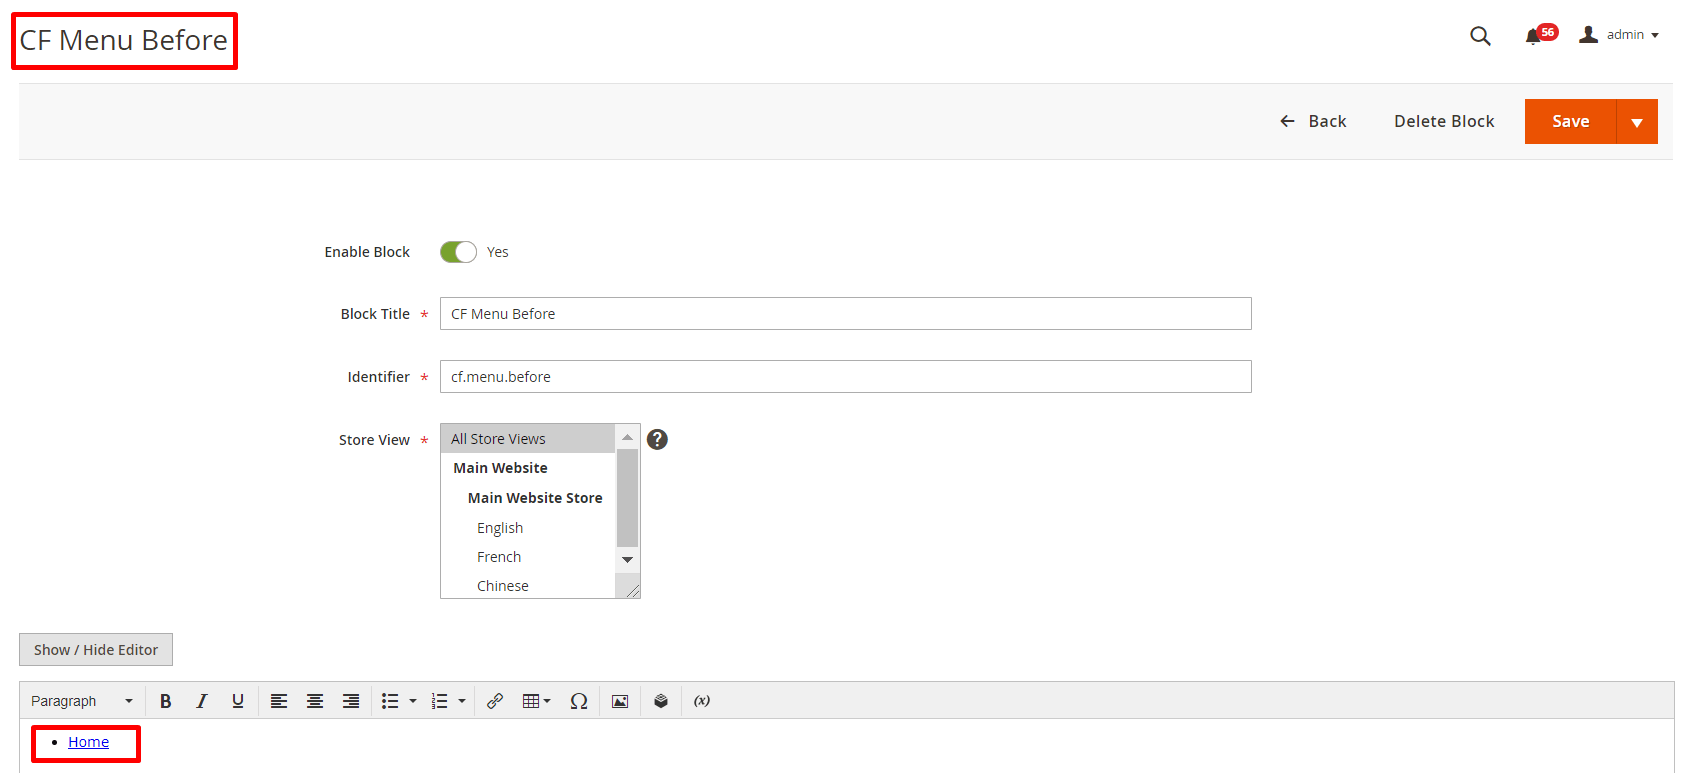
![]() Choose your preferred Store View, and add customized link in Editor section
Choose your preferred Store View, and add customized link in Editor section
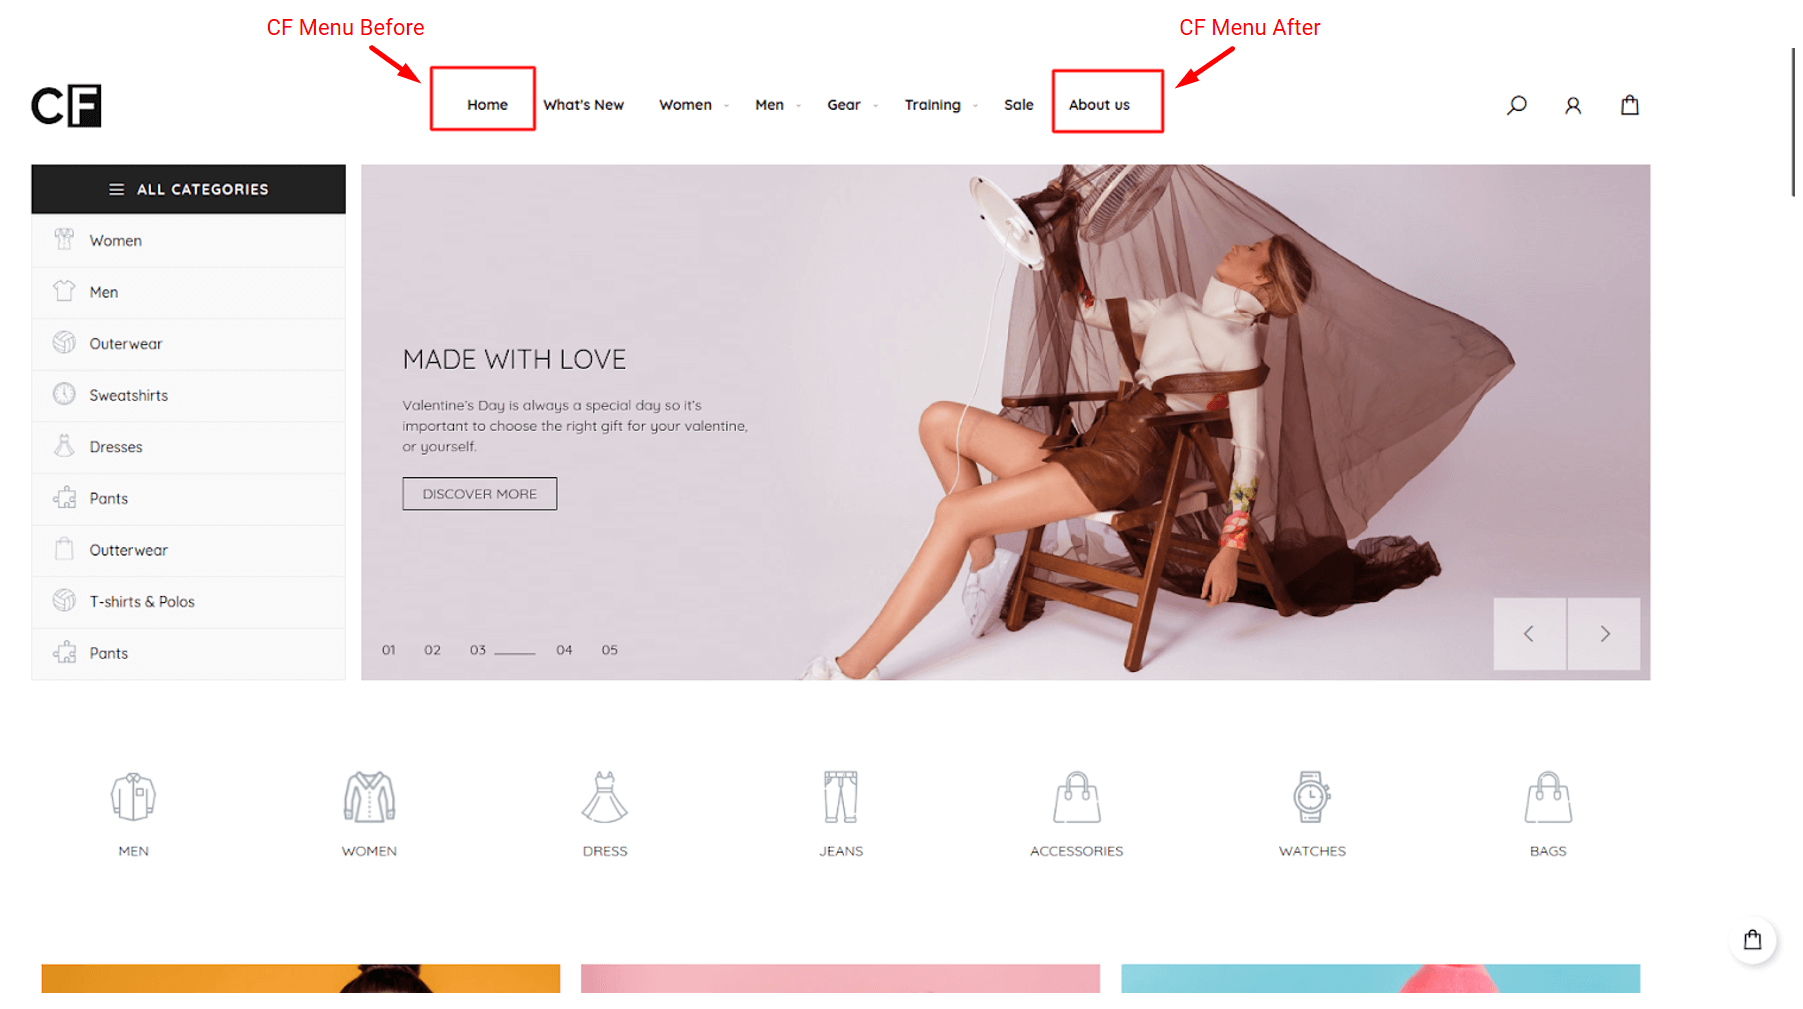
In the example, we add a link to Home Page
- Customized Header links in FrontEnd
Additional Widgets
![]()

| Code Block |
|---|
<div class="block-slide-style1">
<div class="owl-slide-style1">
<div class="item-slide"><img src="{{view url='images/theme/slide4.jpg'}}" alt=""></div>
<div class="item-slide"><img src="{{view url='images/theme/slide4.jpg'}}" alt=""></div>
</div>
</div>
<div class="block-image-style1"><a class="image-colum1" href="#"><img src="{{view url='images/theme/image1.jpg'}}" alt=""> </a> <a class="image-colum2" href="#"><img src="{{view url='images/theme/image2.jpg'}}" alt=""></a> <a class="image-colum3" href="#"><img src="{{view url='images/theme/image3.jpg'}}" alt=""></a> <a class="image-colum4" href="#"><img src="{{view url='images/theme/image4.jpg'}}" alt=""></a></div>
<div class="block-new-style1">{{widget type="Magento\Catalog\Block\Product\Widget\NewWidget" display_type="new_products" products_count="10" template="Magento_Catalog::product/widget/new/content/new_grid.phtml"}}</div>
<div class="block-sales-style1">
<div class="container">
<div class="column-left"><img src="{{view url='images/theme/sale2-home3.jpg'}}" alt=""></div>
<div class="column-right">{{widget type="Magenest\Widget\Block\Product\Widget\HotSalesWidget" title="hot sale" products_count="10" template="Magenest_Widget::product/widget/sales/content/hot_sales_grid.phtml"}}</div>
</div>
</div>
<div class="block-brand-client">
<div class="block-brand-style1">
<div class="block-title">OUR BRAND</div>
<div class="owl-brand-style1">
<div class="item"><img src="{{view url='images/theme/dt1.jpg'}}" alt=""> <img src="{{view url='images/theme/dt2.jpg'}}" alt=""></div>
<div class="item"><img src="{{view url='images/theme/dt3.jpg'}}" alt=""> <img src="{{view url='images/theme/dt4.jpg'}}" alt=""></div>
<div class="item"><img src="{{view url='images/theme/dt5.jpg'}}" alt=""> <img src="{{view url='images/theme/dt6.jpg'}}" alt=""></div>
</div>
</div>
<div class="block-client-style1">
<div class="block-title">CLIENT SAY</div>
<div class="owl-client-style1">
<div class="item">
<p>Lorem Ipsum is simply dummy text of the printing and typesetting industry. Lorem Ipsum has been the industry's standard dummy text ever since the 1500s, when an unknown printer took a galley of type and scrambled it to make a type specimen book. It has survived not only five centuries, but also the leap into electronic typesetting, remaining essentially unchanged.</p>
<br><strong>- John Wick - </strong>
<p>Developer</p>
</div>
<div class="item">
<p>It is a long established fact that a reader will be distracted by the readable content of a page when looking at its layout. The point of using Lorem Ipsum is that it has a more-or-less normal distribution of letters, as opposed to using 'Content here, content here', making it look like readable English. Many desktop publishing packages and web page editors now use Lorem Ipsum as</p>
<br><strong>- John Wick - </strong>
<p>Developer</p>
</div>
</div>
</div>
</div>
<div class="block-3columns-text block-3columns-text-style1">
<div class="container">
<div class="col col-md-4">
<div class="item">
<div class="icon"> </div>
<h3 class="title">Free shipping</h3>
<p class="text">Free shipping on all UK orders</p>
</div>
</div>
<div class="col col-md-4">
<div class="item">
<div class="icon"> </div>
<h3 class="title">Monet guarentee</h3>
<p class="text">30 days money back fuarentee</p>
</div>
</div>
<div class="col col-md-4">
<div class="item">
<div class="icon"> </div>
<h3 class="title">Online support</h3>
<p class="text">We support online 24/24 on day</p>
</div>
</div>
</div>
</div>
|
Widget Settings
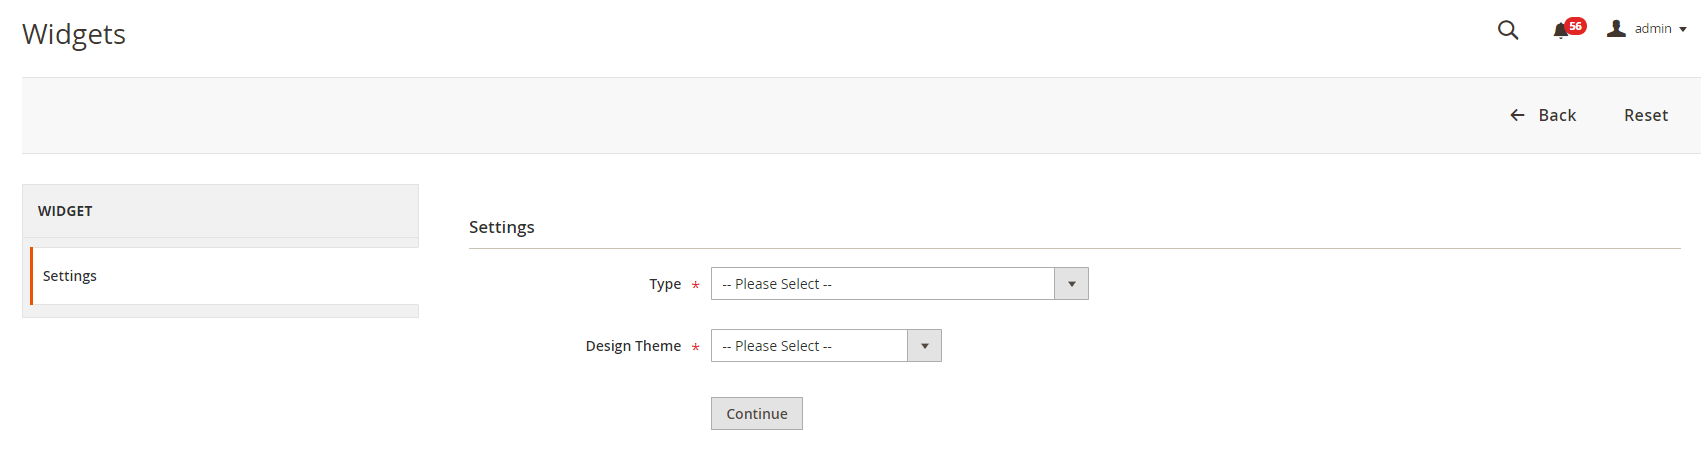
Add new widget
On the admin sidebar, go to Content > Widgets > Add widget.
Type: select CMS Static Block.
Design Theme: select our Magenest Couture Fashion.
 The following widgets are available for you to use:
Flush Cache
After setting up all configurations, flush Magento Cache:
![]() On the admin sidebar, go to System > Cache Management
On the admin sidebar, go to System > Cache Management
![]() Click in Flush Magento Cache button
Click in Flush Magento Cache button

Front End Layout
Home
| Desktop | Mobile | Tablet |
|
|
|

Storefront Properties/ Layout Updates
Widget Title: enter the widget name.
Assign To Store Views: select the store you want to display widgets.
Sort Order: enter the sort order of the new widget.
Display on: choose a page to display the widget (Specific Page).
Container: select the position for the widget ( Main Content Area, Page Footer Top Container, Page FooterCulumns Container ).
Widget Options
Choose the block that is nearest to this widget.
Widget About
Storefront Properties/ Layout Updates
Sort Order: enter value "0".
Display On: select All Page.
Container: select Page Footer Columns Container.
Widget Options
- Select the "foot-About" block you created.

Widget Social
Storefront Properties/ Layout Updates
Sort Order: Enter value "0".
Display on: select All Page
Container: select Page Footer Top Container
Widget Options
- Select the "foot-social" block you created.

Widget Paypal
Storefront Properties/ Layout Updates
Sort Order: Enter value "0".
Display on: select All Page.
Container: select Page Footer Top Container.
Widget Options
- Select the "foot-pay" block you created.

Widget Help
Storefront Properties/ Layout Updates
Sort Order: Enter value "0".
Display on: select All Page.
Container: select Page Footer Columns Container.
Widget Options
- Select the "foot-help" block you created.

Widget Contact Us
Storefront Properties/ Layout Updates
Sort Order: Enter value "0".
Display on: select All Page.
Container: select Page Footer Columns Container.
Widget Options
- Select the "foot-contact" block you created.

Widget Info
Storefront Properties/ Layout Updates
Sort Order: Enter value "0".
Display on: select All Page.
Container: select Page Footer Columns Container.
Widget Options
- Select the "foot-info" block you created.

Front End Layout
Category
| Category Gird | ||
|---|---|---|
| Desktop | Mobile | Tablet |

|


|


| ||
| Category List | ||
| Desktop | Mobile | Tablet |
|---|---|---|

|


|


|
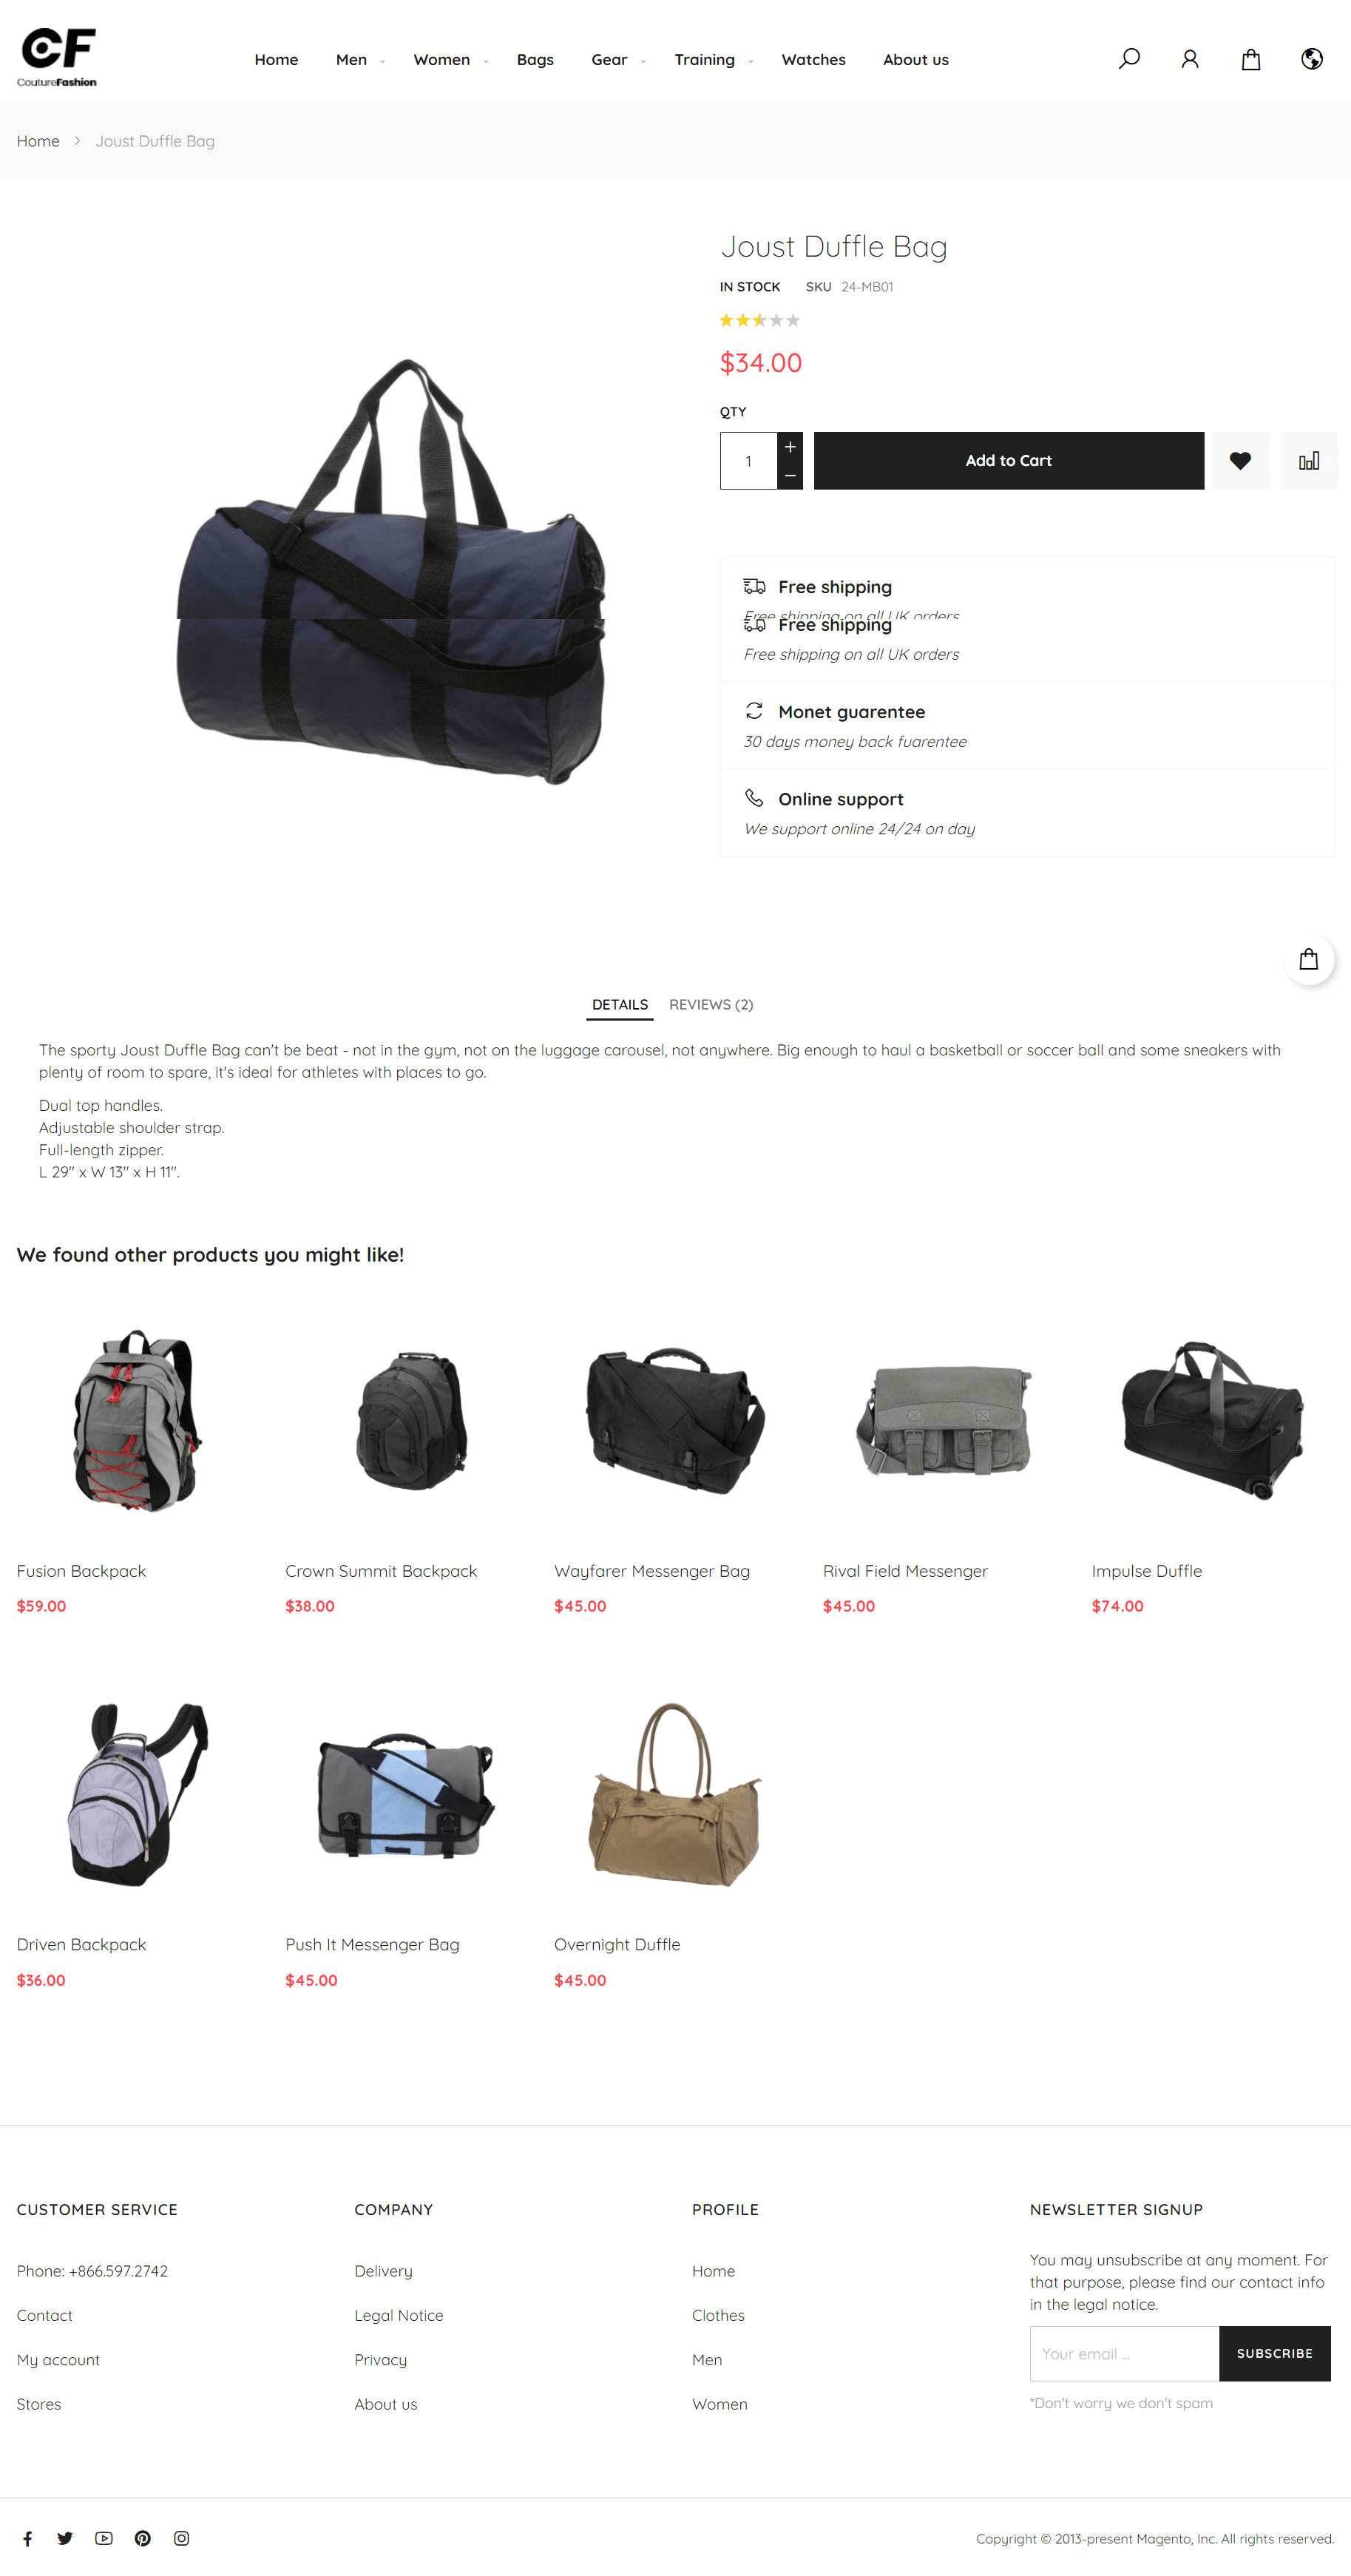
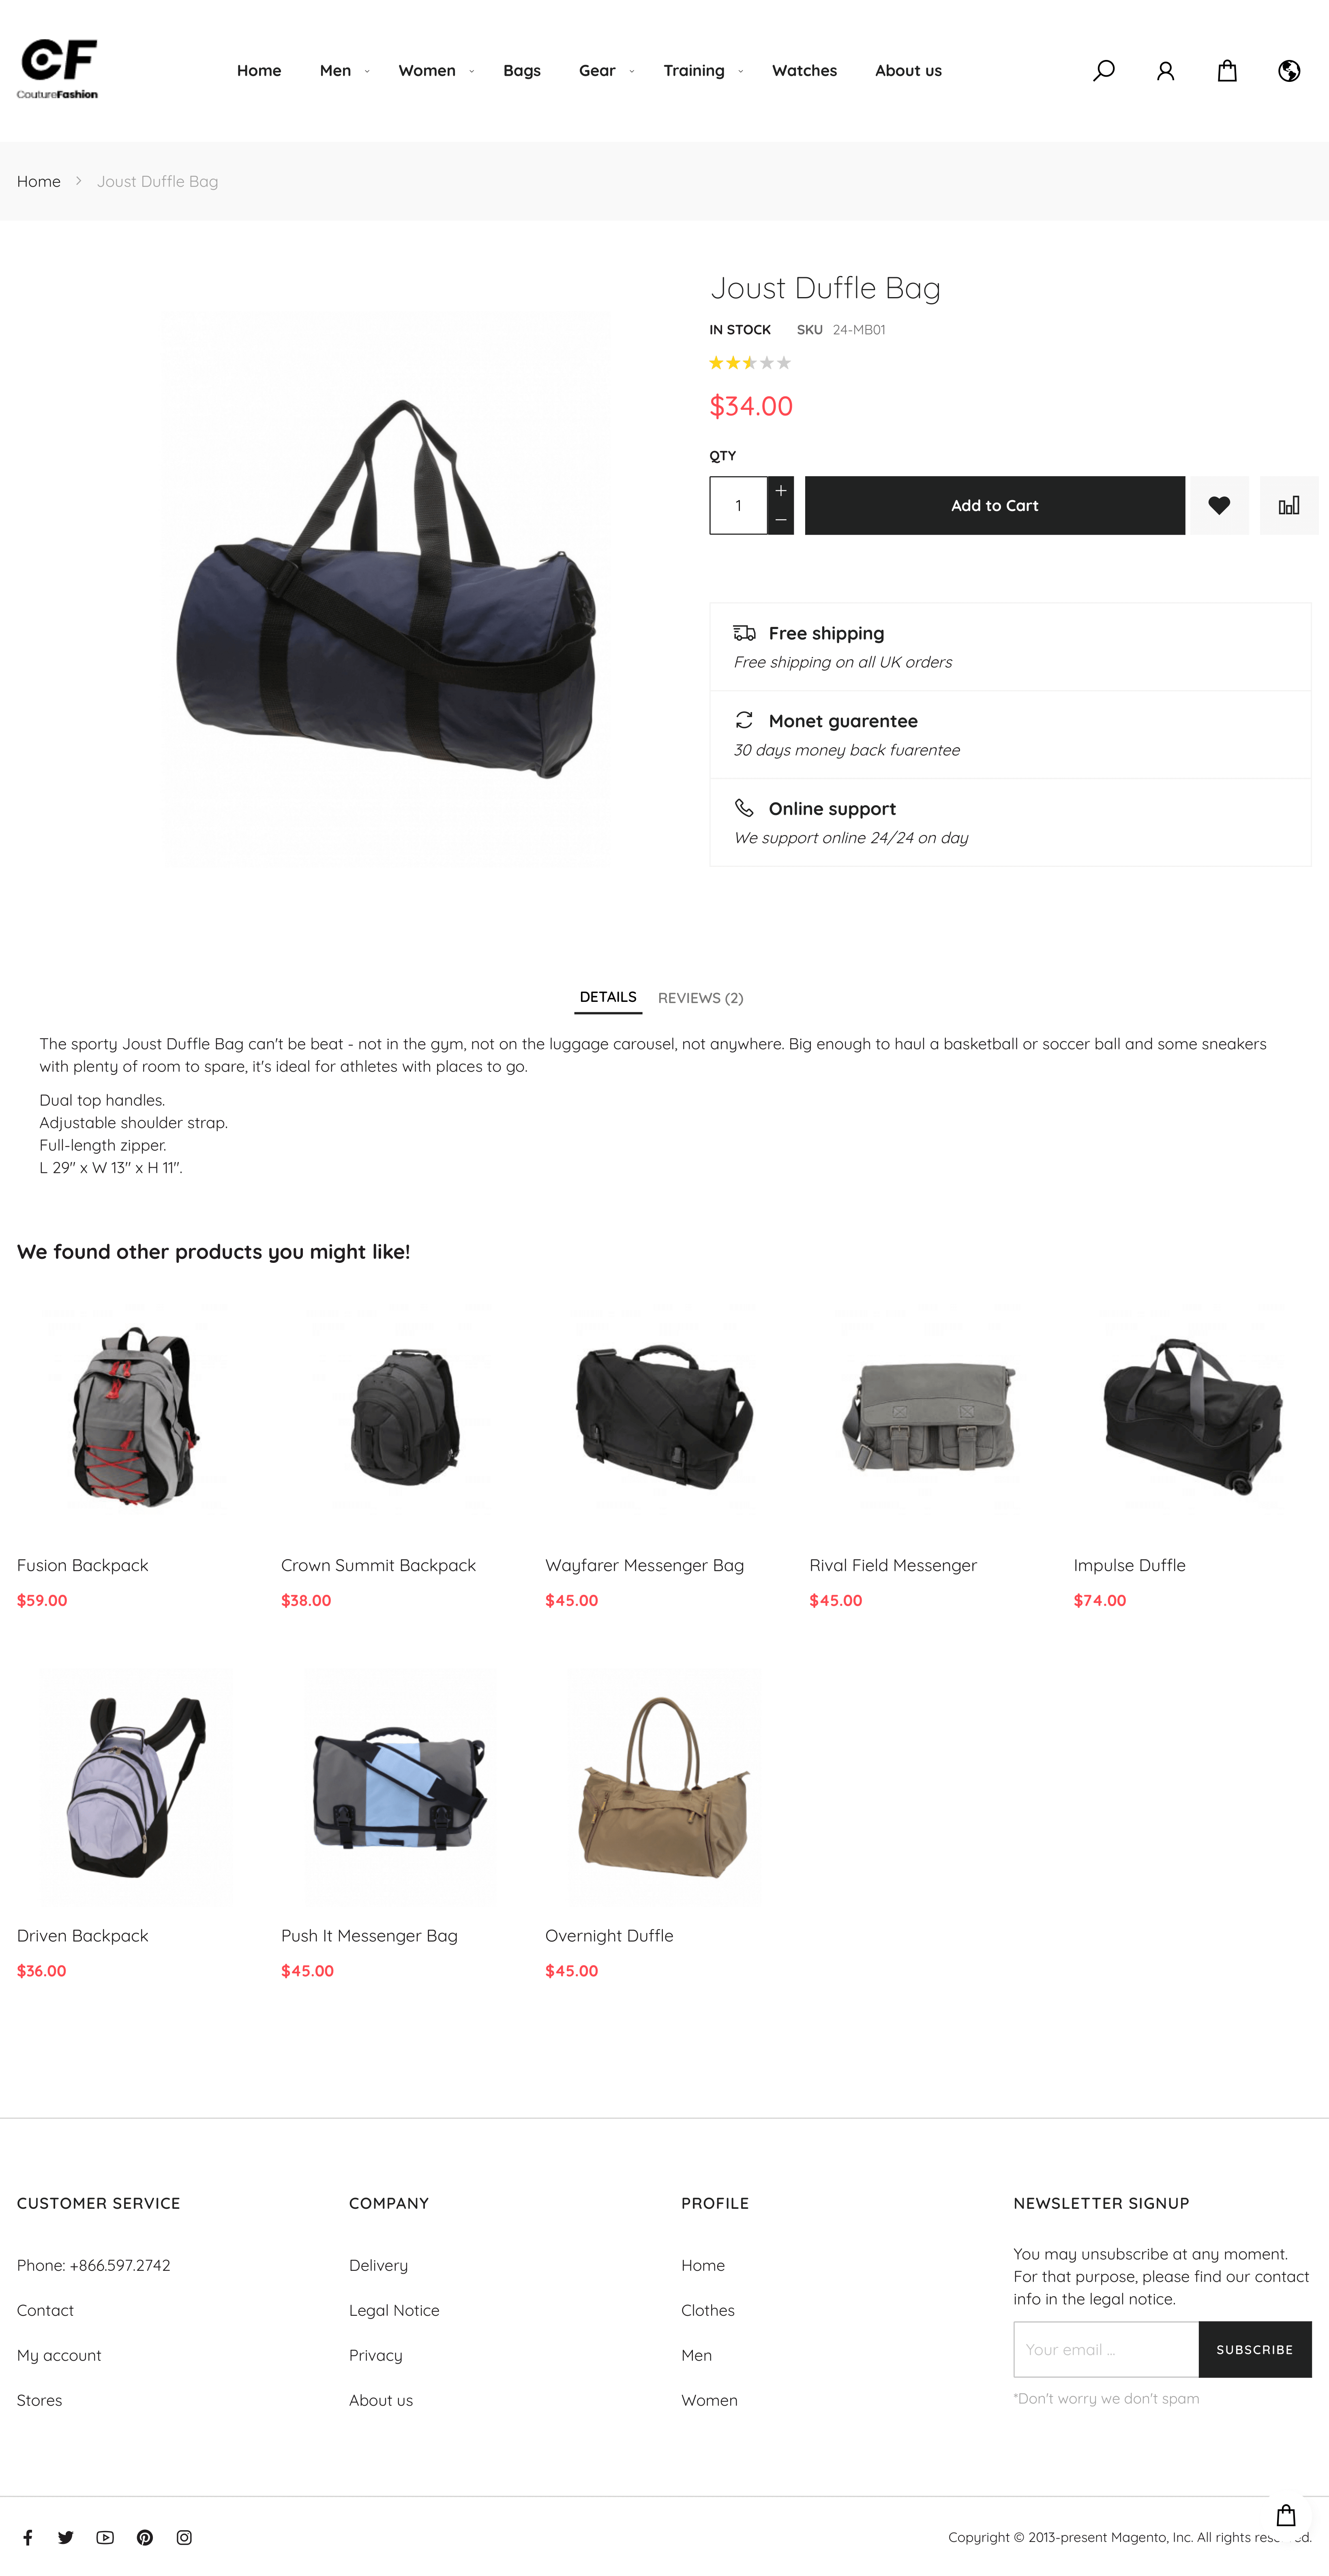
Product
details pageDetails Page
| Desktop | Mobile | Tablet |

|


Home
| Desktop | Mobile | Tablet |
 |  |  |
|
|

Update
- When a bug fix or new feature is released, we will provide you with the product's new package.
- All you need to do is repeating the above installing steps and uploading the package onto your store. The code will automatically override.
- Flush the config cache. Your store and newly installed module should be working as expected.
Support
- Magenest offers the response time can be up to 3-5 days.
- We offers lifetime support free for all of our paid products. Support includes answering questions related to our products, bug/error fixing to make sure our products work well in your site exactly like our demo.
- Support DOES NOT include other services as customize our product to fit your own needs, installation service, uninstallation service. We ONLY support you with exist features of product.
- We’re not able to support third party plugins or ensure thatevery oneworks properly with our themes
License
- All our themes are licensed under the OSL License. You have the right to use each purchased theme on one domain only. You are authorized to make any necessary modifications to themes to suit your needs.
- Each theme comes bundled with plugins that are not licensed under the theme but have their own license. These plugins have been purchased for the use in the individual themes they are bundled with only.
Once again, thank you for purchasing our extension. If you have any questions relating to this extension, please do not hesitate to contact us for support.