Introducing to
Thank you for purchasing our extension. If you have any questions that are beyond the scope of this document, do not hesitate to leave us an email via our email address below.
Created: 16/08/2017 | By: Magenest | Support Portal: http://servicedesk.izysync.com/servicedesk/customer/portal/127
...
...
...
...
...
...
...
...
...
...
...
...
...
...
...
...
...

...
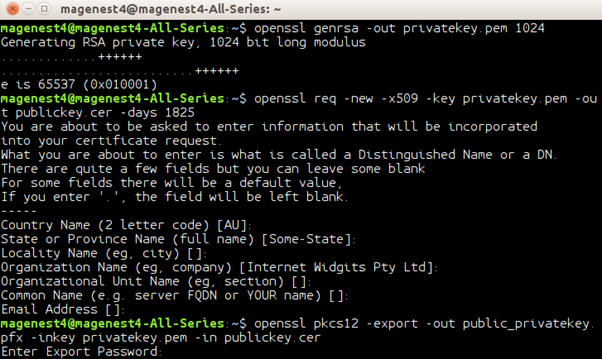
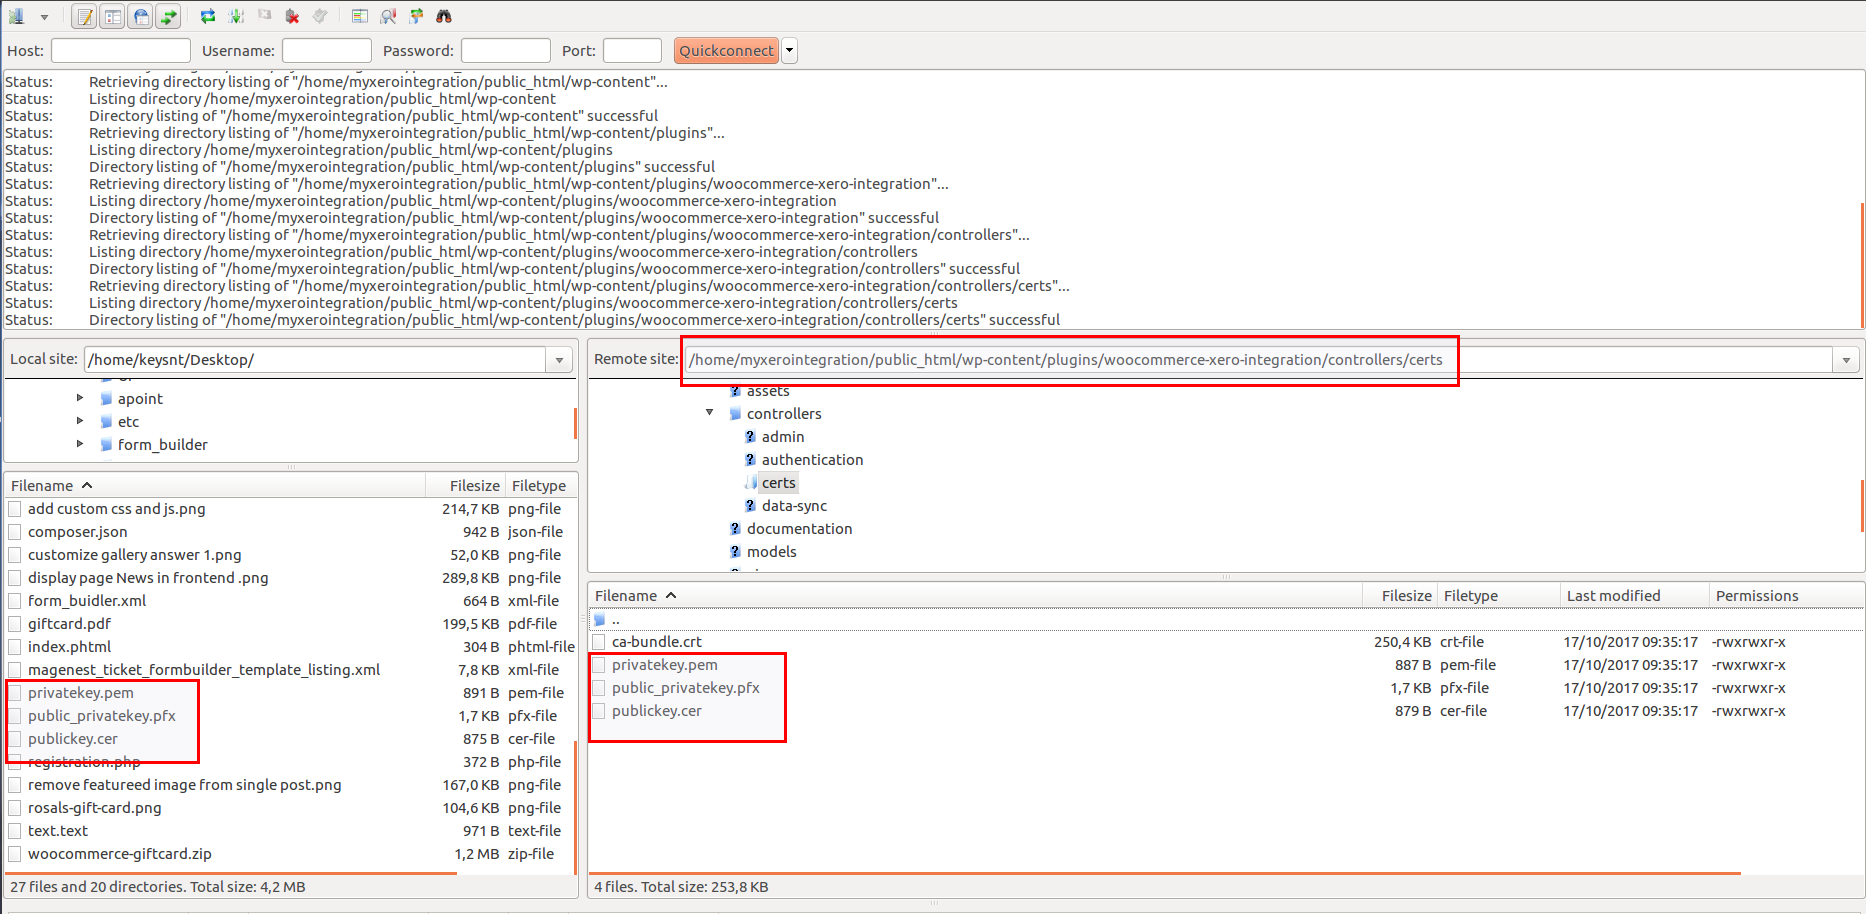
After completingFinished, you receive 3 files:


Use ftp to upload files to the folder following the directory:
woocommerce-xero-integration -> controllers -> certs
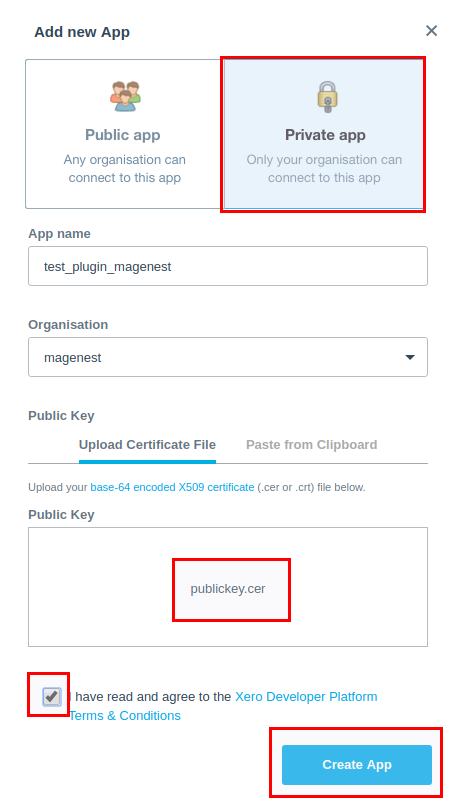
2. Create app private application in app.xero.com

...
- Choose: Private - just for use with my own organisation
- Fill
...
in name of application in the field: Application Name
- Select which organisation your application can access
...
- Public Key:
+ Choose: Upload
...
certificate file (.cer)
...
+ Upload the file publickey.cer has just initialized
+ Click
...
the checkbox: I have read and agree to the Xero Developer Platform.
- Click button
...
Create App.
You receive:
- Consumer Key
- Consumer Secret
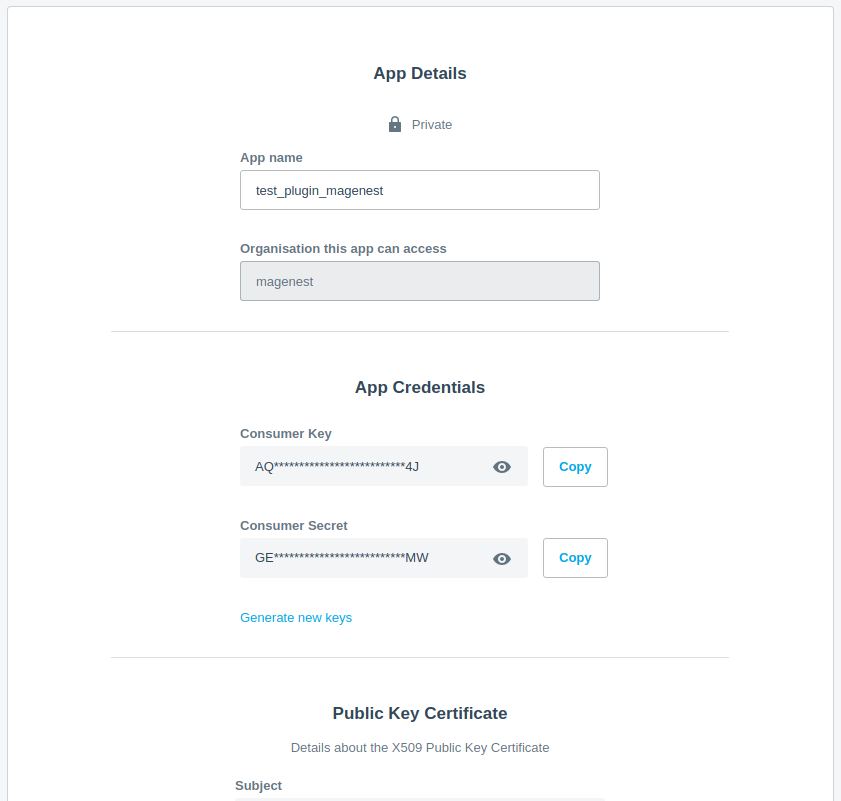
Copy and store 2 keys received.
3. Setting in wordpress website
Before installing the plugin in your wordpress site, you have to upload two file public key and private key to the server "wp-content/plugins/woocommerce-xero-integration/controllers/certs".
Following this directory:
Woocommerce -> Settings -> Xero Integration and Fill in the box with the data you just obtained.
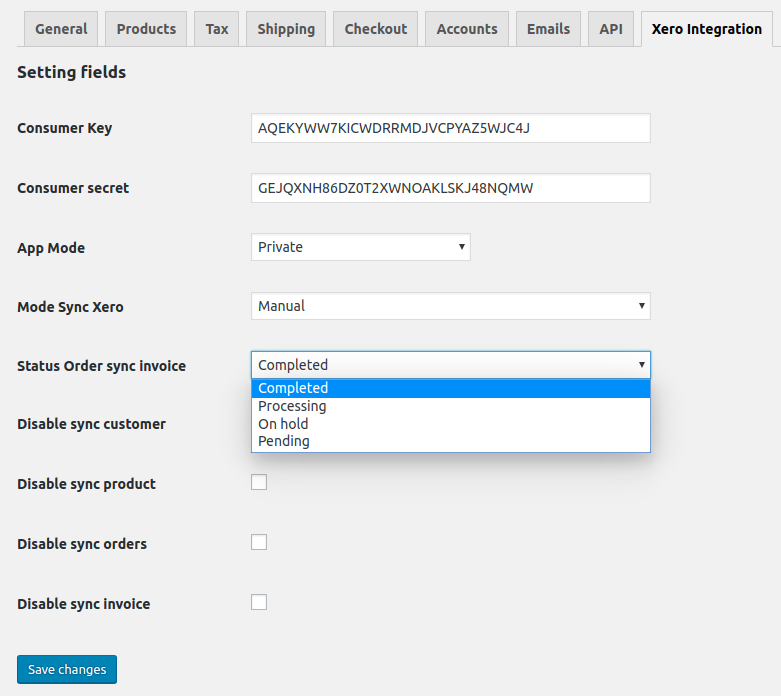

- Consumer Key and Consumer secret in app xero.
- Mode Sync Xero: you can select
...
Example
...
Click button SYNC, after in Xero:


Automatic or Manual
3.1. Sync products manually
+ In manual mode,
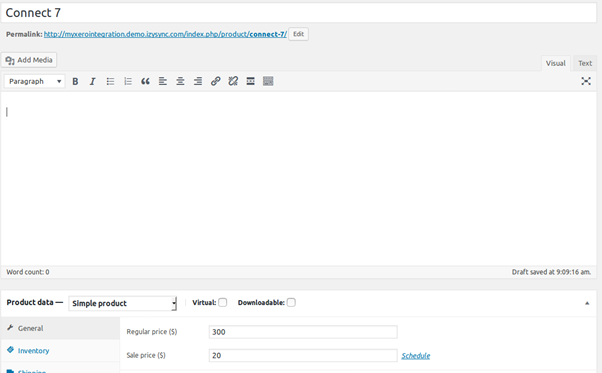
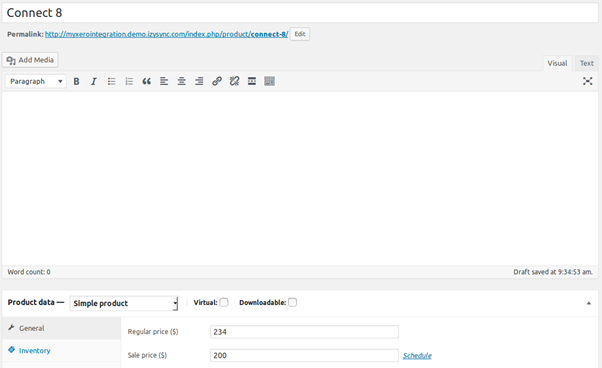
Admin creates a product in Woocommerce with price and description.
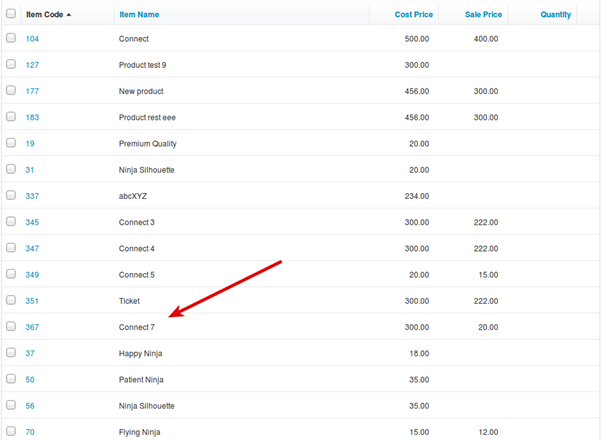
Then, it is in queue in Table Sync Xero.

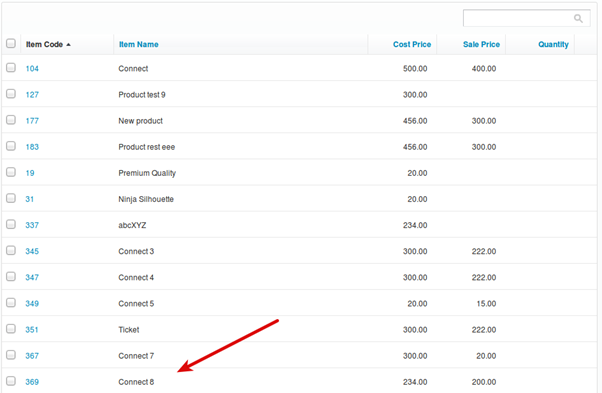
Admin clicks button SYNC to transfer product data to Xero.
Recheck the data in Xero.
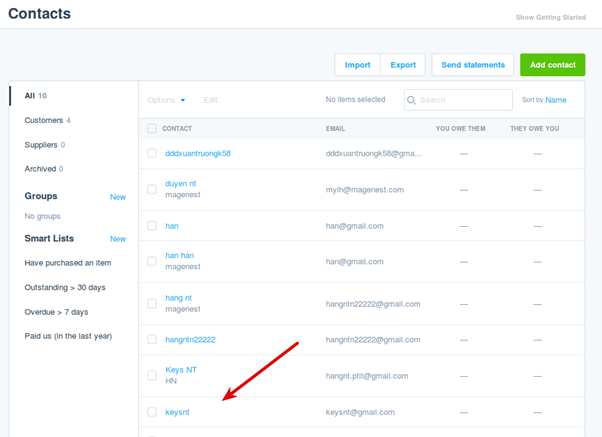
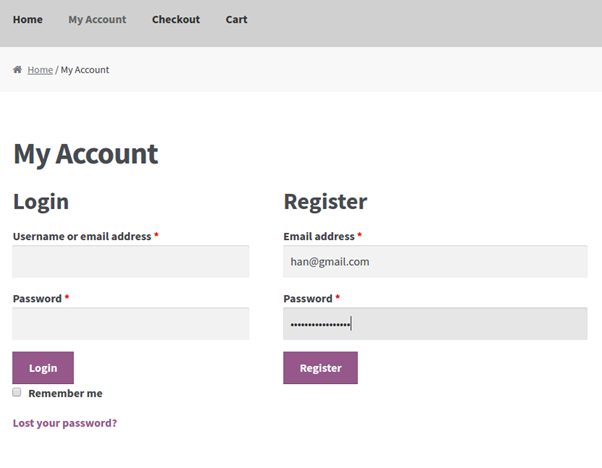
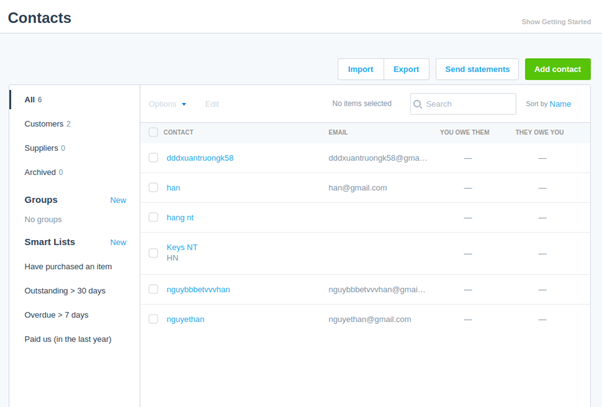
3.2. Sync customers manually
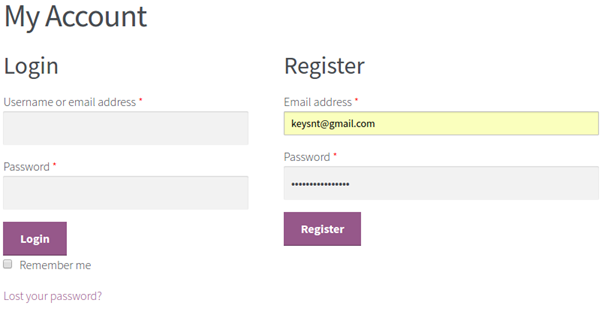
Customer registers a new account in front-end.
The customer account is stored in Table Sync Xero
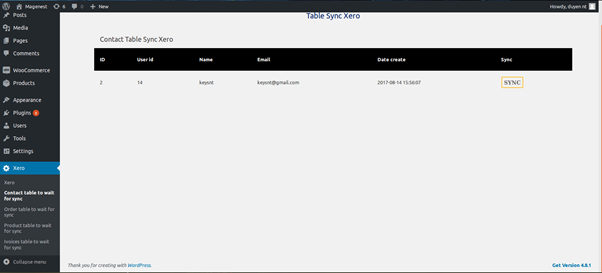
Admin clicks button SYNC to transfer this information to Xero:
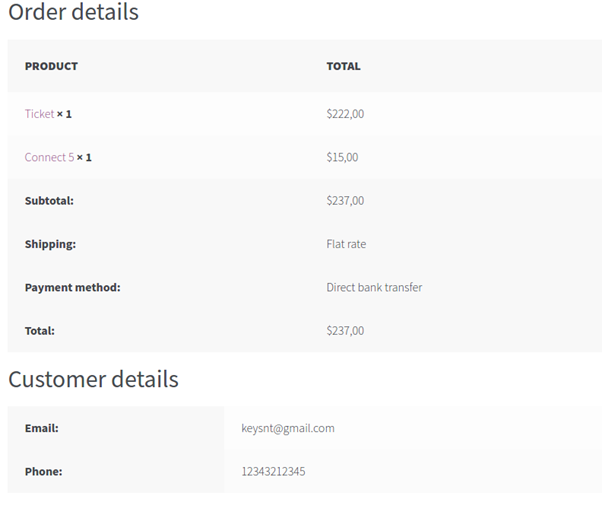
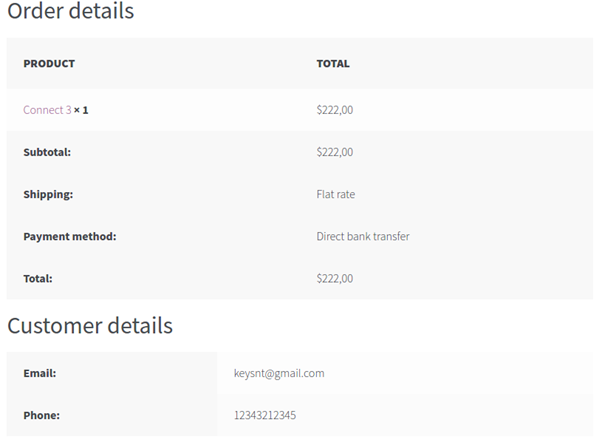
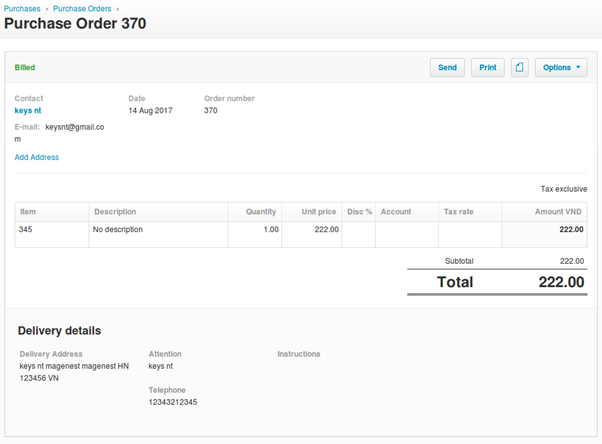
3.3. Add orders manually
After an order is created in Woo site
in
...
Click button SYNC, after in Xero:
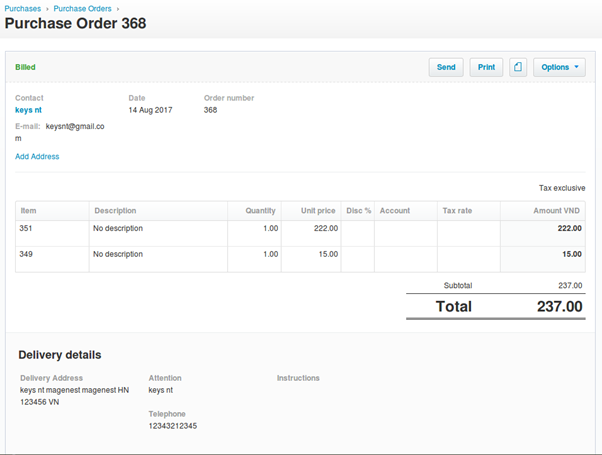
 c, Add Order:
...
backend, Xero -> Order table wait for sync tab:
...
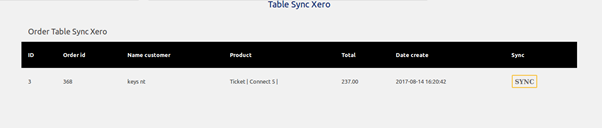
click
...
button SYNC, after in
...
xero:

3.4
...
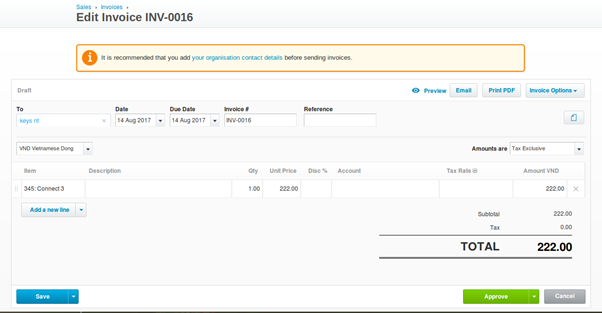
. Add invoices
...
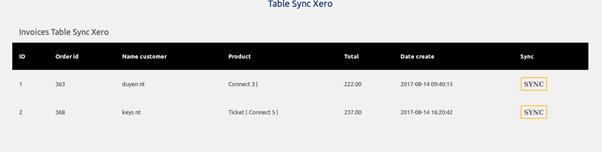
in backend, Xero -> Invoices table wait for sync tab:
...
...
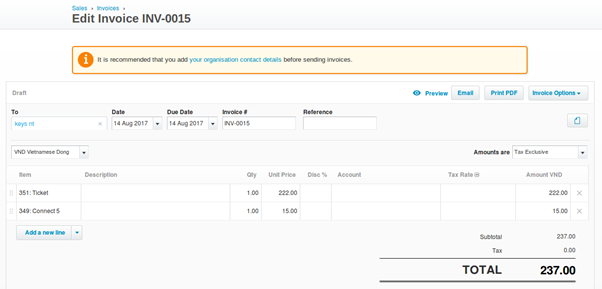
click button SYNC, after in
...
xero:
...
3.5 Mode Auto sync Xero
- Add product
In Xero:
b. Add Customer
in Xero:
...

c. Add Order
in Xero:
d. Add Invoices
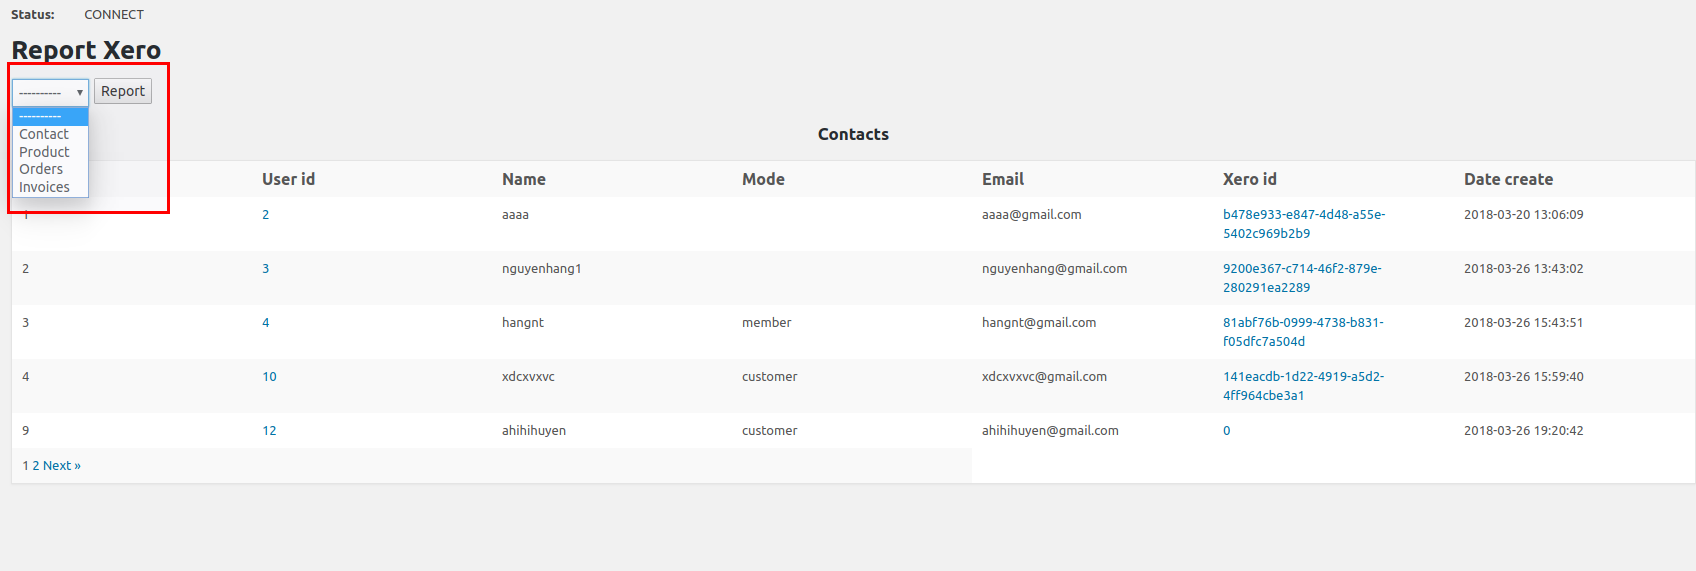
5. Report data sync from woocommerce to xero
...