1. Multiple Vendors Installation Guides
2. Multiple Vendors User Guides
Support Portal
Thank you for purchasing my extension. If you have any questions that are beyond the scope of this help file, please feel free to email via my user page contact form here. Thanks so much!
Created: 26/01/2016 | By: Magenest | Email: [email protected]
| Table of Contents |
|---|
Introduction
The Multiple Vendors Extension for Magento 2 provide the capability to your store to run with multiple vendors. It means vendors can easily add, update or sell the products from a single store. The important feature of this extension is admin have all the rights to approve or reject the vendor request at any time. It is useful to customer also, because customer can easily buy the products from the multiple users at a time using single shopping cart.
Please view more detail at the extension page: http://storeservicedesk.magenestizysync.com/magento-2-multiple-vendors.html
Installation
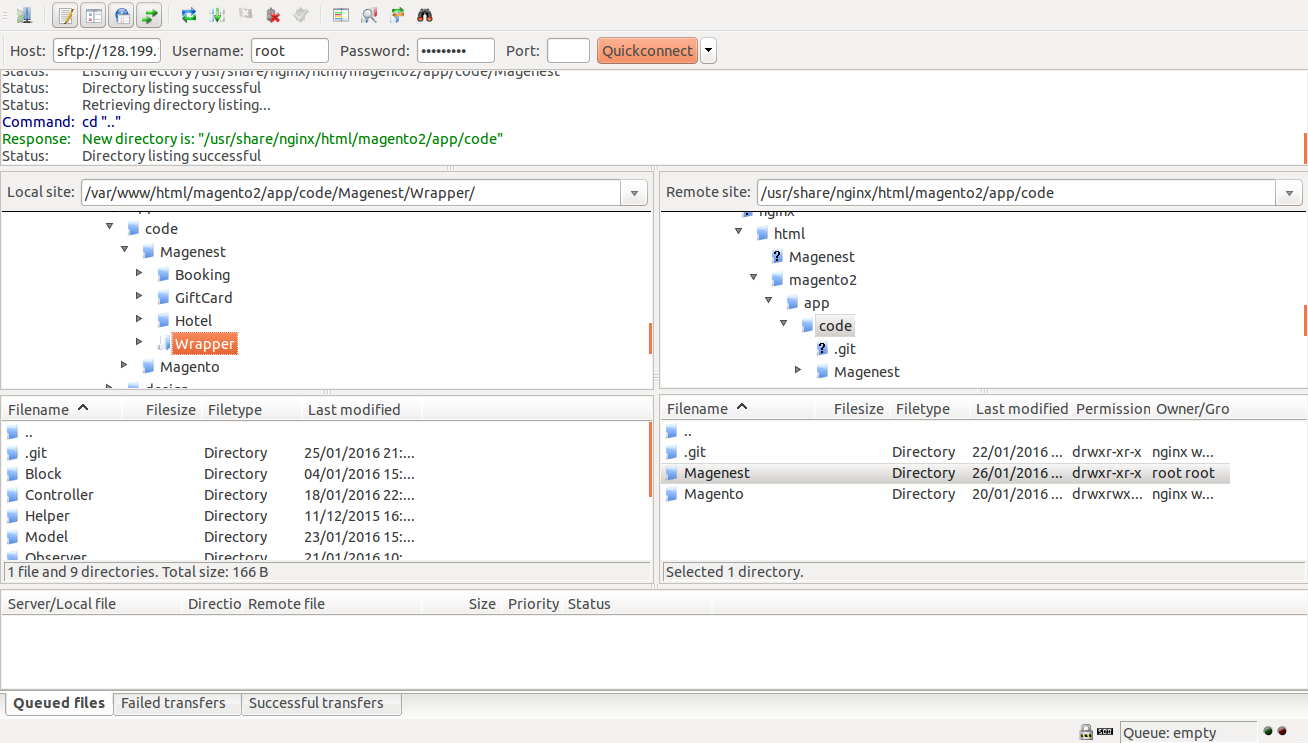
Here we will guide you through the installation process of our extension. First off, open FileZilla, log in to your host as follows:
In the above example we switched the local site to the module directory, and the remote site to the code directory. Now on the remote site window, inside app/code directory, create a folder named Magenest and go inside it. Now on your local site window, right click on Wrapper extension and click Upload. The extension will be uploaded onto your host in a few minutes.
Now, using your Command line/Terminal, log into your ssh server, go to your Magento root directory, say it's named magento2, and execute the following commands:
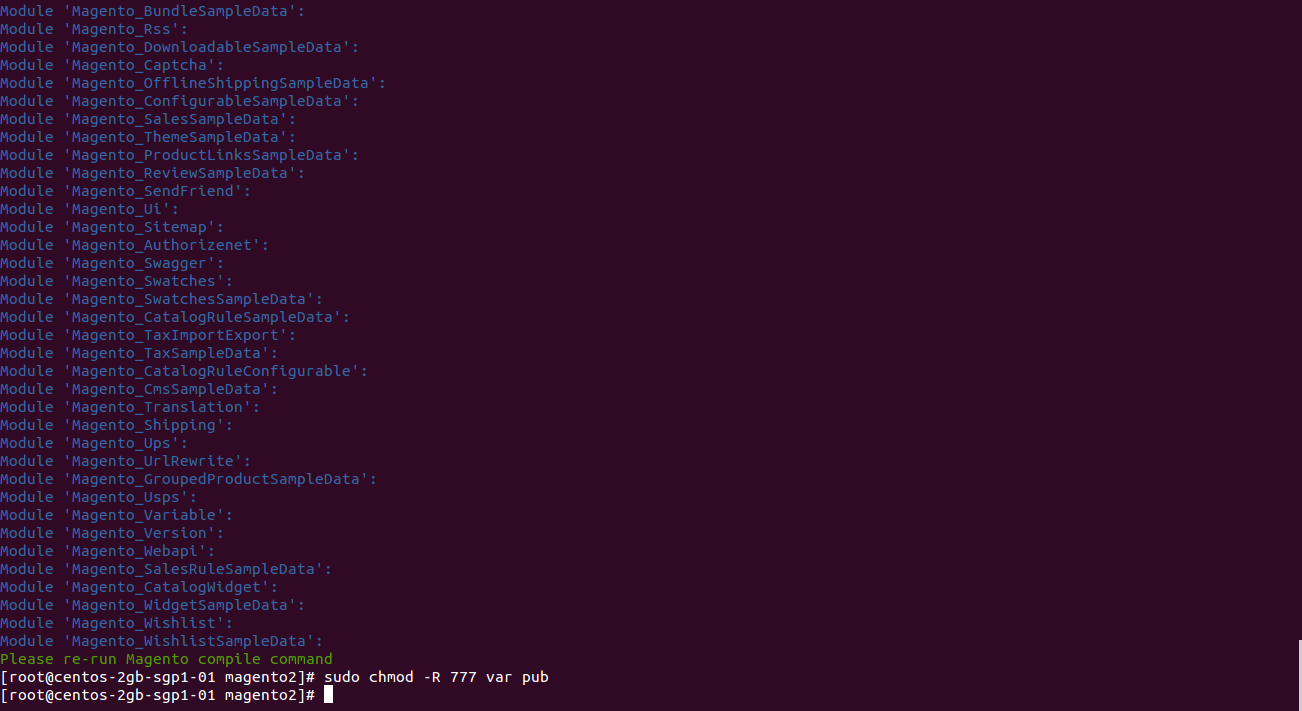
cd ..sudo chmod -R 777 magento2cd magento2php bin/magento setup:upgradesudo chmod -R 777 var pub
After running all these, your Command line/Terminal window might look like this:
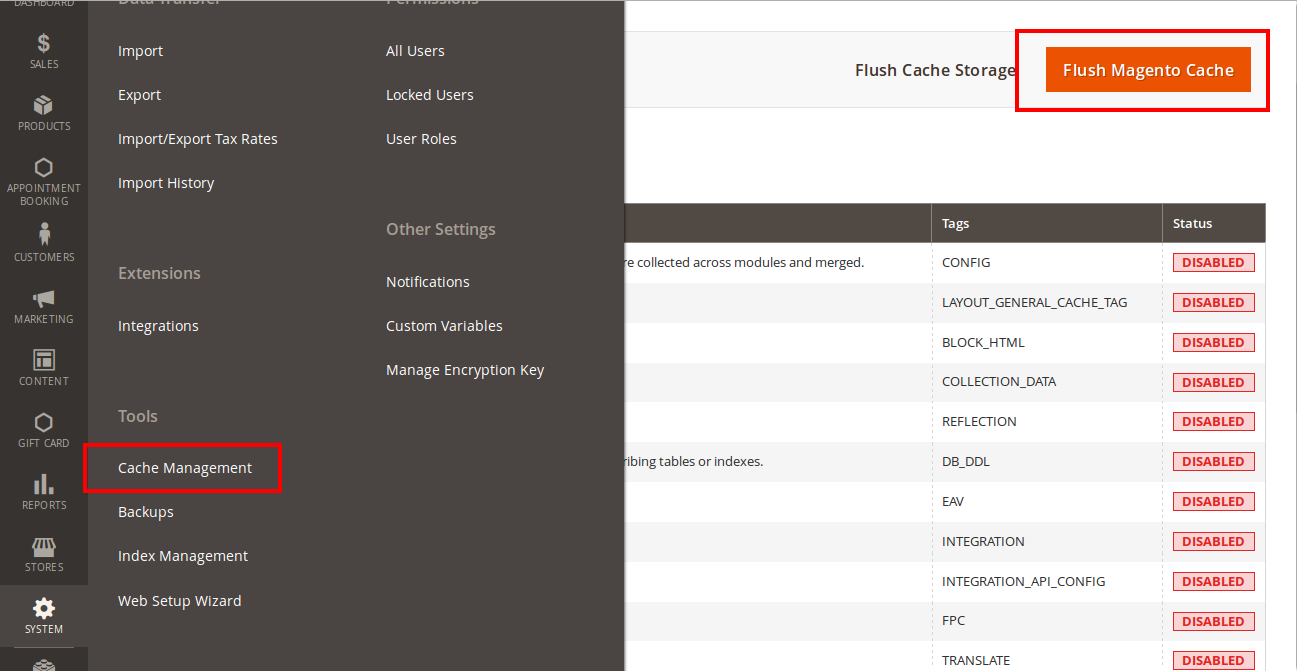
Afterwards, go to your backend site, go to System > Cache Management and flush all caches
Now you can go to your store and check if the extension is working as expected. We are sure it is!.
Update
- When a bug fix or new feature is released, we will provide you with the module's new package.
- All you need to do is repeating the above installing steps and uploading the package onto your store. The code will automatically override.
- Flush the config cache. Your store and newly installed module should be working as expected.
Support
- Magenest offers the response time can be up to 3-5 days.
- We offers lifetime support free for all of our paid products. Support includes answering questions related to our products, bug/error fixing to make sure our products work well in your site exactly like our demo.
- Support DOES NOT include other services as customize our product to fit your own needs, installation service, uninstallation service. We ONLYsupport you with exist features of module.
Once again, thank you for purchasing our extension. If you have any questions relating to this extension, please do not hesitate to contact us for support.
...


