...
Go to the Google Developers Console – https://console.developers.google.com/
Select an existing project, or create a new project by clicking Create Project:
- In the Project name field, type in a name for your new project.
- In the Project ID field, the console has created project ID. Optionally you can type in a project ID for your project. But project ID must be unique world-wide.
- Click on the Create button and the project to be created within some seconds. Once the project is created successfully, the project name would be appearing at the top of the left sidebar.
In the left sidebar, select APIs under the APIs & auth section. A list of Google APIs appears.
Find the Google+ API service and set its status to Enable.In the sidebar, select Credentials under the APIs & auth section.
In the OAuth section of the page, select Create New Client ID.
- Create Client ID dialog box would be appearing for choosing application type.
- In the Application type section of the dialog, select Web application and click on the Configure consent screenscreen button.
- Choose Email address, enter Product name and save the form.
- In the Authorized JavaScript origins field, enter your app origin. If you want to allow your app to run on different protocols, domains, or subdomains, then you can enter multiple origins.
- In the Authorized redirect URI field, enter the redirect URL.
- Click on Create Client ID.
Now you can see the Client ID for web application section. Select Client ID and Client Secret then fill in Configuration of Google in Backend of Magento 2 stores.

...
How to set Client ID and Client Secret of Facebook
Go to the https://developers.facebook.com/apps/ and login at your Facebook developer account.
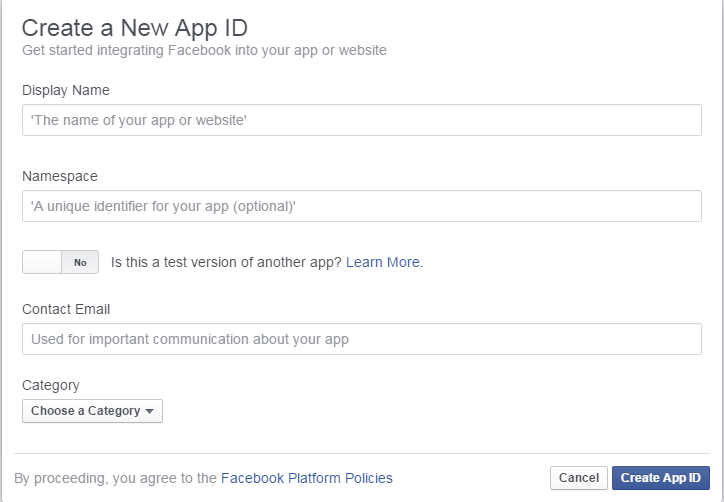
Click My app button on the top right > Website > Skip and Create App ID then fill information in the below screenshot.
Click My app button on the top right > Website > Skip and Create App ID then fill information in the below screenshot.
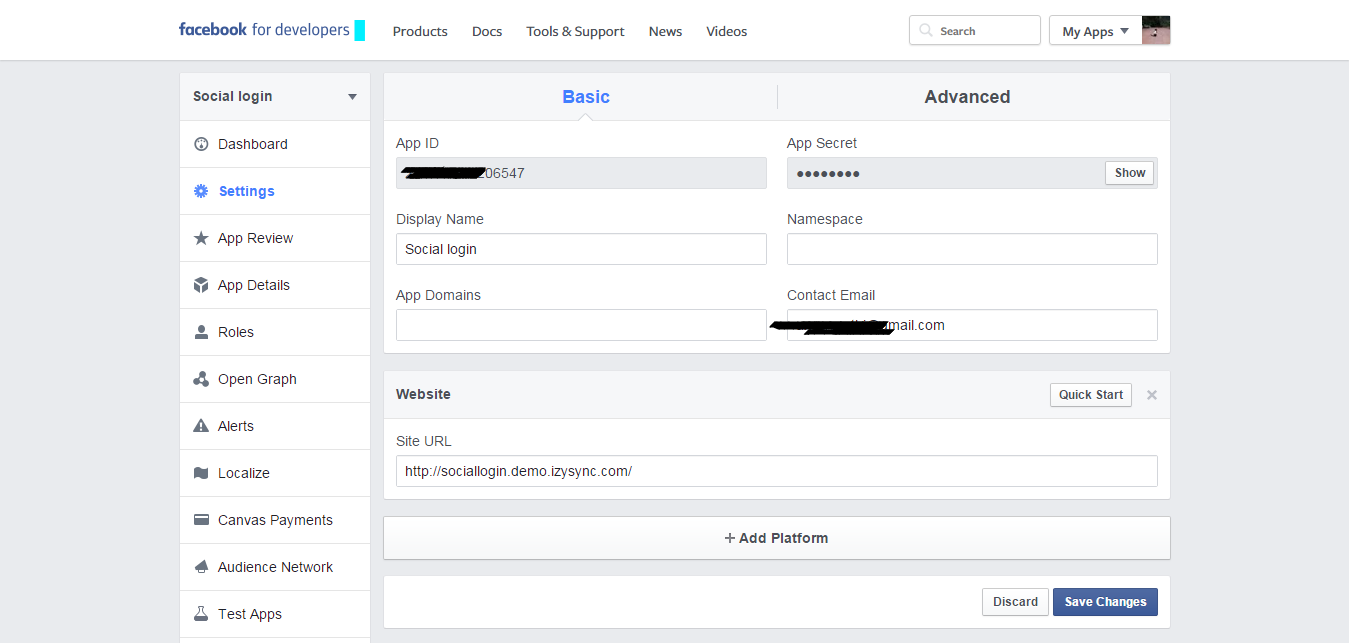
Choose Settings link from the left menu section at the apps page => click on the Add Platform button under app ID and app secret > enter your site URL > click on Save changes button to finish. . Select that App ID and App Secret and enter Configuration of Facebook.
Twitter
- Enable: allow showing or hiding Twitter login button
...